

Page 1

User Guide
for Windows® and Macintosh
®
Page 2

Trademarks
ScanSoft and the ScanSoft logo are
trademarks of ScanSoft, Inc. Kai’s
Power SHOW is a trademark and
QUICKSHOW! is a registered
trademark of ScanSoft, Inc.
Pentium is a registered trademark
of Intel Corporation. Macintosh is
a registered trademark of Apple
Computer, Incorporated. Windows
and PowerPoint are registered
trademarks of Microsoft
Corporation. Sound Ideas is a
trademark of Sound Ideas (A
Division of the Brian Nimens
Corporation Limited). Outside
In
Viewer Technology
1992–1999 Inso Corporation. All
rights reserved. All other product
names mentioned in the manual
and other documentation are used
for identification purposes only
and may be trademarks or
registered trademarks of their
respective companies. Registered
and unregistered trademarks used
herein are the exclusive property of
their respective holders. ScanSoft,
Inc. makes no claim to any such
marks, nor willingly or knowingly
misused or misapplied such marks.
Copyright
This manual, as well as the
software described in it, is
furnished under license and may
only be used or copied in
accordance with the terms of such
license. Program ©1998–1999
ScanSoft, Inc., including the look
and feel of the product.
Kai’s Power SHOW User Guide
©1998–1999 ScanSoft, Inc. No part
of this guide may be reproduced in
any form or by any means without
the prior written permission of
ScanSoft, Inc.
Notice
Before using this software or
reading this user guide, make sure
you have read, understood and
agreed to the software license
agreement displayed on screen
during the software installation
process.
The sound clips used in Kai’s
Power SHOW are part of Sound
Ideas’ General 6000 Series. For
more information on The General
or Sound Ideas’ prominent family
of additional products, please
contact Sound Ideas at (905)
886-5000, or on the Web at
www.sound-ideas.com. Sound
Ideas is a Division of the Brian
Nimens Corporation Limited.
© 1998-1999 ScanSoft, Inc.
9 Centennial Drive
Peabody, MA 01960
SuperGOO User Guide
Page 3

Contents
iii
Table of Contents
Welcome to SHOW . . . . . . . . . . . . . . . . . . . v
Key Features . . . . . . . . . . . . . . . . . . . . . . . . . v
About This User Guide . . . . . . . . . . . . . . . . v
Conventions . . . . . . . . . . . . . . . . . . . . . v
Technical Support . . . . . . . . . . . . . . . . . . . . .vi
Technical Tips . . . . . . . . . . . . . . . . . . . . . . . .vi
Video Drivers . . . . . . . . . . . . . . . . . . . . vi
Chapter 1
Installation
. . . . . . . . . . . . . . . . . . . . . . . 8
Installing Kai’s Power SHOW . . . . . . . . . . . 8
Windows Installation . . . . . . . . . . . . . . . . . . 8
System Requirements . . . . . . . . . . . . . . 8
Installation . . . . . . . . . . . . . . . . . . . . . . 8
Macintosh Installation . . . . . . . . . . . . . . . . . 8
System Requirements . . . . . . . . . . . . . . 8
Installation . . . . . . . . . . . . . . . . . . . . . . 8
Installation Tips . . . . . . . . . . . . . . . . . . . . . . 9
Chapter 2
Kai’s Power SHOW Basics
. . . . 10
How SHOW Works . . . . . . . . . . . . . . . . . . 10
Launching SHOW . . . . . . . . . . . . . . . 10
Creating a New Show . . . . . . . . . . . . . . . . . 10
Opening a Show . . . . . . . . . . . . . . . . . . . . . 11
Working in a Room . . . . . . . . . . . . . . . . . . 11
Displaying Controls . . . . . . . . . . . . . . 11
Using Memory Dots . . . . . . . . . . . . . . 12
Moving Between Rooms . . . . . . . . . . 13
Working with Show Content . . . . . . . . . . 13
Selecting Thumbnails . . . . . . . . . . . . 13
Viewing File Names . . . . . . . . . . . . . . 14
Arranging Content . . . . . . . . . . . . . . . . . . . 14
Arranging Content on the Desktop . 14
Arranging Content in the
Sequencer and Nano Sequencer . . . . 14
Undoing Operations . . . . . . . . . . . . . . . . . 15
Redoing Operations . . . . . . . . . . . . . . 15
Playing a Show . . . . . . . . . . . . . . . . . . . . . . 16
Quitting SHOW . . . . . . . . . . . . . . . . . . . . . 16
Chapter 3
Kai’s Power SHOW Tutorial
. . . 17
Welcome . . . . . . . . . . . . . . . . . . . . . . . . . . . 17
Getting Started . . . . . . . . . . . . . . . . . . . . . . 17
Lesson 1: Importing Files in the
IN Room . . . . . . . . . . . . . . . . . . . . . . . 17
Creating a QUICKSHOW! . . . . . . . . . . . . 18
Lesson 1: Creating a
QUICKSHOW! . . . . . . . . . . . . . . . . . 18
Lesson 2: Editing a
QUICKSHOW! . . . . . . . . . . . . . . . . . 19
Sorting Images in the SORT Room . . . . . 20
Lesson 1: Sorting Pictures on the
Desktop . . . . . . . . . . . . . . . . . . . . . . . . 20
Lesson 2: Loading files into the
Sequencer . . . . . . . . . . . . . . . . . . . . . . 22
Enhancing Slides in the EDIT Room . . . . 24
Lesson 1: Choosing a Slide to
Enhance . . . . . . . . . . . . . . . . . . . . . . . 24
Lesson 2: Special Effect
Transitions . . . . . . . . . . . . . . . . . . . . . 25
Lesson 3: Setting Up Transition
Presets . . . . . . . . . . . . . . . . . . . . . . . . . 26
Working with Text . . . . . . . . . . . . . . . . . . . 26
Lesson 1: Adding Text . . . . . . . . . . . . 27
Lesson 2: Editing Text . . . . . . . . . . . . 27
Lesson 3: Changing Text Attributes . 27
Lesson 4: Adding a Background . . . . 28
Lesson 5: Adding Text Effects . . . . . . 28
Using Sound Clips . . . . . . . . . . . . . . . . . . . 29
Lesson 1: Attaching Sound Clips . . . 29
Playing Shows . . . . . . . . . . . . . . . . . . . . . . . 30
Lesson 1: Using the Projector Icon . 30
Saving Your Show . . . . . . . . . . . . . . . . . . . 30
Lesson 1: Saving Shows . . . . . . . . . . . 31
Distributing Your Show . . . . . . . . . . . . . . . 31
Lesson 1: Preparing a Show for
Distribution . . . . . . . . . . . . . . . . . . . . 31
Lesson 2: Distributing a Show . . . . . 32
Lesson 2: Saving SHOW Slides . . . . . 33
Printing a Show . . . . . . . . . . . . . . . . . . . . . 34
Lesson 1: Setting Up a Page . . . . . . . 34
Page 4

Deleting Thumbnails from the SORT
Room Desktop . . . . . . . . . . . . . . . . . . 45
Setting Thumbnail Size . . . . . . . . . . . 45
Adding Content to a Show . . . . . . . . . . . . . 46
Using the Sequence Floatoid . . . . . . . 46
Using the Sequence Cursor . . . . . . . . 46
Sequencing Content in a Show . . . . . . . . . 47
Using the Sequencer Menu . . . . . . . . 48
Using the Nano Sequencer . . . . . . . . 48
Playing a Show . . . . . . . . . . . . . . . . . . . . . . 48
Chapter 6
The EDIT Room
. . . . . . . . . . . . . . . . . 50
How the EDIT Room Works . . . . . . . . . . . 50
What Are Transitions? . . . . . . . . . . . . 50
Working in the EDIT Room . . . . . . . . . . . 50
Current Frame Window . . . . . . . . . . 51
In and Out Transition Windows . . . 51
Working with Frames . . . . . . . . . . . . . . . . . 51
Selecting Frames to Edit . . . . . . . . . . 51
Copying-and-Pasting Slides . . . . . . . 52
Flipping Frames . . . . . . . . . . . . . . . . . 52
Adding a Slide Display Time to a
Show . . . . . . . . . . . . . . . . . . . . . . . . . . 52
Adding Transitions to a Show . . . . . . . . . . 53
Using the Transition Dialogs . . . . . . 53
Applying transitions to multiple
frames . . . . . . . . . . . . . . . . . . . . . . . . . 54
Using Transition Presets . . . . . . . . . . 54
Working with Text . . . . . . . . . . . . . . . . . . . 54
Adding Text . . . . . . . . . . . . . . . . . . . . 55
Editing Text . . . . . . . . . . . . . . . . . . . . 55
Adding Backgrounds to Slides . . . . . 57
Animating Text . . . . . . . . . . . . . . . . . 58
Text fx Presets . . . . . . . . . . . . . . . . . . 58
Adding Sound . . . . . . . . . . . . . . . . . . . . . . . 59
Loading Sound Clips into SHOW . . 60
Using Sound Fx Presets . . . . . . . . . . . 60
Playing Soundtracks . . . . . . . . . . . . . . . . . . 60
Playing a Show in the EDIT Room . . . . . . 61
Chapter 7
The OUT Room
. . . . . . . . . . . . . . . . . 62
Outputting Your Show . . . . . . . . . . . . . . . 62
Selecting Slides for Output . . . . . . . . 62
Saving a Show . . . . . . . . . . . . . . . . . . . . . . . 62
Save Show vs. Save Project . . . . . . . . 63
Saving a SHOW Project . . . . . . . . . . 63
Saving a Finished Show File . . . . . . . 64
Distributing a Show . . . . . . . . . . . . . . . . . . 64
The SHOW Player Software . . . . . . . 65
Distributing the SHOW Player
Software . . . . . . . . . . . . . . . . . . . . . . . 65
Macintosh and Windows SHOW
Players . . . . . . . . . . . . . . . . . . . . . . . . . 65
Saving a SHOW Slide . . . . . . . . . . . . 66
Saving as HTML Pages . . . . . . . . . . . 66
Recording Shows to Videotape . . . . . 67
AVI or QuickTime Output . . . . . . . . 67
Printing a Show . . . . . . . . . . . . . . . . . . . . . 67
Setting Up a Page . . . . . . . . . . . . . . . . 67
Printing a Single Slide . . . . . . . . . . . . 67
Printing a Show as Individual
Slides . . . . . . . . . . . . . . . . . . . . . . . . . . 68
Congratulations! . . . . . . . . . . . . . . . . 68
Chapter 8
Keyboard Shortcuts
. . . . . . . . . . . 69
Page 5

Welcome
v
Key Features
Kai’s Power SHOW offers the following
powerful, basic features:
• Innovative interface and efficient
workflow
• QUICKSHOW!’s “Simple Sentence
Control”
• Versatile import file format support
• Works great with cameras and
scanners
• Video and sound clip import
• PC PowerPoint slide import
• Sophisticated sequencing controls
• Powerful special effect transitions
• TV-like text effects
• Extensive sound effect library
• Extensive slide background presets
• Included SHOW Player software
• Flexible output options including:
computer monitor, projector, printer,
and the Web
• Works great with other popular
products
About This User Guide
This User Guide provides the information
you need to use SHOW effectively. It will
help you learn the application and serve as
a reference as you attempt more
sophisticated procedures.
This User Guide assumes you are already
familiar with basic Windows or
Macintosh concepts—menus, dialogs,
and mouse operations such as
clicking-and-dragging. If you need more
information on these subjects, or on the
Windows Desktop, or Macintosh Finder,
please refer to the Microsoft Windows
User’s Guide or the Macintosh User’s
Manual, respectively.
Conventions
This user guide is for both Windows and
Macintosh users. By convention,
Macintosh commands precede Windows
commands in the text. For example,
Command/Ctrl+I is equivalent to the
Macintosh Command-I and the Windows
Ctrl+I. For simplicity, the term folder
refers to directories as well as folders. The
SHOW interface for both platforms is
identical, unless otherwise specified.
Page 6
Technical Tips
SHOW can perform truly wonderful
real-time special effect transitions, text
effects, and previews. To perform at this
peak level, SHOW requires an adequate
amount of computer power to look its
best. If you notice that transitions or
animations look “jerky,” if the colors look
strange, or if you simply want to ensure
that you are getting the most from the
application, then this section is for you.
Even more than computer performance,
our tests indicate that setting up your
video card properly can have the most
positive impact on SHOW performance.
This section talks about two important
setup factors and how you might enhance
them to ensure efficiency.
Video Drivers
It is very important to obtain the latest
video drivers from your manufacturer.
Upgrading drivers is usually free, and
generally provides a speed boost and bug
fixes as well.
Video Settings
Modern video cards give you a “color
depth” choice. This color depth is the
number of bits to use for each screen
pixel.
Generally, the more bits per pixel, the
better the quality, and the slower the
speed. However, that's not always the case,
and the only way to find out for sure is to
test the available options. To perform a
test, make one of the following changes
after closing SHOW. Then reopen SHOW
and use the same transition each time.
Choose the video setting that makes the
transitions look the most fluid.
Page 7

Welcome
vii
Choosing the display resolution will not
affect your performance significantly.
However, running presentations at a lower
resolution makes the show larger and
more visually appealing.
Excellent
Page 8

Installation
To install Kai’s Power SHOW:
1.
If necessary, launch Windows (95 or
NT 4).
SHOW will not install in Windows
NT 3.5.1 or Windows 3.X.
2.
Insert the SHOW CD-ROM into your
CD-ROM drive.
The installer and all related files reside
in the root directory of the SHOW
CD-ROM.
3.
If you’re using Windows NT 4 or
Windows 95, choose Start menu>
Run .
4.
Type the letter corresponding to your
CD-ROM drive, followed by :\setup
(for example, type d:\setup if using
the D drive) and click the OK button.
5.
Follow the displayed prompts.
Macintosh Installation
System Requirements
• Power Macintosh
• MacOS 7.5.5 or Later
• 16 MB Free RAM
• 16- or 24-Bit Video
• 50 MB Free Hard Drive Space
• CD-ROM Drive
Installation
To install Kai’s Power SHOW:
1.
Insert the SHOW CD-ROM into your
CD-ROM drive.
2.
Double-click the SHOW CD-ROM
icon on the desktop.
3.
Double-click the SHOW Installer icon
to begin installation.
Page 9

Installation 9
If this happens, try quitting other
applications or allocating LESS
memory to SHOW to give the System
extra breathing space. To reduce
SHOW’s memory, select the
application icon, choose File menu>
Get Info and allocate slightly less
RAM in “Preferred Size.”
• On a Macintosh, allocating more
available RAM to SHOW allows it to
run faster and handle larger files more
efficiently.
If you must use relatively large files,
increase the RAM available to SHOW.
To increase the available RAM, select
the application icon, choose File
menu> Get Info , and allocate more
RAM in “Preferred Size.”
Page 10

Before diving into SHOW, here are a few
basic procedures you should know.
Launching SHOW
You’ll notice when you launch SHOW,
that it takes over your entire screen, even
hiding the Windows or Macintosh menu
bar. You can access the menu bar while in
SHOW by moving the cursor to the
top-right or top-left corner of a room.
To display the system menu:
✤
Move the cursor to the top-right or
top-left corner of the room.
To use Keyboard Shortcuts:
✤
Many actions can be performed using
keyboard shortcuts. Refer to
“Keyboard Shortcuts” on page 69
for a listing of Kai’s Power SHOW
keyboard shortcuts.
Creating a New Show
There are two ways of creating a new
presentation in SHOW. You can use the
QUICKSHOW! automated feature or you
can create a show from scratch.
If you use QUICKSHOW!, creating a new
show is as simple as choosing from
statement presets that identify files,
determine slide sequence, pick which
transitions to apply, and even decide what
audio to play. Simple sentence controls
help you quickly create a custom show.
Refer to “The QUICKSHOW! Feature”
on page 36 for more on using this feature.
You can tweak your “quick” show or
create more complex presentations using
the controls in SHOW’s SORT and EDIT
Rooms. There, you sequence content and
add transitions, animated text, and sound
to each frame. The process of creating a
show is a matter of sorting and selecting
files into the Sequencer; assigning
transitions, text, and sound effects; then
saving, sharing, or printing your show.
Page 11
Kai’s Power SHOW Basics 11
• The Save Project option lets you save
a show in-progress. Save Project
creates a project file (.shw) and a
folder. These contain information
about where files are located on your
hard drive, about transitions, and
even about presets. Save Project does
not copy files or prepare your show
for distribution.
• The Save Show option lets you save
and share your finished show. It
collects and optimizes all files in your
show, then copies them into a folder
that you can move or share. Save
Show creates a show file (.sas)
containing information about how to
reconstruct the show.
When you open a project or show, SHOW
gathers all the content in the show and
places it in the Sequencer and Nano
Sequencer where it is ready for immediate
edit or playback.
To open a previously saved project or
show:
1.
Make sure you’re in the IN Room.
2.
Move the cursor over the Open Show
label, then click the Open an Existing
Show button.
3.
In the dialog that appears, locate the
file you want and open it.
Working in a Room
There are several basic operations that are
common to all rooms. The following
sections provide procedures for basic
operations in any SHOW room.
Displaying Controls
To keep the main working area of a room
uncluttered, many of SHOW’s controls
fade or minimize in size when not in use.
Faded controls re-appear when you move
the cursor over them, and then slowly fade
away when the cursor moves away.
The seven main buttons in the IN Room are
examples of fading controls.
Page 12

The Global Menu
You can access several SHOW shortcuts,
such as New, Open, and Save commands,
Printer Settings, Undo, and Quit, from the
Global menu. This menu appears in all
four rooms.
To display the Global menu:
Click the Kai’s Power SHOW label in the
top-left corner of each room, or
Control-click or right-click anywhere on
the screen.
Using Memory Dots
Several of the controls in SHOW contain
memory dots. Memory dots store
user-definable presets and control
settings, so that you can quickly and easily
use those settings at a later time.
Memory dots are saved with SHOW
project or show files, so your settings are
available the next time you open the
project or show. Most memory dots come
preloaded.
Use memory dots to set and activate:
Simple Sentence Control scripts in the IN
Room, thumbnail positions on the
desktop in the SORT Room, and “Five
Favorites” effect options in the EDIT
Room. These dots serve different
purposes in different procedures, but they
all behave the same.
To activate a saved setting:
✤
Click a full memory dot.
Use the Global menu to access several shortcut
features.
Use memory dots to preset and control settings.
Page 13

Kai’s Power SHOW Basics 13
Working with Show Content
A show is made up of a series of frames
that can be digital photos, pictures,
business slides, or video clips. Here are
basic procedures to use when working
with content.
Selecting Thumbnails
The content you import into SHOW
appears as thumbnails on the IN Room
and SORT Room desktops. When you
move between the IN and SORT Rooms,
thumbnail icons remain on the desktop.
Import a single file and it appears as a
single thumbnail. A folder of files displays
as a pile of thumbnails.
You can select thumbnails individually or
in groups in the SORT Room. Once
selected, thumbnails can be moved,
sequenced, or deleted.
A selected thumbnail has a highlight
around it.
To select a thumbnail:
✤
Click the thumbnail.
To select a group of thumbnails:
✤
Drag an area around the files you
want to select or hold down the Shift
key and click each file you want to
include in the selection.
To add to a selection:
✤
Hold down the Shift key and click the
file you want to add to the selection.
When a thumbnail is selected, a highlight
appears around it.
Page 14

“Selecting
for more
To hide file names on thumbnails:
✤
Go to the Global menu or
Control-click or right-click anywhere
on the screen. Choose Hide File
Names.
Arranging Content
Content can be arranged differently
depending on which room you are in.
When you’re in the SORT Room, content
is arranged by dragging thumbnails on the
desktop.
In the SORT and EDIT Rooms, content
within the Sequencer can be arranged by
dragging a frame within the Sequencer.
This changes the show’s frame order.
Arranging Content on the
Desktop
Just as you would with a stack of photos in
the real world, you can arrange
thumbnails into logical piles on SHOW’s
desktop. You can have all the photos of
people in one pile, all the photos of
landscapes in another pile, and so on.
Arranging Content in the
Sequencer and Nano Sequencer
The Sequencer and Nano Sequencer,
which appear at the bottom of the SORT
and EDIT rooms, display all the content
(frames) currently in your show.
You can use these “filmstrip” controls to
keep track of the items in your show and
to re-arrange the order of your show
contents.
Items are added to the Sequencer in the
SORT Room. Once an item is in the
Sequencer, it also appears in the Nano
Sequencer. Refer to “Adding Content to a
Show” on page 46 for more information.
Once an item appears as a frame in the
show, you change its position in the show
by clicking-and-dragging its frame to a
different location in either sequencer.
The best method of sequencing the
frames in your show is to select them in
the proper order when first adding
them to the Sequencer, using the
Sequence Floatoid or the Select
control’s Sequence cursor in the SORT
Use the Sequencer and Nano Sequencer to keep
track of all the frames in your show.
Page 15

Kai’s Power SHOW Basics 15
To scroll the Sequencer:
✤
Click the scroll arrow on the left or
right end of the Sequencer, or keep
dragging a frame to access a
destination not currently displayed.
✤
You can also access frames not
currently displayed in the Sequencer
by clicking-and-dragging the Nano
Sequencer’s blue Current Frame
Indicator. This tool also determines
the current frame in your show or a
new frame insertion point.
Undoing Operations
SHOW’s undo feature lets you reverse the
last action you performed. You can undo
an operation by using the Global menu,
or by pressing Command/Ctrl-Z.
To undo the last operation:
✤
Select Undo in the Global menu or
Control-click or right-click and
choose Undo from the pop-up menu.
or
Press Command/Ctrl-Z.
Redoing Operations
You can reverse your last undo using the
Redo command. When you undo a
command, the pop-up menu indicates
which action was undone. For example, if
you used undo to reverse a deletion, the
Redo text reads “Redo Delete.”
To redo an operation:
✤
Select Redo in the Global menu or
Control-click or right-click and
choose Redo from the pop-up menu.
Click the arrows on the right end of the
Sequencer to scroll forward through the show, or
the left arrow to scroll backward.
Page 16

To stop and exit a show:
✤
Press ESC.
Quitting SHOW
You can close SHOW from any of the four
rooms using the Global or pop-up menu.
To close SHOW:
1.
Select Quit SHOW in the Global
menu.
2.
Control-click or right-click and
choose Quit SHOW from the pop-up
menu.
3.
If you have any changes you want to
save, click Yes, otherwise click No.
There are also several options for saving
projects and shows. Saving operations are
done in the OUT Room. Refer to “Saving
a Show” on page 62 for more
information.
Page 17

Kai’s Power SHOW Tutorial
17
Getting Started
The first thing you need to do to start the
tutorial is to launch SHOW and import
some images.
To launch SHOW:
✤
Double-click the SHOW icon on the
desktop, or select it from among the
programs in the Start menu.
The IN Room appears. This is where
you begin creating your show.
Lesson 1: Importing Files in the
IN Room
This lesson walks you through the process
of importing your photos, pictures,
business slides, and video clips into
SHOW.
Each of the seven IN Room labels: Open
Show, File, Folder, QUICKSHOW!,
TWAIN, Capture, and Add Show
identifies a different SHOW input option.
ˇ
As you move the cursor over each label, a
button appears that describes each input
option in greater detail. As you move the
cursor to the next label, the last button
gently fades away.
The IN Room is where you can import source
files you’ll use to create a show.
Page 18

Now that you have some source photos,
you can create a show.
Creating a QUICKSHOW!
The lessons in this section will teach you
how to create a quick show in a few easy
steps using the photos you imported in
the IN Room and the Create a
QUICKSHOW! dialog.
The Story So Far
So far in this tutorial, you’ve learned how
to import photos into SHOW. The folder
of photos you imported will be used to
create a show. To find out more about
QUICKSHOW!, refer to “The
QUICKSHOW! Feature” on page 36.
Lesson 1: Creating a
QUICKSHOW!
To help you create presentations quickly
and easily, SHOW provides a powerful
feature called QUICKSHOW!, which uses
a Simple Sentence Control system to
automate the show-creation process.
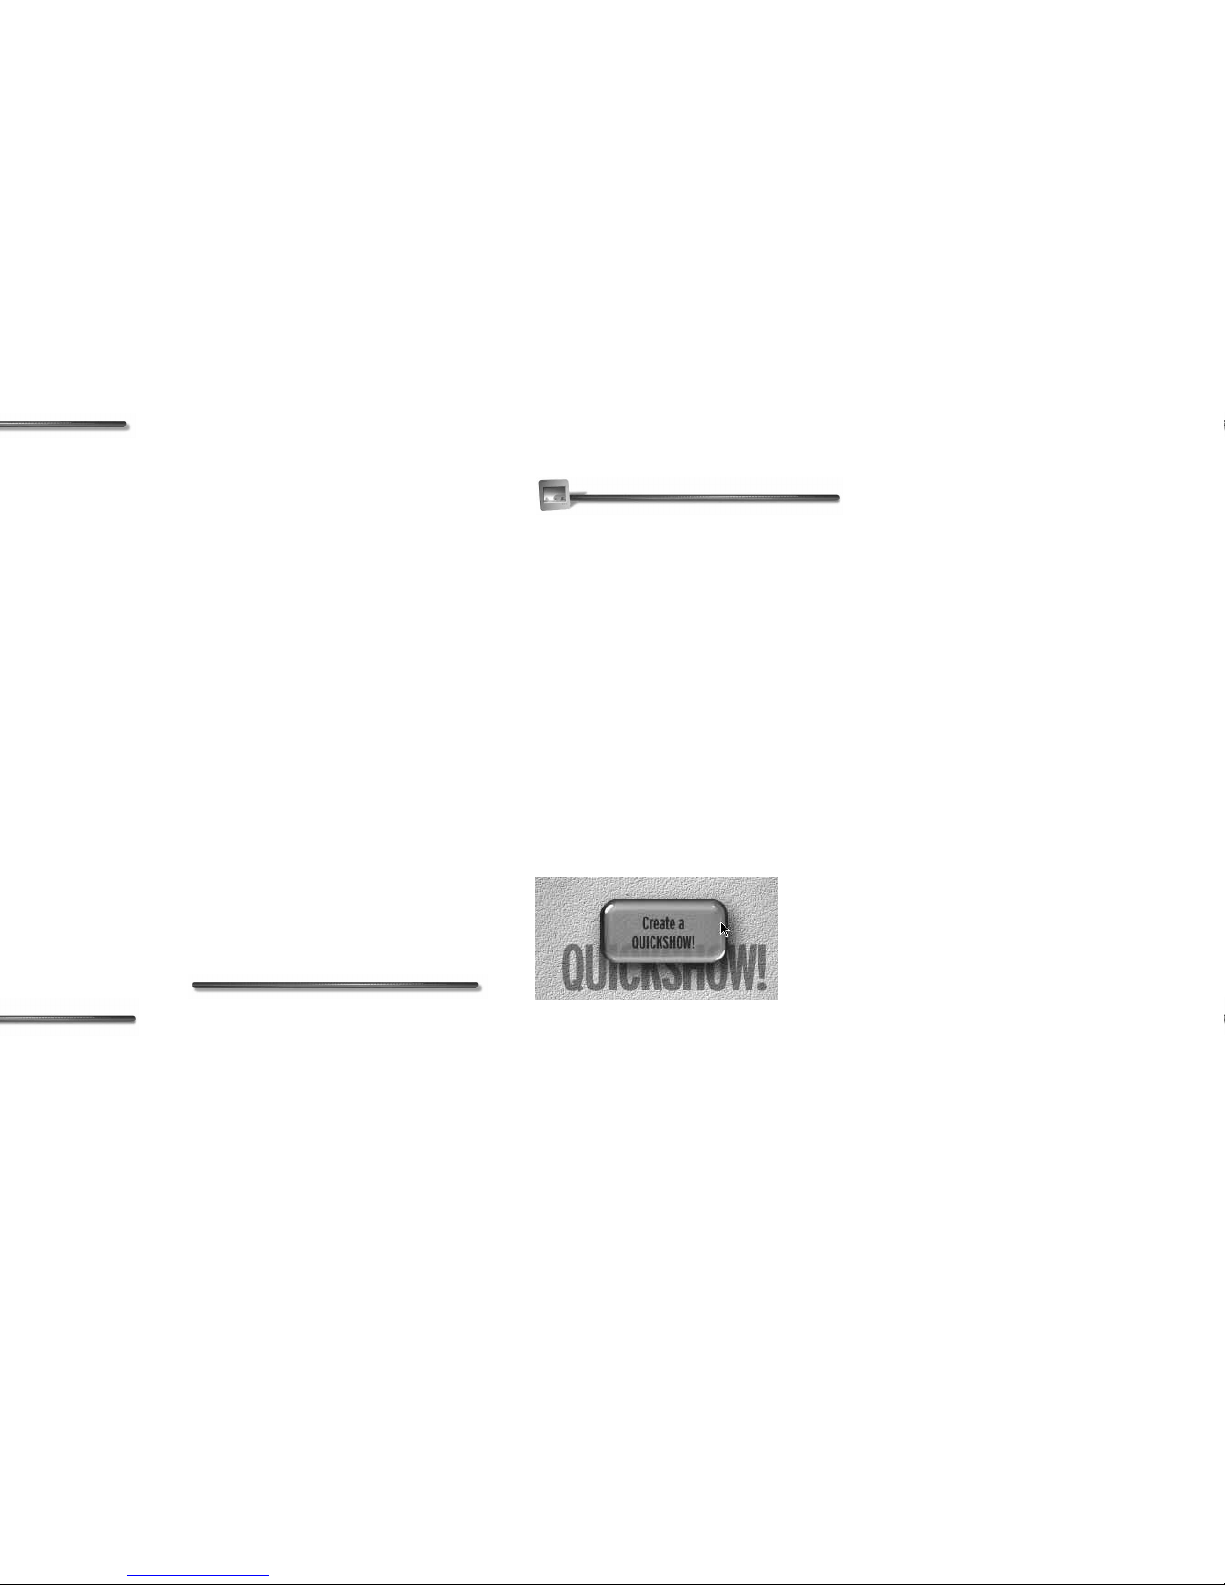
When you move the cursor over the
QUICKSHOW! label, the Create A
QUICKSHOW! button appears. Click it
and a dialog appears that displays several
basic statements. These describe how a
new show will be created. To change how
the show is created, simply change one of
the statements.
To create a QUICKSHOW!:
1. Move the cursor over the
QUICKSHOW! label in the
IN Room, then click the “Create a
QUICKSHOW!” button.
Files imported into SHOW appear as thumbnails
on the desktop.
Use the Create a QUICKSHOW! button to open
the QUICKSHOW! dialog.
Page 19
Kai’s Power SHOW Tutorial 19
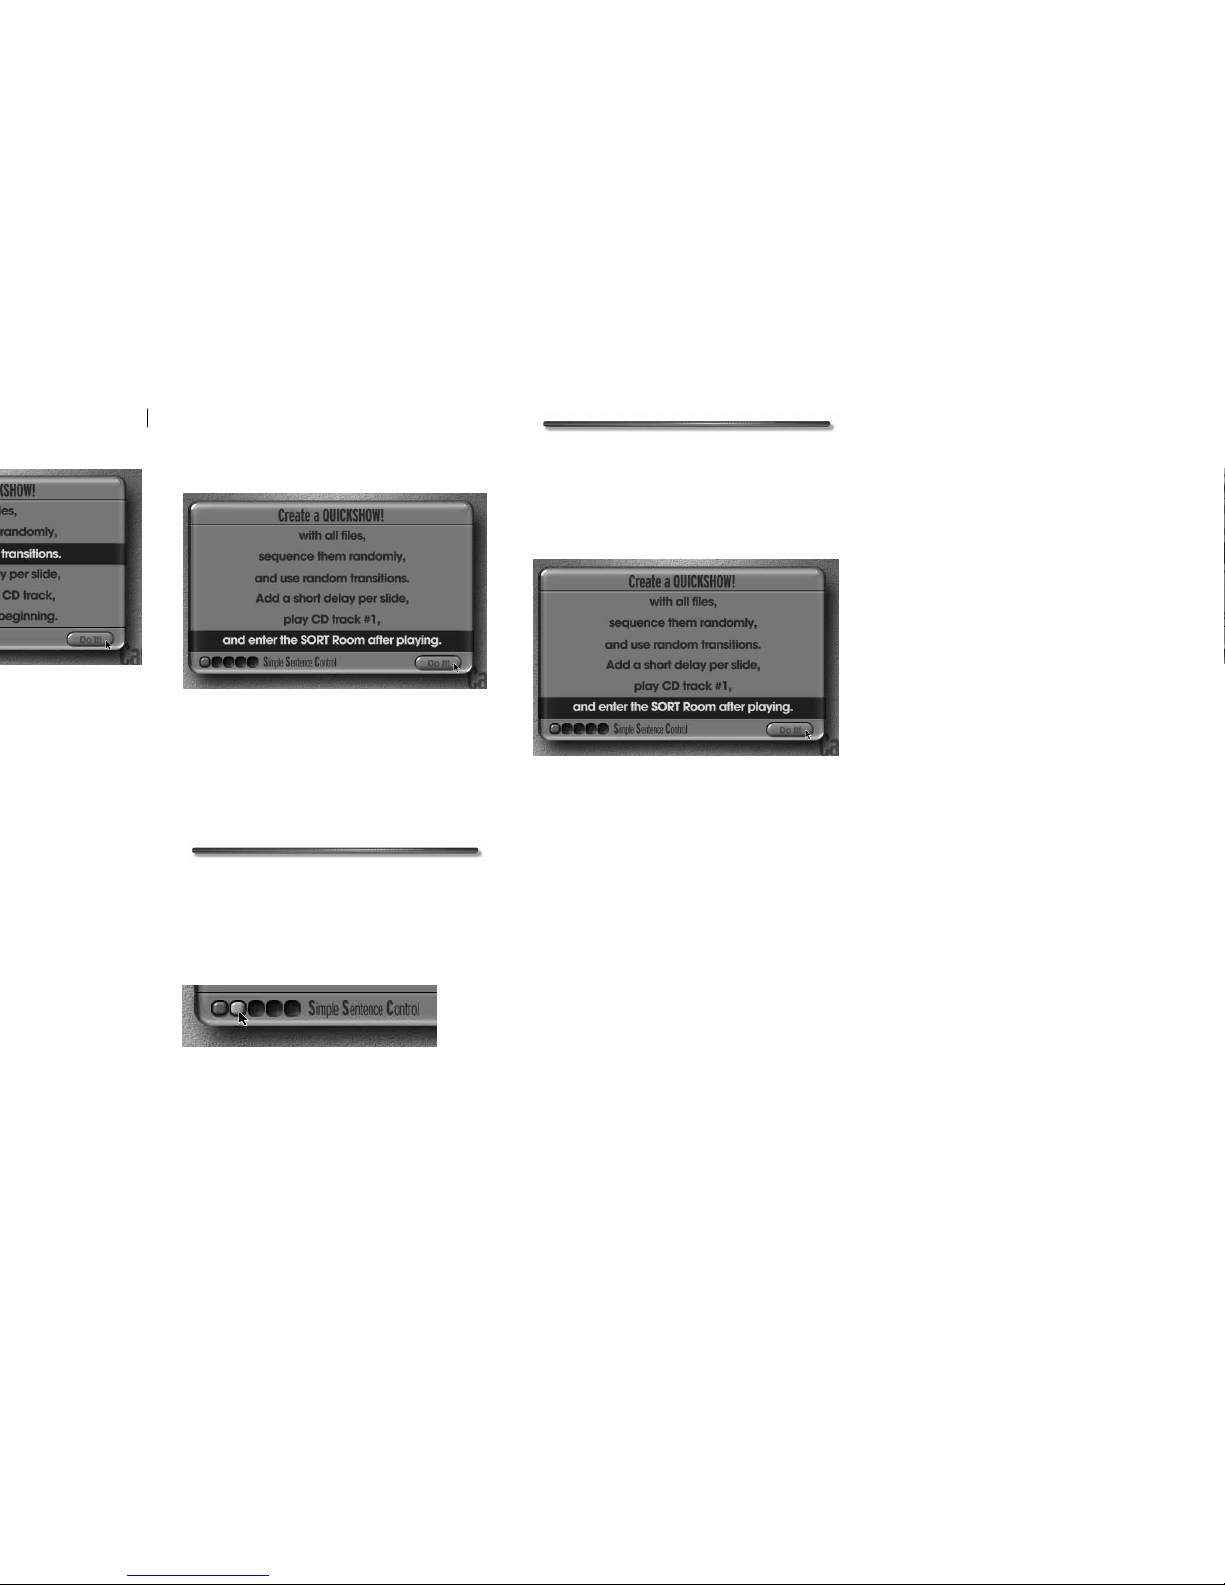
7. Click the sixth statement, then click
and enter the SORT Room after
playing.
Now that you’ve set up your Simple
Sentence Control (SSC) script, you can
save it for later use with different source
files.
To save an SSC Script:
✤ Click on an empty memory dot in the
lower-left corner of the Create a
QUICKSHOW! dialog.
You’re now ready to execute your SSC
script.
To execute an SSC Script:
1. Click the “Do It!” button. SHOW
automatically executes the script and
immediately plays your custom show.
You can cancel out of the Create a
QUICKSHOW! dialog without
executing it. Just click outside the
dialog.
Lesson 2: Editing a QUICKSHOW!
Since the last statement in your SSC script
was and enter the SORT Room after
playing, the SORT Room appears when
the show finishes playing. The SORT
Room lets you rearrange the sequence of
slides in your quick show, or if you’re
creating a presentation from scratch
without QUICKSHOW!, the SORT Room
is where you’ll initially sort, select, and
sequence your IN Room content.
This is how your finished sentences read.
Click a memory dot to save an SSC script for
later use.
Click the Do It! button to execute your script.
Page 20

Sorting Images in the SORT
Room
The SORT Room helps you to sort, select,
and sequence the content you imported in
the IN Room. The SORT Room provides
two main controls: the Sort control and
the Select control.
The Sort control allows you to quickly
sort your thumbnails using several basic
criteria. The Select control provides the
ability to select, deselect, group, or add
content on the desktop to your show
using simple mouse clicks and custom
cursors.
The Story So Far
So far in this tutorial, you’ve learned how
to import photos and pictures into
SHOW using the IN Room, and how to
quickly create shows using the
QUICKSHOW! feature. In this section
you’ll use the Sort control to sort the
folder of photos you imported in the IN
Room. Refer to
“Sort Control” on
page 42
and
“Sorting Content” on
page 43
for more on these controls.
Lesson 1: Sorting Pictures on the
Desktop
In this lesson, you’ll sort through the
Travel Photos you imported in the IN
Room.
Before you begin your work in the SORT
Room, first empty the Sequencer
“filmstrip” of the QUICKSHOW! frames.
To empty the Sequencer:
1.
Click the Sequencer menu in the
top-left corner of the Sequencer.
2.
Choose:
Select > All Frames
3.
Click the Sequencer menu again.
4.
This time, choose:
Select > Delete
.
This is what the SORT Room looks like when you
first enter.
Page 21

Kai’s Power SHOW Tutorial 21
2. Click on the largest “eye icon,” which
now appears in the lower-left corner
of the SORT Room, just above the
Sequencer. This is the Size control.
Click twice more on this icon to
increase thumbnail size many times
(or on the smallest to do the
opposite). The middle size control
returns the thumbnails to their
default size.
Now you can better see thumbnail details
to sort and select specific photos for your
show.
To sort thumbnail icons:
1. With all the thumbnails highlighted,
move the cursor over the Sort label in
the upper-left corner.
The Sort control appears.
2. Click the Sort control to display the
six Sort buttons.
3. Click the Width button.
Use the Size control to set the size of thumbnails
on the desktop.
The Sort control in its minimized state.
The Sort buttons let you perform sorts using
different criteria.
Page 22

In this lesson you’ll add the sorted photos
to the Sequencer using the Sequence
Floatoid and the Select cursor.
To add thumbnails to the Sequencer
using the Sequence Floatoid:
1. Drag a bounding box around a few of
the thumbnails on the desktop. The
Sequence Floatoid appears.
2. Click the Sequence Floatoid to load all
of the selected thumbnails into the
Sequencer.
Remember, the Floatoid loads all the
selected thumbnails into the
Sequencer. If you don’t want to load a
specific thumbnail, deselect it first.
The Sequence Floatoid loads content in
order, from left to right and from top to
bottom. You can also add content to the
Sequencer using the Sort control’s
Sequence cursor.
To add photos to the Sequencer using
the Sequence cursor:
1. Move your cursor over the Select
label. The Select control appears.
2. Click the Select control. The Select
buttons appear.
Select thumbnails and the Sequence Floatoid
appears.
The Select control in its minimized state.
Page 23

Kai’s Power SHOW Tutorial 23
4. Click a photo on the desktop.
The photo’s thumbnail turns gray to
indicate that the photo has been
added to the Sequencer. Note that the
blue Current Frame Indicator on the
Nano Sequencer determines the
insertion point of the new frame.
Click-and-drag the indicator to
change the insertion point.
5. Click another thumbnail.
6. Click another thumbnail.
7. Continue adding thumbnails. The
order in which you click them
determines their order in the
Sequencer.
8. Click the Standard button to turn off
the Sequence cursor.
To edit the order of frames in the
Sequencer:
1. Click-hold the cursor over Frame 4
and drag it to the Frame 6 position.
Release the mouse button when the
border between Frames 6 and 7 is
highlighted.
The original Sequencer frames shift to
fill the gap left behind by the departed
frame.
2. Drag the blue Current Frame
Indicator in the Nano Sequencer to a
new position. A different segment of
frames now appears in the Sequencer.
The Sequencer and Nano Sequencer
correspond and contain all show
frames. However, the Nano
Sequencer provides a broader view of
the show with less frame detail. The
Sequencer displays a segment of the
show’s content and order with greater
frame detail.
3. Click-hold Frame 10 and drag it to the
Frame 13 position. Release the mouse
button when the border between
Frames 13 and 14 is highlighted.
Click a thumbnail to add it to your show.
The Sequencer shows the order of photos you
added to your show.
Page 24

Lesson 1: Choosing a Slide to
Enhance
The EDIT Room helps you enhance slides
using special effects. To begin using the
features in this room, you’ll need to learn
how to select a slide to work on.
To move to the EDIT Room:
✤ Click the EDIT label at the top of the
SORT Room.
The sequence you created in the
SORT Room also appears in the EDIT
Room’s Sequencer and Nano
Sequencer.
To choose a frame from the Sequencer:
✤ Click a frame in the Sequencer to
make it the current frame. Note the
blue highlight around it.
You can also drag the Current Frame
Indicator on the Nano Sequencer to
set the current frame. The current
frame is the frame selected to receive
an In or Out Transition, animated
text effect, or sound effect.
If the frame you want is not visible,
scroll the Sequencer using the left or
right arrow on the Sequencer, or
move the Current Frame Indicator on
the Nano Sequencer.
The current frame appears in the
Current Frame Window in the center
of the room. Its preceding frame
appears in the In Transition window
and its following frame appears in the
Out Transition Windows.
Click any frame to make it the current frame.
Sequential frames appear in the three main
windows of the EDIT Room.
Page 25

Kai’s Power SHOW Tutorial 25
To choose an In Transition:
1. Click the In Transitions label above
the In Transition window. The In
Transition dialog appears.
2. Click-and-drag the Scroll button to
view the Transition menu. Release the
mouse button when the Page Curl
transition appears.
Drag the Scroll button up sharply to
increase the speed of the scrolling
menu or down to decrease speed.
3. Click the Page Curl name in the list.
A real-time preview of the Page Curl
transition appears in the In Transition
Preview window. Click on the
window itself to see the preview again.
You don’t need to wait for the transition
preview to end before you select
another one.
4. Drag the Speed control toward the
tortoise to decrease the relative
transition speed.
Drag toward the rabbit to increase the
speed.
Use the In Transition dialog to choose an In
Transition for the current frame.
When you select a transition from the Transition
menu, a preview appears in the Preview window.
Use the Speed control to increase/decrease the
speed of the transition.
Page 26

In this lesson you’ll store a transition as
one of the Five Favorites presets. (Sound
fx and Text fx Five Favorites work the
same way.)
To set up a Five Favorites preset:
1. While within the Transition dialog,
OPT/Alt-click a Five Favorites button
to clear any preset value.
2. Select a transition, then click the
empty dot to store it.
Working with Text
SHOW lets you add text to your slides in
one of two ways: using the static text
templates, or using animated text effects.
Templates set how your text is arranged.
Once you’ve selected a template, you can
easily replace the default text with your
own.
You cannot add text to a video clip.
You can also add text using the Five
Favorites. These presets contain
pre-formatted text that you can quickly
apply to any slide. Like the Transition Five
Favorites, you can replace these presets
with your own favorites.
The lessons in this section will teach you
how to add and edit text, add a
background for your text, and apply
animated text effects.
The Story So Far
So far in this tutorial, you’ve learned how
to import, sort, and sequence content.
You’ve also learned how to apply
transitions to individual frames. In this
next section, you’ll learn how to add text
and text effects to your slides. Before you
get started, you may want to refer to
“Adding Text” on page 55.
Use the Five Favorites to store your five most used
In and Out Transitions.
Page 27
Kai’s Power SHOW Tutorial 27
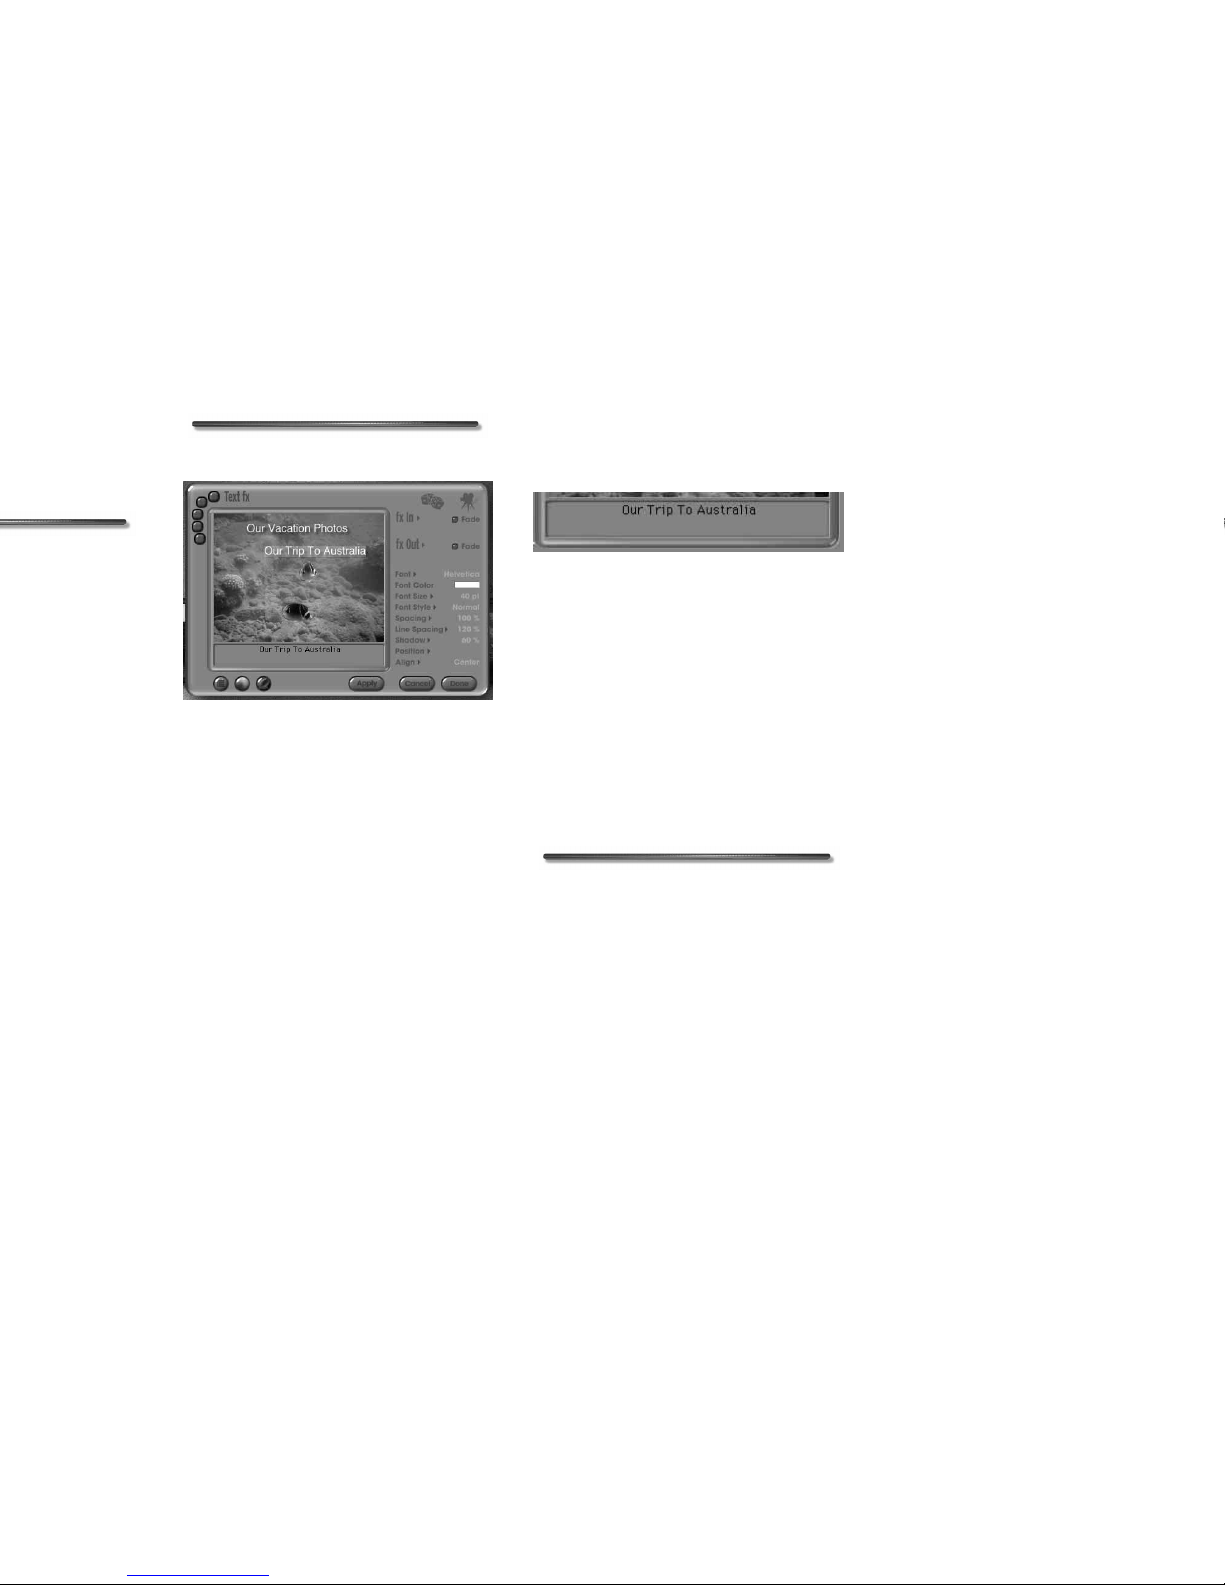
To edit text:
1. While within the Text fx dialog
Preview window, click a text string to
select it. The string also appears in the
Text Entry box at the bottom of the
dialog.
2. Drag over the text in the Text Entry
box to select it, and type some text.
The new text replaces the default text
as you type.
3. Click Done to accept the change and
close the dialog.
If you want to edit multiple strings,
repeat steps 1 and 2.
4. Select a text string you do not want,
then hit the Delete key on the
keyboard.
Lesson 3: Changing Text
Attributes
The Text fx dialog provides several
controls for changing the attributes of the
text you applied to your slide. You can
change everything from font size to
alignment.
To change the color of text:
1. In the Preview window, click a text
string to select it.
2. Click the Font Color label, and drag
over the color you want to apply.
Release the mouse button to apply the
color.
The Text fx dialog.
You can type over the text in the Text fx dialog
just as you would in most text editor
applications.
Page 28

2. Click the Wild & Fun category button
(far-right at the bottom of the
Background dialog box). The
background previews change to
display all the Wild & Fun
backgrounds.
The name of each preset appears as
you move the cursor over it.
3. Click the Wild Mosaic background.
4. The new background appears in the
Text fx dialog’s Preview window.
Lesson 5: Adding Text Effects
Text effects are animations that you assign
to text strings. There are a wide variety of
effects you can create using SHOW’s text
effects. The best way to find the most
appropriate effect is to apply them to your
text and see what happens.
• Click to select, then delete all text
strings on your current slide.
• Click the Randomize control “dice
icon” to see random text effects. Click
anywhere to stop and select the
current preset one.
To apply an In text effect:
1. Click the fx In menu and choose
Pinch.
2. This effect animates in the Preview
window. Since you had no text string
selected, a quote was used.
3. Click to select the quote text string.
4. Edit the text using the Text Entry box.
5. Click the Projector icon to preview
your custom animated message.
It’s possible to assign an In and an Out
text effect to the same text string if you
really want to get fancy. You can also click
the Fade button to add a fade variation to
the text effect.
The Backgrounds dialog shows you previews of
all the background presets available in SHOW.
Page 29

Kai’s Power SHOW Tutorial 29
Editing SHOW Slides
If your marketing messages or fun text
needs change over time, it is possible to
edit SHOW text slides later.
To edit an individual slide, you need to
save it as a SHOW Slide in the OUT
Room. Then you can load the slide using
the In Room’s Add a Picture, Movie, or
SHOW Slide button. Refer to Appendix ,
“Distributing Your Show” for more on
saving slides.
To edit a whole show of SHOW Slides, use
the IN Room’s Open an Existing Show
button, which opens the show and places
it into the Sequencer.
Using Sound Clips
You can also add sound effects to your
show. You can play a sound clip during the
entire show, or only when a specific slide
appears.
The lessons in this section will teach you
how attach a sound clip to a slide.
The Story So Far
So far in this tutorial you’ve learned how
to import, sort, and sequence content.
You’ve also learned how to add transitions
and text effects to your slides in the EDIT
Room. In this next section, you’ll learn
how to use the EDIT Room to add sound
to your show. Refer to “Adding Sound”
on page 59 for more information.
Lesson 1: Attaching Sound Clips
In this lesson you’ll learn how to attach a
sound clip to a specific slide.
To attach a sound clip to a slide:
1. In the EDIT Room, click to select any
frame in the Sequencer.
The frame appears in the Current
Frame window.
2. Click on the Sound fx label above the
Current Frame window. The Sound fx
dialog appears.
Use the Sound fx dialog to preview and attach a
sound clip to a slide.
Page 30

you’ll learn how to preview or play your
show. Refer to “Playing a Show” on
page 48 for more information.
Lesson 1: Using the Projector
Icon
The Projector icon, located on the
Sequencer, lets you play a show. The
Current Frame Indicator or the
corresponding blue frame in the
Sequencer indicates where the show will
start.
In this lesson, you’ll set up the playback of
a portion of your show.
To play a show:
1. In the Nano Sequencer, drag the
Current Frame Indicator to the frame
you want to begin with.
2. Click the Sequencer menu on the left
side of the Sequencer, then choose
Settings> Click to Advance.
3. Click the Projector icon on the right
side of the Sequencer to play your
show.
4. Click the mouse button to advance
the slides.
5. Click ESC to return to the EDIT
Room after your last slide.
Saving Your Show
Once you’re finished creating your show,
you can save or print it. You can even
export it as static Web pages. The OUT
Room contains all the tools you’ll need to
easily save, share, or print your show.
The Story So Far
So far in this tutorial you’ve learned how
to import, sort, sequence, edit, and play
your show. In this next section, you’ll
learn how to save the show for future
editing or to be distributed. Refer to
“Saving a Show” on page 62 for more on
outputting your show.
Use the Current Frame Indicator to set the show’s
start point.
Page 31

Kai’s Power SHOW Tutorial 31
If you change your file location
structure later, the .shw project file
will not find your original content.
2. Move the cursor over the Save Project
label, then click the Save the Show
Project with File Links button.
The Save dialog appears.
3. Enter SHOWProject.shw in the
filename field and set a location for
the show. The default location is the
“My SHOW Files” folder.
SHOW attaches the .shw extension
for you.
4. Click Save. SHOW creates a project
file with links to the pictures,
transitions, and sound clips you used
to create the presentation and a
modified content folder.
Distributing Your Show
You can distribute your show to other
users, regardless of whether or not they
have a copy of Kai’s Power SHOW. The
SHOW Player software (included for both
PC and Macintosh) can be used to play a
show on other computers, even if they
don’t have an installed copy of SHOW.
The lessons in this section will teach you
how to prepare a show for distribution
and how to distribute it using E-mail.
The Story So Far
So far in this tutorial you’ve learned how
to import, sort, sequence, edit, and play
your show. You’ve also learned how to save
your show for future editing. In this next
section, you’ll learn how to save your
show for distribution.
Lesson 1: Preparing a Show for
Distribution
If you want to distribute your show to
someone else or move your show files to
another location on your computer, you
need to use the Save Show option, which
copies the files used in the show into a
“media” folder, located next to the .sas
show file. Keeping and moving these two
files together ensures that the show file
Use the Save the Show Project with File Links
button to save your show as a project.
Page 32

The Show Settings dialog appears.
2. Click the Click to Advance label, then
click the OK button. The Save dialog
appears.
With this setting enabled, the first
slide is displayed until you click the
mouse button. Each subsequent click
of the mouse button advances the
show to the next frame.
3. Enter SHOWOutput.sas in the
filename field, and set a location for
the show.
4. Click Save.
SHOW creates an .sas show file, and
also copies the files used in the show
into a folder located next to the .sas
file. The new folder has the same
name as the .sas file with the word
“media” added.
This way, you can move your
collected show files to a different
location on your hard drive, or your
entire show to another computer and
use SHOW or the SHOW Player to
play it as long as the .sas file is kept
beside the folder.
Lesson 2: Distributing a Show
Now that your show’s been saved, you can
move it to any location on your system, or
E-mail it to another user. When you’re
moving a show, you need to copy both the
.sas show file and its associated folder. You
also need to include the PC or Mac
SHOW Player Installer if the recipient
doesn’t own SHOW.
In this lesson you’ll learn how to E-mail
and play your show remotely.
To distribute a show using E-mail:
1. Make sure your show is saved using
the Collect and Optimize the Entire
Show button.
2. Locate the .sas project file, and its
associated content folder. The folder
has “media” appended to the show’s
name.
Use the Show Settings dialog to set how your
saved show will run.
Page 33

Kai’s Power SHOW Tutorial 33
3. When the install is complete,
double-click the SHOW Player
program icon or select Start
menu> Programs> SHOW Player.
The Open dialog appears.
4. Locate the name of the desired .sas
project file and click Open.
Remember, to successfully use the
player, you must have both the .sas
show file and its associated media
folder.
The show will begin to run on a black
background. If the recipient has the
SHOW application, they can also edit the
show.
Lesson 2: Saving SHOW Slides
It is possible to save an animated text slide
that you create in the EDIT Room as an
individual SHOW slide (.shp) so that you
can open and use it in other SHOW
projects. For example, you might want to
create an animated introduction slide to
be used in all of your sales presentations.
This lesson teaches you to save an
animated SHOW Slide.
To save an animated SHOW Slide:
1. Use the scroll arrow under the Output
Preview window until you find a slide
in your show containing animated
text.
If you click-and-drag on the Output
Preview itself, a small Nano Output
Preview appears in the Output
Preview window. This smaller display
keeps pace with the cursor
movements and allows you to see
which slides you are passing over in
real-time. When you stop dragging,
the slide in the smaller Nano Output
Preview fills the entire Output
Preview.
Use the Output Preview to select the slide you
want to save or print.
Page 34

Lesson 1: Setting Up a Page
The Page Setup dialog lets you control
how slides are printed on a page. You can
use the dialog to set up a kind of contact
sheet used by photographers, where all the
slides in your show are printed as
thumbnail images. You could also print
large pictures to distribute your
presentation at a business meeting.
Besides setting up page layout, the dialog
also lets you print slide numbers and file
names along with your slides. This might
be helpful if you’re using the printouts as
storyboards.
In this lesson, you’ll learn how to setup a
page and print.
To print a show:
1. Move the cursor over the Page Setup
label in the OUT Room, then click the
Print Setup button.
Your printer settings dialog appears.
2. Choose the settings you want to use
for your printer, then click Print.
The Page Setup dialog appears.
3. Click the 2x2 button to print two
slides per line on the page.
The page changes to show you how
your printed page will look.
4. Click Print.
Congratulations. You have completed the
SHOW tutorial. You are now ready to use
SHOW creatively and productively.
However, please read the remainder of
this User Guide to ensure that you take
full advantage of all that SHOW has to
offer. It contains expanded explanations
of all terms and processes mentioned here.
The Page Setup dialog.
Page 35

The IN Room 35
Pictures, photos, and business slides
appear as small thumbnail icons. Video
clips also appear as thumbnails, but have a
small filmstrip icon in the top-right
corner of their thumbnail to differentiate
them.
An existing SHOW presentation opened
in SHOW using the Add Show option
appears as a unique “filmstrip” icon. Each
thumbnail’s file name appears when you
pass the cursor over it and pause.
Content imported as a single file appears
as an individual thumbnail. Content
imported as a folder appears as a pile of
thumbnails.
Piles are an easy way for you to see the
organization of files at a glance. Viewing
the piles on your desktop is like listing the
folders in the Window’s Explorer or the
Macintosh Finder. The piles on the
SHOW desktop act like transparent
folders. With piles, you have all the
advantages of files stored in a single
location (like a folder), while still being
able to see what you’re working with.
Refer to “Arranging Thumbnails” on
page 43 for more on using piles in the
SORT Room.
Different types of content have different
thumbnail icons.
Page 36

• Add an existing SHOW project file
(.shw) or show file (.sas) to the
current show.
The QUICKSHOW! Feature
The QUICKSHOW! feature lets you
create an entire presentation with just a
few simple clicks. It’s one of SHOW’s most
convenient features.
When you activate the QUICKSHOW!
feature, a dialog appears displaying
sentences containing several statements.
These statements make up the Simple
Sentence Control (SSC) script. Each
statement describes the options that will
be used to create your show. For example:
“Create a QUICKSHOW! with all
files, sequence them as loaded, and
use random transitions. Click to
advance, play CD track #1, and loop
to the beginning.”
To change how your show is created, you
simply change one of the statements. For
example, if you want to change which
photos are used in the show, change the
statement “with all files” to “with only
selected files.”
Each statement has several options. Click
on a statement to see the available
options. You can save your favorite
QUICKSHOW! scripts using the memory
dots in the bottom-left corner of the
dialog.
Use the IN Room to open, add, and import files
into SHOW.
Use the IN Room’s QUICKSHOW! dialog to
create an entire show in seconds.
Page 37

The IN Room 37
To use a saved SSC script:
✤ Click a filled memory dot, then click
the Do It! button.
Importing Show Content
The main purpose of the IN Room is to
import the content you’ll need to create
your show. The IN Room lets you import
digital photos, pictures, business slides,
and video clips. You can also load pictures
from a digital camera or scanner.
Show content is imported using the
feature buttons displayed along the
bottom of the IN Room.
Importing Photos and Pictures
SHOW can import photos and pictures,
separately or as folders. You can import
pictures in a wide variety of standard
formats including: TIFF, BMP, PICT, JPG,
FPX, and PSD.
To import a single file:
1. Move the cursor over the File label,
then click the Add a Picture, Movie or
SHOW Slide button.
2. Locate the file you want, then click
Open. The file thumbnail appears on
the IN Room desktop.
To import a folder of files:
1. Move the cursor over the Folder label,
then click the Add a Folder of Files
button.
Use the File option to import a single file.
Use the Folder option to import a folder of files.
Page 38

You cannot import an individual
PowerPoint slide in its native .ppt
format. You have to import an entire
presentation as individual slides, unless
you’re importing them as JPEGs saved
in PC PowerPoint 97.
Interpreting PowerPoint, as with any
other proprietary file format, is not easy.
You might notice that some of your slides
do not display the same in SHOW as they
do in PowerPoint.
In particular, the third-party filter used in
SHOW currently supports only 2-color
gradients and does not support text drop
shadows.
Also, when placing text on an object or
within a region on a slide, vertical text
alignment is not always identical.
Most graphs and charts display accurately,
as do most text characters. Left-justified
bullet text also translates correctly most of
the time. You should keep these tips in
mind when creating PowerPoint slides to
ensure the best playback results within
SHOW.
To import PowerPoint slides on the PC:
1. Move the cursor over the File label,
then click the Add a Picture, Movie or
SHOW Slide button. The Open dialog
appears.
2. Locate the name of your PowerPoint
slide presentation (.ppt).
3. Click Open to load the slides onto
SHOW’s IN Room desktop as a group
of thumbnails.
Tips for Importing PowerPoint Slides
If you use PC PowerPoint 97 (version 8.0),
you have the option of saving a
PowerPoint slide or the entire
presentation as a JPEG or series of JPEG
files.
Once your slide(s) are in JPG format, you
can simply import them into SHOW
using the Add a Picture, Movie or SHOW
Slide button, or the Add a Folder of Files
button within the IN Room.
Use the File option to import a PowerPoint
presentation (as slides without transitions).
Page 39

The IN Room 39
Loading Content from Digital
Input Devices
You can scan images directly into SHOW
or load them from a digital camera using
the TWAIN Interface.
Using an application interface called
TWAIN, SHOW interacts directly with
most scanners and digital cameras. Using
TWAIN features, you can control how an
image is loaded.
The features available in the TWAIN
dialog depend on the scanner connected
to your computer.
To scan pictures directly into SHOW:
1. Move the cursor over the TWAIN
label, then click the Load Pictures
from a Digital Input Device button.
Then choose Select TWAIN Source
from the pop-up menu. The Select
Source dialog appears.
2. Choose your scanner, then click OK.
3. Click the Load Pictures from a Digital
Input Device button again, then
choose Set Destination for Acquires
and Imports from the pop-up. The
Set Destination dialog appears.
4. Choose a location for your scanned
images. The default is the Images
Auto-acquired folder in the SHOW
application folder.
5. Click the Save File as Type pop-up,
then choose a file format for your
scanned files.
6. Click the Load Pictures from a Digital
Input Device button again, then
choose TWAIN Acquire from the
pop-up. The TWAIN dialog appears.
7. Use the dialog controls to scan an
image into SHOW.
Capturing Content Using Plug-ins
SHOW lets you use a variety of import
and capture plug-ins, which support
Photoshop’s plug-in standard, to acquire
images from a variety of sources.
Use the TWAIN option to scan images into
SHOW.
Page 40

5. Click the Import via Plug-Ins button
again, then choose your plug-in from
the list.
6. Use the plug-in controls to scan or
load your picture.
Adding Shows
You can add an existing SHOW project or
show to the current show using the Add
Show option. When you add a show, it
appears as a unique show thumbnail on
the desktop just like any other piece of
content.
To add a show to the current show:
1. Move the cursor over the Add Show
label, then click the Add a Show to the
Current One button.
2. Locate the folder containing the show
or project you want (.sas or .shw),
then click Open. (The default folder
into which your projects and shows
are saved is the “My SHOW Files”
folder.
A filmstrip icon representing the
show appears on the desktop.
Adding a show and opening a show is
not the same. When you open a show,
the slides in the show are automatically
loaded into the Sequencer and Nano
Sequencer, which replaces the existing
show. When you add a show, it appears
as a piece of content that can be
inserted into the current show.
Deleting Thumbnails from the IN
Room Desktop
If you import too many files or change
your mind about a show’s content, you
can easily delete thumbnails from the IN
Room desktop. When you delete a
thumbnail, it disappears from the
desktop, but the original file remains
unchanged on your hard drive.
To delete thumbnails from the desktop:
1. Select the thumbnail or group of
thumbnails.
2. Press the delete key.
Use the Add a Show to the Current One button
to load an existing show to the IN Room desktop.
Page 41

The SORT Room 41
thumbnails. By arranging thumbnails into
piles, and then laying them out around
the desktop, you can see how your show
will take shape.
The sorting process works just like it
would in the real world. If someone gave
you a huge stack of photos and said “make
me a show,” you’d probably drop all the
photos onto a desk and start pulling out
pictures that were somehow related.
Then, you’d group the photos together on
different parts of the desk.
This is the same process that’s mimicked
in the SORT Room. You place a bunch of
photos (in this case thumbnails) onto a
desktop, then pull out pictures that are
related and group them together into
piles.
Once you have all your piles set up, you
can start pulling out specific pictures or
photos to create the pile that will
eventually make up your show.
Selecting Content
The other purpose of the SORT Room is
to add content to your show. The Select
control is designed to help you
accomplish this task.
The Sequencer gives you a representation
of all the frames in your show. The Select
control’s Sequence cursor lets you add
files on your desktop to the Sequencer.
The Sequence cursor lets you visually
order all the frames in the show. You
determine the sequence of your show by
the order in which you click thumbnails.
As you click each thumbnail, it’s added to
the show.
You can also use the Sequence Floatoid,
which appears when you highlight
thumbnails on the desktop, to load them
into the Sequencer.
It is recommended that you select
thumbnails into the Sequencer in proper
order when first adding them. You can,
however, use click-and-drag editing to
correct show sequencing later.
Page 42

Sort Control
The Sort control lets you set criteria for
sorting the thumbnails on the desktop.
Select Control
As its name suggests, the Select control is
used mainly to select thumbnails. Each
button on the control alters the behavior
of the cursor, by allowing it to perform
different tasks. The cursor can select,
delete, group, or add clicked thumbnails
to the Sequencer.
Sequencer
The Sequencer contains all of the show’s
content and order, with frame detail.
However, it displays only a segment of the
frames at once. Each frame in the
Sequencer represents a slide in the show.
Use the criteria buttons on the Sort control to
sort the thumbnails on the desktop.
Use the buttons on the Select control to change
the behavior of the cursor.
The Sequencer displays show content.
Page 43

The SORT Room 43
To perform a sort:
1. Select the thumbnails you want to
sort.
2. Click the Sort control. A series of
buttons appear.
3. Click the criteria button you want to
use. The thumbnails are rearranged.
Option/Alt-click inverts the sort
order.
4. Click the Sequence Floatoid which
maintains sort order as the sorted files
are quickly loaded into the Sequencer.
Working with Thumbnails
Thumbnails visually represent the files
you imported in the IN Room. The SORT
Room offers several features and controls
that let you sort, select, and size
thumbnails.
Arranging Thumbnails
All the content you can use to create a
show are displayed as thumbnails on the
desktop of the SORT Room.
Pictures imported separately appear as
single thumbnails. Pictures imported in
folders appear as thumbnail piles. You can
move the thumbnails and organize them
into separate piles. For example, you can
create a pile of landscape pictures or a pile
of party photos.
Click the Sort control to display criteria buttons.
Imported content appears as thumbnail piles.
Page 44

The memory dots at the bottom of the
Sort control let you save the position of all
the thumbnails.
Since performing a sort re-arranges
thumbnails on the desktop, you’ll
probably want to save thumbnail
positions before you sort again.
Memory dots are saved with your
project or show file.
To save the position of thumbnails on
the desktop:
1. Arrange the thumbnails the way you
want them.
2. Click an empty memory dot at the
bottom of the Sort control to save the
arrangement.
Option/Alt-click a memory dot to
clear it.
Selecting Thumbnails
The Standard, or default, cursor lets you
select individual thumbnails or groups of
thumbnails. You can also use the Add or
Subtract cursors to add or remove
thumbnails from a selection.
To select thumbnails:
1. Make sure the Standard button is
active.
2. Click the thumbnail you want to
select.
To select a group of thumbnails:
1. Drag an area around all the
thumbnails you want to select.
To add thumbnails to a selection:
1. Click the Select control. A series of
buttons appears.
2. Click the Add button.
The Sort control’s memory dots save and recall
thumbnail positions.
The Standard button.
Page 45
The SORT Room 45
Deleting Thumbnails from the
SORT Room Desktop
The Select control lets you change the
behavior of the cursor so that every time
you click a thumbnail, it’s deleted from
the desktop.
When you delete a thumbnail, it
disappears from the desktop, but the
original file remains unchanged on your
hard drive.
To delete a thumbnail from the desktop:
1. Click the Select control. A series of
buttons appears.
2. Click the Delete button.
3. Click the thumbnails you want to
delete.
4. Click the Standard button to reset the
cursor.
Command/Ctrl-Z or the Undo
command lets you undo a mistake,
with one level of undo. Refer to
“Undoing Operations” on page 15
for more on Undo.
Setting Thumbnail Size
You can adjust the size of thumbnails on
the desktop to make it easier to see them,
or, if you have a lot of content, you can
resize thumbnails to reduce clutter.
To set thumbnail size:
✤ Select a single thumbnail or a group
of thumbnails.
✤ Click the smallest size control to
reduce thumbnail size. Click again to
reduce thumbnail size further.
✤ Click the largest size control to
increase thumbnail size. Click again to
increase thumbnail size further.
✤ Click the middle size control to set
thumbnails to default size.
Use the Size control to set the size of thumbnails
on the desktop.
Page 46

To add thumbnails to the Sequencer
using the Floatoid:
1. Select a group of thumbnails on the
desktop. The Sequence Floatoid
automatically appears.
2. Click the Floatoid. The selected
thumbnails are added to the
Sequencer.
If there are already frames in the
Sequencer, the new thumbnails are
inserted at the position of the Current
Frame Indicator.
Using the Sequence Cursor
The Select control lets you adjust the
behavior of the cursor so that every time
you click a thumbnail, it is added to the
Sequencer. Thumbnails are added in the
order you click them. The first thumbnail
you click is added to the first available
frame of the show, and so on.
The Sort control’s Sequence cursor lets
you visually sequence the content on our
desktop. As you click a thumbnail, it’s
added to the Sequencer, and grayed out
on the desktop. This helps you determine
which thumbnails are part of the current
show and which are not.
Since adding content this way is so visual,
it is important to have an adequate
number of thumbnails on the desktop
sorted into usable piles.
If all the frames in the Sequencer are full,
it automatically scrolls to reveal an
additional frame when you click another
thumbnail.
When you select one or more thumbnails, the
Sequence Floatoid automatically appears.
Items added to the Sequencer also appear in the
Nano Sequencer.
Page 47

The SORT Room 47
In order to provide bigger frames showing
more detail, the Sequencer displays only a
subset of frames in the show. Since you’re
seeing only part of the show at once, the
Sequencer provides indicators to help you
keep track of frame order:
• The number of each frame within the
shows appears at the top of the frame.
• The numbers on the left and right side
of the Sequencer let you know how
many frames precede the first visible
frame in the Sequencer, and how
many follow the last visible frame. For
example, if you’re viewing Frame 7
through 11 of a 20 frame show, the
right number will read 9, and the
number on the left end of the
Sequencer will read 6.
You can also use the Pre-Frame and
Post-Frame Indicator arrows on each end
of the Sequencer to scroll through all the
frames in your show.
Video clips in a Sequencer frame are
identified by a “filmstrip” icon. Sound
clips attached to a Sequencer frame are
identified by a “musical note” icon on the
frame.
To re-arrange frames in the Sequencer:
1. Click-and-hold the mouse button
with the cursor over the desired frame
in the Sequencer.
2. Drag the frame to a new position. As
you drag, borders between frames are
highlighted. These highlighted
borders indicate where your frame
will be inserted. Release the mouse
button when the border where you
want your frame placed is highlighted.
If you drag past either end of the
Sequencer, it automatically scrolls.
Note: If you try to drop a frame
exactly on top of another frame (i.e.,
if a border is not highlighted), the
frame you are moving returns to its
original location.
To scroll the Sequencer:
✤ Click or click-hold the Post-Frame
Indicator arrow located on the right
side of the Sequencer to scroll
forward.
✤ Click or click-hold the Pre-Frame
Indicator arrow on the left side to
scroll backward.
Page 48

As you add content to the Sequencer, the
indicator moves to show where content
was added. You can move the indicator to
add content to a different part of the
show. New frames are inserted before the
position of the Current Frame Indicator.
For example, if you place the indicator at
Frame 12, frames you add appear directly
before Frame 12. When adding content to
create a new show, the indicator is always
at the left end of the Sequencer.
You can also click-and-drag frames in the
Nano Sequencer to re-arrange them, just
like you would in the Sequencer.
To re-arrange frames in the Nano
Sequencer:
1. Click-and-drag the mouse button
while the cursor is over a frame in the
Nano Sequencer.
2. Drag the frame to a new position in
the show and release the mouse
button when the cursor is at the
desired insertion point.
To reposition the Current Frame
Indicator:
✤ Drag the Current Frame Indicator to a
new location.
Playing a Show
Once you’ve added the content and
sequenced the frames in your show, you
can play your show to see how it’s
developing.
The Projector icon in the SORT and EDIT
Rooms plays all the frames currently in
the Sequencer starting at the position of
the Current Frame Indicator.
Show playback can be controlled using the
keyboard. The Playback Shortcuts dialog
displays all the available keyboard
commands you can use.
Use the Projector icon to play your show.
The Playback Shortcuts dialog.
Page 49

The SORT Room 49
To playback a show:
✤ Click the Projector icon in the
top-right corner of the Sequencer.
✤ When the show reaches its last frame,
hit the escape key to return to the
SORT or EDIT Room.
When you have selected and sequenced
your content, it is time to move to the
EDIT Room. There, you can bring your
photo show or business presentation to
life with exciting real-time effects and
sounds.
Page 50

There are four steps involved in editing or
enhancing a slide:
• Add an In Transition. The In
Transition is the effect that appears
before the current frame.
• Add an Out Transition. The Out
Transition is the effect that appears
after the current frame.
• Apply text effects. This can mean
anything from adding blocks of static
text to a business slide, to creating
animated messages on family photos.
• Add a sound clip. A sound clip can
include a voice annotation or a sound
effect (.wav) that plays when the slide
appears. An audio CD can be played
in the background, too.
What Are Transitions?
Transitions are the animated special
effects inserted between frames. When
your show plays, the transitions fill the
gaps between one slide and the next. A
transition can be used to create specific
effects in a show, for example, one slide
melting into another.
In a show, all slides (except the first and
perhaps the last) have an In and an Out
transition. In Transitions lead into the
current frame. Out Transitions follow the
current frame into the next. Hence, frame
1’s Out Transition is frame 2’s In
Transition.
The EDIT Room lets you choose from a
wide variety and number of transition
effects. Using the features in this room,
you can preview a transition, while adding
it to any slide in your show quickly and
easily.
Working in the EDIT Room
The EDIT Room has three main working
windows:
• The Current Frame window
• The In Transition window
• The Out Transition window
Page 51

The EDIT Room 51
In and Out Transition Windows
The Transition windows show you what
the In or Out and current frames look like
when an In or Out Transition is applied.
You can click on either window to see a
quick preview of the transition effect
currently applied to the frame.
Working with Frames
Before you can start editing frames, you
need to know how to select them. In
addition to selecting frames, there are
several other operations you can perform
on frames that will enhance their look.
The Sequencer menu provides several
options that let you select, copy and paste,
or flip frames.
Selecting Frames to Edit
You can select a frame individually by
clicking it in the Sequencer, or in groups
using the Sequencer menu.
An individual frame can also be selected
by dragging the Current Frame Indicator
in the Nano Sequencer. The frame under
the indicator is the currently selected
frame.
Use the In Transition Windows to preview the
current transition.
Use the Out Transition Windows to preview the
current transition.
The Sequencer pop-up menu.
The Current Frame Indicator
Page 52

To copy-and-paste a slide:
1. Click a frame in the Sequencer.
2. Click the Sequencer menu, and
choose Copy > Slide.
Choose Sound or Transition to copy
the sound clip or transition effect
from the selected frame.
3. Click the frame where you want to
paste the contents.
4. Click the Sequencer menu, then
choose Paste Slide.
Flipping Frames
You can flip frames horizontally or
vertically in the Sequencer. Flipping lets
you adjust images; especially those
imported from scanners and digital
cameras.
To flip a frame:
1. Click a frame in the Sequencer.
2. Click the Sequencer menu, then
choose Flip > Vertical or Flip >
Horizontal.
Adding a Slide Display Time to a
Show
A show can have a uniform delay
associated with each slide. This delay
extends the time that each slide is visible
in the show. This extra delay time is in
addition to the time it takes to load the
slide.
Although transition speeds can vary
between slides, slide display time must be
uniform. If variable display time is
required, choose the Click to Advance
option.
To add a uniform preset delay to a show:
✤ Click the Sequencer menu, then
choose Settings > and the relative
delay you want.
(You can also select Click to Advance
or Loop.)
To set a precise delay to a show:
✤ Click the Sequencer menu, then
choose Settings > and drag the slider
at the bottom of the menu.
Drag right to increase the delay, and
left to decrease it.
Page 53

The EDIT Room 53
possible to add transition effects to each
of the frames in your show without ever
having to exit the dialog.
When you select a transition, it’s
automatically applied to the frame. You
don’t have to click an OK button, or any
other button, to apply the transition. This
makes it even easier to apply transitions.
You can apply a transition effect to each of
the frames in your presentation just by
pressing the arrow keys and clicking
transitions. When complete, click the
Done button to exit the dialog.
Remember that frame 1’s Out
Transition is frame 2’s In Transition.
You need only select all In or all Out
transitions to account for all necessary
transitions in a show.
.
To display the Transition dialogs:
✤ Click either the In Transition or Out
Transition label.
To view random transitions:
✤ From within the Transition dialog,
click the Randomize control “dice
icon.” SHOW plays random
transitions. Click anywhere to stop
and select the current one.
To select a transition:
✤ Click one of the transitions in the
menu. You can also scroll the list using
the scroll button, or type a letter to be
taken to the corresponding section of
the menu.
To set the transition’s speed:
✤ Adjust the position of the Speed
control slider. Drag right to increase
the transition’s speed, or left to
decrease it.
The In Transition dialog.
Page 54

Using Transition Presets
The five buttons beside the In and Out
Transitions labels are the Five Favorites
presets. These buttons can store your
most commonly used transition effects.
They’re a handy way of quickly accessing
your favorite transitions without having
to enter the Transition dialogs. The Five
Favorites come pre-loaded, but it is easy
to add your favorites.
To apply a transition using a preset:
1. Click to select a frame in the
Sequencer.
2. Click one of the In Transition Five
Favorites buttons. A real-time preview
of the transition is displayed in the In
Transition window.
To save a transition as a new preset:
1. While within the Transition dialog,
OPT-click a Five Favorites button to
clear the preset value.
2. In the Transition menu, select the
transition you want to use.
3. Click the empty Five Favorites button
to store the new favorite transition.
Working with Text
Text effects in SHOW are controlled using
the Text fx dialog. This dialog lets you add
and edit text, add backgrounds, and apply
text animations to a slide.
To display the Text fx dialog:
✤ Click the Text fx label next to the Text
fx Five Favorites buttons.
✤ Make sure the Current Frame
Indicator is pointing to the frame you
want to add text to, before you enter
the text fx dialog. If you want to create
Use the Text fx dialog to add new text, and set up
text animation effects on photos and slides.
Page 55

The EDIT Room 55
Many of these templates contain text
formatted with a heading, a subheading
and several bullet points. So you can
quickly set up the text on your slide by
simply clicking a button.
The Template dialog displays previews of
all 20 available templates.
To add a text template to a slide:
1. Click the Template button. The
Template dialog appears.
2. Click on the desired template preview
to load that template.
The template’s preset text strings
appear in the Preview window and in
the Text Entry box.
Editing Text
Once the template is applied to the slide,
you can replace the preset text strings with
your own text, using the Text Entry box at
the bottom of the dialog. If the template
contains several text strings, just click on
each to load them into the Text Entry box
for fast editing. You can then alter text
appearance by using the Text Attribute
Controls to the right, if necessary.
These controls let you change font color,
change font size, change font style, or
place text on the slide with specific relative
positioning.
The Template dialog.
Use the Template button to add pre-formatted
text to your slide (photo or background).
Use the attributes pop-up menus to edit the text’s
size, color, alignment, and transparency.
Page 56

To change the font type:
1. Click a text string to select it. A
highlight appears around the text.
2. Click the Font label, then choose a
font from the pop-up menu.
The pop-up menu displays all of your
system fonts.
To change the font size:
1. Click a text string to select it.
2. Click the Font Size label, then choose
a size from the pop-up menu.
To change font style:
1. Click a text string to select it.
2. Click the Font Style label, then choose
either Bold, Italic, or Underline from
the pop-up menu.
Active styles are designated with a
check mark in the pop-up menu.
To change letter spacing:
1. Click a text string to select it.
2. Click the Spacing label, and choose a
percentage from the pop-up menu.
Higher percentages expand the
spacing between letters. Lower
percentages compress the spacing.
To change line spacing:
1. Click a text string to select it.
2. Click the Line Spacing label, then
choose a percentage from the pop-up
menu.
Higher percentages increase the
spacing between lines of text. Lower
percentages compress line spacing.
To adjust shadow opacity:
1. Click a text string to select it.
2. Click the Shadow label, then choose a
percentage from the pop-up menu.
Higher percentages make the shadow
darker. Lower percentages make
shadows lighter.
To set text alignment:
1. Click a multi-line text string to select
it.
2. Click the Align label, then choose an
alignment from the pop-up menu.
Page 57

The EDIT Room 57
Backgrounds are divided into five
categories: Corporate Backgrounds,
Gradients, Textured Gradients, Textures,
and Wild & Fun.
When you apply a background, it
replaces the image currently displayed
in the Preview window. If you want to
add a background slide to your show
without replacing an existing frame,
ensure that the Current Frame
Indicator is set on the frame following
the last frame in your show. Then,
merely click-and-drag the new
background slide to its desired position.
To use a color as a background:
✤ Click the Color button at the bottom
of the Text fx dialog, and choose a
color from the picker that appears.
To add a background pattern to a slide:
1. Click the Background button at the
bottom of the Text fx dialog. The
Backgrounds dialog appears.
2. Click to select a background, or click
one of the other buttons at the bottom
to see more background gradient and
texture options.
The new background appears behind
the text in the current frame. The old
background or image is replaced.
3. Use the Cancel button to return to the
Text fx dialog without selecting a
background.
The Color button.
The Background button.
Page 58

✤ Click the Fade button to add a fade
variation to your animation selection.
✤ The text string animates using your
selection. If you don’t like your choice,
select another until you are satisfied.
✤ If you want an Out animation too,
click the fx Out label and repeat the
steps.
Previewing Text Animations
The Projector icon in the Text fx dialog
lets you preview all animations you’ve
added to the text in the Preview window.
To preview text animations:
✤ Click the Projector icon.
To apply your changes
✤ If you are happy with all text
attributes and animations on the
slide, select Done to apply them. The
slide then appears in the Sequencer.
✤ If you are not happy with text
attributes and animations on the
slide, hit Cancel to exit the dialog
without applying any changes to the
current frame.
To see random text effects:
✤ Click the “dice” icon to see random
text effects. Click anywhere to stop
and select the current effect.
Text fx Presets
The Five Favorites Text fx presets contain
five pre-formatted text options, complete
with font, color, and size attributes. Using
these Five Favorites, you can quickly add
text blocks to your slide, which you can
later edit to suit your needs.
To apply a preset, simply click its button.
You can change the Text fx presets, just as
you can the Transition Five Favorites.
Use the Five Favorites presets to add preset text to
a slide.
Page 59

The EDIT Room 59
different sound clip to each of the frames
in your show since you never have to exit
the dialog to make a change.
Sound clips attached to frames play
whenever the slide appears in the show.
Frames with sound clips attached contain
a musical note icon in the Sequencer.
To display the Sound fx dialog:
✤ Click the Sound fx label above the
Current Frame window.
Previewing Sound Clips
You can preview a sound clip simply by
clicking on it in the Sound fx menu.
To preview a sound:
1. Click a category button.
2. Click a sound clip.
To hear random sound effects:
✤ Click the “dice” icon to hear random
text effects. Click anywhere to stop,
and select the current effect.
To choose a sound effect:
1. Click the sound category you want to
use (fun, loops, mechanical, etc.).
2. Click the sound clip you want to use.
You can also use the Scroll button to
browse through the list of clips.
Playing CD Tracks in a Show
Sound clips are not the only type of sound
you can use in your presentation. You can
also have a track from an audio CD play
when a slide appears, or you can have a
track play in the background of your
entire show.
Then, as long as an audio CD is in the
CD-ROM drive on your system, the CD
track will play whenever the slide appears
in your show.
Use the Sound fx dialog to choose and attach a
sound clip.
Page 60

To apply a preset sound clip:
✤ Click a Five Favorites Sound fx
button.
To save a sound clip as a new preset:
1. While in the Sound fx dialog,
OPT-click a Five Favorites button to
clear any preset value.
2. Click to select the sound clip you want
to use as a preset.
3. Click the empty Five Favorites button
to store the new favorite sound.
Playing Soundtracks
Soundtracks can be long sound clips that
play during the entire show. You can play
a soundtrack by adding a long sound clip
to the first frame in your show. If the clip
is long enough, it will play during the
entire show. You can also play a
soundtrack by playing a CD track during
the show. If you initiate an audio CD track
with the first frame in your show, the
track can play during the entire show, or
until it reaches a slide with a sound clip
attached.
You can also create a soundtrack using the
Loop and Continue options in the Sound
fx dialog:
• The Loop control plays the sound clip
over and over again until the show
ends.
• The Continue control plays a sound
clip continuously, regardless of
whether or not the slide is displayed.
The clip plays until it encounters
another sound clip, or until it
encounters a slide with “Fade
Previous” selected.
• To gradually fade a long sound clip,
allowing for a smooth transition to
the sound clip attached to the next
frame, click the “Fade Previous”
option in the next frame.
Page 61

The EDIT Room 61
Page 62

You can also choose from a variety of
print options such as single slides, or as a
contact sheet which shows your slides in a
grid on a single page.
Selecting Slides for Output
The Output Preview window, located in
the center of the OUT Room, displays the
currently selected slide. The indicator
below it displays the frame number of the
selected slide.
When you’re saving or printing a single
slide, you’ll use the Output Preview
window to select the specific slide from
your show.
To select a slide for output:
✤
Click on the forward or backward
scroll arrows on the Output Preview
to locate the slide you seek.
✤
Or, click-and-drag the Output
Preview to get the Nano Output
Preview window which allows you to
scrub through your show quickly. As
you drag, a quick preview of each
slide appears in the window.
Saving a Show
You can save your presentation as:
• an
.shw
project file.
• an
.sas
show for distribution.
• an
.shp
single SHOW slide.
• static HTML pages for the Web.
Use the Output Preview window to select a
specific slide to print or save.
Page 63

The OUT Room 63
• Use Save Show if you’re likely to
move your source files, or when you’re
ready to share your show with others.
Saving a SHOW Project
Save Project lets you save what you’ve
done and work on your show at a later
time. The Save Project option creates links
to all the pictures, video clips, and sounds
used in the show. Even transitions,
presets, and memory dots are saved.
Save Project creates a project file (.shw)
and a project folder, which has the same
name as your project, with the word
“Media” attached to it. When you open
the project file, SHOW locates all the
content and re-assembles the show.
A show saved as a project file can only
be opened by SHOW.
Once you’ve saved your work as a SHOW
project, it’s important to keep source files
in their original locations. If source files
are moved (even to a different location on
the same computer), the project file will
be unable to find them, because the file
links identifying their locations are
broken.
To save a show as a project file:
1. Before you save your project, make
sure source content (pictures and
video clips) are in their original
locations. Don’t move them after you
save the project file.
2. Click the Save Project label, then click
the Save the Show Project with File
Links button.
The Save dialog appears.
3. Choose a name and location for your
file, and click Save. Unless you specify
otherwise, SHOW projects and shows
are saved into the “My SHOW Files”
folder for easy retrieval.
SHOW creates a project file and
folder. These contain modified
content and links to all the pictures,
video clips and sounds you used in
your presentation.
Use the Save the Show Project with File Links
button to save your show as a project.
Page 64
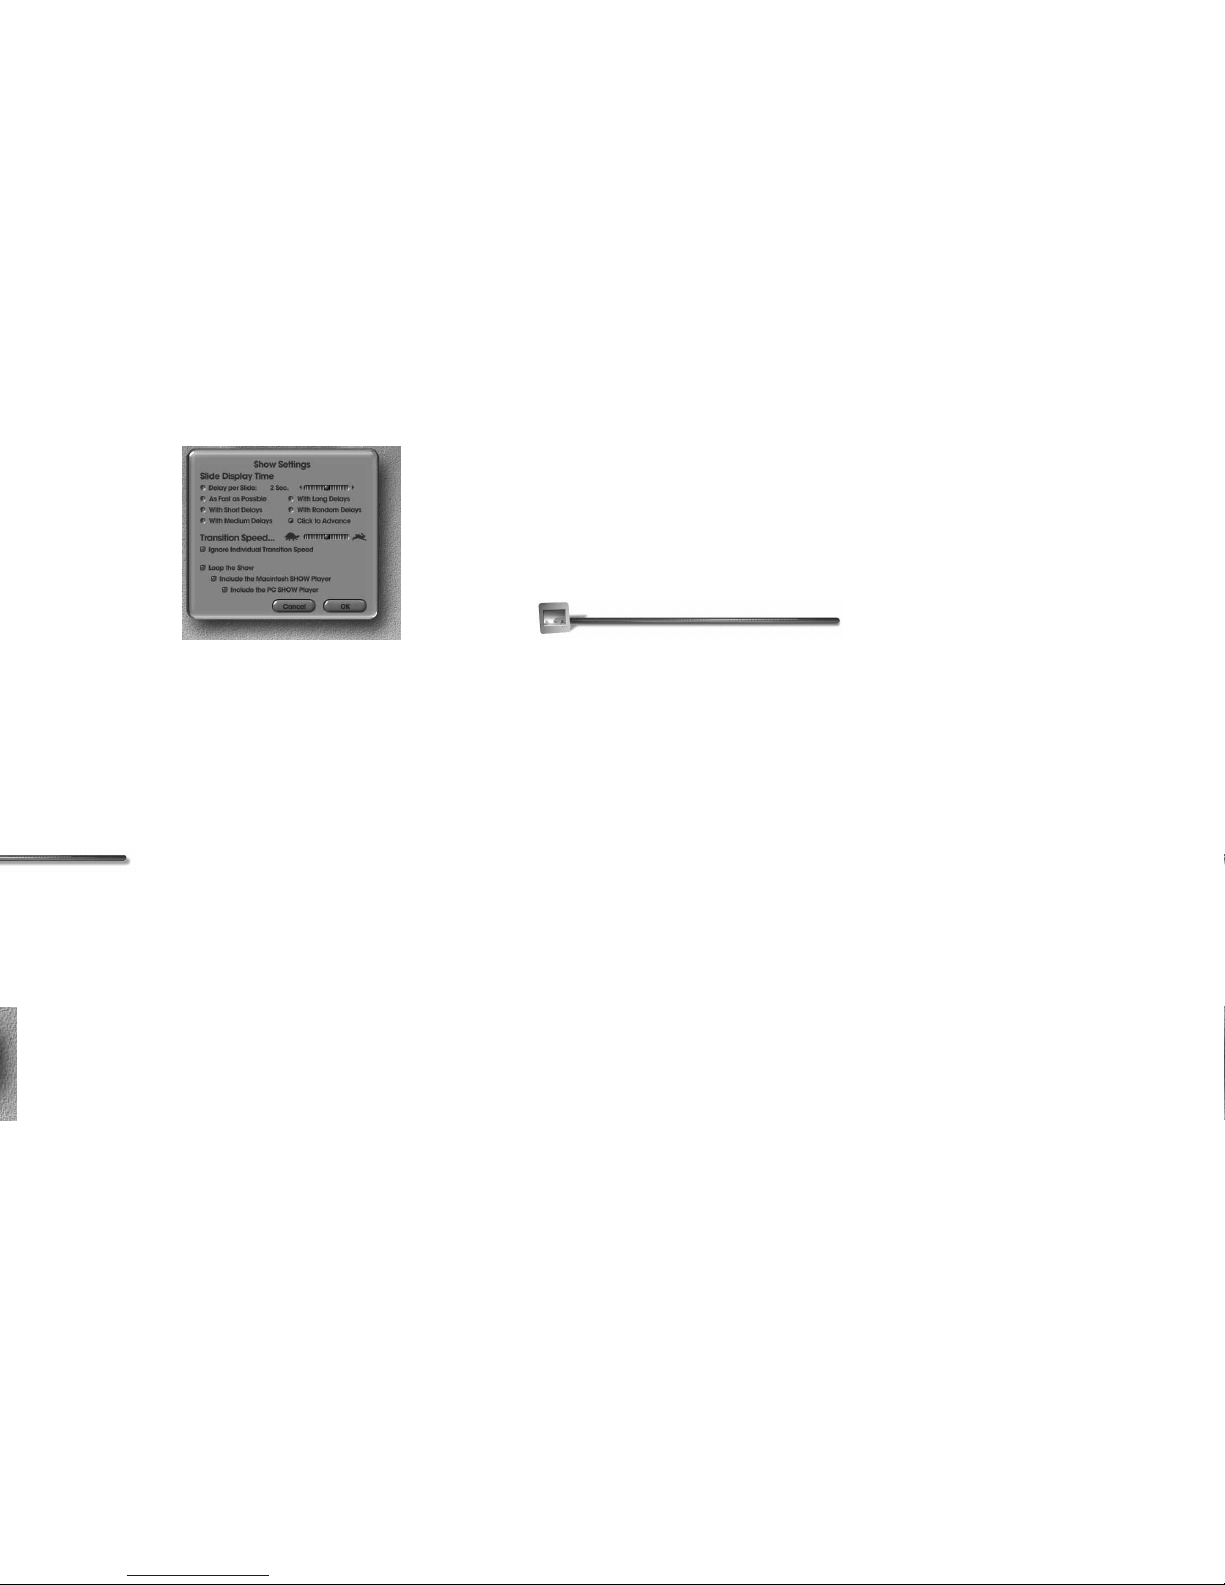
The Show Settings dialog appears.
2. Select a slide display time.
You can set a specific delay time by
dragging the slider next to the Delay
Per Slide label, or you can enable one
of the preset delay options.
Use the Click to Advance option if
you want each slide to advance when
you click the mouse button.
3. Drag the Transition Speed slider to set
the relative speed of all slide
transitions.
4. Click the Ignore Individual Transition
Speed option if you want the speed
you set in this dialog to override
variable times set for individual
transitions.
5. Click the Loop the Show option if you
want your show to continuously loop
whenever you play it.
6. Click either the Include the Macintosh
or PC SHOW Player option to include
the player software installer with the
show.
Distributing a Show
When you’re ready to send a show to
someone, or play a show remotely using
the SHOW Player software (Windows or
Macintosh), be sure to save your show
using the Save Show option. When the
Save Show option is completed, it’s easy to
move or distribute your show. Just make
sure that you keep the following files
together when you move them:
• the .sas show file
• its associated content folder (which
has “media” appended to the show’s
name).
Remember to include either the Windows
or Macintosh SHOW Player Installer if
necessary. The SHOW Player must be
installed on a remote system before a
show can be viewed, unless the SHOW
application is already present on that
system.
Use the Show Settings dialog to set up show
display parameters before you save a show.
Page 65

The OUT Room
65
.sas
Distributing the SHOW Player
Software
The SHOW Player lightweight installers
are small enough to give to friends, family,
and business associates via E-mail or on
removable media. ScanSoft encourages
you to freely distribute these player
installers, so you can share your shows
with those who do not own Kai’s Power
SHOW. For information on how to
include the SHOW players or installers on
your commercial product, please contact
ScanSoft Sales on the World Wide Web at
www.scansoft.com.
You can use utilities like WinZip or Stuffit
to ensure efficient transfer before you put
the SHOW Player files on-line or onto
removable media.
Macintosh and Windows SHOW
Players
If the recipient of your show will be
viewing on a PC, you need only provide
them the Windows SHOW Player
Installer. Macintosh users need only
receive the Macintosh SHOW Player
Installer.
If your show contains an AVI clip, it will
play using the Mac and PC SHOW
Players. However, the PC SHOW Player
will not play QuickTime movies.
To install the SHOW Players
✤
Double-click the SHOW Player
installer icon. Then, just follow the
simple installer prompts to
completion.
To launch the SHOW Players
1.
Double-click the SHOW Player icon,
or select
Start menu > Programs >
SHOW Player
.
2.
Use the Open dialog to locate the
name of the desired .sas show file.
3.
When you locate the desired .sas file,
click “Open” and the show will begin
to play on a black background.
Remember: to successfully use the
player, you must possess both the .sas
show file and its associated content
folder (which has “Media” appended to
the show name).
Page 66

provided in the Web Settings dialog, or as
you edit the HTML pages using an outside
HTML editor.
HTML Templates
The templates provided in the Web
Settings dialog automatically format the
Web pages produced by SHOW, and add
graphical navigation elements. These
templates can help you quickly set up a
Web site using your show.
Different templates provide different ways
of moving between slides.
Save as HTML, then open the resulting
HTML pages in your Web browser to see
what the template looks like. Just drop the
first HTML file (frame0001.html) onto
the browser icon or window.
To save a show in HTML:
1.
Move the cursor over the Web label,
then click the Export the Show to
HTML button.
The Web Settings dialog appears.
2.
Enter an E-mail address to attach to
the Web page in the E-mail address
field.
3.
Enter a home page URL address to
attach to the Web page.
4.
Click the Template field to choose a
basic template for your new HTML
Web page.
5.
Click the OK button, select a location
for the files and save.
Creating a site folder into which you
save the HTML files is a good site
management practice.
Use the Web Settings dialog to set up a template
for your HTML pages, and attach Web addresses
to it.
Page 67

The OUT Room 67
Printing a Show
There are two ways of printing your slides:
• one slide per page
• multiple slides per page
Setting Up a Page
The Page Setup option in the OUT Room
displays a dialog that lets you control how
your SHOW Slides will appear on a
printed page. You can use the options in
this dialog to set up a contact sheet type
layout, or to print each slide on a separate
page.
The dialog also lets you print frame
numbers and file names with the slide
pictures. This can be a handy feature if
you’re using the printed pages as a
storyboard.
To set up a page:
1. Move the cursor over the Page Setup
label, then click the Select Page Setup
Options for Print button.
The options dialog for your printer
appears.
2. Set the print options you want to use,
then click Print.
The Page Setup dialog appears.
3. Enable one of the layout options at
the bottom of the dialog.
You can print a single frame per page,
4 frames per page, or up to 9 frames
per page.
4. Enable the Slide Numbers option if
you want the slide numbers to appear
under the slide picture.
5. Enable the File Name option if you
want the file name for the content on
a slide to appear on the print.
6. Click Print to start printing.
Click Done to store your page settings
without printing.
Printing a Single Slide
When you print a single slide, only the
slide displayed in the Output Preview is
printed.
To print a single slide:
1. Select the slide you want to print
using the Output Preview.
Page 68

Congratulations!
You have completed the SHOW User
Guide. You are now ready to take full
advantage of all that SHOW has to offer.
If you use SHOW as a home photo player,
your vacation slideshows will be fun and
entertaining. If you use SHOW as a
business presentation player, you will
captivate and persuade audiences with
finesse that sets your presentations apart
from the others. Whether you are a
creative consumer, business presenter,
teacher, or artist, your presentations will
never be the same again!
Page 69

Keyboard Shortcuts 69
x N. . . . . . . . . . . . . . . . . . . . . . . . . . . . . Ctrl N
x O. . . . . . . . . . . . . . . . . . . . . . . . . . . . . Ctrl O
x S. . . . . . . . . . . . . . . . . . . . . . . . . . . . . Ctrl S
x S . . . . . . . . . . . . . . . . . . . . . Shift Ctrl S
x P . . . . . . . . . . . . . . . . . . . . . . . . . . . . . Ctrl P
x P . . . . . . . . . . . . . . . . . . . . . Shift Ctrl P
x Q . . . . . . . . . . . . . . . . . . . . . . . Ctrl Q, Alt F4
x Y . . . . . . . . . . . . . . . . . . . . . . . . . . . . . Ctrl Y
x Z . . . . . . . . . . . . . . . . . . . . . . . . . . . . . Ctrl Z
x A. . . . . . . . . . . . . . . . . . . . . . . . . . . . . Ctrl A
x I . . . . . . . . . . . . . . . . . . . . . . . . . . . . . . Ctrl I
x C. . . . . . . . . . . . . . . . . . . . . . . . . . . . . Ctrl C
x V . . . . . . . . . . . . . . . . . . . . . . . . . . . . . Ctrl V
x A. . . . . . . . . . . . . . . . . . . . . . . . . . . . . Ctrl A
x I . . . . . . . . . . . . . . . . . . . . . . . . . . . . . . Ctrl I
x Click. . . . . . . . . . . . . . . . . . . . . . . . Ctrl Click
Delete Individual Thumbnail. . . . . . . . . . Opt Click. . . . . . . . . . . . . . . . . . . . . . . . Alt Click
Delete Sort Control Memory Dots . . . . . . Opt Click. . . . . . . . . . . . . . . . . . . . . . . . Alt Click
Sort by Name . . . . . . . . . . . . . . . . . . . . N . . . . . . . . . . . . . . . . . . . . . . . . . . . . . . . . . . N
Sort by Date . . . . . . . . . . . . . . . . . . . . . D . . . . . . . . . . . . . . . . . . . . . . . . . . . . . . . . . . D
Sort by Size . . . . . . . . . . . . . . . . . . . . . S . . . . . . . . . . . . . . . . . . . . . . . . . . . . . . . . . . S
Sort by Width . . . . . . . . . . . . . . . . . . . . W . . . . . . . . . . . . . . . . . . . . . . . . . . . . . . . . . W
Sort by Height. . . . . . . . . . . . . . . . . . . . H . . . . . . . . . . . . . . . . . . . . . . . . . . . . . . . . . . H
Group Thumbnail Pile . . . . . . . . . . . . . . G . . . . . . . . . . . . . . . . . . . . . . . . . . . . . . . . . . G
Cycle Selection Cursor. . . . . . . . . . . . . . Tab . . . . . . . . . . . . . . . . . . . . . . . . . . . . . . . Tab
Cycle Cursor to Standard Cursor . . . . . . Space . . . . . . . . . . . . . . . . . . . . . . . . . . . Space
Shortcuts . . . . . . . . . . . . . . . . . . . . . . .
x H. . . . . . . . . . . . . . . . . . . . . . . . . . . . . Ctrl H
Play Current SHOW . . . . . . . . . . . . . . . . P . . . . . . . . . . . . . . . . . . . . . . . . . . . . . . . . . . P
Copy Slide/Sound/Transition . . . . . . . . .
x C. . . . . . . . . . . . . . . . . . . . . . . . . . . . . Ctrl C
Paste Slide/Sound/Transition . . . . . . . . .
x V . . . . . . . . . . . . . . . . . . . . . . . . . . . . . Ctrl V
Delete Five Favorites Memory Dots . . . . Opt Click. . . . . . . . . . . . . . . . . . . . . . . . Alt Click
Move Dialog Selection Up . . . . . . . . . . . Arrow Up. . . . . . . . . . . . . . . . . . . . . . . Arrow Up
Move Dialog Selection Down . . . . . . . . . Arrow Down . . . . . . . . . . . . . . . . . . Arrow Down
Scroll Dialog Selection Up . . . . . . . . . . . Hold Arrow Up . . . . . . . . . . . . . . . Hold Arrow Up
Scroll Dialog Selection Down . . . . . . . . . Hold Arrow Down . . . . . . . . . . Hold Arrow Down
Jump Dialog Selection. . . . . . . . . . . . . . A thru Z . . . . . . . . . . . . . . . . . . . . . . . . A thru Z
Shortcuts . . . . . . . . . . . . . . . . . . . . . . .
x H. . . . . . . . . . . . . . . . . . . . . . . . . . . . . Ctrl H
Select All Bounding Boxes . . . . . . . . . . .
x A. . . . . . . . . . . . . . . . . . . . . . . . . . . . . Ctrl A
Invert-Select All Bounding Boxes . . . . . .
x I . . . . . . . . . . . . . . . . . . . . . . . . . . . . . . Ctrl I
Nudge Bounding Boxes . . . . . . . . . . . . .
x Arrow Keys. . . . . . . . . . . . . . . Alt Arrow Keys
Jump Bounding Boxes. . . . . . . . . . . . . .
x Option Arrow Keys . . . . . . Ctrl Alt Arrow Keys
Preview Animation . . . . . . . . . . . . . . . . P . . . . . . . . . . . . . . . . . . . . . . . . . . . . . . . . . . P
Pause/Continue Show . . . . . . . . . . . . . . Space . . . . . . . . . . . . . . . . . . . . . . . . . . . Space
Click To Advance
vs. Time Advance . . . . . . . . . . . . . . . .
x Space. . . . . . . . . . . . . . . . . . . . . . Ctrl Space
Go to Next Slide . . . . . . . . . . . . . . . . . . Right Arrow . . . . . . . . . . . . . . . . . . . Right Arrow
Go To Previous Slide . . . . . . . . . . . . . . . Left Arrow . . . . . . . . . . . . . . . . . . . . . Left Arrow
Next CD Track. . . . . . . . . . . . . . . . . . . . + . . . . . . . . . . . . . . . . . . . . . . . . . . . . . . . . . . +
Previous CD Track. . . . . . . . . . . . . . . . . - . . . . . . . . . . . . . . . . . . . . . . . . . . . . . . . . . . . -
Select a CD Track, and Play. . . . . . . . . . 1.....9. . . . . . . . . . . . . . . . . . . . . . . . . . . . 1.....9
Stop Playing CD Track. . . . . . . . . . . . . . 0 . . . . . . . . . . . . . . . . . . . . . . . . . . . . . . . . . . 0
Increase Speed . . . . . . . . . . . . . . . . . . . Up Arrow. . . . . . . . . . . . . . . . . . . . . . . Up Arrow
Decrease Speed . . . . . . . . . . . . . . . . . . Down Arrow . . . . . . . . . . . . . . . . . . Down Arrow
Shortcuts . . . . . . . . . . . . . . . . . . . . . . .
x H. . . . . . . . . . . . . . . . . . . . . . . . . . . . . Ctrl H
Go To Show Beginning . . . . . . . . . . . . . Home. . . . . . . . . . . . . . . . . . . . . . . . . . . . Home
Go To Show End . . . . . . . . . . . . . . . . . . End. . . . . . . . . . . . . . . . . . . . . . . . . . . . . . . End
Quit Player . . . . . . . . . . . . . . . . . . . . . . Q, Esc . . . . . . . . . . . . . . . . . . . . . . . . . . . Q, Esc
SHOW Player/Playback Shortcuts
EDIT Room Text fx
EDIT Room (Common)
 Loading...