

1
User Guide
for Windows® and Macintosh
®

Trademarks
Kai’s Photo Soap 2 is a trademark of ScanSoft, Inc.
“Macintosh” is a registered trademark of Apple Computer, Incorporated. “Windows” and
“PowerPoint” are registered trademarks of Microsoft Corporation. “Pentium” is a
registered trademark of Intel Corporation. All other product names mentioned in the
manual and other documentati on are used for ident ification purposes only and may be
trademarks or registered trademarks of their respective companies. Registered and
unregistered trademarks used herein are the exclusive property of their respective owners.
ScanSoft, Inc. makes no claim to any such marks, n or willingly or kn owingly misused or
misapplied such marks.
Copyright
Copyright © 1998–2000 by Scan Soft, Inc. Al l rights reser ved. No part of this p ublication
may be transmitted, transcribed, reproduced, stored in any retrieval system o r translated
into any language or computer language in any form or by any means, mech anical,
electronic, magnetic, optical, chemical, manual, or oth erwise, without the prior written
consent of ScanSoft, Inc., 9 Centennial Drive, Peabod y, Massachusetts 01960. Printed
both in the United States of America and the United Kingdom. The software described in
this book is furnished under license and may be used or copied only in accordance with
the terms of such license.
Important N otice
ScanSoft, Inc. provides this publication “as is” withou t warranty of any kind, either
express or implied, incl uding but not l im-ited to t he implied war ranties of
merchantability or f itness for a particu- lar purpose. Some states or jurisd ictions do not
allow disclaimer of ex-press or implied warranties in certain transactions; therefore, this
statement may not apply to you. ScanSoft reserves the right to revise this publication an d
to make changes from time to time in the content hereof without obligation of ScanSoft to
notify any person of such revision or changes.
® ScanSoft, Inc.
9 Centennial Drive
Peabody, Massachusetts 01960
Kai’s Photo Soap 2 User’s Guide
August 2000
2

Welcome to Kai’s Photo Soap 2 7
12 What’s New?
13 Getting Help
14 Starting and Quitting Soap 2
15 Exploring Kai’s Photo Soap 2
22 The Soap 2 Transporter
23 Undo, Apply, and Save
25 Using Albums
26 Export i ng Photos
27 Expanding Soap 2’s Power
TABLE OF
Installing Kai’s Photo Soap 2 29
Organizing Photos 31
32 Overview
32 Loading Photos
33 Working with Thumbnails
37 Previewing Photos
38 Getting File Information
39 Removing Image Files from your Computer
40 Switching Views
41 Working with Desktops
43 Sorting and Searching for Photos
Fixing Photos 48
49 Overview
50 What Kai’s Photo Soap 2 Can Fix
50 Using t he Tools
iii

54 Rotating and Sizing Photos
59 Adjusting Colo r
71 Automatically Fixing Photos
74 Healing Flaws
77 Smoothing and Sharpening
79 Removing Red Eye
80 Removing date and time stamps
81 Duplicating photo elements
83 Other Fun Effects
86 Having Fun with Masks
Composing Images 91
92 Building Compos itions
93 Working with Composition Layers
104 Adding Photos to your Composition
105 Adding Text
107 Adding Objects, Backgrounds, and Edges
108 Adding Shadows to Layers
110 Adding a Canvas Color
111 Saving and Reloading a Composition
Using Albums 114
115 Overview
116 Selecting an Album Style
117 Changing the Layout
118 Loading Photos
119 Adding Text
121 Printing Albums
iv

122 Saving Albums
122 Viewing Album Information
122 Sharing Albums
Printing Photos 123
125 Overview
126 Prin t ing a Single Phot o
127 Printing in Rows and Column s
128 Printing to Popular Sizes
128 Supported Aver y and Kodak Papers
128 Loading Special Papers Correctly
129 Printing to Perforated Paper
TABLE OF
130 Printing to Special Designs
132 Prin t ing Posters
133 Adding Backgrounds or Frames
134 Scaling Up or Down
135 Rotating Photos to Fit
135 Flipping for Iron-Ons
136 Repeating Images on a Page
136 Printing Page Text
136 Printing Filenames, Dates, and Headers
137 Setting Margins
137 Keeping Settings
138 Previewing
Sharing Photos 139
138 Page Setup
139 Sending Photos with E-mail
v

141 Exporting a Desktop as a Web Page
143 Exporting an Album as a Web page
145 Exporting Photos as a PhotoCube Web Page
(PC only)
Using Plug-Ins 147
Appendix A:Tips About Photos 151
152 Tips About Scanning
152 Selecting Photos
Appendix B:Key Shortcuts 154
154 Using Soap 2 Keyboard Shortcuts
Appendix C: Supported Papers 155
Glossary 156
Index 162
vi
Welcome to Kai’s Photo Soap 2
Kai’s Photo Soap 2 is the next generation of Kai’s Power Soap. Load photos from yo ur
computer’s hard drive, a digital camera, a scanner, a picture CD, or right off the Internet.
Collect photos, correct them, then tweak them with special to ols and filters. Present
photos in digital photo albums and slideshows. P rint photos and even output t hem ready
for the Web!
INTRODUCING SOAP 2
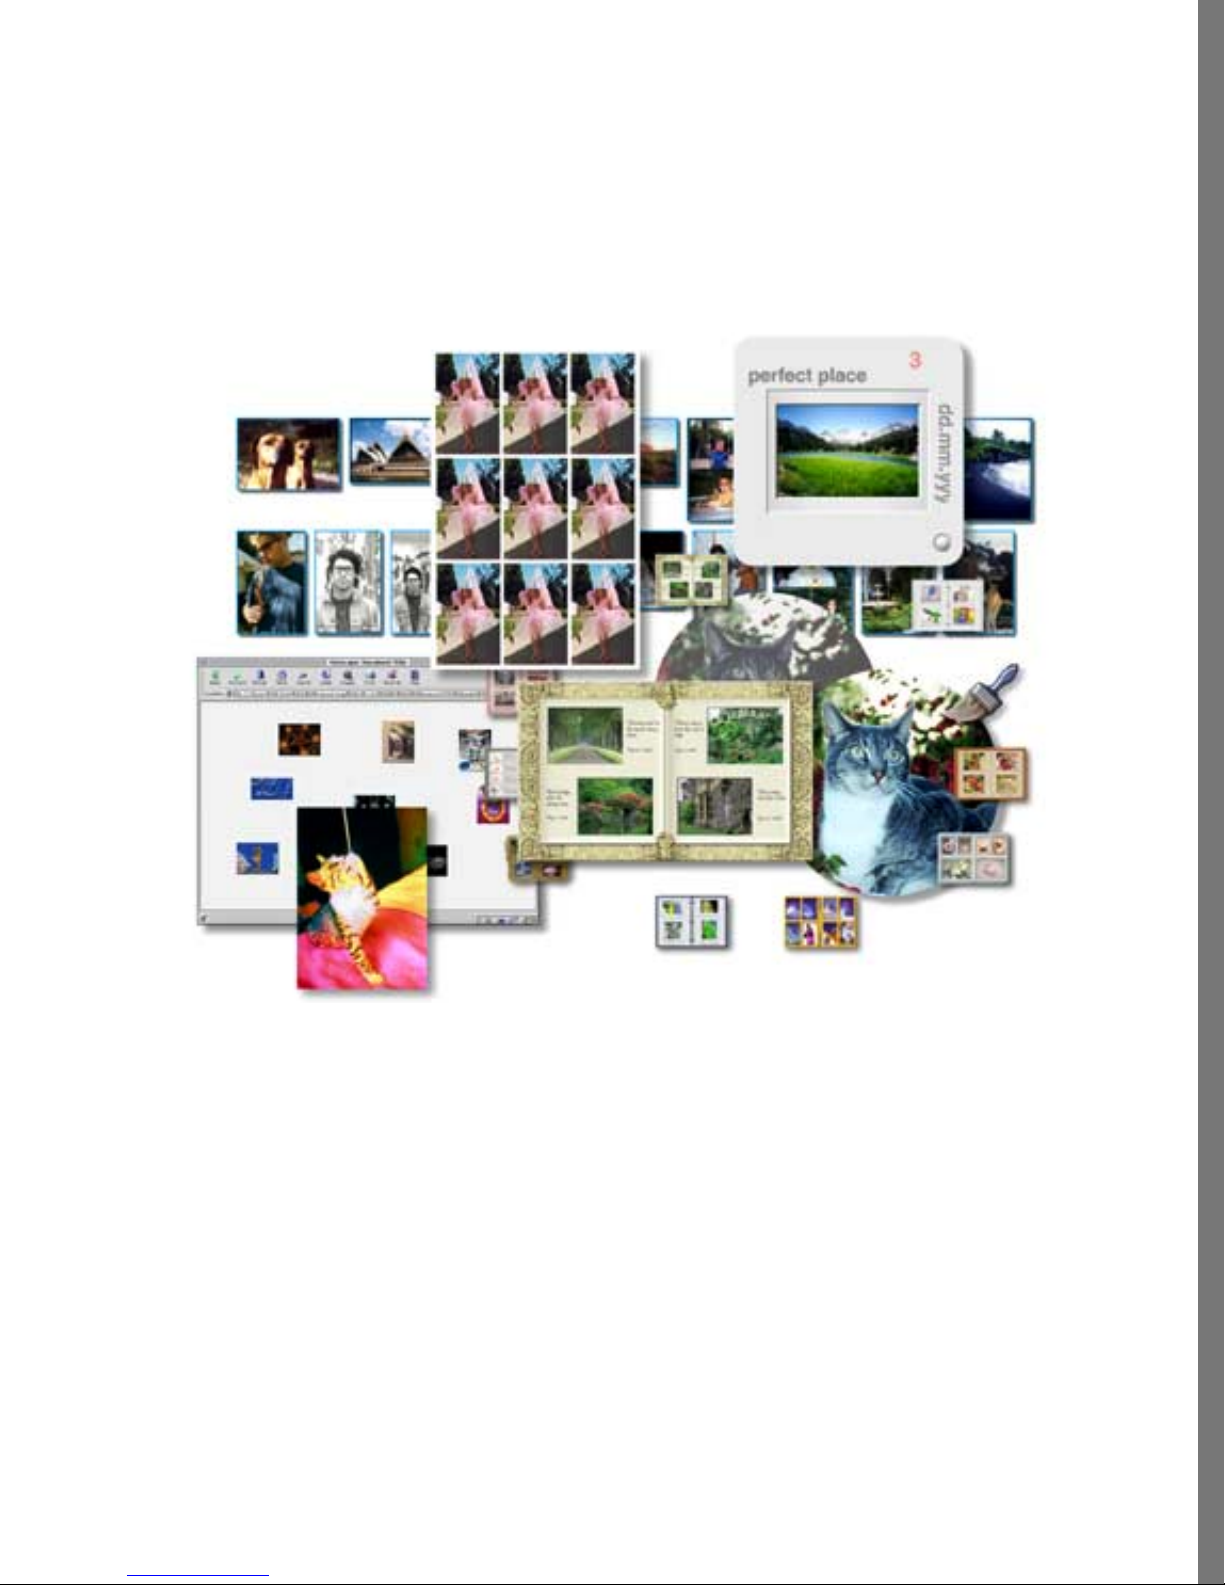
Some of the many thin gs you can do with Soap 2.
7
What Can You Do with Soap 2?
With Soap 2, you can:
• organize your photos
• display and share photos in Soap 2 electronic photo albums
• repair damaged old photos
• create fun special effects
• add clip art, text, or cartoons t o a photo compo sition
• create artful collages, using multiple photos
• export photos or al bums to use on the W EB
• prepare photos to send over e-mail or in an interactive slideshow
• view photos in several ways
You can see your photos on a Soap 2 “desktop ” or “lightbox”.
8
• print photos in rows and columns, or in popular sizes
INTRODUCING SOAP 2
You can print in rows or in popular sizes.
• crop and rotate photos
No more messing with scissors to trim a photo to the correct size. You can rotate or crop photos
easily in Soap 2.
9

• rescue torn, faded, dusty, or wrinkled photos
You can rescue torn, faded, dusty, or wrinkled photos.
• make a photo brighter or sharper.
Adjust the brightness or tweak the contrast to get a better look.
10

• fix red eye or even remove a time/date stamp
INTRODUCING SOAP 2
Get rid of red-eye.
• create fun projects—worki ng with multipl e photos, u sing plug-in filters, addi ng clip
art, text, backgroun ds or frames.
Get creative!.
11

What’s New?
For those using Version 1 of Kai’s Photo Soap, there ar e so many cool new f eatures in
Kai’s Photo Soap 2 that you’ll want to explore the entire program. Here are a few of the
things you’ll find:
• The image window is sizabl e and Soap 2 now lets you wor k with multipl e photos, so
you can fix and clone like crazy. Think of the possibilities.
• A Transporter lets you move photos between the Organize, Clean, Compose, and Pri nt
areas of the product. Just drop photos into the Transporter then drag them out when you
want to work with them.
• You can fix color problems wit h the new QuickColor tool, use Auto Enhance—a way
to handle some phot o color problems one click at a time, paint right on a photo, and
colorize photos for cool effects.
• There are multiple levels of Undo, so you can experiment... change your mind... and
use the Undo command to step back through your changes.
• You can greatly expand S oap 2 capabili ties by using Phot oShop compliant filters.
Apply these kinds of effects to the entire photo or bru sh them onto specific p arts of the
picture.
• There are new ways to share pho tos. Layouts from l eaders in photo t echnology (like
Avery and Kodak) help turn your computer into a mini-darkroom! Prin t sheets of
photos, greeting cards, collages, and even post ers—right from Kai’s Photo Soap 2.
12

Getting Help
You will find the answers to most of your questions within the pages of this User Guide.
If you need further assistance, contact ScanSoft Technical Support on the World Wide
We b a t:
www.scansoft.com
INTRODUCING SOAP 2
13

Starting and Qu itting Soap 2
To start Soap 2:
✤
Double-click the Kai’s Photo Soap 2 logo.
To quit Soap 2
✤
Choose Output menu > Quit Soap 2 or Input menu > Quit Soap 2. (You can also Press Ctrl
+ Q on Windows or Cmd + Q on a Macintosh).
If you’ve made changes to a photo, Soap 2 asks if you want to save your work before
quitting. Refer to “Saving your Work” on page 24 for more about the ways you can save
your work. As a rule of t humb, if you aren’t ready to actually make changes to the
photo file you’re mod ifying, save your wor k using a new file name or save it as
work in progress (a Soap 2 project or composition file).
To access your computer’s operating system while using Soap 2:
✤
Click in the upper ri ght or upper left porti on of the Soap 2 screen.
You can quit/minimize Soap 2 (Win). You can hide, select another program, or use
the Apple menu (Mac).
14

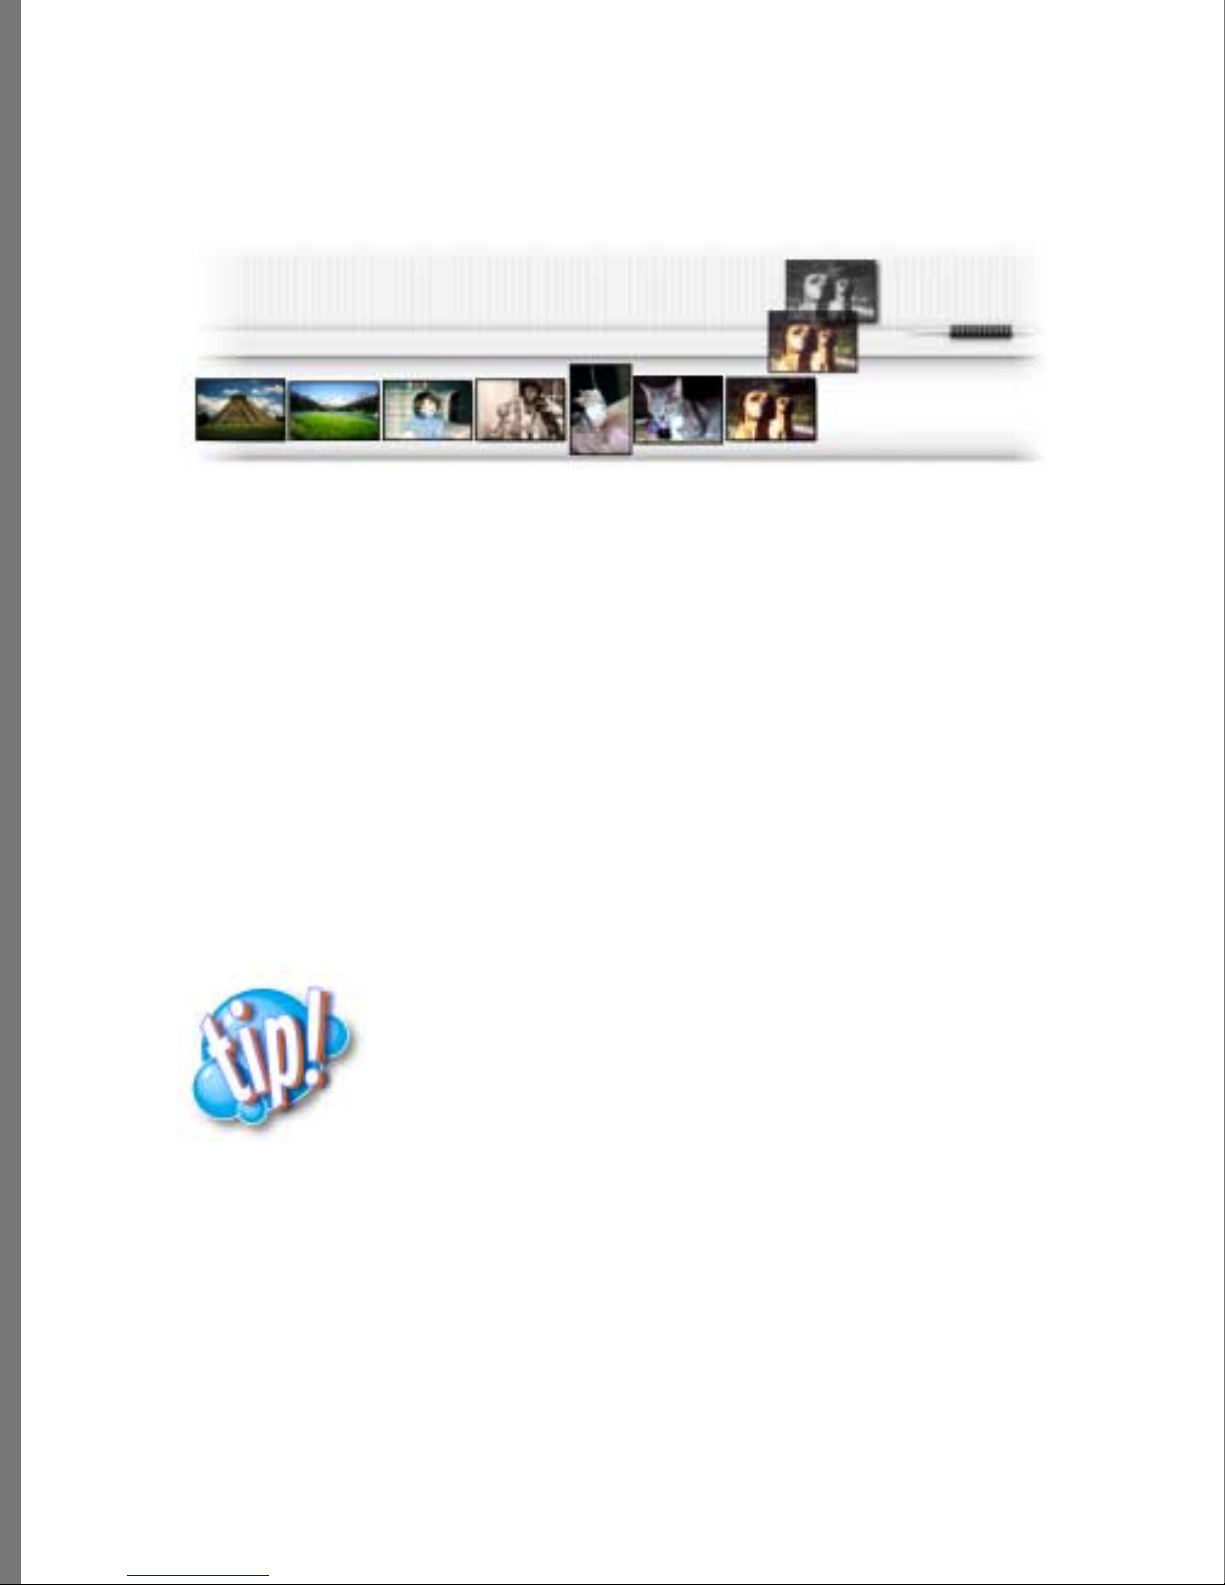
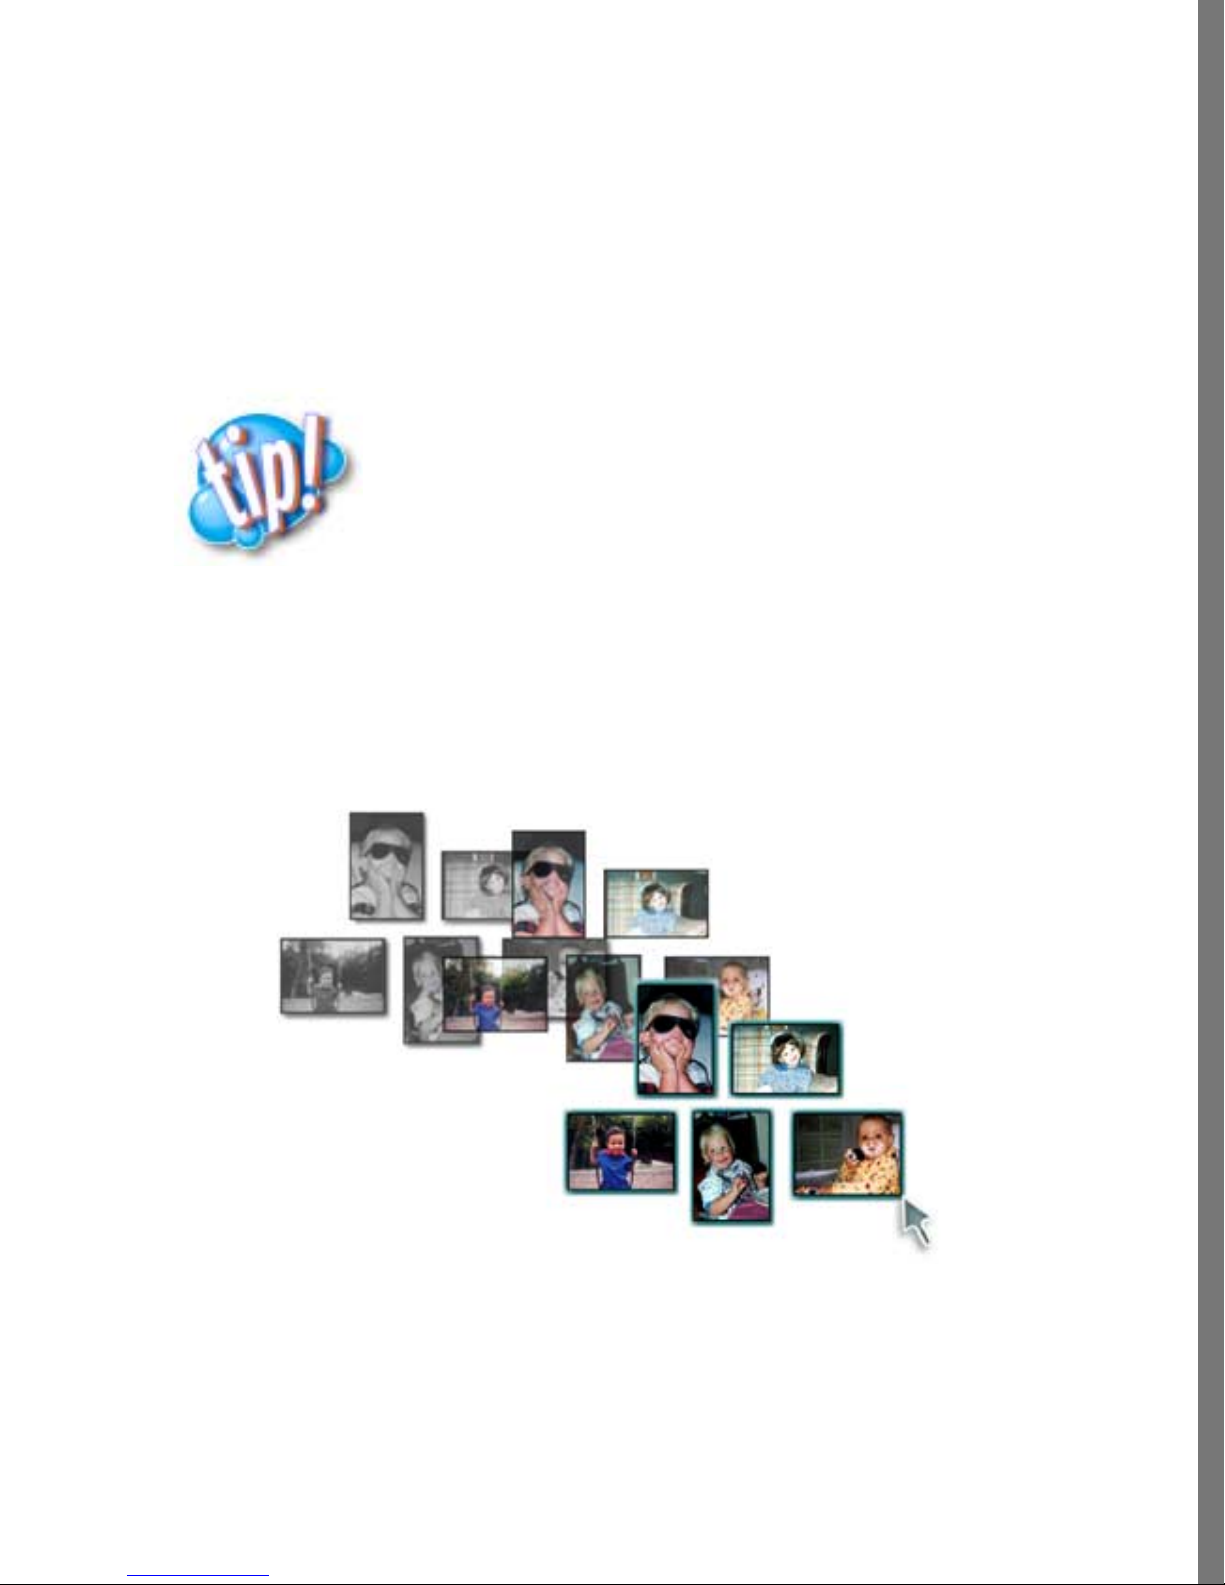
Exploring Kai’s Photo Soap 2
No more dusty boxes of pictures! Photo Soap 2 makes it easy to sto re photos. Th e
Organize tab opens an area where you can load, view, and sort your photos. Select a
photo, then drop it in the Transporter to work with it. From here, you can save a
thumbnail desktop arrangement for later Soap 2 sessio ns; export a de sktop of thumbnai ls
as a Web page; print selected photos; see a quick photo “slideshow” and prepare photos to
send with an e-mail.Soap 2
Click the Organize tab to
open, view, or sort photos.
Print, make slideshows, send
photos over e-mail, expo rt for the
Web, or Quit Soap 2 prog ram.
Converse with other Phot o Soap 2
users.
Help answers
View photos in different ways.
your questions.
INTRODUCING SOAP 2
Sort photos.
Open photos.
Drop photos on th e Transporter, then move
them to other areas in Soap 2.
Load, view, and sort your photos in the Organize area.
15

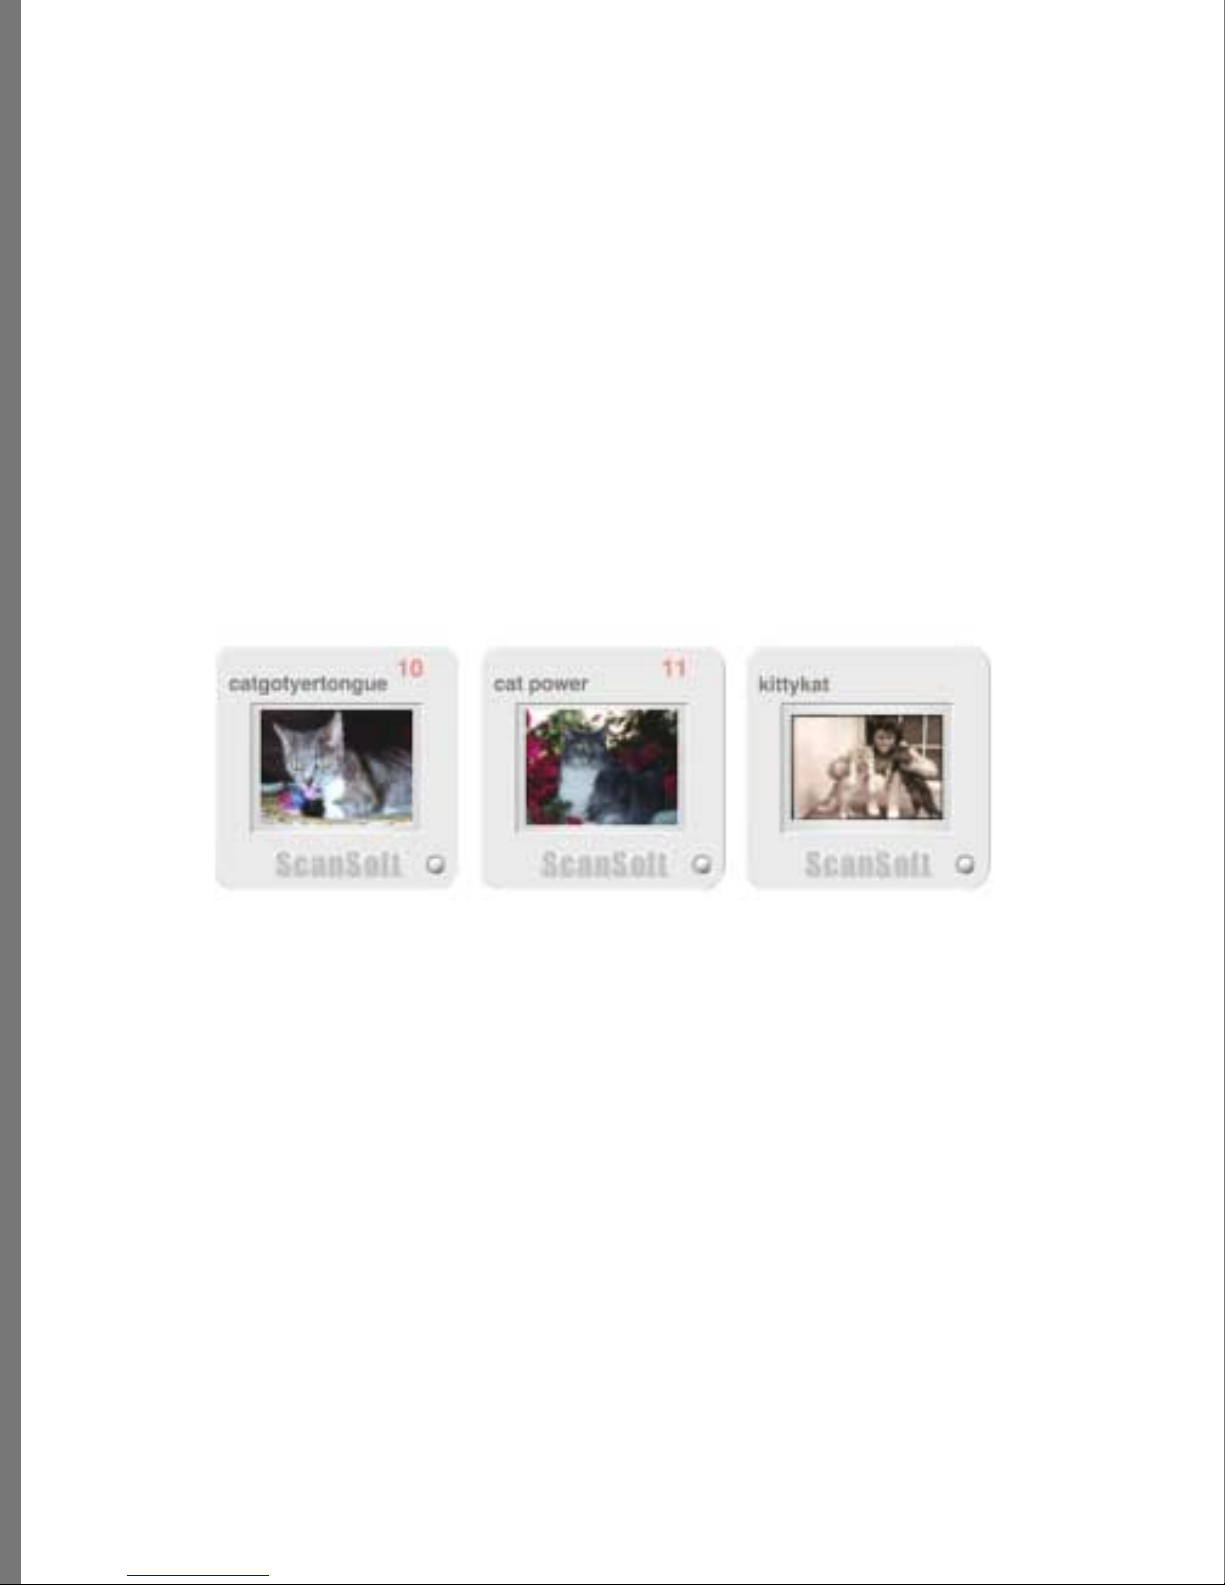
In Contact Sheet view, you can study photo s in a popular photographer s’ review sheet
layout. Export this desktop view to HTML and drop it on a browser for a great way to
pass photos around for review. From here, you can also print selected photos, make
slideshows and send selected photos v ia e-mail.
Choose a Contact Sheet view from the View
menu.
Drop photos on th e Transporter, then move them to other
areas in Soap 2.
Look at photos in Contact Sheet v iew for easy recognition.
16
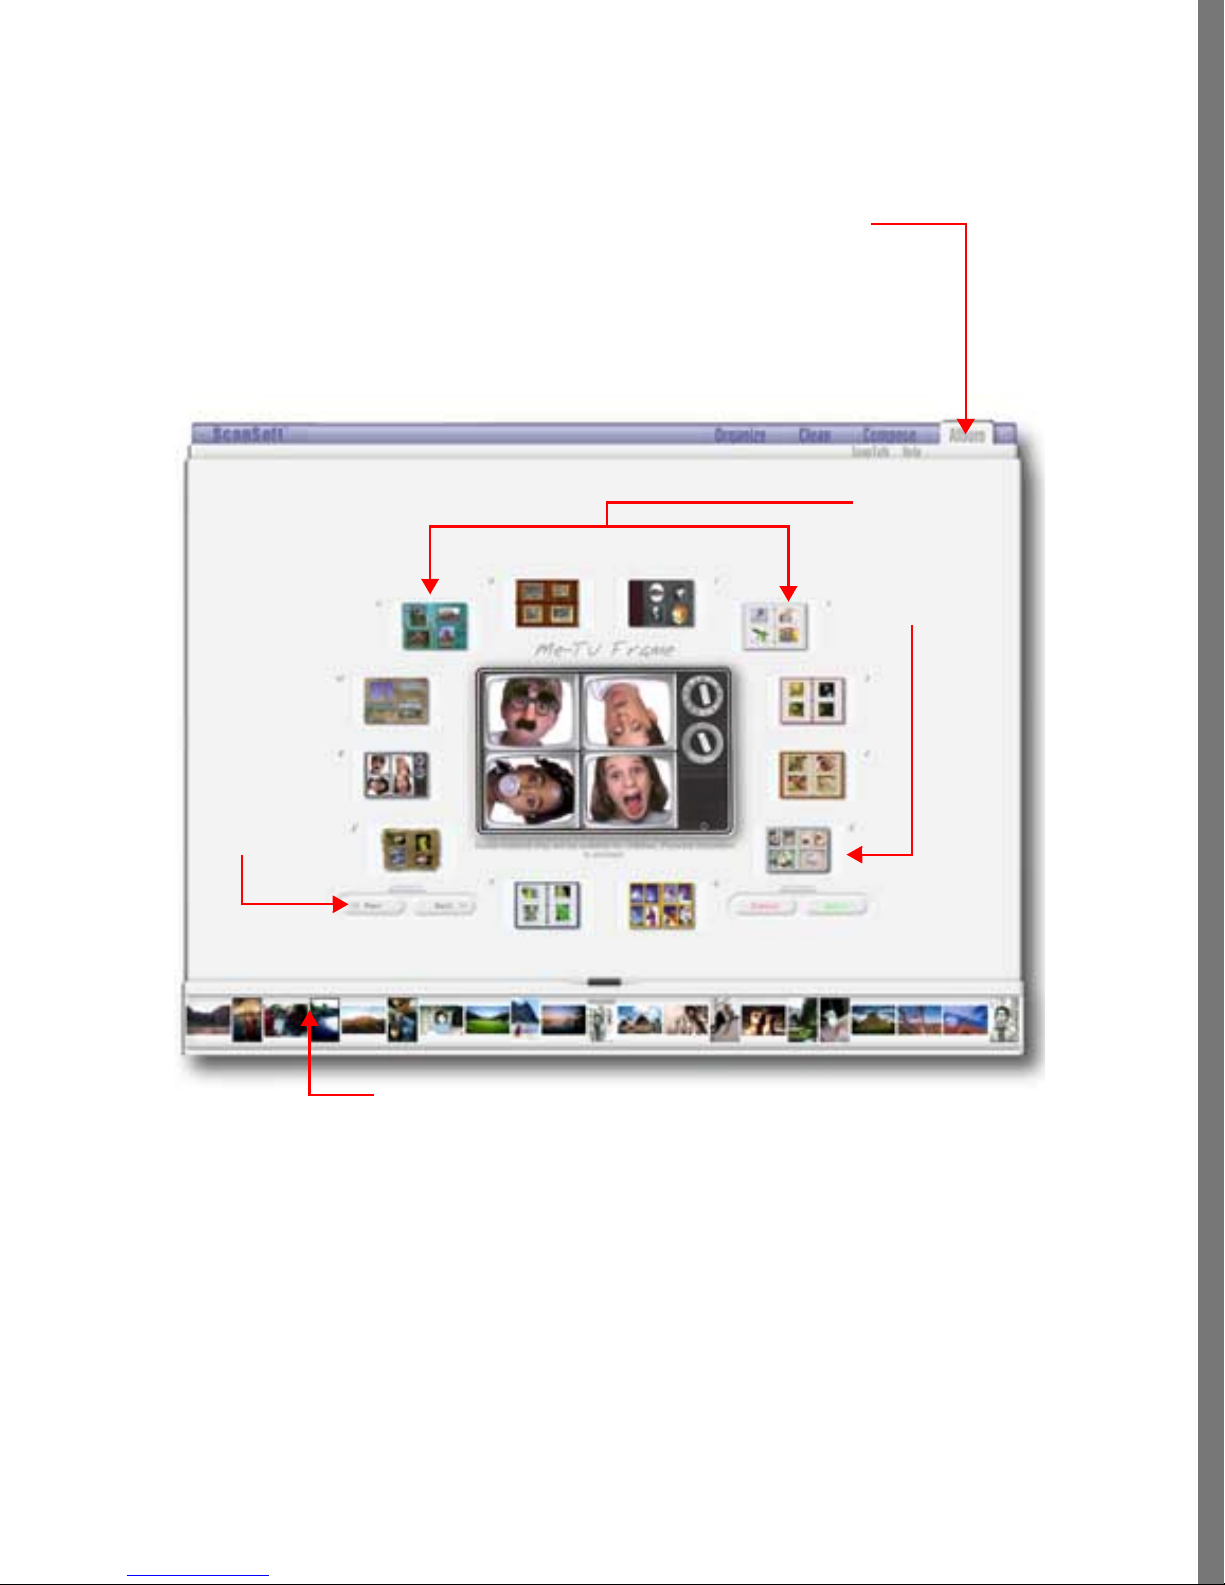
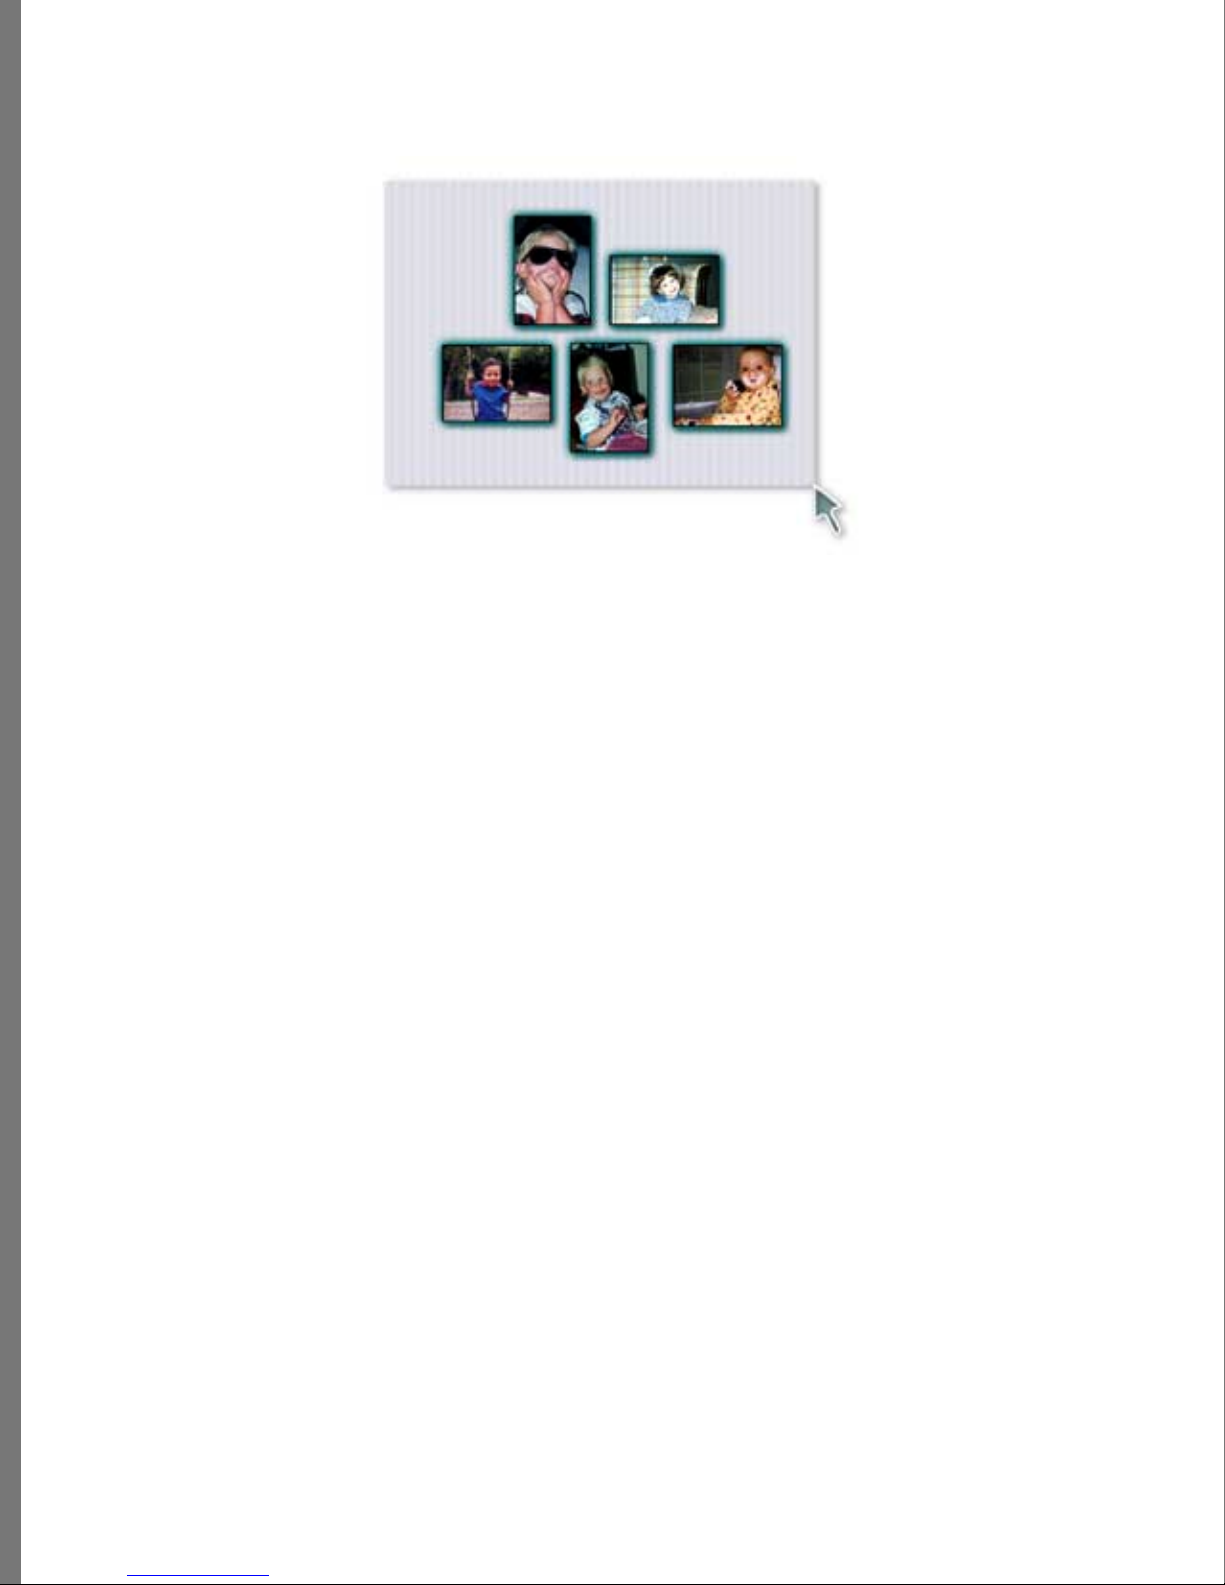
Soap 2 Albums make it easy to display ph otos. Pick an Album style and just d rop photos
into place. Add some t ext and your al bum’s complete. From here, you can print you r
Album or export an Album to use on the Web.
Click Album, then put photos into Albums or Frames to
be presented, printed, e-mailed, or posted on the Web.
Choose an
Album or
Frame style,
then click
the Select
button.
INTRODUCING SOAP 2
Click Prev
and Next for
more Album
styles.
Drag photos from the Transporter in to
empty Album slots.
Display or print photos in cool electronic Albums.
17
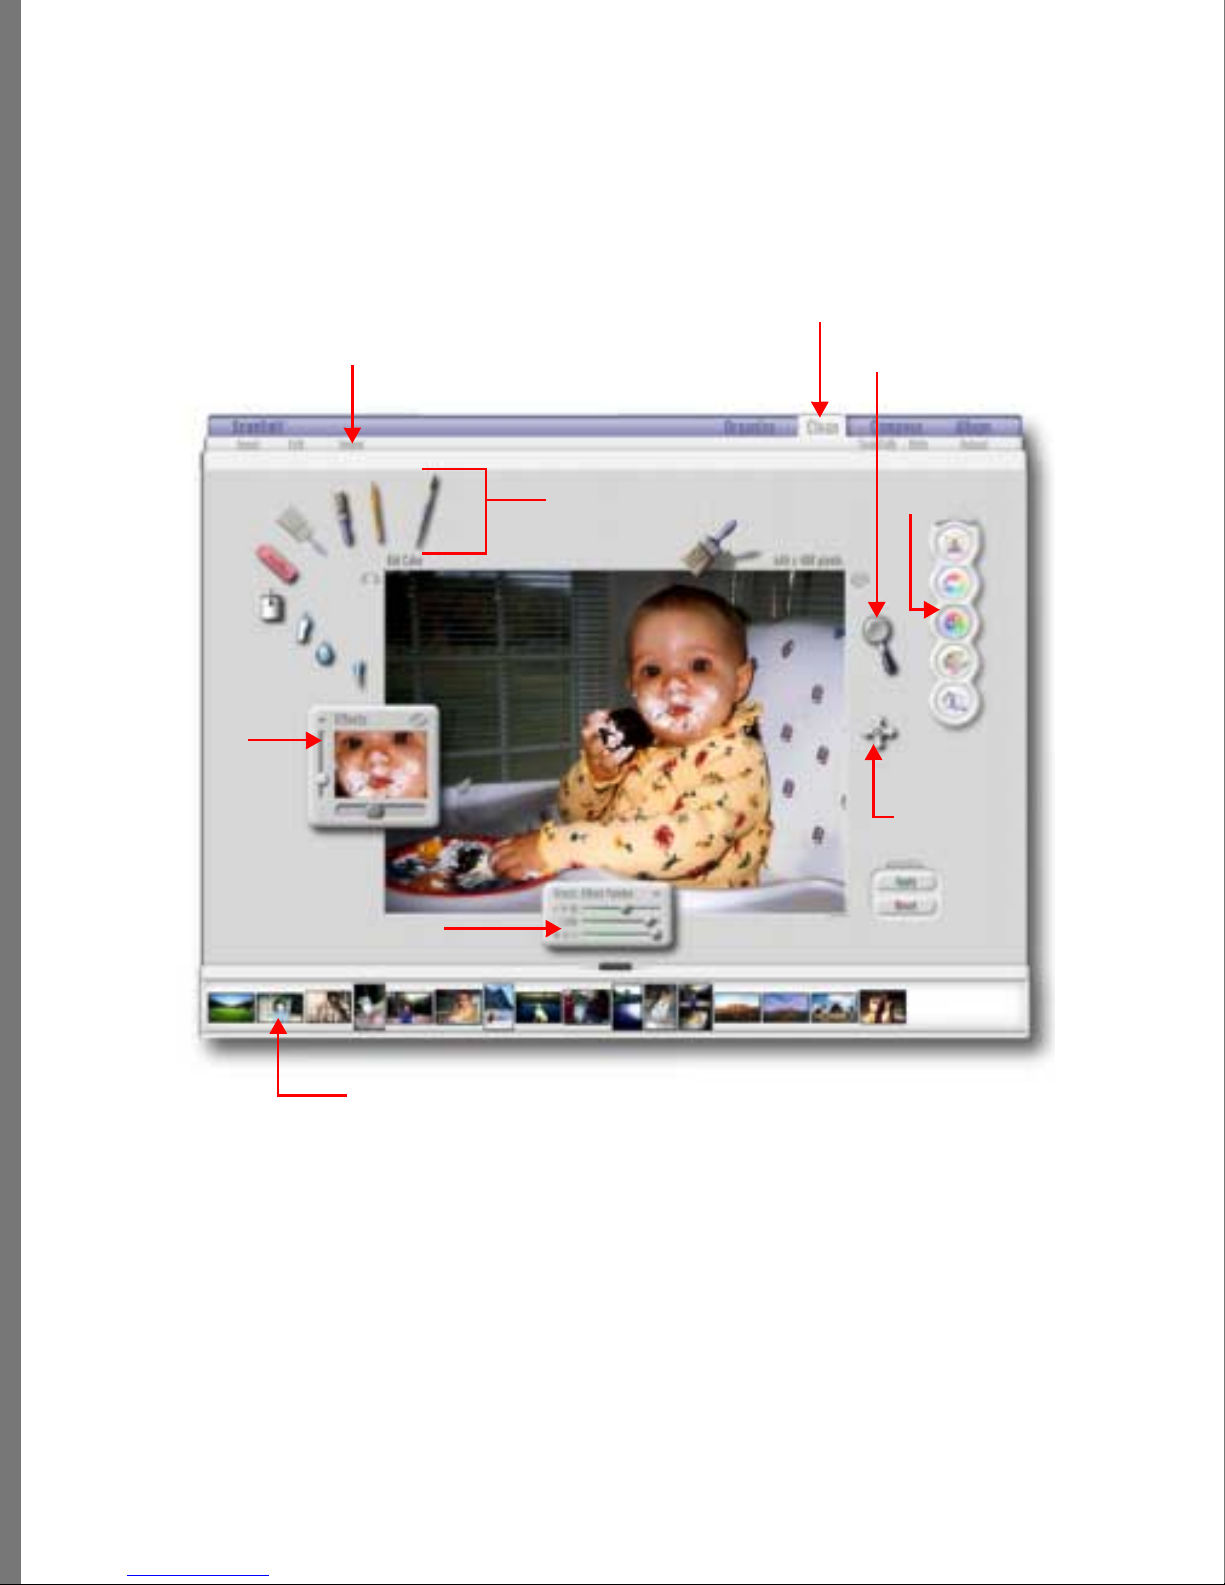
You can fix or enhance a photo in the Clean area. From here, you can also print or export
a photo for use on the Web.
Use the Image menu to
correct color, paint, crop,
rotate, or add effects to your
photo.
Click Clean to make changes t o a photo.
Zoom in or
out.
Click to
Fix or enhance parts of y our
photo, using t he Soap 2 tools.
access
features
Choose
an
effect.
Adjust brush size.
Drag a photo from the Transporter.
Fix or enhance photos in Soap 2’s Clean area.
Move the
photo in the
window.
18
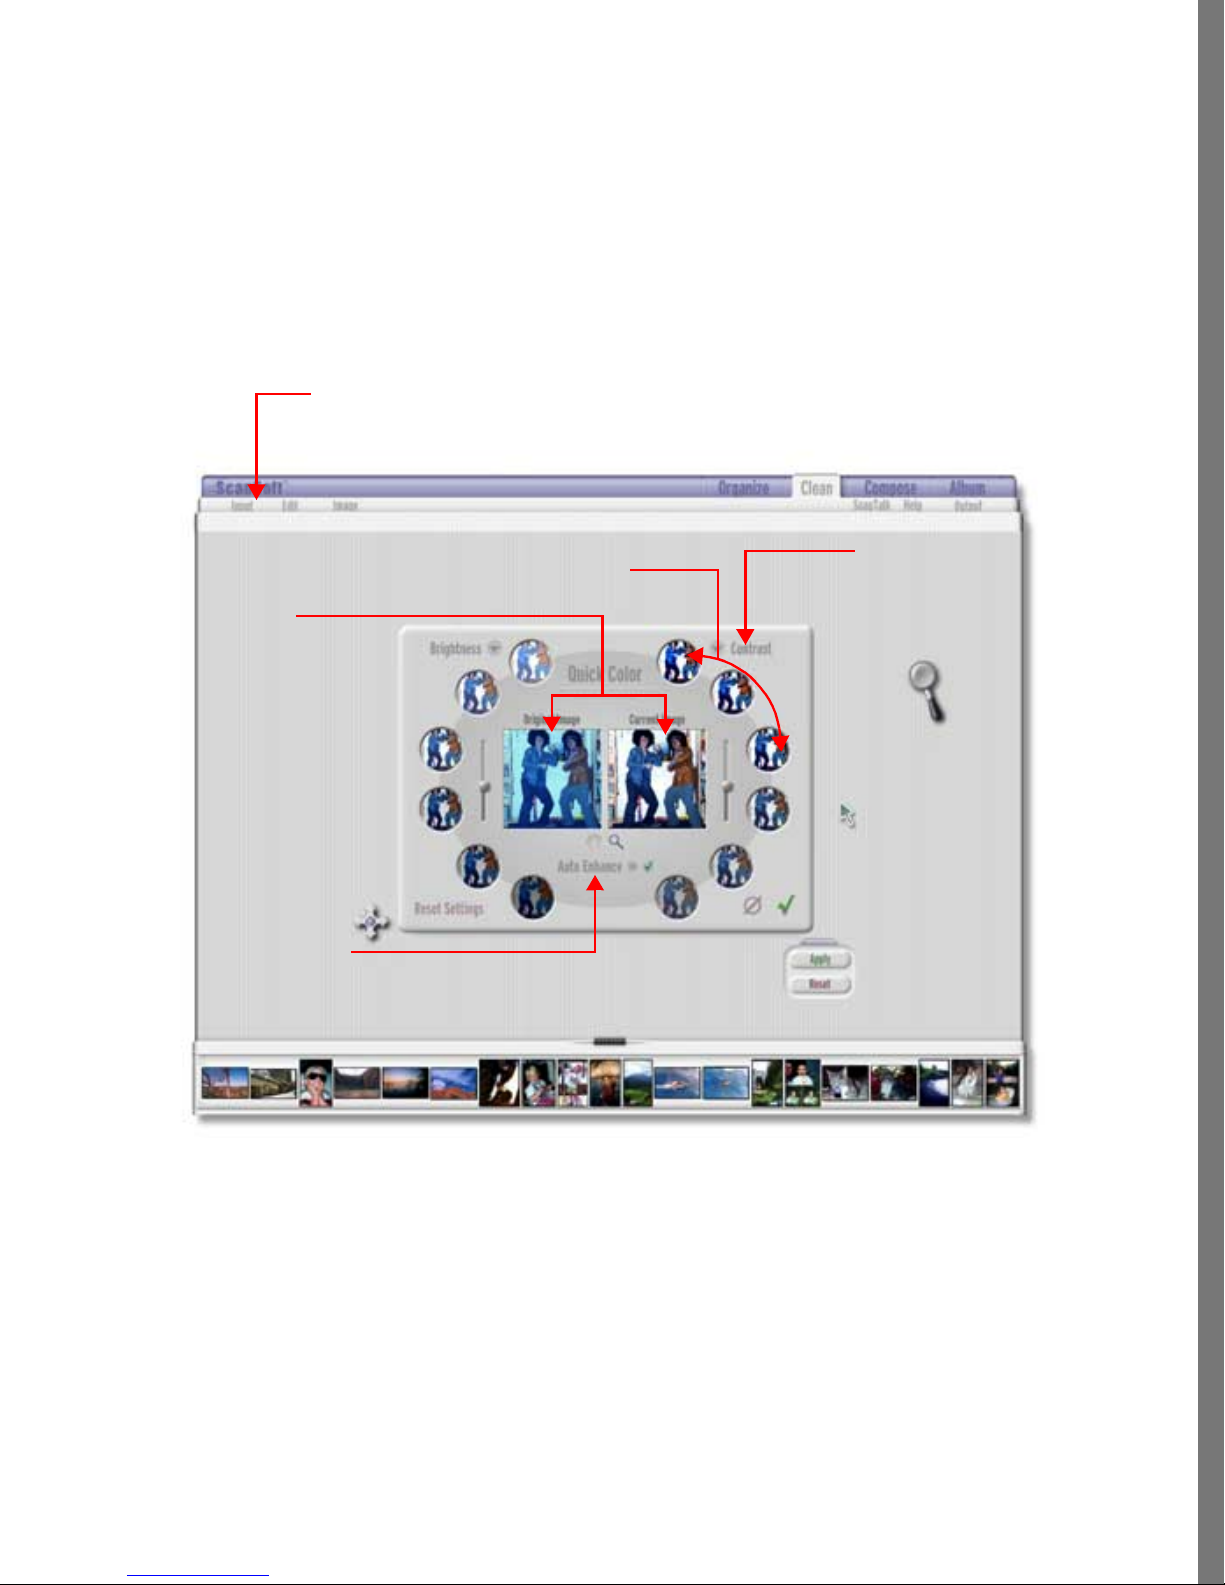
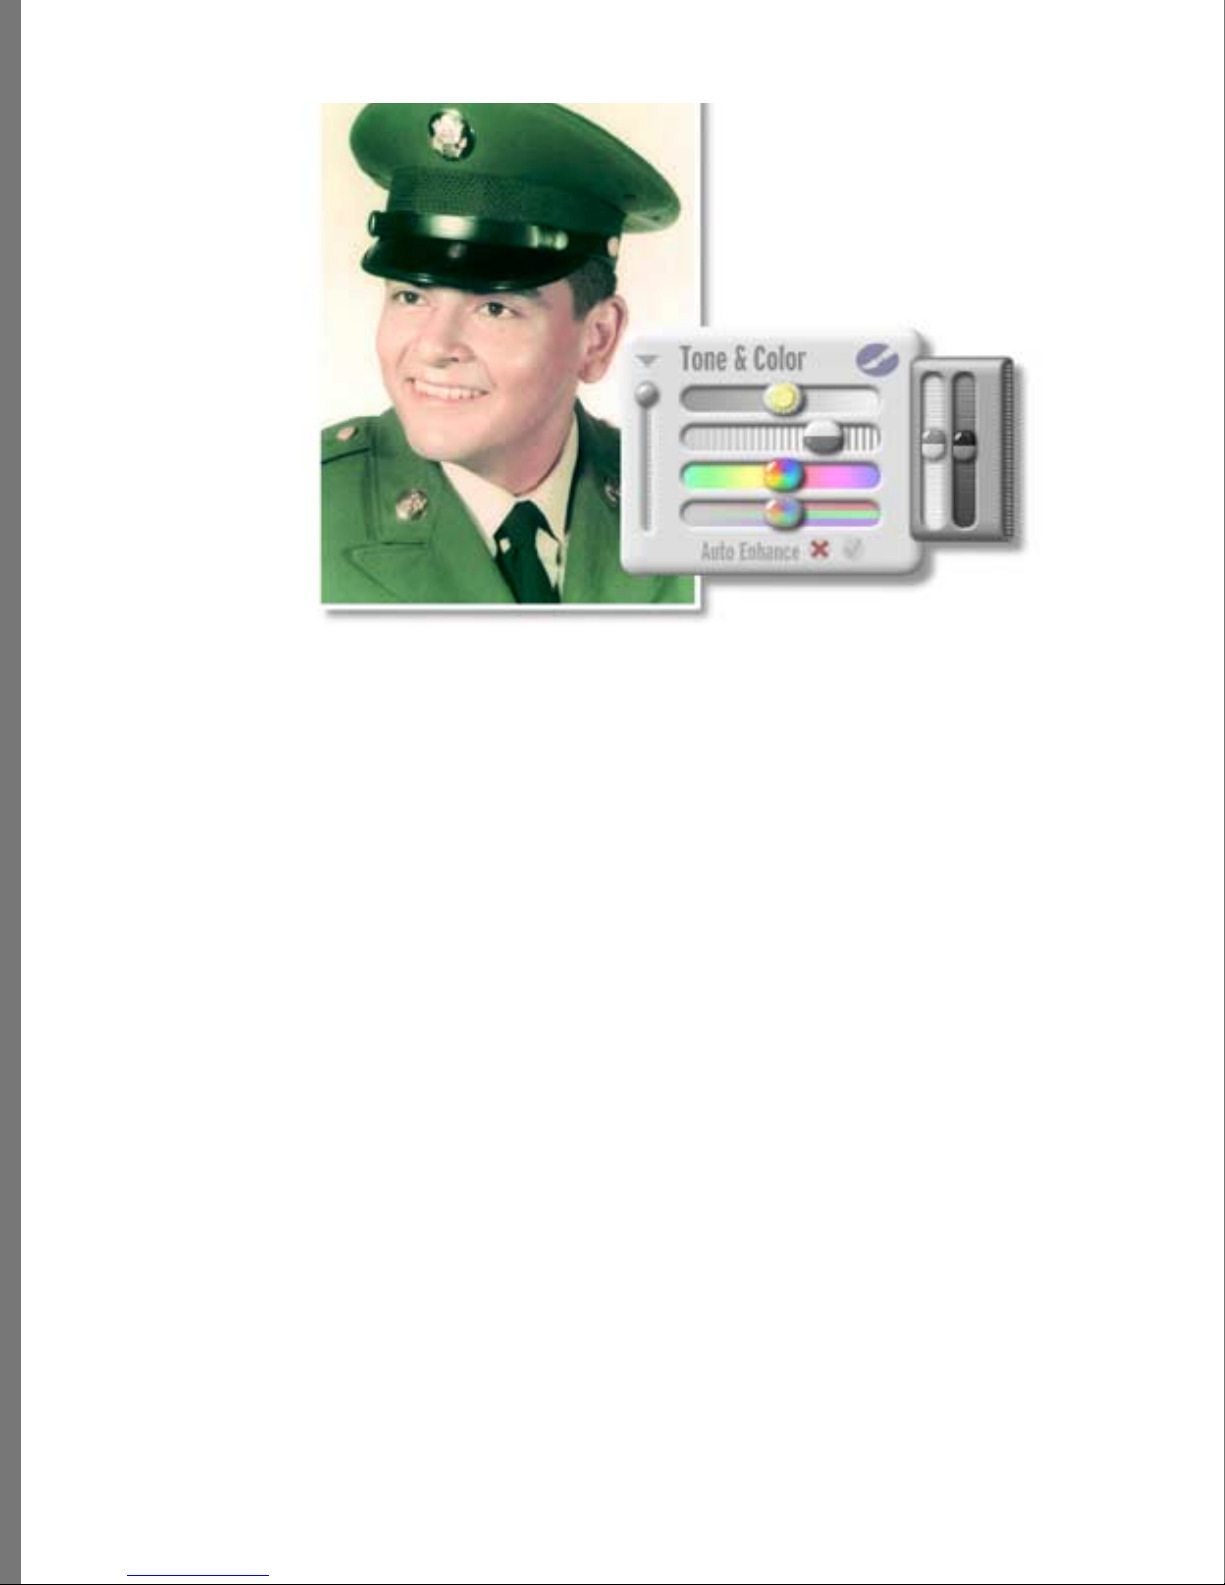
To make fast adjustments to brightness, contrast, hue, saturatio n, red balance, green
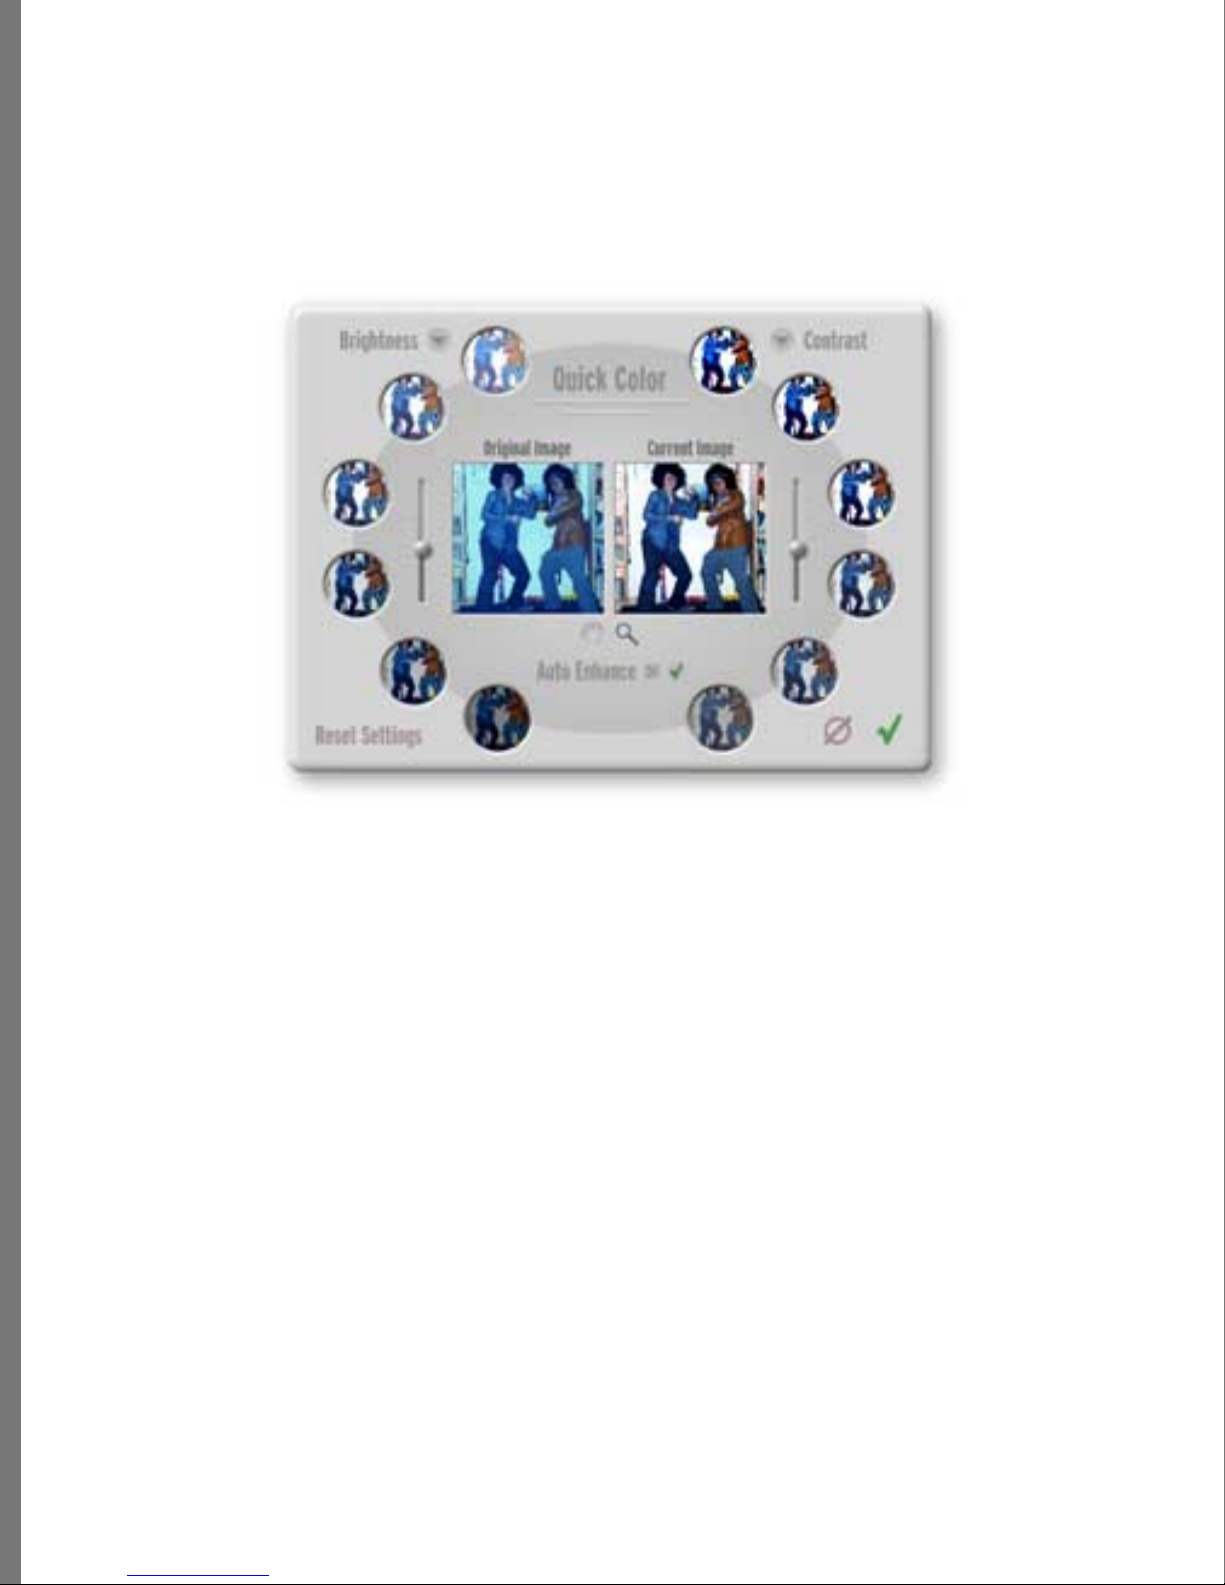
balance, or blue balan ce in your ph oto, choose Image menu > Quick color. The Quick color
selector first lets you select what you wan t to change, t hen gives you vari ations or
selections from which to choose. Pick what l ooks best to YOU.
Each time you click a variation, new variatio ns are displayed . Click until you get the l ook
you like best. Hit Reset anytime you want to start over. And, be sure to try the Auto
Enhance button!
Choose Quick color.
INTRODUCING SOAP 2
Compare
selections with
your original
photo.
Try t h e
Auto
Enhance
button!
Click the
selection that
looks best.
Select what
you want to
change.
QuickColor lets you adjust brightness, contrast, hue, sa turation, as well as red, blue, and green
balance in your phot o. Make quick adjustments with QuickColor!
19
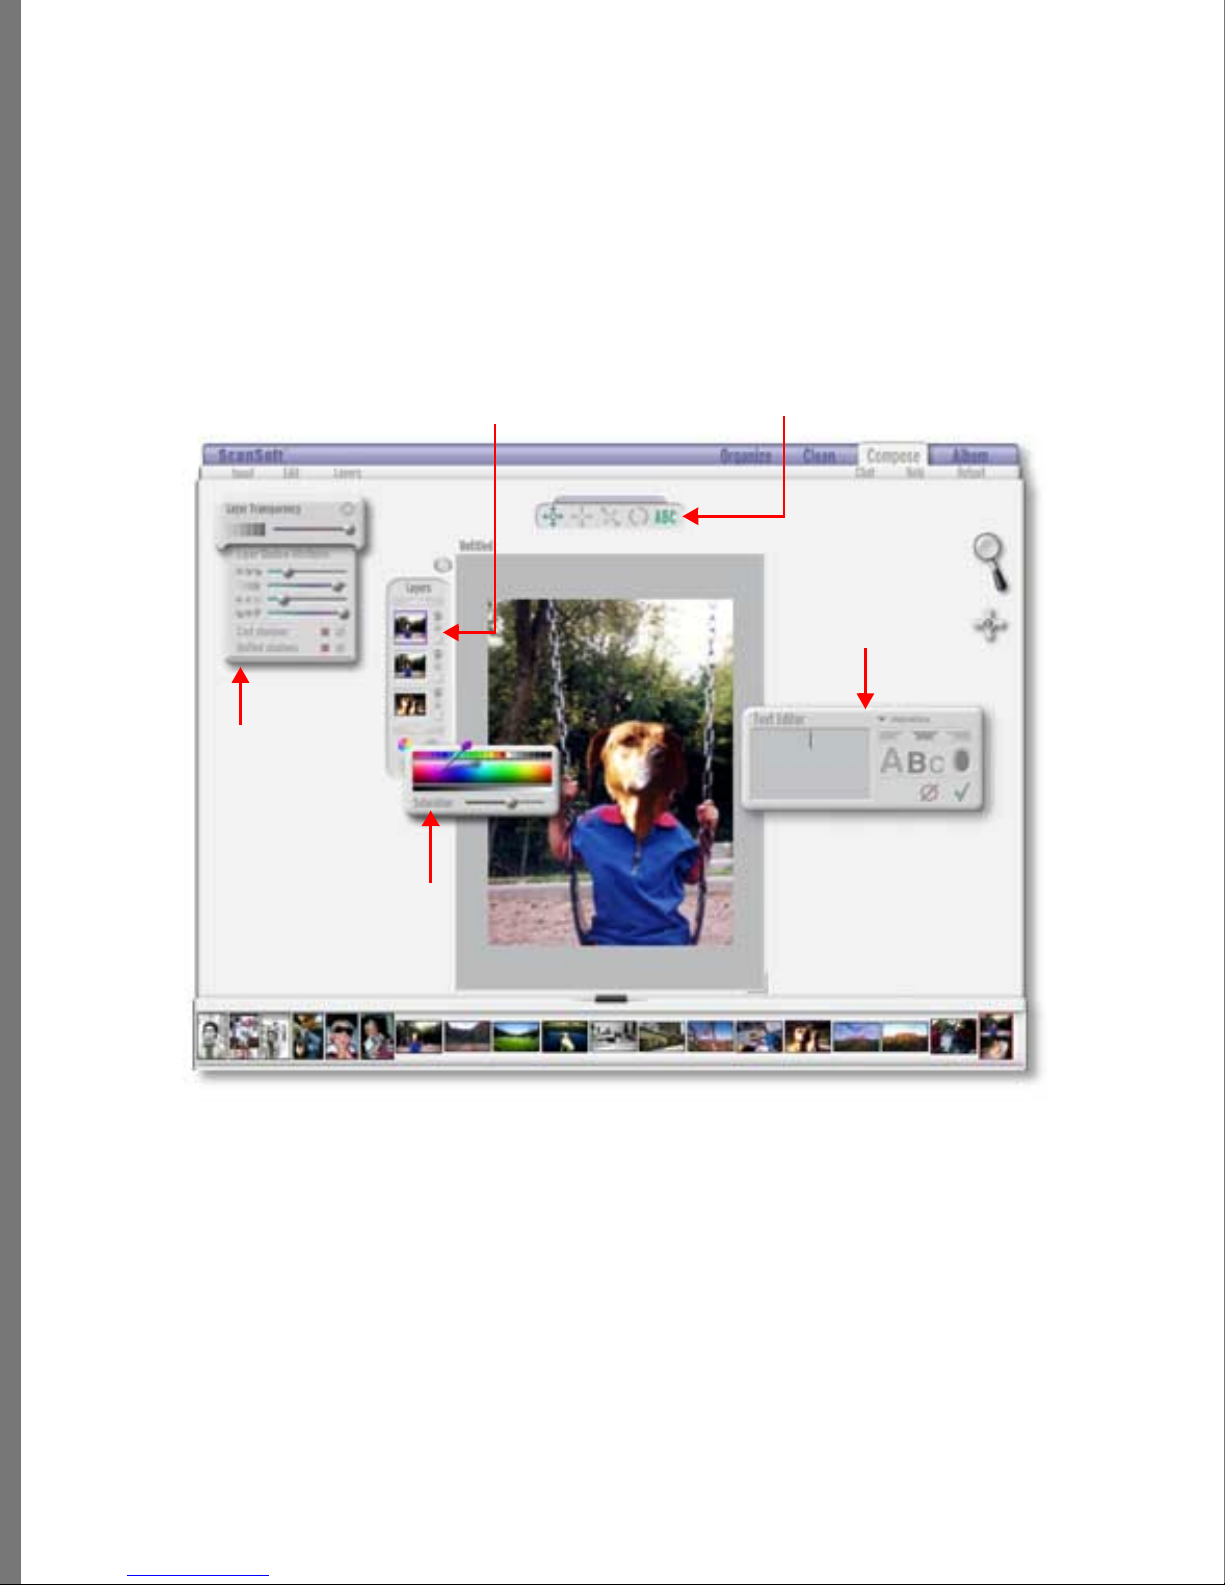
The Compose tab opens an area where you can real ly get creative. After you’ve fi xed or
modified photos, you can cr eate compositio ns by dropping one or more photos onto the
canvas, adding objects (like cartoon elements), pu t in a little te xt, and gener ally hav e fun.
From here, you can pr int, expo rt for use on the Web.
Control layer
transparency.
Set up shadows
Preview
layers.
Hide/Show
layers.
Set
background
color
Edit layers.
Stretch,
move rotate
a layer.
Add text to
composition
.Set text
attributes
In the Compose area, you can build a picture. Drop photos on the canvas. Resize or stretch them.
Rotate elements. Add some text. Put a cartoon in for fun. Add a background. Have FUN!
20

The Print tab opens an area where you can choose from a variety of ways to print your
photos. You can even create posters or a sheet full of wal let sized photos. It’s like having
a darkroom in your ver y own home!
Click to set
margins
Image filename
Click to rotate,
scale, or edit
images
INTRODUCING SOAP 2
Click to add text to
your images
Click to setup
printer page
Click to print
Drag to set margins Print Previe w
The Print ar ea giv es you a preview of what you’re printing and o ffers lots of great ways to print your
photos.
21
The Soap 2 Transporter
Using the Transporter
Use the Transporter to move thumbnails to other areas of Soap 2.
Kai’s Photo Soap 2 Transporter is an important part of Soap 2. The Transporter let s you
move thumbnails around in the application, to work with them. Once you’ve loaded
photos into Soap 2 and ar ranged them on the desktop, just dr op a photo or group of photo s
onto the transporter.
From the Transporter, you can:
• drop thumbnails int o photo po sitions in Al bums. Refer to “Using Albums” on page 114
for more about using Albums.
• drop one onto the Soap area, to fix or enhance it. Refer to “Fixing Photos” on page 48 for
more about fixing photos.
• drop one or more onto the Soap composition area t o get creative. Refer to “Composing
Images” on page 91 f or more about co mposing pictur es with photos.
• drop them onto pages in t he Print area. Refer to “Printing Photos” on page 123 for mor e
about printing photos.
If you open a phot o in the C lean, Compose, Pr int areas, a
thumbnail for that photo is automatical ly added to the
Transporter. Any thumbnail added to the Tr anspor ter is also added
to your Organize area desktop.
22

Undo, Apply, and Save
An important difference between Soap 2 and other photo manipulation pr ograms is that in
Soap 2, all of your changes are done t o a copy of y our photo. This means th at you can
experiment freely, make changes, and THEN decide to either save or discard your work.
You r original image file remains intact until you choose to change it.
Using Undo
If you change your mind while you’ re working with a ph oto, just Un do it! Undo reverses
the last thing you did. For example: if you paint so mething on a photo, you can Undo
what you painted. If you resize, delete, or drop a thumbnail on the transpo rter... you can
Undo it.
Soap 2 even lets you Undo more than one time, so you can Undo or Redo a series of steps
while you’re working. Soap 2 gi ves yo u 5 level s of Und o (m eaning yo u can Undo a series
of five actions). You can change the number of times in a r ow that you can Undo actions.
INTRODUCING SOAP 2
If memory is a concern (which it often is), set the number of
times in a row that you can use Undo to a small number. The
more times in a row that you can Undo actions, the more
memory Soap 2 required.
To Undo an action:
✤
Choose Edit menu > Undo. It’s just that easy!
Refer to “Using the Tools” on page 50 for information about using the Soap 2 Eraser to
make detailed changes to eff ects you’re brushi ng onto part o f a photo.
To Redo an action:
✤
Choose E dit menu > Redo.
To set how many times in a row you can use Undo:
✤
Choose Edit menu > Preferences and set the number of times you can use Undo.
Applying Changes
When you’ve experimented with a photo and found a look that you l ike, it’s probably time
to Apply your changes. The Apply butt on alter s the pix els (shor t for pi cture el ements—or
those little tiny squares that make up your pi cture when i t’s displayed on your computer’s
monitor) in the copy of your photo. Appl y does not affect your actual image fi le. You can
click the Apply button as many times as you want, without changing your origi nal image
file. Refer to “Saving your Work” on page 24 for infor mation about h ow to save your work.
23

Apply sets a new baseline, so that future changes are based upon the effects you’ve
“applied”. Reset returns your photo t o the last time you clicked Appl y. But don’t worry!
If you change your mind, you can even Undo an Ap ply. Apply sometimes makes it easier
for you to work on different areas of a photo. Say, for example, that you’ve modified the
color of Luc’s shirt in a photo. Click Apply to set a new basel ine. Then, star t work on his
hair color. That way, if you don’t like wh at you’ve done to his hair, you can Reset,
without changing the color you applied to his shirt.
To apply changes:
✤
Click Apply.
Saving your Work
When you’re finished modifying a photo and ready to save your work, you can replace
your original image file, save what you’ve done in a file with a new name, or save what
you’re doing as a work i n progress. The op tions to save y our work depend on in which
area of Soap 2 you’re currently working.
To revert to what was last saved:
✤
Cho ose Output> Revert to Saved.
To save a desktop arrangement (from the Organize area):
✤
Choo se Output menu > Save Desktop.
Use the Output menu > Save Desktop As command to save it usi ng a new file
name—without overwriting an existing file.
To save an image file (from the Clean area):
✤
Choose Output menu > Save Image.
Use the Output menu > Save Image As command to save it using a new file
name—without overwriting an existing file.
To save a composition, so that it can be edited at a later time (from the Compose
area):
✤
Choose Output menu > Save Composition.
Use the Output menu > Save Composition As command to save it using a new file
name—without overwriting an existing file.
To save a composition as a flat image file (from the Compose area):
✤
Choose Output menu > Build Image. Although you can certainly open and work with
the resulting image in Soap 2, any la yers you created in the compose area are not
saved. This is sometimes referred to as a “flattened” image, since layers can no
longer be edited. Refer to “Working with Composition La yers” on page 93 for more
information about using layers i n a composition.
To save an Album (from the Album area):
✤
Choose Output menu > Save Album.
24

Use the Output menu > Save Album As command to save it using a new file
name—without overwriting an existing f ile.
Photo files can get l arge, containing a l ot of inform ation.
Keep track of how many photos you save on your computer
or just keep photo s you want t o work with. Move others t o
storage. Too many photos can cause your hard dri ve to get
full.
Using Albums
Displaying photos in Albums
You can display or present your pho tos in Soap 2 electronic Al bums. Albums are
professionally drawn illu strations that look like a variety of al bums (or pictur e frames).
To use Albums, you just select an Album style, then drag photos from the Transporter and
drop them into avail abl e photo posi tions. I t’s that easy! Add some text and y our Alb um is
complete. Refer to “Using Albums” on pa ge 114 for more information about using Albums.
(Advanced users can even create their own Album styles to use with Kai’s Photo Soap 2.)
INTRODUCING SOAP 2
Once you’ve placed photos into an Album, you can:
• save the album and open it lat er
• export your Album to HTML to pu t it on y our Web site, refer to “Exporting an Album as
a Web page” on pa ge 143 for more about ex porting an Al bum as HTML pages
25

• print an Album as a complete book or as individual album pages.
Displaying phot os in an Album.
Exporting Photos
Exporting Photos for E-mail
With Soap 2, it’s easy to send photos over the internet. Soap 2 saves your photos in an
Internet friendly format, so all you have to do is attach them to an e-mail message.
They’ll travel over the Internet in a self-contained mini-program. Once received, your
friends, relatives, or clients can double-click the PhotoM ailer and browse through a
"slideshow" of your most recent creations. Refer to “Sen ding Photos with E-mail” on
page 139 for mor e information about sending photos as e-mail attachments.
Exporting a Desktop as a Web page
Here’s a quick way to make your own personal Home page in a snap, using your favorite
photos! You can post a desktop full of ph otos as your Web site, all with the help of Kai’s
Photo Soap 2.
The HTML page that S oap 2 creates is interactive! Visitors to your site can move
thumbnails around on the exported "desktop" or double-click thumbnails to see a full-size
view of that photo. Refer to “Exporting a Desktop as a Web Page” on page 141 for more
information about exporting desktops as HTML pages.
26

Exporting an Album as Web pages
Here’s a neat way to make your own personal Home page. You can post an Album full of
photos as your Web site. The HTML page that Soap 2 creates is interactive! Visitors to
your site can flip pages in the Album, or they can double- click on a phot o in the Alb um to
see a full-size view of it. Refer to “Exporting an Album as a Web page” on page 143 for m ore
information about expo rting desktops as HTML pages.
Exporting Photos as a PhotoCube Web Page (PC only)
You can export photo s as a 3D PhotoCube, which allows you to display them as a
six-sided three-dimension al cu be. Note that t he Phot oCube ex port featur e is suppo rted o n
the PC platform only and requires that you download a free MetaStream plug-in to view
the cube as a 3D object.
The MetaStream™ 3D technology is a new open PC file format announced joint ly by
®
Corporation and M etaCreations Corporat ion. It en ables delivery and viewing of
Intel
scalable 3D graphics.
To view a 3D PhotoCube, you and those with whom you share the PhotoCube need to
install the MetaStream plug-in. You can find the plug-in at the following We b site:
INTRODUCING SOAP 2
www.metastream.com
Refer to “Exporting Photos as a Photo Cube Web Page (PC only)” on page 145 for more
information about expo rting photo s as a PhotoC ube.
Expanding Soap 2’s Power
Using Plug-ins
Plug-ins are extra features that plug into Soap 2. Plug-ins offer special effects and extra
tools that greatly expand the power of Soap 2.
With Soap 2, you can do something most other programs can’t do. You can br ush an effect
onto just part of your photo, just like any ot her Soap 2 effect!
Filter Plug-ins
Usually, a plug-in applies an effect or a range of effects, like:
• creating a variety of spheres (Spheroid Designer)
• bend, twist, multiply, or otherwise manipulat e gradients or blends between t wo colors
or tints of a color (Gradient Designer)
• creating textures for b ackgrounds and desig ns (Texture Explorer )
27

• create glass, curls, tiles, welds, twirls, feedback, vortexes, and stereo noise (Compact
Filters)
• camera lens effects (Lens f/x Filters)
Acquire Plug-ins
Other plug-ins let you load or export photos, li ke loading phot os from your digi tal
camera, scanner, or using special printing options.
Free Plug-ins
Soap 2 includes three of the four famous Kai’s Power Tools 3 (KPT 3) special effect
plug-ins. Re fer to Using Pl ug-Ins for more informat ion abo ut usin g plug-ins with K ai’s
Photo Soap 2.
An example of a plug-in filter effect.
28

Installing Kai’s Photo Soap 2
Installation instructi ons are provided f or both Windows and Macinto sh. Follow the
instructions appropri ate to you r system.
Kai’s Photo Soap 2 is intended for local installation only. Do
not attempt to install it onto a network server.
System Requirements (Windows)
Windows 95, Windows 98, Windows NT 4.0 with Service Pack 3 or lat er; 32 mb RAM for
Windows 95/98; 64 mb RAM for Windows NT; 100 mb of hard-disk space; CD drive; 16
or 24 bit color (24 bit preferred ).
INSTALLING SOAP 2
System Requirements (Macintosh)
Power PC; System 8.1 or later; 32 mb RAM; 100 mb hard-disk space; CD drive; 16 or 24
bit color (24 preferred).
Windows Installation
To install Soap 2 on a Windows computer:
1 Launch Windows.
2 Insert the Kai’s Photo Soap 2 CD-ROM into your computer’s CD-ROM drive. The
Install Soap 2 dialog appears.
3 Double-click the Kai’s Photo Soap 2 logo.
4 Follow the instructions provided by t he installer.
5 The installation dialog display s an important ReadMe. Click “Continue” after
reading the complete ReadMe.
Macintosh Installation
To install Soap 2 on a Macintosh:
1 Insert the Kai’s Photo Soap 2 CD-ROM into your computer’s CD-ROM drive. The
Install Soap 2 dialog appears.
2 Double-click the Kai’s Photo Soap 2 logo.
29

3 Follow the instructions provided by the installer.
4 The installation dialog displays an importa nt ReadMe. Click “Continue” after
reading the complete ReadMe.
Soap 2 Installation Tips
• If you plan to print photos, adjust the color on your monitor so that it matches the
output of your printer. That way, when a photo looks great on your monitor you can
print it without disappoi ntment.
• Working with photos requires a lot of memory (RAM). For best r esults when
working on a Macintosh, increase the RAM avai lable to Kai’s Photo Soap 2 by
allocating unused RAM to Kai’s Photo Soap 2, thu s allowing it to run faster and
handle larger files more efficiently.
30

ORGANIZING
PHOTOS
What’s in this Section?
Overview . . . . . . . . . . . . . . . . . . . . . . . . . . . . . . . . 32
Loading Photos . . . . . . . . . . . . . . . . . . . . . . . . . . . 32
Working with Thumbnails . . . . . . . . . . . . . . . . . . . 33
Previewing Photos . . . . . . . . . . . . . . . . . . . . . . . . . 37
Getting File Informa tion . . . . . . . . . . . . . . . . . . . . 38
Removing Image Files f rom your Comput er . . . . . . 39
Switching Views . . . . . . . . . . . . . . . . . . . . . . . . . . 40
Working with Desktops . . . . . . . . . . . . . . . . . . . . . 41
Sorting and Searching for Photos . . . . . . . . . . . . . . 43

Overview
In Kai’s Photo Soap 2, you can work with one photo, more than one photo, a folder full of
photos, or many folders full of photos. Dig ital pho tos ar e availabl e from a wide variety of
sources. One way to get di gital images is t o just scan a pri nted photo, o r you can us e a
digital camera. Scanners and digital cameras are usually connected to your computer with
a cable. Pictures are moved (downloaded) from the camera directly into Soap 2. Another
way to get digital photos is to have a photofin ishing lab or copy center scan and put your
photos onto a CD. Finally, you can download digital versions of your photos from a Web
site.
Once you’ve obtained digita l photos, you can use the Soap 2 Organize area to:
• load photos into Soap 2
• look through your photos by spreading t hem out on a Soap 2 virtu al desktop, creating a
contact sheet, or viewing them on a Soap 2 lightbox
• move photos around and pi le them into groups
• look at full-size previ ews of one or mo re photos
• sort through photos, o rganizing them by n ame, date, size, color, how much you like
them, or by keywords that you’ve entered
• clean your computer’s hard-drive, by removing unwanted image files
Loading Photos
Use the following table to learn how to load photos into Kai’s Photo Soap 2.
To load photos from: Do This: Tips
✤
your computer or
removable media
✤
a scanner or digital
camera
✤
a device, using
a Phot oshop
Acquire plug-in
Cho os e I nput menu >
Open File or Input menu
> Open folder, select the
file or folder you want
to load, then clic k
Open.
Cho os e I nput menu >
Acquire TWAIN, th en
follow the onscreen
directions.
Cho os e I nput menu >
Acquire Plug-In.
Pressing ESC stops loading
photos (leaving only those
photos that have already
loaded).
If you have more than one
device (like a scanner or a
digital camera), you can
choose Input menu > Select
Device to select the device
you wish to use.
32

To load photos from: Do This: Tips
✤
a picture CD Choose Input menu >
Open File or Input menu
> Open folder, select the
picture CD, select the
file or folder you want
to load, then click
Open.
Working with Thumbnails
After you’ve loaded photos into Soap 2, you see t hem as small “thumbnail ” copies on the
Organize area desktop. You can see a quick “sl ide” view of each thumbn ail or resize
thumbnails to make them easier for you to work with.
To see a "slide" view of a thumbnail:
✤
Move the cursor over a thumbnail and p ause.
A slide-sized view of that thumbnail is displayed. A slide view allows you to see the
thumbnail at its normal size and displays the image’s file name and date.
ORGANIZING PHOTOS
Selecting Thumbnails
To work with thumbnails, you must select them. In Soap 2, you can select one or more
thumbnails. You can move thumbnails around on th e desktop to arrange t hem, just as yo u
might photos on your dining room table.
To select a thumbnail:
✤
Click a thumbnail to select it.
A color border around a thumbnail indicates that it’s selected.
To select more than one thumbnail:
✤
Click one thumbnail , then Ctrl /Shift+click additional thumbn ails.
A color border around thumbnails indicate they are selected.
✤
Click, hold, then drag to draw a marquee around the thumbnails you want selected.
33
A color border around thumbnails indicates they are sel ected.
Draw a marquee around thumbnails to select them.
To select all except the currently selected thumbnails:
1 Select one or more thumbnail—these are the ones you don’t want selected.
2 Choose Edit menu > Select Inverse. The originally selected thumbnail(s) are deselected
and remaining thumbnails are selected.
To select all the thumbnails:
✤
Choose Edit menu > Select All. All th umbnails are selected.
To deselect all the thumbnails:
✤
Cho ose Edit menu > Select None.
✤
Click on the desktop.
Changing Thumbnail Size
To change the size of a thumbnail
1 Select the thumbnail(s) whose size you wish to change.
2 Press plus (+) on the nu meric keypad to make them larger. Press plus (+) again to
make them even larger.
3 Press minus (-) on the numer ic keypad to make them smaller. Press minus (-) again
to make them even smaller.
4 Press equal (=) on the n umeric keypad to return the t humbnails to a mid-range size.
34
Rotating and Renaming Thumbnails
To rotate a thumbnail:
1 Select the thumbnail(s) you want to rotate.
2 Choose View menu > Rotate.
To rename a thumbnail:
1 Select the thumbnail yo u want to rename.
2 Choose E dit me nu > Re name Image.
You can rotate or rename thumbnails, before yo u save a desktop.
Soap 2 prompts to see if you want to save those kind changes.
Rotating or renaming photos is handy if you’r e acquiring im ages
from a digital camera, Refer to “Saving a Thumbnail Arrangement”
on page 41 for more information.
ORGANIZING PHOTOS
Moving Thumbnails
To move thumbnails:
1 Select one or more thu mbnail.
2 Hold the mouse button down and drag t he thumbnail(s) to a new lo cation.
Drag thumbnails to a new location.
35

Duplicating Thumbnails
Depending on what you’re go ing to d o with a photo , it is sometimes hel pful to hav e more
than one thumbnail copy of an image. For example, you might want to see how a
particular shirt looks in various colors, or how a house looks in each of the four season s.
To duplicate a thumbnail:
1 Select a thumbnail.
2 Choose Edit menu > Duplicate. T he selected thumbnail is copied int o memory. A
duplicate of the thumbnai l appears on the desktop.
Grouping Thumbnails
You can move thumbnail s around on t he desktop or pile them up i nto groups—just like
you might do on your dining room table.
Press G to group selected thumbnails, then arrange your Soap 2 desktop.
To group photos:
1 Select some photos.
2 Press Ctrl/Cmd+G. The selected thumbnails are piled into a group.
3 Grouped the wrong ones? Press S hift+Ctrl/Cmd+G to ungr oup them (or use Undo.)
Once photos are grouped, you can move pil es around. Select a group, change i ts
size, or move it out o f the way unti l later.
36

Deleting Thumbnails
Remember—thumbnails are just little copies of your photos. When you de lete a
thumbnail from the Soap 2 Organize area, you are not deleting an actual image file from
your computer. Refer to “Removing Im age Files from your Computer” on page 39 fo r
information about using Soap 2 to remove image files from your computer.
To delete thum bnails:
1 Select one or more thu mbnail.
2 Choose Edit menu > Delete Thumbnail (or press the del/delete key.) The selected
thumbnail(s) are deleted from the Soap 2 Organize area.
To delete all the thumbnails:
1 Choose E dit me nu > Select All.
2 Choose Edit menu > Delete Thumbnail (or press the del/delete key.) All thumbnail(s)
are deleted from the Soap 2 Organize area.
Previewing Photos
ORGANIZING PHOTOS
With Soap 2, you can see a full-screen preview of any thumbnail(s) you select. When you
select more than one, Soap 2 lets you click t hrough a little “slideshow” of full -screen
previews.
To see full-screen previews:
1 Select one or more thu mbnail(s).
2 Double-click on the selected thumbnail or choose View menu > Slideshow.
37

3 Click a final time to return to the Soap 2 Organize area.
Use View menu > Preview to see a full-screen view of a thumbnail.
Getting File Information
You can view information about each thumbnail. File information includes the name of
the image file, file type, the dimensions of t he image, image resolution, where the file is
located on your computer, the date of the last ti me it was modified , any description or
keywords you may have entered, as well as any personal rati ng (a beauty assignment) you
may have made. Refer to “Sorting and Searc hin g for Photos” o n pa g e 43 for more about using
file information to search for a photo or to sort photos by various criteria.
To view file information:
1 Select a thumbnail.
2 Choose Edit menu > Image Info (or move the cursor over a thumbnail, pause until you
see the slide view, then click on the circle in the bottom right corner of the slide).
38
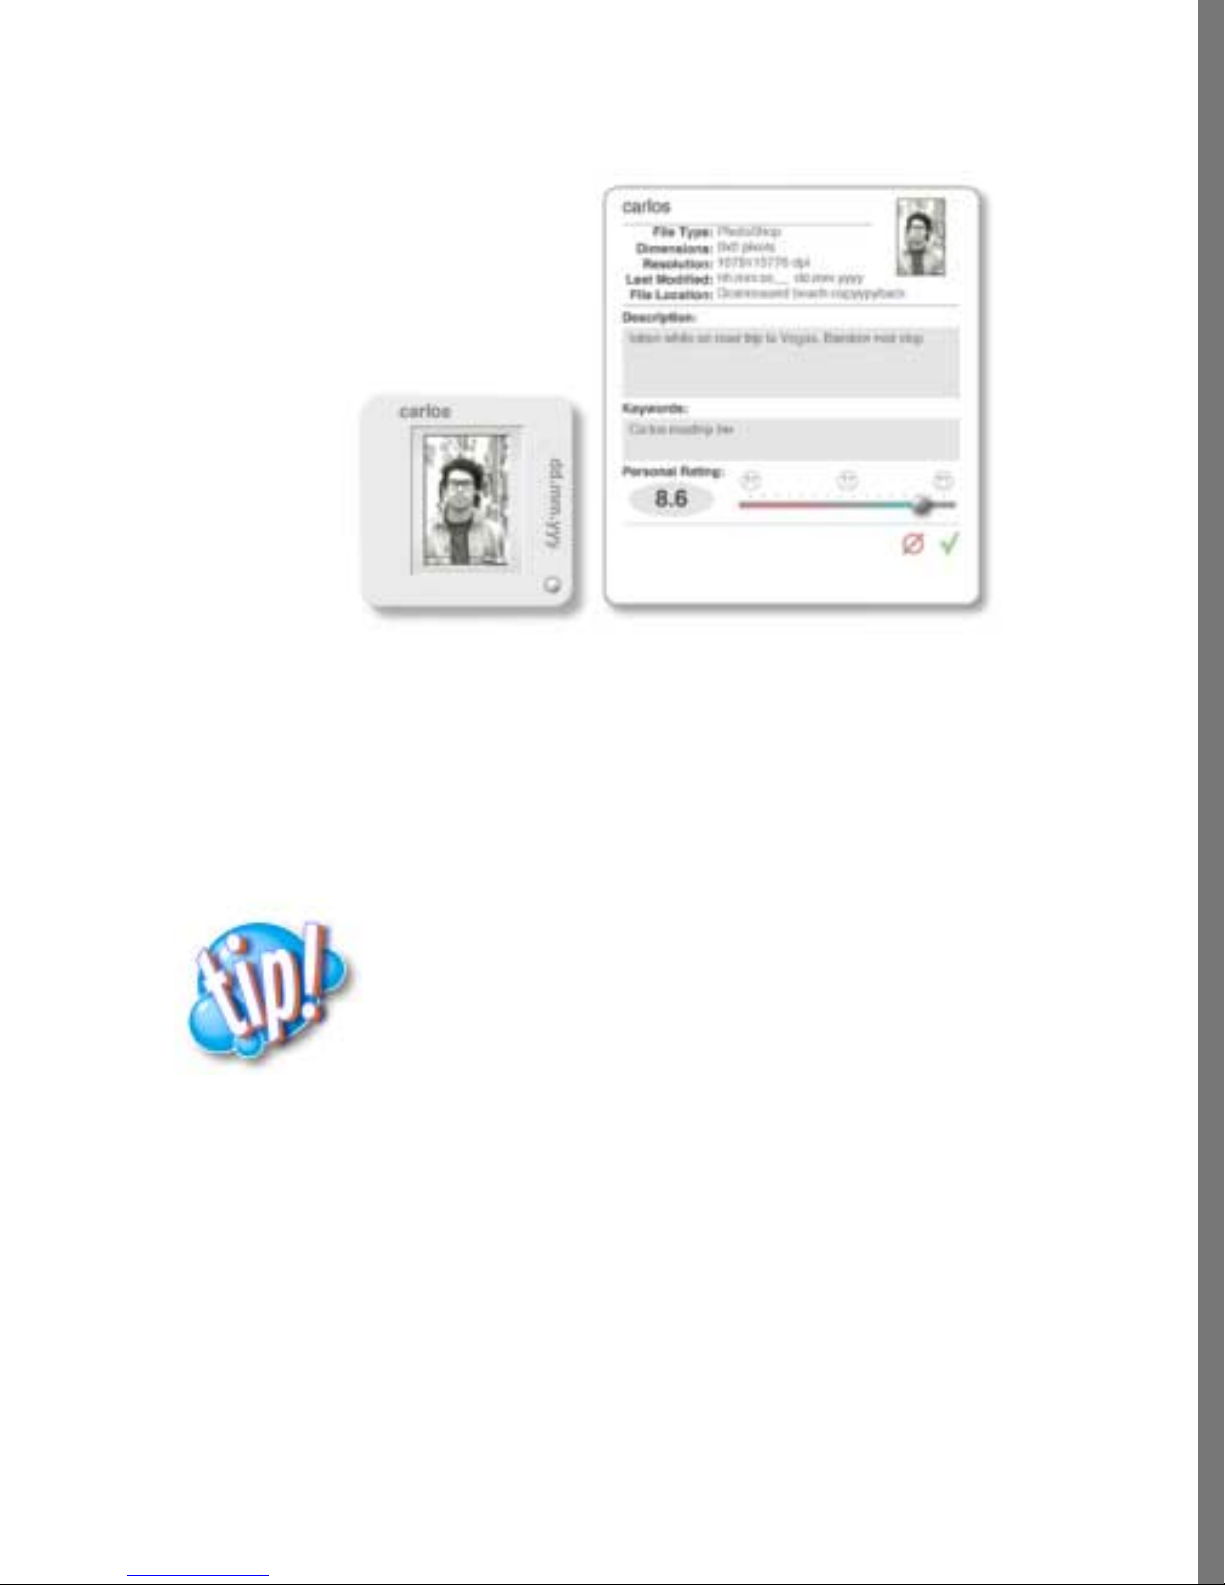
The File Information for the selected photo is displayed.
ORGANIZING PHOTOS
Getting file information.
Removing Image Files from your Computer
Image files can use up a lot of storage space on yo ur computer. A handy way to keep your
computer “clean” is to use Soap 2 to remove image file s from your computer ’s hard drive
or from removable media.
Removing a photo file from your computer is a permanent
action. Be sure that’s what you want to do and AL WAYS make
backup copies of important photos, before you save your
changes or remove the image file from your computer.
To remove photo files from your computer.
1 Select one or more thu mbnails.
2 Press Shift+Delete.
Soap 2 displays a warning that you are about to remove photo file(s) and place them
into the trash.
3 Click on the check in the warning dialog to permanently remove the selected photo
file(s) from your computer.
39
Switching Views
Using other Views
You’r e familiar with the Soap 2 desktop, where you can move and pile photos. But, wait!
There are other ways to view your photos. Have fun exploring Lightbox and Conta ct
Sheet views.
Change views any time. When no thumbnails are select ed, all the photos you’ve loaded
into Soap 2 are displayed. When you have thumbnails selected, only those th at are
selected are displayed in the new view, making it easy to select a small group of photos to
review.
To switch to Lightbox view:
1 (Optional) Select one or more thumbnails.
2 Choose View menu > Lightbox. Your photos are displayed as if they were on top of a
photographer ’s lightbox.
View your photos in Lightbox view.
To switch to Contact Sheet view:
1 (Optional) Select one or more thumbnail.
40

2 Choose View menu > Contact Sheet. You r photos are displayed in a contact sheet
format.
Contact Sheet view.
Working with Desktops
ORGANIZING PHOTOS
Building Thumbnail Arrangement
The first time you open Kai’s Photo Soap 2, you’ ll see t he S oap 2 deskt op. Aft er you lo ad
your own photos, you can arrange or group them in ways that are useful to you. Soap 2
displays your photos as thumbnail representat ions. These thumbnail a rrangements are
referred to as desktops. I f you reopen Soap 2, the l ast desktop you worked with i s the
desktop you see. Refer to “Deleting Thumbnails” on page 37 for information about delet ing
thumbnails from the desktop.
Saving a Thumbnail Arrangement
It never fails! Once you get thumbnails grouped and arranged on a desktop, you’ll
probably have to interrupt your work. It’s nice to know that you can save a Soap 2
thumbnail arrangement, then reload it in order to work with it at a later time. Saving
41

desktops is a handy way to work with specif ic photos, l ike those from a family reunion ,
recent vacation, or genealogy project. Save as many desktop arrangements as you want,
then reload them and start working—right where you left off.
Once you have the right photos loaded a nd have arranged your So ap 2 desktop, you can save the
arrangement as a Soap 2 desktop file.
To create a new desktop:
✤
Choose Input menu > New Desktop. If photos are loaded, Soap 2 prompts you to save
the current desktop.
To save a desktop:
✤
In the Organize area, choose Output menu > Save Desktop.
Use the Output menu > Save Desktop As command to save it usi ng a new file
name—without overwriting an existing file.
You can rotate or rename thumbnails, before yo u save a desktop.
Soap 2 prompts to see if you want to save those kind changes.
Rotating or renaming photos is handy if you’r e acquiring im ages
from a digital camera, Refer to “Rotating and Renaming
Thumbnails” on page 35 for more information.
42

To reload a desktop:
1 In the Organize area, choose Input menu > Open Desktop.
2 Select the desktop you want to open. So ap 2 reload s the saved desktop, so you can
resume work.
Sorting and Searching for Photos
Now, there’s finally a way to take control over all your phot os. You can sort by file name,
date, size, file type, height, width, and aspect ratio (height to widt h). Sort by color if you
want to view all those travel photos of sunsets over the ocean. Enter descriptions, like
“family reunion” or “Hawai i trip” and sort by th ose. Enter one or more keyword f or a
photo and sort by those. You can even give each photo a personal rating (a “b eauty”
assignment) and sort by that.
When acquiring photos from a digital camera, remember that Soap 2 thumbnails are just copies of
your photos. You must save files as they are acquired for file information to be saved. Don’t rely on
automatically generated file names when acquiring phot os from a digital camera. Enter a
group name or rename files before entering file information or you might over write
information entered for another photo of the same name.
ORGANIZING PHOTOS
File inform ation i s stored in file . To preserve file
information, it’s a good idea to make a manual backup once in a
while of the .dbi file in your Soap 2 directory.
When sorting photos, if no thumbnails are selected, Soap 2 alphabeticall y sorts all the
thumbnails on the desktop. If thumbnails are selected, Soap 2 sorts only the selected
photos and then groups them in the middle of the desktop.
Using Keywords
To enter keywords for a photo:
1 Select a photo.
2 Choose Edit menu > Image Info (or move the curso r over a thumbnai l, pause until you
see the slide view, then click on the circle in the bottom right corner of the slide).
The File Information dialog is displayed .
3 Click in the Keywor ds area and enter k eywords for t hat photo.
If you enter more than one keyword, separate them with a comma. Words within
quotes are treated as a single keyword.
4 Click outside the Information dialog to clo se it.
43

To search by keywords:
✤
Choose Edit menu > Keyword Search and enter the keyword by which you want to
sort.Sorting Photos by Name
To sort photos by name:
1 (Optional) Select one or more thumbnails.
When no thumbnails are selected, Soap 2 alphabetically sorts all the thumbnails on
the Soap 2 desktop. If thumbnails are selected, Soap 2 groups the selected photos in
the middle of the desktop after sorting them.
2 Cho ose Sort men u > Al phanumeric.
You can sort thumbnails by name.
Sorting Photos by Date
You can sort photos by the date when it was last mo dified. That this is not necessarily the
same as the date when the pict ure was taken.
To sort by date:
1 (Optional) Select one or more thumbnail.
When no thumbnails are selected, Soap 2 alphabetically sorts all the thumbnails on
the Soap 2 desktop. If thumbnails are selected, Soap 2 groups the selected photos in
the middle of the desktop after sorting them.
44

2 Choose S ort me nu > Date.
Sorting Photos by Size
When you sort by size, S oap 2 reorganizes thumbnai ls on your d esktop according to
thumbnail size.
To sort by size:
1 (Optional) Select one or more thu mbnails.
2 Choose S ort me nu > Si ze.
Sorting Photos by File Type
To sort by file type:
1 (Optional) Select one or more thu mbnails.
2 Choose S ort me nu > Kind.
ORGANIZING PHOTOS
Sorting Photos by Height
When you sort by size, S oap 2 reorganizes thumbnai ls on your d esktop according to
thumbnail height.
To sort by height:
1 (Optional) Select one or more thu mbnails.
2 Choose S ort me nu > Height.
Sorting Photos by Width
When you sort by size, S oap 2 reorganizes thumbnai ls on your d esktop according to
thumbnail width.
To sort by width:
1 (Optional) Select one or more thu mbnail.
2 Choose S ort me nu > Wi dth.
Sorting Photos by Aspect
You can sort by the aspect rati o between a photo’s height and width.
To sort by aspect:
1 (Optional) Select one or more thu mbnail.
2 Choose S ort me nu > Aspect.
45

Sorting Photos by Beauty
You can give each photo a beauty rating in file informatio n—identifying how much you
like that photo.
To assign a personal rating:
1 Select a thumbnail.
2 Choose Edit menu > Image Info (or move the cursor over a thumbnail, pause until you
see the slide view, then click on the circle in the bottom right corner of the slide).
The File Information dialog is displayed.
3 Move the Personal Rating sli der right to give it a high beauty r ating or left to g ive it
a low beauty rating.
4 Click Apply.
To sort by beauty:
1 (Optional) Select one or more thumbnails.
2 Choose Sort menu > Beauty.
Sorting Photos by Color
Sorting by color is a fun way to sort. Yo u can group all of your night time phot os, seaside
shots, or any other group of photos that has a common color theme.
To sort by color:
1 (Optional) Select one or more thumbnails.
2 Choose Sort menu > Color.
Sorting Photos by Description
You can e nter a descript ion for a t humbnail, then use that description to sort for similar
photos. For example, you can enter a description like “I sabel’s first birthday” or “Lee’s
keynote address”, then easily so rt to find simi lar photos.
To enter a description for a photo:
1 Select a thumbnail.
2 Choose Edit menu > Image Info (or move the cursor over a thumbnail, pause until you
see the slide view, then click on the circle in the bottom right corner of the slide).
The File Information dialog is displayed.
3 Click in the Description area and enter a description for that photo.
4 Click outside the Information dialog to close it.
46

To sort by description:
1 (Optional) Select one or more thu mbnails.
2 Choose S ort me nu > Descr iption.
ORGANIZING PHOTOS
47

FIXING
PHOTOS
What’s in this Section?
Overview . . . . . . . . . . . . . . . . . . . . . . . . . . . . . . . . 49
What Kai’s Photo Soap 2 Can Fix . . . . . . . . . . . . . . 50
Using the Tools . . . . . . . . . . . . . . . . . . . . . . . . . . . 50
Rotating and Sizing Photos . . . . . . . . . . . . . . . . . . 54
Adjusting Color . . . . . . . . . . . . . . . . . . . . . . . . . . . 59
Automatically Fixing Photos . . . . . . . . . . . . . . . . . 71
Healing Flaws . . . . . . . . . . . . . . . . . . . . . . . . . . . . 74
Smoothing and Sharpen ing . . . . . . . . . . . . . . . . . . . 77
Removing Red Eye . . . . . . . . . . . . . . . . . . . . . . . . 79
Removing date and time stamps . . . . . . . . . . . . . . . 80
Duplicating photo elements . . . . . . . . . . . . . . . . . . 81
Other Fun Effects . . . . . . . . . . . . . . . . . . . . . . . . . 83
Having Fun wit h Masks . . . . . . . . . . . . . . . . . . . . . 86

Overview
This chapter explains how to fix problems with photos, such as straight ening crooked
photos, fixing blemishes, color casts, or exposure problems. The changes you make using
the tools introduced in this chapter directly affect the pixels in the image. “Building
Compositions” on page 92 explains how to compose or enhance a photo; you can add clipart,
edges, or text, and you can layer multiple images.
FIXING PHOTOS
Use the Image menu to
correct color, paint, crop,
rotate, or add effects to your
photo.
Choose
an
effect.
Click Clean to make changes t o a photo.
Fix or enhance parts of y our
photo, using t he Soap 2
tools.
Zoom in or
out.
Move the
photo in the
window.
Adjust brush size.
Drag a photo from the Transporter.
Fix or enhance photos in the Clean area.
49
What Kai’s Photo Soap 2 Can Fix
Soap 2 can fix many t ypes of problems i ncluding:
• Straightening crooked phot os, or rotati ng them if they load sideways
• Fixing rips, tears, and blemishes
• Resizing photos
• Removing unwanted elements such as that power pole that appears to stick out of
someone’s head
• Remove “red eye” or time stamps from photos
• Sharpen soft contrast photo s or blur b usy backgrounds
• Adjust brightness and contrast
• Change the colors
For information on creating photos, scanning photo s, and selecti ng which types o f
problem photos can be fixed, refer to Appendix A.
Using the Tools
Soap 2 contains powerful tools that are easy to use. They can affect all or part of a photo.
You can use the brush tools to apply effects to selected areas, to apply plug-in effects, and
most importantly, to have fun!
Large Brush Applies an effect to a larger area. Refer to “Brush
Controller” on page 52 for more instructions
Small Brush Applies an effect to a smaller area. Refer to “Brush
Controller” on page 52 for more instructions
Applies an effect to a smaller area than a brush,
Pencil
however, the pencil size can be adjusted like using a
brush
50

Eraser Removes an applied effect, Erasers size can be
adjusted like a brush
Magic Mask R efer to “Using th e Magic Mask” on page 53 for more
instructions
Icicle Hardens edges of effects
Water Drop Softens edges of effects
FIXING PHOTOS
Zoom Refer to “Zooming a nd Panning” on page 53 for
instructions on using this to ol
Pan Scrolls around in zoomed photos
Hand Smears an effect
51
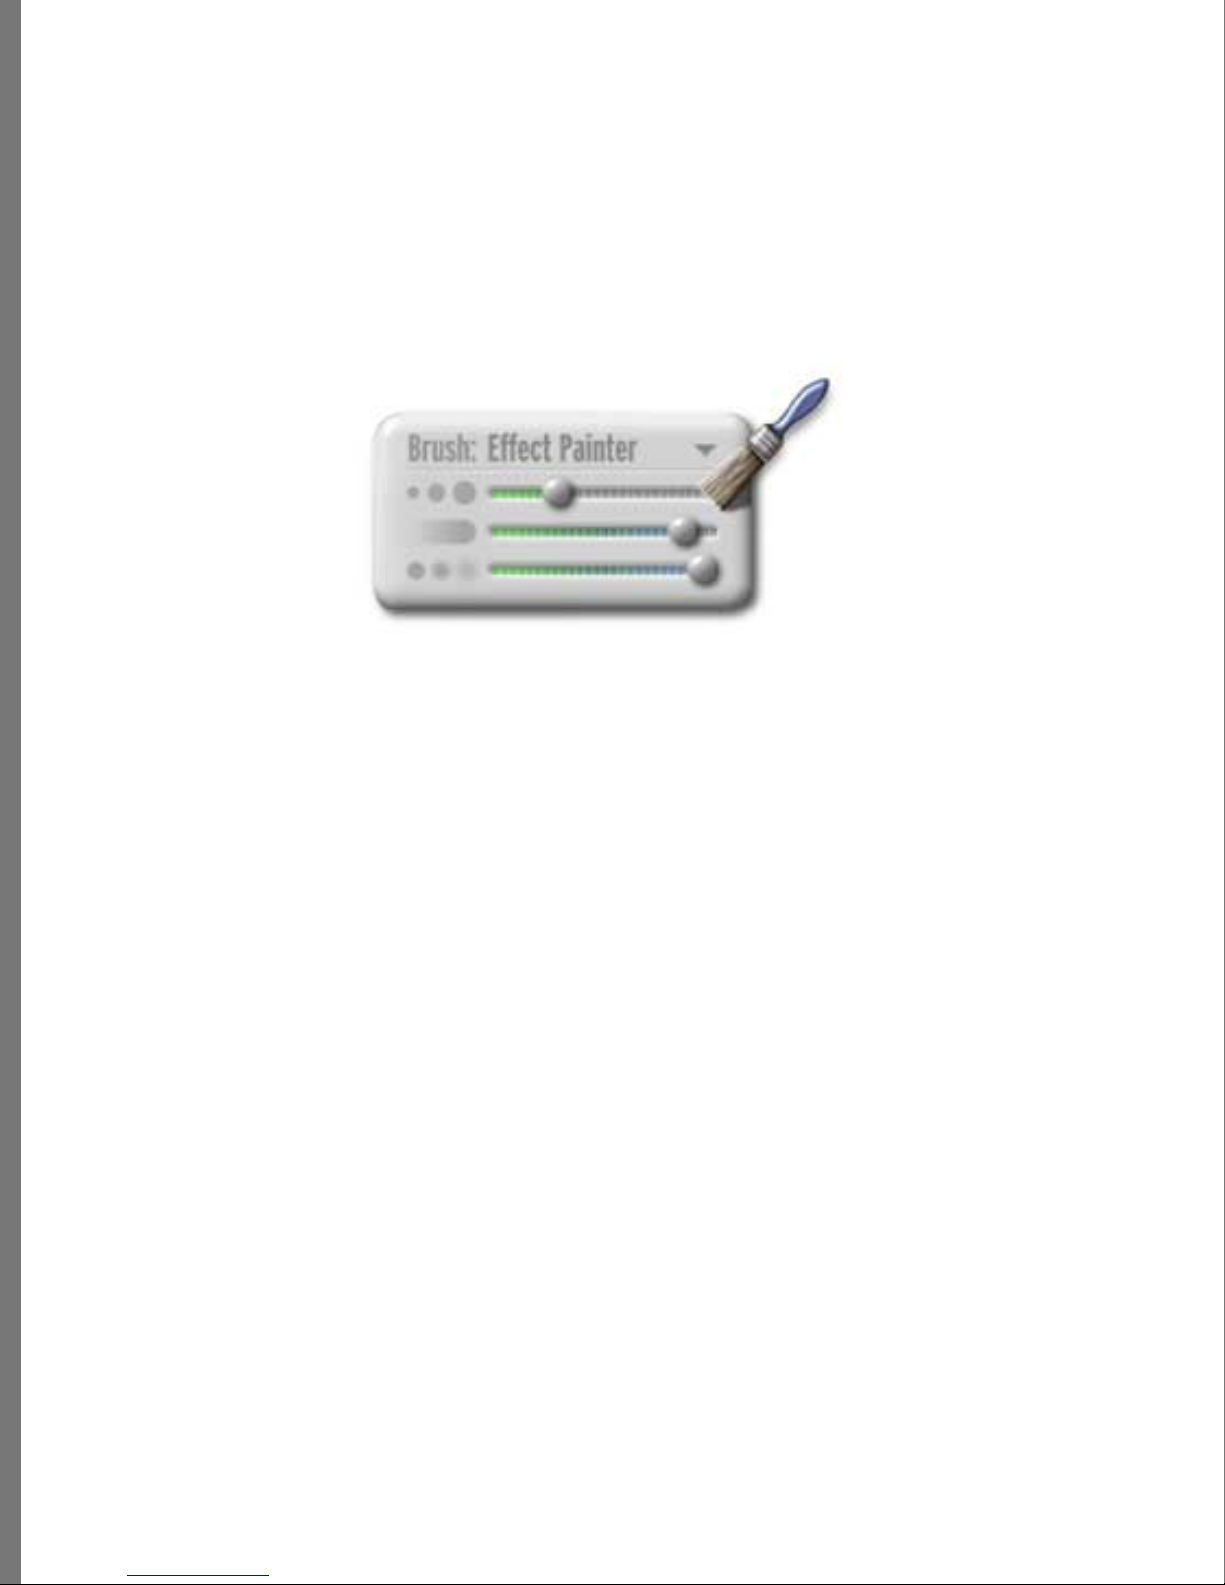
Brush Controller
You can set the brush size, softness, and flow. The size specifies the amount of area
affected by a brush stroke. Softness specifies whether a stroke is har d edges, or feathered
to produce a soft stroke with fuzzy edges. Flow cont rols the amount of effect in a
cumulative manner. With a low flow setting, you can layer the amount of effect applied.
You can also set opacity which is a characteristic of the effect, not the brushes. Opacity
specifies the amount of the original image that shows through (or the transpar ency of the
image).
Setting the brush size.
To change the brush mode:
1 Choose Image menu > Eff ects, and select an effect.
2 Click the Brush to display the brush tools.
• Use the middle slider in the Brush Effects Painter to set the flow.
• Use the bottom slider to set the softness.
• Use the vertical slider in the Effects palette to set the global opacity.
• Pre ss Tab to switch fr om brush to cir cle prev iew.
• Press Space to switch to the Pan tool.
• Press Alt to invert the current tool. For example, press Alt to turn the current
brush into an eraser.
Setting Brush Size
To set the brush size:
1 Choose Image menu > Eff ects, and select an effect.
2 Click the Brush to display the brush tools.
3 Use the top slider in the Brush Effect Painter to set the brush size.
52

Using the Magic Mask
Use the Magic Mask to sel ect a color range. When you cli ck the Magic M ask tool on a
color, it will select similar colors around the area you clicked on. Use the sliders in the
Magic Mask control to fine tune the range and feather of the tool. Refer to “What are
Masks” on page 86 for mor e inf ormati on ab out ma sks.
To use the Magic Mask:
1 Click the Magic Mask tool. (It looks like a bucket.)
2 Drag it to the co lor area you want to select, and click.
3 Use Ctrl+click (or Option+click on the Macintosh) to ad d to the selection or
Alt+click to subtract the last section from the selection.
To change settings for the Magic Mask:
1 While the Magic Mask is selected, click the E ffects palette.
2 Click the downward pointing trian gle and choose Magic Mask.
✤
If desired, you can chang e the range f or feathering (blending).
✤
You can also change the range of col ors selected.
FIXING PHOTOS
Zooming and Panning
You can zoom in on a photo to v iew an area in more detail. Once y ou’ve zoomed in, you
can pan to scroll around and view other areas of the zoomed photo.
To use the Zoom and Pan tools:
1 Click the Zoom t ool (magnif ying glass) to select it.
2 Place it over the area you want to zoom and click, or drag to select an area to zoom.
3 Click again as needed to increase the magnification.
4 Press Shift+click to zoom out again.
5 Click the Pan to ol to select it.
6 Place it over the zoomed image and click and hold t he mouse button.
7 Move the pan control to pan o r scroll the zoomed image.
✤
Press Shift to disable smoo th zoom (use t his if you have a slower comput er).
✤
Press Ctrl+Alt to zoom to the minimum zoom size.
✤
Press and hold the Spacebar to switch to the cross t ool.
53

Resize the window to a smal ler size if you ar e using a slow
computer. You can use the Window Reset button to r eturn it
to the default size for that image.
Scanning photos is a great way t o get t hem into Soap 2, but what d o you do when p ictures
scan in a little crooked? Or what do you do when they load sideways, because the camera
was rotated or the photo was scanned upside down? Soap 2’s rotate tools let you
straighten crooked pictur es, rotate photos for special effects, an d flip pictur es around.
You can also resize the window.
A crooked scan.
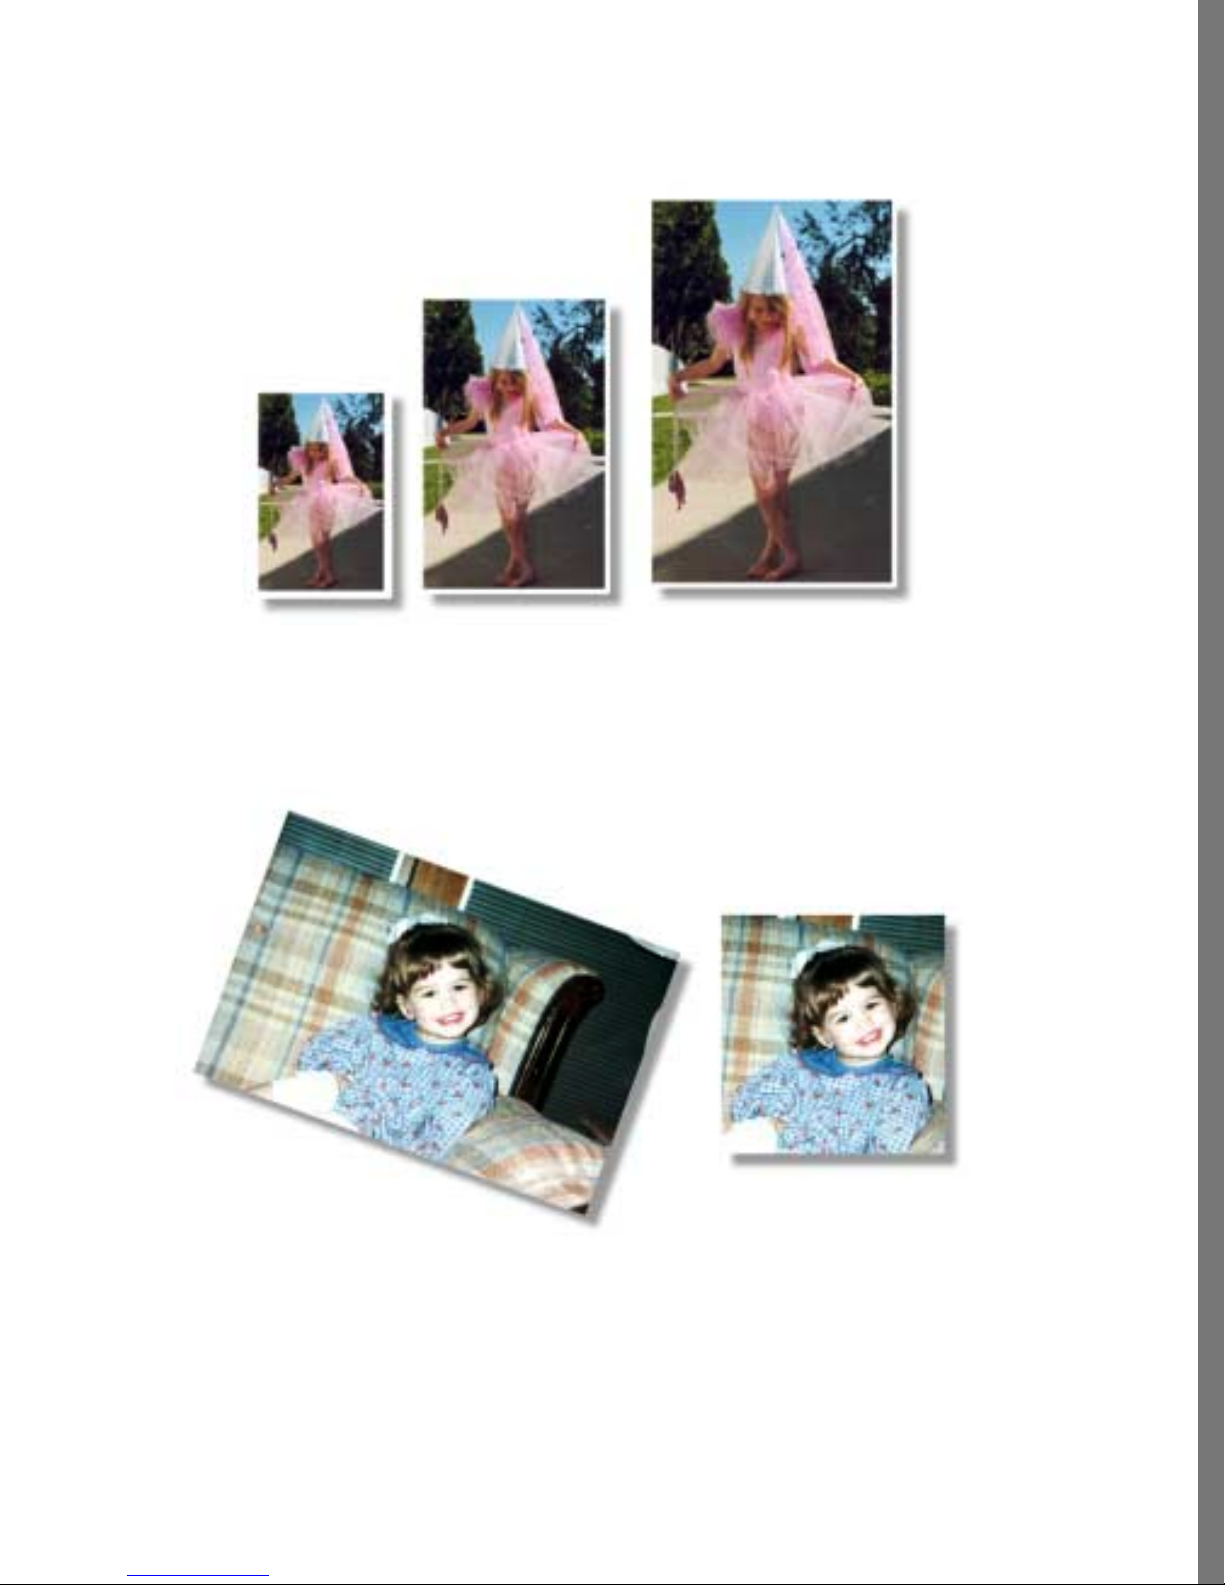
Rotating and Sizing Photos
Rotating Photos
To rotate a photo:
1 If needed, drag the file you want to use from the Transporter.
2 Choose Image menu > Crop and Rotate.
3 To freely rotate the photo, click the Rotate tool, and place the cur sor on the working
window, but away from the image. The cursor changes into two rotating arrows.
4 Click and drag to straighten the image.
5 Click Apply once you have finished.
54
✤
Press Shift to constrai n the rotation by 15 degrees.
FIXING PHOTOS
Rotating a ph oto.
You can experiment, to rotate your picture half t urns (180 degrees) o r quarter turns (90
degrees). Continue clicki ng until the pictur e is back in its original position. You can also
click the 90 degree r otate tool.
Flipping Photos
To flip a photo
1 If needed, drag the photo you want to use from the Transporter.
2 Choose Image menu > Crop and Rotate, and sel ect Horizontal Flip or Vertical Flip.
55
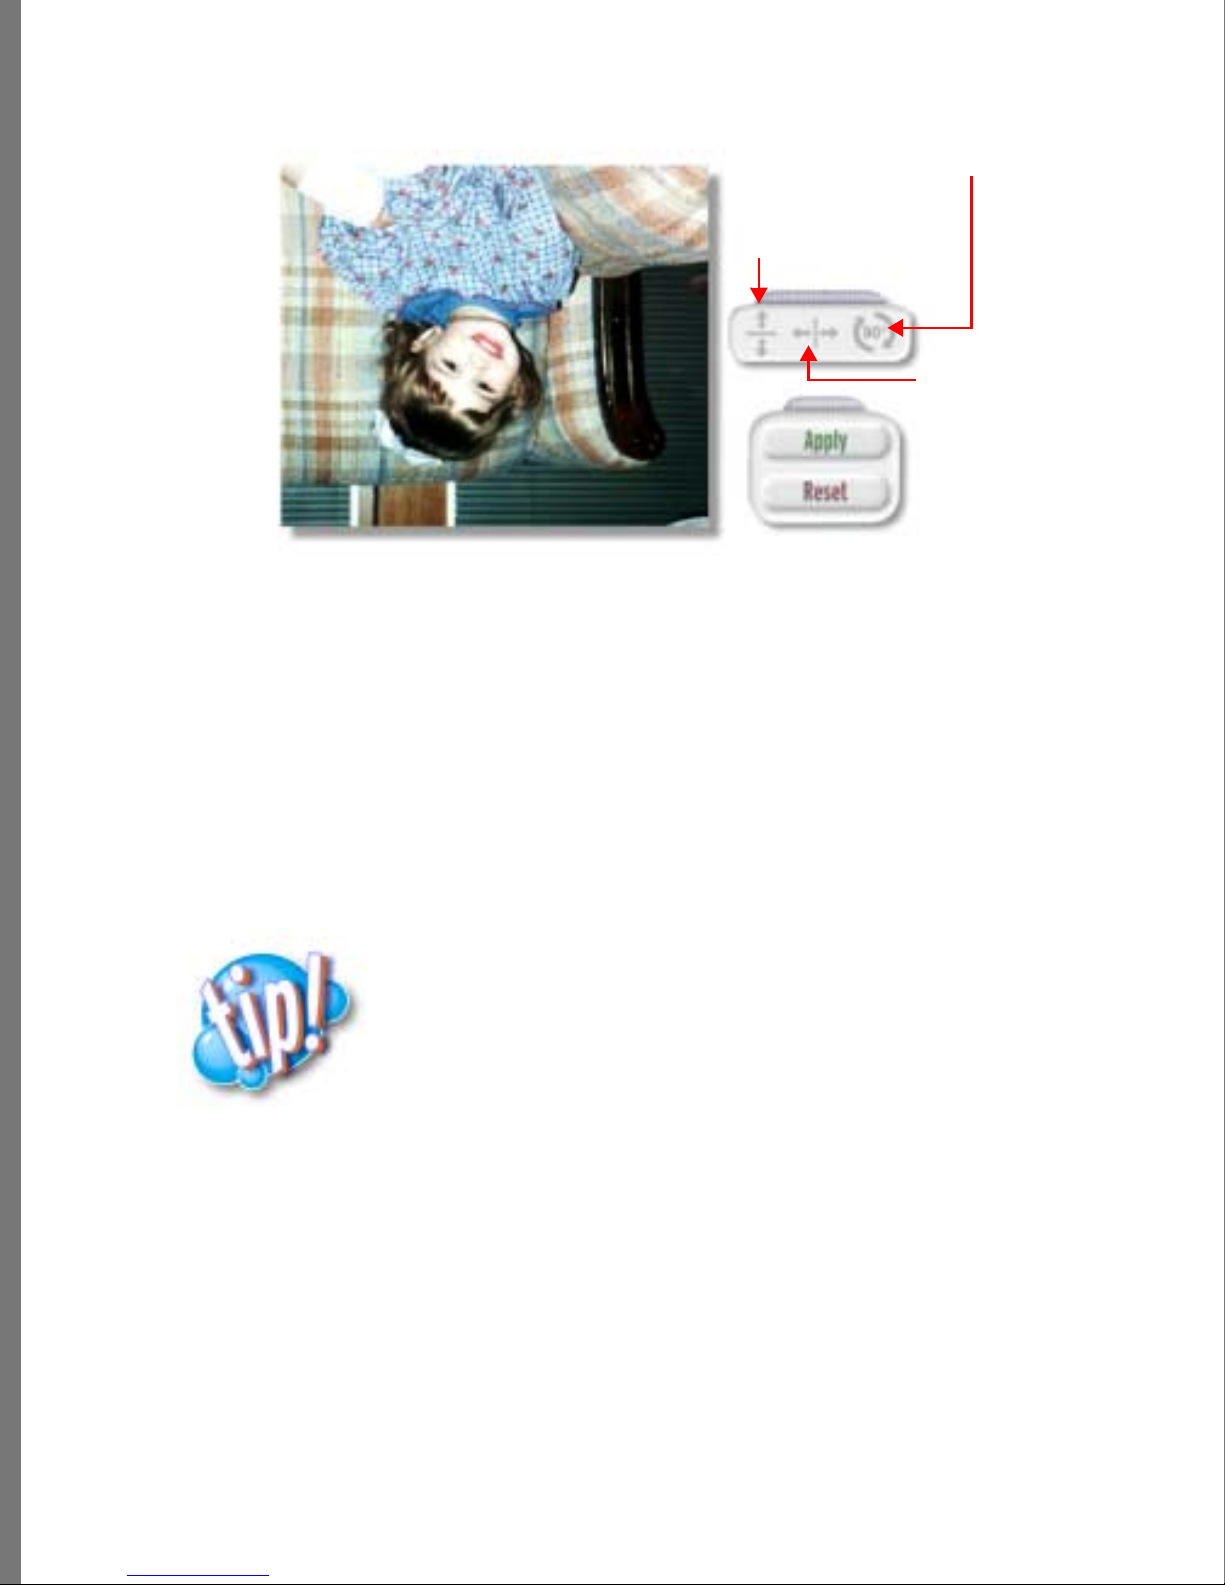
Rotate 90°
Flip
Horizontally
Flip
Vertically
Flipping a photo.
At any time , you ca n click Reset to return the pho to to its origi nal orie ntation.
Resizing Photos
Most of the time you’ ll only need to zoom a p hoto to change how it appears on your
monitor. However, you can also change the size of the photo fil e. If you know where you
want to use a photo, you can resize it for your purpose. For exampl e, if you plan t o use a
photo on the Web or on screen, you’ll want to set it to 72 dpi. If you want to print it,
you’ll want to use 150 or 300 dpi. If you have a higher resolution printer, you may want
to experiment and see whether a higher resolution will work any better.
When you resize a photo, you should size down to reduce the size
of a file, not up. You can’t successfully add information to a photo.
If a photo is too sm all, you are better off scanning it in again at a
higher resolu tio n.
When you resize a photo, you are changing the file size. Depending on the options you
select, you may create a result less pleasing than the original file. If you are uncertain
about resizing a photo, choose Save As and save to a new name instead of Save. Then you
won’t overwrite the original ph oto.
56

To resize a photo:
1 Choose Image menu > Image Size.
2 Select a dpi setting b ased on your intended use.
3 If needed, you can check R esample, then manually set the dimensions an d
resolution.
✤
Check Constrain propo rtions to av oid distort ing the image.
FIXING PHOTOS
The image size dialog box.
DPI stands for dots per i nch and indicates how many dots
per inch the file contains.
57

Cropping Photos
Ever want to use just part of a phot o? I f you’ve ever tried trimming pictures with scissors,
you’ll love using Soap 2 for the job. Soap 2 makes it easy to choose what you want and
throw away the rest. And, you’ll always ha ve a straight edge!
Cropping a photo.
Dad’s the only one who didn’t squint in the group photo? Don’t throw that picture away!
Crop around dad’s head and create what could b e the best por trait he’s ever taken!
• The picture you took at the pet parade has pooch looking small in comparison to all
that background? Crop away that extra background to bring out the subject of your
photo.
• Old photos often have whit e borders. You can easily remove them if desired.
When a picture is rot ated, crop bar s can go outside of the
image area. A crop is relative to the picture and rotates with
the image.
To crop a photo:
1 If needed, drag the photo you want to crop from the Transporter.
2 Choose Image menu > Crop and Rotate.
3 Place the cursor over a vertical crop bar, a horizontal crop bar, and near a corner.
The cursor changes to show you how to move the bars.
58
Place the cursor in the middle of the crop area. It becomes a cross and you can mo ve
the crop area anywhere inside the picture.
4 Click and drag crop bars inwards from the photo’s edge, until the photo is cropped
the way you want it.
Adjusting Color
Soap 2 provides several ways to adjust the color of y our photos. You can adjust the
brightness, contra st, hue, or sat uration di rectly, or use QuickColor. Refer to “Quick Color”
on page 72 for more information.
Adjusting Brightness
Sometimes a photo appear s too bright or too dim. Soap 2 all ows you to adju st the
brightness in your photos.
How Brightness and Contrast Affect your Photos
FIXING PHOTOS
If a photo is t oo bright it may look unreal, as if you t ook a photo while visiting a
Technicolor world. If ther e isn’t enough contr ast, the phot o will looked washed out or
flat, or it may look dark. There isn’t a wide variation of tones used throughout the image.
Problem photos before Soap 2.
59

Lightening or Darkening a Photo
You can adjust the overa ll lightness and darkness of a photo, or you can adjust the
lightness and darkness in a particu lar section. For examp le, only t he area under t he tree i s
too dark.
Adjusting lightness and darkness.
To lighten or darken a complete photo:
✤
Move the Brightness slid er left to li ghten the image, or right to d arken it.
60

Using Paintbrushes and Erasers
If you only need to lighten the area under the tree, you can do that by using the
paintbrushes or erasers. If you are trying to slightly adjust a specific section of a photo,
that is known as “nudging.”.
FIXING PHOTOS
Smearing an effect.
To lighten part of an image:
1 If needed, drag a photo from the Transporter.
2 Choose Image menu > Effects, and choose Color and Tone.
3 Click the Brush icon to display the brush tools.
4 Adjust the Brightness slider and the opacity slider.
5 Select a paintbrush to apply the effect (or the Eraser to remove part of it), depending
on the size of the area you want to change.
6 If needed, you can nu dge (or smear) the effect with Hand tool.
Making small adjustments usually produces more realistic
results than large changes. Try adjusting the opacity after
you have made an adjustment to hue, saturation, or contrast.
61

Softening and Sharpening Effects with the Water Drop and Icicle
Sometimes you need to soften or sharpen a particular effect. Softening blurs the effect
slightly, allowing unmasked areas of the pho to to stan d out more. Sharpening in creases
the edges of the effect in areas where it is applied. For example, you can use the Water
Drop to soften the area where you changed color of the foliage to make the effect look
more natural, or you can use the Icicle to sharpen the edge where you applied an effect.
You can also soften sharp lines such as the edges of a building.
To soften with the Water Drop:
1 Select the Water Drop tool from the workspace.
2 Adjust the brush size if needed.
3 Brush the effect area you want to soften.
You can brush over the same area several times to intensify t he effect.
Softening with the Water Drop.
62
To sharpen with the Icicle:
1 Select the Icicle tool from the workspace.
2 Adjust the brush size.
3 Brush the effect area you want to sharpen.
You can brush over an area to sharpen t he edges more.
FIXING PHOTOS
Sharpening the ed ge of an effect.
63
Lighter or Darker Shadows, Highlights
Sometimes you want to l ighten or darken existing shadows o r take the sheen out of
highlights.
Adjusting the shadows.
To adjust shadows:
1 If needed, drag a photo from the Transporter.
2 Choose Image menu > Effects, and choose Color and Tone.
3 Adjust the Brightness slider and the opacity slider to affect the entire image.
4 To change part of the image, click the B rush icon to display the br ush tools.
5 Use the paintbrushes or erasers to brush over the area you want to change.
64

Adjusting Contrast
Contrast refers to the range of grey tones cont ained in a photo. A photo with high contrast
has more white and black (and less grey tones) while a low contrast photo displays less
variation. Sometimes this is described as “muddy” or flat. If the lightest and dar kest
colors are close to each other, a photo may app ear to have higher con trast than a photo in
which other tones separate the extreme colors.
FIXING PHOTOS
Changing the contrast.
Increasing or Decreasing the Contrast
Each of the images shown below could be improved by changing the contrast. One needs
more contrast while the other needs less. Sometimes the li ghting or colors in an image
can cause it to look murky. Increasing the contrast makes the darker colors d arker and t he
lighter colors lighter. Contrast helps objects st and out from t he background.
65
More and less contrast in the same image.
To increase or decrease contrast:
✤
Move the Contrast slider left to increase contrast or to the right t o decrease it for the
entire image.
✤
Click the drawer tread to v iew the contro ls for adju sting highlight s, mid-tones, and
shadows.
✤
Adjust the sliders as needed.
Using Paintbrushes and Erasers
Sometimes you only want to change the contrast in a certain area of the image. You can
do that using the paintbrushes and erasers.
To use paintbrushes and erasers:
1 After you have adjusted the B rightness slider, select the paintbrush o r eraser you
want to use .
2 If needed, adjust the brush size (or eraser size).
3 Paint or erase over the area where you want to adjust the contrast.
66
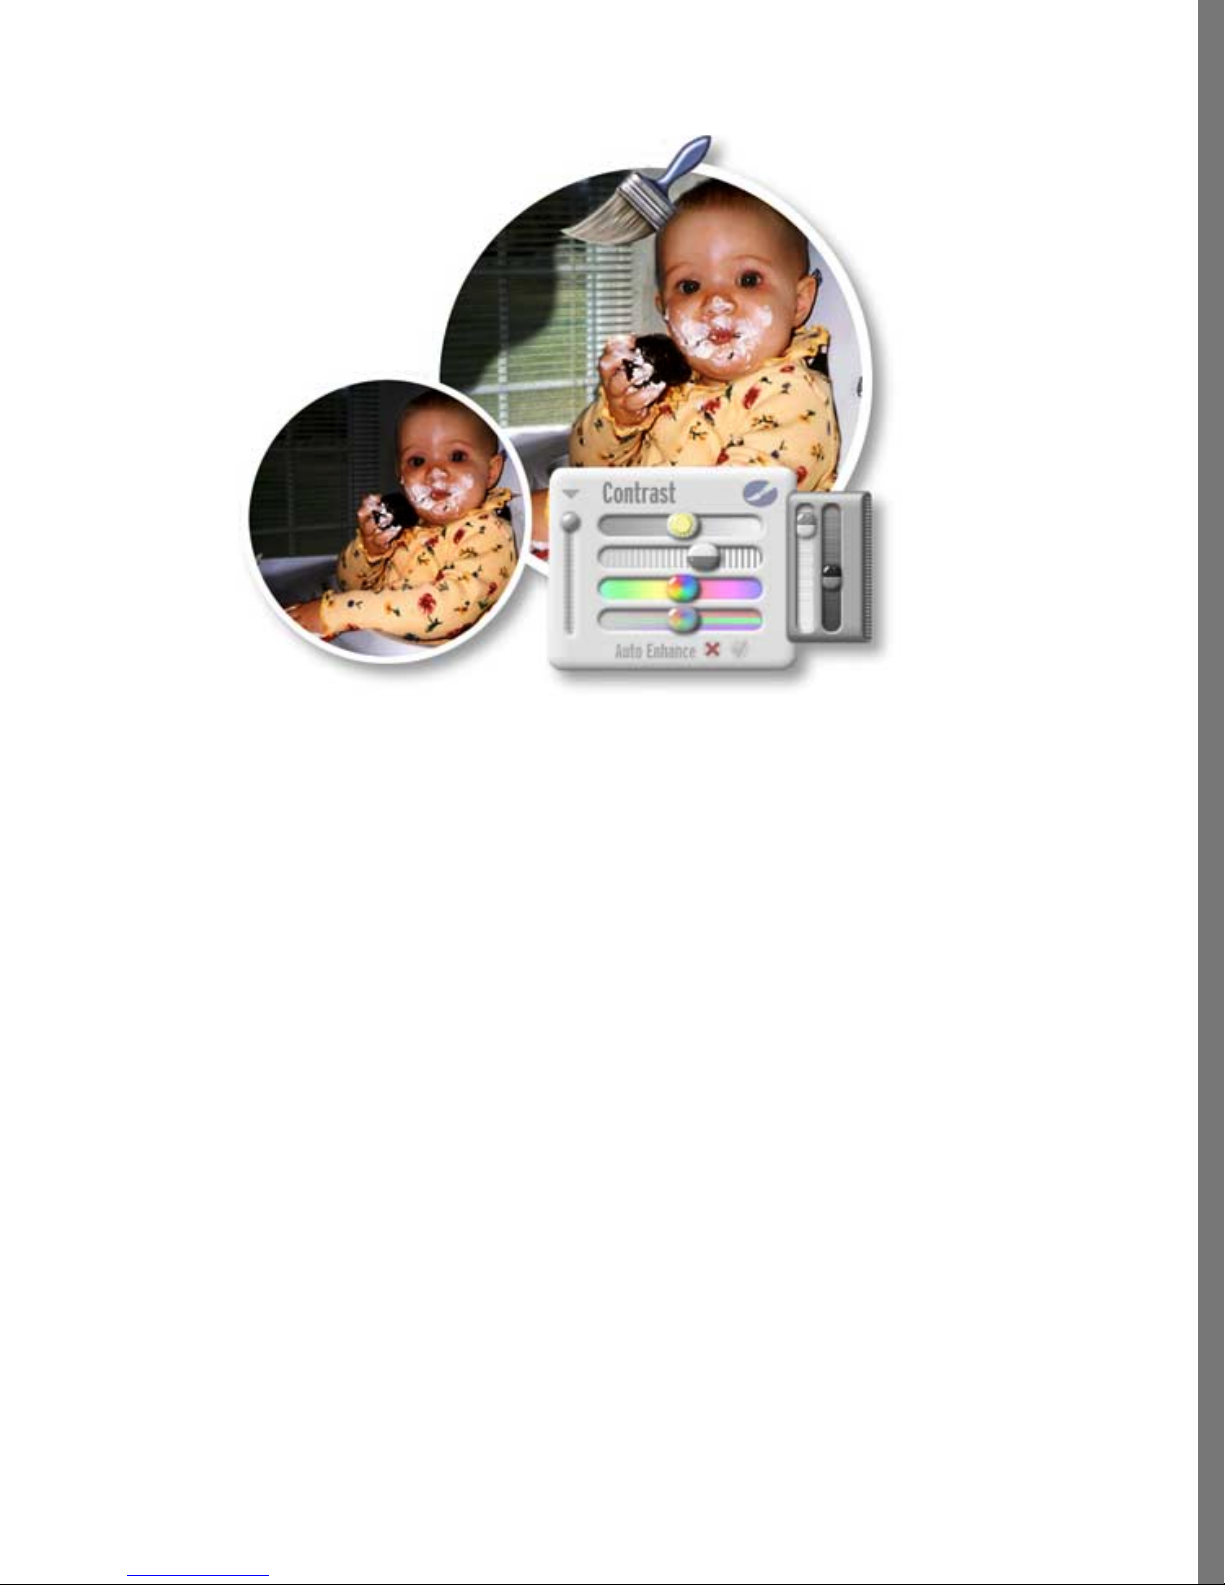
FIXING PHOTOS
Adjusting a correction.
Flattening Towards Grey
If you have a picture that contains very bright pale colors and very dark colo rs, you can
reduce the color range by flattening them towards grey. The final shade depends on the
average brightness of the image.
To flatten towards grey:
1 If needed, drag a photo from the Transporter.
2 Choose Image menu > Effects, and Color and Tone.
3 Drag the Contrast slider to reduce the contrast between the lightest and darkest
colors in your pho to.
67
✤
You can create a black and white photo from a color image by moving the luminosity
slider, and then adjust the contrast as needed.
Adjusting the contrast.
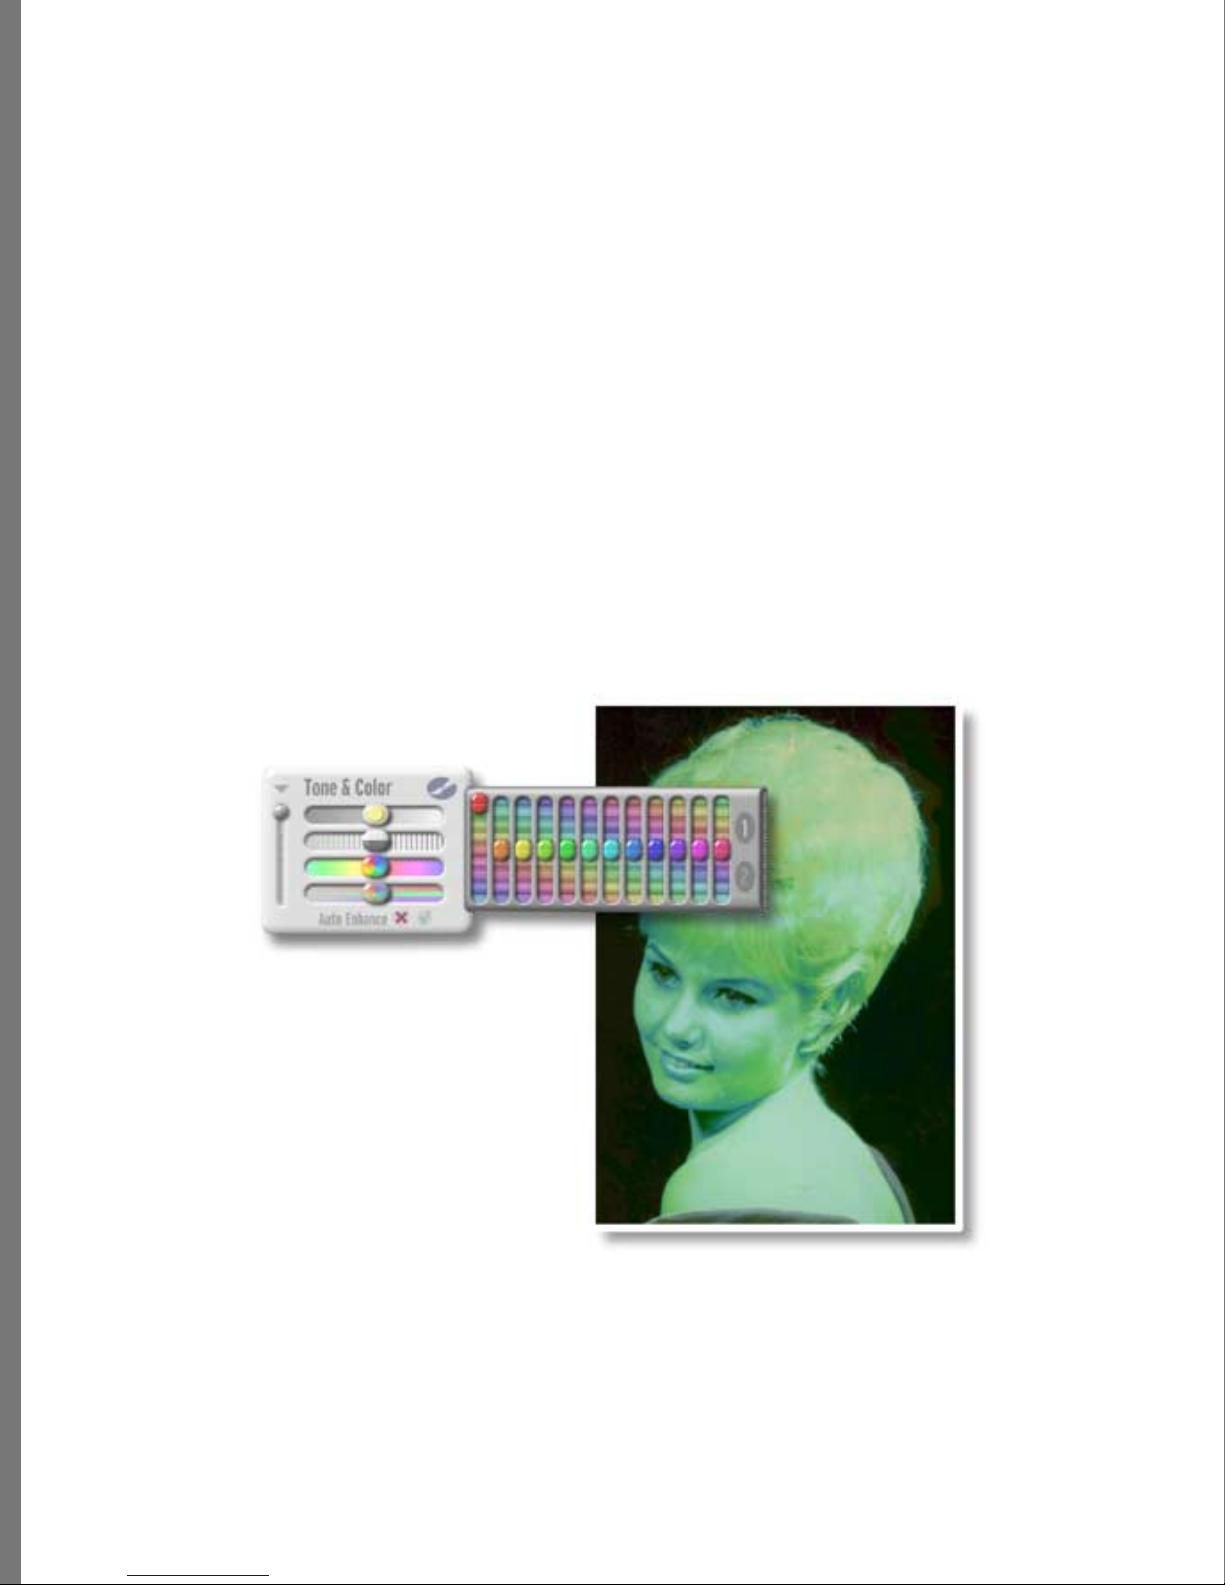
Changing Photo Colors
Soap 2 makes it easy to change phot o colors. You can shift the entire color spectrum in a
photo to correct a problem with the or iginal image. Or, you may want t o change the color
of Benjamin’s car, or Brian’s hair. Experiment and discover some out-of-t his-world
effects. Then use Undo if you don’t like the results.
How Color Effects Your Photos
Time of day, type of film, subject matter, even air temperature all effect color. Color in
turn effects your photos. The same subject, Benjamin’s car for example, taken at different
times of day and in d ifferent lighting conditions will appear to be different col ors.
68

What is Hue and Saturation
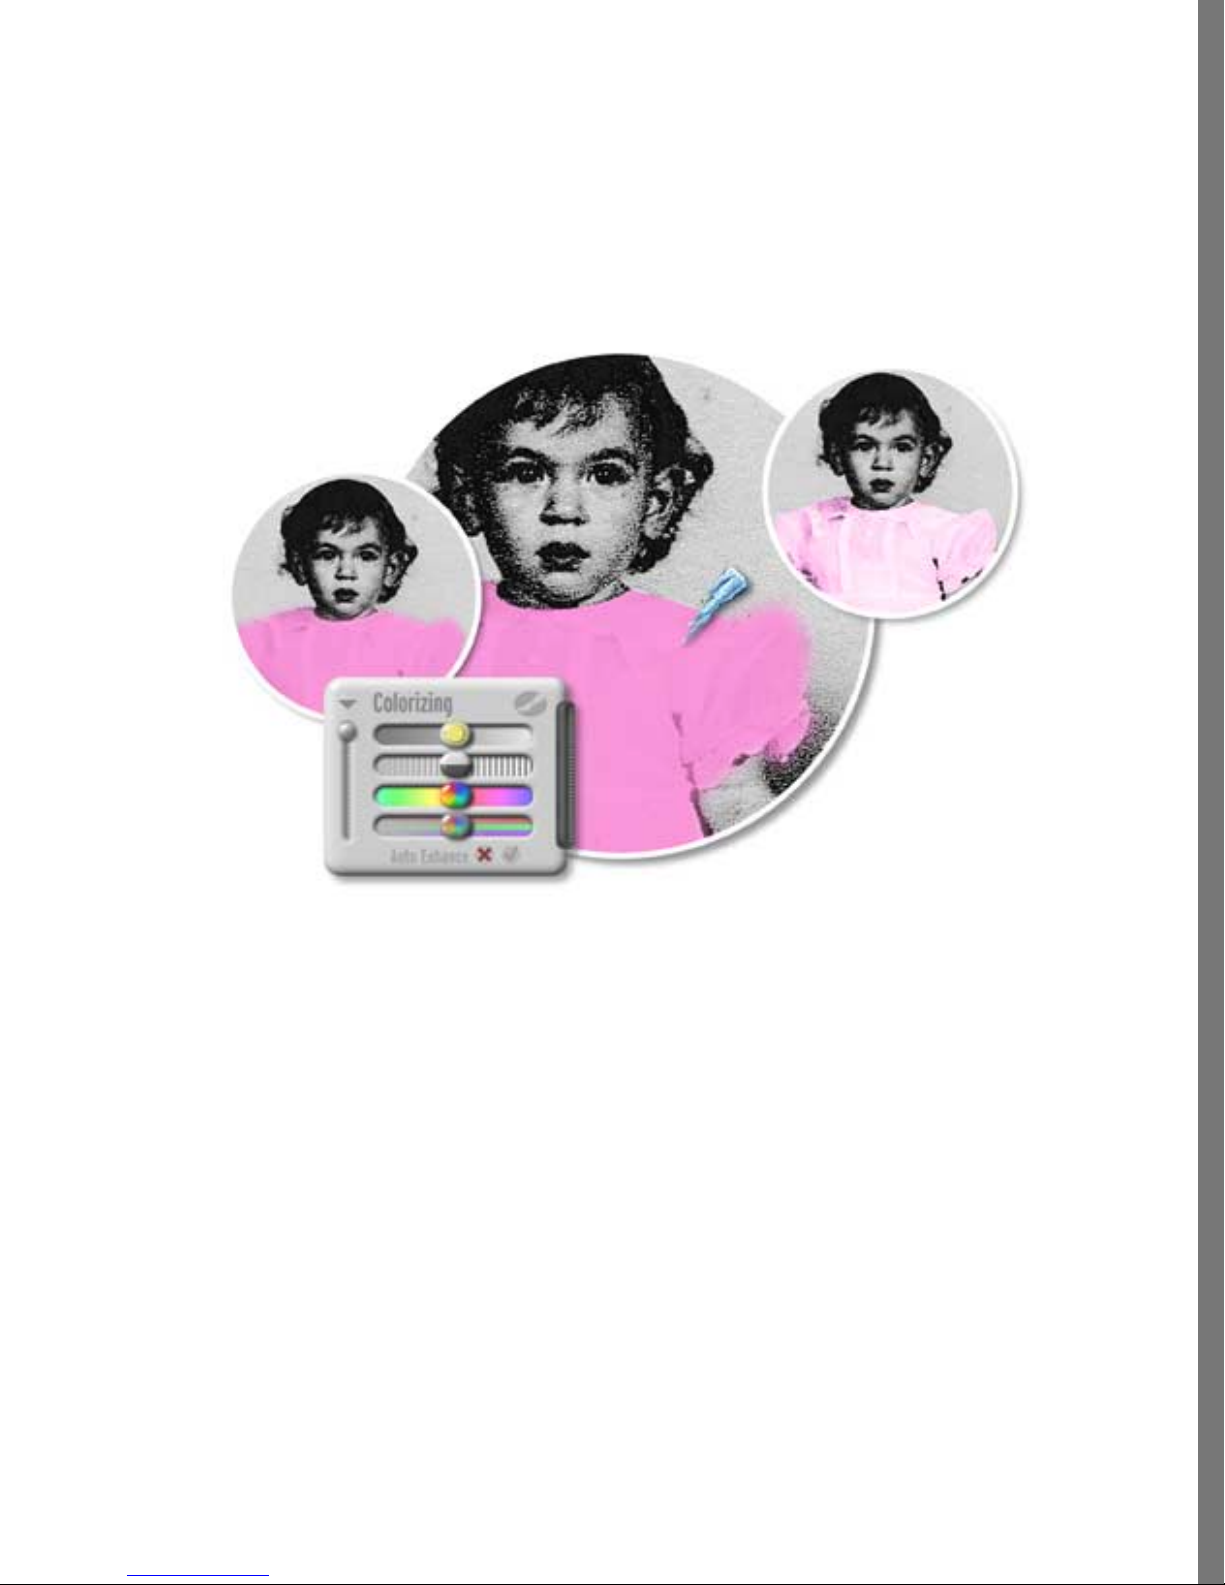
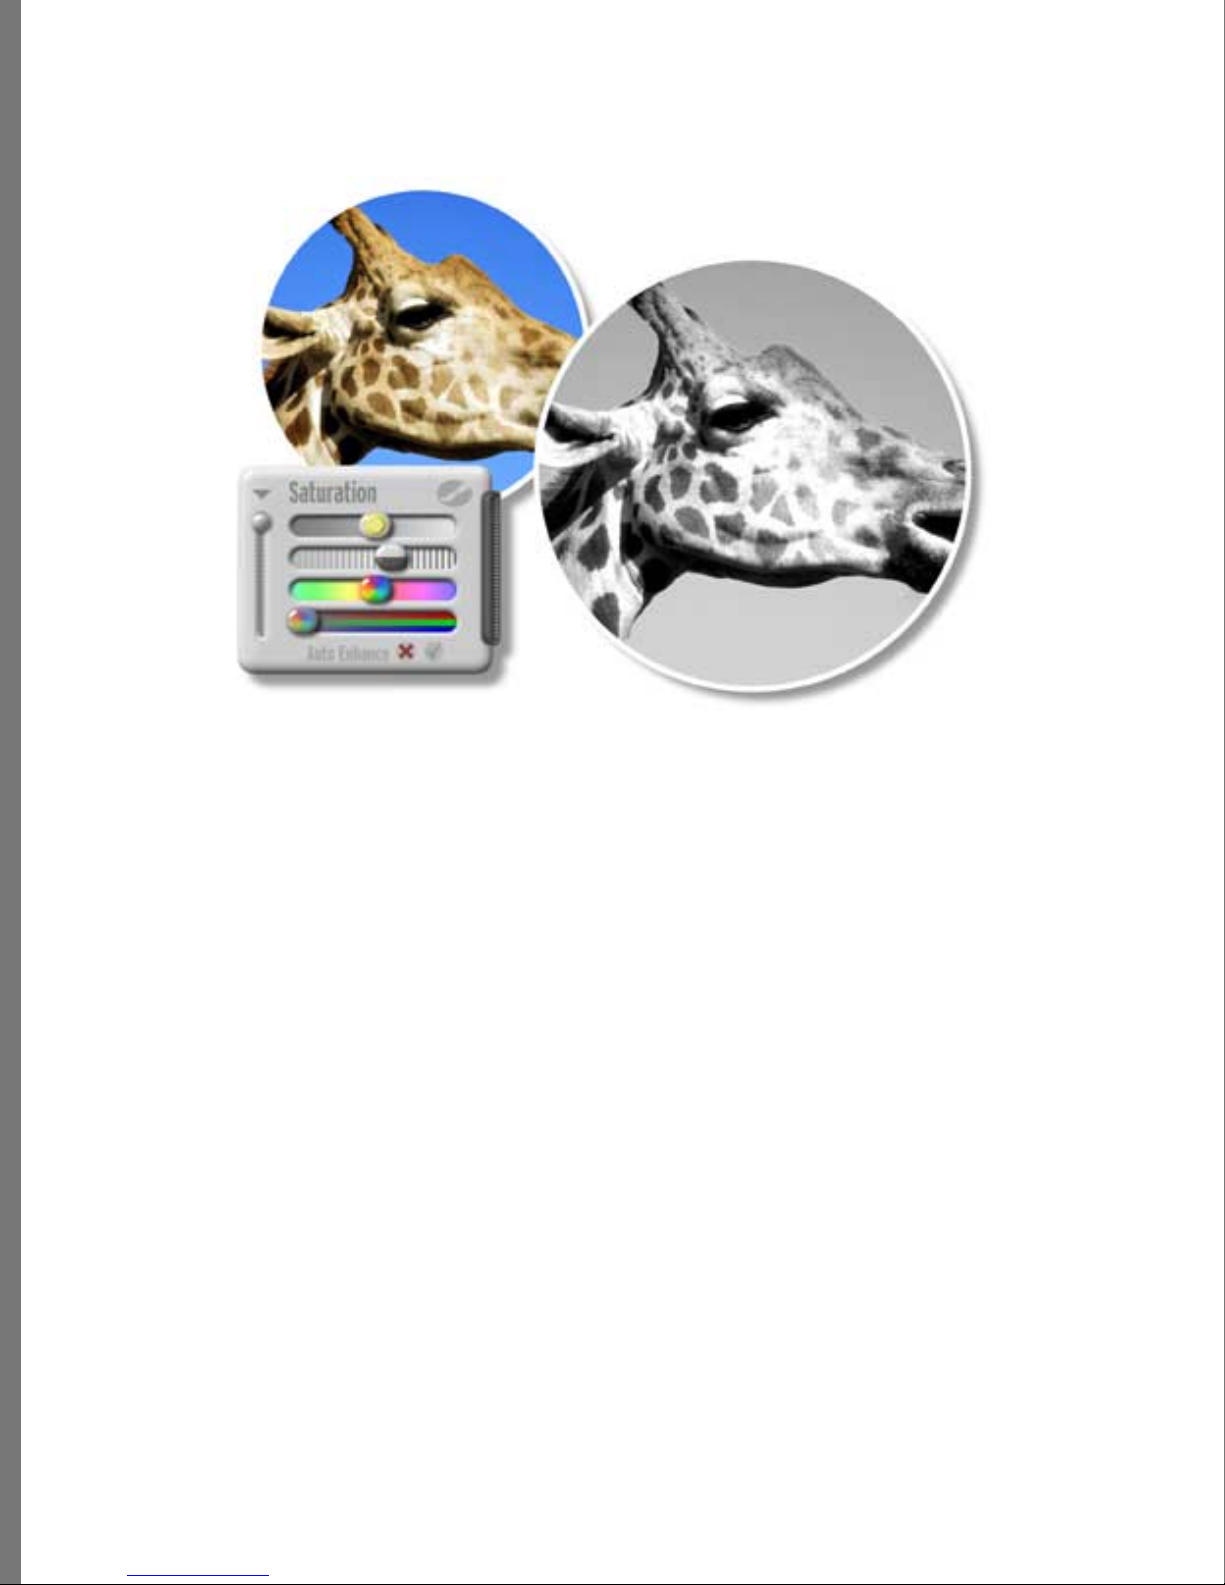
Hue shifts the entire color spectrum like the “Tint” control on a color television.
Saturation controls the intensi ty of colors. A black and white or monochrome photo has
no saturation. Full saturation can create a wild effect.
FIXING PHOTOS
Color controls.
Shifting the Color Spectrum
When experimenting with colors, you can shi ft the col ors for the en tire image, or yo u can
brush over an area to select it, and localize your changes to that area. Both methods can
be used for either subtle or wild results.
To shift the co lor spectrum :
1 If needed, drag a photo from the Transporter.
2 Select Image menu > Effects, and Color and Tone.
3 Drag the hue slider to shift the colors.
4 To affect part of the image, click the brush to display t he brush tools. Then select a
tool to specify the area where you want to app ly the color shi ft.
69
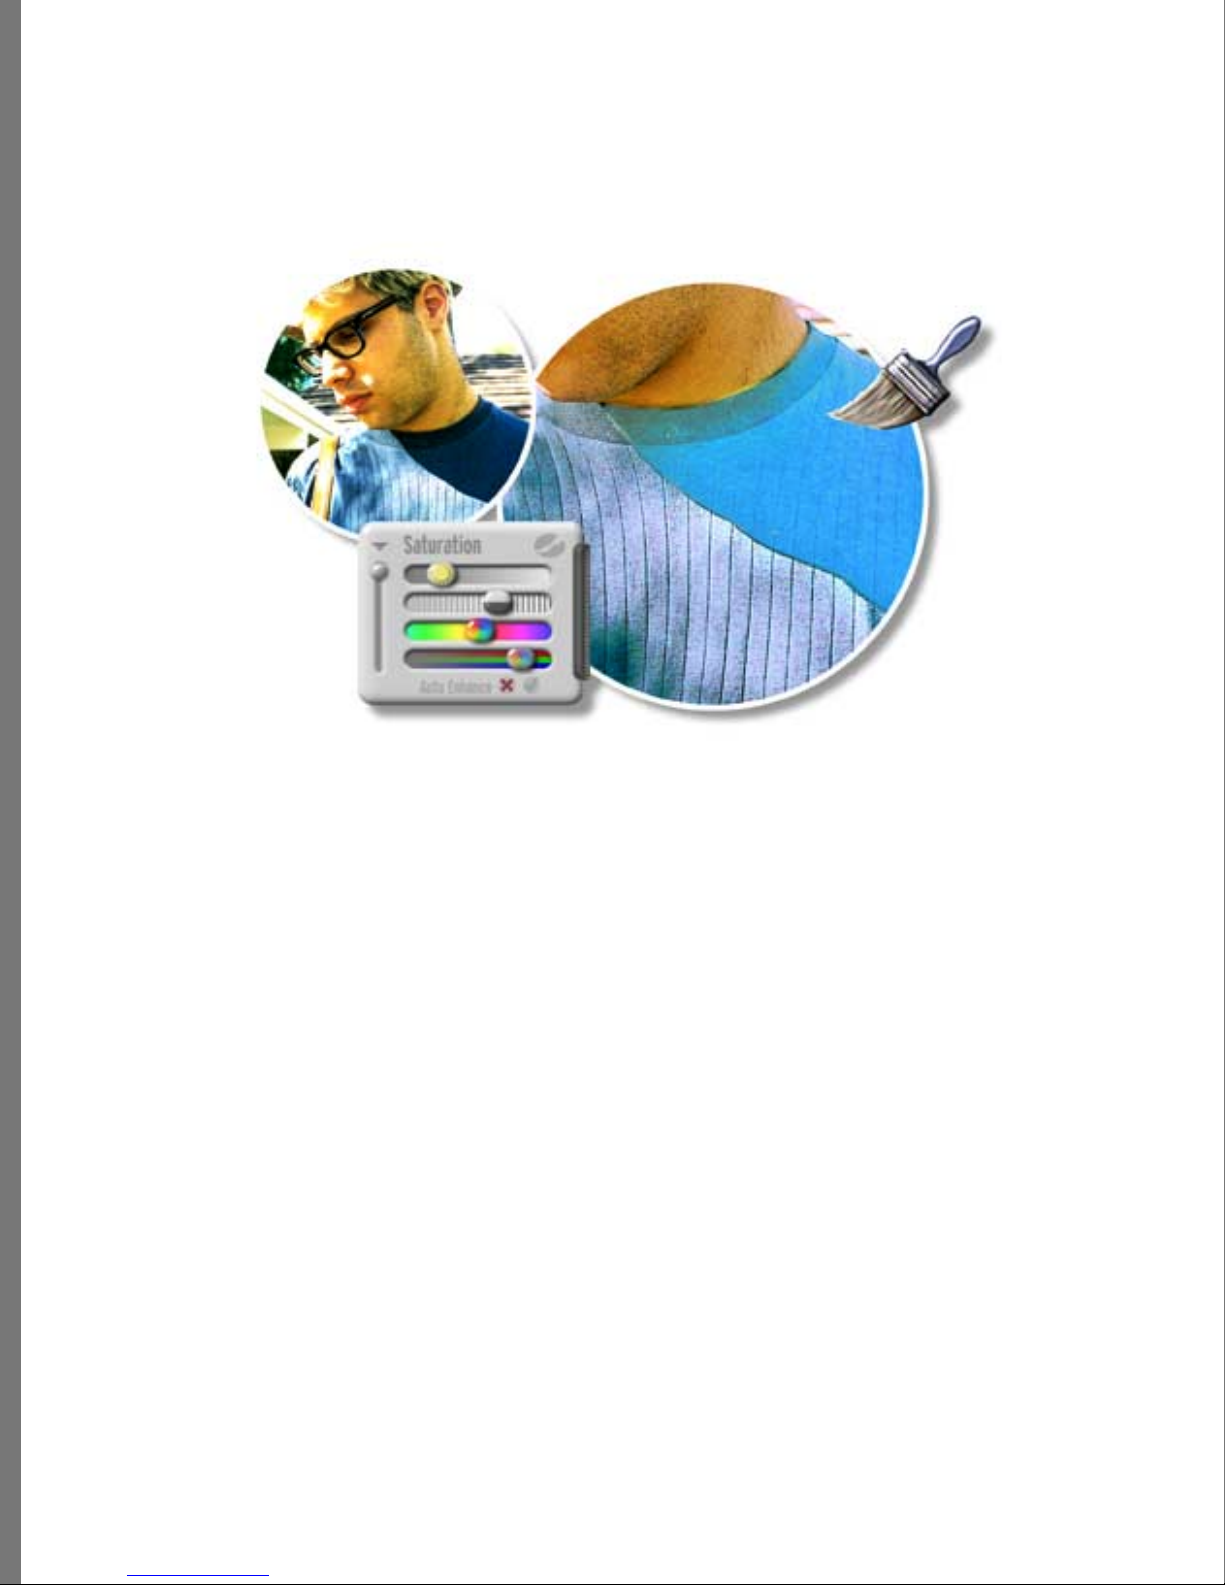
Making Pale Colors Intense
You may have a good photo except that most of the colors are too pale. You can make pale
colors intense by increasing the saturation of the co lor. You can also mute int ense colors
the same way.
To make pale colors intense:
1 If needed, drag a photo from the Transporter.
2 Select Image menu > Effects, and Color and Tone.
3 Drag the saturation slider to adjust the color of th e entire image.
4 To change specific areas, click the brush to display the brush tools.
5 Select a brush tool and brush the areas where you want to intensify the color.
Shifting specific colors
Sometimes you may want to ligh ten or darken a particular color in your photo. In additi on
to adjusting colors, you can use this process to play with th e colors in y our photo and
make it look unread, surreal, or out of thi s world. You can change the entire image, or use
the brush tools to apply an effect to a specif y area of your photo.
Adjusting the red balance of a ph oto .
70

To lighten or darken colors:
1 If needed, drag a photo from the Transporter.
2 Select Ima ge menu > Effe cts, and Color and Tone.
(If desired, click the brush to display and use the brush tools.)
3 Drag the Hue slider to adjust the col ors. If you do n’t see the effect you want, cl ick
the tread to open the Color correction drawer.
4 Select the slider that c orresponds to the color you want to adjust . For example, t o
adjust color red, choose the red slider.
5 Drag the slider to adjust the red areas of t he photo.
To lighten or darken a selection:
1 Use the Magic Mask to select the area yo u want to change. Press S hift+click to add
to your selection if need ed.
2 Then follow the steps listed above.
Automatically Fixing Photos
FIXING PHOTOS
Soap 2 allows you to automatically fix your photo with ju st the click of a button. Some
problems are better suited to automatic fixing than others. These include correcting
exposure problems and color balance. Photos that have regions of both bl ack and white
show the best results.
Overall Exposure, Faded Images
Even the best photogr aphers can create poor ly exposed phot os. Or, you may be working
with an older photo whi ch has faded over time. Soap 2, allows you to easily adjust the
exposure, and restore faded images to their earlier glory.
An example of Auto Enhance.
71
Quick Color
You can rapidly adjust the color sett ings by using Qui ckColor. Choose a corrected image
and view it next to your original. You can stop there, or apply that image and then correct
it further w ith the colo r tools.
QuickColor.
To adjust color:
1 Click the QuickColor shor tcut butto n.
2 Click the color choices to view them in th e larger image next to your o riginal image.
3 If needed, click downward triangles located above the sets of left side and right side
choices, then choose the setting you want to adjust such as Brightness, Contract, or
Red Balan ce.
4 If needed, click the Zoom tool and zoom or pan on the larger images to view specific
areas of your image.
5 Once you’ve selected a color choice, click Appl y, and the changes are applied to
your photo.
6 If needed, you can adjust the color changes further using the Color and Tone tools.
72

Color Casts
Sometimes colors just look wrong, especially when one color dominates the picture
(called a color cast). Soap 2’s Auto Enhance button can sometimes fix these kinds of
flaws, with a single click. Try it to see what it does for your picture. However, it doesn’t
work well on images that don’t have black and white areas.
If photos were correctly exposed or don’t have a color cast,
the results of using the Auto Enhance button may be
minimal. If the photo doesn’t have areas of black and white,
it can make the image look worse.
To Auto Enhance a photo:
1 If needed, drag the photo you want to enhance from the Transporter to the working
window.
2 Use the Zoom and Pan tools if needed to view a specific area of the photo.
3 Choose Image menu > QuickColor.
FIXING PHOTOS
4 Click Auto Enhance, then move the P an control around t o see changes to other parts
of the image.
5 Adjust the results with the color tools if needed .
6 Click Apply to apply those settings to the picture, or click Reset to cancel.
Color lightness and dar kness, color h ues, color in tensity, and how dark and light tones
appear all combine for overall color.
Before and after Auto Enhance.
73
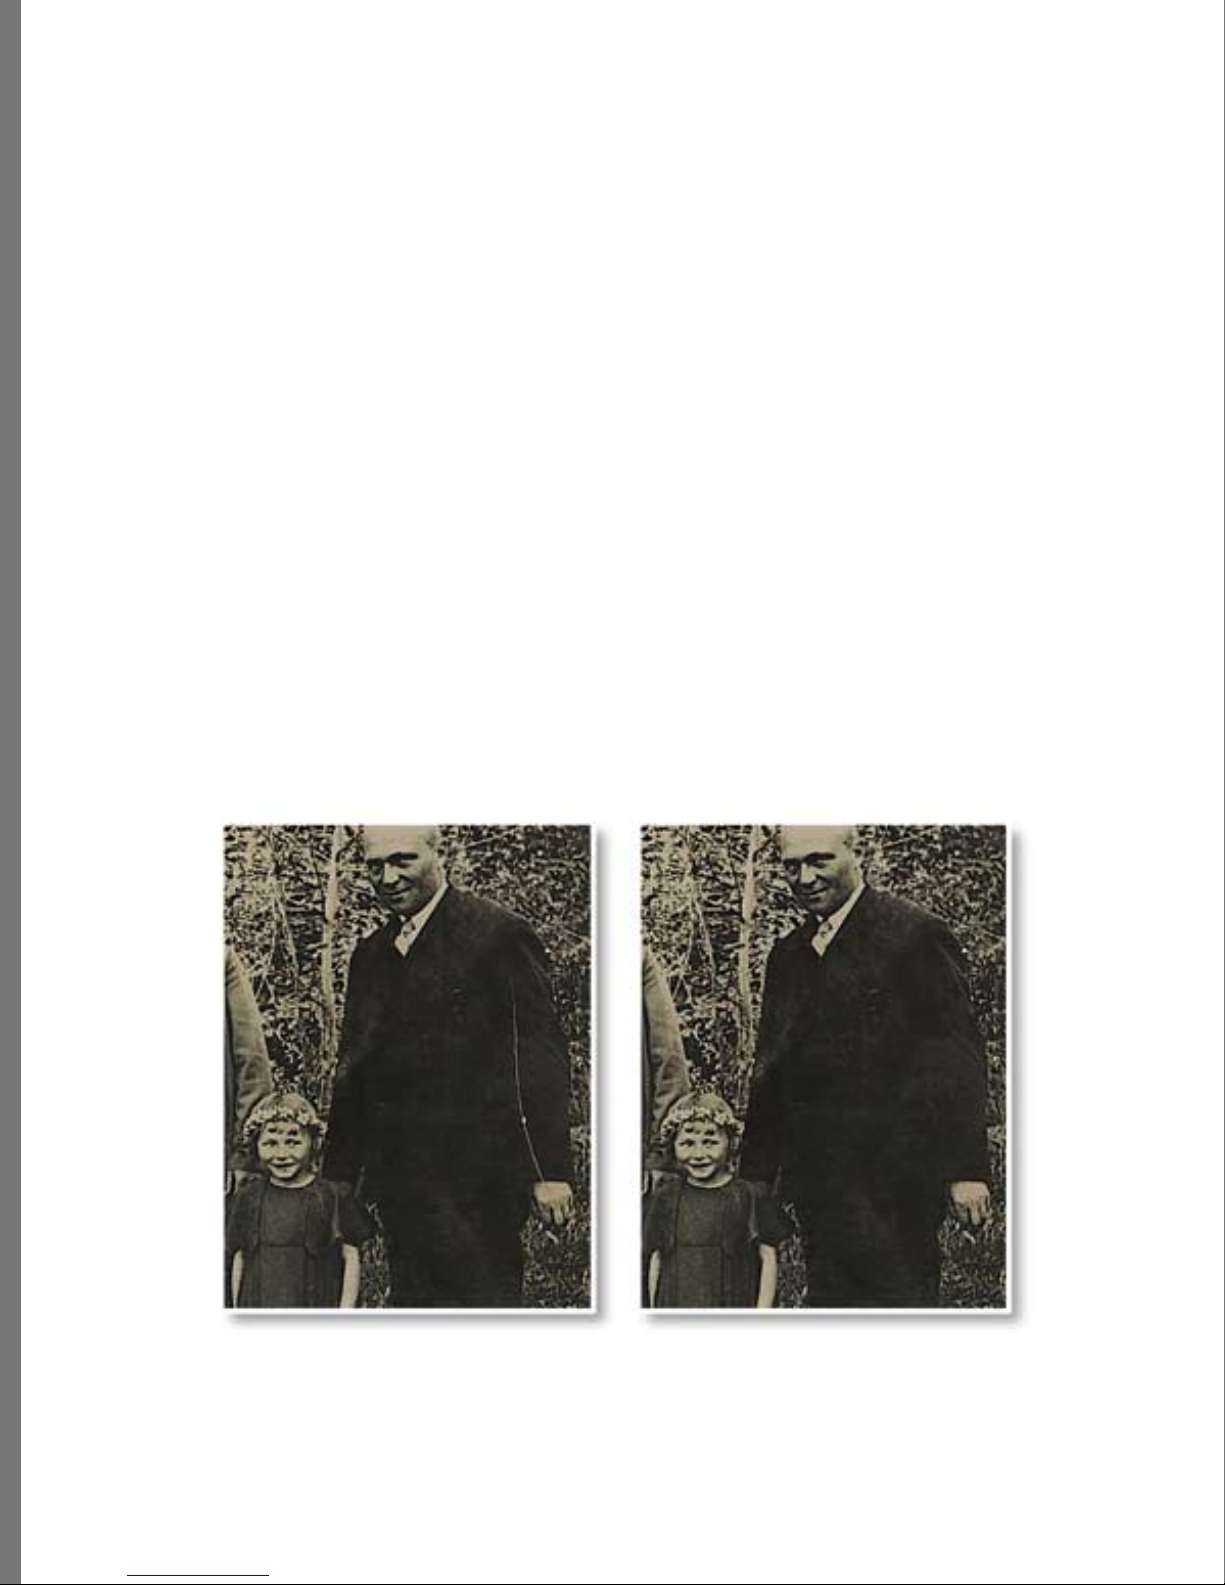
Healing Flaws
Working with family genealogy can be fun, but old photos have their own set of
problems. Imperfections li ke dust, water spots, rips, or cr eases can keep you from
enjoying and sharing t hat treasured weddi ng shot of Aunt Minnie and Uncle Phil.
New photos sometimes make blemishes or wrinkles seem too obvious, or distracting
detail can take away from the main subject of a picture. Details can come out soft or
fuzzy, because of poor focus or lighting conditions. Photos taken with a flashbulb can
make your subject’s eyes look red or unnatural.
Healing Blemishes, Wrinkles, Dust Spots, Rips, and Creases
Soap 2’s Heal tool fixes small imperfections almost magically. Wit h a click or a stroke of
a brush, the Heal tool covers flaws with pixels “pulled in” from sur rounding areas.
(Pixels are the basic drawing unit of computers, sort of li ke those “dots” that make u p a
picture printed on newsprint.) You can even use the Heal tool to perform an instant “face
lift!”
Using the Heal Effect
Small, medium, and large correction controls tells So ap 2 to pull in p ixels from close or
farther away from a flaw. The size of the brush you use det ermines the size of the area
you heal as you paint.
Before and after Heal.
74

To use the Heal effect:
1 If needed, drag a photo from the Transporter.
2 Select Imag e menu > E ffects, and Heal.
3 If needed, you can click the brush in the Heal effect control and use the Brush
controller to set the brush size. (Refer to “Brush Controller” on page 52 for details.)
4 Click a small spot to heal it , or click and drag along a scratch or tear, following the
path of the blemish.
FIXING PHOTOS
Healing an image.
5 Use small or large brush strokes as needed depending on the type of flaw you are
correcting. You can also adjust the effect range using the slider at the bottom of the
Effect tool.
6 Adjust the opacity of the effect.
7 If you make a mistake, u se the erase tool to fix it.
8 Choose Apply once you are sat isfied with your results.
Very wide rips or missing pieces of a photograph may requi r e
combining the Heal, Clo ne, and Smooth tools. If you heal a
large flaw and it leaves a fuzzy area, use Clone to make it look
better.
75

Fixing Fuzzy Areas after Healing
To fix fuzzy areas after healing:
1 If needed, drag the photo you want to use from the Transporter.
2 Choose Image menu > Effects, and select Clone.
The Image Clone control di splays. A copy of your image d isplays along with the
puck. You can zoom or pan the image as needed to locate the area you want to use as
a source for cloning.
Select an area that matches the texture surround ing the healed area. You can clo ne
this texture and apply it over the healed area to blend it.
3 Use the puck to select the source area for cloning. (You can use the puck in the
Clone window or directly on your photo.)
4 Use a brush tool to paint the cloned area into your image. If needed, click the brush
in the Clone control to display the brush tools.
A healed area being covered by a cloned area.
76

Smoothing and Sharpening
Sometimes you may want to blu r or smooth par ts of an imag e, or sharpen ot her parts. For
example, you may want to smooth the background of a wedding photo to draw attention to
the bride and groom. Or, you may want to sharpen Mom’s face.
FIXING PHOTOS
Smoothing and sharpening in use.
Using the Smooth Effect
To use the smooth effect:
1 If needed, drag a photo from the Transporter.
2 Choose Image menu > Effects, and choose Smooth.
3 If needed, click the brush butt on to di splay t he brushes. If it is not clicked, the effect
is applied to the entire image.
77

4 Select a brush and brush the areas of the photo that you want to smooth.
The smooth tool.
Setting the Smooth Ratio
To set the smooth ratio:
1 If needed, drag a photo from the Transporter.
2 Choose Image menu > Effects, and choose Smooth.
3 Adjust the smoothness and opacity usi ng the sliders.
4 If needed, click the brush icon to display the brush tools. Otherwise the effect is
applied to the entire image.
✤
The slider on the bottom adjusts the Smoothness.
✤
The slider on the side adjusts the opacity.
Using the Sharpen Effect
To use the sharpen effect:
1 If needed, drag a photo from the Transporter.
2 Choose Image menu > Effects, and choose Sharpen.
3 If needed, click the brush button to display the brushes. If this is not clicked, the
effect is applied to the entire image.
78

4 Select a brush and brush the areas of the photo that you want to sharpen.
FIXING PHOTOS
Sharpening an image.
Setting the Sharpen Ratio
To set the sharpening ratio:
1 If needed, drag a photo from the Transporter.
2 Choose Image menu > Effects, and choose Sharpen.
3 Adjust the sharpness and op acity using t he sliders.
4 If needed, click the brush image t o display the brush too ls. Otherwise the effect is
applied to the entire image.
✤
The slider on the bottom adjusts the sharpness.
✤
The slider on the side adjusts the opacity.
Removing Red Eye
Red eye occurs when the light source (typically a flash) reflects off of the back of the eye.
To avoid red eye when taking photos, try havi ng the subj ect look to the sid e of the camera
instead of directly at it. However, if the only picture of the entire family that doesn’t
show Sally sticking her tongue out, makes everyone else look like Satan ’s minions, don’t
despair. Red eye can be easily corrected.
79

Using the Red Eye Effect
To use the Red Eye effect:
1 If needed, drag a photo from the Transporter.
2 Choose Image menu > Effects, and select Red Eye.
3 Choose the eye color you want to use. (Refer to “Choosing an Eye Color” on page 80 for
details.)
4 Use the brush to paint across the eye area.
Removing red eye.
If there is a lot of red in the region of the eye, the Red Eye tool will “correct” that
red area too. You may need t o zoom in to apply the tool on a smal ler area.
Choosing an Eye Color
To choose an eye color:
1 If needed, drag a photo from the Transporter.
2 Choose Image menu > Effects, and select Red Eye.
3 Click to select an eye color choice. Then you can apply that eye color using the
brush.
✤
If needed, click the color wheel to select a custom eye color.
Removing date and time stamps
Most cameras provide a date and time stamp feature. W hile this is handy some of the
time, you can easily remove it.
80
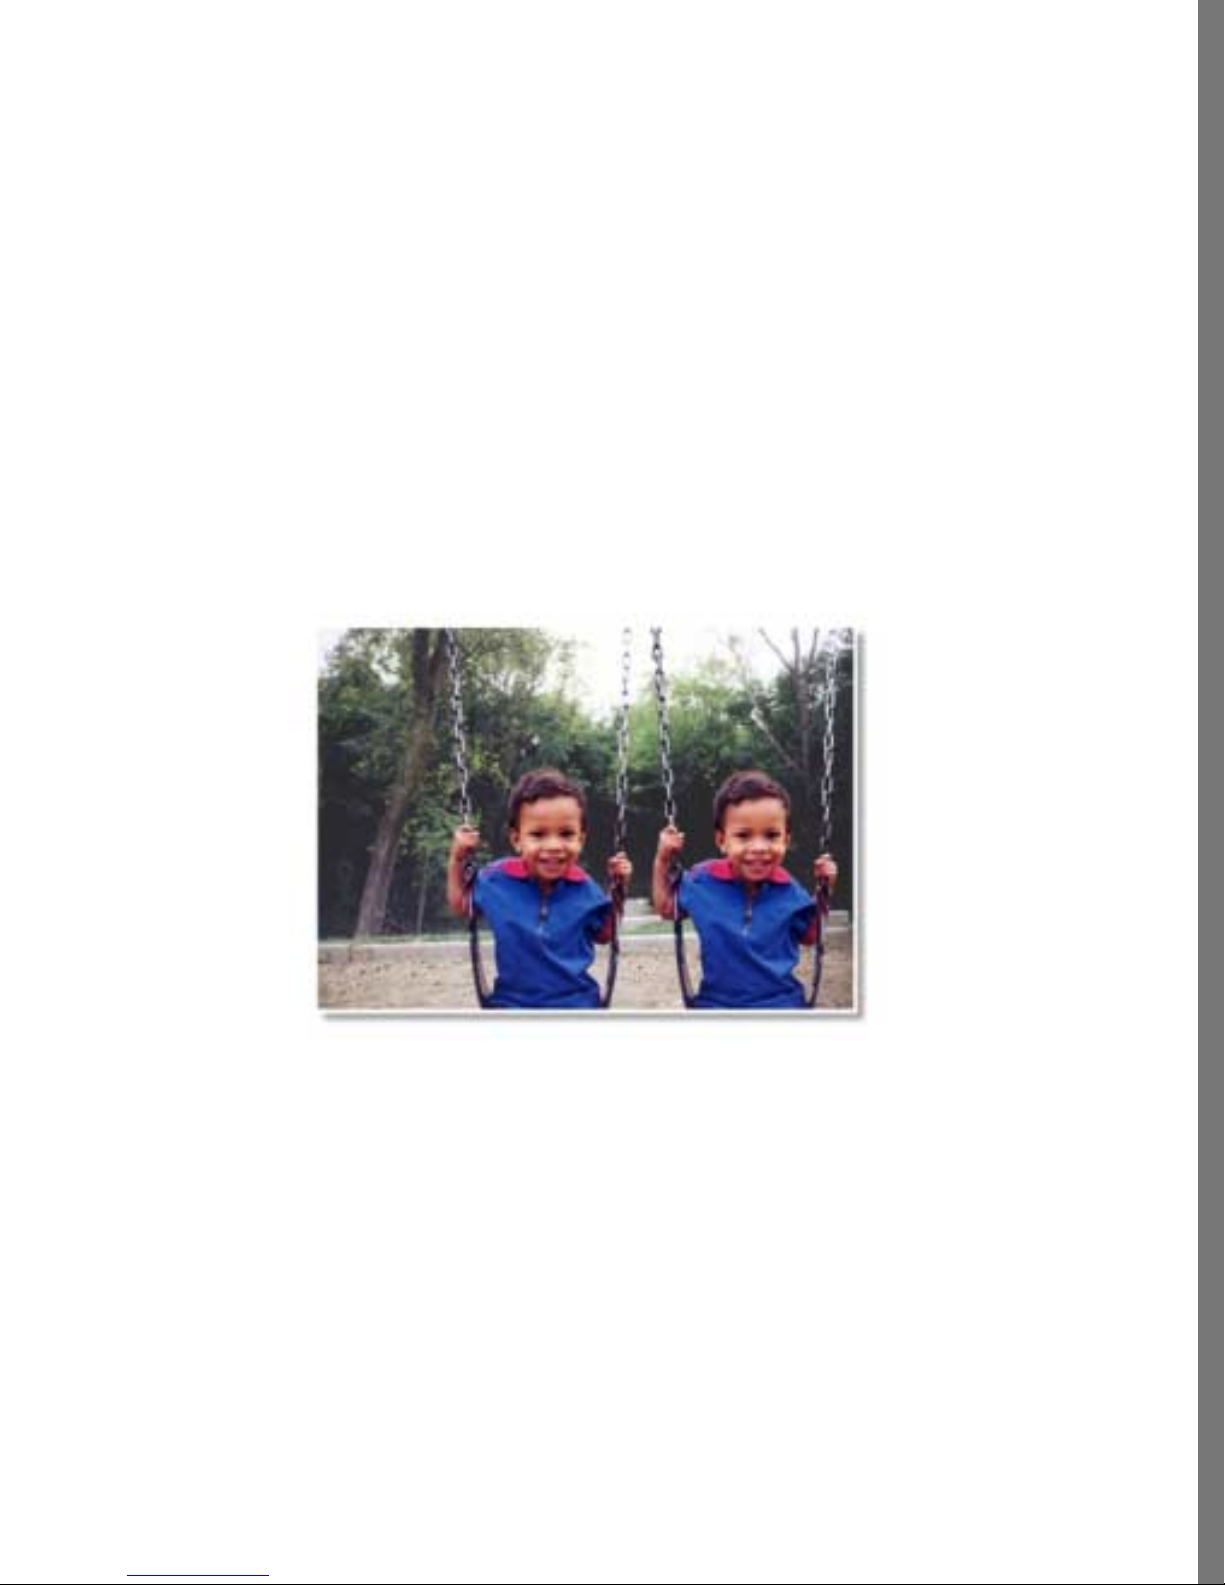
To remove date and time stamps:
1 If needed, drag a photo from the Transporter.
2 Choose Image menu > Effects, and select Heal.
3 Click the brush image to display the Brush controller where you can set the brush
size. (Refer to “Brush Controller” on page 52 for details.)
4 Click the date and time stamp to heal it, or click and drag, following the path of the
date and time stamp.
5 If needed, touch up an area using the Clone tool.
Duplicating ph oto elements
You cou ld you use S oap 2 to make Uncle R obert i nto t wins. You can duplicate any part of
a photo. This process is known as “cl oning” and can be used to fix p roblems in a photo or
to have fun. For example, you can clone your face and place it on top of the body in
another photo. Or, you can clone an area of the clo udy sky and use it to cover up the
power line in another area of the phot o.
FIXING PHOTOS
Changing the weather.
81

What is Cloning?
Cloning is copying pixels from a section of a photo and reproducing them elsewhere.
Use the brush tool along with the Clone co ntrol to clone an image.
Cloning an image.
Cloning between images
If you have two group p hotos and one is perfect except you closed your eyes, and
everyone else blinked in the seco nd one, you coul d duplicate your face from the second
photo and replace your f ace in the first photo.
To clone between images:
1 If needed, drag a photo from the Transporter.
2 Choose Image menu > Effects and select Clone.
The Clone control displays a copy of your image along with the puck.
3 Drag the image from which y ou want to clone from t he Transporter over the copy o f
the original image in the Clone control.
You can zoom or pan the image as needed to locate t he area you want to use as a
source for cloning.
4 Use the puck to select the upper right corner of the source area for cloning.
82
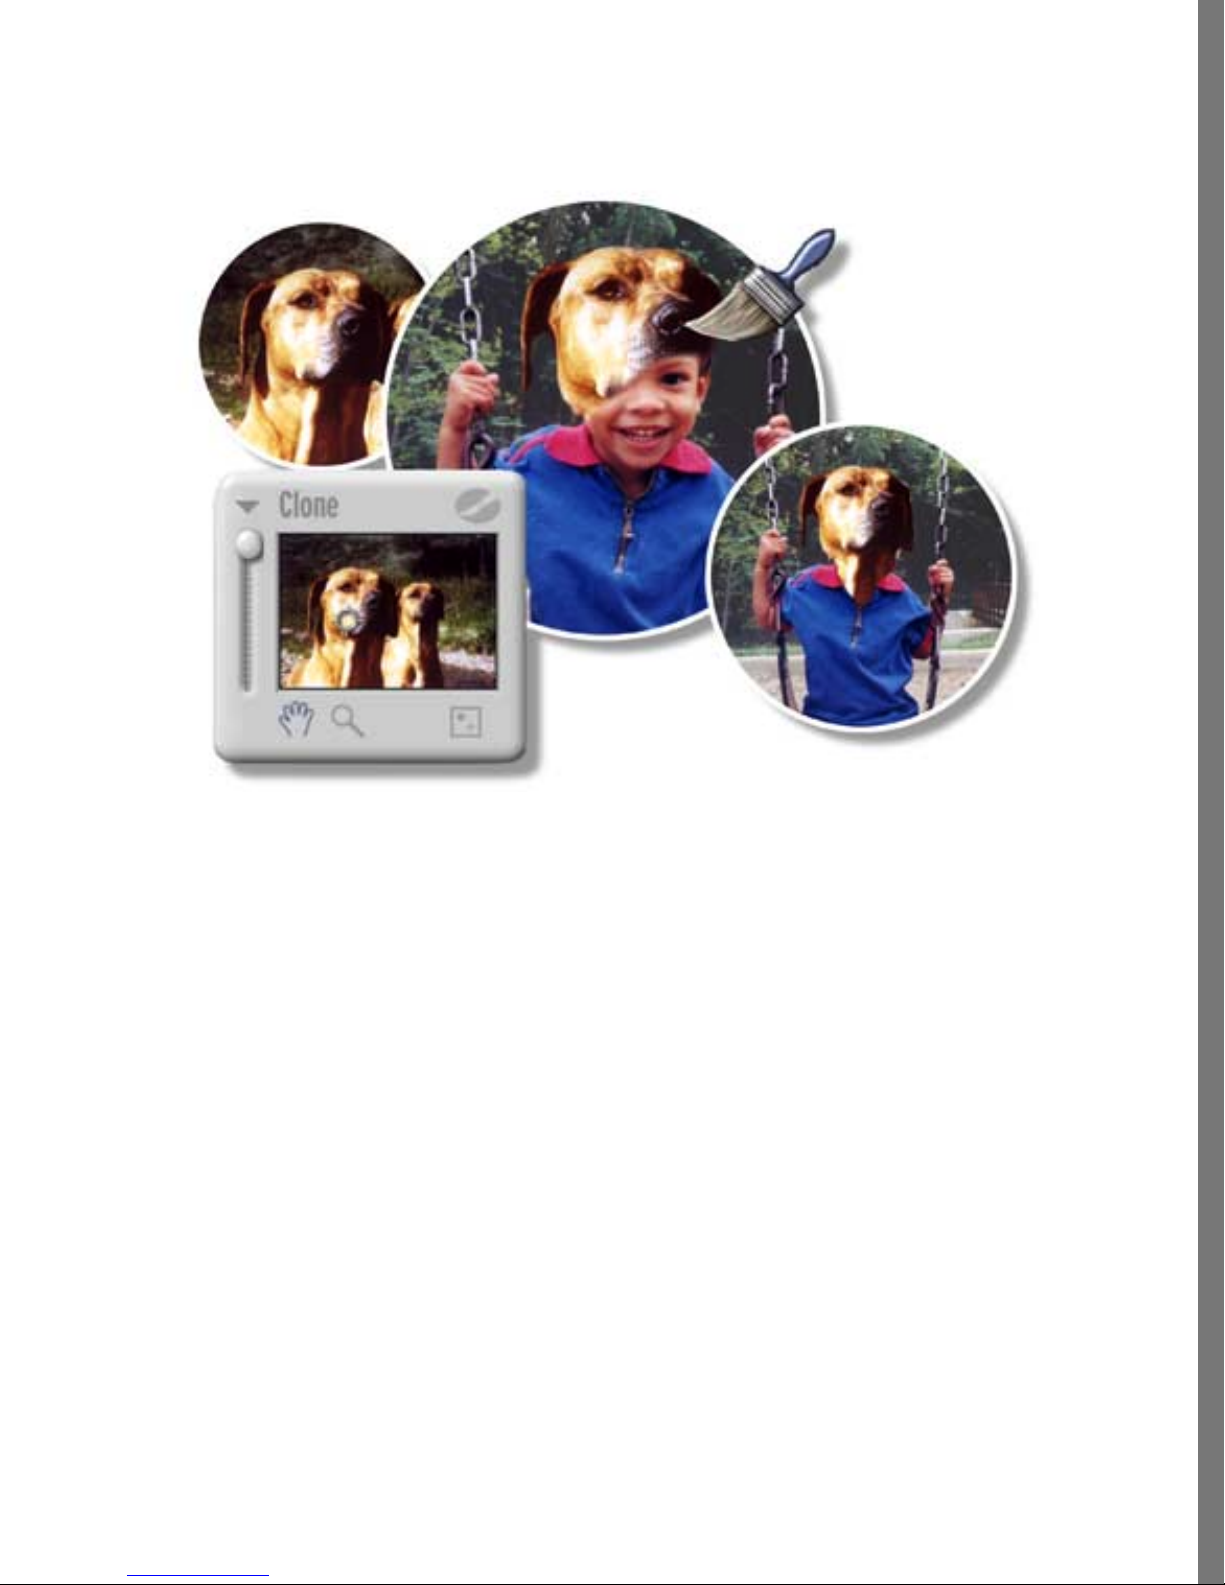
5 Use the brush tool to draw the clo ned ar ea into your i mage If needed , cl ick the br ush
icon in the Clone cont rol to displ ay the brushes.
FIXING PHOTOS
Cloning from another image.
Matching Colors
The color picker allows you to match a shade perfectly.
To match colors:
1 If needed, drag a photo from the Transporter.
2 Choose Image menu > Effects and select Clone.
The Clone controller displays a copy of your image. You can zoom or pan the image
as needed to locate the area you want to use as a source for cloni ng.
3 Click the color wheel, then use the eye dropper to sample any co lor on screen.
Other Fun Effects
You can paint on phot os, colorize images, or make a sepia print. Soap 2 lets you to
modify your photos to create interesting effects. You can also create compositions using
your photos. Refer to “Building Compositions” on page 92 for more details.
83

Painting on Photos
Haven’t you always wanted to see what yo u would look l ike with a mustache or beard?
Here is your chance to p aint one on!
To paint on your photos:
1 If needed, drag a photo from the Transporter.
2 Choose Image menu > Effects, and Color Paint.
3 Choose a brush or other tool.
4 Select a color from the color control, or by cli cking the color picker over any col or
in the photo.
5 Start paintin g on your pho to.
When you first use a co lor, it is “wet” and you can use the Hand tool to smudge it, or
you can sharpen it, soften it, or set the transparency. When you click a new color,
the first color “dries” and can’t be adjusted, although it can still be erased.
Press Ctrl+click to change the “wet” color.
6 If needed, use the eraser to correct any mistakes.
Painting on a photo.
Colorize
Soap 2 allows you to colorize yo ur phot os. Use Color ize to ad d color to a black and whit e
image, creating a hand-tinted look, or turn a color phot os into black and white.
Sometimes older photos use all shades of brown (sepia) rather than black and white.
84

Before Soap 2, you cou ld go to a amusement park, dress in old costu mes, and pay
someone to create a colorized photo or sepia print. Now you can create your own
“antique” photos. All you need to provide is the costumes!
To colorize your photo:
1 If needed, drag a photo from the Transporter.
2 Select Image menu > Effects, and Colorize.
3 If desired, drag the Saturation slider to desatu rate the color, and turn the image into
black and white.
4 Drag the Hue slider to cycle through the colors and select a color.
5 If desired, click the brush, to apply the color using one of the paint to ols.
6 If needed, adjust the transparency using t he slider.
7 Once you are satisfied with the results, click Apply.
FIXING PHOTOS
Colorizing a photo.
.
Save the colors for skintones, blush, or eyes, into the color paint
swatches so you can easily reuse them
85
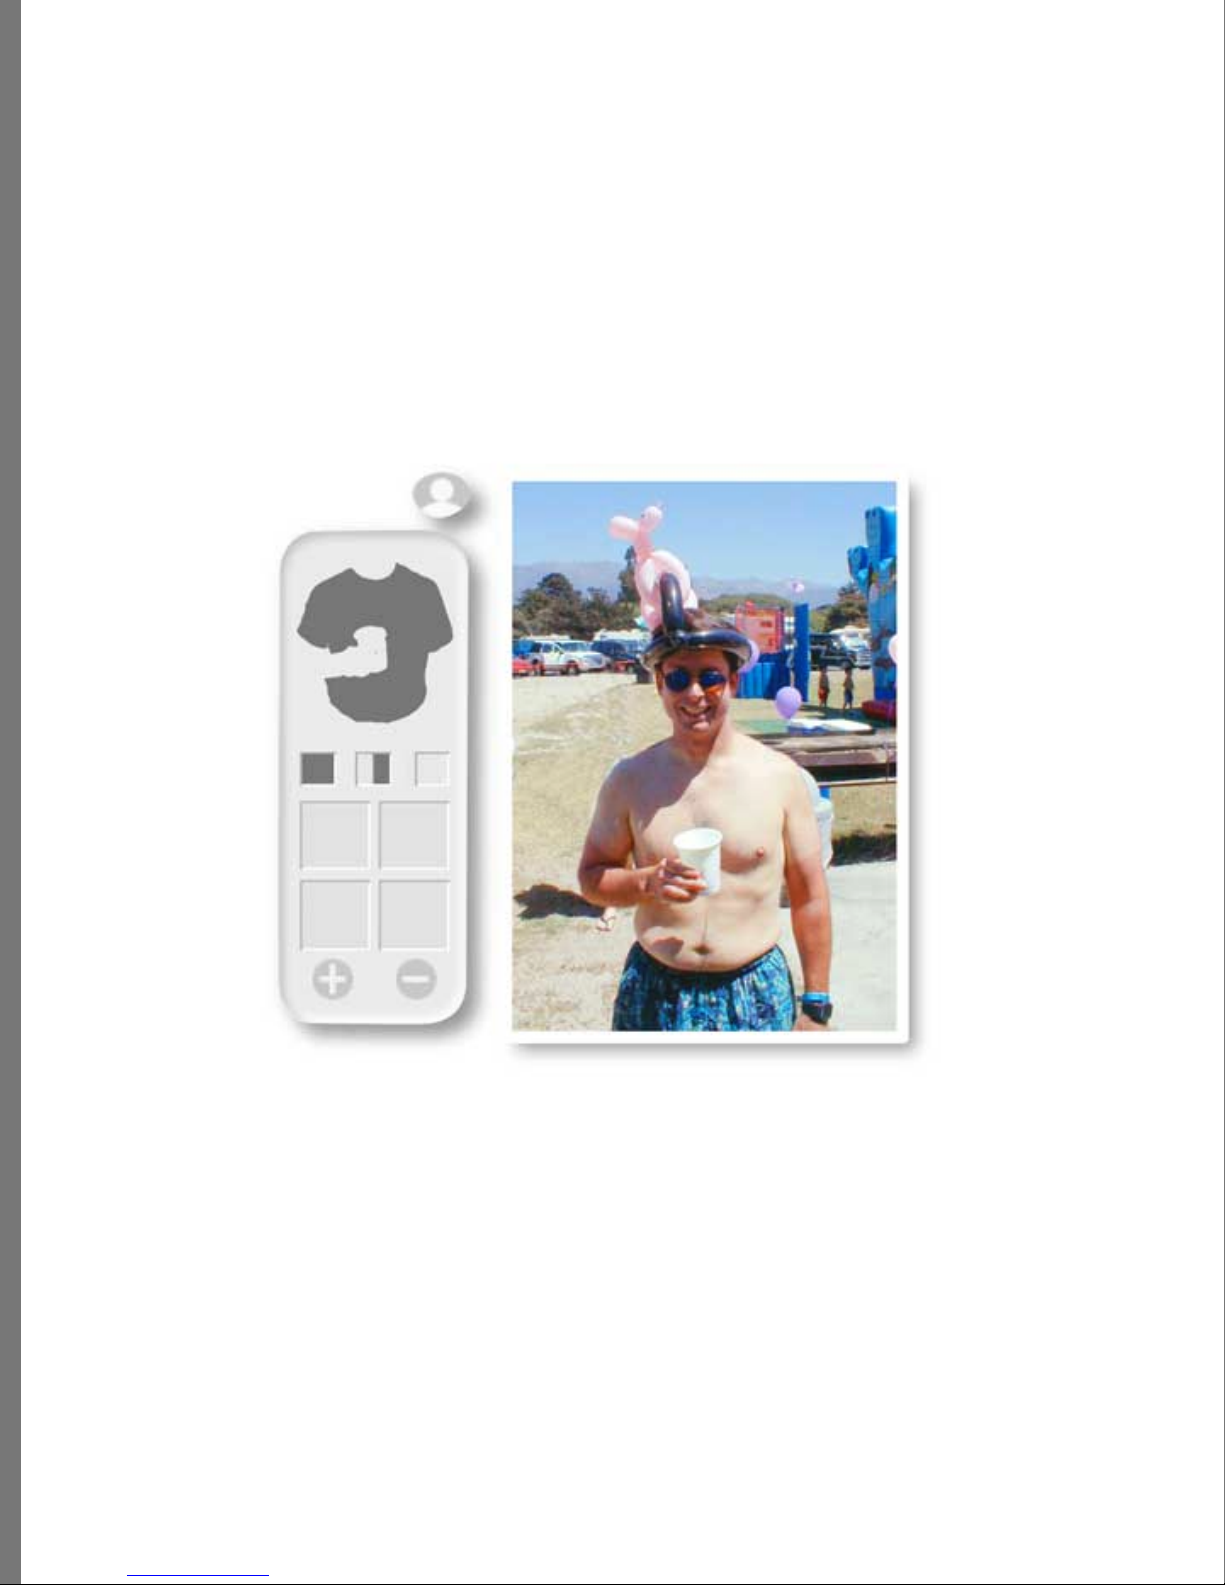
Having Fun with Masks
Masks allow you to apply an effect to certain parts of a photo while leaving ot her areas
untouched. You can use Masks to apply colors, textures, and plug-in effects, or any other
adjustment to selected part s of the photo.
What are Masks
Masking consists of covering up (o r revealing) certain ar eas before applying an effect. If
you’ve ever gotten a sunburn, you’ve seen the effects of a mask. The areas covered by
clothing are the masked areas. Your sunburnt skin was the area where the effect was
applied. In this example, the effect was too much sun!
An example of a mask.
Masking can also mean selecting a specific area in which to apply an effect. That is how
it is used in So ap 2. Unlike p utting on a shirt to av oid a sunbur n, Soap 2 uses mask s to
determine where to apply an effect. For example, if you want t o change the color of
someone’s shirt, you create a mask of that area, then experiment with different colors to
find the one you like. So instead of masking an area to protect it from the effect, you
mask an area to indicate where the effect belongs.
Masks are used to change colors, apply textures, adjust color and contrast. You can even
adjust the transparency to allow the details of the photo to show through. Brushing with
any tool creates a mask. Ad just the mask using the Eraser, Icicle, or Water Drop tool.
86

Once you have finished working wit h a mask, you can ap ply the result s to the photo, an d
if desired, save the mask to reuse in the future. You can use masks to change hair color,
clothing color, car colors, add textures, visualize your house painted a new color, change
day to night, and so on.
Creating Masks
Typically you’ll use one of the Brush tools, the Pencil, or the Magic Mask to create a
mask. However, you can also apply a mask to the entire image. The example below uses a
brush tool to create a color mask, but the same st eps apply to the other tools. (Refer to
“Using the Magic M ask” on page 53 for detail s on using the Magic Mask.) Select a tool based
on the area you are masking. Yo u may want to adjust the size of the tool before you begin
depending on the area you inten d to mask. Refer to “Setting Brush Size” on page 52 to lea rn
how to adjust the size of a tool.
To create a mask:
1 If needed, drag a photo from the Transporter.
2 Select an effect from the shortcut tray or the Image menu.
FIXING PHOTOS
3 Select one of the brush tools, and click User Mask (to the right of the working area)
to display the Mask tray.
4 Brush the area where you want to apply the mask. For example, if you want to
change the color of Uncle Gerald’s car, brush the entire surface of the car.
The masked area is shown in the Mask t ray.
5 Select the Color and Tone controller and set the opacity using the slider so you can
view the car details.
6 Once you are satisfied with your result s, click Apply to app ly the mask to the photo.
• If you made a mistake, click th e eraser and erase your mistake.
• Using th e Mask tray controls, you can invert mask, undo the mask, or create a
mask of the entire image.
• You can store masks in the Mask tray.
• Press Alt+cl ick (or Opt ion+click on t he Macint osh) in a sl ot of the tr ay to re move
a stored mask. You can also click the Plus button.
87

• As needed, switch tools or change brush sizes to mask tiny areas. (You can also
zoom in to mask fine detail.)
Using the Mask tray.
Viewing and Inverting Masks
Sometimes it is easier to select the area that you don’t want masked and then invert the
mask. For example, if you want to change everything except Cousi n Linda’s face, it may
be easier to mask her face.
To invert a mask:
1 If needed, drag a photo from the Transporter.
2 Create a mask of the area where you do not want to apply an effect. (In this example,
mask the face using the brush tool.)
3 Click the Invert item in the Mask tray to invert the mask.
88
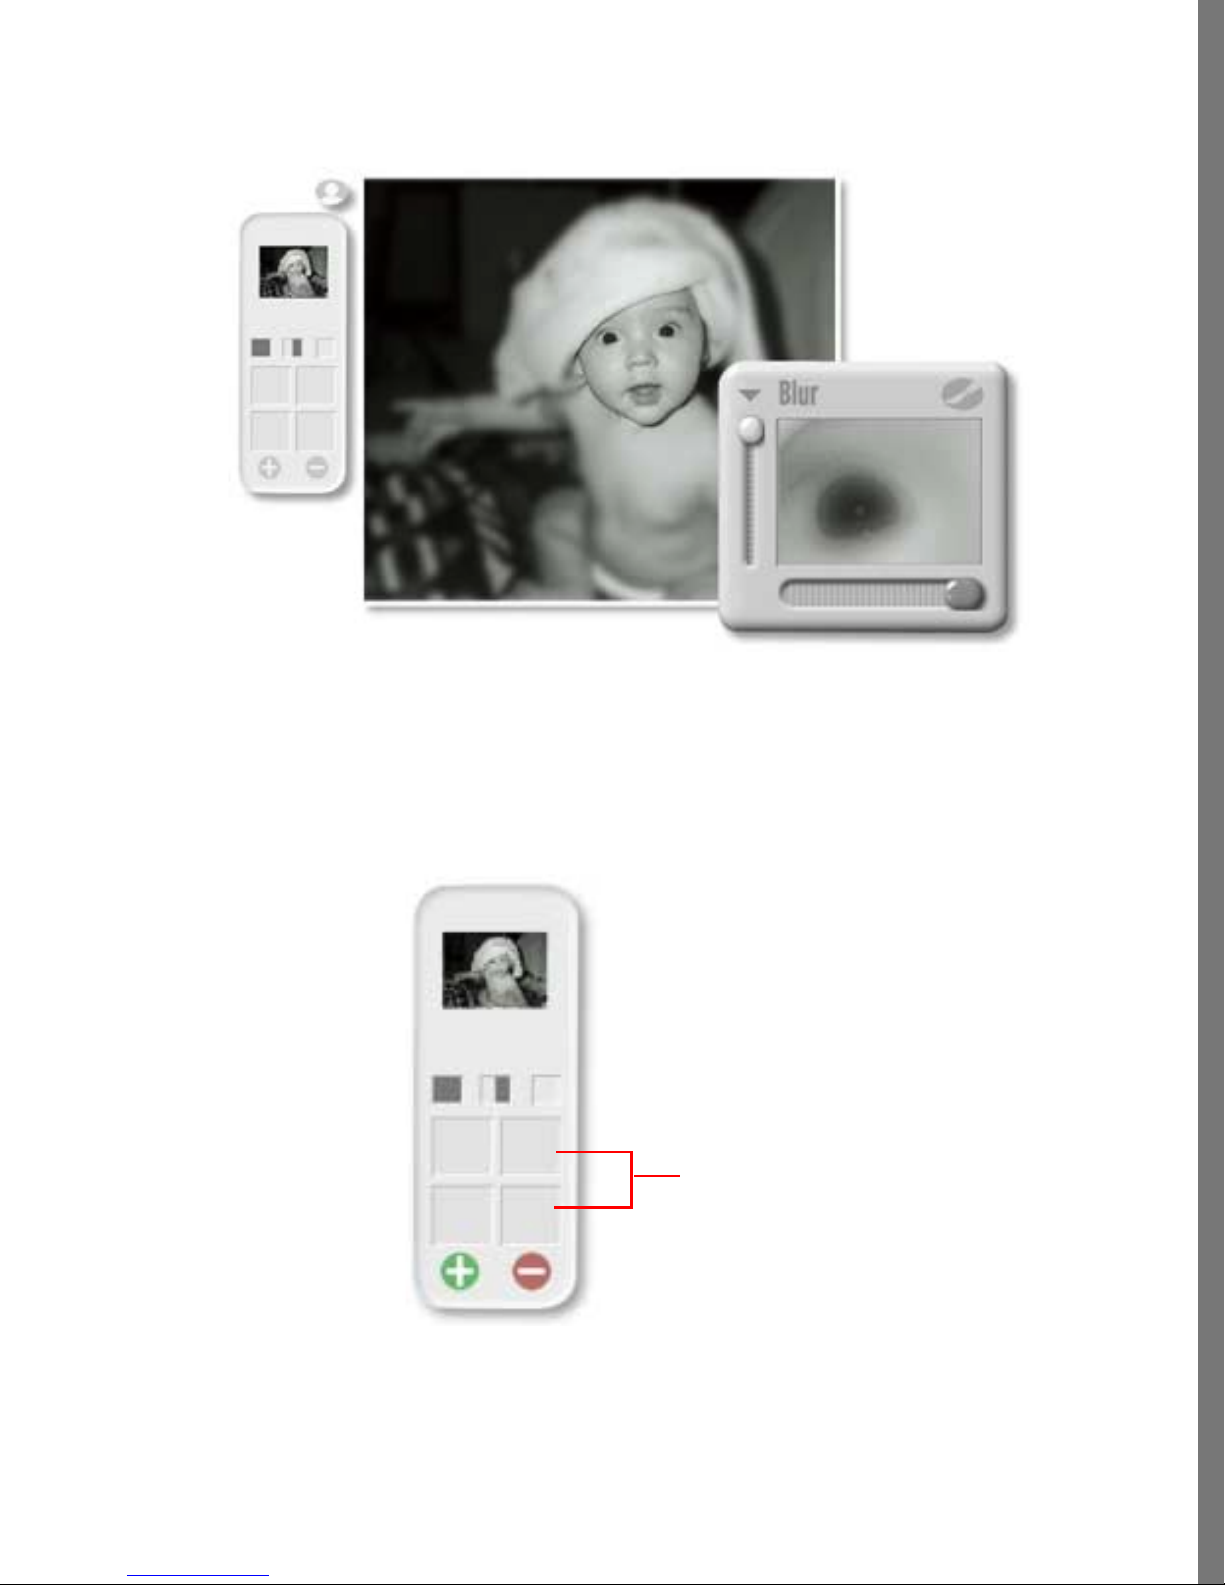
4 Choose Effects menu > Blur to blur the inverted mask.
FIXING PHOTOS
Cousin Linda.
Saving and Reusing Masks
You can assign frequently reused mask s to the mask tr ay. Then you can replace or remove
masks easily.
Stored masks
Store d masks in the Ma sk tray.
89

To assign a mask to the mask tray:
1 If needed, drag a photo from the Transporter.
2 Create a mask. Refer to “Creating Masks” on page 87.
3 Click an unused position to assign the mask to that spot in the mask tr ay, or click the
Plus button to add the mask to the next available spot.
• Click each in use spot in the tray t o view the current stored masks.
• Click the Plus button to assign a mask to a spot in the mask tray.
• Click the Minus button (or Alt+click, or Option+cl ick) to clear a mask from the
mask tray.
.
To edit an alpha channel, pr ess Opt ion+T to load the current alpha
channel. Edit it th en pres s Ctrl+T t o transfer th e results to the Alpha
channel. Press A to view areas that will be transparent.
90
COMPOSING
IMAGES
What’s in this Section?
Building Compositions . . . . . . . . . . . . . . . . . . . . . . 92
Working with Composition Layers . . . . . . . . . . . . . 93
Adding Photos to your Compositio n . . . . . . . . . . . . 104
Adding Text . . . . . . . . . . . . . . . . . . . . . . . . . . . . . 105
Adding Objects, Backgrounds, and Edges . . . . . . . . 107
Adding Shadows to Laye rs . . . . . . . . . . . . . . . . . . . 108
Adding a Canvas Color . . . . . . . . . . . . . . . . . . . . . 110
Saving and Reloading a Composition . . . . . . . . . . . 111
Working with Plug-ins
Using Plug-Ins . . . . . . . . . . . . . . . . . . . . . . . . . . . . 147

Building Compositio ns
Once you’ve fixed or enhanced photos, you can use Kai’s Photo Soap 2 to build creative
compositions. Work with more than one photo. Add text or cool clipart . Create a great
look with shadows—real shadows that reflect a stationary light source—and once y ou get
going, you can even work with a photo’s hidden channel (called its Alpha channel) to
create special “cutouts”.
Starting a Composition
To start a composition:
✤
Choose Input menu > New Composition
Resizing the Canvas
To resize the canvas for your composition
1 Choose Edit menu > Can vas Size.
2 Enter the desired Width.
3 Enter the desired Height.
4 Select between Inches and Pixels. Soap 2 displays the dimensions of your canvas in
the whichever format you select.
5 Select an Anchor Point. By selecting an Anchor Point, you’re telling Soap 2 where
to add or remove canvas. For example, if you select an Anchor Point at the botto m,
your picture remains at the bottom an d Soap 2 adds canvas to the top.
The preview window to the right of the Anchor Point selection area shows what
resizing the canvas does to your composition. If you re duce canvas size, areas mi ght
be clipped off your composition. You might want to chang e the anchor point,
depending upon how resizing the canvas affects your composition.
92

COMPOSING IMAGES
.
Choosing a new canvas size.
Working with Composition Layers
Understanding Layers
In a Soap 2 composition, y ou’ll drop photo, text and objects onto the canvas. Each piece
you add to your composition is a separate l ayer. Layers work like this. Imagine each part
of your composition is drawn on a pi ece of clear plastic or film. As you lay each piece of
“film” in place, you build a compo sition.
93
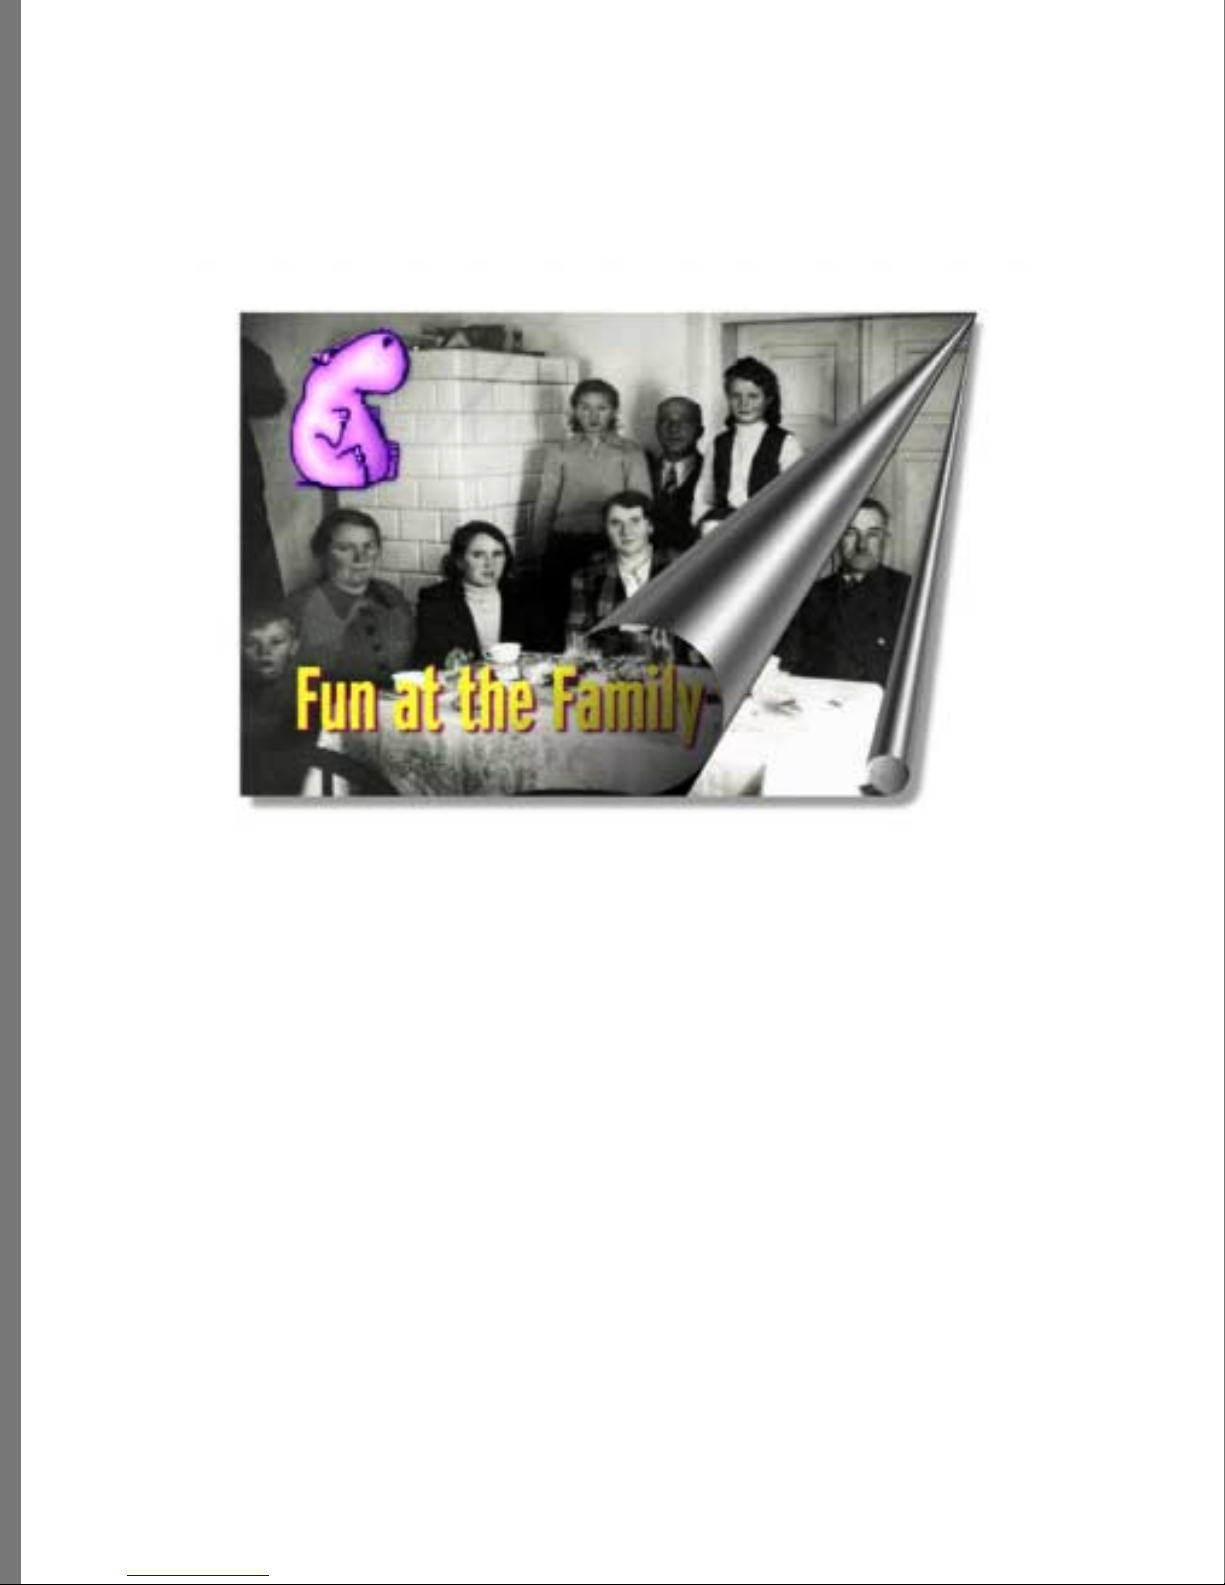
For example: You might start (1)—by dragging a f amily reunio n photo ( which you fix ed
earlier with the QuickCol or tool) onto t he canvas. Next (2) —you add a li ttle text, l ike
“Lynn’s Family Reu nion” (switching on a shadows for that layer). Finally (3)— you add
just the right piece of clip art to finish the piece. These three separat e layers combine to
create a great keepsake for everyone who attended the reunion.
Each part of this composition is a separate layer.
Because each element in your composition is a separate layer, you can:
• select a layer
• move a layer around
• stretch or rotate a layer
• add a shadow to a layer (or to all of them)
• adjust a layer’s transparency
• set a layer in front or in back of another layer
94
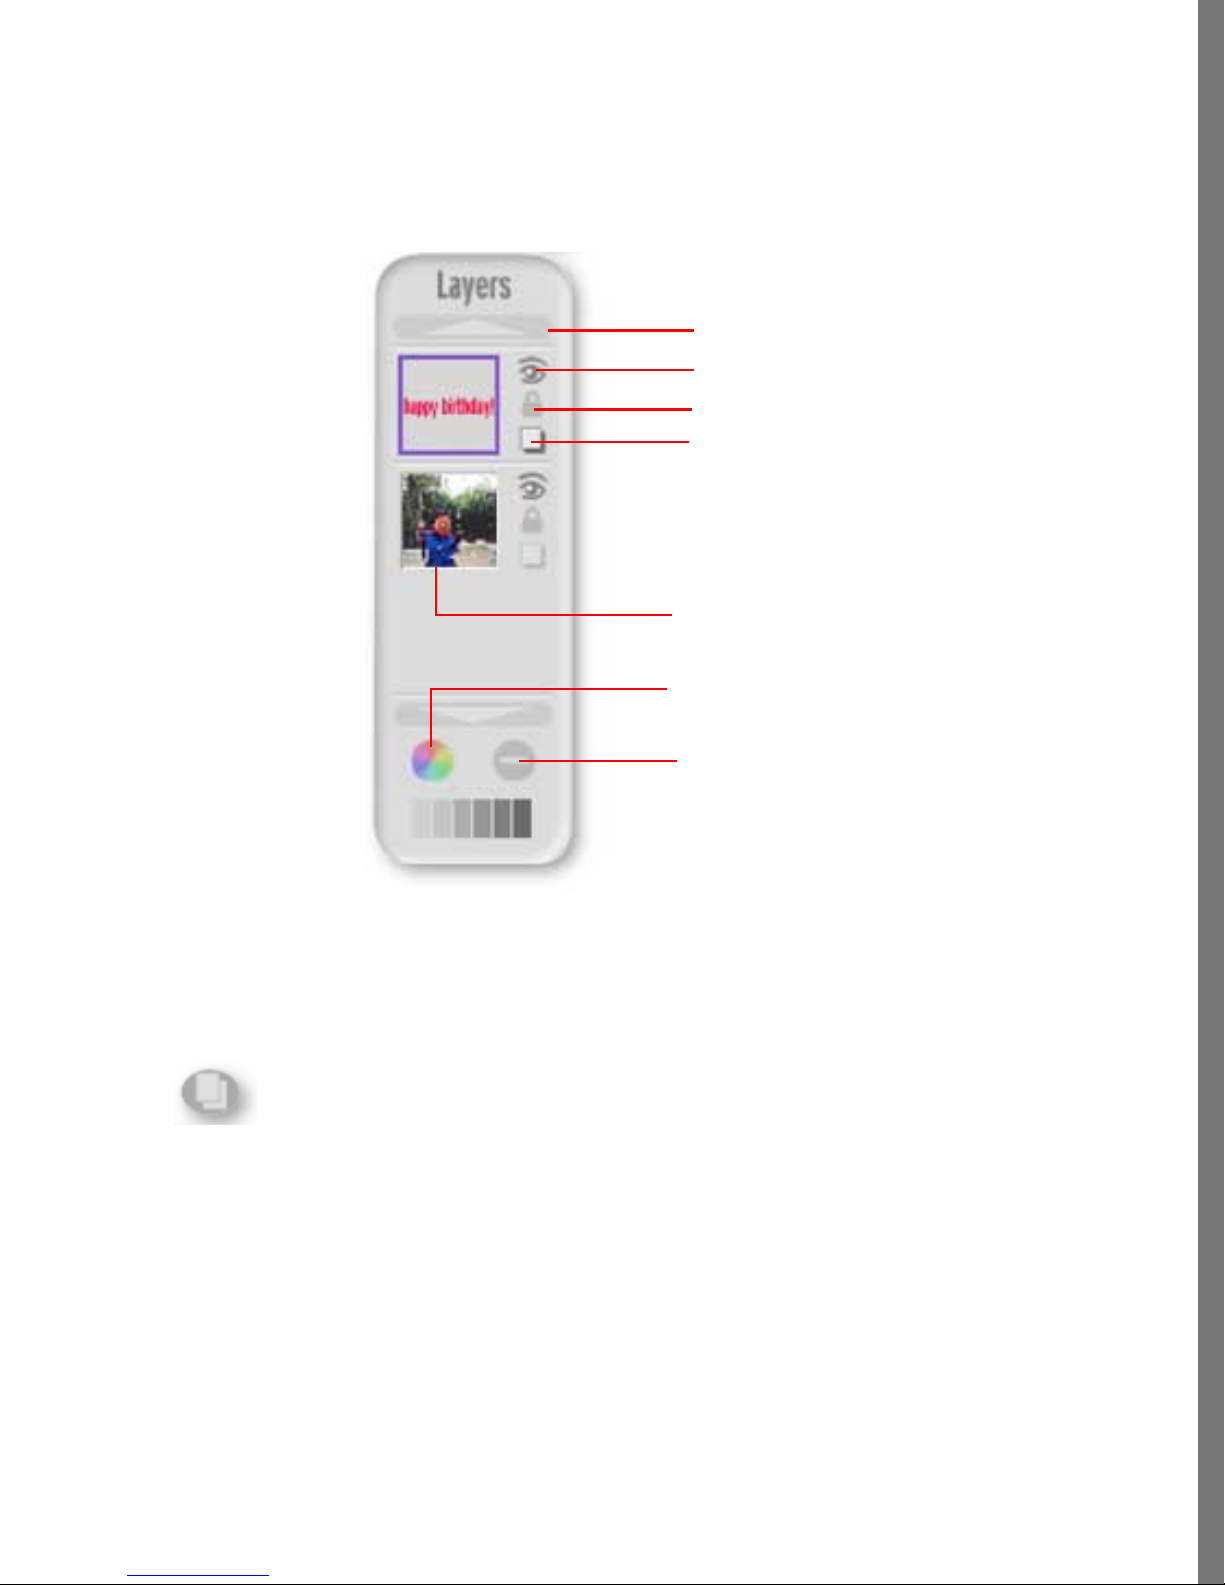
Using the Layers Tray
Each layer in your composition is listed in the Layers tray. This tray makes it possible to
select and control the behavior of each l ayer in your composition. Scroll t hrough the
Layers tray to locate the layer you want to control.
Scroll Layers
Hide/Show Layer
Lock Layers
Hide/Show Layer Shadow
Layer Preview
COMPOSING IMAGES
Canvas C olor
Delete Layer
The Layer tray.
To display the layer tray
✤
Click the layer icon at the upper l eft outside corn er of the compositi on window.
Click to display the layer tray.
Selecting a Layer
To select a layer:
✤
Click on a layer in the composition t o select it.
✤
Click on a layer in the Layers tray to select it.
A faint outline sh ows that a layer i s selected.
95

Moving a Layer
Once you’ve created a layer ( usually by d ragging a phot o from the Transporter), you will
want to position it in your composition.
To move a layer:
1 Click the Move tool.
The Move tool.
2 Click on the layer to select it.
3 Move the layer to a new l ocation.
Sizing and Stretching a Layer
To resize a layer:
1 Click the Uniform Size tool. Using the Uniform Size tool lets you resize a layer,
without distorting i t.
The Uniform Size tool.
2 Click on a layer and h old the mou se button down.
3 Drag the cursor upward to increase layer size or downward to decrease layer size. As
you move the cursor, you’ll see the layer change size.
4 Release the mouse button when the layer is sized correctly.
To stretch a layer:
1 Click the Distortion t ool. The Dist ortion too l lets you r esize a layer by making it
taller or wider. This distorts the layer, allowing you to make interesting effects.
The Distortion tool.
2 Click on a layer and h old the mou se button down.
3 Drag the cursor until the layer is stretch to the desir ed shape.
96

4 Drag the cursor up or down to increase or decrease how tall it is. Drag the cursor
right or left to increase or decrease the layer ’s width. As you move the cursor, you’ll
see the layer change size.
Hold down the Shift key while you drag the cursor to stretch the
layer only horizontally. Hold down the Ct rl/Cmd key while you
drag to stretch the layer only vertically.
5 Release the mouse button when the layer is stretched correctly.
Rotating or Flipping a Layer
To rotate a layer:
1 Click the Rota te tool.
COMPOSING IMAGES
The Rotate tool.
2 Click on a layer and hold the mouse button down.
3 Drag the cursor right to rotate the layer clockwise. Drag the cursor left to rotate the
layer counter-clockwise. As you move the cursor, you’ll see the layer rotate.
If you want to rotate a layer in exact 15 degree movements, hold down th e Shift k ey
while you drag the cursor.
To flip a layer:
1 Choose Layers menu > Flip Horizontal to flip a layer horizontally.
97
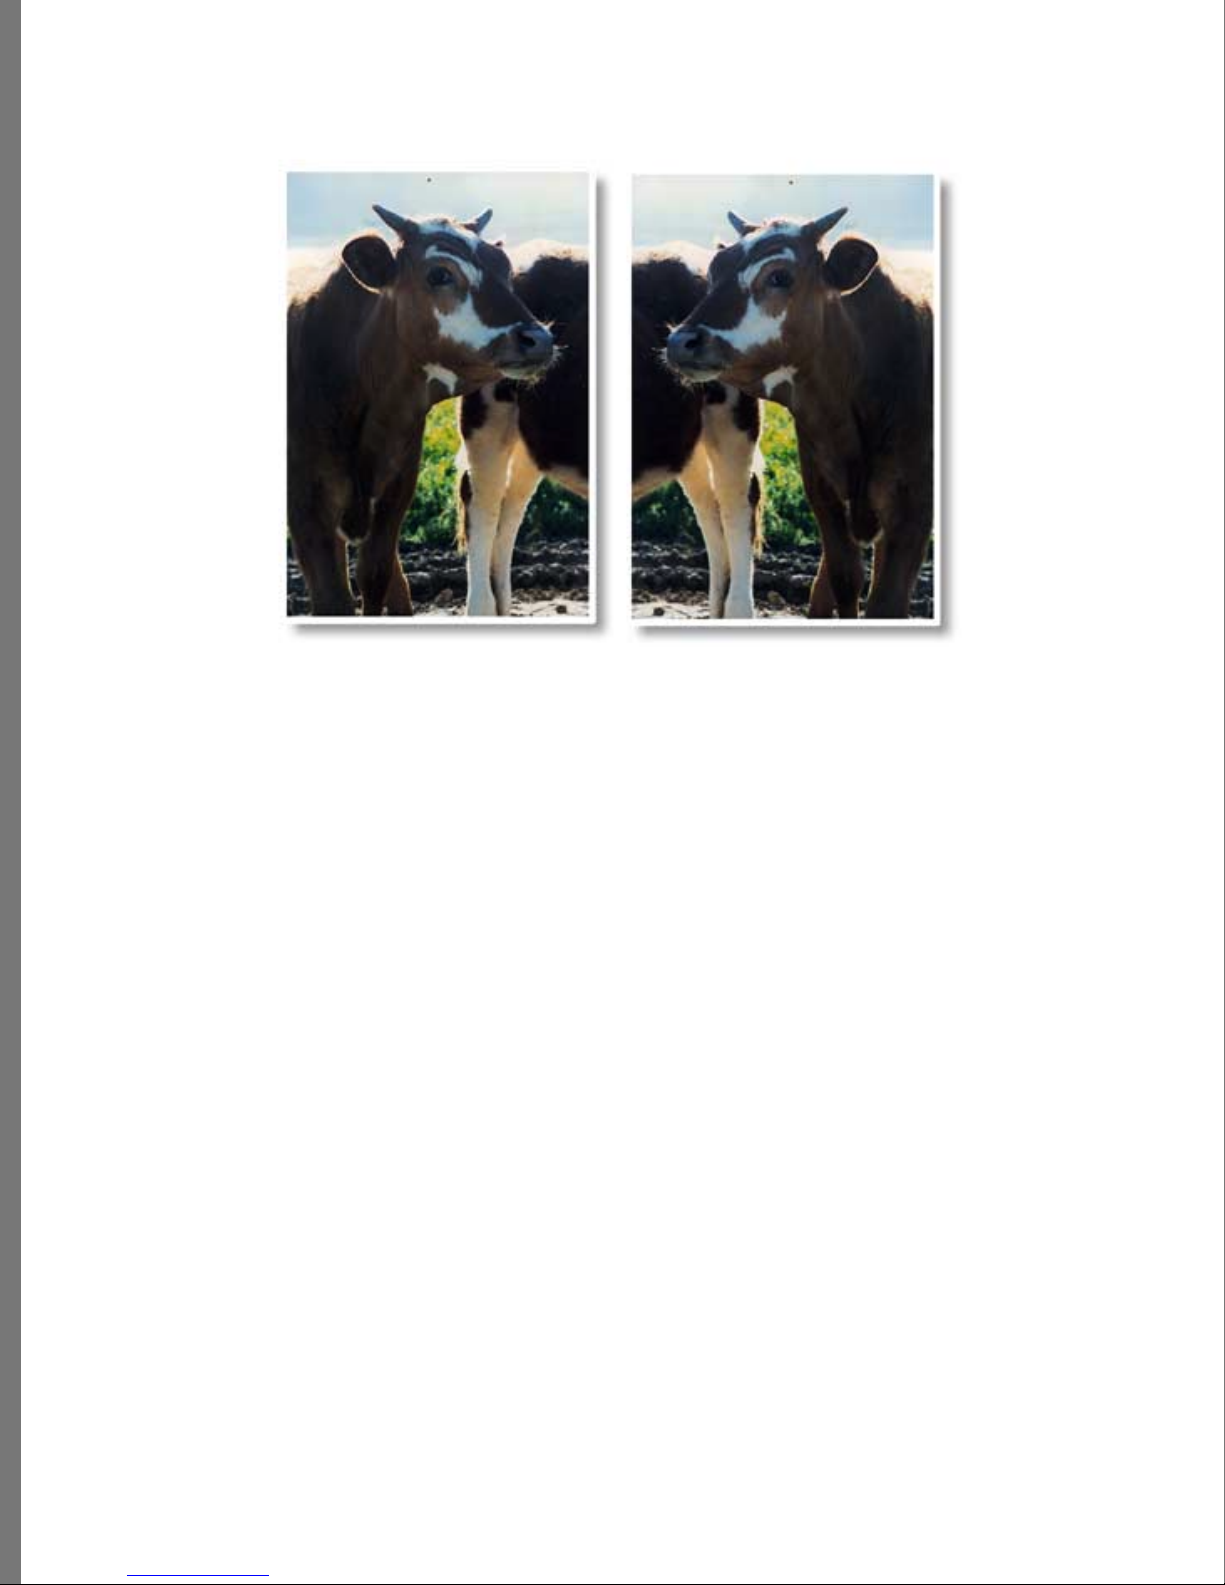
2 Choose Layers menu > Flip Vertical to flip a layer vertically.
Flip a layer.
Adjusting a Layer’s Transparency
You can a djust a lay er’s transparency (how faded or pronounced i t is), allowin g other
details in your compo sition to sho w through. Unl ike hiding a layer, adjusting the
transparency of a layer lets you create very interesting effects. You can let canvas color
merge with a Background Image. Refer to See “Adding a Canvas Color” on page 110 for
information about selecting a Canvas Color. Refer to See “Adding Objects, Backgrounds,
and Edges” on page 107 for inf ormation about using a Background Image.
All layers, except Text layers allow you to brush on transparency, letting you control
exactly what portion of a layer is faded (or even totally transparent). Refer to “Using the
Tools” on page 50 for inf ormation about using tools to brushing on effects. Note that only
Size and Flow settings are available for Transparency brushes and that circle preview
mode is also not available.
98

By brushing on layer transparency, you can brush away edges, softening them to create a
more professional lo oking collage. With the flow turned down low, you can gently build
up transparency, allowing you to fade edges and specific areas of a layer. Use the
transparency brushes to soften the edges of a Composit Library Objects layer. Try it on
Composit Library Edges. You can even create some very cool cutout effects.
COMPOSING IMAGES
Changing a layer’s transparency setting can give you neat effects.
To adjust transparency for an entire layer:
1 Select a layer.
2 If you selected the layer by choosing it in the Layers tray, click the transparency
control bar at the bottom of the L ayers tray t o display the Layer s Attributes cont rol
for the selected layer.
Click to display Layer attributes.
99

If you selected the layer by clicking on it in the composit ion, choose Layers menu >
Show/Hide Layer Attributes t o display the Layers Attributes control for the selected
layer.
The Layer attributes co ntrol.
3 Move the Transparency slider left to make the entire layer more transparent (faded
out). Move it right to make the layer less transpar ent (more pron ounced).
Move the Tr ansparency slider to adjust a layer’s transparency.
To adjust transparency for part of a layer:
1 Select a layer.
2 Choose Layers menu > Hide/Show Transparency Brushes or click the brush icon at the
bottom of the Layers t ray.
100
 Loading...