

WSSMM
1
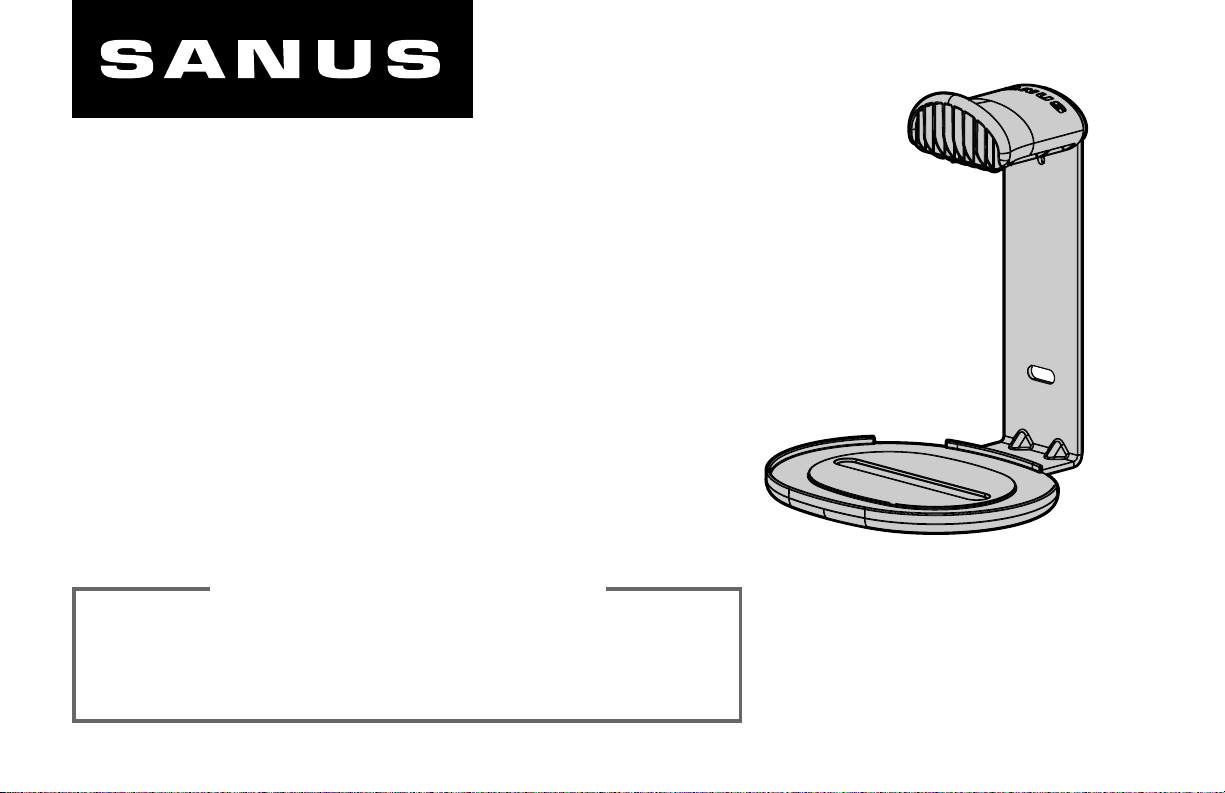
INDOOR/OUTDOOR MOUNT FOR
SONOS® MOVE
™
INSTRUCTION MANUAL
We’ll Make It Stress-Free
If you have any questions along the way, just give us a call.
P: 800-359-5520 • UK: (0) 800 056 2853 • EMEA: +31 (0) 495 580 852
We’re ready to help!
CAUTION: IMPORTANT SAFETY INSTRUCTIONS — PLEASE READ ENTIRE MANUAL PRIOR TO USE — SAVE THESE INSTRUCTIONS
Before getting started, let’s make sure this product is perfect for you!
®
This mount is designed to support the Sonos
CAUTION: Avoid potential personal injuries and property damage!
Check your speaker owner’s manual to see if there are any special requirements for mounting your speaker.
•
Please read through these instructions completely to be sure you’re comfortable with this easy install process.
•
Do not use this product for any purpose not explicitly specified by manufacturer.
•
Manufacturer is not responsible for damage or injury caused by incorrect assembly or use.
•
The wood stud or drywall must have a minimum thickness of 1¾ inch (44 mm) and must be capable of supporting five times the
•
weight of the speaker and mount combined.
Warrantied for outdoor use; UV-resistant plastics fight against sun damage; Galvanized plating and stainless steel hardware prevents against
•
corrosion and leads to longer life of the mount.
Outdoor primer protects against rusting and provides better paint adhesion; outdoor-rated paint meets AAMA 2604-05 Standard for 5-year
•
color retention and chalk resistance.
If you do not understand these instructions or have doubts about the safety of the installation, assembly or use of this product,
•
contact Customer Service.
Move™ speaker.
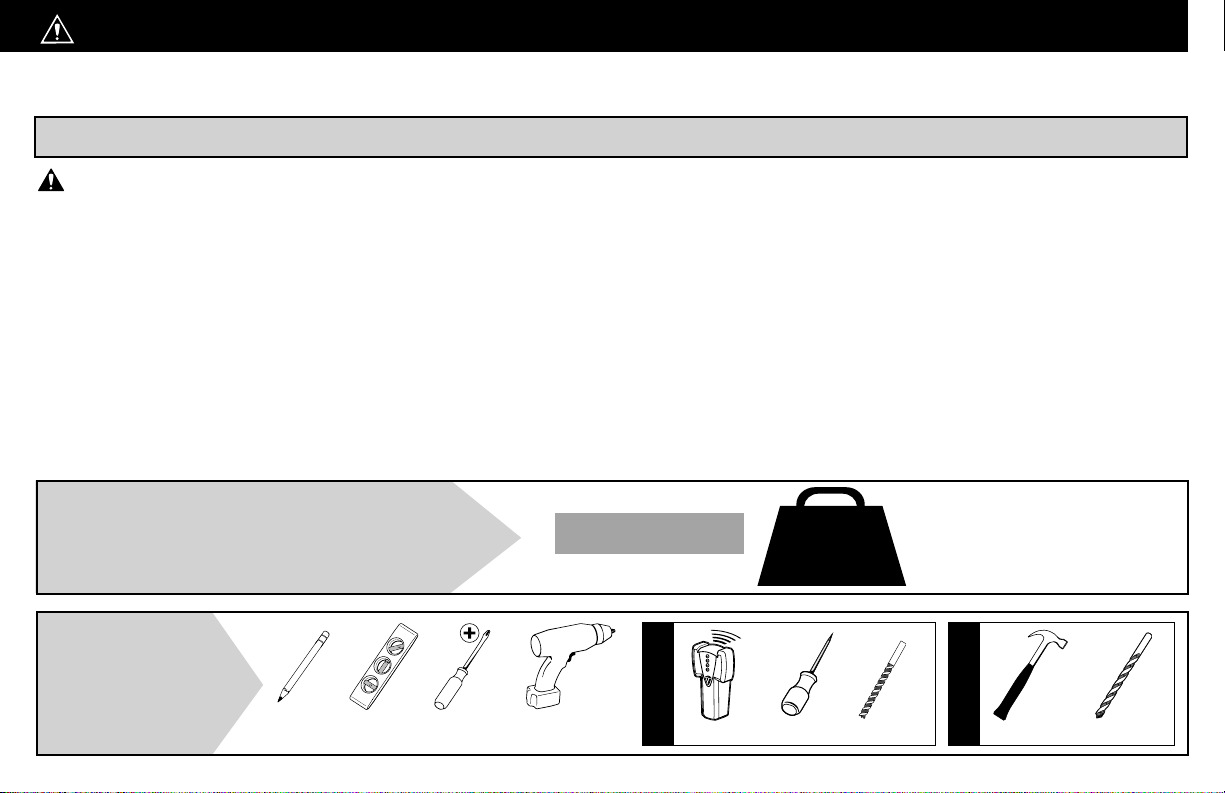
Speaker Weight Limit
DO NOT EXCEED
Tools
Needed
Pencil Level
2
Sonos® Move™
6.7 lbs.
(3.0 kg)
1/8 in.
(3 mm)
Screwdriver Wood Drill Bit
Electric Drill
Stud Finder
Wood Stud Install
Awl
Drywall Install
Hammer Drill Bit
3/8 in.
(10 mm)
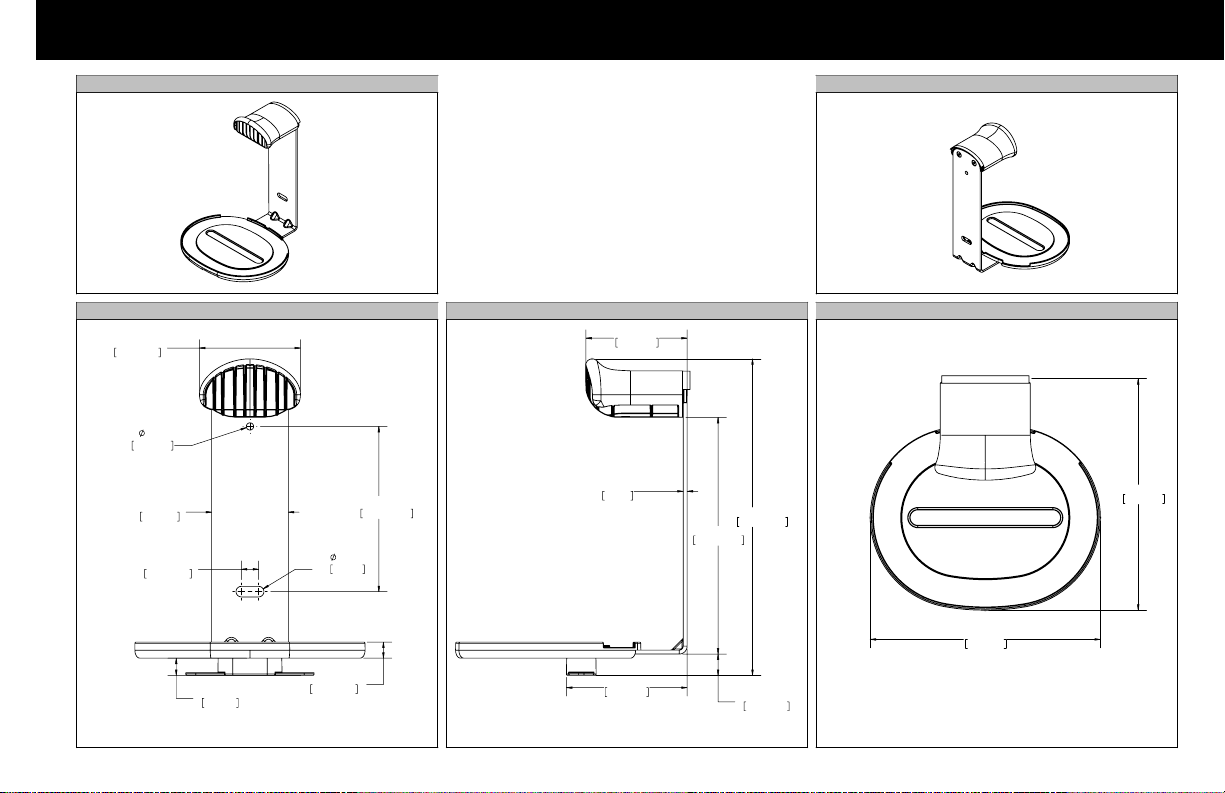
Dimensions
3D VIEW FRONT
FIXED MOUNT - FRONT VIEW
3.01in
76.3mm
0.22in
5.5mm
2.28in
58mm
0.52in
13.1mm
0.31in
8mm
4.91in
124.8mm
3D VIEW REAR
FIXED MOUNT - SIDE VIEW
3.01in
76.5mm
0.12in
3mm
7.04in
178.8mm
9.42in
239.2mm
FIXED MOUNT - TOP VIEW
6.85in
174mm
6.89in
175mm
0.51in
13mm
0.48in
12.1mm
3.59in
91.2mm
0.63in
16.1mm
3

Supplied Parts and Hardware
WARNING: This product contains small items that could be a choking hazard if swallowed.
Before starting assembly, verify all parts are included and undamaged. If any parts are missing or damaged, do not return the damaged item to
your dealer; contact Customer Service. Never use damaged parts!
NOTE: Not all hardware included will be used.
STEP 1 Parts and Hardware
Wall Plate Screw
#10 x 1¾ in.
02 x2
Speaker Mount
05 x1
Washer
03 x2
Wall Template
Anchor
04 x2
01 x1
4
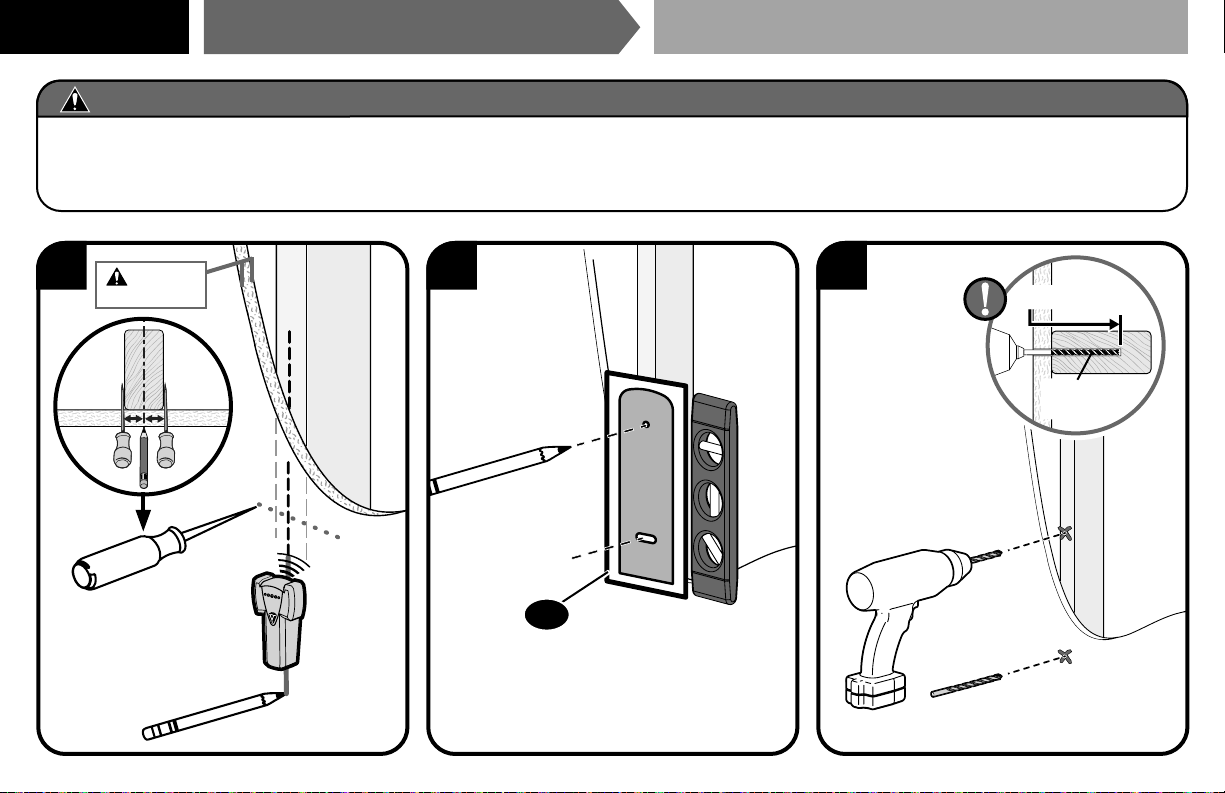
STEP 1A
Wood Stud & Drywall InstallationAttach Wall Plate to Wall
CAUTION: Avoid potential personal injury or property damage!
● Drywall covering the wall must not be less than 1/2 in. (12.7 mm)
● Minimum wood stud size: nominal 2 x 4 in. (51 x 102 mm) actual 1½ x 3½ in. (38 x 89 mm)
● Stud center must be verified
1 2 3
Min. 1/2 in.
(12.7 mm)
01
1 ¾ in. (45 mm)
1/8 in.
(3 mm)
5
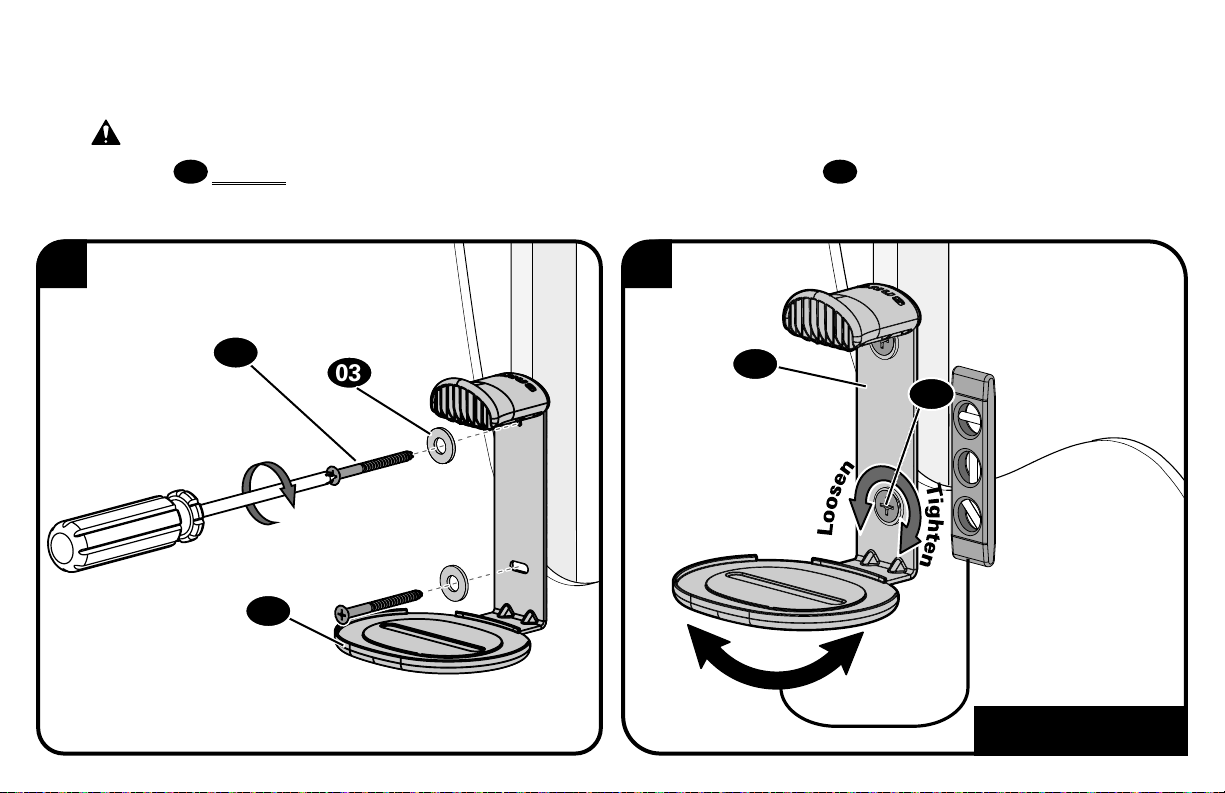
CAUTION: Avoid potential personal injury or property damage!
Both screws
fastened to the wall before continuing on to the next step.
02
MUST BE firmly tightened to prevent unwanted movement of the speaker mount
4 5
02
03
05
6
05
05
Ensure the speaker mount is securely
.
02
Go to STEP 2, PAGE 11.

STEP 1B
CAUTION: Avoid potential personal injury or property damage!
● Minimum wood stud size: nominal 2 x 4 in. (51 x 102 mm) actual 1½ x 3½ in. (38 x 89 mm)
● Stud center must be verified
Wood Stud Only InstallationAttach Wall Plate to Wall
1 2
01
1 ¾ in. (45 mm)
1/8 in.
(3 mm)
7

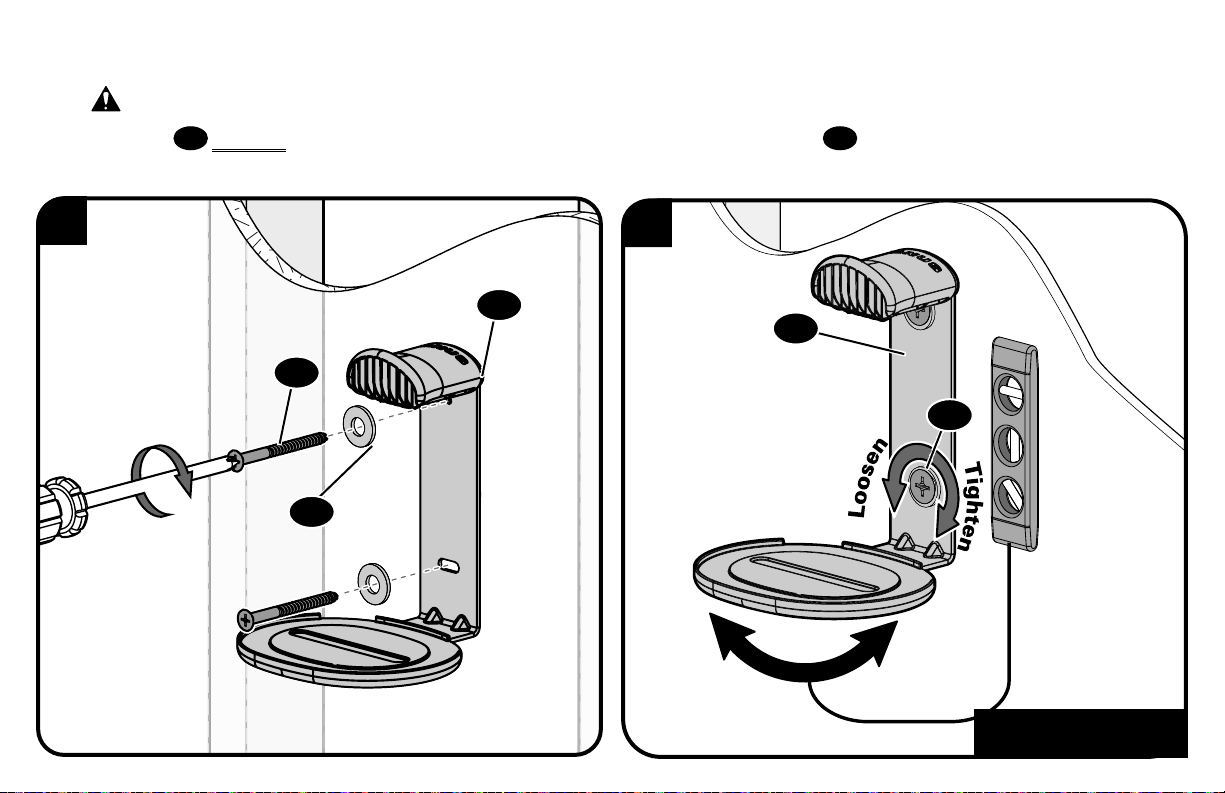
CAUTION: Avoid potential personal injury or property damage!
Both screws
fastened to the wall before continuing on to the next step.
02
MUST BE firmly tightened to prevent unwanted movement of the speaker mount
4 5
02
05
8
03
05
05
Ensure the speaker mount is securely
.
02
Go to STEP 2, PAGE 11.

STEP 1C
CAUTION: Avoid potential personal injury or property damage!
● Drywall covering the wall must not be less than 1/2 in. (12.7 mm)
Drywall Only InstallationAttach Mount to Wall
1 2 3
Min. 1/2 in.
(12.7 mm)
1 in. (25 mm)
3/8 in.
(10 mm)
01
04
9
CAUTION: Avoid potential personal injury or property damage!
Both screws
fastened to the wall before continuing on to the next step.
02
MUST BE firmly tightened to prevent unwanted movement of the speaker mount
4
02
03
05
5
05
05
Ensure the speaker mount is securely
.
02
10
Go to STEP 2, PAGE 11.
STEP 2
Attach Speaker to Mount
For a helpful install video, visit SANUS.com/2910.
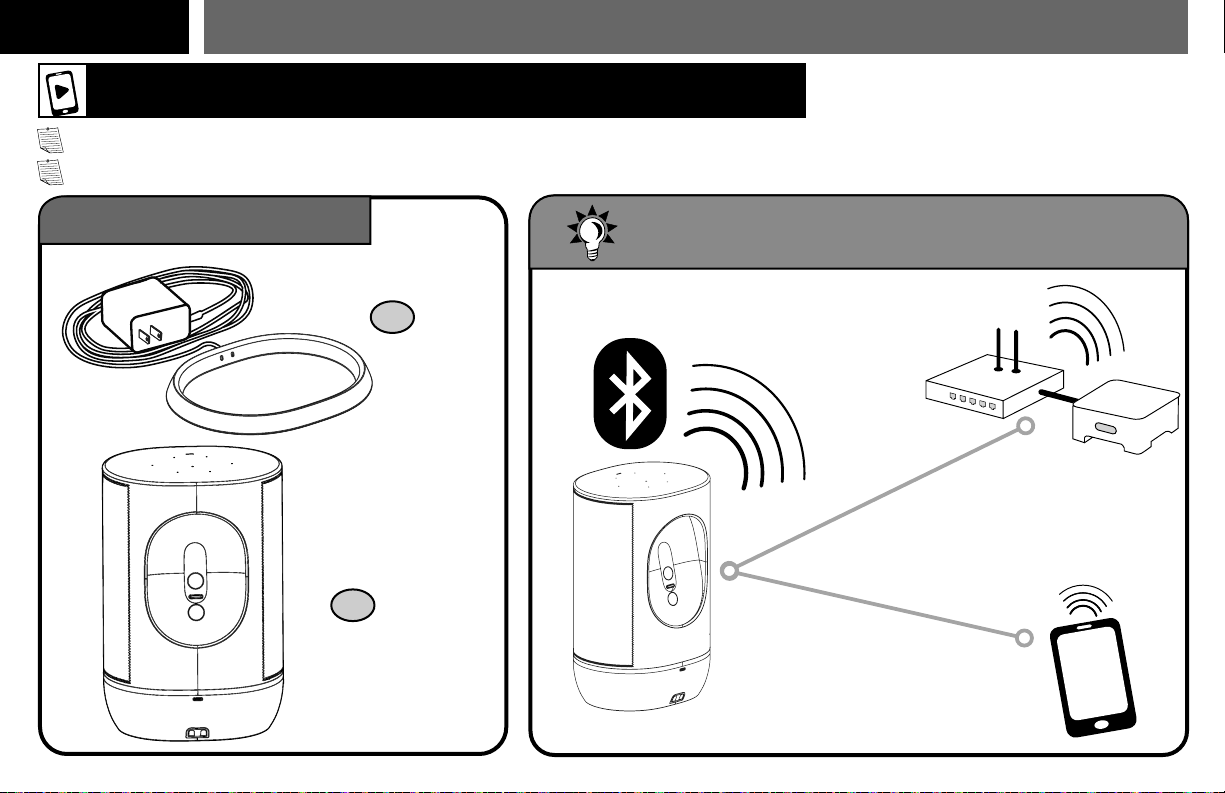
NOTE: Sonos® Move™ Speaker and Sonos® Move™ Charging Base are NOT INCLUDED.
NOTE: Sonos® Move™ Charging Base is OPTIONAL and ONLY recommended for indoor mounting applications.
STEP 2 Parts
Move
Move
™
07 x1
Charging Base
06 x1
™
Speaker
TIP: Set up your Sonos
®
speaker prior to mounting.
11
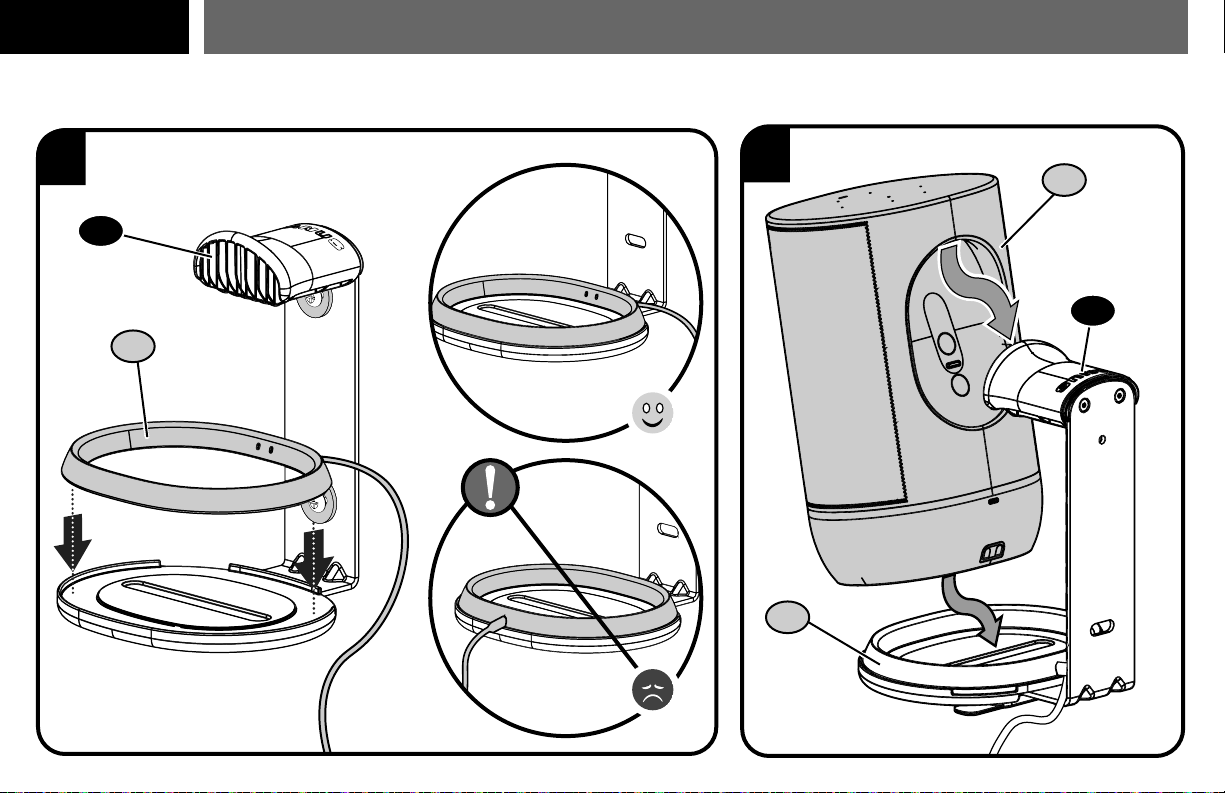
STEP 2
Attach Speaker to Mount
1
2
07
05
05
06
06
12
 Loading...