

Samsung Vp-l320, Vp-l350, Vp-l330, Vp-l300, VP-l980 Disassemble
Samsung Electronics 4-1
4. Disassembly and Reassembly
4-1 Cabinet Disassembly
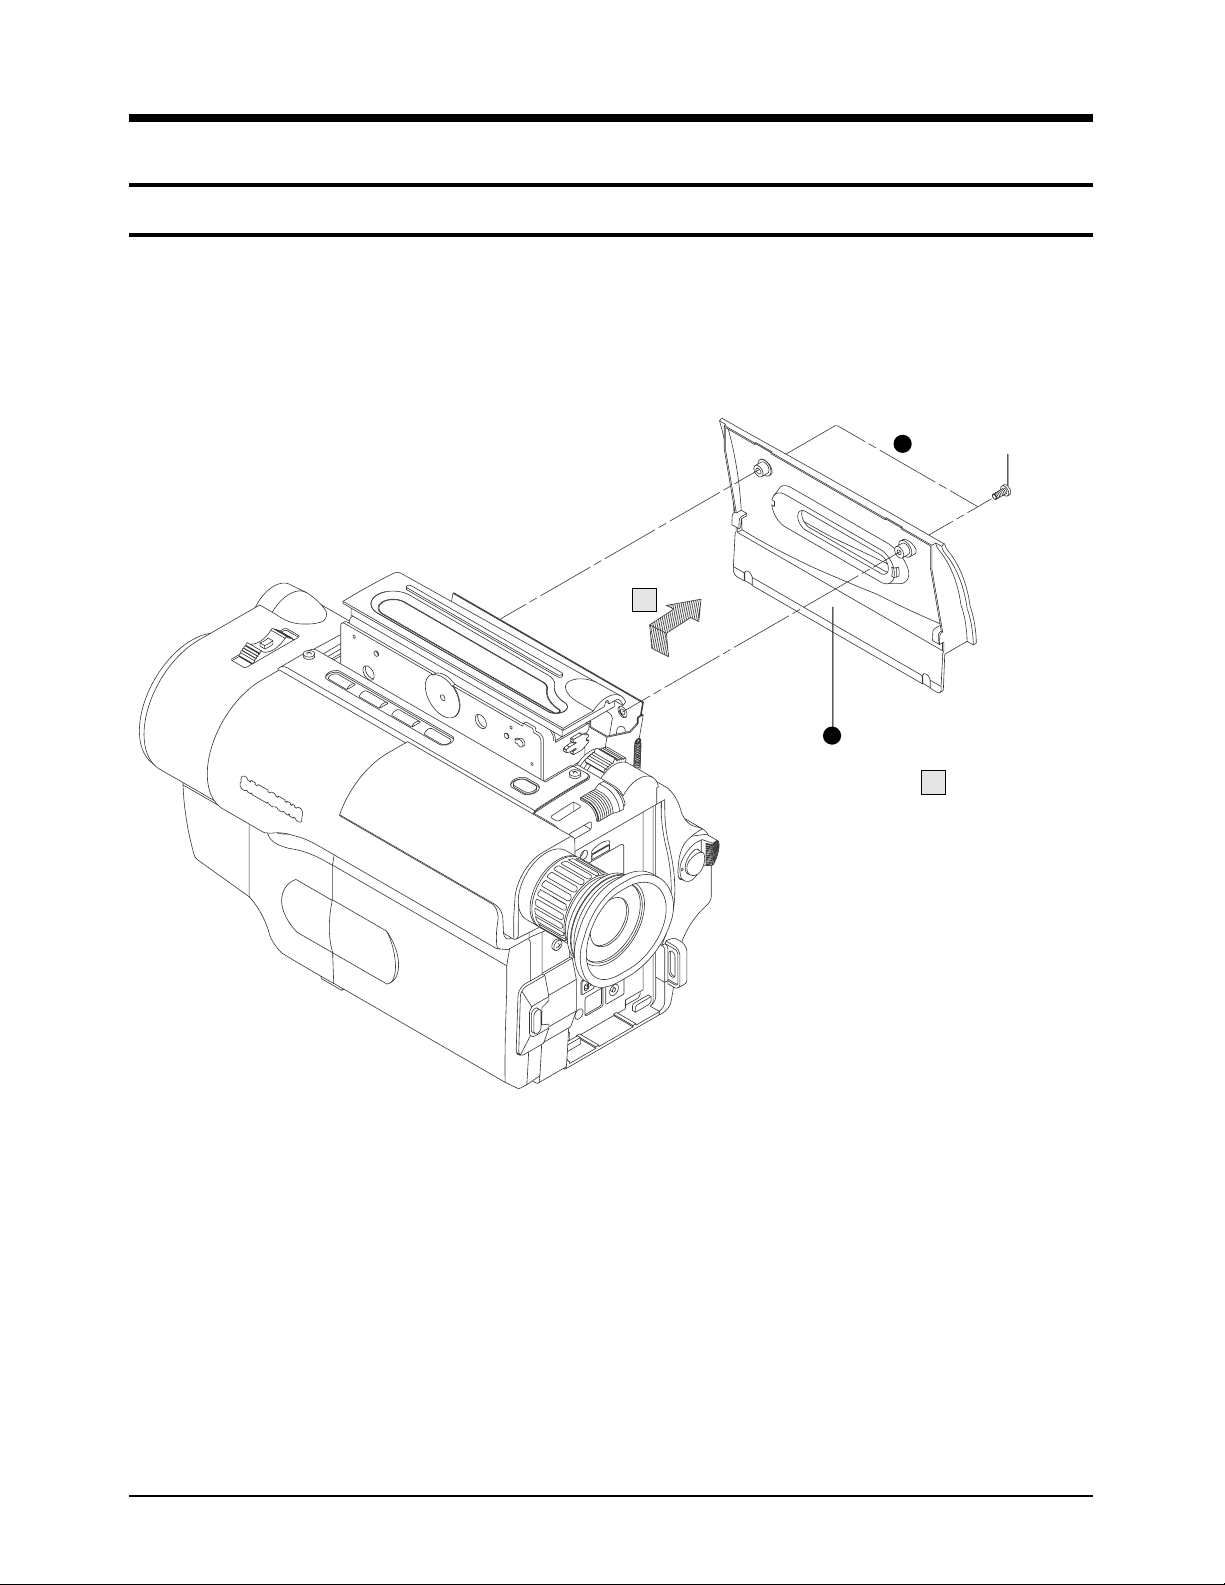
4-1-1 Ass’y Cover Housing Removal
1
Remove 2 screws.
2
Remove the ass'y cover
housing in the direction
of arrow .
A
A
Fig. 4-1 Ass’y Cover Housing Removal
*
It is recommended to eject the cassette
housing for removal the cover housing.
*
You don’t need to disassemble the Cover
Housing except that you change the Deck
Mechanism.

Samsung Electronics4-2
Disassemblr and Reassembly
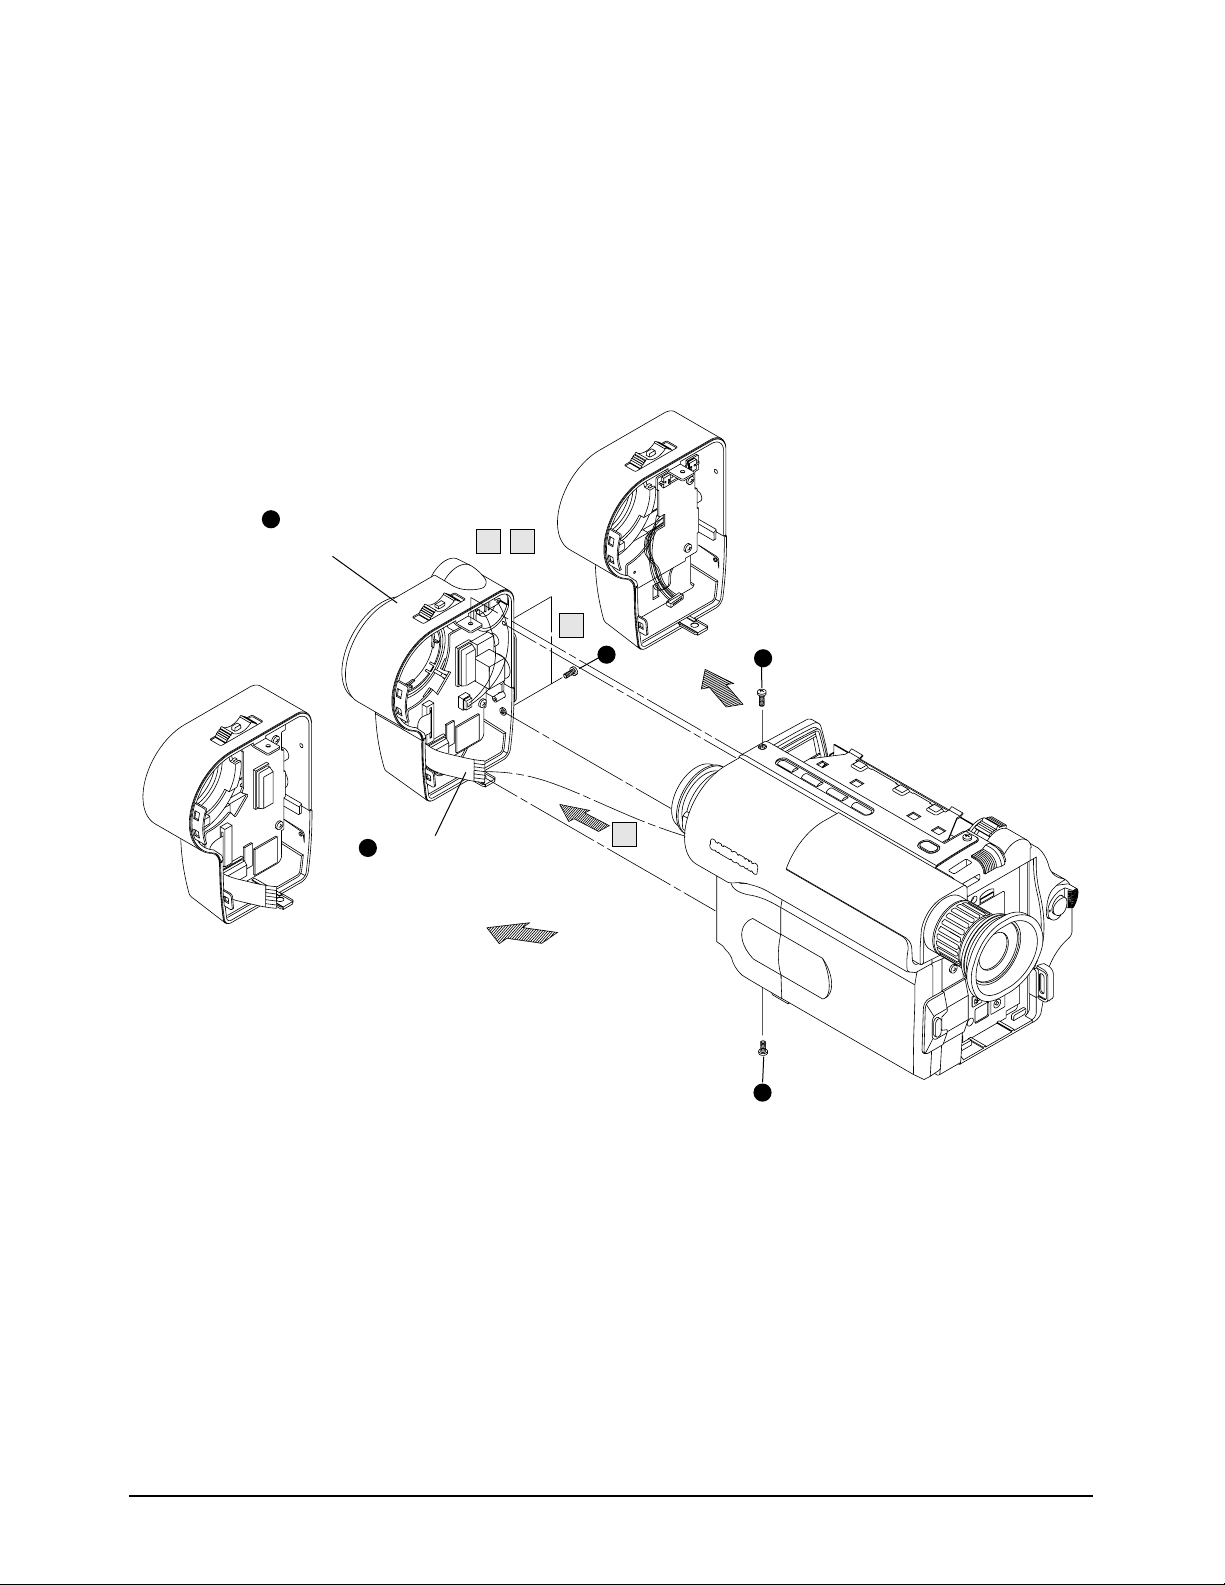
4-1-2 Ass’y Case Top Removal
1
Remove ass'y case top by gentlely releasing
2 locking tabs with a small screw driver.
(see DETAIL "A")
REASSEMBLY : Put the 7 tabs into the slot,
while sliding it as shown in DETAIL "B".
2 locking tabs
Precision screw driver
< DETAIL "A" >
"B"
< DETAIL "B" >
Fig. 4-2 Ass’y Case Top Removal
*
You don’t need to disassemble the Case Top except that
you change the Deck Mechanism.
Samsung Electronics 4-3
Disassemblr and Reassembly
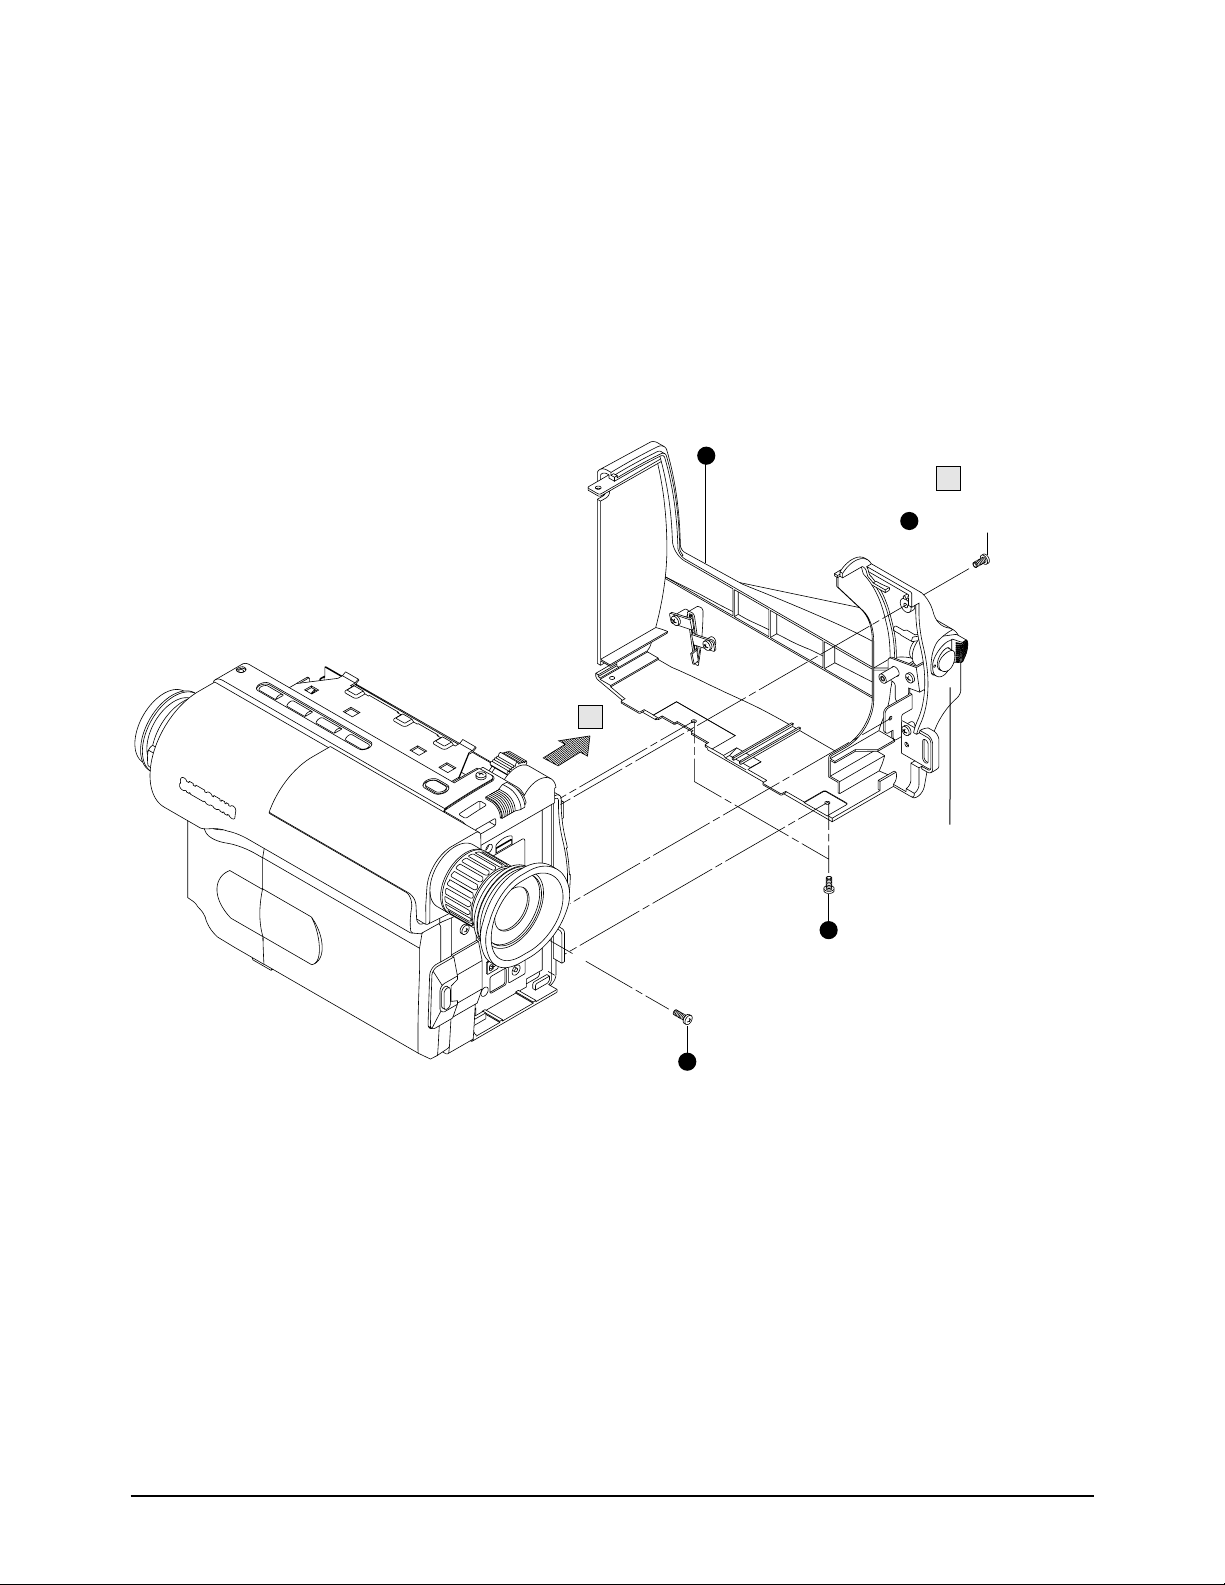
1
1
1
Remove 4 screws.
3
Disconnect the FPC
or wire from the audio block
of MAIN PCB.
(Ass'y front for
EIS models)
(Ass'y front for
Non-EIS models)
2
Pull out the ass'y front in
the direction of arrow , .
B
A
A B
4-1-3 Ass’y Front Removal
Fig. 4-3 Ass’y Front Removal
Samsung Electronics4-4
Disassemblr and Reassembly
4-1-4 Ass’y Case Right Removal
1
Remove 4 screws.
Pull out the unit case
in the direction of arrow .
Disassemble after turning
knob to be "LOCK".
1
1
2
A
A
Fig. 4-4 Ass’y Case Right Removal
 Loading...