

Samsung SC-HMX10, SC-HMX10A, SC-HMX10C, SC-HMX10N, SC-HMX10CN User Manual [es]
...
SC-HMX10
SC-HMX10A
SC-HMX10C
SC-HMX10N
SC-HMX10CN
SC-HMX10ED
High Definition
Digital
Camcorder
user manual
imagine the possibilities
Thank you for purchasing this Samsung product.
To receive more complete service, please register your
product at
www.samsung.com/global/register
Videocámara
Digital de Alta
Definición
manual del usuario
imagina las posibilidades
Gracias por adquirir un producto Samsung.
Para recibir un servicio más completo, registre su
producto en
www.samsung.com/global/register

Español _ii
ii_ English
key features of your HD
camcorder
The HD camcorder is capable of recording and playing back both High Definition
(HD: 1280x720p) and Standard Definition (SD: 720x480p) image quality. Select
the recording image quality, HD (high definition) or SD (standard definition), before
recording.
ENJOYING IMAGES WITH HIGH DEFINITION (HD) QUALITY
You can view the movies with the HD (high definition) image quality.
• This HD camcorder adopts the advanced 720p effective scanning lines to
reproduce a sharper image than the old SD camcorder (480i) and supports the
widescreen view in the aspect ratio of 16:9.
• The movies recorded in the HD (high definition) image quality will best fit the
wide (16:9) HDTV. If your TV is not a high definition TV, movies with HD (high
definition) image quality will be displayed with SD (standard definition) image
quality.
- To enjoy HD-quality images, you need a TV supporting 1280x720p input.
Check you have a high definition TV (HDTV). (Refer to the user manual of
your TV.)
- To enjoy the HD-quality images, use the component cable or HDMI cable.
The multi-AV cable does not support HD-quality images so it down-converts
them to SD-quality images.
• The image is recorded in 720x480p when the quality is set to SD in the HD
camcorder. The movies recorded with SD (standard definition) image quality
cannot be converted to HD (high definition) image quality.
principales funciones de la
videocámara HD
La videocámara HD es capaz de grabar y reproducir con una calidad de imagen
de alta definición (HD: 1280x720p) y con una definición estándar (SD: 720x480p).
Seleccione la calidad de imagen de grabación, HD (alta definición) o SD (definición
estándar), antes de grabar.
DISFRUTE DE LAS IMÁGENES CON CALIDAD DE ALTA
DEFINICIÓN (HD)
Puede ver los videos con una calidad de imagen HD (alta definición).
• Esta videocámara HD adopta líneas de rastreo efectivo 720p avanzado para
reproducir una imagen más nítida que la videocámara SD anterior (480i) y
admite la vista panorámicacon una relación de altura/anchura de 16:9.
• Los videos grabados con una calidad de imagen HD (alta definición) son
los que mejor adoptan la HDTV panorámica (16:9). Si su televisor no es de
alta definición, los videos con una calidad de imagen HD (alta definición) se
mostrarán con una calidad de imagen SD (definición estándar).
- Para disfrutar de las imágenes con calidad HD, necesita un televisor que
admita la entrada 1280x720p. Compruebe si tiene un televisor de alta
definición (HDTV). (Consulte el manual del usuario del televisor.)
- Para disfrutar de imágenes con calidad HD, utilice el cable de componentes
o el cable HDMI. El cable multi-AV no admite imágenes con calidad HD,
con lo cual las convierte en imágenes con calidad SD.
• La imagen se graba en 720x480p con la definición SD en la videocámara HD.
Los videos grabados con calidad de imagen SD (definición estándar) no se
pueden convertir en calidad de imagen HD (alta definición).
HD (high definition) image quality : 60p (Progressive)
1280
720
<720p / 16:9 high definition camcorder>
Image resolution: about 5 times that of the old SD camcorder(480i).
SD(Definición Estándard) Calidad de imágen: 60i (interlazada)
720
480
<480i / Camcorder Digital Normal>
Español _iii
iii_ English
FEATURES OF YOUR NEW HD CAMCORDER
Anynet+
supported
Anynet+
supported
POWER
POWER
150
1.61 Mega pixel (Gross) CMOS sensor
1/4.5” CMOS sensor provides stunning detail and clarity with exceptional video (1280
lines of resolution-HD mode or 720 lines of horizontal resolution-SD mode) and
still image performance (3.0 mega pixels). Unlike traditional CCD imagers, CMOS
sensors require less power, providing better battery performance.
High-capacity embedded fl ash memory (SC-HMX10A/HMX10C/HMX10CN/
HMX10ED only)
The HD camcorder has built-in high capacity fl ash memory that allows you to record
movie or photo images.
H.264 (MPEG4 part10/AVC) encoding
The latest video compression technology, H.264 uses a high compression rate to
sharply increase the recordable time for the same size storage.
HDMI interface (Anynet+ supported)
• If you have an HDTV featuring the HDMI jack, you
can enjoy a clearer and sharper image than ever on
a normal TV.
• This HD camcorder supports Anynet+.
Anynet+ is an AV network system that enables you
to control all connected Samsung AV devices with
Anynet+ supported Samsung TV’s remote control.
Refer to the corresponding TV’s user manual for
more details.
2.7” wide (16:9) touch panel LCD screen (230K pixels)
The 2.7” wide (16:9) LCD screen provides excellent viewing clarity
with improved resolution. The 230K pixel LCD screen rotates up to
270 degrees for multiple viewing angles providing sharp, detailed
images for monitoring or playback, and the widescreen format
makes shooting in 16:9 mode and composing shots even easier.
Touch panel adopted
You can play recorded images and set the functions by simply
tapping on the LCD screen without sophisticated button operation.
Swivel handle for free style shooting
You can adjust the swivel handle’s angle depending on the
recording situation because the swivel handle rotates upto 150°.
CARACTERÍSTICAS DE LA NUEVA VIDEOCÁMARA HD
Sensor CMOS de color de 1,61 megapíxeles (bruto)
El sensor CMOS de 1/4,5 pulg. proporciona unos detalles y una claridad
impresionantes con una resolución de video excepcional (1280 líneas de resolución
-modo HD o 720 líneas de resolución horizontal -modo SD) y un rendimiento de
imágen fi na de 3,0 megapíxeles. A diferencia de los dispositivos de imagenes CCD
tradicionales, los sensores CMOS requieren menos energía con lo cual proporcionan
un mayor rendimiento de la batería.
Memoria Flash incoropada de gran capacidad (sólo SC-HMX10A/HMX10C/
HMX10CN/HMX10ED)
La videocámara HD tiene incorporada una memoria fl ash de gran capacidad que le
permite grabar secuencias de video o imágenes fotográfi cas.
Codifi cación H.264 (MPEG4 part10/AVC)
La tecnología de compresión de video más reciente, H.264 utiliza una velocidad
de compresión alta para aumentar extraordinariamente el tiempo grabable para el
mismo tamaño de almacenamiento.
Interfaz HDMI (compatible con Anynet+)
• Si tiene un HDTV que incorpore una toma HDMI,
puede disfrutar de una imágen más clara y más nítida
en un televisor normal.
• Esta videocámara HD admite Anynet+.
Anynet+ es un sistema de red AV que posibilita el
control de todos los dispositivos de AV Samsung
conectados con el mando a distancia de televisores
Samsung compatibles con Anynet+. Para más
detalles, consulte el manual del usuario del televisor
correspondiente.
Pantalla LCD panorámica con panel táctil de 2,7 pulg, (16:9)
(230.000 píxeles)
La pantalla panorámica (16:9) de 2,7 pulg. proporciona una
claridad de visualización excelente con una resolución mejorada.
La pantalla LCD de 230.000 píxeles gira hasta 270 grados para
adoptar múltiples ángulos de visión, lo cual proporciona imágenes
detalladas nítidas para supervisión o reproducción, y el formato de
pantalla panorámica facilita aún más la grabación en modo 16:9 y
la composición de las tomas.
Panel táctil
Es posible reproducir las imágenes grabadas y defi nir las
funciones simplemente tocando la pantalla LCD sin necesidad de
utilizar sofi sticados botones.
Asa giratoria para mayores posibilidades de grabación
Puede ajustar el ángulo del asa giratoria dependiendo de la
situación de grabación ya que el asa giratoria gira hasta 150°.

Español _iv
iv_ English
safety warnings
advertencias de seguridad
What the icons and signs in this user manual mean:
WARNING
CAUTION
CAUTION
These warning signs are here to prevent injury to you and others.
Please follow them explicitly. After reading this section, keep it in a safe place for
future reference.
Means that death or serious personal injury is a risk.
Means that there is a potential risk for personal injury or
material damage.
To reduce the risk of fire, explosion, electric shock, or
personal injury when using your HD camcorder, follow
these basic safety precautions:
Means hints or referential pages that may be helpful when
operating the HD camcorder.
precautions
• This camcorder should always be connected to an AC outlet with a
protective grounding connection.
• Batteries shall not be exposed to excessive heat such as sunshine,
fire or the like.
Danger of explosion if battery is incorrectly replaced.
Replace only with the same or equivalent type.
If this power supply is used at 240V ac, a suitable plug adapter should
Warning!
Caution
be used.
Significado de los iconos y signos en este manual del
usuario:
Significa que existe riesgo de muerte o daños
ATENCIÓN
PRECAUCIÓN
PRECAUCIÓN
Estos signos de advertencia se incluyen aquí para evitar daños personales en usted
y en otras personas.
Sígalos explícitamente. Después de leer esta sección, guárdela en un lugar seguro
para referencia futura.
personales serios.
Significa que existe riesgo potencial de lesiones
personales o daños materiales.
Para reducir el riesgo de incendio, explosión, descarga
eléctrica o daños personales al utilizar la videocámara
HD, siga estas precauciones básicas de seguridad:
Significa sugerencias o páginas de referencia que
pueden resultar de utilidad al utilizar la videocámara HD.
precauciones
• Esta videocámara debe conectarse siempre a una toma de CA
con conexión de toma de tierra.
• No debe exponer las baterías a calor excesivo, a la luz directa del
sol ni al fuego, etc.
Si la batería no se sustituye correctamente,
Cambie la pila sólo por una igual o de especificaciones equivalentes.
Si se utiliza esta fuente de alimentación a 240V de CA, debe utilizarse
se corre el riesgo de una explosión.
Advertencia
Precaución
un adaptador adecuado.

Español _v
v_ English
important information on use
información importante
sobre su uso
BEFORE USING THIS CAMCORDER
• This HD camcorder records video in H.264 (MPEG4 part10/AVC)
format and at High Resolution (HD-VIDEO) and at Standard
Resolution (SD-VIDEO).
• Please note that this HD camcorder is not compatible with other
digital video formats.
• Before recording important video, make a trial recording.
Play back your trial recording to make sure the video and audio have
been recorded properly.
• The recorded contents cannot be compensated for:
- Samsung cannot compensate for any damage caused when a
recording cannot be played back because of a defect in the HD
camcorder or memory card.
Samsung cannot be responsible for your recorded video and
audio.
- Recorded contents may be lost due to a mistake when handling
this HD camcorder or memory card, etc. Samsung shall not be
responsible for compensation for damages due to the loss of
recorded contents.
• Make a backup of important recorded data
Protect your important recorded data by copying the files to PC. We
also recommend you copy it from your PC to other recording media
for storage. Refer to the software installation and USB connection
guide.
• Copyright: Please note that this HD camcorder is intended for
individual use only.
Data recorded on the storage media in this HD camcorder using
other digital/analog media or devices is protected by the copyright
act and cannot be used without permission of the owner of copyright,
except for personal enjoyment. Even if you record an event such as a
show, performance or exhibition for personal enjoyment, it is strongly
recommended that you obtain permission beforehand.
ANTES DE UTILIZAR ESTA VIDEOCÁMARA
• Esta videocámara HD graba video en formato H.264
(MPEG4 part10/AVC) y en alta resolución (HD-VIDEO) y con una
resolución estándar (SD-VIDEO).
• Recuerde que esta videocámara HD no es compatible con otros
formatos de video digital.
• Antes de grabar video importante, realice una prueba de
grabación.
Reproduzca la prueba de grabación para asegurarse de haber
grabado correctamente el video y el audio.
• No podrá recibir compensación alguna por el contenido
grabado por las siguientes causas:
- Samsung no puede compensar por ningún daño causado
- El contenido grabado podría perderse debido a un error de
• Realice una copia de seguridad de datos importantes grabados.
Proteja los datos importantes grabados copiando los archivos a una
PC. También recomendamos copiar desde la PC a otro soporte de
grabación para guardarlos. Consulte el manual de instalación del
software y de la conexión USB.
• Copyright: Tenga en cuenta que esta videocámara HD está
destinada a usuarios particulares.
Los datos grabados en el soporte de almacenamiento de esta
videocámara HD utilizando otros soportes o dispositivos digitales
o analógicos están protegidos por la ley de copyright y no pueden
utilizarse sin el permiso del propietario del copyright, excepto
para disfrute personal. Incluso aunque grabe un evento, como un
espectáculo, una actuación o una exposición para disfrute personal,
se recomienda encarecidamente obtener de antemano un permiso
para tal fin.
cuando la grabación no pueda reproducirse por un defecto en la
videocámara HD o en la tarjeta de memoria.
Samsung no puede hacerse responsable del video y audio
grabados.
manejo de esta videocámara HD o de la tarjeta de memoria, etc.
Samsung no será responsable de compensar por daños debidos
a la pérdida de contenido grabado.

Español _vi
vi_ English
important information on use
información importante
sobre su uso
ABOUT THIS USER MANUAL
• This User Manual covers models SC-HMX10, SC-HMX10A, SCHMX10C, SC-HMX10N, SC-HMX10CN, and SC-HMX10ED.
The SC-HMX10A, SC-HMX10C/HMX10CN, and SC-HMX10ED
have a 4GB, 8GB, and 16GB built-in flash memory respectively but
also use memory cards. The SC-HMX10/HMX10N does not have
built-in flash memory and uses memory cards exclusively.
Although some features of SC-HMX10, SC-HMX10A, SC-HMX10C,
SC-HMX10N, SC-HMX10CN, and SC-HMX10ED are different, they
operate in the same way.
• Illustrations of model SC-HMX10A are used in this user manual.
• The displays in this user manual may not be exactly the same as
those you see on the LCD screen.
• Designs and specifications of the camcorder and other accessories
are subject to change without any notice.
NOTES REGARDING A TRADEMARK
• All the trade names and registered trademarks mentioned in this
manual or other documentation provided with your Samsung product
are trademarks or registered trademarks of their respective holders.
• Windows® is registered trademark or trademark of Microsoft
Corporation, registered in the United States and other countries.
• Macintosh is trademark of Apple Computer, Inc.
• All the other product names mentioned here in may be the trademark
or registered trademarks of their respect companies.
• Furthermore, “TM” and “R” are not mentioned in each case in this
manual.
INFORMACIÓN SOBRE ESTE MANUAL DEL USUARIO
• Este manual de usuario sobre los modelos SC-HMX10, SCHMX10A, SC-HMX10C, SC-HMX10N, SC-HMX10CN, y SCHMX10ED.
Los modelos SC-HMX10A, SC-HMX10C/HMX10CN, y SCHMX10ED cuentan con una memoria flash incorporada de 4 GB,
8 GB y 16 GB respectivamente pero también utilizan tarjetas de
memoria. El modelo SC-HMX10/HMX10N no lleva incorporada la
memoria flash sino que utiliza exclusivamente tarjetas de memoria.
Aunque algunas funciones de los modelos SC-HMX10, SC-HMX10A,
SC-HMX10C, SC-HMX10N, SC-HMX10CN, y SC-HMX10ED son
diferentes, funcionan de la misma forma.
• En este manual del usuario se utilizan las ilustraciones del modelo
SC-HMX10A.
• Es posible que las pantallas del manual del usuario no sean
exactamente las mismas que las que aparecen en la pantalla LCD.
• Los diseños y especificaciones de los soportes de almacenamiento y
otros accesorios están sujetos a cambio sin aviso previo.
NOTAS RELACIONADAS CON MARCAS COMERCIALES
• Todos los nombres de marcas y marcas comerciales registradas
mencionados en este manual o en el resto de documentación
facilitada con el producto Samsung son marcas comerciales o
marcas registradas de sus respectivos propietarios.
• Windows® es una marca comercial registrada de Microsoft
Corporation, registrada en Estados Unidos y otros países.
• Macintosh es una marca comercial de Apple Computer, Inc.
• El resto de nombres de productos aquí mencionados puede ser
marca comercial o marca registrada de sus respectivas empresas.
• Además, las indicaciones “TM” y “R” no aparecen en todos los casos
en este manual.

Español _vii
vii_ English
precautions when using
precauciones de uso
IMPORTANT NOTE
• Handle the liquid crystal display (LCD) with care:
- The LCD is a very delicate display device: Do not press its surface
with force, hit it or prick it with a sharp object.
- If you push the LCD surface, unevenness in display may occur. If
unevenness does not disappear, turn the camcorder off, wait for a few
moments, and then turn it on again.
- Do not place the camcorder with the open LCD screen down.
- Close the LCD screen when not using the camcorder.
Liquid crystal display :
- The LCD screen the product of highly precise technology. Among
the total number of pixels (approx. 230,000 pixels for LCD screen),
0.01% or less pixels may be missing (black dots) or may remain lit
as colored dots (red, blue, green). This shows the limitations of the
current technology, and does not indicate a fault that will interfere with
recording.
- The LCD screen will be slightly dimmer than usual when the
camcorder is at low temperature, as in cold areas, or immediately
after power is turned on. Normal brightness will be restored when
the temperature inside the camcorder rises. This has no effect on the
images in the storage media, so there is no cause for concern.
• Hold the HD camcorder correctly:
Do not hold the HD camcorder by the LCD screen when lifting it: the LCD
screen could detach and the HD camcorder may fall.
• Do not subject the HD camcorder to impact:
-
This HD camcorder is a precision machine. Take great care that
you do not strike it against a hard object or let it fall.
- Do not use the HD camcorder on a tripod (not supplied) in a place
where it is subject to severe vibrations or impact.
• No sand or dust!
Fine sand or dust entering the HD camcorder or AC power adaptor could
cause malfunctions or defects.
• No water or oil!
Water or oil entering the HD camcorder or AC power adaptor could cause
electric shock, malfunctions or defects.
• Heat on surface of product:
The surface of the HD camcorder will be slightly warm when in use, but
this does not indicate a fault.
NOTA IMPORTANTE
• Maneje la pantalla de cristal líquido (LCD) con cuidado:
- La pantalla LCD es un dispositivo de visualización muy delicado: No
presione su superficie con fuerza, ni la golpee o la pinche con un
objeto punzante.
- Si presiona la superficie de la pantalla LCD, es posible que se
produzcan irregularidades en la pantalla. Si no desaparecen las
irregularidades, apague la videocámara, espere unos instantes y
enciéndala de nuevo.
- No coloque la videocámara con la pantalla LCD abierta hacia abajo.
- Cierre la pantalla LCD cuando no utilice la videocámara.
Pantalla de cristal líquido:
- La pantalla LCD cuenta con una tecnología de gran precisión. Del
número total de píxeles (aprox. 230,000 píxeles de una pantalla LCD),
el 0,01% o menos de los píxeles pueden estar apagados (puntos
negros) o permanecer encendidos como puntos de colores (rojo, azul
y verde). Esto muestra las limitaciones de la tecnología actual y no
indica ningún fallo que interfiera en la grabación.
- La pantalla LCD estará algo más atenuada de lo habitual cuando la
videocámara se encuentre a una temperatura baja, como en áreas
frías o inmediatamente después de encenderla. El brillo normal se
recuperará cuando suba la temperatura interior de la videocámara.
Esto no afecta a las imágenes de los soportes de almacenamiento,
con lo cual no hay ninguna razón para preocuparse.
• Sujete correctamente la videocámara HD:
No la sujete por la pantalla LCD: la pantalla LCD podría soltarse y la
videocámara HD podría caer al suelo.
• No someta la videocámara HD a impactos:
- Esta videocámara HD es una máquina de precisión. Ponga gran
cuidado para evitar golpearla contra objetos duros y no la deje caer.
- No utilice la videocámara HD con trípode (no suministrado) en lugares
expuestos a fuertes vibraciones o impactos.
• Evite la arena o el polvo.
La entrada de arena fina o polvo en la videocámara HD o en el adaptador
de alimentación de CA podría causar averías o fallos.
• Evite el agua o el aceite.
La entrada de agua o aceite en la videocámara HD o en el adaptador de
alimentación de CA podría causar descargas eléctricas o fallos.
• Calor sobre la superficie del producto:
La superficie de la videocámara HD estará ligeramente caliente al
utilizarse, pero no significa que tenga ningún fallo.

precautions when using
• Be careful of ambient temperature:
- Using the HD camcorder in a place where the temperature is over
140°F (60°C) or under 32°F (0°C) will result in abnormal recording/
playback.
- Do not leave the HD camcorder on a beach or in a closed vehicle
where the temperature is very high for a long time: This could cause a
malfunction.
• Do not point directly at the sun:
- If direct sunlight strikes the lens, the HD camcorder could malfunction
or a fire could occur.
- Do not leave the HD camcorder with the LCD screen exposed to
direct sunlight: This could cause a malfunction.
• Do not use the HD camcorder near TV or radio:
This could cause noise to appear on the TV screen or in radio broadcasts.
• Do not use the HD camcorder near strong radio waves or magnetism:
If the HD camcorder is used near strong radio waves or magnetism, such
as near a radio transmitter or electric appliances, noise could enter video
and audio that are being recorded. During playback of normally recorded
video and audio, noise may also be present in picture and sound. At worst
the HD camcorder could malfunction.
• Do not expose the HD camcorder to soot or steam:
Thick soot or steam could damage the HD camcorder case or cause a
malfunction.
• Do not use the HD camcorder near corrosive gas:
If the HD camcorder is used in a place where there is dense exhaust
gas generated by gasoline or diesel engines, or corrosive gas such as
hydrogen sulfide, the external or internal terminals could corrode, disabling
normal operation, or the battery connecting terminals could corrode, so
that power will not turn on.
• Do not wipe the HD camcorder body with benzene or thinner:
- The coating of exterior could peel off or the case surface could
deteriorate.
• Keep the memory card out of reach of children to prevent swallowing.
precauciones de uso
• Tenga cuidado con temperaturas ambientales inusuales:
- Si se utiliza la videocámara HD en un lugar en el que la temperatura
se encuentre por encima de 60°C(140°F) o por debajo de 0°C
(32°F), es posible que la reproducción /grabación no se realice de
forma normal.
- No deje la videocámara HD en la playa o en un vehículo cerrado
donde la temperatura sea muy alta, esto podría causar una avería.
• No apunte directamente al sol:
- Si la luz del sol incide directamente sobre el objetivo, podría
producirse un incendio o una avería en la videocámara HD.
- No deje la videocámara HD con la pantalla LCD expuesta a la luz
directa del sol, esto podría causar una avería.
• No utilice la videocámara HD cerca del televisor o la radio:
Esto podría causar la aparición de ruido en la pantalla del televisor o en
las emisiones de radio.
• No utilice la videocámara con DVD cerca de ondas de radio o
campos magnéticos:
Si se utiliza la videocámara HD cerca de ondas de radio o campos
magnéticos potentes, como transmisores de radio o aparatos eléctricos,
es posible que se produzca ruido en el video y el audio que se esté
grabando. Durante la reproducción de video y audio normalmente
grabados, es posible que también exista ruido en la imagen y el sonido.
En el peor de los casos, es posible que la videocámara HD no funcionara
con normalidad.
• No exponga la videocámara HD a hollín o vapor:
El hollín y el vapor podrían dañar la carcasa de la videocámara HD o
causar una avería.
• No utilice la videocámara con DVD cerca de un lugar en el que se
haya generado gas:
Si la videocámara se utiliza en un lugar en el que se haya generado gas
de escape denso por motores de gasolina o diesel, o bien gas corrosivo
como sulfuro de hidrógeno, podrían dañarse los terminales internos y
externos, impidiendo el funcionamiento normal, o bien los terminales de
conexión de la batería podrían dañarse impidiendo que se encendiera la
unidad.
• No limpie la carcasa de la videocámara HD con benceno ni
disolvente:
- El revestimiento del exterior podría desprenderse o podría
deteriorarse la superficie de la carcasa.
• Mantenga la tarjeta de memoria fuera del alcance de los niños para
impedir su ingesta accidental.
viii_ English
Español _viii

contents
INTRODUCTION TO
BASIC FEATURES
GETTING TO
KNOW YOUR HD
CAMCORDER
06
PREPARATION
10
05
06 What’s included with your HD
camcorder
07 Front & left view
08 Right & top view
09 Rear & bottom view
Using the remote control
10
11 Installing the button type
battery
11 Using the cradle
12 Holding the HD camcorder
13 Charging the battery pack
17 Basic HD camcorder operation
18 Screen indicators
Using the display ( )/iCHECK
22
button
22 Using the LCD enhancer ( )
Using the LCD screen
23
24 Initial setting: OSD language &
date and time
índice
INTRODUCCIÓN
SOBRE LAS
FUNCIONES BÁSICAS
INTRODUCCIÓN A LA
VIDEOCÁMARA HD
06
PREPARACIÓN
10
05
06 Componentes de la
videocámara HD
07 Vistas frontal y lateral izquierda
08 Vistas superior y lateral
derecha
09 Vistas posterior e inferior
10
Utilización Del Mando A Distancia
11 Instalación de la pila de botón
11 Utilización del soporte
12
Sujeción de la videocámara HD
13 Carga de la batería
17 Funcionamiento básico de la
videocámara HD
18 Indicadores de pantalla
22 Utilización del botón Pantalla
22
23 Uso de la pantalla LCD
24 Ajuste inicial: idioma de OSD y
i
( )/
CHECK
Uso del de LCD ( )
fecha y hora
BEFORE
RECORDING
01_ English Español _01
26 Selecting the storage media
(SC-HMX10A/HMX10C/
HMX10CN/HMX10ED only)
27 Inserting/ejecting a memory
26
card
28 Recordable time and number
of images
29 Selecting a suitable memory
card
ANTES DE GRABAR
26 Selección del soporte de
almacenamiento (sólo
26
SC-HMX10A/HMX10C/
HMX10CN/HMX10ED)
27 Inserción/expulsión de una
tarjeta de memoria
28 Tiempo y número de imágenes
grabables
29 Selección de una tarjeta de
memoria apropiada

02_ English Español _02
contents
RECORDING
31 Recording movie images
33 Taking photo images
34 Recording with ease for
31
beginners (EASY Q mode)
35 Capturing still images during
movie images playback
36 Using the external microphone
36 Zooming
37 Self record using the remote
control
índice
GRABACIÓN
31
Grabación de imágenes de video
33
Captura de imágenes fotográficas
34 Grabación sencilla para
31
principiantes (Modo EASY Q)
35 Captura de imágenes fijas du-
rante la reproducción de video
36 Utilización del micrófono
externo
36 Uso del Zoom
37 Autograbación utilizando el
mando a distancia
Changing the playback mode
PLAYBACK
CONNECTION
USING THE MENU
ITEMS
38
39 Playing movie images
41 Viewing photo images
38
43
Connecting to a TV
46 Dubbing images on VCR or
DVD/HDD recorder
Handling menus and quick
47
menus
49 Menu items
51 Quick menu items
52 Recording menu items
47
64 Playback menu items
66 Setting menu items
REPRODUCCIÓN
CONEXIÓN
UTILIZACIÓN DE
OPCIONES DEL
38 Cambio del modo de
reproducción
39 Reproducción de imágenes de
38
MENÚ
47
video
41 Visualización de imágenes
fotográficas
43
Conexión a un televisor
46 Duplicación de imágenes en el
aparato VCR o en la grabadora
de DVD/HDD
47
Manejo del menú y del menú
rápido
49 Opciones de menú
51 Opciones del menú rápido
52 Opciones del menú de
grabación
64 Opciones del menú de
reproducción
66 Ajustes De las opciones del
menú

03_ English Español _03
EDITING MOVIE
IMAGES
72
IMAGE
MANAGEMENT
78
PRINTING PHOTO
IMAGES
72 Deleting a section of a movie
image
73 Dividing a movie image
74 Combining two movie images
75 Playlist
Protection from accidental
78
erasure
79 Deleting images
80 Copying images (SC-
HMX10A/HMX10C/HMX10CN/
HMX10ED only)
81 Moving images (SC-HMX10A/
HMX10C/HMX10CN/
HMX10ED only)
82
DPOF print setting
83 Direct printing with a PictBridge
printer
EDICIÓN DE
IMÁGENES DE
VIDEO
72
GESTIÓN DE
IMÁGENES
78
IMPRESIÓN
DE IMÁGENES
FOTOGRÁFICAS
72 Eliminación de una sección de
una imagen de video
73 División de una imagen de
video
74 Combinación de dos imágenes
de video
75 Lista de reproducción
Protección contra borrado
78
accidental
79 Eliminación de imágenes
80 Copia de imágenes (sólo
SC-HMX10A/HMX10C/
HMX10CN/HMX10ED)
81 Imágenes en movimiento
(sólo SC-HMX10A/HMX10C/
HMX10CN/HMX10ED)
82
Ajuste de impresión DPOF
83 Impresión directa con una
impresora PictBridge
CONEXIÓN A UNA
CONNECTING TO A
System requirements
85
86 Installing the Cyberlink DVD
PC
85
Suite
88 Connecting the USB cable
89 Viewing the contents of storage
media
91 Transferring files from the HD
camcorder to your PC
85 Requisitos del sistema
86 Instalación de CyberLink DVD
PC
85
Suite
88 Conexión del cable USB
89 Visualización del contenido del
soporte de almacenamiento
91
Transferencia de archivos desde
la videocámara HD a la PC

contents
MAINTENANCE &
ADDITIONAL
INFORMATION
92 Maintenance
93 Additional information
95 Using your HD camcorder
abroad
índice
MANTENIMIENTO
E INFORMACIÓN
ADICIONAL
92 Mantenimiento
93 Información adicional
95 Utilización de la videocámara
HD en el extranjero
TROUBLESHOOTING
SPECIFICATIONS
96
Troubleshooting
109
SOLUCIÓN DE
PROBLEMAS
ESPECIFICACIONES
96
Solución de problemas
109
introduction to basic features
INSERT
BATTERY
PACK
INSERT
BATTERY
PACK
This chapter introduces you to the basic features of your HD camcorder.
See the reference pages below for more information.
introducción sobre las
funciones básicas
En este capítulo se presentan las funciones básicas de la videocámara HD.
Consulte las páginas de referencia que se incluyen a continuación para obtener
información adicional.
Step 1
Preparation
• Charging the battery pack
• Setting the date/time and OSD language
page 24-25
• Setting the storage media (built-in memory or
memory card)
(SC-HMX10A/HMX10C/HMX10CN/
HMX10ED only)
page 26
page 13
Step 2
Recording
• Recording the movie or photo images
pages 31,33
Step 3
Playing back
• Selecting an image to play back from the
thumbnail index views
• Viewing playback from your HD camcorder on
your PC or TV
05_ English Español _05
pages 43, 88
pages 39, 41
Paso 1
Preparación
• Recarga de la batería
• Ajuste de la fecha/hora e idioma de OSD
página 24-25
• Ajuste del soporte de almacenamiento
(memoria incorporada, tarjeta de memoria)
página 26
(sólo SC-HMX10A/HMX10C/HMX10CN/
HMX10ED)
página 13
Paso 2
Grabación
• Grabación de imágenes de video o fotografías
páginas 31,33
Paso 3
Reproducción
• Selección de una imagen para reproducirla
a partir de vistas de índices de imágenes en
miniatura
• Visualización de la reproducción desde una
videocámara HD en una PC o en un televisor
páginas 39, 41
páginas 43, 88
Español _06
06_ English
getting to know your HD
camcorder
introducción a la
videocámara HD
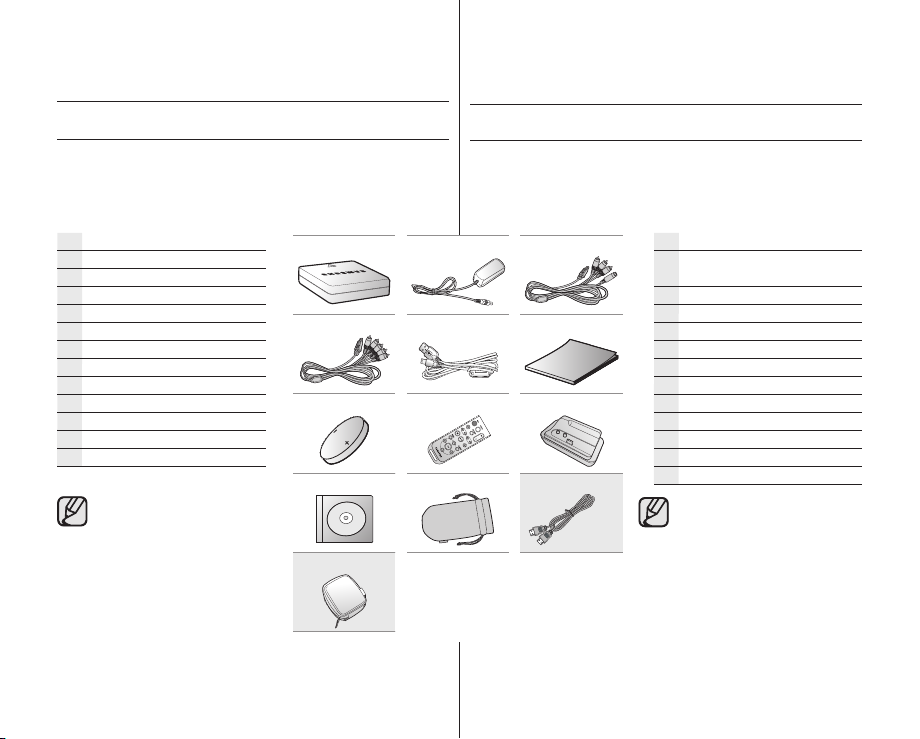
WHAT’S INCLUDED WITH YOUR HD CAMCORDER
Your new HD camcorder comes with the following accessories. If any of
these items is missing from your box, call
Samsung’s Customer Care Center.
The exact appearance of each item may vary by model.
✪
Battery pack (IA-BP85ST)
AC power adaptor (AA-E9 type)
Multi-AV cable
Component cable
USB cable
User manual
Button-type battery
Remote control
Cradle
Software CD
Pouch
HDMI cable*
Carrying case*
The contents may vary depending
on the sales region.
Parts and accessories are
available at your local Samsung
dealer.
* : Not included with your
camcorder. To buy the optional
accessory, contact your nearest
Samsung dealer.
A memory card is not included.
See page 29 for memory
cards compatible with your HD
camcorder.
COMPONENTES DE LA VIDEOCÁMARA HD
La nueva videocámara HD incluye los siguientes accesorios. Si falta
alguno de ellos en la caja, llame al centro de atención al cliente de
Samsung.
El aspecto exacto de cada elemento puede variar entre modelos.
✪
Batería (IA-BP85ST)
Adaptador de alimentación de CA
(tipo AA-E9)
Cable Multi-AV
Cable de componente
Cable USB
Manual del usuario
Pila de botón
Mando a distancia
Soporte
CD de software
Bolsa
Cable HDMI*
Runda de transporte*
El contenido puede variar
dependiendo de la región de
ventas.
Los componentes y accesorios
se encuentran disponibles en el
Servicio técnico de Samsung.
* : No se suministra con la
videocámara. Para adquirir el
accesorio opcional, póngase en
contacto con el distribuidor de
Samsung más cercano.
No se incluye la tarjeta de
memoria. Consulte la página 29
para ver las tarjetas de memoria
compatibles con la videocámara
HD.

Español _07
07_ English
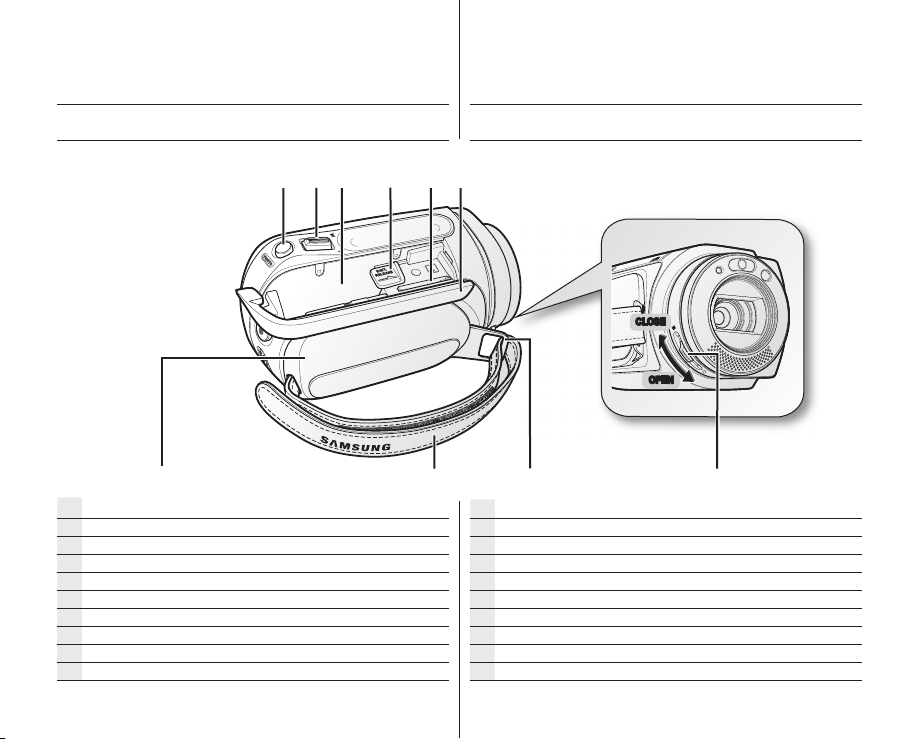
FRONT & LEFT VIEW
VISTAS FRONTAL Y LATERAL IZQUIERDA
Recording indicator
LED Light
Remote sensor
Lens
Internal microphone
Built-in speaker
Display (
LCD enhancer (
USB jack
COMPONENT / AV / S-Video (
RESET button
HDMI jack
Jack cover
TFT LCD screen (Touch panel)
Recording start/stop button
Zoom (W/T) button
Q.MENU button
i
) /
CHECK button
) button
) jack
Indicador de grabación
Luz LED
Mando a distancia
Objetivo
Micrófono interno
Parlante incorporado
Botón Pantalla (
Botón de ajuste de Brillo LCD(
Conector USB
Conector COMPONENT / AV / S-Video (
Botón RESET
Conector HDMI
Tapa de conectores
Pantalla LCD TFT (panel táctil)
Botón Iniciar/Parar grabación
Botón de zoom (W/T)
Botón Q.MENU
) / iCHECK
)
)
Español _08
08_ English
getting to know your HD
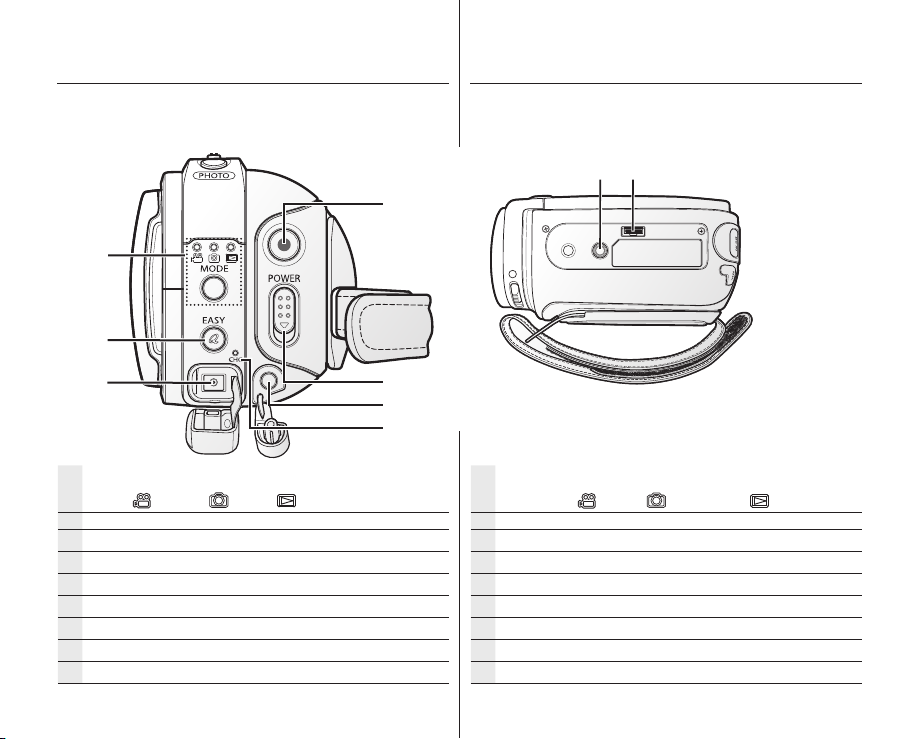
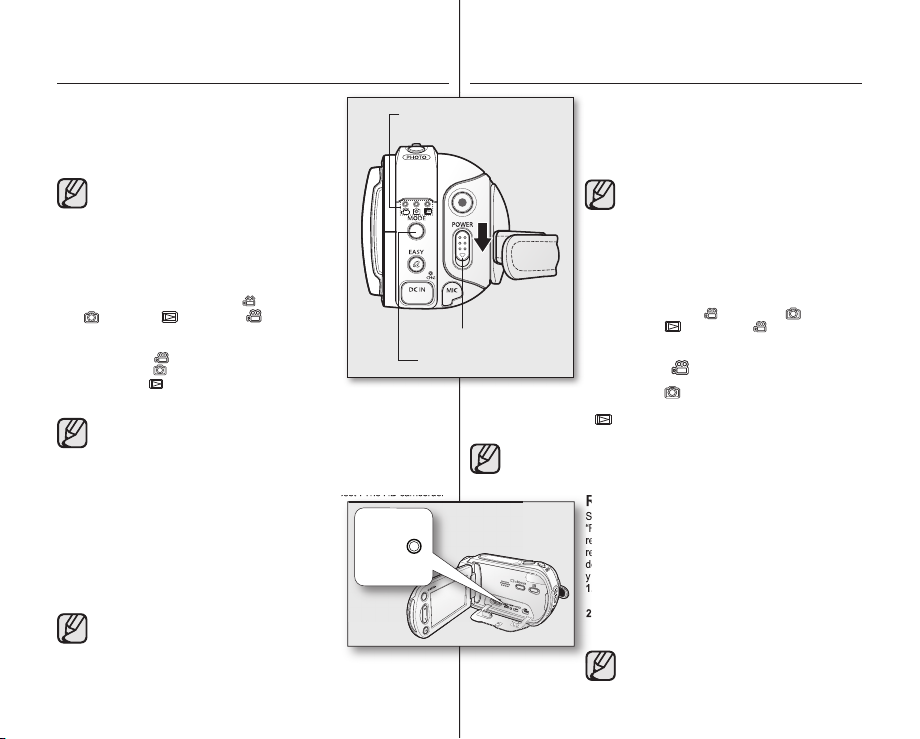
POWER
camcorder
introducción a la
videocámara HD
RIGHT & TOP VIEW
PHOTO button
Zoom (W/T) lever
Battery pack slot
BATT. RELEASE switch
Memory card slot
Battery pack / Memory card cover
Grip belt hook
Grip belt
Swivel handle
Lens open / close switch
VISTAS SUPERIOR Y LATERAL DERECHA
CLOSE
OPEN
Botón PHOTO
Palanca de zoom (W/T)
Ranura de la batería
Interruptor para expulsar la Batería
Ranura para tarjeta de memoria
Tapa de batería/tarjeta de memoria
Enganche de correa de empuñadura
Correa de empuñadura
Asa giratoria
Interruptor de apertura/cierre del objetivo
Español _09
09_ English
REAR & BOTTOM VIEW
VISTAS POSTERIOR E INFERIOR
MODE button / Mode indicator
(Movie ( ) / Photo ( ) / Play ( ) mode)
EASY Q button
DC IN jack
Recording start/stop button
POWER switch
External microphone (MIC) jack
Charging (CHG) indicator
Tripod receptacle
Cradle receptacle
Botón MODE / Indicador de modo
(modo Video (
Botón EASY Q
Conector de entrada de CC
Botón Inicio / Pausa de la grabación
Interruptor POWER
Toma de micrófono (MIC) externo
Indicador de carga (CHG)
Orificio para el trípode
Receptáculo del soporte
) / Foto ( ) / Reproducir ( ))
Español _10
10_ English
preparation
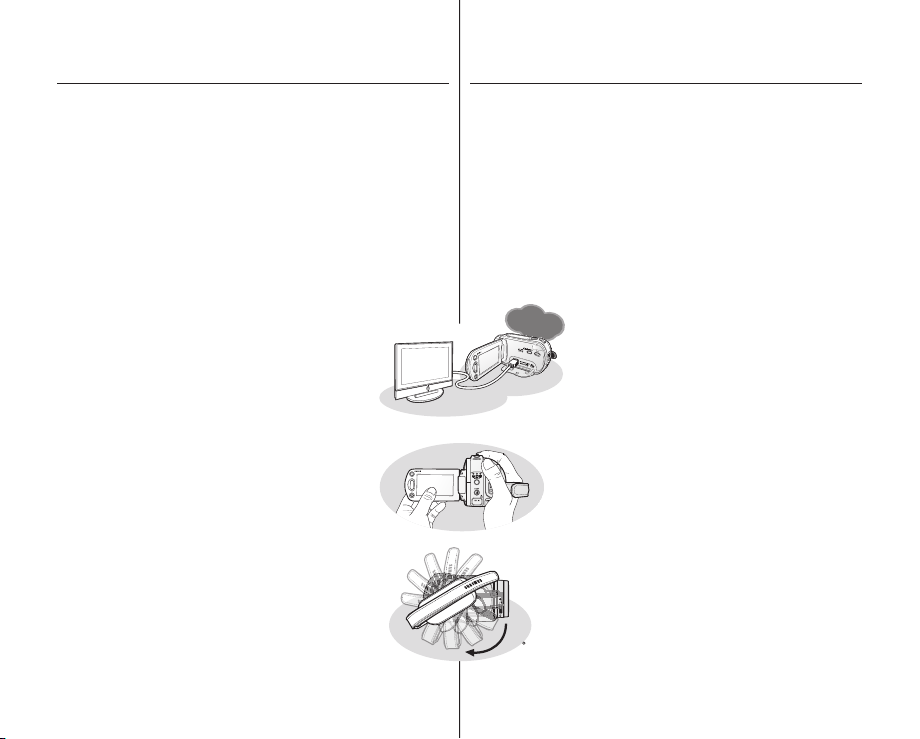
preparación
This section provides information on using this HD camcorder; such as
how to use the provided accessories, how to charge the battery, how to
setup the operation mode and initial setup.
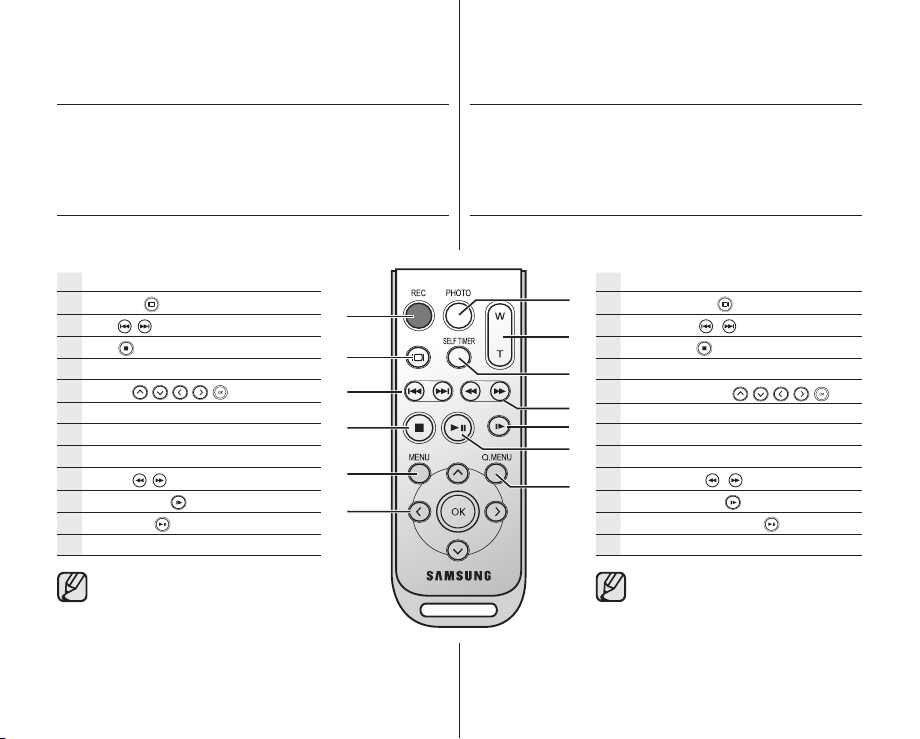
USING THE REMOTE CONTROL
REC button
DISPLAY (
Skip (
Stop (
MENU button
Control (
PHOTO button
Zoom (W/T) button
SELF TIMER button
Search (
Slow playback (
Play/Pause (
Q.MENU button
The buttons on the remote control function
the same as those on HD camcorder.
) button
/ ) button
) button
/ / / / ) buttons
/ ) button
) button
) button
En esta sección se facilita información sobre el uso de esta videocámara
HD, así como el modo de utilizar los accesorios que se facilitan, la forma
de cargar la batería, la manera de configurar el modo de funcionamiento
y la configuración inicial.
UTILIZACIÓN DEL MANDO A DISTANCIA
Botón REC
Botón DISPLAY (
Botón Saltar (
Botón Parar (
Botón MENU
Botones de control (
Botón PHOTO
Botón de zoom (W/T)
Botón SELF TIMER
Botón Buscar (
Botón Repr. lenta (
Botón Reproducir/Pausa (
Botón Q.MENU
Los botones del mando a distancia
funcionan igual que los de la videocámara
HD.
/ )
)
/ )
)
/ / / /
)
)
)

Español _11
11_ English
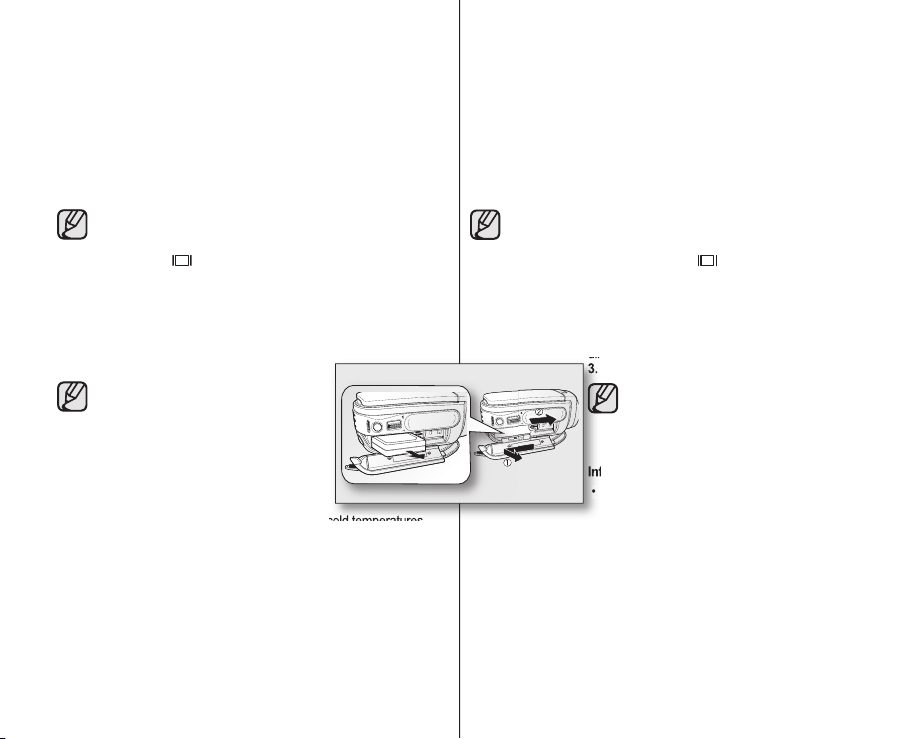
INSTALLING THE BUTTON TYPE BATTERY
3.
Precauciones relacionadas con la pila de botón
• Existe peligro de explosión si la pila de botón se coloca de
ATENCIÓN
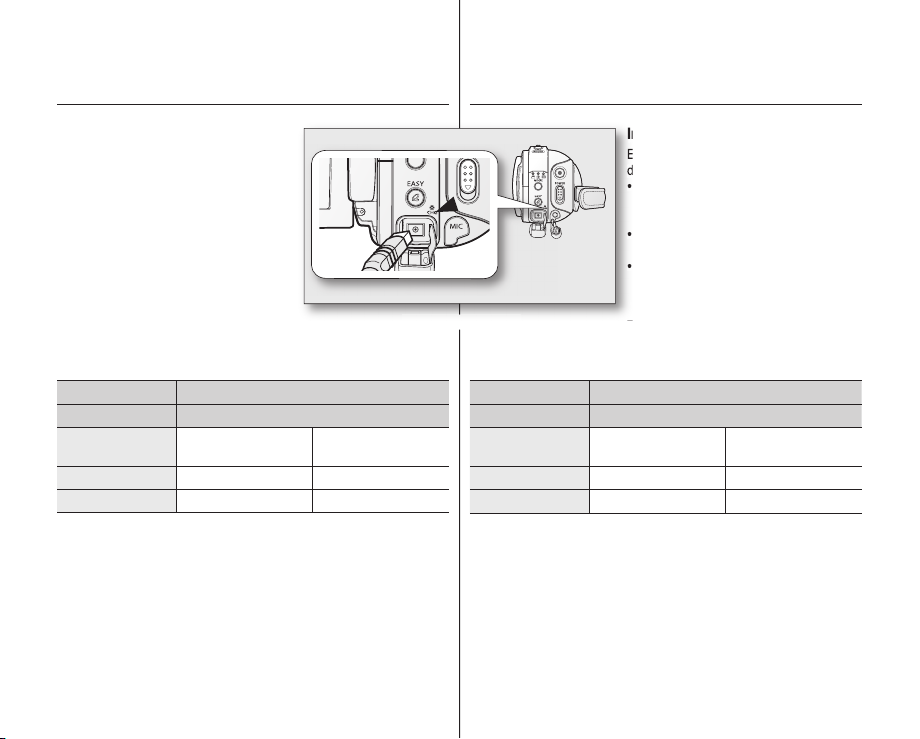
Installing the button type battery in the remote control
1. Turn the battery holder counterclockwise (as indicated with (
fi ngernail or a coin to open it. The battery holder opens.
2. Insert the battery into the battery holder while the positive (+)
terminal facing down and press it fi rmly until you hear a locking
sound.
3. Place the battery holder back in the remote, match its () mark
with the () mark on the remote control, and turn the battery
holder clockwise to lock it.
Precautions regarding the button type battery
• There is a danger of explosion if button type battery is incorrectly
replaced. Replace only with the same or equivalent type.
• Do not pick up the battery using tweezers or other metal tools.
This will cause a short circuit.
• Do not recharge, disassemble, heat or immerse the battery in
water, to avoid the risk of explosion.
Keep the button type battery out of the reach of
the children.
WARNING
Should any battery be swallowed, consult a
doctor immediately.
USING THE CRADLE
The cradle is a connection plate which can be used to make the camcorder
more stable when charging the battery, or connecting to an external devices
(TV, PC, etc.).
• If you connect your HD camcorder to
the provided cradle using more than
one type of cable to output image, the
order of priority of the output signal is
as follows: USB cable Component
/Multi-AV cable.
• Do not connect the connection cables
at the same time, it may cause confl ict
and may not work properly. If this
occurs, remove all the connected
cables and try the connection again.
DC IN jack
INSTALACIÓN DE LA PILA DE BOTÓN
) mark) using your
Instalación de la pila de botón en el mando a distancia
1
2
Battery
holder
3
UTILIZACIÓN DEL SOPORTE
El soporte es una placa de conexión que se puede utilizar para añadir mayor
estabilidad a la videocámata mientras se carga la batería o se conecta a
dispositivos externos (TV, PC, etc.).
USB jack Component/Multi-AV jack
1. Gire el compartimento de la pila hacia la izquierda como se
indica con la marca (
abrirlo. Se abrirá el compartimento de la pila.
2.
Inserte la pila en su soporte con el terminal positivo (+) y
presiónelo fi rmemente hasta que oiga un sonido de cierre.
Coloque el soporte de la pila en el mando a distancia de forma
3.
que coincida la marca () con la marca () del mando a
distancia y gire el soporte de la batería en sentido inverso a la
dirección de las agujas del reloj para bloquearlo.
Precauciones relacionadas con la pila de botón
• Existe peligro de explosión si la pila de botón se coloca de
forma incorrecta. Cambie la pila sólo por una igual o de
especifi caciones equivalentes.
• No agarre la batería utilizando pinzas u otras herramientas
metálicas. Esto provocará un cortocircuito.
• Para evitar riesgos de explosión, no recargue, desmonte,
caliente ni sumerja la batería en agua.
Mantenga la pila de botón fuera del alcance de
los niños.
ATENCIÓN
En caso de que, por accidente, alguien se
tragara una, avise inmediatamente a un médico.
Cradle
receptacle
) utilizando la uña o una moneda para
• Si conecta la videocámara HD
al soporte que se suministra
utilizando más de un tipo de
cable para generar la salida de
imágenes, el orden de prioridad
de la señal de salida es la
siguiente: Cable USB
componente / Multi-AV.
• No conecte los cables al mismo
tiempo, ya que puede crear un
confl icto y es posible que no
funcione correctamente. Si esto
ocurre, retire el resto de cables
conectados e intente la conexión
de nuevo.
Cable de

Español _12
12_ English
preparation
Inserte la mano derecha por la parte
inferior de la videocámara HD hasta la
base del pulgar.
Coloque la mano en una posición en la
que pueda fácilmente accionar el botón
Iniciar/Parar grabación
PHOTO
Ajuste la longitud de la correa de
la empuñadura de forma que la
videocámara HD quede estable
cuando presione el botón
grabación
Ajuste del ángulo
Gire el asa giratoria al ángulo más
conveniente.
Puede girarla hacia abajo entre 10° y 150°.
150
10
preparación
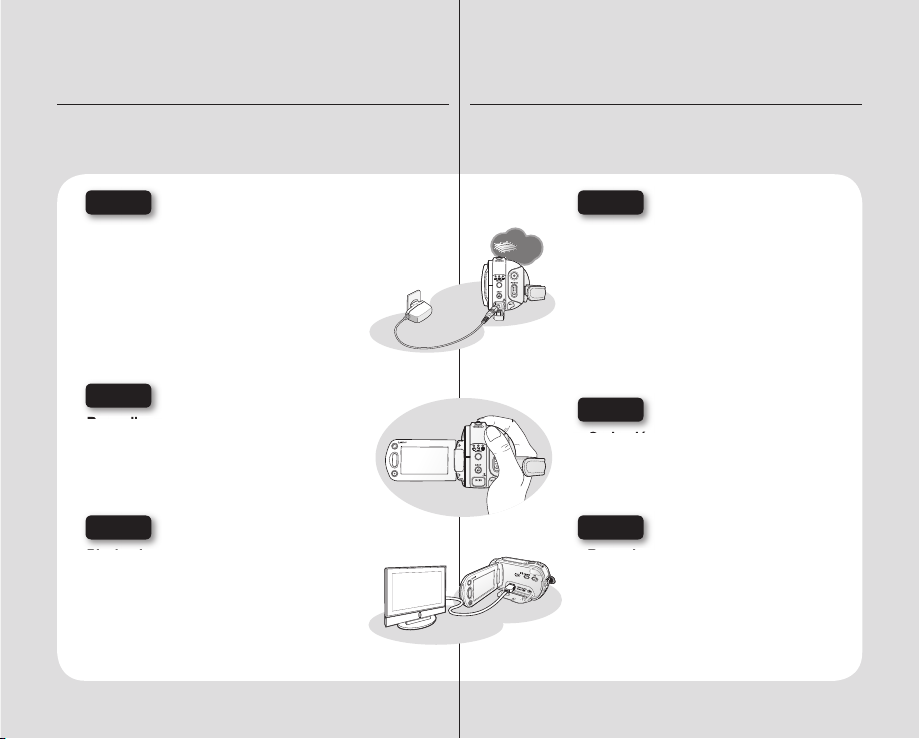
HOLDING THE HD CAMCORDER
Attaching the grip belt
Insert your right hand from the bottom of
the HD camcorder up to the base of your
thumb.
Put your hand in a position where you can
easily operate the Recording start/stop
button, PHOTO button, and the Zoom
lever.
Adjust the length of grip belt so that the
HD camcorder is stable when you press
the Recording start/stop button with
your thumb.
1. Detach the belt.
2. Adjust the length of grip belt and attach it.
Angle Adjustment
Rotate the swivel handle at the most
convenient angle.
You can rotate it downward from 10° to
150°.
Please be careful not to turn the
swivel handle backward as it may
cause damage.
SUJECIÓN DE LA VIDEOCÁMARA HD
Colocación de la correa de la empuñadura.
Inserte la mano derecha por la parte
inferior de la videocámara HD hasta la
1. Suelte la correa.
2. Ajuste la longitud de la correa de la empuñadura y fíjela.
base del pulgar.
Coloque la mano en una posición en la
que pueda fácilmente accionar el botón
Iniciar/Parar grabación, el botón de
PHOTO y la palanca del Zoom
Ajuste la longitud de la correa de
la empuñadura de forma que la
videocámara HD quede estable
cuando presione el botón Iniciar/Parar
grabación con el pulgar.
.
Ajuste del ángulo
Gire el asa giratoria al ángulo más
conveniente.
Puede girarla hacia abajo entre 10° y 150°.
Tenga cuidado de no girar el asa
giratoria hacia atrás ya que podría
dañarla.

Español _13
13_ English
CHARGING THE BATTERY PACK
videocámara HD.
Inserción de la batería
1.
2.
3.
3.
4.
• Use IA-BP85ST battery pack only.
• The battery pack may be charged a little at the time of purchase.
• Be sure to charge the battery pack before you start using your HD
camcorder.
Inserting the battery pack
1. Slide and open the battery pack cover as shown in
the fi gure.
2. Insert the battery pack into the battery pack slot until it
softly clicks.
• Make sure that word mark (SAMSUNG) is facing
down while the set is placed as shown in the
fi gure.
Slide and close the battery pack cover.
3.
Charging the battery pack
1. Slide the POWER switch downward to turn off the power.
2. Open the DC IN jack cover and connect the AC
power adaptor to the DC IN jack.
3. Connect the AC power adaptor to a wall socket.
4. Once charged, disconnect the AC power
adaptor from the DC IN jack on your HD
camcorder.
• Even with the power switched off, the
battery pack will still discharge if it is left
inserted in the HD camcorder.
• You can also charge with the cradle.
page 11
• It is recommended you purchase
one or more additional battery packs
to allow continuous use of your HD
camcorder.
Use only Samsung-approved battery packs. Do not use batteries from other
manufacturers.
Otherwise, there is a danger of overheating, fi re or explosion.
Samsung is not responsible for problems occurring due to using unapproved
batteries.
CARGA DE LA BATERÍA
• Utilice únicamente la batería IA-BP85ST.
• Es posible que la batería tenga algo de carga en el momento de la
compra.
• Asegúrese de cargar la batería antes de empezar a utilizar la
videocámara HD.
Inserción de la batería
1. Deslice y abra la tapa de la batería como se muestra
en la fi gura.
2. Inserte la batería en su ranura hasta que emita un
chasquido suave.
•
Asegúrese de que la marca de la palabra
(SAMSUNG) esté hacia abajo con el aparato
colocado como se muestra en la fi gura.
3. Deslice y cierre la tapa de la batería.
Carga de la batería
1. Deslice el interruptor POWER hacia abajo
para apagar la unidad.
2. Abra la tapa de la toma DC IN y conecte el
adaptador de alimentación de CA a la toma
DC IN.
3. Conecte el adaptador de alimentación de CA
a una toma de corriente.
4. Una vez cargada, desconecte el adaptador
de alimentación de CA del terminal de
entrada de CC de la videocámara HD.
• Incluso con la unidad apagada, la
batería se descargará si se deja
conectada a la videocámara HD.
• También puede cargarla con el
soporte. página 11
• Se recomienda adquirir una o
más baterías para poder utilizar la
videocámara HD de forma continua.
Utilice únicamente baterías aprobadas por Samsung. No utilice baterías de
otros fabricantes.
De lo contrario, existe peligro de sobrecalentamiento, incendio o explosión.
Samsung no se hace responsable de problemas que se produzcan debido al
uso de baterías no aprobadas.
Español _14
14_ English
preparation
Indicador de carga
El color del indicador LED indica el estado
de alimentación o de carga.
•
preparación
Charging indicator
The color of the LED indicates the power or
charging state.
• If the battery pack has been fully
charged, the charge indicator is green.
• If you are charging the battery, the color
of the charge indicator is orange.
• If an error occurs while the battery
pack in charging, the charging indicator
blinks green.
Charging, recording and playback
times with a fully charged battery pack (with no zoom
operation, LCD open, etc.)
Bettery type IA-BP85ST
Charging time approx. 80 min
Recording format
HD approx. 80 min approx. 100 min
SD approx. 85 min approx. 110 min
• Measured times shown above are based on model SC-HMX10A.
(Times for SC-HMX10/HMX10C/HMX10N/HMX10CN/HMX10ED are
almost the same)
• The time is only for reference. Figures showed above are measured under
Samsung’s test environment, and may differ from your actual use.
• The recording time shortens dramatically in a cold environment. The
continuous recording times in the operating instructions are measured
using a fully charged battery pack at 77 °F (25 °C). As the environmental
temperature and conditions vary, the remaining battery time may differ
from the approximate continuous recording times given in the instructions.
Continuous recording
time
Playback time
<Charging indicator>
reproducción con la batería totalmente cargada (sin utilizar el
zoom, con la LCD abierta, etc.)
Tipo de batería IA-BP85ST
Tiempo de carga Aprox. 80 min.
Formato de
• Los tiempos medidos que se muestran anteriormente están basadas en el
modelo SC-HMX10A.
(Los tiempos para los modelos SC-HMX10/HMX10C/HMX10N/HMX10CN/
HMX10ED son casi idénticos.)
• El tiempo es sólo de referencia. Las cifras indicadas anteriormente han
sido medidas en un entorno de prueba de Samsung y pueden diferir del
uso real.
• El tiempo de grabación se acorta enormemente en un ambiente frío. Los
tiempos de grabación continua en las instrucciones de funcionamiento
se miden utilizando una batería totalmente cargada a 25 °C (77 °F).
Conforme la temperatura y las condiciones ambientales varíen, el tiempo
restante de la batería puede diferir de los tiempos de grabación continuos
facilitados en las instrucciones.
Indicador de carga
El color del indicador LED indica el estado
de alimentación o de carga.
• Si la batería está completamente
cargada, el indicador de carga aparece
de color verde.
• Si está cargando la batería, el indicador
de carga aparece de color naranja.
• Si se produce un error mientras se
recarga la batería, el indicador de carga
parpadea en verde.
Tiempos de carga, grabación y
grabación
HD Aprox. 80 min. Aprox. 100 min.
SD Aprox. 85 min. Aprox. 110 min.
Tiempo de grabación
continuada
Tiempo de reproducción
Español _15
15_ English
Continuous recording (without zoom)
dirección que se muestra en la fi gura.
3.
Información sobre baterías
• La batería debe recargarse a una temperatura
The times shown in the table refl ect the available recording time when the HD
camcorder is in the recording mode without using any other functions. In actual
recording, the battery pack may discharge 2-3 times faster than this reference since
the Record start/stop and Zoom are being operated, and playback is performed.
Assume that the recordable time with a fully charged battery pack is between 1/2 and
1/3 of the time in the table, and enough battery packs to allow for the time you are
planning to record on the HD camcorder.
Note that the battery pack discharges faster in cold environment.
• The charging time will vary depending on the remaining
battery level.
• To check the remaining battery charge, press and hold the
Display (
i
CHECK button.
)/
page 22
Ejecting the battery pack
1. Slide and open the battery pack cover.
2. Slide the BATT. RELEASE switch and pull out the battery pack.
• Gently slide the BATT. RELEASE switch in the direction as
shown in the fi gure.
3. Slide and close the battery pack cover.
• Additional battery packs are available
at your local Samsung dealer.
• If the HD camcorder will not be in use
for a while, remove the battery pack
from the HD camcorder.
About battery packs
• The battery pack should be recharged in an
environment that is between 32°F (0°C) and
104°F (40°C). However, when it is exposed to cold temperatures
(below 32°F (0°C)), its usage time becomes reduced and it may
cease to function. If this happens, place the battery pack in your
pocket or other warm, protected place for a short time, then re-insert
it to the HD camcorder.
• Do not put the battery pack near any heat source (i.e. fi re or a
heater).
• Do not disassemble, apply pressure to, or heat the battery pack.
• Do not allow battery pack terminals to be short-circuited. It may cause
leakage, heat generation, induce overheating or fi re.
Grabación continua (sin zoom)
Los tiempos que se muestran en la tabla refl ejan el tiempo de grabación disponible
cuando la videocámara HD se encuentra en el modo de grabación sin utilizar otras
funciones. En una grabación, la batería puede descargarse 2-3 veces más rápido
que esta referencia debido a que se está utilizando Iniciar/parar grabación y el
zoom, y se está realizando la reproducción. Calcule que el tiempo grabable con una
batería totalmente cargada es de entre 1/2 y 1/3 del tiempo de la tabla, y prepare el
número de baterías sufi ciente que le permita grabar con la videocámara HD el tiempo
planeado.
Observe que la batería se descarga más rápidamente en un ambiente frío.
• El tiempo de carga variará dependiendo del nivel de batería
restante.
• Para comprobar la carga restante de la batería, mantenga
presionado el botón Pantalla ( )/
i
CHECK.
página 22
Extracción de la batería
1. Deslice y abra la tapa de la batería.
2. Deslice el interruptor BATT. RELEASE y saque la batería.
• Deslice suavemente el interruptor BATT. RELEASE en la
dirección que se muestra en la fi gura.
3. Deslice y cierre la tapa de la batería.
• La batería adicional está disponible en
el distribuidor local de Samsung .
• Si no va a utilizar la videocámara HD
durante un tiempo, retire la batería de
la misma.
Información sobre baterías
• La batería debe recargarse a una temperatura
ambiente de entre 0° C (32° F) y 40° C (104° F)
temperaturas frías (por debajo de 0°C (32°F)), su tiempo de uso se
reduce y es posible que deje de funcionar. Si esto sucede, coloque
la batería en el bolsillo o en otro sitio caliente protegido durante un
tiempo y vuelva a colocarla en la videocámara HD.
• No ponga la batería cerca de una fuente de calor (un fuego o un
calefactor, por ejemplo).
• No desmonte la batería ni la someta a manipulaciones, presiones ni
al calor.
• No permita que los terminales de la batería se cortocircuiten. Podrían
producirse pérdidas o calentamiento, lo cual podría ocasionar
sobrecalentamiento o un incendio.
No obstante, cuando se expone a
.

Español _16
16_ English
preparation
preparación
Maintaining the battery pack
• The recording time is affected by temperature and environmental conditions.
• We recommend only using the original battery pack that is available from your
Samsung retailer. When the battery reaches the end of its life, please contact
your local dealer. The batteries have to be dealt with as chemical waste.
• Make sure that the battery pack is fully charged before starting to record.
• To preserve battery power, keep your HD camcorder turned off when you are not
operating it.
• Even when the power is switched off, the battery pack will still discharge if it is
left inserted to the HD camcorder. If you do not use the HD camcorder for an
extended time period, keep it with the battery completely depleted.
• For power saving purposes, the HD camcorder will automatically turn off after 5
minutes in standby mode. (Only if you set “Auto Power Off” from the menu to on
(“ 5 min ”).)
• When fully discharged, a battery pack damages the internal cells. The battery
pack may be prone to leakage when fully discharged. Charge the battery pack at
least once per 6 months to prevent complete discharge of the battery pack.
About the battery life
Battery capacity decreases over time and through repeated use. If decreased usage
time between charges becomes significant, it is probably time to replace it with a new
one.
Each battery’s life is affected by storage, operating and environmental conditions.
Using the HD camcorder with the AC power adaptor
It is recommended that you use the AC power adaptor to power the HD camcorder
from a household AC outlet when you perform settings on it, play back, or edit images,
or use it indoors.
CAUTION
page 13
• Before detaching the power source, make sure that the HD camcorder’
s power is turned off. Failure to do so can result in camcorder
malfunction.
• Use a nearby wall outlet when using the AC power adaptor. Disconnect
the AC power adaptor from the wall outlet immediately if any
malfunction occurs while using your HD camcorder.
• Do not use the AC power adaptor in a narrow space, such as between
a wall and furniture.
Mantenimiento de la batería
• El tiempo de grabación se ve afectado por las condiciones ambientales y la
temperatura.
• Recomendamos únicamente el uso de la batería original que está disponible en
los distribuidores autorizados de SAMSUNG. Cuando se agote la vida útil de
la batería, póngase en contacto con su proveedor habitual. Para desechar las
baterías gastadas, éstas deben tratarse como residuos químicos.
• Asegúrese de que la batería esté completamente cargada antes de empezar a
grabar.
• Para ahorrar energía de la batería mantenga la videocámara HD apagada
cuando no se esté usando.
• Incluso con la unidad apagada, la batería se descargará si se deja conectada
a la videocámara HD. Si no utiliza la videocámara HD durante un tiempo
prolongado, guárdela con la batería quitada.
• Para ahorrar energía, la videocámara HD se apagará automáticamente después
de estar 5 minutos en modo de espera. (Sólo si activa “Auto Power Off” en el
menú en (“ 5 min ”).)
• Cuando se descarga completamente, la batería daña las células internas. La
batería puede ser más propensa a fugas cuando se deja totalmente descargada.
Carque la batería al menos una vez cada 6 meses para evitar la descarga
completa de la batería.
Información sobre la duración de la batería
La capacidad de la batería disminuye con el tiempo y tras el uso reiterado. Si el
tiempo de uso reducido entre cargas es cada vez más significativo, probablemente
es hora de sustituirla por una nueva.
La duración de cada batería depende de las condiciones de almacenamiento,
funcionamiento y ambientales.
Utilización de la videocámara HD con el adaptador de
alimentación de CA
Se recomienda utilizar el adaptador de alimentación de CA para suministrar energía a
la videocámara HD a través de la toma de CA cuando realice ajustes, reproduzca o la
utilice en interiores.
PRECAUCIÓN
página 13
• Antes de desconectar la fuente de alimentación, asegúrese de que la
videocámara HD esté apagada. No hacerlo podría provocar una avería
en la videocámara.
• Utilice una toma de corriente cercana cuando utilice el adaptador de
alimentación de CA. Desconecte el adaptador de alimentación de CA
de la toma de corriente inmediatamente si se produce alguna avería
mientras utiliza la videocámara HD.
• No utilice el adaptador de CA colocado en un espacio estrecho, como
entre una pared y un mueble.
Español _17
17_ English
BASIC HD CAMCORDER OPERATION
Reinicialización del sistema
Si la videocámara HD no funciona con normalidad, realice la
“Reinicialización del sistema”: Es posible que la videocámara HD
recupere la normalidad. Con la “reinicialización del sistema” se
reinicializarán todas las opciones a los ajustes predeterminados
de fábrica. La fecha y hora también se reinicializarán: Fije la fecha
y hora de nuevo antes de utilizar la videocámara HD.
1.
2.
Set the appropriate operation mode according to your preference
using the POWER switch and MODE button.
Turning the HD camcorder on and off
You can turn the camcorder on or off by sliding the POWER switch
downward.
• Set the date and time when using your HD camcorder for
• When you use your HD camcorder for the fi rst time or
Setting the operating modes
• You can switch the operating mode in the following order each time
you press the MODE button. Movie mode ( ) Photo mode
( )
Play mode ( ) Movie mode ( )
• Each time the operational mode changes, the respective mode
indicator lights up.
- Movie mode (
- Photo mode (
- Play mode (
page 38
• When the HD camcorder is turned on, the self-diagnosis function operates
• Movie mode is set by default with the power on
System Reset
If the HD camcorder does not operate normally, perform “System Reset”: The HD camcorder
may recover to normal. “System Reset” will reset all settings to
factory defaults. The date and time will also be reset: Set the date
and time again before using the HD camcorder.
1. Turn the HD camcorder off.
• Remove the battery pack or AC adaptor.
2. Use a fi ne tipped pen to hold down the RESET button.
• All settings will be reset.
Do not press the RESET button with undue force.
page 25
the fi rst time.
you reset it, you will see the “Date/Time Set” menu for
the startup display. If you do not set the date and time,
the date and time setting screen appears every time you
turn on your camcorder.
): To record movie images.
): To record photo images.
): To play movie or photo images, or edit them.
and a message may appear. In this case, refer to “Warning indicators and
messages” (on pages 96-99) and take corrective action.
page 31
page 33
.
Mode indicator
MODE button
FUNCIONAMIENTO BÁSICO DE LA VIDEOCÁMARA HD
Ajuste el modo de funcionamiento apropiado a sus preferencias
utilizando el interruptor POWER y el botón MODE
Encendido y apagado de la videocámara HD.
Puede encender y apagar la videocámara deslizando hacia abajo
el interruptor POWER
Ajuste de los modos de funcionamiento
• Puede cambiar el modo de funcionamiento en el orden que
se indica a continuación cada vez que presione el botón
MODE
POWER switch
- Modo Reproducir (
editarlas.
• Cuando se enciende la videocámara HD, se activa la función de
autodiagnóstico y puede aparecer un mensaje. En este caso, consulte
“Mensaje de error” (en las páginas 96-99) y realice una acción correctora.
• Con la unidad encendida el modo Video es la opción preteterminada.
Reproducir (
• Cada vez que cambia el modo de funcionamiento, se
ilumina el indicador de modo respectivo.
- Modo Video (
- Modo Foto ( ): Para grabar imágenes fotográfi cas.
): Para reproducir imágenes de video o fotografías o
página 38
Reinicialización del sistema
Si la videocámara HD no funciona con normalidad, realice la
“Reinicialización del sistema”: Es posible que la videocámara HD
recupere la normalidad. Con la “reinicialización del sistema” se
reinicializarán todas las opciones a los ajustes predeterminados
de fábrica. La fecha y hora también se reinicializarán: Fije la fecha
y hora de nuevo antes de utilizar la videocámara HD.
1. Apague la videocámara HD.
• Retire la batería o el adaptador de CA.
2. Utilice un bolígrafo de punta fi na para presionar el botón
RESET
• Se reinicializan todos los ajustes.
.
• Fije la fecha y hora cuando utilice la videocámara HD
por primera vez.
• Cuando utilice la videocámara HD por primera vez o la
reinicialice, aparecerá el menú“Date/Time Set” en la
pantalla inicial. Si no fi ja la fecha y hora, la pantalla de
ajuste de fecha y hora aparecerá siempre que encienda
la videocámara.
Modo Video (. )
.
página31
página 33
.
No presione el botón RESET con una fuerza excesiva.
página 25
Modo Foto ( ) Modo
)
Modo Video ( )
): Para grabar imágenes de video.

Español _18
18_ English
preparation
preparación
SCREEN INDICATORS
Movie record mode
Movie record mode
Operating mode (STBY (standby) or
(recording))
Time counter (movie recording time) / Self
timer*
Warning indicators and messages
Remaining recordable time
Storage media (built-in memory (SC-HMX10A/
HMX10C/HMX10CN/HMX10ED only) or
memory card)
Battery info.(remaining battery level/time)
Movie image quality
LCD enhancer
Anti-Shake (EIS)
LED light*
Tele macro
Wind cut
Back light
Component out (when component cable is
connected.)
TV type (when component or Multi-AV cable is
connected.)
Menu tab
Zoom / Digital zoom position*
Date/Time
Record/Play mode tab
Shutter speed*
Manual exposure*
Manual focus*
White balance
Fader*
Scene mode (AE) / EASY Q
Digital effect*
• The OSD indicators are based on memory capacity of 4GB (built-in
memory).
• The above screen is an example for explanation: It is different from the
actual display.
• Functions marked with * will not be retained when the HD camcorder is
powered on after turning it off.
• For enhanced performance, the display indications and the order are
subject to change without prior notice.
S.1/60
INDICADORES DE PANTALLA
STBY 00:00:00 [44Min]
Open Lens Cover
JAN/01/2007 12:00 AM
10
Modo Grabar video
Modo Grabar video
Modo de funcionamiento (STBY (espera) o
(grabación))
Contador de tiempo (tiempo de grabación de
video) / Temporizador*
Indicadores y mensajes de advertencia
Tiempo de grabación restante
Soporte de almacenamiento (memoria
80
Min
10
• Los indicadores de OSD están basados en la capacidad de memoria de
4 GB (memoria incorporada).
• La pantalla anterior es un ejemplo explicativo: Es diferente de la pantalla
real.
• Las funciones no marcadas con * se conservarán cuando se encienda
la videocámara HD después de apagarla.
• Para un mayor rendimiento, las indicaciones de pantalla y el orden
están sujetos a cambio sin aviso previo.
incorporada (sólo SC-HMX10A/HMX10C/
HMX10CN/HMX10ED) o tarjeta de memoria)
Inf. de la batería (nivel/tiempo restante de la
batería)
Calidad de la imagen de video
Ampliador de LCD
Anti-temblores (EIS)
Luz LED*
Macro telescópica
Antiviento
Luz de fondo
Salida de componete (cuando está conectado
el cable de componente.)
Tipo de TV (Cuando está conectado el cable
de componentes o Multi-AV.)
Ficha Menú
Posición de Zoom / Zoom digital *
Fecha/Hora
Ficha Modo Grabar/Reproducir
Velocidad de obturador*
Exposición manual*
Enfoque manual*
Balance de blanco
Atenuador*
Modo escena (EA) / EASY Q
Efecto digital*
Español _19
19_ English
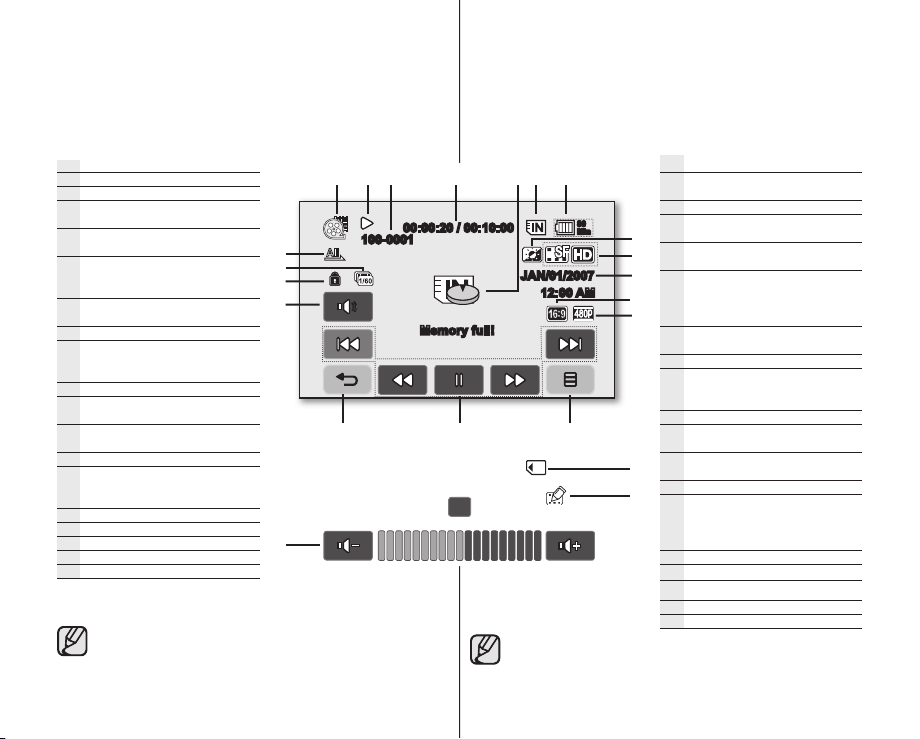
Movie play mode
Movie play mode
Operating status (Play/Pause)
File name (fi le number)
Time code (elapsed time / recorded
time)
Warning indicators and messages/
Volume control
Storage media (built-in memory
(SC-HMX10A/HMX10C/HMX10CN/
HMX10ED only) or memory card)
Battery info. (remaining battery
level/time)
LCD enhancer
Movie image quality / Edited movie
image indicator (partial delete, divide,
combine)
Date/Time
TV type (when component or Multi-AV
cable is conn)
Component out (when component
cable is connected.)
Menu tab
Movie play related function
(Skip / Search / Play / Pause / Slow
Playback)
Return tab
Volume tab
Erase protection
Cont. Capture
Play option
The tabs disappear on the screen after about 3 seconds. They
reappear when you touch any point on the screen.
00:00:20 / 00:10:00
100-0001
Memory full!
10
Modo Reproducir video
Modo Reproducir video
80
Min
JAN/01/2007
12:00 AM
Las fi chas desaparecen de la pantalla una vez transcurridos
3 segundos. Vuelven a aparecer al tocar cualquier parte de la
pantalla.
Estado de funcionamiento
(Reproducir/Pausa)
Número de archivo
Código de tiempo (tiempo transcurrido
/ tiempo grabable)
Indicadores y mensajes de
advertencia/Control de volumen
Soporte de almacenamiento (memoria
incorporada (sólo SC-HMX10A/
HMX10C/HMX10CN/HMX10ED) o
tarjeta de memoria)
Información de la batería (nivel/tiempo
restante de la batería)
Ampliador de LCD
Calidad de la imagen de video /
Indicador de imagen de video editada
(borrado parcial, dividir, combinar)
Fecha/Hora
Tipo de TV (Cuando está conectado
el cable de componentes o Multi-AV.)
Salida de componente (cuando está
conectado el cable de componente.)
Ficha Menú
Función relacionada con Reproducir
video
(Saltar / Buscar / Reproducir / Pausa /
Reproducción a cámara lenta)
Ficha Volver
Ficha Volumen
Protección contra borrado
Captura continua
Opción de reproducción
Español _20
20_ English
preparation
preparación
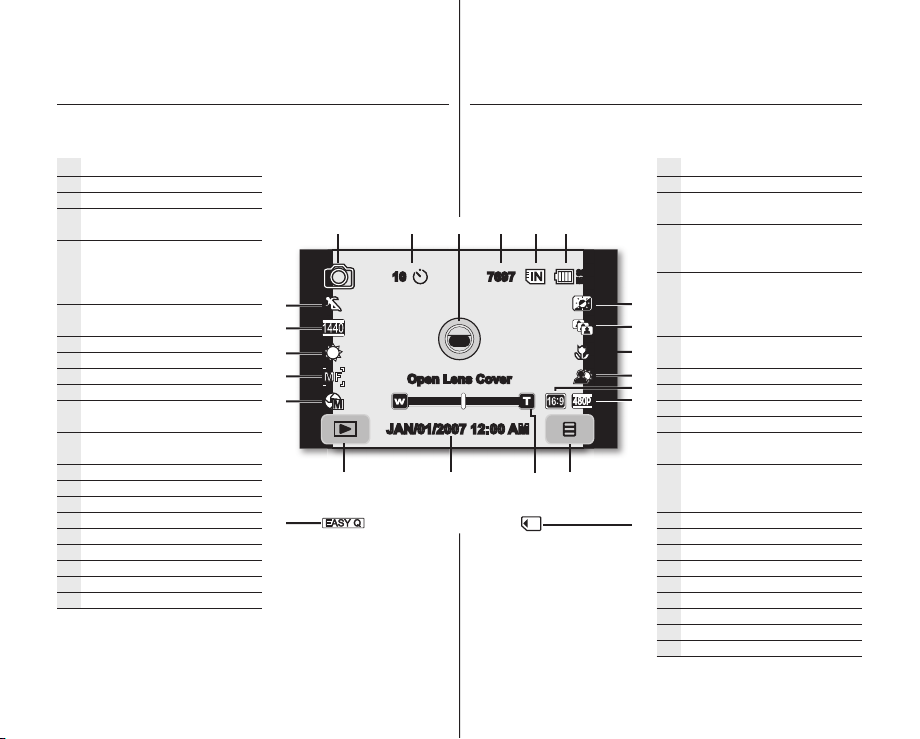
Photo record mode
Photo record mode
Self timer*
Warning indicators and messages
Image counter (total number of
recordable photo images)
Storage media
(built-in memory (SC-HMX10A/
HMX10C/HMX10CN/HMX10ED
only) or memory card)
Battery info. (remaining battery
level/time)
LCD enhancer
Cont. shot
Tele macro
Back light
TV type (when component or Multi-
AV cable is connected.)
Component out (when component
cable is connected.)
Menu tab
Zoom position*
Date/Time
Record/Play mode tab
Manual exposure*
Manual focus*
White balance
Resolution
Scene mode (AE) / EASY Q
10
Open Lens Cover
JAN/01/2007 12:00 AM
7697
Modo Grabar foto
Modo Grabar foto
Temporizador*
Indicadores y mensajes de
advertencia
Contador de imágenes (Número
total de imágenes fotográfi cas
80
Min
grabables)
Soporte de almacenamiento
(memoria incorporada (sólo SC-
HMX10A/HMX10C/HMX10CN/
HMX10ED) o tarjeta de memoria)
Inf. de la batería (nivel/tiempo
restante de la batería)
Ampliador de LCD
Disparo cont.
Macro telescópica
Luz de fondo
Tipo de TV
el cable de componentes o Multi-AV.)
Salida de componente (cuando
está conectado el cable de
componente.)
Ficha Menú
Posición del zoom*
Fecha/Hora
Ficha Modo Grabar/Reproducir
Exposición manual*
Enfoque manual*
Balance de blanco
Resolución
Modo escena (AE) / EASY Q
(Cuando está conectado

Español _21
21_ English
Photo play mode
Photo play mode
Slide show / Playback zoom
File name (fi le number)
Image counter
(current image / total number of
recorded images)
Storage media
(built-in memory (SC-HMX10A/
HMX10C/HMX10CN/HMX10ED only)
or memory card)
Battery info.
(remaining battery level/time)
LCD enhancer
Date/Time
TV type (when component or Multi-
AV cable is connected.)
Component out (when component
cable is connected.)
Previous image/Next image
Menu tab
Return tab
Erase protection
Print mark (DPOF)
Resolution
100-0001
01
X 1.1
1 / 12
JAN/01/2007
12:00 AM
Modo Reproducir foto
Modo Reproducir foto
Presentación / Zoom en reproducción
Número de archivo
Contador de imágenes
(imagen actual / nº total de imágenes
80
Min
grabadas)
Soporte de almacenamiento
(memoria incorporada (sólo
SC-HMX10A/HMX10C/HMX10CN/
HMX10ED) o tarjeta de memoria)
Información de la batería
(nivel/tiempo restante de la batería)
Ampliador de LCD
Fecha/Hora
Tipo de TV (Cuando está conectado el
cable de componentes o Multi-AV.)
Salida de componente (cuando está
conectado el cable de componente.)
Imagen anterior/Imagen siguiente
Ficha Menú
Ficha Volver
Protección contra borrado
Marca de impresión (DPOF)
Resolución
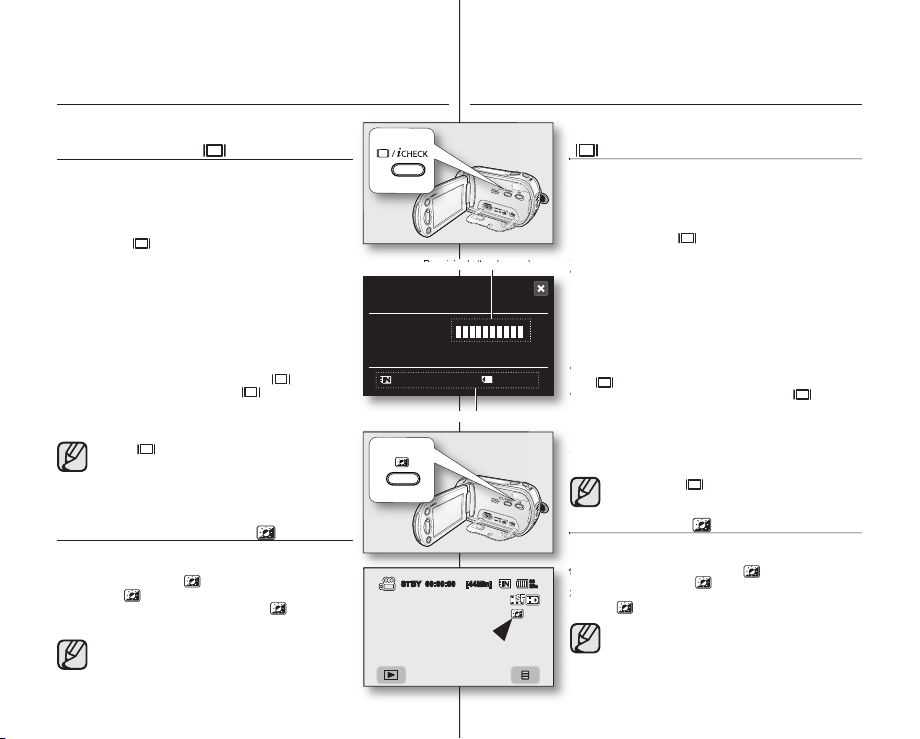
Español _22
22_ English
preparation
también se implemente en exteriores con luz diurna brillante.
1.
2.
• Modo de visualización mínima: sólo aparecerá el indicador de estado
Si la videocámara HD tiene información de advertencia, aparecerá un
• Con la unidad encendida, mantenga presionado el botón
• Con la unidad apagada, presione el botón
• Si no se ha insertado ningún soporte de almacenamiento, este icono
USING THE DISPLAY ( )/
Switching the information display mode
You can switch between the on-screen information display modes:
Press the Display
The full and minimum display modes will alternate.
• Full display mode: All information will appear.
• Minimum display mode: Only operating status indicator will appear.
If the HD camcorder has warning information, a warning message will appear.
( )/
i
CHECK button.
Checking the remaining battery and recording
capacity
• When the power is on, press an hold the Display ( )/iCHECK button.
• When the power is off, press the Display ( )/iCHECK button.
• After a while, the battery time and approximate recordable time according
to the storage and quality appear for about 10 seconds.
• If a storage media is not inserted, its icon does not appear.
Display ( )/iCHECK
quick menu screen.
USING THE LCD ENHANCER ( )
Contrast is enhanced for a clear and bright image. This effect is also
implemented outdoors in bright daylight.
1. Press the LCD enhancer (
• The (
2. To exit LCD enhancer, press the LCD enhancer ( ) button again.
) indicator is displayed.
•
LCD enhancer function does not affect the quality of the
image being recorded.
•
When LCD enhancer works at the low illumination, some
stripes may occur on the LCD screen. It is not a malfunction.
i
CHECK BUTTON
button does not work in the menu or
) button.
preparación
Remaining battery (approx.)
Battery
80 Min
Memory (Super Fine)
Recordable memory capacity (approx.)
0%
044 Min
STBY 00:00:00 [44Min]
50% 100%
022 Min
UTILIZACIÓN DEL BOTÓN PANTALLA
i
( )/
CHECK
Cambio del modo de visualización de
información
Puede cambiar entre los modos de visualización de la información en
pantalla:
Presione el botón Pantalla
Se alternarán los modos de visualización completo y mínimo.
• Modo de visualización completa: Aparecerá toda la información.
• Modo de visualización mínima: sólo aparecerá el indicador de estado
de funcionamiento.
Si la videocámara HD tiene información de advertencia, aparecerá un
mensaje de advertencia.
( )/
i
CHECK
.
Comprobación de la batería restante y la
capacidad de grabación
• Con la unidad encendida, mantenga presionado el botón Pantalla
i
( )/
• Con la unidad apagada, presione el botón Pantalla ( )/
durante 2 segundos.
• Después de un instante, aparecerá durante unos 10 segundos
el tiempo de la batería y el tiempo grabable aproximado según el
almacenamiento y la calidad.
• Si no se ha insertado ningún soporte de almacenamiento, este icono
no aparece.
.
CHECK
El botón Pantalla
modo de menú o de menú rápido.
( )/iCHECK no está operativo en el
USO DEL DE LCD( )
El contraste se mejora para obtener una imagen clara y brillante. Este efecto
también se implemente en exteriores con luz diurna brillante.
1. Presione el botón Ampliador de LCD (
80
Min
• Aparece el indicador ( ) .
2. Para salir del Ampliador de LCD, presione de nuevo el botón de
LCD (
).
•
La función Amplifi cador de LCD no afecta a la calidad de la
imagen que se va a grabar.
•
Cuando el mejorador de LCD funcione con una iluminación
excasa, es posible que aparezcan algunas bandas en la
pantalla LCD. No se trata de ninguna avería.
) .
i
CHECK
 Loading...