

Page 1
User Guide
DS-5021D / DS-5014D
This manual cont ai ns in fo r mat io n th at is pro pr ieta ry to SAM SUN G Ele ctro n ic s Co. L td. and is prot e cted by copy r ight .
No information contained herein may be copied, translated, transcribed or duplicated for any commercial purposes or disclosed to third
parties in any for m with ou t th e pr ior wr i t ten con s en t of SAM SUN G Ele ctr on ic s Co. L td.
CLASS B Digital device or Peripheral
This equipment has been tested and found to comply with the limits for a Class B digital device, pursuant to International Standaards
EN55022, and EN61000, Part 15 of the FCC Rules and Australian Standard AS/NZS3548
These limits are designed to provide reasonable protection against harmful interference in a residential installation. This equipment
generates, uses and can radiate radio frequency energy and, if not installed and used in accordance with the instructions, may cause harmful
interference to radio communications. However, there is no guarantee that interference will not occur in a particular installation.
If this equipment does cause harmful interference to radio or television reception, which can be determined by turning the equipment off and on,
the user is encour age d t o try to correct the inter fer en ce by one or more of th e f oll o wing meas ure s :
- Reorient or relocate the receiving antenna.
- Increase the separation between the equipment and receiver.
- Connect the equipment into an outlet on a circuit different from that to which the receiver is connected.
- Consult the dealer or experienced radio TV technician for help.
.
Page 2

COPYRIGHT
This manual is proprietary to SAMSUNG Electronics Co., Ltd. and is protected by copyright.
No information contained herein may be copied, translated, transcribed or duplicated for any
commercial purposes or disclosed to third parties in any form without the prior written consent
of SAMSUNG Electronics Co., Ltd.
TRADEMARKS
OfficeServ DS-5021D, OfficeServ DS-5014D are the trademark of SAMSUNG Electronics Co.,
Ltd. Product names mentioned in this document may be trademarks and/or registered
trademarks of their respective companies.
Please read this guide before using the DS-5021D, DS-5014D digital phone, and follow the instructions to use
the DS-5021D, DS-5014D digital phone safely and correctly.
This manual may be changed for product improvement, standardization and other technical reasons without prior
notice.
For further information on the updated manual or the content contained in the manual, contact your Authorised
Samsung Reseller.
©2003 SAMSUNG Electronics Co., Ltd. All rights reserved.
HYPERLINK
Page 3
ABOUT THIS GUIDE
This User guide provides instructions for the use of Samsung’s latest DS-5021D and
DS-5014D 2 line LCD digital phones that can be used in connection with Samsung’s
Enterpri se IP Solu ti on s , OfficeServ Sy ste m.
Please take the time to study this guide to become familiar with the operation of your
DS- 5021D/5014D phone and the benefits this new IP technology can provide. Keep this
guide handy. You may need to look up instructions for infrequently used features.
Learning to use the power of the DS-5021D/5014D phone will simplify your commun ication
needs.
Conventions
The following special paragraphs are used in this user guide to point out information that
must be read.
NOTE
WARNING
Provides information or instructions that you should follow in order to avoid
personal injury or fatality.
CAUTION
Provides information or instructions that you should follow in order to avoid
a service failure or damage to your DS-5021D/5014D phone.
NOTE
Indicates addition al i n fo r mati on fo r refe re n ce.
© SAMSUNG Electronics Co., Ltd.
Page I
Page 4

SAFETY CONCERNS
This page is intentionally left blank.
Page II
© SAMSUNG Electronics Co., Ltd.
Page 5
SAFETY CONCERNS
For product safety and correct operation, the following information must be read before the
installation and operation of your DS-5021D/5014D digital phone.
Symbols
Caution
Indication o f a ge ne ral ca ution
Restriction
Indication o f a p rohibited action w hen u si ng the pro du ct
Instruction
Indication of a required action
© SAMSUNG Electronics Co., Ltd.
Page III
Page 6

SAFETY CONCERNS
The handset receiver on the digital phone may
retain metallic objects. Care should be taken
when using the handset in the vicinity of
small metal objects.
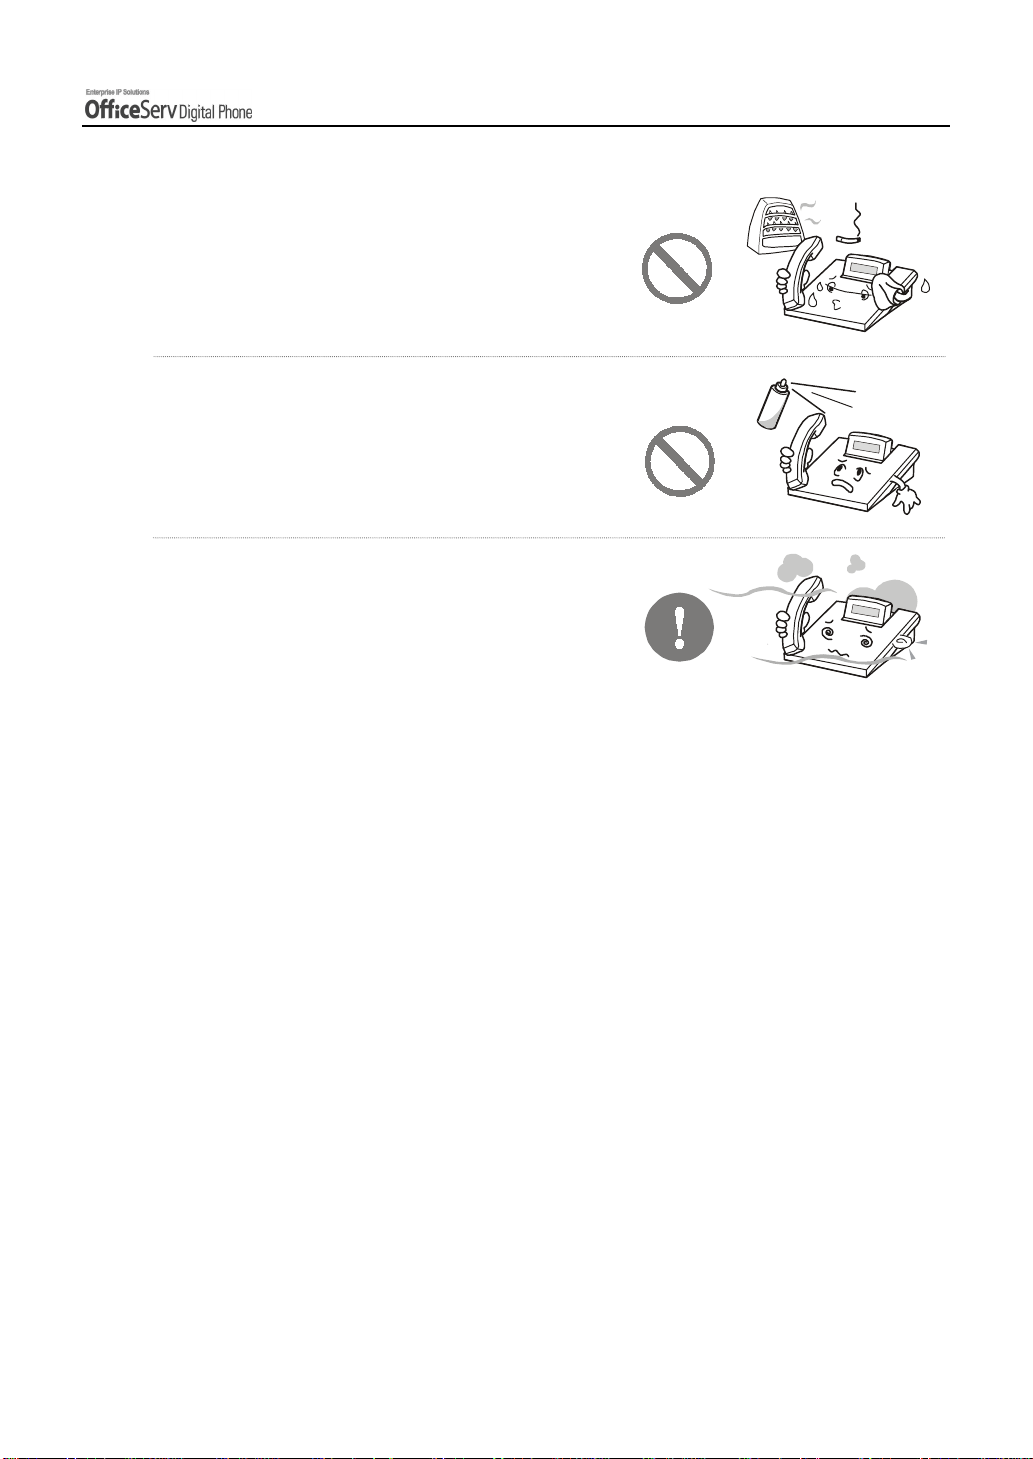
Avoid placing objects containing water such as
vases, cups, cosmetics, and medicines near the
phone.
Moisture in the digital phone may cause a fire and
electric shocks.
Do not install the phone on an unstable surface
or in direct sunlight.
WARNING
It may cause severe damage to the plastic case of
the phone, and reduced the performance of your
digital phone.
Do not place t he p hon e in a d ust y area or ar ea s w i th
extreme or volatile changes in temperature.
It may cause a fire or electric shocks.
Page IV
© SAMSUNG Electronics Co., Ltd.
Page 7
Do not install the phone near a heater or naked flames
(cigarette lighter, heating apparatus, etc.).
It may cause a fire or electric shocks.
Do not use fl amm a b l e s olve n t or ma t er i al s
near the phone. Do not store them near the phone.
It may cause a fire or electric shocks.
If the phone makes excessive noise,
emits an odour, or smoke, immediately unplug
the phone and call your Authorised Samsung
Reseller.
SAFETY CONCERNS
© SAMSUNG Electronics Co., Ltd. Page V
Page 8
SAFETY CONCERNS
CAUTION
Use a soft dry cloth to clean the phone.
Do not use any chemical solvents like wax,
benzene, alcohol, thinner,
aerosols, lubricant, or detergent.
The use of chemicals on the phone may cause
fading/discoloring or damage to the parts.
Do not place heavy things on the phone.
It may cause damage to some parts.
Do not separate, repair or remodel
the phone arbitrarily.
If a repair is needed, please contact your
Authorised Samsung Reseller.
Page VI
© SAMSUNG Electronics Co., Ltd.
Page 9

TABLE OF CONTENTS
ABOUT THIS GUIDE
Conventions..........................................................................................................................I
SAFETY CONCERNS
Symbols..............................................................................................................................III
Warning...............................................................................................................................IV
Caution ...............................................................................................................................VI
PREPARATION
1. Main Features................................................................................................................................. 1
2. Checking the Parts in the Packa ge............................................................................................ 4
3. Name and Features o f the DS-5021 D / 5014D Digit al phone................................................. 5
Front Panel..........................................................................................................................5
Name and Features of Each Part........................................................................................6
Bottom Panel of the DS-5021D / 5014D..............................................................................8
Additional Module................................................................................................................9
4. Assembling the DS -5021 D / 5014D Digital phone.................................................................11
Connecting lines to the phone...........................................................................................11
Using the Desktop Stand................................................................................................... 11
When used as the wall mounting digital phone.................................................................12
Adding a KDB Module .......................................................................................................13
Adding an AOM .................................................................................................................14
© SAMSUNG Electronics Co., Ltd.
Page VII
Page 10

TABLE OF CONTENTS
THINGS YOU SHOULD KNOW
1. About Stations and Trunk Lines...............................................................................................15
2. Selecting System Functions......................................................................................................16
Using the Scroll / Soft Button............................................................................................. 16
Using the Function Code ...................................................................................................17
Assigning the Programmable Button Extenders................................................................19
3. Entering Characters.................................................................................................................... 21
Special Button Used..........................................................................................................21
Entering Characters........................................................................................................... 22
4. Configuring My Phone................................................................................................................ 23
To Change the digital phone Passcode.............................................................................23
Setting the Answer Mode .................................................................................................. 24
Using the Headset / Handset (Headset Operation)...........................................................25
Enabling / Disabling the Key Confirmation Tone...............................................................26
Pulse to Tone Changeover ................................................................................................ 27
Hot Keypad........................................................................................................................27
5. Volume Adjustment .................................................................................................................... 28
Adjusting Handset Volume ................................................................................................28
Adjusting Speaker Volume ................................................................................................ 29
Adjusting Ring Volume ......................................................................................................29
6. Types of Signal Tone.................................................................................................................. 30
7. Telephone Status Indicator ....................................................................................................... 31
8. Button LED ................................................................................................................................... 32
BASIC FEATURES
1. Before Making / Answering a Call
Calling Methods.................................................................................................................33
Call Answering Methods....................................................................................................33
................................
................................................................
................................................................
........................................................
................................................................
........................
................................................
33
Page VIII
© SAMSUNG Electronics Co., Ltd.
Page 11

TABLE OF CONTENTS
2. Intercom Calls..............................................................................................................................34
Assigning the Names to Your Extension ...........................................................................34
Calling an Extension Number............................................................................................35
Answering an Intercom Call............................................................................................... 36
Voice Page Announce Mode (Intercom Calls Only) ..........................................................36
Automatic Answer Mode (Intercom Calls Only)................................................................37
Busy Station Callback........................................................................................................38
Busy Station Camp-On...................................................................................................... 39
Calling Your System Operator ........................................................................................... 39
3. Outside Calls................................................................................................................................40
Calling Outside numbers...................................................................................................40
Authorization Code and Account Code ............................................................................. 42
Answering an Outside Call ................................................................................................ 42
Universal Answer...............................................................................................................43
New Call ............................................................................................................................43
Busy Line Queuing With Callback .....................................................................................43
Cancelling Callback ...........................................................................................................44
Redial.................................................................................................................................45
Automatic Redial / Retry....................................................................................................47
Call Park............................................................................................................................48
4. Intercom / Outside Calls............................................................................................................. 49
Holding a Call ....................................................................................................................49
Call Pickup.........................................................................................................................54
Dialling by Directory Name................................................................................................56
Transferring Calls ..............................................................................................................57
Speed-Dial..................................................................................................................... ....61
Conference Calls...............................................................................................................66
© SAMSUNG Electronics Co., Ltd. Page IX
Page 12

TABLE OF CONTENTS
CONVENIENT FEATURES
1. Do Not Disturb ............................................................................................................................. 69
Setting Do Not Disturb.......................................................................................................69
Cancelling Do Not Disturb ................................................................................................. 70
One Time DND..................................................................................................................70
2. Call Forwarding............................................................................................................................ 71
Call Forward Option...........................................................................................................71
Forwarding Calls................................................................................................................73
Forwarding All Calls...........................................................................................................74
Forward Busy.....................................................................................................................75
Forward No Answer...........................................................................................................76
Forward Busy / No Answer................................................................................................77
Forward When DND is Set ................................................................................................ 78
Forward Follow Me............................................................................................................79
3. Paging and Messaging............................................................................................................... 81
Internal Page .....................................................................................................................81
External Page....................................................................................................................82
All Page .............................................................................................................................83
Meet Me Page : MMPG.....................................................................................................84
Call Park and Page............................................................................................................ 86
Rejoining a Page ...............................................................................................................88
Setting a Message Indication ............................................................................................89
Cancelling Messages......................................................................................................... 90
Returning Messages..........................................................................................................91
Viewing Message Indication ..............................................................................................92
Programmed Messages .................................................................................................... 93
Programmed Message List................................................................................................ 94
Page X
© SAMSUNG Electronics Co., Ltd.
Page 13

TABLE OF CONTENTS
4. Alarm Features............................................................................................................................. 95
Appointment Reminder / Alarm Clock ............................................................................... 95
Alarm Cancel .....................................................................................................................96
Alarm Message..................................................................................................................97
Alarm Message Cancel ..................................................................................................... 99
5. Use with the Door Phone.........................................................................................................100
Answering The Door Phone ............................................................................................ 100
Calling The Door Phone / Room Monitor.........................................................................101
6. Executive / Secretary Hot Line................................................................................................ 102
7. Group Listening.........................................................................................................................103
8. Account Code ............................................................................................................................ 104
9. Locking Your digital phone .....................................................................................................105
10. Off-Hook Voice Announcement.............................................................................................. 106
OHVA............................................................................................................................... 106
OHVA Cancel...................................................................................................................107
OHVA Block.....................................................................................................................107
OHVA Reject....................................................................................................................107
11. In Group / Out Of Group.................................................................................................... .......108
12. Mute .............................................................................................................................................109
13. Background Music ....................................................................................................................110
14. Timer............................................................................................................................................ 111
Call Duration Timer...........................................................................................................111
Auto Timer ....................................................................................................................... 112
Timer Function................................................................................................................. 113
15. Ring Preference .........................................................................................................................114
© SAMSUNG Electronics Co., Ltd. Page XI
Page 14

TABLE OF CONTENTS
APPLICATION MENUS
1. Navigation Buttons ...................................................................................................................115
Menu Button .................................................................................................................... 115
Send Button.....................................................................................................................116
End Button....................................................................................................................... 116
Cancel button...................................................................................................................116
Enter button..................................................................................................................... 116
Direction button................................................................................................................117
2. Main Menus ................................................................................................................................118
How to Select Items......................................................................................................... 118
3. Reviewing and Calling Recently Called Numbers...............................................................119
4. Reviewing and Calling Recently Received Numbers .........................................................120
5. Reviewing and Calling Speed Dial Numbers........................................................................121
6. Reviewing and Calling Numbers by Name ...........................................................................122
7. Setting Forward Type and Number........................................................................................123
8. Setting Alarm Reminders.........................................................................................................125
ANNEX
1. Troubleshooting ........................................................................................................................ 127
2. Product Specifications............................................................................................................129
Page XII
© SAMSUNG Electronics Co., Ltd.
Page 15
PREPARATION
1. Main Features
Application menu
This button allows you to access the digital phone’s menu
functions. The menu functions include the recent outgoing
Menu
Send
Speed Dial
Enter
End
call log, incoming call log, system directory functions,
transferring incoming calls, inquiry of speed dial numbers,
and alarm function.
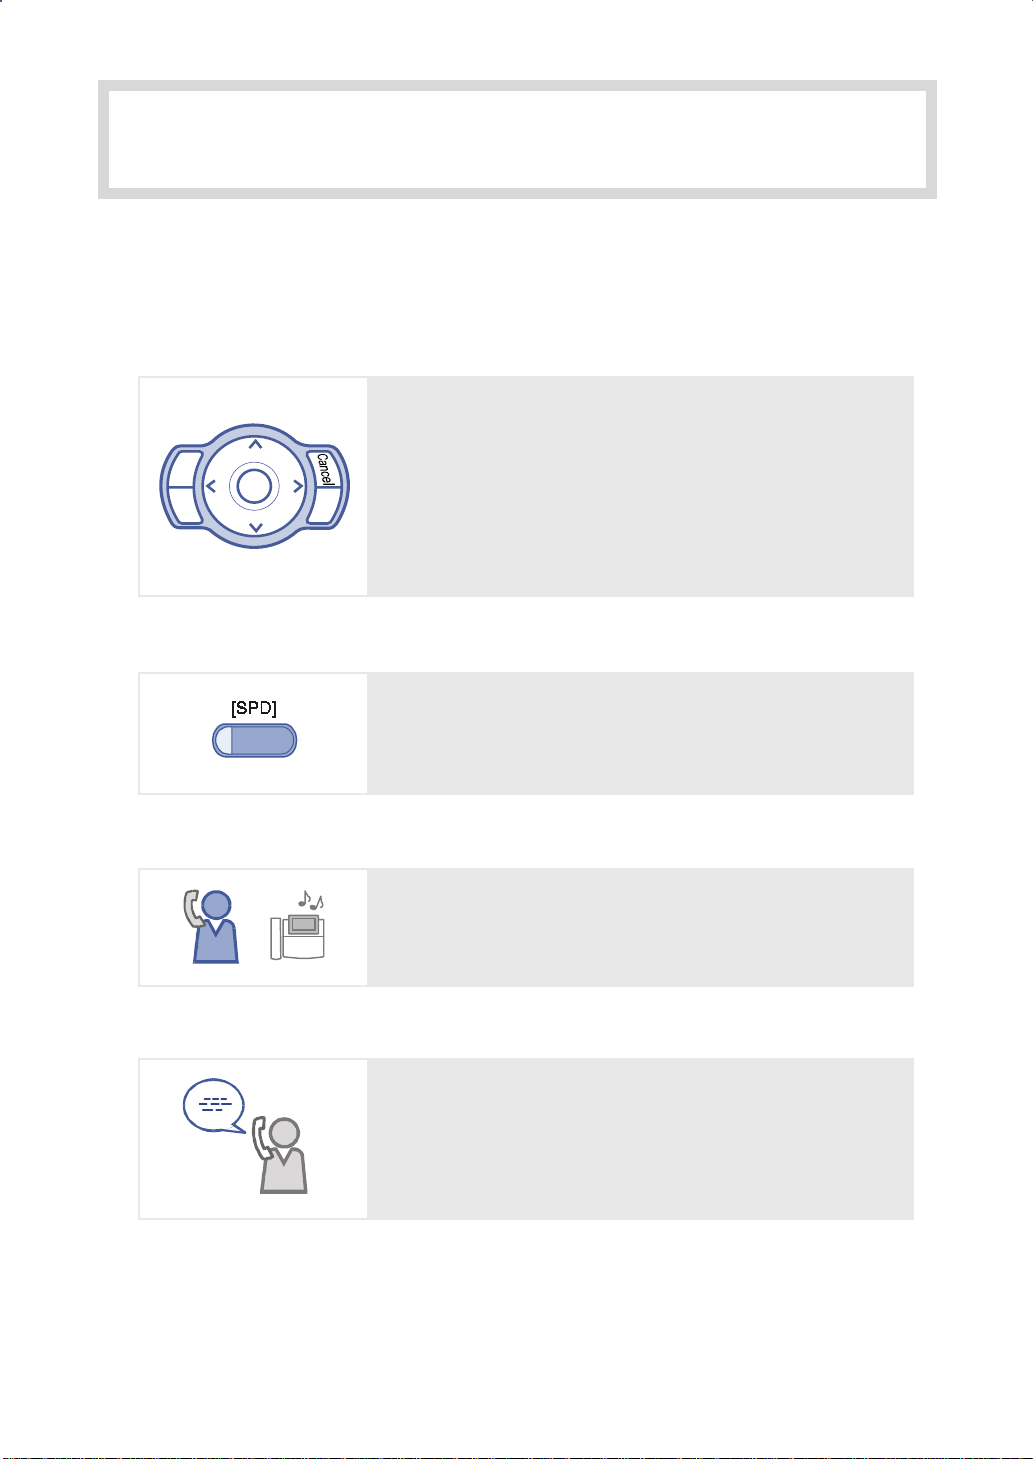
For frequently used phone numbers, you can press one
speed dial butt on to make a cal l to th e sp ee d dia l nu mbe r.
Pickup
You can answer a call at another extension.
Automatic Redial/Retry
When your call is important but your party is busy on
another call, you can use automatic redial/retry function.
The digital phone redials the called number automatically
until your party is free to take your call.
© SAMSUNG Electronics Co., Ltd. Page 1
Page 16
PREPARATION
p
Hold
Hold
Conference Calls
Call Forwarding
You can use the Hold feature when you need something or
another call arrives. Use this button to temporarily hold the
current call until you are ready to resume the call. You can
even pickup a held call at another station.
This button is used wh en mul tip le pa rti e s need to be
connected simultaneously during a phone conversation.
Up to five parties including you can be connected in
a conference call.
If you cannot answer an incoming call, the call can be
forwarded to another extension(unconditionally, while you
are busy on a call, or when you are away from your
hone).
Do Not Disturb
When you do not want to be disturbed, the DND feature
can be set to block incoming calls and the phone will not
ring. Y our calls can be forwarded to another station when
you do not wish to be disturbed.
Page 2 © SAMSUNG Electroni cs Co., Ltd.
Page 17
Page
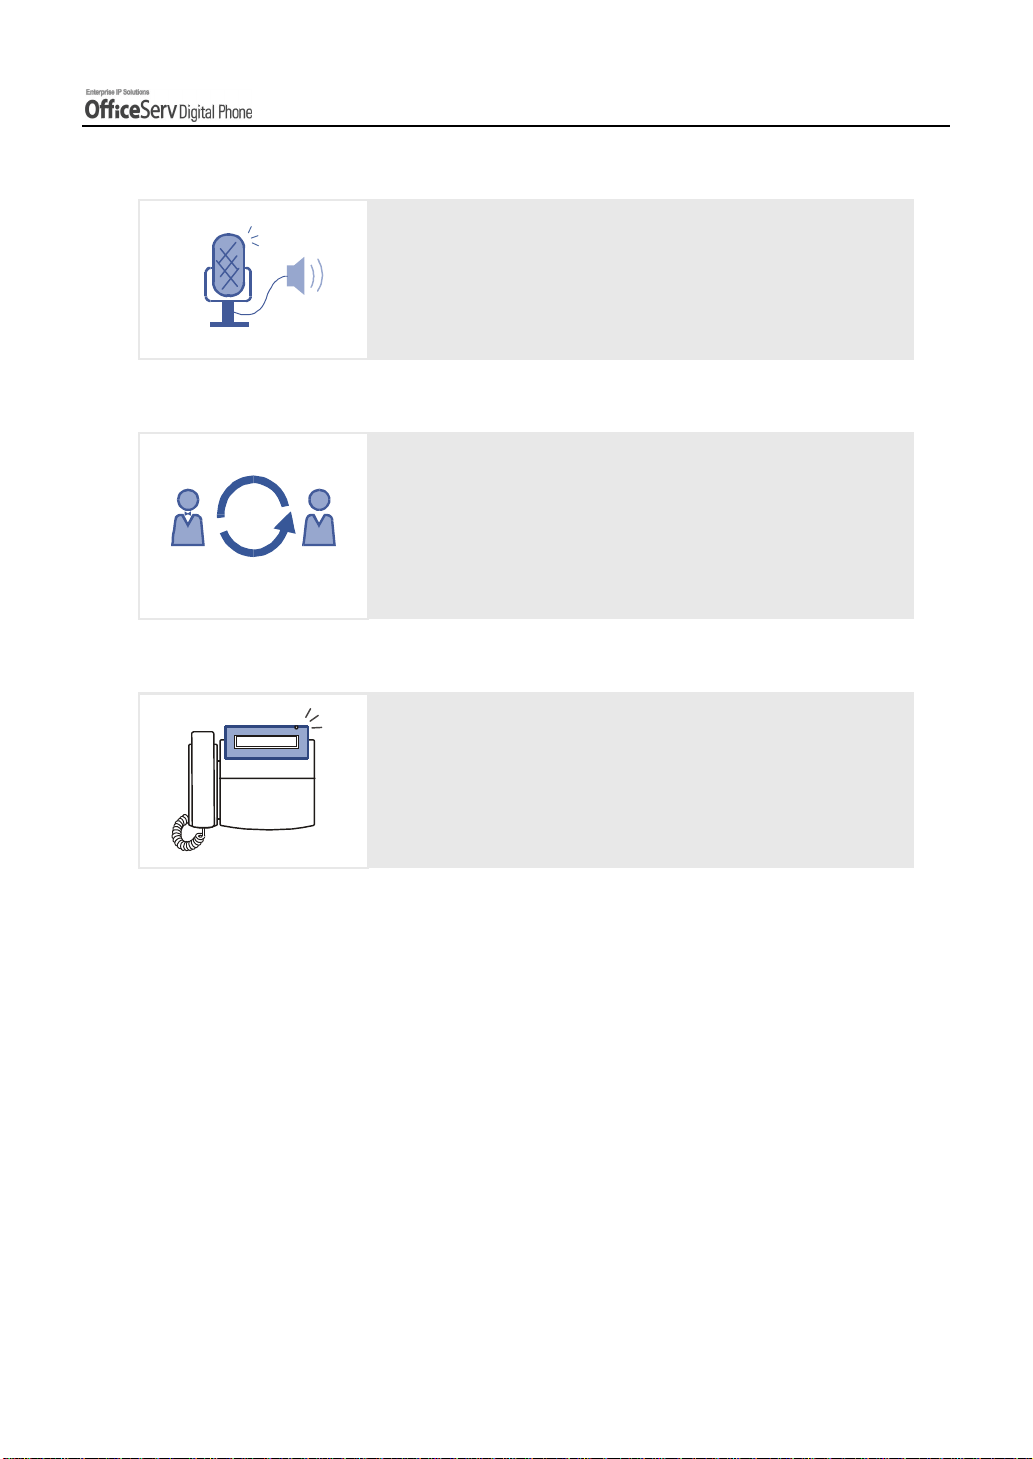
Executive/Secretary
Caller ID
PREPARATION
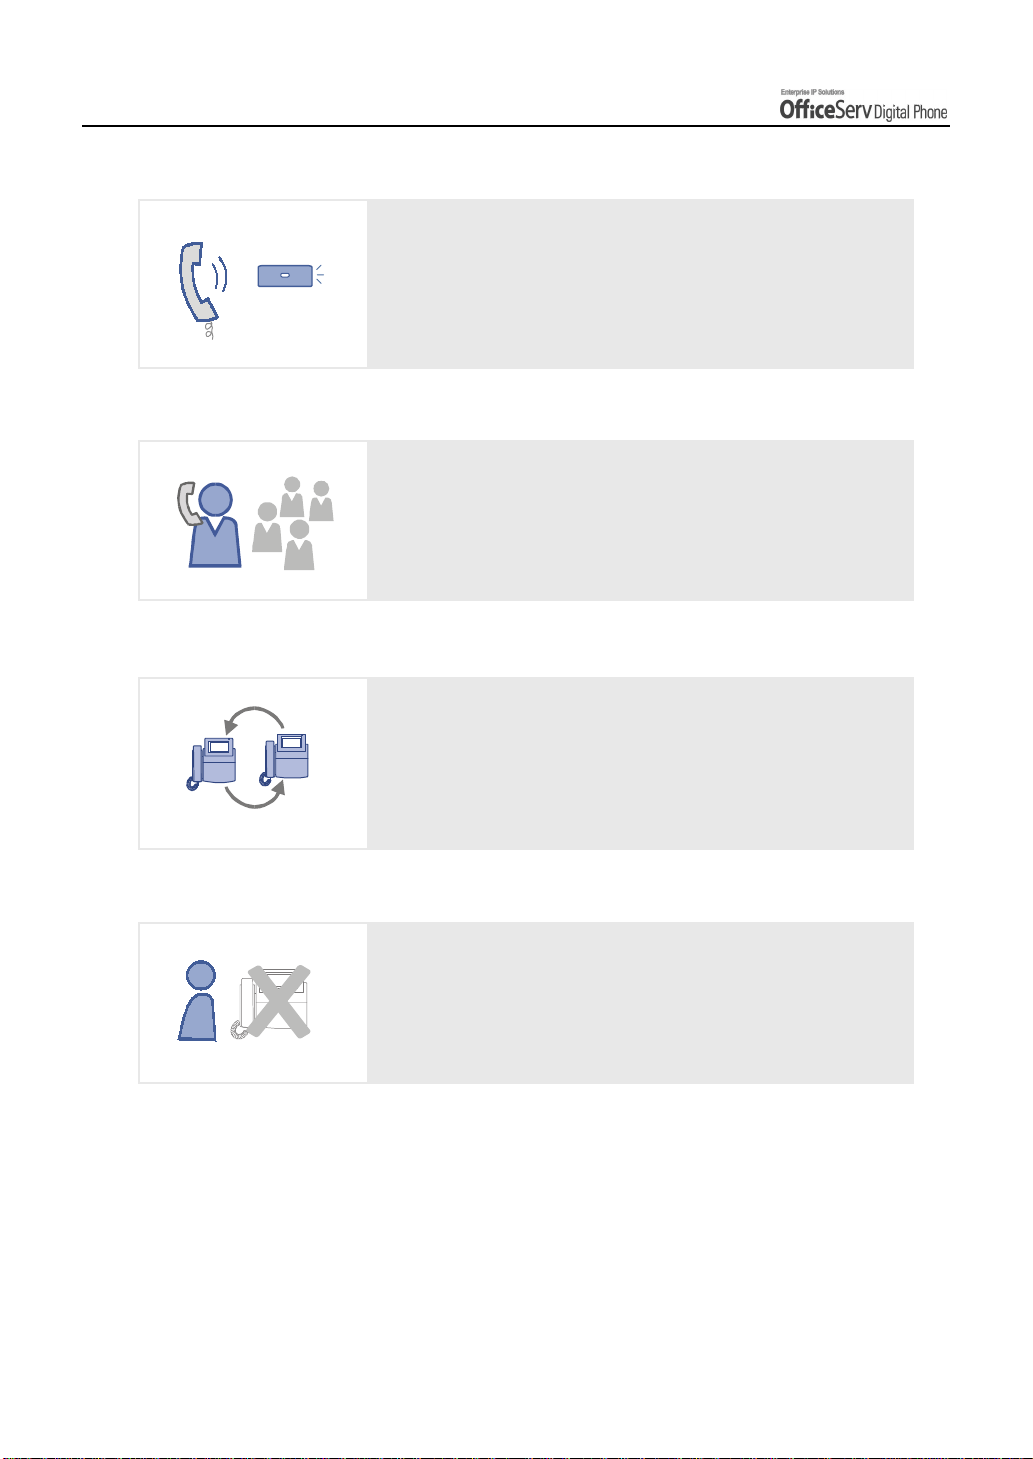
If you have an urgent announcement to make, or you wish
to locate a colleague, you can page through the speaker of
other stations, or through optional external speakers.
When the Executive/Secretary button is pressed once,
the executive an d his/ her se creta ry can be conn e cte d.
The secretary can use this Executive/Secretary feature to
receive an incoming call and then simply forward it to the
executive.
XX-XXX-XXXX
When there is an incoming call, the caller ID or name
will be displayed on the LCD screen. You can see who is
calling before an sweri ng th e cal l and r e spo nd acco rdin gl y.
© SAMSUNG Electronics Co., Ltd. Page 3
Page 18
PREPARATION
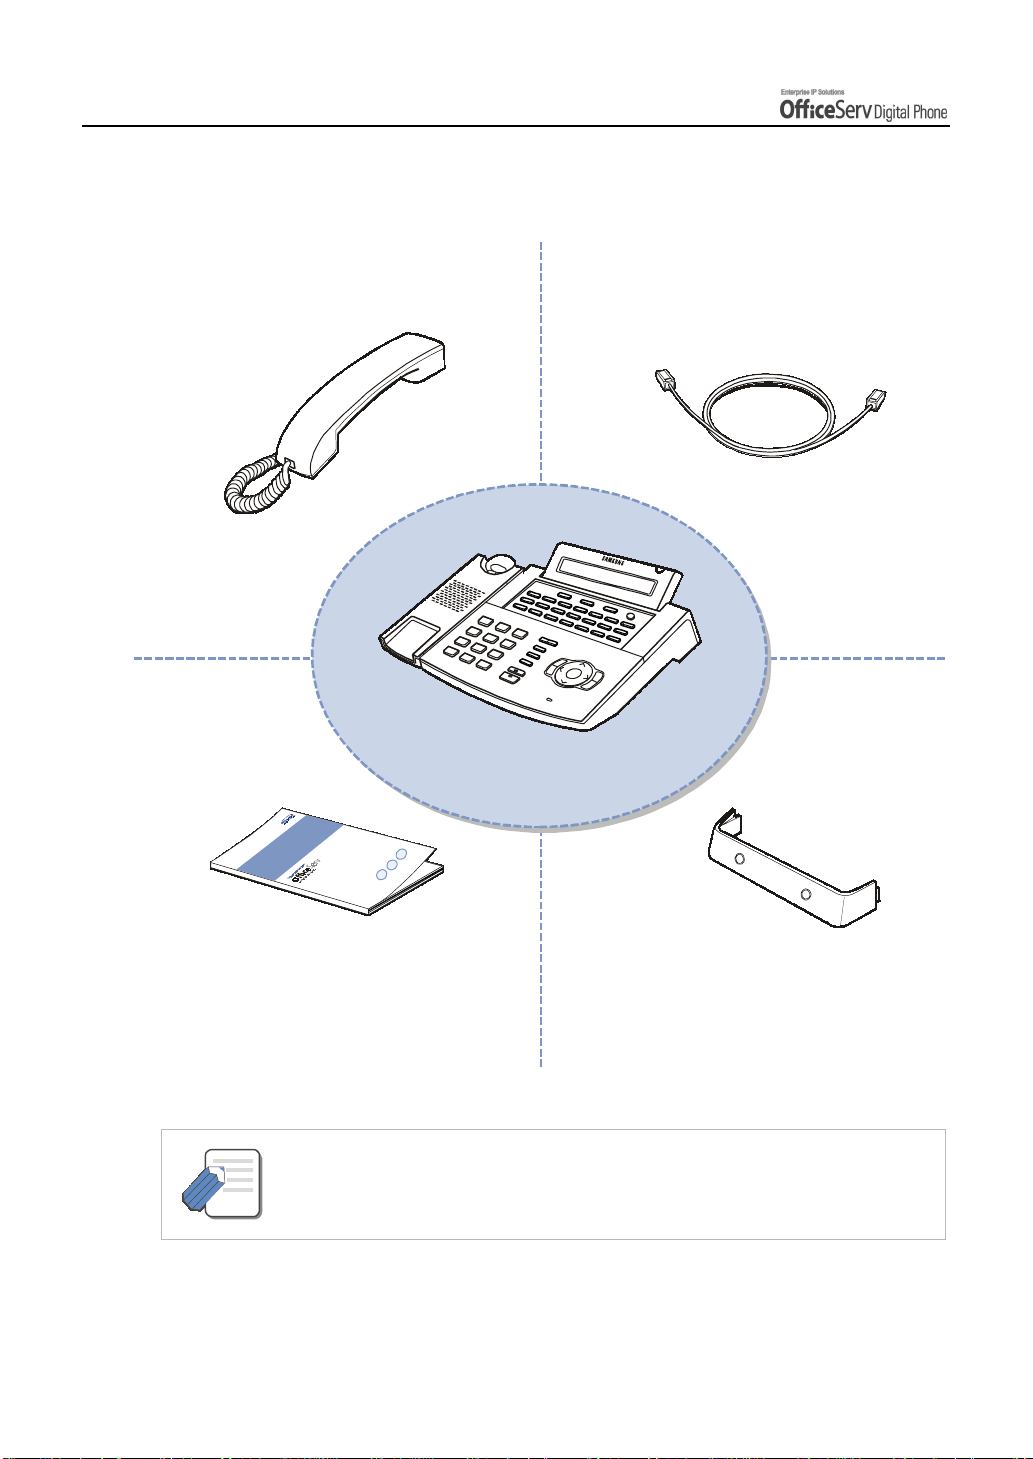
2. Checking Parts in the Package
Handset
User Guide
Dual–Jack
Modular Line
DS-5021D
Phone Stand
- Please contact your Author is e d Samsung Reseller if any item a bove is miss ing or
damaged.
NOTE
Page 4 © SAMSUNG Electroni cs Co., Ltd.
Page 19
PREPARATION
3. Name and Feature s of the DS-5021D / 5014D
Digital phone
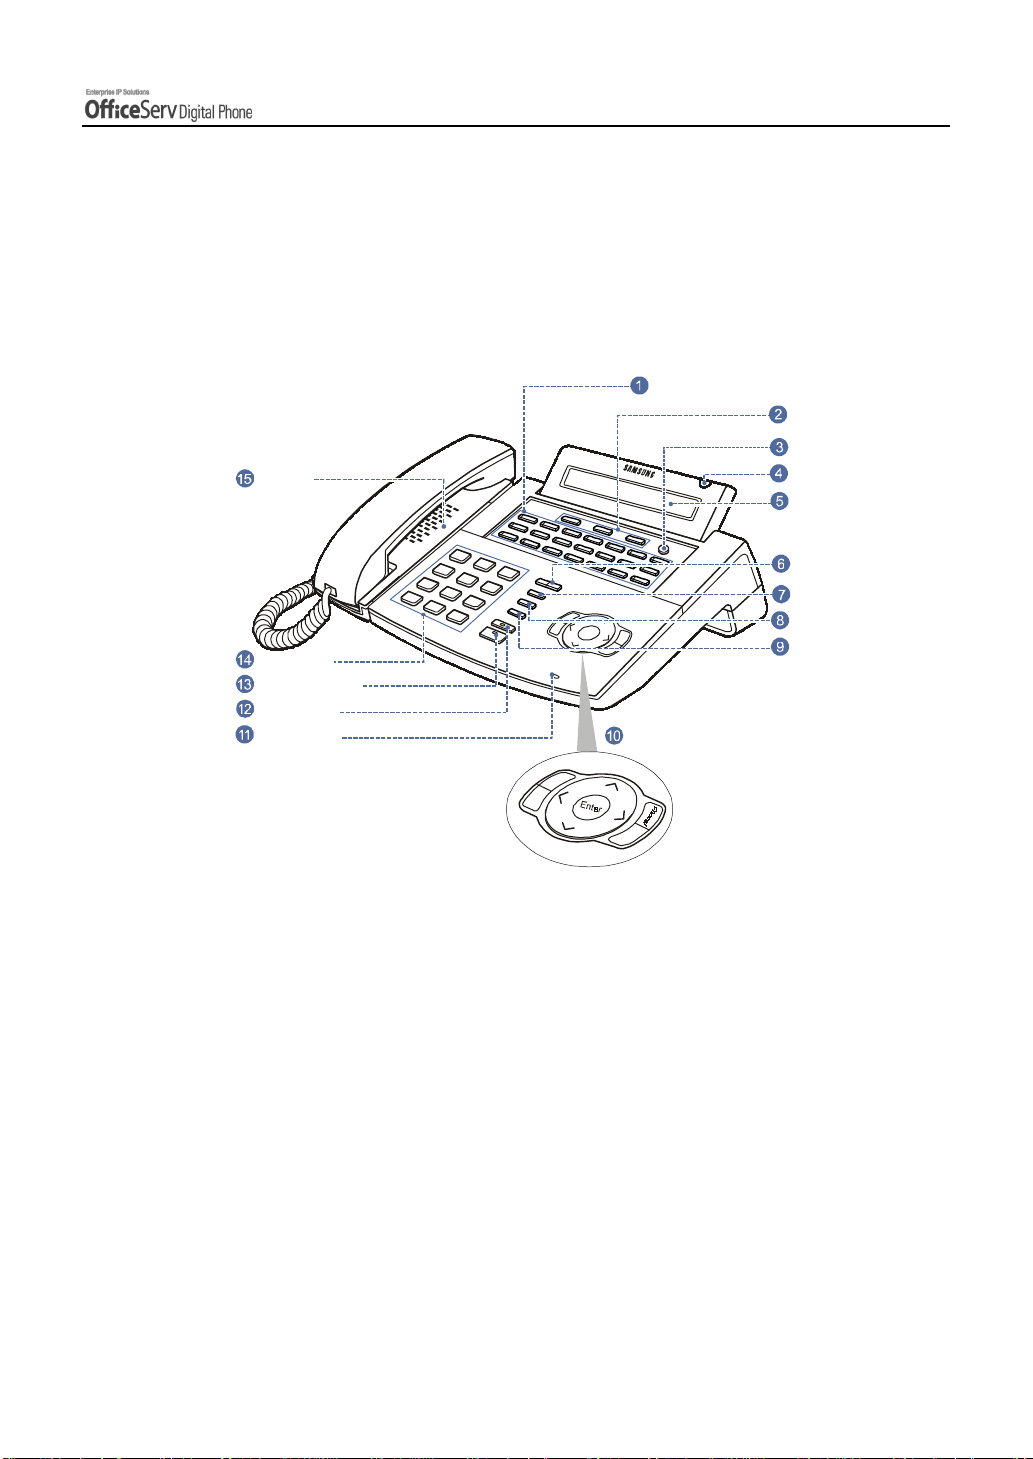
Front Panel
Programmable Buttons
(DS-5021D : 21, DS-5014D : 14)
Soft Buttons
Scroll Button
Speaker
Dial Buttons
Speaker Button
Hold Button
Microphone
Navigation Buttons
Status Indicator
LCD screen
Redial Button
Volume Button
Conference Button
Transfer Button
u
n
e
M
d
n
e
S
E
n
d
© SAMSUNG Electronics Co., Ltd. Page 5
Page 20

PREPARATION
Name and Features of Each Part
EMBEDEMBED
Programmable Buttons
The DS-5021D digital phone has 21 programmable buttons and the DS-5014D digital
phone has 14 programmable buttons. The programmable buttons allow you to activate
desired functions or telephone numbers with a single button press.
Among the programmable buttons, the functions of 3 buttons are pre-set as follows.
Message Button
!
When someone has left you a message this button’s LED blinks.
Call1, Call2 Buttons
!
While the hold or conference functions are in use, the corresponding button’s LED blinks. Up to 6 call
buttons can be set. By default 2 call buttons are set.
Soft Buttons
If the Scroll button is pressed, the function menus appear on the LCD screen. The Soft
buttons can be used to select the desired menu from the function menus displayed.
Scroll Button
This button is used to activate the function menu on the LCD screen when in the idle
condition. If this Scroll button is pressed, 3 menus [CALL, OTHER, ANS] will be displayed
on the LCD screen.
Status Indicator
The indicator shows the status of the phon e wi th 3 col o u rs : red, gr ee n and yellow .
LCD screen
The LCD screen shows the processing status and progress of a call, in addition to the
various function menus depending on the status of the phone.
Volume Button
The volume button is used to control the volume of the digital phone handset,
speakerphone, ringer, background music and voice announcements.
Redial Button
Pressing thi s but to n di al s th e la st phone nu mbe r tha t you just call ed or all ow s y ou to view
up to 10 previously dialled calls.
Page 6 © SAMSUNG Electroni cs Co., Ltd.
Page 21

PREPARATION
Conference Button
This button allows you to set up a conference call for up to 5 persons, including you.
Transfer Button
This button is used in the following cases :
When transferring your current call to other extension, extension group or externally.
!
During a screened transfer pressing the transfer button allows you to toggle between
!
the Original caller and station user you wish to transfer the caller to.
To enter station based programming options.
!
Navigation Buttons
This button allows you to access the digital phone’s menu functions. The menu functions
include the recent outgoing call log, incoming call log, system directory functions,
transferring incoming calls, inquiry of speed dial numbers, and alarm function.
Microphone
On the right side of speaker button, a microphone is located under a small hole in the
plastic casing. You use the microphone in speakerphone mode to speak to your caller.
Hold Button
The hold button is used to place an existing call on hold and return to the call at a later
time without hanging-up.
Speaker Button
This is used when you wish to use the digital phone’s speakerphone.
Dial Buttons
The dial buttons are used to input digits, and is made up of 10 digits [0]-[9] and [*], [#]
buttons. Also, if a dial button is pressed for a longer duration, the corresponding personal
speed dial number can be dialled.
Speaker
You can hear call status tones and announcements over the digital phone’s speaker.
© SAMSUNG Electronics Co., Ltd. Page 7
Page 22
PREPARATION
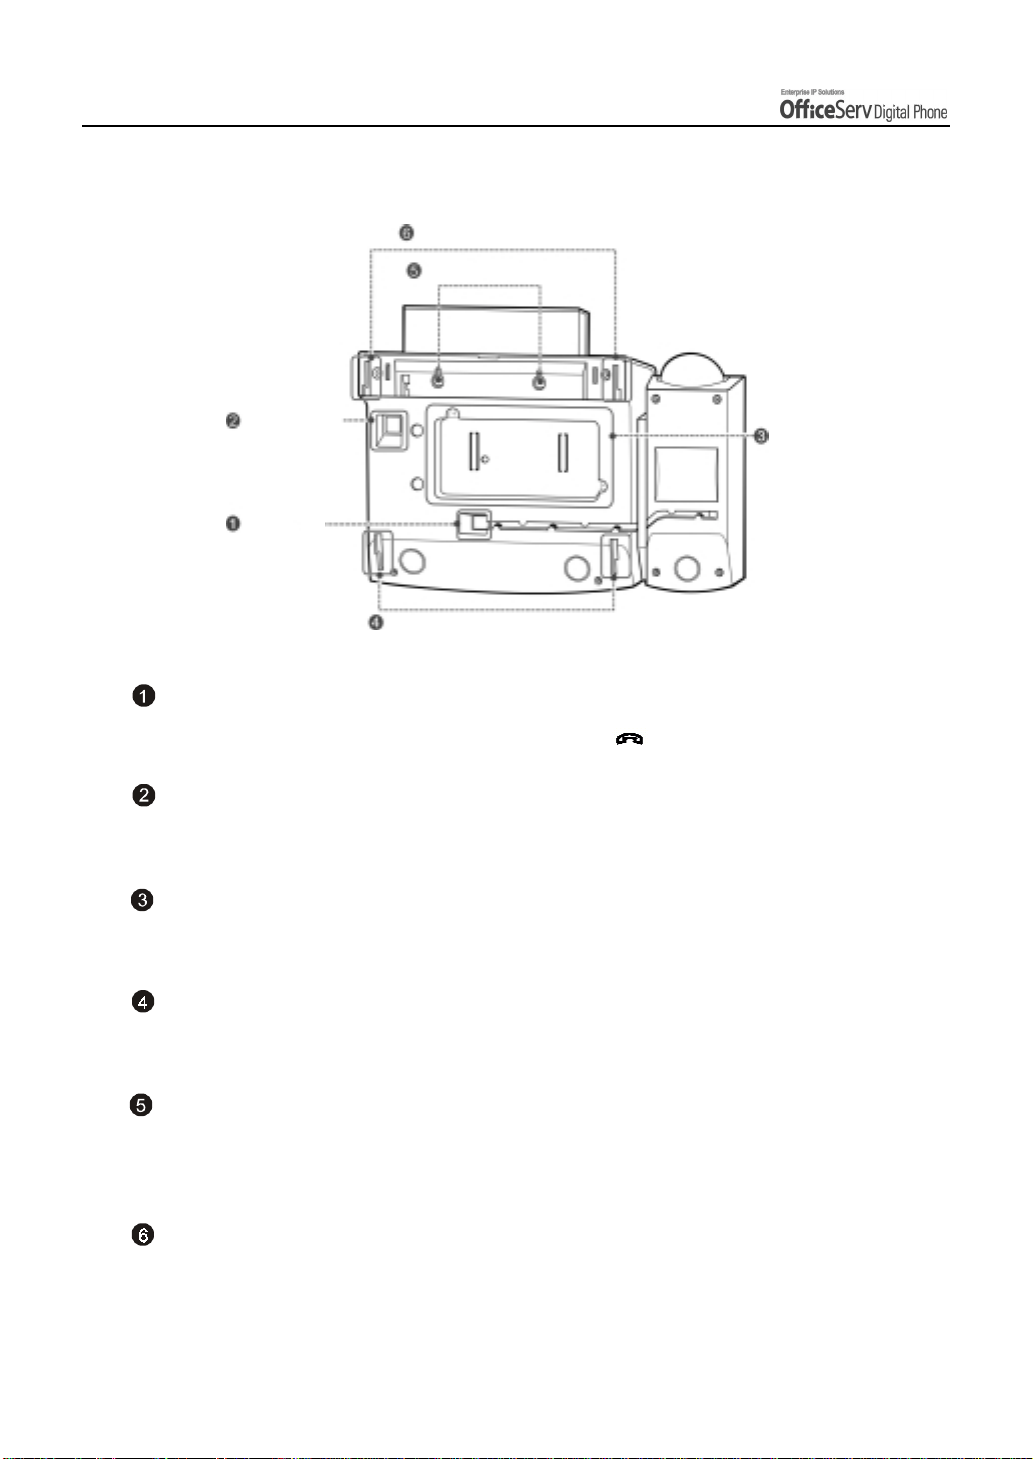
Bottom Panel of the DS-5021D / 5014D
Groove for the Desk Stand
Wall Mounting Holes
Phone Line
Connection Port
Handset
Connection
Port
Groove for the Wall Mounting Stand
Expansion Modu le
Handset Connection Port
Plug the handset cord into this port marked with the symbo l.
Phone Line Connection Port
Connect the ph on e line cord .
Expansion Module
Plug the KDB module into this module and secure with the two screws provided.
Groove for the Wall Mounting Stand
When used as a wall-mounting phone, assemble the phone stand into these grooves.
Wall Mounting Holes
When used as a wall mounting phone, these 2 holes are used to secure the phone on
screws that are installed in the wall.
Groove for the Desk Stand
When used as the desk phone, assemble the phone stand into these grooves.
Page 8 © SAMSUNG Electroni cs Co., Ltd.
Page 23
PREPARATION
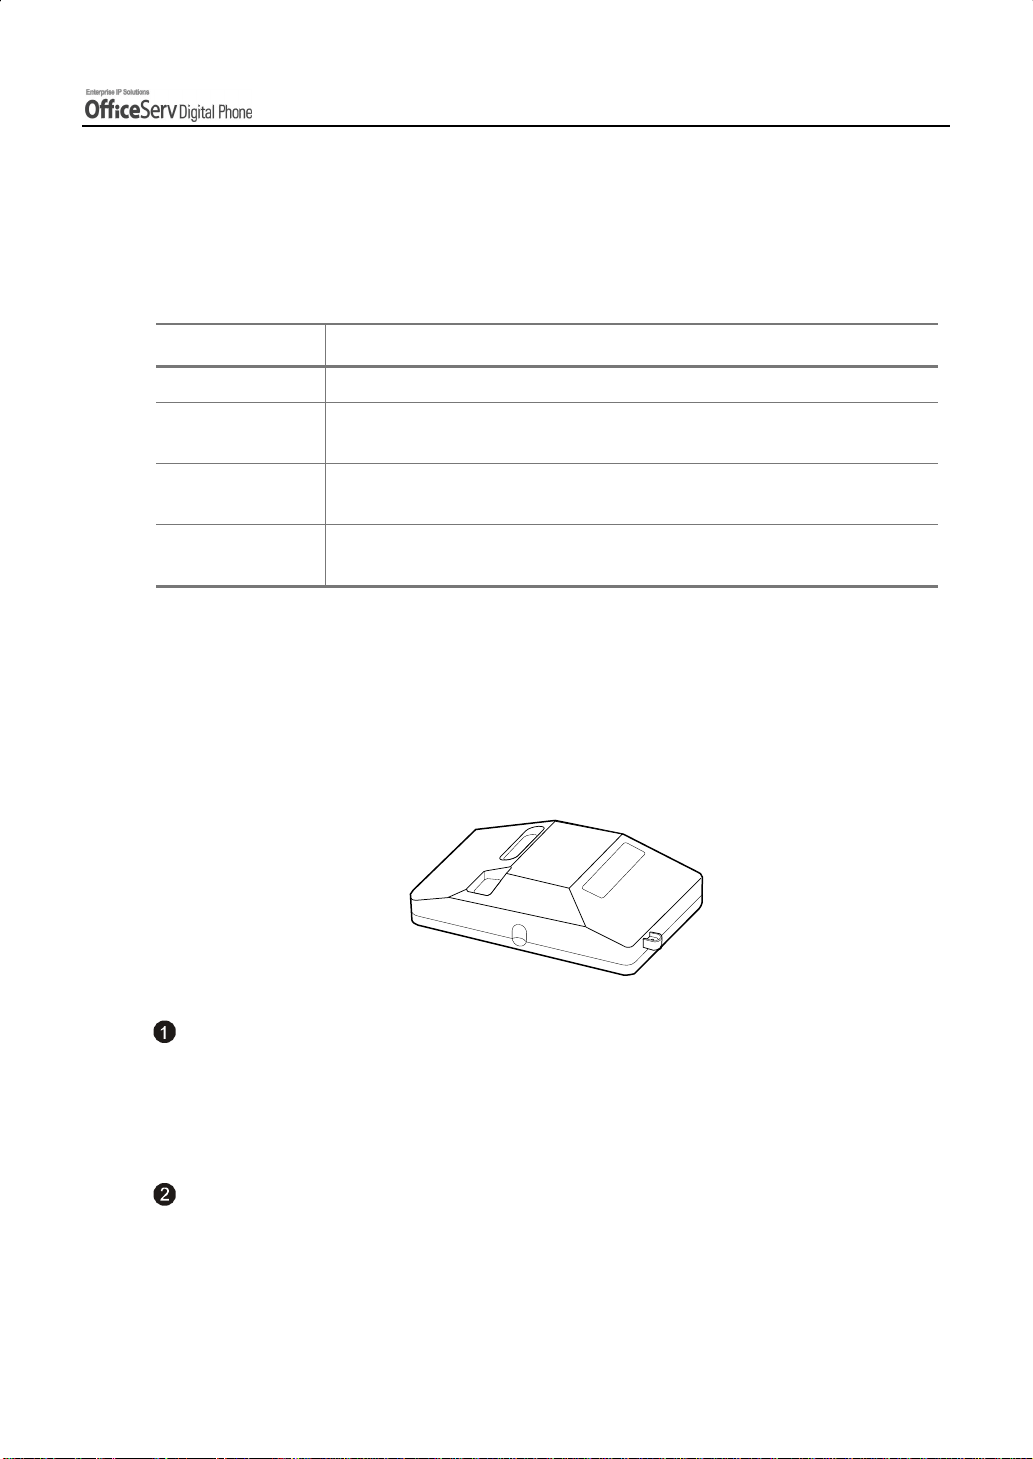
Additional Module
As the additi on al mod ule s th at can be co nn e cte d to th e DS -5 021 D /5 01 4D pho n es an d
provide various functions, there are KDB-D/KDB-S/KDB-F for the modules types. The
acoustic optic modulator(AOM) can be also connected to the DS-5021D/5014D phone.
Module Type Functions
KDB-D Can connect the digital extension device.(Supplying the DLI Port)
KDB-S Can connect a regular phone with a wireless phone.
(Supplying the SLI port)
KDB-F Changes the speakerphone mode to the full duplex and prov ides an
enhanced function.
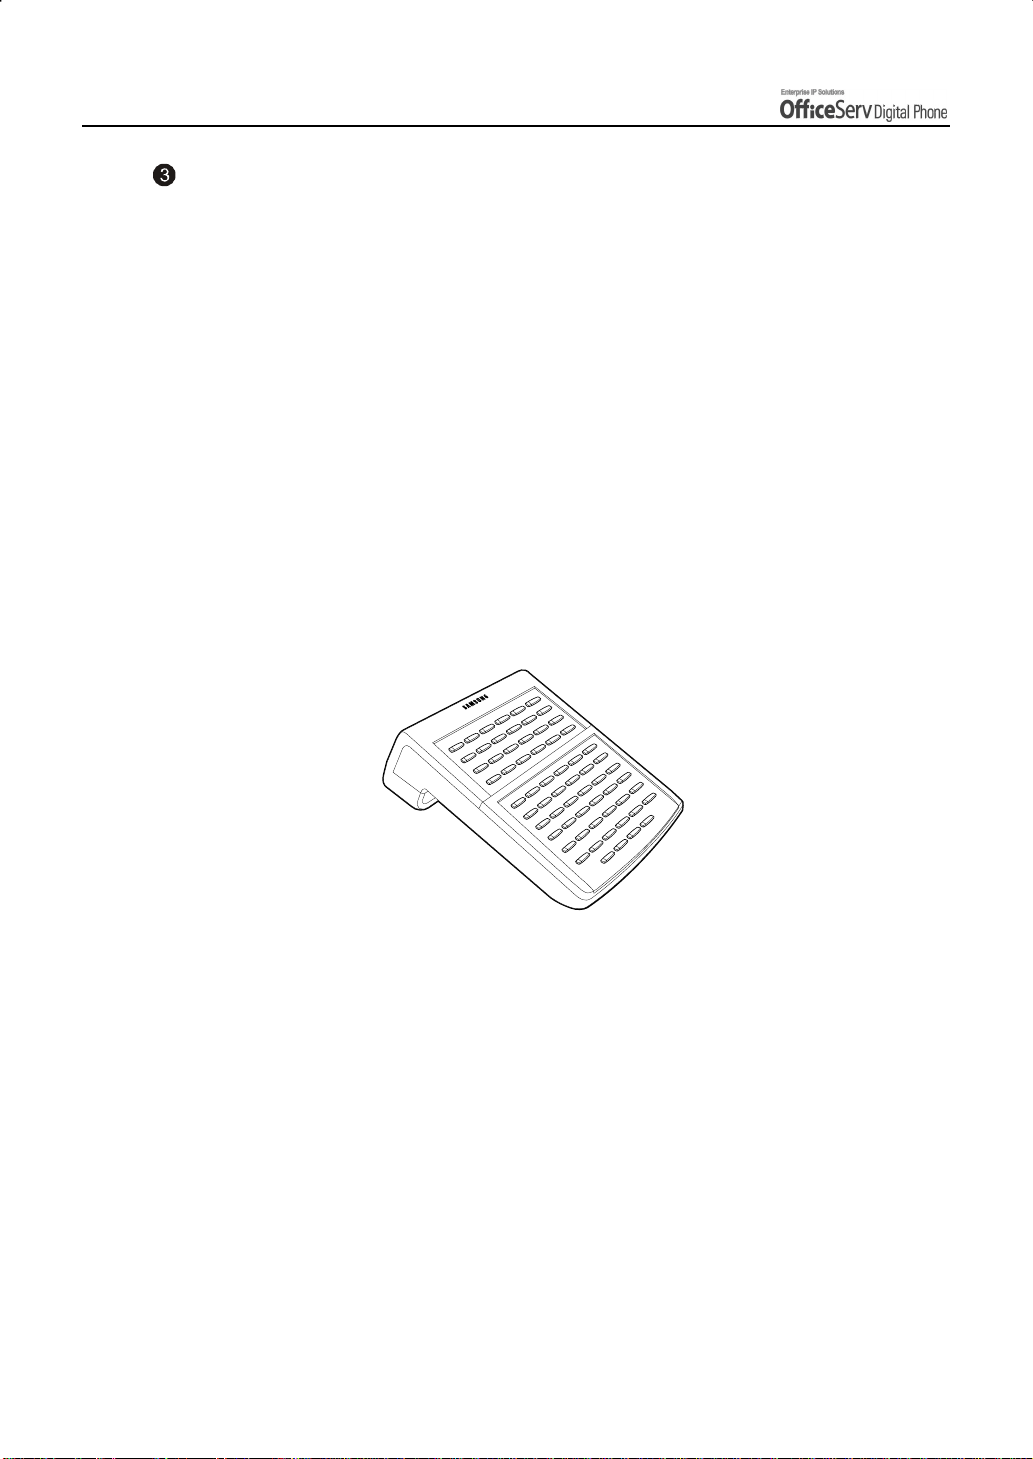
AOM Including 64 programmable buttons, this module can be connected to the
DS-5021D/5014D phone.
KDB
The DS-5021D/5014D phone has 3 types of KDB module, such as KDB-D/KDB-S/KDB-F,
and one of these can be installed in the phone. If the KDB module is installed, the phone
function can be enhanced, and depending on the module types, the number of local ports
can be increased. The shape of KDB module is shown below.
KDB-D
If the phone is added to the DLI(Digital Line Interface) port that supports 2B+D, the
KDB-D module can be installed. The KDB-D module provides the DLI port, so it
connects the digital extension devices, such as a digital phone or 64-button module.
KDB-S
If the phone is added to the DLI(Digital Line Interface) port that supports 2B+D, the
KDB-S module can be installed. The KDB-S provides the SLI(Single Line Interface) port
that can conne ct a wi rele ss pho ne wi th a reg ula r ph on e.
© SAMSUNG Electronics Co., Ltd. Page 9
Page 24
PREPARATION
KDB-F
The standard mode of speakerphone in DS-5021D/5014D phone is ‘Half Duplex’. The
half duplex means that it can communicate in both directions but only one way at a
time. The KDB-F enhances the speakerphone mode to the full duplex, so it can provide
better communication. Connecting up to 3 external microphones to the KDB-F module,
a conference can use this in a very convenient way. To use this function, the phone
shall have the pre-programmed EXTMIC button.
AOM
There is AOM(Add On Module) other than the KDB modules, as for the additional modules
that provide various functions by connecting to the DS-5021D/5014D phone.
The AOM is a button expansion box that is composed of programmable buttons only. The
DS-5021D/5014D phone can connect AOM of 64 buttons. If the AOM module is installed,
that means more programmable buttons are added. Then more functions can be registered
for convenient use.
Page 10 © SAMSUNG Electronics Co., Ltd.
Page 25
4. Assembling the DS-5 021D / 501 4D Dig ital
phone
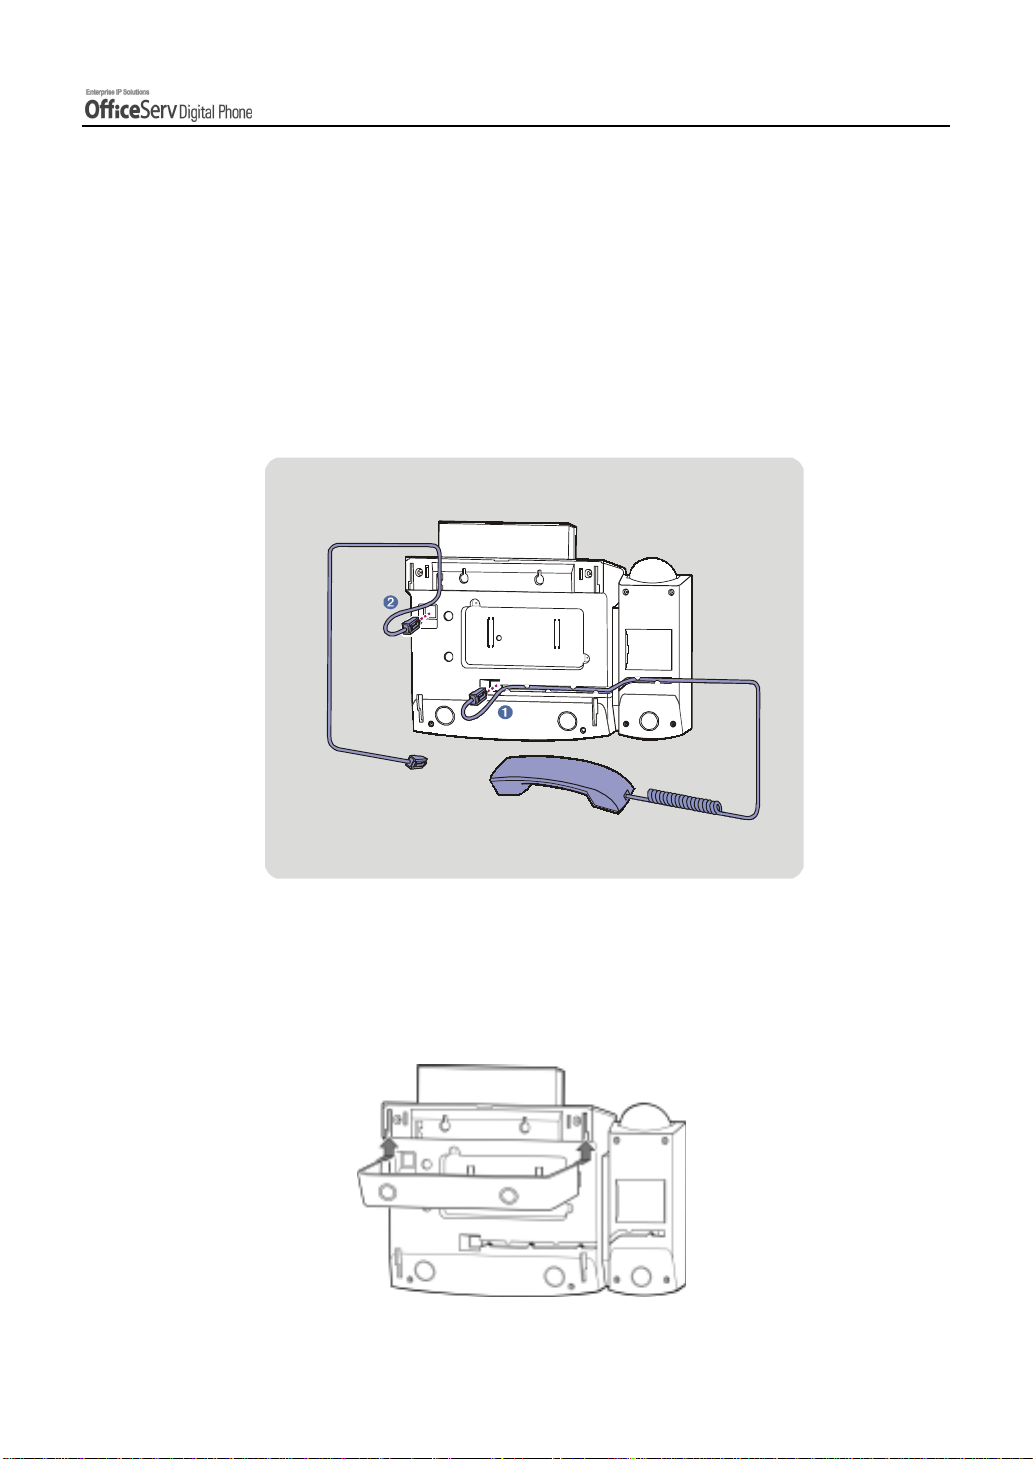
Connecting lines to the phone
PREPARATION
1.
Connect the handset to the
2.
Connect the line cord to the
handset connection port.
phone line connection port.
Using the Desktop Stand
If the phone need s to be used in a de skto p environment, inse rt th e de skto p sta nd in t o the
two side holes, whi ch are lo ca te d at th e rea r o f th e ph on e , and pu sh it in the upwa r d
direction, as shown in the figure below.
© SAMSUNG Electronics Co., Ltd. Page 11
Page 26
PREPARATION
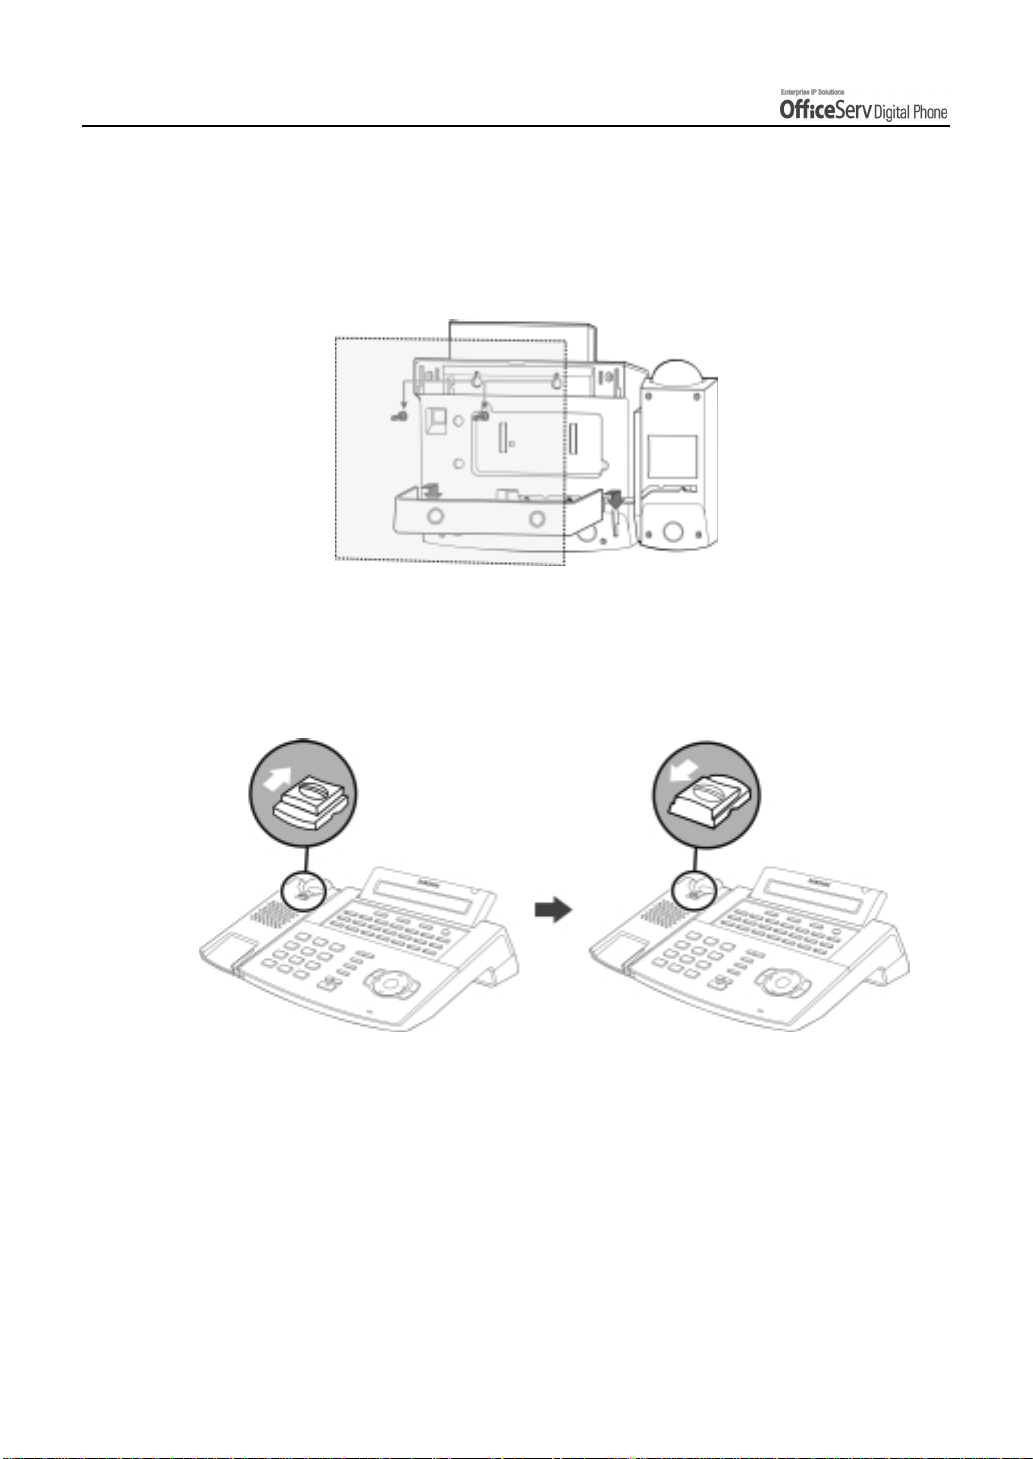
When used as the wall mounting digital phone
Assemble the stand into the left/right slots that are located in the lower section
of the base. Place the two holes for wall mounting on screws that are installed
on the wall.
When used as a wall mounted digital phone, the location of the handset hook should be
changed so that th e hand se t can be secu red . Take out the hand set ho o k, fli p i t over a nd
then insert the hook back into the hook holder as shown.
Page 12 © SAMSUNG Electronics Co., Ltd.
Page 27
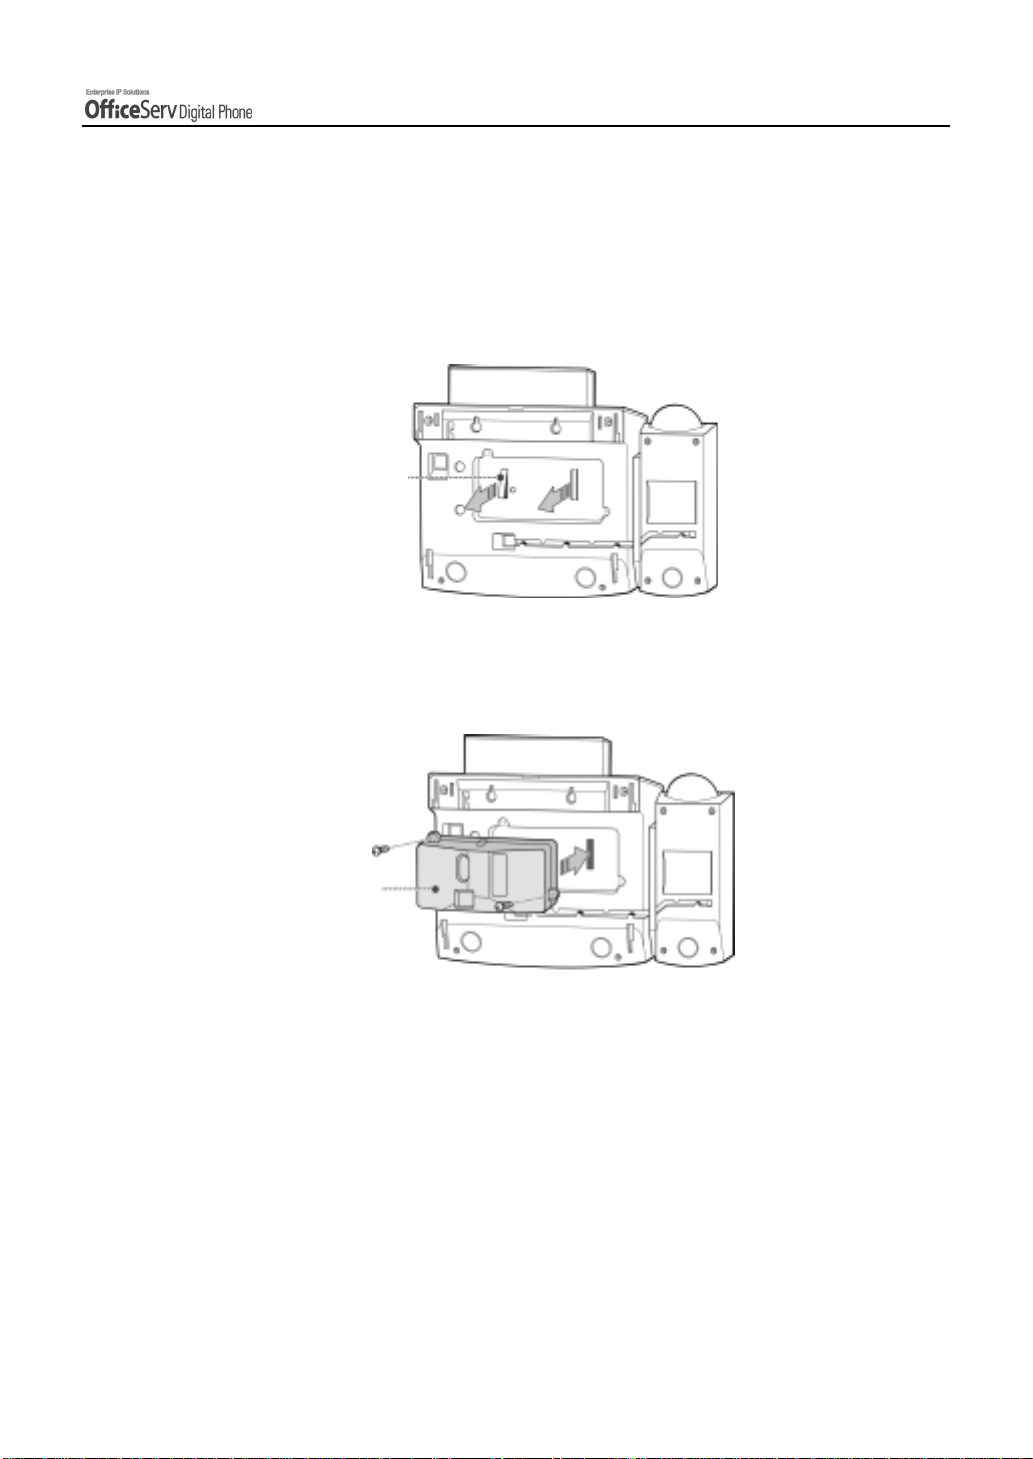
Adding a KDB Module
1.
In the center of the bottom panel, there is an expansion module that can install KDB.
Tw o con ne ct or s are covered with the pla s ti c cover, which shall be removed in order to
install the KDB module.
Plastic Cover
2.
After removing the cover, plug in the KDB module and secure with the two screws
provided.
PREPARATION
KDB
© SAMSUNG Electronics Co., Ltd. Page 13
Page 28
PREPARATION
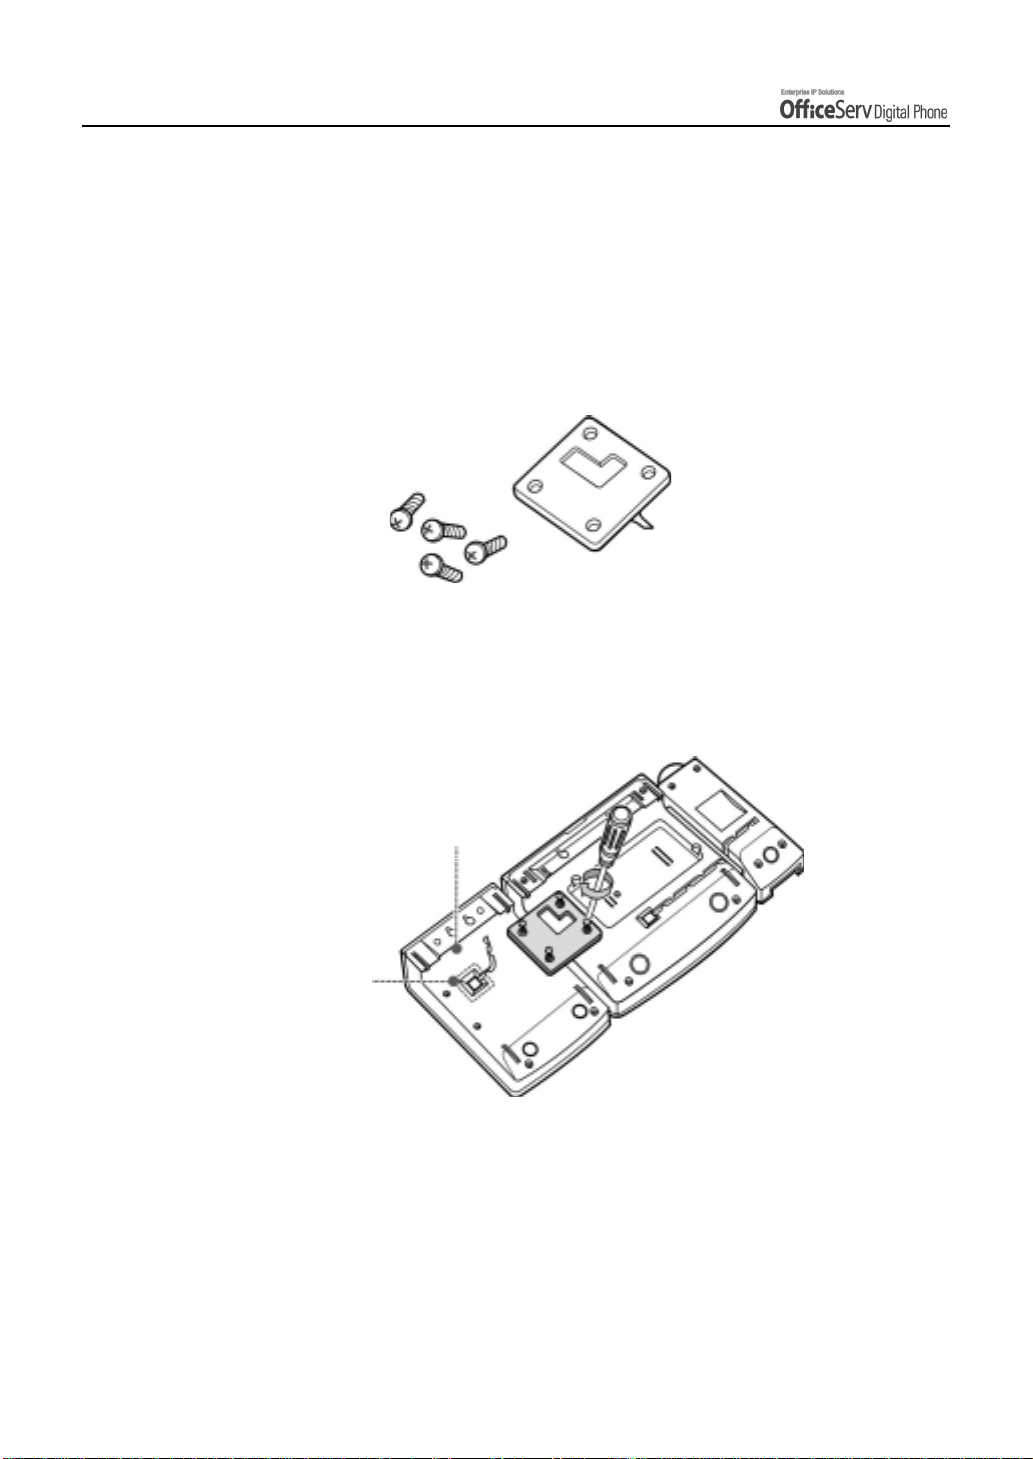
Adding an AOM
1.
Connect the DLI cable on the main system to the DLI port at the bottom of AOM. At this
time, the AOM extension pair shall be assigned at the telephone system in order to use
AOM.
2.
Prepare the foll owin g A OM conn e cto rs an d 4 scr ew s tha t are provi de d wi th AOM it sel f.
3.
Connect AOM to the phone by using the AOM connector. Place the AOM connector
over two screw holes in the right side of AOM and the other two screw holes at the
side of DS-5021D/5014D line cord port. Then tighten those screws.
AOM
A
DLI port
Page 14 © SAMSUNG Electronics Co., Ltd.
Page 29
THINGS YOU SHOULD KNOW
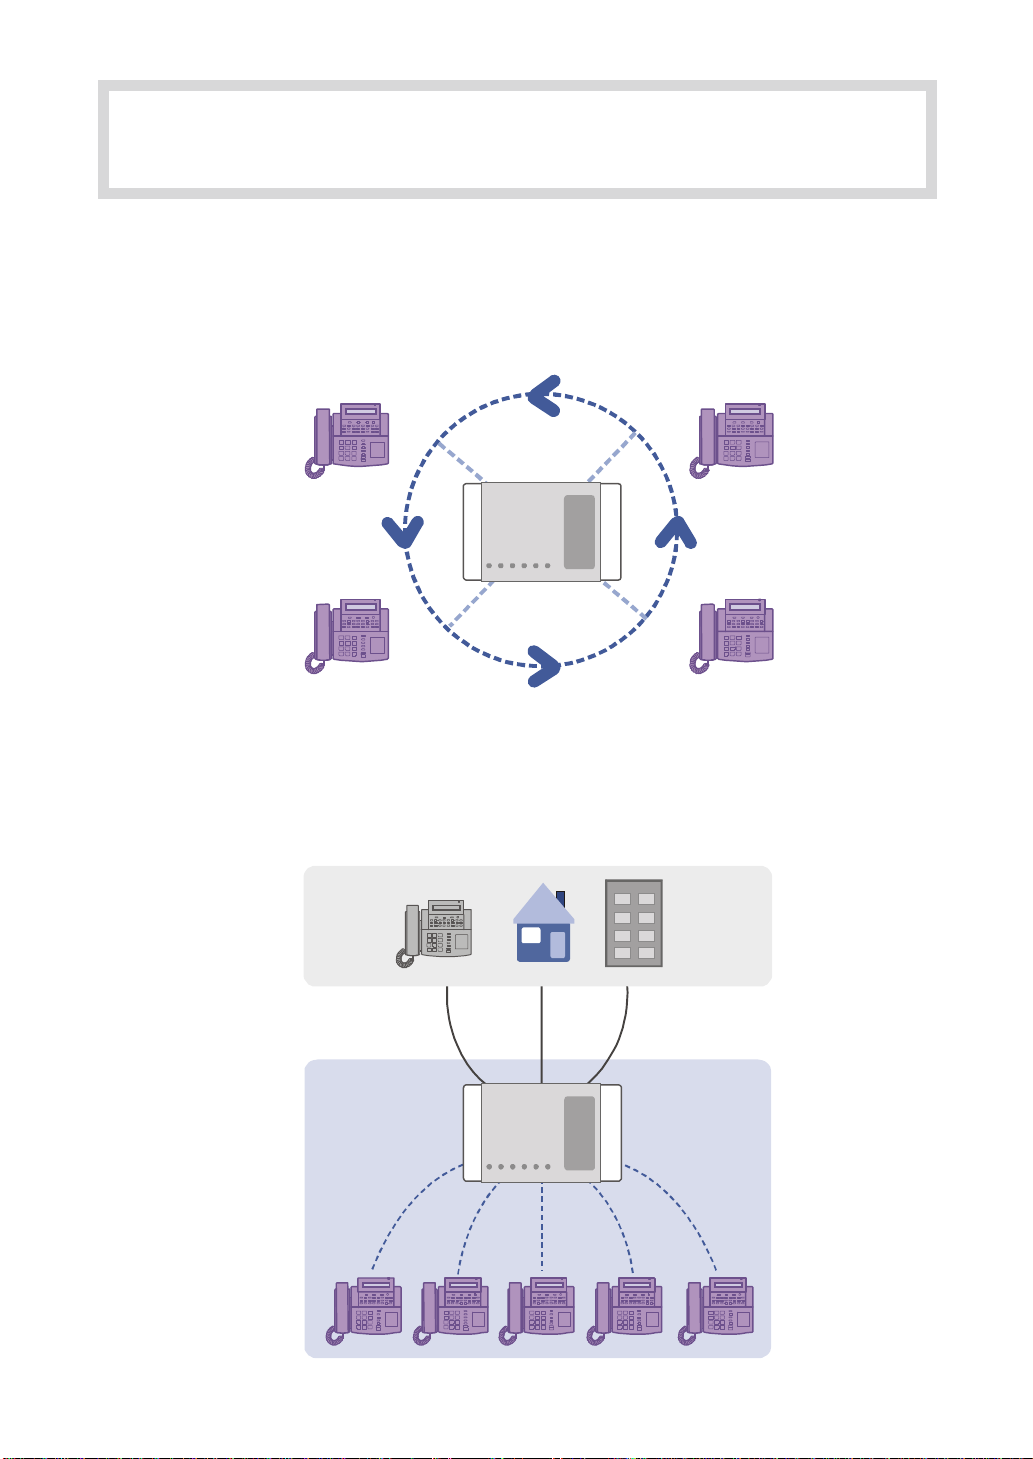
1. About Stations and Trunk Lines
A station
system.
A trunk line
you to make telephone calls to parties outside your office(for example, your home) or to
receive incoming calls from external parties.
is a digital or digital phone or standard telephone connected to the OfficeServ
Telephone
System
is directly connected to your phone company’s telephone network. It allows
Outs ide
Trunk Line
Ins ide
Te l e p h o n e
System
Extension
© SAMSUNG Electronics Co., Ltd. Page 15
Page 30
THINGS YOU SHOULD KNOW
2. Selecting System Functions
To use the functions of the OfficeServ system you can: press the programmable button that is
registered with the required function, select the function by using the Scroll button and 3 Soft
buttons that are underneath the LCD screen or dial the function code.
For example, if the callback function is required, find the programmable button with this function
first. If this button doesn’t exist, then press the Soft button corresponding to the location of [CBK]
on the LCD screen.
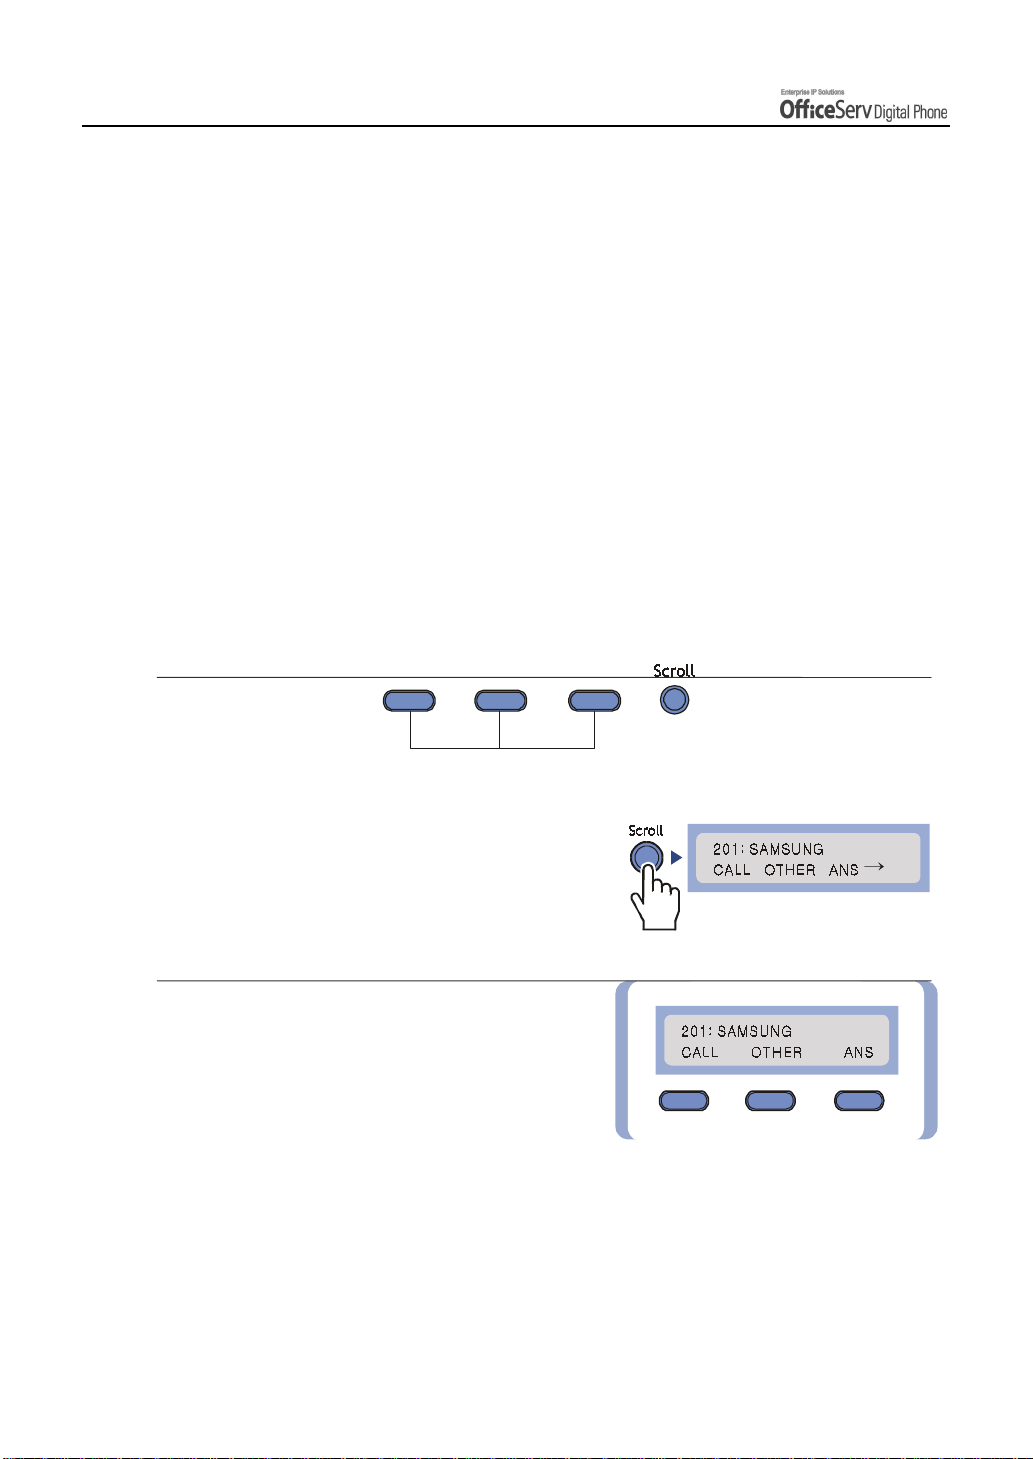
Using the Scroll / Soft Button
The Scroll button is used to display the function menu on the LCD screen. If the Scroll button is pressed, the
LCD screen will show three menus such as [CALL], [OTHER], and [ANS] in a row. If the Scroll button is
pressed again, another menu appears.
Three Soft buttons are located underneath the LCD screen.
Among three Soft buttons, the one on the left is called the left Soft button, and the one in the middle is called
the middle Soft button, and finally the one on the right is called the right Soft button.
Soft button
1.
Press the Scroll button once when the digital
phone is in the idle state and the LCD screen
will show the screen.
2.
First select one of the main menus ; [CALL],
[OTHER], or [ANS]. T o select the [CALL] menu,
press the left So ft bu tt on , to sele c t t he
[OTHER] menu, press the middle Soft button,
and finally to select the [ANS] menu, press
the right Soft button.
[CALL] Menu : Displays the functions related to
!
making a call.
[OTHER] Menu : Displays any other functions not related
!
to answe ri n g or r e c e iv in g a ca ll .
[ANS] Menu : Displays functions related to answering calls
!
at other system devices or pages.
Page 16
© SAMSUNG Electronics Co., Ltd.
Page 31

S
YOU SHOULD KNOW
Scroll
3.
Keep pressing the Scroll button until the desired
function shows up.
THING
If there is a " symbol displayed, it means that
additional menus are available.
4.
If the desired function appears on the
LCD screen, select it by using the Soft button
associated with the desired function.
Using the Function Code
Many of the OfficeServ system functions can be invoked by dialling function codes. Please refer to the table
below for the default function codes(these maybe changed in your system-refer to your System
Administrator).
Dial Button Function Dial Button Function
0 Trunk access group number 55+0 Page internal zone 0
10+xxx Answer parked calls 55+1 Page internal zone 1
1 1 Set calls on hold or clear on hold 55+2 Page internal zone 2
12+xxx Answer call on hold at another
station
13 Release door lock 55+4 Page internal zone 4
16+xxx Assign speed-dial number 55+5 Page external zone 1
17 Dial stored number 55+6 Page external zone 2
19 Redial 55+7 Page external zone 3
2xx Station number 55+8 Page external zone 4
3xx Station number 55 9 Page all external zones
400 Cancel DND 55+* Page all zones
401 Set DND 56 Answer transfer page
41 Set Message No Ring 57 Clear alarm sensor
42+xxx Cancel message 58 Clear DISA Alarm
43 Set/Return message 59 Change to my station level
55+3 Page internal zone 3
© SAMSUNG Electronics Co., Ltd.
Page 17
Page 32

THINGS YOU SHOULD KNOW
Dial Button Function Dial Button Function
44 Reserve connection to a busy
600 Cancel all call forwarding
station/trunk line
45 Busy station Camp-on 601+xxx Set Forward All Calls
46 Conference 602+xxx Set Forward Busy
47 Enter account code 603+xxx Set Forward No Ans
48 Set station message 604+xxx Set Forward Busy/No Ans
49 Flash 66 Group call pickup
500~529 Station group 67 Night ring answer
53+grp+0 Exclude group 681 Voice Dialler
53+grp+1 Include group 682 Record Voice Dialler
54+zone Transfer page 7xx
55+0 Page all internal zones 8x
Trunk line
Trunk group number
606 + xxx Set Forward Follow me 9 Attendant Console group
65 Direct call pickup
- If the table above doe s not ha ve the desired function code or the function code
does not match with the de s ire d f unc tion, the sy s tem ’ s numbe r ing pla n may have
NOTE
been changed ; please consult with your System Administrator.
Page 18
© SAMSUNG Electronics Co., Ltd.
Page 33

THING
S
YOU SHOULD KNOW
Assigning the Programmable Button Extenders
By adding an extender to some buttons, you can use the digital phone more conveniently. For example, if the
extender 4 is added to the [PAGE] button, when this button is pressed, it will allow a page announcement to
be made to stations in page zone 4. Refer to the following table to select the extenders that can be assigned
for each programmable button.
Button Description Extenders
BOSS Director/Secretary 1-4
DP Direct Call Pick-up Station or station group number
DS Direct Station Required station numbers
0=FWD Cancel, 1=FWD All, 2=FWD Busy,
FWRD Call Forwarding
GPIK Group Call Pick-up 01-20
GCONF Conference group 1-5
IG Group In/Out Required station group 5XX(X)
3=FWD No Answer , 4 FWD Busy/No Answer,
5=FWD DND and-6=Follow Me
MMPG Meet Me Page 0-9, *
P A RK Park Orbits 0-9
PMSG Programmed Message 01-20
P A GE Paging 0-9, *
SG Station Group Selection 5XX(X)
SPD Speed Dial Personal 00-49, or System 500-999
DIR Directory Name Dialling PERS(1), SYS(2) or STN(3)
VT Voice M ail Transfer Voice Mail Group(5XX)
© SAMSUNG Electronics Co., Ltd.
Page 19
Page 34

THINGS YOU SHOULD KNOW
1.
Press the
2.
Press
3.
Select the programmable button that requires
an extender by using the
button to, scroll thr oug h prog rammab le
buttons and then press the right Soft button ,
or press the programmable button to
add an extender.
[Transfer] button
[1] [0] [7]
.
.
[!!!!Volume""""]
Page 20
4.
When the cursor comes to the input area
on the LCD panel, dial the required extender.
5.
Save the extender by pressing the right or
left Soft button. Press the
to finish programming.
[Transfer]
button
© SAMSUNG Electronics Co., Ltd.
Page 35

THING
S
YOU SHOULD KNOW
3. Entering Characters
Using the dial buttons of this phone, you can easily enter/edit, letters, numbers and special
characters.
Special Button Used
To enter letters of the alphabet the following special button is used.
Button A : Switch to capital/small letters when entering characters.
!
The A button of the DS-5021D/5014D digital phone is located on the first button of the
bottom row of the programmable buttons below the LCD screen.
An example for the DS-5021D is shown.
Button A
© SAMSUNG Electronics Co., Ltd.
DS-5021D
Page 21
Page 36

THINGS YOU SHOULD KNOW
Entering Characters
Press the [!Volume"] button to move the cursor and insert or modify the desired letter.
Press the [Volume"] button and move the cursor one space to the right to use the same
dial button letters as the previous letter used.
Procedures for entering characters are described below.
Enter the characters according to the table below. Press button A to switch between capital
and lower case letters.
Dial button
Dial frequency
0
1
2
3
4
5
6
7
8
9
*
#
12345
<>. )0
Space ? , ! 1
ABC@2
DEF#3
GH I $ 4
JKL%5
MNO^ 6
PQRS7
TUV*8
WXYZ 9
:=[]*
#
?
[
)
I
Space
.
<
]
_
;
@
&
“
>
+
”
%
"
!
/
^
{
:
$
=
(
}
’
Page 22
Press the [#] button to enter special characters. Special characters are displayed in the
following order.
#, space, &, !, :, ?, ., ,, %, $, -, <, >, /, =, [, ], @, ^, (, ), _, +, {, }, |, ; , ”, ", ’
© SAMSUNG Electronics Co., Ltd.
Page 37

S
4. Configuring My Phone
Allows you to set the feature preferences for your digital phone.
To Change the Digital phone Passcode
The pre-assigned station passcode is 1234. You can change the station passcode if needed.
THING
YOU SHOULD KNOW
1.
Press the
2.
Press
3.
Enter the previous passcode.
4.
Enter the new passcode. The pa sscode must
be a 4-digit number.
[Transfer]
[1] [0] [1]
button.
.
5.
Re-enter the new passcode for con firmat ion.
If the passcode is ente red corre ctly,
a beep will be hea rd tw i ce. I f fo u r beep s a re
heard, it means that the new passcode
entry was unsuccessful.
Please re-enter the new pa sscode .
© SAMSUNG Electronics Co., Ltd.
Page 23
Page 38

THINGS YOU SHOULD KNOW
6.
Save the new passcode by pressing
[Transfer]
the
button.
Setting the Answer Mode
Intercom calls can be answered with one of three answer modes. A different answering mode can be selected
for
[0] ANS MODE : the answer mode when answering intercom calls.
!
[1] EXEC ANS : the answer mode when answering calls using the executive/secretary hot line.
!
You must be a designated Boss or Secretary for this option to be available.
1.
Press the
2.
Dial
3.
Select the call type(ANS MODE or EXEC ANS)
using the
[Transfer]
[1] [0] [3]
.
[!!!!Volume""""] button
button.
. Move the
cursor by pressing the right Soft button.
4.
[0](
Dial
[1](
or
Ring mode),
Auto Answer mode),
[2](
Voice Announce).
Page 24
© SAMSUNG Electronics Co., Ltd.
Page 39

THING
S
YOU SHOULD KNOW
5.
Press the
the selected entry.
NOTE
[Transfer]
- If your digital phones is programmed for the Voice Announce answering function,
and Call Forwarding No A nsw e r is se t, y ou m us t pres s the [Spea ker] button or
[Send] button to answer before the no an answer timer expires. Otherwise, the call will
be forwarded.
button and save
Using the Headset / Handset (Headset Operation)
The DS-5021D/5014D digital phone user can switch between handset mode and headset mode. In headset
mode, you can answer or end a call by pressing the [Send] button or [End] button.
1.
Press the
[Transfer]
button.
2.
3.
© SAMSUNG Electronics Co., Ltd.
[1] [1] [0]
Dial
To use the handset, dial
use the headset, dial
.
[0] [2] [0]
[0] [2] [1]
, and to
.
Page 25
Page 40

THINGS YOU SHOULD KNOW
4.
Save the selected entry by pressing
[Transfer]
the
NOTE
button.
- The digital phone can have a he adset m ode button. I f s o, pre ss this button when its LED
is off and the digita l phone is c ha nge d to he ads e t m ode and the L E D w ill light up.
Press this button again to return the dig ita l phone ba c k to ha ndse t mode a nd the LED
button
goes off.
Enabling / Disabling the Key Confirmation Tone
You can enable or disable a short confirmation tone whenever a dial button is pressed.
1.
Press the
2.
Dial
3.
To use the key confirmation tone,
dial
dial [0]
4.
Save the selected entry by pressing
the
[Transfer]
[1] [1] [0]
[0] [4] [1]
[4] [0]
[Transfer]
button.
.
, and to disable that the tone,
.
button.
Page 26
© SAMSUNG Electronics Co., Ltd.
Page 41

THING
S
YOU SHOULD KNOW
Pulse to Tone Changeover
When making an outside call on a dial
pulse(mechanical) line, press the
All digits dialled after the
sent as tones(electronic method).
[#]
[#]
button.
button will be
Hot Keypad
The hot keypad allows you to make a call or activate the other functions of the OfficeServ system by pressing
the dial buttons or function keys directly, without picking up the handset or pressing the [Speaker] button.
If the hot keypad function is turned off, you must pick up the handset or press the [Speaker] button first.
1.
Press the
2.
Dial
3.
To enable hot keypad, dial
disable, dial
4.
Save the selected entry by pressing
the
[Transfer]
[1] [1] [0]
[0] [3] [0].
[Transfer]
button.
.
[0] [3] [1]
button.
, and to
© SAMSUNG Electronics Co., Ltd.
Page 27
Page 42

THINGS YOU SHOULD KNOW
5. Volume Adjustment
The [
!!!!
Volume
""""
] button is used for adjusting the volume of the handset, speaker , and ringer.
Adjusting Handset Volume
1.
During a call using the handset.
2.
Press the
the handset vol u me.
3.
Press the
the handset vol u me.
[Volume"
[!!!!Volume
]
"
button to increase
""
]
button to decrease
Page 28
© SAMSUNG Electronics Co., Ltd.
Page 43

S
Adjusting Speaker Volume
THING
YOU SHOULD KNOW
1.
During a call using the
2.
Press the
the speaker volume.
3.
Press the
the speaker volume.
[Volume"
[!!!!Volume
[Speaker]
]
"
button to increase
""
]
button to decrease
button.
Adjusting Ring Volume
1.
To increase the ring volume, press the
[Volume"
is ringing.
2.
To decrease the speaker volume, press the
[!!!!Volume
is ringing.
© SAMSUNG Electronics Co., Ltd.
]
"
button while th e phon e
""
]
button while th e phon e
Page 29
Page 44

THINGS YOU SHOULD KNOW
6. Types of Signal Tone
The types of signal tone used in t his te lep hone syst e m are des cribed in the f oll owing ta ble .
Signal
T one Name
Dial tone
Ring back
tone
Busy tone
Transfer
tone
Confirmation
tone
* The Signal Interval may vary for each country.
A steady tone that indicates
you can begin dialling.
Indicates the station you dialled
is ringing.
Indicates the station you dialled
is busy.
Indicates your call is being held
and you can dial another
station.
Very short beeps that indi cate
you have correctly set or
cancelled a system feature.
Usages Signal Interval
Page 30
© SAMSUNG Electronics Co., Ltd.
Page 45

S
7. Telephone Status Indicator
The status indicator turns on or off according to the telephone status.
Functions Status of LCD Indicators
Busy/Off-hook Steady red
Extension Ring Flashing red
Trunk Ring Flashing green
Recalling Flashing yellow
Message waiting Flashing red
Calling Denied Fast flashing red within 1-second interval.
THING
YOU SHOULD KNOW
© SAMSUNG Electronics Co., Ltd.
Page 31
Page 46

THINGS YOU SHOULD KNOW
8. Button LED
The [Transfer] button, [Hold] button, and [Speaker] button have a LED that turns on or off
according to the phone status.
Transfer
Hold
Speaker
For incoming external calls or intercom calls ringing at your digital phone the trunk button
LED or Call button LED will flash green. The trunk button LED will flash red on other digital
phones with the same trunk button. While holding a call, the green LED of the trunk line will
blink.
In the followi ng ta bl e, th e fu n cti on s of LE D s ar e summarized.
Functions Button LED Status
Trunk line or functions are in use LED is steady green.
New call is ringing LED is a fast flashing green.
While a call is on hold LED is a slow flashing green or red.
A call recalling to the digital phone LED is a slow flashing yellow .
Page 32
© SAMSUNG Electronics Co., Ltd.
Page 47

BASIC FEATURES
1. Before Making / Answering a Call
This section provides you with information on how to make or answer a call by using the handset or
speakerphone.
Calling Methods
▪ Using a handset
This function allows you to lift the handset
and make a call.
▪ Using a speakerphone
This function allows you to make a call
through the speakerphone without lifting
the handset.
Call Answering Methods
▪ Using a handset
This function allows you to lift the handset
and answer a call.
▪ Using a speakerphone
This function allows you to answer
a call through the speakerphone without
lifting th e ha nd se t.
© SAMSUNG Electronics Co., Ltd. Page 33
Page 48

BASIC FEATURES
2. Intercom Calls
This function is used when you want to make a call to other stations.
Assigning the Names to Your Extension
You can assign a name of up to 11 letters to your extension.
This allows other extension users with display stations to call you using the directory dial feature and to see
your name when you call them.
1.
Press the
2.
Press Dial
3.
Enter the name.
Refer to th e ‘
in this guide for entering characters.
[Transfer]
[1] [0] [4]
Things You Should Know
button.
.
’
4.
Save the name by pressing
[Transfer]
the
Page 34 © SAMSUNG Electronics Co., Ltd.
button.
Page 49

Calling an Extension Number
1.
Pick up the handset and check
for dial tone.
2.
Dial the extension number or station group
number. Wait until the other party answers
the call. If a short signal tone(not a ringing
tone) is heard, the receiving extension has
set up the Voice Announce or Automatic
Answer function.
BASIC FEATURES
3.
Replace the handset or press the
to finish the call.
- If you have a [DSS] button assi g ne d to an e x te ns ion num ber or s ta tion g r oup, pre s s this
NOTE
button instead of dialling the corres ponding st a tion number.
[End]
button
© SAMSUNG Electronics Co., Ltd. Page 35
Page 50

BASIC FEATURES
Answering an Intercom Call
1.
When the Digital phone rings,
pick up the handset or press
the [Speaker] button or
2.
To finish the call replace the hand se t
or press either the
[Send]
[Speaker]
button.
[End]
or
button.
Voice Page Announce Mode (Intercom Calls Only)
When another station calls you, a short signal tone will be heard followed by the caller’s announcement.
1.
To answer the call, pick up the hand se t
or press the
2.
To end the call, replace
the handset or press either the
[Speaker]
or
[Send]
button.
button.
[End]
Page 36 © SAMSUNG Electronics Co., Ltd.
Page 51

BASIC FEATURES
Automatic Answer Mode (Intercom Calls Only)
When another station calls you, a short signal tone will be heard and then the Digital phone automatically
answers the call.
1.
The microphone and speaker are
turned on and you can communicate
hands-free.
2.
For a private conversation, lift the handset.
3.
To end the call, replace the handset
or press either the
[End]
or
[Speaker]
button.
© SAMSUNG Electronics Co., Ltd. Page 37
Page 52

BASIC FEATURES
Busy Station Callback
When the called station is busy, you can set a busy station callback. When the busy station becomes free,
your Digital phone will ring. If you pick up the Digital phone, the other station will begin to ring.
1.
When you hear a busy signal, press the
[CBK]
the Soft button co r resp ond in g t o
[CBK]
2.
When you hear the confirmation signal,
replace the hand se t.
3.
When the reserved station becomes
free, your Digital phone rings.
The ‘CALL BACK’ message will appear
on the LCD screen.
button or dial
on the LCD panel.
[4] [4]
. Or, press
[CBK]
CALL BACK
4.
Lift the handse t o r pre ss
[Speaker]
the
call the now idle sta ti on .
5.
To end the call, replace the handset
or press either the
NOTE
Page 38 © SAMSUNG Electronics Co., Ltd.
[Send]
or
- If you do not answer the Callba c k within 30 s e conds , the c a llback will be canc e lled.
If a callback is set up, the [CBK] button’s LED, if programmed, will light.
button to
[Speaker]
or
[End]
button.
Page 53

BASIC FEATURES
Busy Station Camp-On
When you call another station and receive a busy signal, you can give the called station off-hook r ing tone and
wait for a little while.
1.
Press the
Or, press the Soft button corresponding
to the
2.
The called station will receive
off-hook ring tone repeated every few seconds
and an available [C all ] but to n will fl a sh to
indicate your call is wait ing.
3.
Wait for the ca ll ed pa rty to an swe r.
The called station must release its first call
or place it on hold before answering
your camp-on.
[CAMP]
[CAMP]
button or dial
on the LCD screen.
[4] [5]
.
[CAMP]
Calling Your System Operator
[9]
Dial
group. If you want to call a specific operator,
dial that person’s extension number.
© SAMSUNG Electronics Co., Ltd. Page 39
to call your system operator or operator
Page 54

BASIC FEATURES
3. Outside Calls
This function is used when you want to make an external call using any available trunk line.
Calling Outside numbers
You can use a handset or speakerphone when calling an external number.
To make an external call with a handset, follow the procedures below.
1.
Pick up the handset.
2.
Press the trunk or trunk group button or
or dial the trunk group access
code(e.g., 0).
3.
Dial the telephone number
you want to call.
4.
Finish your call by re pl aci ng
the handset o r pr e ssi ng th e
- If the hot keypad fea ture is us e d, y ou c an mak e an ex terna l ca ll w ithout pic k ing up
a handset by dialling the trunk access code.
NOTE
Page 40 © SAMSUNG Electronics Co., Ltd.
[End]
button.
Page 55

BASIC FEATURES
To make an external call with a speakerphone, follow the procedures below.
1.
Press the
2.
Press the trunk li ne or di al the t run k
access code.
3.
Dial the telephone number.
[Speaker]
button.
4.
Finish the call, by pressing
[Speaker]
the
NOTE
© SAMSUNG Electronics Co., Ltd. Page 41
button.
- If the LCR(Least Cost Routing) feature is enabled on the OfficeServ system, press
the [LCR] button or dial the LCR access code.
Page 56

BASIC FEATURES
Authorization Code and Account Code
Authorization Code
If your OfficeServ system is programmed
to require you to ent e r an au th o rizat io n co de
before making a call, dial [*] plus a valid code
before selecting a trunk line.
Account Code
If your OfficeServ system is programmed to
require you to enter an account code before
making a call, press the
[4] [7]
or dial
press the
plus a valid code,
[ACCT]
then select a trunk line.
[ACCT]
button
button again and
- Ask your System A dminis tra tor for m ore information on authorization codes and
NOTE
account codes.
Answering an Outside Call
If you lift up th e hand se t wh en th e Digi ta l ph on e is
ringing, you are automatically connected to
the ringing call. Or, press the
to automatically answer on the speakerphone.
- If a call is flashing a t y our D igital phone but not r ing ing, you must press the f lashing
button to answer.
NOTE
[Send]
button
Page 42 © SAMSUNG Electronics Co., Ltd.
Page 57

Universal Answer
External calls may be programmed to ring
through an external speaker. In this case,
[6] [7]
dial
the call.
or the press
[UA]
button to answer
New Call
BASIC FEATURES
Press the
your existi ng call , wa it fo r di al t one an d
then make a new cal l on th e same li ne .
If this
Digital phone, press the Soft button corresponding
[NEW]
to
[NEW]
[NEW]
on the LCD screen.
button to disconn e ct
button does not appear on your
Busy Line Queuing With Callback
If there are no available trunk lines, you will hear busy tone when you try to make an external call, you can
set a callback. When a line becomes free, your Digital phone will ring. You can reserve up to 5 callbacks for
extension or trunk calls.
1.
If you receive a busy tone when trying to
access a trunk line ,
press the
Or, press the Soft button corresponding
[CBK]
to
2.
When confirmation tone is heard,
put down the ha ndse t.
[CBK]
button or dial
on the LCD screen.
[4] [4]
.
[CBK]
3.
When the line becomes free,
the system will call y ou ba ck.
© SAMSUNG Electronics Co., Ltd. Page 43
Page 58

BASIC FEATURES
4.
Lift the hands e t o r pr e ss the
to respond to the Callback. Wait for dial tone
and dial the telephone number or speed dial
number again.
- A callback will be cancelled if not a nswer e d within 30 s e conds . If y ou ha ve se t a
NOTE
callback, your [CBK] button’s L ED, if programmed, will light.
[Send]
button
Cancelling Callback
A maximum of 5 callbacks can be set for extensions or external calls lines at the same time. To cancel a
callback, follow the procedure below.
1.
Press the
You will hear confirmation tone.
[CBK]
button or dial
[4] [4]
.
[CBK]
2.
Press the
the oldest callba c k that you have set .
Page 44 © SAMSUNG Electronics Co., Ltd.
[Hold]
button. This will cancel
Page 59

BASIC FEATURES
Redial
To redial the last telephone number you dialled, press the [Send] button for approximately 2 seconds or dial
[1] [9].
Pressing the [Redial] key will give you the option to review up to 10 of your previously dialled external
numbers. You have to set ‘Redial Review’ as ‘On’ in the ‘MMC210’ to review these numbers.
[
!!!!
[Redial]
Volum e
button.
]
""""
button to select the
[NND]
.
1.
Press the
2.
Use the direction buttons or
the
required number to redial and press
the Soft button co r resp ond in g t o
3.
To review details about the previous call
prior to dialling it, press the Soft button
corresponding to
[Dial]
.
4.
Press the
automatically redial the last number
you dialle d.
NOTE
© SAMSUNG Electronics Co., Ltd. Page 45
[Redial]
- If the hot keypad fea tur e is turne d off, you have to lift up the ha nds e t f ir st or pres s
- Redial does not apply to inte rc om ca lls .
button twice to
the [Speaker] button bef or e y ou be gin us ing the re dia l fea ture.
Page 60

BASIC FEATURES
Save Number with Redial
To save the number you just dialled
for later use, press the
before hangin g up .
This saved number can be redialled at
any time by pressing the
NOTE
[1] [7]
. The same external trunk line
- The saved telephone numbe r will be save d in m emory until you save another number.
- Saved Number Redial does not a pply to intercom calls.
or dialling
will be selected for you .
[SAVE]
[SNR]
button
button
Page 46 © SAMSUNG Electronics Co., Ltd.
Page 61

BASIC FEATURES
Automatic Redial / Retry
When you make an outside call and receive a busy signal, the OfficeServ system can automatically redial the
number for you. It will automatically redial at a pre-programmed interval for up to 99 attempts.
1.
When you hear a busy signal,
press the
the Soft button co r resp ond in g t o
on the LCD screen.
2.
The system will reserve the line
and automatically redial the same number
for you. You will hear the call progress
tones through the speaker. At this time,
the microphone is muted.
[RETRY]
button or press
[RETRY]
[RETRY]
3.
When the called party answers,
you must pick up the handset or press
[Speaker]
the
you begin speaking.
You must answer within 10 seconds.
NOTE
[Send]
or
- If you make another ca ll, a uto-r e dial is ca nc e lled.
- T o cancel a retry, lift and replace the handset.
button before
© SAMSUNG Electronics Co., Ltd. Page 47
Page 62

BASIC FEATURES
Call Park
You can park an outside call in one of 10 ‘parking orbits’.
1.
Press the
Or, press the Soft button corresponding
[PARK]
to
2.
Dial the orbit number required,
the
Or, p ress a de di cated
the
To have the call ’parked’ picked up
by another station, notify the station user
of the parking orbit number.
3.
To pick up the parked call,
press the
the required orbit number or press
the flashing
[PARK]
on the LCD screen.
[PARK]
[PARK ]
button will flash.
button will also fla sh.
[PARK]
[PARK]
button.
[0]-[9]
[PARK]
button followed by
button.
button ;
[PARK]
;
[PARK]
Page 48 © SAMSUNG Electronics Co., Ltd.
Page 63

BASIC FEATURES
4. Intercom / Outside Calls
Holding a Call
You can temporarily suspend a conversation without ending the call by placing the call on hold.
Or, when another call is received, you can put your first call on hold and answer the new call.
You can simply press the button on hold again to resume the conversation.
The types of hold available are system hold(general hold), automatic hold, exclusive hold, and consultation
hold.
System Hold
1.
While you are en gage d in a conversation,
press the
[Hold]
button.
2.
The call on hold will flash green on
your Digital phone and this line will flash red
on other stations.
3.
To return to the held call.
Press the line button.
The green LED wi ll stop Fl a shin g.
4.
Resume your conversation with the other party.
- While you are on a call, pr es s ing a trunk line button or f l a shing Call button will
NOTE
automatically put your fir s t call on hold a nd c on nec t y ou to the new call. Refer below.
~
o
l
l
e
H
© SAMSUNG Electronics Co., Ltd. Page 49
Page 64

BASIC FEATURES
Automatic Hold
With Automatic Hold set, when you are answering an outside call, pressing the trunk line or flashing Call
button will automatically put your outside call on hold and connect you to the next call. You can set Automatic
hold on your digital phone by following the procedure below.
1.
Press the
2.
Dial
3.
To use this function, dial
and if this function is not required,
dial [0] [0] [0].
[Transfer]
[1] [1] [0]
button.
.
[0] [0] [1]
,
4.
Press the
the selected item.
NOTE
Page 50 © SAMSUNG Electronics Co., Ltd.
[Transfer]
- Intercom calls will be placed on hold by pressing the [Hold] or [Transfer] button.
If you press another tr unk line button or flashing Call button while you a re on a n
intercom call, the intercom will be disconnected.
button to save
Page 65

Exclusive Hold
To place an outside call on hold exclusively so that other users cannot get it.
BASIC FEATURES
[Hold]
[Hold]
button twice.
button.
- Intercom calls will always be placed on exclusive hold.
1.
Press the
2.
The call will flash green on your Digital phone
and this line will show a steady red light
on other stations.
3.
To retrieve the call on hold, press
the flashing green line button or press
the
NOTE
© SAMSUNG Electronics Co., Ltd. Page 51
Page 66

BASIC FEATURES
Consultation Hold
When you are talking to an external caller and it is necessary to consult with another extension.
1.
Press the
[Transfer]
button ; you will hear
transfer dial tone. Your outside call is placed
on Transfer hold.
2.
Dial the extension number.
3.
Consult with the internal party.
4.
Press the
[Transfer]
button to re tu r n
to the outside party or to hang up
to transfer the call.
~
o
l
l
e
H
- Repeatedly pressing the [Tra nsfer] button will tog g le be tween the outside pa rty
NOTE
Page 52 © SAMSUNG Electronics Co., Ltd.
and internal extension.
Page 67

Hold Recall
1.
If you leave a call on hold longer
than the system hold timer allows, it will recall
your station.
At this time, the call button on hold will have
a slow flashing amber light. If you do not
answer this recall within a pre-programmed
period of time, it may go to the system operator
depending upon your OfficeServ system programming.
2.
When your Digital phone rings, lift the handset
or press the
[Send]
button to answe r th e r e call .
BASIC FEATURES
Retrieving Calls Held a t Another Station
1.
When a line is on system hold, the line will
have a flashing red light. To retrieve the call
on hold, press the line button with the red
flashing light.
2.
When a line is on hold and it does not appear
on your Digita l ph on e , di al
number or the extension number of the station
that placed th e call on hold.
[1] [2]
plus the line
© SAMSUNG Electronics Co., Ltd. Page 53
Page 68

BASIC FEATURES
Call Pickup
This section explains how to pickup a call that is ringing at another station.
Station Call Pickup
If a call rings on another station and you know the station number, you can answer the call on your digital
phone.
1.
A call is ringing on another station.
2.
Pick up the handset and listen for
the dial tone.
3.
4.
[6] [5]
Dial
Dial the station number that is ringing.
.
Page 54 © SAMSUNG Electronics Co., Ltd.
Page 69

BASIC FEATURES
Group Call Pickup
Each station can be assigned to a call pickup group. Refer to your System Administrator for details on your
pick up group.
1.
When a call is ringing on another station
assigned to your pick up group.
2.
Pick up the handset and check for
dial tone.
3.
4.
[6] [6]
Dial
Or press the flashing
button, or press
followed by the related group number.
NOTE
.
[GROUP PICKUP]
[GROUP PICKUP]
- A group number(e x tende r ) ca n be a ssi g ne d to the [GROUP PICKUP] button.
- Station Call Pickup and Group C a ll Pick up may not enable you to answer the r eca lls
at stations depending on the O fficeServ system pr ogram m ing. R efe r to your Samsung
Authorised Reseller for further details.
button
[GROUP PICKUP]
© SAMSUNG Electronics Co., Ltd. Page 55
Page 70

BASIC FEATURES
Dialling by Directory Name
Each extension number or speed dial number can have a relevant directory name.
You can select the extension number or speed dial number from the list of directory names by scrolling down
in alphabetical order. This online directory allows you to make any extension call or to find a speed dial
number within just a few seconds.
1.
Press the
the Soft button related to
the CALL men u.
2.
Select the directory you wish to use,
PERS(
SYS(
STN(
or
3.
Press the dial button that matches
the first letter of name that you wish to find.
4.
Find the required name by using
the
[DIR]
button, or pre ss
[DIR]
Personal, Spee d Di al Nu mbe r ),
System Speed Dial Number)
Station Name).
[
Volum e
!!!!
""""
]
button.
in
[DIR]
5.
Press the Soft button corresponding
DIAL
to [
the call to the sele cte d nu mber.
Page 56 © SAMSUNG Electronics Co., Ltd.
] on the LCD screen to make
- To directly move to one of the dir ector ie s , an ex tende r ca n be a dde d to [DIR] button.
[1] for the Personal Speed Dial list, [2] for the System Speed Dial list and [3] for
NOTE
the Station list.
Page 71

Transferring Calls
You can transfer your call to another extension or return to the outside party.
BASIC FEATURES
1.
While on a call, press the
Your call is automatically put on transfer hold.
2.
Dial an extension or group number.
Or, press the
group button. Your call will be
automatically put on transfer hold.
3.
For blind tran sfe r, hang up
when you hear ringi ng . Or, wait for the called
party to answer and advise him/her of the call.
Then hang up.
[DSS]
[Transfer]
button or station
button.
Reconnection with the Outside Party
If the transfer is refused and
the called stat ion ha ng s up , y ou wil l be
reconnected to th e ou t side line. Or,
you can press the
return to the outside party .
© SAMSUNG Electronics Co., Ltd. Page 57
[Transfer]
button to
Page 72

BASIC FEATURES
Call Retransferring
If you wish to send the call to another extension
without wai tin g fo r the fi r st st at i on t o ha ng up ,
simply press another
Or, p ress th e CA LL button or trunk line button to
return to the outside party and begin the transfer
process again.
NOTE
[DSS]
- When you are transfe r r ing a ca ll to a s ta tion programmed for Voice Announce
or Auto Answer, the transferred call will always ring.
- After the internal party answers, you may alternate back and forth between the parties
by pressing the [Transfer] button.
- You cannot transfer an Intercom call by pressing the [DSS] button for the st a tion re quir ed.
You must press the [Transfer] button first and then press the [DSS] button or dial the
destination extension numbe r.
button.
Transfer With Camp-On
When you are transferring a call to
another station and you receive a busy signal,
you may camp the call on to this station.
So, when this stat ion be co mes fre e,
it can be connected to the transferred call.
Simply hang up when you hear a busy signal.
Then, the called party will be alerted by
a call waiting tone .
Page 58 © SAMSUNG Electronics Co., Ltd.
Page 73

BASIC FEATURES
Transfer To Voice Mail
This feature is used to send a call directly to a voice mailbox. Your Digital phone must have a correctly
programmed [VT] button to accomplish this.
1.
Press the
Or, press the Soft button corresponding
[VT]
to
2.
Dial the mailbox nu mbe r.
3.
Hang up when dialling is completed.
[VT]
button while you are on a call.
on the LCD screen.
[VT]
© SAMSUNG Electronics Co., Ltd. Page 59
Page 74

BASIC FEATURES
Call Waiting
If an outside call or another station has camped-on to you, your Digital phone will ring and the waiting call’s
LED will flash green.
1.
Press the flashing button to answer
the waiting call.
If your Digital phonee has the Automatic Hold
feature set, your current call will go
on hold automatically.
2.
If Automatic Hold is not set,
press the
the button wi th th e fl a shin g LED .
Or, fi ni sh th e fi rst call an d h ang up ;
the waiting call wi ll ri ng you r Digi t al phon e .
[Hold]
button and then press
3.
Lift the handse t o r pre ss the
[Send]
button to answer.
Page 60 © SAMSUNG Electronics Co., Ltd.
Page 75

BASIC FEATURES
Speed-Dial
You may assign any frequently used numbers to a personal speed dial number list for your station. These
personal speed dial numbers are in addition to the system Speed dial numbers available. Speed dial numbers
can be allocated to buttons which allow you to press the one touch speed dial button to call the number.
Explanation of Special Feature Buttons
When programming speed dial numbers, the special feature buttons are used and they are
designated as A, B, C, D, E, and F buttons. Each special feature button is explained in the
following table.
A, B, C, D, E, and F buttons of the DS-5021D/5014D digital phone are the first 6 buttons in
the last row of the prog ra mmable bu tt on s lo cated bel ow t he LCD scree n.
For example, the DS-5021D digital phone is shown below.
ABCDEF
Button Features
A Button Not used.
B Button To insert a FLASH(time loop break).
C Button To insert a PAUSE.
D Button To convert from the pulse dialling(mechanical method) to the tone
dialling(Electronic method).
E Button Used to hide the numbers from showing up on the LCD screen.
F Button Used to input a speed dial name.
Hold Button To clear a speed dial number.
© SAMSUNG Electronics Co., Ltd. Page 61
Page 76

BASIC FEATURES
Programming the Speed Dial Numbers
Your station can be assigned up to fifty numbers, 00~49. Ask your System Administrator for the number of
speed dial numbers that have been assigned to your station.
To program the personal dial numbers,
!
1.
Press the
without lifting the handset.
2.
Select a free spee d dial number
location(00-49).
3.
Dial either a specific trunk line number or the
trunk access code.
4.
Dial the telephone number to be saved
(maximum of 24 digits), including the #,
*, FLASH, PAUSE, etc.
Press the special key [F] to enter a name
for the Speed dial number then press
the special key [F] to return to the speed dial
entry menu again .
[Transfer]
button and dial
[1] [0] [5]
,
5.
Press the
the number. Or press the right Soft button
and repeat steps 2 to 5.
Page 62 © SAMSUNG Electronics Co., Ltd.
[Transfer]
button to save
Page 77

BASIC FEATURES
Dialling Speed Dial Numbers
You can dial a speed dial number stored in the list of system speed dial numbers between 500-999 or the list
of your personal number between 00-49 using the following procedure.
1.
Press the
without lifting the handset.
2.
Dial the speed dial location number
that is programmed with the telephone number
you wish to call.
3.
The telephone number is automatically
dialled for you.
Alternatively, to dial one of your first 10 personal speed dial numbers.
!
[Memory] button
or dial
[1] [6]
,
[Memory]
1.
Without lifti ng th e ha nd se t,
press a dial button 0-9 for approximately
2 Seconds.
2.
The telephone number programmed in
the correspondi ng pe rso nal spe ed dia l
location(00-09) will be dialled automatically.
© SAMSUNG Electronics Co., Ltd. Page 63
Page 78

BASIC FEATURES
Assigning a Name to the Speed Dial Button.
A name of 11 characters can be assigned for each speed dial button.
This name is used to dial the telephone number using the directory feature.
1.
Press the
2.
Dial
3.
Press the speed dial number location to
be assigned with a name(00-49).
4.
Enter a name. Refer to
the ‘
this manual for how to enter a letter.
[Transfer]
[1] [0] [6]
Things You Should Know
.
button.
’ in
5.
Press the
the speed dial na me o r th e righ t So ft bu tt on
to .enter further names by repeating
steps 3 to 5.
Page 64 © SAMSUNG Electronics Co., Ltd.
[Transfer]
button to save
Page 79

BASIC FEATURES
Programming One-touch Speed Dial Buttons
You can assign a frequently used number from the speed dial numbers to one of the programmable keys on
the Digital phone for one touch speed dial use.
1.
Without lifting up the handset,
press the
[Transfer]
button.
2.
3.
4.
5.
[1] [0] [7]
Dial
Locate a vacant
[Volume
the
the right Soft button.
Dial the speed dial number
location(00-49 or 500-999) to be
assigned for this button.
Press the
the selected number.
.
[SPD]
]
""""
button and press
[Transfer]
button to save
button using
6.
If the one touch speed dial button is pressed,
a call is made to this saved speed dial number
automatically.
© SAMSUNG Electronics Co., Ltd. Page 65
Page 80

BASIC FEATURES
Using Chain Dialling
After a speed dial number is pressed,
additional numbers can be dialled manually
or you can chain together speed dial numbers.
After the first speed dial number,
press the
[Memory]
then dial other speed dial number location.
Or after the speed dia l nu mbe r is pressed, dial the add it i onal nu mbe rs manually.
Conference Calls
You can make a conference call of up to 5 parties including yourself. The OfficeServ system also allows each
station to pre assign up to 5 conference groups so you can set up a conference call by pressing a single
[Group Conference] programmable button. Refer to your System Administrator to confirm that this option is
available to you.
button or dial
[1] [6]
[Memory]
and
1. Press the
[Conference]
button while
engaged in a conversation.
You will hear conference tone.
2. Make another call, either intercom
or outside. Press the
[Conference]
and you will hear conference T one.
3.
Make another cal l to ad d ad di t i onal pa rties
or press the
[Conference]
button to join
all parties into the conference.
Then, Repeat the last step, until all other
parties required are connected.
button
Page 66 © SAMSUNG Electronics Co., Ltd.
Page 81

4.
To drop a person from your conference call,
press the
the extension or trunk number that is to
be dropped.
[Conference]
button and dial
BASIC FEATURES
Press the
again to re-establish the conference.
NOTE
[Conference]
- When attempting to add a nothe r pe r son to the c onference and you are not able to re ac h
the desired person, s im ply pr e ss the [Conference] button ag ai n.
button
Programming Conference Groups.
1.
Press the
2.
Dial
© SAMSUNG Electronics Co., Ltd. Page 67
[Transfer]
[1] [1] [8]
button.
.
Page 82

BASIC FEATURES
3.
Select the required Conference Group
number by using the
and press the right Soft button.
4.
Select ‘Name’ and press the right Soft button
to enter the Conference Group name.
Refer to th e ‘
this guide for entering characters.
Press the right Soft button to save the name.
5.
Using the
[MBR1~4]
[
Volum e
!!!!
Things You Should Know
[
Volum e
!!!!
and press the right Soft button.
]
""""
button to select
] button
""""
’ in
6.
Dial the extension number or
outside telephone number remembering to
dial the trunk access code first and press
the right Soft button. Repeat steps 6 and 7 to
add conference group members.
7.
Save the settings by pressing
[Transfer]
the
To make a group conference call press
[GCONF]
the
the group number and the conference will
be setup automatically. If an extender
has been added to the
just press the
Page 68 © SAMSUNG Electronics Co., Ltd.
button.
button follow e d by
[GCONF]
[GCONF]
programmable button.
button(1~5)
Page 83

CONVENIENT FEATURES
1. Do Not Disturb
When Do Not Disturb is registered, you can block incoming calls to your digital phone yet still use
the digital phone for outgoing calls.
Setting Do Not Disturb
1.
Press the
while on-hook, or select
the LCD screen usi ng th e S croll but to n
and [Other] Soft button.
2.
The status indicator and/or
LED flashes to inform you that the Do Not
Disturb mode is set.
NOTE
[DND]
button or dial
- When the digital phone is set in the D o Not D is turb m ode , the dig ita l phone sta t us
indicator(LED above the LCD) fla shes indica ting tha t the D o Not D is tur b m ode is set.
- If a Forward DND destination has been set, all incoming calls will be forwarde d to tha t
destination when DND is enabled.
[DND]
[DND]
[4] [0] [1]
from
button
© SAMSUNG Electronics Co., Ltd. Page 69
Page 84

CONVENIENT FEATURES
Cancelling Do Not Disturb
The procedure for cancelling the Do Not Disturb mode is described below.
1.
Check if the status indicator is flashing.
2.
Press the
3.
The status indicator goes off.
[DND]
button or dial
[4] [0] [0]
One Time DND
If you do not wish to be disturbed while you
are on a call, press the
set the station to Do Not Disturb. When you
complete the call, the Do Not Disturb mode is
automatically canc el le d and new calls will be
received.
[DND]
A
button is needed to use this feature.
[DND]
button and
.
Page 70 © SAMSUNG Electronics Co., Ltd.
Page 85

2. Call Forwarding
This section explains various call forwarding features available on your OfficeServ system.
Call Forward Option
You can verify or change the Call Forward settings and the number specified for forwarding
from the LCD screen of your digital phone. Enabling Call Forwarding can also be achieved using
the dial buttons or the Forward Set Menu.
CONVENIENT FEATURES
1.
Press the
2.
Dial
3.
Select the Call Forward option by dia lling
from [0] to [5], or by using the
button.
[Transfer]
[1] [0] [2]
button.
.
[
!!!!
Volume
""""
]
4.
Press the right Soft button to move the cursor.
© SAMSUNG Electronics Co., Ltd. Page 71
Page 86

CONVENIENT FEATURES
5.
Dial the station, station group, or external
number remembering to insert the trunk
access code prior to the external number.
6.
Press the right Soft button to
move the cursor.
7.
Dial [1] to enable call forwarding to the
destination, or press the
button and select between [YES] or [NO].
[
Volume
!!!!
""""
]
8.
Press the
to save and exit.
Page 72 © SAMSUNG Electronics Co., Ltd.
[Transfer]
button
Page 87

CONVENIENT FEATURES
Forwarding Calls
You can forward calls to another station,
station group, or an external number.
Programming procedures for various types
of forwarding calls are described in detail
next. If your digital phone has the FWD ALL,
FWD BUSY, and FWD NO ANSWER FWD
BUSY/NO ANSWER buttons, you can forward calls by pressing one of these buttons.
In this case, a red LED is lit on the button indicating which call forward option is enabled.
In order to cancel all forward call options, lift the handset and press
[6] [0] [0].
© SAMSUNG Electronics Co., Ltd. Page 73
Page 88

CONVENIENT FEATURES
Forwarding All Calls
You can forward all your calls to another internal, station group or external number.
1.
2.
3.
[6] [0] [1].
Dial
Dial the station number, group number,
or external number. Remember to insert
the trunk access code prior to entering
the external number.
Hang up after the confirmation tone
is received.
- The station receiving a forwarded call can transfer the call back to the forwarding station.
This feature is very useful when you are expecting an im por ta nt c a ll and do not w a nt to be
NOTE
Page 74 © SAMSUNG Electronics Co., Ltd.
disturbed.
- If you set your digital phone to For ward All Calls, and you do not hav e a [FORWARD
ALL] button the [T ransfer] button will lig ht. This indica tes tha t y our dig i tal phone is se t
to Forward All Calls.
Page 89

CONVENIENT FEATURES
Forward Busy
When you are busy on a call, incoming calls can be forwarded to another station, station group
or an external number.
1.
2.
3.
[6] [0] [2]
Dial
Dial the station number, group number,
or external number. Remember to insert
the trunk access code prior to entering
the external number.
Hang up after the confirmation tone
is received.
.
© SAMSUNG Electronics Co., Ltd. Page 75
Page 90

CONVENIENT FEATURES
Forward No Answer
Calls can be forwarded when you are not available to answer the call.
1.
2.
3.
[6] [0] [3]
Dial
Dial the station number, group number,
or external number. Remember to insert
the trunk access code prior to entering
the external number.
Hang up after the confirmation tone
is received.
.
Page 76 © SAMSUNG Electronics Co., Ltd.
Page 91

CONVENIENT FEATURES
Forward Busy / No Answer
When the Forward Busy(FWD BUSY) and Forward No Answer(FWD NOANS) destinations are both
set, you may enable both these options simultaneously.
When you are busy, calls will be transferred to the number specified in Forward Busy destination.
If you do not answer, the calls will be forwarded to the Forward No Answer destination.
1.
2.
[6] [0] [4]
Dial
Hang up after the confirmation tone
is received.
.
© SAMSUNG Electronics Co., Ltd. Page 77
Page 92

CONVENIENT FEATURES
Forward When DND is Set
You can set a forward destination for those times you need to set Do Not Disturb.
1.
2.
3.
[6] [0] [5]
Dial
Dial the station number, group number,
or external number. Remember to insert
the trunk access code prior to entering
the external number.
Hang up after the confirmation tone is
received. When you enable DND on
your digital phone, all calls will be forwarded
to the destination set above.
.
Page 78 © SAMSUNG Electronics Co., Ltd.
Page 93

CONVENIENT FEATURES
Forward Follow Me
All incoming calls to your digital phone can be forwarded to the station you are currently using.
In addition, you can arrange for calls to another station to be forwarded to your digital phone
(Remote Forwarding).
To forward all calls to your digital phone to the station you are currently using :
1.
2.
3.
[6] [0] [6]
Dial
‘enter the station to follow from’ is displayed.
Dial the station number of your digital phone.
Hang up after the confirmation tone
is received.
at the station you are using.
© SAMSUNG Electronics Co., Ltd. Page 79
Page 94

CONVENIENT FEATURES
To forward c alls from a specific station to your digital ph one ( Remote Forwarding ) :
1.
2.
3.
[6] [0] [6]
Dial
‘enter the station to follow from’ is displayed.
Dial the station number.
Hang up after the confirmation tone
is received.
.
Page 80 © SAMSUNG Electronics Co., Ltd.
Page 95

3. Paging and Messaging
This section explains how to use the OfficeSer v paging a nd messag ing fu nctions.
- You must use the dig ital phone ha nds e t when paging.
- If you are a frequent user of paging you can have a dedicated page z one button as one of your
NOTE
Internal Page
You can make a page announcement through the station speakers.
There are 5 internal zones 0-4.
1.
Pick up the handset and check for
dial tone.
programmable buttons, making it unnecessary to press the [PAGE] button followed by the
zone number .
CONVENIENT FEATURES
[4]
[PAGE]
[PAGE]
.
button or dial
from the LCD screen
2.
Press the
or select
by using the Scroll button and Soft buttons.
3.
Select a zone number from
and
4.
Start your announcement after
receiving confirmation tone.
[5] [5]
[0], [1], [2], [3],
,
© SAMSUNG Electronics Co., Ltd. Page 81
Page 96

CONVENIENT FEATURES
5.
Hang up after paging.
External Page
You can page externally through optional external speakers.
There are 4 external zones 5-8 and [9] for all external zones.
1.
Pick up the handset and check
for dial tone.
2.
Press the
or select
by using the Scroll button and Soft buttons.
3.
Select a zone number from
and
by dialling
4.
Start your announcement after
receiving confirmation tone.
[PAGE]
[PAGE]
[8],
or page all exte rnal zones
[9]
button or
from the LCD screen
.
[5] [5],
[5], [6], [7],
Page 82 © SAMSUNG Electronics Co., Ltd.
Page 97

5.
Hang up after paging.
All Pa g e
You can also page all external zones and internal page zone 0 simultaneously.
1.
Pick up the handset and check
the dial tone.
CONVENIENT FEATURES
2.
Press the
or select
by using the Scroll button and Soft buttons.
3.
Press the
4.
Start your announcement after
receiving confirmation tone.
[PAGE]
[PAGE]
[*]
or
button or
from the LCD screen
[ALL PAGE]
[5] [5]
button.
,
© SAMSUNG Electronics Co., Ltd. Page 83
Page 98

CONVENIENT FEATURES
5.
Hang up after paging.
Meet Me Page : MMPG
1.
Pick up the handset and check
for dial tone.
2.
Press the
or select
using the Scrol l bu t to n and So ft bu tt on s.
3.
Dial the required zone number.
4.
After receiving the confirmation tone
instruct the other party to press
[MMPG]
[MMPG]
button or
from the LCD screen
[5] [4]
,
[5] [6]
.
Page 84 © SAMSUNG Electronics Co., Ltd.
Page 99

CONVENIENT FEATURES
5.
Press the
6.
Hold the handset un til th e ot her pa rty
enters the page answer code(
7.
The call is automatically connected when
the other par ty ent e rs th e pa ge an swe r
code.
[WAIT]
[Transfer]
or
button.
[5] [6]
).
© SAMSUNG Electronics Co., Ltd. Page 85
Page 100

CONVENIENT FEATURES
Call Park and Page
You can transfer an external call to another person by parking the call and notifying the other
person of the call via paging. This function is useful in a factory or in a large office when
the called person is away from their workstation.
Call Park and Page
1.
Press the
the call and the call is automatically on hold.
You can also select
LCD screen using the Soft button.
2.
Dial the appropriate page zone number
to notify that the call is parked and to
inform the required party of you r stat io n
number or the calling trunk number.
3.
Hang up.
[PAGE]
button while conne ct ed to
[PAGE]
from the
Page 86 © SAMSUNG Electronics Co., Ltd.
 Loading...