


BD-E6100
Blu-ray
user manual
imagine the possibilities
Thank you for purchasing this Samsung product.
To receive more complete service,
please register your product at
www.samsung.com/register
™
Disc Player
Safety Information
Warning
TO REDUCE THE RISK OF ELECTRIC SHOCK, DO NOT REMOVE THE COVER (OR BACK).
NO USER-SERVICEABLE PARTS ARE INSIDE. REFER SERVICING TO QUALIFIED SERVICE PERSONNEL.
CAUTION
RISK OF ELECTRIC SHOCK
DO NOT OPEN
This symbol indicates "dangerous voltage"
inside the product that presents a risk of
electric shock or personal injury.
CAUTION: TO REDUCE THE RISK OF ELECTRIC
SHOCK, DO NOT REMOVE COVER (OR BACK)
NO USER SERVICEABLE PARTS INSIDE. REFER
SERVICING TO QUALIFIED SERVICE PERSONNEL.
This symbol indicates important instructions
accompanying the product.
Do not install this equipment in a confined space
such as a bookcase or similar unit.
WARNING
To prevent damage which may result in fire
or electric shock hazard, do not expose this
appliance to rain or moisture.
CAUTION
Blu-ray Disc Player USES AN INVISIBLE LASER
BEAM WHICH CAN CAUSE HAZARDOUS
RADIATION EXPOSURE IF DIRECTED. BE SURE
TO OPERATE Blu-ray Disc Player CORRECTLY
AS INSTRUCTED.
CAUTION
THIS PRODUCT UTILIZES A LASER. USE
OF CONTROLS OR ADJUSTMENTS OR
PERFORMANCE OF PROCEDURES OTHER
THAN THOSE SPECIFIED HEREIN MAY RESULT
IN HAZARDOUS RADIATION EXPOSURE. DO
NOT OPEN COVERS AND DO NOT REPAIR
YOURSELF. REFER SERVICING TO QUALIFIED
PERSONNEL.
This product satisfies CE regulations when
shielded cables and connectors are used to
connect the unit to other equipment. To prevent
electromagnetic interference with electric
appliances, such as radios and televisions, use
shielded cables and connectors for connections.
IMPORTANT NOTE
The mains lead on this equipment is supplied with
a molded plug incorporating a fuse. The value of
the fuse is indicated on the pin face of the plug.
If it requires replacing, a fuse approved to BS1362
of the same rating must be used.
Never use the plug with the fuse cover omitted
if the cover is detachable. If a replacement fuse
cover is required, it must be of the same colour as
the pin face of the plug. Replacement covers are
available from your dealer.
If the fitted plug is not suitable for the power points
in your house or the cable is not long enough to
reach a power point, you should obtain a suitable
safety approved extension lead or consult your
dealer for assistance.
However, if there is no alternative to cutting off the
plug, remove the fuse and then safely dispose of
the plug. Do not connect the plug to a mains jack,
as there is a risk of shock hazard from the bared
flexible cord.
To disconnect the apparatus from the mains, the
plug must be pulled out from the mains socket,
therefore the mains plug shall be readily operable.
The product unit accompanying this user manual
is licenced under certain intellectual property rights
of certain third parties.
|
2 English
CLASS 1 LASER PRODUCT
This Compact Disc player is classified as a CLASS
1 LASER product. Use of controls, adjustments
or performance of procedures other than those
specified herein may result in hazardous radiation
exposure.
CAUTION :
• CLASS 3B VISIBLE AND INVISIBLE LASER
RADIATION WHEN OPEN. AVOID EXPOSURE
TO THE BEAM (IEC 60825-1)
• THIS PRODUCT UTILIZES A LASER.
USE OF CONTROLS OR ADJUSTMENTS
OR PERFORMANCE OF PROCEDURES
OTHER THAN THOSE SPECIFIED HEREIN
MAY RESULT IN HAZARDOUS RADIATION
EXPOSURE. DO NOT OPEN COVER AND DO
NOT REPAIR YOURSELF. REFER SERVICING
TO QUALIFIED PERSONNEL.
CLASS 1 LASER PRODUCT
KLASSE 1 LASER PRODUKT
LUOKAN 1 LASER LAITE
KLASS 1 LASER APPARAT
PRODUCTO LÁSER CLASE 1
Precautions
Important Safety Instructions
Read these operating instructions carefully before
using the unit. Follow all the safety instructions
listed below.
Keep these operating instructions handy for future
reference.
1. Read these instructions.
2. Keep these instructions.
3. Heed all warnings.
4. Follow all instructions.
5. Do not use this apparatus near water.
6. Clean only with a dry cloth.
7. Do not block any ventilation openings. Install
in accordance with the manufacturer's
instructions.
8. Do not install near any heat sources such
as radiators, heat registers, stoves, or other
apparatus (including AV receivers) that
produce heat.
9. Do not defeat the safety purpose of the
polarized or grounding-type plug. A polarized
plug has two blades with one wider than the
other. A grounding type plug has two blades
and a third grounding prong. The wide blade
or the third prong are provided for your safety.
If the provided plug does not fit into your
outlet, consult an electrician for replacement
of the obsolete outlet.
10. Protect the power cord from being walked on
or pinched particularly at plugs, convenience
receptacles, and the point where it exits the
apparatus.
11. Only use attachments/accessories specified
by the manufacturer.
12. Use only with the cart,
stand, tripod, bracket,
or table specified by the
manufacturer, or sold with
the apparatus. When a cart
is used, use caution when
moving the cart/apparatus combination to
avoid injury from tip-over.
13. Unplug this apparatus during lightning storms
or when unused for long periods of time.
14. Refer all servicing to qualified service
personnel. Servicing is required when the
apparatus has been damaged in any way,
such as when the power-supply cord or plug
is damaged, liquid has been spilled or objects
have fallen into the apparatus, the apparatus
has been exposed to rain or moisture, does
not operate normally, or has been dropped.
01 Safety Information
English 3
|
Safety Information
Disc Storage & Management
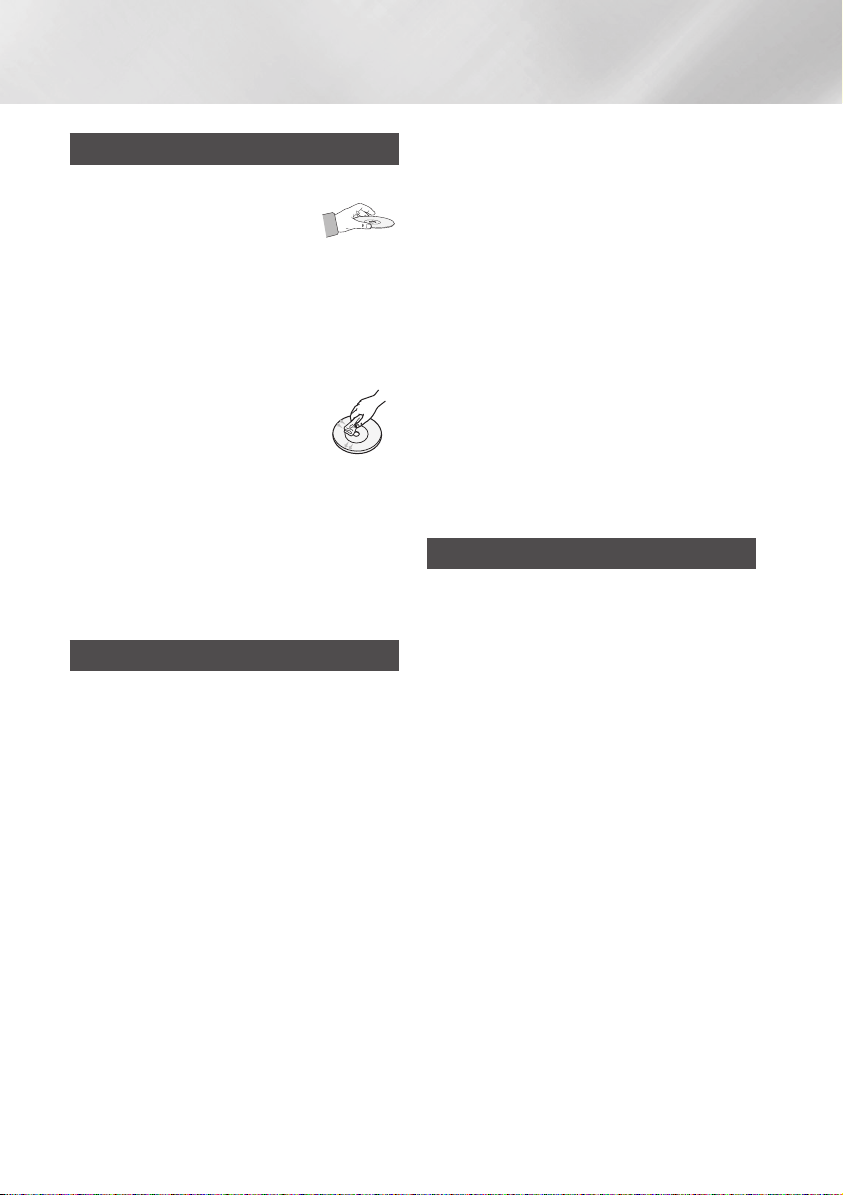
• Holding Discs
- Fingerprints or scratches on
a disc may reduce sound and
picture quality or cause skipping
- Avoid touching the surface of a disc where
data has been recorded.
- Hold the disc by the edges so that fingerprints
will not get on the surface.
- Do not stick paper or tape on the disc.
• Cleaning Discs
- If you get fingerprints or dirt on a
disc, clean it with a mild detergent
diluted in water and wipe with a
soft cloth.
- When cleaning, wipe gently from the inside to
the outside of the disc.
• Disc Storage
`Do not keep in direct sunlight.
`Keep in a cool ventilated area.
`Keep in a clean protection jacket and store
vertically.
Handling Cautions
• Do not expose this apparatus to dripping or
splashing. Do not put objects filled with liquids,
such as vases on the apparatus.
• To turn this apparatus off completely, you must
pull the power plug out of the wall socket.
Consequently, the power plug must be easily
and readily accessible at all times.
• Do not plug multiple electric devices into the
same wall socket. Overloading a socket can
cause it to overheat, resulting in a fire.
• Maintenance of Cabinet.
- Before connecting other components to this
player, be sure to turn them off.
- If you move your player suddenly from a cold
place to a warm place, condensation may
occur on the operating parts and lens and
cause abnormal disc playback. If this occurs,
unplug the player, wait for two hours, and
then connect the plug to the power outlet.
Then, insert the disc, and try to play back
again.
• If the product makes an abnormal noise or
produces a burning smell or smoke, turn off
the power switch immediately and disconnect
the power plug from the wall outlet. Then,
contact the nearest customer service centre for
technical assistance. Do not use the product.
Using the product as it is may cause a fire or an
electric shock.
Using the 3D function
IMPORTANT HEALTH AND SAFETY
INFORMATION FOR 3D PICTURES.
Read and understand the following safety
information before using the 3D function.
• Some viewers may experience discomfort while
viewing 3D TV such as dizziness, nausea, and
headaches.
If you experience any such symptom, stop
viewing 3D TV, remove the 3D Active Glasses,
and rest.
• Watching 3D images for an extended period of
time may cause eye strain. If you feel eye strain,
stop viewing 3D TV, remove your 3D Active
Glasses, and rest.
• A responsible adult should frequently check on
children who are using the 3D function.
If there are any reports of tired eyes, headaches,
dizziness, or nausea, have the child stop viewing
3D TV and rest.
• Do not use the 3D Active Glasses for other
purposes (Such as general eyeglasses,
sunglasses, protective goggles, etc.)
|
4 English

• Do not use the 3D function or 3D Active Glasses
while walking or moving around. Using the 3D
function or 3D Active Glasses while moving
around may cause you to bump into objects,
trip, and/or fall, and cause serious injury.
• If you want to enjoy 3D content, connect a 3D
device (3D compliant AV receiver or TV) to the
player's HDMI OUT port using a high-speed
HDMI cable. Put on 3D glasses before playing
the 3D content.
• The player outputs 3D signals only through
HDMI cable connected to the HDMI OUT port.
• As the video resolution in 3D play mode is fixed
according to the resolution of the original 3D
video, you can not change the resolution to your
preference.
• Some functions such as BD Wise, screen size
adjustment, and resolution adjustment may not
operate properly in 3D play mode.
• You must use a high-speed HDMI cable for
proper output of the 3D signal.
• Stay at least three times the width of the screen
from the TV when watching 3D images. For
example, if you have a 46-inch screen, stay 138
inches (11.5 feet) from the screen.
• Place the 3D video screen at eye level for the
best 3D picture.
• When the player is connected to some 3D
devices, the 3D effect may not function properly.
• This player does not convert 2D content into
3D.
• "Blu-ray 3D" and "Blu-ray 3D" logo are
trademarks of the Blu-ray Disc Association.
01 Safety Information
Copyright
© 2012 Samsung Electronics Co.,Ltd.
All rights reserved; No part or whole of this user's
manual may be reproduced or copied without the
prior written permission of Samsung Electronics
Co.,Ltd.
English 5
|

Contents
SAFETY INFORMATION
2 Warning
3 Precautions
3 Important Safety Instructions
4 Disc Storage & Management
4 Handling Cautions
4 Using the 3D function
5 Copyright
GETTING STARTED
8 Disc and Format Compatibility
8 Disc types and contents your player can
play
8 Disc types your player cannot play
9 Region Code
9 Logos of Discs the player can play
10 Supported Formats
12 Accessories
13 Front Panel
13 Rear Panel
14 Remote Control
14 Tour of the Remote Control
CONNECTIONS
15 Connecting to a TV
16 Connecting to an Audio System
16 Method 1 Connecting to an HDMI
supported AV receiver
16 Method 2 Connecting to an AV receiver
with Dolby Digital or DTS decoder
17 Connecting to a Network Router
17 Wired Network
17 Wireless Network
SETTINGS
18 The Initial Settings Procedure
18 The Home Screen
19 Accessing the Settings Screen
19 Buttons on the Remote Control Used for
the Settings Menu
20 Settings Menu Functions
25 Networks and the Internet
25 Configuring Your Network Connection
27 Wi-Fi Direct
28 Soft AP
29 AllShare Settings
29 Upgrading Software
29 By Online
30 By USB
30 By Disc
30 By Downloaded
31 Standby Mode Upgrade
MEDIA PLAY
32 Playing Commercial Video Discs
32 The AllShare Play Screen
32 Accessing the AllShare Play Screen
32 The AllShare Play Screen at a Glance
32 Playing Files on a USB Device or USB
Compatible Mobile Phone
33 Playing Commercial Audio Discs
33 Music Screen Controls
34 Playing a Disc with User Recorded
Content
34 Using the AllShare Network Function
34 To Download the AllShare Software
35 Playing Content Located on Your PC or
DLNA Device through the Blu-ray Disc
Player
35 Controlling the Playback of Content
Located on Your PC with Your Smart
Phone
|
6 English

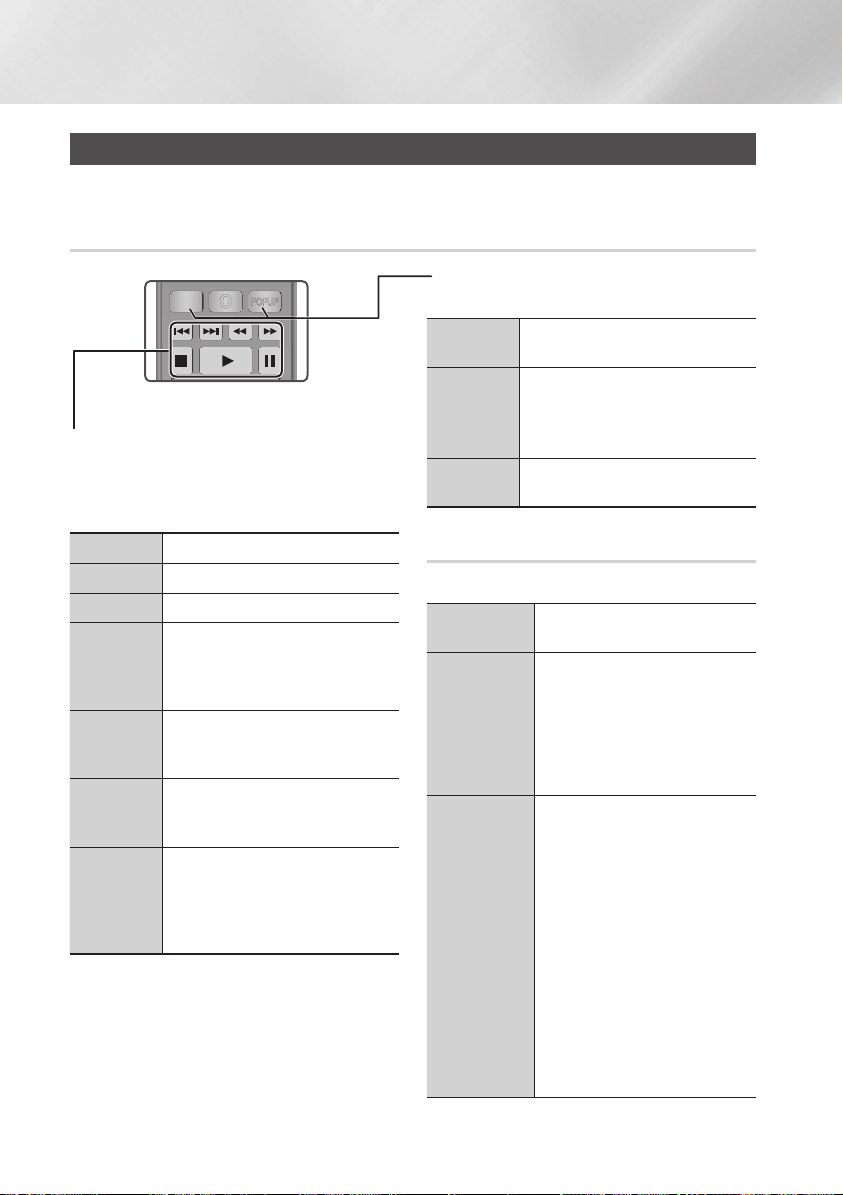
36 Controlling Video Playback
36 Buttons on the Remote Control used for
Video Playback
36 Using the Tools Menu
38 Controlling Music Playback
38 Buttons on the Remote Control used for
Music Playback
38 Using the Tools Menu
39 Repeating Tracks on an Audio CD
39 Shuffling Tracks on an Audio CD
39 Creating a Playlist from a CD
39 Ripping
40 Playing Photo Contents
40 Using the Tools Menu
41 Using the Tools Menu when a file is
highlighted
NETWORK SERVICES
43 Using Smart Hub
43 Smart Hub at a Glance
44 Using the Web Browser
45 BD-LIVE™
APPENDIX
46 Compliance and Compatibility Notice
47 Copy Protection
47 Network Service Disclaimer
48 Licence
50 Additional Information
50 Note
52 Resolution according to the contents type
53 Digital Output Selection
54 Troubleshooting
56 Repairs
57 Specifications
Contents
English 7
|

Getting Started
Disc and Format Compatibility
Disc types and contents your player can play
Media Disc Type Details
Blu-ray Disc
3D Blu-ray Disc
VIDEO
MUSIC
PHOTO
| NOTE |
\The player may not play certain CD-RW/-R and DVD-R because of the disc type or recording conditions.
\If a DVD-RW/-R has not been recorded properly in DVD video format, it will not be playable.
\Your player will not play content that has been recorded on a DVD-R at a bit-rate that exceeds 10 Mbps.
\Your player will not play content that has been recorded on a BD-R or USB device at a bit rate that exceeds 25 Mbps.
\Playback may not work for some types of discs, or when you use specific functions, such as angle change and aspect ratio
adjustment. Information about the discs is written in detail on the disc box. Please refer to this if necessary.
\When you play a BD-J title, loading may take longer than a normal title or some functions may perform slowly.
DVD-VIDEO
DVD-RW
DVD-R
DVD+RW
DVD+R
CD-RW/-R,
DVD-RW/-R,
BD-RE/-R
CD-RW/-R,
DVD-RW/-R,
BD-RE/-R
BD-ROM or BD-RE/-R recorded in the BD-RE format.
DVD-VIDEO, recorded DVD+RW/DVD-RW(V)/DVD-R/+R that have been recorded and
finalized, or a USB storage media containing DivX, MKV, MP4 contents.
Music recorded on CD-RW/-R, DVD-RW/-R, BD-RE/-R or a USB storage media
containing MP3 or WMA contents.
Photos recorded on CD-RW/-R, DVD-RW/-R, BD-RE/-R or a USB storage media
containing JPEG contents.
Disc types your player cannot play
• HD DVD
• DVD-ROM/PD/
MV, etc
|
8 English
• DVD-RAM
• Super Audio CD
(except CD layer)
• DVD-RW(VR mode)
• CVD/CD-ROM/CDV/
CD-G/CD-I/LD
(CD-Gs play audio only,
not graphics.)
• 3.9 GB DVD-R for
Authoring.
Region Code
Both players and discs are coded by region.
These regional codes must match for a disc to
play. If the codes do not match, the disc will not
play.
The Region Number for this player is displayed on
the rear panel of the player.
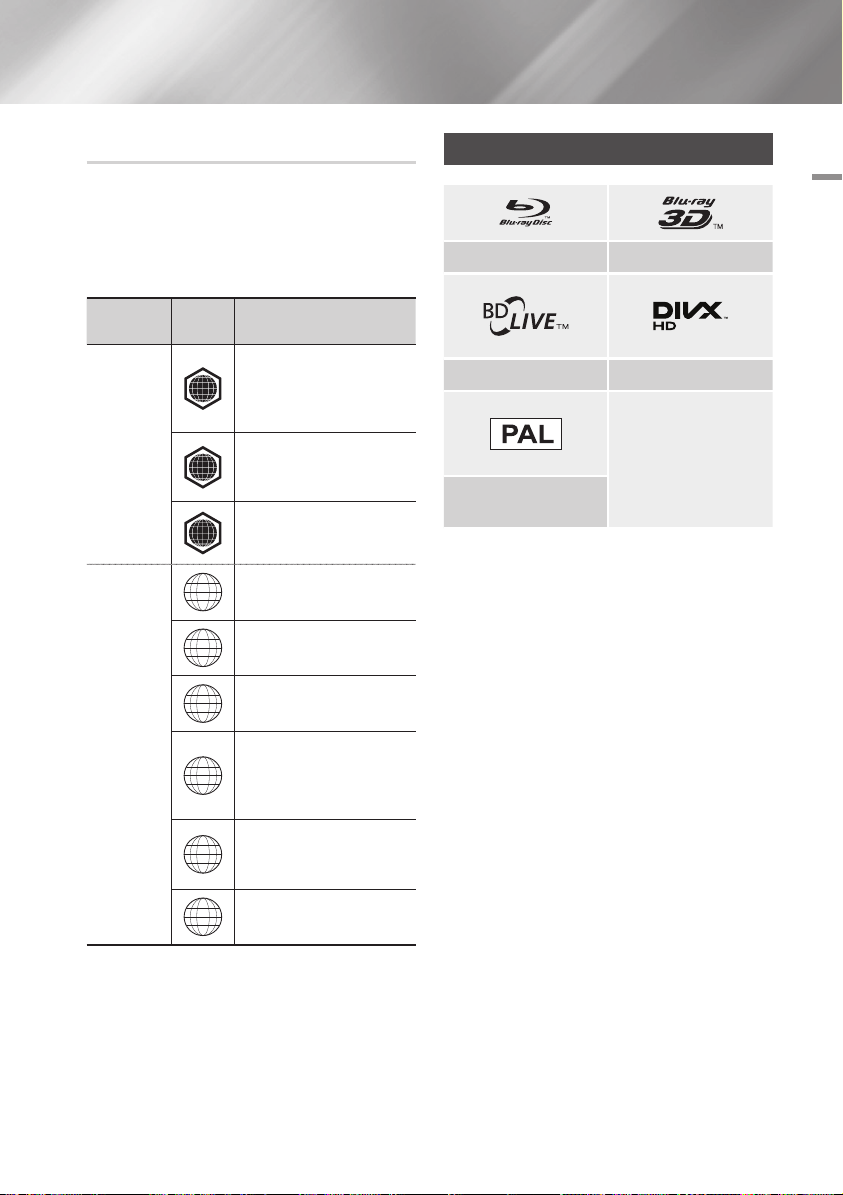
Logos of Discs the player can play
02 Getting Started
Blu-ray Disc 3D Blu-ray Disc
Disc Type
Blu-ray Disc
DVD-VIDEO
Region
Code
North America, Central America,
South America, Korea, Japan,
A
Taiwan, Hong Kong and South
East Asia.
Europe, Greenland, French
territories, Middle East, Africa,
B
Australia and New Zealand.
India, China, Russia, Central and
C
South Asia.
The U.S., U.S. territories and
1
Canada
Europe, Japan, the Middle East,
2
Egypt, South Africa, Greenland
Taiwan, Korea, the Philippines,
3
Indonesia, Hong Kong
Mexico, South America,
Central America, Australia,
4
New Zealand, Pacific Islands,
Caribbean
Russia, Eastern Europe, India,
most of Africa, North Korea,
5
Mongolia
Area
BD-LIVE DivX
PAL broadcast System in U.K.,
France, Germany, etc.
6
China
English 9
|

Getting Started
Supported Formats
Video File Support
File Extension Container Video Codec Resolution
*.avi
*.mkv
*.asf
*.wmv
*.mp4
*.3gp
*.vro
*.mpg
*.mpeg
*.ts
*.tp
*.trp
`Limitations
- Even when a file is encoded by a supported codec listed above, the file might not be played if its
content is defective or corrupted.
- Normal playback is not guaranteed if the file's container information is wrong or the file itself is
corrupted.
- Files having higher bit or frame rates than standard may stutter when played back.
- The seek (skip) function is not available if the file's index table is damaged.
- When you playback a file remotely through a network connection, video playback may stutter
depending on the network speed.
- Some USB/Digital camera devices may not be compatible with the player.
`Video decoder
- Supports up to H.264 Level 4.1
- Does not support GMC 2 or higher
`Audio decoder
- Supports WMA 7, 8, 9 and STD
- Does not support WMA 9 PRO multi-channel or lossless audio if the number of channels is more than 2.
- Does not support WMA sampling rate of 22050Hz mono.
AVI
MKV
ASF
MP4
3GP
VRO
VOB
PS
TS
DivX 3.11/4.x/
5.x/6.1
MPEG4 SP/ASP
H.264 BP/
MP/HP
Window Media
Video v9
MPEG2
MPEG1 352x288
1920x1080
1920x1080
Frame rate
(fps)
6~30
24/25/30
24/25/3 20
Bit rate (Mbps) Audio Codec
20
25
25
Dolby Digital
LPCM
AAC
HE-AAC
WMA
DD+
MP3
DTS
|
10 English

`Comments
- MPEG4 : Supports up to GMC 1-Warping Point.
- H.264 : Supports up to BP/MP/HP Level 4.1.
- WMV : Supports V9, VC1 SP/MP/AP L3.
- MPEG1 : Does not support D-picture.
- MPEG2 : Supports up to Hight Profile High
Level.
Ğ
Supported DivX subtitle file formats
*.ttxt, *.smi, *.srt, *.sub, *.txt
| NOTE |
\Some DivX, MKV and MP4 format discs may not play,
depending on their video resolution and frame rate.
Music File Support
File
Extension
*.mp3
*.wma
Container
MP3
WMA
Audio
Codec
Support Range
MP3 -
* Sampling rates (in
kHz) - 8, 11, 16,
22, 32, 44.1, 48
WMA
* Bit rates - All bit rates in the range
5kbps to 384kbps
Notes on the USB connection
• Your player supports USB storage media, MP3
players, digital cameras, and USB card readers.
• Some USB/digital camera devices may not be
compatible with the player.
• Your player supports the FAT16, FAT32, and
NTFS files systems.
• Connect USB devices directly to the player's
USB port. Connecting through a USB cable
may cause compatibility problems.
• Inserting more than one memory device into
a multi-card reader may cause the reader to
operate improperly.
• The player does not support the PTP protocol.
• Do not disconnect a USB device during a
"loading" process.
• The bigger the image resolution, the longer the
image takes to display.
• This player cannot play MP3 files with DRM
(Digital Rights Management) downloaded from
commercial sites.
• Your player only supports video that is under
30fps (frame rate).
• Your player only supports USB Mass Storage
Class (MSC) devices such as thumb drives and
USB HDD. (HUB is not supported.)
• Certain USB HDD Devices, multi-card readers
and thumb drives may not be compatible with
this player.
• If some USB devices require excessive power,
they may be limited by the circuit safety device.
• If playback from a USB HDD is unstable, provide
additional power by plugging the HDD into a
wall socket.
If the problem continues, contact the USB HDD
manufacturer.
• You must remove the USB storage device
safely. (by performing the "Safely Remove
USB" function to prevent possible damage to
the USB memory.)
Press the HOME button to move to the home
screen, press the YELLOW (C) button, and
then press the v button.
• SAMSUNG is not responsible for any data file
damage or data loss.
• Your player does not support compression file,
sparse file and encryption file of NTFS.
- Before disconnecting a USB device, please
use USB Safety Removal.
- If you don't use USB Safety Removal, your
data on USB device can be corrupted or lost
- You can repair or format a USB device on
your Desktop PC. (MS-Windows OS only)
02 Getting Started
English 11
|

Getting Started
AVCHD (Advanced Video Codec High Definition)
• This player can play back AVCHD format discs. These discs are normally recorded and used in
camcorders.
• The AVCHD format is a high definition digital video camera format.
• The MPEG-4 AVC/H.264 format compresses images with greater efficiency than the conventional
image compressing format.
• Some AVCHD discs use the "x.v.Color" format. This player can play back AVCHD discs that use
"x.v.Color" format.
• "x.v.Color" is a trademark of Sony Corporation.
• "AVCHD" and the AVCHD logo are trademarks of Matsushita Electronic Industrial Co., Ltd. and Sony
Corporation.
| NOTE |
\Some AVCHD format discs may not play, depending on the recording conditions.
AVCHD format discs need to be finalized.
\"x.v.Color" offers a wider colour range than normal DVD camcorder discs.
Accessories
Check for the supplied accessories shown below.
SOURCE
VOL VOL
– +
VOL
+
VOL
–
SAMSUNG TV
1
2
3
4
5
6
7
8
9
DISC MENU
TITLE MENU
POPUP
0
HOME REPEAT
SMART
Batteries for Remote Control (AAA Size)
HOME
HUB
RETURN
A B C D
BONUS SUBTITLE FULL
AUDIO
VIEW
PANDORA
DIGITAL
SUBTITLE
INFOTOOLS
EXIT
SCREEN
INPUT
|
12 English
User Manual Remote Control
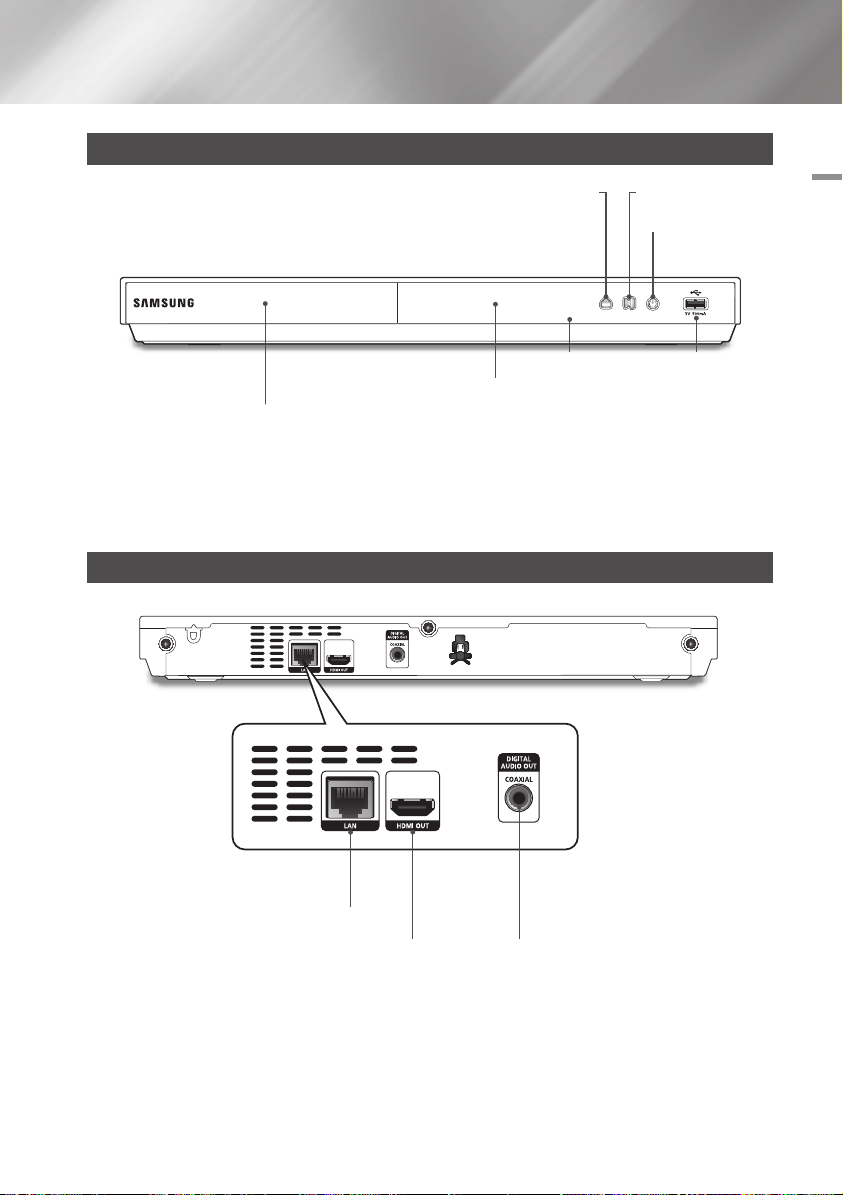
Front Panel
OPEN/CLOSE BUTTON PLAY/PAUSE BUTTON
POWER BUTTON
DISPLAY USB HOST
REMOTE CONTROL SENSOR
DISC TRAY
| NOTE |
\To upgrade the player's software through the USB Host jack, you must use a USB memory stick.
\When the player displays the Blu-ray Disc menu, you cannot start the movie by pressing the Play button on the player or the
remote. To play the movie, you must select Play Movie or Start in the disc menu, and then press the v button.
Rear Panel
02 Getting Started
LAN
HDMI OUT DIGITAL AUDIO OUT
English 13
|

Getting Started
Remote Control
Tour of the Remote Control
After setup, allows you to set the input
(This button is only available in samsung TV.)
Press to open and close the disc tray.
Press numeric buttons to operate options.
Press to skip backwards or forwards.
Press to move to the home menu.
These buttons are used both for menus
on the player and also several Blu-ray Disc
Press to use bonusview function. Press to use full screen function.
Use to access various audio functions on a
source on your TV.
Turn the player on and off.
Use to enter the disc menu.
Press to stop a disc.
Press to use Smart Hub.
Press to use the Tools menu.
Return to the previous menu.
functions.
disc.
SOURCE
VOL VOL
– +
VOL
+
VOL
SAMSUNG TV
1
2
3
4
5
6
7
8
DISC MENU
SMART
HOME
HUB
RETURN
A B C D
BONUS SUBTITLE FULL
AUDIO
VIEW
PANDORA
DIGITAL
9
TITLE MENU
POPUP
0
HOME REPEAT
INFOTOOLS
EXIT
SCREEN
SUBTITLE
INPUT
Turn the TV on and off.
(This button is only available in samsung TV.)
–
TV volume adjustment.
(This button is only available in samsung TV.)
Use to enter the Popup menu/Title menu.
Press to search backwards or forwards.
Press to pause a disc.
Press to play a disc.
Press to use repeat function.
Use to display the playback information.
Use to select menu items and change
menu values.
Press to exit the menu.
Press to switch the Blu-ray Disc/DVD's
subtitle language.
Installing batteries
|
14 English
| NOTE |
\If the remote does not operate properly:
- Check the polarity +/– of the batteries.
- Check if the batteries are drained.
- Check if the remote sensor is blocked by obstacles.
- Check if there is any fluorescent lighting nearby.
| CAUTION |
\Dispose of batteries according to local environmental
regulations. Do not put them in the household trash.

Connections
Connecting to a TV
Connect an HDMI cable (not supplied) from the HDMI OUT jack on the back of the product to the HDMI
IN jack on your TV.
- Do not connect the power cord to the wall outlet until you have made all the other connections.
- When you change the connections, turn off all devices before you start.
Audio
Video
03 Connections
| NOTE |
\If you use an HDMI-to-DVI cable to connect to your display device, you must also connect the Digital Audio Out on the player
to an audio system to hear audio.
\An HDMI cable outputs digital video and audio, so you don't need to connect an audio cable.
\Depending on your TV, certain HDMI output resolutions may not work. Please refer to the user manual of your TV.
\When you connect the player to your TV using the HDMI cable or to a new TV, and then turn it on for the first time, the player
automatically sets the HDMI output resolution to the highest supported by the TV.
\A long HDMI cable may cause screen noise. If this occurs, set HDMI Deep Colour to Off in the menu.
\To view video in the HDMI 720p, 1080i, or 1080p output mode, you must use a High speed (category 2) HDMI cable.
\HDMI outputs only a pure digital signal to the TV.
If your TV does not support HDCP (High-bandwidth Digital Content Protection), random noise appears on the screen.
English 15
|
Connections
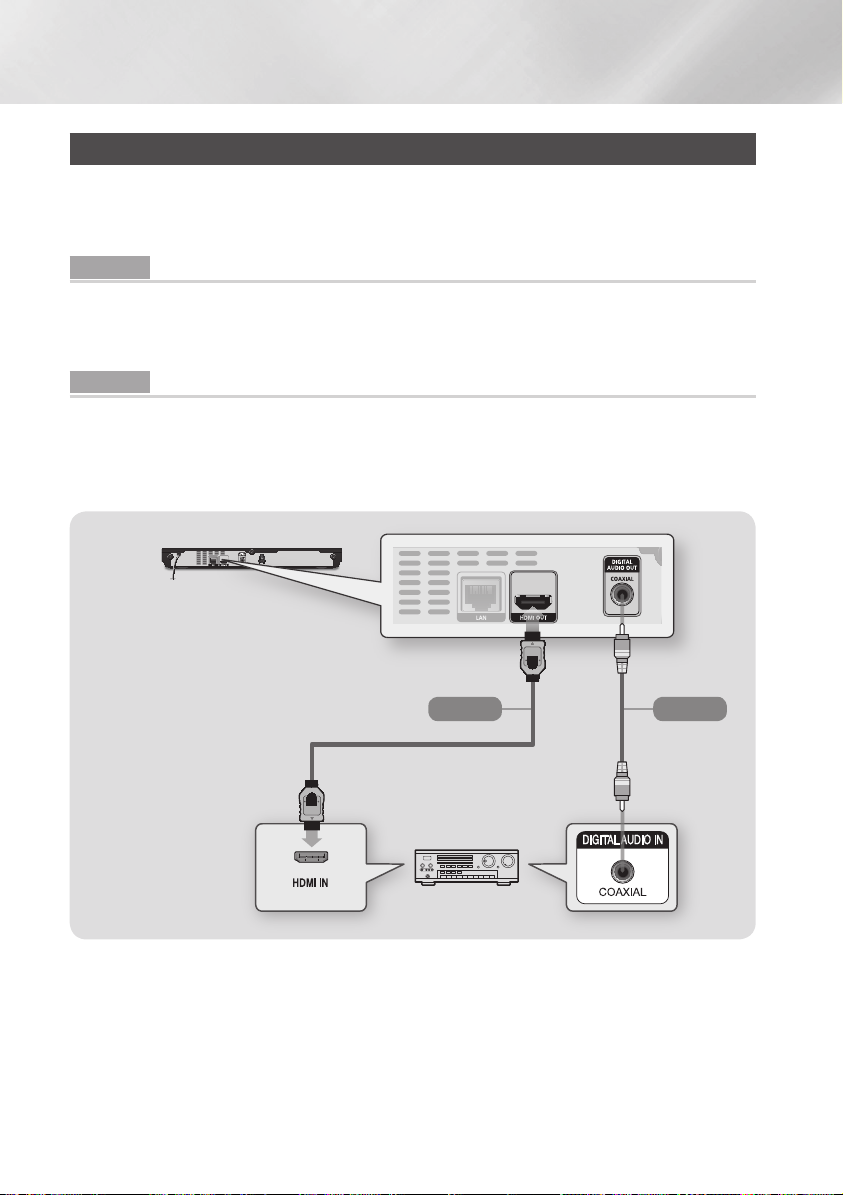
Connecting to an Audio System
You can connect the Blu-ray player to an the audio system using the method illustrated below.
- Do not connect the power cord to the wall outlet until you have made all the other connections.
- When you change the connections, turn off all devices before you start.
Method 1 Connecting to an HDMI supported AV receiver
• Connect an HDMI cable (not supplied) from the HDMI OUT jack on the back of the product to the
HDMI IN jack on your receiver.
• Best quality (Recommended)
Method 2 Connecting to an AV receiver with Dolby Digital or DTS decoder
• Using a digital Coaxial cable (not supplied), connect the Coaxial Digital Audio Out jack on the product
to the Digital Coaxial In jack of the receiver.
• Good quality
• You will hear sound only through the front two speakers with Digital Output set to PCM.
|
16 English
Method 2Method 1
AudioAudio
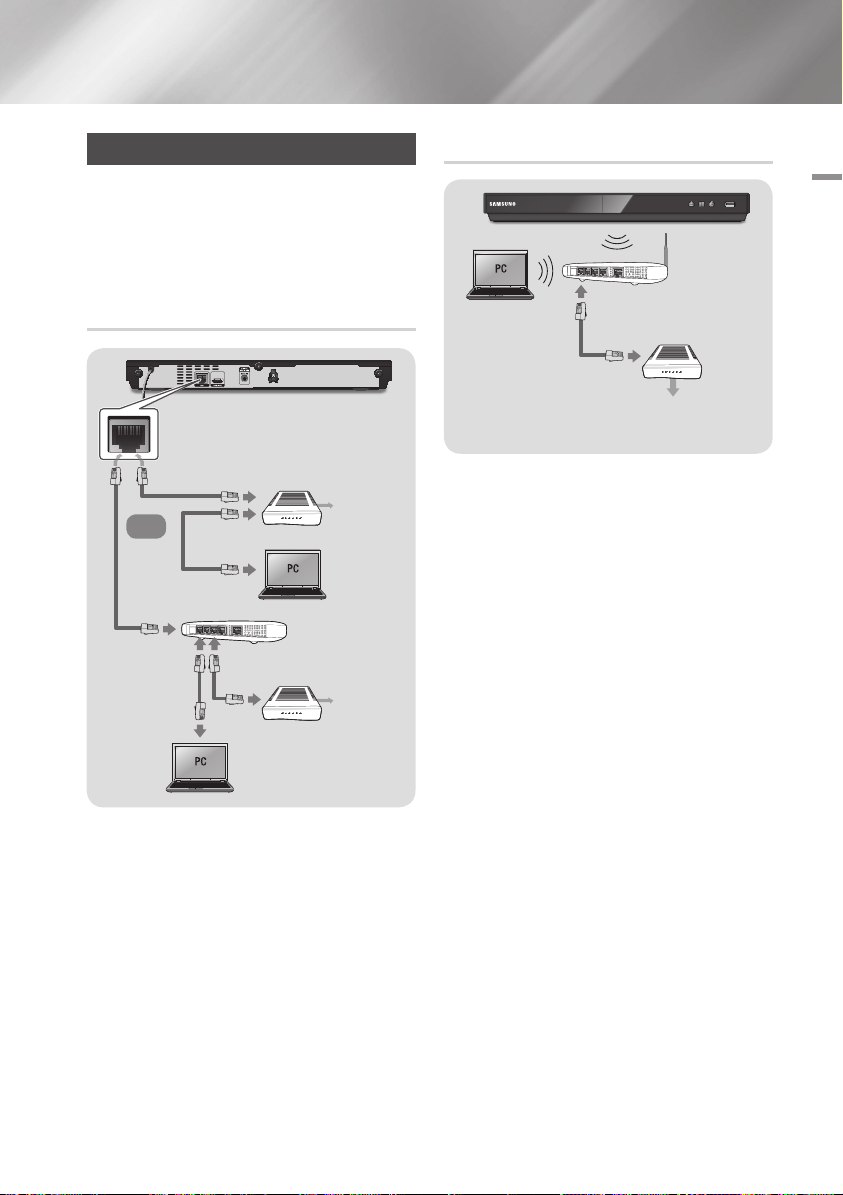
Connecting to a Network Router
You can connect your player to your network
router using one of the methods illustrated below.
To use the AllShare network functionality, you
must connect your PC to your network as shown
in the illustrations.
The connection can be wired or wireless.
Wired Network
Broadband modem
(with integrated router)
Broadband
Or
Router
Broadband
modem
| NOTE |
\Internet access to Samsung's software update server
may not be allowed, depending on the router you use or
your ISP's policy. For more information, contact your ISP
(Internet Service Provider).
\DSL users, please use a router to make a network
connection.
service
Broadband
service
Wireless Network
03 Connections
Wireless Router
Broadband
service
| NOTE |
\If your wireless router supports DHCP, this player can use
a DHCP or static IP address to connect to the wireless
network.
\Set your wireless router to Infrastructure mode. Ad-hoc
mode is not supported.
\The player supports only the following wireless security
key protocols:
- WEP (OPEN/SHARED), WPA-PSK (TKIP/AES),
WPA2-PSK (TKIP/AES)
\Select a channel on the wireless router that is not
currently being used. If the channel set for the wireless
router is currently being used by another device nearby, it
will result in interference and communication failure.
\If you select the Pure High-throughput (Greenfield)
802.11n mode and set the Encryption type on your router
or router to WEP, TKIP or TKIP-AES (WPS2Mixed), the
player will not support a connection in compliance with
new Wi-Fi certification specifications.
\Wireless LAN, by its nature, may cause interference,
depending on the operating conditions (router
performance, distance, obstacles, interference by other
radio devices, etc).
English 17
|

Settings
The Initial Settings Procedure
• The Home screen will not appear if you do not
configure the initial settings.
• The OSD (On Screen Display) may change in this
player after you upgrade the software version.
• The access steps may differ depending on the menu
you selected.
The Initial Settings Procedure lets you set the OSD
and menu languages, configure the connection
to your home network, choose the aspect ratio
output (screen size and format) that is correct for
your TV, and apply an upgrade to your player's
software, if one is available.
| NOTE |
\If you skip Network Setup during the Initial Settings
procedure, you can configure your network settings later.
See "Configuring Your Network Connection" on pages
25~27 for instructions.
\If you want to display the Initial Settings screen again and
make changes, select Settings > System > Initial Settings
in the Home screen or select the Reset option. (See pages
22 or 24)
\If you want to use an Anynet+(HDMI-CEC) function,
please follow the instructions below.
1) Connect the player to an Anynet+(HDMI-CEC)compliant Samsung TV using HDMI Cable.
2) Set the Anynet+(HDMI-CEC) feature to On in both the
TV and the player.
3) Set the TV to the Initial Settings Procedure.
The Home Screen
Settings
Set various functions to suit your personal preferences.
1
2
1
2
3
`Selecting an Option on the Home Screen
1. To select an option on the Home screen,
| NOTE |
\If you leave the player in the stop mode for more than
5 minutes without using it, a screen saver will appear on
your TV. If the player is left in the screen saver mode for
more than 20 minutes, the power will automatically turn
off.
Smart Hub AllShare Play
Smart Hub : Starts Smart Hub. From Smart Hub,
you can access YouTube, games, and other apps.
AllShare Play : Play videos, photos or music
content from Disc, USB, PC or mobile devices.
Settings : Set various functions to suit your
personal preferences.
move the cursor using the ◄► buttons until
it highlights the option of your choice, and
then press the v button.
3
|
18 English
Accessing the Settings Screen
HOME
1
4
7
VOL
+
2
5
8
0
VOL
–
3
6
9
SOURCE
DISC MENU
HOME REPEAT
TITLE MENU
VOL VOL
POPUP
SAMSUNG TV
SMART
HUB
– +
INFOTOOLS
RETURN
EXIT
1. Select Settings on the Home screen, and
then press v button. The Settings screen
appears.
3D Settings
Display
TV Aspect Ratio 16:9 Original
Smart Hub Screen Size Size 3
Audio
BD Wise On
Resolution Auto
Network
Movie Frame (24Fs) Auto
System
HDMI Colour Format Auto
HDMI Deep Colour Auto
Support
Progressive Mode Auto
2. To access the menus, sub-menus, and
options on the Settings screen, please refer
to the remote control illustration below.
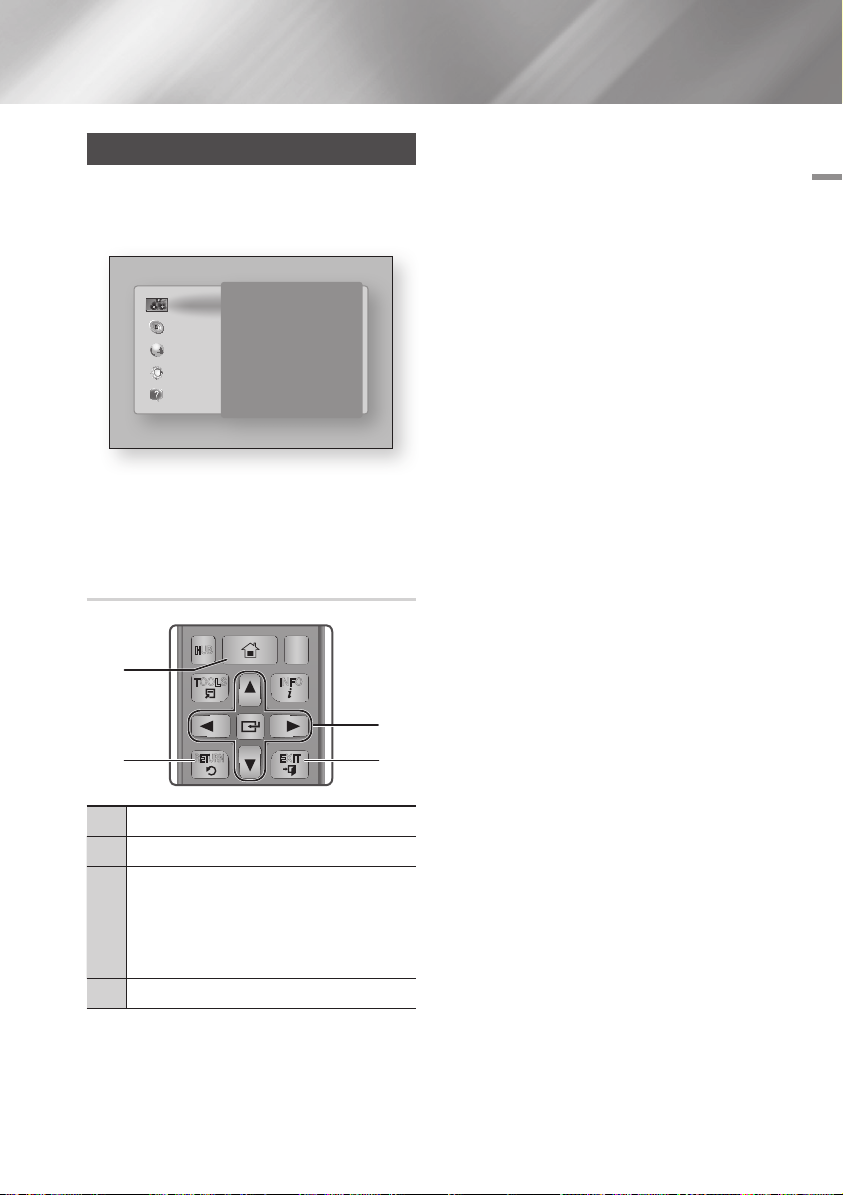
Buttons on the Remote Control Used
for the Settings Menu
1
3
Detailed Function Information
Each Settings function, menu item, and individual
option is explained in detail on-screen. To view an
explanation, use the ▲▼◄► buttons to select the
function, menu item, or option. The explanation
will usually appear on the right side of the screen.
A short description of each Settings function
starts on the next page. Additional information on
some of the functions is also in the Appendix of
this manual.
04 Settings
2 4
HOME Button : Press to move to the Home screen.
1
RETURN Button : Return to the previous menu.
2
(Enter) / DIRECTION Buttons :
v
• Press ▲▼◄► to move the cursor or select an
item.
3
• Press the v button to activate the currently
selected item or confirm a setting.
EXIT Button : Press to exit the current menu.
4
English 19
|

Settings
Settings Menu Functions
Display
Select whether to play a Blu-ray Disc with 3D contents
in 3D Mode.
3D Settings
TV Aspect Ratio
Smart Hub Screen Size
BD Wise
Resolution
Movie Frame (24Fs)
HDMI Colour Format
HDMI Deep Colour
Progressive Mode Lets you improve picture quality when viewing DVDs.
•
If you move to the Home or Smart Hub Home
screen while in 3D mode, the player will switch to 2D
automatically.
Lets you adjust the output of the player to the screen
size and screen format of your TV.
Lets you select the optimal size for the Smart Hub
Screen.
BD Wise is Samsung's latest inter-connectivity feature.
When you connect a Samsung player and a Samsung
TV with BD Wise to each other via HDMI, and BD Wise
is on in both the player and TV, the player outputs video
at the video resolution and frame rate of the Blu-ray
Disc/DVD.
Set the output resolution of the HDMI video signal to
Auto, 1080p, 1080i, 720p or 576p/480p.
The number indicates the number of lines of video per
frame.
The i and p indicate interlaced and progressive scan,
respectively. Generally, the higher quality.
If the player is connected to a 24Fs compatible TV,
setting the Movie Frame (24Fs) feature to Auto lets the
player adjust its HDMI output to 24 frames per second
automatically for improved picture quality.
•
You can enjoy the Movie Frame (24Fs) feature only on
a TV supporting this frame rate.
•
Movie Frame is only available when the player is in the
HDMI 1080i or 1080p output resolution modes.
Lets you set the colour space format for the HDMI
output so that it matches the capabilities of the
connected device (TV, monitor, etc). The screen goes
black momentarily after you have selected a format.
Lets you set the product to output HDMI video with
Deep Colour. Deep Colour provides more accurate
colour reproduction with greater colour depth.
|
20 English

Audio
Digital Output
PCM Downsampling
Dynamic Range Control
Downmixing Mode
Lets you select the digital audio output format that is
suitable for your TV or AV Receiver. For more details,
see the digital output selection table on page 53.
Lets you choose to have 96Khz PCM signals
downsampled to 48Khz before they are outputted to an
amplifier. Choose On if your amplifier or receiver is not
compatible with a 96Khz signal.
Lets you apply dynamic range control to Dolby Digital,
Dolby Digital Plus, and Dolby True HD audio.
Auto : Automatically controls the dynamic range of
Dolby TrueHD audio, based on information in the
Dolby TrueHD soundtrack. Also turns dynamic range
control on for Dolby Digital and Dolby Digital Plus.
Off : Leaves the dynamic range uncompressed,
letting you hear the original sound.
On : Turns dynamic range control on for all three
Dolby formats. Quieter sounds are made louder and
the volume of loud sounds is reduced.
Lets you select the multi-channel downmix method that
is compatible with your stereo system. You can choose
to have the player downmix to normal stereo or to
surround compatible stereo.
04 Settings
Network
Network Settings
Network Status Lets you check the current network and Internet status.
Wi-Fi Direct
Configure the network connection so you can enjoy
various features such as Internet services or AllShare
Wi-Fi functionality, and perform software upgrades.
Lets you connect a Wi-Fi Direct device to the player
using a peer-to-pear network, without the need for a
wireless router. Note that if you set wireless network, it
may be disconnected while you're using Wi-Fi Direct.
English 21
|

Settings
Network
System
Lets you connect other types of Wi-Fi devices to the
Soft AP
AllShare Settings
Device Name
BD-Live Settings
Initial Settings Lets you re-run the Initial Settings procedure.
Quick Start
Anynet+ (HDMI-CEC)
player wirelessly. Requires that you create a security key
which you must enter into the other Wi-Fi devices when
you are connecting them to the network.
Lists network connected AllShare devices and lets you
control whether each device (a smartphone, a tablet,
etc.) can share content with or control the player.
Lets you input a name for the player that will identify it
on your networks.
Set various BD-Live function. BD-Live allows you to
access extra features available on some Blu-ray Discs if
you are connected to the Internet.
BD-Live Internet Connection : Lets you fully allow,
partly allow, or prohibit a BD-Live Internet connection.
BD Data Management : Manage BD data
downloaded from a BD-Live service or Blu-ray Disc.
Lets you set the player to turn on quickly by decreasing
the boot time.
| NOTE |
\If this function set to On, Standby power consumption will be
increased.
Anynet+ is a convenient function that offers linked
operations with other Samsung players that have the
Anynet+ feature and lets you control those products
with one Samsung TV remote. To operate this function,
you must connect this player to an Anynet+ Samsung
TV using an HDMI cable.
|
22 English

System
Device Manager
Language
You can connect a wireless USB keyboard or mouse to
the USB port on the front of the player.
Keyboard Settings : Lets you configure a wireless
USB keyboard connected to the player.
| NOTE |
\You can use the keyboard only when a QWERTY keyboard
screen or window appears in the Web Browser.
Mouse Settings : Lets you configure a wireless USB
mouse connected to the player. You can use the
mouse in the player's menu in the same way you use
a mouse on your PC.
`To use a mouse with the player's menu:
Connect the USB mouse to the player.
1.
2.
Click the primary button you selected in Mouse
Settings. The Simple Menu appears.
3.
Click the menu options you want.
| NOTE |
\Depending on the model of the USB HID keyboard and mouse
may not be compatible with your product.
\Some HID keyboard keys may not work.
\Wired USB keyboards are not supported.
\Some applications may not be supported.
\If a wireless HID Keyboard does not operate because of
interference, move the keyboard closer to the player.
You can select the language you prefer for the Onscreen menu, disc menu, subtitles, etc.
•
The language you select for the disc menu, disc
audio, or subtitles will only appear if it is supported on
the disc.
04 Settings
English 23
|

Settings
System
Support
Security
General
DivX® Video On
Demand
Software Upgrade
Contact Samsung
Remote Management
Reset
The default PIN is 0000. Enter the default PIN to access
the security function if you haven't created your own
PIN. After you have accessed the security function for
the first time, change the PIN using the Change PIN
function.
BD Parental Rating : Prevents playback of Blu-ray
Discs with a rating equal to or above a specific age
rating you enter unless the PIN is entered.
DVD Parental Rating : Prevents playback of DVDs
with a rating above a specific numerical rating you
select unless the PIN is entered.
Change PIN : Change the 4-digit PIN used to access
security functions.
`If you forget your PIN:
Remove any disc or USB storage device.
1.
2.
Press and hold the p button on the front panel for
5 seconds or more.
All settings will revert to the factory settings.
You can change the options listed below to match your
preferences.
Time Zone : Select the time zone in which you live.
Menu Transparency : Adjust the transparency of the
menu box.
View DivX® VOD Registration Codes to purchase and
play DivX® VOD contents.
For more information about the Software Upgrade
function, see "Upgrading Software" on pages 29~31.
Provides contact information for assistance with your
player.
When activated, lets Samsung Call Centre agents
diagnose and fix problems with the product remotely.
Requires an active Internet connection.
| NOTE |
\Remote Management service might not be available in some
countries.
\Contact your nearest service centre for your PIN code and tell
the code to the person in charge. It enables remote diagnosis
of the product and required measures.
Resets all settings to their default settings except for the
network and Smart Hub settings.
The default security PIN is 0000.
|
24 English
Networks and the Internet
When you connect this player to a network,
you can use network based applications and
functions such as Smart Hub and BD-LIVE,
and upgrade the player's software through the
network connection. For more information about
accessing and using Internet services, see the
Network Services chapter of this manual on pages
43~45. Instructions for configuring the network
connection start below.
Configuring Your Network Connection
Before you begin, contact your ISP to find out
if your IP address is static or dynamic. If it is
dynamic, and you have a wired or wireless
network, we recommend using the Automatic
configuration procedures described below.
If you are connecting to a wired network, connect
the player to your router using a LAN cable before
you start the configuration procedure.
If you are connecting to a wireless network,
disconnect any wired network connection before
you begin.
To begin configuring your network connection,
follow these steps:
1. In the Home screen, select Settings, and
then press the v button.
2. Select Network, and then press the v
button.
3. Select Network Settings, and then press the
button.
v
4. Go to the instructions for Wired networks
starting below or the instructions for Wireless
networks starting on page 26.
Wired Network
Ğ
Wired - Automatic
After following Steps 1 to 3 above:
1. Select Start in the Network Settings screen,
and then press the v button. The player
detects the wired connection, verifies the
network connection and then connects to the
network.
Ğ
Wired - Manual
If you have a static IP address or the Automatic
procedure does not work, you'll need to set the
Network Settings values manually.
After following Steps 1 to 3 above:
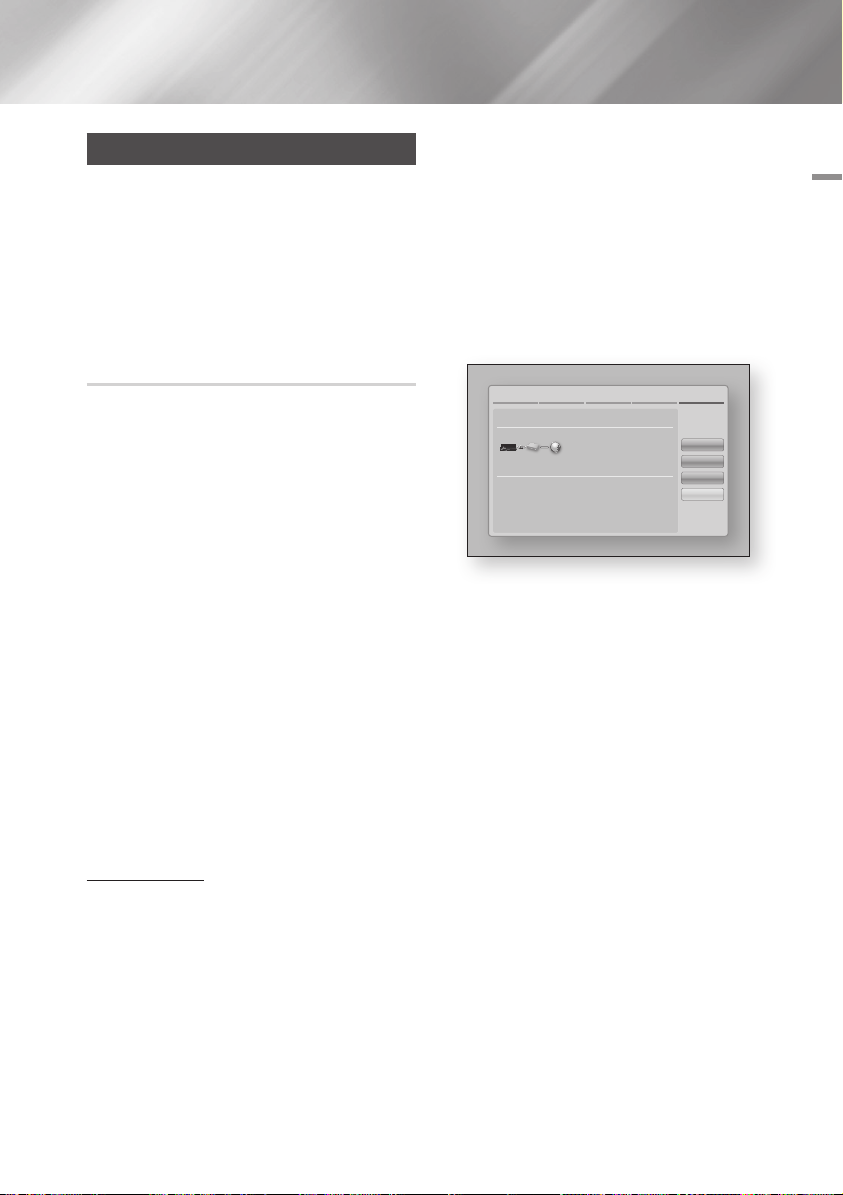
1. Select Start in the Network Settings screen,
and then press the v button.
The Network Status screen appears.
The player attempts to verify the network
connection and fails.
Network Settings
Wired network connection failed.
IP auto setting failed. Try the following to set your IP address
automatically. Or set your IP address manually by selecting 'IP
Settings'.
- Ensure DHCP server is enabled on router and unplug and re-plug-in
the router.
- Contact your Internet Service Provider for more information.
MAC Address XX:XX:XX:XX:XX:XX
IP Address 0.0.0.0
Subnet Mask 0.0.0.0
Gateway 0.0.0.0
DNS Server 0.0.0.0
Previous
IP Settings
Retry
OK
2. Select IP Settings on the right of the screen,
and press the v button.
The IP Settings screen appears.
3. Select the IP Mode field, and then set it to
Manual.
4. Use the number keypad on your remote to
enter the Network values. Use the ▲▼◄►
buttons on the remote to move from entry
field to entry field.
| NOTE |
\You can get these values from your Internet provider. You
can also view these values on most Windows computers.
For instructions, see "Getting the Network Settings
Values." on page 26.
5. When done, highlight OK, and then press
button. The player verifies the network
v
connection and then connects to the
network.
04 Settings
English 25
|
Settings
< Getting the Network Settings Values >
You can view your Network Settings values on
most Windows computers. To view the Network
Settings values, follow these steps:
• Windows XP
1. Right click the Network icon on the bottom
right of the Windows desktop.
2. In the pop-up menu, click Status.
3. On the dialog that appears, click the Support
tab.
4. On the Support tab, click the Details button.
The Network settings are displayed.
• Windows 7
1. Click the Network icon on the bottom right of
the Windows desktop.
2. In the pop-up menu, click Network and
Sharing Centre.
3. On the dialog that appears, click the Local
Area Connection or Wireless Network
Connection depending on your network
connection.
4. On the Support tab, click the Details button.
The Network settings are displayed.
| NOTE |
\Depending on your Windows version, the information may
differ.
Wireless Network
You can setup a wireless network connection in
three ways:
- Wireless Automatic
- Wireless Manual
- WPS(PBC)
When you configure the wireless network
connection, any wireless network devices currently
connected through the player or, if applicable,
the player's current wired connection, will be
disconnected.
Ğ
Wireless (General) - Automatic
After followng Steps 1 to 3 in "Configuring Your
Network Connection" on page 25.
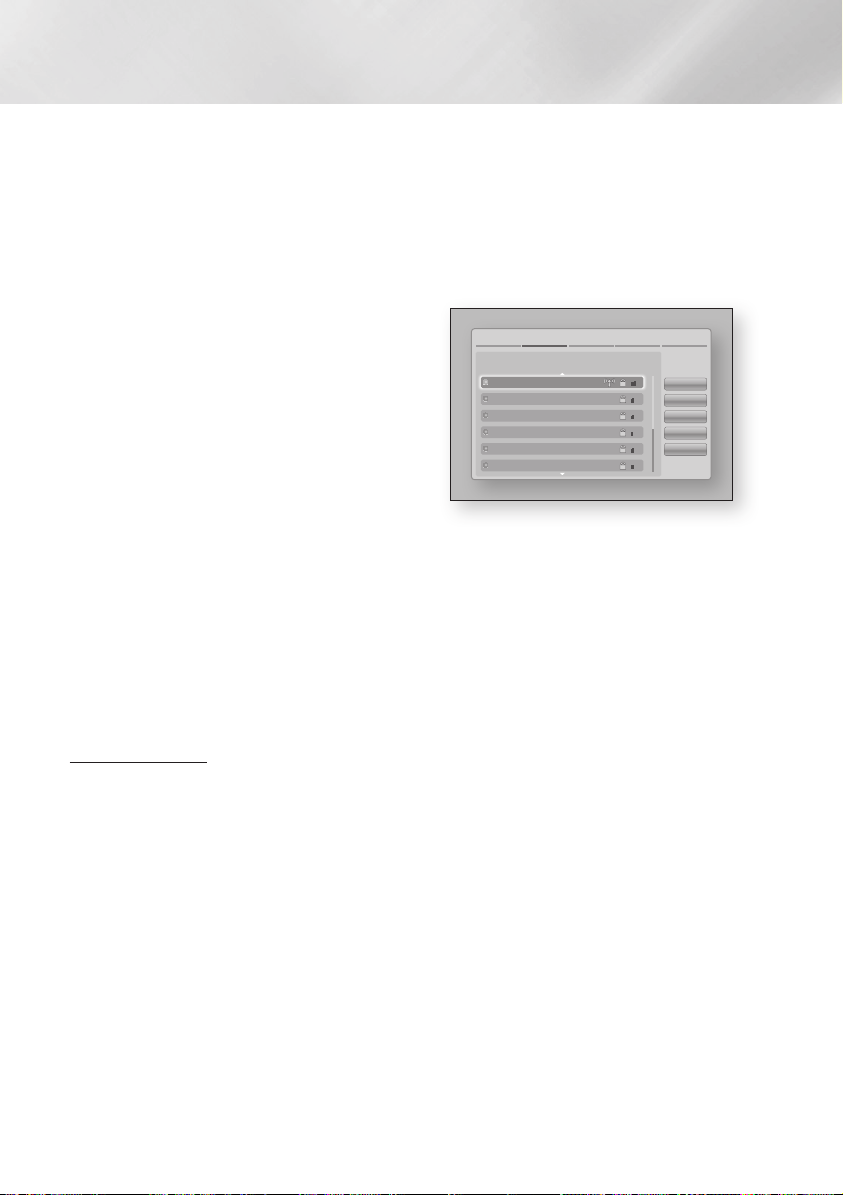
1. Select Start in the Network Settings screen,
and then press the v button.
The player searches for and then displays a
list of the available networks.
Network Settings
Select your wireless router from the list.
iptime23
ELT
JSY
KT_WLAN_C361
Mirhenge_edu
SO070VOIP
Refresh
WPS(PBC)
Previous
Next
Cancel
2. Select the desired network, and then press
the v button.
3. Select Next, and then press the v button
again.
4. On the Security screen, enter your network's
Security Code or Pass Phrase.
Enter numbers directly using the number
buttons on your remote control. Enter letters
by selecting a letter with an arrow button, and
then pressing v button.
5. When done, select Next at the right of the
screen. The player verifies the network
connection and then connects to the
network.
| NOTE |
\You should be able to find the Security Code or Pass
Phrase on one of the set up screens you used to set up
your router or modem.
Ğ
Wireless (General) - Manual
If you have a static IP address or the Automatic
procedure does not work, you'll need to set the
Network Settings values manually.
After folloiwng Steps 1 to 3 in "Configuring Your
Network Connection" on page 25.
|
26 English

1. Select Start in the Network Settings screen,
and then press the v button. The player
searches for and then displays a list of the
available networks.
2. Select the desired network, and then press
the v button.
3. Select Next, and then press the v button
again.
4. On the Security screen, enter your network's
Security Code or Pass Phrase. Enter
numbers directly using the number buttons
on your remote control. Enter letters by
selecting a letter with the ▲▼◄► buttons,
and then pressing the v button.
5. When done, select Next at the right of the
screen, and then press the v button.
6. The Network Status screen appears.
The player attempts to verify the network
connection and fails.
7. Select IP Settings on the right of the screen,
and press the v button. The IP Settings
screen appears.
8. Select the IP Mode field, and then set it to
Manual.
9. Use the number keypad on your remote to
enter the Network values. Use the ▲▼◄►
buttons on the remote to move from entry
field to entry field.
| NOTE |
\You can get these values from your Internet provider. You
can also view these values on most Windows computers.
For instructions, see "Getting the Network Settings
Values." on page 26.
10. When done, highlight OK, and then press v
button. The Network Status screen appears.
The product verifies the network connection
and then connects to the network. When it
is done, highlight OK, and then press v
button.
Ğ
WPS(PBC)
After followng Steps 1 to 3 in "Configuring Your
Network Connection" on page 25.
1. Select Start in the Network Settings screen,
and then press the v button.
The player searches for and then displays a
list of the available networks.
2. Press the WPS(PBC) button on your router
within two minutes. Your player automatically
acquires all the network settings values it
needs and connects to your network.
The Network Status screen appears. The
player connects to the network after the
network connection is verified.
Wi-Fi Direct
The Wi-Fi Direct function allows you to connect
Wi-Fi Direct devices to the player and each other
using a peer-to-peer network, without a wireless
router.
| NOTE |
\Some Wi-Fi Direct devices may not support the AllShare
function if connected via Wi-Fi Direct. If this is the case,
it is advisable to change the network connection method
between devices.
1. Turn on the Wi-Fi direct device and activate
its Wi-Fi Direct function.
2. In the Home screen, select Settings, and
then press the v button.
3. Select Network, and then press the v
button.
4. Select Wi-Fi Direct, and then press the v
button.
The Wi-Fi Direct devices that you can
connect appear.
Display
Audio
Network
System
Support
Wi-Fi Direct
Refresh
Close
' Return
Device Name : [BD]E6100
Select your Wi-Fi Direct device to connect to.
AndroidXXXXXXX Disconnected
04 Settings
English 27
|

Settings
5. You have three ways to complete the Wi-Fi
connection:
• Through the Wi-Fi device.
• Through the player using PBC.
• Through the player using a PIN.
Each is covered below.
Through the Wi-Fi Device
1. On the Wi-Fi device, follow the procedure on
the device for connecting to another Wi-Fi
Direct device. See the device's user manual
for instructions.
2. When you have completed the procedure,
you should see a pop-up on your TV screen
saying that a device that supports Wi-Fi
Direct has requested to connect. Select OK,
and then press the v button to accept.
3. The Connecting pop-up appears, followed
by the Connected pop-up. When it closes,
you should see the device listed on the Wi-Fi
Direct screen as connected.
Through the Player Using PBC
1. Select the Wi-Fi Direct device you want to
connect to this player, and then press the v
button. The PBC/PIN pop up appears.
2. Select PBC, and then press the v button.
The PBC pop-up appears.
3. Press the PBC button on the Wi-Fi Direct
device within 2 minutes.
4. The Connecting pop-up appears, followed
by the Connected pop-up. When it closes,
you should see the device listed on the Wi-Fi
Direct screen as connected.
Through the Player Using a PIN
1. Select the Wi-Fi Direct device you want to
connect to this player, and then press the v
button. The PBC/PIN pop up appears.
2. Select PIN, and then press the v button.
The PIN pop-up appears.
3. Note the PIN code in the pop-up, and then
enter it into the appropriate field in the Wi-Fi
Direct device you want to connect.
4. The Connecting pop-up appears, followed
by the Connected pop-up. When it closes,
you should see the device listed on the Wi-Fi
Direct screen as connected.
| NOTE |
\The wired or wireless network connection will be
disconnected when you use the Wi-Fi Direct function.
Soft AP
Soft AP is short for Software enabled Access
Point.
Soft AP lets you connect other Wi-Fi devices to
your network through the player and lets you can
enjoy various features such as AllShare network
functionality or network remote control.
It requires that you create a security key which you
must enter into the other Wi-Fi devices when you
are connecting them to the network.
1. In the Home screen, select Settings, and
then press the v button.
2. Select Network, and then press the v
button.
3. Select Soft AP, and then press the v
button.
4. Select On or Off, and then press the v
button.
< To Set the Soft AP Security Key >
1. On the Soft AP screen, select Security Key,
and then press the v button. The Security
Key screen appears.
2. On the Security key screen, enter a security
key. Enter numbers directly using the number
buttons on your remote control. Enter
letters by selecting a letter with the ▲▼◄►
buttons, and then pressing the v button.
3. When done, use the the ▲▼◄► buttons to
move to Done at the bottom of the screen,
and then press the v button.
When you connect a Wi-Fi device through the
connection procedure on the device, you must
enter the security key you created here into the
appropriate field.
|
28 English

AllShare Settings
The AllShare Settings screen lists your network
connected AllShare devices and their IP
addresses. Through this screen, you can allow
a device to access the player, deny access, or
delete the device from the AllShare list.
1. In the Home screen, select Settings, and
then press the v button.
2. Select Network, and then press the v
button.
3. Select AllShare Settngs, and then press the
button.
v
4. Select a device, and then press the v
button. The AllShare Settings pop-up
appears.
5. Select Allow, Deny, or Delete from the list,
and then press the v button.
The AllShare Settings screen only displays devices
if you have established networked connections
to AllShare devices. For more information about
AllShare networked devices, see page 32.
Upgrading Software
The Software Upgrade menu allows you to
upgrade the player's software for performance
improvements or additional services.
• Never turn the player off or back on manually during
the update process.
1. In the Home screen, select the Settings, and
then press the v button.
2. Select Support, and then press the v
button.
3. Select Software Upgrade, and then press
the v button.
4. Select one of the following methods:
• By Online
• By USB
• By Disc
• By Downloaded
• Standby Mode Upgrade
5. Press the v button.
| NOTE |
\The upgrade is complete when the player turns off, and
then turns on again by itself.
\Samsung Electronics shall takes no legal responsibility
for player malfunction caused by an unstable Internet
connection or consumer negligence during a software
upgrade.
\If you want to cancel the upgrade while the upgrade
software is downloading, press the v button.
\When the system upgrade is progressing, "UP" is
displayed on the front panel.
By Online
Your player must be connected to the Internet to
use the By Online function.
1. Select By Online, and then press the v
button. The Connecting to Server message
appears.
2. If there is a download available, the Download
pop-up appears with a progress bar and the
download starts.
3. When the download is complete, the
Upgrade Query window appears with three
choices: Upgrade Now, Upgrade Later, or
Don't Upgrade.
4. If you select Upgrade Now, the player
upgrades the software, turns off, and then
turns on automatically.
5. If you do not make a selection in one minute
or select Upgrade Later, the player stores
the new upgrade software. You can upgrade
the software later using the By Downloaded
function.
6. If you select Don't Upgrade, the player
cancels the upgrade.
04 Settings
English 29
|

Settings
By USB
1. Visit www.samsung.com.
2. Click SUPPORT on the top right of the page.
3. Enter the product's model number into the
search field, and then click Find Product.
4. Click Get downloads in the centre of the
page below the Downloads header.
5. Click Firmware in the centre of the page.
6. Click the ZIP icon in the File column on the
right side of the page.
7. Click OK in the pop-up that appears to
download and save the firmware file to your
PC.
8. Unzip the zip archive to your computer. You
should have a single folder with the same
name as the zip file.
9. Copy the folder to a USB flash drive.
10. Make sure no disc is inserted in the player,
and then insert the USB flash drive into the
USB port of the player.
11. In the player's menu, go to Settings >
Support > Software Upgrade.
12. Select By USB.
| NOTE |
\There should be no disc in the player when you upgrade
the software using the USB Host jack.
\When the software upgrade is done, check the software
details in the software Upgrade menu.
\Do not turn off the player during the software upgrade.
It may cause the player to malfunction.
\Software upgrades using the USB Host jack must be
performed with a USB flash memory stick only.
By Disc
1. Follow Steps 1 through 7 in By USB.
2. Unzip the zip archive to your computer. You
should have a single folder with the same
name as the zip file.
3. Write the folder onto a disc. We recommend
a CD-R or DVD-R.
4. Finalize the disc before you remove it from
your computer.
5. Insert the disc into the player.
6. In the player's menu, go to Settings >
Support > Software upgrade.
7. Select By Disc.
| NOTE |
\When the system upgrade is done, check the software
details in the software Upgrade menu.
\Do not turn off the player during the Software Upgrade.
It may cause the player malfunction.
By Downloaded
The By Downloaded option lets you upgrade
using a file the player downloaded earlier but
you decided not to install immediately or a file
downloaded by the player in Standby Mode.
1. If upgrade software has been downloaded,
you will see the software version number to
the right of By Downloaded.
2. Select By Downloaded, and then press the
button.
v
3. The player displays a message asking if you
want to upgrade. Select Yes. The player
begins the upgrade.
4. When the update is complete, the player
turns off automatically, and then turns on.
| NOTE |
\When the system upgrade is done, check the software
details in the software Upgrade menu.
\Do not turn off the player during the software Upgrade.
It may cause the player to malfunction.
|
30 English

Standby Mode Upgrade
You can set the Standby Mode Upgrade function
so that the player downloads new upgrade
software when it is in Standby mode.
In Standby mode, the player is off, but its Internet
connection is active. This allows the player to
download upgrade software automatically, when
you are not using it.
1. Press the ▲▼ buttons to select Standby
Mode Upgrade, and then press the v
button.
2. Select On or Off.
If you select On, the player will automatically
download new upgrade software when it
is in Standby mode with the power off. If it
downloads new upgrade software, the player
will ask you if you want to install it when you
turn the player on.
| NOTE |
\To use Standby Mode Upgrade function, your player must
be connected to the Internet.
04 Settings
English 31
|
Media Play
Your Blu-ray Disc Player can play content located
on Blu-ray/DVD/CD discs, USB devices, PCs, and
DLNA compatible cell phones. To play content
located on your PC or on a DLNA compatible cell
phone, you must connect your PC and the player
to your network and download and install the
AllShare network software on your PC.
Playing Commercial Video Discs
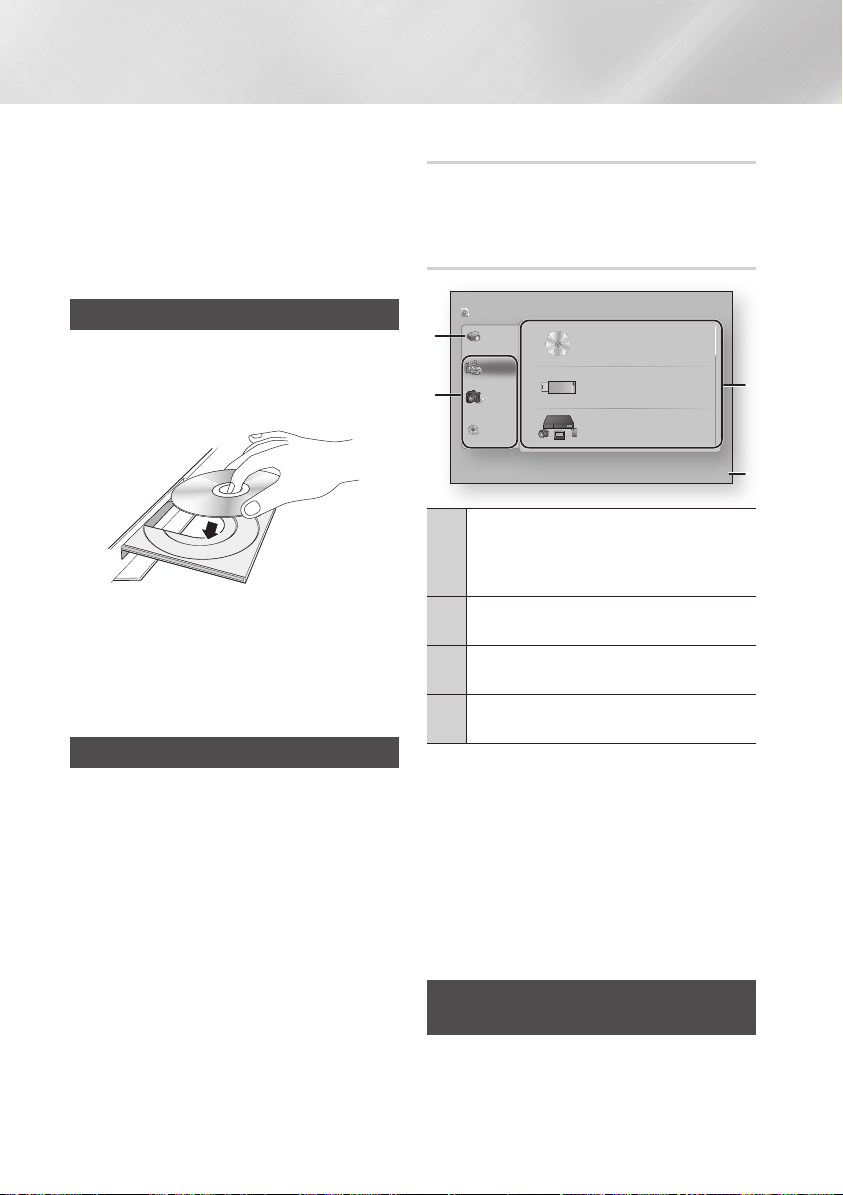
1. Press the 8 button to open the disc tray.
2. Push a disc gently into the disc tray with the
disc’s label facing up.
3. Press the 8 button to close the disc tray.
Playback starts automatically.
4. If playback does not start automatically, press
the 6 button on the remote or see "The
AllShare Play Screen" below.
The AllShare Play Screen
For all media, except for commercail video discs,
the AllShare Play Main Screen or one of its
subscreens is your primary means of accessing
and selecting content to view or play. For example,
if you connect a USB device to the player, the
player will display the content located on the USB
device on the AllShare Play USB screen.
| NOTE |
\You can use the AllShare Play Screen to access a
commercial video disc. For example, when you stop a
movie, but leave the disc in the player, you can start it
again using the AllShare Play Screen. However, unlike
other media, when you insert a commercial video disc,
it bypasses the AllShare Play Screen and starts playing
automatically.
|
32 English
Accessing the AllShare Play Screen
To access the AllShare Play Main screen, select
AllShare Play on the Home screen, and then press
the v button.
The AllShare Play Screen at a Glance
AllShare Play
/ Videos /
Disc
1
2
My list
Videos
Photos
Music
USB
DLNA
No Disc inserted.
There is no device connected.
There is no device connected.
a
Login ' Return
My list : Lists recently played or viewed files. If the
device or media containing files listed in My List is
1
inserted into or connected to the player, you can
use My List to play or view those files.
Contents Type : Lets you select the type of content
2
to view or play: Videos, Photos, or Music.
Device Type : Lets you select the device or media
3
where the content is located.
Displays the coloured buttons on your remote that
4
you can press to access or perform functions.
| NOTE |
\The video files played via DLNA will be listed in My List
only when the network connection has been established.
\Blu-ray/DVD/CD disk contents will not be listed in My List.
\
The AllShare Play screen will only display files of the
Content Type you selected. For example, if you select
Music, you will only be able to see music files. If you open
folders labelled Photos or Videos, no files will be displayed.
To view other types of files, select a different Content Type.
Playing Files on a USB Device or
USB Compatible Mobile Phone
There are two methods you can use to play or
view multimedia files located on a USB device
or USB compatible mobile phone through your
player.
3
4
Method 1
1. Turn the player on.
2. Connect the USB device or mobile phone to
the USB port on the front panel of the player.
The New Device Connected pop-up appears.
AllShare Play
New device connected.
Play videos, photos, or music content from Disc, USB, PC or mobile
Smart Hub
Videos
Photos
Music
devices.
m80
" Enter ' Return
Settings
c
Safely Remove USB
| NOTE |
\If the pop-up does not appear, go to Method 2.
3. Use the ▲▼ buttons to select Videos,
Photos, or Music, and then press the v
button. The AllShare Play screen appears
listing the content of the device or phone.
Depending on how the contents is arranged,
you will see either folders, individual files, or
both.
4. Select a file to view or play, and then press
the v button.
5. Press the RETURN button to exit a folder or
to return to the Home screen.
Method 2
1. Turn the player on.
2. Connect the USB device or mobile phone to
the USB port on the front panel of the player.
3. Select AllShare Play on the Home screen,
and then press the v button.
4. On the left side, select Videos, Photos, or
Music, and then press the v button.
5. On the right side, select USB, and then press
the v button. The AllShare Play screen
appears listing the contents of the device or
phone. Depending on how the contents are
arranged, you will see either folders, individual
files, or both.
6. If necessary, use the the ▲▼◄► buttons
to select a folder, and then press the v
button.
7. Use the ▲▼◄► buttons to select a file to
view or play, and then press the v button.
8. Press the RETURN button to exit a folder or
to return to Home screen.
| NOTE |
\To remove the USB storage device, you must use the
"Safely Remove USB" function to prevent possible
damage to the USB memory. Press the HOME button to
move to the Home screen, press the YELLOW (C) button,
and then press the v button.
\If you insert a disc when playing a USB device or phone,
the device mode changes to "Disc" automatically.
\If your mobile phone is DLNA compatible, you can play
contents without connecting a USB cable. See "Using the
AllShare Network Function" on pages 34~35.
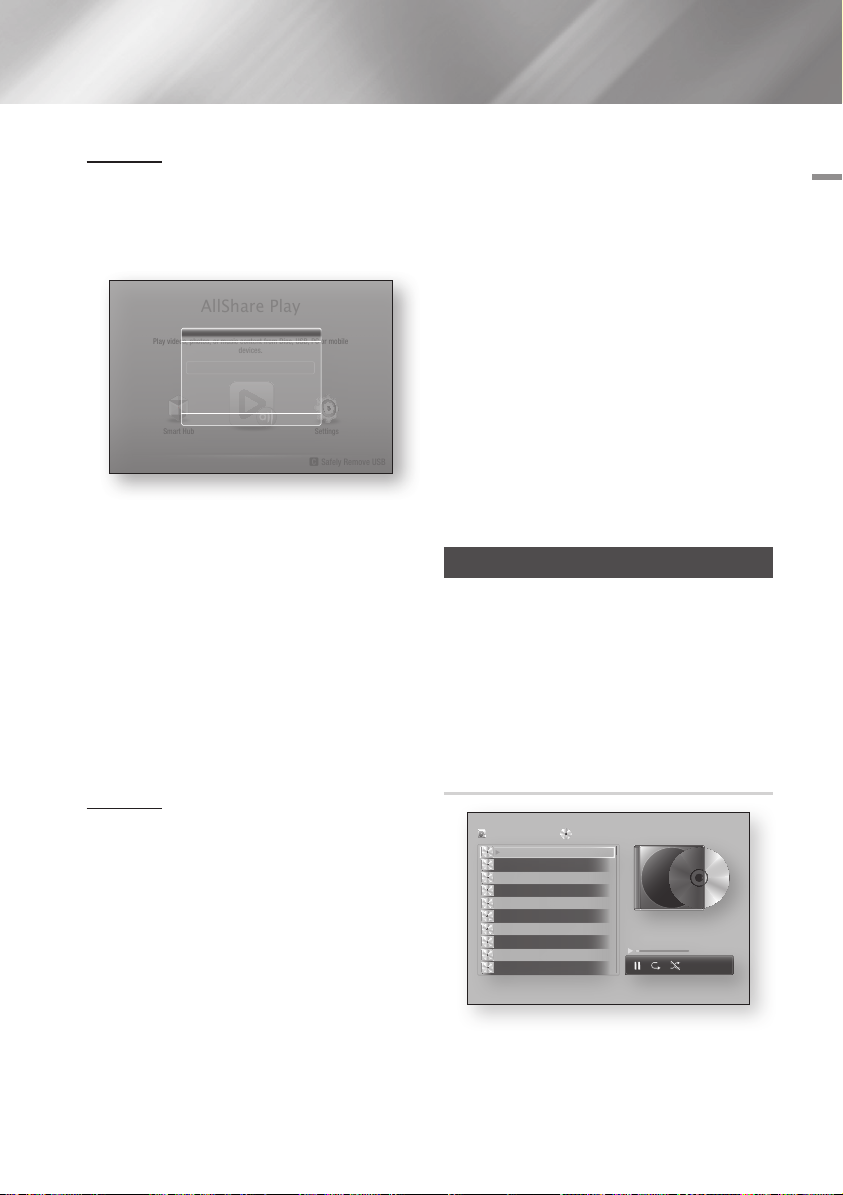
Playing Commercial Audio Discs
1. Place a pre-recorded, commercial audio disc
into the disc tray with the disc's label facing
up, and then close the tray. The AllShare
Music screen appears listing the tracks.
Playback of the first track starts automatically.
2. To play a particular track, use the ▲▼ buttons
on the remote to select the track, and then
press the v button.
Music Screen Controls
AllShare Play
TRACK 001
TRACK 002
TRACK 003
TRACK 004
TRACK 005
TRACK 006
TRACK 007
TRACK 008
TRACK 009
TRACK 010
/ Music /
Audio CD
02:38
03:17
05:21
05:34
02:54
03:44
TRACK 001
04:07
03:42
03:15
03:16
bc Page Move / Tools ' Return
1/14
00:03 / 02:38
05 Media Play
English 33
|

Media Play
Pause a track.
Play a track.
Repeat one track or all tracks.
Play tracks in random order.
To access the controls, play a track, and then use
the ◄► buttons to move to the control of your
choice.
| NOTE |
\The Music Screen controls are only accessible when a
track is playing.
\All controls do not appear at the same time.
\For more information about playing music, go to
Controlling Music Playback on pages 38~40.
Playing a Disc with User Recorded
Content
You can play mulitmedia files you have recorded
on DVD or CD discs.
1. Place a user recorded disc into the disc tray
with the disc's label facing up, and then
close the tray. The Device Connected pop-up
appears.
2. Use the ▲▼ buttons to select the type of
content you want to view or play - Videos,
Photos, or Music - and then press the v
button.
| NOTE |
\Even though the player will display folders for all content
types, it will only display files of the Content Type you
selected in Step 2. For example, if you selected music,
you will only be able to see music files. You can change
this selection on the AllShare Play main screen.
3. Use the ◄► buttons to select the folder
containing the content type you chose in
Step 2, and then press the v button.
4. If you selected Music, the Allshare Music
screen appears listing the music files on the
disc. Use the ▲▼ buttons to select the file
you want to play, and then press the v
button.
5. If you selected Photos, the AllShare Photos
screen appears listing the photos on the disc.
Use the ▲▼◄► buttons to select the photo
you want to view, and and then press the v
button.
6. If you selected Videos, the AllShare Videos
screen appears listing the video files on the
disc. Use the ▲▼◄► buttons to select the
video you want to watch, and and then press
the v button.
| NOTE |
\For all folders, - Music, Photo, and Video - you can
also push the TOOLS button on your remote, and then
select Play Folder to play or view all the files in the folder
automatically. Select the folder first before pushing the
TOOLS button.
Using the AllShare Network
Function
AllShare lets you play Videos, Photos, or Music
located on your PC or your DLNA compatible
device through the player using a wireless network
connection.
To Download the AllShare Software
To use AllShare with your PC or DLNA device, you
must install AllShare software on your PC.
You can download the PC software and get
detailed instructions for using AllShare from the
Samsung.com website.
1. Go to www.samsung.com.
2. Click Support at the top of the page.
3. On the Support page, enter the model
number of your player into the Model Number
field, and then press the v button.
4. On the page that appears, click Get
downloads on the left side under Downloads.
The Download Centre appears.
5. On the Download Centre page, click the
Software tab.
6. On the software tab, click the File icon on the
right side of the AllShare line.
|
34 English
7. In the pop-up that appears, click Save File.
8. Find the AllShare install file on your disk, and
then double click the file.
9. In the pop-up that appears, click Run, and
then follow the directions that appear on your
screen.
Download the AllShare Installation/Instruction
manual from the same Software Tab by clicking
the corresponding PDF file symbol in the File
column on the right. The file, in PDF format, will
download and open. You can view and/or save
the file.
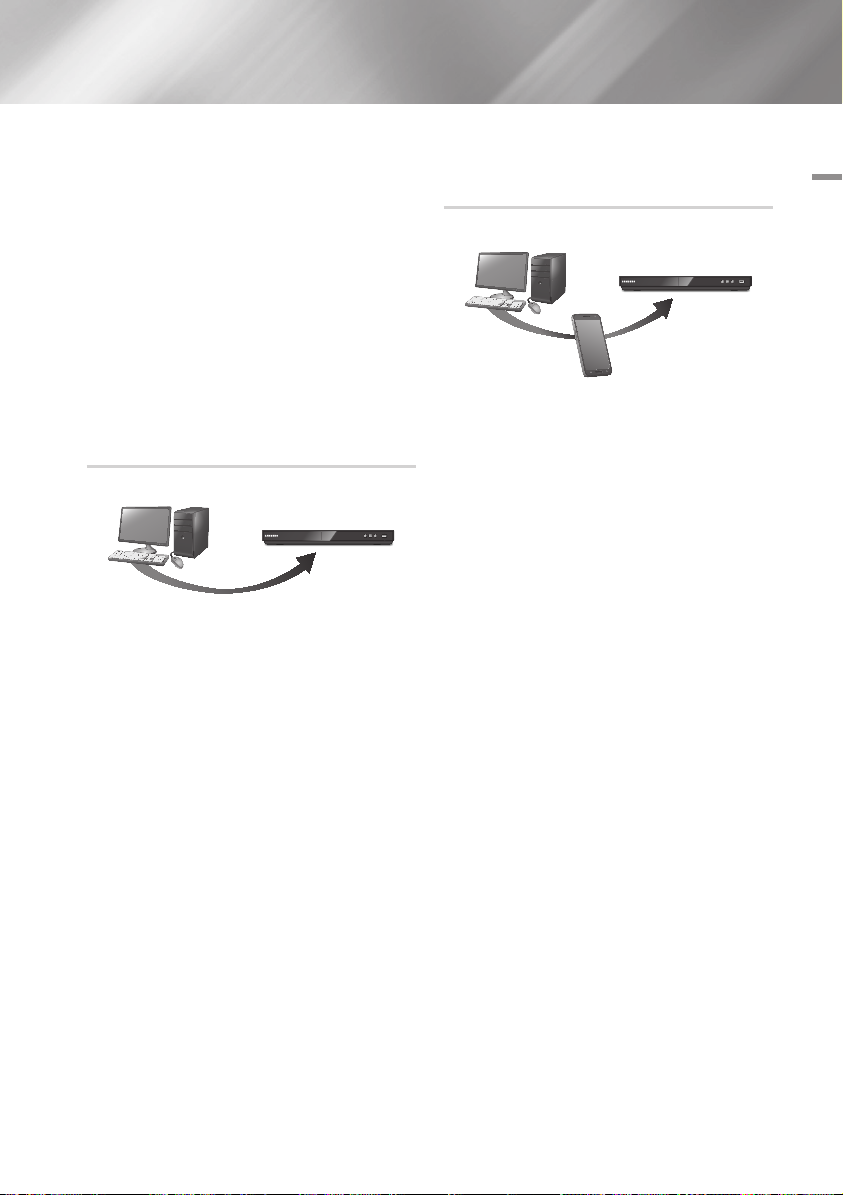
Playing Content Located on Your PC or
DLNA Device through the Blu-ray Disc
Player
PC Blu-ray Disc Player
Play back
PC's files
AllShare Connection
1. Connect the Blu-ray Disc Player, your PC,
and/or your DLNA compatible cell phone to
the same wireless network.
2. Follow the directions in the AllShare software
Installation/Instruction manual to set up
devices and files for playing or viewing.
3. Select AllShare Play in the player's Home
screen, and then press the v button. The
AllShare Play screen appears.
4. Select the connected DLNA compatible
device or your PC, and then press the v
button. A screen listing the available files
appears.
5. Select the file you want to play or view, and
then press the v button.
Controlling the Playback of Content
Located on Your PC with Your Smart
Phone
PC
AllShare
Connection
Smart Phone
(Only available with Samsung phones supporting
AllShare functionality.)
1. Connect the Blu-ray Disc Player, your PC,
and your DLNA compatible cell phone to the
same wireless network.
2. Follow the directions in the AllShare software
Installation/Instruction manual to set up
devices and files for playing or viewing.
3. On your computer, using the AllShare
software, confirm your phone is connected.
4. On the phone, select the file you want to view
or play, and then select the Blu-ray player as
the playback device.
5. On the phone, start playback.
Blu-ray Disc Player
Play back
PC's files
Control PC's files to
Blu-ray Disc Player
05 Media Play
English 35
|
Media Play
1
4
7
VOL
+
2
5
8
0
VOL
–
3
6
9
SOURCE
DISC MENU
TITLE MENU
VOL VOL
POPUP
SAMSUNG TV
– +
Controlling Video Playback
You can control the playback of video content located on a DVD, USB, mobile device or PC. Depending
on the disc or contents, some of the functions described in this manual may not be available.
Buttons on the Remote Control used for Video Playback
Using the disc menu, title menu, popup
menu, and title list
Playback related buttons
The player does not play sound in Search, Slow or
Step mode.
• To return to normal speed playback, press the
button.
6
button
6
button
5
button
7
Fast Motion
Play
Slow Motion
Play
Step Motion
Play
Skip Motion
Play
|
36 English
Starts playback.
Stops playback.
Pauses playback.
During playback, press the 3 or 4
button.
Each time you press the 3 or 4
button, the playback speed will change.
In pause mode, press the 4 button.
Each time you press the 4 button, the
playback speed will change.
In pause mode, press the 7 button.
Each time you press the 7 button, a
new frame appears.
During playback, press the 1 or 2
button.
Each time you press 1 or 2 button,
the disc moves to the previous or next
chapter or file.
DISC MENU
button
TITLE MENU
button
POPUP MENU
button
During playback, press this button to
display the Disc menu.
During playback, press this button to
display the Title menu.
• If your disc has a playlist, press the
GREEN (B) button to go to the playlist.
During playback, press this button to
display the Popup menu.
Using the Tools Menu
During playback, press the TOOLS button.
Play from the
Beginning
Movie Note
Scene Search
Select to return to the beginning of the
movie, and then press the v button.
Movie Note provides information such
as director, cast, synopsis, etc.
| NOTE |
\Movie Note is available if the disc
includes Movie Note information
and connected to a network.
You can use the Scene Search
function during playback to view or
start a movie from the scene of your
choice.
| NOTE |
\If the index information in the file
is damaged or the file does not
support indexing, you will not be
able to use the Scene Search
function.
\If you play the AllShare Play after
connect to a computer with the
network, the Scene Search may
not be supported.

Title Search
Chapter Search
Time Search
Repeat Mode
If there is more than one movie on the
disc or device, select to start a different
title.
1. Select Title Search, and then press
the v button.
2. Use the ▲▼ buttons to select
a title, and then press the v
button.
Select to play the chapter of your
choice.
1. Select Chapter Search, and then
press the v button.
2. Use the ▲▼ buttons to select a
chapter, and then press the v
button.
Select to play the movie from a
selected time point.
1. Select Time Search, and then
press the v button.
2. Using the number buttons, enter
the time point you want to go to,
and then press the v button.
| NOTE |
\You can also use the ◄► buttons
to advance or rewind the movie.
The movie advances or rewinds one
minute each tme you press the ◄
► buttons.
Select to repeat a title, chapter, or
specific section.
- Off : Select to return to normal
playback.
- Title : Choose to repeat a selected
title.
- Chapter : Choose to repeat a
specific chapter.
- Repeat A-B : Choose to repeat a
specific section.
Repeat Mode
Full Screen
Picture Mode
Audio
Subtitle
Angle
1. Press the ▲▼ buttons to select
repeat A-B, and then press the
button.
v
2. Press the v button at the point
where you want repeat play to start
(A). Let the movie play.
3. Press the v button at the point
where you want repeat play to stop
(B).
| NOTE |
\You must set point (B) at least 5
seconds of playing time after point
(A).
Select to change the full screen size.
Select to set the picture mode.
- Dynamic : Increases sharpness and
brightness.
- Standard : Choose this setting for
most viewing applications.
- Movie : The best setting for
watching movies.
- User : Lets you adjust the sharpness
and noise reduction function
respectively.
| NOTE |
\When you use the BD wise function,
this menu will not appear.
Select to set the desired audio
language.
Select to set the desired subtitle
language.
- You can also operate this function
by pressing the SUBTITLE button on
the remote control.
Select to view a scene from another
angle. The Angle option displays the
number of angles available to view.
When a Blu-ray Disc/DVD contains
multiple angles of a particular scene,
you can change angle.
05 Media Play
English 37
|
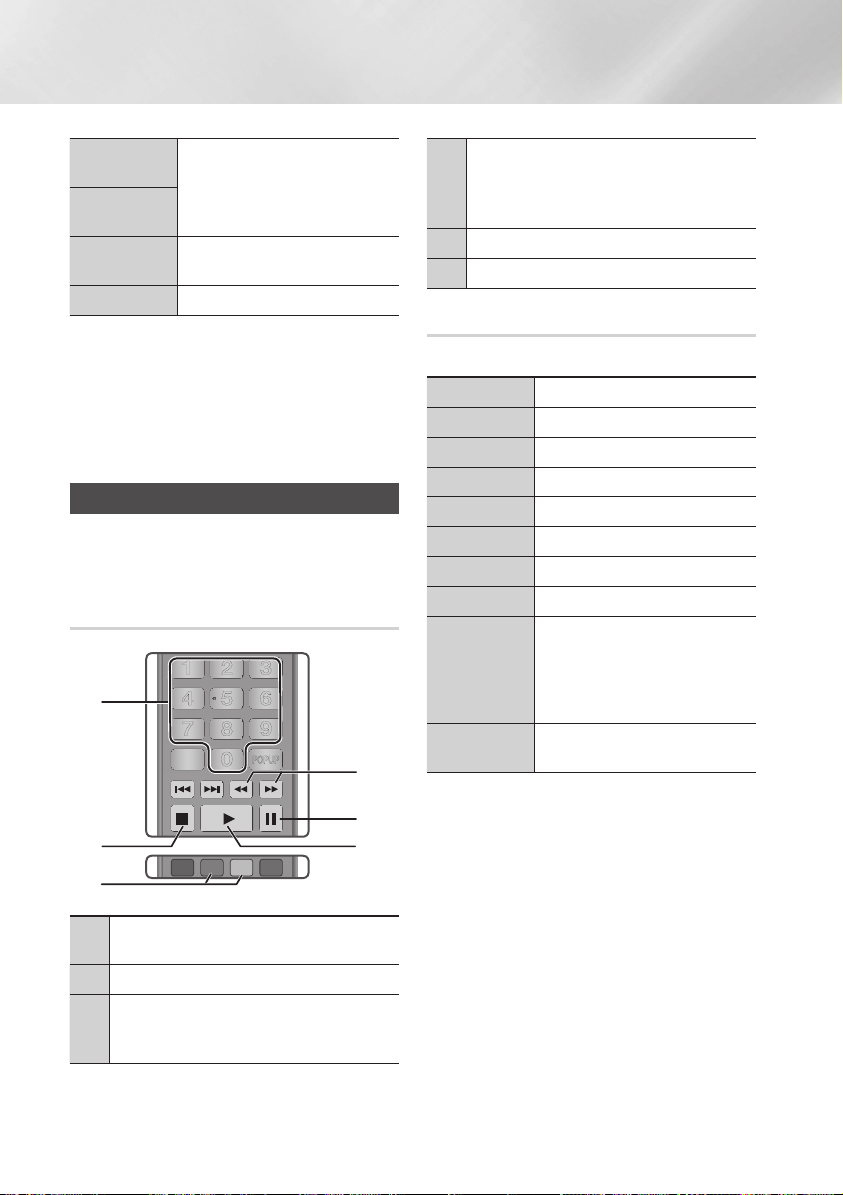
Media Play
1
4
7
VOL
+
2
5
8
0
VOL
–
3
6
9
SOURCE
DISC MENU
TITLE MENU
VOL VOL
POPUP
SAMSUNG TV
– +
HOME
1
4
7
VOL
+
2
5
8
0
VOL
–
3
6
9
SOURCE
DISC MENU
HOME REPEAT
TITLE MENU
VOL VOL
POPUP
A B C D
SAMSUNG TV
SMART
HUB
– +
INFOTOOLS
RETURN
EXIT
BONUSVIEW
Video
BONUSVIEW
Select to set the desired bonusview
option.
Audio
Go to Videos
List
Information
Select to go to the list of videos on the
current media.
Select to view video file information.
| NOTE |
\Depending on the disc or storage device, the Tools menu
may differ. See pages 40~42 for addtional options.
\Video files with high bit rates of 20Mbps or more strain
the player's capabilities and may stop playing during
playback.
Controlling Music Playback
You can control the playback of music content
located on a DVD, USB, mobile device or PC.
Buttons on the Remote Control used
for Music Playback
1
2
3
NUMBER buttons : Press the number of a track.
1
The selected track is played.
|
button : Stops a track.
2
5
Skip : During playback, press the GREEN (B) or
YELLOW (C) button to move to the previous or next
3
page of the playlist.
38 English
4
5
6
Fast Play (Audio CD (CD-DA) only)
During playback, press the 3 or 4 button.
4
Each time you press the 3 or 4 button, the
playback speed will change.
button : Pauses a track.
5
7
button : Plays the currently selected track.
6
6
Using the Tools Menu
During playback, press the TOOLS button.
View
Folder view
Title
Artist
Album
Genre
Play Selection
Go to Playlist
Rip
Information
| NOTE |
\Depending on the disc or storage device, the Tools menu
may differ. See pages 40~42 for addtional options.
See pages 40~42.
See pages 40~42.
See pages 40~42.
See pages 40~42.
See pages 40~42.
See pages 40~42.
See pages 40~42.
See pages 40~42.
The Ripping function converts CD
audio to the mp3 format and saves
the converted files on a USB device
connected to the player. See Ripping
on pages 39~40.
Select to see the (Contents)
information: File size, date created, etc.
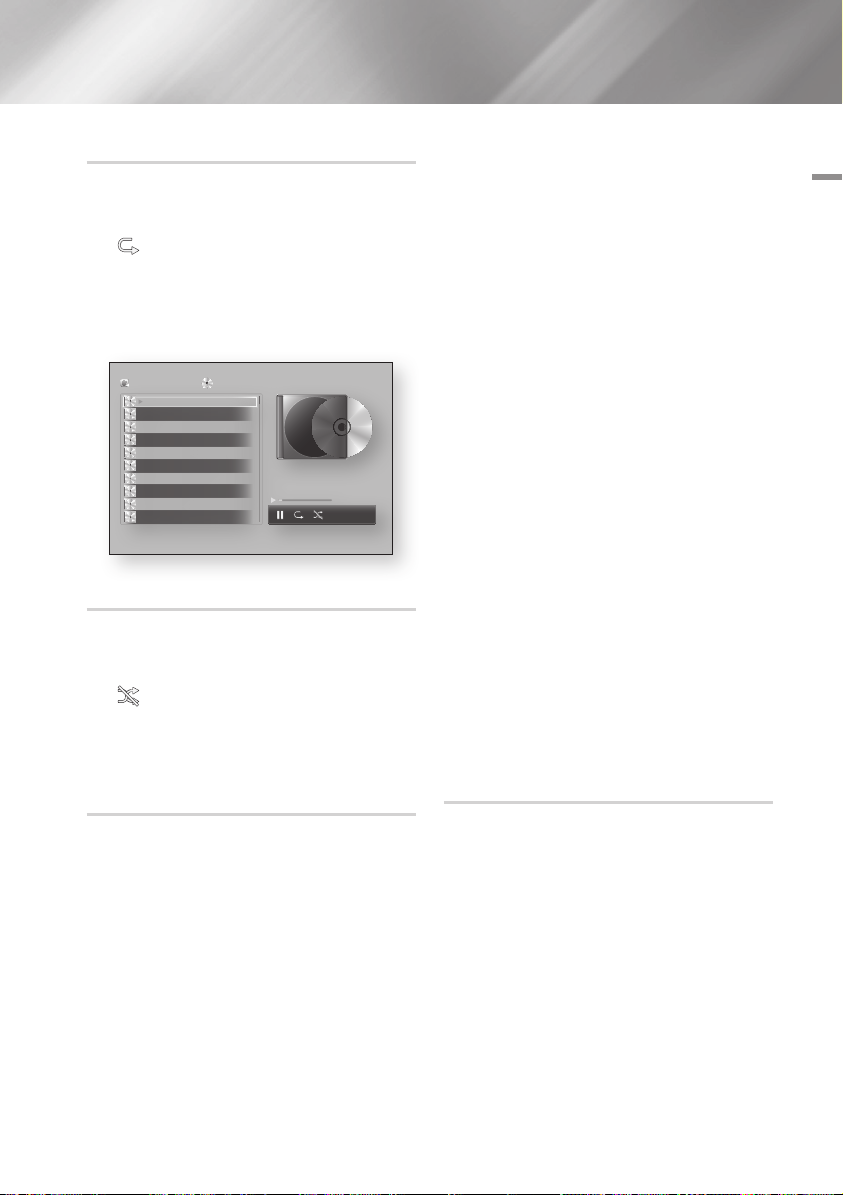
Repeating Tracks on an Audio CD
You can set the product to repeat tracks on an
audio CD (CD-DA/MP3).
1. During playback, use the ► button to select
in the lower right corner of the screen,
and then press the v button.
2. Use the ▲▼ to select the repeat mode you
want - Off, One Song, or All - and then press
the v button.
AllShare Play
TRACK 001
TRACK 002
TRACK 003
TRACK 004
TRACK 005
TRACK 006
TRACK 007
TRACK 008
TRACK 009
TRACK 010
/ Music /
Audio CD
02:38
03:17
05:21
05:34
02:54
03:44
TRACK 001
04:07
03:42
03:15
03:16
bc Page Move / Tools ' Return
1/14
00:03 / 02:38
Shuffling Tracks on an Audio CD
You can set the product to play tracks on an audio
CD (CD-DA/MP3) at random.
1. During playback, use the ► button to select
in the lower right corner of the screen,
and then press the v button.
2. Use the ▲▼ to set the Shuffle mode On or
Off, and then press the v button.
Creating a Playlist from a CD
1. With the Playback screen displayed, press
the TOOLS button. The Tools menu appears.
2. Use the ▲▼ buttons to select Play
Selection, and then press the v button.
The Play Selection screen appears.
3. Use the ▲▼ buttons to select a track, and
then press the v button. A check appears
to the left of the track.
4. Repeat Step 3 to select and check additional
tracks.
5. To remove a track from the list, move to the
track, and then press the v button again.
The check on the track is removed.
6. When done, press the ► button to select
Play, and then press the v button. The
Music Playback screen reappears listing only
the tracks you checked. The selected tracks
play automatically.
| NOTE |
\You can create a playlist with up to 99 tracks on Audio
CDs (CD-DA).
\If you have created a playlist, Play Selection is replaced
by Edit playlist on the Tools menu.
\On the Play Selection screen, you can also choose Select
All, Deselect All, and Cancel.
- Use Select All to select all tracks. This cancels your
individual track selections. When you press the
RETURN button on your remote or select 6 button,
and then press the v button, all tracks will appear
on the Music Playback screen, and the product will
begin to play all tracks from Track 001.
- Use Deselect All to deselect all selected tracks at once.
Then, select individual tracks or use Select All to select
all the tracks, and then press the RETURN button
on your remote or select 6 button, and then press
the v button. If you do not use Select All or select
individual tracks, the Playlist will not change.
- Cancel cancels any changes you made on the Play
Select screen. When you return to the Playback screen,
the Playlist will be unchanged.
Ripping
1. Insert a USB device into the USB jack on the
front of the product.
2. With the Playback screen displayed, press
the TOOLS button. The Tools menu appears.
3. Use the ▲▼ buttons to select Rip, and
then press the v button. The Rip screen
appears.
4. Use the ▲▼ buttons to select a track, and
then press the v button. A check appears
to the left of the track.
5. Repeat Step 3 to select and check additional
tracks.
05 Media Play
English 39
|
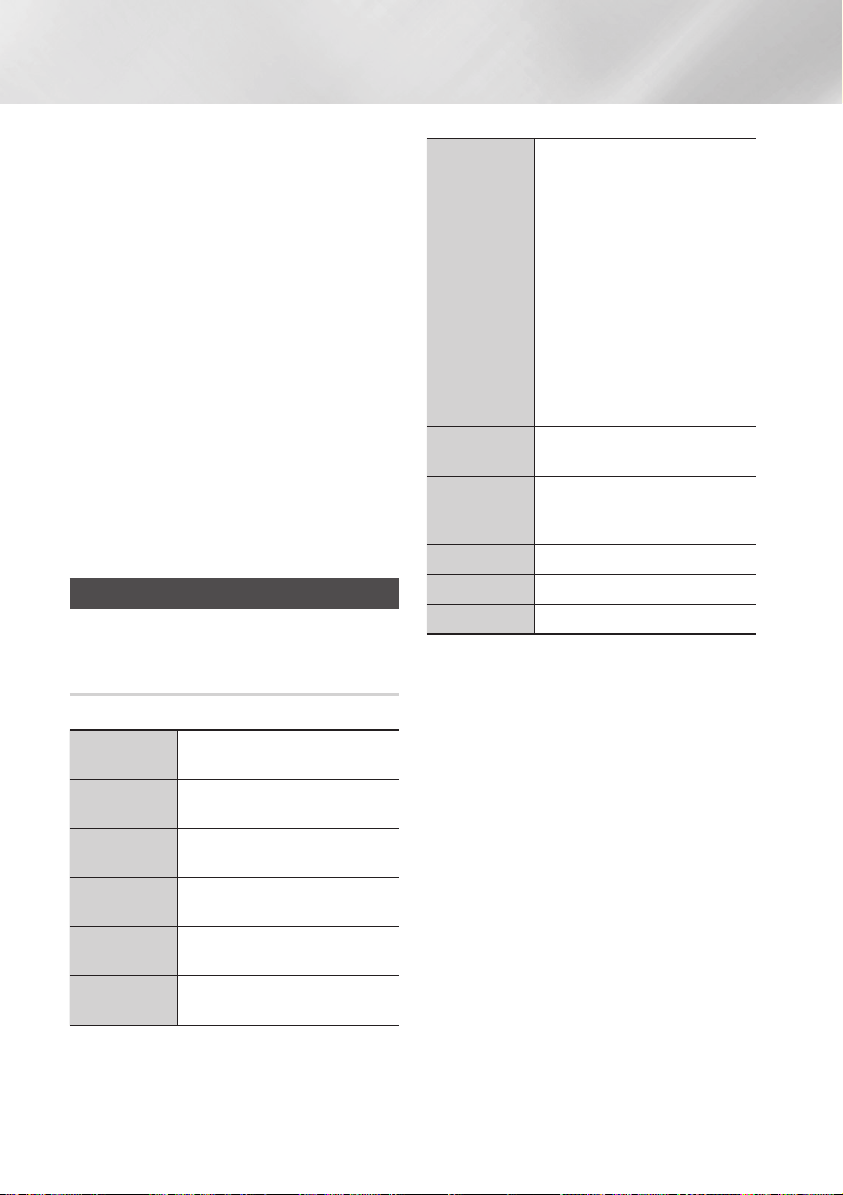
Media Play
6. To remove a track from the list, move to the
track, and then press the v button again.
The check on the track is removed.
7. When done, press the ► button to select
Rip, and then press the v button. The Rip
pop-up appears.
8. Press the v button to begin the ripping
process. The Ripping Completion Bar popup
appears.
9. When ripping is complete, the "Ripping is
completed." message appears. Press the v
button.
10. Press the RETURN button to go back to the
Playback screen.
| NOTE |
\This function is not available with DTS Audio CD.
\This function may not be supported by some discs.
\This function will be encoded to the .mp3 format at
192kbps.
Playing Photo Contents
You can play photo contents located on a DVD,
USB, mobile device or PC.
Using the Tools Menu
During playback, press the TOOLS button.
Go to Photos
List
Start Slide
Show
Slide Show
Speed
Slide Show
Effect
Background
Music On
Background
Music Setting
Select to go to the list of photos on the
current media.
Select to start the slide show.
Select to set a slide show's speed.
Select to set a slide show's special
effects.
Select to listen to music while viewing
a slide show.
Select to set the background music
setting.
Select to set the picture settings.
- Dynamic : Choose to increase
Sharpness.
- Standard : Choose for most viewing
applications.
- Movie : This is the best setting for
Picture Mode
Zoom
Rotate
Play Selection
Login/Out
Information
| NOTE |
\Depending on the disc or storage device, the Tools menu
may differ. All options may not be displayed.
\To enable the background music function, the photo file
must be in the same storage media as the music file.
However, the sound quality can be affected by the bit rate
of the MP3 file, the size of the photo, and the encoding
method.
\You can't enlarge the subtitle and PG graphic in the full
screen mode.
watching movies.
- User : Lets you adjust the sharpness
and noise reduction function
respectively.
| NOTE |
\When you use the BD wise function,
this menu will not appear.
Select to enlarge the current picture.
(Enlarge up to 4 times)
Select to rotate the picture. (This will
rotate the picture either clockwise or
counter clockwise.)
See pages 40~42.
See pages 40~42.
Shows the picture information.
|
40 English

Using the Tools Menu when a file
is highlighted
When a file is highlighted, press the TOOLS
button.
Select to access the sort options: Artist,
View
Folder view
Title
Artist
Album
Genre
Latest Date
Earliest Date
Monthly
Genre, Monthly, Latest Date, etc. The
sort options that appear depend on the
storage and media type.
Appears in the View function screen.
Select to display the folders on the
storage device.
Appears on the View function screen.
Select to sort all photo or video files on
a storage device by title.
Appears on the View function screen.
Select Artist to sort and then display
all music tracks on a storage device by
artist.
Appears on the View function screen.
Select Album to sort and then display
all music tracks on a storage device by
album.
Appears on the View function screen.
Select Genre to sort and then display
all music tracks on a storage device by
genre.
Appears on the View function screen.
Select to sort and then display all photo
or video files on a storage device from
the latest to earliest date.
Appears on the View function screen.
Select to sort and then display all photo
or video files on a storage device from
the earliest to latest date.
Appears on the View function screen.
Select to sort all photo or video files on
a storage device by the month created.
Play Selection
Send
Play Selection lets you select specific
music, video, and photo files to play.
It works essentially the same for all
media. The example below is for
photos.
1. On the selection screen, use the
▲▼◄► buttons to select a
photo you want to view, and and
then press the v button.
A check mark appears to the left
of the picture.
2. Repeat Step 1 for each photo you
want to view.
3. To de-select a photo, highlight it,
and then press the v button.
4. When done, use the ◄► buttons
to select Play, and then press
the v button. A slide show
containing the photos you selected
begins.
5. To pause the slide show, press the
button once. To restart the
v
slide show, press the v button
again.
6. To stop the slide show, press the
RETURN button.
| NOTE |
\After the slide show begins, you can
control the slide show by pressing
the TOOLS button and displaying
the Slide Show menu. See "Using
the Tools Menu" page 40.
Select Send to upload selected files to
Picasa, Facebook, Cloud Storage, or
Family Story.
To use Send, you need to establish an
account with the on-line site, and then
log in using the Log In function.
05 Media Play
English 41
|

Media Play
Send
Login / Out
Add to Playlist
1. Use the ▲▼◄► buttons to
select a file, and then press the
button.
v
2. Repeat for each track or file you
want to upload.
| NOTE |
\You can also move to Select All on
the right, and then press the
button to select all tracks or files.
3. Select Send on the right side, and
then press the v button.
4. Use the ▲▼ buttons to select the
on line site you want to upload the
files or tracks to, and then press
the v button.
The Log In/Out function lets you log in
to your online Samsung account.
Select to create a playlist or add files
or tracks to a playlist.
1. Use the ▲▼◄► buttons to
highlight a track or file, and then
press the v button.
2. Repeat for each track or file you
want to add.
3. Select Add on the right, and then
press the v button.
4. On the screen that appears,
perform one of the following
actions:
• Select the Playlist to which you want
to add the tracks or files and then
press v button.
• Select Create New, and then press
the v button. On the keyboard
pop-up that appears, create a name
for the new playlist. Enter numbers
using the numbers on the remote.
Enter letters by using the ▲▼◄►
buttons to move the cursor, and
then pressing the v button.
When finished, move to Done at
the bottom of the screen, and then
press the v button.
v
Depending on the screen you are
Delete (Playlist)
Edit Playlist
Play Current
Group
Go to Playlist
Encoding
Information
| NOTE |
\Depending on the disc or storage device, the Tools menu
may differ. All options may not be displayed.
viewing, select Delete to erase a file
from erasable media (such as a USB
device) or to delete a playlist.
Select Edit Playlist to remove files or
tracks from an existing playlist. The
storage device containing the playlist
must be inserted into or attached to
the player.
1. Use the ▲▼◄► buttons to
select a file, and then press the
button.
v
2. Repeat for each track or file you
want to remove.
| NOTE |
\You can also move to Select All on
the right, and then press the
button to select all tracks or files.
3. Select Remove on the right side,
and then press the v button.
After you have sorted by Artist, Genre,
Album,Title, Latest Date, Earliest Date,
or Monthly, select a group that is the
result of the sort (for example, all
pictures taken in August), and then
select Play Current Group to play or
view the files in that group only.
Select to go to the Playlist section of
the Main AllShare screen.
Encoding - which changes by language
or by geographical area - modifies
how the player sorts, arranges, and
presents files or tracks, displays dates,
etc. Select Encoding to change the
encoding to match your language or
geographical area.
Displays media file and content
information.
v
|
42 English

Network Services
You can enjoy various network services such as
Smart Hub or BD-LIVE by connecting the player
to your network.
To use network services, you must first:
1. Connect the player to the network.
(See page 17)
2. Configure the network settings.
(See pages 25~27)
Using Smart Hub
Using Smart Hub, you can download movies,
videos, and music from the Internet, and access
various for pay or free-of-charge applications
and view them on your TV. Application content
includes news, sports, weather forecasts, stock
market quotes, maps, photos, and games.
For instructions that explain how to use Smart
Hub, follow these steps:
1. Go to www.samsung.com.
2. Click Support at the top of the page.
3. On the Support page, enter the model
number of your player into the Model Number
field, and then press the Enter button.
4. On the page that appears, click Get
downloads on the left side under Downloads.
The Download Centre appears.
5. On the Download Centre page, click the
Manuals tab.
6. On the Manuals tab, click the file icon to the
right of Smart Hub Users Manual. The manual
downloads.
| NOTE |
\The web location of the Smart Hub manual is subject to
change without notice.
\If the home page is updated or revised, the content
mentioned in the user manual may differ from the actual
menus.
Smart Hub at a Glance
1 2 483
Search
Samsung Apps Your Video Family Story Fitness Kids
0
Contents 1
9
xxxxxxxx
Your Video : Provides recommendations for videos
1
based on your tastes.
Search : Provides an integrated search of your
2
video providers and connected AllShare devices.
Recommended : Displays recommended contents
3
managed by Samsung.
Commercial : Displays the Smart Hub Guide, an
introduction to the player, and new application
4
introductions.
Family Story : Effortless way to access family
content.
5
• Provides access to family photos, messages, and
events, anytime and anywhere.
Fitness : Gateway to the Unified Self-Care Service.
• Presents fitness videos from various content
6
partners with feedback on calories burned after
every workout.
Kids : Kids service gives kids an easy and safe way
to enjoy their favourite content.
7
• Provides a wide variety of fun and safe content
for children.
Navigation Help : Displays the remote control
buttons you can use to navigate in Smart Hub.
• RED (A) : To log in to Smart Hub.
8
• GREEN (B) : To display the background screen.
• Tools : To display the settings window.
• Return : To return to the previous menu.
5 6 7
Contents 3
Contents 2
xxxxxxxx
xxxxxxxx
a
Login b Wallpaper / Tools ' Return
Contents 4
06 Network Services
xxxxxxxx
English 43
|

Network Services
My Applications : Displays your personal gallery
of applications which you can add to, modify, and
9
delete.
Samsung Apps : Open Samsung Apps to download
various for pay or free-of-charge application
0
services.
Using the Web Browser
You can access the internet using the Web
Browser application which is installed in the Smart
Hub screen by default.
1. Select Smart Hub on the Home screen, and
then press the v button.
2. Select the Web Browser application in Smart
Hub, and then press the v button.
| NOTE |
\When you run the Web Browser with the player connected
by HDMI to a BD Wise compatible TV - and BD Wise is on
- the browser is maximized to fill the screen and the TV's
resolution is set to the optimal resolution automatically.
\The Web Browser is not compatible with Java
applications.
\If you attempt to download a file, and the file can not be
saved, an error message will appear.
\E-commerce, for purchasing proudcts online, is not
supported.
\ActiveX is not supported.
\Access may be blocked to some websites or to web
browsers operated by certain businesses.
Web Browser at a Glance
1
http://www.samsung.com
b Control Panel c Pointer Browsing Scroll up/down / Tools ' Return
Control Panel : Displays the various Web Browser
functions.
: Moves to the previous page.
•
•
: Moves to the last page before going back.
: Reloads the current page so that it is
•
refreshed on the screen.
•
: Moves to the Home screen of the Web
Browser.
•
: Allows you to zoom in or out of the screen at
various percentages.
•
: Allows you to bookmark specific pages so
that you can move to them easily.
1
•
: Allows you to view the history of your visited
pages by date, name, or frequency.
http://www.samsung.com
•
page address manually or select a page from the
visited page list to move to that page.
•
: Allows you to switch easily between
multiple, currently open Web Browser windows.
•
: Allows you to search for information by
entering words.
•
: Lets you share the current site with your
family group by sending a message.
•
: Allows you to configure all settings for using
the Web Browser.
: Allows you to enter a
2
|
44 English

Navigation Help : Displays the remote control
buttons you can use to navigate in Web Browser.
• GREEN (B) : To display the Control Panel.
• YELLOW (C) : To switch the pointer.
2
( )
•
• Tools : To display Tools window.
• Return : To return to the previous menu.
: Scroll Up/Scroll Down the page.
BD-LIVE™
Once the player is connected to your network, you
can enjoy various movie-related service contents
available on BD-LIVE compliant discs.
1. Attach a USB memory stick to the USB jack
on the front of the player, and then check
its remaining memory. The memory device
must have at least 1GB of free space to
accommodate the BD-LIVE services.
2. Select Settings on the Home screen, and
then press the v button.
3. Select Network, and then press the v
button.
4. Select BD Live Settings, and then press the
button.
v
5. Select BD Data Management, and then
press the v button.
6. Select Select Device, and then press the
button.
v
7. Select USB, and then press the v button.
8. Insert a Blu-ray Disc that supports BD-LIVE.
9. Select an item from the list of BD-LIVE service
contents provided by the disc manufacturer.
| NOTE |
\The way you use BD-LIVE and the provided contents may
differ, depending on the disc manufacturer.
06 Network Services
English 45
|

Appendix
Compliance and Compatibility Notice
NOT ALL discs are compatible
• Subject to the restrictions described below and those noted throughout this Manual, including the Disc
Type and Characteristics section of this user manual, disc types that can be played are: pre-recorded
commercial BD-ROM, DVD-VIDEO, and Audio CD (CD-DA); BD-RE/-R, DVD-RW/-R; and CD-RW/-R.
• Discs other than the above cannot and/or is not intended to be played by this player. And some of the
above discs may not play due to one or more reasons provided below.
• Samsung cannot assure that this player will play every disc bearing the BD-ROM, BD-RE/-R,
DVD-VIDEO, DVD-RW/-R, DVD+RW/+R and CD-RW/-R logos, and this player may not respond to
all operating commands or operate all features of every disc. These and other disc compatibility and
player operation issues with new and existing format discs are possible because:
- Blu-ray is a new and evolving format and this player may not operate all features of Blu-ray Discs
because some features may be optional, additional features may have been added to the Bluray Disc format after the production of this player, and certain available features may be subject to
delayed availability;
- not all new and existing disc format versions are supported by this player;
- new and existing disc formats may be revised, changed, updated, improved and/or supplemented;
- some discs are produced in a manner that allows specific or limited operation and feature during
playback;
- some features may be optional, additional features may have been added after the production of this
player or certain available features may be subject to delayed availability;
- some discs bearing the BD-ROM, BD-RE/-R, DVD-VIDEO, DVD-RW/-R, DVD+RW/+R and
CD-RW/-R logos may still be non-standardized discs;
- some discs may not be played depending on their physical state or recording conditions;
- problems and errors can occur during the creation of Blu-ray Disc, DVD software and/or the
manufacture of discs;
- this player operates differently than a standard DVD player or other AV equipment; and/or
- for reasons noted throughout this user manual and for other reason(s) discovered and posted by
SAMSUNG customer care centre.
• If you encounter disc compatibility or player operation problems, please contact SAMSUNG customer
care centre.
You may also contact SAMSUNG customer care centre for possible updates on this player.
• For additional information on playback restrictions and disc compatibility, refer to the Precautions,
Before Reading the user manual, Disc Types and Characteristics, and Before Playing sections of this
user manual.
• For Blu-ray Disc Player progressive scan output : CONSUMERS SHOULD NOTE THAT NOT
ALL HIGH DEFINITION TELEVISION SETS ARE FULLY COMPATIBLE WITH THIS PRODUCT AND
MAY CAUSE ARTIFACTS TO BE DISPLAYED IN THE PICTURE. IN CASE OF PROGRESSIVE SCAN
PICTURE PROBLEMS, IT IS RECOMMENDED THAT THE USER SWITCH THE CONNECTION TO
THE 'STANDARD DEFINITION' OUTPUT. IF THERE ARE QUESTIONS REGARDING OUR TV SET
COMPATIBILITY WITH THIS PRODUCT, PLEASE CONTACT OUR CUSTOMER SERVICE CENTRE.
|
46 English

Copy Protection
• Because AACS (Advanced Access Content System) is approved as content protection system for
Blu-ray Disc format, similar to use of CSS (Content Scramble System) for DVD format, certain
restrictions are imposed on playback, analogue signal output, etc., of AACS protected contents.
The operation of this product and restrictions on this product may vary depending on your time of
purchase as those restrictions may be adopted and/or changed by AACS after the production of this
product. Furthermore, BD-ROM Mark and BD+ are additionally used as content protection system for
Blu-ray Disc format, which imposes certain restrictions including playback restrictions for BD-ROM
Mark and/or BD+ protected contents. To obtain additional information on AACS, BD-ROM Mark, BD+,
or this product, please contact SAMSUNG customer care centre.
• Many Blu-ray Disc/DVDs are encoded with copy protection. Because of this, you should only connect
your Player directly to your TV, not to a VCR. Connecting to a VCR results in a distorted picture from
copy-protected Blu-ray Disc/DVDs.
• Under the U.S. Copyright laws and Copyright laws of other countries, unauthorized recording, use,
display, distribution, or revision of television programs, videotapes, Blu-ray Discs, DVDs, and other
materials may subject you to civil and/or criminal liability.
• Cinavia Notice : This product uses Cinavia technology to limit the use of unauthorized copies of
some commercially-produced film and videos and their soundtracks. When a prohibited use of
an unauthorized copy is detected, a message will be displayed and playback or copying will be
interrupted.
More information about Cinavia technology is provided at the Cinavia Online Consumer Information
Centre at http://www.cinavia.com. To request additional information about Cinavia by mail, send a
postcard with your mailing address to: Cinavia Consumer Information Centre, P.O. Box 86851, San
Diego, CA, 92138, USA.
This product incorporates proprietary technology under licence from Verance Corporation and is
protected by U.S. Patent 7,369,677 and other U.S. and worldwide patents issued and pending as well
as copyright and trade secret protection for certain aspects of such technology. Cinavia is a trademark
of Verance Corporation. Copyright 2004-2010 Verance Corporation. All rights reserved by Verance.
Reverse engineering or disassembly is prohibited.
07 Appendix
Network Service Disclaimer
All content and services accessible through this device belong to third parties and are protected by
copyright, patent, trademark and/or other intellectual property laws. Such content and services are
provided solely for your personal noncommercial use. You may not use any content or services in a
manner that has not been authorized by the content owner or service provider. Without limiting the
foregoing, unless expressly authorized by the applicable content owner or service provider, you may
not modify, copy, republish, upload, post, transmit, translate, sell, create derivative works, exploit, or
distribute in any manner or medium any content or services displayed through this device.
English 47
|

Appendix
THIRD PARTY CONTENT AND SERVICES ARE PROVIDED "AS IS." SAMSUNG DOES NOT WARRANT
CONTENT OR SERVICES SO PROVIDED, EITHER EXPRESSLY OR IMPLIEDLY, FOR ANY PURPOSE.
SAMSUNG EXPRESSLY DISCLAIMS ANY IMPLIED WARRANTIES, INCLUDING BUT NOT LIMITED
TO, WARRANTIES OF MERCHANTABILITY OR FITNESS FOR A PARTICULAR PURPOSE. SAMSUNG
DOES NOT GUARANTEE THE ACCURACY, VALIDITY, TIMELINESS, LEGALITY, OR COMPLETENESS
OF ANY CONTENT OR SERVICE MADE AVAILABLE THROUGH THIS DEVICE AND UNDER NO
CIRCUMSTANCES, INCLUDING NEGLIGENCE, SHALL SAMSUNG BE LIABLE, WHETHER IN
CONTRACT OR TORT, FOR ANY DIRECT, INDIRECT, INCIDENTAL, SPECIAL OR CONSEQUENTIAL
DAMAGES, ATTORNEY FEES, EXPENSES, OR ANY OTHER DAMAGES ARISING OUT OF, OR IN
CONNECTION WITH, ANY INFORMATION CONTAINED IN, OR AS A RESULT OF THE USE OF ANY
CONTENT OR SERVICE BY YOU OR ANY THIRD PARTY, EVEN IF ADVISED OF THE POSSIBILITY OF
SUCH DAMAGES.
Third party services may be terminated or interrupted at any time, and Samsung makes no representation
or warranty that any content or service will remain available for any period of time. Content and services
are transmitted by third parties by means of networks and transmission facilities over which Samsung
has no control. Without limiting the generality of this disclaimer, Samsung expressly disclaims any
responsibility or liability for any interruption or suspension of any content or service made available
through this device.
Samsung is neither responsible nor liable for customer service related to the content and services.
Any question or request for service relating to the content or services should be made directly to the
respective content and service providers.
Licence
• Dolby and the double-D symbol are registered trademarks of Dolby Laboratories.
• Manufactured under licence under U.S. Patent Nos: 5,956,674; 5,974,380; 6,487,535
& other U.S. and worldwide patents issued & pending. DTS, the Symbol, & DTS and the
Symbol together are registered trademarks & DTS 2.0+Digital Out is a trademark of DTS,
Inc. Product includes software. © DTS, Inc. All Rights Reserved.
• DivX
- ABOUT DIVX VIDEO: DivX® is a digital video format created by DivX, LLC, a
subsidiary of Rovi Corporation. This is an official DivX Certified® device that plays
DivX video. Visit divx.com for more information and software tools to convert your files into DivX
videos.
- ABOUT DIVX VIDEO-ON-DEMAND: This DivX Certified® device must be registered in order to
play purchased DivX Video-on-Demand (VOD) movies. To obtain your registration code, locate the
DivX VOD section in your device setup menu. Go to vod.divx.com for more information on how to
complete your registration.
- DivX Certified® to play DivX® video up to HD 1080p, including premium content.
DivX®, DivX Certified® and associated logos are trademarks of Rovi Corporation or its subsidiaries
and are used under license.
Covered by one or more of the following U.S. patents : 7,295,673; 7,460,668; 7,515,710; 7,519,274.
|
48 English

• The terms HDMI and HDMI High-Definition Multimedia Interface, and the HDMI
Logo are trademarks or registered trademarks of HDMI Licensing LLC in the United
States and other countries.
• Oracle and Java are registered trademarks of Oracle and/or its affiliates. Other names
may be trademarks of their respective owners.
• Open Source Licence Notice
- In the case of using open source software, Open Source Licences are available on the product
menu.
• Blu-ray Disc™, Blu-ray™ and the logos are trademarks of the Blu-ray Disc Association.
Recommendation - EU Only
• Hereby, Samsung Electronics, declares that this BD Player is in compliance with the
essential requirements and other relevant provisions of Directive 1999/5/EC.
The official Declaration of Conformity may be found at http://www.samsung.com,
go to Support > Search Product Support and enter the model name.
This equipment may be operated in all EU countries.
In France, this equipment may only be used indoors.
07 Appendix
English 49
|

Appendix
Additional Information
Note
3D Settings
• For some 3D discs, to stop a movie during 3D playback, press the 5 button once. The movie
stops and the 3D mode option is de-activated.
To change a 3D option selection when you are playing a 3D movie, press the 5 button once.
The Blu-ray menu appears. Press the 5 button again, then select 3D Settings in the Blu-ray
menu.
• Depending on the content and the position of the picture on your TV screen, you may see vertical
black bars on the left side, right side, or both sides.
TV Aspect Ratio
• Depending on the disc type, some aspect ratios may not be available.
• If you select an aspect ratio and option that is different than the aspect ratio of your TV screen,
the picture might appear to be distorted.
• If you select the 16:9 Original, your TV may display 4:3 Pillarbox (black bars on sides of picture).
BD Wise (Samsung Players only)
• When BD Wise is on, the Resolution setting automatically defaults to BD Wise and BD Wise
appears in the Resolution menu.
• If the player is connected to a device that does not support BD Wise, you can not use the BD
Wise function.
Settings
• For proper operation of BD Wise, set the BD Wise option of both the player and the TV to On.
Digital Output
• Be sure to select the correct Digital Output or you will hear no sound or just loud noise.
• If the HDMI device (AV receiver, TV) is not compatible with compressed formats (Dolby Digital,
DTS), the audio signal outputs as PCM.
• Regular DVDs do not have BONUSVIEW audio and Navigation Sound Effects.
• Some Blu-ray Discs do not have BONUSVIEW audio and Navigation Sound Effects.
• This Digital Output setup does not affect the HDMI audio output to your TV.
It affects the coaxial and HDMI audio output when your player is connected to an AV receiver.
• If you play MPEG audio soundtracks, the audio signal outputs as PCM regardless of your Digital
Output selections (PCM or Bitstream).
PCM Downsampling
• Even when PCM Downsampling is set to Off, some discs will only output downsampled audio
through the coaxial digital outputs.
• HDMI
- If your TV is not compatible with compressed multi-channel formats (Dolby Digital, DTS), the
player may output PCM 2ch downmixed audio even though you selected Bitstream (either
Reencoded or Unprocessed) in the setup menu.
- If your TV is not compatible with PCM sampling rates over 48kHz, the player may output
48kHz.
|
50 English

Settings
Media Play
BD-LIVE Internet Connection
• What is a valid certificate?
When the player uses BD-LIVE to send the disc data and a request to the server to certify the
disc, the server uses the transmitted data to check if the disc is valid and sends the certificate
back to the player.
• The Internet connection may be restricted while you are using BD-LIVE contents.
BD Data Management
• In the external memory mode, disc playback may be stopped if you disconnect the USB device in
the middle of playback.
• Only those USB devices formatted in the FAT file system (DOS 8.3 volume label) are supported.
We recommend you use USB devices that support USB 2.0 protocol with 4 MB/sec or faster
read/write speed.
• The Resume Play function may not work after you format the storage device.
• The total memory available to BD Data Management may differ, depending on conditions.
Anynet+ (HDMI-CEC)
• Depending on your TV, certain HDMI output resolutions may not work. Please refer to the user
manual of your TV.
• This function is not available if the HDMI cable does not support CEC.
• If your Samsung TV has an Anynet+ logo, then it supports the Anynet+ function.
Selecting the Audio Language
• The ◄► indicator will not appear on the screen if the BONUSVIEW section does not contain any
BONUSVIEW audio settings.
• The languages available through the Audio Language function depend on the languages that are
encoded on the disc. This function or certain languages may not be available.
• Some Blu-ray Discs may allow you to select either the PCM or Dolby Digital audio soundtrack in
English.
Selecting the Subtitle Language
• Depending on the Blu-ray Disc / DVD, you may be able to change the subtitle language in the
Disc Menu. Press the DISC MENU button.
• This function depends on the selection of subtitles that are encoded on the disc and may not be
available on all Blu-ray Discs/DVDs.
• Information about the main feature BONUSVIEW mode will also appear if the Blu-ray Disc has a
BONUSVIEW section.
• This function changes both the primary and secondary subtitles at the same time.
• The total number of primary and secondary subtitles are displayed respectively.
• If you press the SUBTITLE button on the remote control, the subtitle bar appears.
Press the RETURN button to remove the subtitle bar.
07 Appendix
English 51
|

Appendix
Resolution according to the contents type
Output
Setup
BD Wise Resolution of Blu-ray Disc 1080p 576i/480i
Auto Max. Resolution of TV input Max. Resolution of TV input Max. Resolution of TV input
1080p 1080p 1080p 1080p
Movie Frame : Auto (24Fs) 1080@24F 1080@24F -
1080i 1080i 1080i 1080i
720p 720p 720p 720p
576p/480p 576p/480p 576p/480p 576p/480p
| NOTE |
\If the TV you connected to the player does not support Movie Frame or the resolution you selected, the message "If no
pictures are shown after selecting Yes, please wait for 15 seconds before returning to the previous resolution. Do you want
to change the resolution?" appears. If you select Yes, the TV's screen will go blank for 15 seconds, and then the resolution
will revert to the previous resolution automatically.
\If the screen stays blank after you have changed the resolution, remove all discs, and then press and hold the
on the front of the player for more than 5 seconds. All settings are restored to the factory default. Run the Initial Settings
procedure again. Then, go to Settings > Display > Resolution in the Menu, and select the correct resolution for your TV.
\When you run the Initial Settings procedure, re-select the language and aspect ratio (screen size and format) only. Resetting
does not affect your network settings, so you should be able to skip Network Setup and Software Upgrade.
\When the factory default settings are restored, all stored user BD data will be deleted.
\The Blu-ray Disc must have the 24 frame feature for the player to use the Movie Frame (24Fs) mode.
Blu-ray Disc
E-contents/
Digital contents
DVD
p
button
|
52 English

Digital Output Selection
Setup PCM
Connection
PCM Up to 7.1ch PCM 2ch PCM PCM 2ch Re-encoded DTS
Dolby Digital PCM 2ch PCM 2ch Dolby Digital Dolby Digital Re-encoded DTS
Dolby Digital
Plus
Audio Stream
on Blu-ray
Disc
Audio Stream
on DVD
Definition for
Blu-ray Disc
* If Source Stream is 2ch, "Re-encoded Dolby D" Settings are not applied.
Blu-ray Discs may include three audio streams :
- Main Feature Audio : The audio soundtrack of the main feature.
- BONUSVIEW audio : An additional soundtrack such as the director or actor's commentary.
- Navigation Sound Effects : When you choose some menu navigation, Navigation Sound Effects may
sound. Navigation Sound Effects are different on each Blu-ray Disc.
Dolby TrueHD PCM 2ch PCM 2ch Dolby TrueHD Dolby Digital Re-encoded DTS
DTS PCM 2ch PCM 2ch DTS DTS Re-encoded DTS
DTS-HD High
Resolution
Audio
DTS-HD
Master Audio
PCM PCM 2ch PCM 2ch PCM 2ch PCM 2ch PCM 2ch PCM 2ch
Dolby Digital PCM 2ch PCM 2ch Dolby Digital Dolby Digital Dolby Digital Dolby Digital
DTS PCM 2ch PCM 2ch DTS DTS DTS DTS
Any
HDMI
Receiver
PCM 2ch PCM 2ch
PCM 2ch PCM 2ch
PCM 2ch PCM 2ch
Decodes main feature
audio and BONUSVIEW
audio stream together
into PCM audio and add
Navigation Sound Effects.
Coaxial
Bitstream
(Unprocessed)
HDMI
Receiver
Dolby Digital
Plus
DTS-HD High
Resolution
Audio
DTS-HD
Master Audio
Outputs only main feature
audio stream so that your
AV receiver can decode the
audio bitstream.
You will not hear
BONUSVIEW audio and
Navigation Sound Effects.
Coaxial
Dolby Digital Re-encoded DTS
DTS Re-encoded DTS
DTS Re-encoded DTS
Bitstream
(Re-encoded
DTS)
HDMI Receiver
or Coaxial
Decodes main
feature audio
and BONUSVIEW
audio stream
together into
PCM audio and
add Navigation
Sound Effects,
then re-encodes
the PCM
audio into DTS
bitstream
Bitstream
(Re-encoded
Dolby D)
HDMI supported
AV receiver or
Coaxial
Re-encoded
Dolby Digital *
Re-encoded
Dolby Digital *
Re-encoded
Dolby Digital *
Re-encoded
Dolby Digital *
Re-encoded
Dolby Digital *
Re-encoded
Dolby Digital *
Re-encoded
Dolby Digital *
Decodes main
feature audio and
BONUSVIEW audio
stream together
into PCM audio
and add Navigation
Sound Effects,
then re-encodes
the PCM audio
into Dolby Digital
bitstream
07 Appendix
English 53
|

Appendix
Troubleshooting
Before requesting service, please try the following solutions.
PROBLEM SOLUTION
No operation can be performed with the
remote control.
The disc does not play. • Ensure that the disc is installed with the label side facing up.
The disc Menu does not appear. • Ensure that the disc has disc menus.
The prohibition message appears on the
screen.
Play mode differs from the Setup Menu
selection.
The screen ratio cannot be changed. • The Screen Ratio is fixed on your Blu-ray Disc/DVD.
No audio. • Make sure you have selected the correct Digital Output in the Audio Options
The screen is blank. • If the HDMI output is set to a resolution your TV cannot support (for
• Check the batteries in the remote control. They may need replacing.
• Operate the remote control at a distance of no more than 6.1m from the
player.
• Remove the batteries and hold down one or more buttons for several
minutes to drain the microprocessor inside the remote control to reset it.
Reinstall the batteries and try to operate the remote control again.
• Check the region number of the Blu-ray Disc/DVD.
• This message appears when an invalid button is pressed.
• The Blu-ray Disc/DVD's software doesn't support the feature (e.g., angles).
• You've requested a title or chapter number or search time that is out of
range.
• Some of the functions selected in the Setup Menu may not work properly if
the disc is not encoded with the corresponding function.
• This is not a problem with the player.
Menu.
example, 1080p), you may not see a picture on your TV.
• Press the
• When the factory default settings are restored, all stored user BD data will
p
inside. All settings will revert to the factory settings.
be deleted.
button (on front panel) for more than 5 seconds with no disc
Forgot password • Press the
|
54 English
inside. All settings including the password will revert to the factory settings.
Don't use this unless absolutely necessary.
• When the factory default settings are restored, all stored user BD data will
be deleted.
p
button (on front panel) for more than 5 seconds with no disc

PROBLEM SOLUTION
If you experience other problems. • Go to the contents and find the section of the user manual that contains the
explanations regarding the current problem, and follow the procedure once
again.
• If the problem still cannot be solved, please contact your nearest Samsung
authorized service centre.
The picture is noisy or distorted • Make sure that the disc is not dirty or scratched.
• Clean the disc.
No HDMI output. • Check the connection between the TV and the HDMI jack of the player.
• Check if your TV supports 576p/480p, 720p, 1080i or 1080p HDMI input
resolution.
07 Appendix
Abnormal HDMI output screen. • If random noise appears on the screen, it means that TV does not support
AllShare function
I can see folders shared through AllShare,
but I cannot see the files.
The video plays intermittently. • Check if the network is stable.
The AllShare connection between the player
and the PC is unstable.
HDCP (High-bandwidth Digital Content Protection).
• AllShare only shows Video, Photo, and Music files. Other types of files are
not displayed.
• Check if the network cable is properly connected and if the network is not
overloaded.
• The wireless connection between the DLNA compatible device and the
player is unstable.
Check the connection.
• IP addresses within the same subnetwork should be unique.
If they are not, IP interference can cause this phenomenon.
• Check if you have a firewall enabled.
If so, disable the firewall function.
English 55
|

Appendix
PROBLEM SOLUTION
BD-LIVE
I cannot connect to the BD-LIVE server. • Test whether the network connection is successful using the Network
Status function. (See page 21)
• Check whether a USB memory device is connected to the player.
• The memory device must have at least 1GB of free space to accommodate
the BD-LIVE service.
You can check the available size in BD Data Management. (See page 22)
• See if the BD-LIVE Internet Connection option is set to Allow(All).
• If all above fails, contact the contents provider or update to the player to the
latest firmware.
When using the BD-LIVE service, an error
occurs.
| NOTE |
\When the factory default settings are restored, all stored user BD data will be deleted.
• The memory device must have at least 1GB of free space to accommodate
the BD-LIVE service.
You can check the available size in BD Data Management. (See page 22)
Repairs
If you contact us to repair your player, an administration fee may be charged if either:
1. An engineer is called out to your home at your request and there is no defect in the product.
2. You bring the unit to a repair centre and there is no defect in the product.
We will provide you with the amount of the administration fee before we make a home visit or begin any
work on your player.
We recommend you read this manually thoroughly, search for a solution on line at www.samsung.com, or
contact Samsung Customer Care before seeking to repair your player.
|
56 English

Specifications
Weight 1.8 Kg
General
USB
HDMI
Audio Output Digital Audio Output Coaxial
Network
• Network speeds equal to or below 10Mbps are not supported.
• Design and specifications are subject to change without prior notice.
• For the power supply and power consumption, refer to the label attached to the player.
• Weight and dimensions are approximate.
Dimensions 430 (W) X 194.5(D) X 37 (H) mm
Operating Temperature Range +5°C to +35°C
Operating Humidity Range 10 % to 75 %
Type A USB 2.0
DC output 5V 500mA Max.
Video
Audio PCM, Bitstream
Ethernet 100BASE - TX Terminal
Wireless LAN Built-in
Security
WPS(PBC) Supported
2D : 1080p, 1080i, 720p, 576p/480p
3D : 1080p, 720p
WEP (OPEN/SHARED)
WPA-PSK (TKIP/AES)
WPA2-PSK (TKIP/AES)
07 Appendix
English 57
|

Contact SAMSUNG WORLD WIDE
If you have any questions or comments relating to Samsung products, please contact the SAMSUNG customer
care centre.
Area Contact Centre
ALBANIA 42 27 5755 www.samsung.com
AUSTRIA
BELGIUM 02-201-24-18
BOSNIA 05 133 1999 www.samsung.com
BULGARIA 07001 33 11 www.samsung.com
CROATIA 062 SAMSUNG (062 726 7864) www.samsung.com
CZECH 800 - SAMSUNG (800-726786) www.samsung.com
DENMARK 70 70 19 70 www.samsung.com
FINLAND 030 - 6227 515 www.samsung.com
FRANCE 01 48 63 00 00 www.samsung.com
GERMANY
CYPRUS 8009 4000 only from landline www.samsung.com
GREECE
HUNGARY 06-80-SAMSUNG(726-7864) www.samsung.com
ITALIA 800-SAMSUNG(726-7864) www.samsung.com
KOSOVO +381 0113216899 www.samsung.com
LUXEMBURG 261 03 710 www.samsung.com
MACEDONIA 023 207 777 www.samsung.com
MONTENEGRO 020 405 888 www.samsung.com
0810 - SAMSUNG (7267864,
€ 0.07/min)
01805 - SAMSUNG(726-7864
€ 0,14/Min)
80111-SAMSUNG (80111 726
7864) only from land line
(+30) 210 6897691 from mobile
and land line
Web Site
www.samsung.com
www.samsung.com/be
(Dutch)
www.samsung.com/be_
fr (French)
www.samsung.com
www.samsung.com
Correct disposal of batteries in this product
(Applicable in the European Union and other European countries with separate battery return systems.)
This marking on the battery, manual or packaging indicates that the batteries in this product should not be disposed of
with other household waste at the end of their working life. Where marked, the chemical symbols Hg, Cd or Pb indicate
that the battery contains mercury, cadmium or lead above the reference levels in EC Directive 2006/66.
If batteries are not properly disposed of, these substances can cause harm to human health or the environment.
To protect natural resources and to promote material reuse, please separate batteries from other types of waste and
recycle them through your local, free battery return system.
Area Contact Centre
NETHERLANDS
NORWAY 815-56 480 www.samsung.com
POLAND
PORTUGAL
ROMANIA
SERBIA
SLOVAKIA
SPAIN
SWEDEN 0771 726 7864 (SAMSUNG) www.samsung.com
Switzerland
U.K 0330 SAMSUNG (7267864) www.samsung.com
EIRE 0818 717100 www.samsung.com
LITHUANIA 8-800-77777 www.samsung.com
LATVIA 8000-7267 www.samsung.com
ESTONIA 800-7267 www.samsung.com
0900-SAMSUNG (0900-
7267864) (€ 0,10/Min)
0 801-1SAMSUNG(172-678)
+48 22 607-93-33
808 20-SAMSUNG (808 20
7267)
08010 SAMSUNG (08010 726
7864) only from landline
(+40) 21 206 01 10 from mobile
and land line
0700 Samsung (0700 726
7864)
0800 - SAMSUNG(0800-726
786)
902 - 1 - SAMSUNG (902 172
678)
0848 - SAMSUNG(7267864,
CHF 0.08/min)
Web Site
www.samsung.com
www.samsung.com
www.samsung.com
www.samsung.com
www.samsung.com
www.samsung.com
www.samsung.com
www.samsung.com/ch
www.samsung.com/ch_
fr (French)
Correct Disposal of This Product (Waste Electrical & Electronic Equipment)
(Applicable in the European Union and other European countries with separate collection systems)
This marking on the product, accessories or literature indicates that the product and its electronic accessories (e.g.
charger, headset, USB cable) should not be disposed of with other household waste at the end of their working life.
To prevent possible harm to the environment or human health from uncontrolled waste disposal, please separate these
items from other types of waste and recycle them responsibly to promote the sustainable reuse of material resources.
Household users should contact either the retailer where they purchased this product, or their local government office,
for details of where and how they can take these items for environmentally safe recycling.
Business users should contact their supplier and check the terms and conditions of the purchase contract.
This product and its electronic accessories should not be mixed with other commercial wastes for disposal.
AK68-02231C-00

BD-E6100
Blu-ray
Bedienungsanleitung
erleben sie die möglichkeiten
Danke für den Kauf dieses Samsung Produkts.
Registrieren Sie Ihr Produkt unter folgendem Link, und
profitieren Sie von unserem umfassenden Kundenservice:
www.samsung.com/register
™
Disc Player
Sicherheitsinformation
Warnung
ABDECKUNG ODER RÜCKWAND NICHT ÖFFNEN! STROMSCHLAGGEFAHR! TEILE IM GERÄTEINNEREN
KÖNNEN VOM BENUTZER NICHT GEWARTET WERDEN. LASSEN SIE REPARATUREN NUR VON
QUALIFIZIERTEM FACHPERSONAL DURCHFÜHREN.
ACHTUNG
STROMSCHLAGGEFAHR!
NICHT ÖFFNEN!
Dieses Symbol weist auf eine „
gefährliche Netzspannung“ im Inneren
des Geräts hin. Es besteht die Gefahr
von Stromschlägen und Verletzungen.
ACHTUNG : NEHMEN SIE DIE ABDECKUNG ODER RÜCKWAND AUF
KEINEN FALL AB, UM DAS RISIKO EINES ELEKTRISCHEN SCHLAGS
ZU VERRINGERN. IM INNEREN BEFINDEN SICH KEINE TEILE, DIE VOM
BENUTZER GEWARTET WERDEN MÜSSEN LASSEN SIE REPARATUREN
NUR VON QUALIFIZIERTEM FACHPERSONAL DURCHFÜHREN.
Dieses Symbol weist auf wichtige Anweisungen
im Begleitmaterial zum Produkt hin.
Achten Sie beim Aufstellen des Geräts darauf,
dass genügend Platz zur Verfügung steht. Stellen
Sie das Gerät daher beispielsweise nicht in einem
engen Bücherregal auf.
WARNUNG
Um Schäden zu vermeiden, die eine Brand- oder
Stromschlaggefahr nach sich ziehen können, setzen
Sie dieses Gerät nicht Regen oder Feuchtigkeit aus.
ACHTUNG
IN DIESEM BLU-RAY DISC-PLAYER KOMMT EIN
UNSICHTBARER LASERSTRAHL ZUM EINSATZ,
DER ZU VERLETZUNGEN ODER SCHÄDEN
FÜHREN KANN, WENN ER DIREKT AUF PERSONEN
ODER GEGENSTÄNDE GERICHTET WIRD. BEDIENEN
SIE DEN BLU-RAY DISC-PLAYER AUSSCHLIESSLICH
GEMÄSS DEN ANWEISUNGEN IN DER
BEDIENUNGSANLEITUNG.
ACHTUNG
ÖFFNEN SIE KEINE ABDECKUNGEN,
UND FÜHREN SIE REPARATURARBEITEN
NIEMALS SELBST AUS. LASSEN SIE
REPARATUREN NUR VON QUALIFIZIERTEM
KUNDENDIENSTPERSONAL DURCHFÜHREN.
Dieses Produkt erfüllt die CE-Richtlinien für
abgeschirmte Kabel und Anschlüsse zur
Verbindung mit anderen Geräten. Um eine
elektromagnetische Beeinflussung anderer Geräte
(z. B. Radios und Fernsehgeräte) zu vermeiden,
verwenden Sie nur abgeschirmte Kabel und
Anschlüsse für die Verbindungen.
WICHTIGER HINWEIS
Das Netzkabel dieses Geräts ist mit einem Formstecker
mit integrierter Sicherung ausgestattet. Die
Nennspannung dieser Sicherung ist auf der Unterseite
des Steckers angegeben.
Im Bedarfsfall ist die Sicherung gegen eine Sicherung
nach BS 1362 (bzw. der jeweiligen Entsprechung dieser
Norm) mit derselben Nennspannung auszutauschen.
Verwenden Sie den Stecker keinesfalls, wenn die
Sicherungsabdeckung entfernt ist, sofern diese
abnehmbar ist. Wenn eine Ersatzabdeckung für
die Sicherung benötigt wird, muss diese dieselbe
Farbe wie die Stiftseite des Steckers haben.
Ersatzabdeckungen sind im Fachhandel erhältlich.
Falls der montierte Stecker nicht für die Steckdosen
in Ihrem Haushalt geeignet ist oder das Kabel nicht
bis zu einer Steckdose reicht, erwerben Sie ein
geeignetes, geprüftes Verlängerungskabel oder
wenden Sie sich an Ihren Fachhändler.
Wenn es keine andere Möglichkeit als das
Abtrennen des Steckers vom Kabel gibt, entfernen
Sie die Sicherung, und entsorgen Sie den Stecker
ordnungsgemäß. Stecken Sie den Stecker nicht
in eine Steckdose. Es besteht Stromschlaggefahr
durch die nicht isolierten Enden des Stromkabels.
Entfernen Sie den Stecker aus der Steckdose, um das
Gerät vollständig abzuschalten. Aus diesem Grund
sollte sich der Netzstecker in Reichweite befinden.
Die zu diesem Benutzerhandbuch
gehörige Produkteinheit ist unter geistigen
Eigentumsrechten Dritter lizenziert.
|
2 Deutsch

CLASS 1 LASER PRODUCT
Dieses Compact Disk Gerät ist als CLASS 1
LASER Produkt eingestuft. Die Verwendung von
anderen Bedienelementen, Einstellungen oder
die Durchführung von Prozeduren die von denen
hier angegebenen abweichen, können zu einer zu
einer gefährlichen Strahlenbelastung führen.
ACHTUNG :
• NACH DEM ÖFFNEN SICHTBARE UND
UNSICHTBARE LASERSTRAHLUNG DER
KLASSE 3B. EINWIRKUNG DES STARHLS
VERMEIDEN (IEC 60825-1)
• DIESES GERÄT VERWENDET EINEN LASER.
Die Verwendung von anderen Bedienelementen,
Einstellungen oder die Durchführung von
Prozeduren die von denen hier angegebenen
abweichen, können zu einer zu einer
gefährlichen Strahlenbelastung führen. DAS
GEHÄUSE NICHT ÖFFNEN UND KEINE
REPARATUREN SELBST DURCHFÜHREN.
QUALIFIZIERTES PERSONAL MIT DER
WARTUNG BEAUFTRAGEN.
CLASS 1 LASER PRODUCT
KLASSE 1 LASER PRODUKT
LUOKAN 1 LASER LAITE
KLASS 1 LASER APPARAT
PRODUCTO LÁSER CLASE 1
Vorsichtsmaßnahmen
Wichtige Sicherheitshinweise
Lesen Sie diese Bedienungsanleitung sorgfältig
durch, bevor Sie das Gerät in Betrieb nehmen.
Befolgen Sie alle folgenden Sicherheitshinweise.
Halten Sie sie diese Bedienungsanleitung zur
späteren Einsichtnahme griffbereit.
1. Lesen Sie diese Anweisungen.
2. Bewahren Sie diese Anweisungen auf.
3. Beachten Sie alle Warnhinweise.
4. Befolgen Sie alle Anweisungen.
5.
Betreiben Sie das Gerät nicht in der Nähe von Wasser.
6. Nur mit einem trockenen Tuch reinigen.
Blockieren Sie nicht die Belüftungsöffnungen.
7.
Halten Sie sich bei der Aufstellung und beim
Anschließen an die Anweisungen des Herstellers.
8. Nicht in der Nähe von Wärmequellen wie
Heizkörpern, Warmluftgittern, Öfen oder
anderen Wärme erzeugenden Apparaten
(einschließlich AV-Receiver) aufstellen.
9. Nehmen Sie unter keinen Umständen
Änderungen am gepolten oder geerdeten
Schutzkontaktstecker vor. Ein gepolter
Stecker verfügt über zwei Kontaktstifte, von
denen einer breiter ist als der andere. Ein
geerdeter Stecker verfügt über zwei Stiften
sowie einen Erdungskontakt. Der breite
Kontaktstift bzw. der Erdungsstift wird aus
Sicherheitsgründen verwendet. Falls der
vorhandene Stecker nicht in Ihre Steckdose
passt, lassen Sie die Steckdose durch einen
qualifizierten Elektriker austauschen.
10. Nicht auf das Netzkabel treten und
insbesondere an den Steckern,
Steckerbuchsen und an der Stelle aus dem
es aus dem Gerät austritt nicht knicken.
11. Zubehör und/oder Zusatzgeräte dürfen nur
mit Genehmigung des Herstellers hinzugefügt
werden.
12. Verwenden Sie für das
Gerät nur Gestelle, Ständer,
Stative, Konsolen und
Tische, die vom Hersteller
empfohlen oder in
Verbindung mit dem Gerät
verkauft werden. Bei Verwendung eines
Transportwagens bewegen Sie das Gerät
nur mit äußerster Vorsicht, um Verletzungen
durch Umkippen zu vermeiden.
13. Trennen Sie das Gerät bei Gewitter oder
längerer Abwesenheit vom Stromnetz.
14.
Überlassen Sie Reparaturarbeiten stets
Fachleuten. Eine Wartung ist immer dann
erforderlich, wenn das Gerät auf irgendeine
Weise beschädigt wurde, beispielsweise bei
beschädigtem Netzkabel oder Stecker, bei in
das Gerät gelangter Flüssigkeit oder Objekten,
wenn das Gerät Regen oder Feuchtigkeit
ausgesetzt war, nicht ordnungsgemäß arbeitet
oder fallengelassen wurde.
01 Sicherheitsinformation
Deutsch 3
|
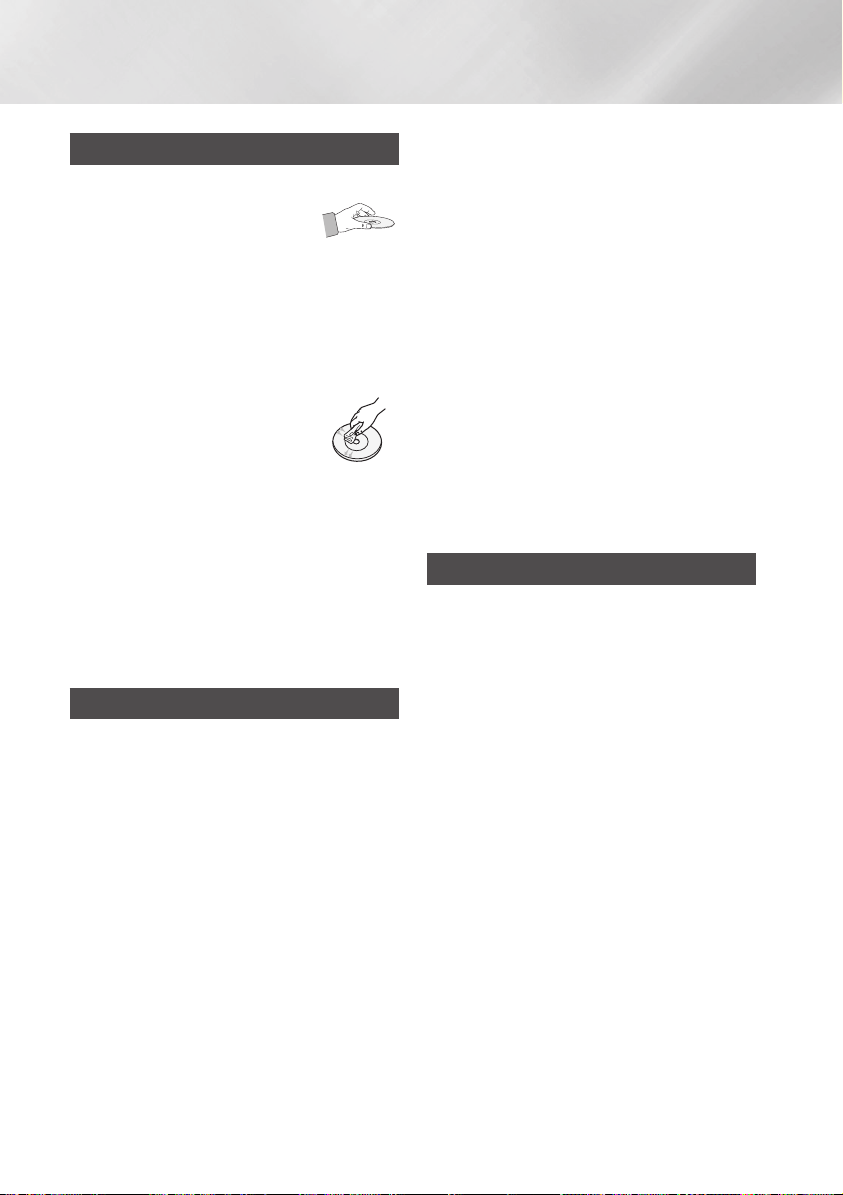
Sicherheitsinformation
Lagerung und Handhabung der Disks
• Umgang mit den Disks
- Fingerabdrücke oder Kratzer auf
der Disk verschlechtern die Tonund Bildqualität oder bewirken
eine springende Wiedergabe.
- Vermeiden Sie das Berühren der Oberfläche
der Disk, auf der die Daten gespeichert sind.
- Halten Sie die Disk am Rand fest, sodass keine
Fingerabdrücke auf die Oberfläche gelangen.
- Kein Papier oder Aufkleber auf die Disk kleben.
• Reinigung der Disks
- Wenn sich Fingerabdrücke oder
Schmutz auf der Disk befinden,
mit Seifenwasser und einem
weichen Tuch reinigen.
- Beim Reinigen vorsichtig von
innen in Richtung des Randes der Disk
wischen.
• Disk-Lagerung
`Setzen Sie die Disk keiner direkten
Sonneneinstrahlung aus.
`Bewahren Sie die Disk an einem kühlen, gut
belüfteten Ort auf.
`Bewahren Sie die Disk in einer sauberen
Schutzhülle auf und lagern Sie sie senkrecht.
Vorsichtsmaßnahmen für den B
• Das Gerät keinem Tropf- oder Spritzwasser
aussetzen. Keine mit Flüssigkeiten gefüllten
Behälter, wie Vasen, auf das Gerät stellen.
• Um das Gerät vollständig abzuschalten, muss
der Netzstecker aus der Steckdose gezogen
werden. Aus diesem Grund muss der Stecker
immer einfach und unbehindert zugänglich sein.
• Schließen Sie nicht mehrere Geräte an die
gleiche Steckdose an. Eine Überlastung der
Steckdose kann zu Überhitzung führen und
einen Brand verursachen.
etrieb
• Wartung des Gehäuses.
- Wenn Sie andere Komponenten an diesen Player
anschließen, müssen diese vorher abgeschaltet werden.
- Wenn der Player plötzlich von einem kalten an einen
warmen Ort umgestellt wird, kann es zu einer
Kondensation an den Betriebsteilen und der Linse
kommen, was zu einer fehlerhaften Wiedergabe der
Disk führen kann. Falls dieser Fall eintritt, den Netzstecker
des Players ziehen, zwei Stunden warten und den
Stecker erneut in die Steckdose stecken.
Anschließend die Disk einlegen und die Wiedergabe
erneut versuchen.
•
Wenn Sie unnormale Geräusche, einen
stechenden Geruch oder Rauch wahrnehmen,
schalten Sie das Gerät unverzüglich über den
Netzschalter aus und ziehen Sie den Netzstecker.
Setzen Sie sich anschließend mit dem nächsten
Kundendienst in Verbindung um technische Hilfe
zu erhalten. Das Gerät nicht verwenden. Die
Verwendung des Gerät in diesem Zustand kann
einen Brand oder Elektroschock verursachen.
3D-Funktion verwenden
WICHTIGE GESUNDHEITS- UND
SICHERHEITSHINWEISE FÜR 3D-BILDER
Lesen Sie die folgenden Sicherheitshinweise,
bevor Sie die 3D-Funktion nutzen und stellen Sie
sicher, dass Sie diese verstanden haben.
• Bei einigen Zuschauer können beim Anschauen
von 3D-Fernsehen Beschwerden auftreten, wie
Schwindel, Übelkeit und Kopfschmerzen.
Wenn bei Ihnen solche Symptome auftreten,
unterbrechen Sie das Anschauen des 3D
Programms, setzen Sie die 3D-Brille ab und
machen Sie eine Pause.
• Das Betrachten von 3D-Bildern für einen
längeren Zeitraum kann die Augen überlasten.
Wenn Sie eine Ermüdung der Augen verspüren,
unterbrechen Sie das Anschauen des 3D
Programms, setzen Sie die 3D-Brille ab und
machen Sie eine Pause.
• Eltern müssen Kinder beaufsichtigen, wenn
diese die 3D-Funktion nutzen.
Wenn die Kinder über ermüdete Augen,
Kopfschmerzen, Schwindelgefühl oder Übelkeit
klagen, unterbrechen Sie die Wiedergabe des
3D-Programms und lassen Sie die Kinder
ausruhen.
• Die 3D-Brille nicht für andere Zwecke
verwenden (wie als normale Brille, Sonnenbrille,
Schutzbrille usw.).
|
4 Deutsch

•
Verwenden Sie die 3D-Funktion oder die 3D-Brille nicht
während Sie umherlaufen. Wenn Sie die 3D-Funktion
oder die 3D-Brille verwenden während Sie umherlaufen,
können Sie gegen Gegenstände prallen, stolpern und/
oder hinfallen und sich ernsthaft verletzen.
•
Wenn Sie 3D-Inhalte genießen möchten, schließen
Sie das 3D-Gerät (3D-fähiger AV-Receiver oder
Fernsehgerät) über ein HochgeschwindigkeitsHDMI-Kabel an den HDMI OUT Anschluss des
Players an. Setzen Sie eine 3D-Brille auf, bevor Sie
den 3D-Inhalt wiedergeben.
• Der Player gibt 3D-Signale nur über an den
HDMI OUT-Anschluss angeschlossene HDMIKabel wieder.
• Da die Videoauflösung im 3D-Wiedergabemodus
fest auf die Auflösung des original 3D-Videos
eingestellt ist, kann die Auflösung nicht an Ihre
Vorlieben angepasst werden.
•
Einige Funktionen, wie BD Wise, die Einstellung
der Bildschirmgröße und Auflösung können im
3D-Wiedergabemodus eventuell nicht richtig
funktionieren.
• Für die korrekte Wiedergabe von 3D Signalen
müssen Sie ein Hochgeschwindigkeits-HDMIKabel verwenden.
• Bei der Betrachtung von 3D-Bildern müssen
Sie einen Abstand vom Fernsehgerät von
mindestens dreimal die Bildschirmbreite
einhalten. Wenn Sie z. B. einen 46 Zoll
Bildschirm haben, müssen Sie einen Abstand
von 3,5 Meter vom Bildschirm einhalten.
• Um beste 3D-Bilder zu erhalten, müssen
Sie den 3D-Videobildschirm in Augenhöhe
aufstellen.
• Beim Anschluss dieses Players an einige
3D-Geräte kann der 3D-Effekt nicht richtig
funktionieren.
• Dieser Player kann keinen 2D-Inhalt nach 3D
konvertieren.
• "Blu-ray 3D" und das "Blu-ray 3D" Logo sind
eingetragene Markenzeichen der Blu-ray Disc
Association.
01 Sicherheitsinformation
Copyright
© 2012 Samsung Electronics Co.,Ltd.
Alle Rechte vorbehalten. Ohne vorherige
schriftliche Genehmigung von Samsung
Electronics Co.,Ltd. ist das vollständige oder
teilweise Reproduzieren oder Kopieren dieser
Bedienungsanleitung nicht gestattet.
Deutsch 5
|

Inhalt
SICHERHEITSINFORMATION
2 Warnung
3 Vorsichtsmaßnahmen
3 Wichtige Sicherheitshinweise
4 Lagerung und Handhabung der Disks
4 Vorsichtsmaßnahmen für den B
4 3D-Funktion verwenden
5 Copyright
etrieb
ERSTE SCHRITTE
8 Kompatible Disks und Formate
8 Disktypen und Inhalte, die Ihr Player
8 Disktypen und Inhalte, die Ihr Player nicht
9 Regionalcode
9 Logos der vom Player wiedergegebenen
10 Unterstützte Formate
12 Zubehör
13 Vorderseite
13 Rückseite
14 Fernbedienung
14 Übersicht der Fernbedienung
wiedergeben kann.
wiedergeben kann.
Disk-Typen
ANSCHLÜSSE
15 Anschluss an ein Fernsehgerät
16 Anschluss an ein Audiosystem
16 Methode 1 Anschließen an einen AV-
16 Methode 2 Anschließen an einen AV-
17 Anschließen an einen Netzwerk Router
17 Kabelnetzwerk
17 WLAN-Netzwerk
Receiver mit HDMI Unterstützung
Receiver mit Dolby Digital oder DTS
Decoder
EINSTELLUNGEN
18 Ersteinstellungen konfigurieren
18 Der Home Bildschirm
19 Zugriff auf den Einstellungen Bildschirm
19 Im Einstellungen Menü verwendete
20 Einstellungen Menü Funktionen
25 Netzwerke und das Internet
25 Konfigurieren Ihrer Netzwerkverbindung
27 Wi-Fi Direkt
28 Soft-AP
29 AllShare Einstellungen
29 Aktualisieren der Software
29 Online
30 PER USB
30 Über Disk
30 Über Download
31 Update im Standby
Fernbedienungstasten
MEDIA PLAY
32 Wiedergabe von kommerziellen Video
Disks
32 Der AllShare Play Bildschirm
32 Zugriff auf den AllShare Play Bildschirm
32 Der AllShare Wiedergabebildschirm im
32 Wiedergabe von Dateien auf einem USB-
33
33 Musik Bildschirm Steuerelemente
34
34
34 Herunterladen der AllShare Software
35
35 Steuern der Wiedergabe des sich auf
Überblick
Gerät oder einem USB kompatiblen
Mobiltelefon
Wiedergabe von kommerziellen Audio Disks
Wiedergabe von selbst aufgenommenen Disks
Verwenden der AllShare Netzwerkfunktion
Wiedergabe von Inhalten auf Ihrem PC oder
DLNA-Gerät über den Blu-ray Disc-Player
Ihrem PC befindenden Inhalts mit Hilfe
Ihres Smartphones
|
6 Deutsch

36 Steuern der Videowiedergabe
36 Tasten auf der Fernbedienung für die
Videowiedergabe
36 Extras Menü verwenden
38 Steuern der Musikwiedergabe
38 Tasten auf der Fernbedienung für die
Musikwiedergabe
38 Extras Menü verwenden
39 Wiederholen von Titeln auf einer Audio CD.
39 Wiedergabe der Titel auf einer Audio CD in
zufälliger Reihenfolge
39 Wiedergabeliste für eine CD erstellen
39 Ripping
40 Anzeigen von Fotos
40 Extras Menü verwenden
41 Verwenden des Extras Menü, wenn eine
Datei markiert ist
NETZWERKDIENSTE
43 Smart Hub verwenden
43 Smart Hub Übersicht
44 Verwenden des Webbrowsers
45 BD-LIVE™
ANHANG
46 Übereinstimmungs- und
Kompatibilitätshinweis
47 KOPIERSCHUTZ
47 Netzwerkdienst Haftungsausschluss
48 Lizenz
50 Zusätzliche Informationen
50 Hinweis
52 Auflösung nach Art des Inhalts
53 Auswahl des Digitalausgangs
54 Problembehebung
56 Reparaturen
57 Technische Daten
Inhalt
Deutsch 7
|

Erste Schritte
Kompatible Disks und Formate
Disktypen und Inhalte, die Ihr Player wiedergeben kann.
Medium Disktyp Details
Blu-ray Disc
3D Blu-ray Disc
VIDEO
MUSIK
FOTO
| HINWEIS |
\
Der Player kann unter Umständen einige CD-RW/-R und DVD-R Disks aufgrund des Disktyps oder der Aufnahmebedingungen
nicht wiedergeben.
\Wenn eine DVD-RW/-R nicht korrekt im DVD-Videoformat aufgenommen wurde, kann sie nicht wiedergegeben werden.
\Der Player kann keine Inhalte auf DVD-Rs wiedergeben, die bei einer Bitrate von mehr als 10 Mbps aufgenommen wurden.
\Der Player kann keine Inhalte auf BD-R Disks oder USB-Geräten wiedergeben, die bei einer Bitrate von mehr als 25 Mbps
aufgenommen wurden.
\Auf einigen Disktypen oder bei der Verwendung von speziellen Funktionen, wie die Änderung des Winkels und der Einstellung
des Bildformats, kann die Wiedergabe nicht funktionieren. Ausführlichere Informationen zu den Disks finden Sie auf der
jeweiligen Verpackung. Lesen Sie diese Informationen bei Bedarf durch.
\Bei der Wiedergabe eines BD-J Titels kann das Laden länger dauern als bei einem normalen Titel oder einige Funktionen
können langsamer ausgeführt werden.
DVD-VIDEO
DVD-RW
DVD-R
DVD+RW
DVD+R
CD-RW/-R,
DVD-RW/-R,
BD-RE/-R
CD-RW/-R,
DVD-RW/-R,
BD-RE/-R
BD-ROM oder BD-RE/-R, aufgezeichnet im BD-RE Format.
DVD-VIDEO, Aufnahme DVD+RW/DVD-RW(V)/DVD-R/+R abgeschlossene Aufnahme,
oder USB-Speichermedium mit DivX, MKV, MP4 Inhalt.
Auf CD-RW/-R, DVD-RW/-R, BD-RE/-R oder einem USB-Speichergerät aufgezeichnete
Musik im MP3 oder WMA Format.
Auf CD-RW/-R, DVD-RW/-R, BD-RE/-R oder einem USB-Speichergerät aufgenommene
Musik im JPEG Format.
Disktypen und Inhalte, die Ihr Player nicht wiedergeben kann.
• HD DVD
• DVD-ROM/PD/
MV, usw.
|
8 Deutsch
• DVD-RAM
• Super Audio CD (außer
CD-Layer)
• DVD-RW (VR-Modus)
• CVD/CD-ROM/CDV/
CD-G/CD-I/LD(CD-Gs
nur Audio Wiedergabe
ohne Grafik.)
• 3.9 GB DVD-R für
Videoschnittarbeiten.
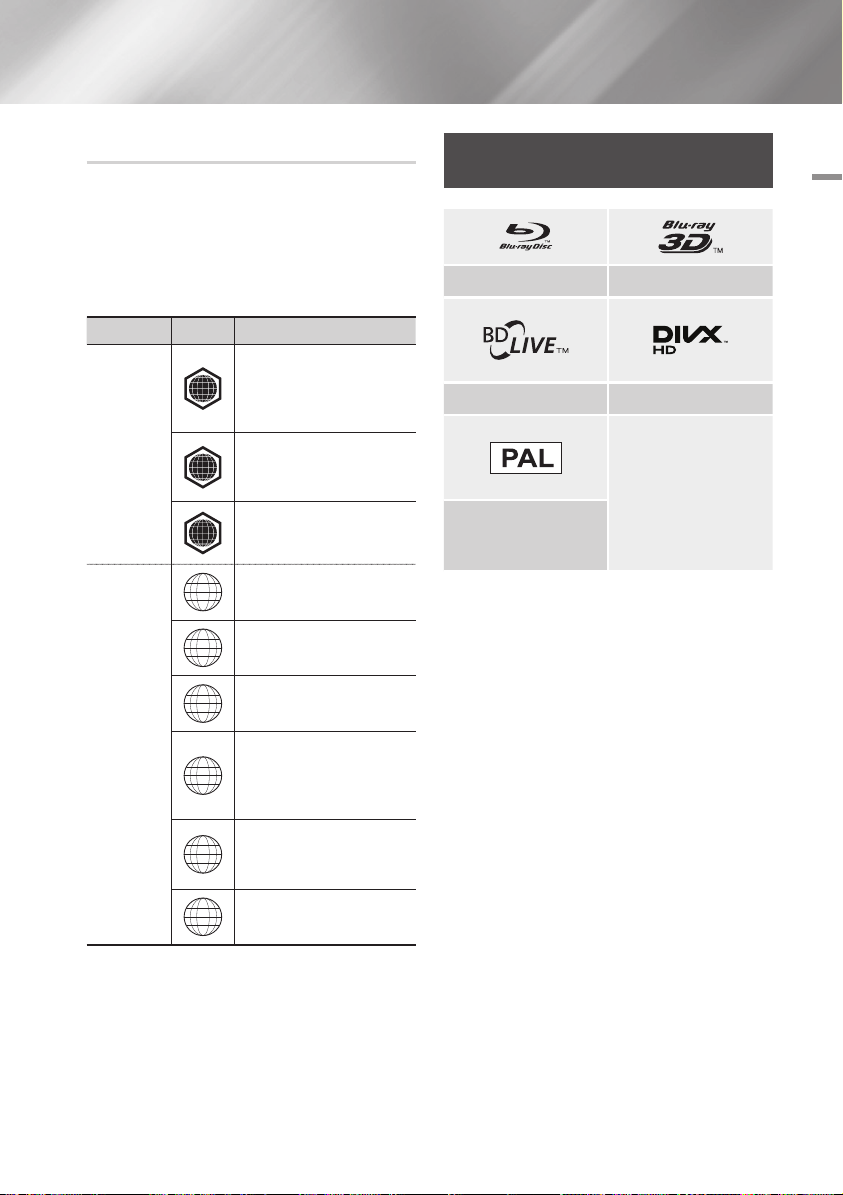
Regionalcode
Sowohl Player als auch Disks sind nach Regionen
codiert. Diese Regionalcodes müssen für die
Wiedergabe einer Disk übereinstimmen. Wenn die
Codierungen nicht übereinstimmen, kann die Disk
nicht abgespielt werden.
Die Nummer der Region für dieses Gerät ist auf
der Gehäuserückwand angebracht.
Logos der vom Player
wiedergegebenen Disk-Typen
Blu-ray Disc 3D Blu-ray Disk
02 Erste Schritte
Disktyp
Blu-ray Disc
DVD-VIDEO
Regionalcode
Nordamerika, Mittelamerika,
Südamerika, Korea, Japan,
A
Taiwan, Hongkong und
Sudostasien.
Europa, Grönland, Französische
Überseegebiete, Naher Osten,
B
Afrika, Australien und Neuseeland
Indien, China, Russland, Zentral-
C
und Südasien.
USA, US-Territorien und Kanada
1
Europa, Japan, Naher Osten,
2
Ägypten, Südafrika, Grönland
Taiwan, Korea, Philippinen,
3
Indonesien, Hongkong
Mexiko, Südamerika,
Mittelamerika, Australien,
4
Neuseeland, Pazifische Inseln,
Karibik
Russland, Osteuropa, Indien, die
meisten afrikanischen Länder,
5
Nordkorea, Mongolei
Region
BD-LIVE DivX
PAL-Fernsehsystem in
Großbritannien, Frankreich,
Deutschland, usw.
6
China
Deutsch 9
|

Erste Schritte
Unterstützte Formate
Unterstützte Videodatei
Dateierweiterung
*.avi
*.mkv
*.asf
*.wmv
*.mp4
*.3gp
*.vro
*.mpg
*.mpeg
*.ts
*.tp
*.trp
`Einschränkungen
- Auch wenn eine Datei durch ein oben aufgelistetes, unterstütztes Codec codiert ist, kann die Datei nicht
wiedergegeben werden, wenn der Inhalt defekt oder beschädigt ist.
- Die normale Wiedergabe wird nicht garantiert, wenn die Dateiinformationen im Container falsch sind
oder die Datei selbst beschädigt ist.
- Dateien mit einer höheren Bitrate oder Bildfrequenz als der Standard können bei der Wiedergabe stottern.
- Die Suche (Überspringen) Funktion steht nicht zur Verfügung, wenn die Indextabelle der Datei
beschädigt ist.
- Wenn eine Datei über ein Netzwerk wiedergegeben wird, kann die Videowiedergabe, je nach der zur
Verfügung stehenden Netzwerkgeschwindigkeit, stottern.
- Einige USB-Geräte oder Digitalkameras können unter Umständen nicht mit dem Player kompatibel sein.
`Video Decoder
- Unterstützung von H.264 bis Level 4.1
- GMC 2 oder höher wird nicht unterstützt
`Audio Decoder
- Unterstützt WMA 7, 8, 9 und STD
- Wenn die Anzahl der Kanäle mehr als zwei beträgt wird WMA 9 PRO oder verlustfreies Audio nicht unterstützt.
- Eine WMA - Abtastfrequenz von 22050Hz Mono wird nicht unterstützt.
Container Video Codec Auflösung
DivX 3.11/4.x/
AVI
MKV
ASF
MP4
3GP
VRO
VOB
PS
TS
5.x/6.1
MPEG4 SP/ASP
H.264 BP/
MP/HP
Window Media
Video v9
MPEG2
MPEG1 352x288
1920x1080
1920x1080
Bildfrequenz
(fps)
6~30
24/25/30
24/25/3 20
Bitrate (Mbps) Audio Codec
20
25
25
Dolby Digital
LPCM
AAC
HE-AAC
WMA
DD+
MP3
DTS
|
10 Deutsch

`Bemerkungen
- MPEG4 : Unterstützt 1 Warp Point GMC.
- H.264 : Unterstützt BP/MP/HP Level 4.1.
- WMV : V9, VC1 SP/MP/AP L3 wird unterstützt.
- MPEG1 : D-picture wird nicht unterstützt.
- MPEG2 : Unterstützung bis zu Hight Profile High
Level.
Ğ
Unterstützung der DivX Untertitelformate
*.ttxt, *.smi, *.srt, *.sub, *.txt
| HINWEIS |
\Einige DivX, MKV- und MP4-Diskformate können je nach
deren Videoauflösung und der Bildfrequenz möglicherweise
nicht wiedergegeben werden.
Unterstützte Musikdatei
Dateierweiterung
*.mp3
*.wma
Container
MP3
WMA
Audio
Codec
MP3 -
WMA
Unterstützter
Bereich
* Abtastfrequenzen
(in kHz) - 8, 11, 16,
22, 32, 44.1, 48
* Bitraten Alle
Bitraten im Bereich
von 5kbps bis
384kbps
Hinweise für den USB-Anschluss
• Ihr Player unterstützt USB-Speichergeräte, MP3Player, Digitalkameras, USB-Kartenlesegeräte.
•
Einige USB-Geräte oder Digitalkameras können unter
Umständen nicht mit dem Player kompatibel sein.
•
Ihr Player unterstützt das FAT16, FAT32, und NTFS
Dateisystem.
•
Schließen Sie USB-Geräte direkt an den USBAnschluss des Geräts an. Der Anschluss über
ein USB-Kabel kann zu Kompatibilitätsproblemen
führen.
• Wenn mehr als ein Speichergerät in einen MultiKartenleser eingelegt wird, kann dies zu einer
Fehlfunktion des Players führen.
• Der Player unterstützt das PTP-Protokoll nicht.
• Das USB-Gerät nicht während eines
Ladevorgangs entfernen.
• Je größer die Bildauflösung, desto länger dauert
die Anzeige des Bildes.
•
Der Player kann keine MP3-Dateien mit DRM
(Digital Rights Management) abspielen, die von
kommerziellen Webseiten heruntergeladenen wurden.
• Ihr Gerät unterstützt nur Videos mit einer
Bildfrequenz von unter 30 BpS.
• Das Gerät unterstützt nur USB Mass Storage
Class (MSC) Geräte, wie USB-Sticks und USBFestplatten. (HUBs werden nicht unterstützt)
• Bestimmte USB-Festplatten, Multi-Kartenleser
und USB-Sticks sind unter Umständen mit
diesem Gerät nicht kompatibel.
•
Wenn ein USB-Gerät einen hohen Stromverbrauch
aufweist, kann die Funktion des USB-Geräts von
der Sicherheitsschaltung eingeschränkt werden.
•
Wenn die Wiedergabe über eine USB-Festplatte nicht
stabil ist, schließen Sie die Festplatte an eine Steckdose
an, um eine bessere Stromversorgung zu gewährleisten.
Wenn das Problem weiterhin auftritt, setzen Sie sich bitte
mit dem Hersteller der USB-Festplatte in Verbindung.
•
Sie müssen das USB-Speichergerät sicher
entfernen
Funktion durch) um die gespeicherten Daten auf
Ihrem USB-Gerät nicht zu beschädigen.
Drücken Sie die HOME Taste, um zum Home
Bildschirm zu wechseln, danach die GELB (C)
Taste, und anschließend die v Taste drücken.
• SAMSUNG über nimmt keine Haftung für die
Beschädigung von Dateien oder Datenverlust.
• Der Player unterstützt keine komprimierten,
geteilten Dateien und das NTFS Dateisystem
(führen Sie die “USB sicher entfernen“
- Wenn Sie ein USB-Gerät entfernen, verwenden
Sie bitte USB-Gerät sicher entfernen.
- Wenn das USB-Gerät nicht sicher entfernt
wird, können die Daten auf dem USB-Gerät
beschädigt werden oder verloren gehen.
- Sie können USB-Geräte kann mit Hilfe Ihres
PCs reparieren oder formatieren. (nur MSWindows Betriebssystem)
02 Erste Schritte
Deutsch 11
|

Erste Schritte
AVCHD (Advanced Video Codec Höchauflösung)
• Dieses Gerät kann Disks im AVCHD Format wiedergeben. Diese Disks werden normalerweise
aufgezeichnet und in Camcordern verwendet .
• Das AVCHD-Format ist ein hochauflösendes digitales Videokameraformat.
• Das MPEG-4 AVC/H.264 Format komprimiert Bilder effizienter als das herkömmliche
Bildkomprimierungsformat.
• Einige AVCHD-Disks verwenden das “ x.v.Color” Format. Dieses Gerät kann AVCHD-Disks
wiedergeben, die das “ x.v.Color" Format verwenden.
• “ x.v.Color” ist eine Handelsmarke von Sony Corporation.
• “ AVCHD" und das AVCHD Logo sind ein eingetragenes Warenzeichen von Matsushita Electronic
Industrial Co., Ltd. und Sony Corporation.
| HINWEIS |
\Einige AVCHD-Disks können je nach Aufnahmebedingungen nicht wiedergegeben werden.
Mit AVCHD formatierte Disks müssen abgeschlossen werden.
\“ x.v.Color” bietet einen größeren Farbbereich als normale Camcorder DVDs.
Zubehör
Überprüfen Sie, ob das unten aufgelistete Zubehör mitgeliefert wurde.
SOURCE
VOL VOL
– +
VOL
+
VOL
–
SAMSUNG TV
1
2
3
4
5
6
7
8
9
DISC MENU
TITLE MENU
POPUP
0
HOME REPEAT
SMART
Batterien für die Fernbedienung (Größe AAA)
HOME
HUB
RETURN
A B C D
BONUS SUBTITLE FULL
AUDIO
VIEW
PANDORA
DIGITAL
SUBTITLE
INFOTOOLS
EXIT
SCREEN
INPUT
|
12 Deutsch
Benutzerhandbuch Fernbedienung
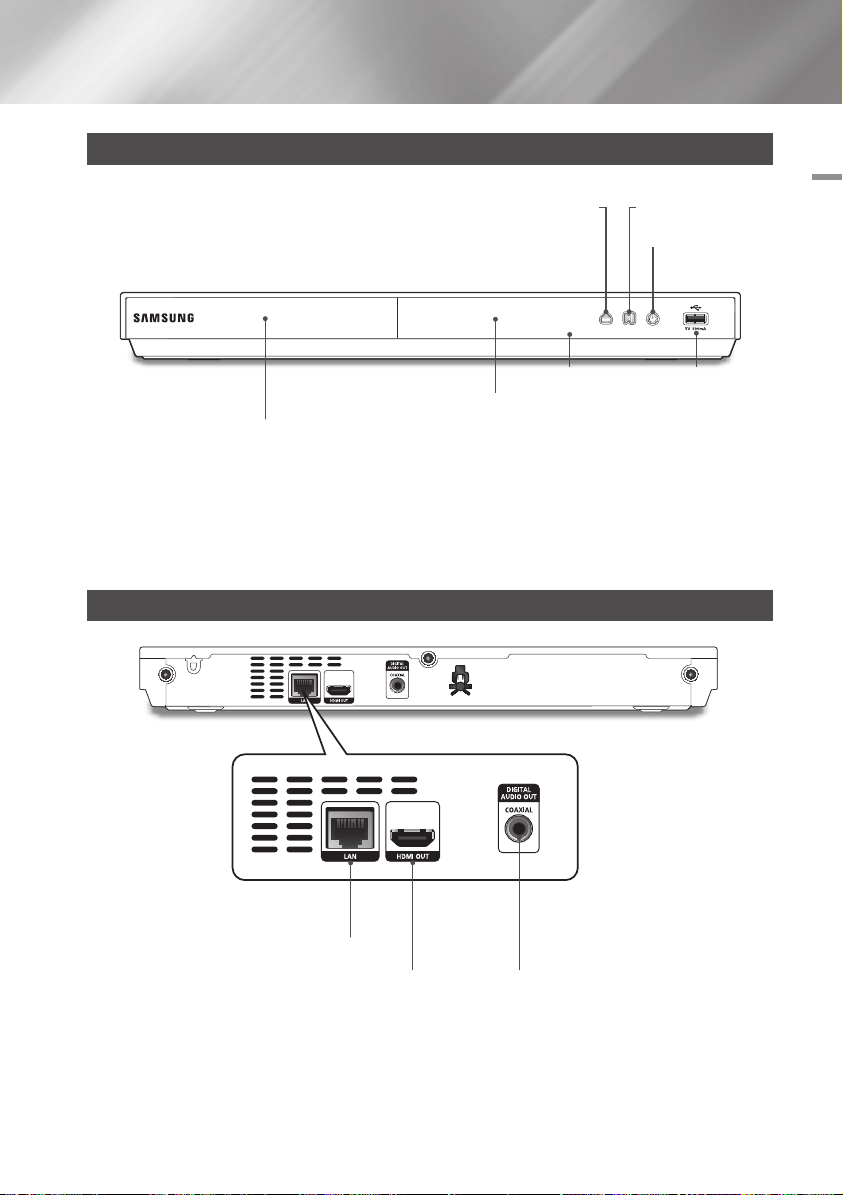
Vorderseite
ÖFFNEN/SCHLIESSEN TASTE
ANZEIGE USB-HOST
FERNBEDIENUNGSSENSOR
DISK-LADE
| HINWEIS |
\Um die Firmware des Geräts über den USB-Anschluss zu aktualisieren, muss ein USB-Speicherstick verwendet werden.
\Wenn das Gerät das Menü der Blu-ray-Disk anzeigt, kann der Film nicht über die Wiedergabe Taste am Gerät oder
der Fernbedienung gestartet werden. Um einen Film abzuspielen, muss Film Wiedergabe oder Start im Menü der Disk
ausgewählt und anschließend die v Taste gedrückt werden.
TASTE WIEDERGABE /
ANHALTEN
NETZSCHALTER
Rückseite
02 Erste Schritte
LAN
HDMI OUT DIGITAL AUDIO OUT
Deutsch 13
|
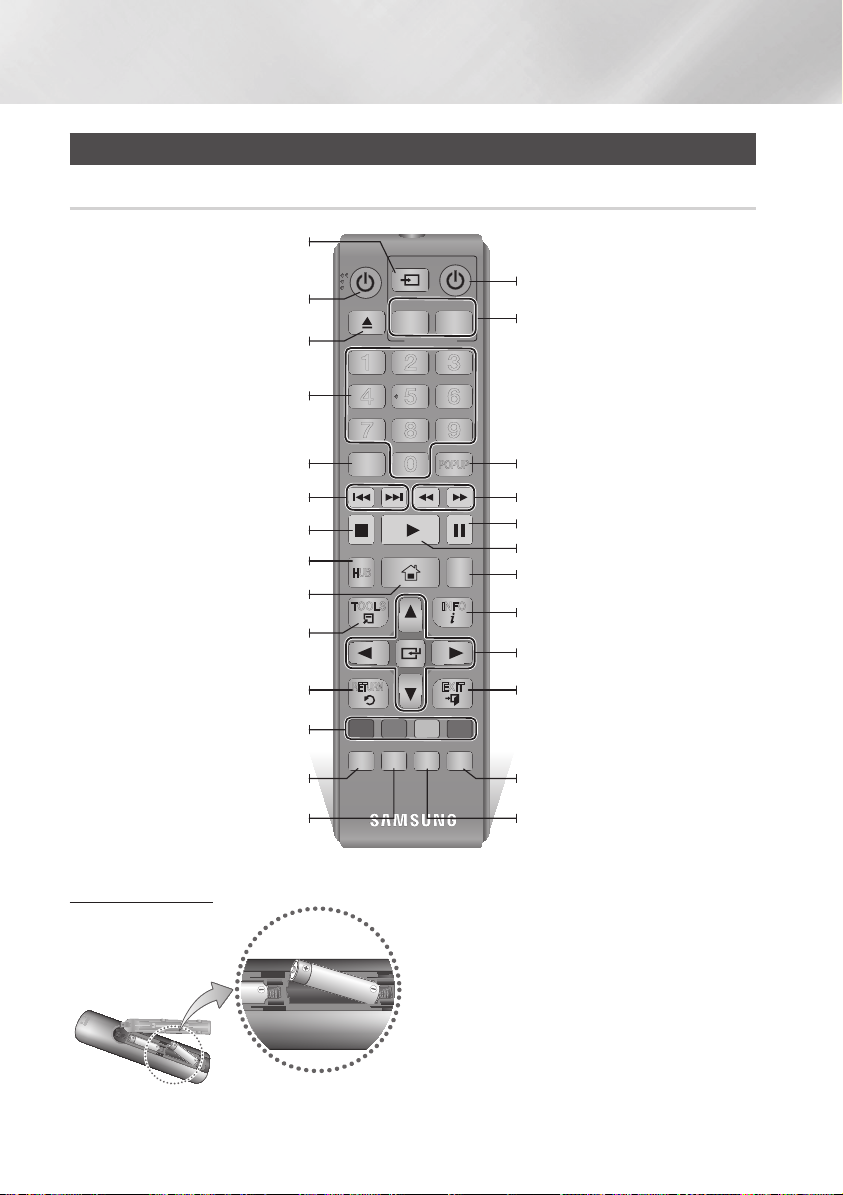
Erste Schritte
Fernbedienung
Übersicht der Fernbedienung
Nach Beendigung der Einstellungen, können Sie mit dieser
Taste an Ihrem Fernseher das Quellgerät festlegen.
(Diese Taste steht nur an Samsung Fernsehgeräten zur Verfügung.)
Ein- und Ausschalten des Players.
Drücken, um das Diskfach zu öffnen oder zu
Zifferntasten für die Bedienung von Optionen.
Zugriff auf das Disk-Menü.
Drücken, um vorwärts- oder rückwärts zu springen.
Anhalten der Wiedergabe.
Verwendung von Smart Hub.
Wechseln zum Home-Menü.
Drücken, um das Extras Menü aufzurufen.
Rückkehr zum vorherigen Menü.
schließen.
1
4
7
DISC MENU
SMART
HOME
HUB
RETURN
SOURCE
VOL VOL
– +
VOL
+
VOL
SAMSUNG TV
2
5
8
TITLE MENU
POPUP
0
HOME REPEAT
INFOTOOLS
EXIT
Schaltet das Fernsehgerät ein und aus.
(Diese Taste steht nur an Samsung Fernsehgeräten zur Verfügung).
–
Einstellen der Lautstärke am Fernsehgerät.
(
Diese Taste steht nur an Samsung Fernsehgeräten zur Verfügung.)
3
6
9
Zugriff auf das Popup-Menü/Titel-Menü.
Drücken, um die Vorwärts- oder Rückwärtssuche zu starten.
Unterbrechen der Wiedergabe einer Disk.
Starten der Wiedergabe einer Disk.
Drücken, um die Wiederholen Funktion zu verwenden.
Drücken, um die Wiedergabe Informationen
anzuzeigen.
Auswahl von Menüoptionen und Ändern
der Menüwerte.
Verlassen des Menüs.
Tasten für die Bedienung von Menüs des
Players und einiger Blu-ray-Disk Funktionen.
Drücken, um die Bonusview Funktion zu verwenden.
Ermöglicht den Zugriff auf verschiedene
Audio Funktionen auf einer Disk.
Batterien einlegen
|
14 Deutsch
A B C D
BONUS SUBTITLE FULL
VIEW
PANDORA
AUDIO
DIGITAL
SUBTITLE
SCREEN
INPUT
| HINWEIS |
\
Falls die Fernbedienung nicht ordnungsgemäß funktioniert:
- Die Polarität +/– der Batterien prüfen.
- Überprüfen Sie, ob die Batterien leer sind.
-
-
| ACHTUNG |
\Entsorgen Sie Batterien gemäß den örtlichen
Umweltschutzvorschriften. Werfen Sie Batterien nicht in
den Hausmüll.
Drücken, um die Vollbild Funktion zu
verwenden.
Drücken, um die Untertitelsprache der
Blu-ray-Disk/DVD umzuschalten.
Überprüfen Sie, ob der Sensor der Fernbedienung verdeckt ist.
Überprüfen Sie, ob sich Leuchtstofflampen in der Nähe befinden.
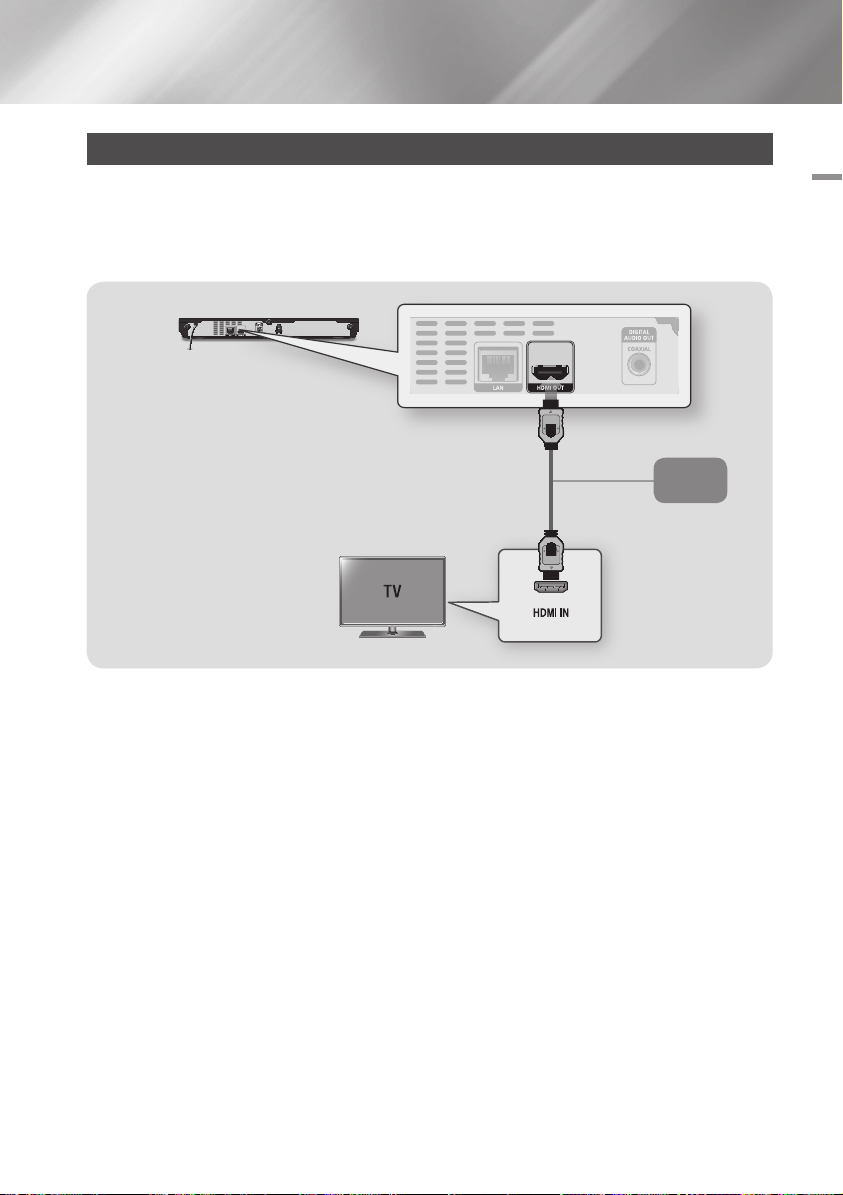
Anschlüsse
Anschluss an ein Fernsehgerät
Schließen Sie ein HDMI-Kabel (nicht mitgeliefert) an den HDMI OUT Ausgang auf der Rückseite des
Geräts und an den HDMI IN Eingang an Ihrem Fernsehgerät an.
- Schließen Sie das Netzkabel erst an, wenn Sie alle anderen Verbindungen hergestellt haben.
- Wenn Sie die Anschlüsse ändern möchten, schalten Sie zuerst alle Geräte aus.
Audio
Video
03 Anschlüsse
| HINWEIS |
\Wenn Sie ein HDMI-nach DVI Kabel für den Anschluss an Ihr Anzeigegerät verwenden, müssen Sie ebenfalls den Digital
Audio Out Anschluss des Geräts an das Audiosystem anschließen, um den Ton hören zu können.
\Ein HDMI-Kabel überträgt digitale Video- und Audiosignale, sodass Sie kein Audiokabel anschließen müssen.
\Je nach Fernsehgerät stehen für den HDMI-Ausgang bestimmte Auflösungen möglicherweise nicht zur Verfügung.
Informationen dazu finden Sie in der Bedienungsanleitung Ihres Fernsehgeräts.
\Wenn Sie den Player das erste Mal mit einem HDMI-Kabel an den Fernseher oder an ein neues Fernsehgerät anschließen,
wird die HDMI-Auflösung des Ausgangs automatisch an die höchste vom Fernsehgerät unterstützte Auflösung eingestellt.
\Ein langes HDMI-Kabel kann Bildrauschen verursachen. Wenn dieser Fall eintritt, Deep Colour im Menü auf Aus stellen.
\Um Videobilder in HDMI 720p, 1080i, oder 1080p Auflösung anzuzeigen, müssen Sie ein Hochgeschwindigkeits-HDMI-Kabel
(Kategorie 2) verwenden.
\HDMI sendet ein rein digitales Signal an das Fernsehgerät.
Wenn Ihr Fernsehgerät HDCP (High-bandwidth Digital Content Protection) nicht unterstützt, wird ein Rauschsignal auf dem
Bildschirm angezeigt.
Deutsch 15
|

Anschlüsse
Anschluss an ein Audiosystem
Sie können den Blu-ray Player wie auf der nachfolgenden Abbildung dargestellt, an ein Audio-System anschließen.
- Schließen Sie das Netzkabel erst an, wenn Sie alle anderen Verbindungen hergestellt haben.
- Wenn Sie die Anschlüsse ändern möchten, schalten Sie zuerst alle Geräte aus.
Methode 1 Anschließen an einen AV-Receiver mit HDMI Unterstützung
• Schließen Sie ein HDMI-Kabel (nicht mitgeliefert) an den HDMI OUT Ausgang auf der Rückseite des
Geräts und an den HDMI IN Eingang an Ihrem Receiver an.
• Beste Qualität (Empfohlen)
Methode 2 Anschließen an einen AV-Receiver mit Dolby Digital oder DTS Decoder
• Mit der Hilfe eines digitalen Coaxial Kabels (nicht mitgeliefert) den Coaxial Digital Audio Ausgang am
Gerat mit dem Coaxial Digital Eingang am Receiver verbinden.
• Gute Qualität
• Der Ton wird nur über die beiden Frontlautsprecher wiedergegeben, wobei Digital Output auf PCM
eingestellt sein muss.
|
16 Deutsch
Methode 2Methode 1
AudioAudio
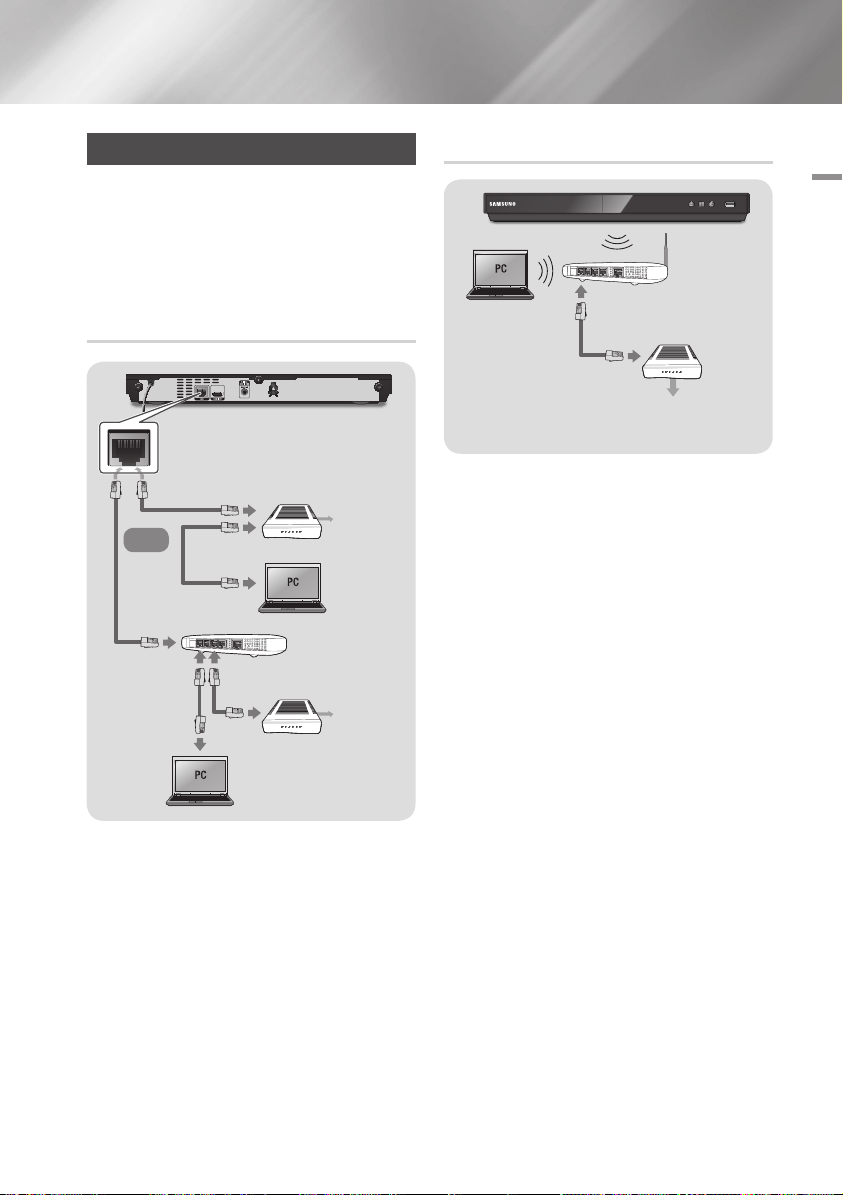
Anschließen an einen Netzwerk Router
Sie können das Gerät mit Hilfe einer der im
Folgenden beschriebenen Methoden mit Ihrem
Netzwerk Router verbinden.
Um die AllShare Funktion nutzen zu können, muss
Ihr PC, wie in der Abbildung dargestellt, mit einem
Netzwerk verbunden sein.
Die Verbindung kann über Kabel oder Funk erfolgen
.
Kabelnetzwerk
WLAN-Netzwerk
03 Anschlüsse
Wireless Router
Breitband-Dienste
Breitbandmodem
(mit integriertem Router)
Breitband-
Oder
Router
Breitbandmodem
| HINWEIS |
\Der Internetzugriff auf den Samsung Software-
Aktualisierungsserver kann je nach verwendetem Router
oder den Richtlinien Ihres Internetanbieters untersagt
sein. Weitere Informationen erhalten Sie von Ihrem ISP
(Internet Service Provider).
\Bei Verwendung von DSL muss die Netzwerkverbindung
über einen Router hergestellt werden.
Dienste
BreitbandDienste
| HINWEIS |
\Wenn der WLAN-Router DHCP unterstützt, kann dieses
Gerät eine DHCP oder statische IP-Adresse für die
Verbindung mit dem drahtlosen Netzwerk verwenden.
\Stellen Sie den WLAN-Router in den Infrastruktur Modus.
Der Ad-hoc Modus wird nicht unterstützt.
\Das Gerät unterstützt nur die folgenden
Verschlüsselungsalgorythmen:
- WEP (OPEN/SHARED), WPA-PSK (TKIP/AES),
WPA2-PSK (TKIP/AES)
\Wählen Sie auf dem WLAN-Router einen unbelegten
Kanal aus. Wenn der für den Router ausgewählte Kanal
von einem anderen Gerät in der Nähe verwendet wird,
führt dies zu Interferenzen und Übertragungsfehlern.
\Wenn Sie den 802.11n Modus auswählen und den
Verschlüsselungalgorythmus des Routers auf WEP, TKIP
oder TKIP oder TKIP-AES (WPS2Mixed) einstellen, baut
das Gerät gemäß den neuen Wi-Fi Zertifizierungsregeln
keine Verbindung auf.
\WLAN kann je nach Betriebsbedingungen (Router
Leistung, Entfernung, Hindernisse, Interferenzen durch
andere Radiogeräte, usw.), Interferenzen verursachen.
Deutsch 17
|

Einstellungen
Ersteinstellungen konfigurieren
• Der Home Bildschirm erscheint nicht, wenn die
Ersteinstellungen nicht konfiguriert sind.
• Die OSD (On Screen Display) dieses Players kann
sich möglicherweise nach Aktualisierung der
Softwareversion ändern.
• Die Schritte für den Zugriff können sich je nach
ausgewähltem Menü unterscheiden.
Mit der Ersteinstellungen Prozedur können Sie
die Sprache der Bildschirmanzeige und Menüs
einstellen, die Verbindung mit Ihrem Heimnetzwerk
konfigurieren, das zu Ihrem Fernsehgerät
passende Bildschirmformat (Bildschirmgröße und
Format) auswählen und die Software Ihres Players
aktualisieren und anwenden, insofern verfügbar.
| HINWEIS |
\
Wenn Sie während der Ersteinstellungen die
Netzwerkeinrichtung überspringen, können Sie die
Einrichtung des Netzwerks zu einem späteren Zeitpunkt
vornehmen. Siehe "Konfigurieren Ihrer Netzwerkverbindung"
auf den Seiten 25 - 27 für weitere Anweisungen.
\Wenn Sie den Bildschirm für die Ersteinstellungen erneut
anzeigen und Änderungen vornehmen möchten, wählen
Sie auf dem Home Bildschirm Einstell. > System >
Ersteinstellung oder die Rücksetzen Option. (Siehe Seiten
22 oder 24)
\Wenn Sie eine Anynet+(HDMI-CEC) Funktion nutzen
möchten, folgen Sie bitte den folgenden Anweisungen.
1) Schließen Sie das Gerät mit Hilfe eines HDMI-Kabels
an ein Anynet+(HDMI-CEC) kompatibles Samsung
Fernsehgerät an.
2) Aktivieren Sie die Anynet+(HDMI-CEC) Funktion am
Fernsehgerät und am Gerät.
3) Stellen Sie das Fernsehgerät in die Ersteinstellungen
Prozedur ein.
Der Home Bildschirm
Einstell.
Stellen Sie verschiedene Funktionen gemäß Ihrem persönlichen
Geschmack ein.
1
2
Smart Hub AllShare Play
Smart Hub : Startet Smart Hub. Über Smart
Hub können Sie auf YouTube, Spiele oder andere
1
Anwendungen zugreifen.
AllShare Play : Gibt Videos, Fotos oder Musik von
einer Disk, einem USB-Speichergerät, PC oder
2
einem mobilen Gerät wieder.
Einstell. : Passen Sie verschiedene Funktionen an
3
Ihre persönlichen Vorlieben an.
`Auswahl einer Option auf dem Home Bildschirm
1.
Um eine Option auf dem Home Bildschirm
auszuwählen,
Tasten den Cursor bewegen, bis die gewünschte
Option markiert ist und anschließend die v
Taste drücken.
| HINWEIS |
\Wenn nach Betätigung der Stopp Taste des Players das
Gerät länger als 5 Minuten nicht benutzt wird, schaltet
sich automatisch der Bildschirmschoner ein. Wenn sich
der Player länger als 20 Minuten im Screensaver Modus
befindet, wird er automatisch ausgeschaltet.
müssen Sie mit Hilfe der ◄►
3
|
18 Deutsch

Zugriff auf den Einstellungen Bildschirm
HOME
1
4
7
VOL
+
2
5
8
0
VOL
–
3
6
9
SOURCE
DISC MENU
HOME REPEAT
TITLE MENU
VOL VOL
POPUP
SAMSUNG TV
SMART
HUB
– +
INFOTOOLS
RETURN
EXIT
1.
Auf dem Home Bildschirm Einstell. auswählen
und anschließend die v Taste drücken. Der
Einstellungen Bildschirm wird angezeigt.
3D-Einstell.
Anzeige
TV-Format 16:9 Original
Smart Hub-Bildschirmgröße Größe 3
Audio
BD Wise Ein
Auflösung Auto
Netzwerk
Film-Bildfrequenz (24 fps) Auto
System
HDMI-Farbformat Auto
HDMI-Deep Color Auto
Unterstützung
Progressiver Modus Auto
2.
Den Zugriff auf die Menüs, Untermenüs und
Optionen, entnehmen Sie bitte der nachfolgenden
Darstellung der Fernbedienung
.
Im Einstellungen Menü verwendete
Fernbedienungstasten
1
3
Ausführliche Funktionsinformationen
Jede Einstellungen Funktion, Menüposition und
individuelle Option wird ausführlich auf dem
Bildschirm erklärt. Um sich eine Erklärung anzeigen
zu lassen, verwenden Sie bitte die ▲▼◄► Tasten,
um eine Funktion, Menüposition oder Option
auszuwählen. Die Erklärung wird für gewöhnlich auf
der rechten Bildschirmseite angezeigt.
Eine Kurzbeschreibung für jede Einstellungen
Funktion beginnt auf der nächsten Seite. Zusätzliche
Informationen über einige der
sich ebenfalls im Anhang
Funktionen befinden
dieser Anleitung.
04 Einstellungen
2 4
HOME Taste : Drücken, um zum Home-Menü zu wechseln.
1
RETURN Taste : Rückkehr zum vorherigen Menü.
2
(Enter) / RICHTUNGSTASTEN :
v
• Mit Hilfe der ▲▼◄► Tasten den Cursor
bewegen oder eine Position auswählen.
3
• Drücken Sie die v Taste, um die ausgewählte
Position zu aktivieren oder um eine Einstellung zu
bestätigen.
EXIT Taste : Verlassen des Menüs.
4
Deutsch 19
|

Einstellungen
Einstellungen Menü Funktionen
Anzeige
3D-Einstell.
TV-Format
Smart Hub-
Bildschirmgröße
BD Wise
Auflösung
Film-Bildfrequenz (24 fps)
HDMI-Farbformat
HDMI-Deep Color
Progressiver Modus
Sie können auswählen, ob eine Blu-ray Disk mit
3D-Inhalten im 3D-Modus wiedergeben soll.
•
Wenn Sie zum Home oder Smart Hub Home Bildschirm
wechseln, während Sie sich im 3D Modus befinden,
wird automatisch in den 2D Modus umgeschaltet.
Mit dieser Funktion kann die Bildausgabe des Geräts an
die Bildschirmgröße und das Bildschirmformat Ihres
Fernsehgeräts angepasst werden.
Mit dieser Funktion könne Sie die optimale Größe des
Smart Hub Bildschirms einstellen.
Bei BD Wise handelt es sich um Samsungs neueste Funktion für für
den Zusammenschluss von Geräten.
Wenn Sie einen Samsung Player und ein Samsung-Fernsehgerät mit
BD Wise Funktion über ein HDMI aneinander anschließen und BD
Wise auf beiden Geräten aktiviert ist, gibt der Player das Video mit
der Videoauflösung und der Bildfrequenz der BD/DVD-Disk wieder.
Mit dieser Funktion die Auflösung des HDMI Videosignals auf
Auto, 1080p, 1080i, 720p oder 576p/480p eingestellt werden.
Die Zahl zeigt die Anzahl der Zeilen des Videos pro Bild an.
Das i und das p stehen entsprechend für
"Zeilensprungverfahren“ und "progressive Abtastung“. Im
Allgemeinen die höhere Qualität.
Wenn das Gerät an ein mit der Bildfrequenz von 24 BpS
kompatibles Fernsehgerät angeschlossen und die FilmBildfrequenz (24 fps) Funktion auf Auto eingestellt ist,
wird die HDMI-Ausgabe des Geräts für eine bessere
Bildqualität auf 24 Bilder pro Sekunde eingestellt.
•
Diese Bildfrequenz Funktion kann nur auf Fernsehgeräten
verwendet werden, die diese Bildfrequenz unterstützen.
•
Film-Bildfrequenz steht nur zur Verfügung, wenn sich
das Gerät im Modus für die HDMI 1080i oder 1080p
Ausgabeauflösung befindet.
Hier kann das Farbraumformat für die HDMI-Wiedergabe an
die Möglichkeiten des angeschlossenen Geräts (Fernsehgerät,
Bildschirm, usw.) angepasst werden. Nach der Auswahl eines
Formats wird der Bildschirm für einen Moment schwarz.
Mit dieser Option die Wiedergabe von HDMI Videobildern
des Geräts auf Deep Colour Farbtiefe eingestellt werden.
Deep Colour bietet genauere Farbwiedergabe mit
größerer Farbentiefe.
Mit dieser Funktion kann die Bildqualität bei der
Wiedergabe von DVDs verbessert werden.
|
20 Deutsch

Audio
Mit dieser Funktion können Sie das Digital Audio
Digital-Ausgang
PCM-Downsampling
Dynamikumfangsteuerung
Downmix-Modus
Wiedergabeformat einstellen, dass zu Ihrem Fernsehgerät
oder AV-Receiver passt. Weitere Details finden Sie in der
Auswahltabelle für die Digital Wiedergabe auf Seite 53.
Mit dieser Funktion lassen sich PCM Signale mit 96kHz
auf 48kHz reduzieren, bevor sie an den Verstärker
gesendet werden. Wählen Sie Ein, wenn Ihr Verstärker
oder Receiver nicht für 96kHz Signale geeignet ist.
Mit dieser Funktion können Sie die
Dynamikumfangsteuerung auf Dolby Digital, Dolby
Digital Plus, und Dolby True HD Audio anwenden.
Mit dieser Einstellung können Sie Methode zum
Heruntermischen von Mehrkanalton auswählen, die mit
Ihrem Stereo System kompatibel ist. Sie können wählen,
ob auf normales Stereo oder auf Surround kompatibles
Stereo heruntergemischt werden soll.
Auto :
Steuert automatisch den Dynamikumfang
von Dolby TrueHD Audio auf Grundlage der
Informationen im Dolby TrueHD Soundtrack.
Schaltet ebenfalls die Dynamikumfangsteuerung
für Digital und Dolby Digital Plus ein.
Aus : Der Dynamikumfang wird nicht komprimiert und
Sie hören den Originalklang.
Ein : Schaltet die Dynamikumfangsteuerung für alle
drei Dolby Formate ein. Leisere Töne werden verstärkt
und die Lautstärke von lauten Tönen wird reduziert.
04 Einstellungen
Netzwerk
Netzwerkeinstellungen
Netzwerkstatus
Wi-Fi-Direkt
Konfigurieren Sie die Netzwerkverbindung, damit Sie
sich an solchen Funktionen, wie Internetdienste oder
AllShare Wi-Fi erfreuen und Software Aktualisierungen
durchführen können.
Hiermit können Sie den aktuellen Zustand der Netzwerkund Internetverbindung prüfen.
Mit dieser Funktion können Sie ein Wi-Fi Direkt Gerät an
Ihr Gerät über ein Peer-to-Peer Netzwerk anschließen,
ohne das Sie einen WLAN-Router benötigen.
Sie, dass wenn Sie Wi-Fi Direkt verwenden, die
Verbindung zum WLAN-Netzwerk unterbrochen
werden kann.
Beachten
Deutsch 21
|

Einstellungen
Netzwerk
System
Soft-AP
AllShare-Einstellungen
Gerätename
BD-Live-Einstell.
Ersteinstellung
Schnellstart
Anynet+ (HDMI-CEC)
Mit dieser Funktion können Sie andere Arten von Wi-FiGeräten ohne Kabel an den Player anschließen. Es ist
erforderlich, einen Sicherheitsschlüssel erstellen, den
Sie in die übrigen Wi-Fi Geräte eingeben müssen, wenn
Sie diese an das Netzwerk anschließen.
Listet die mit dem Netzwerk verbundenen AllShare
Geräte auf und ermöglicht es Ihnen einzustellen, ob ein
Gerät (Smartphone, Tablet, usw.) seine Inhalte mit dem
Player teilen oder den Player steuern kann.
Hier können Sie einen Namen für den Player eingeben,
mit dem Sie ihn in Ihrem Netzwerk identifizieren können.
Hier können verschiedene BD-Live Funktionen
eingestellt werden. BD-Live ermöglicht Ihnen den Zugriff
auf Sonderfunktionen, die auf einigen Blu-ray Disks
verfügbar sind, wenn Sie eine Internetverbindung haben.
BD-Live Internet-Verbindung : Hier können Sie
eine BD-Live Internetverbindung vollständig oder
teilweise erlauben bzw. verbieten.
BD-Datenmanagement : Dient zur Verwaltung der
von einem BD-Live Dienst heruntergeladenen Daten
oder einer Blu-ray-Disk.
Mit dieser Funktion können Sie die Ersteinstellungen
erneut konfigurieren.
Mit dieser Einstellung können Sie zum Hochfahren benötigte
Zeit verkürzen und den Player somit schneller einschalten.
| HINWEIS |
\Wenn diese Funktion auf Ein eingestellt ist, ist der
Stromverbrauch im Standby-Modus höher.
Bei Anynet+ handelt es sich um eine nützliche Funktion, die
den vernetzten Betrieb mit anderen Samsung Playern zur
Verfügung stellt, die über die Anynet+ Funktion verfügen.
Um diese Funktion zu nutzen, müssen Sie diesesGerät mit
Hilfe eines HDMI-Kabels an ein Samsung Fernsehgerät mit
Anynet+ Funktion anschließen.
|
22 Deutsch

System
Gerätemanager
Sprache
Sie können eine drahtlose USB-Tastatur oder Maus an
den USB-Anschluss auf der Vorderseite des Geräts
anschließen.
Tastatureinstell. : Hier können die Einstellungen für
eine an das Gerät angeschlossene kabellose USBTastatur vorgenommen werden.
| HINWEIS |
\Sie können die Tastatur nur dann verwenden, wenn ein
QWERTY Tastatur Bildschirm oder Fenster im Webbrowser
erscheint.
Mauseinstellungen : Hier können die Einstellungen
für eine an das Gerät angeschlossene kabellose Maus
vorgenommen werden. Sie können das Menü des
Players mit der Maus auf die gleiche Weise bedienen,
wie Sie es vom PC gewähnt sind.
`Das Menü des Players mit der Maus bedienen:
Schließen Sie die USB-Maus an den Player an.
1.
2.
Klicken Sie mit der Taste, die Sie in den
Mauseinstellungen ausgewählt haben. Das
Einfache Menü wird angezeigt.
3.
Wählen Sie die gewünschten Menüoptionen aus.
| HINWEIS |
\Bestimmte Modelle von USB HID Tastaturen oder Mäusen
sind mit Ihrem Gerät eventuell nicht kompatibel.
\
Einige Tasten der HID Tastatur können unter Umständen nicht
funktionieren
\Kabel USB-Tastaturen werden nicht unterstützt.
\E
\Falls die kabellose Tastatur nicht funktioniert, platzieren Sie
sie näher am Player.
Sie können die Sprache auswählen, in der das Bildschirmmenü,
Diskmenü, Untertitel usw. angezeigt werden sollen.
•
Die Sprache, die Sie für das Diskmenü, Disk Audio
oder die Untertitel ausgewählt haben erscheint nur,
wenn sie von der Disk unterstützt wird.
.
inige Anwendungen werden unter Umständen nicht unterstützt.
04 Einstellungen
Deutsch 23
|

Einstellungen
System
Sicherheit
Allgemein
DivX® Video On
Demand
Die voreingestellte PIN lautet 0000. Geben Sei die
voreingestellte PIN für den Zugriff aud die Sicherheitsfunktion
ein, wenn Sie keine eigene PIN erstellt haben. Nachdem Sie
das erste Mal auf die Sicherheitsfunktion zugegriffen haben,
ändern Sie bitte die PIN mit Hilfe der PIN ändern Funktion.
BD-Sicherungsstufe : Verhindert die Wiedergabe von
Blu-ray-Disks mit festgelegter Altersbeschränkung,
bis die PIN eingegeben wurde.
DVD-Sicherungsstufe : Verhindert die Wiedergabe
von DVDs mit festgelegter Altersbeschränkung, bis
die PIN eingegeben wurde.
PIN ändern : Ändern der 4-stelligen PIN für den
Zugriff auf Sicherheitsfunktionen.
`Wenn Sie die PIN vergessen haben:
Entfernen Sie alle Disks und USB-Speichergeräte.
1.
2.
Drücken Sie die p Taste auf dem Bedienfeld und
halten Sie sie für 5 Sekunden oder länger gedrückt.
Alle Einstellungen werden auf die werksseitigen
Standardeinstellungen zurückgesetzt.
Die im Folgenden aufgelisteten Optionen können an Ihre
Vorlieben angepasst werden.
Zeitzone : Wählen Sie Ihre Zeitzone in der Sie sich
befinden aus.
Menütransparenz : Dient zur Einstellung der
Transparenz des Menü Fensters.
Anzeige von DivX® VOD-Registrierungscodes, um
DivX® VOD-Inhalt zu erwerben und wiedergeben.
Unterstützung
|
24 Deutsch
Software-Update
Samsung kontaktieren
Fernverwaltung
Zurück
Für weitere Informationen über die Software Aktualisierungsfunktion
siehe "Aktualisieren der Software" auf den Seiten 29~31.
Hier erhalten Sie Kontaktinformationen, wenn Sie Hilfe
für Ihren Player benötigen.
Wenn diese Option aktiviert ist, können die Mitarbeiter des
Samsung Callcenters Probleme aus der Ferne diagnostizieren und
beheben. Hierfür ist eine aktive Internetverbindung erforderlich.
| HINWEIS |
\
In einigen Ländern steht der Remote Management Dienst nicht
zur Verfügung.
\Setzen Sie sich mit Ihrem nächsten Kundendienst in
Verbindung, um den PIN Code zu erhalten und teilen Sie diesen
der Zuständigen Person mit. Dadurch werden die Ferndiagnose
des Geräts und die erforderlichen Messungen ermöglicht.
Setzt alle Einstellungen, mit Ausnahme der Netzwerk- und
Smart Hub Einstellungen auf die Voreinstellungswerte zurück.
Die voreingestellte PIN lautet 0000.

Netzwerke und das Internet
Wenn Sie dieses Gerät an ein Netzwerk anschließen,
können Sie auf dem Netzwerk basierende Anwendungen
und Funktionen, wie Smart Hub und BD-LIVE
verwenden sowie die Software des Geräts aktualisieren.
Für weitere Informationen über den Zugriff und die
Ğ
Wenn Sie über eine statische IP-Adresse verfügen oder
die automatische Einstellung nicht funktioniert, müssen
Sie die Netzwerkeinstellung manuell durchführen.
Nachdem Sie die obigen Schritte 1 bis 3 befolgt haben:
1. Wählen Sie Start auf dem
Verwendung von Internet Diensten, lesen Sie bitte das
Kapitel Netzwerkdienste auf den Seiten 43-45 in dieser
Bedienungsanleitung. Die Anleitung für die Konfiguration
der Netzwerkverbindung folgt im Anschluss.
Konfigurieren Ihrer Netzwerkverbindung
Kabelnetzwerk - Manuell
04 Einstellungen
Netzwerkeinstellungen Bildschirm und
drücken Sie anschließend die v Taste.
Der Netzwerkstatus-Bildschirm erscheint.
Der Versuch des Geräts, die
Netzwerkverbindung zu prüfen schlägt fehl.
Setzen Sie sich zuerst mit Ihrem Internetanbieter in
Verbindung, um zu erfahren, ob Sie über eine statische
oder dynamische IP-Adresse verfügen.
Wenn es sich
um eine dynamische Adresse handelt und Sie über
Kabelnetzwerk oder ein kabelloses Netzwerk verfügen,
empfehlen wir Ihnen die im Folgenden beschriebenen
automatischen Konfigurationsprozeduren.
Wenn Sie eine Verbindung zu einem Kabelnetzwerk
aufbauen möchten, schließen Sie das Gerät bitte mit
einem Netzwerkkabel an einen Router an, bevor Sie
mit der Konfiguration beginnen.
Wenn Sie eine Verbindung zu einem drahtlosen
2.
Netzwerk herstellen möchten, trennen Sie bitte bevor
Sie beginnen alle Kabelnetzwerkverbindungen ab.
Um mit der Konfiguration der Netzwerkverbindung zu
3. Gehen Sie zum Feld IP-Modus und setzen
beginnen, folgen Sie diesen Schritten:
1.
Wählen Sie auf dem Home Bildschirm
4. Verwenden Sie die Nummerntasten auf
Einstell., und drücken Sie die v Taste.
2.
Wählen Sie Netzwerk, und drücken Sie die
Taste.
v
3. Wählen Sie Netzwerkeinstellungen, und
drücken Sie die v Taste.
| HINWEIS |
4. Fahren Sie mit den Anweisungen für
Kabelnetzwerke fort oder gehen Sie zur Seite
26, um mit den Anweisungen für drahtlose
Netzwerke fortzufahren.
Kabelnetzwerk
Ğ
Kabelnetzwerk - Automatisch
5. Wenn die Einstellungen abgeschlossen
Nachdem Sie die obigen Schritte 1 bis 3 befolgt haben:
1.
Wählen Sie Start auf dem Netzwerkeinstellungen
Bildschirm und drücken Sie anschließend die
v
Taste. Das Gerät erkennt den Kabelanschluss,
überprüft die Netzwerkverbindung und stellt
anschließend eine Verbindung mit dem Netzwerk her.
Netzwerkeinstellungen
Verbindung zu kabelgebundenem Netzwerk fehlgeschlagen
Autom. IP-Zuordnung fehlgeschl. Gehen Sie wie folgt vor, um die IP
autom. zuzuord. Oder ordnen Sie die IP manuell über
"IP-Einstellungen" zu.-Überpr. Sie, ob der DHCP-Server am Router
aktiv. ist, und trennen u. verb. Sie den Router wieder. Weitere Inform.
erhalten Sie von Ihrem Internetdienstanb.
Mac-Adresse XX:XX:XX:XX:XX:XX
IP-Adresse 0.0.0.0
Teilnetzmaske 0.0.0.0
Gateway 0.0.0.0
DNS-Server 0.0.0.0
Zurück
IP-Einst.
E. ver.
OK
Wählen Sie IP-Einst. auf der rechten Seite des
Bildschirms und drücken Sie die v Taste.
Der IP-Einstellungen Bildschirm wird angezeigt.
Sie es auf Manuell.
Fernbedienung, um die Netzwerkdaten
einzugeben. Verwenden Sie die ▲▼◄►
Tasten auf der Fernbedienung, um von
Eingabefeld zu Eingabefeld zu wechseln.
\Sie können diese Werte bei Ihrem Internetanbieter
erfragen. Diese Werte können Sie ebenfalls auf den
meisten Windows Computern einsehen. Für weitere
Anweisungen, siehe „Abrufen der Werte für die
Netzwerkeinstellungen" auf Seite 26.
sind, OK markieren und anschließend die
Taste drücken. Das Gerät überprüft die
v
Netzwerkverbindung und stellt anschließend
eine Verbindung zum Netzwerk her.
Deutsch 25
|
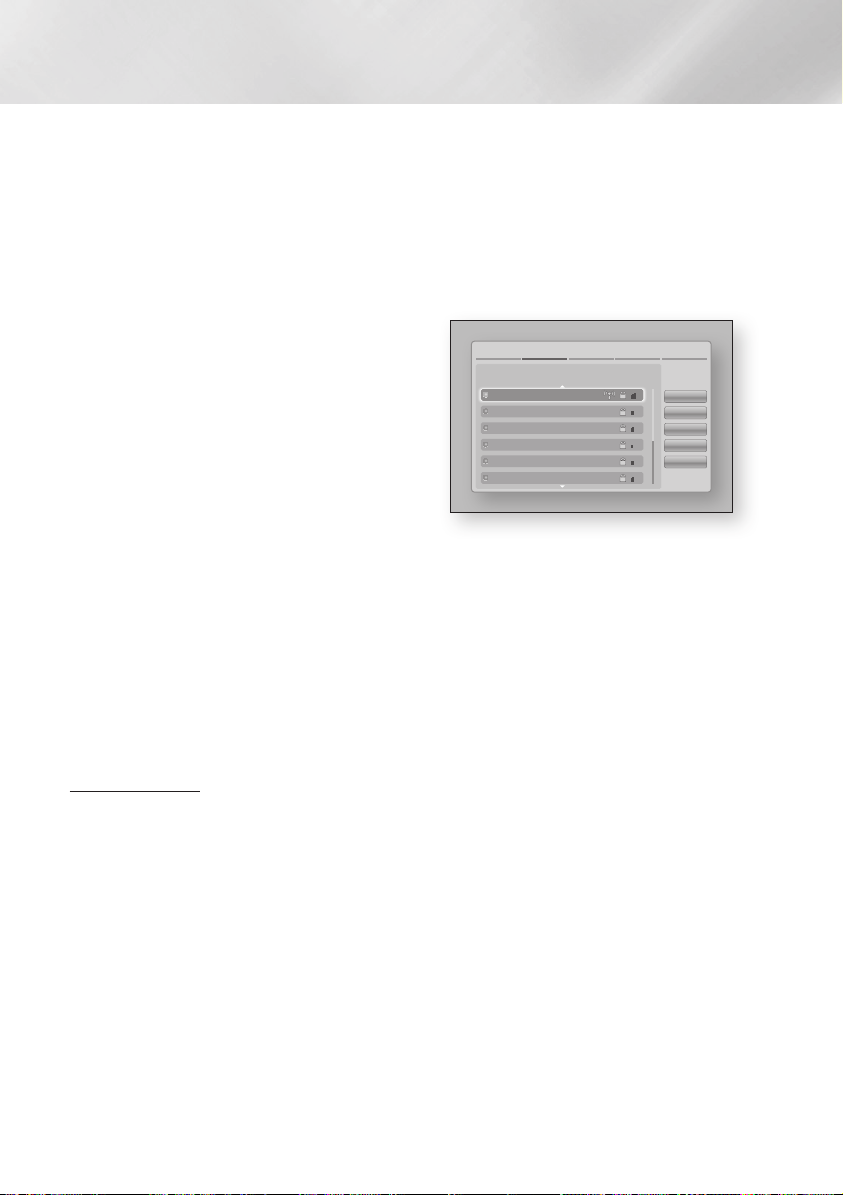
Einstellungen
< Abrufen der Werte für die
Netzwerkeinstellungen >
Sie können sich die Werte für die Netzwerkeinstellungen
auf den meisten Windows Computern anzeigen lassen.
Um die Werte für die Netzwerkeinstellungen aufzurufen,
folgen Sie bitte diesen Schritten:
• Windows XP
1. Klicken Sie mit der rechten Maustaste auf
das Netzwerk Symbol in der unteren rechten
Ecke des Arbeitsplatzes.
2. Klicken Sie auf Status im Pop-up-Menü.
3. Im angezeigten Dialogfeld klicken Sie auf
Support-Tab.
4. Im Tab Allgemein auf die Schaltfläche 'Details'
klicken Die Netzwerkeinstellungen werden
angezeigt.
• Windows 7
1. Klicken Sie auf das Netzwerk Symbol in der
unteren rechten Ecke des Arbeitsplatzes.
2. In dem Popup-Fenster auf 'Netzwerk- und
Freigabecenter öffnen' klicken.
3.
In dem angezeigten Dialogfenster je nach Ihrer
Netzwerkverbindung auf 'LAN-Verbindung'
oder 'WLAN-Verbindung' klicken.
4.
Im Tab Allgemein auf die Schaltfläche 'Details' klicken
Die Netzwerkeinstellungen werden angezeigt.
| HINWEIS |
\Je nach Ihrer Windows-Version können die Informationen
unterschiedlich sein.
WLAN-Netzwerk
Eine drahtlose Netzwerkverbindung kann auf drei
Arten eingerichtet werden:
- WLAN Automatisch
- WLAN Manuell
- WPS(PBC)
Wenn Sie die drahtlose Netzwerkverbindung
konfigurieren, wird jedes über das Gerät
angeschlossene drahtlose Netzwerkgerät oder,
falls zutreffend, die aktuelle Kabelverbindung des
Geräts, getrennt.
Ğ
WLAN (Allgemein) - Automatisch
Befolgen Sie die Schritte 1 bis 3 unter „Konfigurieren
Ihrer Netzwerkverbindung" auf Seite 25.
1.
Wählen Sie Start auf dem Netzwerkeinstellungen
Bildschirm und drücken Sie anschließend die
Taste.
v
Das Gerät sucht nach verfügbaren Netzwerken
und zeigt diese in einer Liste an.
Netzwerkeinstellungen
Wählen Sie den drahtl. Router aus d. Liste aus.
iptime23
ATES_02
ELT
KT_WLAN
KWI-B2200T-06275
Mirhenge_edu
Aktual.
WPS(PBC)
Zurück
Weiter
Abbr.
2. Wählen Sie das gewünschte Netzwerk aus
und drücken Sie anschließend die v Taste.
3. Wählen Sie Weiter, und drücken Sie erneut
die v Taste.
4. Geben Sie im Sicherheitsbildschirm Ihren
Sicherheitscode oder das Passwort ein für
das Netzwerk ein.
Geben Sie die Nummern direkt mit Hilfe der
Tasten auf der Fernbedienung ein. Geben Sie
einen Buchstaben ein, indem Sie ihn mit Hilfe
der Pfeiltasten markieren und anschließend
die v Taste drücken.
5.
Nach der Eingabe Weiter auf der rechten
Bildschirmseite wählen. Das Gerät überprüft die
Netzwerkverbindung und stellt anschließend eine
Verbindung zum Netzwerk her.
| HINWEIS |
\Der Sicherheitscode oder das Passwort können Sie einem
der Setup-Bildschirme entnehmen, die Sie bei der Konfiguration
Ihres Modems oder Routers benutzt haben.
Ğ
WLAN (Allgemein) - Manuell
Wenn Sie über eine statische IP-Adresse verfügen
oder die automatische Einstellung nicht funktioniert,
müssen Sie die Netzwerkeinstellung manuell
durchführen.
Befolgen Sie die Schritte 1 bis 3 unter „Konfigurieren
Ihrer Netzwerkverbindung" auf Seite 25.
|
26 Deutsch

1. Wählen Sie Start auf dem
Netzwerkeinstellungen Bildschirm und
drücken Sie anschließend die v Taste. Das
Gerät sucht nach verfügbaren Netzwerken
und zeigt diese in einer Liste an.
2. Wählen Sie das gewünschte Netzwerk aus
und drücken Sie anschließend die v Taste.
3. Wählen Sie Weiter, und drücken Sie erneut
die v Taste.
4. Geben Sie im Sicherheitsbildschirm Ihren
Sicherheitscode oder das Passwort ein
für das Netzwerk ein. Geben Sie die
Nummern direkt mit Hilfe der Tasten auf
der Fernbedienung ein. Geben Sie einen
Buchstaben ein, indem Sie ihn mit Hilfe der
▲▼◄►Tasten markieren und anschließend
die v Taste drücken.
5. Wenn die Eingabe abgeschlossen ist, Weiter
auf der rechten Bildschirmseite auswählen
und anschließend die v Taste drücken.
6. Der Netzwerkstatus-Bildschirm erscheint.
Der Versuch des Geräts, die
Netzwerkverbindung zu prüfen schlägt fehl.
7.
Wählen Sie IP-Einst. auf der rechten Seite des
Bildschirms und drücken Sie die v Taste. Der IPEinstellungen Bildschirm wird angezeigt.
8. Gehen Sie zum Feld IP-Modus und setzen
Sie es auf Manuell.
9. Verwenden Sie die Nummerntasten auf
Fernbedienung, um die Netzwerkdaten
einzugeben. Verwenden Sie die ▲▼◄►
Tasten auf der Fernbedienung, um von
Eingabefeld zu Eingabefeld zu wechseln.
| HINWEIS |
\Sie können diese Werte bei Ihrem Internetanbieter
erfragen. Diese Werte können Sie ebenfalls auf den
meisten Windows Computern einsehen. Für weitere
Anweisungen, siehe „Abrufen der Werte für die
Netzwerkeinstellungen" auf Seite 26.
10.
Wenn die Einstellungen abgeschlossen sind, OK
markieren und anschließend die v Taste drücken.
Der Netzwerkstatus-Bildschirm erscheint. Das
Gerät überprüft die Netzwerkverbindung und stellt
anschließend eine Verbindung zum Netzwerk her.
Wenn die Einstellungen abgeschlossen sind, OK
markieren und anschließend die v Taste drücken
Ğ
WPS(PBC)
Befolgen Sie die Schritte 1 bis 3 unter „Konfigurieren
Ihrer Netzwerkverbindung" auf Seite 25.
1.
Wählen Sie Start auf dem Netzwerkeinstellungen
Bildschirm und drücken Sie anschließend die
Taste.
v
Das Gerät sucht nach verfügbaren Netzwerken
und zeigt diese in einer Liste an.
2. Innerhalb von 2 Minuten die WPS(PBC)
Taste auf Ihrem Router betätigen. Der
Player ruft automatisch alle erforderlichen
Netzwerkeinstellungen ab und stellt eine
Verbindung zum Netzwerk her.
Der Netzwerkstatus-Bildschirm erscheint.
Nachdem die Netzwerkverbindung geprüft
wurde, stellt der Player eine Verbindung mit
dem Netzwerk her.
Wi-Fi Direkt
Die Wi-Fi Direkt Funktion ermöglicht es Ihnen, WiFi Direkt Geräte und alle anderen, ein Peer-toPeer
Netzwerk verwendenden Geräte ohne einen
WLAN-Router an dieses Gerät anzuschließen.
| HINWEIS |
\
Einige Wi-Fi Direkt Geräte unterstützen die AllShare Funktion
eventuell nicht, wenn sie über Wi-Fi-Direkt angeschlossenen
sind. Wenn dies der Fall ist, wird empfohlen, die Art der
Netzwerkverbindung zwischen den Geräten zu ändern.
1. Schalten Sie das Wi-Fi Direkt Gerät ein und
aktivieren Sie dessen Wi-Fi direkt Funktion.
2.
Wählen Sie auf dem Home Bildschirm
Einstell., und drücken Sie die v Taste.
3. Wählen Sie Netzwerk, und drücken Sie die
Taste.
v
4. Wählen Sie Wi-Fi-Direkt, und drücken Sie
die v Taste.
Die verfügbaren Wi-Fi Direkt Geräte werden
angezeigt.
Display
Audio
Network
System
Support
Wi-Fi-Direct
Aktual.
Schließen
'
Zurück
Gerätename : [BD]E6100
Wählen Sie d. Wi-Fi-Direkt-Gerät für d. Verb. aus.
AndroidXXXXXXX Getrennt
.
04 Einstellungen
Deutsch 27
|

Einstellungen
5.
Es stehen drei Wege zur Verfügung, die Wi-FiVerbindung abzuschließen:
• Über das Wi-Fi Gerät.
• Über dieses Gerät mit Hilfe von PBC.
• Über dieses Gerät mit Hilfe einer PIN.
Jede dieser Möglichkeiten wird im Folgenden
beschrieben.
Über das Wi-Fi Gerät
1.
Folgen Sie auf dem Wi-Fi Gerät den Anweisungen
für den Anschluss an ein anderes Wi-Fi Direkt
Gerät. Schlagen Sie in der Bedienungsanleitung
des Geräts für weitere Anweisungen nach.
2.
Wenn die Prozedur abgeschlossen ist, sollte auf dem
Bildschirm des Fernsehgeräts ein Popup-Fenster mit
der Meldung erscheinen, dass ein die Wi-Fi Direkt
Funktion unterstützendes Gerät eine Verbindung
herstellen möchte. Wählen Sie OK, und drücken Sie
anschließend die v Taste, um bestätigen.
3.
Das Popup-Fenster für den Verbindungsaufbau
gefolgt vom Popup-Fenster für die hergestellte
Verbindung erscheinen. Wenn das letzte Fenster
geschlossen wird, sollte das Gerät auf dem Wi-Fi
Direkt Bildschirm als verbunden aufgelistet werden.
Über dieses Gerät mit Hilfe von PBC
1. Wählen Sie das Wi-Fi Direkt Gerät, das Sie
an dieses Gerät anschließen möchten und
drücken Sie anschließend die v Taste. Das
PBC/PIN Popup-Fenster erscheint.
2. Wählen Sie PBC, und drücken Sie die v
Taste. Das PBC Popup-Fenster erscheint.
3. Drücken Sie innerhalb von 2 Minuten die
PBC Taste auf dem Wi-Fi Direkt Gerät.
4.
Das Popup-Fenster für den Verbindungsaufbau gefolgt
vom Popup-Fenster für die hergestellte Verbindung
erscheinen. Wenn das letzte Fenster geschlossen
wird, sollte das Gerät auf dem Wi-Fi Direkt Bildschirm
als verbunden aufgelistet werden.
Über dieses Gerät mit Hilfe einer PIN
1. Wählen Sie das Wi-Fi Direkt Gerät, das Sie
an dieses Gerät anschließen möchten und
drücken Sie anschließend die v Taste. Das
PBC/PIN Popup-Fenster erscheint.
2. Wählen Sie PIN, und drücken Sie die v
Taste. Das PIN Popup-Fenster erscheint.
3.
Notieren Sie den PIN Code in dem Popup-Fenster
und tragen Sie ihn in das entsprechende Feld des
Wi-Fi Direkt Geräts ein, das Sie anschließen möchten.
4.
Das Popup-Fenster für den Verbindungsaufbau
gefolgt vom Popup-Fenster für die hergestellte
Verbindung erscheinen. Wenn das letzte Fenster
geschlossen wird, sollte das Gerät auf dem Wi-Fi
Direkt Bildschirm als verbunden aufgelistet werden.
| HINWEIS |
\Die Kabelnetzwerkverbindung oder die WLAN
Netzwerkverbindung wird unterbrochen, wenn Sie die WiFi Direkt Funktion nutzen.
Soft-AP
Soft AP ist die Abkürzung für Software Access Point.
Mit Hilfe von Soft AP können Sie andere Wi-Fi Direkt
Geräte über dieses Gerät mit Ihrem Netzwerk verbinden,
sodass Sie verschiedene Funktionen, wie AllShare oder
die Fernbedienung über Netzwerk nutzen können.
Es ist erforderlich, einen Sicherheitsschlüssel zu erstellen,
den Sie in die übrigen Wi-Fi Geräte eingeben müssen,
wenn Sie diese an das Peer-to-Peer Netzwerk anschließen
möchten.
1.
Wählen Sie auf dem Home Bildschirm
Einstell., und drücken Sie die v Taste.
2. Wählen Sie Netzwerk, und drücken Sie die
Taste.
v
3. Wählen Sie Soft-AP, und drücken Sie die
Taste.
v
4. Wählen Sie Ein oder Aus und drücken Sie
anschließend die v Taste.
< Einstellen des Soft-AP Sicherheitsschlüssels >
1.
Auf dem Soft/AP Bildschirm Sicherheitsschlüssel
auswählen und anschließend die v Taste
drücken. Der Sicherheitsschlüssel Bildschirm
erscheint.
2.
Geben Sie einen Sicherheitsschlüssel ein. Geben
Sie die Nummern direkt mit Hilfe der Tasten auf
der F
ernbedienung ein. Geben Sie einen Buchstaben
ein, indem Sie ihn mit Hilfe der ▲▼◄► Tasten
markieren und anschließend die v Taste
drücken.
3.
Wenn die Eingabe abgeschlossen ist, mit Hilfe der
▲▼◄► Tasten zu Fertig am unteren Rand gehen
und anschließend die v Taste drücken.
Wenn Sie ein Wi-Fi-Gerät über die Anschlussprozedur
auf dem Gerät anschließen, müssen Sie den hier
erstellten Sicherheitsschlüssel in das entsprechende
Feld eingeben.
|
28 Deutsch

AllShare Einstellungen
Das AllShare Einstellungen Fenster listet alle an
das Netzwerk angeschlossenen AllShare Geräte
und deren IP-Adressen auf. Über diesen Bildschirm
können Sie einem Gerät erlauben, eine Verbindung
zu dem Player herzustellen, den Zugriff verweigern
oder ein Gerät aus der AllShare Liste entfernen.
1.
Wählen Sie auf dem Home Bildschirm
Einstell., und drücken Sie die v Taste.
2. Wählen Sie Netzwerk, und drücken Sie die
Taste.
v
3. Wählen Sie AllShare-Einstellungen, und
drücken Sie die v Taste.
4. Wählen Sie ein Gerät und drücken Sie die v
Taste. Das AllShare Popup-Fenster erscheint.
5. Wählen Sie Zulassen, Verbiet. oder Aus der
Liste löschen und drücken Sie anschließend
die v Taste.
In dem AllShare Einstellungen Fenster werden nur
dann Geräte angezeigt, wenn Netzwerkverbindungen
zu AllShare Geräten aufgebaut wurden. Für weitere
Informationen über AllShare Netzwerkgeräte,
schlagen Sie bitte auf Seite 32 nach.
Aktualisieren der Software
Mit diesem Menü können Sie Software-Updates
herunterladen, welche der Leistung des Geräts verbessern
oder zusätzliche Dienste zur Verfügung stellen.
• Den Player während des Aktualisierungsvorgangs
niemals manuell ein oder aus schalten.
1.
Wählen Sie auf dem Home Bildschirm Einstell.,
und drücken Sie die v Taste.
2. Wählen Sie Unterstützung, und drücken Sie
die v Taste.
3. Wählen Sie Software-Update, und drücken
Sie die v Taste.
4. Wählen Sie eine der folgenden Methoden:
• Online
• PER USB
• Über Disk
• Über Download
• Update im Standby
5. Drücken Sie die v Taste.
| HINWEIS |
\Das Upgrade ist abgeschlossen, wenn sich der Player
abschaltet und anschließend selbst wieder einschaltet.
\Samsung Electronics haftet nicht für Fehlfunktionen
des Players, die auf eine instabile Internetverbindung
oder fahrlässiges Handeln des Benutzers während der
Software-Aktualisierung zurückzuführen sind.
\Wenn Sie das Upgrade während des Herunterladens der
Software abbrechen möchten, müssen Sie die v Taste
drücken.
\Während die Aktualisierung des Systems stattfindet, wird
"UP" auf der Anzeige des Geräts angezeigt.
Online
Ihr Gerät muss mit dem Internet verbunden sein,
um die Online Funktion nutzen zu können.
Wählen Sie Online, und drücken Sie die v
1.
Taste. Die Mitteilung über den Verbindungsaufbau
mit dem Server erscheint.
2. Wenn ein Download zur Verfügung steht,
wird das Download Popup-Fenster mit
einem Fortschrittsbalken angezeigt und der
Download beginnt.
3. Wenn der Download abgeschlossen ist,
wird das Upgrade Anfragefenster mit drei
Auswahlmöglichkeiten angezeigt: Akt. jetzt,
Akt. später oder Nicht akt.
4. Wenn Sie Akt. jetzt wählen, aktualisiert der
Player die Software, schaltet sich ab und
anschließend automatisch wieder ein.
5. Wenn Sie innerhalb einer Minute keine
Auswahl treffen oder Akt. später auswählen,
speichert der Player das Software Update.
Sie können das Update später mit Hilfe der
Über Download Funktion durchführen.
6. Wenn Sie Nicht akt. auswählen, bricht der
Player die Aktualisierung ab.
04 Einstellungen
Deutsch 29
|

Einstellungen
PER USB
1.
Besuchen Sie die Webseite www.samsung.com.
2. Klicken Sie am oberen Rand der Seite auf
SUPPORT.
3. Geben Sie den Produktnamen oder die
Artikelnummer in das Suchfeld ein und klicken
Sie anschließend auf Alle Ergebnisse.
4. Klicken Sie im mittleren Teil der Seite auf den
Tab Downloads.
5. Klicken Sie auf Firmware.
6. Klicken Sie in der Spalte Datei auf der rechten
Seite auf das ZIP Symbol.
7.
Klicken Sie in dem angezeigten Popup-Fenster
auf OK, um die Firmware herunterzuladen und
auf Ihrem PC zu speichern.
8. Entpacken Sie das Zip-Archiv auf Ihrem
Computer. Sie sollten einen eigenen Ordner
mit dem gleichen Namen wie die Zip-Datei
anlegen.
9.
Den Ordner auf ein USB-Flash-Laufwerk kopieren
10.
Stellen Sie sicher, dass sich keine Disk im
Gerät befindet und stecken Sie das USB-FlashLaufwerk in den USB-Anschluss des Geräts.
11. Im Menü des Geräts nach Einstell. >
Unterstützung > Software-Update wechseln.
12. Wählen Sie PER USB.
| HINWEIS |
\Es darf keine Disk im Gerät eingelegt sein, wenn die
Software über den USB-Anschluss aktualisiert wird.
\Überprüfen Sie nach Abschluss der Aktualisierung im
Software-Upgrade-Menü die Firmware-Details.
\Schalten den Player während der Software-Aktualisierung
nicht aus.
Der Player könnte beschädigt werden.
\Software-Updates über den USB-Anschluss dürfen nur
mit einem USB-Memorystick durchgeführt werden.
Über Disk
1.
Folgen Sie den Schritten 1 bis 7 unter PER USB
2. Entpacken Sie das Zip-Archiv auf Ihrem
Computer. Sie sollten einen eigenen Ordner
mit dem gleichen Namen wie die Zip-Datei
anlegen.
3. Schreiben Sie den Ordner auf eine Disk.
Wir empfehlen eine CD-R oder DVD-R zu
verwenden.
4. Schließen Sie die Disk ab, bevor Sie sie aus
dem Computer entfernen.
5. Legen Sie die Disk in das Gerät ein.
6. Im Menü des Geräts nach Einstell. >
Unterstützung > Software-Update wechseln.
7. Über Disk auswählen.
| HINWEIS |
\Überprüfen Sie nach Abschluss der Aktualisierung im
Software-Upgrade-Menü die Firmware-Details.
\
Schalten den Player während der Software-Aktualisierung nicht aus.
Der Player könnte beschädigt werden.
.
Über Download
Die Option Über Download ermöglicht das Update
mit einer Datei, die das Gerät bereits früher
heruntergeladen hat, Sie sich jedoch entschieden
haben, diese Datei nicht sofort zu installieren, oder
mit einer Datei, die das Gerät im Standby-Modus
heruntergeladen hat.
Wenn eine Upgrade Software heruntergeladen
1.
wurden, erscheint die Nummer der Softwareversion
auf der rechten Seite von Über Download.
2.
Wählen Sie Über Download, und drücken Sie die
Taste.
v
3.
Sie werden gefragt, ob Sie das Upgrade
durchführen möchten. Wählen Ja. Der Player
beginnt mit der Aktualisierung
4.
Wenn die Aktualisierung abgeschlossen ist, schaltet
sich der Player automatisch aus und wieder ein.
| HINWEIS |
\
Überprüfen Sie nach Abschluss der Aktualisierung im SoftwareUpgrade-Menü die Firmware-Details.
\Schalten Sie den Player während der Aktualisierung nicht aus.
Der Player könnte beschädigt werden.
.
|
30 Deutsch

Update im Standby
Sie können die Funktion Update im Standby
verwenden, damit das Gerät neue Updates
herunterlädt, wenn es sich im Standby-Modus
befindet.
Im Standby-Modus ist der Player ausgeschaltet,
seine Internetverbindung ist jedoch aktiv. Dies
ermöglicht es dem Player Upgrades automatisch
herunterzuladen, wenn Sie ihn gerade nicht
benutzen.
1. Wählen Sie mit Hilfe der ▲▼ Tasten Update
im Standby, und drücken Sie anschließend
die v Taste.
2. Wählen Sie Ein oder Aus.
Wenn Sie Ein eingestellt haben, wird der
abgeschaltete Player automatisch die neuen
Upgrades herunterladen, wenn er sich im
Standby-Modus befindet. Wenn er die neuen
Upgrades herunterlädt, werden Sie gefragt,
ob Sie das Upgrade installieren möchten,
wenn Sie den Player einschalten.
| HINWEIS |
\Für die Nutzung der Update im Standby Funktion muss Ihr
Gerät mit dem Internet verbunden sein.
04 Einstellungen
Deutsch 31
|

Media Play
Ihr Blu-ray Disc-Player kann Inhalte auf Blu-rayDisks/DVDs/CDs, USB-Geräten, PCs und DLNA
kompatiblen Mobiltelefonen wiedergeben.Um
Inhalte auf Ihrem PC oder DLNA kompatiblen
Mobiltelefon wiederzugeben, müssen Sie Ihren PC
und den Player an Ihr Netzwerk anschließen und die
AllShare Netzwerksoftware auf Ihrem PC installieren.
Wiedergabe von kommerziellen Video Disks
1. Drücken Sie die 8 Taste, um die Disk-Lade
zu öffnen.
2.
Legen Sie vorsichtig eine Disk mit der
bedruckten Seite nach oben in die Lade ein.
3. Drücken Sie die 8 Taste, um die Disk-
Lade zu schließen. Die Wiedergabe beginnt
automatisch.
4.
Wenn die Wiedergabe nicht automatisch startet,
drücken Sie die 6 Taste auf der Fernbedienung
oder schlagen Sie unter "Der AllShare Play
Bildschirm" nach.
Zugriff auf den AllShare Play Bildschirm
Um auf den AllShare Haupt-Wiedergabebildschirm
zuzugreifen, wählen Sie AllShare Play auf dem Home
Bildschirm und drücken Sie anschließend die
v
Taste.
Der AllShare Play Bildschirm im Überblick
AllShare Play
/ Videos /
Disk
1
2
Liste
Videos
Fotos
Musik
USB
DLNA
Keine Disk eingelegt.
Kein Gerät angeschlossen
Kein Gerät angeschlossen
a
Anmelden ' Zurück
Liste : Zeigt die zuletzt wiedergegebenen Dateien an.
Wenn das Gerät oder das Speichermedium mit den unter
1
Liste aufgelisteten Dateien angeschlossen oder eingelegt
ist, können Sie über Liste diese Dateien wiedergeben.
Art des Inhalts : Mit dieser Funktion können Sie
die Art des wiederzugebenden Inhalts auswählen:
2
Videos, Fotos oder Musik.
Gerätetyp : Mit dieser Funktion können Sie das
3
Gerät oder Medium mit dem Inhalt auswählen.
Zeigt die farbigen Tasten auf der Fernbedienung
an, die Sie für den Zugriff oder die Ausführung von
4
Funktionen verwenden können.
3
4
Der AllShare Play Bildschirm
Für alle Medien, mit Ausnahme von kommerziellen
Video Disks, ist der AllShare Play Bildschirm oder
einer seiner Unterbildschirme das Hauptwerkzeug
für den Zugriff und die Auswahl von Inhalten für die
Wiedergabe. Wenn Sie z. B. ein USB-Gerät an den
Player anschließen, wird der Inhalt des USB-Geräts
auf dem AllShare Play USB-Bildschirm angezeigt.
| HINWEIS |
\
Sie können den AllShare Play Bildschirm für den Zugriff
auf eine kommerzielle Video Disk verwenden. Wenn Sie z.
B. eine Filmwiedergabe anhalten, die Disk jedoch im Gerät
lassen, können Sie die Disk erneut über den AllShare Play
Bildschirm starten. Wenn Sie jedoch eine kommerzielle
Video Disk einlegen, wird, anders als bei anderen
Medien, der AllShare Play Bildschirm umgangen und die
Wiedergabe beginnt automatisch.
|
32 Deutsch
| HINWEIS |
\Die über DLNA wiedergegebenen Videodateien werden in
Liste nur dann angezeigt, wenn eine Netzwerkverbindung
besteht.
\Blu-ray/DVD/CD Inhalte werden jedoch in Liste nicht
aufgeführt.
\Der AllShare Play Bildschirm zeigt nur Dateien von der
ausgewählten Art des Inhalts an. Wenn Sie z. B. Musik
auswählen, werden nur Musikdateien angezeigt. Wenn
Sie die Ordner Fotos oder Videos öffnen, werden keine
Dateien angezeigt. Um andere Dateiarten anzuzeigen,
müssen Sie eine andere Art des Inhalts auswählen.
Wiedergabe von Dateien auf einem USB-Gerät
oder einem USB kompatiblen Mobiltelefon
Es gibt zwei Methoden, um Multimediadateien auf
einem USB-Gerät oder einem USB kompatiblen
Mobiltelefon über Ihren Player wiederzugeben.
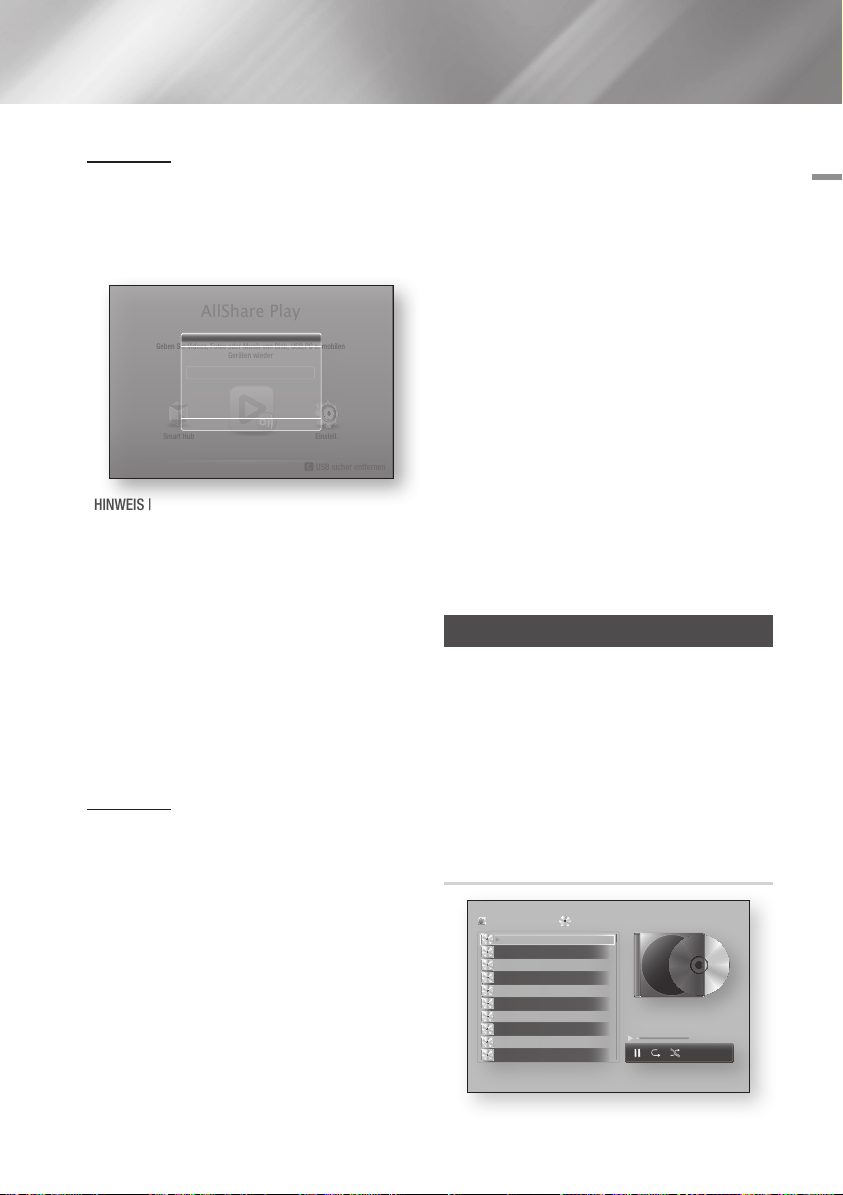
Methode 1
1. Schalten Sie den Player ein.
2.
Schließen Sie das USB-Gerät oder das Mobiltelefon
an den USB-Anschluss an der Vorderseite des Geräts
an. Das Neues Gerät angeschlossen Popup-Fenster
erscheint.
AllShare Play
Neues Gerät angeschlossen.
Geben Sie Videos, Fotos oder Musik von Disk, USB,PC o. mobilen
Smart Hub
Videos
Fotos
Musik
Geräten wieder
m80
" Eingabe ' Zurück
Einstell.
c
USB sicher entfernen
| HINWEIS |
\
Wenn das Popup-Fenster nicht angezeigt wird, fahren Sie mit Methode 2 fort.
3.
Wählen Sie mit Hilfe der ▲▼ Tasten Videos, Fotos,
oder Musik aus und drücken Sie anschließend die
Taste. Der AllShare Play Bildschirm erscheint in
v
dem der Inhalt des Geräts oder Telefons angezeigt
wird. Je nachdem, wie der Inhalt angeordnet ist,
sehen Sie entweder Ordner, einzelne Dateien oder
beides.
4. Wählen Sie eine wiederzugebende Datei aus
und drücken Sie die v Taste.
5. Drücken Sie die RETURN Taste, um einen
Ordner zu verlassen oder um zum Home
Bildschirm zurückzukehren.
Methode 2
1. Schalten Sie den Player ein.
2. Schließen Sie das USB-Gerät oder das
Mobiltelefon an den USB-Anschluss an der
Vorderseite des Geräts an.
3.
Auf dem Home Bildschirm AllShare Play auswählen
und anschließend die v Taste drücken.
4. Wählen Sie auf der linken Seite Videos, Fotos,
oder Musik aus und drücken Sie anschließend
die v Taste.
5.
Wählen Sie auf der rechten Seite USB und drücken
Sie die v Taste. Der AllShare Play Bildschirm
erscheint in dem der Inhalt des Geräts oder
Telefons angezeigt wird. Je nachdem, wie der
Inhalt angeordnet ist, sehen Sie entweder Ordner,
einzelne Dateien oder beides.
6. Falls erforderlich, verwenden Sie die ▲▼◄►
Tasten, um einen Ordner auszuwählen und
drücken Sie die v Taste.
05 Media Play
7. Verwenden Sie die ▲▼◄► Tasten, um eine
Datei für die Wiedergabe auszuwählen und
drücken Sie die v Taste.
8. Drücken Sie die RETURN Taste, um einen
Ordner zu verlassen oder um zum Home
Bildschirm zurückzukehren.
| HINWEIS |
\Um das USB-Speichergerät zu entfernen, müssen Sie
die „USB sicher entfernen“ Funktion durchführen, um
die gespeicherten Daten auf Ihrem USB-Gerät nicht zu
beschädigen. Drücken Sie die HOME Taste, um zum
Home Bildschirm zu wechseln, danach die GELB (C)
Taste, und anschließend die v Taste drücken.
\Wenn Sie eine Disk einlegen während Sie über ein USB-
Gerät oder Telefon wiedergebe, wird der Gerätemodus
automatisch auf „Disk" umgeschaltet.
\Wenn Ihr Telefon DLNA kompatibel ist, können Sie Inhalte
ohne den Anschluss über ein USB-Kabel wiedergeben.
Siehe „Verwenden der AllShare Netzwerkfunktion" auf
den Seiten 34-35.
Wiedergabe von kommerziellen Audio Disks
1. Führen Sie eine kommerzielle Disk mit der
Aufschrift nach oben zeigend in den Schlitz
ein. Der AllShare Musik Bildschirm wird
angezeigt, in dem die Titel aufgelistet sind.
Die Wiedergabe wird automatisch mit dem
ersten Titel gestartet.
2. Um einen bestimmten Titel wiederzugeben,
die ▲▼ Tasten auf der Fernbedienung
verwenden, um den Titel auszuwählen und
die v Taste drücken.
Musik Bildschirm Steuerelemente
AllShare Play
TRACK 001
TRACK 002
TRACK 003
TRACK 004
TRACK 005
TRACK 006
TRACK 007
TRACK 008
TRACK 009
TRACK 010
/ Musik /
Audio-CD
02:38
03:17
05:21
05:34
02:54
03:44
TRACK 001
04:07
03:42
03:15
03:16
bc Page Move / Extras ' Zurück
1/14
00:03 / 02:38
Deutsch 33
|

Media Play
Unterbrechen eines Titels.
Wiedergabe eines Titels.
Einen oder alle Titel wiederholen.
Wiedergabe der Titel in zufälliger Reihenfolge.
Um auf die Steuerelemente zuzugreifen, geben Sie einen
Titel aus und verwenden Sie anschließend die ◄► Tasten,
um zum gewünschten Steuerelement zu gelangen.
| HINWEIS |
\Die Musik Bildschirm Steuerelemente stehen nur zur
Verfügung, wenn ein Titel wiedergegeben wird.
\Es werden nicht alle Elemente gleichzeitig angezeigt.
\Für weitere Informationen über die Musikwiedergabe,
gehen Sie zu „Steuern der Musikwiedergabe" auf den
Seiten 38~40.
Wiedergabe von selbst
aufgenommenen Disks
Sie können Multimedia Dateien wiedergeben, die
Sie auf DVDs oder CDs aufgenommen haben.
1.
Führen Sie eine selbst aufgenommene Disk mit der
Aufschrift nach oben zeigend in den Schlitz ein. Das
Neues Gerät angeschlossen Popup-Fenster erscheint.
2.
Mit Hilfe der ▲▼ Tasten die Art des Inhalts auswählen,
den Sie wiedergeben möchten - Videos, Fotos oder
Musik - und drücken Sie dann die v Taste.
| HINWEIS |
\Obwohl der Player die Ordner für alle Inhalte anzeigt,
werden nur die Dateien von der Art des Inhalts angezeigt,
die Sie unter Schritt 2 ausgewählt haben. Wenn Sie z.
B. Musik ausgewählt haben, werden nur Musikdateien
angezeigt. Sie können diese Auswahl auf dem
Hauptbildschirm der AllShare Wiedergabe ändern.
3. Mit Hilfe der ◄► Tasten den Ordner mit dem
unter Schritt 2 gewählten Inhalt auswählen
und dann die v Taste drücken.
4.
Wenn Sie Musik gewählt haben, erscheint der
AllShare Musik Bildschirm, in dem die Musikdateien
auf der Disk aufgelistet werden. Verwenden Sie die
▲▼ Tasten, um eine Datei für die Wiedergabe
auszuwählen und drücken Sie die v Taste.
5. Wenn Sie Fotos gewählt haben, erscheint
der AllShare Fotos Bildschirm, in dem die
Fotodateien auf der Disk aufgelistet werden.
Verwenden Sie die ▲▼◄► Tasten, um das
Foto auszuwählen, das Sie anzeigen möchten
und drücken Sie die v Taste.
6. Wenn Sie Videos gewählt haben, erscheint
der AllShare Videos Bildschirm, in dem die
Videodateien auf der Disk aufgelistet werden.
Verwenden Sie die ▲▼◄► Tasten, um das
Video auszuwählen, das Sie wiedergeben
möchten und drücken Sie die v Taste.
| HINWEIS |
\Für alle Ordner - Music, Photo, und Video - können Sie
ebenfalls die TOOLS Taste auf der Fernbedienung drücken
und anschließend Ordner wiedergeben auswählen, um
alle Dateien in dem Ordner automatisch wiederzugeben.
Wählen Sie zuerst den Ordner aus, bevor Sie die TOOLS
Taste drücken.
Verwenden der AllShare
Netzwerkfunktion
Mit AllShare können Sie Videos, Fotos oder Musik von
Ihrem PC oder DLNA kompatiblen Geräten über das
Gerät mit Hilfe einer WLAN-Verbindung wiedergeben.
Herunterladen der AllShare Software
Um AllShare auf Ihrem PC DLNA-Gerät nutzen zu
können, müssen Sie die AllShare Software auf Ihrem
PC installieren.
Sie können die PC Software herunterladen und
erhalten ausführliche Anweisungen für die Nutzung
von AllShare auf der Webseite www.samsung.com.
1. Besuchen Sie www.samsung.com.
2.
Klicken Sie am oberen Rand der Seite auf Support.
3.
Geben Sie auf der Support Seite die
Modellbezeichnung Ihres Geräts in das Produktsuche
Feld ein und drücken Sie die v Taste.
4. Klicken Sie auf der aufgerufenen Seite unter
Weiterer Support auf AllShare PC S/W
Das Download Center wird aufgerufen.
5. Klicken Sie auf AllShare-PC-Software
herunterladen.
6. Es erscheint das Popup-Fenster Öffnen von
AllSharePCSW.exe.
|
34 Deutsch

7. Klicken Sie auf Datei speichern.
8. Wechseln Sie in das Downloadverzeichnis
mit der heruntergeladenen Datei und
doppelklicken Sie auf die Datei.
9. In dem angezeigten Popup-Fenster
auf Ausführen klicken. Folgen Sie den
Anweisungen auf Ihrem Bildschirm.
Laden Sie die Installationsanweisung/
Bedienungsanleitung aus dem gleichen Software Tab
durch Anklicken des entsprechenden PDF-Datei Symbols
in der Datei Spalte auf der rechten Seite herunter. Die
PDF-Datei wird heruntergeladen und geöffnet Die Datei
kann geöffnet oder gespeichert werden.
Wiedergabe von Inhalten auf Ihrem
PC oder DLNA-Gerät über den Blu-ray
Disc-Player
PC Blu-ray Disc Player
Wiedergabe
der PC-Dateien
AllShare Verbindung
1. Verbinden Sie den Blu-ray Disc-Player,
Ihren PC und/oder Ihr DLNA kompatibles
Mobiltelefon mit dem gleichen Netzwerk.
2. Folgen Sie den Anweisungen aus
Installations- und Bedienungsanleitung der
AllShare Software, um die Geräte und Dateien
für die Wiedergabe einzurichten.
3. Auf dem Home Bildschirm des Players
AllShare Play auswählen und anschließend
die v Taste drücken. Der AllShare Play
Bildschirm erscheint.
4. Wählen Sie das angeschlossene kompatible
DLNA Gerät oder Ihren PC aus und drücken
Sie die v Taste Ein Bildschirm mit den
verfügbaren Dateien wird angezeigt.
5. Wählen Sie die Dateien, die Sie wiedergeben
möchten, und drücken Sie die v Taste.
Steuern der Wiedergabe des sich auf
Ihrem PC befindenden Inhalts mit Hilfe
Ihres Smartphones
PC
AllShare
Verbindung
Smart Phone
(Steht nur für Samsung Telefone mit AllShare
Unterstützung zur Verfügung.)
1. Verbinden Sie den Blu-ray Disc-Player, Ihren
PC und Ihr DLNA kompatibles Mobiltelefon
mit dem gleichen Netzwerk.
2. Folgen Sie den Anweisungen aus
Installations- und Bedienungsanleitung der
AllShare Software, um die Geräte und Dateien
für die Wiedergabe einzurichten.
3. Bestätigen Sie in der AllShare Software auf
Ihrem PC, dass Ihr Telefon angeschlossen ist.
4.
Wählen Sie auf dem Telefon die Datei, die Sie
wiedergeben möchten und wählen Sieanschließend
den Blu-ray Player als Wiedergabegerät aus.
5. Starten Sie die Wiedergabe auf dem Telefon.
Blu-ray Disc Player
Wiedergabe
der PC-Dateien
Sendet PC Dateien an
den Blu-ray Disc-Player
05 Media Play
Deutsch 35
|

Media Play
1
4
7
VOL
+
2
5
8
0
VOL
–
3
6
9
SOURCE
DISC MENU
TITLE MENU
VOL VOL
POPUP
SAMSUNG TV
– +
Steuern der Videowiedergabe
S
ie können die Wiedergabe von Videoinhalten auf DVDs, USB-Geräten, mobilen Geräten oder dem PC steuern.
Je nach Disk oder Inhalt können einige in dieser Anleitung beschriebenen Funktionen nicht zur Verfügung stehen.
Tasten auf der Fernbedienung für die Videowiedergabe
Bedienen des Disk Menüs, Titel Menüs,
Popup Menüs und der Titelliste
Tasten für die Wiedergabe
Während der Suche, Zeitlupen- oder
Einzelbildwiedergabe wird der Ton nicht wiedergegeben.
• Um zur normalen Wiedergabegeschwindigkeit
zurückzukehren, die 6 Taste drücken.
Taste
6
Taste
5
Taste
7
Beschleunigte
Wiedergabe
Wiedergabe
in Zeitlupe
Einzelbildwiedergabe
Springen
|
36 Deutsch
Startet die Wiedergabe.
Beendet die Wiedergabe.
Anhalten der Wiedergabe.
Während der Wiedergabe die 3 oder
Taste drücken.
4
Jedes Mal, wenn Sie die 3 oder 4
Taste drücken, ändert sich die
Wiedergabegeschwindigkeit.
Drücken Sie im Pause-Modus die 4 Taste.
Jedes Mal, wenn Sie die 4 Taste drücken,
ändert sich die Wiedergabegeschwindigkeit.
Drücken Sie im Pause-Modus die 7 Taste.
Jedes Mal, wenn Sie die 7drücken, wird ein
neues Bild angezeigt.
Während der Wiedergabe die 1 oder
Taste drücken.
2
Jedes mal, wenn Sie die 1 oder 2
Taste drücken, wird zum nächsten oder
vorherigen Kapitel, bzw. Datei gesprungen.
DISC MENU
Taste
TITLE MENU
Taste
POPUP MENU
Taste
Während der Wiedergabe diese Taste
drücken, um das Disk Menü aufzurufen.
Während der Wiedergabe diese Taste
drücken, um das Titel Menü aufzurufen.
•
Wenn Ihre Disk über eine Wiedergabeliste
verfügt, drücken Sie die GRÜN (B) Taste,
um zur Wiedergabeliste zu wechseln.
Während der Wiedergabe diese Taste
drücken, um das Popup Menü aufzurufen.
Extras Menü verwenden
Drücken Sie während der Wiedergabe die TOOLS Taste.
Vom Anfang
wiedergeben
Movie Note
Scene Search
Wählen, um zum Anfang des Films
zurückzukehren und drücken Sie dann
die v Taste.
Movie Note stellt Infos zur Verfügung,
z. B. Regisseur, Darsteller, Handlung usw.
| HINWEIS |
\Movie Note ist verfügbar, wenn auf
der Disk Movie Note Informationen
gespeichert sind und eine
Netzwerkverbindung besteht.
Sie können die Szene Suchen Funktion
bei der Wiedergabe verwenden, um
einen Film von der gewünschten Szene
an anzuschauen oder zu starten.
| HINWEIS |
\Wenn die Index Informationen in der
Datei beschädigt sind oder die Datei
die Indexierung nicht unterstützt,
kann die Scene Search Funktion
nicht genutzt werden.
\
Wenn Sie die AllShare Play
Funktion nutzen, nachdem Sie über
das Netzwerk eine Verbindung einem
Computer hergestellt haben, wird
Scene Search nicht unterstützt

Titelsuche
Kapitelsuche
Zeitsuche
Wiederholmod.
Wenn sich mehr als ein Film auf der
Disk oder dem Gerät befindet wählen,
um einen anderen Titel zu starten.
1. Wählen Sie Titelsuche und drücken
Sie die v Taste.
2. Wählen Sie mit Hilfe der ▲▼
Tasten einen Titel aus und drücken
Sie anschließend die v Taste.
Dient zur Wiedergabe eines Kapitels
Ihrer Wahl.
1. Wählen Sie Kapitelsuche und
drücken Sie die v Taste.
2. Wählen Sie mit Hilfe der ▲▼
Tasten ein Kapitel und drücken Sie
anschließend die v Taste.
Wählen Sie diese Option, um den Film
von einem bestimmten Zeitpunkt an
wiederzugeben.
1. Wählen Sie Zeitsuche und drücken
Sie die v Taste.
2. Geben Sie mit Hilfe der
Nummerntasten den Zeitpunkt ein,
zu dem Sie wechseln möchten und
drücken Sie dann die v Taste.
| HINWEIS |
\Sie können ebenfalls die ◄►
Tasten verwenden, um den Film
vor- oder zurückzuspulen.
Durch jedes Drücken der ◄►
Tasten wird der Film um eine
Minute vor- oder zurückgespult.
Mit dieser Option kann ein Titel, Kapitel
oder ein bestimmter Abschnitt
wiederholt werden.
- Aus : Kehrt zur normalen
Wiedergabe zurück.
- Titel :
Wählen Sie diese Einstellung, um
einen gewählten Titel zu wiederholen.
- Kapitel : Wählen Sie diese
Einstellung, um ein bestimmtes
Kapitel zu wiederholen.
- Wiederhol. A-B : Wählen Sie diese
Einstellung, um einen bestimmten
Abschnitt zu wiederholen.
Wiederholmod.
Vollbild
Bildmodus
Audio
Untertitel
Winkel
1.
Wählen Sie mit Hilfe der ▲▼
Tasten Wiederhol. A-B, und drücken
Sie anschließend die v Taste.
2. Drücken Sie die v Taste, um
den Punkt zu markieren, an dem
die Wiederholung starten soll (A).
Lassen Sie den Film laufen.
3. Drücken Sie die v Taste, um
den Punkt zu markieren, an dem
die Wiederholung enden soll (B).
| HINWEIS |
\Der Punkt (B) muss mindestens 5
Sekunden hinter Punkt (A) liegen.
Mit dieser Option können Sie in den
Vollbild Modus wechseln.
Wählen Sie diese Einstellung, um den
Bildmodus einzustellen.
- Dynamisch : Erhöht die Schärfe und
Helligkeit.
- Standard : Wählen Sie diese Einstellung
für die meisten Programme.
- Film : Die beste Einstellung zum
Ansehen von Filmen.
- Benutzer : Ermöglicht die
Einstellung der Schärfe und der
Rauschunterdrückung.
| HINWEIS |
\
Wenn Sie die BD-Wise Funktion eingeschaltet
haben, wird dieses Menü nicht angezeigt.
Wählen Sie diese Option, um die
gewünschte Audiosprache einzustellen.
Wählen Sie diese Option, um die
gewünschte Untertitelsprache einzustellen.
- Sie können diese Funktion auch
durch Drücken der SUBTITLE Taste
auf der Fernbedienung auswählen.
Wählen Sie diese Option, um eine Szene
unter einem anderen Blickwinkel aus zu
betrachten. Die Winkel Option zeigt die
Anzahl der verfügbaren Winkel an.
Wenn eine Blu-ray-Disk/DVD mehrere
Blickwinkel einer bestimmten Szene enthält,
können Sie den Blickwinkel ändern.
05 Media Play
Deutsch 37
|
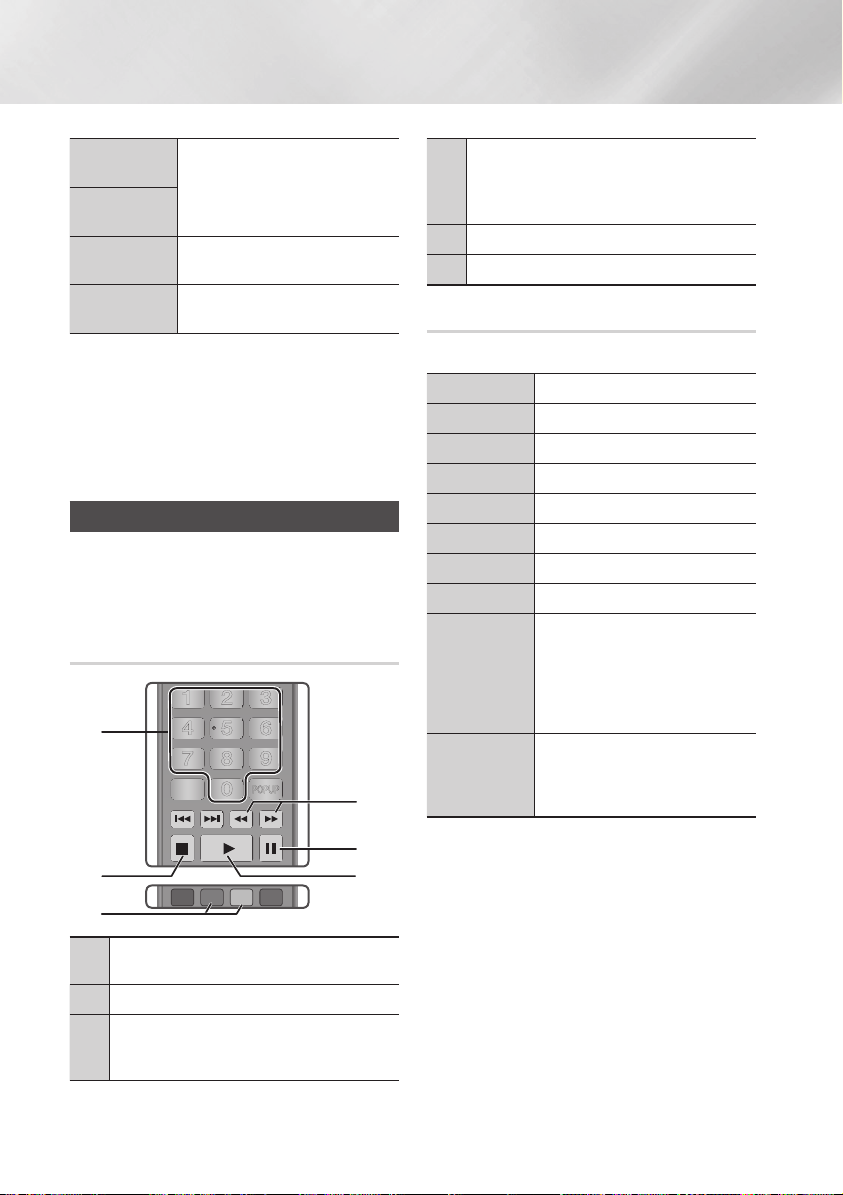
Media Play
1
4
7
VOL
+
2
5
8
0
VOL
–
3
6
9
SOURCE
DISC MENU
TITLE MENU
VOL VOL
POPUP
SAMSUNG TV
– +
HOME
1
4
7
VOL
+
2
5
8
0
VOL
–
3
6
9
SOURCE
DISC MENU
HOME REPEAT
TITLE MENU
VOL VOL
POPUP
A B C D
SAMSUNG TV
SMART
HUB
– +
INFOTOOLS
RETURN
EXIT
BONUSVIEW
Video
BONUSVIEW
Wählen Sie diese Option, um den
gewünschten Bonusview auszuwählen.
Audio
Zur Videoliste
Information
Wählen Sie diese Option, um zu der Liste der
Videos auf dem eingelegten Medium zu wechseln.
Wählen Sie diese Option, um Informationen
der Videodatei anzuzeigen.
| HINWEIS |
\
Abhängig von der Disk oder dem Speichergerät kann das Extras
Menü abweichen. Auf den Seiten 40-42 finden Sie weitere Optionen.
\Videodateien mit hohen Bitraten von 20Mbps oder mehr
beanspruchen das Gerät stark und können zu einer
Unterbrechung der Wiedergabe führen.
Steuern der Musikwiedergabe
Sie können die Wiedergabe von auf DVDs,
USB-Geräten, mobilen Geräten oder dem PC
gespeicherten Musiktiteln steuern.
Tasten auf der Fernbedienung für die
Musikwiedergabe
1
2
3
ZAHL Tasten : Drücken Sie die Nummer des Titels.
1
Der ausgewählte Titel wird wiedergegeben.
Taste : Stoppt die Wiedergabe eines Musiktitels.
2
5
Überspringen : Während der Wiedergabe die GRÜN
(B) oder GELB (C) Taste drücken, um zur vorherigen
3
oder nächsten Seite der Wiedergabeliste zu wechseln.
|
38 Deutsch
4
5
6
Schnelle Wiedergabe (nur bei Audio CDs (CD-DA))
Während der Wiedergabe die 3 oder 4 Taste drücken.
4
Jedes Mal, wenn Sie die 3 oder 4 Taste drücken,
ändert sich die Wiedergabegeschwindigkeit.
Taste
5
6
: Unterbrechen eines Titels.
7
Taste : Wiedergabe des ausgewählten Musiktitels.
6
Extras Menü verwenden
Drücken Sie während der Wiedergabe die TOOLS Taste.
Ansicht
Ordneransicht
Titel
Interpret
Album
Genre
Auswahl wdg.
Zur Wiedergabeliste
Ripp.
Information
| HINWEIS |
\Abhängig von der Disk oder dem Speichergerät kann das
Extras Menü abweichen. Auf den Seiten 40-42 finden Sie
weitere Optionen.
Siehe Seiten 40~42.
Siehe Seiten 40~42.
Siehe Seiten 40~42.
Siehe Seiten 40~42.
Siehe Seiten 40~42.
Siehe Seiten 40~42.
Siehe Seiten 40~42.
Siehe Seiten 40~42.
Die Ripping Funktion wandelt CD Audio
in das mp3 Format um und speichert
die umgewandelten Dateien auf einem
an das Gerät angeschlossenes USBGerät. Siehe Ripping auf den Seiten
39~40.
Wählen Sie diese Option, um sich
Informationen, wie Dateigröße,
Erstellungsdatum usw. anzeigen zu
lassen.
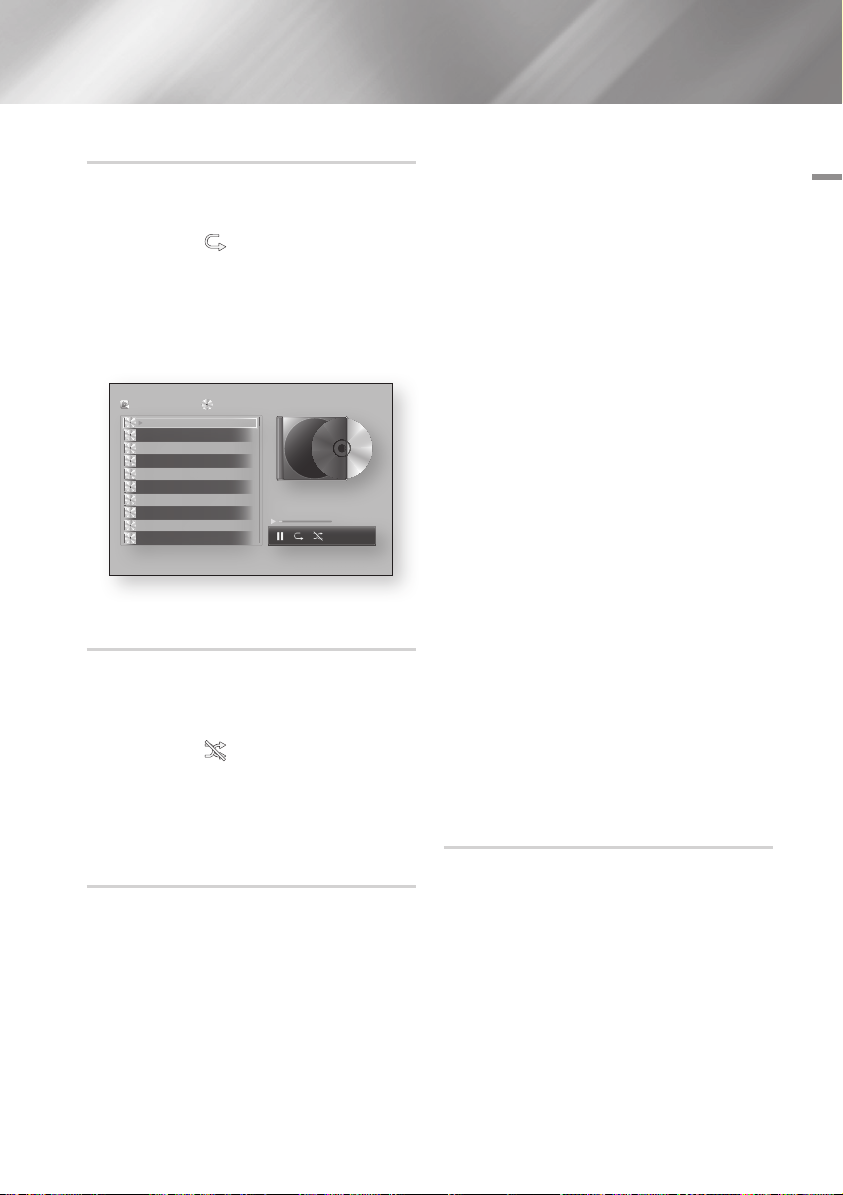
Wiederholen von Titeln auf einer Audio CD.
5. Um einen Titel aus der Liste zu entfernen,
Sie können das Gerät so einstellen, dass die Titel auf
einer Audio-CD (CD-DA/MP3) wiederholt werden.
6.
1. Verwenden Sie während der Wiedergabe die
► Taste, um
in der unteren rechten Ecke
des Bildschirms auszuwählen und drücken
Sie anschließend die v Taste.
2. Wählen Sie mit Hilfe der ▲▼ Tasten den
gewünschten Wiederholmodus - Aus, Ein
| HINWEIS |
Lied, oder Alles - und drücken Sie dann die
Taste.
v
AllShare Play
TRACK 001
TRACK 002
TRACK 003
TRACK 004
TRACK 005
TRACK 006
TRACK 007
TRACK 008
TRACK 009
TRACK 010
/ Musik /
Audio-CD
02:38
03:17
05:21
05:34
02:54
03:44
04:07
03:42
03:15
03:16
bc Page Move / Extras ' Zurück
TRACK 001
1/14
00:03 / 02:38
Wiedergabe der Titel auf einer Audio
CD in zufälliger Reihenfolge
Sie können das Gerät so einstellen, dass die Titel
auf einer Audio-CD (CD-DA/MP3) in zufälliger
Reihenfolge wiedergegeben werden.
1. Verwenden Sie während der Wiedergabe die
► Taste, um in der unteren rechten Ecke
des Bildschirms auszuwählen und drücken
Sie anschließend die v Taste.
2. Schalten Sie mit Hilfe der ▲▼ Tasten
Zufallswiedergabe Ein oder Aus, und drücken
Sie dann die v Taste.
Wiedergabeliste für eine CD erstellen
1. Rufen Sie den Wiedergabebildschirm auf und
drücken Sie die TOOLS Taste. Das Extras
Menü wird angezeigt.
2.
Wählen Sie mit Hilfe der ▲▼ Tasten Auswahl
wdg., und drücken Sie anschließend die v Taste.
Der Auswahl wiedergeben Bildschirm erscheint.
3. Wählen Sie mit Hilfe der ▲▼ Tasten einen
Titel aus und drücken Sie anschließend die
Taste. Auf der linken Seite des Titels
v
erscheint eine Markierung.
4. Wiederholen Sie Schritt 3, um weitere Titel
auszuwählen und zu markieren.
Ripping
1. Schließen Sie ein USB-Gerät an den USB-
2. Rufen Sie den Wiedergabebildschirm auf und
3. Mit Hilfe der ▲▼ Tasten Ripp. auswählen,
4. Wählen Sie mit Hilfe der ▲▼ Tasten einen
5. Wiederholen Sie Schritt 3, um weitere Titel
zum Titel gehen und die v Taste drücken.
Die Markierung des Titels wird entfernt.
Nach Abschluss die ► Taste drücken, um Wiederg,
auszuwählen und anschließend die v Taste
drücken. Der Musikwiedergabe Bildschirm erscheint
erneut, in dem nur die von Ihnen ausgewählten Titel
aufgeführt werden. Die ausgewählten Titel werden
automatisch wiedergegeben.
\Sie können auf Audio CDs (CD-DA) eine Wiedergabeliste
mit maximal 99 Titeln erstellen.
\Wenn Sie eine Wiedergabeliste erstellt haben, wird im
Extras Menü Auswahl wdg durch Wdg.-L. bearb. ersetzt.
\Auf dem Auswahl wiedergeben Bildschirm können Sie
ebenfalls Alles auswählen, Alle abwählen und Abbruch
auswählen.
-
Verwenden Sie Alles auswählen, um alle Titel auszuwählen.
Dadurch wird die Auswahl einzelner Titel abgebrochen. Wenn
Sie die RETURN Taste auf der Fernbedienung drücken oder die
Taste wählen und anschließend die v Taste drücken,
6
erscheinen alle Titel auf dem Musik Wiedergabe Bildschirm
und das Gerät gibt alle Titel beginnend mit Titel 001 wieder.
- Verwenden Sie Alle abwählen, um alle Titel gleichzeitig
abzuwählen. Wählen Sie anschließend einzelne Titel
aus oder verwenden Sie die Alles auswählen, um alle
Titel auszuwählen und drücken Sie dann die RETURN
Taste auf der Fernbedienung oder wählen Sie die 6
Taste und drücken Sie anschließend die v Taste.
Wenn Sie nicht Alles auswählen oder einzelne Titel
auswählen, wird die Wiedergabeliste nicht geändert.
- Abbruch bricht alle Änderungen, die Sie auf dem
Auswahl Wiedergeben Bildschirm gemacht haben ab.
Wenn Sie zum Wiedergabebildschirm zurückkehren,
bleibt die Wiedergabeliste unverändert.
Anschluss auf der Vorderseite des Geräts an.
drücken Sie die TOOLS Taste. Das Extras
Menü wird angezeigt.
und die v Taste drücken. Der Ripp.
Bildschirm wird angezeigt.
Titel aus und drücken Sie anschließend die
Taste. Auf der linken Seite des Titels
v
erscheint eine Markierung.
auszuwählen und zu markieren.
Deutsch 39
|
05 Media Play
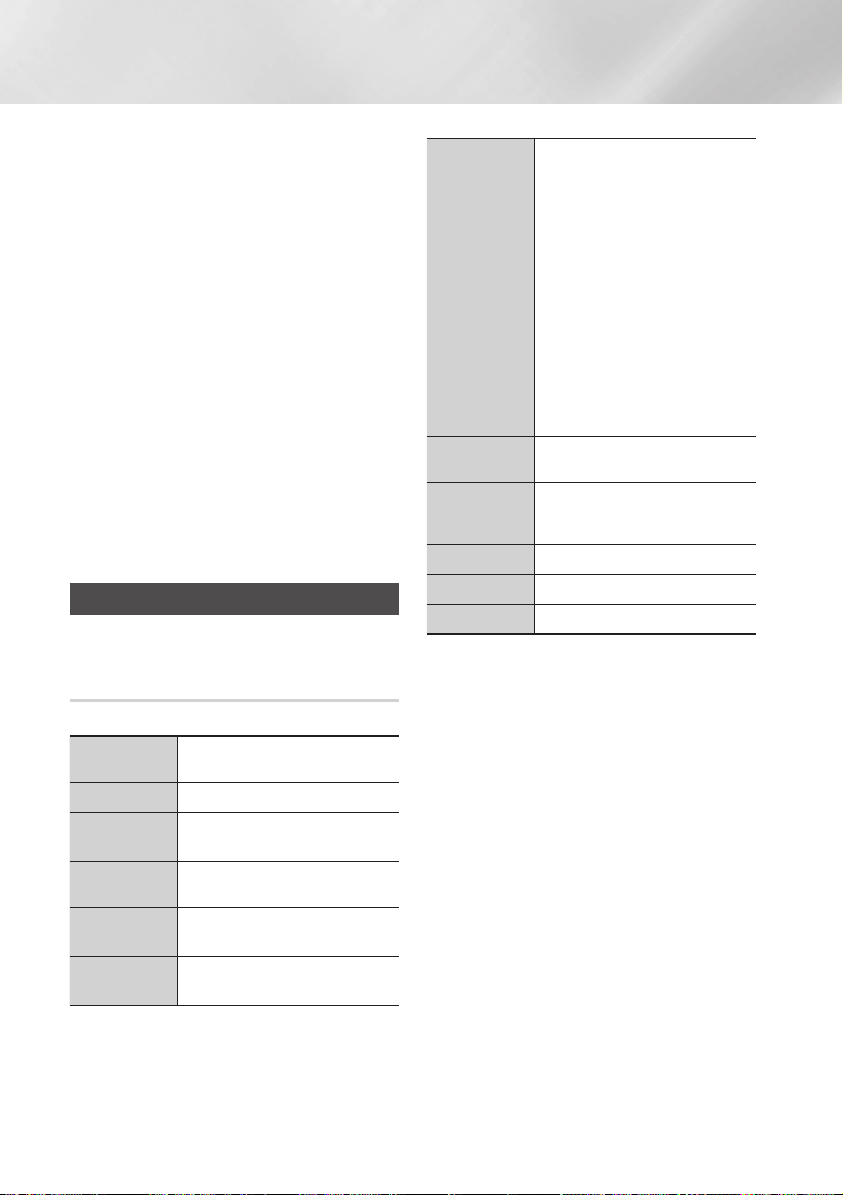
Media Play
6. Um einen Titel aus der Liste zu entfernen,
zum Titel gehen und die v Taste drücken.
Die Markierung des Titels wird entfernt.
7. Nach Abschluss die ► Taste drücken, um
Ripp. auszuwählen und anschließend die v
Taste drücken. Das Ripp. Popup-Fenster
erscheint.
8. Drücken Sie die v Taste, um mit dem
Rip-Vorgang zu starten. Der Rippen
Fortschrittsbalken erscheint.
9.
Wenn das Rippen abgeschlossen ist, erscheint
die Meldung "Kopieren abgeschlossen.".
Drücken Sie die v Taste.
10. Drücken Sie die RETURN Taste, um zum
Wiedergabebildschirm zurückzukehren.
| HINWEIS |
\Diese Funktion ist für DTS Audio CD nicht verfügbar.
\Diese Funktion wird eventuell von einigen Disks nicht
unterstützt.
\Mit dieser Funktion wird in das .mp3 Format mit 192kbps
kodiert.
Anzeigen von Fotos
Sie können auf DVDs, USB-Geräten, mobilen
Geräten oder dem PC gespeicherte Fotos anzeigen.
Extras Menü verwenden
Drücken Sie während der Wiedergabe die TOOLS Taste.
Zur Fotoliste
Diashow starten
DiashowGeschw.
Diashow-Effekt
Hintergrundmusik
an
Einstellung der
Hintergrundmusik
Wählen Sie diese Option, um zu der Liste der
Fotos auf dem eingelegten Medium zu wechseln.
Startet die Diashow.
Wählen Sie diese Option, um die
Geschwindigkeit der Diashow einzustellen.
Wählen Sie diese Option, um die
Spezialeffekte der Diashow einzustellen.
Wählen Sie diese Option, um während
der Diashow Musik zu hören.
Dient zur Einstellung der
Hintergrundmusik Optionen.
Wählen Sie diese Option, um den
Bildeinstellungen einzustellen.
- Dynamisch : Wählen Sie diese
Option, um die Schärfe zu erhöhen.
- Standard :
die meisten Wiedergabeanwendungen
verwendet werden.
Bildmodus
Zoom
Drehen
Auswahl wdg.
Anmelden/Logout
Information
| HINWEIS |
\Abhängig von der Disk oder dem Speichergerät kann
das Extras Menü abweichen. Eventuell werden nicht alle
Optionen angezeigt.
\
Um die Hintergrundmusik Funktion aktivieren zu können,
muss sich die Bilddatei im gleichen Ordner befinden, wie die
Musikdatei.
Die Audioqualität kann durch die Bitrate der MP3-Datei, die
Bildgröße und die Kodierungsmethode beeinträchtigt werden.
\Sie können den Untertitel und die PG-Grafik im
Vollbildschirmmodus nicht vergrößern.
- Film : Dies ist die beste Einstellung
zum Ansehen von Filmen.
- Benutzer : Ermöglicht die
Einstellung der Schärfe und der
Rauschunterdrückung.
| HINWEIS |
\Wenn Sie die BD-Wise Funktion
eingeschaltet haben, wird dieses
Menü nicht angezeigt.
Vergrößert das aktuelle Bild. (bis zu
vierfache Vergrößerung.)
Dreht das Bild. (Das Bild wird entweder
im Uhrzeigersinn oder gegen den
Uhrzeigersinn gedreht.)
Siehe Seiten 40~42.
Siehe Seiten 40~42.
Zeigt die Bildinformationen an.
Diese Einstellung kann für
|
40 Deutsch

Verwenden des Extras Menü, wenn
eine Datei markiert ist
Wenn eine Datei markiert ist, die TOOLS Taste drücken.
Wählen Sie diese Option, um die
Ansicht
Ordneransicht
Titel
Interpret
Album
Genre
Spätestes Dat.
Frühestes Dat.
Monatlich
Sortieroptionen einzustellen: Interpret, Genre,
Monatlich, Spätestes Dat. usw. Die angezeigten
Sortieroptionen hängen von der Art der der
Speicherung und des Speichermediums ab.
Erscheint im Bildschirm der Ansicht Funktion.
Wählen Sie diese Option, um die Ordner auf
dem Speichergerät anzuzeigen.
Erscheint im Bildschirm der Ansicht Funktion.
Wählen Sie diese Option, um alle Fotos oder Videos
auf dem Speichergerät nach Titel zu sortieren.
Erscheint im Bildschirm der Ansicht Funktion.
Wählen Sie Interpreten aus und es werden
alle Musiktitel auf dem Speichergerät nach
Interpreten sortiert angezeigt.
Erscheint im Bildschirm der Ansicht Funktion.
Wählen Sie Album aus und es werden alle
Musiktitel auf dem Speichergerät nach Alben
sortiert angezeigt.
Erscheint im Bildschirm der Ansicht Funktion.
Wählen Sie Genre aus und es werden alle
Musiktitel auf dem Speichergerät nach Genres
sortiert angezeigt.
Erscheint im Bildschirm der Ansicht Funktion. Nach
Auswahl dieser Option werden alle Fotos oder
Videos auf einem Speichergerät vom spätesten bis
zum jüngsten Datum sortiert angezeigt.
Erscheint im Bildschirm der Ansicht
Funktion. Nach Auswahl dieser Option
werden alle Fotos oder Videos auf
einem Speichergerät vom jüngsten bis
zum spätesten Datum sortiert angezeigt.
Erscheint im Bildschirm der Ansicht
Funktion. Wählen Sie diese Option,
um alle Fotos oder Videos auf dem
Speichergerät nach Erstellungsmonat
sortiert anzuzeigen.
Auswahl wdg.
Senden
Mit der Auswahl Wiedergabe Funktion
können Sie bestimmte Musik-, Videound Fotodateien für die Wiedergabe
auswählen. Funktioniert grundsätzlich
für alle Medien gleich. Das folgende
Beispiel ist für Fotos angegeben.
1. Verwenden Sie auf dem
Auswahlbildschirm die ▲▼◄►
Tasten, um ein Foto auszuwählen,
das Sie anzeigen möchten und
drücken Sie die v Taste.
Auf der linken Seite des Fotos
erscheint eine Markierung.
2. Wiederholen Sie Schritt 1 für jedes
Foto, dass Sie anzeigen möchten.
3. Um ein Foto abzuwählen, das
Foto markieren und die v Taste
drücken.
4.
Nach Abschluss die ◄► Tasten
drücken, um Wiederg, auszuwählen
und anschließend die v Taste
drücken. Eine Diashow mit den
ausgewählten Fotos wird gestartet.
5. Um die Diashow zu unterbrechen,
die v Taste einmal drücken. Um
die Diashow fortzusetzen, die v
Taste erneut drücken.
6. Um die Diashow anzuhalten, die
RETURN Taste drücken.
| HINWEIS |
\
Nachdem die Diashow gestartet
wurde, kann die Diashow durch
Drücken der TOOLS Taste die Diashow
gesteuert und das Diashow Menü
angezeigt werden. Siehe „Verwenden
des Extra Menüs" auf Seite 40.
Wählen Sie Senden, um die
ausgewählten Dateien auf Picasa,
Facebook, Cloud Storage, oder Family
Story hochzuladen.
Um Senden nutzen zu können, müssen
Sie ein Konto auf der Online Seite
einrichten sich anschließend mit der
Anmelden Funktion anmelden.
05 Media Play
Deutsch 41
|

Media Play
Senden
Anmelden/
Logout
Zu W.-Li. hinz.
|
42 Deutsch
1. Wählen Sie mit Hilfe der ▲▼◄►
Tasten eine Datei aus und drücken
Sie anschließend die v Taste.
2.
Wiederholen Sie diese Schritte für jede
Datei, die Sie hochladen möchten.
| HINWEIS |
\
Sie können ebenfalls Alle wählen auf der
Rechten Seite verwenden und die v
Taste drücken, um alle Titel auszuwählen.
3. Wählen Sie Senden auf der
rechten Seite und drücken Sie
anschließend die v Taste.
4. Wählen Sie mit Hilfe der ▲▼
Tasten die Online Seite, auf die Sie
die Dateien oder Titel hochladen
möchten und drücken Sie
anschließend die v Taste.
Mit der Login/Out An-/Abmelden
Funktion können Sie sich an Ihrem
Samsung Online Konto anmelden.
Wählen Sie diese Option, um eine
Wiedergabeliste zu erstellen oder
um Dateien oder Titel zu einer
Wiedergabeliste hinzuzufügen.
1. Markieren Sie mit Hilfe der
▲▼◄► Tasten einen Titel
oder eine Datei und drücken Sie
anschließend die v Taste.
2. Wiederholen Sie diese Schritte für
jede Datei oder jeden Titel, den Sie
hochladen möchten.
3. Wählen Sie Hinzuf. auf der
rechten Seite und drücken Sie
anschließend die v Taste.
4.
Führen Sie in dem angezeigten Fenster
eine der folgenden Aktionen durch:
•
Wählen Sie die Wiedergabeliste aus, zu
der Sie die Titel oder Dateien hinzufügen
möchten und drücken Sie die v Taste.
•
Wählen Neu erst. und drücken Sie
die v Taste. In dem erscheinenden
Tastatur Popup-Fenster einen Namen
für die neue Wiedergabeliste eingeben.
Mit Hilfe der Nummerntasten auf der
Fernbedienung die Nummern eingeben.
Geben Sie die Buchstaben mit Hilfe der
▲▼◄► Tasten ein und drücken Sie
anschließend die v Taste. Wenn die
Eingabe abgeschlossen ist, Fertig am
unteren Bildschirmrand auswählen und
anschließend die v Taste drücken.
Je nachdem welchen Bildschirm Sie gerade
Entfernen
(Wiedergabeliste)
Wdg.-L. bearb.
Gruppe
abspielen
Zur
Wiedergabeliste
Kodierung
Information
| HINWEIS |
\Abhängig von der Disk oder dem Speichergerät kann
das Extras Menü abweichen. Eventuell werden nicht alle
Optionen angezeigt.
betrachten, Löschen auswählen, um eine
Datei von einem beschreibbaren Medium
(wie einem USB-Gerät) oder eine
Wiedergabeliste zu löschen.
Wählen Sie Wdg.-L. bearb. um Dateien ider
Titel aus einer bestehenden Wiedergabeliste
zu löschen. Das Speichermedium mit der
Wiedergabeliste muss in den Player eingelegt
oder an diesen angeschlossen sein.
1.
Wählen Sie mit Hilfe der ▲▼◄►
Tasten eine Datei aus und drücken Sie
anschließend die v Taste.
2.
Wiederholen Sie diese Schritte für jede
Datei, die Sie löschen möchten.
|
HINWEIS |
\Sie können ebenfalls Alles auswählen
auf der Rechten Seite verwenden und
die v Taste drücken, um alle Titel
auszuwählen.
3.
Auf der rechten Seite Entfernen
auswählen und anschließend die v
Taste drücken.
Nachdem Sie nach Interpret, Genre, Album,
Titel, Spätestes Dat., Frühestes Dat. oder
Monatlich sortiert haben, wählen Sie eine
Gruppe aus den Suchergebnissen aus (z.
B. alle im August aufgenommenen Bilder)
und wählen Sie anschließend Gruppe
abspielen, um nur die Dateien aus dieser
Gruppe wiederzugeben.
Wählen Sie diese Option, um zum
Wiedergabeliste Bereich auf dem
AllShare Hauptbildschirm zu wechseln.
Die Kodierung ändert sich je nach
Sprache oder Region und hat Einfluss
darauf, wie der Player Dateien und Titel
sortiert und anordnet, bzw. das Datum
anzeigt. Wählen Sie Kodierung, um die
Kodierung an Ihre Sprache oder Region
anzupassen.
Zeigt die Informationen über die
Mediendatei und den Inhalt an.
 Loading...