

Page 1
Mobile Phones Division
Tel. +33 1 40 70 88 44 - Fax +33 1 40 70 66 40 - www.sagem.com
Le Ponant de Paris - 27, rue Leblanc - 75512 PARIS CEDEX 15 - FRANCE
SAGEM SA - Société anonyme à directoire et conseil de surveillance
capital : 33 300 000 € - 562 082 909 RCS PARIS
SAGEM
SA
ENGLISH
*251310522*
251310522_myX-1_Couv_en.qxd 25/09/03 14:20 Page 1
Page 2

Compatibility of your SIM card
Your phone is compatible with SIM 3V
cards only.
You have just bought a mobile phone and we
congratulate you on your choice.
Your phone will allow you to use different international
networks (GSM 900 MHz and DCS 1800 MHz)
depending on the roaming agreements between the
operators.
We would like to remind you that this phone is
approved to European standards.
To get the most out of using your phone, we
recommend that you read this manual carefully and
keep it handy for future reference if needed.
WARNING
According to the configuration of the networks and
associated subscriptions, certain functions may not be
available (usually indicated by *).
Make sure your SIM card is compatible with your
phone. If an incompatible SIM card is inserted, a
message will be displayed when switching on your
phone. For further information, contact your Operator.
The SAGEM logo and trademark are the property of
SAGEM SA.
AT is a registered trademark of Hayes Microcomputer
products Inc.
Hayes is a registered trademark of Hayes Microcomputer
Products Inc.
T9™ Text Input is a registered trademark of ©Tegic
Communications Inc.
T9 is licensed under one or more of the following U.S.
Patents: 5,818,437, 5,953,541, 5,187,480, 5,945,928,
6,011,554 and additional patents are pending worldwide.
1
MYX-1_EN-00.pmd 23/09/2003, 16:291
Page 3

Conformance Document
SAGEM SA declare under its sole responsibility that
the product Dual Band GSM/DCS Type A2003
conforms to the requirements of the following EEC
directives:
EEC Directive 1999/5/CE
Safety EN 60950: 2000
EMC EN 301 489-1
Low voltage
directive 73/23/CEE
Network 3GPP TS 51.010-1 v5.3.0 selected
Health EN 50360
2
EN 301 489-7
with GCF-CC v3.10.0 included
Requirements GT01 v 4.7.0
TBR 19 Edition 5
TBR 20 Edition 3
TBR 31 Edition 2
TBR 32 Edition 2
EN 301 419-1
EN 301 511
EN 50361
MYX-1_EN-00.pmd 23/09/2003, 16:292
Page 4
Functions at a glance
Switch on
Press .
Call
Dial the number then press .
Answer
Press .
Hang up
Press .
Switch off
Press (long press).
Hands-free
To communicate, press .
Lock and unlock the keyboard from the standby
screen
∗∗
Press
∗ then OK.
∗∗
Redial last number
Press twice.
Make a call from a number stored in the directory
By name: enter the first letter of the name, press ,
scroll down the list to find your correspondent, then
press to call.
By location in the directory: enter the location number
then press
∗∗
∗ to call.
∗∗
MYX-1_EN-00.pmd 23/09/2003, 16:293
3
Page 5

Menus at a glance
Enter using or
Navigate using and
Validate using OK
Quit or return to the previous menu using C
According to the model of your phone, to the
configuration of the networks and associated
subscriptions, certain functions may not be
available (indicated by *).
Depending on the model, the phone menus will
appear as listed below:
Services
Directory
Directory menu
Sort by location
Create record
Call groups
Available memory
Personal numbers
Text messages
Call services
Quit
Write new...
Call forwarding
View last numbers
Duration and cost of calls (*)
Display numbers
Double call
Automatic redial
Blacklist
Voice mail number
Local information (*)
Ringing and beeps
Volume and choice of music
Call groups
Personalised ringing tone
Vibrate (*)
Silent mode
Beeps
Controls
Customization
Select language
Automatic response
Network selection
Setting time/date
Display contrast
Currency converter
Security
Keyboard locking
PIN number
PIN number 2 (*)
Phone code
Confidentiality messages
Operator password (*)
Limit incoming calls (*)
Limit outgoing calls (*)
Pre-set directory (*)
Costs (*)
Accessories
Calculator
Alarm
Timer
Car kit (*)
Data parameters
Games
4
MYX-1_EN-00.pmd 23/09/2003, 16:294
Page 6

Glossary
Outgoing call A call made from your phone.
Incoming call A call received by your phone.
SIM card The card containing your subscription and access rights to services. The
PIN The personal code linked to your SIM card.
PIN2 The second personal code linked to your SIM card to access certain
Phone code The phone code is a secret code intended to protect the phone in case of theft.
IMEI The identification number of your phone.
SMS or EMS Short Message Service or Extended Message Service: sending and receipt of
Service provider Company which manages the network subscription.
or operator
detachable part is the “micro-SIM”.
functions (*).
text messages, icons, animated screen savers and melodies.
MYX-1_EN-00.pmd 23/09/2003, 16:295
5
Page 7

Contents
Presentation of the phone ............................. 8
Function keys ................................................ 9
Alphanumeric keyboard ................................. 9
Key 1 ........................................................... 10
Key ∗ ........................................................... 10
Display ......................................................... 10
Exchanging the front and back panel ........... 11
Getting started .............................................. 12
Information on the SIM card ......................... 12
Installing the SIM card and the battery .......... 13
Charging the battery..................................... 14
Switching on/switching off, starting up .......... 15
Setting Time and Date ................................. 15
Searching for a network ............................... 16
Switching off ................................................ 17
Recommendation ........................................ 17
Menu access ............................................... 17
Deleting characters ...................................... 17
Initial communication - Hands-free mode .. 18
Making a call ................................................ 18
Receiving a call ........................................... 18
Volume control ............................................. 18
Hands-free mode (*) .................................... 19
Ending a call ................................................ 19
Directory ....................................................... 20
Directory display .......................................... 20
Storing a number ......................................... 20
Deleting a number ....................................... 21
Call groups .................................................. 21
Sorting ......................................................... 23
Sending a short message to a stored
number ........................................................ 23
Directory memory space .............................. 24
6
Displaying personal numbers ....................... 24
Making a call with a stored number .............. 24
Messages ...................................................... 25
Receiving a message .................................. 25
Editing a message using Easy
Message T9™ ............................................. 31
Options for messages in the list ................... 35
Calls ............................................................... 36
Forwarding calls ........................................... 36
Viewing the list of the last numbers used ...... 37
Monitoring the duration and cost of calls (*) .. 37
Displaying the numbers ................................ 38
Authorising double call ................................. 39
Configuring automatic redial ......................... 39
Blacklist ....................................................... 40
Voice mail number ....................................... 40
Local information distribution ........................ 40
Replacing the international prefix ................. 40
Placing calls on hold .................................... 41
Multi-conferencing (*) ................................... 41
Ringing tones ............................................... 43
Selecting the volume and the type
of ringing tone .............................................. 43
Call groups .................................................. 43
Personalising the ringing tone ...................... 44
Setting the vibrator (*) .................................. 45
Selecting silent mode ................................... 45
Setting the beeps ......................................... 45
Deleting DTMF tones ................................... 46
MYX-1_EN-00.pmd 23/09/2003, 16:296
Page 8

Contents
Settings ......................................................... 47
Customizing your phone .............................. 47
Selecting the display language ..................... 49
Select the type of response .......................... 50
Selecting the network ................................... 50
Setting the time and date ............................. 51
Controlling screen contrast ........................... 52
Converting currencies .................................. 52
Security ......................................................... 53
Locking the keyboard ................................... 53
Changing the PIN number ............................ 53
Changing the PIN2 number (*) ..................... 54
Changing the phone code ............................ 54
Changing the operator password (*) ............. 55
Limiting incoming calls (*) ............................ 55
Limiting outgoing calls (*) ............................. 56
Setting up the pre-set directory (*) ................ 56
Charge checking (*) ..................................... 57
Confidentiality messages ............................. 57
Accessories .................................................. 58
Calculator .................................................... 58
Setting the alarm .......................................... 58
Setting the timer........................................... 59
Configuring your phone with a car kit ............ 59
Data parameters .......................................... 60
WAP (depending on model) ......................... 61
The WAP menus ......................................... 61
Configuration of parameters ......................... 62
Connection .................................................. 63
Downloading objects .................................... 63
Disconnection .............................................. 64
Exit from the WAP function .......................... 64
Icons ............................................................ 64
Games ........................................................... 65
Available accessories ................................... 66
Available accessories .................................. 66
Upkeep ........................................................ 66
Battery ......................................................... 66
Maintenance menu ...................................... 66
Recommendations ....................................... 67
Technical Characteristics ............................ 71
Troubleshooting ........................................... 73
7
MYX-1_EN-00.pmd 23/09/2003, 16:297
Page 9
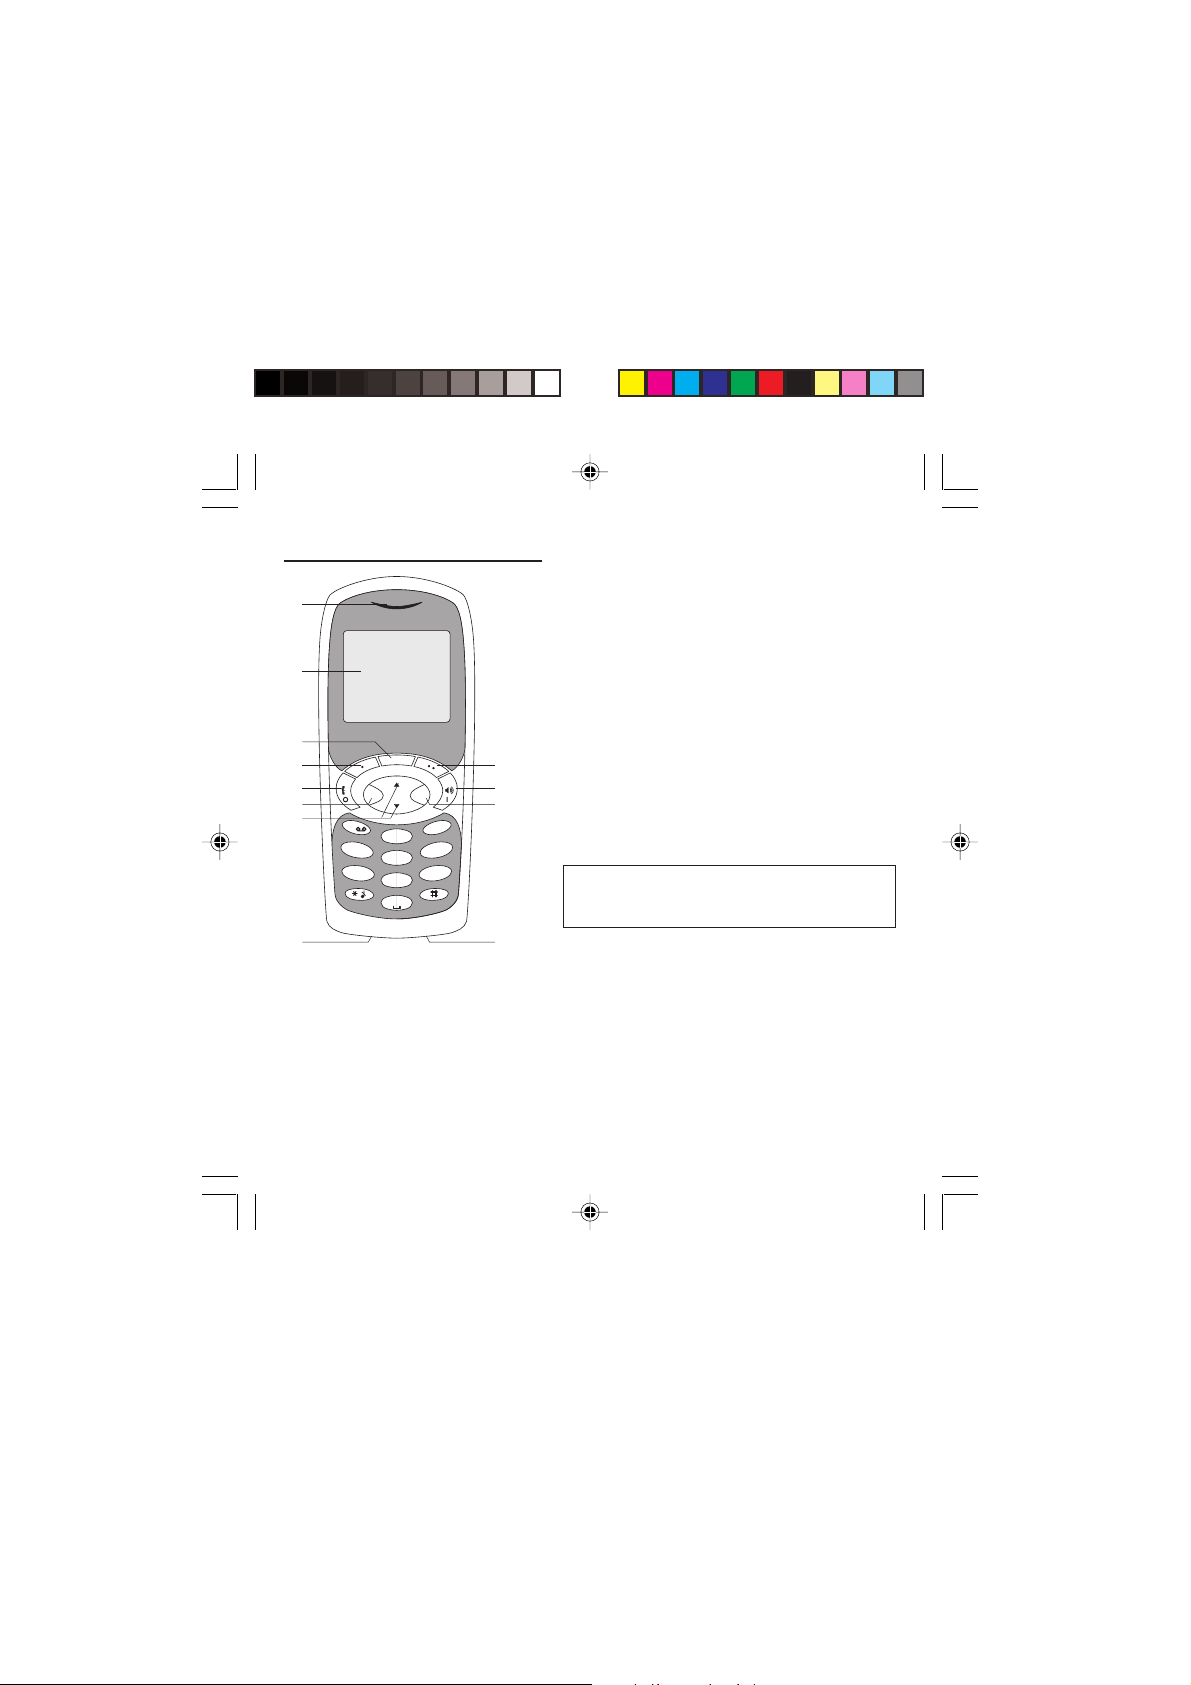
Presentation of the phone
1 - Ear phone/Speaker
11
2
s
4
my X-1
3
7 8
9
6
1
4
7
OKC
def
3
abc
2
ghi
pqrs
mno
6
jkl
5
wxyz
9
tuv
8
0
+
12 11
5
10
2 - High definition graphics screen
3 - Programmable lefthand key
4 - Central key
5 - Programmable righthand key
6 - Scrolling arrows
7 - Stop/End call
8 - Operate/Call - Activation of hands-free
9 - Cancel
10 - Validate
11 - Battery charging and accessories socket
12 - Microphone
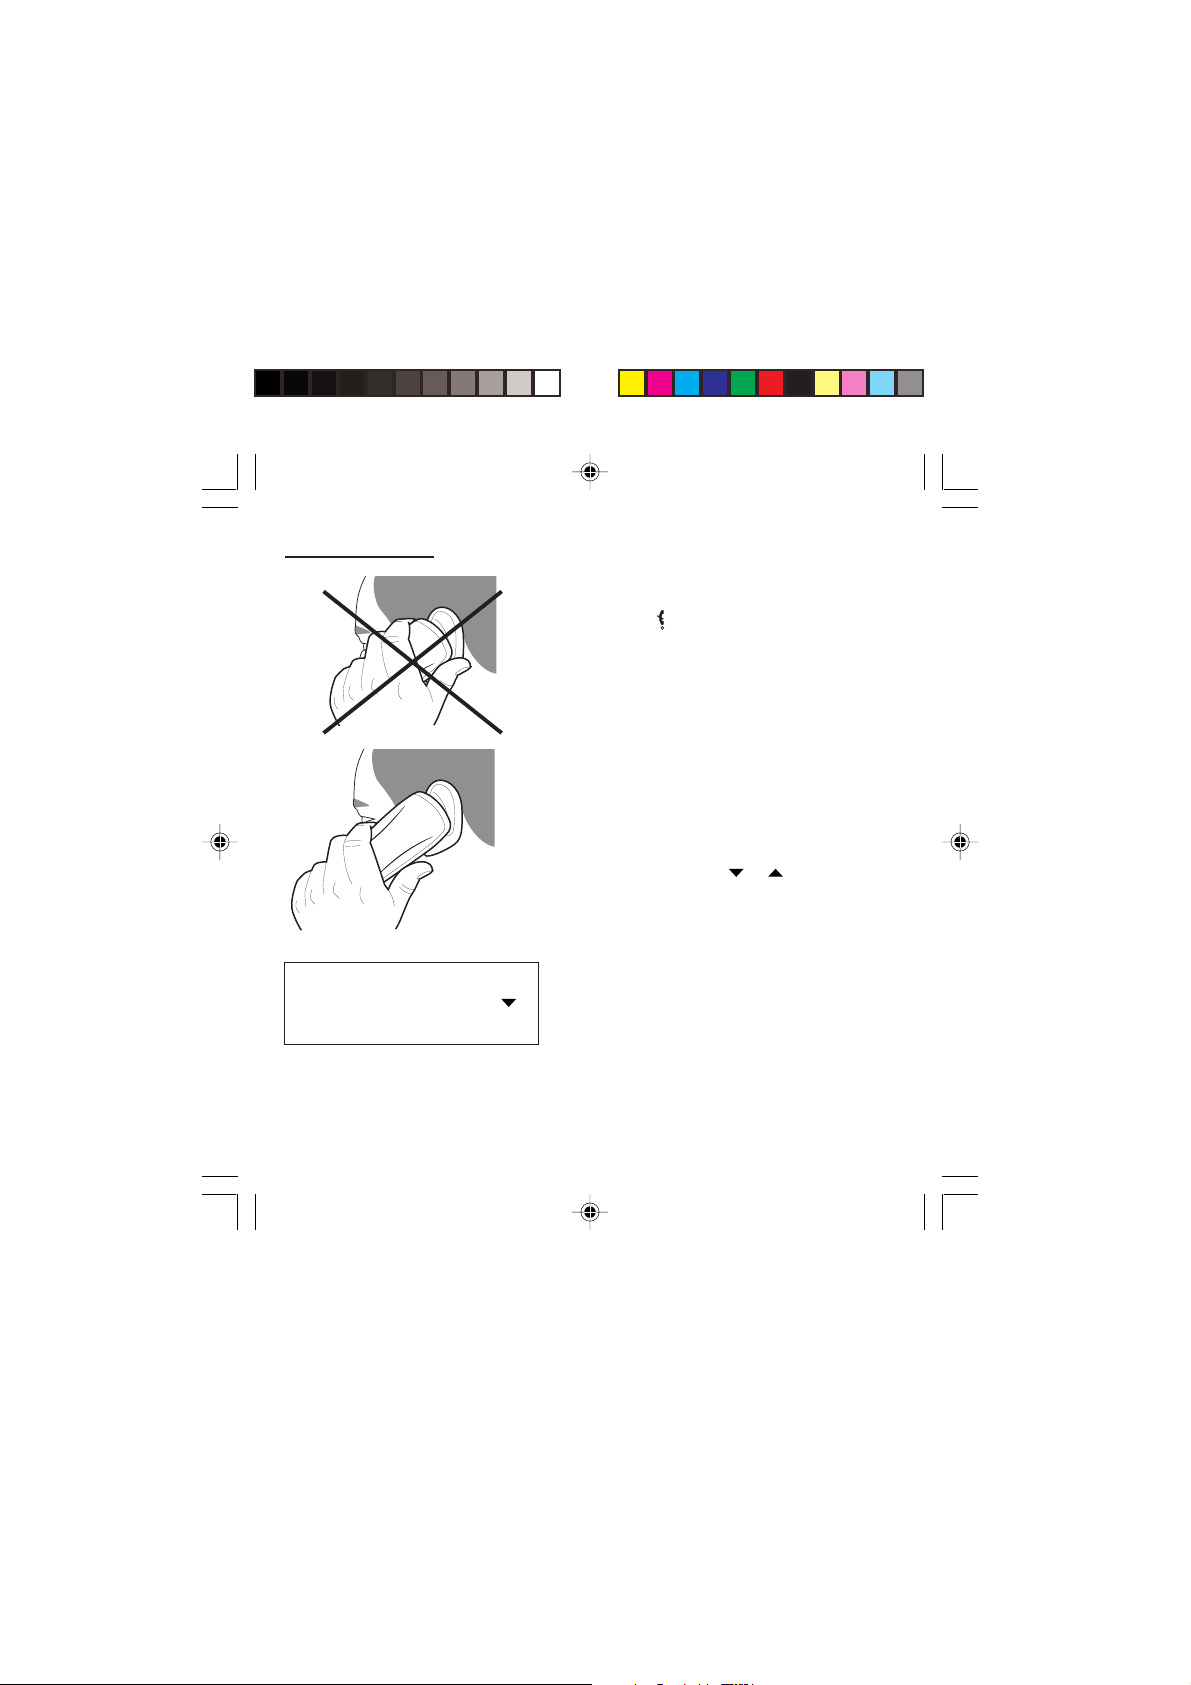
WARNING!
During a call, mind you do not obstruct the
microphone with your hand.
8
MYX-1_EN-01present.pmd 23/09/2003, 16:298
Page 10

Presentation of the phone
Function keys
Switch off – Reject a call – Hang up
Switch on – Call a number – Receive a call – Hands-
free mode (*)
C Short press: Return to the previous menu – Delete a
character
Long press: Exit menu mode – Complete deletion of
the entry
OK Validate
- Programmable keys for direct access to the functions
that you have selected (depending on model)
- Volume control during conversation (lefthand key :
lower, righthand key : louder)
- Contextual action
@ Mobile Internet access key (depending on model)
and Entry and scrolling through the menus.
Alphanumeric keyboard
Made up of 12 keys: 0 to 9,
To obtain a number or letter, hold down the relevant
key until the desired number or letter appears.
Letters with accents are obtained by a long press on
after entering the letter with no accent.
Punctuation marks and special symbols are obtained
by a long press on the # key.
∗∗
∗ and #.
∗∗
∗∗
∗
∗∗
MYX-1_EN-01present.pmd 23/09/2003, 16:299
9
Page 11
Presentation of the phone
Key 1
A long press on key 1 allows you to access the
voicemail service (depending on model).
∗∗
Key
∗
∗∗
A long press on key
deactivate the silent mode.
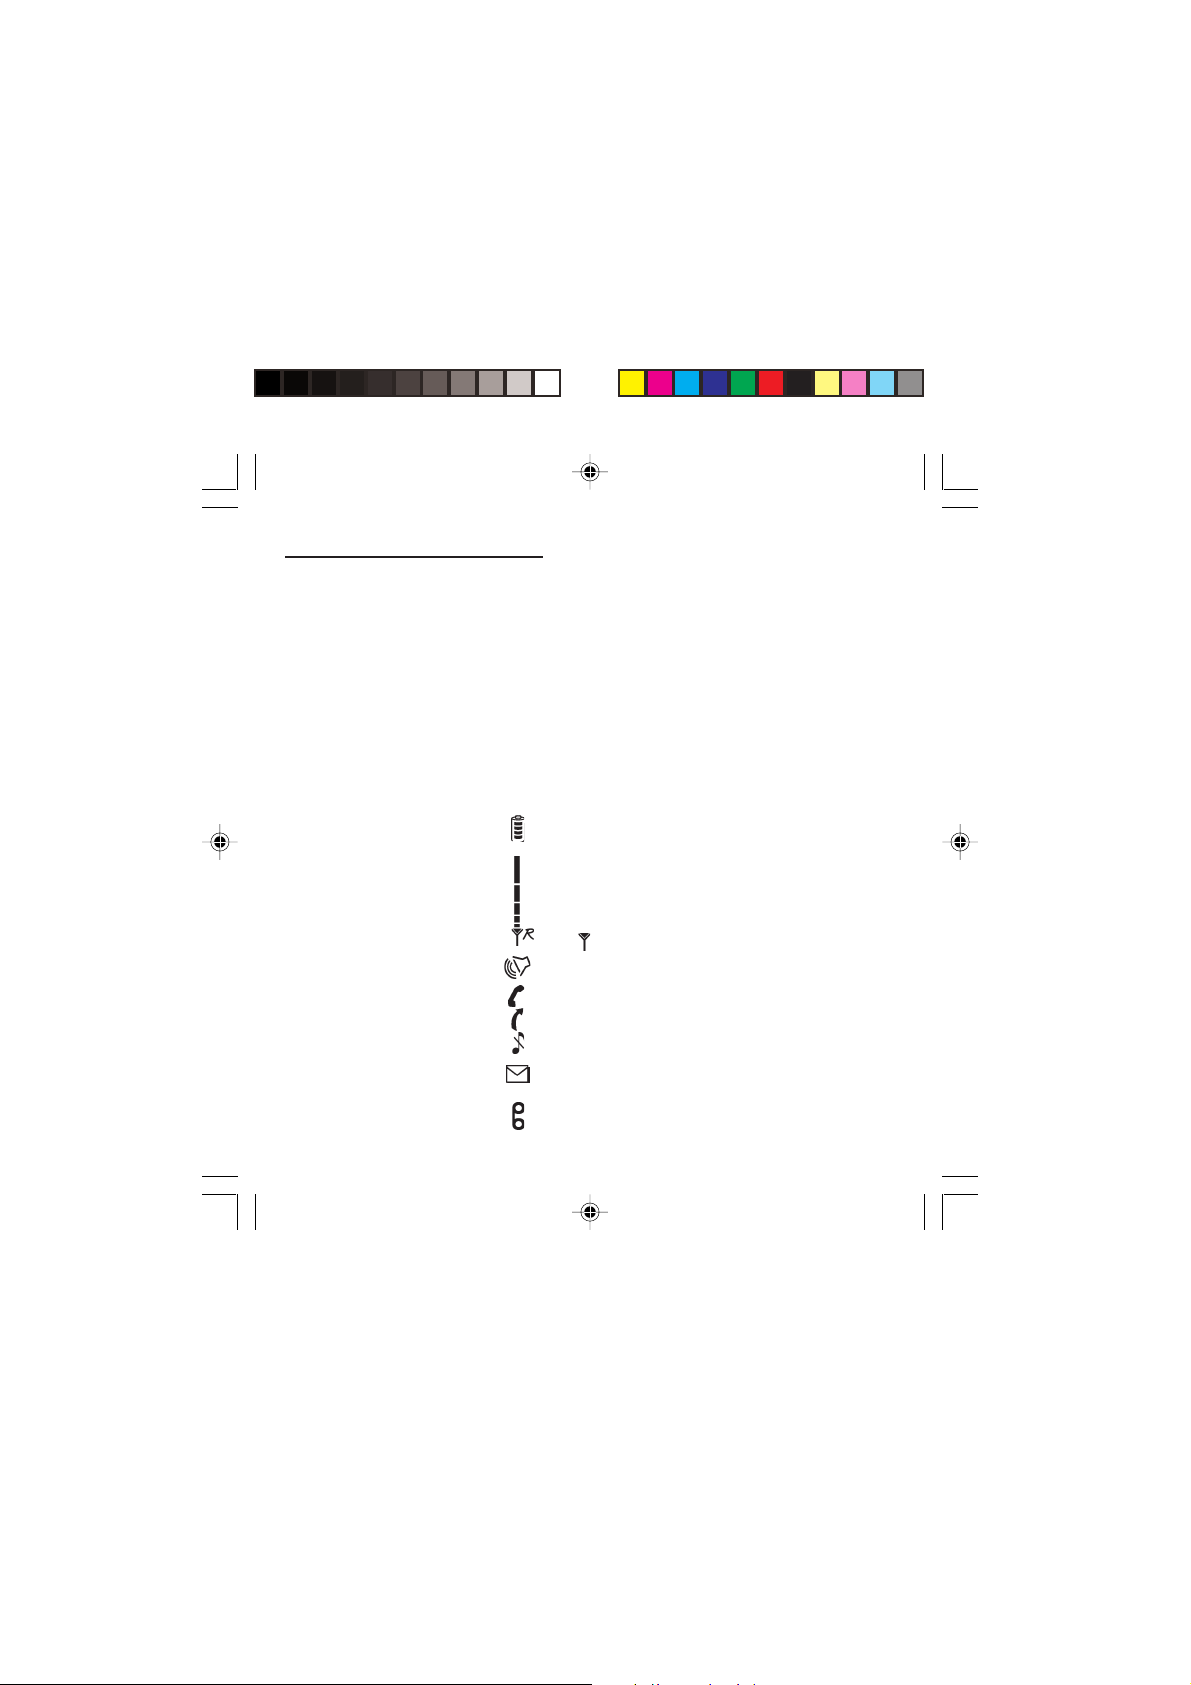
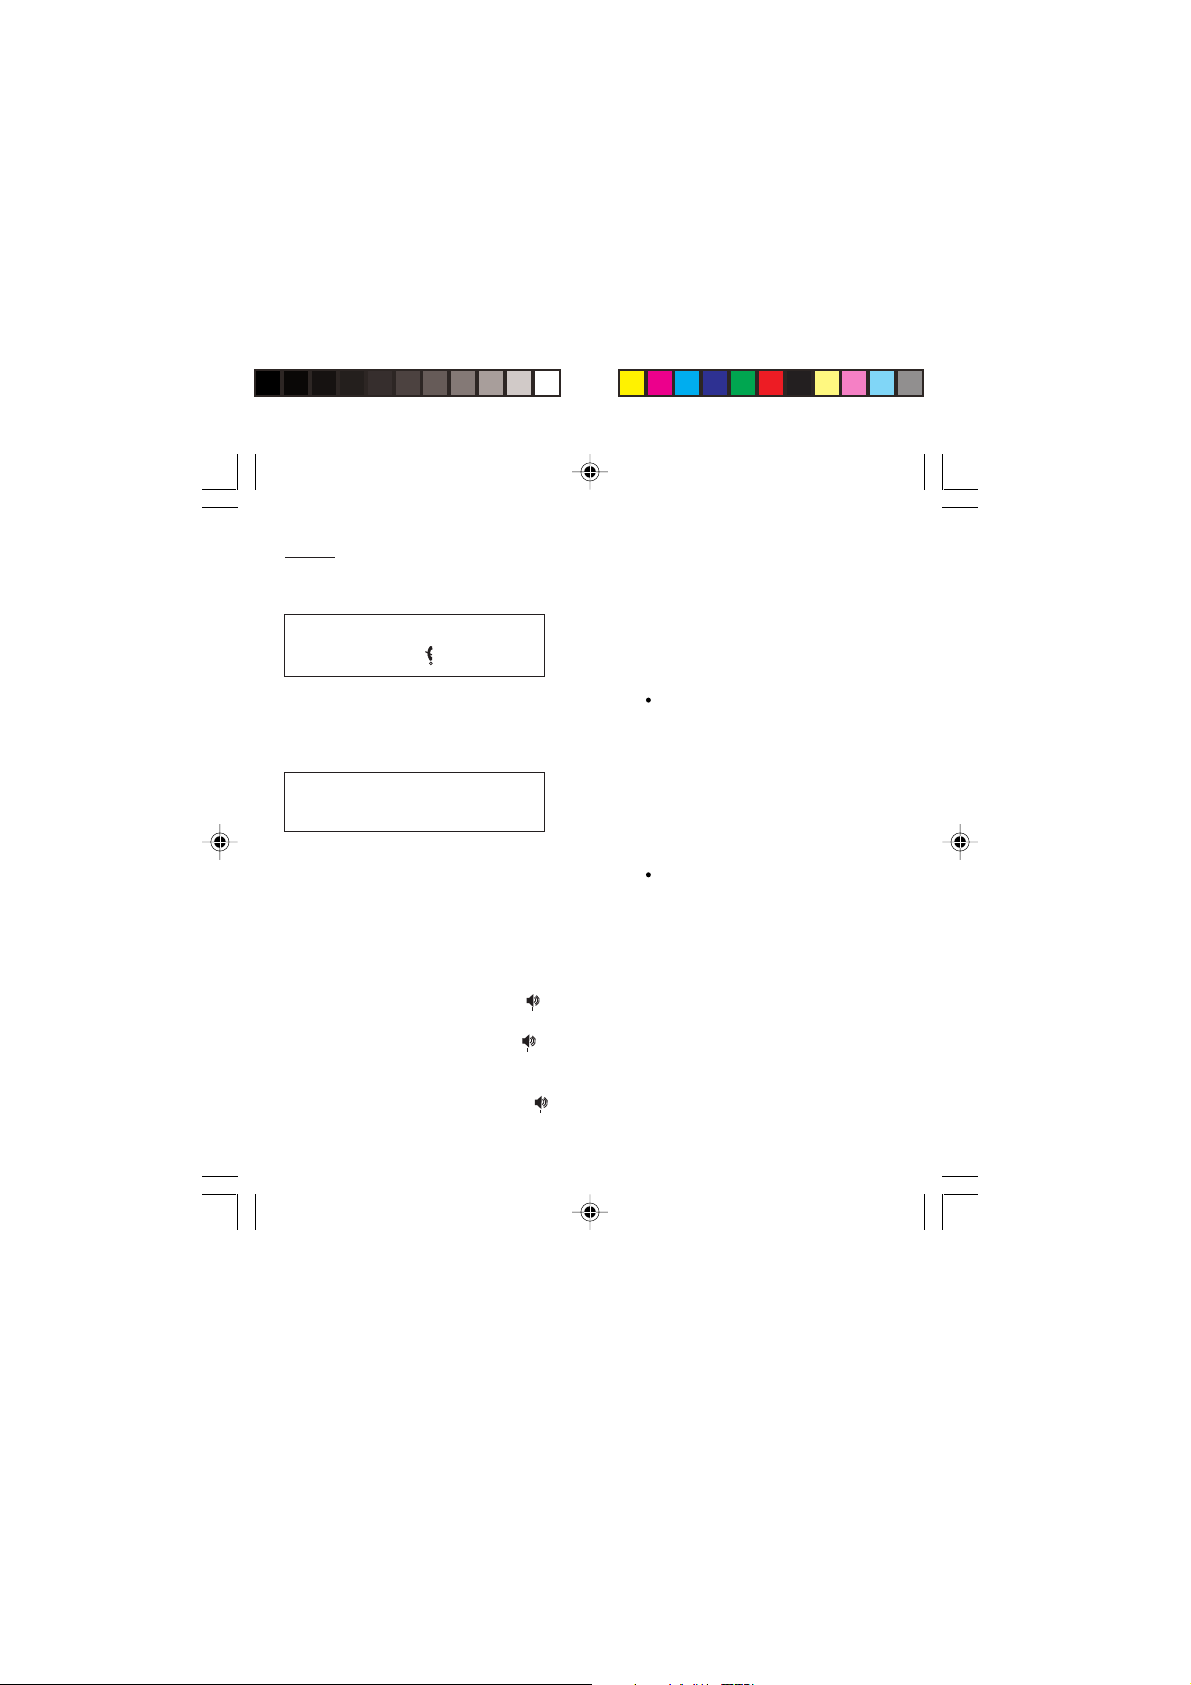
Display
The high definition graphics screen enables you to read
messages easily. Various icons inform you about the
status of functions.
Battery charge indicator (black if charged, clear if
discharged)
Received signal strength indicator (maximum strength:
5 bars)
The R letter indicates if the network found does not
correspond to the subscription
If flashes, the phone is searching for a network
Hands-free loudspeaker
Call in progress
Permanent call forwarding
Silent mode
Receipt of messages and presence of messages not
read.
Flashing: message memory full.
Voice messages present.
10
∗∗
∗ allows you to activate or
∗∗
MYX-1_EN-01present.pmd 23/09/2003, 16:2910
Page 12
Presentation of the phone
The three keys located under the screen are
allocated to actions described at the bottom of the
screen just above the key, each time it is necessary.
For example:
Validate Pressing the righthand key validates the
current function.
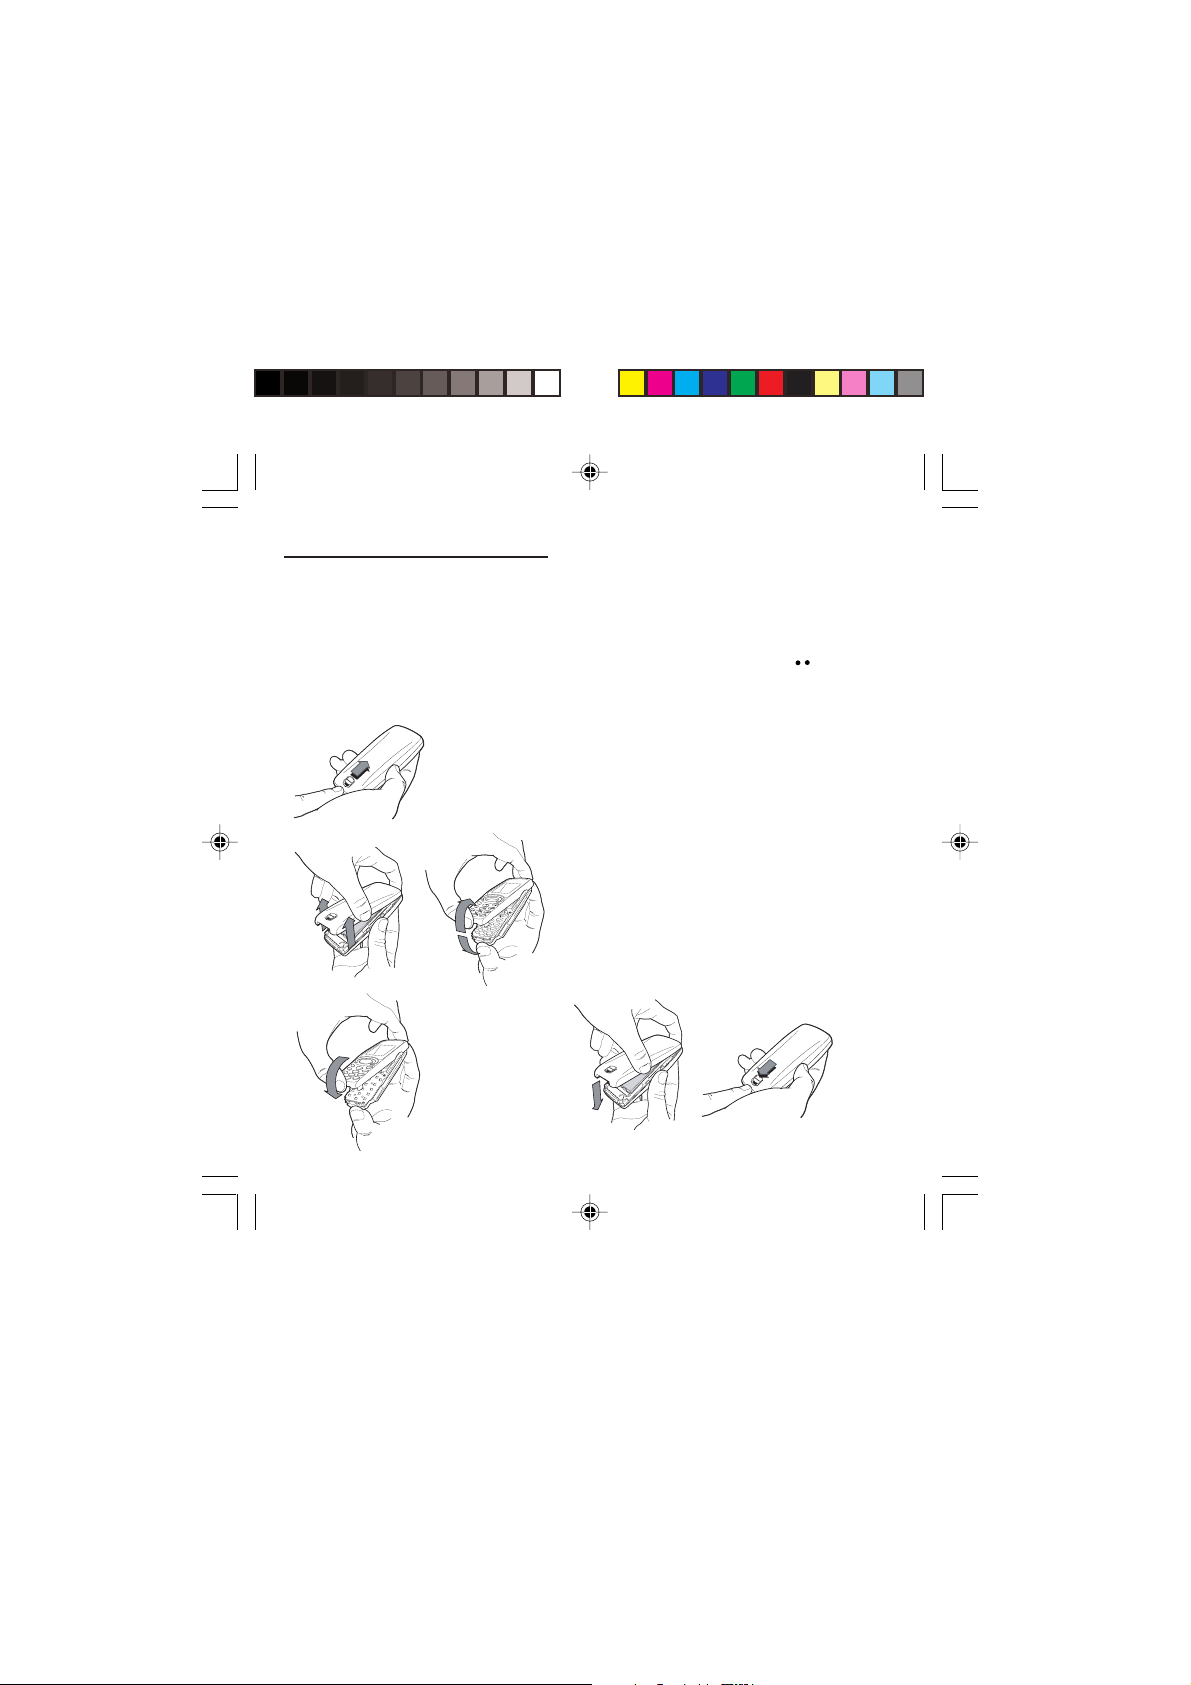
Exchanging the front and back panel
Switch off the phone.
1
2
1 Turn it over and slide the back catch upwards.
2 Take off the back cover starting at the bottom. Take
out the central section and the keypad.
3 Position the keypad in the new front cover making
sure that no dust gets in, then follow with the
central section.
4 Replace the back cover, clicking in first the upper
part then the lower and pushing the back catch
downwards into the locked position.
3
MYX-1_EN-01present.pmd 25/09/2003, 12:5111
4
11
Page 13
Getting started
SIM card
This card must be handled and stored with
care in order to avoid excessive stresses
or scratches that would damage it. If your
SIM card is lost, contact your Operator or
Service Provider immediately.
Note: Do not leave you SIM card within the
reach of small children.
Information on the SIM card
To use your phone, you have a small card called a SIM
card. In addition to all of the information necessary for
the network, this card contains other information that
you can modify:
• secret codes (PIN and PIN2 - Personal Identification
Number)
• directory
• mini-messages
• functioning of specific services.
Your phone is compatible with the different SIM cards
provided by the Operators.
It is compatible with SIM/WIM cards (cards which
contain in addition the WIM module (Wireless Identity
Module) which allows secured WAP communications).
12
MYX-1_EN-02Getting started.pmd 23/09/2003, 16:2912
Page 14
Getting started
1
2
3
4
56
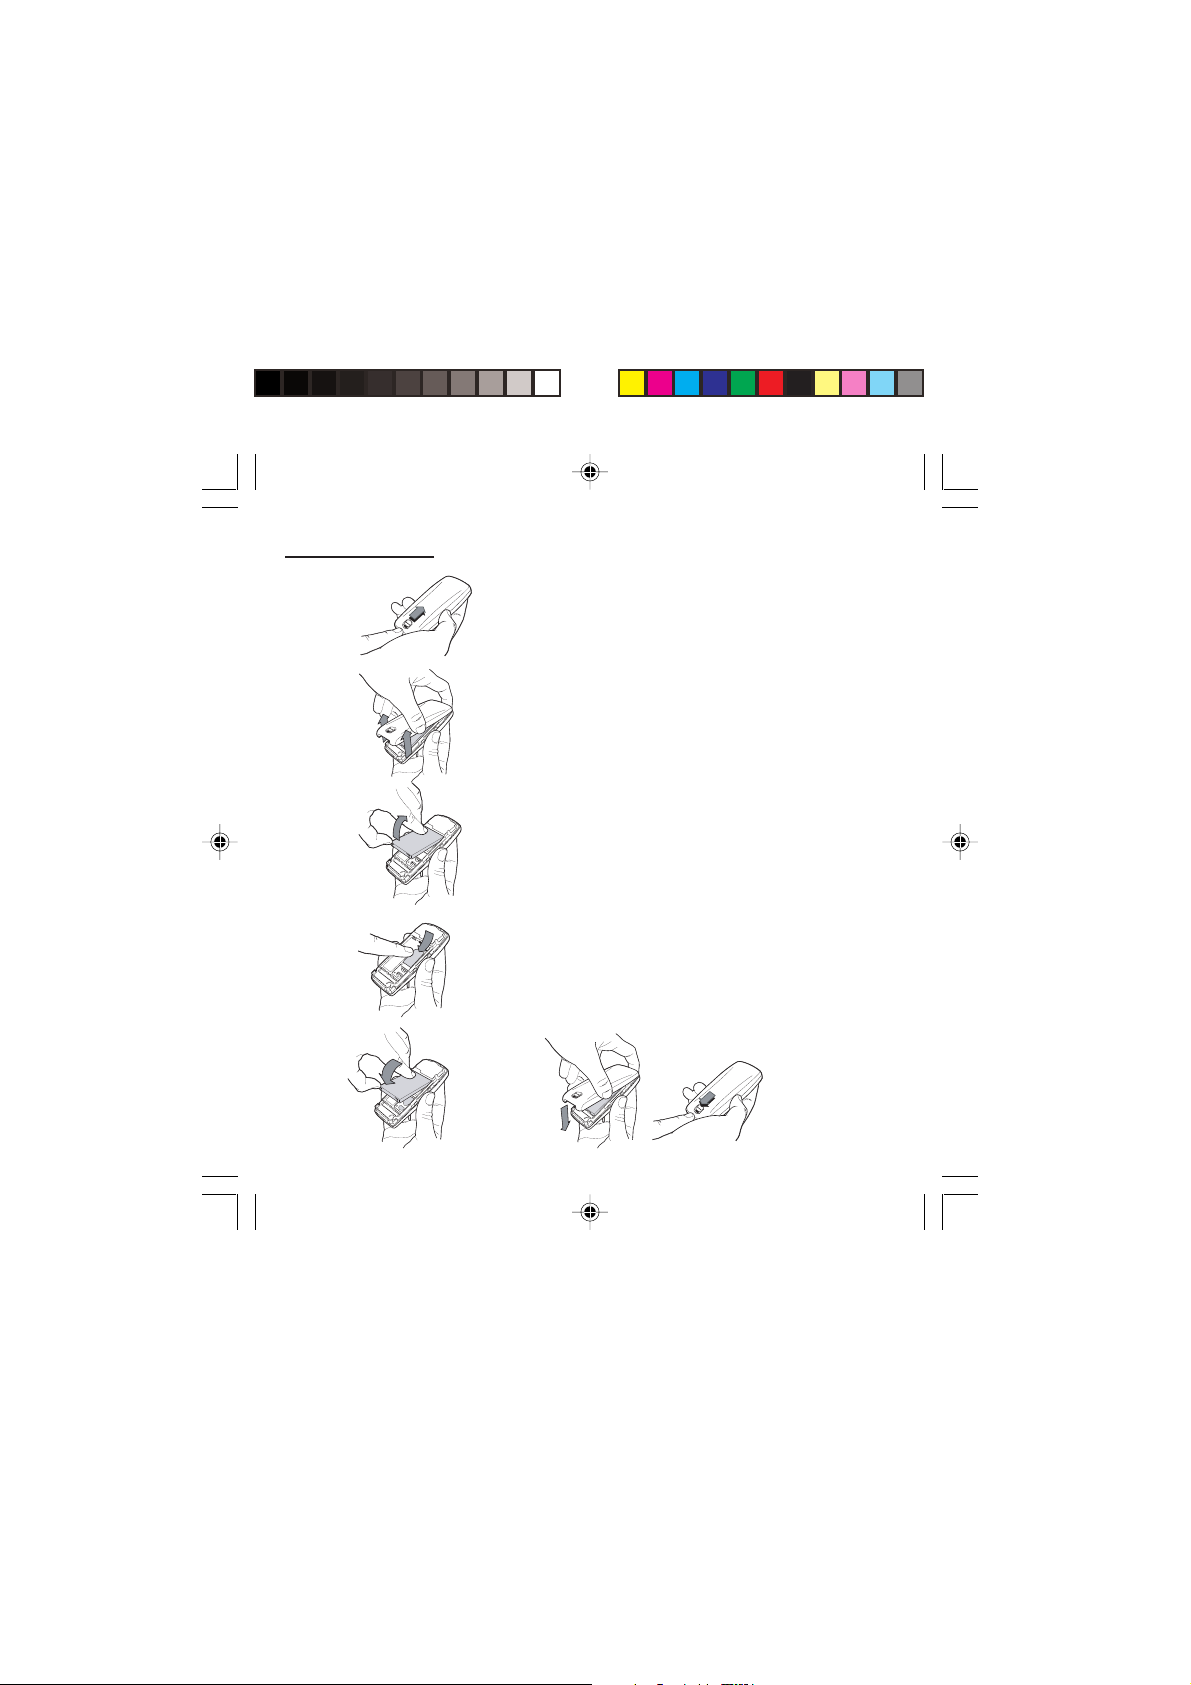
Installing the SIM card and the battery
Switch off your phone and disconnect the charger.
The SIM card is inserted beneath the phone’s battery.
1 Turn your phone over and slide the backcatch up.
2 Take off the back cover, starting from the bottom.
3 Take out the battery.
4 Slide the card along the base beneath the retaining
plate, with the gold coloured sections facing towards
the phone and the cut-off corner lined up to match
the drawing on the phone.
5 Place the battery by first inserting the upper section
into the opening.
6 Replace the back cover, clicking in first the upper part
then the lower and pushing the backcatch downwards
into the locked position.
13
MYX-1_EN-02Getting started.pmd 23/09/2003, 16:3013
Page 15
Getting started
1
4
g
hi
2
7
ab
p
qrs
c
5
3
jkl
def
8
6
tu
m
v
no
0
9
w
+
xyz
Warning
There is a risk of explosion if the battery
is incorrectly replaced or disposed of in
fire.
Do not short-circuit.
The battery does not contain any
components that can be changed by
you.
Do not attempt to open the battery
case.
Only use the correct chargers and
batteries as shown in the
manufacturer’s catalogue.
Spent batteries must be collected at the
appropriate sites.
You are advised to remove the battery if
you intend to leave your phone unused
for a long period.
14
Charging the battery
Your phone is powered by a rechargeable battery. A
new battery must be charged for at least 4 hours before
it is used for the first time. It will reach its nominal
capacity after several usage cycles.
When your battery has run down, the phone displays it
and cuts out.
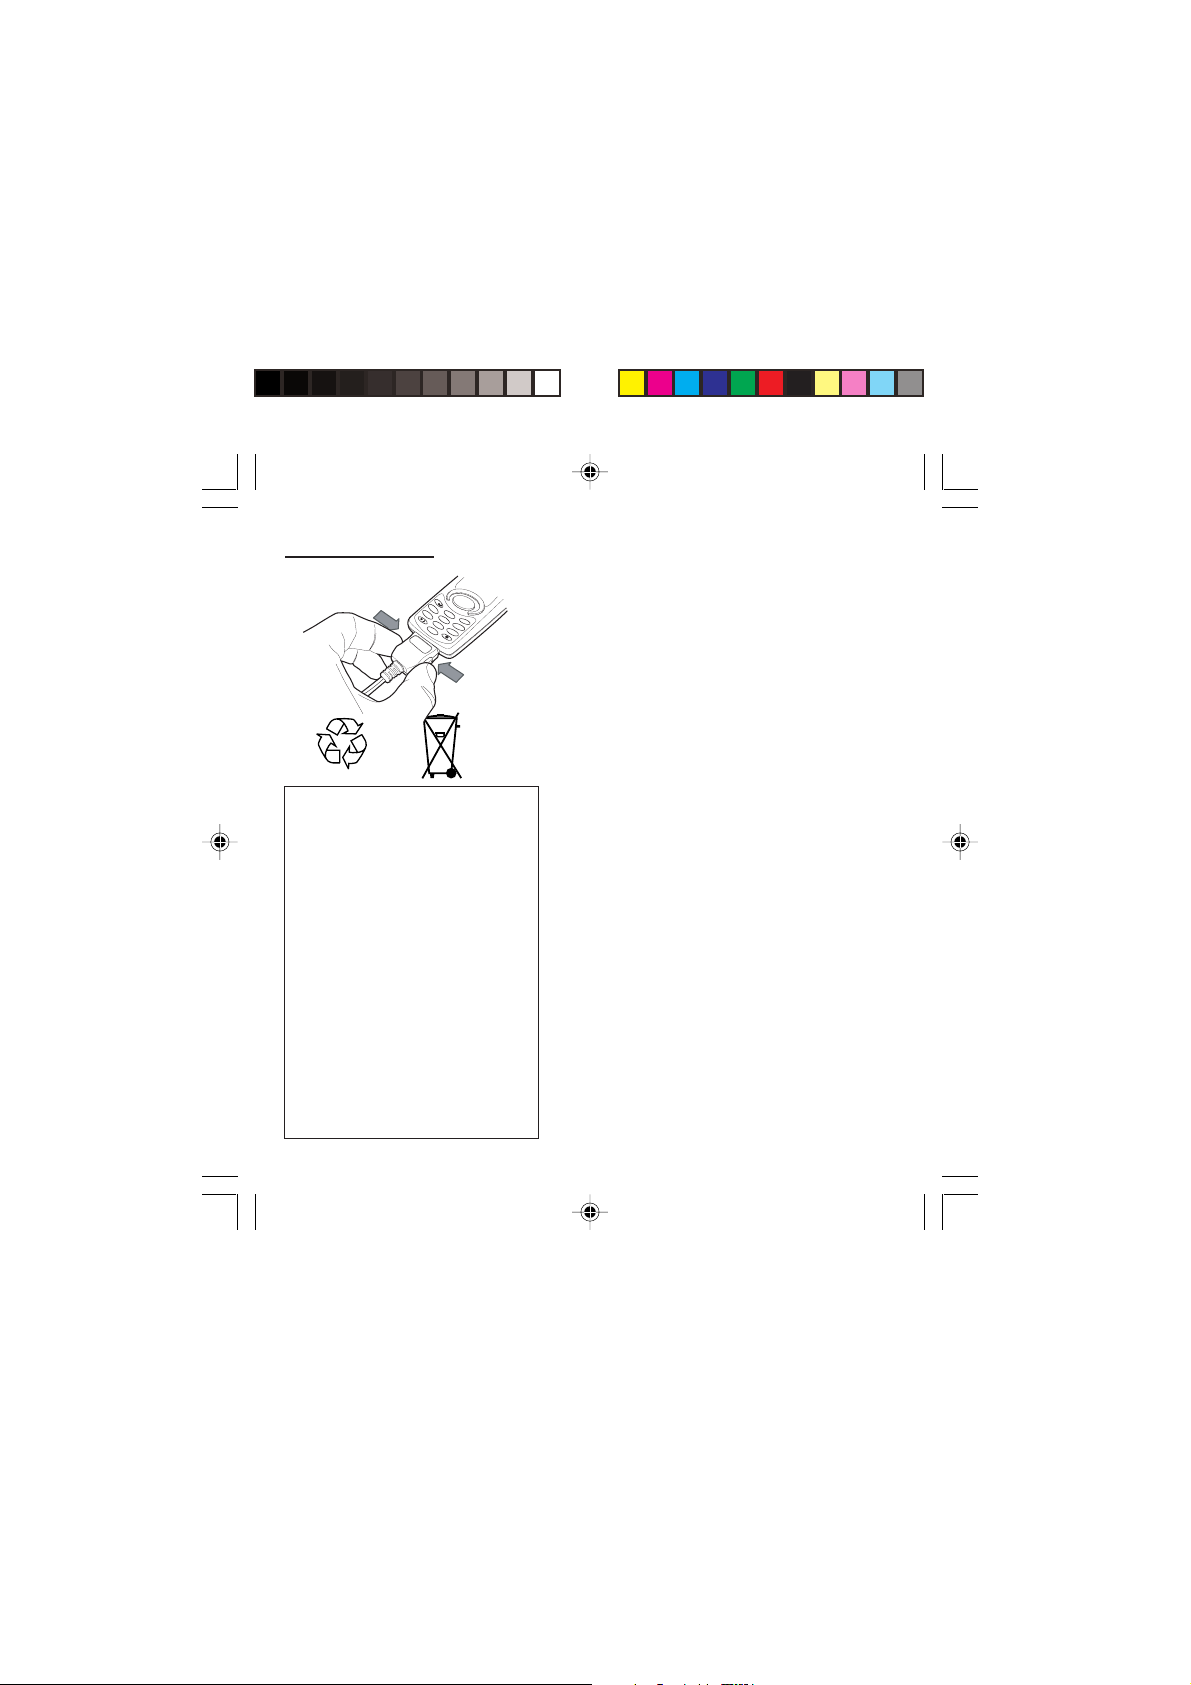
To recharge your battery:
Connect the charger to a wall outlet.
Connect the end of the charging cable to the bottom of
your phone.
The phone will start charging. The battery charging
indicator indicates the charge.
Charging stops by itself.
Unplug the cable.
It is possible that during charging, the battery may heat
up slightly; this is normal.
MYX-1_EN-02Getting started.pmd 23/09/2003, 16:3014
Page 16
Getting started
Control of the PIN code
If your phone displays SIM absent,
press (long press) to switch off your
phone and check that your SIM card is
correctly positioned.
Warning
If the wrong PIN code is entered three
times in a row, the card will be locked. To
unlock your card:
- enter **05*
- enter the PUK code (Personal
Unlocking Key) provided by your
Network Operator and validate,
- enter your PIN code and validate,
- enter your PIN code again and validate.
After 5 or 10 times (depending on SIM
card type), the SIM card will be
permanently locked. Contact your
Operator or your Service Provider to
obtain a new card.
The same procedure (entering 052)
applies when the PIN-2 code is blocked
(PUK 2 code).
Switching on/switching off,
starting up
To switch on your phone:
Press to switch on your phone.
If access to the SIM card is protected by a secret code,
the phone will ask you to enter your PIN code.
PIN code
This is the personal code for your SIM card. You may
be asked to enter this code when the instruction: Pin
number? appears after you switch on your phone.
Enter the code of between 4 and 8 digits given to you
by your operator. These digits will not be displayed on
the screen for security reasons.
Press # or OK or on righthand key to validate.
PIN2 code (*)
If one was given to you by your Operator, a second PIN
code provides secure access to certain functions.
Setting Time and Date
The first time the phone is used, the time and date will
need to be set.
If the battery has completely run down or been taken
out, you will be asked to validate the time and date.
15
MYX-1_EN-02Getting started.pmd 23/09/2003, 16:3015
Page 17

Getting started
Network indicator
The indicator of the level of
network signal received enables
you to visualise the quality of
reception. If it shows less than
three bars, look for better reception
to make your call in good
conditions.
Setting the time
Set the time either by typing it in or by using the
scrolling arrows to alter the numbers already displayed.
Setting the date
Set the date either by typing it in numerically or by
using the scrolling arrows to alter the display.
When the time and date are correct, validate with the
OK key.
Searching for a network
The phone then searches for a network on which it can
communicate:
If it finds one, the name of the network appears on the
screen.
You are ready to make or receive a call.
If the R letter and a network name are displayed, calls
can be made.
If the R letter is displayed without any network name,
only emergency services will be accessible (police,
ambulance, fire brigade).
If the flashes, the phone will keep searching. No
network is available.
16
MYX-1_EN-02Getting started.pmd 23/09/2003, 16:3016
Page 18
Getting started
Direct access to menus
To directly access a menu, press
then enter the number of the selected
menu.
Switching off
Hold down the key until the end message is
displayed.
Release the key. The phone switches off.
Recommendation
Your phone is equipped with an integrated antenna. For
the best reception, try not to cover the top part of the
phone with your hand.
Menu access
The menu functions permit you to verify or modify the
various functions of your phone to adapt it to your
needs.
Press the scrolling arrows or to access the
menus.
Scroll through the menus using the scrolling arrows
then press OK to access the selected menu.
Each time you want to validate an action, press OK.
To abandon an action, press C.
To exit the menu mode, press and hold C.
Deleting characters
You can cancel an entry error:
Press quickly on C to delete the last character.
MYX-1_EN-02Getting started.pmd 23/09/2003, 16:3017
17
Page 19
Initial communication - Hands-free mode
Making a call
The network is displayed.
International call
Press 0 (long press) to display + then
dial the country code without waiting for
a tone, then the number you require.
Emergency services
Depending on the operator, you can
contact the emergency services with or
without a SIM card or when the keyboard
is locked. It is sufficient to be in a zone
served by a network.
To call the international emergency
service, dial 112 then press .
Other emergency service numbers may
exist, depending on the country.
Dial the number.
Press .
During the call, flashes on the screen, and tones
may signal the establishment of a connection.
When the person you have called answers, speak.
Receiving a call
When you receive a call:
Press then speak.
The caller’s number is displayed when it is presented
to the network.
All incoming and outgoing call numbers are registered
in the list of the last calls.
Volume control
Increase or decrease the volume during a conversation
by pressing the lefthand ( ) or righthand ( ) key.
18
MYX-1_EN-03comm.pmd 23/09/2003, 16:3018
Page 20

Initial communication - Hands-free mode
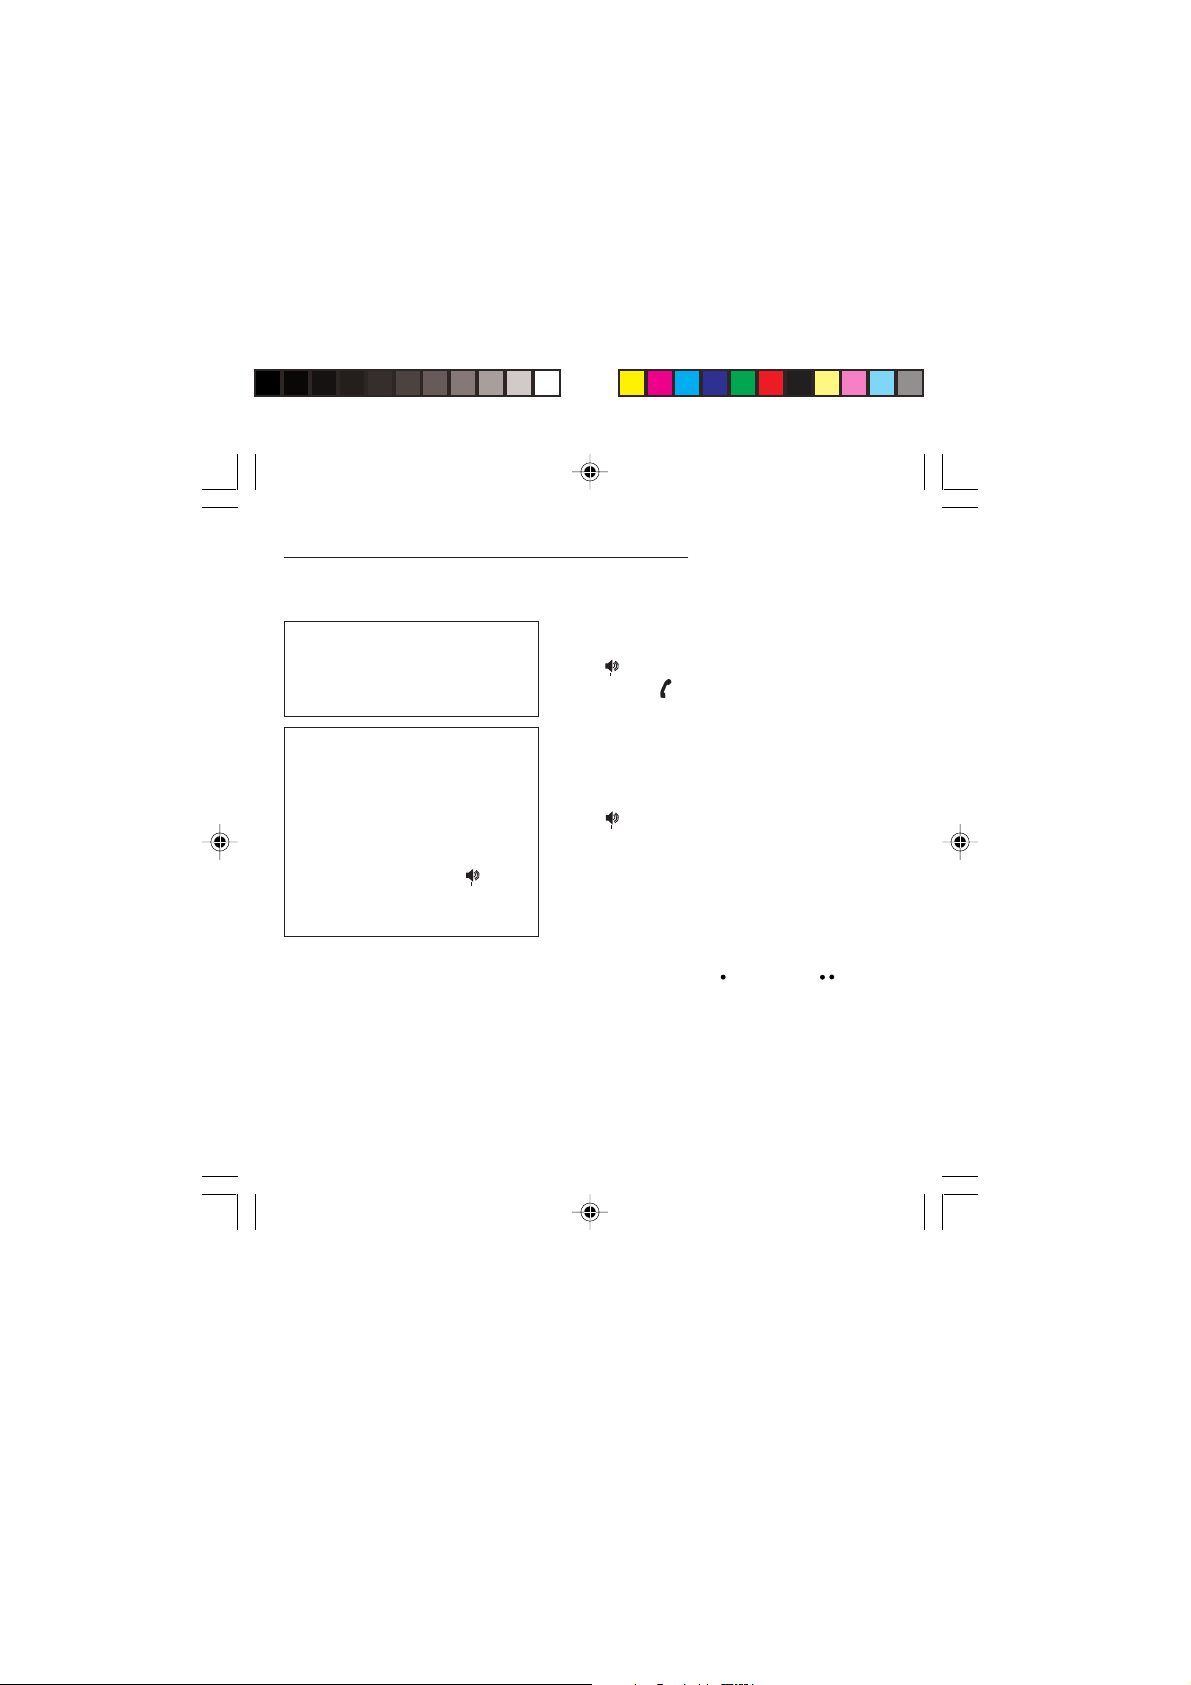
The “Hands-free” mode enables you to
follow a conversation with several
people and be free to move, for
example, to take notes during your
conversation.
Warning
Before putting the phone to your ear,
check the volume control settings as
well as the selected listening method,
especially if using integrated hands free
mode, which could cause ear damage if
used incorrectly.
Hands-free mode (not available on all
models)
During a call, you can transfer from handset mode to
hands-free mode simply by pressing one key and the
reverse.
Press .
The screen displays for handset mode and for
“hands-free” mode.
Ending a call
Press .
The end of call message appears on the screen.
19
MYX-1_EN-03comm.pmd 23/09/2003, 16:3019
Page 21
Directory
The quantity of phone numbers stored
in the SIM card directory varies
depending on the capacity of the card.
Your Operator or your Service Provider
can provide you with this information.
It is advisable to store numbers in their
international format (+, country code,
and number). You can verify the
contents of a record and modify it by
selecting the required name.
When sorting by location, pressing on
∗∗
the
∗ key launches a search for the first
∗∗
available location; pressing on # returns
to the start of the list.
Directory display
You can store the telephone numbers that you call
regularly:
- in the SIM card,
- in the phone itself.
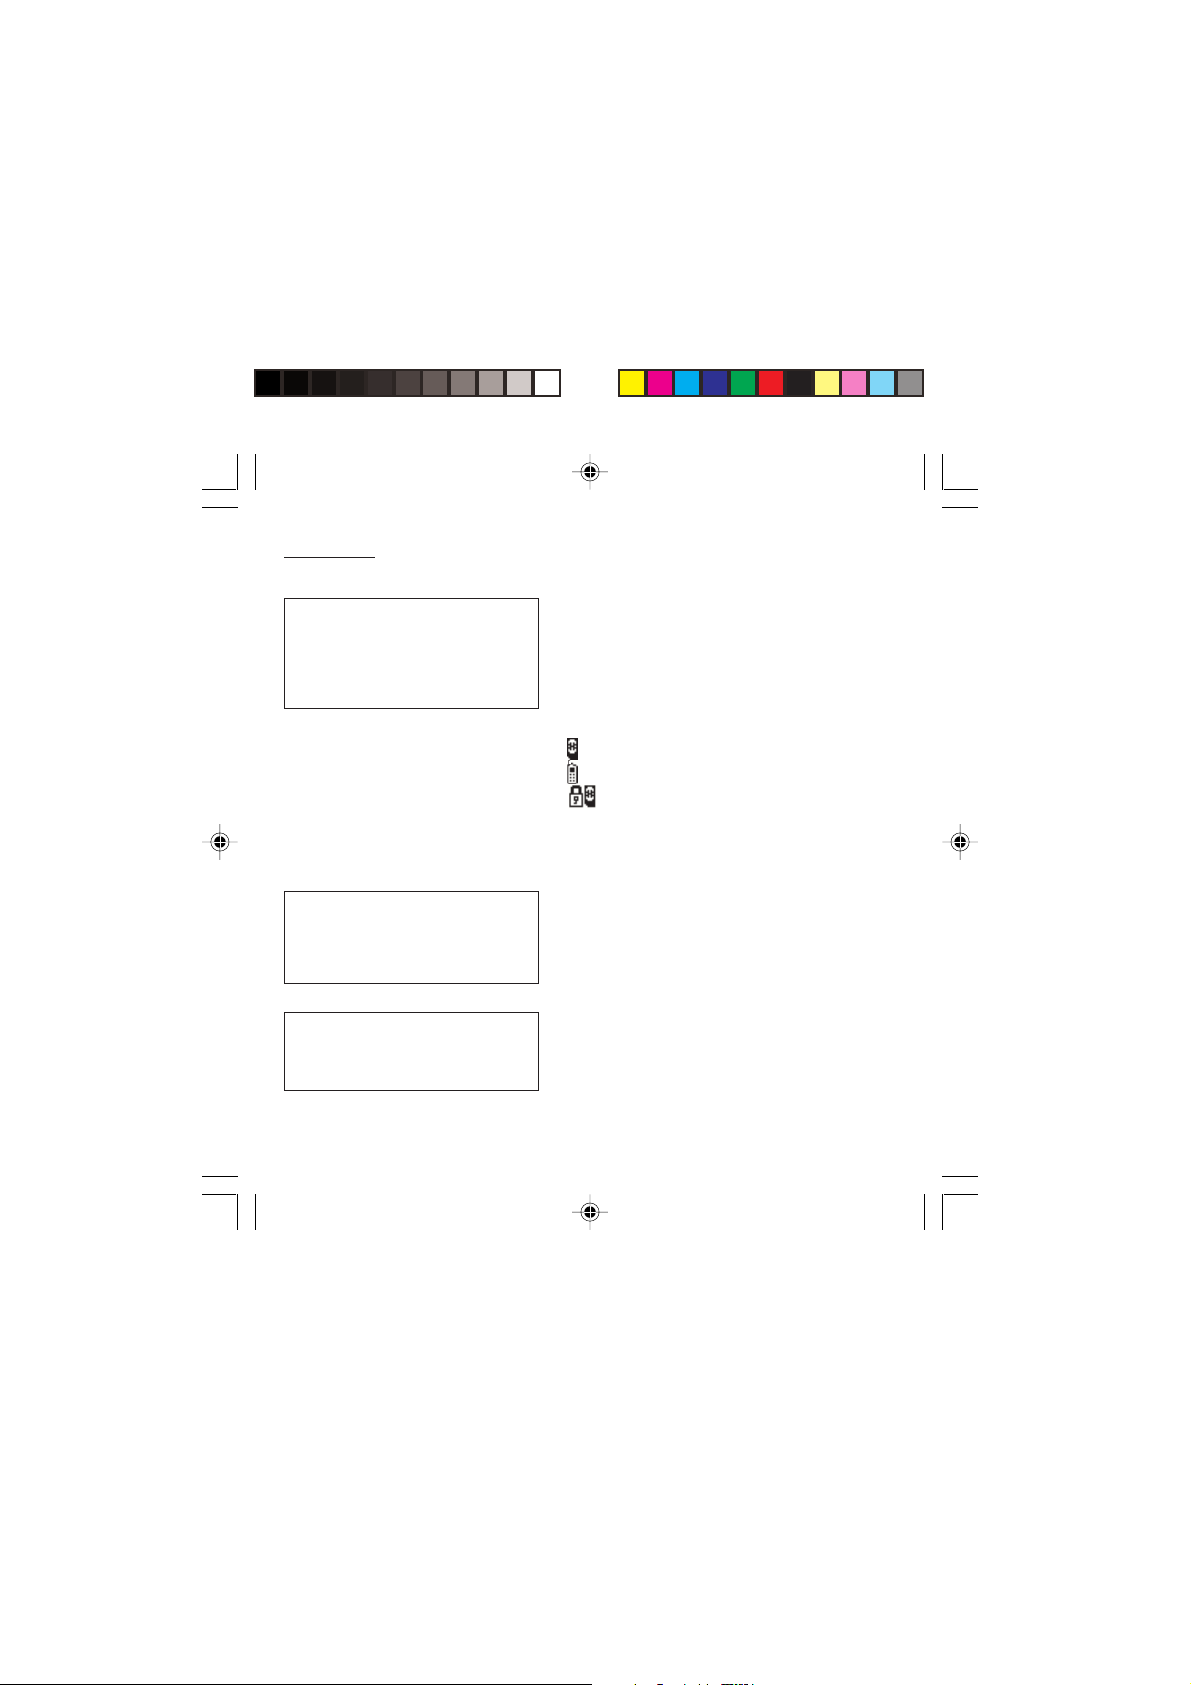
Different icons will inform you of the directory location
where the number is stored when you search for it:
SIM card directory
Your phone’s directory
SIM card pre-set directory.
Storing a number
In the Directory menu, select Create record. Validate
by pressing OK.
Enter the name (the number of accepted characters
depends on the SIM card used). Validate.
Enter the number including the area code, if necessary
(up to 20 characters). Validate.
You can enter spaces in the number (displayed as
commas “,”) by pressing (long press) on
figures entered after a space are processed in a DTMF
sequence (usable after a number).
If necessary, select the call group to which you want to
assign this number.
Depending on the available space, you can select the
storage location of the number entered: SIM card or
phone itself.
∗∗
∗ or #. The
∗∗
20
MYX-1_EN-04Directory.pmd 23/09/2003, 16:3020
Page 22

Directory
Deleting a number
To delete the contents of a directory location, select the
name using the scrolling arrows. Validate by pressing
OK. Select Delete, then validate.
Call groups
You are also able to classify contacts recorded in the
directory into Call Groups.
To each of these groups you attribute certain
characteristics (icon, ringing tone, vibrator, etc.).
Creating a group
Groups are defined by default in your phone.
In order to look up their characteristics, display a list of
the groups - Directory/Directory menu/Call groups
menu.
Using the scrolling arrows, choose a group and press
OK. You are then able to look up or alter its
characteristics or to erase the group.
To create a new group:
Go into Directory/Directory menu/Call groups.
Choose Create group.
Enter a name and validate.
Choose an icon using the scrolling arrows and validate.
Choose a ring tone, then choose a vibrator mode, and
validate.
MYX-1_EN-04Directory.pmd 23/09/2003, 16:3021
21
Page 23
Directory
If call groups are not enabled, you
cannot attach correspondents to
groups.
The selection of a call group is made when entering a
number into the directory, or when modifying a number
you have already saved.
Activate the Call Groups function
If you want the characteristics of the groups to apply to
each call:
Go into Directory/Directory menu/Call groups.
Choose Activate groups.
Tick the box and validate.
The calls received from contacts who do not belong to
a Call group use the parameters provided in the
Ringing and beeps menu.
Available memory
To ascertain the number of groups which can still be
created:
Go into Directory/Directory menu/Call groups/
Group menu.
Choose Available memory.
The first number shows the number of groups which
can still be created, and the second shows the
maximum number of groups.
Looking up a group
Select the group to be looked up and press OK.
Choose See group. The screen presents the name,
the icon, and the choice of vibrator mode of the group.
If there are contacts attached to this group, press the
righthand key to view the list of these ones.
22
MYX-1_EN-04Directory.pmd 23/09/2003, 16:3022
Page 24
Directory
Modifying a group
Select the group to be modified, and press OK.
Choose Modify.
Carry out the wanted modifications.
Validate by OK.
Deleting a group
Select the group to be deleted, and press OK.
Choose Delete.
Confirm by OK.
Sorting
Directory menu enables you to sort the stored
numbers by name or location; for the latter, the free
locations are indicated in the list.
Sending a short message to a stored
number
Select the recipient scrolling using the scrolling arrows
and validate using OK. Select Send message and
validate using OK.
Compose your text message.
Press OK. Select Send and validate using OK. The
recipient number is displayed.
Send your message using the righthand key .
MYX-1_EN-04Directory.pmd 23/09/2003, 16:3023
23
Page 25

Directory
Directory memory space
In Directory menu, select Available memory. Validate
using OK.
The screen will display the amount of available space
on the SIM card and on the phone itself.
Displaying personal numbers
Using Directory menu/Personal numbers menu, you
can create records for your own numbers in order to be
able to consult them.
Making a call with a stored number
Here are all the ways you can call a correspondent,
whose number you have saved in the directory, from
the standby screen:
1) Enter the first letter(s) of your correspondent’s name,
as you saved it into the directory, and then press .
The directory list is displayed, with the first name that
corresponds with the letter you entered at the top. If
your correspondent is not at the top, use the scrolling
arrows to select the name.
Press on to make the call.
2) Enter the number under which you have saved your
correspondent’s details, and then press on
dial).
3) Enter the number under which you have saved your
correspondent’s details, and then press on #. Your
correspondent’s number is displayed, at which point
you can modify or add to the number. Press on to
make the call.
∗∗
∗ (rapid
∗∗
24
MYX-1_EN-04Directory.pmd 23/09/2003, 16:3024
Page 26

Messages
Access to this service depends on the
network. For more information, consult
your Operator or your Service Provider.
Ask your operator about downloading
icon, animated screen saver or melody
messages.
Unread messages are in bold.
Receiving a message
Several types of message may be received:
• text messages
• text messages which may include different types of
objects (images, melodies, animated icons)
• icons for call groups
• animated screen savers
• melodies
• WAP bookmarks
• WAP information.
When you receive a message, the phone beeps (the
beep is selected using the menu Ringing and beeps/
Volume and choice of music/Messages).
The icon is displayed on your phone screen.
This icon remains on screen until the messages have
been read. When the icon flashes, the memory is full.
The receipt of icons, animated screen savers or
melodies can take several minutes. Messages inform
you of the downloading progress.
At any time, you can:
• hide that screen by pressing the lefthand key (e.g.
to make a call or access other information on your
phone),
• or cancel the download in progress by pressing the
righthand key .
Go into the Text messages menu to access the list of
messages received.
25
MYX-1_EN-05messages.pmd 23/09/2003, 16:3025
Page 27

Messages
Meaning of the symbols at the top of the
screen
This symbol indicates a text message that has been
written. If this symbol is flashing, it means that the
message has not been sent.
This symbol indicates a message that has been
received. If this symbol is flashing, it means that the
message has not yet been read.
This symbol indicates a message which is incomplete
or in the process of being received.
This symbol indicates that the message is corrupted: it
consists of several fragments, some of which have
been lost.
Meaning of the symbols in front of each message
Call group icons
Animated screen savers
Text messages
Melodies
Text messages which include objects
Actions possible for a message received
Select a message.
By pressing the lefthand key , you can read a text
message, view it, listen to it or extract the objects it
contains.
26
MYX-1_EN-05messages.pmd 23/09/2003, 16:3026
Page 28

Messages
Warning
Only the screen savers and melodies
without Copyright may be forwarded to
another person and depending on
model.
Press the lefthand key (Options), to view the options
available, which vary according to the type of message
received:
• read it
• delete it
• reply
• forward it to another person
• consult the available memory
• delete all the read messages
• delete all the messages
• choose a sending option
• enter the number of the messaging centre
• add a WAP bookmark (see below)
• save it in your phone (melody, animated screen saver
and icon (see below)).
Adding a WAP bookmark in your
phone (depending on model)
To add a WAP bookmark received:
If you have just read it, choose the Add WAP
bookmark option by pressing the lefthand key
(Options).
or
Select it in the list and choose the Add WAP
bookmark option by pressing the lefthand key
(Options).
MYX-1_EN-05messages.pmd 23/09/2003, 16:3027
27
Page 29

Messages
Saving an object included in a text message
which has been received (depending on
model)
Some text messages may contain images, melodies
(symbolised by a note of music) or animated icons.
To save an object in your phone:
Put the cursor on the object you wish to save.
Press the righthand key ( Extract).
Press the righthand key .
Select New and press the righthand key .
Type in a name and press OK.
The space required and the space available in the
phone are shown.
If the maximum number of objects or the maximum
total size has been reached, you will be asked if you
wish to delete objects or replace an existing object with
the new one.
Saving a melody in your phone
A melody is saved in the Ringing and beeps/
Personalised ringing tone menu.
If you have just listened to it, press the righthand
key .
or
Select it in the list and choose the Save option by
pressing the lefthand key (Options).
28
MYX-1_EN-05messages.pmd 23/09/2003, 16:3028
Page 30

Messages
ü
Warning
You must view the entire screen saver in
order to be able to save it.
The space required as well as the space available in
the phone are indicated.
If the maximum number of melodies or the maximum
capacity has been reached, you will be asked if you
wish to delete some melodies or replace an existing
melody with the new one.
This sign placed in front of a melody indicates that it
can be deleted and will free enough memory space to
save the new one.
This sign placed in front of a melody indicates that it
can be deleted but will not free enough memory space
to save the new one.
Saving an animated screen saver on your phone
An animated screen saver is saved in the Controls/
Customization/Screen Saver menu.
If you have just viewed it, press the righthand key .
or
Select it in the list and choose the Save option by
pressing the lefthand key (Options).
The space required as well as the space available in
the phone are indicated.
If the maximum number of animated screen savers or
the maximum capacity has been reached, you will be
asked if you wish to delete some animated screen
savers or replace an existing one with the new one.
MYX-1_EN-05messages.pmd 23/09/2003, 16:3029
29
Page 31

Messages
Saving an icon in your phone
An icon is saved in the menu Ringing and beeps/Call
groups/Call groups menu.
If you have just viewed the icon, press the righthand
key .
or
Select it in the list and choose the Save option by
pressing the lefthand key (Options).
The space required as well as the space available in
the phone are indicated.
If the maximum number of icons or the maximum
capacity has been reached, you will be asked if you
wish to delete some icons or replace an existing one
with the new one.
Receiving WAP information (depending on
model)
Internet servers may send you information messages.
In case the phone is not connected to the WAP, a
warning message is sent by SMS (preceded by the
symbol @ in the list of messages). When selecting
Read, the phone directly goes to the WAP function
where a connection may be required for processing.
Then you can read the information sent.
30
MYX-1_EN-05messages.pmd 23/09/2003, 16:3030
Page 32
Messages
T9™ mode is activated as soon as you
create or modify a message.
Language
By default, the language used is that
which is activated on the phone’s menu
display (or English if a language not
supported by Easy Message T9™ is
selected in the menu).
As you go along, depending on the keys
pressed, the software looks in a
dictionary for the corresponding words
that are most frequently used.
Editing a message using Easy
Message T9™
The Easy Message T9™ function helps you to easily
enter messages.
Select the Text messages/Write new... menu and
press OK.
Selecting the editing language
Select Options by pressing the lefthand key ; scroll
down to languages and press OK, then scroll down to
the required Language and press OK.
Using T9 mode
Press the key corresponding to the letter required,
compose the word by continuing to press the keys
corresponding to the different letters, without worrying
about the display, until the whole word is entered: it will
appear in negative, white on black.
If the word proposed corresponds to the one you are
looking for, press 0 to validate it, create a space and go
on to the next word.
IIt is possible that there are several words in the
dictionary that contain the same sequence of keys
pressed. If the word that appears is not the one you
want, press the central key to scroll through the words
present in the dictionary, corresponding to this
sequence of keys. When you find the word you want,
press 0 to validate, type a space and go on to the next
word.
MYX-1_EN-05messages.pmd 23/09/2003, 16:3031
31
Page 33

Messages
32
If the word that you want does not appear in the
dictionary, several additional modes allow you to vary
the nature of the words entered.
Additional entry modes
The righthand key selects one mode or another.
The 123 mode inserts numbers.
The ABC mode enters words that do not exist in the
dictionary or in another language. To obtain a letter,
hold down the corresponding key. The letters and
numbers scroll. Release the key when the required
letter appears.
The # key allows you to enter symbols. You will see a
page of symbols (there are several pages available by
scrolling up or down) corresponding to the numbers 0
to 9. To select one of these, simply press the corresponding number key, ie, 6 for ? After the symbol has
been entered in the text, the phone reverts to the
previous mode.
The scrolling arrows keys allow you to access to
several symbol lists.
Capital letters
You can type capital letters, by pressing the
before entering the relevant character. The following
characters will automatically return to lowercase.
∗∗
∗ key
∗∗
Words in capital letters
You can also choose to type a whole word in capital
letters by pressing twice on the
the word. It is possible to return to lower case mode by
pressing once on the
∗∗
∗ key before entering
∗∗
∗ ∗
∗ key.
∗ ∗
MYX-1_EN-05messages.pmd 23/09/2003, 16:3032
Page 34

Messages
The number of messages stored in the
SIM card changes depending on the SIM
card capacity; contact your Operator or
your Service Provider. for further
information.
Punctuation marks
Punctuation marks are obtained by using either the 1
key (except in 123 mode), or using the Insert symbols
mode (quick access using # key).
Accented characters
Accented characters are automatically generated in the
word in Easy Message T9™ mode. In ABC mode, you
need to wait for the accented character to be displayed
whilst holding down the corresponding key.
Options available when writing a message
Press the lefthand key (Options) to view the various
actions available:
• Send your message
• Store your message
• Insert (depending on model)
- images (already predefined in the phone, call group
icons or animated screen savers)
- melodies (already predefined in the phone or
personalised)
- symbols: the symbol attaches a of symbols (there
are several pages available by scrolling up or
down) corresponding to the numbers 0 to 9. To
select one of these, simply press the corresponding
number key, ie, 6 for ? After the symbol has been
entered in the text, the telephone reverts to the
previous mode.
MYX-1_EN-05messages.pmd 23/09/2003, 16:3033
33
Page 35

Messages
Press OK to insert the image or melody you have
chosen.
Press C to delete the image or melody already
included in the text.
Notes:
- Predefined images and melodies are replaced by a
code in the messages to reduce the size of the
messages sent.
- To be able to view the images or listen to the
melodies, the person to whom a message that
includes inserted objects is sent must have an
EMS compatible phone.
• Languages: T9 mode can be used in different
languages
- Scroll to the required language and press OK, the
T9 mode will use this selected language.
• Formatting: the following options are available:
- text alignment (this option applies to all the text
typed in),
- font size (the size applies to all characters typed in
after you have selected the size),
- style (for example, bold) (the style applies to all
characters typed in after you have selected the
style).
Note: depending on the font, certain sizes or styles
may not be available.
• De-activate Zoom
• Cancel.
34
MYX-1_EN-05messages.pmd 23/09/2003, 16:3034
Page 36

Messages
When sending a long message, the
number next to the icon indicates the
number of calls required to send the
message.
Options for messages in the list
When a message has been selected from the list of
messages, pressing the lefthand key (Options)
displays the following actions:
• read it
• send it
• delete it
• modify it.
When Write new... has been selected from the list of
messages, press the lefthand key (Options) to:
• find out how much memory is available
• delete the messages that have been read
• delete all the messages
• select a send option (acknowledgement, reply given,
period of validity, message format)
• enter the message centre number.
Reply to a received message by selecting the relevant
message from your list with the up and down key and
then press the central key.
MYX-1_EN-05messages.pmd 23/09/2003, 16:3035
35
Page 37

Calls
Look out for incompatibilities; for more
information, consult your Operator or
your Service Provider.
The forwarding number to the messaging
centre depends on the subscription type.
Warning
Cancellations of forwarding can cause
particular reactions in certain networks.
Forwarding calls
Forwarding voice calls
Depending on your subscription, this service allows you
to transfer incoming calls to another number or a
mailbox.
Scroll through the menu to activate the type of
forwarding that you require:
• Forward all voice calls: all incoming calls are
forwarded to a number you define
• Forward all conditional calls
• Forward calls when your line is busy
• Forward calls when there is no answer on your
extension after a period that you can define by
answering the questions on the menu
• Forward calls when your phone is unavailable,
outside of network coverage or switched off.
Enter the number to which you want to forward your
calls. If necessary, include the area code you would
use if you were calling the number from your phone.
Validate by pressing the rightand key .
A message on the screen confirms that forwarding has
been activated.
You can also cancel all types of forwarding.
You can view the status of a type of call forwarding in
order to verify whether it is active or not. This function
is also useful for controlling the number to which your
calls are forwarded. The information supplied is
provided by the network.
36
MYX-1_EN-06Calls.pmd 23/09/2003, 16:3036
Page 38
Calls
For services specific to a network, such
as mailboxes, short dialling is only valid
when covered by the particular network.
You may possibly prefer an international
number.
This memory is linked to the phone and
not to the SIM card.
Several options are available for this
number: store it in your directory, send
it a short message, delete it. You can
also delete the whole list of numbers.
This data is purely indicative and does
not represent proof. The metering
criteria for the network can be
appreciably different (indivisible minutes,
etc.).
Forwarding data or faxes
Depending on your subscription, this service permits
you to transfer data or faxes that are addressed to you
to another number.
You can activate the data or faxes forwarding service,
to enter the required number, cancel it and view the
status of the service.
Viewing the list of the last numbers
used
You can consult the list of the last numbers used
(outgoing and incoming if available).
To redial a number:
Select from the list using the scrolling arrows.
Make the call by pressing on .
Shortcut: from the standby screen, press on .
Monitoring the duration and cost of
calls (*)
On the Counters menu you can view the duration of
the last call and all calls made since the last deletion.
The Delete durations menu enables you to delete the
duration of the last call and reset to zero the total calls
counter.
On the Costs (*) menu you can view the cost of the
last call and all calls made since the last deletion.
37
MYX-1_EN-06Calls.pmd 23/09/2003, 16:3037
Page 39

Calls
38
The Delete costs (*) menu enables you to clear the
cost of the last call and to reset the call counter after
entering your PIN2 code.
The Display of duration menu enables you to select
the duration display during a call.
Displaying the numbers
This menu permits you to see the status of the display
numbers function for:
• your identity (phone number)
• the identity of the person calling you.
Anonymous mode
You can decide whether the person you are calling is
given your phone number or not.
• Preset: the phone network default mode.
• No: you do not wish to use the anonymous mode
• Yes: you wish to use the anonymous mode and
Your number
• On outgoing calls you can check that your phone
• On incoming calls, you can check that the telephone
and the person you are calling will know your
number.
the person you are calling cannot know your
number.
number is displayed on the phone of the person you
are calling (CLIR).
number of a phone to which you are transferring calls
will appear on the phone of a person calling you
(COLR).
MYX-1_EN-06Calls.pmd 23/09/2003, 16:3038
Page 40

Calls
Call waiting
You can activate, deactivate and view
the status of the call waiting service in
order to check whether it is active or not.
Callers Number
• On outgoing calls, you can see the phone number to
which your call is being transferred (COLP) if the
person you are calling has authorised his or her
identity to be displayed by deactivating the COLR
option.
• On incoming calls, when it is activated, this function
displays on your phone the phone number of the
person calling (CLIP). This function is only possible if
the caller has authorised his identity to be displayed
by deactivating his CLIR option.
Authorising double call
(Service depending on the operator)
During a call, a special tone can inform you that
another caller is trying to reach you. The caller’s
number - and name, if stored - is displayed on the
screen.
During a call, when pressing the central key, the
lefthand key changes function and gives access to
different possibilities of actions with this call.
Configuring automatic redial
You can activate automatic redial either by default or on
demand.
MYX-1_EN-06Calls.pmd 23/09/2003, 16:3039
39
Page 41

Calls
40
Blacklist
The blacklist is used to limit failures on automatic
calls (calls generated by the automatic redial
function or by applications: data, fax for example).
When several automatic calls failed with a number
(number busy or unknown), this number is put in the
blacklist and no automatic call will be done with this
number any more until you delete it from the
blacklist.
Note: this function does not apply to the calls
performed manually.
Voice mail number
To program a special permanent call number, type in
this number and validate.
This number is used when calling the voice mail
centre with the programmable keys.
Local information distribution
This menu allows you to activate and select reception
of information distributed by the network.
Replacing the international prefix
(Depending on model)
In the event that a call is not possible with the “+”
prefix, you have the option of choosing a
replacement prefix with no need to change the
number(s) already recorded with the prefix + in the
directory.
MYX-1_EN-06Calls.pmd 26/09/2003, 08:5740
Page 42
Calls
Warning
In this case, pressing ends all calls.
Multi-conferencing enables you to talk to
several callers (depending on the
network capacity and on the model).
0 Reject a call holding or waiting (or multi-conference
1 End the current call holding or waiting (or the multi-
1 X End the current call order number X.
Placing calls on hold
(Service depending on the operator)
During a call, you can put the current call on hold by
pressing OK.
During a call, when pressing the central key, the
lefthand key changes function and enables you to
access different options for the call.
Multi-conferencing (*)
(Service depending on the operator and depending on
model)
A multi-conference is limited to 6 participants: 5 in a
multi-conference and one additional call
During a call, when pressing the central key, the
lefthand key changes function and gives access to
different possibilities of actions with this call.
Standard commands
Sequences of standard keys also permit access to
services such as call notification, call holding, multiconferencing, and open up additional possibilities:
calls).
conference calls if there are any) and accept the call
(or multi-conference calls).
MYX-1_EN-06Calls.pmd 23/09/2003, 16:3041
41
Page 43

Calls
2 Place on hold the current call (or multi-conference
calls) and accept the call holding or waiting (or multiconference calls).
2 X Place on hold the multi-conference calls except for the
current call order number X (private call).
3 Add a call holding (or multi-conference calls) to the
current call (or to the multi-conference).
Tel N° Place on hold the current call (or the multi-conference
calls) and call another phone number.
Note:
If you use this feature, we recommend that you first
place the current caller on hold, then dial the new
number as a courtesy to your caller and to ensure
privacy with the other party if desired.
End all calls except for a possible call waiting.
42
MYX-1_EN-06Calls.pmd 23/09/2003, 16:3042
Page 44

Ringing tones
There are numerous tunes available
(including a “silent ringing tone”) and
several volume levels including a
crescendo.
Selecting the volume and the type of
ringing tone
You can set your phone to ring on receiving calls
and/or messages.
You can, during adjustment, listen to the melody
selected or not: activate or deactivate by pressing the
central key; the symbol appears barred or not.
Select the ringing tone required using the scrolling
arrows.
Press the righthand key to move on to the next
section.
Select the volume required for using the phone with the
scrolling arrows (from 1 to 4 and + for the volume
crescendo) and validate using OK.
Press the righthand key to move on to the next
section.
Select the volume required for using the hands free car
or pedestrian kit with the scrolling arrows (from 1 to 4
and + for the volume crescendo) and validate
using OK.
Call groups
See chapter How to use the directory for all the
functions about call groups.
Downloaded icons
If you have saved icons received by message
(see Text messages chapter), they will appear in the
menu Ringing and beeps/Call groups/Call groups
menu.
43
MYX-1_EN-07ringtones.pmd 23/09/2003, 16:3043
Page 45

Ringing tones
If you select an icon in the list, it will appear at the top
of the screen.
You can then delete it or select one of the following
options:
• change its title
• consult the available memory
• delete the selected icon
• delete all saved icons.
Personalising the ringing tone
You have the option of creating a personalised call
tune. A help menu, accessible by pressing the
righthand key , will guide you.
If you have saved melodies received by message
(see Messages chapter), they will appear in that menu.
You can then modify the selected melody (if the
copyright allows it), listen to it or select one of the
following options:
• change its title
• send it by message to another person (if it is not
Copyright protected)
• consult its memory capacity
• consult the available memory
• delete the selected melody
• delete all melodies.
44
MYX-1_EN-07ringtones.pmd 23/09/2003, 16:3044
Page 46

Ringing tones
Wherever you require your calls to arrive
discreetly, you can use the vibrator or
select the silent mode.
Silent mode is automatically deactivated
when the hands free car kit is connected
as well as when the phone is switched
on/off.
You can select the tones produced by
your keypad: Beep, DTMF (musical
keys) or non active tones (in this last
case, when you press your keyboard, it
does not make a noise).
Setting the vibrator (depending on
model)
Using the scrolling keys, select one of the following
options: inactive vibrate, only vibrate, vibrate and ring,
vibrate then ring.
Validate by pressing the righthand key .
Selecting silent mode (depending on
model)
If you want the ringing tone of your phone to be
replaced by the vibrator and the beeps to be
suppressed (except for the alarm tone), tick the box
and validate by pressing OK.
You can also activate/deactivate the silent mode by
holding down the
This mode is indicated by the symbol on the screen.
∗ ∗
∗ key.
∗ ∗
Setting the beeps
Different controls are available:
Setting the keypad tones
Select the tone required using the scrolling arrows and
validate (press the righthand key ).
Setting the network tone
If you want your phone to give a warning beep when it
locates a network on which it can communicate:
Tick the box and validate by pressing OK.
45
MYX-1_EN-07ringtones.pmd 23/09/2003, 16:3045
Page 47

Ringing tones
Setting the low battery tone
If you want your phone to give a warning beep when
your battery is low:
Tick the box and validate by pressing OK.
Deleting DTMF tones
(Depending on model)
You can delete the emission of DTMF tones during a
call. You can thus make a call, in a comfortable and
discreet way for you caller.
To be discreet, clear the selection from the box.
Validate by pressing OK.
46
MYX-1_EN-07ringtones.pmd 23/09/2003, 16:3046
Page 48

Settings
The frequency of display of the screen
saver has a direct impact on the phone's
operating capacity. For optimal operating
capacity, set the maximum interval.
Customizing your phone
Installing the energy saving mode
In order not to use the phone’s screen light and thereby
increase its operating time:
In the Customization/Energy saving menu, check No
light and press OK to validate.
Configuring the idle mode
You can choose between an animated idle screen or
the economy mode.
In the Customization/Screen Saver menu, use the
scrolling arrows to select the animation you want, a
text, a banner or the economy mode.
Press the righthand key to access the setting of the
animation or economy mode activation interval.
Press OK to validate.
To exit the animation or economy mode, press .
If you have saved animated screen savers received by
message (see Messages chapter), they will appear in
that menu.
The following options are available according to the
type of screen:
• validate the animated screen savers as default
screen
• change its title (only downloaded screens)
• consult its memory capacity
• consult the available memory
47
MYX-1_EN-08settings.pmd 23/09/2003, 16:3047
Page 49

Settings
The action allocated to a programmable
key is triggered by a long press or two
short presses only from the standby
screen.
• consult the available memory
• delete the selected screen
• delete all screens.
Personalising the welcome screen
(Depending on model)
You can personalise the welcome screen of your phone
by typing a text. Validate by pressing OK.
Customizing the programmable keys
(Depending on model)
This menu, accessible directly by a short press on a
programmable key from the standby screen, enables
you to configure the lefthand and righthand keys.
There are different possibilities for each of the keys:
Directory
Validate Directory.
When you press the key, you can see the names in the
directory.
Rapid dial
Select a name from the directory and validate. When
you press the key, you will automatically call the name
selected.
48
MYX-1_EN-08settings.pmd 23/09/2003, 16:3048
Page 50

Settings
Silent mode
This mode, indicated on the screen
saver, is automatically deactivated/
activated when the hands free kit is
connected.
Silent mode (depending on model)
Validate Silent mode.
The ringing tone of your phone will be replaced
automatically by the vibrator and all the beeps will be
suppressed (except for the alarm).
Call voice mail
Validate Call voice mail.
When you press the key you will automatically call your
mailbox number.
Text messages
Validate Text messages.
When you press the key you can read the short
messages stored in the SIM card or in the phone itself.
View calls
Validate View calls
When you press the key, you can view the list of the
last calls made and received if available.
Selecting the display language
You can select the language in which you wish your
phone display to operate:
Select Automatic
The display language will be that of your SIM card (if
available).
MYX-1_EN-08settings.pmd 23/09/2003, 16:3049
49
Page 51

Settings
Network
When your home network is not
accessible (abroad, for example), your
phone automatically searches for
another available and authorised
network in the order of preference
indicated by the list on the SIM card.
Otherwise select the language of your choice using the
scrolling arrows and validate by pressing OK.
Select the type of response
You can reply to a telephone call:
either automatically, if you have ticked the Automatic
ans. box (for a hands free kit) and validated by
pressing OK
or by pressing any numeric key if you have ticked the
Any key and validated by pressing OK.
Selecting the network
Every SIM subscription card can store an ordered list of
preferred networks.
If the list has not been programmed, or if none of the
networks on the list are available or authorised, the
phone searches for an authorised network providing
the highest level of signal.
If none of the available network is authorized, you can
use your phone to make emergency calls only until a
network connection can be re-established.
If no network is available, your phone continues to
search for one.
In all cases, the phone searches for its home network
first.
50
MYX-1_EN-08settings.pmd 23/09/2003, 16:3050
Page 52

Settings
Depending on model, you can choose a
manual selection for a network search.
Available networks
This menu enables you to start a search for all
available networks at the present location and to
display them.
Use the scrolling arrows to scroll the available networks
and validate the one wanted (press the righthand
key ).
Preferred networks
To program a list of preferred networks into your
SIM card:
Use the scrolling arrows to select from the list.
Validate.
If the network is not on the list, select the country code
then the network code (ask the organisation from which
you obtained the SIM card).
Setting the time and date
Setting time/date/Control menu
Set the hours and minutes by pressing on the
corresponding numbers or by scrolling through the
values using the or arrows.
Press the righthand key to go to the next setting.
Set the day, month and year.
Press OK to validate.
Setting time/date/Display menu
MYX-1_EN-08settings.pmd 23/09/2003, 16:3051
51
Page 53

Settings
Use the scrolling arrows to select the type of clock to
be displayed on the screen or to display no clock.
Press OK to validate.
Controlling screen contrast
Control screen contrast using the scrolling arrows, and
validate by pressing OK.
Converting currencies
This menu enables you to convert one currency into
another. Using the scrolling arrows, you can select:
Rapid exchange
If you tick the Rapid exchange box, the converter will
operate on the standby screen, enter the digits required
and use the scrolling arrows to perform a conversion.
Exchange rate
Enter the conversion rate corresponding to the two
selected currencies.
Currencies
Enter the symbols of the two currencies to convert. A
long press on C returns to the beginning of the line to
enter them (if the symbols are already entered).
52
MYX-1_EN-08settings.pmd 23/09/2003, 16:3052
Page 54

Security
Locked keyboard
You can still make emergency calls and
answer calls.
For a quick keypad locking, press
then OK from the standby screen.
Warning
If the wrong PIN code is entered three
times in a row, the card will be locked.
To unlock your card, call the
organisation which issued your card
for guidance in unlocking it.
If your SIM card is permanently
locked, contact your Operator or your
Service Provider to obtain a new card.
∗∗
∗
∗∗
Locking the keyboard
This menu enables you to lock your phone’s
keyboard to prevent calls from being made
unintentionally in your bag or pocket.
Tick the Lock box: the keyboard will automatically be
locked.
To unlock your keyboard:
Press * then OK.
After unlocking, the keyboard will be locked after a
certain period.
Changing the PIN number
You can change your PIN number:
To the question: Old pin number ?, enter your old
PIN code and validate (press the righthand key ).
To the question: New pin number ?, enter your new
PIN code (a number between 4 and 8 digits) and
validate by pressing OK.
To the question: Verify pin numb. ?, enter your new
PIN code a second time to verify and validate by
pressing OK.
Checking the PIN number
You can activate your PIN number so that it is
requested and checked every time the phone is
switched on, so that if the phone is lost or stolen,
your SIM card cannot be used:
To the question: Pin number ?: enter your PIN
number and validate (press the righthand key ).
53
MYX-1_EN-09security.pmd 23/09/2003, 16:3053
Page 55

Security
The phone code is a secret code,
intended to protect the phone in the
event of theft. It is linked automatically
to the SIM card present on activation.
54
Tick the box Pin num. control and validate by
pressing OK.
Changing the PIN2 number (*)
You have a second PIN number. The procedure for
modifying the PIN2 number is identical to that for the
PIN number.
Changing the phone code
The Phone code menu enables you to activate the
phone code so that it is requested and checked each
time the phone is switched on, in the case of a
different SIM card being used.
If the incorrect code is entered, the time interval
between each attempt increases, making use
impossible.
To change the phone code, you must first check that
it is active (Control phone code menu).
To activate:
To the question: Phone code?, enter 0000 and
validate (press the righthand key ).
Tick the Phone control box and validate by
pressing OK.
To deactivate:
To the question: Phone code?, enter your code
(possibly changed) and validate (press the righthand
key ).
Do not tick the Phone control box and validate by
pressing OK: it will reset the code to 0000.
MYX-1_EN-09security.pmd 23/09/2003, 16:3054
Page 56
Security
Access to this service depends on your
subscription type. For more
information contact your Operator or
Service Provider.
The restriction can apply to ALL
incoming calls or to incoming calls
when you are not in your home country
(if you have roaming).
Once the phone code is activated, you can modify it:
To the question: Old phone code?, enter your old
phone code and validate (press the righthand
key ).
To the question: New phone code? enter your new
phone code (a number of between 4 and 8 digits)
and validate by pressing OK.
To the question: Verif. phone code? enter your new
phone code a second time to verify it and validate by
pressing OK.
Changing the operator password (*)
Depending on model, you have an operator
password supplied by the network operator. The
procedure for modifying this password is identical to
that for your PIN code.
Limiting incoming calls (*)
Depending on your subscription, this service enables
you to restrict certain types of incoming calls.
If you have this service, you will have been provided
with a password when you subscribed. This
password is necessary to activate this function.
You can activate, deactivate, and view the status of
the type of call barring. You can also cancel ALL
types of barring.
MYX-1_EN-09security.pmd 23/09/2003, 16:3055
55
Page 57

Security
Access to this service depends on your
subscription type. For more
information contact your Operator or
Service Provider.
The restriction can apply to ALL
outgoing calls, to all your
INTERNATIONAL outgoing calls or to
outgoing international calls EXCEPT
those sent to your HOME country.
This directory is linked to the
SIM card. Thus, its size is determined
by limitations of this card.
56
Limiting outgoing calls (*)
Depending on your subscription, this service stops
certain types of outgoing calls being made from your
phone.
If you have this service, you will have been provided
with a password when you subscribed. This
password is necessary to activate this function.
You can activate, deactivate, and view the status of
the type of call barring. You can also cancel ALL
types of barring.
Setting up the pre-set directory (*)
The pre-set directory allows you to limit calls. When
you activate this directory, only the numbers you
store in this directory can be called.
Before creating it, you must first activate it:
Display the Pre-set directory menu.
Enter your PIN2 number.
Tick the Pre-set directory box.
Validate by pressing OK.
To create the pre-set directory, proceed as you would
proceed for another directory (see chapter How to
use the Directory/Storing a number).
MYX-1_EN-09security.pmd 23/09/2003, 16:3056
Page 58

Security
Warning
These functions depend on the ability
of the network to send charge data to
your phone in real time, and on the
capacity or options on your SIM card.
Charge checking (*)
The Settings menu allows you to select the type of
charge indication after entering your PIN2 code:
- Currency: enter the currency name (maximum
3 characters) and charge per unit. Ask your
operator for this value.
- Telephone unit.
The Limitation menu allows you to activate the credit
function in the selected currency after entering your
PIN2 code.
Confidentiality messages
The function Confidentiality messages allows you
to delete automatically the numbers recorded in the
Call Services menu and the text messages that are
in the phone's memory when a new SIM card is
inserted. This function is activated/deactivated in the
menu Confidentiality messages.
57
MYX-1_EN-09security.pmd 23/09/2003, 16:3057
Page 59

Accessories
central key Subtract
∗∗
∗ Multiply
∗∗
# Divide
OK Equals
C Delete
∗ ∗
∗ or # or @ or Decimal point
∗ ∗
Monetary conversion
The alarm function is represented on
the screen by the symbol .
Permanent flashing of this symbol
indicates that an alarm time has been
programmed but the date and time
clock has not been initialised.
Calculator
You can operate the calculator using the following keys:
Add
Long press on:
Monetary operations if there is no calculation in
progress
(See chapter Phone adjustment)
From the standby screen, you can convert a currency
into another according to the settings chosen
(calculator key ) or menu (Controls/Currency
converter).
Setting the alarm
To use your phone as an alarm clock:
Using the numbers or the scrolling arrows, set the
alarm time.
Press the righthand key to go to the next item.
Set the minutes.
Tick the box and validate by pressing OK.
58
MYX-1_EN-10accessories.pmd 23/09/2003, 16:3058
Page 60

Accessories
To use your phone with a hands-free kit,
see the notes supplied with the kit.
This delay starts counting down as soon
as the end of a call is detected.
The ringer is stopped by pressing any key; the alarm
remains programmed.
The alarm function remains active when the phone is
switched off. It is not affected by silent mode.
Setting the timer
The same procedure is applied as for the alarm
function, but in this case you start a time clock running
against a defined value. The phone must remain
switched on.
Configuring your phone with a car kit
(Depending on model)
As regards the phone, there are several options:
Programming the switch-off delay on your
phone
Set the phone off delay using the numbers or scrolling
arrows.
Press the righthand key to go to the next item.
Tick the box and validate by pressing OK.
MYX-1_EN-10accessories.pmd 23/09/2003, 16:3059
59
Page 61

Accessories
This can only happen when the vehicle
is not running.
Programming the alarm timing
You can be notified that your phone is ringing when
you are not in your car.
For an external warning, set the delay using the digits
or scrolling arrows.
Tick the box and validate by pressing OK.
Data parameters
You can set the serial link speed when using AT
commands.
60
MYX-1_EN-10accessories.pmd 23/09/2003, 16:3060
Page 62

WAP (depending on model)
The WAP function allows connection to Internet sites.
Thus, you can connect to sites, among others, which
allow downloading of melodies, icons or animated
screen savers.
The WAP menus
Depending on model, scrolling menu 0
allows you to access the WAP function.
When navigating in WAP, you can
return to Menu Services at any time by
pressing the green key .
Bookmarks enables you to record a
directory of Internet site names and
addresses for easy and fast access.
WAP: Wireless Application Protocol –
This is a protocol which converts
Internet language into the language
which can be understood by a mobile
phone.
The WAP browser is licensed from:
The WAP browser remains the
exclusive property of Openwave. It is
therefore highly prohibited to modify,
translate, reverse engineer, de-compile
or disassemble the browser or any part
thereof.
From the standby screen, press on the central key
@ to access the local menu for WAP functions.
The Services menu, pop-up menu, may be displayed
at any time when navigating in the WAP function. It
contains the following sub-menus:
Home: connection to the home page.
Bookmarks: from the standby screen, following a
number key with the central key @ initiates access to
the favourite corresponding with the number.
You can receive bookmarks by message and add
them to this list (see Text messages chapter). You
can also send some by message:
select a bookmark, press the lefthand key
(Options) then select Send by SMS.
Go to the URL: this menu enables you to directly
enter an Internet address.
Inbox: this menu enables to read the messages sent
by the Internet site.
Reload: updating of the current page.
Reset cache: empties data stored from previous
connections.
Advanced...: see § Configuration of parameters.
About...: Information about OpenwaveTM.
Exit: return to the phone standby screen.
61
MYX-1_EN-11WAP.pmd 23/09/2003, 16:3061
Page 63

WAP (depending on model)
Configuration of parameters
Advanced... menu: access to sub-menus:
• Connection settings which allow you to set the
parameters for several access providers
All of the information to be entered in
the settings is supplied by your
operator or service provider.
(depending on model). The current access service
has a star in front of it.
Configuration of WAP parameter
- Select the desired access service using the
scrolling arrows then press on Modify (lefthand
key ).
- Enter the name of the service then validate.
- Enter the internet address of the home page then
validate.
- Enter the connection settings.
- Press on Details (lefthand key ).
a user name,
a password,
the IP address of the WAP gateway: enter the IP
number using the central key @ (Next) then
choose Secure or Non secure.
the call number,
the access mode (digital or analog).
Once all the parameters are entered, you can
activate the selected service.
- Confirm your choice with OK.
62
MYX-1_EN-11WAP.pmd 23/09/2003, 16:3062
Page 64

WAP (depending on model)
• Show URL which presents the current Internet
address.
• Disconnect which ends the communication (allows
a navigation whithout being connected).
• Circuit prompt which enables to activate or not the
connection confirmation message at each
connection attempt.
• Linger timer enables you to set a time limit, after
which the phone will disconnect automatically if you
have forgotten to disconnect from a service.
• Security which enables a server identification by
the phone for security reasons.
• FastW@p (depending on model) which provides
quicker access to the pages of Internet sites.
Connection
When connecting on the GSM network,
the @ character flashes, and the cost
of communications starts to clock up as
soon as it stops flashing.
From the Home menu, start up connection to a
service.
Once connected to a service, press on G then
[Menu] to return to the local menu.
Downloading objects
You may connect to some Internet sites, allowing
download of melodies, icons or animated screen
savers. Once downloaded, they are in the inbox.
Then, you can save them in your phone (same
procedure as the one for SMS download).
MYX-1_EN-11WAP.pmd 23/09/2003, 16:3063
63
Page 65

WAP (depending on model)
Disconnection
You will be automatically disconnected
after a short pause if you have
forgotten to disconnect from a service.
Disconnection is achieved by pressing on G then
[Menu] and then by using the Advanced... menu and
Disconnect.
The @ character disappears from the sreen.
Exit from the WAP function
To exit from the browser and end the current
communication (if necessary):
- press
or
- from the local menu, select Quit and validate by
pressing OK.
Icons
The G icon enables you, by pressing the central
key @, to access two display modification
possibilities:
- the zoom to change the size of characters by
pressing on the lefthand key succesively,
- full screen display by pressing on the righthand
key .
64
MYX-1_EN-11WAP.pmd 23/09/2003, 16:3064
Page 66

Games
Depending on the model, several games are available.
The presentation menu guides you on how best to use
them.
MYX-1_EN-12games.pmd 23/09/2003, 16:3065
65
Page 67

Available accessories
Warning
Do not connect/disconnect the special
socket on your phone during a call.
The use of the EXTERNAL SIGNAL
function to activate the lights on a
vehicle or the horn, in order to take a
call on a public road, may not be
authorised.
Warning
Certain chemical products can damage
plastic. Do not use aerosols, certain
special cleaning products, corrosive
products, solvents, alcohol and
detergents.
66
Available accessories
Depending on the model, different accessories are
available on your phone:
• Additional batteries
• Additional chargers
• Desk charger
• Cigarette lighter adapter
• Hands-free kits
• Front and back covers in different colours
• A cable for data exchange between your phone and a
PC (depending on model).
Upkeep
Clean your phone using a soft slightly damp non fluffy
cloth.
Battery
After a long period of non use (several months), when
the charger is being connected, the unit might not
switch on.
In this case:
Disconnect the charger, wait a few seconds, and plug it
in again.
It may be necessary to repeat this several times.
Maintenance menu
This menu contains information that you could be
asked for to perform specific operations. If they are
required, you will be shown how to find information you
need.
MYX-1_EN-13acess-upkeep.pmd 23/09/2003, 16:3066
Page 68

Recommendations
Recommendations
CE marking on the unit conforms to
directives 1999/5/EC, 89/336/CEE and
73/23/CEE.
The use of your phone is controlled by safety
regulations intended to protect both the user and his/
her environment.
Electrical safety
Only use the appropriate chargers contained in the
manufacturer’s catalogue. Using another charger
could be dangerous and will invalidate the
manufacturer’s warranty.
The main plug socket must be easily accessible. The
main voltage should correspond to that given on the
manufacturer’s plate on the charger.
Airplane safety
In an airplane, your phone must be switched off to
ensure that it does not interfere with the planes
systems.
Its use is illegal and you could be prosecuted or
banned from using cellular networks in the future if
you do not abide by these regulations.
Areas containing combustibles
It is advisable to switch your phone off in the vicinity
of gas stations.
Regulations limit the use of radio equipment in
chemical factories, gas depots and any area where
there are mines. You are advised to abide by these
rules.
MYX-1_EN-14recommendations.pmd 23/09/2003, 16:3067
67
Page 69

Recommendations
Warning
Ensure that no part of your body is
permanently close to the aerial unless
there is a metal screen (e.g.: a vehicle
roof, …).
Road safety
Except in an emergency, do not use your phone
when driving without a hands-free kit that enables
you to maintain your freedom of movement. Always
keep your eyes on the road when you are driving.
To make a call, pull to the side of the road, then
make your call. Abide by the current laws.
The phone must be shielded sufficiently from
electronic equipment in the vehicle. It gives off microwaves, which may affect the operation of such
equipment.
Installation of your phone in a vehicle must only be
performed by qualified personnel.
Non ionising radiation
To obtain maximum satisfaction from your phone, use
it in a vertical position. Your personal safety can only
be improved by doing so.
Electronic medical equipment
Your phone emits radio waves that could possible
interfere with electronic medical equipment, for
example an auditory prosthesis, heart
pacemakers, … Your doctor or the manufacturer of
the medical item will be able to advise you on
whether your phone could cause such interference.
In hospitals, the phone must be switched off.
68
MYX-1_EN-14recommendations.pmd 23/09/2003, 16:3068
Page 70

Recommendations
General precautions
Do not attempt to open your phone and repair it
yourself. The manufacturer cannot be held
responsible for any damage/accident that may result
from this.
Any work carried out by non-authorised personnel
will invalidate your warranty.
Do not use your phone in damp areas (bathroom,
swimming pool, …). Protect it from liquids and other
moisture.
Do not expose your phone to extreme temperatures
(from - 10°C to + 55°C).
Do not leave your phone within the reach of small
children (certain removable parts may be accidentally
ingested).
Use your phone with original accessories, or your
warranty will be rendered invalid.
The physicochemical processes created by chargers
impose temperature limits when charging the battery.
Your phone automatically protects the batteries in
extreme temperatures.
Removing the battery may mean that the time is lost.
You are strongly advised not to connect your phone
to the charger if it doesn’t contain a battery.
To avoid the risk of demagnetisation, do not let
electronic devices close to your phone for a long
time.
MYX-1_EN-14recommendations.pmd 23/09/2003, 16:3069
69
Page 71

Recommendations
SAGEM SA cannot be hold responsible for the
contents of messages, programs and downloadable
object and for the direct or indirect damage which
may be cause to the user of the phone or the phone
itself.
Note on downloading facilities
Your mobile phone allows you to download ringtones, icons
and animated screen savers. You must check that these
objects are free of copyright. SAGEM is not responsible for the
content of downloaded objects.
Some of these objects may contain data which may cause
malfunction or loss of data within your mobile phone (ie, a
virus).
For this reason, SAGEM declines all responsibility for (1) the
reception of data that has been downloaded or loss of said
data, (2) the consequences on the operation of the mobile
phone and (3) damage resulting from the reception of said
downloaded data or loss of said data. Moreover, SAGEM
draws attention to the fact that problems caused by the
reception of downloaded data that does not comply with
SAGEM’s specifications are not covered by the guarantee.
Consequently, the cost of diagnosing and repairing mobile
phones affected by said downloaded data will be charged to
customers.
The software program developed by SAGEM remains the
exclusive property of SAGEM SA. It is therefore highly
prohibited to modify, translate, de-compile or disassemble this
software program or any part thereof.
70
MYX-1_EN-14recommendations.pmd 23/09/2003, 16:3070
Page 72

Technical Characteristics
Weight: 92 g
Size: 106x46x20 mm
Volume: 78 cm
Original battery: Lithium Ion 680 mAh, 720 mAh or
780 mAh (depending on model)
Battery life calls/standby: up to 3h30/300 h
The technical characteristics of the product are subject to
change without notice.
This mobile phone complies with European requirements
regarding exposure to radio waves.
Your mobile phone is a radio transmitter and receiver. It
is designed and manufactured not to exceed the limits for
exposure to radio frequency (RF) energy recommended
by the Council of the European Union and ICNIRP. These
limits are part of comprehensive guidelines and establish
permitted levels of RF energy for the general population.
The guidelines were developed by independent scientific
organisations through periodic and thorough evaluation of
scientific studies. The limits include a substantial safety
margin designed to assure the safety of all persons,
regardless of age and health.
The exposure standard for mobile phones employs a unit
of measurement known as the Specific Absorption Rate,
or SAR. The SAR limit recommended by the Council of
the European Union and the ICNIRP is 2.0 W/kg*.
*The SAR limit for mobile phones used by the public is
2.0 watts/kilogram (W/kg) averaged over 10 g of tissue.
The limit incorporates a substantial margin of safety to
give additional protection for the public and to account for
any variations in measurements. SAR values may vary in
different regions on the world, depending on national
reporting requirements and the network band.
3
MYX-1_EN-15charactech.pmd 23/09/2003, 16:3071
71
Page 73

Technical Characteristics
Tests for SAR have been conducted using standard
operating positions with the phone transmitting at its
highest certified power level in all tested frequency
bands. Although the SAR is determined at the highest
certified power level, the actual SAR level of the phone
while operating can be well below the maximum value.
This is because the phone is designed to operate at
multiple power levels so as to use only the power
required to reach the network. In general, the closer you
are to a base station antenna, the lower the output.
Before a phone model is available for sale to the public,
compliance with the European R&TTE directive must be
shown. This directive includes as one essential
requirement the protection of the health and the safety for
the user and any other person.
This highest SAR value for this model phone when tested
for compliance against the standard was: 0.64 W/kg.
While there may be differences between the SAR levels
of various phones and and at various positions, they all
meet the EU requirements for RF exposure.
Advice for limiting exposure to radiofrequency (RF) fields:
For individuals concerned about limiting their exposure to
RF fields, the World Health Organization (WHO)
provides the following advice:
Precautionary measures: Individuals: Present scientific
information does not indicate the need for any special
precautions for the use of mobile phones. If individuals
are concerned, they might choose to limit their own or
their children’s’ RF exposure by limiting the length of
calls, or using «hands-free» devices to keep mobile
phones away from the head and body. Further information
on this subject can be obtained from the WHO home
page http://www.who.int/peh-emf WHO Fact sheet 193:
72
June 2000.
MYX-1_EN-15charactech.pmd 23/09/2003, 16:3072
Page 74

Troubleshooting
Problem - Situation Actions
The phone does not turn on Remove the battery and then replace it.
or
Connect the phone to the charger (check that this is
plugged in) for approximately 5 minutes.
No network recognised Remove the SIM card. Check that there is no dust or
Calls to a messaging service or voice Check in the Ringing and beeps/Tones menu that the
server do not get through box is ticked.
Unable to turn the phone on Charge the phone for 15 minutes before turning it on.
Error message: The battery pack is not recognised by the phone.
BATTERY STATUS NOT KNOWN Check that the battery pack is correctly fitted in the
Error message: LOW BATTERY This message is displayed when the battery charge is
grit in the SIM slot. Replace the SIM card being sure
to push it right up to the stop point.
Check the battery charging indicator:
cycling: charging normally
not cycling: disconnect the charger, re-connect and
then check the battery charging indicator: if it is still
not cycling, disconnect the charger and re-connect
several times.
If the battery is still not charging, contact the after
sales service.
When the battery charging indicator is continuously
on, the battery is fully charged.
phone.
too low. The phone turns off automatically. Charge
the phone.
MYX-1_EN-16dépannage.pmd 23/09/2003, 16:3073
73
Page 75

Troubleshooting
Problem - Situation Actions
Error message: SIM NOT PRESENT Check that the SIM card has been inserted correctly.
Examine the SIM card. If it is damaged, contact your
mobile phone operator sales point. If the message is
still displayed, contact the after sales service.
Error message: INCORRECT PIN The PIN has been incorrectly entered. If the PIN is
Error message: SIM BLOCKED The PIN has been incorrectly entered three times.
Error message: SIM LOCKED The mobile phone operator may require certain types
entered incorrectly three times, the SIM card is
blocked.
Use your Personal Unblocking Key (PUK) to unblock
the SIM card.
Enter:
**05*PUK*PIN*PIN#
PUK: your PUK code supplied by your mobile phone
operator.
PIN: your PIN code.
After 10 (or 5 depending on the type of SIM card)
unsuccessful attempts, the SIM card is blocked
permanently. You must then contact your mobile
phone operator to get a new card.
of SIM card to be used. This message indicates that
the SIM card is not accepted.
Remove the SIM card and turn the phone on again. If
you get the SIM not present error message, check
with your phone dealer whether your SIM card is
compatible. Otherwise, contact the after sales
service.
74
MYX-1_EN-16dépannage.pmd 23/09/2003, 16:3074
Page 76

Troubleshooting
Problem - Situation Actions
The phone display does not change Press a key. If nothing is displayed, check the
No connection made Check the form of the number called.
Unable to receive calls Try to make a call to check that the phone and the
position of the SIM card. If the problem continues,
contact the after sales service.
Check that there is at least one field strength dot
showing. If R is displayed but there is no mobile
phone operator name, only emergency calls are
allowed.
Check that you have not used all your credit with the
mobile phone operator.
Check that the SIM card provides the service you
required and that it has not expired.
Check and, if necessary, disable the outgoing call
lock.
The network is saturated. Please try later.
If you still have problems getting a connection,
contact the Hotline.
network are operational.
Check and, if necessary, disable the permanent call
redirection (permanent call redirection icon
displayed).
Check and, if necessary, disable the incoming call
lock.
If you still have problems receiving calls, contact the
Hotline.
MYX-1_EN-16dépannage.pmd 23/09/2003, 16:3075
75
Page 77

Troubleshooting
Problem - Situation Actions
Cannot send messages Check that the SIM card provides this service.
Check that the message server is correctly set up.
Try to make a call to check that the phone and the
network are operational.
Try sending the message later.
No voice box Check that the SIM card provides this service.
Set up the redirection to the voice box using the
information provided by the mobile phone operator.
76
MYX-1_EN-16dépannage.pmd 23/09/2003, 16:3076
 Loading...