

SABINE NAVIGATOR - OPERATING GUIDE ADDENDUM Operating Manual
NAVIGATOR System Processor
Operating Guide Addendum
13301 NW US HWY 441, Alachua, Florida 32615-8544 USA
(386) 418-2000 Fax (386) 418-2001 www.Sabine.com
080211
Using Blank Front Panel Units (-S series)
and New Features in all models
Navigators now come in two types of base models: front panel control, or the new blank front panel units,
which have an S in the part number.
And Navigators can now be ordered with Mic/Line switches for each input and a global phantom power
switch, allowing your unit to be a complete mixer. This option is indicated with an M in the part number.
Navigators can also come with the RJ45 connector installed that allows you to remotely control them with
the NAVRC-100 Wall Panel Remote. These wall panel-ready units have an R in the part number. Finally,
the 4802 and 8802 units can have an optional digital input/output which appears as a DB25 connector on
the back panel. These units have a D in the part number. IMPORTANT: These options do not appear in the
model number on the unit itself – you will see these on your invoice, shipping box, or packing list.
Blank Front Panel Units
Several important connection controls must be done using Navigator Remote Control software rather than
using the front panel – these units have no controls on the front panel!
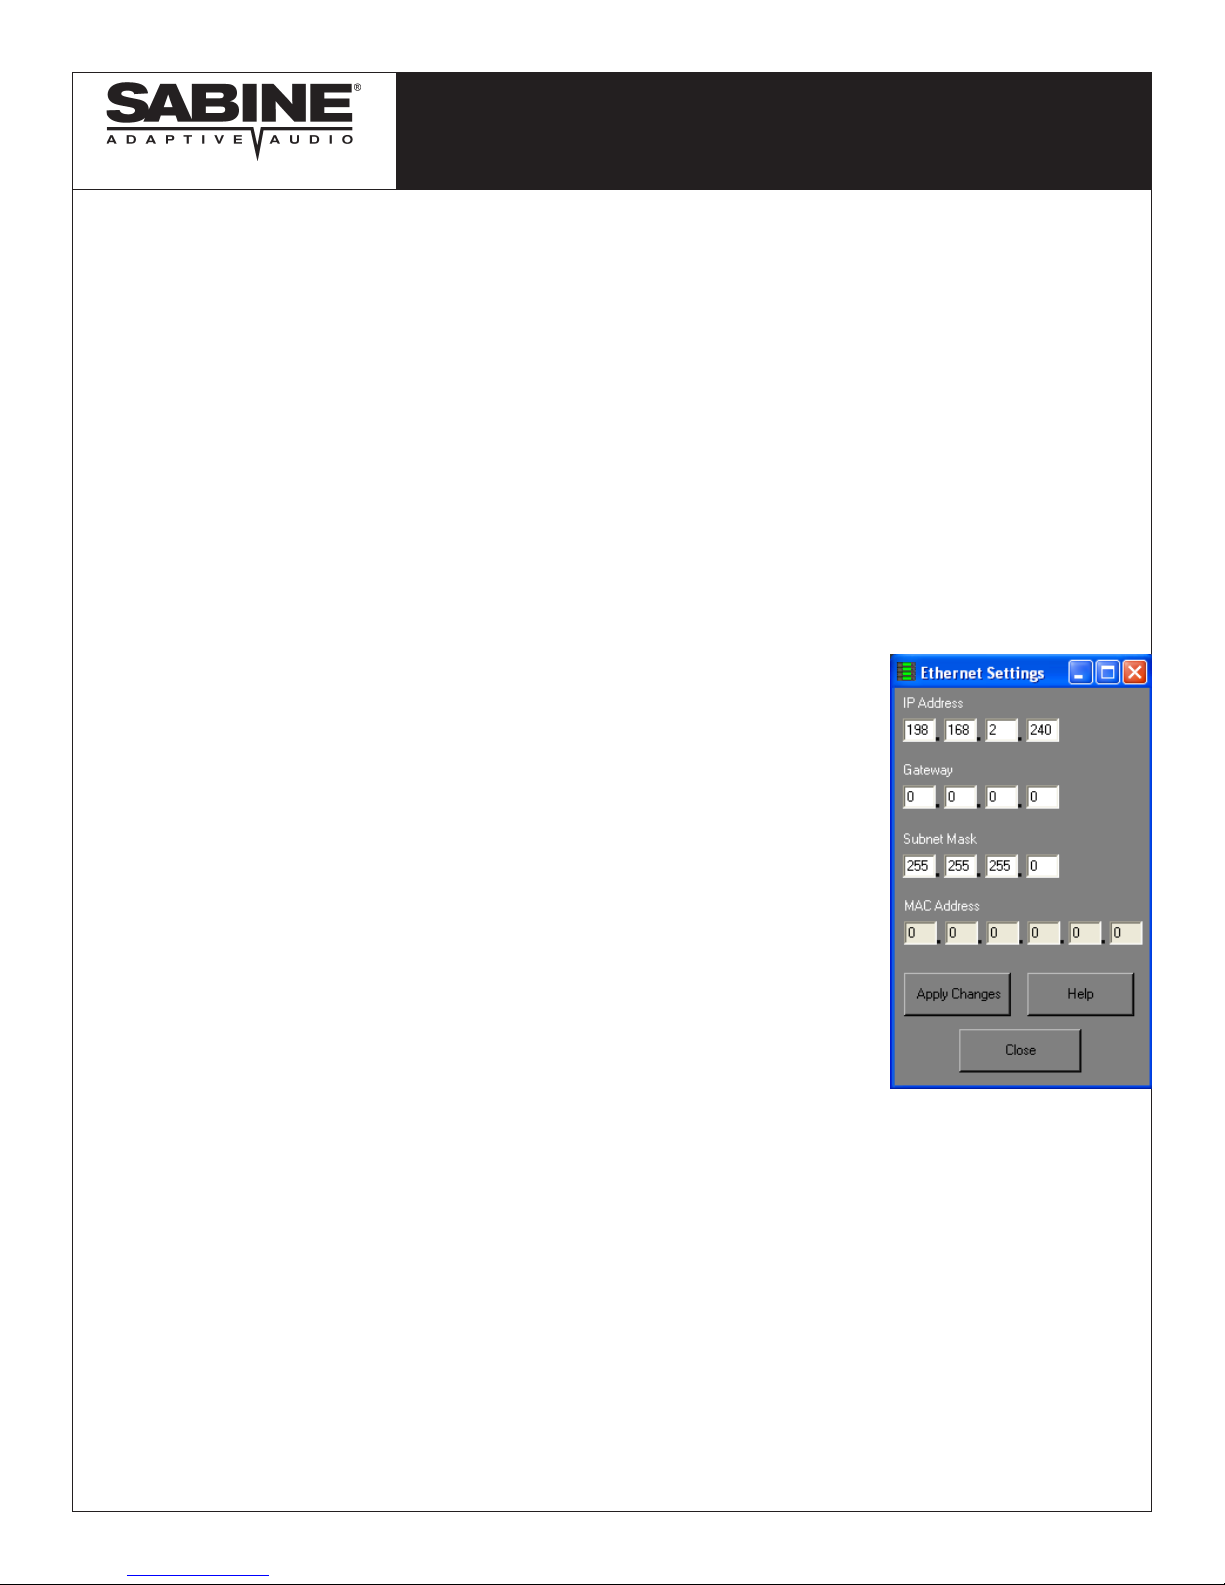
Ethernet Connections
To set up an Ethernet connection on a blank front panel Navigator, the
Ethernet address must rst be programmed into the unit using the RS232/USB
connection. To do this, use the remote control software to connect via RS232/
USB, then go to the Function menu and select Ethernet Settings. In the dialog
that appears, enter your preferred Ethernet settings for IP address, gateway,
and subnet mask (the MAC address is read-only). Click ‘Apply Settings’ and
wait for the hourglass cursor to change back into the normal pointer, indicating
that the settings have been programmed into your Navigator.
Exit the Navigator software, and turn off the Navigator. Turn the Navigator on,
and restart the software. Choose Live Mode, then Ethernet as your connection
type, and enter the IP numbers you programmed into the unit. The software
will recognize these from now on, and you can also save these in a separate
le: choose Save File from the menu in the Connections Setup window.
Setting Up a Multiple Unit Navigator Network
All Navigators in a network must have unique Device Numbers. For front panel units, press the Global button
and use the Menu keys to scroll to Device Number page, where you can change the device number (start
with 1 and increase by 1 for each Navigator). Click Enter twice to save, and then reboot the Navigator.
For blank front panel units, the Device Number must be set using the remote software. Since the all Navigators
are set to ‘Device Number = 1’ by default, you must connect to each Navigator individually to program the
Device Numbers. Once connected, go to the Function menu and select ‘Set Device Number.’ In the dialog
box that appears, set the desired device number and turn the Navigator off then on again. Repeat for each
Navigator that will be in your network. Once they are all programmed, restart the remote software and use
the connection setup window to set the com port or Ethernet address for each Navigator in your network.
For a complete explanation of Navigator connections please see the operating guide.
© 2008 Sabine, Inc.
Contined on next page
Navigator-OpGuide-ADD-080211.indd

13301 NW US HWY 441, Alachua, Florida 32615-8544 USA
(386) 418-2000 Fax (386) 418-2001 www.Sabine.com
New Features in All Models
Mic/Line Switching (M option)
If your Navigator has this option installed you will control this function in one of two ways:
NAV240, 360, or 480, active or blank front panel:
There are up/down push-button switches on the
back panel for setting mic or line level for each
input.
NAV4802, 8802, active or blank front panel: You
will need to use the Navigator Remote Control
software to control these switches. Choose “Mic
Preamps’ from the Function menu.
To access the front panel controls for Mic/Line
switching press the Global button and scroll using the Menu keys to the “Mic Preamp” menu.
NAVIGATOR System Processor
Operating Guide Addendum
080211
Digital Input/Output (D option)
Navigators with a D in the part number have the optional Digital
I/O installed. This option is only available with the 4802 and
8802 series units. Controls for the Digital I/O appear as menu
items in both the front panel and the remote control software.
Note that you can mix analog and digital inputs and outputs
on your Navigator.
To access the front panel controls for the digital I/O press
the Global button and scroll using the Menu keys to the “I/O
Mode” menu.
Wall Panel Remote Ready (R option)
All Navigators can have this option added, and it appears as
an R in the part number. This option allows you to control your
Navigator with the NAVRC-100 Wall Panel Controller, which
must be purchased separately. As in the Digital I/O, controls
for the Wall Panel connection appear in both the front panel
and the remote control software.
Setting the wall panel involves choosing the mode for the
Navigator and setting the total number of wall panels that will
control this Navigator. See the operating guide for a complete
explanation of this procedure.
To access the front panel controls for the digital I/O press the Global button and scroll using the Menu keys
to the “Panel” menu.
AutoMixer - Preliminary Release
You may notice a function in your NAV4802 or 8802 called “AutoMix.” For now this feature is disabled. When
it is released you will have priority-based input auto mixing with very exible controls by simply upgrading
© 2008 Sabine, Inc.
your Navigator rmware. See the operating guide or visit the Sabine website for this procedure.
Navigator-OpGuide-ADD-080211.indd
 Loading...