

Page 1
RB18L15/RB18L40
18V LITHIUM-ION BATTERY PACK
ORIGINAL INSTRUCTIONS
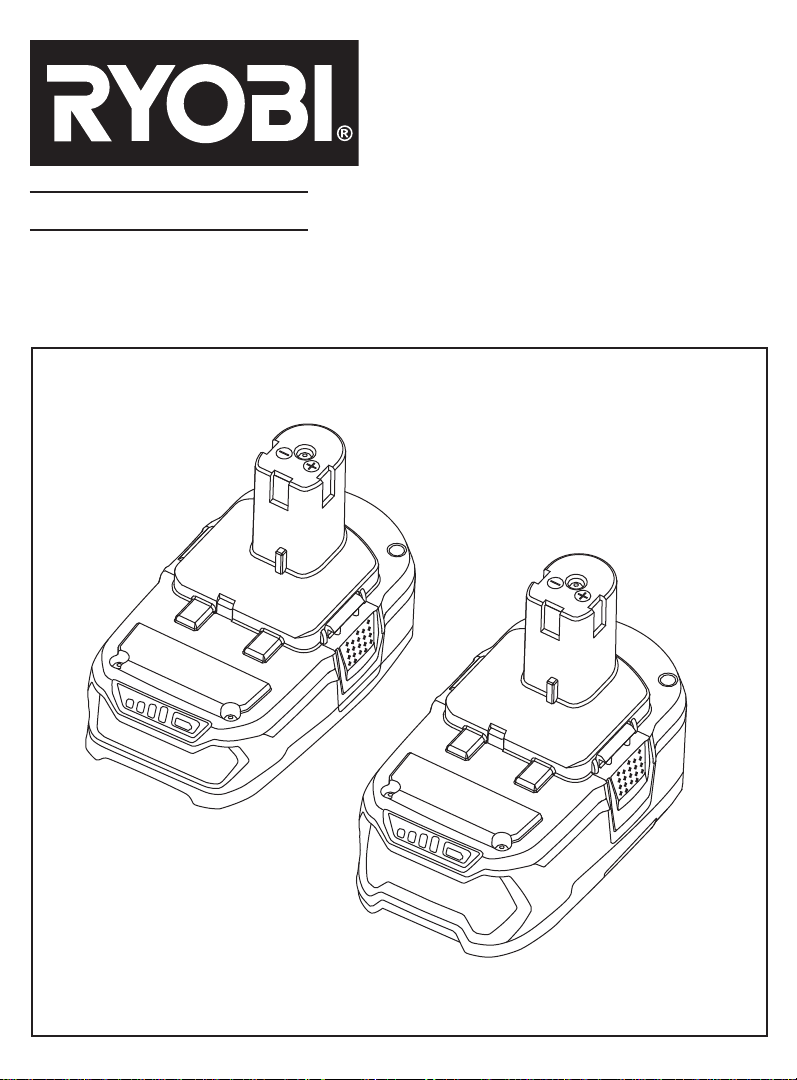
RB18L15
RB18L40
Page 2
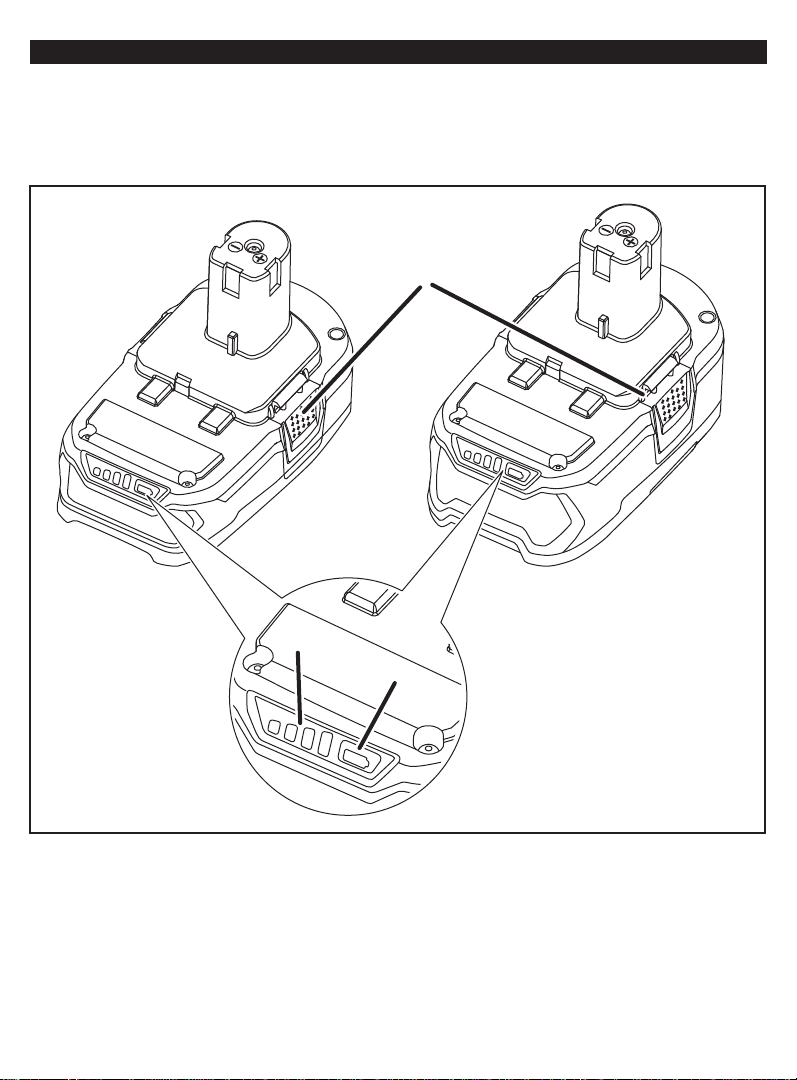
1. Latches
2. Charge level indicator
3. Charge level indicator button
RB18L15 RB18L40
DESCRIPTION
1
2
3
Fig. 1
Page 3

Important!
It is essential that you read the instructions in this manual before
operating this machine.
Subject to technical modifications.
Page 4

English
Save all warnings and instructions for future
reference.
The term "power tool" in the warnings refers to your
mains-operated (corded) power tool or battery operated
(cordless) power tool.
SAFETY INSTRUCTIONS
The product is not intended for use by persons (including
children) with reduced physical, sensory or mental
capabilities, or lack of experience and knowledge, unless
they have been given supervision or instruction concerning
use of the product by a person responsible for their safety.
Children should be supervised to ensure that they do not
play with the product.
Please read and observe these instructions before using
the product.
When battery pack is not in use, keep it away from
other metal objects such as paper clips, coins, keys,
nails, screws or other small metal objects that can
make a connection from one terminal to another.
Shorting the battery terminals together may cause
sparks, burns or fire.
Do not place battery tools or their batteries near fire
or heat. This will reduce the risk of explosion and
possible injury.
Do not crush, drop or damage battery pack. Do not use
a battery pack or charger that has been dropped or
received a sharp blow. A damaged battery is subject to
explosion. Properly dispose of a dropped or damaged
battery immediately.
Batteries can explode in the presence of a source
of ignition, such as a pilot light. To reduce the risk
of serious personal injury, never use any cordless
product in the presence of open flame. An exploded
battery can propel debris and chemicals. If exposed,
flush with water immediately.
Do not charge battery tool in a damp or wet location.
Following this rule will reduce the risk of electric shock.
For best results, charge the battery tool in a location
where the temperature is more than 10°C but less than
37°C. To reduce the risk of serious personal injury, do
not store outside or in vehicles.
Under extreme usage or temperature conditions,
battery leakage may occur. If liquid comes in contact
with the skin, wash immediately with soap and water,
then neutralize with lemon juice or vinegar. If liquid
gets into the eyes, flush them with clean water for
at least 10 minutes, then seek immediate medical
attention. Following this rule will reduce the risk of
serious personal injury.
OPERATION
Use the battery pack for Ryobi One+ 18V cordless
products only.
BATTERY PROTECTION FEATURES
Ryobi One+ 18V lithium-ion battery packs are designed
with features that monitor and protect the lithium-ion cells
(active, standby, shut off and sleep modes ) and maximize
battery life.
The tool may stop during use to prevent overheating or
overloading of the battery (active mode). In this case,
release the trigger to reset and resume operation.
If this does not reactivate the tool, the battery is
completely discharged (stand-by or sleep mode) and
needs to be charged in a compatible charger.
The battery can be recharged in stand-by or sleep
mode. It is not necessary to completely discharge the
battery pack before recharging.
NOTE: A completely discharged battery (sleep mode)
needs reactivation before the charging process begins. To
reactivate a battery in sleep mode, place the battery in the
charger and wait for 90 seconds. If the charging process
does not begin, please remove the battery and wait for 30
seconds. Then start a second attempt to re-activate the
battery by placing it in the charger. If the charging process
does not begin after 3 attempts, the battery may be faulty.
In this case, have the battery serviced by a qualifi ed repair
person using only identical replacement parts.
NOTE: The LED charge indicator light will not work if the
battery protection feature has caused the battery pack to
stop powering the tool (sleep mode). When the charger
resets the battery pack, the LED will again function.
The One+ 18V lithium-ion battery packs are equipped
with an additional SHUT-OFF mode, minimizing selfdischarge of the battery while the battery is not in use.
It will be reactivated automatically when used with a
tool or by pressing the LED gauge.
NOTE: In SHUT-OFF mode, the battery will show low
voltage when tested with a volt-meter. Use the battery
in a tool or press the LED gauge for read-out of the
actual voltage.
COLD WEATHER OPERATION
The lithium-ion battery pack can be used in temperatures
down to -10°C. Put the battery pack on a tool and use the
tool in light duty application. After a while, the battery pack
will warm up and begin operating normally.
CHARGING THE BATTERY PACK
Battery packs are shipped in a low charge condition to
prevent possible problems. Therefore, they should be
charged prior to fi rst use.
NOTE: If the charger does not charge the battery pack
1
Page 5

English
under normal circumstances, return both the battery pack
and charger to the nearest Ryobi authorised service
centre for electrical check.
Battery pack
RB18L15
RB18L40
RB18LL40
* for vehicles' 12V DC outlets
Compatible charger
(not included)
BCL-1418
BCL14181H
BCL14183H
BCL1418IV*
BCS-618
BCL1800
BCS618G
WARNING
Only charge in compatible 18V chargers. Use of
other chargers may result in fi re, damager or serious
personal injury.
Press down on the battery pack to ensure contacts on
the battery pack engage properly with the contacts in
the charger.
Connect the charger to the power supply. Make sure it
is the required power supply.
Make sure the latches on each side of the battery pack
snap into place and the battery pack is secured in the
charger before beginning operation.
Place the battery pack in the charger aligning raised
rib on the battery pack with the groove in the charger.
The battery pack will become slightly warm to the
touch while charging. This is normal and does not
indicate a problem.
NOTE: Do not place the charger and battery pack in an
area of extreme heat or cold. They will work best at normal
room temperature.
Place charger on hard surface not soft (carpet, etc.),
when charging batteries.
When batteries become fully charged, unplug the
charger from power supply and remove the battery
pack.
To remove battery pack from the charger, depress the
latches on each side of the battery pack.
After normal usage, a minimum of 1 hour charging
time is required to fully recharge the battery pack.
CHARGING A HOT BATTERY PACK
When using a tool continuously, the battery pack will
become hot. A hot battery pack should be let to cool before
attempting to recharge. When a hot battery pack is placed
on the charger, the charger may indicate the battery pack
is not ready to charge. When the battery pack cools, the
charger will automatically begin charging.
CHARGING A COOL BATTERY PACK
If the battery is below normal temperature range, the red
LED will begin fl ashing and the green LED will be off.
When the battery warms to a temperature of more than
0°C, the charger will automatically begin charge mode.
CHARGE STATUS
See Fig. 1.
To display the amount of charge left in the battery, press
the Charge level indicator button.
Charge level indicator Amount of charge left
0-10%
10-25%
25-50%
50-75%
MAINTENANCE
The batteries have been designed to provide maximum
trouble-free life. However, like all batteries, they will
eventually wear out. DO NOT disassemble battery pack
and attempt to replace the batteries. Handling of these
batteries, especially when wearing rings and jewellery,
could result in serious burns.
To obtain the longest possible battery life, remove the
battery pack from the charger once it is fully charged and
ready for use.
STORAGE
For battery storage longer than 30 days:
Store the battery pack where the tem per a ture is below
27°C.
2
75-100%
Page 6

English
Store battery packs in a "charged" condition (minimum
of 30%-50% charged).
To charge the battery pack after a six months storage
period, it is recommended to discharge the battery
about 10%-20% (by running it in a tool) and charge
afterwards to maximize the battery lifetime.
ENVIRONMENTAL PROTECTION
Recycle raw materials instead of disposing as
waste. Please recycle where facilities exist.
Check with your local authority or retailer for
recycling advice.
WARNING
Upon removal, cover the battery pack’s terminals with
heavy-duty adhesive tape. Do not attempt to destroy
or disassemble battery pack or remove any of its
components. Batteries must be recycled or disposed
of properly. Also, never touch both terminals with metal
objects and/or body parts as short circuit may result.
Keep away from children. Failure to comply with these
warnings could result in fi re and/or serious injury.
3
Page 7

Techtronic Industries (Australia) Pty. Ltd.
Level 1, 660 Doncaster Road
Doncaster, VIC 3108, Australia
Techtronic Industries New Zealand Ltd.
27 Clemow Drive
Mt. Wellington, Auckland 1060, New Zealand
961152070-01
 Loading...