

92148900R1
SUPER DUTY 2.5” LEVELING KIT
Thank you for choosing Rough Country for your suspension needs.
Rough Country recommends a certified technician installs this system. In addition to these instructions, professional
knowledge of disassemble/reassembly procedures as well as post installation checks must be known. Attempts to install
this system without this knowledge and expertise may jeopardize the integrity and/or operating safety of the vehicle.
Please read all the instructions before beginning the installation. Check the kit hardware against the parts list on the
back page of these instructions. Be sure you have all the needed parts and understand where they go. Also please review the tools needed list and make sure you have needed tools.
PRODUCT USE INFORMATION
As a general rule, the taller a vehicle is the easier it will roll. Seat belts and shoulder harnesses should be worn at all
times. Avoid situations where a side rollover may occur. Braking performance and capabilities are decreased when significantly larger/heaver tires and wheels are used. Take this into consideration while driving. Also, speed ometer recalibration is necessary when larger tires are installed.
Do no add, alter, or fabricate any factory or after-market parts which increase vehicle height over the intended height of
the Rough Country product purchased. Mixing component brands, lifts, and/or combining body lift with suspension lifts
voids all warranties. Rough Country makes no claims regarding lifting devices and excludes any and all implied claims.
We will not be responsible for any product that is altered.
This kit with its new heavy duty track bar only fits trucks produced after 03/01/99—2000 models forward. If you
have a truck produced prior to this date this kit will not fit the vehicle. A difference of bolt size on the stock track
bar bracket does not allow the installation of the new track rod.
If the vehicle has a tool box in the rear or any other reason that the rear may be lower then normal this lift may not result
in a level look most often desired. Rough Country offers block and u-bolt combinations and add-a-leafs to raise the rear
of this vehicle to a look that is more desirable —contact you local distributor for details.
This kit was designed for use with a 305/70R-16 tire on a factory wheel. Any other variation will need to be verified before use to prevent possible clearance issues.
If you have any questions about this installation or the product included please call our customer service department at
800-222-7023.
NOTICE TO DEALER AND VECHICLE OWNER
Any vehicle equipped with any Rough country product must have the “Warning to Driver” decal installed on the sun visor
or dash. The decal is to act as a constant reminder for whoever is operating the vehicle of its unique handling characteristics. INSTALLING DEALER—It is your responsibility to install the warning decal and to forward these installation instructions on too the vehicle owner for review and to be kept in the vehicle for its service life.
INSTALLATION INSTRUCTIONS
1. Place the vehicle in park. Block the rear wheels and
jack up the front of the vehicle. Secure with jack
stands behind the spring shackle on the frame rail.
2. Lightly support the front axle assembly with a floor
jack.
3. Remove the tires/wheels.
4. Remove the front shock absorbers.
5. Remove the 4 nuts on the front bumper holding the
front bumper to the frame using a 18mm socket and
the rear bumper support bolts (1 each side) on the
frame bracket as shown in Figure 1 using a 15mm
socket.
Figure 1
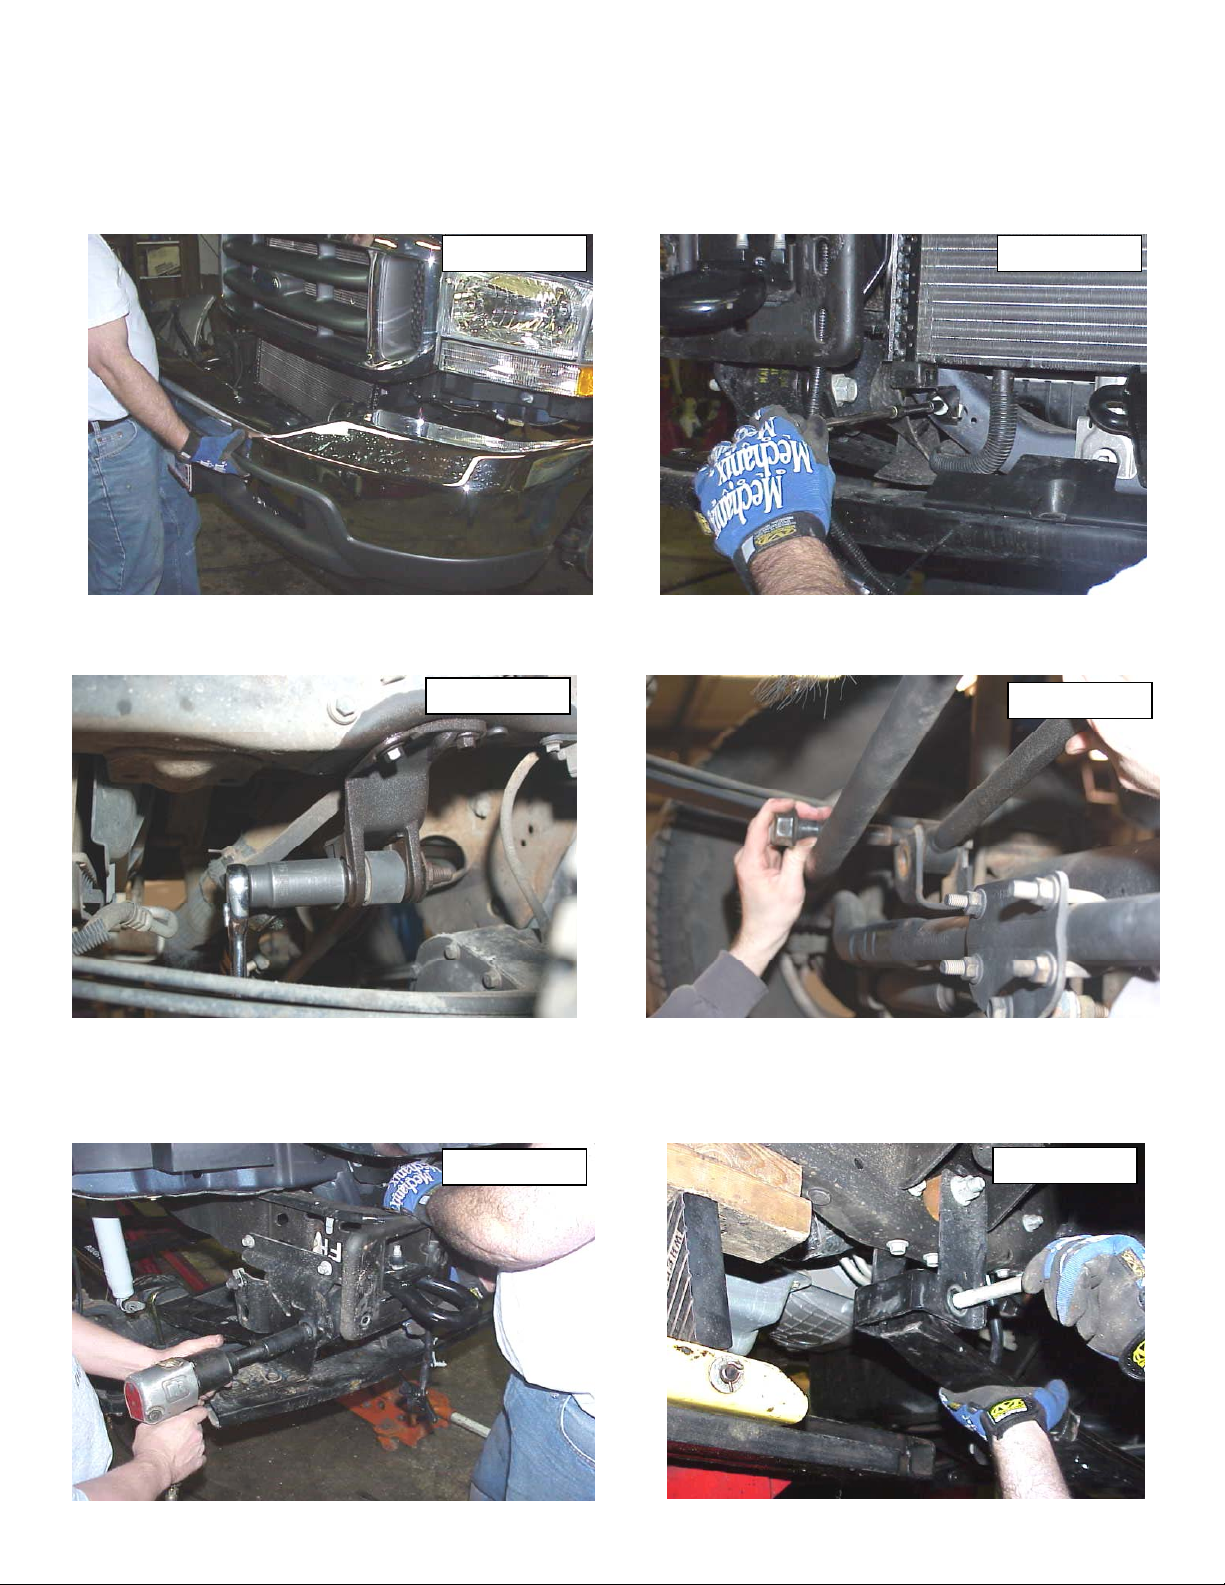
6. Gently pull the bumper outward as shown in Figure 2. Carefully remove the lighting harness plugs, and any other
wiring attached to the bumper assembly to allow for removal noting the routing of the wiring. Place the bumper assembly out of harms way to ensure that no damage occurs to the bumper.
7. The radiator cooler lower mounts will have to be removed to allow the cooler to move outward to gain access to the
front spring bolts. Remove bolts on both sides of cooler as shown in Figure 3 (Passenger Side Shown). Retain the
factory hardware for reuse.
Figure 2 Figure 3
8. Remove the factory track rod from the axle and the frame using a 30mm socket / wrench. Remove the factory track
bar. See Figure 4 & 5.
Figure 4
Figure 5
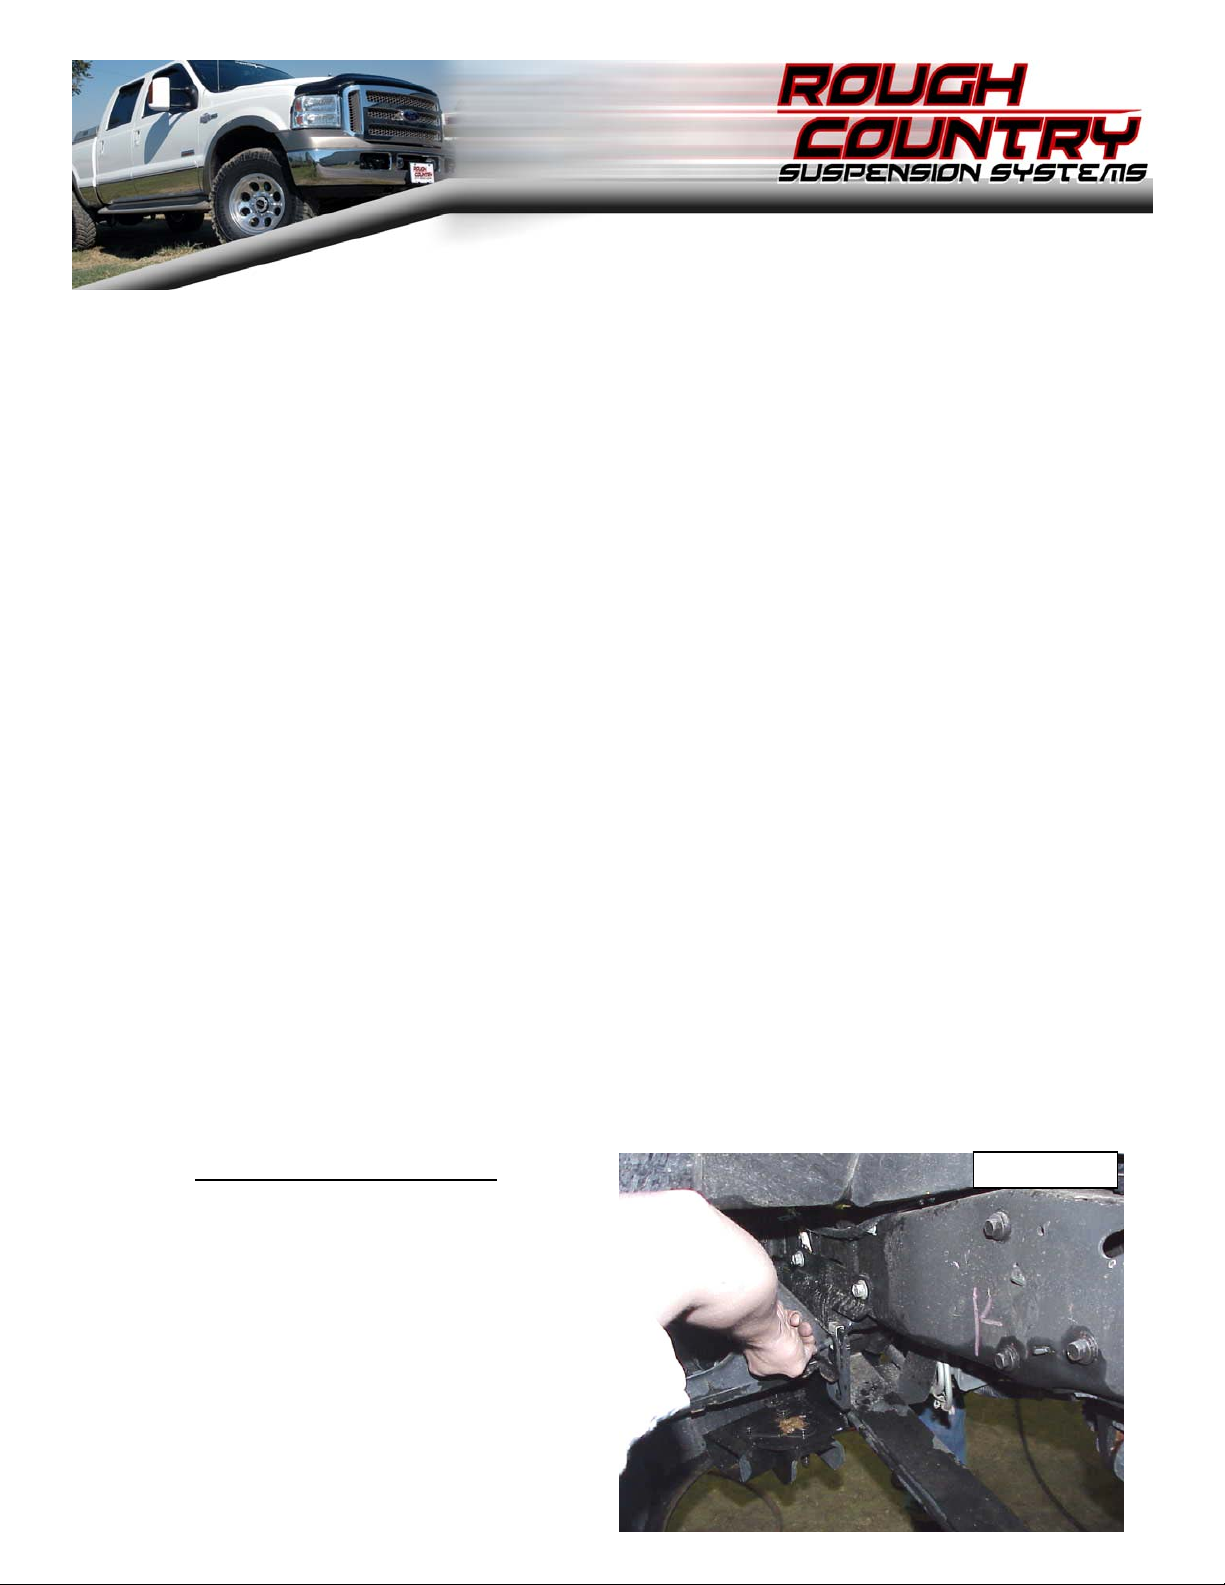
9. Make sure the axle is still being supported with the floor jack. On the front spring bolt, gently pull the radiator cooler
outward to remove the spring bolts. Remove spring bolts and retain for reuse. See Figure #6. Remove factory rear
spring shackle bolts. See Figure #7. Retain for reuse.
10. Remove the factory front spring bolts. See Figure #6 and factory rear spring shackle bolts. See Figure #7.
9.
Figure 6
Figure 7
11. Remove the factory front u-bolts. Be sure the floor jack is still in position under the axle to avoid movement.
12. Lower the floor jack to gain clearance between the axle and spring assembly
13. Install the new Rough Country spring in the mounts using the factory hardware.
14. Raise the axle to meet the spring and center. Install the new u-bolts.
15. Repeat process for opposite side.
16. It may be necessary to bend the brake line bracket on the side of the frame rail downward slightly to allow for more
travel. Simply bend the bracket downward toward the axle. This bracket is located on the frame rail where the metal
line and the rubber line meet.
17. Assemble the new shock absorbers with the supplied poly bushings and correspo nding sleeves. Note supplied
sleeve goes on body end of shock and on this shock the piston must run up. Install the shock absorbers.
18. Reinstall the front bumper making sure to re-clip the wiring to the bumper and to reattach the wiring harne ss for the
lighting. (If applicable).
19. Reinstall the tires /wheels and lower vehicle to the ground.
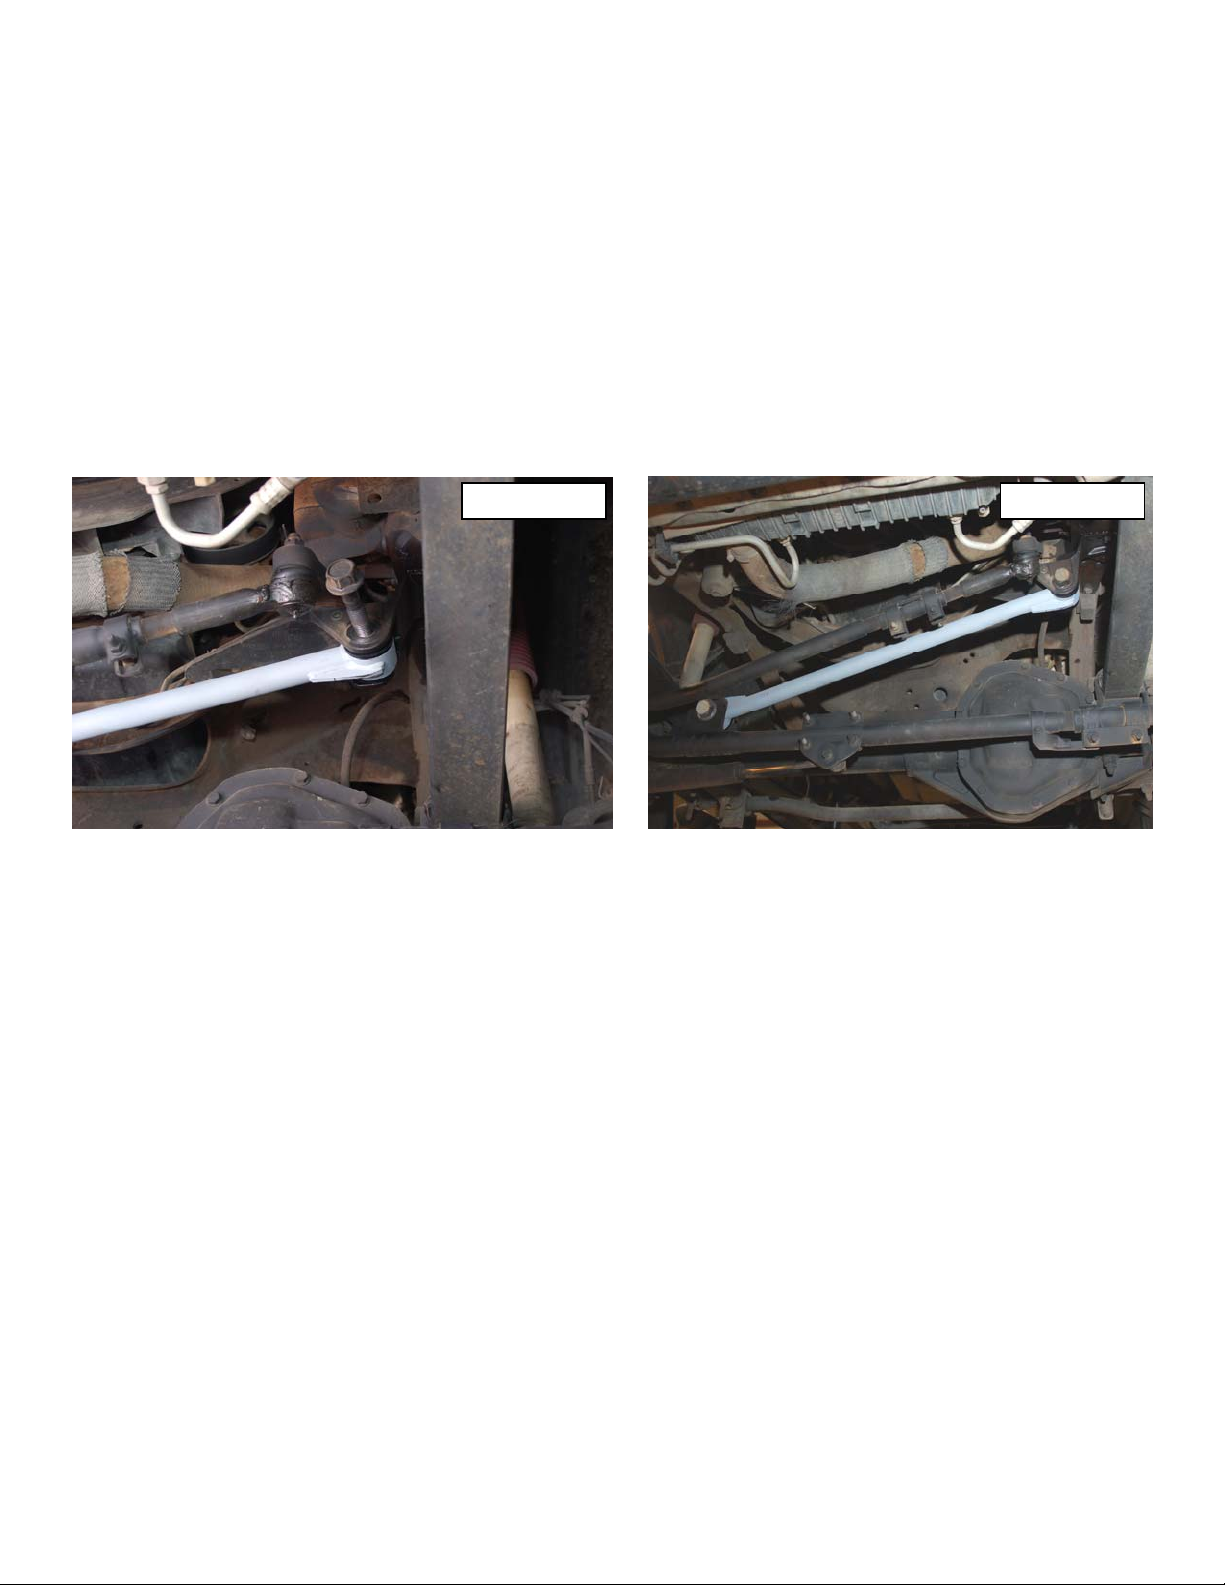
20. After vehicle is on the ground, the new track rod can be installed. Install new track rod with stock hardware and u sing
a 30mm socket. See Figure 8 & 9. It may be necessary to turn the steering wheel to align the track rod in the mount.
This is best accomplished with two people. One turning the steering wheel and one under the truck inserting the
bolts in the mounts.
Figure 8 Figure 9
POST INSTALLTION INSTRUCTIONS
1. Check all fasteners for proper torque. Check to ensure there is adequate clearance between all rotating, mobile,
fixed and heated members. Check steering gear for interference and proper working order. Test brake system
2. Perform steering sweep. Check to ensure brake hoses have sufficient slack and will not contact rotating, mobile, or
fixed members, adjust lines/brackets to eliminate interference and maintain proper working order. Failure to perform
inspections may result in component failure
3. Readjust headlights to factory settings
4. Have vehicle aligned by a certified alignment professional.
5. Re-torque all nuts, bolts, and especially u-bolts after the first 100 miles, again after another 100 miles and then check
periodically thereafter
6. All components must be retightened after 500 miles, and every three thousand miles after installation
MAINTENANCE INFORMATION
It is the ultimate buyers responsibility to have all bolts/nuts checked for tightness after the first 100 miles and then every
1,000 miles. A qualified professional mechanic must inspect wheel alignment, steering system, suspension and driveline
at least every 3,000 miles
Optional Items for this application available from Rough Country:
Rough Country Rear Shock Absorbers –Part #8111-Hydro / 9111-Nitro for stock height vehicles.
Rear 2” Add-A-Leaf-Part #6130 and RC Shock #8181 and 9181 for 2” rear listed vehicles.

KIT CONTENTS:
2-Fr Springs
2-Fr Shock Absorbers
1-Fr Track Rod
4-Fr U-bolts
Poly Bag Containing:
4-Track Rod Bushings
2-Track Rod Sleeves
4-Shock Bushings
2-Lower Shock Sleeves
U-bolt Hardware Bag
TOOLS NEEDED:
Hammer
Floor Jack
Jack Stands
15mm Socket / Wrench
21mm Socket / Wrench
24mm Socket / Wrench
10mm Socket
18mm Socket
30mm Socket
TORQUE SPECS:
Size Grade 5 Grade 8
5/16” 15 ft/lbs 20 ft/lbs
3/8” 30 ft/lbs 35 ft/lbs
7/16” 45 ft/lbs 60 ft/lbs
1/2” 65 ft/lbs 90 ft/lbs
9/16” 95 ft/lbs 130 ft/lbs
5/8” 135 ft/lbs 175 ft/lbs
3/4” 185 ft/lbs 280 ft/lbs
Thank You for purchasing a Rough Country Suspension leveling kit.
 Loading...