

Rotel RR-939 Owners manual
RR-939B
1 2 3
MOVIE FILT
4 5 6
5.1 CH
7 8 9
SELECT
10 0 ENTER
BACK
PAUSE
C. DELAY
PLAY
SEL
STOP
DYNAMIC
SEARCH –
SEARCH +
LIGHT
RR-939B
MUTE
POWER
BAND
VOL
T / V
CH
CD TUNER VIDEO 4
VIDEO 1
AUX/V5
PHONO
M 1 M 2 M 3
M 4
[SHIFT]
AUD
SATCDTV
TAPE
VCR
DVD
CBL
VIDEO 2 VIDEO 3TAPE 1 TAPE 2
GUIDE
RECALL
MENU
PRE
CH
SURROUND + ON SCREEN
TRACK – TRACK +
DISC 1 DISC 2 DISC 3 PROG
DISC 4 DISC 5 DISC 6 TIME [REVIEW]
CLEAR [SCAN]
RANDOM [REPEAT]
OPN/CLS SUR-DELAY
UP DOWN
ZONE
REMOTE CONTROL
TÉLÉCOMMANDE
FERNBEDIENUNG
MANDO A DISTANCIA
COMANDO A DISTANZA
AFSTANDSBEDIENING
FJERNBETJENING
Owner’s Manual ............................. 2
Guide d’utilisation ........................ 10
Bedienungsanleitung .................. 20
Manual de Instrucciones............ 30
Manuale di Istruzioni .................. 40
Gebruiksaanwijzing .................... 49
Brukermanual ............................... 58
RR-939B
English
○○○○○○○○○○○○○○○○○○○○○○
Introduction
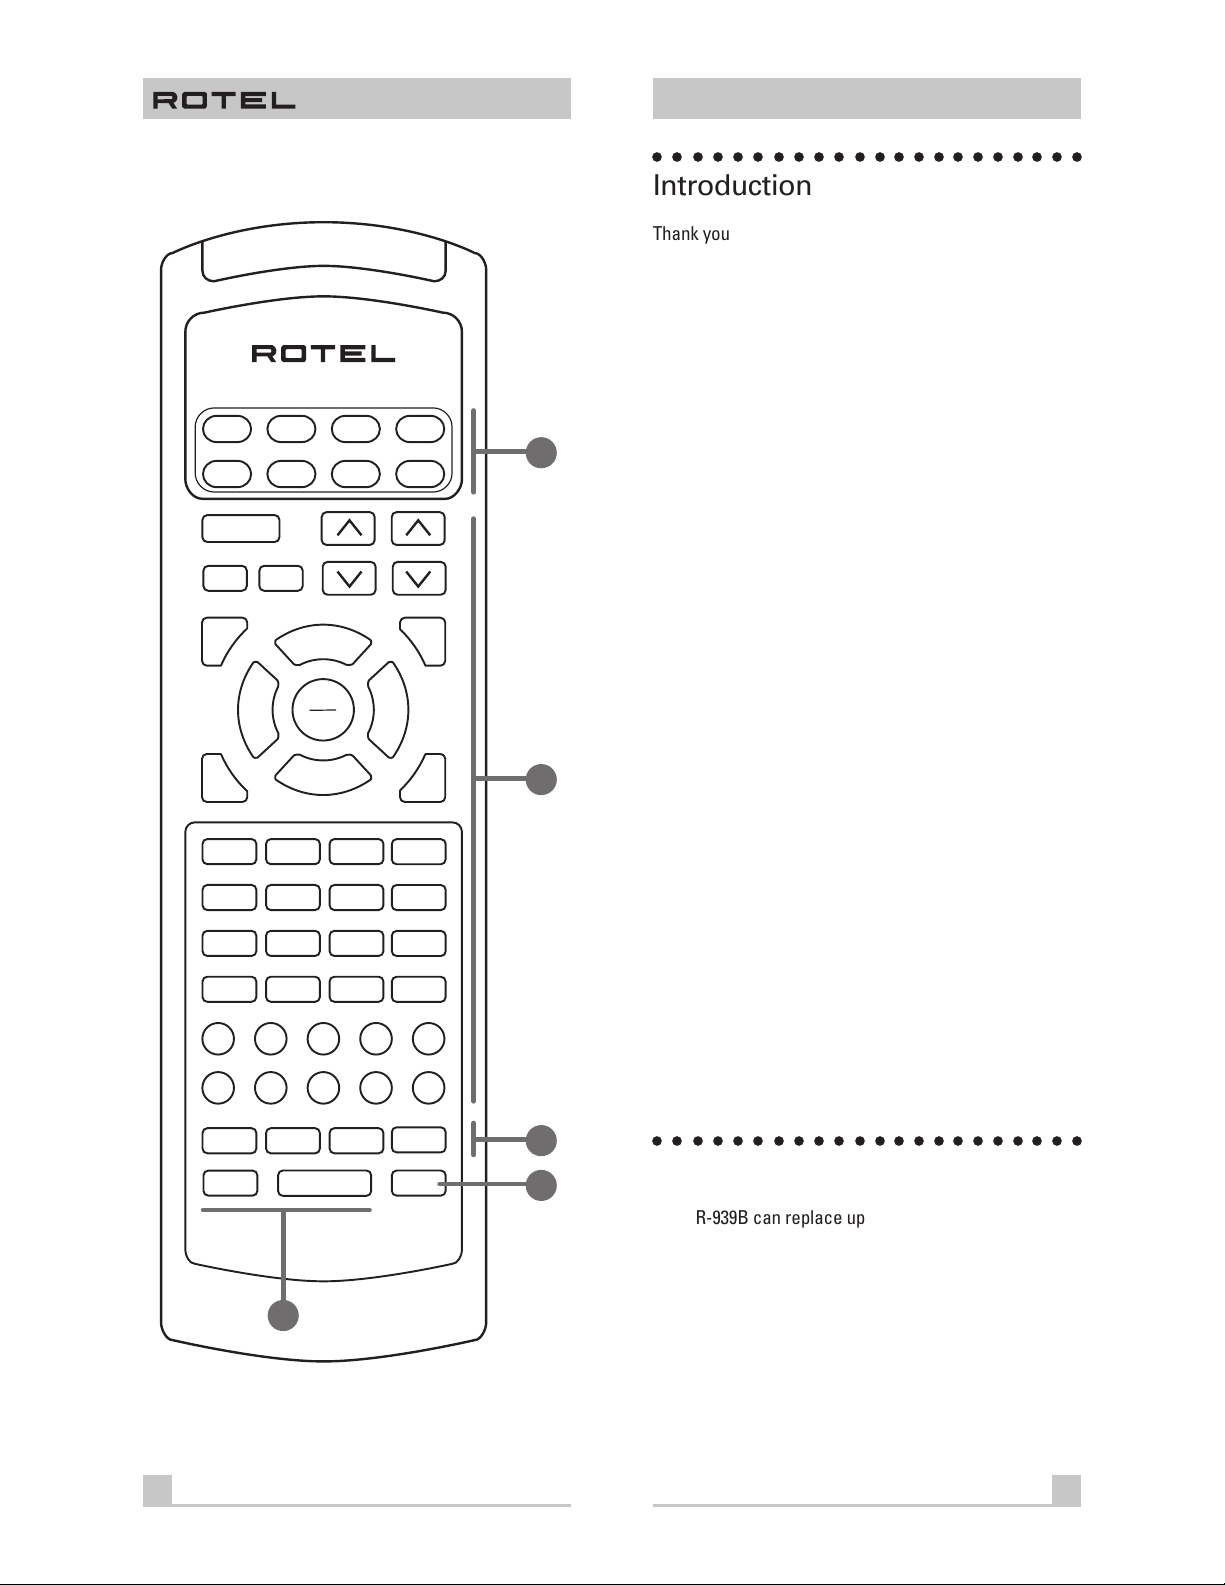
Thank you for purchasing the RR-939B Universal Remote
Control. It is designed to operate all current Rotel products as well as a wide range of popular audio and video
components from other manufacturers. You will find that
the RR-939B Remote Control is a significant improvement
over conventional remotes in overall convenience and
ease of operation.
AUD
SAT
POWER
MUTE
SURROUND + ON SCREEN
GUIDE
TRACK – TRACK +
UP DOWN
RECALL
OPN/CLS SUR-DELAY
DISC 1 DISC 2 DISC 3 PROG
DISC 4 DISC 5 DISC 6 TIME [REVIEW]
10 0 ENTER
CD
TAPE
TV
PAUSE
C. DELAY
PLAY
SEL
STOP
DYNAMIC
VOL
BAND
T / V
SEARCH –
1 2 3
4 5 6
7 8 9
VCR
DVD
CBL
CH
MENU
SEARCH +
PRE
CH
MOVIE FILT
5.1 CH
SELECT
CLEAR [SCAN]
BACK
RANDOM [REPEAT]
Please take a few moments to read this user guide. You’ll
1
find the time well spent as it will significantly shorten
your search for remote control sanity.
Some Preliminary Precautions
• The RR-939B is surprisingly rugged but it is not
indestructible. So please don’t drop it — particularly
not on a concrete floor! With normal care, the
RR-939B’s low maintenance design will let you enjoy its
convenience for years to come.
• When the RR-939B needs a bit of cleaning, use a soft,
lint-free damp cloth.
2
• Above all, don’t try to take the RR-939B apart. There
isn’t anything inside you can fix anyway and disassembly will void the warranty.
Battery Installation
Remove the RR-939B and the package of 4 AAA batteries
from the packing material. Turn the RR-939B over and lift
the cover off the battery compartment by compressing
the release tab and lifting up.
CD TUNER VIDEO 4
VIDEO 1
M 1 M 2 M 3
[SHIFT]
LIGHT
AUX/V5
VIDEO 2 VIDEO 3TAPE 1 TAPE 2
PHONO
M 4
ZONE
3
2
Place the four AAA batteries inside (follow the polarity
drawing on the bottom of the compartment) and replace
the cover. MAKE SURE you install the batteries correctly!
○○○○○○○○○○○○○○○○○○○○○○
Using the RR-939B
The RR-939B can replace up to eight different remote
RR-939B
controls. Stored in memory are control codes to operate
your specific audio/video components, selected from
hundreds of models in the RR-939B’s extensive database.
4
Programming the RR-939B to operate your components
takes just minutes and need only be done once. See the
PROGRAMMING section of this manual for easy to follow
instructions.
1
2
RR-939B
English
Once the programming is complete, you select a component with the press of a button and turn the RR-939B into
the remote control for your Rotel CD player or your Sony
TV set or your Panasonic video recorder. Then, you simply press command buttons that duplicate the functions
on the remote that came with your component.
To get started, look at the layout of the RR-939B and the
following operating instructions:
Device Buttons
1
Eight buttons at the top of the RR-939B determine which
set of commands is currently active. For example, if you
press the AUDIO button (labeled AUD), the RR-939B becomes the remote control for your Rotel Surround Sound
Processor. If you press the TV button, the RR-939B becomes the remote control for your TV set.
These buttons are also used in programming the
RR-939B. See PROGRAMMING section below for details.
Command Buttons
2
This large group of buttons duplicates the functions on
the remote controls for your audio/video components. A
general description of these functions follows. Detailed
information on the specific function of each button can
be found in the CONTROL COMMANDS tables.
At the top of this group of buttons are basic controls
such as Power, Volume, Channel Selection, etc.
Below these is a group of buttons that duplicate the
transport functions on a tape recorder or VCR (Stop,
Play, Pause, etc.) as well as the Up and Down commands
that might be found on a cable or satellite TV receiver.
The next group of buttons duplicates the numeric keypad
buttons such as might be used for direct track selection
on a CD Player or direct channel selection on a TV set.
Included in this section are special command buttons
providing functions found on various components.
At the bottom of this group of buttons are ten round
source selection buttons labelled CD, TUNER, TAPE, etc.
These duplicate the source input selection buttons on a
receiver, preamplifier, or surround sound processor. The
function of these buttons is not the same as the DEVICE
buttons at the top of the remote control. The DEVICE buttons determine which command set is active on the
RR-939B. The source select COMMAND buttons switch
inputs on the audio/video component being controlled.
To operate the RR-939B:
Step One: Press a DEVICE button to activate the commands for the desired component. This command set
will remain active until you press a different DEVICE button.
Step Two: Press COMMAND buttons to operate the
component you have selected.
Remember that the COMMAND buttons duplicate many
controls on many different types of audio/video components and their function may vary depending on the type
of component selected. For example, the PLAY/SELECT
button engages the play mode on a CD Player, but it duplicates the SELECT function on a cable TV converter.
Note: The RR-939B tells you which command set is active. Each time you press a COMMAND button, the active DEVICE key blinks red to tell you which component
you are controlling. If the COMMAND button that you
press has no function in the active command set (for example, the numeric keys in VCR mode), no DEVICE button
will blink, indicating that the COMMAND button is inactive.
The COMMAND buttons are labelled, often with multiple
labels if the button serves different purposes for different
kinds of components. As long as you remember that
pressing a DEVICE button turns the RR-939B into, for example, a CD player remote control or a VCR remote control, the functions of each button should be intuitive.
Tables listing the function of each button for each type of
component are supplied with this manual.
A few buttons have a second function, activated by
pressing and releasing the SHIFT button before pressing
the COMMAND button, as described below.
Macro Buttons
3
A macro is a series of individual commands triggered by
pressing one button. Macros make operating a complex
home entertainment system much easier. For example,
think of playing a videotape: You turn on the TV, turn on
the VCR, select the TV input connected to the VCR, and,
finally, put the VCR into Play mode. That’s four separate
commands — and it may take you as many as six pushes
on various buttons to execute them. A macro makes this
simpler by executing all the needed commands with just
one push of a button.
3
4
RR-939B
English
There are five MACRO buttons on the RR-939B – the four
buttons labeled M1, M2, M3, and M4, along with the
POWER button. A sequence of up to eight different commands can be memorized to be replayed automatically
with the press of a MACRO button. See the section, PROGRAMMING MACROS, for more detailed information.
Note: Macro buttons are available only in the AUD, SAT,
and CBL modes. However, you can include switching to a
different DEVICE mode as part of a macro, in order to operate other components.
To replay a MACRO, first activate one of the DEVICE
modes (AUD, SAT, and CBL only). Then, press the desired
MACRO button. If a macro has been programmed for that
button, the RR-939B will replay the memorized sequence
of commands and the DEVICE button will blink red for
each command. If no macro has been programmed, or if
macros are not available in that DEVICE mode, nothing
will happen and no DEVICE buttons will blink.
Special Buttons
There are two special function buttons at the bottom of
the RR-939B remote.
The LIGHT button turns on backlighting so you can see
the buttons in a dark room. The lights stay on for 7 seconds and will stay on for an additional 7 seconds each
time another button is pressed.
The SHIFT button activates additional commands for
some buttons. These functions are shown in italics on
the illustrations and in the command tables. To activate
one of these commands, press and release the SHIFT
button and then press the desired COMMAND button.
○○○○○○○○○○○○○○○○○○○○○○
4
Programming
The RR-939B can replace up to eight different remote
controls, one for each of the eight DEVICE buttons. Before you use it, you must program the RR-939B, i.e. tell it
which audio/video components you wish it to control.
The RR-939B contains hundreds of command sets for
various A/V components. Programming the remote involves selecting the command sets that correspond to
the components in your system, and assigning them to
the eight DEVICE buttons by entering a three digit code.
This need only be done once during initial set-up of the
RR-939B.
The easiest way to proceed is to find your components
and corresponding three-digit codes from the list of
codes supplied with this manual. If your component is
not listed, there is an alternative auto-search method for
finding the right command set.
Three Digit Code Programming
Find your audio/video component in the code list and
note the 3-digit code(s):
Step One: Turn on the component you wish to memorize.
Step Two: Press the corresponding DEVICE button (for
example, if you are memorizing the command set for a
CD player, press the CD DEVICE button at the top of the
RR-939B). While pressing the DEVICE button, simultaneously press the MUTE button and hold both for at least
one second. The DEVICE key will light in red for 20 seconds, indicating that you have entered the program
mode. The next step must be done within this 20 second
period, or the RR-939B will revert to its standard operating mode.
Step Three: Point the RR-939B at the audio/video component and enter the 3-digit code, using the numeric buttons. The DEVICE key will flash each time you enter a
digit. If you have entered the correct code, the component will turn off. If there is more than one 3-digit code
for your brand of source component, continue entering
additional 3-digit codes from the list until the component
turns off, indicating that you have found the right one.
Step Four: Store the code number by pressing the corresponding DEVICE button again. The button will blink
twice to confirm the storage of the code in memory.
Step Five: Test the COMMAND buttons, using the tables
as a reference for the available functions. If the functions
do not work correctly, repeat the above steps, with the
next available 3-digit code from the list for your brand of
component.
Repeat the steps above for each of up to eight components, assigning each one to the appropriate DEVICE key.
Auto-Search Programming
If the code table does not provide a 3-digit code or if
none of the code numbers assigned to your brand of
component work, use the following auto-search method
to find a code number that will operate your components.
5
6
RR-939B
English
Step One: Turn on the component you wish to operate.
Step Two: Press the corresponding DEVICE button and
the MUTE button, simultaneously for one second or
more. The LED will light for 20 seconds.
Step Three: Press and hold the CH UP or CH DOWN button. This sends a succession of Power ON/OFF code signals that are stored in memory. Stop pressing the CH
button as soon as the component turns off, signifying that
you have found a code set that operates that component.
Step Four: Press the DEVICE button to store the code set
you have found. The button will blink twice to confirm
that you have stored the code.
Step Five: Test the remote control functions. If any do not
work properly, repeat the preceding steps until you find
the right code.
Displaying a Code Number
To find out which 3-digit code is currently stored on a DEVICE button:
Step One: Press the DEVICE button and the MUTE button
simultaneously for one second or more. The DEVICE button will light red for 20 seconds.
Step Two: Press the RECALL button. The DEVICE button
will blink a number of times, indicating the first digit in the
code, followed by a one second interval with the light off,
followed by a number of blinks indicating the second
digit, followed by another interval, followed by blinks indicating the third digit. For example, one blink, three
blinks, and eight blinks, with one second intervals in between, represents the 3-digit code number 138.
Note: The number ZERO in a 3-digit code is represented
by 10 blinks.
To memorize a macro sequence:
Step One: Press a DEVICE button (AUD, SAT, or CBL only)
and the MUTE button simultaneously for at least one
second. The DEVICE button will light red for 20 seconds.
Step Two: Press the MACRO button you wish to program.
Step Three: Press a sequence of commands (up to 8) that
you wish to store. Pressing a DEVICE button to change
modes during the sequence counts as one command.
Step Four: Press the CH UP button to store the macro sequence. The DEVICE button will blink twice to confirm.
Note: Because the POWER button can be used as a
MACRO button, the normal Power On/Off commands are
temporarily stored on the MUTE button during the macro
learning sequence. To include a power on/off command
in a macro, simply press the MUTE button.
To erase a previously stored macro sequence, follow the
above steps, skipping Step 3 without entering any commands, i.e. memorize a blank macro.
○○○○○○○○○○○○○○○○○○○○○○
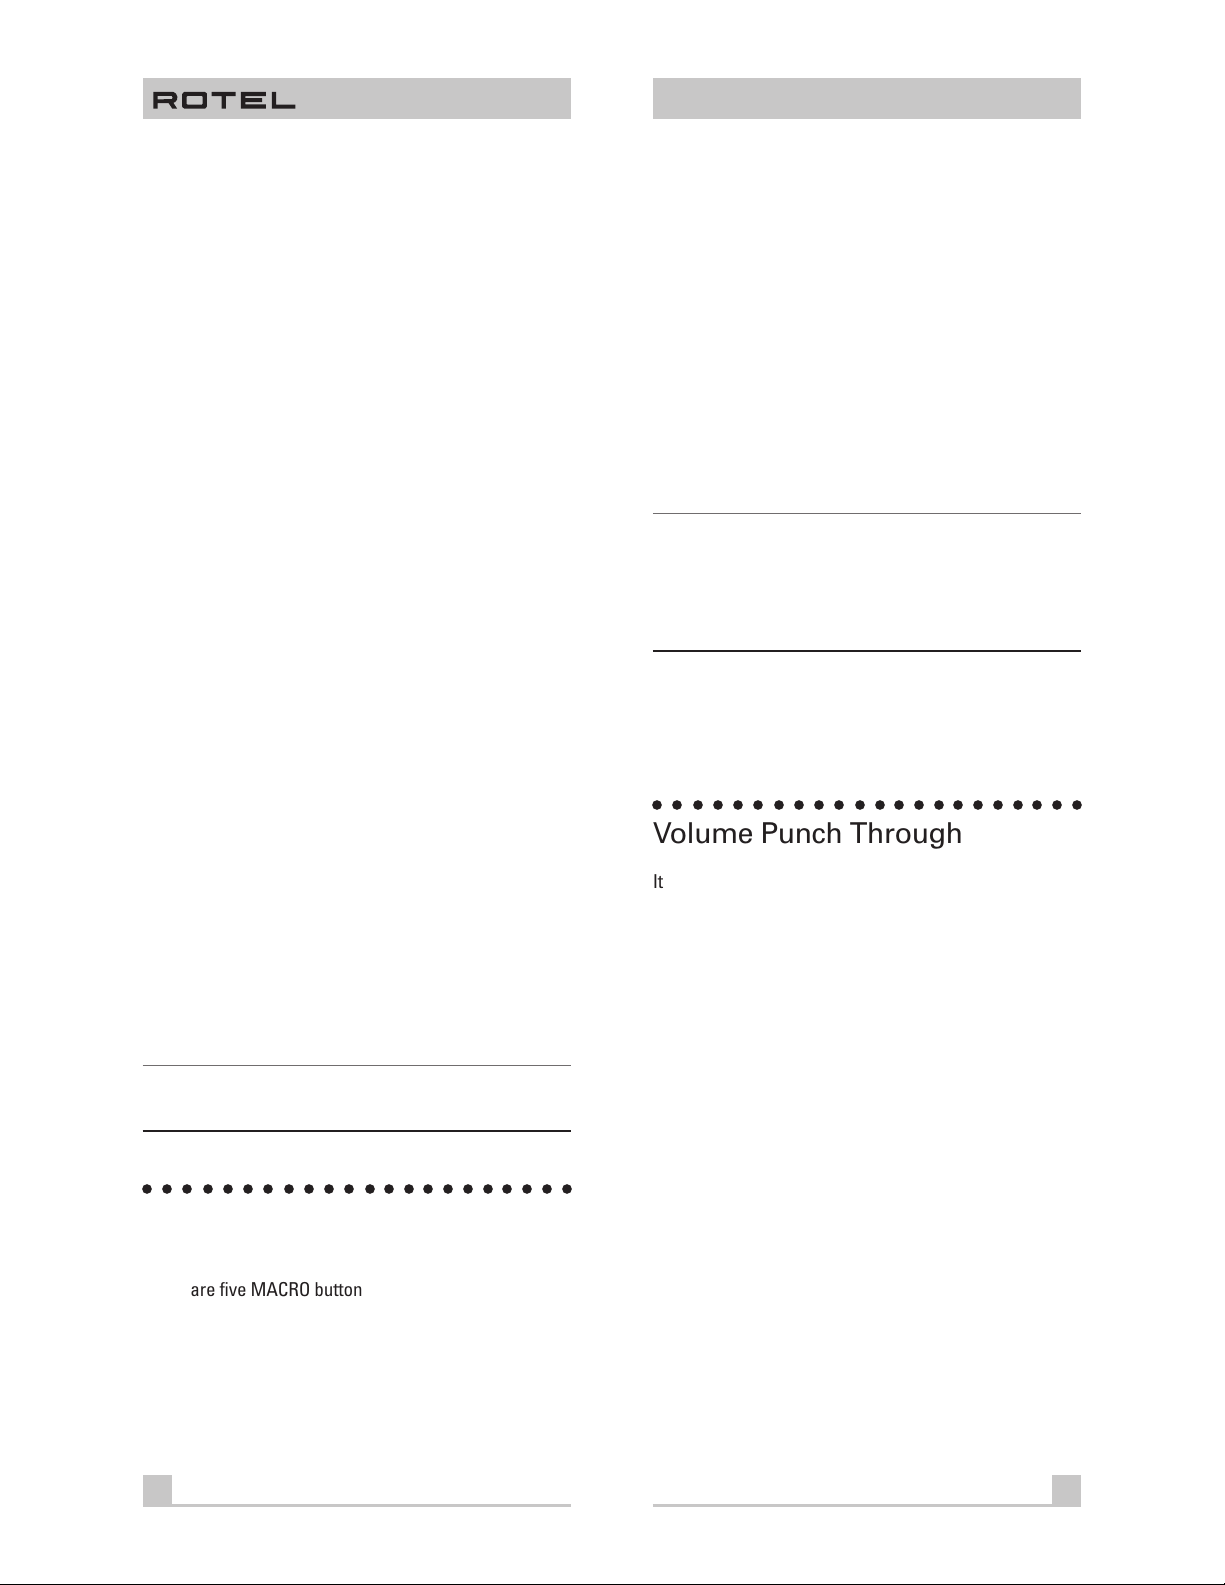
Volume Punch Through
It may be desirable to have the AUDIO or TV volume
commands available at all times. For example, when using the RR-939B to control your CD player, you might
want the VOLUME buttons (which would normally be inactive in CD mode) to change the volume of your preamp
or surround sound processor. This feature, called Volume
Punch Through, can be used to make the volume commands from either the AUDIO or TV device mode available in other device modes.
To set-up the Volume Punch Through feature:
○○○○○○○○○○○○○○○○○○○○○○
Macro Programming
There are five MACRO buttons – the four labeled M1, M2,
M3, and M4 plus the POWER button. When the RR-939B
is in the AUDIO, SAT, or CABLE mode, the macro buttons
can store and replay a sequence of up to 8 commands.
7
Step One: Press the DEVICE button (the device you wish
to transfer the volume function to) and the MUTE button
simultaneously for at least one second.
Step Two: Press the VOLUME UP button.
Step Three: Press the AUDIO or TV DEVICE button (the
device you wish to transfer the volume function from).
The DEVICE button will blink twice to confirm.
8
RR-939B
Example: To have the AUDIO volume command prevail in
the VCR mode, press the VCR DEVICE button in Step One
and the AUDIO DEVICE button in Step 3.
○○○○○○○○○○○○○○○○○○○○○○
Mapping a Component to
Another Device Button
In some systems, you may need to program one command set to another DEVICE button. For example, if you
have two CD players, you may wish to use the SAT DEVICE button to store and activate commands for a second CD player. To reassign device codes to another
button:
Français
○○○○○○○○○○○○○○○○○○○○○○
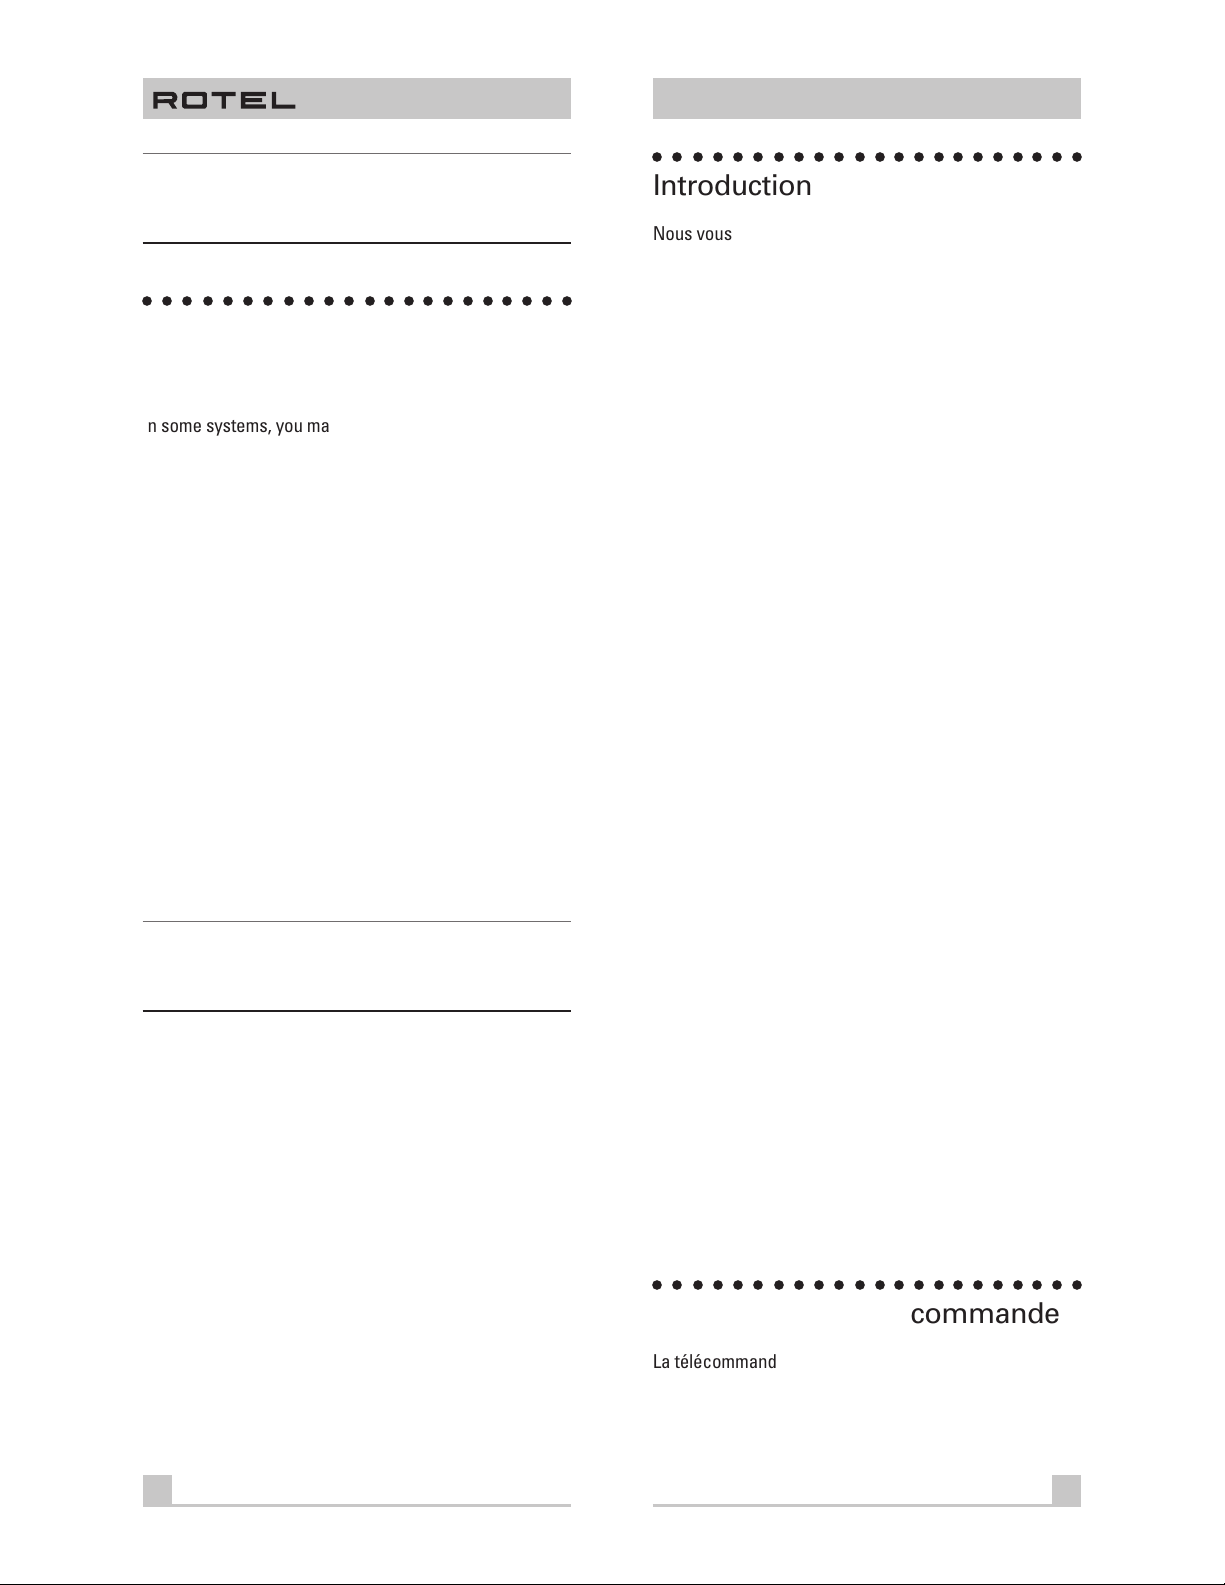
Introduction
Nous vous remercions d’avoir fait l’achat de la
télécommande universelle RR-939B de Rotel. Cette
télécommande est conçue pour commander tous les
appareils Rotel que l’on retrouve actuellement sur le
marché ainsi qu’une vaste gamme de composantes
audio et vidéo populaires d’autres marques. La
télécommande RR-939B de Rotel s’avère assez différente
des autres télécommandes, plus pratique et plus facile
d’utilisation.
Nous vous invitons à prendre quelques minutes pour lire
ce guide d’utilisation. Vous gagnerez ainsi un temps
précieux en recherche ultérieure sur le fonctionnement
de la télécommande.
Step One: Press the new DEVICE button where you wish
to store the command set and the MUTE button simultaneously for at least one second.
Step Two: Press the DEVICE button corresponding to the
command set you wish to transfer in order to access the
command sets for that type of component.
Step Three: Enter the 3-digit code for the audio/video
component you wish to transfer.
Step Four: Press the DEVICE button where you wish to
store the command set. It will blink twice to confirm.
Example:
To store CD commands on the SAT DEVICE button, press the SAT DEVICE button in Steps One and Four.
Press the CD DEVICE button in Step Two.
Quelques précautions
• La télécommande RR-939B est étonnamment robuste
mais pas indestructible. On doit donc éviter de la
laisser tomber par terre, surtout sur un plancher de
béton. Utilisée dans des conditions normales, la
télécommande RR-939B nécessite peu d’entretien et
vous procurera beaucoup de plaisir pendant de
nombreuses années.
• Si on doit nettoyer la télécommande, utiliser un linge
doux et sec sans charpie.
• On ne doit surtout pas tenter de démonter la
télécommande qui ne contient aucune pièce qui peut
être réparée par l’usager. Une telle manipulation
annulera la garantie.
Installation des piles
Enlever la télécommande et les quatre piles AAA de
l’emballage. Enlever ensuite le couvercle que l’on
retrouve à l’arrière de la télécommande en tirant sur la
patte du couvercle.
Installer les quatre piles dans le logement des piles en
respectant la polarité (suivre le schéma que l’on retrouve
au fond du logement des piles) et replacer le couvercle.
On doit S’ASSURER de placer les piles correctement.
○○○○○○○○○○○○○○○○○○○○○○
Utilisation de la télécommande
La télécommande RR-939B peut remplacer jusqu’à huit
télécommandes différentes. Des codes de commande
sont stockés dans sa mémoire et permettent de
commander des composantes audio et vidéo choisies
9
10
RR-939B
Français
parmi des centaines de modèles et entrées dans la
gigantesque base de données de l’appareil. Il suffit de
quelques minutes pour programmer la télécommande de
façon définitive. Se reporter à la section intitulée
«PROGRAMMATION» de ce guide pour suivre les
instructions de programmation faciles à consulter.
Lorsque la programmation est terminée, une simple
commande du doigt permet de convertir votre
télécommande RR-939B en une télécommande dédiée
qui commandera votre lecteur de disques compacts
Rotel, votre téléviseur Sony ou votre magnétoscope
Panasonic. Il suffit ensuite d’appuyer sur les touches de
commande qui reproduisent les mêmes fonctions que
l’on retrouve sur la télécommande de la composante en
question.
Avant de débuter, consulter le schéma de la
télécommande RR-939B et les instructions d’utilisation
correspondantes :
Touches de choix de composante
Huit touches en haut de la télécommande déterminent
quel groupe de commande est actif. Par exemple,
lorsqu’on appuie sur la touche AUDIO (identifiée AUD), la
télécommande devient la télécommande du processeur
ambiophonique Rotel. Lorsqu’on appuie sur la touche TV,
elle permet de commander les fonctions du téléviseur.
On utilise aussi ces touches pour programmer la
télécommande RR-939B. Se reporter à la section intitulée
«PROGRAMMATION».
Touches de commande
Cette importante série de touches reproduit les fonctions
que l’on retrouve sur la télécommande des composantes
audio et vidéo. On trouvera ci-dessous une description
générale de ces fonctions. On trouvera dans la liste des
COMMANDES des renseignements précis sur la fonction
de chaque touche.
Au-dessus de ce groupe de touches, on retrouve les
commandes de base telles que les commandes
d’alimentation, de volume, de choix de canaux, etc.
Sous ces touches, on retrouve un groupe de touches qui
reproduisent les fonctions de transport d’un
magnétophone ou d’un magnétoscope (arrêt, marche,
pause, etc.) ainsi que les commandes «canal suivant» et
«canal précédent» que l’on peut retrouver sur un
téléviseur raccordé au réseau de câblodistribution ou à un
satellite.
2
1
Le prochain groupe de touches permet de reproduire le
clavier numérique que l’on utilise habituellement pour
choisir un plage sur un lecteur de disques compacts ou
un canal sur un téléviseur. On retrouve aussi dans cette
section des touches de commande spéciales qui
commandent des fonctions que l’on retrouve sur
diverses composantes.
Au bas de cette série de touches, on retrouve dix
commutateurs de source ronds identifiés CD, TUNER,
TAPE, etc. qui permettent de reproduire les sélecteurs
d’entrée sur un ampli-syntoniseur, un préamplificateur ou
un processeur ambiophonique. La fonction de ces touches
n’est pas la même que celle des touches de CHOIX DE
COMPOSANTE que l’on retrouve dans la partie supérieure
de la télécommande. Les touches de CHOIX DE
COMPOSANTE déterminent quel groupe de commandes
est actif sur la télécommande. Quant aux touches de choix
de source, elles permettent de mettre en circuit les
entrées sur la composante audio ou vidéo commandée.
Pour utiliser la télécommande RR-939B :
Première étape: Appuyer sur une touche DEVICE (CHOIX
DE COMPOSANTE) pour mettre en circuit les
commandes de la composante choisie. Ce groupe de
commandes reste actif jusqu’à ce qu’on appuie sur une
autre touche DEVICE (CHOIX DE COMPOSANTE).
Deuxième étape: Appuyer sur les touches COMMAND
(COMMANDE) pour commander la composante choisie.
On ne doit pas oublier que les touches COMMAND
(COMMANDE) reproduisent plusieurs des commandes
que l’on retrouve sur différentes marques de
composantes audio et vidéo et que leur fonction peut
varier en fonction du type de composante choisie. Ainsi,
la touche PLAY/SELECT permet de mettre un lecteur de
disques compacts en mode lecture alors qu’elle
commande la fonction SELECT sur un câblosélecteur.
Remarque: La télécommande RR-939B vous indique quelle
groupe de commandes est actif. Chaque fois que l’on
appuie sur une touche COMMAND, le témoin rouge
DEVICE (COMPOSANTE) clignote pour indiquer quelle
composante est commandée. Si on appuie sur une touche
COMMAND qui ne commande aucune fonction dans le
groupe de commandes (par exemple les touches
numériques d’un mode MAGNÉTOSCOPE), aucun témoin
ne clignotera, ce qui indique que la touche COMMAND est
inactive.
11
12
RR-939B
Français
Les touches COMMAND (COMMANDES) sont identifiées
et portent souvent plusieurs indications si elles servent à
commander différentes composantes. Il suffit de se
rappeler qu’une touche DEVICE (CHOIX DE
COMPOSANTE) sert à convertir la télécommande pour
télécommander par exemple un lecteur de disques
compacts ou un magnétoscope. Les fonctions de chaque
touche devraient être intuitives. Des tables indiquant la
fonction de chaque touche pour chaque type de
composante sont fournies au verso de ce guide.
Quelques touches ont une deuxième fonction qui est
activée lorsqu’on enclenche ou lorsqu’on relâche la
touche SHIFT avant d’appuyer sur la touche COMMAND
(COMMANDES), tel qu’on le décrit ci-dessous.
Touches macro
3
Une macro est un ensemble de commandes
déclenchées de façon simultanée lorsqu’on appuie sur
une seule touche. Une macro permet de simplifier le
fonctionnement des chaînes ambiophoniques. Par
exemple, pour utiliser un magnétoscope, on doit d’abord
mettre le téléviseur en circuit, puis le magnétoscope. On
doit ensuite choisir l’entrée du téléviseur raccordé au
magnétoscope et enfin mettre le magnétoscope en mode
lecture. On doit donc effectuer quatre commandes
distinctes et enfoncer plus de six touches. Une macro
simplifie le tout en exécutant toutes les commandes par
le biais d’une seule touche.
La télécommande RR-939B est dotée de cinq touches
MACRO : M1, M2, M3, M4 et le commutateur
d’alimentation. On peut entrer en mémoire une séquence
maximale de huit commandes différentes qui seront
reproduites automatiquement lorsqu’on appuie sur une
touche MACRO. Pour de plus amples renseignements, se
reporter à la section intitulée «PROGRAMMATION
MACRO».
Remarque: Les touches MACRO ne peuvent être utilisées
qu’en modes AUD, SAT et CBL. Cependant, on peut
commuter une composante vers un autre dans le cadre
d’une macro afin de commander d’autres composantes.
Pour lancer une MACRO, on doit d’abord activer un des
modes COMPOSANTES (AUD, SAT et CBL seulement) et
appuyer sur la touche MACRO désirée. Si on a
programmé une macro avec cette touche, la
télécommande RR-939B lancera la séquence de
commandes mémorisée et la touche COMPOSANTE
rouge clignotera lors de chaque commande. Si aucune
macro n’a été programmée ou s’il n’y a aucune macro
dans le mode COMPOSANTE en question, aucune
séquence de commandes ne sera déclenchée et aucune
touche COMPOSANTE ne clignotera.
Touches spéciales
4
On distingue deux touches de fonctions spéciales au bas
de la télécommande RR-939B.
La touche LIGHT met en circuit un éclairage d’appoint
qui vous permet de voir les touches dans le noir.
L’éclairage reste allumé pendant 7 secondes et pendant
7 autres secondes chaque fois qu’on appuie sur une
touche.
La touche SHIFT permet d’obtenir des commandes
additionnelles à partir de certaines touches. Ces
fonctions sont affichées en italiques sur les illustrations
et sur les tableaux des commandes. Pour lancer une
commande, appuyer sur la touche SHIFT et la relâcher.
Appuyer ensuite sur la touche de COMMANDE désirée.
○○○○○○○○○○○○○○○○○○○○○○
Programmation
La télécommande RR-939B peut remplacer jusqu’à dix
télécommandes différentes, soit une pour chaque touche
COMPOSANTE. Avant de pouvoir utiliser la
télécommande, on doit d’abord la programmer, c’est-àdire lui indiquer quelle composante audio/vidéo on désire
commander.
La télécommande RR-939B renferme des centaines de
séries de commandes destinées à diverses composantes
audio/vidéo. Lorsqu’on programme la télécommande
RR-939B, on choisit une série de commandes qui
correspondent aux commandes qui doivent être fournies
aux composantes de votre chaîne. On affecte ensuite
ces séries de commandes aux huit touches
COMPOSANTES en entrant un code de trois chiffres. On
exécute cette manœuvre une seule fois lors de la
préparation initiale de la télécommande.
La façon la plus facile de programmer la télécommande
consiste à trouver vos composantes et les codes de trois
chiffres correspondants à partir de la liste des codes. Si
votre composante n’apparaît pas sur la liste, il existe un
autre méthode de recherche automatique qui vous
permettra de trouver la bonne série de commandes pour
votre composante.
13
14

RR-939B
Français
Programmation de la télécommande à
l’aide d’un code de trois chiffres
Trouvez votre composante audio/vidéo à partir de la liste
fournie et notez le codes de trois chiffres:
Première étape: Mettre en circuit la composante que
l’on désire commander.
Deuxième étape: Appuyer sur la touche COMPOSANTE
correspondante (par exemple, si on entre en mémoire la
série de commandes destinées à un lecteur de disques
compacts, appuyer sur la touche COMPOSANTE CD
dans la partie supérieure de la télécommande). Tout en
appuyant sur la touche COMPOSANTE, appuyer sur la
touche MUTE et maintenir les deux touches enfoncées
pendant au moins une seconde. Le témoin rouge
COMPOSANTE clignotera pendant 20 secondes pour
indiquer que l’on a entré en mémoire le mode
programmation. La prochaine manœuvre doit être
exécutée dans les 20 secondes, sinon la télécommande
reviendra au mode de fonctionnement normal.
Troisième étape: Pointer la télécommande vers la
composante audio/vidéo et entrer le code de trois
chiffres à l’aide des touches numériques. Le témoin
COMPOSANTE rouge clignote chaque fois qu’on entre
un chiffre. Si l’on a entré le bon code, la composante se
mettra hors circuit. S’il existe plus d’un code de trois
chiffre pour la composante source, continuer à entrer les
autres codes de trois chiffres à partir de la liste jusqu’à
ce que la composante se mette hors circuit. Ceci signifie
que l’on a trouvé le bon code.
Quatrième étape: Entrer le code en mémoire en
appuyant à nouveau sur la touche COMPOSANTE
correspondante. Le témoin clignotera deux fois pour
confirmer que le code a bel et bien été entré en mémoire.
Cinquième étape: Effectuer un essai avec la touche COMMAND en utilisant les tables fournies comme référence
aux fonctions disponibles. Si les fonctions ne s’exécutent
pas correctement, répéter les étapes données ci-dessus
en utilisant le prochain code de trois chiffres de la liste
pour votre marque de composante.
Répéter les étapes données ci-dessus pour chacune des
huit composantes en affectant chaque composante à la
touche COMPOSANTE appropriée.
Programmation en mode de recherche
automatique
Si la liste des codes ne donne pas le code de trois
chiffres d’une composante, utiliser la méthode de
recherche automatique suivante pour trouver un code
qui permettra de commander l’appareil en question.
Première étape: Mettre la composante à commander en
circuit.
Deuxième étape: Appuyer simultanément sur la touche
COMPOSANTE et la touche MUTE correspondante
pendant au moins une seconde. Le témoin restera allumé
pendant 20 secondes.
Troisième étape: Appuyer sur la touche CH UP ou CH
DOWN et la maintenir enfoncée. Ceci permet à l’appareil
d’émettre une série de signaux codés de MISE EN
CIRCUIT / MISE HORS CIRCUIT qui sont stockés en
mémoire. Relâcher la touche CH dès que la composante
se met hors circuit pour indiquer que le bon code de
commande de la composante a été trouvé.
Quatrième étape: Appuyer sur la touche COMPOSANTE
pour stocker le code en mémoire. Le témoin clignotera
deux fois pour confirmer l’entrée en mémoire du code.
Cinquième étape: Faire l’essai des fonctions de la
télécommande. Si une commande ne fonctionne pas
bien, répéter les étapes données ci-dessus jusqu’à ce
qu’on ait trouvé le bon code.
Affichage du code
Pour voir quel code de trois chiffres a été entré en
mémoire à partir d’une touche COMPOSANTE :
Première étape: Appuyer simultanément sur une touche
COMPOSANTE et sur la touche MUTE pendant au moins
une seconde. Le témoin COMPOSANTE devrait s’allumer
pendant 20 secondes.
Deuxième étape: Appuyer sur la touche RECALL
(RAPPEL). Le témoin COMPOSANTE devrait clignoter le
nombre de fois correspondant au premier chiffre du
code. Ceci devrait être suivi d’une intervalle d’une
seconde sans que le témoin ne s’allume et de plusieurs
clignotements du témoin qui correspondent au deuxième
chiffre du code. Il devrait finalement y avoir une autre
intervalle suivie du nombre de clignotements
correspondant au troisième chiffre du code. Ainsi, un
15
16
RR-939B
Français
clignotement, trois clignotements et huit clignotements
séparés d’une intervalle d’une seconde correspondent
au code de trois chiffres 138.
Remarque: Le chiffre 0 dans un code de trois chiffres est
représenté par 10 clignotements du témoin.
○○○○○○○○○○○○○○○○○○○○○○
Programmation macro
La télécommande RR-939B est dotée de 5 touches
MACRO dont quatre sont identifiées M1, M2, M3, M4 et
dont la cinquième est identifiée par le commutateur
POWER (MISE EN CIRCUIT). Lorsque la télécommande
est en mode AUDIO, SAT ou CÂBLE, les touches macro
peuvent stocker en mémoire et lancer une séquence de
8 commandes au maximum. Pour stocker en mémoire
une séquence macro :
Première étape: Appuyer simultanément sur une touche
DEVICE (COMPOSANTE) (AUD, SAT ou CBL seulement)
et sur la touche MUTE (SOURDINE) pendant au moins
une seconde. Le témoin de la touche DEVICE
(COMPOSANTE) passera au rouge pendant 20 secondes.
Pour effacer une séquence macro programmée, suivre
les étapes données ci-dessus en omettant l’étape 3 et en
n’effectuant aucune commande.
Commandes prioritaires du volume
L’usager peut désirer commander en tout temps le
volume de sa chaîne ou de son téléviseur. Par exemple,
lorsqu’il utilise la télécommande RR-939B pour
commander un lecteur de disques compacts, il peut
désirer commander le VOLUME sonore (commande
habituellement inactive en mode CD) du préamplificateur
ou du processeur ambiophonique. Il peut alors utiliser
une commande appelée commande prioritaire qui
permet de transférer les commandes de volume d’une
composante AUDIO ou du TÉLÉVISEUR à un autre mode
de composante. Pour obtenir la commande prioritaire du
volume :
Première étape: Appuyer simultanément sur la touche
DEVICE (composante) (la composante dont on désire
commander le volume) et sur la touche MUTE (mise en
sourdine) pendant au moins une seconde.
Deuxième étape: Appuyer sur la touche VOLUME UP
(augmentation du volume).
Deuxième étape: Appuyer sur la touche MACRO que l’on
désire programmer.
Troisième étape: Appuyer sur une séquence de
commande (maximum 8) que l’on désire entrer en
mémoire. Le fait d’appuyer sur une touche DEVICE
(COMPOSANTE) pour changer de mode lors de la
séquence compte pour une commande.
Quatrième étape: Appuyer sur la touche CH UP pour
stocker en mémoire la séquence macro. Le témoin de la
touche DEVICE (COMPOSANTE) clignote deux fois pour
confirmer la commande.
Remarque: Étant donné que le commutateur de mise en
circuit (POWER) peut servir à la programmation d’une
macro, les commandes normales de mise en circuit/hors
circuit sont temporairement stockées sur la touche
MUTE (SOURDINE) lors de la séquence de
programmation macro. Pour ajouter une commande de
mise en circuit ou de mise hors circuit dans une macro,
simplement appuyer sur la touche MUTE (SOURDINE).
Troisième étape: Appuyer sur la touche AUDIO ou sur la
touche TV DEVICE (composante vidéo) (la composante à
partir de laquelle on désire commander le volume). Le
témoin de la touche de COMPOSANTE clignotera deux
fois pour confirmer la commande.
Exemple: Pour obtenir la commande du volume AUDIO
en mode VCR (magnétoscope), appuyer sur la touche
DEVICE (composante) à l’étape 1 et sur la touche AUDIO
DEVICE (composante audio) à l’étape 3.
17
18
RR-939B
Deutsch
Affectation d’une composante à une autre
touche de composante
Sur certaines chaînes, on peut désirer programmer une
série de commandes en affectant ces commandes à une
autre touche de COMPOSANTE. Par exemple, si on dispose de deux lecteurs de disques compacts, on peut
vouloir utiliser la touche SAT DEVICE pour stocker et
activer les commandes du deuxième lecteur de disques
compacts. Pour réaffecter les codes de composante à
une autre touche :
Étape 1: Appuyer simultanément sur la nouvelle touche
de COMPOSANTE vers laquelle on désire stocker la
série de commandes et sur la touche MUTE (mise en
sourdine) pendant au moins une seconde.
Étape 2: Appuyer sur la touche de COMPOSANTE qui
correspond à la série de commandes que l’on désire
transférer afin d’avoir accès à la série de commande de
ce type de composante.
Étape 3: Entrer le code de trois chiffres qui correspond à
la composante audio/vidéo que l’on désire transférer.
Étape 4: Appuyer sur la touche de la COMPOSANTE dans
laquelle on désire entrer la série de commandes. Le
témoin de la touche clignotera deux fois pour confirmer
la commande.
Exemple: Pour entrer en mémoire les commandes d’un
lecteur de disques compacts à partir de la touche SAT
DEVICE, appuyer sur la touche SAT DEVICE aux étapes
un et quatre. Appuyer ensuite sur la touche CD DEVICE à
l’étape 2.
○○○○○○○○○○○○○○○○○○○○○○
Einleitung
Wir möchten Ihnen für Ihr Vertrauen in die Marke Rotel
und den Kauf der Rotel-Fernbedienung RR-939B danken.
Diese Fernbedienung ist auf den Betrieb aller aktuellen
fernbedienbaren Rotel-Produkte sowie einer großen Zahl
von Audio- und Videokomponenten anderer Hersteller
ausgelegt. Die RR-939B bietet eine Reihe von Funktionen,
die die Handhabung erleichtern und die Bedienerfreundlichkeit verbessern.
Bitte lesen Sie sich diese Bedienungsanleitung in Ruhe
durch. Die Zeit, die Sie darin investieren, wird sich später
durch eine optimale und zeitsparende Nutzung der
Fernbedienung auszahlen.
Einige Vorsichtsmaßnahmen
• Die RR-939B ist zwar erstaunlich widerstandsfähig,
jedoch auch nicht unzerstörbar. Lassen Sie sie bitte
nicht fallen - vor allem nicht auf einen Steinfußboden!
Unter normalen Bedingungen werden Sie dank der
wartungsfreien Konstruktion der RR-939B in den
kommenden Jahren viel Freude an ihr haben.
• Das Gerät darf nur über Batterien betrieben werden
(Typ “AAA”/Mignon). Betreiben Sie das Gerät nie mit
einem anderen Batterietyp oder einer anderen
Energieversorgung.
• Ausgelaufene oder beschädigte Batterien können bei
Berührung mit der Haut Verätzungen verursachen.
• Setzen Sie die Fernbedienung keinen hohen
Temperaturen, starken Vibrationen oder hoher
Feuchtigkeit aus.
• Lassen Sie das Verpackungsmaterial nicht
herumliegen. Plastiktüten etc. könnten für Kinder
gefährlich werden.
• Reinigen Sie die Oberflächen der Fernbedienung nur
mit einem weichen, trockenen Tuch. Verwenden Sie
auf keinen Fall aggressive Reinigungsmittel oder
chemische Lösungen, da hierdurch die
Gehäuseoberfläche beschädigt werden könnte.
• Das Gerät ist wartungsfrei. Öffnen Sie es deshalb
niemals. Durch das Öffnen erlischt Ihr Garantieanspruch.
2019
RR-939B
Deutsch
Einlegen der Batterien
Entnehmen Sie die RR-939B und die beiliegenden vier
Batterien des Typs “AAA”/Mignon der Verpackung.
Drehen Sie die Fernbedienung zum Einlegen der
Batterien um. Auf der Rückseite befindet sich der
Batteriefachdeckel. Entfernen Sie ihn, indem Sie die
Sperrvorrichtung nach oben ziehen.
Legen Sie nun die vier Batterien entsprechend der auf
dem Batteriefachboden angegebenen Polarität ein und
schieben Sie den Batteriefachdeckel wieder auf, bis die
Rastzungen hörbar einrasten. Wenden Sie dabei bitte
keinerlei Gewalt an.
Achtung: Die Batterien dürfen nur gegen Batterien des
gleichen Typs ausgetauscht werden. Achten Sie beim
Einlegen der Batterien auf die richtige Polung.
○○○○○○○○○○○○○○○○○○○○○○
Produktbeschreibung
Die RR-939B kann bis zu acht verschiedene
Fernbedienungen ersetzen. Im Speicher sind Codes
gespeichert, über die Ihre Audio-/Videokomponenten
bedient werden können. In der umfangreichen
Datenbank der RR-939B sind die Codes mehrerer hundert
Modelle gespeichert. Die Programmierung der RR-939B
zur Fernbedienung Ihres Gerätes dauert nur wenige
Minuten und ist nur einmal erforderlich. Details dazu
können Sie dem Kapitel “So programmieren Sie die
Fernbedienung” entnehmen.
Ist der Programmiervorgang abgeschlossen, wählen Sie
das entsprechende Gerät einfach per Tastendruck aus
und machen die RR-939B zur Fernbedienung für Ihren
Rotel-CD-Player oder Ihr Sony-Fernsehgerät oder Ihren
Panasonic-Videorecorder. Anschließend drücken Sie
einfach die Befehlstasten, die den Funktionen der dem
Gerät beiliegenden Fernbedienung entsprechen.
Sehen wir uns zunächst den Aufbau der RR-939B an
(siehe Seite 1):
Gerätetasten
Diese acht im oberen Displaybereich der RR-939B
befindlichen Tasten legen fest, welche Befehle gerade
aktiv sind. Drücken Sie z.B. die mit AUD gekennzeichnete
AUDIO-Taste, wird die RR-939B zur Fernbedienung Ihres
Surround-Sound-Prozessors. Drücken Sie die TV-Taste,
können Sie über die RR-939B Ihr Fernsehgerät bedienen.
1
Diese Tasten werden auch zur Programmierung der
RR-939B genutzt. Einzelheiten hierzu entnehmen Sie bitte
dem Abschnitt “So programmieren Sie die
Fernbedienung” unten.
Befehlstasten
Diese umfangreiche Tastengruppe reproduziert die
Funktionen der Fernbedienungen Ihrer Audio-/
Videokomponenten. Eine allgemeine Beschreibung
dieser Funktionen folgt. Eine detaillierte Beschreibung zu
jeder einzelnen Taste finden Sie in den beiliegenden
Tabellen.
Zu den oberen Tasten dieser Gruppe zählen
grundlegende Befehle wie Power, Lautstärke (Volume),
Kanalauswahl (Channel Selection) etc.
Darunter befindet sich eine Gruppe von Tasten, die die
Laufwerksfunktionen eines Cassettendecks oder eines
Videorecorders steuern (Stop, Play, Pause etc.) sowie
die Up- und Down-Befehle, die auf einem Cable- oder
Satelliten-TV-Receiver zu finden sind.
Die nächsten Tasten sind die Zifferntasten, die für die
direkte Auswahl von Titeln auf einer CD oder bei Ihrem
Fernsehgerät zur Senderwahl genutzt werden. Zu diesem
Bereich gehören auch spezielle Befehlstasten, die
Funktionen wie sie auf verschiedenen Geräten zu finden
sind steuern.
Im unteren Bereich dieser Gruppe befinden sich zehn
runde Tasten zur Quellenwahl, die mit CD, TUNER, TAPE
etc. gekennzeichnet sind. Sie sind die Tasten zur
Quelleneingangswahl eines Receivers, Vorverstärkers
oder Surround-Sound-Prozessors. Die Funktionen dieser
Tasten entsprechen nicht denen der Gerätetasten im
oberen Bereich der Fernbedienung. Die Gerätetasten
legen fest, welcher Befehl auf der RR-939B aktiviert wird.
Die BEFEHLSTASTEN zur Quellenwahl schalten die
Eingänge an den gesteuerten Audio-/Videokomponenten.
Zum Betrieb der RR-939B:
Schritt 1: Drücken Sie eine der Gerätetasten, um die
Befehle für die gewünschte Komponente zu aktivieren.
Diese Befehle bleiben aktiviert, bis Sie eine andere
Gerätetaste betätigen.
Schritt 2: Drücken Sie die BEFEHLStasten (Tastengruppe
2), um die ausgewählte Komponente zu bedienen.
2
21
22
RR-939B
Deutsch
Denken Sie daran, daß BEFEHLStasten viele
Fernbedienungsfunktionen unterschiedlichster Arten von
Audio-/Videokomponenten steuern und ihre Funktion
abhängig von dem ausgewählten Typ variieren kann. So
wird über den PLAY/SELECT-Modus der Play-Modus
eines CD-Players aktiviert, aber die SELECT-Funktion
einer Cable-Box.
Hinweis: Die RR-939B gibt Ihnen Informationen darüber,
welcher Befehl aktiviert wurde. Jedes Mal, wenn Sie
eine BEFEHLStaste drücken, blinkt die aktive
GERÄTEtaste rot und sagt Ihnen auf diese Weise,
welches Gerät Sie gerade steuern. Hat die
BEFEHLStaste, die Sie gerade drücken, im aktiven
Befehlsbereich keine Funktion (z.B. die Zifferntasten im
Videorecorder-Modus), blinkt keine GERÄTEtaste. Auf
diese Weise wird angezeigt, daß die BEFEHLStaste
inaktiv ist.
Die BEFEHLStasten sind zum Teil verschieden
gekennzeichnet. Dies ist der Fall, wenn eine Taste
verschiedene Funktionen für verschiedene Arten von
Komponenten aktiviert. Wenn Sie sich bewußt machen,
daß das Drücken der Gerätetaste die RR-939B z.B. zu
einer Fernbedienung für einen CD-Player oder einen
Videorecorder macht, ergeben sich die Funktionen jeder
Taste automatisch. Beiliegend finden Sie Tabellen, in
denen Sie die Funktion jeder Taste für verschiedene
Gerätetypen nachschlagen können.
Einige Tasten haben eine zweite Funktion, die durch
Drücken und Loslassen der SHIFT-Taste vor Drücken der
BEFEHLStaste aktiviert werden kann (siehe unten).
Macro-Tasten
Die Macro-Funktion erlaubt es, eine Reihe einzelner
Befehle auf nur einer Taste abzuspeichern. Macros
erleichtern den Umgang mit einem komplizierten HomeEntertainment-System. Nehmen wir z.B. das Abspielen
einer Videocassette: Sie schalten den Fernseher und den
Videorecorder ein, wählen den an den Videorecorder
angeschlossenen TV-Eingang und schalten schließlich
den Videorecorder in den Play-Modus (das setzt
natürlich voraus, daß bereits ein Video eingelegt ist). Das
sind vier eigenständige Befehle, wobei Sie zur
Ausführung auf sechs verschiedene Tasten drücken
müssen. Ein Macro macht dies einfacher, indem alle
erforderlichen Befehle nach nur einem einzigen
Tastendruck ausgeführt werden.
3
Auf der RR-939B gibt es fünf Macro-Tasten - die vier mit
M1, M2, M3 und M4 gekennzeichneten Tasten und die
POWER-Taste. Es können bis zu acht verschiedene
Befehle auf einer Taste abgespeichert werden. Genaue
Informationen entnehmen Sie bitte dem Abschnitt “So
programmieren Sie ein Macro”.
Hinweis: Die Macro-Tasten sind nur in den Modi AUD,
SAT und CBL aktivierbar. Sie können jedoch innerhalb
eines Macros in einen anderen Gerätemodus
umschalten, um ein anderes Gerät zu bedienen.
Zur Wiedergabe eines Macros aktivieren Sie zunächst
einen der GERÄTEmodi (nur AUD, SAT oder CBL).
Anschließend drücken Sie die gewünschte MACROTaste. Ist für diese Taste ein Macro programmiert
worden, aktiviert die RR-939B die gespeicherte
Befehlsabfolge. Die GERÄTEtaste blinkt bei jedem Befehl
rot. Ist kein Macro programmiert worden oder sind in
diesem GERÄTEmodus keine Macros programmierbar,
geschieht nichts und auch die GERÄTEtaste blinkt nicht.
Sondertasten
Im unteren Bereich der RR-939B gibt es zwei
Sondertasten.
Über die LIGHT-Taste können die einzelnen Tasten
beleuchtet werden, so daß Sie diese auch in dunklen
Räumen erkennen können. Die Tasten leuchten 7
Sekunden und jedes Mal, wenn eine andere Taste
gedrückt wird, weitere 7 Sekunden.
Die SHIFT-Taste aktiviert bei einigen Tasten zusätzliche
Befehle. Diese Funktionen sind in dieser Anleitung kursiv
gedruckt. Zur Aktivierung dieser Befehle drücken Sie die
SHIFT-Taste und lassen sie wieder los. Anschließend
drücken Sie die gewünschte BEFEHLStaste.
○○○○○○○○○○○○○○○○○○○○○○
4
So programmieren Sie die
Fernbedienung
Über die RR-939B können bis zu acht verschiedene
Geräte, ein Gerät für jede der acht Gerätetasten,
fernbedient werden. Bevor Sie die Fernbedienung nutzen
können, müssen Sie die RR-939B programmieren, d.h. ihr
mitteilen, welche Audio-/Videokomponente über sie
ferngesteuert werden soll.
23
24
 Loading...