

Page 1

Rapture
User’s Guide
Benutzerhandbuch
Manual del Usuario
Manuel de l’utilisateur
Page 2

Information in this document is subject to change without notice and does not represent a commitment on the part of Twelve Tone
Systems, Inc. The software described in this document is furnished under a license agreement or nondisclosure agreement. The
software may be used or copied only in accordance of the terms of the agreement. It is against the law to copy this software on any
medium except as specifically allowed in the agreement. No part of this document may be reproduced or transmitted in any form or by
any means, electronic or mechanical, including photocopying and recording, for any purpose without the express written permission of
Twelve Tone Systems, Inc.
Copyright © 2006 Twelve Tone Systems, Inc. All rights reserved.
Program Copyright © 2006 Twelve Tone Systems, Inc. All rights reserved.
ACID is a trademark of Sonic Foundry, Inc.
Cakewalk is a registered trademark of Twelve Tone Systems, Inc. Project5 and the Cakewalk logo are trademarks of Twelve Tone
Systems, Inc. Other company and product names are trademarks of their respective owners.
Visit Cakewalk on the World Wide Web at www.cakewalk.com.
Die Informationen in diesem Dokument unterliegen Änderungen ohne vorherige Ankündigung und stellen keine Verpflichtung von
Seiten von Twelve Tone Systems, Inc dar. Die in diesem Dokument beschriebene Software wird im Rahmen einer Lizenz oder
Nichtveröffentlichungsvereinbarung bereit gestellt. Die Software darf nur in Übereinstimmung mit den Vereinbarungsbedingungen
verwendet oder kopiert werden. Das Kopieren dieser Software auf ein anderes Medium als im Rahmen der Vereinbarung ausdrücklich
zugelassen ist verboten. Ohne ausdrückliche schriftliche Genehmigung von Twelve Tone Systems, Inc. darf kein Teil dieses Dokuments
in irgendeiner Form oder auf irgendeine Weise, weder elektronisch noch mechanisch, einschließlich von Fotokopien oder
Auszeichnungen, zu irgendeinem Zweck reproduziert oder übertragen werden.
Copyright © 2006 Twelve Tone Systems, Inc. Alle Rechte vorbehalten.
Programm Copyright © 2006 Twelve Tone Systems, Inc. Alle Rechte vorbehalten.
ACID ist eine Marke von Sonic Foundry, Inc.
Cakewalk ist eine eingetragene Marke von Twelve Tone Systems, Inc. Project5 und das CakewalkLogo sind Marken von Twelve Tone
Systems, Inc. Alle anderen Firmen und Produktnamen sind Marken ihrer jeweiligen Rechtsinhaber.
Besuchen Sie Cakewalk im World Wide Web unter www.cakewalk.com.
Page 3

La información de este documento está sujeta a cambios sin previo aviso y no representa un compromiso por parte de Twelve Tone
Systems, Inc. El software descrito en este documento se facilita bajo un acuerdo de licencia o de no divulgación. El software puede
utilizarse o copiarse siguiendo sólo los términos del acuerdo. La copia de este software en cualquier medio es ilegal, exceptuando los
casos previstos de forma específica en el acuerdo. Ninguna parte de este documento puede reproducirse ni transmitirse de ninguna
forma ni por ningún medio, electrónico o mecánico, incluyendo las fotocopias y la grabación, para cualquier finalidad sin el
consentimiento expreso por escrito de Twelve Tone Systems, Inc.
Copyright © 2006 Twelve Tone Systems, Inc. Todos los derechos reservados.
Programa Copyright © 2006 Twelve Tone Systems, Inc. Todos los derechos reservados.
ACID es una marca comercial de Sonic Foundry, Inc.
Cakewalk es una marca comercial registrada de Twelve Tone Systems, Inc. SONAR y el logotipo de Cakewalk son marcas comerciales
de Twelve Tone Systems, Inc. Otros nombres de empresas y de productos son marcas comerciales de sus respectivos propietarios.
Visite Cakewalk en la World Wide Web: www.cakewalk.com.
Les informations contenues dans ce document sont sujettes à modification sans préavis et n’impliquent aucun engagement de la part de
Twelve Tone Systems, Inc. Le logiciel présenté dans le présent document est fourni dans le cadre d’un accord de licence ou de
confidentialité. L’utilisation et la copie de ce logiciel sont régies par les termes dudit contrat. La copie de ce logiciel sur un média autre
que celui spécifiquement autorisé par ledit accord constitue une infraction à la loi. La reproduction ou la diffusion d’une partie ou de
l’ensemble de ce document est strictement interdite de quelque forme ou par quelque moyen que ce soit, électronique ou mécanique, y
compris la photocopie et l’enregistrement, pour des fins autres que celles expressément autorisées par écrit par Twelve Tone Systems,
Inc.
Copyright © 2006 Twelve Tone Systems, Inc. Tous droits réservés.
Programme : Copyright © 2006 Twelve Tone Systems, Inc. Tous droits réservés.
ACID est une marque de commerce de Sonic Foundry, Inc.
Cakewalk est une marque déposée de Twelve Tone Systems, Inc. SONAR et le logo Cakewalk sont des marques de commerce de
Twelve Tone Systems, Inc. Les autres entreprises et les autres noms de produits sont des marques de commerce de leurs propriétaires
respectifs.
Consultez le site web de Cakewalk : www.cakewalk.com.
Page 4

Page 5

Table of Contents
English
1 Introduction . . . . . . . . . . . . . . . . . . . . . . . . . . . . . . . 7
Welcome . . . . . . . . . . . . . . . . . . . . . . . . . . . . . . . . . . . .8
Installation for Mac . . . . . . . . . . . . . . . . . . . . . . . . . . . .8
Installation for Windows . . . . . . . . . . . . . . . . . . . . . . . . 8
Architecture of Rapture . . . . . . . . . . . . . . . . . . . . . . . . .8
MIDI Controllers . . . . . . . . . . . . . . . . . . . . . . . . . . . . . .8
2 Getting Started . . . . . . . . . . . . . . . . . . . . . . . . . . . . 9
Loading Programs. . . . . . . . . . . . . . . . . . . . . . . . . . . .10
Loading Elements . . . . . . . . . . . . . . . . . . . . . . . . . . . . 10
Combining and Mixing Elements. . . . . . . . . . . . . . . . .11
Saving Programs and Elements . . . . . . . . . . . . . . . . .12
Using Effects. . . . . . . . . . . . . . . . . . . . . . . . . . . . . . . .12
Using Rapture as a Multi-timbral Instrument . . . . . . . .13
The Modulation Matrix. . . . . . . . . . . . . . . . . . . . . . . . .13
The X/Y Pad . . . . . . . . . . . . . . . . . . . . . . . . . . . . . . . . 14
3 The Interface and Controls . . . . . . . . . . . . . . . . . 15
The Interface’s Controls . . . . . . . . . . . . . . . . . . . . . . . 18
4 Main Functions . . . . . . . . . . . . . . . . . . . . . . . . . . . 21
Programs, Elements and Audio Files . . . . . . . . . . . . .22
File Organization. . . . . . . . . . . . . . . . . . . . . . . . . 22
Loading Samples . . . . . . . . . . . . . . . . . . . . . . . . . . . . 23
Editing Oscillator Controls. . . . . . . . . . . . . . . . . .24
Copying, Unloading, and Resetting Elements . . . . . . 26
Chaining Elements. . . . . . . . . . . . . . . . . . . . . . . 26
Ring Modulation. . . . . . . . . . . . . . . . . . . . . . . . . 27
The DSP Section . . . . . . . . . . . . . . . . . . . . . . . . . . . . 27
Using the Filters . . . . . . . . . . . . . . . . . . . . . . . . . 27
Using the LoFi Module. . . . . . . . . . . . . . . . . . . . 31
Using the Drive Module . . . . . . . . . . . . . . . . . . . 31
Using the EQ’s. . . . . . . . . . . . . . . . . . . . . . . . . . . . . . 32
The Insert FX Section . . . . . . . . . . . . . . . . . . . . . . . . 32
Delay Mode . . . . . . . . . . . . . . . . . . . . . . . . . . . . 32
Reverb Mode . . . . . . . . . . . . . . . . . . . . . . . . . . . 35
Distortion Mode . . . . . . . . . . . . . . . . . . . . . . . . . 35
The Modulators Section . . . . . . . . . . . . . . . . . . . . . . . 36
Envelope Generators. . . . . . . . . . . . . . . . . . . . . 36
Low Frequency Oscillators. . . . . . . . . . . . . . . . . 40
Keytracking . . . . . . . . . . . . . . . . . . . . . . . . . . . . 42
The Step Generator . . . . . . . . . . . . . . . . . . . . . . 43
Modulator Copy/Paste . . . . . . . . . . . . . . . . . . . . 45
Amplitude Editing. . . . . . . . . . . . . . . . . . . . . . . . 46
The Global Page . . . . . . . . . . . . . . . . . . . . . . . . . . . . 46
The Modulation Matrix . . . . . . . . . . . . . . . . . . . . . . . . 46
MIDI Learn . . . . . . . . . . . . . . . . . . . . . . . . . . . . . . . . . 47
The Mixer. . . . . . . . . . . . . . . . . . . . . . . . . . . . . . . . . . 48
Microtuning and Alternative Tunings . . . . . . . . . . . . . 49
Sinc Interpolation . . . . . . . . . . . . . . . . . . . . . . . . . . . . 50
Page 6

Appendix A: Parameter Reference . . . . . . . . . . . . . . . 51
Appendix B: Modulation Matrix . . . . . . . . . . . . . . . . . . 57
Index . . . . . . . . . . . . . . . . . . . . . . . . . . . . . . . . . . . . . . . . 69
LICENSE AGREEMENT . . . . . . . . . . . . . . . . . . . . . . . . . 71
vi
Page 7

Introduction
In This Chapter
Welcome. . . . . . . . . . . . . . . . . . . . . . . . . . . . . . . . . . . . . . . 8
Installation for Mac . . . . . . . . . . . . . . . . . . . . . . . . . . . . . . . 8
Installation for Windows . . . . . . . . . . . . . . . . . . . . . . . . . . . 8
Architecture of Rapture . . . . . . . . . . . . . . . . . . . . . . . . . . . . 8
MIDI Controllers . . . . . . . . . . . . . . . . . . . . . . . . . . . . . . . . . 8
English
Page 8

Welcome
Architecture of Rapture
Thank you for purchasing Rapture!
Rapture is a wavetable synthesizer with advanced sound
manipulation capabilities, well suited for electronicarelated music styles. A comprehensive Modulation Matrix
provides expressive control and a unique Step Generator
provides an intuitive interface for the creation of rhythmic
parameter changes.
Installation for Mac
To install Rapture on a Mac:
1. Insert the Rapture installation CD into your CD drive.
2. Double-click the CD icon that appears on your
desktop.
3. Double-click the “Rapture Installer” icon, and follow
on-screen instructions.
The installer will give you the option of installing VST, AU,
and/or RTAS formats to your system’s plug-in library.
Installation for Windows
To install Rapture on Windows:
1. Insert the Rapture installation CD into your CD drive.
2. The Rapture installer should start automatically. If it
does not, go to My Computer and double-click the CD
drive icon.
3. Follow the on-screen instructions provided by the
installer.
The installer will give you the option of installing DXi, VST
and/or RTAS formats to your system.
Rapture is composed of six individual sound generation
components, called Elements.
A Rapture Program (stored as a file with a .
sion) is defined by the settings of all parameters within all
Elements and the Global section. Each Element has a
complete engine composed of an Oscillator, a per-voice
DSP stage (Bit Reduction, Decimation, Drive and two
multi-mode resonant filters), and a set of Modulators
(envelope generators, low frequency oscillators and step
generators) applied to the main sound generation parameters. The sound generated by the six Elements is mixed
and routed to a global DSP stage (three band parametric
equalizer and multi-effects section).
The Oscillator is the core of the sound manufacturing process. Each Oscillator is capable of high-quality, high-performance wavetable synthesis. This type of synthesis is an
efficient method of creating sustained sounds by looping a
minimal amount of audio data. In Rapture, the wavetable is
defined by a single-cycle audio file.
During the wave loading procedure, Rapture creates all
the sample images required for the Oscillator to play the
single cycle across the whole keyboard range without any
aliasing distortion. Rapture ships with over two hundred
wavetable definition files, which can be expanded.
PROG exten-
MIDI Controllers
To get the most out of Rapture, we recommend using a
good MIDI controller. Many programs use the Mod Wheel,
Aftertouch, and Velocity to change the sound of the program while the program is playing back.
8
Page 9

Getting Started
In This Chapter
Loading Programs . . . . . . . . . . . . . . . . . . . . . . . . . . . . . . 10
Loading Elements . . . . . . . . . . . . . . . . . . . . . . . . . . . . . . . 10
Combining and Mixing Elements . . . . . . . . . . . . . . . . . . . 11
Saving Programs and Elements . . . . . . . . . . . . . . . . . . . . 12
Using Rapture as a Multi-timbral Instrument . . . . . . . . . . 13
The Modulation Matrix . . . . . . . . . . . . . . . . . . . . . . . . . . . 13
The X/Y Pad . . . . . . . . . . . . . . . . . . . . . . . . . . . . . . . . . . . 14
English
Page 10
This section provides a brief-but-useful introduction to
Rapture’s more significant concepts and most-used functions. More detailed information is included in later chapters of this User’s Guide.
You can also access the online help topics by pressing the
F1 key on your Windows keyboard or Command+”?” on
your Mac keyboard while the Rapture interface is
launched.
You can also load a program by clicking the Program Handling button and choosing Load Program from the
popup menu, or by drag and dropping a .
Rapture window.
When you load a program, you load all the Elements at
once, along with all the associated effects, filters, etc.
PROG file into the
Loading Elements
Loading Programs
A Rapture program is made of up to six Elements. Each
Element contains a wavetable oscillator and a chain of
effects, filters, envelope generators, step generators, and
LFO’s. You can turn each Element off or on in the Mixer
section at the bottom of Rapture’s interface. If you want to
use Rapture as a six-part multi-timbral synth, you can also
set each Element to respond to a different MIDI channel.
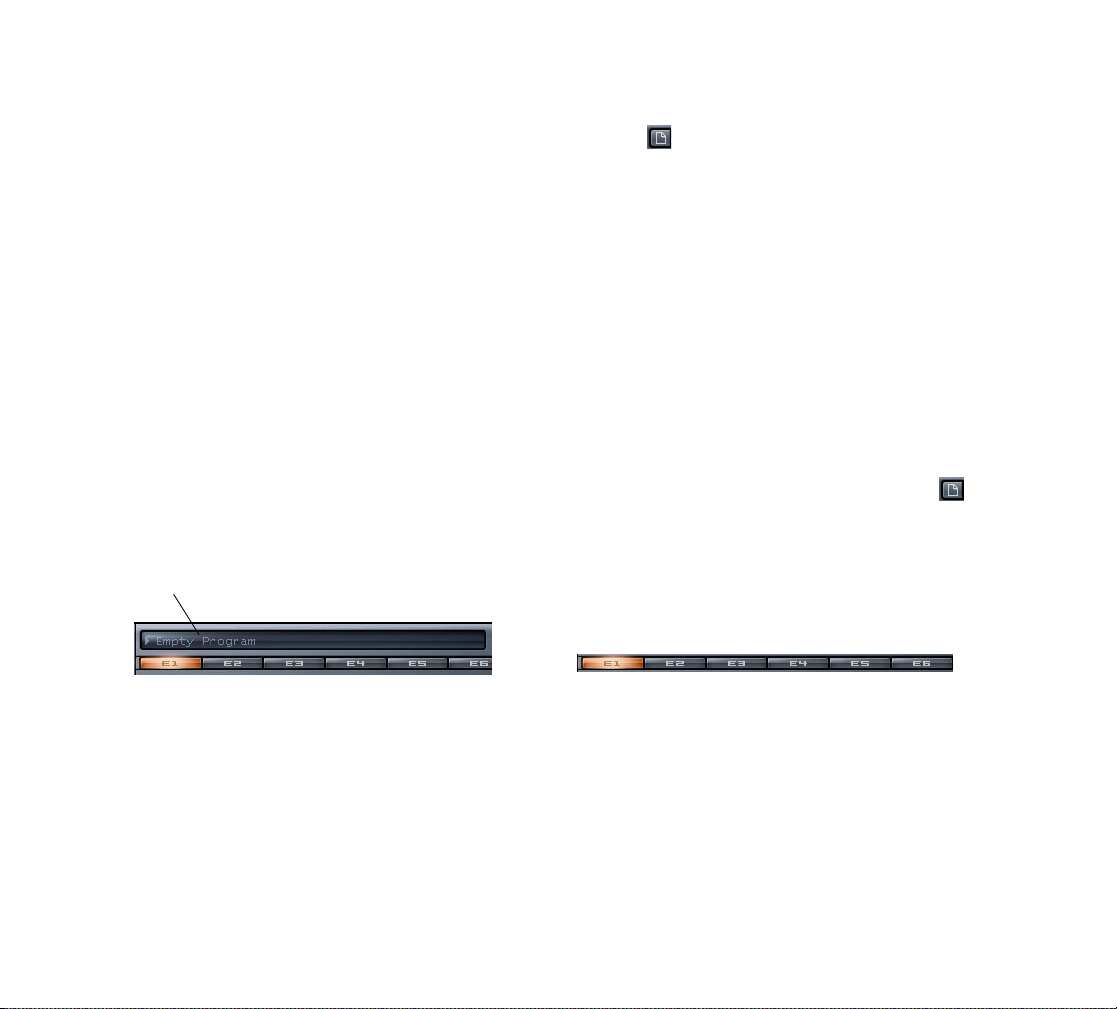
To Load a Program
1. Click the program window:
Click here
The Program Browser appears.
2. Navigate to the folder where the desired program is
located, and double-click the name of the program.
Close the Program Browser after you double-click the
program.
Rapture loads the program you double-clicked, and displays the program name in the program window.
Rapture allows you to create and load single element files.
An element file stores a single Element’s selected wavetable, modulators, EQ and insert effect settings as a disk
file with an .
reloaded and recombined to create new programs.
Loading an Element file does not change any settings in
the unselected Elements. If you wish to clear settings from
all Elements before loading any Element files, initialize the
program first by clicking the Program Handling button
and choosing Initialize Program from the popup menu.
ELEM extension. Element files can then be
To Load an Element
1. Right-click (Ctrl-click on a Mac) the Element button of
the Element that you want to load a sound into (E1,
E2, E3, E4, E5 or E6).
2. Select Load Element from the popup menu:
The Load Element dialog appears.
3. Navigate to the folder where the desired Element is
located, click the name of the Element, and click the
Open button.
10
Page 11
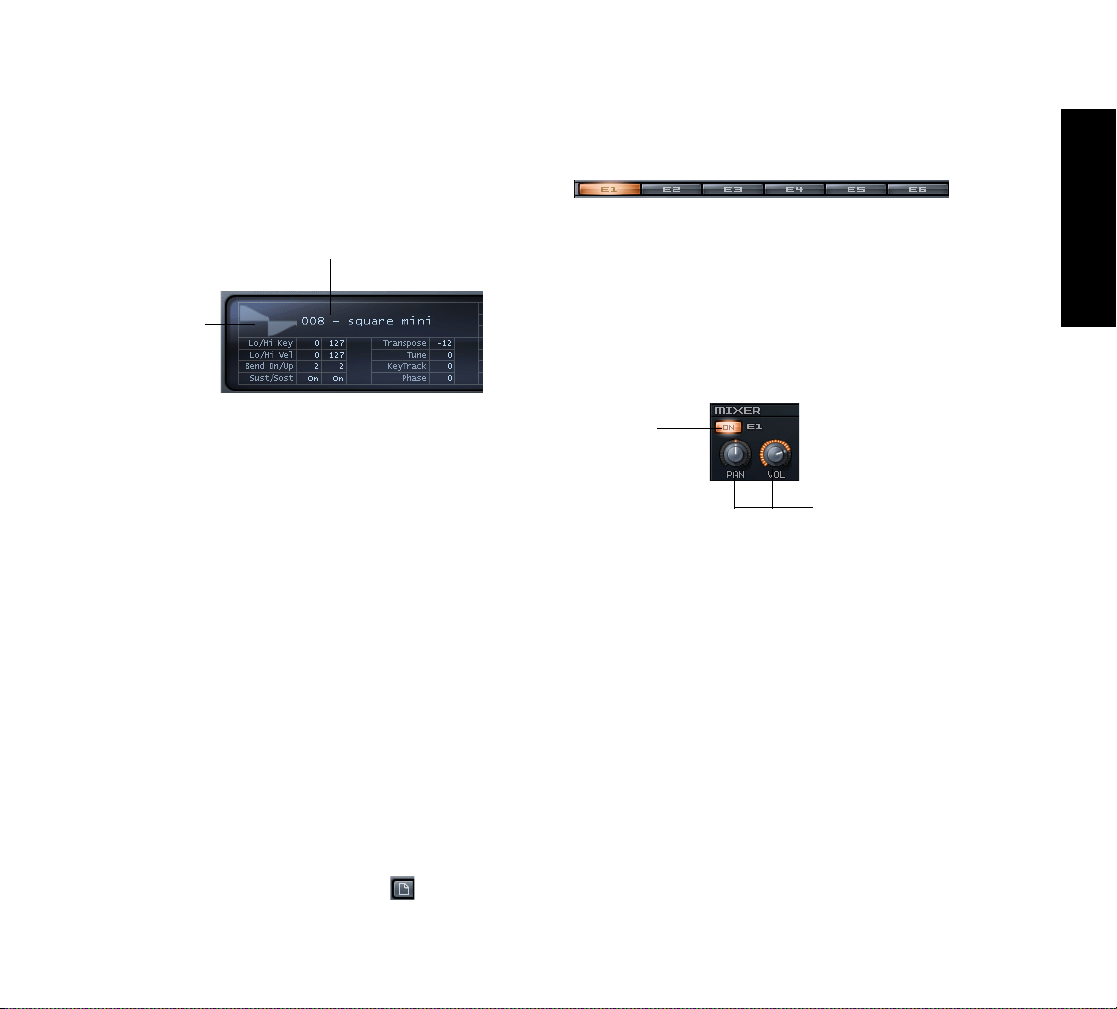
Rapture loads the Element you clicked and the Wavetable
Display window shows the name of the wave file used by
the wavetable oscillator. The graphic represents the singlecycle waveform used by the Oscillator to create a sustained sound.
Name of the selected wave file
Waveform display of
the single-cycle
wave file
You can also load an Element by selecting any of the files
in the Elements folder of the Program browser, or by drag
and dropping an .
Tip: When you left-click an Element button to view that
Element’s settings, you can switch to another Element by
pressing 1 through 6 on your computer keyboard (but not
the Num Pad).
ELEM file into the Rapture window
Combining and Mixing
Elements
If you want to combine different Elements into a new program, simply load up to six Elements and then save a new
program. This is valuable if you want to play different timbres at the same time: for example, you could double a
lead and a pad.
Here’s the procedure:
To Combine Elements into a New Program
1. Initialize the program to clear all sounds and effects:
click the Program Handling button and choose
Initialize Program from the popup menu (click Yes to
the All Current Settings Will Be Discharged prompt).
Click the E1 button to display the controls for Element 1.
2. Load an Element into Element 1: right-click (Ctrl-click
on a Mac) the E1 button, choose Load Element from
the popup menu, navigate to the desired Element,
select it and click the Open button.
3. Adjust any effects, filters, etc. for Element 1, and
make sure Element 1’s On button is enabled in the
Mixer section:
Click to turn
Element 1 on
or off
Click and drag to adjust Element
1’s pan and volume controls
You can also adjust each Element’s individual pan
and volume settings in the Mixer section.
4. Repeat steps 2 and 3 for any additional Elements you
want to combine for this program (for Element 2, click
button E2 to display the controls for Element 2, load
an Element into Element 2, adjust settings for
Element 2, and make sure Element 2’s On button is
enabled; for Element 3, click button E3, etc.).
5. When you’ve loaded and configured up to six
Elements, adjust the program’s master stereo mix in
the Master section.
English
11
Page 12
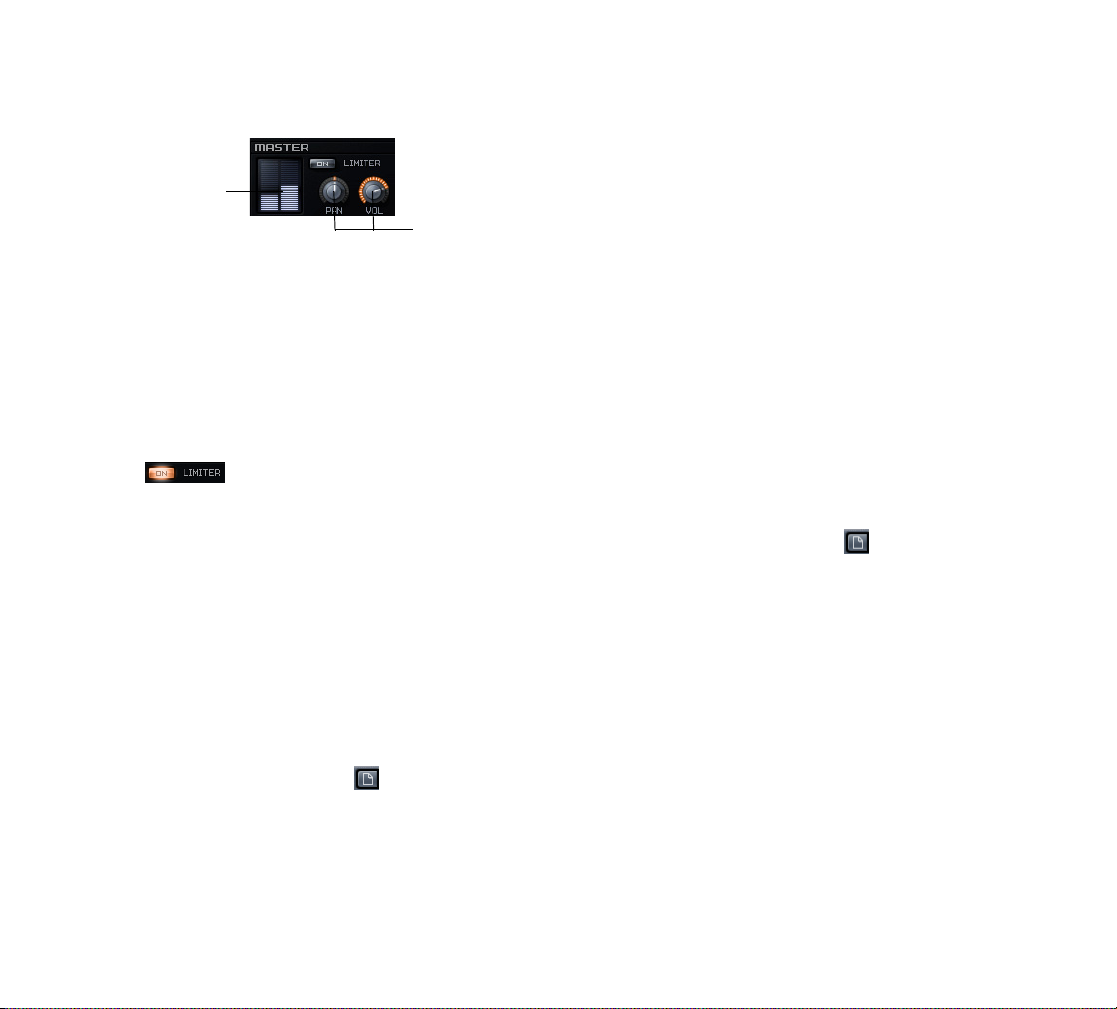
Stereo level meter
Master pan and
volume controls
These master controls, Pan and Volume, modify the
combined signal of all currently active Elements. The
level meter gives a visual indication of the Rapture’s
stereo output.
Note: If the levels are high and you want a hard
limiter applied to this program, enable the Limiter On
button in the Master section. The limiter will ensure
levels are always kept below digital zero (0 dB), which
is very useful for highly resonant or distorted sounds.
6. When the program sounds the way you want it, save
the program as described in the next section.
Saving Programs and Elements
Once you’ve configured a Program or an Element the way
you want it, you can save it to your Programs or Elements
folders. Rapture also allows you to set the program it will
automatically load every time a new Rapture instance is
inserted.
To Save a Program
1. When the program sounds the way you want it, click
the Program Handling button and choose Save
Program or Save Program As from the popup
menu.
2. If you chose Save Program, Rapture saves the
program under its current name in its current folder.
3. If you chose Save Program As, the Save Program
dialog appears: navigate to the folder where you want
to save the program, type a name for the program,
and click the Save button.
Rapture will automatically add the ‘.prog’ extension to
the program, and the program name display will be
updated to reflect the program name.
To Save an Element
1. When the Element sounds the way you want it, rightclick (Ctrl-click on a Mac) that Element button and
choose Save Element As from the popup menu. This
opens the Save Element dialog.
2. Navigate to the folder where you want to save the
Element, type a name for the Element, and click the
Save button.
To Save the Default Program
1. Load the program that you want Rapture to use when
you haven’t chosen a program.
2. Click the Program Handling button and choose
Save Default Program from the popup menu.
3. Click Yes when Rapture asks you if this is what you
want to do.
Rapture saves the current program as the default program.
Using Effects
Insert FX are available for each individual Element, and a
Program can contain both Global and Master FX. Each
category of effect (Insert, Global and Master) features the
same type of menu and parameter controls.
Here’s the procedure for adding a master effect to your
program:
12
Page 13

To Apply Master FX to a Program
1. Display the Global page by clicking the Global button.
To Use Rapture as a Multi-timbral Instrument
1. Load the program that you want to use as a multitimbral program.
The Master FX section is located just above the Mixer
section.
Click to choose an effect Parameter knobs
2. Choose an effect type by clicking the arrow in the FX
window and then choosing an effect from the popup
menu that appears.
3. Adjust the effect with the corresponding parameter
knobs.
For more information on effects, see “The Insert FX Section” on page 32.
Using Rapture as a Multitimbral Instrument
Each of the six Elements can function as a separate instrument, if you want to use a single instance of Rapture as a
six-part multi-timbral instrument.
2. Click the Options button . The Options dialog
appears.
3. Check the Set Program As Multi-timbral option, and
click OK.
4. Save the program, if you want to change it to a multitimbral program.
When a program is in Multi-timbral mode, the six Elements
respond to MIDI channels 1-6, respectively.
The Modulation Matrix
You can use the Modulation Matrix to virtually 'connect' different modulation sources to several parameters. The
Modulation Matrix expands the control and performance
behavior of a program
To Assign a Modulation Source to a Rapture
Parameter (Modulator Destination)
1. Display the Modulation Matrix by clicking the Show/
Hide Modulation Matrix button .
2. In the Source column, click the arrow at the left side
of the column to open the Modulation Source menu.
3. Pick a Modulation Source that you want to use to
control a Rapture parameter.
4. In the Destination column, click the arrow at the left
side of the column to open the Destination menu (a
list of Rapture parameters).
5. Click the Rapture parameter that you want to control
with the Source you chose in the left column.
English
13
Page 14
6. In the Depth column, drag up or down to enter a
number that controls how strongly and in which
direction the parameter responds to changes in the
source (negative numbers produce an inverse
relationship).
7. In the Smooth column, drag upward to produce a
number that smooths out the response of the
Destination to the Source.
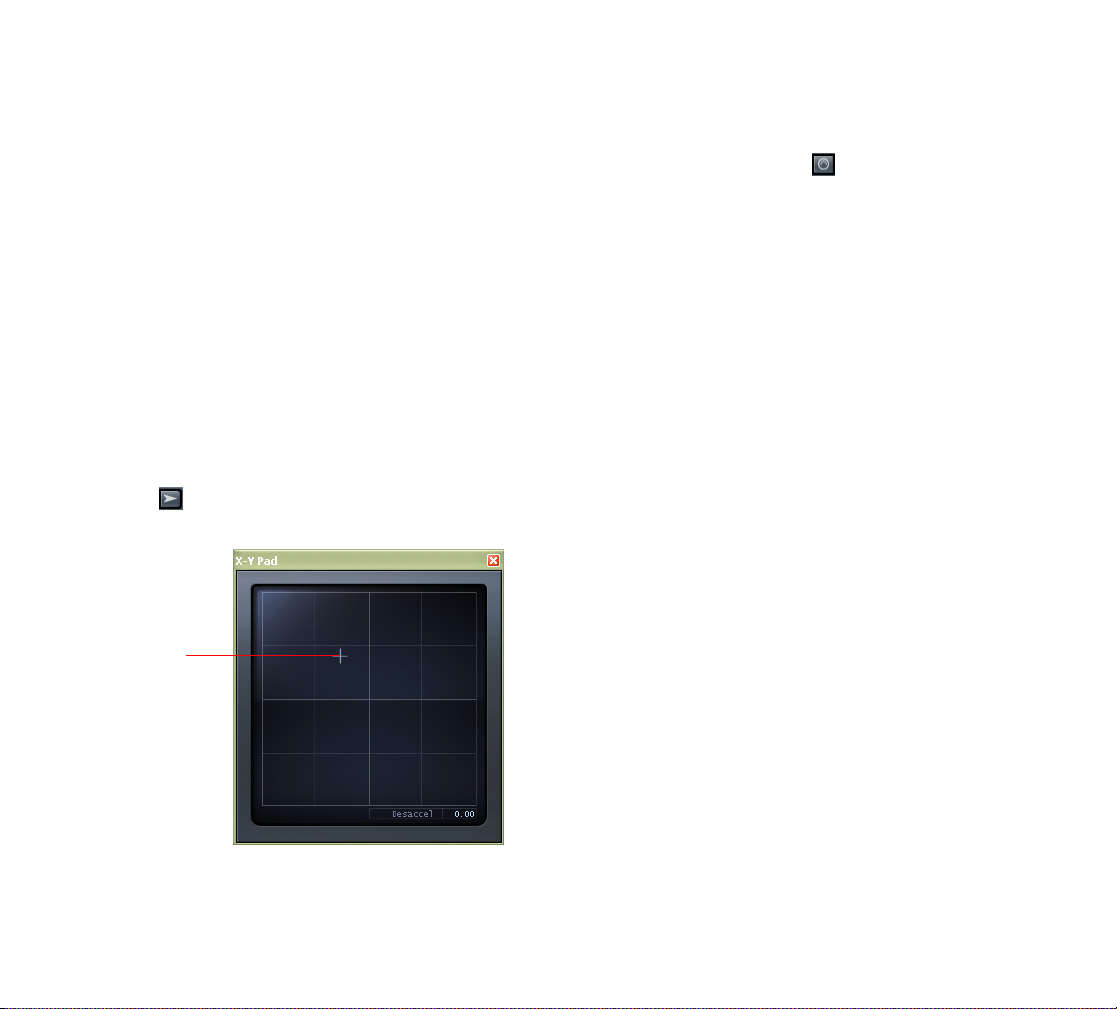
The X/Y Pad
This X/Y Pad is used to adjust assigned synth parameter
levels by dragging the X/Y crosshair around the pad.
Parameter levels rise and fall as you move the crosshair.
The Desaccel field allows you to slow down the response
of the cross hair—higher values cause a slower response.
Open the X/Y Pad by clicking the Show/Hide Vector Mixer
button .
Cross hair
To Assign Parameters to the X/Y Pad
1. Display the Modulation Matrix by clicking the Show/
Hide Modulation Matrix button .
2. In the Source column, click the arrow at the left side
of the column to open the Modulation Source menu.
3. From the Source menu, select X/Y Pad X or X/Y Pad
Y.
4. In the Destination column, click the arrow at the left
side of the column to open the Modulation Destination
menu.
5. From the Destination menu, select any of the
available synth parameters.
The X/Y Pad will now control the selected parameters. You
can assign as many parameters to the X/Y Pad as space
provides in the Modulation Matrix.
14
Page 15

The Interface and Controls
In This Chapter
The Interface. . . . . . . . . . . . . . . . . . . . . . . . . . . . . . . . . . . 16
The Interface’s Controls . . . . . . . . . . . . . . . . . . . . . . . . . . 18
English
Page 16

The Interface
The Main Interface
Program name and
browser launcher
Oscillator/Editor
section
Envelope Generator
(EG) and LFO
section
Step Generator
EQ section
Insert FX section
Mixer section
The main Rapture interface consists of three areas:
• Program area (top)
In this area we can find the program selector/loader,
and the buttons for Program Handling, Options, the
Modulation Matrix and the X/Y Pad.
The Modulation Matrix and X/Y Pad are deployable
windows. In the Modulation Matrix window, all
Element selection
buttons and Global
page button
Filter/Drive section
Master output
section
modulation assignments for the current preset are
defined. The X/Y Pad allows you to control synth
parameters .
• Elements area (middle)
This area has an horizontal selector button to choose
the Element for editing (1-6), plus all the Element
components like the EQ and Step Generator.
16
Page 17

• Mixer/Master area (bottom)
This area has the mixer controls for the six elements,
as well as master controls to adjust the final stereo
mix.
The Global Page
Program name and
browser launcher
Global FX 1
Global FX 2
Global Step
Generator
Master EQ section
Master FX section
Rapture also has a Global page with settings for Global
and master FX. Access the Global page by pressing the
Global button next to the Element selection buttons.
English
Global page button
Mixer section
Master output
section
17
Page 18
The Interface’s Controls
All the functions in Rapture are performed by the following
controls:
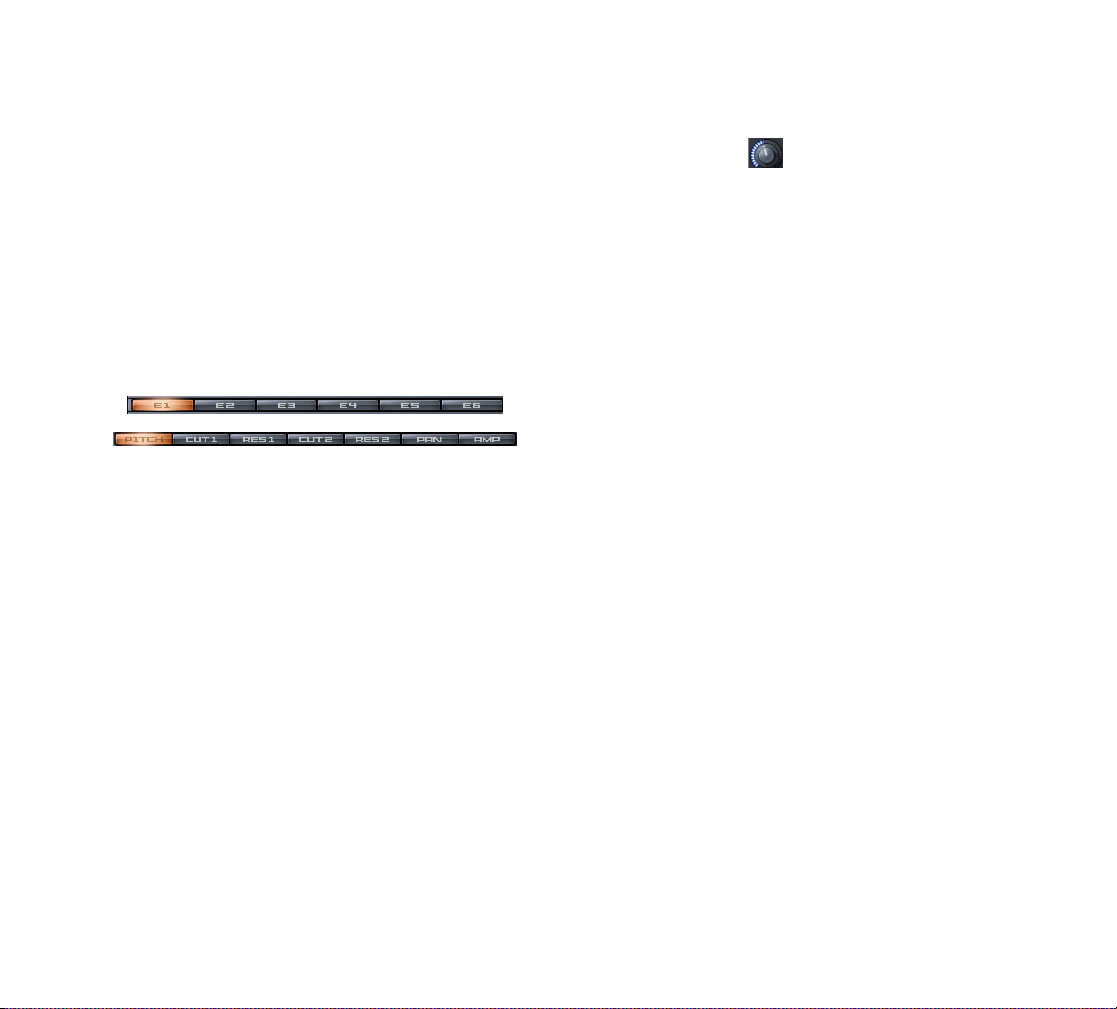
Horizontal Selectors
The horizontal selectors are always in the header of a section, and are used to choose a ‘page’ for editing in a multiple-page context.
They’re used to select the main component page (Element
1-6, Global), and the Modulator page (Pitch, Cutoff 1 & 2,
Resonance 1 & 2, Pan and Amplitude).
To Use Horizontal Selectors
• Direct Clicking or Clicking and Dragging can be used
to select each page in the Horizontal Selectors.
• If a horizontal selector is ‘active’, it will receive
keystrokes. Number keys can be used to select each
page when active.
Knobs
Parameters that are continuously variable and suited for
automation are controlled by knobs. The knobs in Rapture
can be operated by mouse movements, mouse wheel,
keyboard, or MIDI messages.
When a parameter is not active (if the whole section is off,
for instance), the knob will become semi-transparent. If a
knob is operated when in this status, the parameter will be
adjusted. However, there won’t be any change to the
resulting sound.
To Use Knobs
• Hovering the mouse over the knob for a moment
(without clicking on it) will make a tooltip appear,
displaying the currently selected element, the
parameter name and the current parameter value.
• Clicking on the knob, then moving the mouse
vertically will adjust the parameter value. A tooltip will
show the parameter value for current adjustment.
• Double-clicking on the knob will set the parameter to
its default value (the ‘natural’ value for each
parameter).
• After a knob is clicked (or double-clicked), it becomes
‘active’. When a knob is active, it receives mouse
wheel messages and keystrokes.
• The mouse wheel will change the parameter value in
± 5% steps for the active knob. If the Shift key is
down while moving the wheel, the knob will move in ±
1% steps, allowing for more precise adjustment.
Tooltips will display the parameter value for mouse
wheel messages as long as the mouse cursor is over
the knob. Knobs won’t generate interpolated values
on mouse wheel.
18
Page 19
• If a knob is ‘active’, it will receive keystrokes. The
following keys can be used to change the parameter
value:
Key... Change...
Left, Right arrow ± 0.1%
Up, Down arrow ± 1%
Home Minimum
End Maximum
Tooltips will display the parameter value for mouse wheel
messages as long as the mouse cursor is over the knob.
Knobs won’t generate interpolated values on keystrokes.
Buttons
Buttons are used to turn on/off a component.
• The Up/Down selectors are controlled in the same
way as the knobs: clicking on it and moving the
mouse vertically. However, adjusting an Up/Down
selector won’t result in interpolated values. A tooltip
will show the parameter value for current adjustment.
• Like the knobs, after an Up/Down selector is clicked,
it becomes active. The font color will change to
orange when in that status.
• When a text selector is active, it can receive mouse
wheel messages and keystrokes.
• Since many parameters represented by Up/Down
selectors have broad ranges, and at the same time
they require precise adjustments, the following
modifiers can be used to achieve different speed/
resolution changes while using the mouse:
Modifier... Change...
Shift Small steps
(small parameter movements,
increased resolution)
English
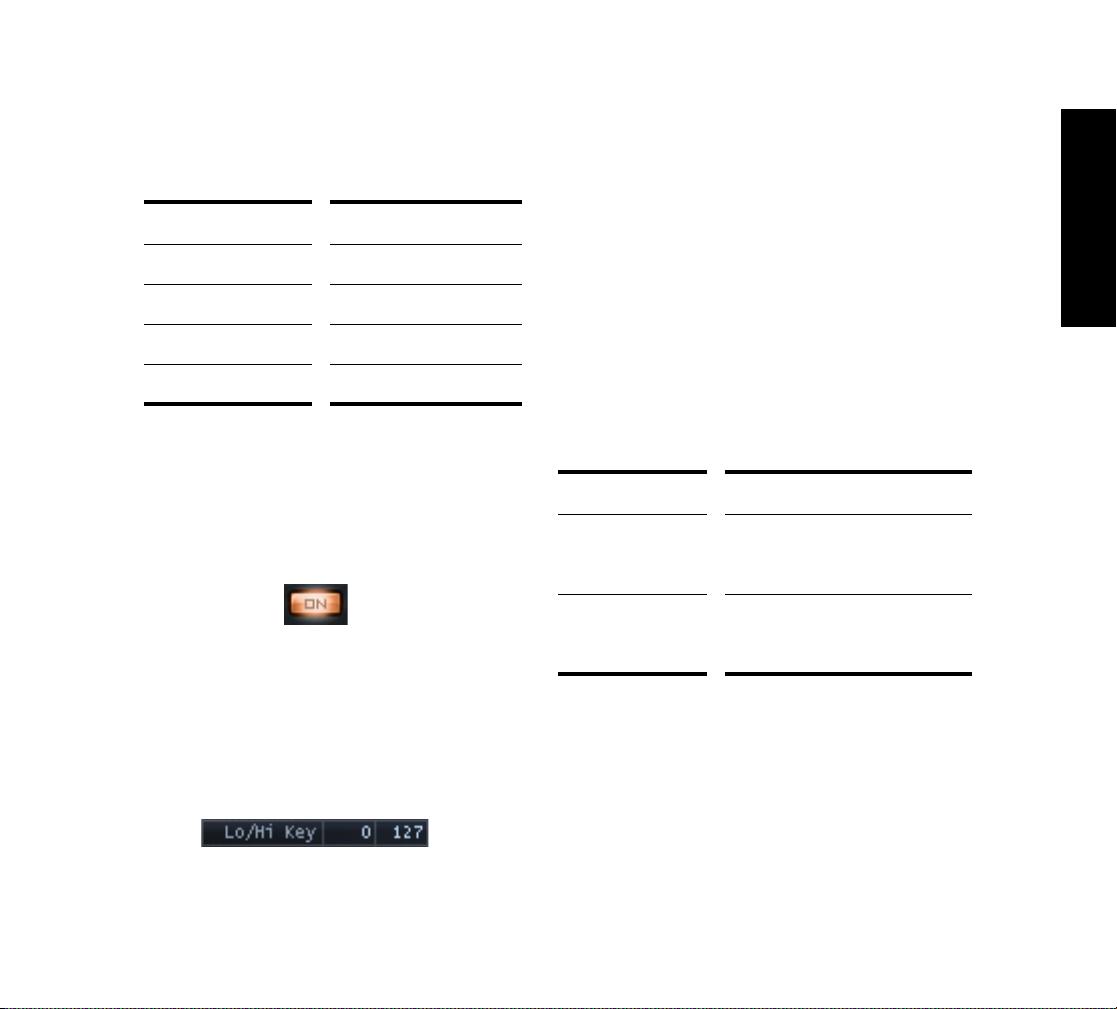
Clicking on a button will turn the component on/off, and the
button image will reflect the status.
Up/Down selectors
Parameters with numerical values, not suitable for automation are controlled via Up/Down selectors. An example of
this type of parameters is the Low and High Keyboard Note
for any Element, in the Oscillator control display.
Control
(Command on a
Mac)
• The range and step size for each parameter is shown
in the ‘Parameter Ranges’ table. See “Appendix A:
Parameter Reference” on page 51.
Big steps
(big parameter changes, reduced
resolution)
19
Page 20
• If an Up/Down selector is active, it will receive
keystrokes. The following keys can be used to
change the parameter value:
Key... Parameter Value...
When a Text Selector is clicked, it becomes active. The
font color will change to orange when in that status.
When a text selector is active, it can receive mouse wheel
messages and keystrokes. The following keys can be used
to change the parameter value:
Up/Down Arrows Next/Previous parameter value.
Standard Steps.
Page Up/Down Step forward/backward 10 steps
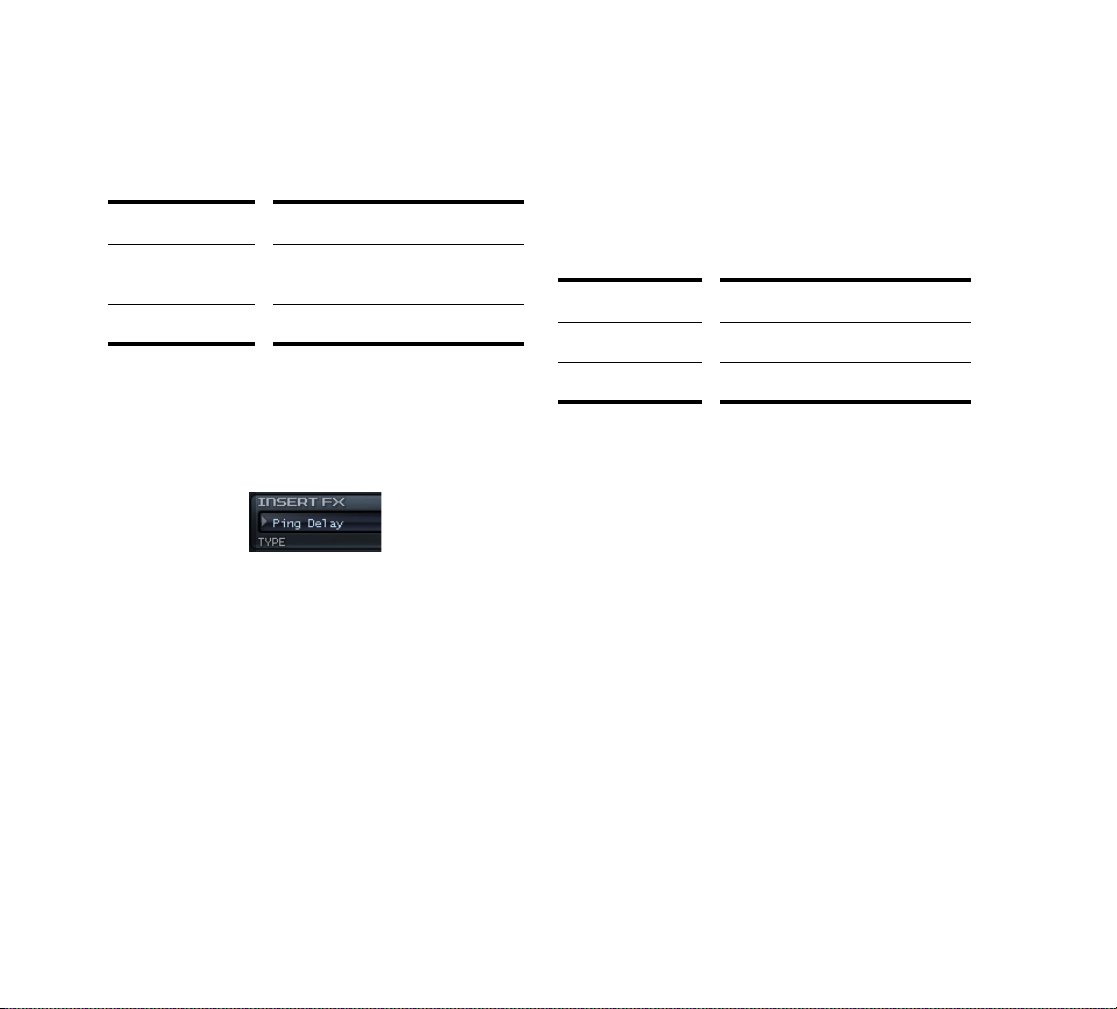
Text Selectors
The text selectors are used to choose a value for parameters that have multiple options, non-numerical. An example
of this kind of parameter is the Insert FX Type.
A text selector will advance to next/previous value when
the display text is left/right clicked (left click/Control+click
on a Mac).
Key... Change...
Up/Down Arrows Next/Previous parameter value
Page Up/Down Step forward/backward 10 steps
Tip: Many text selector values can also be accessed via a
menu. Click the gray triangle to the left or right of a text
selector to view available options in a popup menu.
Envelope, Step Generator, LFO Waveform and
Key Tracking controls
The Modulators section includes special controls to set the
Envelope Generators, Step Generator, the LFO Waveforms and the Keyboard Tracking. For precise details on
how to operate those controls, see “The Modulators Section” on page 36.
20
Page 21

Main Functions
In This Chapter
Programs, Elements and Audio Files . . . . . . . . . . . . . . . . 22
Loading Samples . . . . . . . . . . . . . . . . . . . . . . . . . . . . . . . 23
Copying, Unloading, and Resetting Elements . . . . . . . . . 26
The DSP Section . . . . . . . . . . . . . . . . . . . . . . . . . . . . . . . 27
Using the EQ’s . . . . . . . . . . . . . . . . . . . . . . . . . . . . . . . . . 32
The Insert FX Section . . . . . . . . . . . . . . . . . . . . . . . . . . . . 32
The Modulators Section . . . . . . . . . . . . . . . . . . . . . . . . . . 36
The Modulation Matrix . . . . . . . . . . . . . . . . . . . . . . . . . . . 46
MIDI Learn . . . . . . . . . . . . . . . . . . . . . . . . . . . . . . . . . . . . 47
The Mixer . . . . . . . . . . . . . . . . . . . . . . . . . . . . . . . . . . . . . 48
Microtuning and Alternative Tunings. . . . . . . . . . . . . . . . . 49
Sinc Interpolation . . . . . . . . . . . . . . . . . . . . . . . . . . . . . . . 50
English
Page 22

The following sections describe the advanced functionality
of Rapture and other details not covered in the introductory
topics.
Programs, Elements and Audio
Files
As described in the Getting Started chapter, a Rapture program has six Elements at its disposal, making for sophisticated sound programming potential. A program consists of
the settings for these six elements, including references to
the wavetables used by all oscillators, and all global settings.
File Organization
After installation, the following folders will be created inside
the Rapture folder:
Multisamples\ Multisamples folder
All factory wavetables,
multisample definitions and
sample collections.
Programs\ Programs folder
All factory presets/programs.
Rapture will point to this folder on
Save…Program.
Programs\Elements\ Elements folder
All factory elements. Rapture will
point to this folder on
Save…Element.
Sample Pool\ Sample Pool folder
Project/Demo song specific
samples.
File/Folder... Stores...
Documentation\ Documentation folder
Release Notes, User Manual and
Registration information.
Lfo Waveforms\ Lfo Waveforms folder
All factory LFO waveforms. Userdefined waverforms can be
stored here as well.
MIDI\ MIDI folder
All MIDI Learn data.
22
Tunings\ Tunings folder
All microtuning and alternate
tuning files.
Program Files
Program files (.prog) can be anywhere in the disk or network. The ‘Programs\’ folder was created for organizational purposes, but the user can save a program
anywhere.
Program files are not required for the Song Persistence to
work. A copy of the program file is saved as persistence,
and it’s reloaded on song reload.
This means each song will include a ‘snapshot’ of the used
programs in the moment the song was last saved. This
allows you to preserve old songs and their settings even if
factory programs are updated in the future.
Page 23

Elements
Rapture can save and load individual Elements to file. The
idea here is making an ‘Element Set’, capable of serving
as ‘quick construction kit’ for new programs. An element
file contains all settings for an element, including the
wavetable and oscillator parameters, with all modulators
and DSP settings applied.
Tip: Elements stored in the default Elements folder can be
loaded directly via the Program Browser. Launch the Porgram Browser and navigate to the Elements folder to make
your selection. Loading an Element in this way will not
affect the other Elements within the program.
Audio Files
Rapture specializes in using single-cycle audio files to
define wavetables, driving the Oscillator for wavetable synthesis. However, Rapture allows a variety of other audio
file types to be loaded as well. Unlike Program files, audio
SFZ, .WAV, .AIF, .AIFF, .OGG) are not included in the
files (.
Song Persistence. Therefore, songs will be affected by any
changes to the original audio source.
Additionally, the samples are external standard wave files
which can be edited using a standard wave editor. Consequently, this warning is here: if a multisample definition file
is edited, and/or a sample file is edited, the old song might
sound different after reloading it if it happens to use the
edited files.
Samples
If a sample defined inside an .sfz definition file is missing,
Rapture will try to load it from the original location on Program/Song reload.
If that wave file isn’t in the original location, Rapture will try
to find it in the Sample Pool folder. This simplifies exchanging sample files between users.
Rapture will report every sample it can’t find after above
attempts fail.
Loading Samples
You can load single samples (Wave or AIFF files), or multisamples, (SFZ files) which already contain key mapping
and velocity switching assignments. You can load samples
in any bit depth and sample rate, in mono or stereo, in
looped or unlooped format. Wave and AIFF files can be
loaded directly, or as a sample inside an SFZ definition file.
Samples can be of any bit depth (8 to 32-bit), any samplerate, and either mono or stereo. Each sample in a multisample can be a standard PCM Windows wave file (.
an Apple audio format (.
standard, high-quality, open and royalty-free ogg-vorbis
OGG). Those files can also be loaded directly into
format (.
an Element.
Alternatively, it is possible to open multisample definition
files (.sfz) or individual samples by drag and dropping them
into Rapture window. The sample will be loaded into the
selected element.
Tip: If a multisample or individual sample (even samples
inside a multisample) is loaded more than once, across
multiple elements, or multiple instances of Rapture, the
sample will exist in memory only once. The size indicated
for the second and subsequent instances will be zero,
which boosts memory efficiency.
Loading a sample or multisample does not clear the effects
that may be patched into Rapture at the time of loading. If
you want to clear all effects first, initialize the program by
clicking the Program Handling button and choosing
Initialize Program from the popup menu.
A multisample consists of a group of samples, their key
mapping, and velocity switching. If you want to change key
mapping and/or velocity switching, you can edit each multisample’s .sfz file, which is found in the multisample folder
along with the multisamples. You can use Notepad to edit
a .sfz file. The .sfz format is explained at http://www.rgcaudio.com/sfzformat.htm.
AIFF) or a compressed file in the
WAV),
English
23
Page 24
Note: Rapture can read .sfz files in Unicode (little or big
endian), UTF-8 and ANSI. Inside unicode/utf files, any
character set can be used in the definition of folder and
filenames. It is possible to install Rapture in a unicodenamed folder.
To Load a Wavetable or Sample
1. Click the Wavetable Display window to open the Load
Multisample dialog, and navigate to the folder where
the desired wavetable or sample is located.
Wavetable Display window
Waveform
Note: Rapture streams samples from RAM, so only
samples under a minute in length are suitable for
loading, depending on the amount of RAM in your
computer. Playback of a stereo sample will use more
CPU than a mono sample, but less CPU than two
mono samples.
2. Click the name of the wavetable or sample, and click
the Open button.
Or
• Drag a wave file from the Windows Explorer or the
MacOS Finder to Rapture’s Oscillator section.
Tip: You can navigate forwards and backwards through
wave files in the current wave directory without opening a
browse dialog by left-clicking or right-clicking (Ctrl-click on
a Mac) the waveform in the Wavetable Display window.
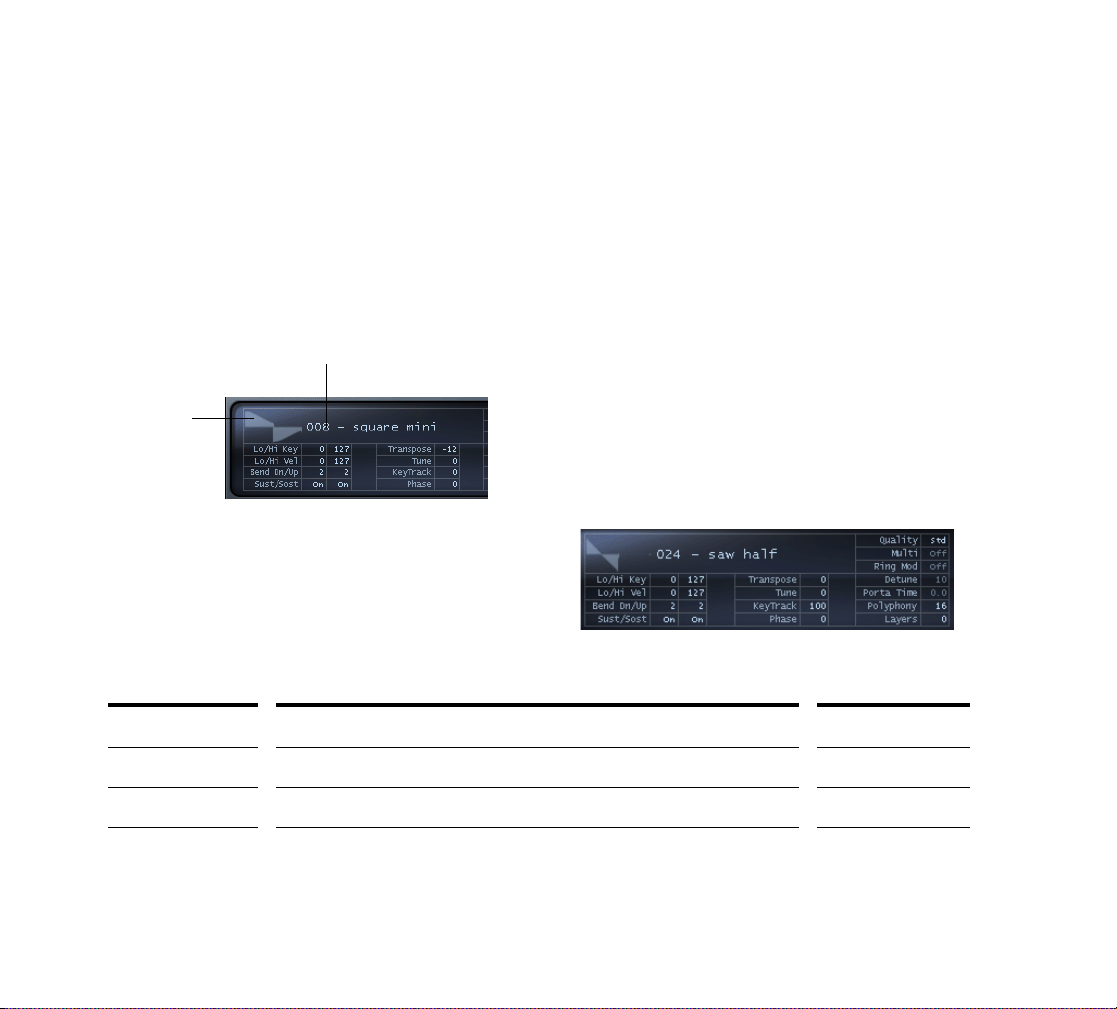
Editing Oscillator Controls
Once the wavetable is loaded into the Element, you can
adjust a number of mapping, tuning, and performance
parameter. The following controls are located in the Oscillator section:
Control... Does This... Value Type...
Lo/Hi Key Changes the range of notes that the element will play. Note Number
Lo/Hi Vel Changes the velocity range that the element will play. Velocity Value
Bend Up/Down Changes the pitch bend range. Semitones
24
Page 25

Sust/Sost Changes whether the element responds to MIDI Sustain data (cc # 64), or
MIDI Sostenuto (cc # 66).
Transpose Changes the pitch (keyboard mapping is unaffected). Semitones
Tune Adjusts the pitch in one-cent increments, up or down. Cents
Keytrack Changes the pitch variation for each note, in cents. Cents per Key
Off/On
English
Phase Adjusts the initial phase of the waveform, from 0 to 360 degrees, when a
MIDI Note On event arrives.
It is possible to create complex sound textures by combining waveforms
in two oscillators with different starting phases.
Quality Defines how the wavetable rendering quality.
"Standard" should be used when no exposed pitch sweeps are performed
with that oscillator. "High" will perform a high-order partial-level
interpolation, allowing huge pitch sweeps without audible aliasing.
Multi Turns the currently loaded wavetable into multiple oscillators (voices),
spread across the stereo field at even distributions and with different
detuning levels.
Note that the detuning level is regulated by the Detune control.
Ring Mod Changes the oscillator into TWO oscillators which ring modulate each
other. For more information, see “Ring Modulation” on page 27.
Note that the detune level between both oscillators is regulated by the
Detune control.
Detune Applied to the most-detuned oscillators when in Multi or Ring Mod mode;
the middle oscillators are interpolated from that value. The Detune range
is one semitone, or 100 cents.
Porta Time Forces pitch glide when polyphony is set to 0 (monophonic/legato mode).
Value ranges from 0 to 10 seconds.
Degrees
Std/Hi
Off, 3v, 5v, 7v, 9v
On/Off
Cents
Seconds
25
Page 26

Polyphony Sets the polyphony for the element. Setting Polyphony to 1 puts that
Element in monophonic mode, setting it to 0 puts that Element in
monophonic and legato mode.
Notes
Layers Shows what sample layer is currently playing. Rapture defines a Layer as
Tip: The Multi and Ring Mod controls are suitable for much
higher detuning factors, if extreme effects are wanted. Further detuning is available via the Modulation Matrix.
Copying, Unloading, and
Resetting Elements
If you right-click (Control-click on a Mac) an Element button (E1 through E6), a popup context menu appears,
which contains the following commands:
• Unload Element—removes the multisample from the
multisample window without removing parameter
settings.
• Reset Element—removes the multisample from the
multisample window and removes all parameter
settings.
• Copy Element—places all information from current
Element, including multisample assignments and all
parameter settings, on the clipboard.
• Paste Element—pastes copied Element data from the
clipboard to the current Element: to paste, right-click
(Control-click on a Mac) the Element button of the
Element that you want to paste to, and select Paste
Element from the popup menu.
the playback for one sample, either mono or stereo.
• Paste Element Fx—pastes only Insert Fx settings
from a copied Element to the current Element.
Remember, only one Element can be selected and edited
at a time. Read on for details about the remaining Element
context menu items.
Chaining Elements
Sometimes a program requires two different wavetables to
be processed with their own LoFi, Filter and Drive settings,
but with the same EQ and effects applied to both.
The result of that operation is the same as mixing the two
elements and then applying the EQ and effects on the mix.
However, the CPU usage in the latter is much lower, since
only one set of effects is operational.
Rapture allows you to ‘chain’ the output of one element
into the effects of the next, for the first five elements. Chain
to Next Element is in the last section of the Element context menu. Re-select this menu item to unchain the elements.
This field is display
only, 0 to INF.
26
Page 27
Ring Modulation
“Modulation” in this sense means that an aspect of the
audio signal is being modified in an explicit way using digital signal processing. Ring Modulation is a process in
which two audio signals are used to create a new signal
containing the sum and differences of those frequencies.
These frequencies will typically be non-harmonic, resulting
in rather disharmonic, bell-like sounds.
Mathematically, the resulting frequency is the sum and the
difference of the input frequencies, or the 'sidebands'
where the upper sidebands are the sums and the lower
sidebands are the differences. Use Rapture’s Detune
parameter in either the Oscillator section or the Modulation
Matrix (destination Detune), to control the modulation
amount.
Rapture offers the Ring Modulate Previous Elements
option in the Element context menu. When this menu item
is checked, the current Element will ring-modulate the output of all previous elements.
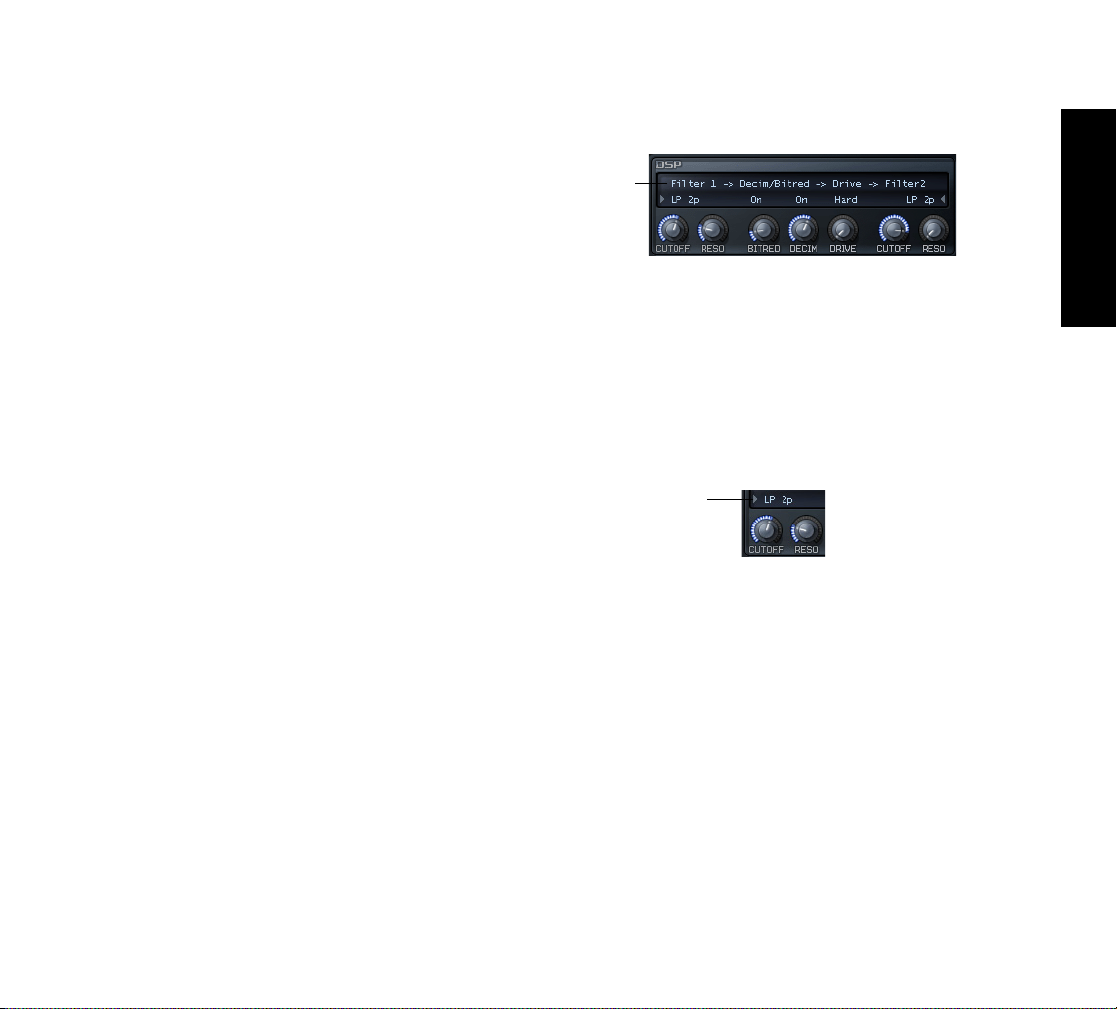
The DSP Section
Click to change
the order of
DSP processes
English
Using the Filters
The DSP section provides two multimode filters. This is
useful for filter effects, such as combining low-pass and
high-pass frequency filters or using two separate bandpass
filters. Rapture’s filters provide a wide selection of filter
types, which you choose from the dropdown menu:
Choose filter types here
The DSP section of Rapture contains Filter, Drive and LoFi
parameters. Independent controls are provided for two Filters, the LoFi module, and the Drive module. The order of
these processes can be altered, thereby modifying the signal path and the resulting sound.
To Reorder the DSP Chain
• Click on the signal path above the controls to cycle
through the available reordering options or to Bypass
the section entirely. Left-click or right-click (Ctrl-click
on a Mac) on the signal path to iterate forwards or
backwards respectively.
The dropdown menu has the following choices:
27
Page 28

Filter... Description...
LP1P Low Pass, One-Pole filter (6dB/octave roll-off). Allows passing all frequencies below the specified by
the Cutoff knob. Above that frequency, there’s a 6dB/octave roll-off, very gentle.
This filter doesn’t feature resonance.
HP1P High Pass, One-Pole filter (6dB/octave roll-off). Allows passing all frequencies above the specified by
the Cutoff knob. Below that frequency, there’s a 6dB/octave roll-off, very gentle.
This filter doesn’t feature resonance.
BP1P Band Pass composed of two One-Pole LP and HP filters in series (6dB/octave roll-off). Allows
passing all frequencies in the neigborhood of the specified by the Cutoff knob. Above and below that
frequency, there’s a 6dB/octave roll-off, very gentle.
BR1P Band Rejection composed of two One-Pole HP and LP filters in series (6dB/octave roll-off). Allows
AP1P All Pass, One-Pole filter.
LP2P Low Pass, Two-Pole filter (12dB/octave roll-off).
passing all frequencies except the ones in the neigborhood of the specified by the Cutoff knob.
Surrounding that frequency, there’s a 6dB/octave roll-off, very gentle.
This filter doesn’t feature resonance.
This filter is used to introduce sub-sample delay times.
This is useful when phase aligning samples between different elements.
This is a very subtle effect.
This filter allows passing all frequencies below the specified by the Cutoff knob. Above that
frequency, there’s a 12dB/octave roll-off in amplitude.
This filter features resonance, which is a boost of the frequencies surrounding the cutoff frequency.
Resonance can dramatically increase the loudness. Please make sure you have the main Limiter
turned on when editing programs with high resonance.
28
Page 29

HP2P High Pass, Two-Pole filter (12dB/octave roll-off).
This filter allows passing all frequencies above the specified by the Cutoff knob. Below that
frequency, there’s a 12dB/octave roll-off in amplitude.
This filter features resonance, which is a boost of the frequencies surrounding the cutoff frequency.
Resonance can dramatically increase the loudness. Please make sure you have the main Limiter
turned on when editing programs with high resonance.
BP2P Band Pass, Two-Pole filter (12dB/octave roll-off).
This filter allows passing all frequencies around the specified by the Cutoff knob. Below and above
that frequency, there’s a 12dB/octave roll-off in amplitude.
This filter features resonance, which is a boost of the frequencies surrounding the cutoff frequency.
High resonance settings on a band pass filter result in a narrow output bandwidth. For most sounds,
this is percieved as a reduced loudness. However, if the incoming sound frequency matches the filter
cutoff, a dramatically high loudness is expected. Please make sure you have the main Limiter turned
on when editing programs with high resonance.
BR2P Band Rejection, Two-Pole filter (12dB/octave roll-off).
This filter allows passing all frequencies except the ones around the specified by the Cutoff knob.
Surrounding that frequency, there’s a 12dB/octave roll-off in amplitude.
English
PK2P Peak Filter. This filter will reinforce the Cutoff frequency by 6dB, and the surrounding frequencies with
a slope of 12dB/octave.
The width of the peak is adjusted with the Resonance knob.
LP4P Low Pass, Four-Pole filter (24dB/octave roll-off).
This filter allows passing all frequencies below the specified by the Cutoff knob. Above that
frequency, there’s a 24dB/octave roll-off in amplitude.
This filter features resonance, which is a boost of the frequencies surrounding the cutoff frequency.
Resonance can dramatically increase the loudness. Please make sure you have the main Limiter
turned on when editing programs with high resonance.
29
Page 30

HP4P High Pass, Four–Pole filter (24dB/octave roll-off).
This filter allows passing all frequencies above the specified by the Cutoff knob. Below that
frequency, there’s a 24dB/octave roll-off in amplitude.
This filter features resonance, which is a boost of the frequencies surrounding the cutoff frequency.
Resonance can dramatically increase the loudness. Please make sure you have the main Limiter
turned on when editing programs with high resonance.
LP6P Low Pass, Six-Pole filter (36dB/octave roll-off).
This filter allows passing all frequencies below the specified by the Cutoff knob. Above that
frequency, there’s a 36dB/octave roll-off in amplitude.
This filter features resonance, which is a boost of the frequencies surrounding the cutoff frequency.
Resonance can dramatically increase the loudness. Please make sure you have the main Limiter
turned on when editing programs with high resonance.
HP6P High Pass, Six–Pole filter (36dB/octave roll-off).
This filter allows passing all frequencies above the specified by the Cutoff knob. Below that
frequency, there’s a 36dB /octave roll-off in amplitude.
This filter features resonance, which is a boost of the frequencies surrounding the cutoff frequency.
Resonance can dramatically increase the loudness. Please make sure you have the main Limiter
turned on when editing programs with high resonance.
PINK Multiple Knee filter, composed of multiple Low Pass, One-Pole filters.
This is a static filter, generally used to create pink noise. When applied to sample material it has the
effect of creating a slight darkening on the tone, without affecting the sound character at all.
COMB Comb filter.
A comb filter creates several frequency ‘notches’, which color the sound in a particular way.
30
Page 31

Using the LoFi Module
Rapture’s LoFi module contains a bit reduction effect and a
decimation effect that you can apply to the current Element.
The bit reduction effect emulates the sound of older, low
bit-resolution samplers. The decimation effect continuously
adjusts the sample rate.
When placed after a Filter in the signal path, the Drive
module allows you to ‘tame’ high resonance filter settings,
create a broken, distorted sound, or add some character to
a sound, depending which drive mode is selected:
Mode... Description...
Off Effect bypassed.
English
To Use Bit Reduction
1. Enable the On button that’s above the Bit Red knob.
2. Adjust the Bit Red knob between 0 and 100% to
achieve the desired sound.
To Use Decimation
1. Enable the On button that’s above the Decim knob.
2. Adjust the Decim knob between 0 and 100% to
achieve the desired sound.
Using the Drive Module
Rapture’s Drive module adds various overdrive effects,
which you choose from the dropdown menu. The Drive
knob adjusts the shape of the selected effect.
Click here to toggle through overdrive
types or Off
Drag knob to adjust
Drive Shape
Tube Very soft effect.
A shaping process like the one found
in tube amplifiers is applied.
Soft Slight overdrive.
Mid Mid overdrive.
Hard Aggressive overdrive effect, ideal to
be applied on solo lead instruments
Asymmetric Bright distortion effect.
31
Page 32

Using the EQ’s
The Insert FX Section
Rapture’s three EQ modules give you tremendous control
over the sound of each Element.
Each EQ has the following controls:
EQ On button
Lo shelf
• On button—enable this button to use the EQ.
• Low shelf button—when this button is enabled, the
EQ modifies all frequencies below the Freq knob
value.
• Band pass button—when this button is enabled, the
EQ modifies all frequencies surrounding the Freq
knob value.
• High shelf button—when this button is enabled, the
EQ modifies all frequencies above the Freq knob
value.
• Gain knob—turn this knob to the left to cut the
selected frequencies by up to 24 dB, or to the right to
boost by up to 24 dB.
• Freq knob—turn this knob to select a frequency
between 8 and 22480 Hz.
• Q knob—turn this knob to the left to narrow the range
of affected frequencies, or to the right to widen the
range.
Band pass
Gain
Frequency
Q
High shelf
Each element in Rapture contains an Insert FX section
featuring several combinations of Delay, Filter, Modulation,
Phaser, Reverb and Distortion effects.. Depending on the
mode selected, the knobs control different effect parameters as described below.
Note: Knobs and the Filter are disabled (greyed-out) when
not applicable to the selected mode.
Delay Mode
Rapture’s Insert FX section offers many delay types in the
Type menu, and has a built-in filter that you can select
options for in the Filter menu.
The Delay mode has the following controls:
Delay Type menu
Filter parameters
Filter menu
LFO parameters
Delay parameters
Mix parameters
32
Page 33

• Delay menu—choose the desired type of delay effect,
defined in the following table:
Delay Type... Description...
Off No Effect. All CPU usage is recovered.
Stereo Delay A stereo delay effect, with independent delay lines for both stereo channels and output filter.
The delay output is routed through the filter.
Cross Feedback Delay Two independent delay lines, with the feedback of each channel routed to the input of the
other.
The delay output is routed through the filter.
Ping Delay A delay effect where the echoes bounce in the stereo field.
The delay output is routed through the filter.
L/R/C Delay The first echo appears in left channel, the second in the right channel and subsequent
images move gradually to the center.
The delay output is routed through the filter.
R/L/C Delay The first echo appears in right channel, the second in the left channel and subsequent
images move gradually to the center.
The delay output is routed through the filter.
Triple Delay Similar to Stereo Delay, but a mono echo image with independent delay time appears
centered in the stereo field.
The delay output is routed through the filter.
Detuning Delay A static delayed image appears, tuned differently than the original according to the
Modulation Frequency and Depth settings.
Chorus A standard stereo modulated delay, with feedback. This setting allows for several Chorus
and Flanger effects.
English
Symphonic A multiple voice chorus effect.
33
Page 34

LFO Filter Delay Similar to Stereo Delay, but a low frequency oscillator is used to change the filter cutoff.
Filter is applied to the wet signal only.
Panning Delay A delay effect where the echo image is panned in the stereo by a low frequency oscillator.
Auto Pan The low frequency oscillator is used to move the sound in the stereo field cyclically.
LFO Filter Signal is processed by the filter, and the filter cutoff is modulated by the Low Frequency
Phased Delay Similar to Stereo Delay, with the output passed thru a Phaser. The CENTER, LFO FREQ
Filter/Phaser A combination of a Filter effect with a Phaser effect. Both effects are controlled with the
• Filter menu—choose the type of filter. Choices are
Low Pass (LP), Band Pass (BP), High Pass (HP),
Band Reject (BR), All Pass (AP), Peak (PK), Comb
filter, and Pink. Strength choices are 6 dB(1P) up to
36 dB (6P).
• Delay parameters—Left delay: choose a tempo ratio.
Center delay: choose a tempo ratio (knob is greyedout if the delay type doesn’t use a center delay). Right
delay: choose a tempo ratio. Feedback: choose from
0 to 100%.
• Filter parameters—choose a cutoff frequency and
resonance level. A knob is greyed-out if the chosen
filter doesn’t support the parameter that the knob
controls.
Oscillator.
and LFO DEPTH control the Phaser behavior.
same LFO, so LFO FREQ and LFO DEPTH will control the filter and phaser sweep and
depth simultaneously.
• LFO parameters—if a chosen delay type uses an
LFO, set the frequency and depth with these two
knobs. Knobs are greyed-out if the relevant
parameter is not used.
• Mix parameters—use these knobs to control the
Delay input level and dry/wet mix.
34
Page 35

Reverb Mode
Rapture’s Insert FX section also offers many reverbs in the
Type menu.
The Reverb mode uses several knobs for parameter control:
Distortion Mode
Rapture’s Insert FX section also includes distortion effects
in the Type menu.
The Distortion mode uses several knobs for parameter
control:
English
Type menu
Reverb Tone
• Type menu—choose the desired type of reverb effect:
Small Room, Mid Room, Large Room, Small Hall, Mid
Hall, Large Hall, and Chamber.
• Reverb Size parameter—use the Center knob to
adjust the size
• Reverb Damp parameter—use the Feedback knob to
adjust reverb damping
• Reverb Tone parameter—use the Cutoff knob to
adjust the reverb tone
• Mix parameters—use these knobs to control the
Reverb input level and wet/dry mix.
Reverb Size Reverb Damp
Mix parameters
Type menu
Distortion Tone
• Type menu—choose the desired type of distortion
effect: Distortion 1 or Distortion 2.
• Distortion Feeback parameter—use the Feedback
knob to adjust the distortion feedback
• Distortion Tone parameter—use the Cutoff knob to
adjust the distortion tone
• Mix parameters—use these knobs to control the
Distortion input level and wet/dry mix.
Caution: Distortion effects can be very loud, so make sure
youhave the Limiter turned On before applying them. Use
the DRY/WET knob to adjust the overall level of the distortion effect. The Limiter can be turned Off after the adjustment is complete.
Distortion Feedback
Mix parameters
35
Page 36

The Modulators Section
Unlike other synthesizer designs where just a few Envelope Generators (EG), Low Frequency Oscillators (LFO),
Keyboard Tracking generators, etc. are shared and routed
to the destination parameter via a Modulation Matrix, Rapture has one set of dedicated components for each destination.
In this way, a total of forty-two Envelope Generators, fortytwo Low Frequency Oscillators, forty-two Keyboard Tracking Generators, and forty-two Step Generators are available for a program, and they can be all active at once with
their own settings.
The Modulators section allows you to generate envelopes
to control an Element’s pitch, cutoff and resonance for both
filters, pan and amplitude/volume.
after sustain point will be operational, stopping once the
final node is reached.
If a loop is defined, the EG will move to the defined loop
start node once it reaches the sustain node, over and over
again.
Here are some procedures for generating envelopes:
To Display an Envelope
• To display the envelope for pitch, cutoff, resonance,
pan, or amplitude, respectively, click the Pitch button,
Cutoff 1 or 2 button, Resonance 1 or 2 button, Pan
button, or Amplitude button, respectively. After you
click an envelope button, you can switch between
envelopes by pressing the numbers 1 through 7 on
your keyboard (not the Num Pad).
Envelope Generators
Rapture’s Envelope Generators (EG) are possibly the
most advanced EG system currently available, and provide
much of the basis for Rapture’s versatility. Each EG features an arbitrary amount of envelope segments, with
adjustable shape, keyboard tracking and velocity tracking
for each segment. The EG also allow looping, so they can
be turned in a complex wave low frequency oscillator.
The EG will start working on note-on, and will follow all
defined segments until the last node, if there’s no loop nor
sustain point defined. Once the final node is reached, the
level will remain unchanged for the whole note duration.
When the Amplitude Envelope Generator reaches the last
node and if no loop is defined, it will deactivate the layer
(layer expired).
If a sustain point is defined, the EG will start on note on
and will follow all defined segments until the sustain node
is reached. Then the level will remain unchanged until the
Note-Off event for the layer. Then the segments defined
36
Pitch Cutoff 1 Resonance Pan AmplitudeCutoff 2 Resonance 2
To Turn On an Envelope Generator
1. Display the desired envelope.
2. Click the EG Status field so that it’s on.
Click here
Page 37

To Edit EG Depth and Velocity Response
• To edit EG Depth, drag the Depth field up or down.
• To edit velocity intensity, drag the Vel->int value up or
down. This controls the intensity in which the Note-on
velocity affects the modulation depth.
• To edit how velocity affects EG times, as a multiplier
of the time, drag the Vel->tim value up or down.
• To edit how velocity affects the current envelope’s
value, drag the Vel Track field up or down.
To Graph or Edit an Envelope
1. Click an envelope button to display the desired
envelope, and make sure the EG Status field is On.
2. Add and edit nodes according to the following table:
Edit a line
segment.
Reset a line
segment.
Adjust a line
segment shape.
Remove/reset all
nodes.
Drag the line segment.
Double-click the segment or hold
the Shift key and click the
segment.
Ctrl-click the segment and drag
vertically (Command-click on a
Mac).
Press r or right-click (Ctrl-click on
a Mac) above the EG grid and
choose Reset All Nodes from the
context menu.
English
To Do This... Do This...
Add a node to the
envelope.
Remove a node. Right-click the node (Control-click
Move a node. Drag the node.
Move a node
without moving
other nodes.
Right-click the envelope (Controlclick on a Mac). If the envelope
does not have any line segments
and nodes yet, right-click the
graph where you would like to
insert a line segment and a node.
on a Mac).
Ctrl-drag the node (Commanddrag on a Mac).
Display the
values of a node.
Scroll the graph. Drag the border at the bottom of
Fit the envelope
to the window.
Hold the mouse over the node.
The node values appear at the top
of the graph, including node
number, time, distance from
previous node, and level.
the envelope window.
• Double-click the border at the
bottom of the envelope
window.
or
• Right-click (Ctrl-click on a
Mac) above the EG grid and
choose Fit from the context
menu.
37
Page 38

Zoom in on
envelopes.
Zoom out on
envelopes.
• Scroll the mouse wheel up;
hold the Ctrl key (Command
on a Mac) down for finer
adjustments
or
• Hold the mouse over the
center of the area you want
to zoom in on, and press the
* key on the Num Pad.
or
• Right-click (Ctrl-click on a
Mac) above the EG grid and
choose Zoom In from the
context menu.
• Scroll the mouse wheel
down; hold the Ctrl key
(Command on a Mac) down
for finer adjustments
or
• Hold the mouse over the
center of the area you want
to zoom in on, and press the /
key on the Num Pad.
or
• Right-click (Ctrl-click on a
Mac) above the EG grid and
choose Zoom Out from the
context menu.
Change a line
segment from the
default “variable
power” curve to
an exponential
curve, or vice
versa. See the tip
on amplitude
editing below.
Precisely move a
node.
Set/Clear/
Reposition
SUSTAIN point
(loop end)
Set/Clear/
Reposition LOOP
START point
Hold your mouse over the end
node of the line segment, and
press N on your keyboard, or
right-click (Ctrl-click on a Mac)
above the EG grid and choose
Toggle Envelope Shape from the
context menu.The segment turns
dark blue when the exponential
curve is being used.
Click the node, then press any of
the Arrow keys. Hold the Shift key
down to move by finer increments.
Select the desired node and press
S on your keyboard, or right-click
(Ctrl-click on a Mac) above the EG
grid and choose Set/Clear Active
Node as Sustain from the context
menu. Rapture adds a vertical red
line under the node. Open the
context menu or press S again to
clear the loop point.
Select the desired node and press
the key L, or right-click (Ctrl-click
on a Mac) above the EG grid and
choose Set/Clear Active Node as
Loop from the context menu.
Open the context menu or press L
again to remove loop start point.
38
Page 39

Adjust Time
Velocity Tracking
for a segment.
Try increasing the
velocity tracking
value for different
parts of a
sample’s
amplitude curve,
and playing your
keyboard harder
or softer to hear
the difference.
For example, if
you set a positive
value for the
attack segment of
an amplitude
curve, playing
your keyboard
harder increases
the time that the
attack segment
takes.
Make the EG window active (click
anywhere on it), then press the V
on your keyboard (this is a toggle
command), or right-click (Ctrl-click
on a Mac) above the EG grid and
choose Edit Segment Time
Velocity Tracking from the
context menu.
Orange-shaded bars appear
above or below the horizontal
center line of the graph,
depending on each segment’s
velocity tracking setting.
Positive bars (above the center
line of the graph) mean higher
velocity = longer time.
Negative bars (below the center
line of the graph) mean higher
velocity = shorter time.
If there is no positive or negative
value for velocity tracking in a
segment, no orange bar appears.
To add or adjust a velocity tracking
value to a segment, drag in the
area above or below the center
line of the graph within a line
segment’s boundaries. The
tracking value works by
multiplying the segment time, from
0.1x to 10x.
Adjust Time
Keyboard
Tracking for a
segment
Try increasing the
time keyboard
tracking value for
different parts of a
sample’s
amplitude curve,
and playing your
keyboard higher
or lower to hear
the difference.
For example, if
you set a positive
value for the
attack segment of
an amplitude
curve, playing
higher notes on
your keyboard
increases the
time that the
attack segment
takes.
Make the EG window active (click
anywhere on it), then press the K
on your keyboard (this is a toggle
command) or right-click (Ctrl-click
on a Mac) above the EG grid and
choose Edit Segment Time
Keyboard Tracking from the
context menu.
Blue-shaded areas appear above
or below each line segment,
depending on each segment’s
time keyboard tracking setting.
Positive bars (above the center
line of the graph) mean higher
range = longer time.
Negative bars (below the center
line of the graph) mean higher
range = shorter time.
ITo add a time keyboard tracking
value to a segment, drag in the
area above or below the center
line of the graph within the line
segment’s boundaries.
To adjust a value, click between
the two nodes surrounding the
desired segment, drag vertically to
adjust. The tracking value works
by multiplying the segment time,
from 0.1x to 10x.
English
39
Page 40

Low Frequency Oscillators
The Low Frequency Oscillators (LFO) in Rapture are a
great component to add animation and movement to the
sound. Originally intended to emulate the vibrato and tremolo found in natural acoustic instruments, synthesizers
have redefined their use, making them a fundamental component in the construction of evolving pads and textures.
As with the EG, one LFO is available for each destination
in each element, for a total of forty-two LFOs which can be
operative simultaneously.
The LFO main parameter is the LFO waveform. Rapture
has a graphical waveform selector, which allows selecting
the wave shape and phase for the selected waveform.
Selections... Description...
Waveform • Left/Right-click (Left/Control-
click on a Mac) on the
waveform to select next/
previous waveform, or
• Right-click (Ctrl-click on a
Mac) above the LFO window
to access all LFO options
from a popup menu.
Tip: Rapture allows user-defined waveforms for LFOs as
well. The following requirements must be satisfied to add
your own waveforms:
• User defined waveforms need to be stored in the
folder \LFO Waveforms.
• Files must named in a consecutive numbering order:
LfoWaveform030.wav
LfoWaveform031.wav
LfoWaveform032.wav
etc…
• Note that the first twenty waveforms (0 to 19) are
hard-coded, therefore numbering should begin at
"…020."
• Rapture supports up to 80 user-defined LFO wave
files (020 to 099).
• LFO files must be standard wav files, 8 to 32-bit mono
(stereo will be converted to mono by adding both
channels), any samplerate and length.
• Note that waveform 100/101 is an internal random
generator, unipolar/bipolar respectively.
Phase • Hold the Shift key, then click
on the waveform and drag
horizontally to select the LFO
start-up phase
• Press the Left/Right arrow
keys for 1 degree adjustment
• Press Shift plus the Left/
Right arrow keys for 10
degree adjustment
40
Page 41

Beyond the selected waveform, each LFO features the following parameters:
Parameters... Description...
Status Turns the LFO on or off, or puts it in Shot mode.
Shot is short for “one-shot,” and means the LFO plays one cycle of the LFO shape at the
beginning of the voice event and does not repeat.
Freq Frequency, in Hertz.
The waveform indicator will display the selected frequency, with a horizontal scale of two
seconds. This is, two cycles will be shown when the frequency is set to 1Hz.
Sync Synchronize to Host Tempo, in Beats.
When Sync is in the Off position, the LFO will move at the frequency defined by the previous
value (Freq).
When a Sync value is selected, from 1/8t to 128d, the LFO will follow the host tempo and
position, generating one cycle each time the host moves through the specified beat value.
For instance, if Sync is set to 1, the LFO will generate one cycle in each host beat.
Delay Time from Note-On message to LFO startup, in Seconds.
After Note-On, the LFO will wait a time to start working, as specified by this parameter. A value of
zero means instant startup.
Fade Time for LFO fade-in, in seconds.
Once the LFO starts working (after LFO Delay time), the LFO modulation level will rise gradually
to a maximum, which will be reached after the time specified by the Fade parameter.
Depth LFO modulation depth.
This determinates how much the LFO will affect the selected destination, expressed in the
destination units. For instance, for the Pitch LFO, the depth is expressed in cents.
English
41
Page 42

To Control an Envelope’s LFO
• Click the LFO Status field to turn the LFO on or off.
LFO Status field
• Click the current waveform to select from several
waveform options.
Keytracking
The keytracking control adjusts how the selected parameter changes with the keyboard (hence 'keyboard tracking').
The left node represents MIDI Note 0, the right node represents MIDI Note 127. The shape and orientation of the
curve in between represents the parameter variation in the
whole note range.
Keytrack envelope
Right-click (Ctrl-click on a Mac) here
to access LFO popup menu
LFO waveform
• Drag in the fields to adjust other LFO parameters as
described above.
42
To Control Keytracking
• Drag the nodes or curve of the Keytrack envelope
where it appears under the LFO waveform. You can
drag the line segment into a curve, or reset the line
segment by double-clicking it. You can move both
nodes by pressing the up or down Arrow keys, or by
pressing the Page Up or Page Down keys for larger
increments.
Keytracking maps the range of your MIDI controller to
changes in the current envelope. For example, if you display the Cutoff envelope, and drag the Keytrack envelope
into an upward slope, playing higher notes on your controller will raise the cutoff frequency. On the Amplitude envelope, you can actually use the Keytrack envelope as a
global gain—drag both nodes of the Keytrack envelope up
or down to control global output volume.
Here’s another example of using Keytracking: if you load a
bright waveform, for instance a saw, and apply a low-pass
filter on it, then set the cutoff to 800 Hz, playing high notes
in the keyboard will result in a lower volume than playing
low notes. This happens because higher notes will result in
more-filtered notes. Here's where keytracking enters in
action. Two options are available:
Page 43

• Adjust the CUTOFF keytracking control so the cutoff
point moves together with the played note. This
results in all notes having the same amount of
harmonics, hence the same output level.
OR
• Adjust the AMPLITUDE keytracking control. This will
keep higher notes dull and filtered, but will raise the
volume of those notes so they will better match the
volume of the unfiltered low notes.
Tip: When adjusting any envelope but Pitch, you can reset
the Keytrack envelope by right-clicking the Keytrack window and selecting Keyboard Tracking reset from the
context menu. When in Pitch mode, this launches the Load
Tuning Definition File window. See “Microtuning and Alternative Tunings” on page 49.
Parameter... Range...
Pitch 0 to 9600 cents (8 octaves)
Cut 1 0 to 12000 cents
Res 1 0 to 20 dB
Cut 2 0 to 12000 cents
Res 2 0 to 20 dB
Pan 0 to 100%
English
The Step Generator
The Step Modulator is much like an LFO, where the
'shape' can be defined by setting arbitrary values to variable range steps for Pitch, Cutoff, Resonance, Pan and
Amplitude modulation at regular time intervals.
To set values in a given step, hold left-click (Ctrl-click on a
Mac) and drag across the Step Generator.
The Step Generator is affected by the following controls:
Amp o to 100%
Each destination parameter’s range of values in the Step
Generator is specified below:
Parameters... Description...
Status Turns the Step Generator on or
off.
Steps Sets the number of steps in the
generator, from 2 to 128.
43
Page 44

Freq Frequency, in Hertz.
Defines the number of times that
the drawn pattern repeats per
second, from 0 to 40Hz.
Right-click (or Ctrl-click on a Mac) to access the Step Generator’s context menu, which contains more helpful functions:
Sync Synchronize to Host Tempo, in
Beats.
When Sync is in the Off position,
the Step Generator will move at
the frequency defined by the
previous value (Freq).
When a Sync value is selected,
from 1/8t to 128d, the Step
Generator will follow the host
tempo and position, generating
one cycle each time the host
moves through the specified
beat value.
For instance, if Sync is set to 1,
the Step Generator will generate
one cycle in each host beat.
Smooth Controls the rate at which a step
value rises or falls to meet the
next value.
Depth Variable range, dependent on
modulation destination.
Controls the max range for Step
Generator values in the current
modulation mode.
Menu item... Description...
Reset Steps Resets all steps to a default
Randomize Steps Sets a random value to each
Reverse Step Levels Reverses the order of the values
Mirror Step Levels Repeats step levels, starting at
Invert Step Levels Inverts levels by subtracting the
Copy/Paste Steps Copy and paste current step
No Snap; Snap to 10
Levels, 12 levels, 24
levels
value. Shortcut key: R
step. Shortcut key: N
in the current sequence.
the step after the 50% point of
the sequence, iterating
backwards from the last step of
the first half of the sequence.
current value from 50% the max
value, then adding the difference
to the 50% value. Shortcut key: I
values across modulation
destinations, elements and the
Global section
Subdivides the step into “n”
equal values, useful for
articulating step sequences
44
Page 45

MIDI Note Entry (C4 =
Base)
Note: Available for
Pitch Modulation only
Here are a few additional procedures for manipulating Step
Generator data:
Enter step sequence using MIDI
note events starting at C4.
Default depth setting is to 2400
(two octave range), but may
need to be adjusted by user. Any
note lower than C4 backs up one
step.
MIDI note entry mode ends by
entering a note for every step in
the sequence.
To Reset a Step Value to Default
• Ctrl-click and Ctrl-click-drag (Command-click on a
Mac).
To Snap All Steps to the Nearest Pitch or Logical
Value
•Press P.
To Increase/Decrease All Step Values
• Scroll the mouse wheel up/down over the active Step
Generator.
To Copy/Paste a Modulator Value
1. To copy a whole Modulator, just one envelope, an
LFO, a Keytrack setup, or a Step Generator, rightclick (Control-click on a Mac) an envelope button and
choose Copy-(name of component you want to
copy) from the popup menu.
English
Right-click one of the seven envelope buttons, Ctrl-click on a Mac
2. To paste what you just copied, right-click (Controlclick on a Mac) the envelope button where you want
to paste the copied data, and choose Paste-(name of
component you want to paste) from the popup
menu.
You can paste between instances of Rapture.
Node values
Modulator Copy/Paste
Sometimes it is desirable to have identical settings for the
EG, LFO or Keytrack in two different parameters or elements. Rapture offers the ability to Copy/Paste any EG,
LFO, Keytrack, Step Generator or the whole Modulator to a
new destination, or to the same destination in another element.
Nodes
45
Page 46

Amplitude Editing
Rapture actually uses two amplitude envelopes. If you
don’t turn on the Amplitude EG, Rapture uses a master
envelope that makes sure the ampltude reaches zero after
you stop playing the current Element. If you turn on the
Amplitude EG and create an amplitude envelope, that
envelope controls the amplitude, unless the envelope that
you created does not eventually reach zero amplitude. If
your envelope does not eventually turn the sound off, the
master envelope does it for you.
Tip: If you are editing the amplitude for a sample from an
acoustic source, and want a more natural release, you can
change the type of envelope curve Rapture uses. The
default type is variable power, which is CPU-friendly, and
works well when you’re using heavy reverb or delay. The
optional exponential type works better with exposed
acoustic sounds by creating a more natural sounding
release.
To change the envelope curve to exponential:
1. Display the Amplitude curve for your sample.
2. Highlight the ending node for the segment by holding
the mouse over the node.
3. Press the N key on your keyboard.
The envelope segment turns dark blue, meaning that it is
now an exponential curve. You can press the N key again
to return to the default envelope type.
The Global Page
The Global page contains effects, EQ’s and a Global Step
Generator that adjusts Rapture’s stereo output. Settings
made here affect all elements within a program.
The Global page conducts the signal through the following
path:
1. Global FX 1 (standard insert FX menu + controls,
applied to all elements)
2. Global FX 2 (standard insert FX menu + controls,
applied to all elements)
3. Global Step Generator; a Left/Right channel Step
Generator output level modulator; note that this level
gates even effects tails from upstream delay lines and
reverbs
4. Master EQ section (3 standard multimode band EQs)
5. Master FX (standard insert FX menu + controls,
applied to the post Global Step Generator mix)
The Global Step Generator is controlled in the same way
as the Step Generator in the Modulator section, but instead
provides discrete left and right channel control of Rapture's
stereo mix.
Note: You can achieve identical level patterns using the
Step Generator's Copy/Paste function, available via context menu.
For more details on using Step Generators, see“The Step
Generator” on page 43.
For more details on effects and EQs, see “The Insert FX
Section” on page 32 and “Using the EQ’s” on page 32.
The Modulation Matrix
Rapture features a very clear distinction between ‘sound
modulations’ and ‘performance modulations’. The first
group is represented by the Modulators, while the second
is achieved thru the Modulation Matrix.
In the Modulation Matrix it is possible to ‘wire’ any MIDI
control or message to any sound parameter in Rapture in
any program. This way each program can be perfectly
adapted to the control environment from a single, unified
place. The Modulation Matrix features 24 rows which can
46
Page 47

connect any of the over 130 possible sources, to over 150
destinations. All those ‘connections’ can have a specified
depth and a smooth value, and are stored in the program
file.
To deploy/collapse the Modulation Matrix window, click on
the button in the top area, marked with a MIDI connector. The Modulation Matrix features the following parameters:
Parameter... Description...
Source The Source is the MIDI control
which Rapture will use to change
the parameter selected as
destination.
Sources can be any MIDI Control
Message (CC1-CC127), Pitch
Bend, Channel and Polyphonic
Aftertouch, Keyboard, Keyboard
Gate, Attack and Release Velocity,
Unipolar and Bipolar Random and
Alternate, and the X/YPad..
Destination Element Pitch, Cutoff, Resonance,
Pan, Amplitude and their LFO
Depth and Speed, Envelope and
Step Generator parameters, plus
most EQ/FX parameters can be
used as destinations.
Depth The depth for the modulation, in
parameter units.
Smooth Smooths out the response of the
Destination to the Source.
See “Appendix B: Modulation Matrix” on page 57 for more
information.
MIDI Learn
In addition to the Modulation Matrix, Rapture features one
of the most advanced MIDI control customization systems
of any virtual synthesizer. The MIDI Learn feature allows
you to assign any knob or button on the screen to any MIDI
controller, even assigning multiple controllers to a single
parameter or vice-versa.
To invoke the MIDI Learn menu, just right-click (Controlclick on a Mac) on a knob or button. To assign a MIDI controller, select MIDI Learn from the pop-up menu.
Once you select MIDI Learn, Rapture enters a "waiting"
mode, expecting a MIDI controller to be received. You can
send the controller by using a physical MIDI control device
or by using your sequencer to send a MIDI continuous
controller (CC). Multiple knobs/buttons can be set to "waiting" mode at once in order to assign them to the same control.
Note: When sequencers’ Start/Stop Audio Streaming functions occur, they send numerous controllers. Avoid those
operations while Rapture is in "waiting" mode, as it might
learn unexpected controller numbers.
As soon as MIDI controller information is received, Rapture assigns it to the selected controls. The controls will
display new values according to the incoming controller
values.
Once a control is assigned, you can scale it (setting the
minimum and maximum) and reverse the control polarity.
To perform these operations, call the MIDI Learn menu
again by right-clicking (Control-click on a Mac) the control.
New options will appear:
English
47
Page 48

Menu option... Description...
MIDI Learn Assigns additional controllers
to the parameter. This option
will always remain active since
it is possible to assign multiple
controllers to any parameter.
MIDI Forget Removes all MIDI controller
associations from the knob/
button.
Set Min Sets the minimum value this
control will have when the
incoming MIDI control value is
zero.
Set Max Sets the minimum value this
knob will have when the
incoming MIDI control value is
127.
eter is assigned to a hard-wired MIDI controller, that controller will adjust both the new parameter and the hardwired one simultaneously.
The following controllers are hard-wired:
CC7 = Volume
CC11 = Expression
CC64 = Sustain (can be enabled/disabled perelement using display control)
CC66 = Sostenuto (can be enabled/disabled perelement using display control)
CC73 = Global Amplitude Attack
CC72 = Global Amplitude Release
The Mixer
The Mixer section in Rapture is defined so the volume, pan
and on/off settings for the six elements are simultaneously
accessible.
There are three controls for each element in the mixer:
Reverse Inverts the MIDI control
polarity.
Any MIDI controller can be learned except CC0, CC32
(bank change), CC120 (all sounds off), CC121 (all controllers off), and CC123 (all notes off).
Aftertouch and pitch bend MIDI messages can also be
assigned as standard controllers. When Pitchbend is
assigned, the center will be calculated according to the Min
and Max settings for selected parameter.
Note: Some MIDI controllers are hard-wired in Rapture but
can still be learned. This means that if an additional param-
48
Control... Description...
On/Off Turns the element on or off.
When an element is off, it won’t
take any CPU.
Pan Element stereo panoramic
position.
Volume Main element volume.
Page 49

Microtuning and Alternative
Tunings
2. Click on the Keytrack window.
Microtuning has been an interesting field of research for
musicians and physicists for years. Several synthesizers
have included some sort of microtuning abilities to allow
performers to use alternative tunings to the standard 12tone equal-tempered system. One of the powerful features
of Rapture is that it can load native ScalaTM .
tuning files.
Scala is a powerful freeware software tool for experimentation with musical tunings, such as just intonation scales,
equal and historical temperaments, microtonal and macrotonal scales, and non-Western scales. It supports scale
creation, editing, comparison, analysis, storage, tuning of
electronic instruments, and MIDI file generation and tuning
conversion. All this is integrated into a single application
with a wide variety of mathematical routines and scale creation methods.
Scala is ideal for the exploration of tunings and becoming
familiar with the concepts involved. In addition, a very large
library of scales is freely available for Scala and can be
used for analysis or music creation.
Note: For more information about Scala, visit the Scala
home page at http://www.xs4all.nl/~huygensf/scala/
Rapture allows each element in a program to use a specific microtuning definition, so multiple microtuning sets
can be used in a single patch.
SCL micro-
To load a microtuning definition for any element
1. Select the Pitch Modulator for that element.
Keytrack window
A 'File...Open' dialog box will appear.
3. Select the microtuning definition file of your choice.
The Keytrack window will display a graphical representation of the selected tuning scale. A tooltip will display the
currently loaded definition file.
To reset an element to standard tuning
1. Select the Pitch Modulator for that element
2. Shift-click on the Keytrack window.
The tuning definition file selected is remembered and
reloaded with the program.
Not limited to 12-tone scales, Rapture microtuning support
allows for any number of notes, including mean-tone and
quarter-tone scales. Rapture includes 200 Scala tuning
definition files with the default installation. A file with over
2900 tuning definition files (.scl) can be downloaded for
free from:
http://www.xs4all.nl/~huygensf/doc/scales.zip
You can find a brief description of the scala files here:
http://www.xs4all.nl/~huygensf/doc/scalesdir.txt
English
49
Page 50

Sinc Interpolation
When you freeze or play back a Rapture track, you have
the option to use a higher-quality algorithm called sinc
interpolation. This can increase the time it takes to freeze
tracks, and use a little more of your computer’s resources
when you play back audio. If you’re using distortion, you
don’t need this algorithm.
To Use Sinc Interpolation
1. Open the Options dialog by clicking the Options
button .
2. Check the Use Sinc Interpolation When Freezing/
rendering checkbox.
50
Page 51

Appendix A: Parameter Reference
This section provides a reference for every Rapture parameter. Each parameter is described in terms of its value ranges
(Min/Max/Default), increment size (Fine/Norm/Coarse) and
unit type (Unit).
*Note: All Fx parameters are also applicable to Global Fx. In
addition, all StepGen parameters are applicable to Global
StepGen L and R.
English
Page 52

Number Name Min Max Default Fine Norm Coarse Unit
1 LoKey 0 127 1 1 1 12 Note
2 HiKey 0 127 1 1 1 12 Note
3 LoVel 0 127 1 1 1 10 -
4 HiVel 0 127 1 1 1 10 -
5 Bend Up 0 24 2 1 1 1 St
6 Bend Down 0 24 2 1 1 1 St
7 Sustain Off, On
8 Sostenuto Off, On
9 Transpose -96 96 0 1 1 12 St
10 Tune -100 100 0 1 1 10 Ct
11 KeyTrack -200 200 100 1 1 10 Ct/Key
12 Phase 0 360 0 1 1 10 Deg
13 Quality Std, High
14 Multi Off, 3v, 5v, 7v, 9v
15 Ringmod Off, On
16 Detune 0 100 10 1 1 10 Ct
17 Porta Time 0 10 0 0.01 0.1 1 s
18 Polyphony 0 inf 16 1 1 10 Layer
19 DSP Order Bypass, F1->LoFi->Drive->F2, F1->Drive->F2->LoFi, F1->Decim + F2->Drive
52
Page 53

20 Filter 1Type Off, LP1P, HP1P, BP1P, BR1P, LP2P, HP2P, BP2P, BR2P, LP4P, HP4P, LP6P, HP6P,
COMB, PINK
21 Filter 1 Cutoff 8.2 22350 8.2 Log Log Log Hz
22 Filter 1 Reso 0 40 0 0.04 0.4 4 dB
23 BitRed On/Off - - Off - - - -
24 BitRed Amount 0 100 0 0.1 1 5 %
25 Decim On/Off - - Off - - - -
26 Decim Amount 0 100 0 0.1 1 5 %
27 Drive Type Off, Tube, Soft, Mid, Hard, Asymmetric
28 Drive Shape 0 100 0 0.1 1 5 %
29 Filter 2Type Off, LP1P, HP1P, BP1P, BR1P, LP2P, HP2P, BP2P, BR2P, LP4P, HP4P, LP6P, HP6P,
COMB, PINK
30 Filter 2 Cutoff 8.2 22350 8.2 Log Log Log Hz
31 Filter 2 Reso 0 40 0 0.04 0.4 4 dB
32 EG Status Off, On
33 EG Depth
34 Pitch -9600 9600 0 1 10 50 Ct
35 Cutoff 1/2 -12000 12000 0 1 10 100 Ct
36 Resonance 1/2 -40 40 0 0.01 0.1 1 dB
37 Pan -100 100 0 0.01 0.1 1 %
38 Amplitude -100 100 0 0.01 0.1 1 %
English
39 EG Vel->Int
53
Page 54

40 Pitch -9600 9600 0 1 10 50 Ct
41 Cutoff 1/2 -12000 12000 0 1 10 100 Ct
42 Resonance 1/2 -40 40 0 0.01 0.1 1 dB
43 Pan -100 100 0 0.01 0.1 1 %
44 Amplitude -100 100 0 0.01 0.1 1 %
45 EG Vel->Tim -1024 1024 0 0.01 0.1 1 x (mul)
46 VelTrack 0 100 100 0.01 0.1 1 %
47 Pitch -9600 9600 0 1 10 50 Ct
48 Cutoff 1/2 -13700 13700 0 1 10 100 Ct
49 Resonance 1/2 -40 40 0 0.01 0.1 1 dB
50 Pan -100 100 0 0.01 0.1 1 %
51 Amplitude -100 100 0 0.01 0.1 1 %
52 LFO Status Off, Shot, On
53 LFO Waveform 20 internal waveforms, 80 external waveforms, random unipolar, random bipolar
54 LFO Frequency 0 40 1 0.001 0.01 0.5 Hz
55 LFO Sync 1/8t, 1/8, 1/8d, 1/4t, 1/4, 1/4d, 1/2t, 1/2, 1/2d, 1t, 1, 1d, 2t, 2, 2d, 4t, 4, 4d, 8t, 8, 8d, 16t,
16, 16d
56 LFO Delay 0 10 0.001 0.01 0.05 2 S
57 LFO Fade 0 10 0.001 0.01 0.05 2 S
58 LFO Depth
59 Pitch 0 4800 0 1 1 50 Ct
60 Cutoff 1/2 0 6000 0 1 1 100 Ct
54
Page 55

61 Resonance 1/2 0 20 0 0.01 0.1 0.5 dB
62 Pan 0 100 0 0.1 1 5 %
63 Volume 0 6 0 0.1 1 2 dB
64 StepGen Status* Off, On
65 StepGen Steps 2 128 16 1 1 4 Step
English
66 StepGen
Frequency
67 StepGen Sync 1/8t, 1/8, 1/8d, 1/4t, 1/4, 1/4d, 1/2t, 1/2, 1/2d, 1t, 1, 1d, 2t, 2, 2d, 4t, 4, 4d, 8t, 8, 8d, 16t,
68 StepGen Smooth 1 1000 1 1 10 100 ms
69 StepGen Depth
70 Pitch 0 9600 0 1 1 50 Ct
71 Cutoff 1/2 0 12000 0 1 1 100 Ct
72 Resonance 1/2 0 20 0 0.01 0.1 0.5 dB
73 Pan 0 100 0 0.1 1 5 %
74 Amplitude 0 100 100 0.1 1 5 %
75 Eq On/Off Off, On
76 Eq Type Lo Shelf, Peaking, Hi Shelf
77 Eq Gain -24 24 0 0.024 0.24 2.4 dB
78 Eq Freq 8.2 22350 8.2 Log Log Log Hz
79 Eq Q 0.1 8 1 Log Log Log -
0 40 1 0.001 0.01 0.5 Hz
16, 16d, 32t, 32, 32d, 64t, 64, 64d, 128t, 128, 128d
55
Page 56

80 Fx Type* Off, Stereo Delay, Cross Feedback Delay, Ping Delay, L/R/C Delay, R/L/C Delay,
Triple Delay, Detuning Delay, Chorus, Symphonic, LFO Filter Delay, Panning Delay,
Autopan, LFO Filter, Phased Delay, Filter/Phaser, Small Room, Mid Room, Large
Room, Small Hall, Mid Hall, Large Hall, Chamber, Distortion 1, Distortion 2
81 Fx, Global Fx
Filter Type
82 Fx Delay Left 1/8t, 1/8, 1/8d, 1/4t, 1/4, 1/4d, 1/2t, 1/2, 1/2d, 1t, 1, 1d, 2t, 2, 2d, 4t, 4, 4d, 8t, 8, 8d, 16t,
83 Fx Delay Center
84 Fx Delay Right
85 Fx Delay
Feedback
86 Fx Filter Cutoff 8.2 22350 8.2 Log Log Log Hz
87 Fx Filter
Resonance
88 Fx Lfo Freq 0 10 0 0.01 0.1 0.5 Hz
89 Fx Lfo Depth 0 100 0 0.1 1 5 %
90 Fx Input 0 100 0 0.1 1 5 %
91 Fx Dry/Wet 100:0 0:100 50:50 0.1 1 5 %
92 Mixer Element
Status
93 Mixer Pan -100 100 0 0.2 2 10 %
94 Mixer Volume 0 100 0 0.1 1 5 %
Off, LP1P, HP1P, BP1P, BR1P, LP2P, HP2P, BP2P, BR2P, LP4P, HP4P, LP6P, HP6P,
COMB, PINK
16, 16d (0 to 50ms for Chorus and Symphonic for L and R)
0 100 0 0.1 1 5 %
0 40 0 0.04 0.4 4 dB
Off, On
95 Mixer Volume 0 100 0 0.1 1 5 %
56
Page 57

Appendix B: Modulation Matrix
This section provides a reference for Modulation Matrix
parameters. Of particular note is the nature of input sources,
which include many different types of MIDI events and other
functions.
Note about “mapped to”: “Mapped to” values, such as “0 1” describe the mathematical product of the source function
as it modulates the specified destination parameter.
Example:
If you map the cutoff frequency to a depth of 1000 cents,
a value of 64 from a given MIDI controller will change
the cents value to 500 (1000 * 0.5 = 500).
English
Page 58

Modulation Matrix Sources
Source... Description...
CC 1 to CC 127 MIDI Continuous Controllers 1 to 127
Any MIDI Controller can be used as source, mapped to 0-1..
Pitch Bend MIDI Pitch Bend messages, mapped to 0-1.
Channel Aftertoch MIDI Channel Aftertouch, mapped to 0-1.
Polyphonic Aftertouch MIDI Polyphonic Aftertouch messages, mapped to 0-1.
Attack Velocity Incoming Note-On MIDI Velocity, mapped to 0-1.
Release Velocity Incoming Note-Off MIDI Velocity, mapped to 0-1.
Keyboard Incoming Note-On MIDI Note, mapped to 0-1 (Note 0 = 0,
Note 127 = 1).
Key Gate Digital value based on MIDI Note-On messages: 0 when no
Random Unipolar Random value generated on MIDI Note-On messages, 0-1.
Random Bipolar Random value generated on MIDI Note-Off messages, -1-1.
Alternate Alternate value generated on MIDI Note-On messages, 0 or 1
X/Y Pad X Value based on user’s horizontal motion over the X/Y Pad.
X/Y Pad Y Value based on user’s vertical motion over the X/Y Pad.
keys are depressed, 1 when there’s any note depressed.
in each new note-on.
58
Page 59

Modulation Matrix Destinations
Destination... Description... Range Unit
Sample Offset 1-6, All When loading a sample (wav/aif/ogg/sfz), offset
sets the point where the playback starts.
When a wavetable is loaded, it sets the startup
phase (same as the main Phase control).
For elements 1 to 6, and for all elements
simultaneously.
Sample Delay 1-6, All Time elapsed since note-on to sample
playback.
For elements 1 to 6, and for all elements
simultaneously.
Pitch 1-6, All Pitch for elements 1 to 6 and for all elements
simultaneously.
Detune 1-6, All Detune for elements 1 to 6 and for all elements
simultaneously.
This setting will only effect oscillators In MULTI
or RINGMOD modes.
Bitred 1-6, All Bit reduction depth for elements 1 to 6 and for
all elements simultaneously.
Requires the BITRED dsp component to be
ON.
Decim 1-6, All Decimation depth for elements 1 to 6 and for all
elements simultaneously.
Requires the DECIM dsp component to be ON.
Drive 1-6, All Drive depth for elements 1 to 6 and for all
elements simultaneously.
Requires the DRIVE dsp component to be
active, in any mode.
±441000 samples
English
±100000 ms
±2400 cents
±4800 cents
±100 %
±100 %
±100 %
59
Page 60

F1 Cutoff 1-6, All Filter 1 Cutoff for elements 1 to 6 and for all
elements simultaneously.
±13700 cents
F1 Resonance 1-6, All Filter 1 Resonance for elements 1 to 6 and for
all elements simultaneously.
F2 Cutoff 1-6, All Filter 2 Cutoff for elements 1 to 6 and for all
elements simultaneously.
F2 Resonance 1-6, All Filter 2 Resonance for elements 1 to 6 and for
all elements simultaneously.
Pan 1-6, All Pan for elements 1 to 6 and for all elements
simultaneously.
Volume 1-6, All Volume for elements 1 to 6 and for all elements
simultaneously.
Pitch LFO Depth 1-6, All Depth for the Pitch LFO added to the static
depth value for elements 1 to 6 and for all
elements simultaneously.
F1 Cutoff LFO Depth 1-6, All Depth for the filter 1Cutoff LFO added to the
static depth value for elements 1 to 6 and for all
elements simultaneously.
F1 Reso LFO Depth 1-6, All Depth for the filter 1Resonance LFO added to
the static depth value for elements 1 to 6 and
for all elements simultaneously.
F2 Cutoff LFO Depth 1-6, All Depth for the filter 2 Cutoff LFO added to the
static depth value for elements 1 to 6 and for all
elements simultaneously.
±40 dB
±13700 cents
±40 dB
±100 %
±100 cents
±2400 cents
±13700 cents
±40 dB
±13700 cents
F2 Reso LFO Depth 1-6, All Depth for the filter 2 Resonance LFO added to
the static depth value for elements 1 to 6 and
for all elements simultaneously.
Pan LFO Depth 1-6, All Depth for the Pan LFO added to the static depth
value for elements 1 to 6 and for all elements
simultaneously.
60
±40 dB
±100 %
Page 61

Volume LFO Depth 1-6, All Depth for the Volume LFO added to the static
depth value for elements 1 to 6 and for all
elements simultaneously.
±6 DB
Pitch LFO Freq 1-6, All Frequency of the Pitch LFO added to the static
frequency setting for elements 1-6 and for all
elements simultaneously
F1 Cutoff LFO Freq 1-6, All Frequency of the filter 1 Cutoff LFO added to
the static frequency setting for elements 1-6
and for all elements simultaneously
F1 Reso LFO Freq 1-6, All Frequency of the filter 1 Resonance LFO added
to the static frequency setting for elements 1-6
and for all elements simultaneously
F2 Cutoff LFO Freq 1-6, All Frequency of the filter 2 Cutoff LFO added to
the static frequency setting for elements 1-6
and for all elements simultaneously
F2 Reso LFO Freq 1-6, All Frequency of the filter 2 Resonance LFO added
to the static frequency setting for elements 1-6
and for all elements simultaneously
Pan LFO Freq 1-6, All Frequency of the Pan LFO added to the static
frequency setting for elements 1-6 and for all
elements simultaneously
Volume LFO Freq 1-6, All Frequency of the Volume LFO added to the
static frequency setting for elements 1-6 and for
all elements simultaneously
Pitch LFO Delay 1-6, All Delay of the Pitch LFO added to the static delay
setting for elements 1-6 and for all elements
simultaneously
±40 Hertz
English
±40 Hertz
±40 Hertz
±40 Hertz
±40 Hertz
±40 Hertz
±40 Hertz
±10000 ms
F1 Cutoff LFO Delay 1-6, All Delay of the filter 1 Cutoff LFO added to the
static delay setting for elements 1-6 and for all
elements simultaneously
±10000 ms
61
Page 62

F1 Reso LFO Delay 1-6, All Delay of the filter 1 Resonance LFO added to
the static delay setting for elements 1-6 and for
all elements simultaneously
±10000 ms
F2 Cutoff LFO Delay 1-6, All Delay of the filter 2 Cutoff LFO added to the
static delay setting for elements 1-6 and for all
elements simultaneously
F2 Reso LFO Delay 1-6, All Delay of the filter 2 Resonance LFO added to
the static delay setting for elements 1-6 and for
all elements simultaneously
Pan LFO Delay 1-6, All Delay of the Pan LFO added to the static delay
setting for elements 1-6 and for all elements
simultaneously
Volume LFO Delay 1-6, All Frequency of the Volume LFO added to the
static delay setting for elements 1-6 and for all
elements simultaneously
Pitch LFO Fade 1-6, All Delay of the Pitch LFO added to the static fade
setting for elements 1-6 and for all elements
simultaneously
F1 Cutoff LFO Fade 1-6, All Delay of the filter 1 Cutoff LFO added to the
fade delay setting for elements 1-6 and for all
elements simultaneously
F1 Reso LFO Fade 1-6, All Delay of the filter 1 Resonance LFO added to
the fade delay setting for elements 1-6 and for
all elements simultaneously
F2 Cutoff LFO Fade 1-6, All Delay of the filter 2 Cutoff LFO added to the
static fade setting for elements 1-6 and for all
elements simultaneously
±10000 ms
±10000 ms
±10000 ms
±10000 ms
±10000 ms
±10000 ms
±10000 ms
±10000 ms
F2 Reso LFO Fade 1-6, All Delay of the filter 2 Resonance LFO added to
the fade delay setting for elements 1-6 and for
all elements simultaneously
62
±10000 ms
Page 63

Pan LFO Fade 1-6, All Delay of the Pan LFO added to the static fade
setting for elements 1-6 and for all elements
simultaneously
±10000 ms
Volume LFO Fade 1-6, All Frequency of the Volume LFO added to the
static fade setting for elements 1-6 and for all
elements simultaneously
Pitch StepGen Depth 1-6, All Depth for the Pitch StepGen added to the static
depth value for elements 1 to 6 and for all
elements simultaneously.
F1 Cutoff StepGen Depth 1-6, All Depth for the filter 1Cutoff StepGen added to
the static depth value for elements 1 to 6 and
for all elements simultaneously.
F1 Reso StepGen Depth 1-6, All Depth for the filter 1Resonance StepGen added
to the static depth value for elements 1 to 6 and
for all elements simultaneously.
F2 Cutoff StepGen Depth 1-6, All Depth for the filter 2 Cutoff StepGen added to
the static depth value for elements 1 to 6 and
for all elements simultaneously.
F2 Reso StepGen Depth 1-6, All Depth for the filter 2 Resonance StepGen
added to the static depth value for elements 1 to
6 and for all elements simultaneously.
Pan StepGen Depth 1-6, All Depth for the Pan StepGen added to the static
depth value for elements 1 to 6 and for all
elements simultaneously.
Volume StepGen Depth 1-6, All Depth for the Volume StepGen added to the
static depth value for elements 1 to 6 and for all
elements simultaneously.
±10000 ms
English
±2400 cents
±13700 cents
±40 dB
±13700 cents
±40 dB
±100 %
±6 dB
Pitch StepGen Freq 1-6, All Frequency of the Pitch StepGen added to the
static frequency setting for elements 1-6 and for
all elements simultaneously
±40 Hertz
63
Page 64

F1 Cutoff StepGen Freq 1-6, All Frequency of the filter 1 Cutoff StepGen added
to the static frequency setting for elements 1-6
and for all elements simultaneously
±40 Hertz
F1 Reso StepGen Freq 1-6, All Frequency of the filter 1 Resonance StepGen
added to the static frequency setting for
elements 1-6 and for all elements
simultaneously
F2 Cutoff StepGen Freq 1-6, All Frequency of the filter 2 Cutoff StepGen added
to the static frequency setting for elements 1-6
and for all elements simultaneously
F2 Reso StepGen Freq 1-6, All Frequency of the filter 2 Resonance StepGen
added to the static frequency setting for
elements 1-6 and for all elements
simultaneously
Pan StepGen Freq 1-6, All Frequency of the Pan StepGen added to the
static frequency setting for elements 1-6 and for
all elements simultaneously
Volume StepGen Freq 1-6, All Frequency of the Volume StepGen added to the
static frequency setting for elements 1-6 and for
all elements simultaneously
Pitch StepGen Smooth 1-6, All Smooth of the Pitch StepGen added to the
static smooth setting for elements 1-6 and for all
elements simultaneously
F1 Cutoff StepGen Smooth 1-6, All Smooth of the filter 1 Cutoff StepGen added to
the static smooth setting for elements 1-6 and
for all elements simultaneously
F1 Reso StepGen Smooth 1-6, All Smooth of the filter 1 Resonance StepGen
added to the static smooth setting for elements
1-6 and for all elements simultaneously
±40 Hertz
±40 Hertz
±40 Hertz
±40 Hertz
±40 Hertz
±1000 Hertz
±1000 ms
±1000 ms
64
Page 65

F2 Cutoff StepGen Smooth 1-6, All Smooth of the filter 2 Cutoff StepGen added to
the static smooth setting for elements 1-6 and
for all elements simultaneously
±1000 ms
F2 Reso StepGen Smooth 1-6, All Smooth of the filter 2 Resonance StepGen
added to the static smooth setting for elements
1-6 and for all elements simultaneously
Pan StepGen Smooth 1-6, All Smooth of the Pan StepGen added to the static
smooth setting for elements 1-6 and for all
elements simultaneously
Volume StepGen Smooth 1-6, All Smooth of the Volume StepGen added to the
static smooth setting for elements 1-6 and for all
elements simultaneously
Pitch EG Attack 1-6, All Time for the Pitch EG Attack added to the static
time value for elements 1 to 6 and for all
elements simultaneously.
F1 Cutoff EG Attack 1-6, All Time for the filter 1Cutoff EG Attack added to
the static time value for elements 1 to 6 and for
all elements simultaneously.
F1 Reso EG Attack 1-6, All Time for the filter 1Resonance EG Attack added
to the static time value for elements 1 to 6 and
for all elements simultaneously.
F2 Cutoff EG Attack 1-6, All Time for the filter 2 Cutoff EG Attack added to
the static time value for elements 1 to 6 and for
all elements simultaneously.
F2 Reso EG Attack 1-6, All Time for the filter 2 Resonance EG Attack
added to the static time value for elements 1 to
6 and for all elements simultaneously.
±1000 ms
English
±1000 ms
±1000 ms
±100000 ms
±100000 ms
±100000 ms
±100000 ms
±100000 ms
Pan EG Attack 1-6, All Time for the Pan EG Attack added to the static
time value for elements 1 to 6 and for all
elements simultaneously.
±100000 ms
65
Page 66

Volume EG Attack 1-6, All Time for the Volume EG Attack added to the
static time value for elements 1 to 6 and for all
elements simultaneously.
±100000 ms
Pitch EG Release 1-6, All Time for the Pitch EG Release added to the
static time value for elements 1 to 6 and for all
elements simultaneously.
F1 Cutoff EG Release 1-6, All Time for the filter 1Cutoff EG Release added to
the static time value for elements 1 to 6 and for
all elements simultaneously.
F1 Reso EG Release 1-6, All Time for the filter 1Resonance EG Release
added to the static time value for elements 1 to
6 and for all elements simultaneously.
F2 Cutoff EG Release 1-6, All Time for the filter 2 Cutoff EG Release added to
the static time value for elements 1 to 6 and for
all elements simultaneously.
F2 Reso EG Release 1-6, All Time for the filter 2 Resonance EG Release
added to the static time value for elements 1 to
6 and for all elements simultaneously.
Pan EG Release 1-6, All Time for the Pan EG Release added to the
static time value for elements 1 to 6 and for all
elements simultaneously.
Volume EG Release 1-6, All Time for the Volume EG Release added to the
static time value for elements 1 to 6 and for all
elements simultaneously.
Eq1 Gain 1-6, All Gain of the first Eq band. ±24 dB
Eq1 Frequency 1-6, All Frequency of the first Eq band. ±12000 cents
±100000 ms
±100000 ms
±100000 ms
±100000 ms
±100000 ms
±100000 ms
±100000 ms
Eq1 Q 1-6, All Q of the first Eq band. ±1
Eq2 Gain 1-6, All Gain of the second Eq band. ±24 dB
Eq2 Frequency 1-6, All Frequency of the second Eq band. ±12000 cents
66
Page 67

Eq2 Q 1-6, All Q of the second Eq band. ±1
Eq3 Gain 1-6, All Gain of the third Eq band. ±24 dB
Eq3 Frequency 1-6, All Frequency of the third Eq band. ±12000 cents
Eq3 Q 1-6, All Q of the third Eq band. ±1
Fx Feedback 1-6, All Fx Delay Feedback ±100 %
Fx Cutoff 1-6, All Fx Filter Cutoff ±13700 Cents
Fx Resonance 1-6, All Fx Filter Resonance ±40 dB
Fx LFO Frequency 1-6, All Fx LFO Frequency ±10 Hertz
Fx LFO Depth 1-6, All Fx LFO Depth ±100 %
Fx Input Level 1-6, All Fx Input Level ±100 %
Fx Dry/Wet 1-6, All Fx Dry/Wet ±100 %
English
67
Page 68

68
Page 69

Index
English
A
Alternative tunings 49
Amplitude editing 46
C
Chaining elements 26
D
Delay effects 32
Distortion effects 35
Drive module 31
DSP Section 27
E
Element 23
Envelope Generators 36
EQ modules 32
F
File organization 22
Filter 27
G
Global page 46
I
Insert FX 32
K
Keytracking 42
L
Limiter 12
LoFi module 31
Low Frequency Oscillators (LFO) 40
M
Master section 11
Microtuning 49
MIDI Learn 47
Mixer 48
Modulation Matrix 13, 46
Modulators Section 36
Multisamples 23
Multi-timbral mode 13
Page 70

O
Oscillator Controls 24
P
Program files 22
R
Reverb effects 35
Ring Modulation 27
S
Samples 23
Saving Programs and Elements 12
Scala files 49
Sinc interpolation 50
Step Generators 43
W
Wavetable synthesis 8
X
X/Y Pad 14
70
Page 71

TWELVE TONE SYSTEMS, INC.
d/b/a CAKEWALK
LICENSE AGREEMENT
YOU SHOULD CAREFULLY READ ALL OF THE FOLLOWING TERMS AND CONDITIONS BEFORE USING THIS PRODUCT.
INSTALLING AND USING THE PRODUCT INDICATES YOUR ACCEPTANCE OF THESE TERMS AND CONDITIONS. IF YOU
DO NOT AGREE WITH THEM, YOU SHOULD PROMPTLY RETURN THE PRODUCT UNUSED AND YOUR MONEY WILL BE
REFUNDED.
1. GRANT OF LICENSE. In consideration of payment of the license fee, Twelve Tone Systems, Inc., d/b/a Cakewalk ("Cakewalk" or
the "Licensor") grants to you, the Licensee, a nonexclusive license to have one person use the enclosed Cakewalk software product (the "Product") on one personal computer at a time. If you want to use the Product on more than one personal computer at a
time, or if you want to network the Product, you must obtain separate licenses from Cakewalk by calling (617) 423-9004. This
license does not grant you any right to any enhancement or update to the Product. Enhancements and updates, if available, may
be obtained by you at Cakewalk’s then current standard pricing, terms and conditions.
2. OWNERSHIP OF THE PRODUCT. Portions of the Product incorporate certain material proprietary to third parties. Cakewalk and
licensors of Cakewalk own and will retain all title, copyright, trademark and other proprietary rights in and to the Product. This
License is NOT a sale of the Product or any copy of it. You, the Licensee, obtain only such rights as are provided in this Agreement.
You understand and agree as follows:
2.1. You may NOT make any copies of all or any part of the Product except for archival copies of the computer software components of the Product as permitted by law,
2.2. You may NOT reverse compile, reverse assemble, reverse engineer, modify, incorporate in whole or in part in any other product or create derivative works based on all or any part of the Product.
2.3. You may NOT remove any copyright, trademark, proprietary rights, disclaimer or warning notice included on or embedded in
any part of the Product.
2.4. You may NOT transfer the Product. If transferred, the original and subsequent owners forfeit all rights to use the software.
2.5 You may not use the documentation for any purpose other than to support your use of the SOFTWARE PRODUCT.
2.6 You may not perform engineering analyses of the SOFTWARE PRODUCT, including performance analyses, or benchmark
analyses, without the written permission of Cakewalk.
3. CONTENT RESTRICTIONS. Unless specified elsewhere in your product package, the following restrictions apply to all digitally
recorded sounds, MIDI or Cakewalk-format song files or rhythm patterns, and printed or digitally reproduced sheet music contained
in the product package (the “content”):
All content is protected by copyright and owned by Cakewalk or other parties that have licensed these works to
Cakewalk.
Any duplication, adaptation, or arrangement of the content without written consent of the owner is an infringement of U.S. or foreign copyright law and subject to the penalties and liabilities provided therein.
English
Page 72

You may not synchronize the content with any videotape or film, or print the content in the form of standard music
notation, without the express written permission of the copyright owner.
The content may not be used for broadcast or transmission of any kind.
You may not resell or redistribute the content “as is” (i.e., stand alone) in any way, including for use in sampling or
sample playback units, or in any sound library product, or in any radio or television broadcast, soundtrack, film or
other commercial product in any media, whether the works remain in their original form or are reformatted,
mixed, filtered, re-synthesized or otherwise edited.
4. LICENSEE'S RESPONSIBILITIES FOR SELECTION AND USE OF THE PRODUCT. Cakewalk hopes the Product will be useful
to your business or personal endeavors. HOWEVER, CAKEWALK DOES NOT WARRANT THE OPERATION OF THE PRODUCT
OR THE ACCURACY OR COMPLETENESS OF ANY INFORMATION CONTAINED IN THE PRODUCT. You, and not Cakewalk,
are responsible for all uses of the Product.
5. WARRANTY.
5.1. Limited Warranty. Subject to the other provisions in Articles 4 and 5 of this Agreement, Cakewalk warrants to you, the original
licensee, that the media on which the Product is recorded will be free of defects in material and workmanship under normal use for
a period of thirty (30) days from purchase, and that the Product will perform substantially in accordance with the user guide for a
period of thirty (30) days from purchase. Cakewalk's sole responsibility under this warranty will be, at its option, (1) to use reasonable efforts to correct any defects that are reported to it within the foregoing warranty period or (2) to refund the full purchase price.
Cakewalk does not warrant that the Product will be error free, nor that all program errors will be corrected. In addition, Cakewalk
makes no warranties if the failure of the Product results from accident, abuse or misapplication. Outside the United States, these
remedies are not available without proof of purchase from an authorized international source. All requests for warranty assistance
shall be directed to Cakewalk at the following address:
Cakewalk
268 Summer st.
Boston, MA 02210 U.S.A.
617 423-9004
5.2. Limitations on Warranties. THE EXPRESS WARRANTY SET FORTH IN THIS ARTICLE 4 IS THE ONLY WARRANTY GIVEN
BY CAKEWALK WITH RESPECT TO THE ENTIRE PRODUCT; CAKEWALK MAKES NO OTHER WARRANTIES, EXPRESS,
IMPLIED OR ARISING BY CUSTOM OR TRADE USAGE, AND SPECIFICALLY DISCLAIMS THE IMPLIED WARRANTIES OF
NON-INFRINGEMENT, MERCHANTABILITY OR FITNESS FOR ANY PARTICULAR PURPOSE. CAKEWALK SHALL NOT BE
HELD RESPONSIBLE FOR THE PERFORMANCE OF THE PRODUCT NOR FOR ANY LIABILITY TO ANY OTHER PARTY
ARISING OUT OF USE OF THE PRODUCT.
SOME STATES DO NOT ALLOW LIMITATIONS ON HOW LONG AN IMPLIED WARRANTY LASTS, SO THE ABOVE LIMITATION
MAY NOT APPLY TO YOU. THIS WARRANTY GIVES YOU SPECIFIC LEGAL RIGHTS, AND YOU MAY ALSO HAVE OTHER
RIGHTS WHICH VARY FROM STATE TO STATE.
6. LIMITATIONS ON REMEDIES. Cakewalk's liability in contract, tort or otherwise arising in connection with the Product shall not
exceed the purchase price of the Product. IN NO EVENT SHALL CAKEWALK BE LIABLE FOR SPECIAL, INCIDENTAL, TORT OR
CONSEQUENTIAL DAMAGES (INCLUDING ANY DAMAGES RESULTING FROM LOSS OF USE, LOSS OF DATA, LOSS OF
Page 73

PROFITS OR LOSS OF BUSINESS) ARISING OUT OF OR IN CONNECTION WITH THE PERFORMANCE OF THE PRODUCT,
EVEN IF CAKEWALK HAS BEEN ADVISED OF THE POSSIBILITY OF SUCH DAMAGES.
SOME STATES DO NOT ALLOW THE EXCLUSION OR LIMITATION OF INCIDENTAL OR CONSEQUENTIAL DAMAGES SO
THE ABOVE EXCLUSION OR LIMITATION MAY NOT APPLY TO YOU.
7. U.S. GOVERNMENT RESTRICTED RIGHTS. If you are a government agency, you acknowledge that the Product was developed at private expense and that the computer software component is provided to you subject to RESTRICTED RIGHTS. The
rights of the government regarding its use, duplication, reproduction or disclosure by the Government is subject to the restrictions
set forth in subparagraph (c)(1)(ii) of the rights in Technical Data and Computer Software clause at DFARS 252.227-7013, and
(c)(1) and (2) of the Commercial Computer Software -- Restricted Rights clause at FAR 52.227-19. Contractor is Twelve Tone Systems, Inc., d/b/a Cakewalk.
8. TERMINATION. This License Agreement will terminate immediately if you breach any of its terms. Upon termination, you will be
required promptly to return to Cakewalk or to destroy all copies of the Product covered by this License Agreement.
9. MISCELLANEOUS.
9.1. Governing Law. The terms of this License shall be construed in accordance with the substantive laws of the United States and/
or Commonwealth of Massachusetts, U.S.A.
9.2. No Waiver. The failure of either party to enforce any rights granted hereunder or to take any action against the other party in the
event of any breach hereunder shall not be deemed a waiver by that party as to subsequent enforcement of rights or subsequent
actions in the event of future breaches.
9.3. Litigation Expenses. If any action is brought by either party to this Agreement against the other party regarding the subject matter hereof, the prevailing party shall be entitled to recover, in addition to any other relief granted, reasonable attorneys' fees and litigation expenses.
9.4. Unenforceable Terms. Should any term of this License Agreement be declared void or unenforceable by any court of competent jurisdiction, such declaration shall have no effect on the remaining terms hereof.
9.5.Certain components of this software are the property of Progressive Networks and its suppliers. You are not allowed to distribute these DLLs to others.
YOU ACKNOWLEDGE THAT YOU HAVE READ THIS LICENSE AGREEMENT, UNDERSTAND IT AND AGREE TO BE BOUND
BY ITS TERMS AND CONDITIONS. YOU FURTHER AGREE THAT IT IS THE COMPLETE AND EXCLUSIVE STATEMENT OF
THE LICENSE AGREEMENT BETWEEN YOU AND CAKEWALK WHICH SUPERSEDES ANY PROPOSALS, OR PRIOR
AGREEMENT, ORAL OR WRITTEN, AND ANY OTHER COMMUNICATIONS BETWEEN YOU AND CAKEWALK RELATING TO
THE SUBJECT MATTER OF THIS LICENSE AGREEMENT.
English
Page 74

Page 75

Inhaltsverzeichnis
1 Einführung. . . . . . . . . . . . . . . . . . . . . . . . . . . . . . . 77
Willkommen. . . . . . . . . . . . . . . . . . . . . . . . . . . . . . . . .78
Installation auf dem Macintosh . . . . . . . . . . . . . . . . . .78
Installation unter Windows . . . . . . . . . . . . . . . . . . . . .78
Die Architektur von Rapture . . . . . . . . . . . . . . . . . . . . 78
MIDI-Controller . . . . . . . . . . . . . . . . . . . . . . . . . . . . . .79
2 Erste Schritte. . . . . . . . . . . . . . . . . . . . . . . . . . . . . 81
Laden von Programmen . . . . . . . . . . . . . . . . . . . . . . . 82
Laden von Elementen . . . . . . . . . . . . . . . . . . . . . . . . .82
Kombinieren und Mischen von Elementen . . . . . . . . .83
Speichern von Programmen und Elementen . . . . . . . 84
Verwenden von Effekten . . . . . . . . . . . . . . . . . . . . . . . 85
Verwenden von Rapture als multitimbrales Instrument86
Die Modulationsmatrix. . . . . . . . . . . . . . . . . . . . . . . . . 86
Das X/Y-Pad . . . . . . . . . . . . . . . . . . . . . . . . . . . . . . . .86
3 Bedienoberfläche und Bedienelemente . . . . . . . 89
Bedienelemente . . . . . . . . . . . . . . . . . . . . . . . . . . . . .92
4 Wesentliche Funktionen. . . . . . . . . . . . . . . . . . . . 95
Programme, Elemente und Audiodateien . . . . . . . . . . 96
Dateiorganisation . . . . . . . . . . . . . . . . . . . . . . . .96
Laden von Samples . . . . . . . . . . . . . . . . . . . . . . . . . .97
Einstellen der Oszillatorbedienelemente. . . . . . . 99
Kopieren, Entladen und Zurücksetzen von Elementen101
Verketten von Elementen . . . . . . . . . . . . . . . . 101
Ringmodulation . . . . . . . . . . . . . . . . . . . . . . . . 102
Der DSP-Bereich . . . . . . . . . . . . . . . . . . . . . . . . . . . 102
Verwenden der Filter . . . . . . . . . . . . . . . . . . . . 102
Verwenden des LoFi-Moduls . . . . . . . . . . . . . . 107
Verwenden des Drive-Moduls . . . . . . . . . . . . . 107
Verwenden des Equalizers . . . . . . . . . . . . . . . . . . . 108
Der Insert-FX-Bereich . . . . . . . . . . . . . . . . . . . . . . . 108
Der Delaymodus . . . . . . . . . . . . . . . . . . . . . . . 108
Der Reverb-Modus. . . . . . . . . . . . . . . . . . . . . . 111
Verzerrereffekte (Distortion). . . . . . . . . . . . . . . 111
Der Modulatorbereich . . . . . . . . . . . . . . . . . . . . . . . 112
Hüllkurvengeneratoren . . . . . . . . . . . . . . . . . . 112
LFOs . . . . . . . . . . . . . . . . . . . . . . . . . . . . . . . . 117
Keyboard-Tracking . . . . . . . . . . . . . . . . . . . . . 120
Der Stepgenerator . . . . . . . . . . . . . . . . . . . . . . 121
Kopieren und Einfügen von Modulatoren . . . . 124
Lautstärkebearbeitung . . . . . . . . . . . . . . . . . . . 124
Die globale Bedienseite . . . . . . . . . . . . . . . . . . . . . . 125
Die Modulationsmatrix . . . . . . . . . . . . . . . . . . . . . . . 125
Die MIDI-Learn-Funktion . . . . . . . . . . . . . . . . . . . . . 126
Der Mixer . . . . . . . . . . . . . . . . . . . . . . . . . . . . . . . . . 128
Microtuning und alternative Stimmungen. . . . . . . . . 128
Sinc-Interpolierung . . . . . . . . . . . . . . . . . . . . . . . . . . 129
Deutsch
Page 76

Anhang A: Parameterreferenz . . . . . . . . . . . . . . . . . . 131
Anhang B: Modulationsmatrix . . . . . . . . . . . . . . . . . . 139
Index . . . . . . . . . . . . . . . . . . . . . . . . . . . . . . . . . . . . . . . 153
LIZENZVEREINBARUNG. . . . . . . . . . . . . . . . . . . . . . . 155
76
Page 77

Einführung
In diesem Kapitel finden Sie
Erläuterungen zu folgenden
Themen:
Willkommen . . . . . . . . . . . . . . . . . . . . . . . . . . . . . . . . . . . 78
Installation auf dem Macintosh . . . . . . . . . . . . . . . . . . . . . 78
Installation unter Windows . . . . . . . . . . . . . . . . . . . . . . . . 78
Die Architektur von Rapture . . . . . . . . . . . . . . . . . . . . . . . 78
MIDI-Controller . . . . . . . . . . . . . . . . . . . . . . . . . . . . . . . . . 79
Deutsch
Page 78

Willkommen
Herzlichen Glückwunsch zu Ihrer Entscheidung für
Rapture!
Rapture ist ein Wavetable-Synthesizer mit innovativen
Funktionen zur Soundmanipulation – perfekt für
Electronica und verwandte Musikstile. Die umfassende
Modulationsmatrix ermöglicht eine ausdrucksstarke
Klangsteuerung, und der einzigartige Stepgenerator stellt
eine intuitive Oberfläche zur Erstellung rhythmischer
Parameteränderungen bereit.
Installation auf dem Macintosh
So installieren Sie Rapture auf einem Macintosh:
1. Legen Sie die Installations-CD von Rapture in Ihr CDROM-Laufwerk.
2. Doppelklicken Sie auf das angezeigte CD-Symbol.
3. Doppelklicken Sie auf das Symbol "Rapture Installer"
(Rapture-Installationsprogramm für Mac OSX) und
folgen Sie der Anleitung auf dem Bildschirm.
Das Installationsprogramm erlaubt Ihnen die Installation
von Rapture als Plug-In in den Formaten VST, AU und/
oder RTAS.
Installation unter Windows
So installieren Sie Rapture unter Windows:
1. Legen Sie die Installations-CD von Rapture in Ihr CDROM-Laufwerk.
2. Das Installationsprogramm für Rapture wird in der
Regel automatisch gestartet. Falls nicht, öffnen Sie
den Arbeitsplatz und doppelklicken Sie auf das
Symbol für das CD-Laufwerk.
3. Folgen Sie den Anweisungen des
Installationsprogramms auf dem Bildschirm.
Das Installationsprogramm erlaubt Ihnen die Installation
von Rapture als Plug-In in den Formaten DXi, VST und/
oder RTAS.
Die Architektur von Rapture
Rapture besteht aus sechs individuellen
Klangerzeugungskomponenten, den so genannten
Elementen.
Ein Rapture-Programm (welches als Datei mit der
Erweiterung .
Einstellungen aller Parameter aller Elemente sowie den
Einstellungen des globalen Bereichs zusammen. Jedes
Element umfasst eine vollständige KlangerzeugungsEngine, die aus einem Oszillator, einer DSP-Stufe pro
Stimme (mit den Funktionen "Bit Reduction", "Decimation",
"Drive" und zwei resonanzfähigen Multimodefiltern) und
einem Satz Modulatoren (Hüllkurvengeneratoren,
Tiefpassfilter und Stepgeneratoren) besteht, die sich auf
die wesentlichen Klangerzeugungsparameter anwenden
lassen. Die von den sechs Elementen erzeugten Signale
werden gemischt und in eine globale DSP-Stufe (mit
parametrischem 3-Band-Equalizer und Multieffektsektion)
geführt.
Der Oszillator ist der Kern des Klangerzeugungsvorgangs.
Die Oszillatoren basieren auf der hochwertigen und
leistungsfähigen Wavetable-Synthese. Diese
Syntheseform stellt eine effiziente Methode zur Erstellung
nichtperkussiver Klänge dar. Zu diesem Zweck wird ein
ganz kurzer Audioausschnitt in einer
Wiederholungsschleife (Loop) wiedergegeben. Bei
Rapture besteht die Wavetable (Wellentabelle) aus einer
Audiodatei mit genau einem Audiozyklus.
Beim Laden der Wellenform erzeugt Rapture alle SampleImages, die der Oszillator braucht, um den Einzelzyklus
PROG gespeichert wird) setzt sich aus den
78
Page 79

über die gesamte Tastatur wiedergeben zu können, ohne
dass durch Aliasing bedingte Verzerrungen entstehen. Im
Lieferumfang von Rapture sind mehr als 200 WavetableDefinitionsdateien enthalten. Diese lassen sich durch
zusätzliche Dateien ergänzen.
MIDI-Controller
Die optimale Leistung erzielen Sie bei Rapture durch den
Einsatz eines guten MIDI-Controllers. Viele Programme
nutzen Steuereinrichtungen wie Modulationsrad,
Aftertouch und Anschlagsstärke (Velocity) zur
Echtzeitbeeinflussung des Klangs während der
Wiedergabe.
Deutsch
79
Page 80

80
Page 81

Erste Schritte
In diesem Kapitel finden Sie
Erläuterungen zu folgenden
Themen:
Laden von Programmen . . . . . . . . . . . . . . . . . . . . . . . . . . 82
Laden von Elementen. . . . . . . . . . . . . . . . . . . . . . . . . . . . 82
Kombinieren und Mischen von Elementen . . . . . . . . . . . . 83
Speichern von Programmen und Elementen . . . . . . . . . . 84
Verwenden von Rapture als multitimbrales Instrument. . . 86
Die Modulationsmatrix . . . . . . . . . . . . . . . . . . . . . . . . . . . 86
Das X/Y-Pad . . . . . . . . . . . . . . . . . . . . . . . . . . . . . . . . . . . 86
Deutsch
Page 82

In diesem Abschnitt finden Sie eine kurze, aber hilfreiche
Einführung in die wichtigsten Konzepte und
meistverwendeten Funktionen von Rapture. Die Details
werden dann in den weiteren Kapiteln dieses
Benutzerhandbuchs erläutert.
Sie können die Themen der Onlinehilfe auch anzeigen,
indem Sie die Funktionstaste F1 (Windows) bzw. die
Tastenkombination Befehlstaste + "?" (Macintosh)
betätigen.
Laden von Programmen
Rapture lädt das gewählte Programm und zeigt den
entsprechenden Programmnamen im Programmfenster
an.
Sie können Programme auch laden, indem Sie auf die
Schaltfläche "Program Handling" (Programmverwaltung)
klicken und im Menü Load Program (Programm
laden) auswählen, oder indem Sie eine .
Rapture-Fenster ziehen.
Beim Laden eines Programms werden alle Elemente
einschließlich zugehöriger Effekte, Filtereinstellungen usw.
gleichzeitig geladen.
PROG-Datei in das
Ein Programm besteht bei Rapture aus bis zu sechs
Elementen. Dabei besteht jedes Element aus einem
Wavetable-Oszillator und einer Abfolge von Effekten,
Filtern, Hüllkurven- und Stepgeneratoren und LFOs. Jedes
Element können Sie im Mixerbereich ganz unten auf der
Bedienoberfläche von Rapture ein- oder ausschalten.
Wollen Sie Rapture als sechsfach multitimbralen
Synthesizer verwenden, dann können Sie jedem Element
auch einen anderen MIDI-Kanal zuweisen.
So laden Sie ein Programm
1. Klicken Sie auf das Programmfenster.
Hier klicken
Der Programm-Browser wird angezeigt.
2. Öffnen Sie den Ordner, in dem das gewünschte
Programm gespeichert ist, und doppelklicken Sie auf
den Programmnamen. Schließen Sie den ProgrammBrowser nach dem Doppelklicken auf das Programm.
82
Laden von Elementen
Rapture gestattet Ihnen die Erstellung und das Laden
einzelner Elementdateien. In einer Elementdatei sind die
Wavetable, die Modulatoren und die Einstellungen von
Equalizern und Insert-Effekten eines einzelnen Elements
gespeichert. Elementdateien werden auf der Festplatte mit
der Erweiterung .
Elementdateien durch sukzessives Laden miteinander
kombinieren und als Basis für ein neues Programm
verwenden.
Beim Laden einer Elementdatei werden die Einstellungen
nicht gewählter Elemente nicht geändert. Wenn Sie die
Einstellungen aller Elemente vor dem Laden von
Elementdateien löschen wollen, initialisieren Sie zunächst
das Programm, indem Sie auf die Schaltfläche "Program
Handling" klicken. Wählen Sie dann im Menü den
Eintrag Initialize Program (Programm initialisieren) aus.
So laden Sie ein Element
1. Klicken Sie mit der rechten Maustaste (Windows)
bzw. bei gedrückter Ctrl-Taste (Macintosh) auf die
Elementschaltfläche des Elements (E1…E6), in das
Sie einen Klang einladen wollen.
ELEM abgelegt. Sie können mehrere
Page 83

Kombinieren und Mischen von
Elementen
2. Wählen Sie Load Element aus dem Kontextmenü.
Das Dialogfeld "Load Element" (Element laden) wird
angezeigt.
3. Öffnen Sie den Ordner, in dem das gewünschte
Element gespeichert ist. Klicken Sie auf den Namen
des Elements und dann auf die Schaltfläche "Open"
(Öffnen).
Rapture lädt nun das gewählte Element. Im WavetableFenster erscheint der Name der Wave-Datei, die vom
Wavetable-Oszillator verwendet wird. Die Grafik zeigt dazu
den Wellenformzyklus an, den der Oszillator zur Erstellung
eines Dauertons verwendet.
Name der gewählten Wave-Datei
Wellenformanzeige
des Zyklus in der
Wave-Datei
Sie können ein Element auch laden, indem Sie eine der
Dateien im Ordner "Elements" des Programm-Browsers
auswählen oder eine .
ziehen.
Tipp: Wenn Sie auf eine Elementschaltfläche geklickt
haben, um die Einstellungen eines Elements anzuzeigen,
können Sie durch Betätigung der Tasten 1 bis 6 auf Ihrer
Computertastatur (nicht aber der Tasten auf dem
Ziffernblock) zum Element mit der betreffenden Nummer
umschalten.
ELEM-Datei in das Rapture-Fenster
Um verschiedene Elemente zu einem neuen Programm zu
kombinieren, können Sie einfach bis zu sechs Elemente
laden und diese dann gemeinsam als neues Programm
speichern. Dies ist nützlich, wenn Sie verschiedene
Klangfarben gleichzeitig spielen möchten. So können Sie
etwa einen Lead-Sound und ein Pad miteinander
kombinieren.
Die Vorgehensweise ist im folgenden Abschnitt
beschrieben.
So kombinieren Sie Elemente zu einem neuen
Programm
1. Initialisieren Sie das Programm, um alle Sounds und
Effekte zurückzusetzen. Klicken Sie zu diesem
Zweck auf die Schaltfläche "Program Handling"
und wählen Sie im Menü den Eintrag Initialize
Program (Programm initialisieren). Bestätigen Sie
nachfolgend die Meldung "All Current Settings Will Be
Discharged" (Alle aktuellen Einstellungen werden
verworfen) durch Anklicken der Schaltfläche Yes).
Klicken Sie auf die Schaltfläche "E1", um die
Bedienelemente für Element 1 anzuzeigen.
2. Laden Sie ein Element in Element 1. Klicken Sie
hierzu mit der rechten Maustaste (Windows) bzw. bei
gedrückter Ctrl-Taste (Macintosh) auf die Schaltfläche
"E1" und wählen Sie Load Element (Element laden)
aus dem Kontextmenü. Navigieren Sie dann zum
gewünschten Element, wählen Sie es aus und klicken
Sie auf "Open" (Öffnen).
3. Nehmen Sie Effekteinstellungen, Filtereinstellungen
usw. für Element 1 vor und stellen Sie sicher, dass im
Deutsch
83
Page 84

Mixerbereich die Schaltfläche "On" (Ein) für Element
1 aktiviert ist.
Element 1 durch
Anklicken einoder ausschalten
Klicken und ziehen, um die
Panorama- und Lautstärkeregler
für Element 1 einzustellen
Sie können die Panorama- und
Lautstärkeeinstellungen der einzelnen Elemente
auch im Mixerbereich vornehmen.
4. Wiederholen Sie Schritte 2 und 3 für weitere
Elemente, die Sie in diesem Programm kombinieren
wollen. Klicken Sie etwa für Element 2 auf die
Schaltfläche "E2", um die Bedienelemente für
Element 2 anzuzeigen, laden Sie ein Element in
Element 2, stellen Sie die Effekte für Element 2 ein
und prüfen Sie, ob im Abschnitt "Mix" die Schaltfläche
"On" (Ein) für Element 2 aktiviert ist. Für Element 3
klicken Sie dann auf die Schaltfläche "E3" und
verfahren nachfolgend wie beschrieben.
5. Wenn Sie die bis zu sechs Elemente geladen und
konfiguriert haben, stellen Sie den Stereosummenmix
des Programms im Master-Bereich ein.
Stereopegelanzeige
Regler für
Gesamtpanorama
und -lautstärke
Mit diesen Master-Reglern für Panorama und
Lautstärke bearbeiten Sie das Gesamtsignal aller
derzeit aktiven Elemente. Die Pegelanzeige stellt das
Stereoausgangssignal von Rapture optisch dar.
Hinweis: Wenn die Pegel hoch sind und Sie das
Programm mit einem Hard-Limiter (d. h. einem
Begrenzer mit festen Einstellungen) bearbeiten
wollen, aktivieren Sie die Schaltfläche "Limiter On" im
Master-Bereich. Der Limiter stellt sicher, dass die
Pegel immer unterhalb der digitalen Vollaussteuerung
(0 dB) bleiben. Diese Funktion ist gerade für Sounds
mit hohen Resonanzwerten oder starker Verzerrung
sehr sinnvoll.
6. Wenn das Programm wie gewünscht klingt, speichern
Sie es wie im folgenden Abschnitt beschrieben ab.
Speichern von Programmen
und Elementen
Nachdem Sie ein Programm oder Element wie gewünscht
konfiguriert haben, können Sie es im betreffenden Ordner
"Programs" bzw. "Elements" speichern. Rapture gestattet
ferner die Auswahl eines Programms, das bei jedem
Einfügen einer neuen Rapture-Instanz automatisch
geladen wird.
So speichern Sie ein Programm
1. Wenn das Programm wie gewünscht klingt, klicken
Sie auf die Schaltfläche "Program Handling" und
wählen Sie Save Program (Programm speichern)
oder Save Program As (Programm speichern unter)
aus dem Menü.
2. Wenn Sie Save Program auswählen, speichert
Rapture das Programm unter dem aktuellen Namen
und im aktuellen Ordner.
3. Wenn Sie hingegen Save Program As auswählen,
wird das Dialogfeld "Save Program" (Programm
speichern) angezeigt. Öffnen Sie den Ordner, in dem
84
Page 85

Sie das Programm speichern möchten, geben Sie
einen Namen für das Programm ein und klicken Sie
auf "Save" (Speichern).
Rapture fügt automatisch die Dateierweiterung
".prog." hinzu. Der angezeigte Programmname wird
aktualisiert.
So speichern Sie ein Element
1. Wenn Sie mit dem Klang Ihres Elements zufrieden
sind, klicken Sie mit der rechten Maustaste
(Windows) bzw. bei gedrückter Ctrl-Taste (Macintosh)
auf die Schaltfläche "Program Handling" und wählen
Sie im Menü den Eintrag Save Element As (Element
speichern unter) aus. Das Dialogfeld "Save Element"
(Element speichern) wird angezeigt.
2. Öffnen Sie den Ordner, in dem Sie das Element
speichern möchten, geben Sie einen Namen für das
Element ein, und klicken Sie auf "Save" (Speichern).
So speichern Sie das Standardprogramm
1. Laden Sie das Programm, das Rapture verwenden
soll, wenn kein anderes Programm ausgewählt
wurde.
2. Klicken Sie auf die Schaltfläche "Program Handling"
und wählen Sie im Menü den Eintrag Save
Default Program (Standardprogramm speichern).
3. Klicken Sie nachfolgend auf Yes, um die Verwendung
des Programms zu bestätigen.
Rapture speichert das aktuelle Programm nun als
Standardprogramm.
Verwenden von Effekten
Master-Effekte) verfügen über dieselben Menüs und
Parameterbedienelemente.
Gehen Sie wie nachfolgend beschrieben vor, um einen
Master-Effekt für Ihr Programm zu konfigurieren.
So stellen Sie einen Master-Effekt für ein
Programm ein
1. Rufen Sie durch Anklicken der Schaltfläche "Global"
die gleichnamige Seite auf.
Der Master FX-Bereich befindet sich direkt über dem
Mixerbereich.
Deutsch
Anklicken, um einen Effekt auszuwählen Parameterregler
2. Wählen Sie zunächst einen Effekttyp aus, indem Sie
auf dem Pfeil im Effektfenster klicken und dann einen
Effekt aus dem angezeigten Menü selektieren.
3. Den Effekt können Sie mit den entsprechenden
Parameterreglern einstellen.
Weitere Informationen zu Effekten finden Sie unter “Der
Insert-FX-Bereich” auf Seite 108.
Für jedes Element stehen separate Insert-Effekte zur
Verfügung. Zudem verfügen Programme über globale und
Master-Effekte. Alle Effektkategorien (Insert-, Global- und
85
Page 86

Verwenden von Rapture als
multitimbrales Instrument
Sie können jedes der sechs Elemente separat
ansprechen, wenn Sie eine einzelne Rapture-Instanz als
sechsfach multitimbrales Instrument verwenden wollen.
So verwenden Sie Rapture als multitimbrales
Instrument
1. Laden Sie das Programm, das Sie multitimbral
verwenden möchten.
2. Klicken Sie auf die Schaltfläche "Options" (Optionen)
. Das Dialogfeld "Options" (Optionen) wird
angezeigt.
3. Markieren Sie die Option "Set Program As Multitimbral" (Programm multitimbral verwenden) und
klicken Sie dann auf "OK".
4. Speichern Sie das Programm, wenn Sie es zukünftig
immer multitimbral einsetzen möchten.
Wenn für ein Programm der Multitimbralmodus gewählt ist,
lassen sich die sechs Elemente über den jeweiligen MIDIKanal 1 bis 6 ansteuern.
Die Modulationsmatrix
Sie können mithilfe der Modulationsmatrix verschiedene
Modulationsquellen virtuell mit verschiedenen Parametern
verknüpfen. Die Modulationsmatrix erweitert die Steuerund Ausdrucksmöglichkeiten eines Programms.
So verknüpfen Sie eine Modulationsquelle mit
einem Parameter (Modulationsziel)
1. Rufen Sie die Modulationsmatrix auf, indem Sie auf
die Schaltfläche "Show/Hide Modulation Matrix"
(Modulationsmatrix ein-/ausblenden) klicken .
2. Klicken Sie in der Spalte "Source" (Quelle) links auf
den Pfeil, um das Menü "Modulation Source"
(Modulationsquelle) zu öffnen.
3. Wählen Sie die Modulationsquelle aus, die Sie zur
Steuerung eines Rapture-Parameters verwenden
möchten.
4. Klicken Sie in der Spalte "Destination" (Ziel) links auf
den Pfeil, um das Menü "Destination" zu öffnen. Nun
wird eine Liste der Parameter von Rapture angezeigt.
5. Klicken Sie auf den Parameter, den Sie mit der in der
linken Spalte gewählten Modulationsquelle steuern
möchten.
6. Durch Ziehen mit der Maus können Sie in der Spalte
"Depth" (Intensität) einen Wert festlegen, der angibt,
mit welcher Intensität und Ausrichtung der Parameter
auf Steuermeldungen der Quelle reagiert. Negative
Werte erzeugen dabei invertierte Modulationen.
7. Durch Ziehen mit der Maus können Sie in der Spalte
"Smooth" (Glättung) einen Wert für die Glättung der
durch die Modulationsquelle hervorgerufenen
Änderungen am Zielparameter festlegen.
Das X/Y-Pad
Das X/Y-Pad dient der Änderung zugewiesener
Synthesizerparameterwerte. Hierzu wird das Fadenkreuz
im Pad verschoben. Je nach Bewegung des
Fadenkreuzes werden die Werte erhöht oder vermindert.
Mit dem Feld "Desaccel" können Sie die Trägheit des
Fadenkreuzes erhöhen. Höhere Werte verlangsamen die
Reaktion.
86
Page 87

Sie öffnen das X/Y-Pad durch Anklicken der Schaltfläche
"Show/Hide Vector Mixer" (Vektormixer ein-/ausblenden)
.
Fadenkreuz
So weisen Sie dem X/Y-Pad Parameter zu
1. Rufen Sie die Modulationsmatrix auf, indem Sie auf
die Schaltfläche "Show/Hide Modulation Matrix"
(Modulationsmatrix ein-/ausblenden) klicken .
2. Klicken Sie in der Spalte "Source" (Quelle) links auf
den Pfeil, um das Menü "Modulation Source"
(Modulationsquelle) zu öffnen.
3. Wählen Sie im Menü "Source" einen der Einträge X/Y
Pad X oder X/Y Pad Y.
4. Klicken Sie in der Spalte "Destination" (Ziel) links auf
den Pfeil, um das Menü "Modulation Destination"
(Modulationsziel) zu öffnen.
5. Wählen Sie im Menü "Destination" einen der
angezeigten Synthesizerparameter aus.
Das X/Y-Pad steuert nun die ausgewählten Parameter. Sie
können dem X/Y-Pad so viele Parameter zuweisen, wie
Platz in der Modulationsmatrix vorhanden ist.
Deutsch
87
Page 88

88
Page 89

Bedienoberfläche und
Bedienelemente
In diesem Kapitel finden Sie
Erläuterungen zu folgenden
Themen:
Bedienoberfläche . . . . . . . . . . . . . . . . . . . . . . . . . . . . . . . 90
Bedienelemente . . . . . . . . . . . . . . . . . . . . . . . . . . . . . . . . 92
Deutsch
Page 90

Bedienoberfläche
Das Hauptfenster
Programmname und
Aufruf des
Programm-Browsers
Oszillator-/
Editorbereich
Hüllkurvengenerator
- und LFO-Bereich
Stepgenerator
EQ-Bereich
Insert-FX-Bereich
Mixerbereich
Die Bedienoberfläche von Rapture besteht aus drei
Bereichen:
• Programmbereich (oben)
In diesem Bereich befinden sich die Funktionen zum
Auswählen und Laden von Programmen und die
Schaltflächen für Programmverwaltung, Optionen,
Modulationsmatrix und X/Y-Pad.
Wahlschalter für die
Elemente und
Schaltfläche für die
Globalseite
Filter-/DriveBereich
Master-Bereich
Modulationsmatrix und X/Y-Pad sind separat
aufzurufende Fenster. Im Modulationsmatrixfenster
werden alle Modulationszuweisungen für das aktuelle
Preset definiert. Mit dem X/Y-Pad steuern Sie
Synthesizerparameter.
90
Page 91

• Elementbereich (Mitte)
Dieser Bereich enthält einen horizontalen
Wahlschalter, um das zu bearbeitende Element (1-6)
sowie alle Elementkomponenten wie EQ oder
Stepgenerator auszuwählen .
Die globale Bedienseite
Programmname und
Aufruf des
Programm-Browsers
Globaler Effekt 1
Globaler Effekt 2
Globaler
Stepgenerator
• Mixer-/Master-Bereich (unten)
Dieser Bereich enthält die Mixerregler der sechs
Elemente sowie Summenregler zur Einstellung der
Ausgangsstereomischung.
Rapture verfügt ferner über eine globale Bedienseite, auf
der die Einstellungen für globale und Master-Effekte
vorgenommen werden. Sie rufen die globale Seite durch
Anklicken der Schaltfläche "Global" neben den
Elementwahlschaltern auf.
Schaltfläche zum
Aufruf der globalen
Bedienseite
Deutsch
Master-EQ-Bereich
Master-FX-Bereich
Mixerbereich
Master-Bereich
91
Page 92

Bedienelemente
Alle Funktionen in Rapture werden über die folgenden
Bedienelemente gesteuert:
Horizontale Wahlschalter
Die horizontalen Wahlschalter befinden sich oben im
jeweiligen Bereich und werden verwendet, um eine von
mehreren verfügbaren Seiten zur Bearbeitung
auszuwählen.
Sie dienen der Auswahl auf der Hauptseite (Elemente 1
bis 6 und globale Bedienseite) und auf der Modulatorseite
(Tonhöhe, Filterfrequenzen und -resonanzen sowie
Panorama und Lautstärke).
So verwenden Sie horizontale Wahlschalter
• Seiten lassen sich durch direktes Anklicken der
horizontalen Wahlschalter oder durch Klicken und
Ziehen mit der Maus auswählen.
• Wenn ein horizontaler Wahlschalter aktiv ist, kann er
auf Tastenbetätigung reagieren. Seiten lassen sich
zudem, sofern aktiv, auch über die Zifferntasten
auswählen.
Regler
Parameter, die stufenlos einstellbar und automatisierbar
sind, werden über Regler eingestellt. Die Regler in
Rapture können über Mausbewegungen, das Mausrad,
die Tastatur oder MIDI-Meldungen gesteuert werden.
Wenn ein Parameter nicht aktiv ist (z. B. weil der gesamte
Bereich deaktiviert ist), wird der entsprechende Regler
halbtransparent dargestellt. Wenn ein Regler in diesem
Status bedient wird, wird der entsprechende
Parameterwert zwar geändert, aber dies wirkt sich nicht
auf den zu hörenden Klang aus.
So verwenden Sie Regler
• Wenn Sie den Mauszeiger auf einen Regler setzen
(ohne ihn anzuklicken), dann erscheint nach einem
Moment ein QuickInfo, welches das derzeit gewählte
Element, den Parameternamen und den aktuellen
Parameterwert anzeigt.
• Klicken Sie auf den Regler und bewegen Sie die
Maus dann vertikal, um den Parameterwert
anzupassen. Ein QuickInfo zeigt während der
Einstellung den aktuellen Parameterwert an.
• Durch einen Doppelklick auf einen Regler wird der
entsprechende Parameter auf seinen Standardwert
(den "natürlichen" Wert) zurückgesetzt.
• Wenn ein Regler angeklickt (oder darauf ein
Doppelklick ausgeführt) wird, wird er zum aktiven
Regler. Aktive Regler können durch Bewegungen des
Mausrads und Tastenbetätigung gesteuert werden.
• Das Mausrad ändert den Parameterwert für den
aktiven Reglern in Schritten von ±5%. Wenn Sie beim
Bewegen des Mausrades die Umschalttaste
drücken, ändert sich der Parameterwert mit einer
Schrittweite von ±1%, was eine genauere Einstellung
ermöglicht.
Solange sich der Mauszeiger über dem Regler
befindet, wird der Parameterwert für
Mausradmeldungen in einem QuickInfo angezeigt.
Regler erzeugen bei Mausradsteuerung keine
interpolierten Werte.
92
Page 93

• Wenn ein Regler aktiv ist, reagiert er auf
Tastenbetätigungen. Die folgenden Tasten können
verwendet werden, um den Parameterwert zu
ändern:
High Key" (niedrigste und höchste spielbare Note) eines
Elements in der Oszillatorbedienanzeige.
Taste Änderung
Links-/Rechtspfeiltaste ± 0.1%
Aufwärts-/
Abwärtspfeiltaste
Pos1 Minimum
Ende Maximum
Solange sich der Mauszeiger über dem Regler befindet,
wird der Parameterwert für Tastaturmeldungen in einem
QuickInfo angezeigt. Regler erzeugen bei
Tastatursteuerung keine interpolierten Werte.
± 1%
Schaltflächen
Schaltflächen werden verwendet, um Komponenten einoder auszuschalten.
Wenn Sie auf eine Schaltfläche klicken, wird die
Komponente ein- bzw. ausgeschaltet; die Schaltfläche
zeigt den entsprechenden Status an.
Aufwärts-/Abwärtswahlschalter
Nicht automatisierbare Parameter mit numerischen
Werten werden über die Aufwärts-/Abwärtswahlschalter
gesteuert. Ein Beispiel für diesen Parametertyp ist "Low/
• Die Aufwärts-/Abwärtswahlschalter werden ebenso
gesteuert wie die Regler: Klicken Sie darauf und
bewegen Sie die Maus nach oben oder unten. Die
Einstellung der Aufwärts-/Abwärtswahlschalter
erzeugt jedoch keine interpolierten Werte. Ein
QuickInfo zeigt während der Einstellung den
aktuellen Parameterwert an.
• Wie ein Regler wird auch ein Aufwärts-/
Abwärtswahlschalter aktiv, sobald er angeklickt wird.
In diesem Zustand wird die Schriftfarbe orangefarben.
• Wenn ein Aufwärts-/Abwärtswahlschalter aktiviert ist,
kann er Mausradmeldungen empfangen und auf
Tastenbetätigungen reagieren.
• Da viele der durch die Aufwärts-/Abwärtswahlschalter
dargestellten Parameter große Wertebereiche
aufweisen und gleichzeitig eine genaue Einstellung
erfordern, können die folgenden Modifikatoren
verwendet werden, um bei Verwendung der Maus
verschiedene Geschwindigkeiten bzw. Auflösungen
einzustellen:
Modifikator Änderung
Umschalttaste Kleine Schrittweite
Strg-Taste
(Befehlstaste beim
Macintosh)
(hohe Auflösung, geringe
Werteänderungen)
Große Schrittweite
(geringe Auflösung, hohe
Werteänderungen)
Deutsch
93
Page 94

• Bereich und Schrittweite aller Parameter sind in der
Tabelle "Parameterbereiche" aufgeführt. Siehe
“Anhang A: Parameterreferenz” auf Seite 131.
• Wenn ein Aufwärts-/Abwärtswahlschalter aktiv ist,
reagiert er auf Tastenbetätigungen. Die folgenden
Tasten können verwendet werden, um den
Parameterwert zu ändern:
Mausradmeldungen empfangen und auf
Tastenbetätigungen reagieren. Die folgenden Tasten
können verwendet werden, um den Parameterwert zu
ändern:
Taste Änderung
Taste Parameterwert
Aufwärts-/
Abwärtspfeiltasten
Bild auf/ab 10 Schritte auf/ab
Nächster bzw. vorhergehender
Parameterwert
bei Standardschrittweite.
Textwahlschalter
Die Textwahlschalter werden verwendet, um einen
Parameter mit verschiedenen nichtnumerischen Optionen
einzustellen. Ein Beispiel hierfür ist etwa der Parameter
"Insert FX Type" (Insert-Effekttyp).
Wenn Sie unter Windows mit der linken Maustaste auf
einen Textwahlschalter klicken, wird der folgende, bei
Anklicken mit der rechten Maustaste der vorherige Wert
ausgewählt. Beim Macintosh erfolgt die Auswahl durch
Anklicken (nächster Wert) bzw. durch Anklicken bei
gedrückter Ctrl-Taste (vorheriger Wert).
Beim Klicken auf einen Textwahlschalter wird dieser aktiv.
In diesem Zustand wird die Schriftfarbe orangefarben.
Wenn ein Textwahlschalter aktiviert ist, kann er
Aufwärts-/
Abwärtspfeiltasten
Bild auf/ab 10 Schritte auf/ab
Tipp: Viele Textselektorwerte lassen sich auch über ein
Menü aufrufen. Klicken Sie auf das graue Dreieck links
oder rechts neben einem Textselektor, um die verfügbaren
Funktionen in einem Popupmenü anzuzeigen.
Nächster/vorhergehender
Parameterwert
Bedienelemente für die Parameter "Envelope"
(Hüllkurve), "LFO Waveform" (LFO-Wellenform)
und "Key Tracking"
Der Modulatorbereich umfasst spezielle Bedienelemente
zur Einstellung von Hüllkurvengeneratoren, LFOWellenformen und Keyboard-Tracking. Detaillierte
Hinweise zur Bedienung dieser Bedienelemente finden Sie
unter “Der Modulatorbereich” auf Seite 112.
94
Page 95

Wesentliche Funktionen
In diesem Kapitel finden Sie
Erläuterungen zu folgenden
Themen:
Programme, Elemente und Audiodateien . . . . . . . . . . . . . 96
Laden von Samples . . . . . . . . . . . . . . . . . . . . . . . . . . . . . 97
Kopieren, Entladen und Zurücksetzen von Elementen. . 101
Der DSP-Bereich . . . . . . . . . . . . . . . . . . . . . . . . . . . . . . 102
Verwenden des Equalizers . . . . . . . . . . . . . . . . . . . . . . . 108
Der Insert-FX-Bereich. . . . . . . . . . . . . . . . . . . . . . . . . . . 108
Der Modulatorbereich . . . . . . . . . . . . . . . . . . . . . . . . . . . 112
Die Modulationsmatrix . . . . . . . . . . . . . . . . . . . . . . . . . . 125
Die MIDI-Learn-Funktion . . . . . . . . . . . . . . . . . . . . . . . . 126
Der Mixer . . . . . . . . . . . . . . . . . . . . . . . . . . . . . . . . . . . . 128
Microtuning und alternative Stimmungen . . . . . . . . . . . . 128
Sinc-Interpolierung . . . . . . . . . . . . . . . . . . . . . . . . . . . . . 129
Deutsch
Page 96

Die folgenden Abschnitte beschreiben die erweiterten
Funktionalitäten von Rapture und andere Sachverhalte,
die in den einführenden Kapiteln nicht behandelt wurden.
MIDI\ MIDI-Ordner.
Enthält alle Daten für die MIDILearn-Funktion.
Programme, Elemente und
Audiodateien
Wie bereits im Kapitel "Erste Schritte" beschrieben,
besteht ein Programm bei Rapture aus bis zu sechs
Elementen und bietet so viel Potenzial für
anspruchsvollste Klangprogrammierung. Ein Programm
umfasst die Einstellungen dieser sechs Elemente
einschließlich der Verweise auf die Wavetables, die von
den Oszillatoren verwendet werden, und aller globaler
Einstellungen.
Dateiorganisation
Nach der Installation werden die folgenden Verzeichnisse
im Rapture-Verzeichnis erstellt:
Verzeichnis Inhalt
Documentation\ Dokumentationsordner.
Enthält Versionshinweise, das
Benutzerhandbuch und
Registrierungsinformationen.
Lfo Waveforms\ Ordner für LFO-Wellenformen.
Enthält alle werksseitig
vorprogrammierten LFOWellenformen.
Benutzerdefinierte Wellenformen
lassen sich ebenfalls hier
ablegen.
Multisamples\ Ordner für Multisamples.
Enthält alle werksseitig
vorhandenen Wavetables,
Multisample-Definitionen und
Samplesammlungen.
Programs\ Ordner für Programme.
Enthält alle Werkspresets und programme. Wenn Sie ein
Programm speichern wollen,
zeigt Rapture diesen Ordner
standardmäßig als
Zielverzeichnis an.
Programs\Elements\ Ordner für Elemente.
Enthält alle Werkselemente.
Wenn Sie ein Element speichern
wollen, zeigt Rapture diesen
Ordner standardmäßig als
Zielverzeichnis an.
Sample Pool\ Samplepoolordner
Enthält Samples für Projekt- oder
Demosongs.
Tunings\ Ordner für Stimmungen.
Enthält alle Microtuning-Dateien
und Dateien für alternative
Stimmungen.
96
Page 97

Programmdateien
Programmdateien (.prog) können überall auf der
Festplatte oder im Netzwerk gespeichert werden. Der
Ordner "Programs\" dient lediglich Organisationszwecken,
Sie können Ihre Programme an beliebiger anderer Stelle
ablegen.
Sie brauchen sich nicht darum zu kümmern, wo Sie
Programmdateien ablegen, damit Ihre Songs korrekt
wiedergegeben werden: Eine Kopie der Programmdatei
wird zu Konsistenzzwecken gespeichert und immer dann
geladen, wenn auch der Song geladen wird.
Jeder Song enthält also eine Momentaufnahme aller
verwendeten Programme zu dem Zeitpunkt, an dem der
Song beim letzten Mal gespeichert wurde. Auf diese Weise
können Sie ältere Songs und die entsprechenden
Einstellungen auch dann korrekt wiedergeben, wenn die
Werksprogramme in Zukunft geändert werden sollten.
Elemente
Rapture kann einzelne Elemente als Datei speichern und
laden. Dieses Konzept erlaubt die Erstellung einer Art
"Elementpool", der als Grundlage für die schneller
Erstellung neuer Programme dienen kann. Eine
Elementdatei enthält alle Einstellungen eines Elements
einschließlich der Wavetable- und Oszillatorparameter,
aller Modulatoren und der programmierten DSPEinstellungen.
Tipp: Elemente, die im Standardordner für Elemente
abgelegt sind, lassen sich direkt über den ProgrammBrowser laden. Starten Sie den Programm-Browser und
öffnen Sie den Elementordner, um dort Ihre Auswahl zu
treffen. Wenn Sie ein Element auf diesem Wege laden,
werden die übrigen Elemente des aktuellen Programms
hiervon nicht betroffen.
Audiodateien
Rapture ist spezialisiert auf die Erstellung von Wavetables
unter Verwendung von Audiodateien, die genau einen
Audiozyklus enthalten. Im Ergebnis erzeugen die
Oszillatoren von Rapture ihre Klänge also auf der Basis
der so genannten Wavetable-Synthese. Rapture gestattet
aber auch das Laden einer Vielzahl anderer
Audiodateitypen. Im Unterschied zu Programmdateien
werden von den Audiodateien (.
jedoch keine songspezifischen Kopien erstellt. Dies
bedeutet, dass sich alle Änderungen, die Sie an den als
Basis verwendeten Audiodateien vornehmen, direkt auf
die Wiedergabe betreffender Songs auswirken.
Zudem handelt es sich bei den Samples um
standardkonforme Wave-Dateien, die mit einem
konventionellen Wave-Editor bearbeitet werden können.
Daher folgende Warnung: Wenn Sie eine MultisampleDefinitionsdatei und/oder eine Sampledatei editieren,
klingt ein Song, der die betreffenden Dateien verwendet,
aufgrund der Änderungen unter Umständen anders als
vorher.
SFZ, .WAV, .AIF, .AIFF, .OGG)
Samples
Wenn beim Laden eines Programms oder Songs ein in
einer SFZ-Definitionsdatei referenziertes Sample nicht
gefunden werden kann, versucht Rapture es von der
ursprünglichen Position zu laden.
Wenn sich die Wave-Datei nicht mehr an der
ursprünglichen Position befindet, durchsucht Rapture den
Samplepoolordner. Dies vereinfacht den Austausch von
Sampledateien zwischen Benutzern.
Rapture meldet jedes Sample, das auch nach
Durchführung der beschriebenen Vorgänge nicht gefunden
werden konnte.
Laden von Samples
Sie können Einzelsamples (Wave- oder AIFF-Dateien) und
auch Multisamples (SFZ-Dateien) laden, die bereits
Zuordnungsdaten für Tastatur- und
Anschlagsstärkenbereiche enthalten. Dabei lassen sich
Deutsch
97
Page 98

geloopte wie auch ungeloopte Mono- und Stereosamples
beliebiger Auflösung und Samplerate laden. Wave- und
AIFF-Dateien können Sie entweder direkt oder als Sample
in einer SFZ-Definitionsdatei laden.
Samples können eine beliebige Auflösung (8 bis 32 Bit)
und Sample-Rate aufweisen und wahlweise mono oder
stereo sein. Als Sample in einem Multisample können
Wave-Dateien (PCM-kodierte, meist unter Windows
eingesetzte Audiodateien mit der Erweiterung .
Dateien (Audiodateien im Apple-Format mit der
Erweiterung .
Vorbis-Format sein (Ogg Vorbis ist ein hochwertiges,
lizenzfreies Open-Source-Format; die Dateien haben die
Erweiterung
Element geladen werden.
Ferner können Multisample-Definitionsdateien (SFZDateien) oder einzelne Samples auch via Drag & Drop
direkt in das Rapture-Fenster gezogen werden. Das
Sample wird dann in das ausgewählte Element geladen.
Tipp: Wenn ein Multisample oder ein einzelnes Sample
(auch solche aus einem Multisample) mehrfach – z. B. in
mehrere Elemente oder Rapture-Instanzen – geladen wird,
ist es physisch trotzdem nur einmal im Speicher
vorhanden. Die für die zweite und alle weiteren Instanzen
angegebene Größe ist demzufolge Null. Hierdurch wird
der Speicher effizient genutzt.
Wenn Sie ein Sample oder Multisample laden, werden
eventuell vorhandene Effektverknüpfungen in Rapture
nicht gelöscht. Wenn Sie die Effekte zuvor löschen
möchten, initialisieren Sie das Programm, indem Sie die
Schaltfläche "Program Handling" (Programmverwaltung)
anklicken und im Menü Initialize Program
(Programm initialisieren) auswählen.
Ein Multisample besteht aus einer Gruppe von Samples
und den zugehörigen Zuordnungsdaten für Tastatur- und
Anschlagsstärkenbereiche. Um die Zuordnung der
Tastatur und Anschlagsstärkenbereiche zu ändern,
AIFF) oder komprimierte Dateien im Ogg-
OGG). Auch diese Dateien können direkt in ein
WAV), AIFF-
können Sie die SFZ-Datei des Multisamples bearbeiten.
Diese Datei und die Multisamples finden Sie im
Multisampleordner. SFZ-Dateien können Sie mit dem
Windows-Editor bearbeiten. Eine Erläuterung des SFZFormats finden Sie unter http://www.rgcaudio.com/
sfzformat.htm.
Hinweis: Rapture kann SFZ-Dateien in den Formaten
Unicode (Little und Big Endian), UTF-8 und ANSI lesen. In
Unicode- und UTF-Dateien kann zur Definition von
Ordner- und Dateinamen jeder beliebige Zeichensatz
verwendet werden. Sie können Rapture mithin in einem im
Unicode-Format benannten Ordner installieren.
So laden Sie eine Wavetable oder ein Sample
1. Klicken Sie in das Wavetable-Fenster, um das
Dialogfeld "Load Multisamples" (Multisamples laden)
anzuzeigen. Öffnen Sie dann den Ordner, in dem die
Wavetable bzw. das Sample abgelegt ist.
Wavetable-Fenster
Wellenform
Hinweis: Rapture liest Samples im StreamingVerfahren aus dem RAM aus. Aufgrund dessen ist es
abhängig von der Speicherausstattung Ihres
Computers unter Umständen möglich, dass nur
Samples von maximal einer Minute Länge zur
Verwendung geeignet sind. Die Wiedergabe eines
Stereosamples belastet den Prozessor stärker als die
98
Page 99

eines Monosamples, jedoch weniger stark als die
Wiedergabe zweier Monosamples.
2. Klicken Sie auf den Namen der Wavetable oder des
Samples und dann auf die Schaltfläche "Open"
(Öffnen).
ODER
• Ziehen Sie eine Wave-Datei aus dem WindowsExplorer bzw. dem Finder auf den Oszillatorbereich
von Rapture.
Tipp: Sie können die Wave-Dateien im aktuellen
Verzeichnis nacheinander aufrufen, ohne ein Dialogfeld zu
öffnen, indem Sie im Wavetable-Fenster mit der linken
Maustaste auf die Wellenform klicken. Klicken Sie die
Wellenform mit der rechten Maustaste (Windows) bzw. bei
gedrückter Ctrl-Taste (Macintosh) an, dann wird die
Aufrufreihenfolge umgekehrt.
Einstellen der
Oszillatorbedienelemente
Sobald eine Wavetable in das Element geladen ist, können
Sie eine Anzahl von Zuordnungs-, Stimmungs- und
Abspielparameter einstellen. Im Oszillatorbereich finden
Sie die folgenden Bedienelement vor:
Bedienelement Funktion Typ
Lo/Hi Key Bestimmt den Notenbereich, in dem das Element wiedergegeben wird. Notennummer
Deutsch
Lo/Hi Vel Bestimmt den Anschlagsstärkenbereich, in dem das Element
wiedergegeben wird.
Bend Up/Down Bestimmt den Pitchbend-Bereich. Halbtöne
Sust/Sost Bestimmt, ob und wie das Element auf die MIDI-Controller 64 (Sustain)
und 66 (Sostenuto) reagiert.
Transpose Ändert die Tonhöhe (dies betrifft jedoch nicht die Tastaturzuordnung). Halbtöne
Tune Erhöht oder vermindert die Tonhöhe in Schritten von 1 Cent (100 Cent =
1 Halbton).
Keyboard-Tracking Ändert die Tonhöhenabweichung pro Note. Cent pro Taste
Notennummer
On/Off (ein/aus)
Cent
99
Page 100

Phase Stellt die Startphase der Wellenform im Bereich von 0 bis 360° ein. Diese
Startphase wird dann beim Empfang eines Note-On-Befehls verwendet.
Es ist möglich, durch Verwendung einer Wellenform mit
unterschiedlichen Startphasen in zwei Oszillatoren komplexe
Klangtexturen zu erstellen.
Grad
Quality Bestimmt die Rendering-Qualität der Wavetable.
"Standard" sollte immer dann verwendet werden, wenn mit dem
Oszillator keine prägnanten Tonhöhenverläufe ausgeführt werden. Die
Einstellung "High" führt eine Interpolierung höherer Ordnung auf
Teiltonebene durch und gestattet so umfassende Tonhöhensweeps ohne
hörbares Aliasing.
Multi Verteilt die aktuell geladene Wavetable auf mehrere Oszillatoren
(Stimmen), die gleichmäßig und mit unterschiedlicher Verstimmung im
Stereofeld verteilt werden.
Beachten Sie, dass der Verstimmungsgrad durch den Regler "Detune"
gesteuert wird.
Ring Mod Wandelt den Oszillator in ZWEI Oszillatoren um, die sich gegenseitig
ringmodulieren. Weitere Informationen finden Sie unter “Ringmodulation”
auf Seite 102.
Beachten Sie, dass der Verstimmungsgrad zwischen beiden Oszillatoren
durch den Regler "Detune" bestimmt wird.
Detune Die hier vorgenommene Verstimmungseinstellung gilt im Multioszillator-
und Ringmodulationsmodus für den am stärksten verstimmten Oszillator;
die übrigen Oszillatoren werden von diesem Wert interpoliert. Der
Wertebereich beträgt einen Halbton (100 Cent).
Porta Time Erzwingt einen stufenlosen Tonhöhenübergang (Portamento), wenn die
Polyfonie auf 0 gesetzt ist (dies entspricht dem monofonen Modus mit
Legatomodus). Der Wertebereich liegt zwischen 0 und 10 Sekunden.
Std/Hi
Off (aus), 3v, 5v, 7v,
9v
On/Off
Cent
Sekunden
100
 Loading...