

Roland KS-10Z Users Manual
© 2018 Roland CorporationOwner’s Manual
English
5 Before using this unit, carefully read the leaet “USING THE UNIT SAFELY” and “IMPORTANT NOTES.” After reading, keep the
document(s) where it will be available for immediate reference.
5 This document explains the specications of the product at the time that the document was issued. For the latest information,
refer to the Roland website.
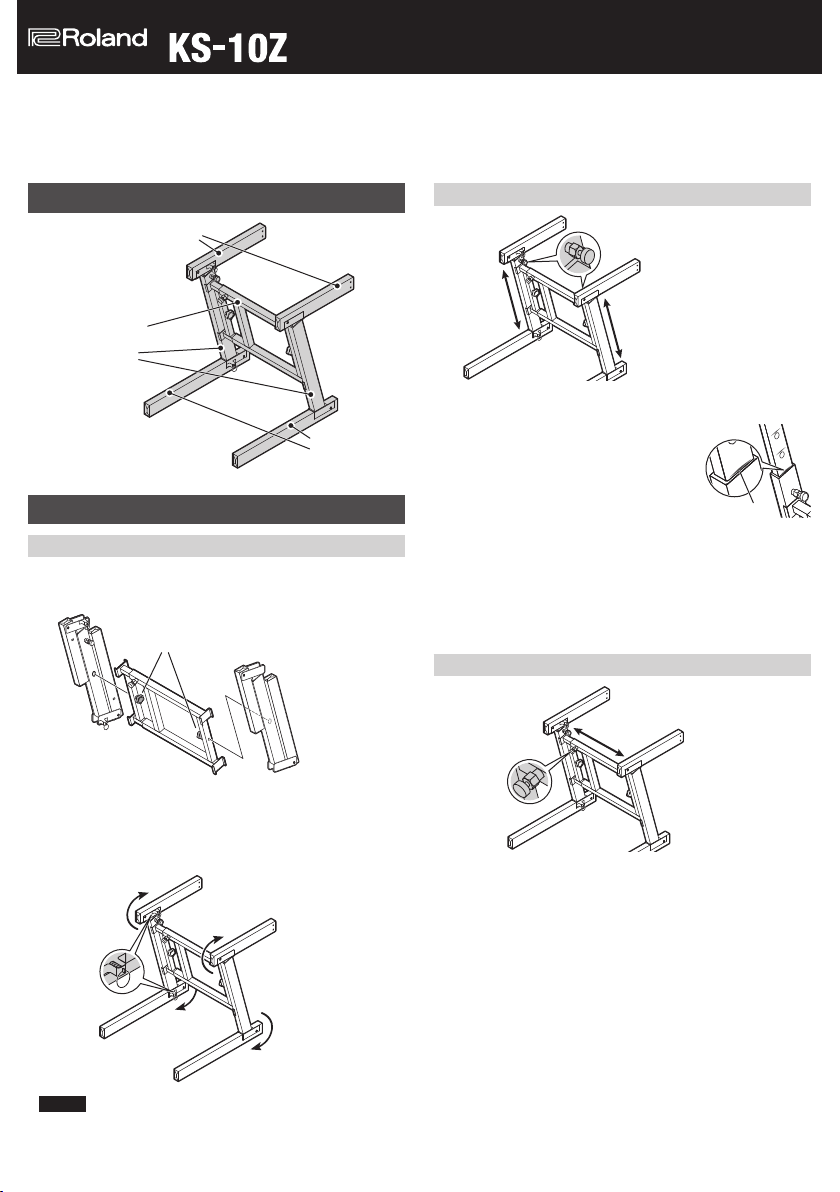
Part Descriptions
Arms
Center frame
Side frames
Legs
Assembly
Attaching the Side Frames
1. Using the included knob bolts, fasten the left and
right side frames to the center frame.
Knob bolts (included)
Adjusting the Height
Knob bolts
1. Loosen the knob bolt of each side frame.
2. While pulling out the knob bolt,
lift up the arm and adjust it to the
height of the calibration line.
* You must adjust it precisely to the
calibration line.
Calibration lines
3. Release the knob bolt.
When you release the knob bolt, it enters the screw
hole.
* Slightly raise and lower the arm to verify that it is locked.
4. Firmly tighten the knob bolt to secure it.
Adjusting the Width
Knob bolt
2. Open the arm and leg of each side frame until you
hear a click.
Make sure that the lock pins of the arm and leg t into
the holes and are secure.
Lock pins
NOTE
When opening the arm and leg of each side frame, take care
not to pinch your nger etc.
1. Loosen the knob bolt of the center frame.
2. While pulling out the knob bolt, adjust the width of
the center frame.
3. Release the knob bolt.
4. Adjust the position of the center frame so that the
knob bolt enters the screw hole.
* Slightly slide the side frame to left and right to verify that
it is locked.
5. Firmly tighten the knob bolt to secure it.
Roland is an either registered trademark or trademark of Roland
Corporation in the United States and/or other countries.
 Loading...