

Page 1
Installation Instructions 3
10000043395
Beipackinformation 12
Notice d'utilisation 19
Hoja adicional 26
Foglio informativo 33
en
de
fr
es
it
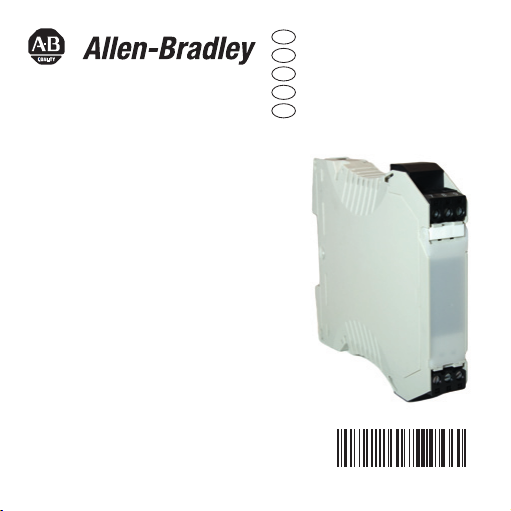
Passive Isolator, 2 Channel
931S-A1A1N-IP2
DIR 10000043395
(Version 00)
Page 2

Page 3

• Disconnect power prior to installation
WARNING
• Installation only by Qualified personnel
• Follow all applicable local and national electrical codes
2 Application
The 2 Channel Passive Isolator 931S-A1A1N-IP2 without
additional voltage supply are suitable for connection to 2-wire
sensors. The signal is galvanically isolated and equally emitted as
a 2-wire signal. The voltage supply for input/output is generated
from the input-circuit.
3
Page 4

3 Mounting and dismounting
3.1 Mounting onto TS 35 DIN rails
(Page 41, Fig. 1)
3.2 Pluggable electronic components for range alteration
(depending on model)
(Page 41, Fig. 2)
1. Remove connector, (depending on model either screw-type
or tension clamp).
2. Press locking clips on both sides of the enclosure.
3. Pull out the circuit board.
The circuit board can only be inserted in one position.
The connectors are all keyed to insure proper installation.
3.3 Labelling possibilities
1492-M5X10 markers can be used to label module.
4
Page 5

4 Electrical connection
(Page 42, Fig. 3)
2-channel: 931S-A1A1N-IP2
5 Dimensions
(Page 43, Fig. 4)
5
Page 6

7 Technical data
Input
Input signal 0 ... 20 mA (4 ... 20 mA)
Input voltage, max. 18 V
Input current, max. 50 mA
Operating current < 100 µA
Voltage drop approx. 3 V at RL = 0 Ω
at Iin = 20 mA
approx. 13 V at RL = 500 Ω
at Iin = 20 mA
Output
Output signal 0 ... 20 mA (4 ... 20 mA)
Load resistance ≤ 500 Ω
Accuracy by Tu = 23 °C < 0.1 % from end value
Influence of the load resistance < 0.1 % from measurement per
100 Ω load resistance
Temperature coefficient 50 ppm/K from measured value
Response time 4.5 ms by 500 Ω burden
Remaining ripple < 20 mV
eff
Chopper frequency approx. 170 kHz
6
Page 7

Coordination of Insulation according to EN 50178, 04.98
(Safe Distance)
Rated Voltage 300 V
Rated surge Voltage 6 kV
Overvoltage category III
Contamination class 2
Clearance and
creepage distances ≥ 5.5 mm
Isolation voltage
Voltage endurance
Input/output 4 kV
Input/output/to mounting rail 4 kV
/1 s
eff
/1 min
eff
Connection data
Connection BLZ/SL
Insulating stripping length 8 ± 0.5 mm
Solid core 0.5 ... 2.5 mm
Flexible core 0.5 ... 2.5 mm
With ferrules 0.5 ... 1.5 mm
2
2
2
7
Page 8

EMC specification according to EN 55011,
according to EN 50081-1
according to EN 50082-2
General
Operating temperature
mounted on DIN rails
without clearance -25 ... +70 °C
Storage temperature -40 ... +80 °C
8
class B, group 1
Page 9

8 UL Class 1, Division 2 Markings
WARNING
for selected Signal Conditioners
A. “This equipment is suitable for use in Class I, Division 2,
Groups A, B, C and D hazardous locations or non hazardous
locations only or the equivalent.”
B. “WARNING: EXPLOSION HAZARD - Substitution of
components may impair suitability for use in Class I, Division
2 environments.”
C. “WARNING: EXPLOSION HAZARD - The area must be
known to be non hazardous before servicing/replacing the
unit and before installing or removing I/O wiring.”
D. “WARNING: EXPLOSION HAZARD - Do Not disconnect
equipment unless power has been disconnected and the area
is known to be non hazardous.”
The warning references on this side have only validity for modules
with a UL Class I, Devision 2 permission.
9
Page 10

9 Accessories
Marker
10
Cat. No.
1492-M5X10
Page 11

DIR 10000043395
(Version 00)
11
Page 12

1 Allgemeine Hinweise
ACHTUNG
Der Signalwandler ohne zusätzliche Spannungsversorgung aus
der 931S-A1A1N-IP2 sollte nur von qualifiziertem Fachpersonal
installiert werden. Nach erfolgter fachgerechter Installation kann
der Signalwandler ohne zusätz-liche Spannungsversorgung mit
Spannung versorgt werden.
2 Anwendung
Signalwandler ohne zusätzliche Spannungsversorgung der
931S-A1A1N-IP2 sind für den Anschluß von 2-Leiter-Sensoren
geeignet. Das Signal wird galvanisch entkoppelt und ebenfalls
als 2-Leiter-Signal ausgegeben. Die Spannungsversorgung für
Ein-/Ausgang wird aus dem Eingangskreis generiert.
3 Montage und Demontage
Die Montage und Demontage darf nur im spannungsfreien
Zustand erfolgen! Nichtbeachtung führt zu schweren Schäden!
12
Page 13

3.1 Auf- und Abrasten auf Normschiene TS 35
ACHTUNG
(Seite 41, Fig. 1)
3.2 Steckbare Elektronik für eine evtl. Bereichsänderung
(je nach Ausführung)
(Seite 41, Fig. 2)
1. Stecker abziehen, (je nach Ausführung Schraubanschluß-
oder Zugfederanschlußtechnik).
2. Beidseitige Verriegelungshaken am Gehäuse drücken und
3. Elektronik herausziehen.
Die Elektronik kann nur in einer Position gesteckt
werden. Werkseitig sind die Stecker kodiert.
Ein Vertauschen der Stecker wird verhindert.
3.3 Bezeichnungsmöglichkeit
Bezeichnung mit Verbindermarkierern 1492-M5X10 möglich.
13
Page 14

4 Der elektrische Anschluß
(Seite 42, Fig. 3)
2-kanal: 931S-A1A1N-IP2
5 Abmessungen
(Seite 43, Fig. 4)
14
Page 15

7 Technische Daten
Eingang
Eingangssignal 0 ... 20 mA (4 ... 20 mA)
Eingangsspannung, max. zul. 18 V
Eingangsstrom, max. zul. 50 mA
Ansprechstrom < 100 µA
Spannungsabfall ca. 3 V bei RL = 0 Ω
bei Iin = 20 mA
ca. 13 V bei RL = 500 Ω
bei Iin = 20 mA
Ausgang
Ausgangssignal 0 ... 20 mA (4 ... 20 mA)
Lastwiderstand ≤ 500 Ω
Genauigkeit bei Tu = 23 °C < 0,1 % vom Endwert
Einfluß des Lastwiderstandes < 0,1 % vom Meßwert pro 100 Ω
Lastwiderstand
Temperaturkoeffizient 50 ppm/K vom Meßwert
Ansprechzeit 4,5 ms bei 500 Ω Bürde
Restwelligkeit < 20 mV
eff
Chopperfrequenz ca. 170 kHz
15
Page 16

Isolationskoordination nach EN 50178, 04.98
(Sichere Trennung)
Bemessungsspannung 300 V
Bemessungsstoßspannung 6 kV
Überspannungskategorie III
Verschmutzungsgrad 2
Luft- und Kriechstrecken ≥ 5,5 mm
Isolationsspannung,
Spannungsfestigkeit
Eingang/Ausgang 4 kV
Ein-Ausgang/Tragschiene 4 kV
/1 s
eff
/1 min
eff
Anschlußdaten
Anschluß BLZ/SL
Abisolierlänge 8 ± 0,5 mm
eindrähtig 0,5 ... 2,5 mm
feindrähtig 0,5 ... 2,5 mm
mit Aderendhülse 0,5 ... 1,5 mm
2
2
2
16
Page 17

EMV-Spezifikation gemäß EN 55011, Klasse B,
Gruppe 1
gemäß EN 50081-1
gemäß EN 50082-2
Allgemeines
Betriebstemperatur
- angereiht ohne Abstand
auf Tragschiene -25 ... +70 °C
Lagertemperatur -40 ... +80 °C
17
Page 18

8 Zubehör
Marker
DIR 10000043395
18
(Version 00)
Cat. No.
1492-M5X10
Page 19

1 Remarques générales
ATTENTION
Le convertisseur de signaux sans alimentation supplémentaire
de la 931S-A1A1N-IP2 ne doit être installé que par un personnel
qualifié. Une fois installé, le convertisseur de signaux sans alimentation supplémentaire peut être mis sous tension.
2 Application
Le convertisseur de signaux sans alimentation supplémentaire de
la 931S-A1A1N-IP2 sont appropriés à la con-nexion de capteurs
à 2 conducteurs. Le signal est désaccouplé galvaniquement et
émis comme signal à 2 conducteurs. L'alimentation en tension
pour l'entrée et la sortie est générée à partir du circuit d'entrée.
3 Montage et démontage
N'effectuer le montage et le démontage que lorsque l'appareil
est hors tension! Un non respect entraîne de graves dommages!
19
Page 20

3.1 Montage et démontage sur profilé standard TS 35
ATTENTION
(Page 41, Fig. 1)
3.2 Electronique enfichable pour une éventuelle modification
des plages (selon l'exécution)
(Page 41, Fig. 2)
1. Retirer la fiche (selon l'exécution raccord à visser ou à ressort
de traction).
2. Appuyer sur les crochets de verrouillage des deux côtés du
boîtier et
3. retirer l'électronique.
L’électronique peut être enficher exclusivement dans une position.
Les fiches sont codées en usine. Il est impossible de confondre
les fiches.
3.3 Possibilité de désignation
Désignation possible avec marqueurs de raccord 1492-M5X10.
20
Page 21

4 Raccordement électrique
(Page 42, Fig. 3)
2 canal: 931S-A1A1N-IP2
5 Dimensions
(Page 43, Fig. 4)
21
Page 22

7 Caractéristiques techniques
Entrée
Signal d'entrée 0 ... 20 mA (4 ... 20 mA)
Tension d'entrée, max. adm. 18 V
Courant d'entrée, max. adm. 50 mA
Courant de réponse < 100 µA
Chute de tension env. 3 V à RL = 0 Ω
à Iin = 20 mA
env. 13 V à RL = 500 Ω
à Iin = 20 mA
Sortie
Signal de sortie 0 ... 20 mA (4 ... 20 mA)
Résistance de charge ≤ 500 Ω
Précision à Tu = 23 °C < 0,1 % de la valeur finale
Influence de la résistance < 0,1 % de la mesure par 100 Ω
de charge de résistance de charge
Indice de température 50 ppm/K de la mesure
Temps de réponse 4,5 ms à 500 Ω de charge
Onde résiduelle < 20 mV
eff
Fréquence du vibreur env. 170 kHz
22
Page 23

Coordination d'isolation selon EN 50178, 04.98
(séparation sûre)
Tension de mesure 300 V
Pointe de tension de mesure 6 kV
Catégorie de surtension III
Degré de salissement 2
Entrefer et ligne de fuite ≥ 5,5 mm
Tension d'isolation,
résistance à la tension
Entrée/sortie 4 kV
Entrée/sortie/Profilé support 4 kV
/1 s
eff
/1 min
eff
Données de connexion
Connexion BLZ/SL
Longueur d'isolation 8 ± 0,5 mm
monofilaire 0,5 ... 2,5 mm
à fil fin 0,5 ... 2,5 mm
avec douille finale de brin 0,5 ... 1,5 mm
2
2
2
23
Page 24

Spécification CEM selon EN 55011, classe B,
selon EN 50081-1
selon EN 50082-2
Données générales
Température de service
- ajouté sans écart
sur profilé support -25 ... +70 °C
Température de stockage -40 ... +80 °C
24
groupe 1
Page 25

8 Accessoires
Marker
Cat. No.
1492-M5X10
DIR 10000043395
(Version 00)
25
Page 26

1 Avisos generales
¡ATENCIÓN!
El convertidor de señales sin alimentación adicional de la serie
931S-A1A1N-IP2 ha de ser instalado por profesionales califica-
dos. Después de una instalación correcta, puede suminis-trarse
corriente al convertidor de señales sin alimentación adicional.
2 Aplicación
Los convertidores de señales sin alimentación
serie
931S-A1A1N-IP2
permiten la conexión de senso-
adicional de la
res de 2
conductores. La señal es desacoplada galvánicamente, siendo
emitida asimismo como señal de 2 conductores. La alimentación
para entrada/salida es generada del circuito de
entrada.
3 Montaje y desmontaje
¡El montaje y el desmontaje deben efectuarse en estado sin
tensión! ¡La falta de cumplimiento de ello puede inducir a
graves daños!
26
Page 27

3.1 Enclavamiento y desenclavamiento en un riel
¡ATENCIÓN!
normalizado TS 35
(Página 41, Fig. 1)
3.2 Dispositivo electrónico enchufable para una posible
modificación de la gama (en función de la versión)
(Página 41, Fig. 2)
1. Extraer la clavija, (en función de la versión conexión roscada
o mediante resorte de tracción).
2. Apretar los ganchos de enclavamiento en ambos lados de la
caja y
3. extraer el dispositivo electrónico.
El dispositivo electrónico sólo puede enchufarse en una sola
posición. Los conectores han sido codificados en la fábrica.
Ello impide que los conectores sean confundidos.
3.3 Posibilidad de identificación
Posibilidad de identificación con marcadores de empalmadores
1492-M5X10.
27
Page 28

4 La conexión eléctrica
(Página 42, Fig. 3)
2 canal: 931S-A1A1N-IP2
5 Dimensiones
(Página 43, Fig. 4)
28
Page 29

7 Características técnicas
Entrada
Señal de entrada 0 ... 20 mA (4 ... 20 mA)
Tensión de entrada máx. adm. 18 V
Corriente de entr., máx. adm. 50 mA
Corriente activa < 100 µA
Caída de tensión 3 V aprox. a RL = 0 Ω
a Iin = 20 mA
13 V aprox. a RL = 500 Ω
a Iin = 20 mA
Salida
Señal de salida 0 ... 20 mA (4 ... 20 mA)
Resistencia de carga ≤ 500 Ω
Precisión a Tu = 23 °C < 0,1 % del valor final
Influencia de la resist. de carga < 0,1 % del valor de medición
por 100 Ω resistencia de carga
Coeficiente de temperatura 50 ppm/K del valor de medición
Tiempo de reacción 4,5 ms a 500 Ω carga
Ondulación residual < 20 mV
eff
Frecuencia de cortador periód. 170 kHz aprox.
29
Page 30

Coordinación de aislamiento según EN 50178, 04.98
(seccionamiento seguro)
Tensión asignada 300 V
Tensión asignada transitoria 6 kV
Categoría de sobretensión III
Grado de contaminación 2
Intervalos de aire y de fuga ≥ 5,5 mm
Tensión de aislamiento,
resistencia de tensión
Entrada/salida 4 kV
Entrada-salida/guía portadora 4 kV
/1 s
eff
/1 min
eff
Datos de conexión
Conexión BLZ/SL
Longitud de desforrado 8 ± 0,5 mm
rígido 0,5 ... 2,5 mm
flexible 0,5 ... 2,5 mm
con terminal 0,5 ... 1,5 mm
2
2
2
30
Page 31

Especificación CEM conforme a EN 55011, Clase B,
Grupo 1
conforme a EN 50081-1
conforme a EN 50082-2
Generalides
Temperatura de servicio
- acoplado sin separación
en guía portadora -25 ... +70 °C
Temperatura de almacen. -40 ... +80 °C
31
Page 32

8 Accesorios
Marker
DIR 10000043395
32
(Version 00)
Cat. No.
1492-M5X10
Page 33

1 Avvertenze generali
ATTENZIONE
Il trasduttore di segnale senza tensione di alimen-
tazione supplementare della 931S-A1A1N-IP2 deve essere installato solo da tecnici qualificati. Al termine dell'installazione regolare, il trasduttore
di segnale può essere alimentato senza tensione di alimentazione
supplementare.
2 Campo di applicazione
I trasduttori di segnale senza tensione di alimentazione supplementare delle 931S-A1A1N-IP2 possono essere utilizzati per il
collegamento di sensori a 2 conduttori. Il segnale viene disaccoppiato galvanicamente ed emesso anche come segnale a 2 conduttori. La tensione di alimentazione per l'ingresso/l'uscita viene
generata dal circuito di ingresso.
3 Montaggio e smontaggio
Il montaggio e lo smontaggio devono essere eseguiti solo dopo
aver staccato la tensione elettrica! L'inosservanza di questa
misura precauzionale causa gravi danni!
33
Page 34

3.1 Applicazione e distacco del binario normato TS 35
ATTENZIONE
(Pagina 41, Fig. 1)
3.2 Scheda elettronica per un'eventuale modifica del campo
(a seconda del modello)
(Pagina 41, Fig. 2)
1. Estrarre la spina (a seconda del modello: tecnica di collega-
mento a viti o a molle di trazione).
2. Premere i ganci di arresto su entrambi i lati della scatola.
3. Estrarre la scheda elettronica.
La scheda elettronica può essere inserita solo in una posizione.
I connettori sono codificati in fabbrica.
Ciò impedisce di scambiare i connettori tra loro.
3.3 Possibilità di designazione
Designazione possibile con marcatori di collegamento
1492-M5X10.
34
Page 35

4 Collegamento elettrico
(Pagina 42, Fig. 3)
2 canale: 931S-A1A1N-IP2
5 Dimensioni
(Pagina 43, Fig. 4)
35
Page 36

7 Dati tecnici
Ingresso
Segnale di ingresso 0 ... 20 mA (4 ... 20 mA)
Tensione di ingresso, max. amm. 18 V
Corrente di ingresso, max. amm. 50 mA
Corrente di intervento < 100 µA
Caduta di tensione circa 3 V con RL = 0 Ω
con Iin = 20 mA
circa 13 V con RL = 500 Ω
con Iin = 20 mA
Uscita
Segnale di uscita 0 ... 20 mA (4 ... 20 mA)
Resistenza del carico ≤ 500 Ω
Precisione a Tu = 23 °C < 0,1% del valore finale
Influenza della resistenza < 0,1% del valore di misura per
del carico 100 Ω di resistenza di carico
Coefficiente di temperatura 50 ppm/K del valore di misura
Tempo di intervento 4,5 ms a carico di 500 Ω
Ondulazione residua < 20 mV
eff
Frequenza di chopper circa 170 kHz
36
Page 37

Coordinazione dell'isolamento a norme 50178, 04.98
(disaccoppiamento sicuro)
Tensione di taratura 300 V
Tensione impulsiva di taratura 6 kV
Categoria di sovratensione III
Grado di imbrattamento 2
Vie aria e di dispersione
superficiale ≥ 5,5 mm
Tensione di isolamento
Rigidità dielettrica
Ingresso/uscita 4 kV
Ingresso-uscita/binario portante 4 kV
/1 s
eff
/1 min
eff
Dati di allacciamento
Allacciamento BLZ/SL
Lunghezza di spellatura 8 ± 0,5 mm
ad un filo 0,5 ... 2,5 mm
a filo sottile 0,5 ... 2,5 mm
con capocorda 0,5 ... 1,5 mm
2
2
2
37
Page 38

Specifiche EMC a norme EN 55011, classe B,
a norme EN 50081-1
a norme EN 50082-2
Generalità
Temperatura di esercizio
- allineamento senza distanza
su binario portante -25 ... +70 °C
Temperatura di immagazzinaggio -40 ... +80 °C
38
gruppo 1
Page 39

8 Accessori
Marker
Cat. No.
1492-M5X10
39
Page 40

40
DIR 10000043395
(Version 00)
Page 41

2.
1.3.
Fig. 1
Fig. 2
2.
3.
2.
1.
41
Page 42

42
Fig. 3
Page 43

Fig. 4
43
 Loading...