

Page 1
Installation Instructions
IMPORTANT: SAVE THESE INSTRUCTIONS FOR FUTURE USE.
42JS VisiSight
(sold separately)
Horizontal
mounting
bracket
Bracket base
4-40 screws
60-BJT-L2
Bracket base
4-40 screws4-40 screws
M3 screws
Power, Control and Information Solutions Headquarters
Americas: Rockwell Automation, 1201 South Second Street, Milwaukee, WI 53204-2496 USA, Tel: (1) 414.382.2000, Fax: (1) 414.382.4444
Europe/Middle East/Africa: Rockwell Automation NV, Pegasus Park, De Kleetlaan 12a, 1831 Diegem, Belgium, Tel: (32) 2 663 0600, Fax: (32) 2 663 0640
Asia Pacic: Rockwell Automation, Level 14, Core F, Cyberport 3, 100 Cyberport Road, Hong Kong, Tel: (852) 2887 4788, Fax: (852) 2508 1846
www.rockwel lautomation.com
60-2619 Swivel/Tilt Mounting Bracket
Description
The 60-2619 swivel/tilt bracket allows for a +/- 10° vertical and
360° rotation adjustment for the 42JS VisiSight family of
photoelectric sensors.
This product includes:
• Swivel/tilt mounting bracket
• Swivel/tilt ball
• 60-BJT-L2 mounting bracket for vertical installation
• Horizontal mounting bracket
• Mounting hardware (4-40 screws)
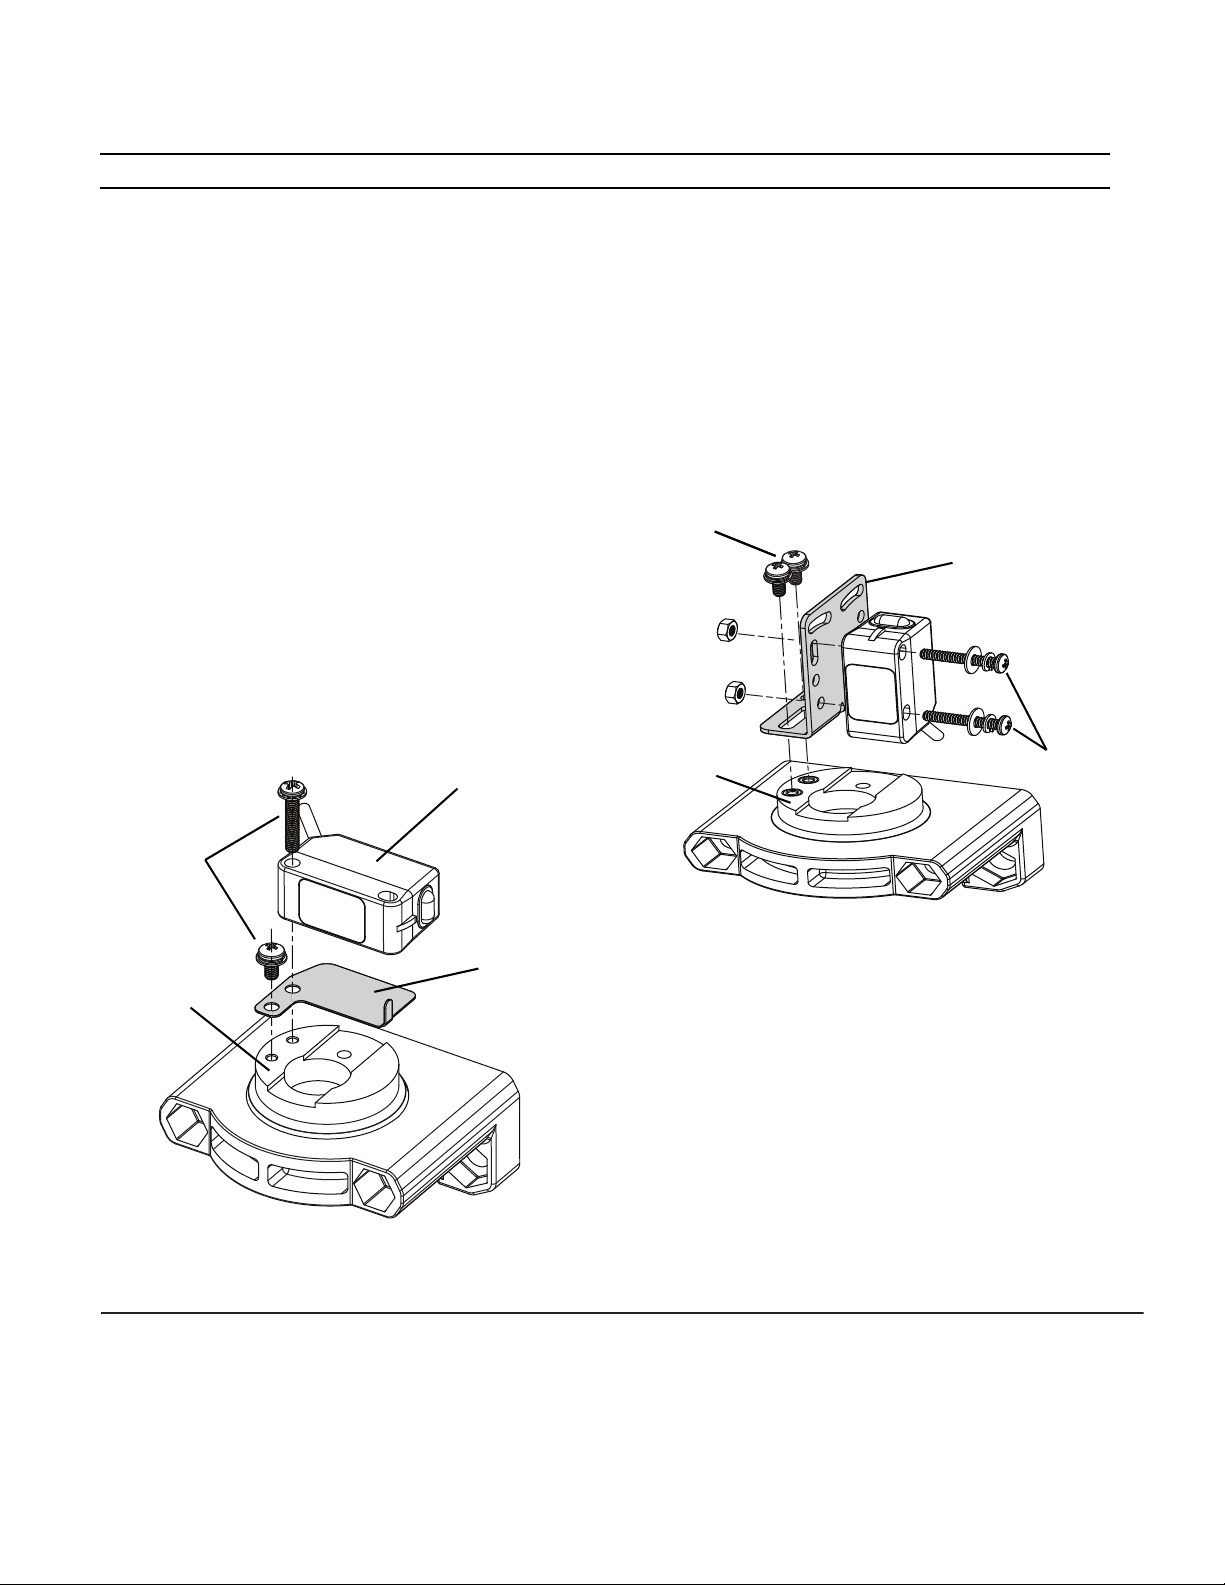
The 42JS VisiSight can be mounted horizontally and vertically on
the 60-2619 mounting bracket.
For horizontal sensor installation:
1. Assemble the swivel/tilt ball and mounting bracket as shown
below.
2. Insert the top portion of the horizontal bracket in the top
mounting hole of the 42JS VisiSight. Insert the long 4-40
screw in the bottom mounting hole to secure the sensor and
the bracket to the swivel/tilt mounting surface.
3. Insert the short 4-40 screw in the available mounting hole to
secure the replacement bracket to the mounting surface.
For vertical sensor installation:
1. Assemble the swivel/tilt ball and mounting bracket as shown
below.
2. Install the 60-BJT-L2 mounting bracket on the swivel/tilt ball
and secure the bracket to the base with the 4-40 screws.
3. Install the 42JS VisiSight on the 60-BJT-L2 mounting bracket
using the M3 screws provided with the 42JS VisiSight sensor
(sold separately).
4. Insert the short 4-40 screw in the available mounting hole to
secure the replacement bracket to the mounting surface.
Copyright © 2012 Rockwell Automation, Inc. All Rights Reserved. PN-168543
10000234773 Ver 00
October 2012
Printed in USA
 Loading...