

Page 1
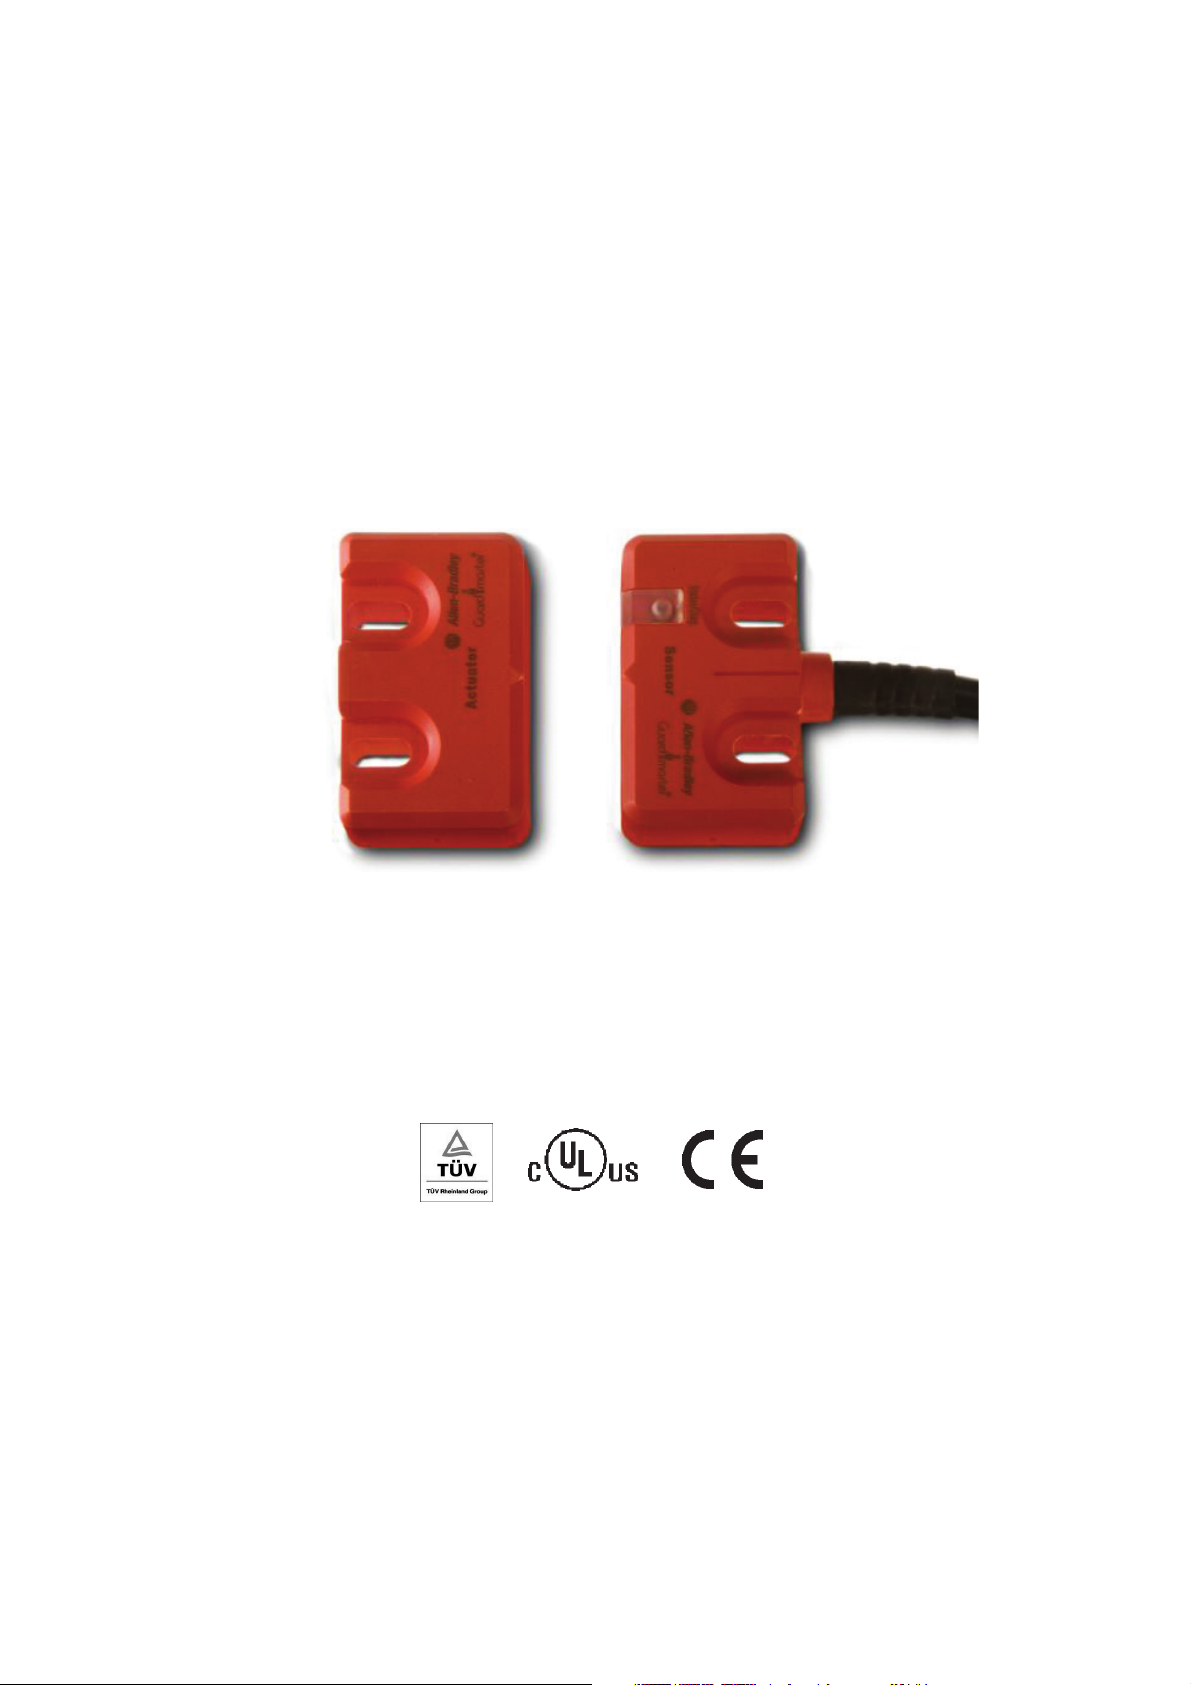
Magnetically Coded
Non Contact Switch (MC2)
Installation Instructions
Certifications
IMPORTANT:
SAVE THESE INSTRUCTIONS FOR FUTURE REFERENCE
Note: Refer to Technical Specifications for Certification information and ratings.
440N-Z21W1PA 3 Metre Cable
440N-Z21W1PB 10 Metre Cable
440N-Z21W1PH 8-Pin micro (M12) Pigtail
Page 2

Table of Contents
Installation Instructions 3
Warnings 3
Technical Specification 3
Safety Ratings 3
Operating Characteristics 3
Physical Characteristics 3
Outputs 3
Response Time 3
Environmental 3
Protection 4
Dimensions 4
Mode of Operation 4
Status Indicators 4
Mounting Information 4
Nut Torque Specification 4
Minimum Distance Between Sensors 5
Misalignment Curve 5
Diagnostics 6
Troubleshooting 6
Wiring Diagram 7
Recommended Mating Cable 7
Power Supply Requirements 8
Approved Relays 8
Application Wiring Examples 9
Maintenance 12
Repair 12
Declaration of Conformity 12
72697 Issue 4 EO: 28485
2 Magnetically Coded Non Contact Switch Installation Instructions
ENGLISH:
This instruction sheet is available in multiple languages at www.rockwellautomation.com/literature.
Select publication language and type "SensaGuard" in the search field.
GERMAN: Dieses Instruktionsblatt kann in mehreren Sprachen unter www.rockwellautomation.com/literature gelesen werden.
Bitte Ihre Sprache anwählen und "SensaGuard" im Suchfeld eintippen.
FRENCH: Ces instructions sont disponibles dans différentes langues à l'adresse suivante www.rockwellautomation.com/literature.
Sélectionner la langue puis taper “SensaGuard” dans le champ de recherche.
ITALIAN:
La presente scheda d'istruzione è disponibile in varie lingue sul sito www.rockwellautomation.com/literature.
Selezionare la lingua desiderata e digitare "SensaGuard" nel campo di ricerca.
SPANISH:
Puede encontrar esta hoja de instrucciones en varios idiomas en www.rockwellautomation.com/literature.
Seleccione el idioma de publicación y escriba "SensaGuard" en el campo de búsqueda.
PORTUGUESE:
Esta folha de instruções está disponível em várias línguas em www.rockwellautomation.com/literature.
Seleccione a língua de publicação e entre com "SensaGuard" no espaço de busca.
POLISH:
Ta kartka z instrukcjami jest dostepna w wielu jezykach na stronie: www.rockwellautomation.com/literature
Wybierz jezyk publikacji i wpisz w polu poszukiwania "SensaGuard".
Page 3
1. Installation Instructions
Installation must be in accordance with the following steps and stated specifications and should be carried out by suitable competent personnel. The unit is not to be used as a mechanical stop. Guard stops and guides must be fitted.
Adherence to the recommended maintenance instructions forms part of the warranty.
This device is intended to be part of the safety related control system of a machine. Before installation, a risk assessment should be performed to determine whether the specifications of this device are suitable for all foreseeable operational and environmental characteristics of the machine to which it is to be fitted. Refer to Technical Specifications for
Certification information and ratings.
ATTENTION: The presence of spare actuators compromise the integrity of the safety systems. Personal
injury or death, property damage or economic loss can result. Appropriate management controls, working procedures and alternative protective measures should be introduced to control
their use and availability.
WARNING: Do not defeat, tamper, remove or bypass this unit. Severe injury to personnel could result.
2. Technical Specification
2.1
Safety Ratings
Standards EN1088,ISO14119, IEC/EN60947-5-3
Safety Classification Dual contacts suitable for Cat.3 or 4 systems
Functional Safety Data B10d: > 2 x 10
6
operations at min.
Usable for ISO 13849-1:2006 and IEC 62061. Data other PFH
D
: > 3 x 10
7
than B10d is based on: Usage rate of 10p/10mins., MTTFd: > 385 years
24 hrs/day, 360 days/year, representing 51840 operations Dual channel interlock may be suitable for performance
per year. levels PLe or PLd (according to ISO 13849-1:2006) and for
use in SIL2 or SIL3 systems (according to IEC 62061)
Note:
For up-to-date information, visit www.ab.com depending on application characteristics.
Certifications CE marked for all applicable directives, cULus, and TUV
2.2
Operating Characteristics (at rated temperature range)
Make, minimum Break, maximum
Sensing distance horizontal plane of operation 10mm 25mm
Sensing distance vertical plane of operation 6mm 20mm
Typical misalignment ±4mm (see Misalignment Graphs)
Operational Current ≤ 30mA + 1 Aux
Maximum # of switches, connected in series Monitoring Relay Unit dependent (see Section 10)
Operating Voltage 24V dc +10% / -15% (see Section 9)
2.3
Physical Characteristics
Case Material ULTRADUR
Actuator Material ULTRADUR
Colour Red
2.4
Outputs
Safety Output (Solid State Relay) 2 x N.C. 50mA
Auxiliary 1 x PNP N.O. 200mA
2.5
Response Time
Switch response time 5ms
Series response time 5ms
Maximum Frequency of Operation 1Hz
2.6
Environmental
Operating Temperature -10…+55°C (+14…+131°F)
Operating Humidity 5% -95% relative
Washdown rating / Enclosure type rating NEMA 3, 4X, 12,13, IP67, 68 & 69K
Shock & Vibration IEC680068-2-27 30 g, 11ms
IEC680068-2-6 10…55Hz
E.M.C. EN 61000-6-2, EN 60947-5-3
2.7
Protection
Safety Output Short-Circuit Protection Provided by the approved safety Relays (See section 10)
Auxiliary Overload Protection Internal Resettable Fuse
24V Supply Reverse Polarity Protection Incorporated
Electrical Life 1 x 10
6
cycles
72697 Issue 4 EO: 28485
Magnetically Coded Non Contact Switch Installation Instructions 3
Page 4
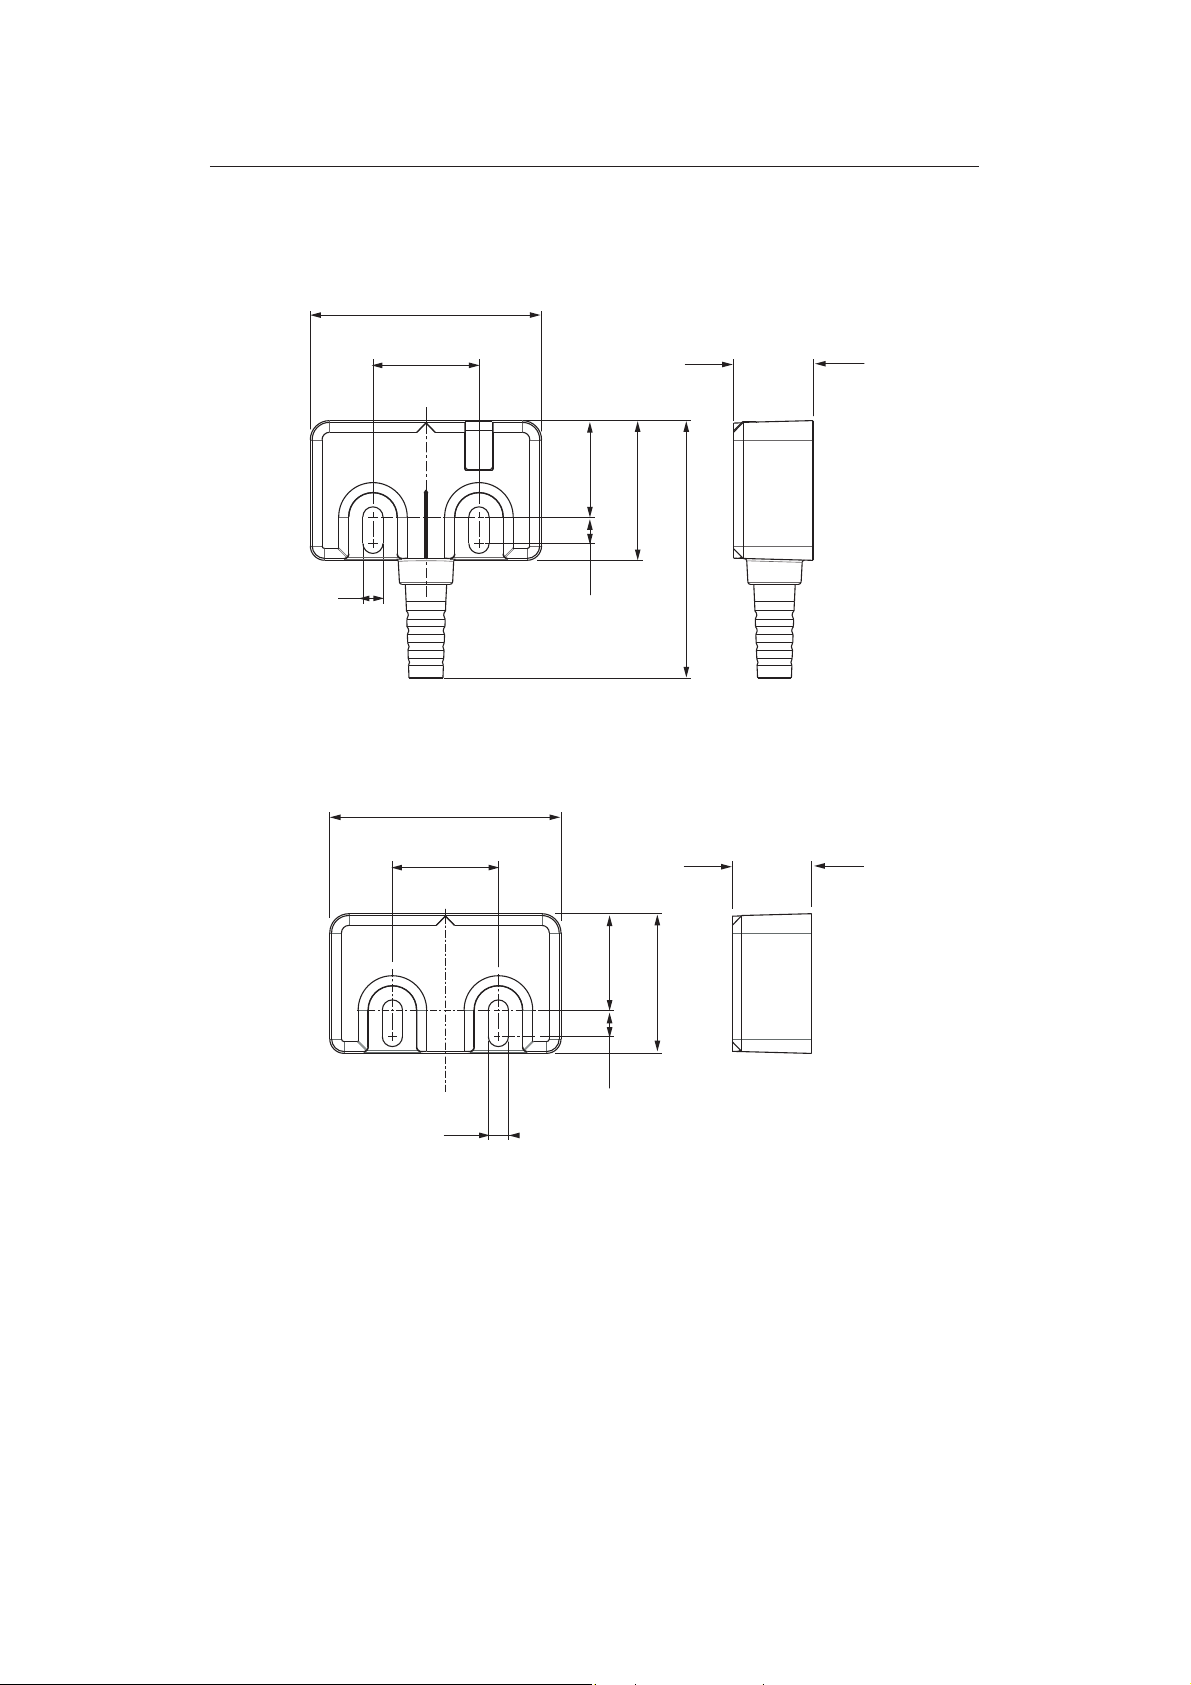
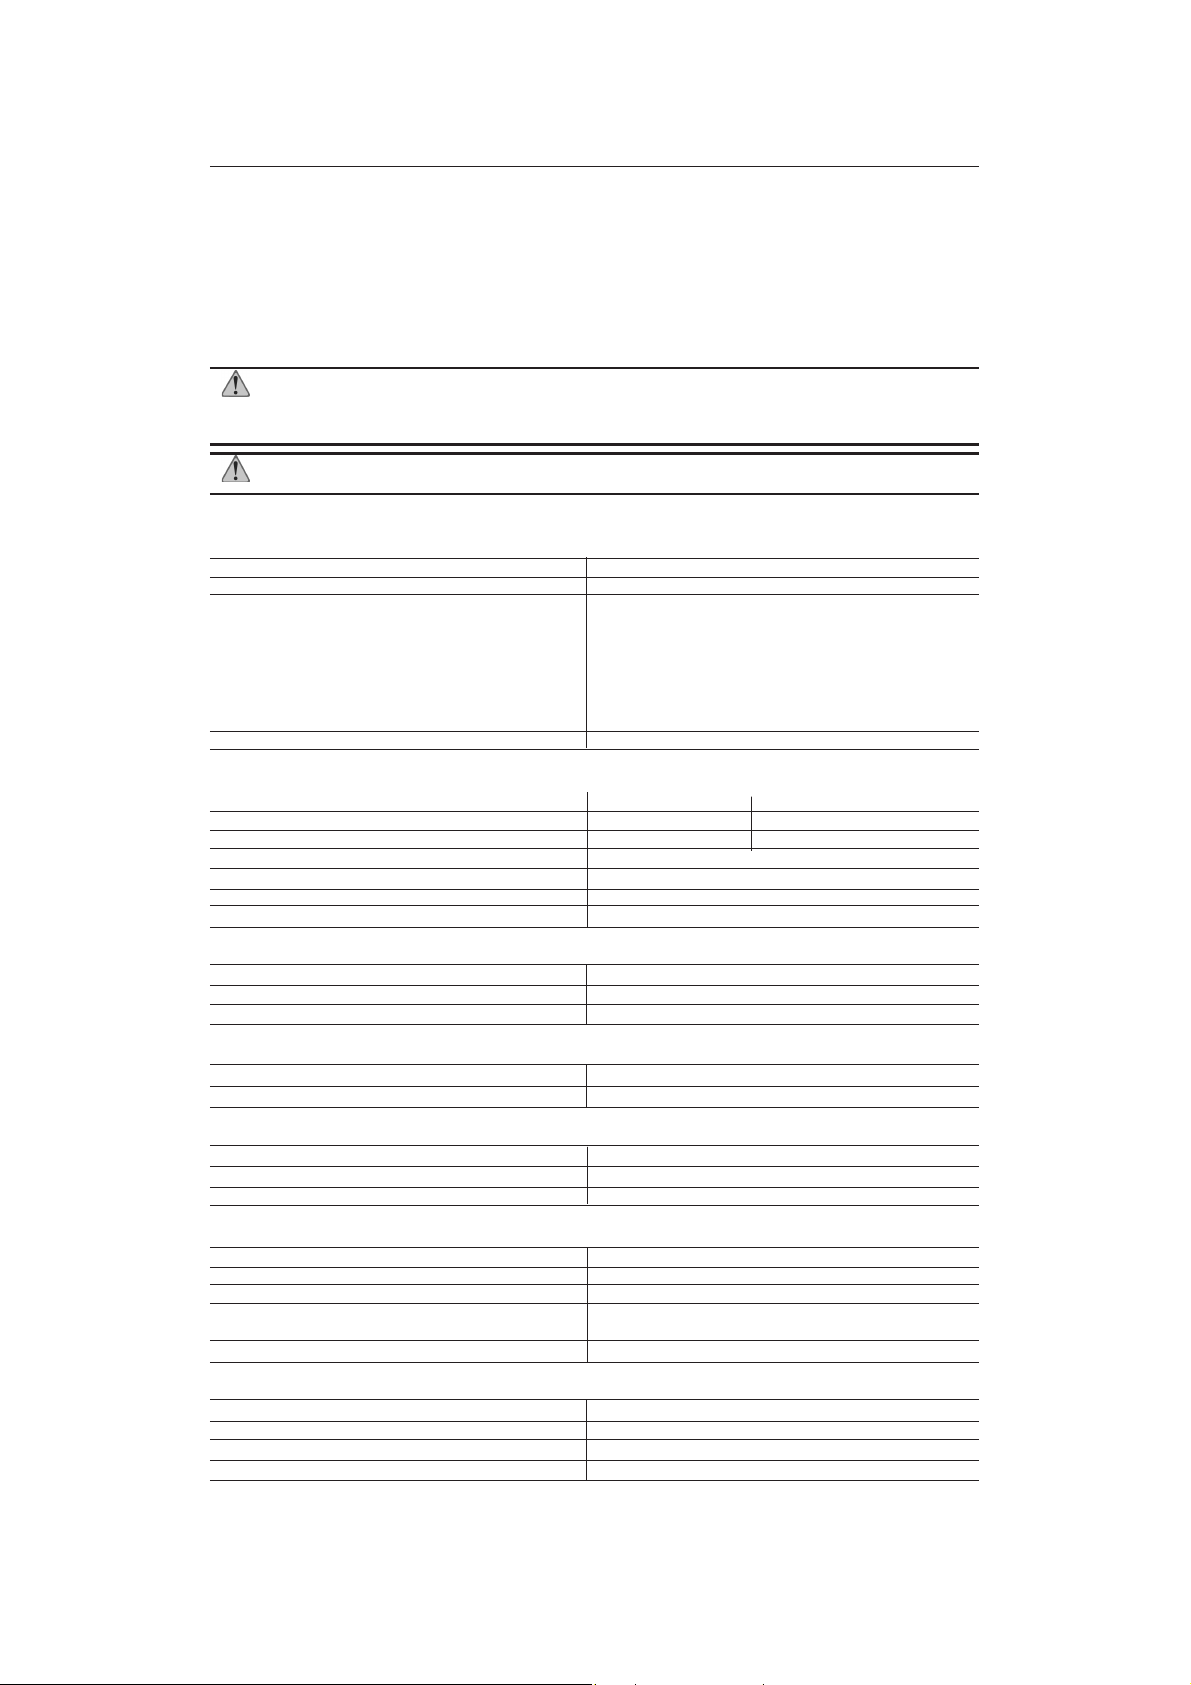
3. Physical Dimensions - mm (inches)
4. Mounting Information
Use non-removable screws, bolts, or nuts to mount the switch and actuator. Do not over torque the
mounting hardware. It is recommended to use M3 screws and washers throughout.
Position the switch and actuator so they are aligned with each other.
4.1
Mounting for Maximum Misalignment
Mount the Sensor to the fixed part of the guard and the Actuator to the movable section. Keep the
Sensor and Actuator within the sensing range detailed in section 4.4.
72697 Issue 4 EO: 28485
4 Magnetically Coded Non Contact Switch Installation Instructions
Note: Refer to Technical Specifications for Certification information and ratings.
48.0
(1.89)
16.5
(0.65)
(2.1)
Ø4.2
(0.17)
22.0
(0.87)
20.0
5.5
(0.79)
(0.22)
29.0
(1.14)
53
48.0
(1.89)
16.5
(0.65)
(0.87)
Ø4.2
(0.17)
22.0
20.0
5.5
(0.79)
(0.22)
29.0
(1.14)
Page 5

4.2
Maximum Torque Specification
- 1 N•M (8.86 in•lbs), use non-magnetic fixing hardware.
4.3
Minimum Distance Between Sensors
- 50mm
4.4
Misalignment Curve
4.5.
Direction of Approach
72697 Issue 4 EO: 28485
Magnetically Coded Non Contact Switch Installation Instructions 5
Note: Refer to Technical Specifications for Certification information and ratings.
Note: To prevent damage to the MC2 it is recommended to leave a 2mm gap between the Sensor and Actuator.
The maximum switching distance and misalignment tolerance will be obtained when the MC2 is mounted on non-ferrous material. Mounting the MC2 on ferrous/magnetic material will reduce the switching distances and tolerance to
misalignment.
To obtain maximum switching
distance center switches +/- 4mm
To prevent damage it is recommended
Actuator
that a 2mm gap be maintained
between the actuator and sensor
Sensor Sensor
distance 8 - 14 mm
For more detailed misalignment characteristics refer to the misalignment curves
24
20
16
12
8
4
2mm Gap
0
-4 -8 -12 -16 -2048-24121620
0
0
2mm Gap
0
24
20
16
12
8
4
-4 -8 -12 -16 -2048-24121620
SensorActuator
To prevent damage it is recommended that a 2mm gap
be maintained between the actuator and sensor
Actuator
To obtain maximum switching
distance 8 - 14 mm
16
12
8
0
0
2mm Gap 2mm Gap
0
2mm Gap
0
4
-4 -8 -12 -16 -2048-24121620
20
16
12
8
4
-4 -8 -12 -16 -2048-24121620
Page 6

5. LED Operation and Diagnostic
Unit Indicators (per IEC 60073)
State Status Troubleshooting
Off Not Powered Check supply, check wiring to controller A
Device Output Off Overload Check AUX connections
LED Red Actuator not present If actuator present check misalignment.
Green Actuator Present NA
Green Actuator Present Check wiring to controller
flashing Actuation not present on other Check actuators on other switches
switches or wiring fault
6. Troubleshooting
72697 Issue 4 EO: 28485
6 Magnetically Coded Non Contact Switch Installation Instructions
Note: Refer to Technical Specifications for Certification information and ratings.
S11
S21
Safety A
Safety B
24V
Aux
Safety A
Safety B
24V
Aux
Safety A
Safety B
24V
Aux
Safety A
Safety B
24V
Aux
Safety A
Safety B
24V
Aux
S12
S22
LED - Flashing
Green
LED - Red
Aux - ON
LED - Red
Aux - ON
LED - Green
Aux - OFF
Aux - OFF
LED - Flashing
Green
Aux - OFF
AuxAuxAuxAuxAux
6.1
Series Circuit - 2 Guards Open
6.2
Series Circuit - Open circuit on channel A
The auxiliary contacts close at the same time as the first safety contact opens
The auxiliary contacts close at the same time as the first safety contact opens
Open Circuit between two MC2s
S11
S21
Safety A
Safety B
24V
LED - Green
Aux - OFF
Aux
Safety A
Safety B
24V
LED - Green
Aux - OFF
Aux
Safety A
Safety B
24V
LED - Flashing
Green
Aux - OFF
Aux
Safety A
Safety B
24V
LED - Flashing
Green
Aux - OFF
Aux
Safety A
Safety B
24V
Aux
LED - Flashing
Green
Aux - OFF
S12
S22
AuxAuxAuxAuxAux
Page 7

7. Connection Information
7.3
Connection Table
MSR100 family MSR200/300
Red/Safety A S11 S11
Grey/Safety A S12 S12 or S42
Yellow/Safety B S21 S21
Pink/Safety B S22 S22 or S52
Brown / +24V A1 / +24V A1 / +24V
Blue / 0V A2 / 0V A2 / 0V
Note: When the MC2 is used with any MSR100 series Relay for the diagnostic function to operate
correctly the Red and Grey wires (Safety A) must be connected to S11 and S12.
72697 Issue 4 EO: 28485
Magnetically Coded Non Contact Switch Installation Instructions 7
Note: Refer to Technical Specifications for Certification information and ratings.
7.1
Wiring Diagram
Pin # Wire Colour Signal
1 White PNP Aux
2 Brown +24V
3 Green Not connected
4 Yellow Safety B
5 Grey Safety A
6 Pink Safety B
7 Blue 0V
8 Red Safety A
7.2
Recommended Mating Cable
For 8-Pin micro (M12) option. 889D-F8AB-*. Lengths are available up to 30m (98.4 ft)
Not
connected
Safety A
Safety B
2
3
476
1
8
5
+24V
Aux
Gnd
Safety B
Safety A
Page 8

8. Power Supply Requirements
24V dc +10%/-15% has to be supplied by a power supply that complies with IEC / EN 60204 and IEC / EN 61558-1.
Such a power supply meets the electrical safety requirements and maintains the minimum power of
20.4V dc during 20ms even in the event of voltage dips.
When using an approved Relay with an MC2 and the same power supply is utilised for all devices the
Relay will provide surge protection for the MC2. If a separate power supply is used for the MC2 then
extra protection will be required.
9. Approved Monitoring Relay Units
1. MC2 can only be used with the approved Relays, use of other devices not
listed is at the users own risk.
2. Only 24Vdc MSR Relays or MSR Relays configured for 24Vdc operation are
compatible with MC2.
9.1
Approved Monitoring Relay Unit List and maximum number
of series MC2s
Monitoring Relay Series Catalogue Part No. Maximum number of
MC2 units in series
24Vdc Supply Voltage
MSR Series -5% -10% -15%
MSR30RT/RTP 440R-N23197/440R-N23198 10 10 10
MSR 100 Series
MSR121RT 440R-J23102 8 - MSR123RT 440R-J23106 8 - MSR124RT 440R-G23110/440R-G23108/440R-G23107 10 10 10
MSR126T/R 440R-N23117/440R-N23123 10 10 10
MSR126.1T/.1R 440R-N23114/440R-N23120 10 10 10
MSR127T/TP 440R-N23126/440R-N23132 10 10 10
MSR127R/RP 440R-N23129/440R-N23135 10 10 10
MSR131RTP 440R-C23139 10 10 10
MSR138DP 440R-M23151 10 10 10
MSR138.1DP 440R-M23084 10 10 10
MSR142RTP 440R-G23216 10 8 MSR144RTP 440R-C23205 10 10 10
MSR178DP 440R-M23227 10 10 10
MSR 200 Series
MSR210P 440R-H23176 10 10 10
MSR220P 440R-H23177 10 10 10
MSR300 Series
MSR320P connected to a 440R-W23218 10 10 10
MSR310 or MSR312
Note:
For up-to-date information, visit www.ab.com
9.2
Safety Ratings
1. An MC2 can achieve up to Cat 4/PLe, SIL CL3 when individually monitored by an approved
Monitoring Relay Unit (see 9.1) that itself achieves Cat 4/PLe, SIL CL3.
2.. Two or more MC2 Sensors connected in series with an approved Relay achieves up to
CAT3/PLd/SIL CL2.
72697 Issue 4 EO: 28485
8 Magnetically Coded Non Contact Switch Installation Instructions
Note: Refer to Technical Specifications for Certification information and ratings.
Page 9

10. Application Wiring Examples
10.1
Single Switch, Automatic Reset, Monitored Outputs MSR127TP
72697 Issue 4 EO: 28485
Magnetically Coded Non Contact Switch Installation Instructions 9
Note: Refer to Technical Specifications for Certification information and ratings.
MC2
Connected
Not
Aux
Safety B-
Safety B+
Safety A-
Safety A+
0v
+24v
Green (3)
White (1)
Pink (6)
Yellow (4)
Grey (5)
Red (8)
Blue (7)
Brown (2)
L2 L3
L1
3313A1 S11 S12 23
K1
K2
34 42
Grey
Red
S52 41
MSR127RP
S34 14A2 S21 S22 24
Pink
Yellow
+24V
diagnostic operation the
red wire (QD pin 8) must
be connected to S11.
Note: To maintain correct
0V
Page 10

10.2
Multiple Switches, Automatic Reset, Monitored Output MSR127TP
72697 Issue 4 EO: 28485
10 Magnetically Coded Non Contact Switch Installation Instructions
Connected
Green (3)
Not
Aux
White (1)
Safety B-
Pink (6)
Safety B+
Yellow (4)
Safety A-
Safety A+
0v
+24v
Connected
Not
Aux
Safety B-
Safety B+
Safety A-
Safety A+
0v
+24v
Connected
Not
Aux
Safety B-
Safety B+
Safety A-
Safety A+
0v
+24v
Connected
Not
Aux
Safety B-
Safety B+
Safety A-
Safety A+
0v
+24v
Connected
Not
Aux
Safety B-
Safety B+
Safety A-
Safety A+
0v
+24v
Grey (5)
Red (8)
Blue (7)
Brown (2)
Green (3)
White (1)
Pink (6)
Yellow (4)
Grey (5)
Red (8)
Blue (7)
Brown (2)
Green (3)
White (1)
Pink (6)
Yellow (4)
Grey (5)
Red (8)
Blue (7)
Brown (2)
Green (3)
White (1)
Pink (6)
Yellow (4)
Grey (5)
Red (8)
Blue (7)
Brown (2)
Green (3)
White (1)
Pink (6)
Yellow (4)
Grey (5)
Red (8)
Blue (7)
Brown (2)
Red
Grey
Red
Grey
Red
Grey
Grey Red
Yellow
Pink
Yellow
Pink
Yellow
Pink
Yellow
Pink
L1 L2 L3
Fuses
Grey
Red
the Red (QD pin 8) wire from the
Note: To maintain diagnostic function
K1
K2
24 24
24 24
S34 14A2 S21 S22 24
S52 13A1 S11 S12 23
MSR127TP
Pink
Yellow
S5
S4
Actuator in place Flashing LED Green Actuator in place Flashing LED Green
S3
Actuator NOT in place LED Red
MC2 MC2 MC2
S1 S2
Actuator in place LED Green Actuator in place LED Green
MC2 MC2
first switch (S1 in this example)
must be connected to S11
+24V
0V
Page 11

10.3
Multiple Switches, Manual Reset, Monitored Output MSR210P
72697 Issue 4 EO: 28485
Magnetically Coded Non Contact Switch Installation Instructions 11
MC2
Connected
Not
Aux
Safety B
Safety B
Safety A
Safety A
0v
+24v
Green (3)
White (1)
Pink (6)
Yellow (4)
Grey (5)
Red (8)
Blue (7)
Brown (2)
L1 L2 L3
Fuses
31
13A1
K1
K2
Expansion Cable
Termination or
32
14 24
RESET
S34A2 S21
MC2
Connected
Not
Aux
Safety B
Safety B
Safety A
Safety A
0v
+24v
Green (3)
White (1)
Pink (6)
Yellow (4)
Grey (5)
Red (8)
Blue (7)
Brown (2)
+24V
S12 23
S22
S41 S32 S51 Y31 Y40 Y41 Y42
Expansion Cable
Termination or
S62
S52 Y30 Y32 Y2Y1Y33
S42
S11
0V
Page 12

11. Maintenance
Every six months
Check the correct operation of the switching circuit. Also check for signs of abuse or tampering.
Inspect the switch casing for damage.
12. Repair
If there is any malfunction or damage, no attempts at repair should be made. The unit should be
replaced before machine operation is allowed.
13. Declaration of Conformity
This is to declare that the products shown on this document conforms with the Essential Health and
Safety Requirements (EHSRs) of the European Machinery Directive (98/37/EC Machinery Directive,
2004/108/EC EMC Directive). These products also conform to EN 60947-5-3, EN 1088, EN ISO
12100 parts 1 & 2, EN 60204-1 and have Third Party Approval.
For a comprehensive certificate please visit:
www.ab.com
72697 Issue 4 EO: 28485
12 Magnetically Coded Non Contact Switch Installation Instructions
R
Copyright © 2012 Rockwell Automation, Inc. All Rights Reserved.
Check the machine is
isolated and stopped
whenever the interlocked
guard door is open.
IMPORTANT: After
installation and
commissioning, the
actuator, switch and hardware
should be coated with
tamper evident varnish or
similar compound.
 Loading...