

Page 1
ACCU-CHEK
®
Active
BLOOD GLUCOSE SYSTEM
Reference Manual
Page 2

Please read this manual carefully and completely before performing
the first measurement. Should you have any questions, please
contact our customer support and service centre. You will find our
address in Chapter 10.4.
The Accu-Chek Softclix finger pricker is intended for patient
self-monitoring by a single person.
It must not be used to collect blood in a multi-patient setting
as it does not incorporate any features to guard against
cross-infection.
On packaging, on the type plate and in the parts of this manual
dealing with your Accu-Chek Active meter you may encounter the
following symbols, shown here with their meaning:
For in vitro diagnostic use
This product fulfils the requirements of Directive
98/79/EC on in vitro diagnostic medical devices.
Catalogue number
Please consult instructions for use
Caution (refer to accompanying documents).
Please refer to safety-related notes in the manual
accompanying this instrument.
Manufacturer
IVD
REF
0088
Page 3

Contents
1
|
Introduction 8
|
1.1 The meter’s main features at a glance 9
|
1.2 About this reference manual 12
|
2
|
Modes 14
|
2.1 Test Mode 15
|
2.2 Memory Mode 16
|
2.3 Set Mode 17
|
3
|
Initial steps before testing 18
|
3.1 After opening the pack 18
|
3.2 Basic settings 19
|
Turning the meter on in Set Mode 23
|
Setting the date and time 27
|
Setting the beep tone 31
|
3.3 Coding 32
|
Inserting the coding chip 35
|
Page 4

4
|
Testing blood glucose with your
|
Accu-Chek Active meter 36
|
4.1 Materials for testing blood glucose 36
|
4.2 Preparing for the blood glucose test 37
|
4.3 Performing a blood glucose test 38
|
In-meter dosing 44
|
Plausible results 49
|
Implausible results 52
|
Out-of-meter dosing 55
|
Testing by healthcare professionals 59
|
5
|
Using Accu-Chek Active as an electronic diary 60
|
5.1 Results memory 60
|
5.2 Retrieving results 62
|
Finding the 7 or 14 day average of glucose results 67
|
Clearing (erasing) results from memory 71
|
5.3 Downloading data to a PC 74
|
6
|
Checking Accu-Chek Active 80
|
6.1 Quality control testing with control solution 80
|
6.2 Preparing for the quality control test 82
|
6.3 Quality control test procedure 84
|
6.4 Performing a full display check 96
|
Contents
Page 5

7
|
Keeping your meter in tip-top condition 98
|
7.1 Cleaning your Accu-Chek Active meter 99
|
Cleaning and disinfection in the professional
|
environment 104
|
7.2 Battery life and battery replacement 106
|
7.3 Measurement and storage conditions 109
|
8
|
Summary: All the display messages on your
|
Accu-Chek Active meter 112
|
8.1 About the display messages 112
|
8.2 Messages and symbols 113
|
8.3 Troubleshooting 117
|
8.4 Possible sources of error 120
|
9
|
Accu-Chek Softclix 123
|
9.1 The Accu-Chek Softclix at a glance 124
|
9.2 Selecting the penetration depth of your
|
Accu-Chek Softclix finger pricker 126
|
9.3 Using the Accu-Chek Softclix finger pricker 128
|
10
|
Appendix 132
|
10.1 Technical data 132
|
10.2 System components 134
|
10.3 Manufacturer’s warranty and guarantee 136
|
10.4 Customer support and service 138
|
Page 6
Parts summary Accu-Chek Active
8
7
1
3
2
9
Page 7
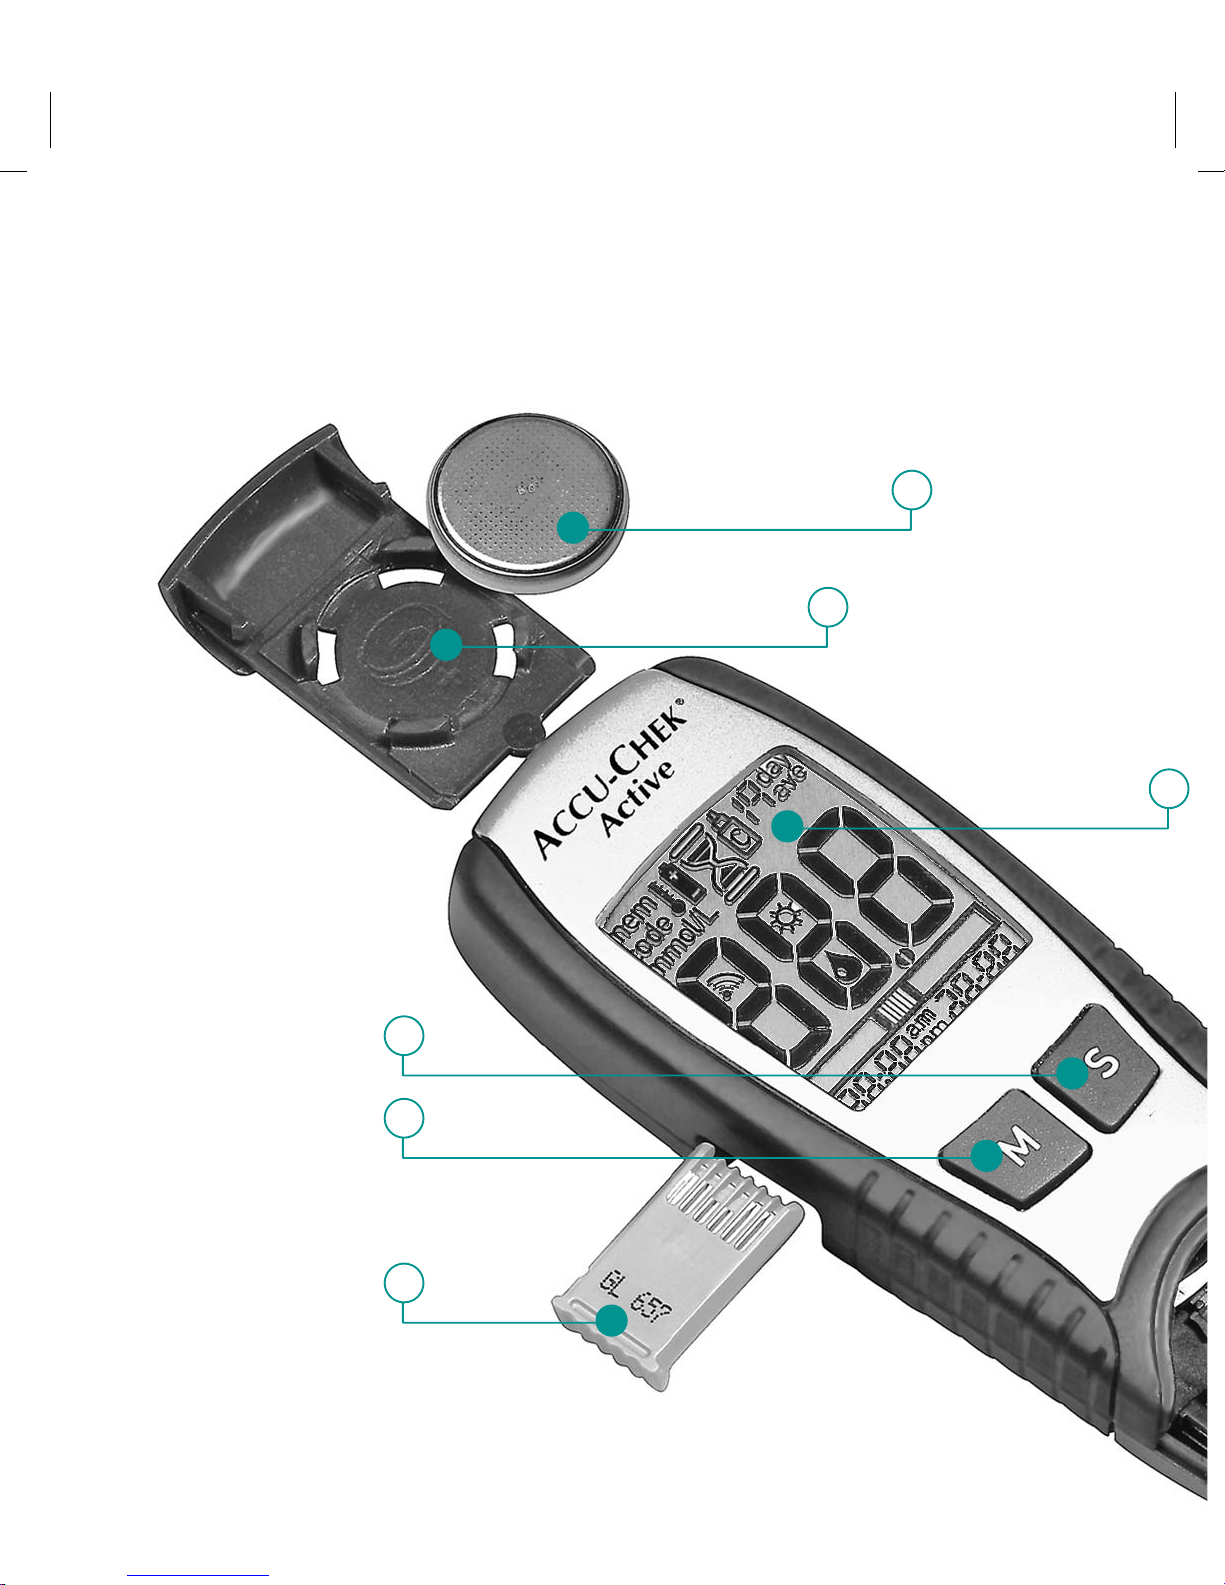
1
2
3
4
5
6
7
8
9
Liquid crystal display (LCD)
M(emory) button
S(et) button
Test strip slot with switch
Measurement optics
Test strip guide
Battery compartment
Battery
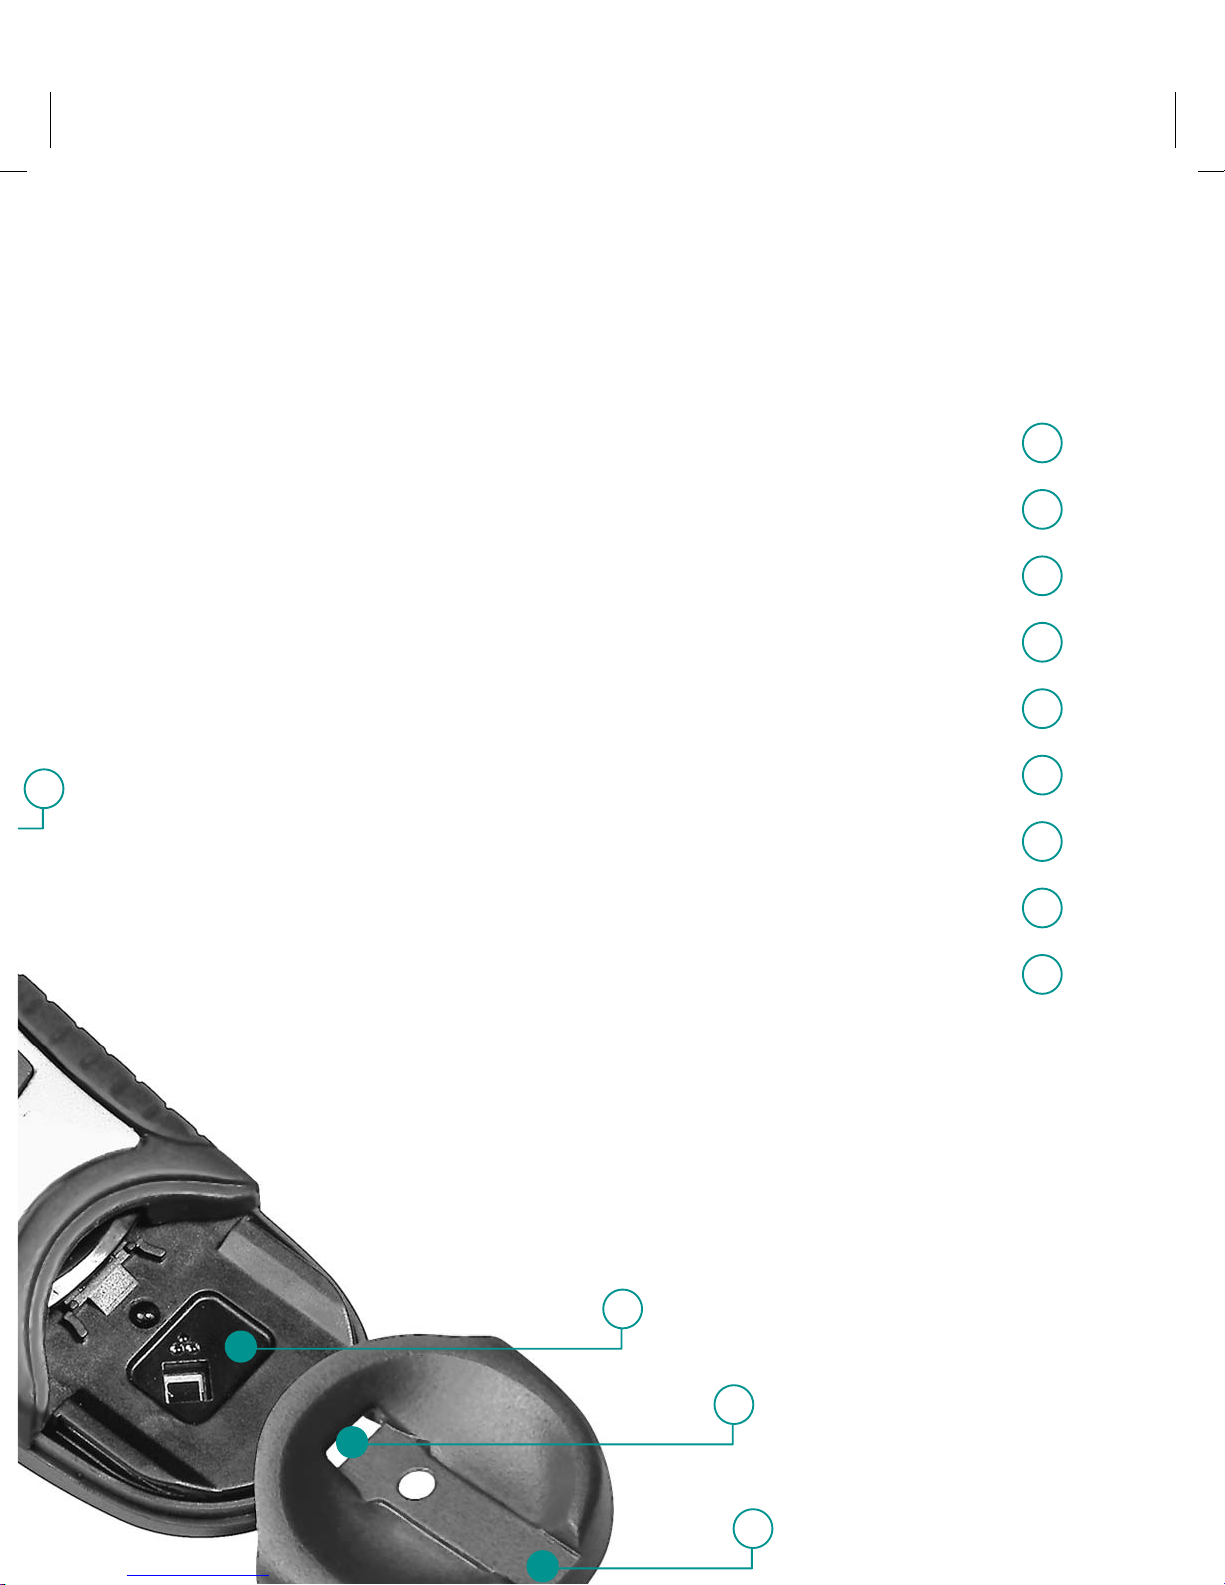
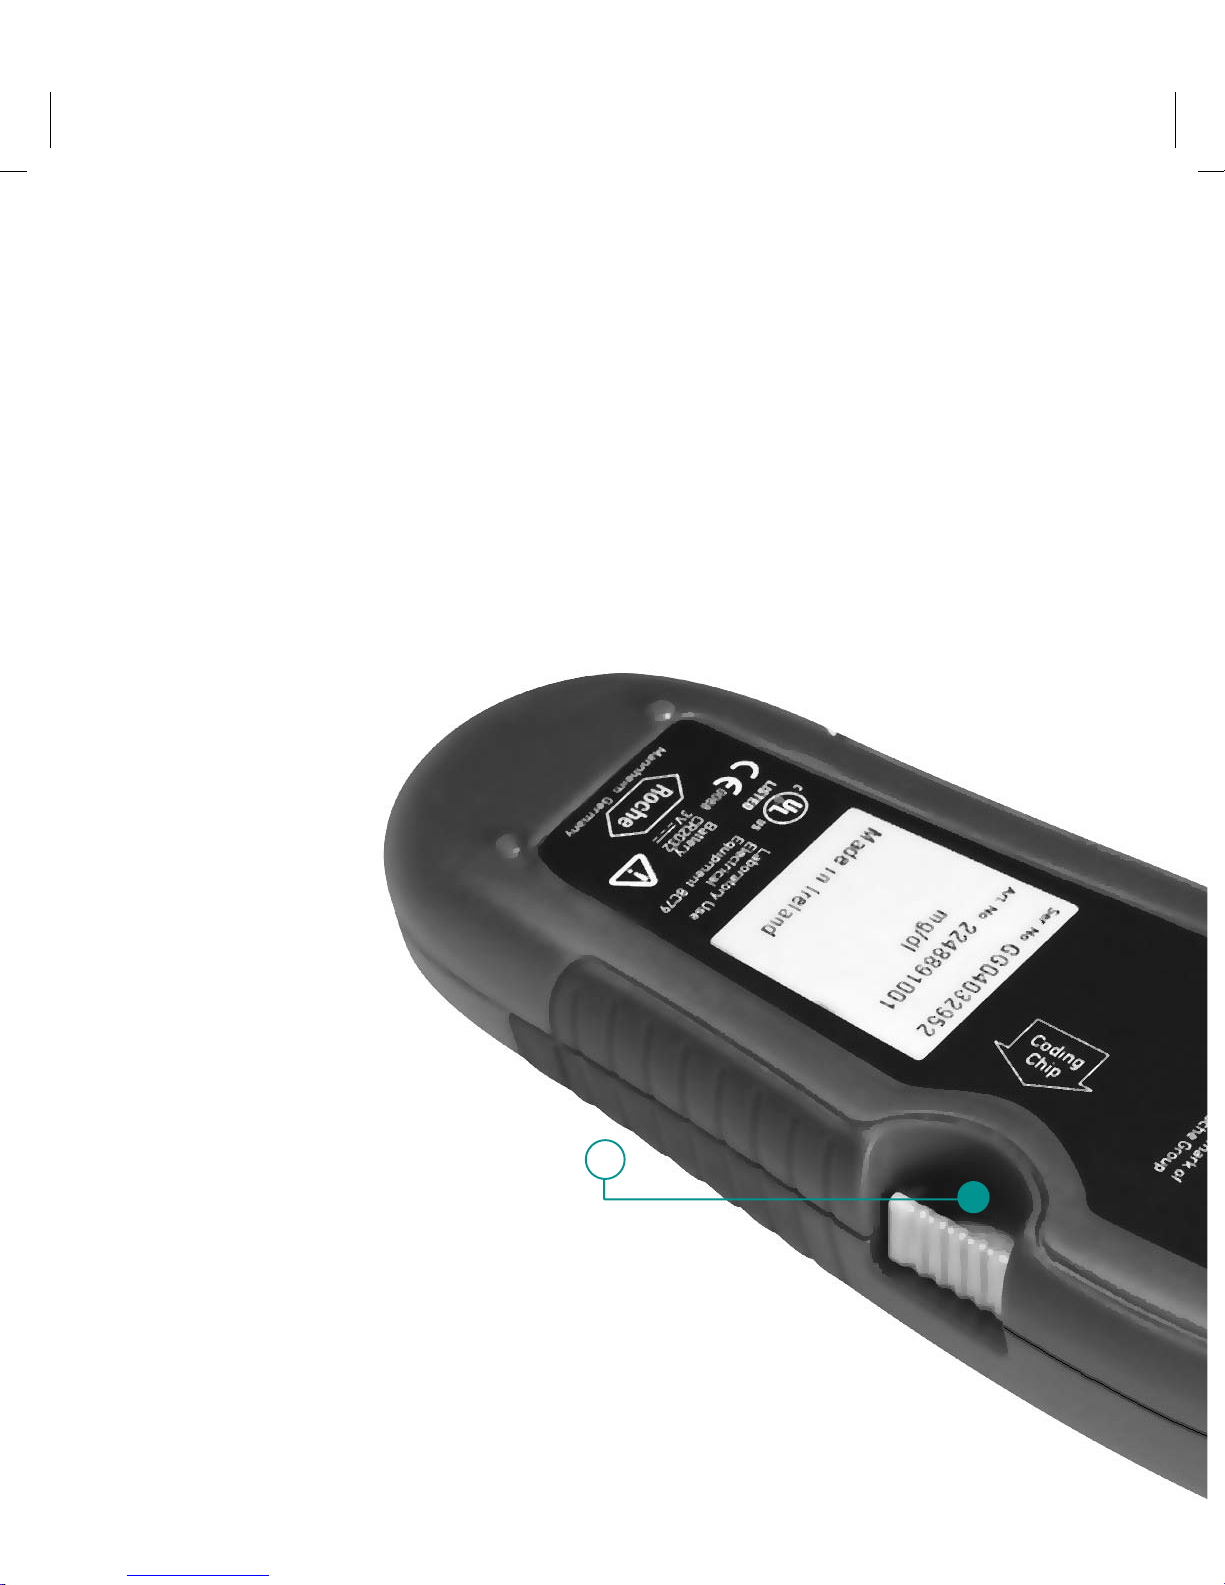
Coding chip
1
5
4
6
Page 8
Parts summary Accu-Chek Active
10
Page 9
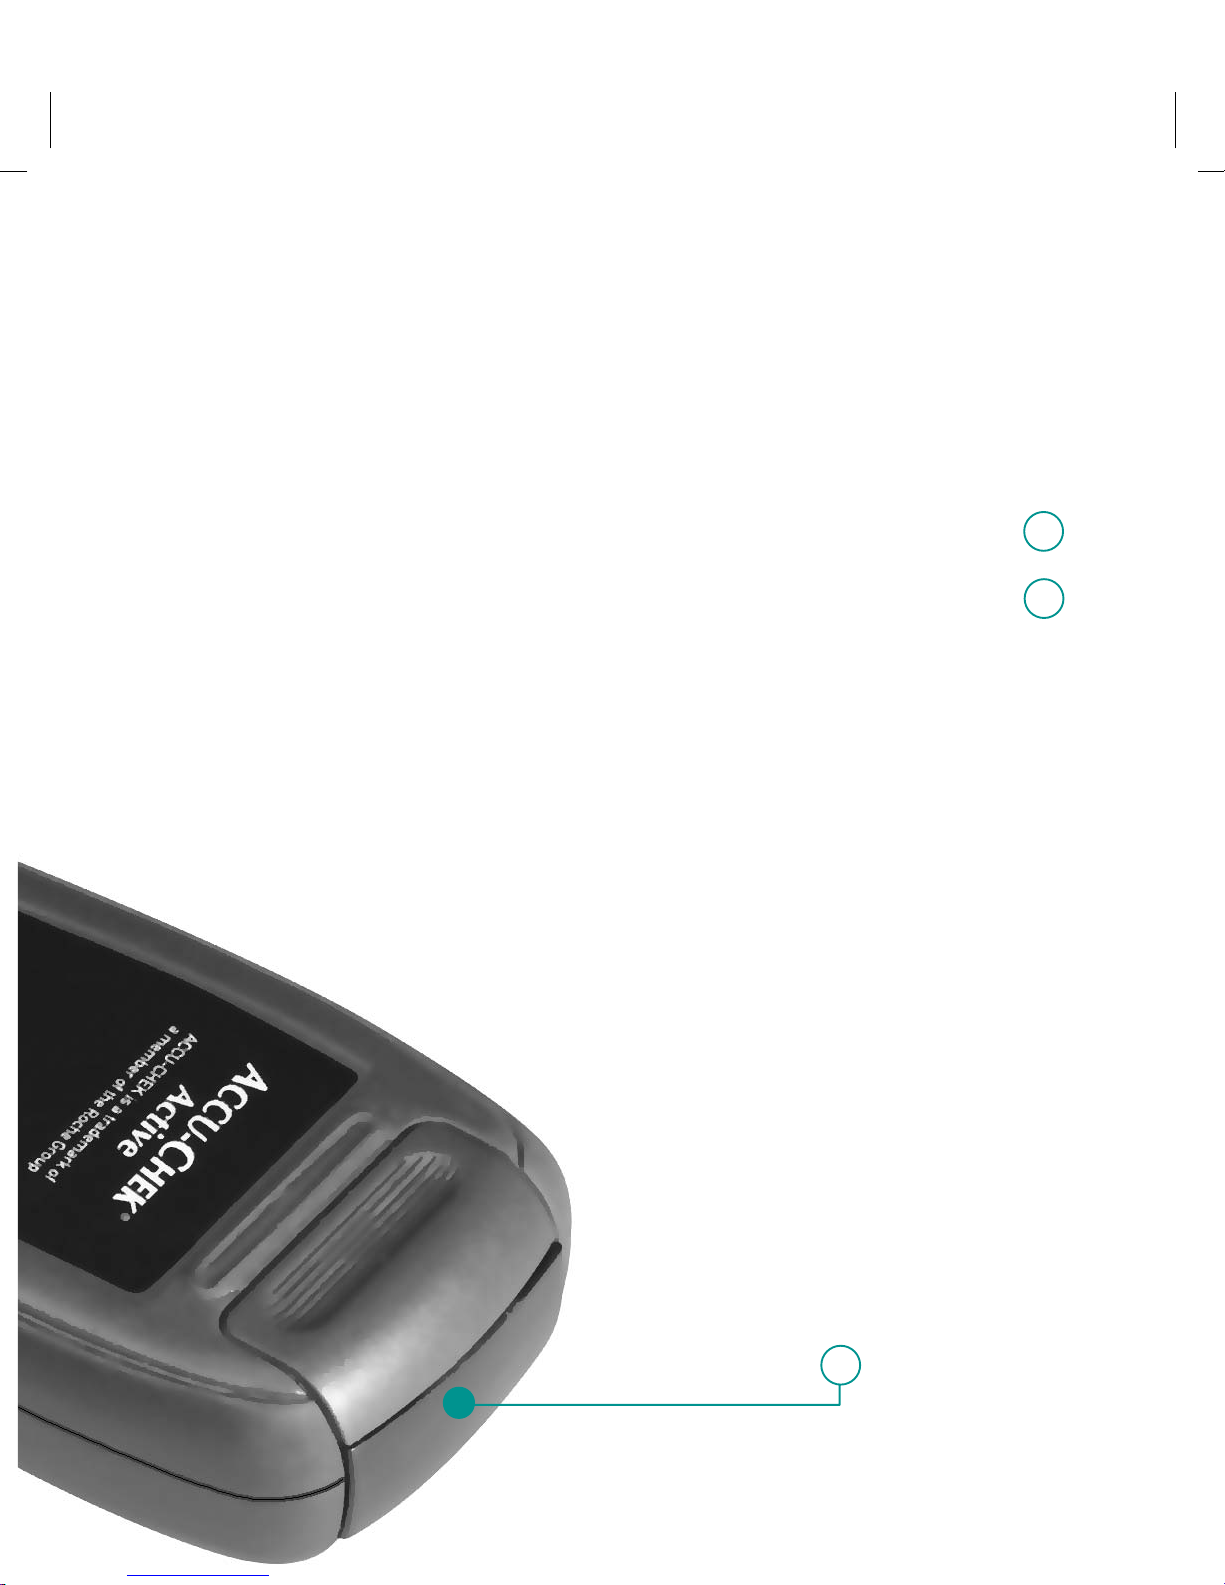
Coding chip slot
Infrared interface
10
11
11
Page 10

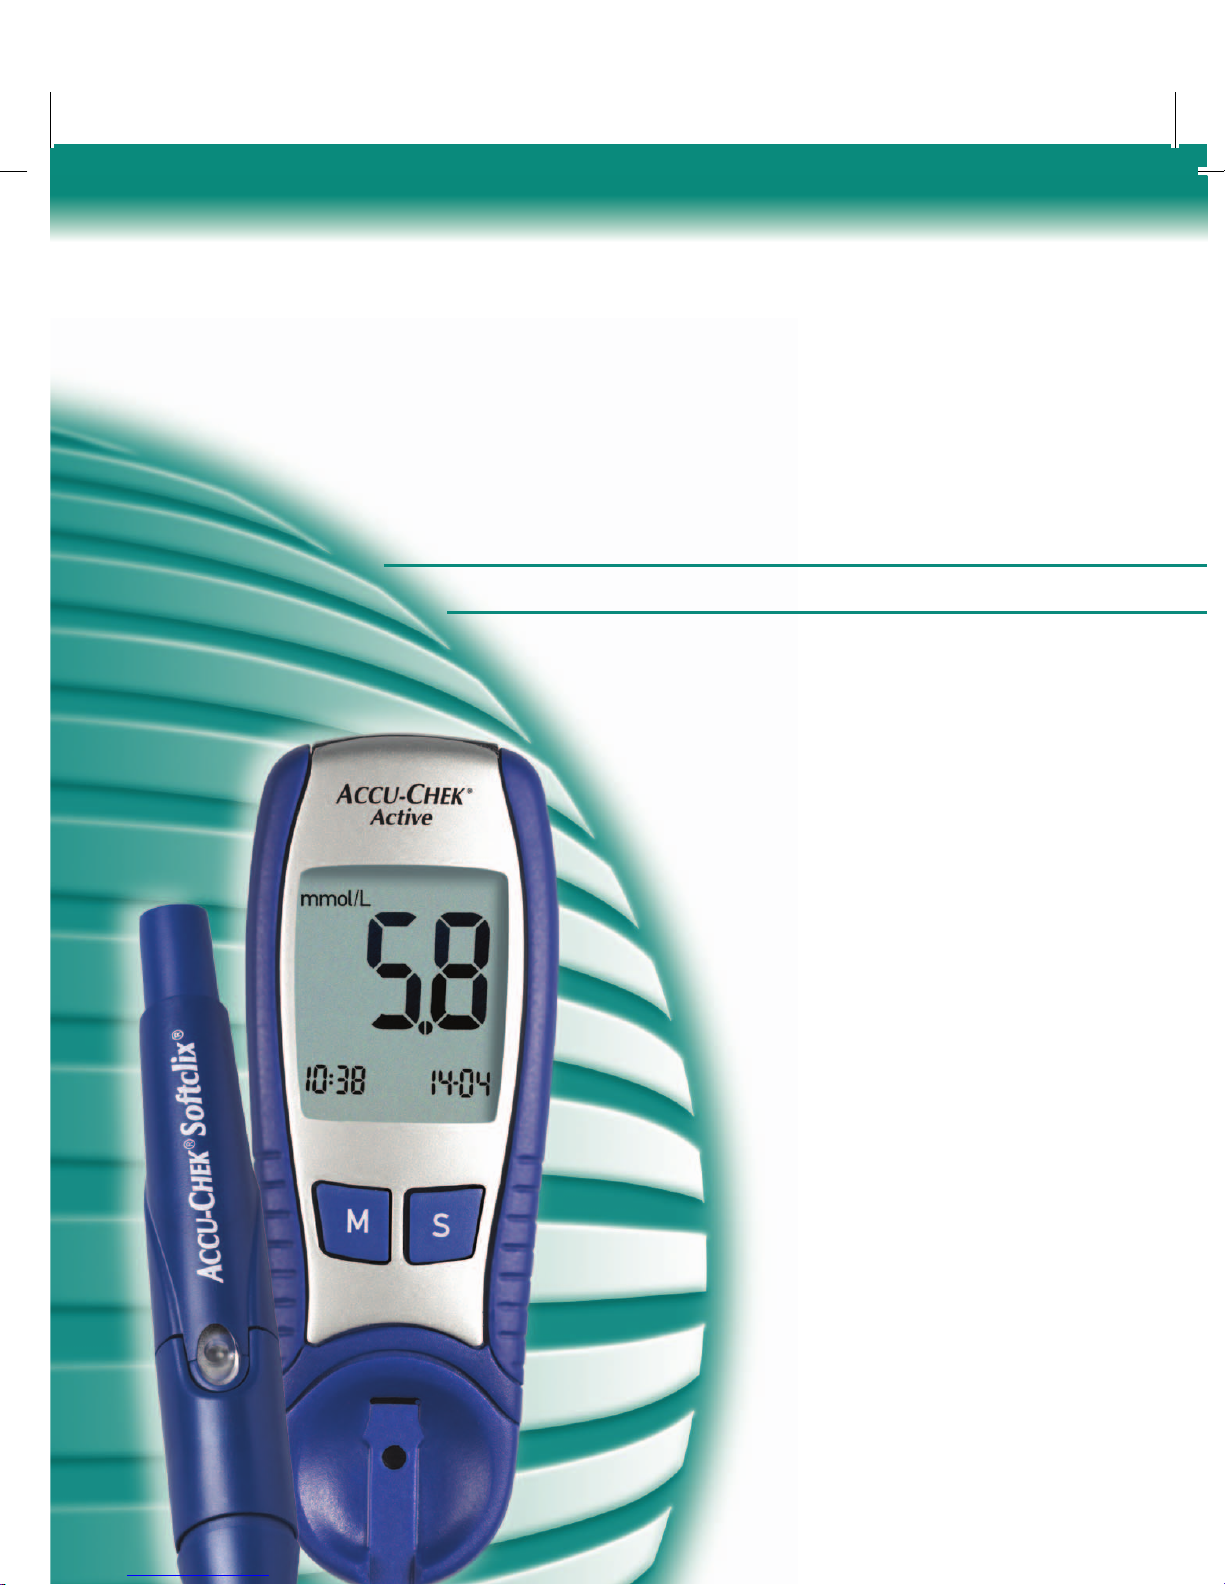
Your Accu-Chek Active blood glucose meter is a state-of-the art
precision instrument that will enable you to test your blood glucose
simply and with confidence.
Before using your Accu-Chek Active meter or Accu-Chek Softclix
finger pricker for the first time, please refer to the Getting Started
Guide included in this pack. Should you require further information,
please study this reference manual.
This manual may tell you a lot of what you know already, but it will
also introduce many features that will be new to you. At the end of
this introduction you will find a brief summary of your meter’s main
properties and functions. Each of the functions will be described in
more detail later in this manual.
If there are any other points you are unclear about – Chapter 10.4
provides the address and telephone numbers of our customer
support and service centre.
Last update: 2006-11
1 Introduction
Page 11

씰 Testing in record time: With a testing time of about
5 seconds, your Accu-Chek Active is one of the fastest blood
glucose meters available.
씰 New design: Your new Accu-Chek Active was designed for good
looks, and ergonomic functionality.
씰 Tiny blood sample: Your Accu-Chek Active requires only a tiny
drop of blood – 1 to 2 µL – if you apply the blood drop to the
middle of the test pad. If at any time the drop you apply is too
small, the meter will detect this and issue a warning.
씰 Easy to operate: No need to press buttons when you carry out
the test.
씰 Easy-to-use data analysis function: Accu-Chek Active has a
200-value memory for saving results (together with date and
timestamp) as well as an infrared interface for communicating
with a PC running a suitable analysis program.
1.1 The meter’s main features at a glance
Page 12

씰 Integrated data evaluation: From the results stored in memory
your meter can calculate the average of your blood glucose
results over the last 7 or 14 days.
씰 Out-of-meter dosing: After activating the test cycle you may
remove the test strip to apply blood (e.g. from an earlobe),
and then insert it again in the meter.
씰 Accurate results: Application of blood to the test strip starts a
colour reaction. The final colour is accurately read (measured
photometrically) by the meter’s optical system and the result
is converted to a blood glucose value.
씰 Dependable coding: Each pack of test strips contains a coding
chip that holds all of the important information that is needed
to evaluate the strips from that particular pack. Whenever you
open a new pack of strips, simply insert the new coding chip in
the coding chip slot.
1.1 The meter’s main features at a glance
Page 13

씰 Easy-to-read display: Numbers and messages are clearly
presented on a spacious display screen. Clear symbols give you
additional easy-to-follow instructions.
씰 Intelligent power supply: Accu-Chek Active shuts off automati-
cally after 1–2 minutes of non-use. Naturally, all of your results
and other data remain safe in memory. Also, you receive a
warning when the battery has only enough power for about
another 50 tests.
Page 14

This manual will help you get to know your new Accu-Chek Active
meter step by step. It will provide you with all the information you
need to operate, troubleshoot, clean and care for your meter. It is
important to remember that, in order to keep your meter in tip-top
condition, you need to comply with the care instructions in addition
to following the correct operating procedures. Accu-Chek Active is
a precision instrument. Dirt or the wrong cleaning agent can impair
its function.
Please read carefully all text in this manual that is preceded by the
following symbols:
This warns of a situation that may pose a risk to your health
(e.g. as a result of you calculating the wrong insulin dose).
1.2 About this reference manual
Page 15

This symbol indicates that your meter is at risk of being
damaged.
This symbol highlights important information that will help you
get the most out of your meter.
We recommend that you start by familiarizing yourself with all of
the elements of your Accu-Chek Active shown on pages 4–7 of this
manual. Practise all of the operations described in this manual, and
also practise testing. That way you can feel confident in testing
whenever you need.
Page 16

As you will have gathered, your Accu-Chek Active meter can do
much more than just measure blood glucose. It offers a number
of additional functions, which fall into three groups. “Mode” refers
to a group of functions that you can call upon. You select a mode
simply by turning on the meter or by the way in which you turn it on.
Detailed information on the various ways of turning on your meter
and the options available in each mode is provided later
in this manual.
2 Modes
Page 17

This is the main mode in which you will use your Accu-Chek Active
meter and is used exclusively for testing your blood glucose.
By inserting a test strip in the test strip guide, you automatically
enter this mode.
2.1 Test Mode
Page 18

Memory Mode provides you with various functions to help you
evaluate your results. To enter this mode, turn on your Accu-Chek
Active meter by pressing the M(emory) button.
씰 You can retrieve up to 200 results.
씰 Your Accu-Chek Active meter can calculate the average of your
glucose results over the last 7 or 14 days.
씰 You can download your results to a PC from the meter’s memory
(Accu-Chek Compass software available separately).
씰 You can erase the most recent result.
2.2 Memory Mode
Page 19

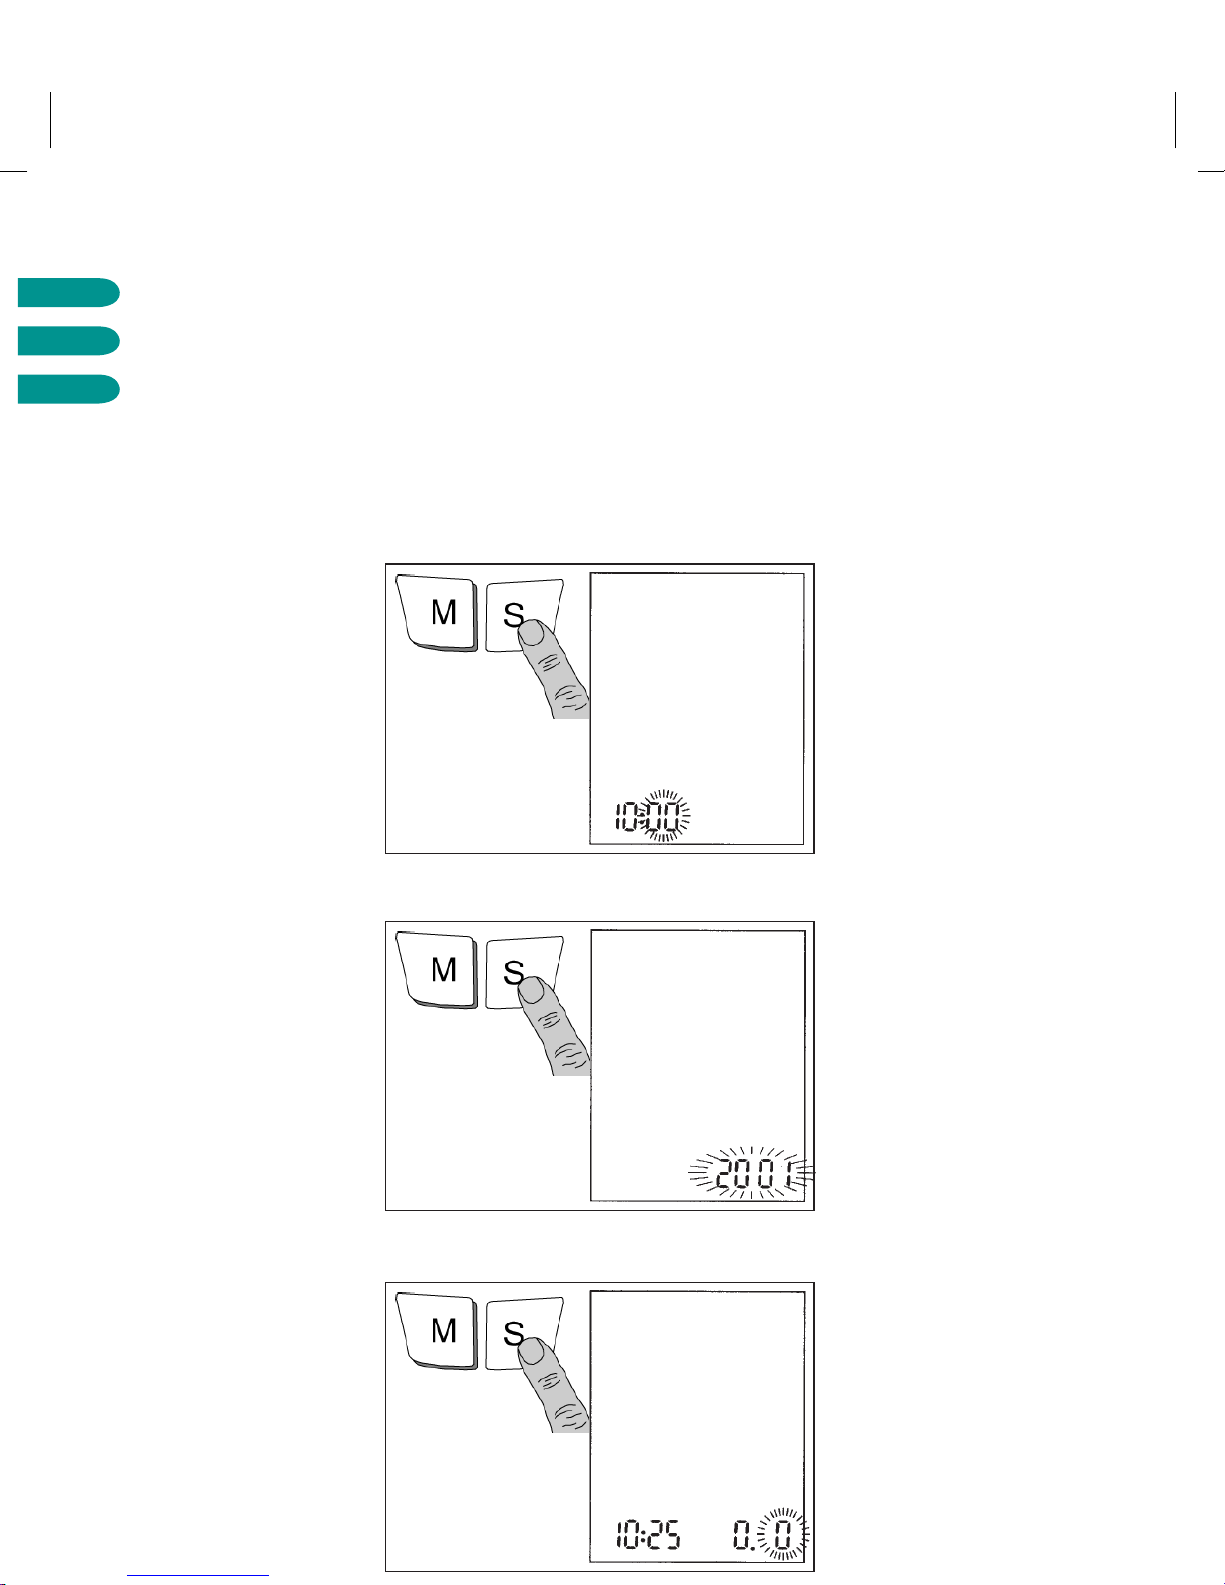
To enter Set Mode, turn on your Accu-Chek Active
meter by pressing the S(et) button.
씰 You can choose the format in which you wish the date and time
to be displayed.
씰 You can enter the date and time (required once only).
씰 You can enable and disable the beep tone.
2.3 Set Mode
Page 20

3.1 After opening the pack
Accu-Chek Active is sold complete with one lithium battery already
inserted. A plastic film protects the battery against becoming
drained prematurely. Before using the meter, remove the film
covering the battery.
씰 The film is visible at the top of your Accu-Chek Active meter,
projecting from the battery compartment. Simply pull the film
directly away from the top of the meter.
씰 This will open the battery compartment. Then you can remove
the protective film.
씰 Slide the battery compartment back into the meter and press
gently inwards until it clicks into place.
3 Initial steps before testing
Page 21

When you turn on your Accu-Chek Active meter for the first time,
it has the following settings (which you can change):
씰 Display format for the date: day.month/DD.MM
(or alternatively month.day/MM-DD)
씰 Display format for the time: 24h (or alternatively 12h)
씰 Year: year of manufacture
씰 Date: 0.0 (or alternatively 0-0)
씰 Time: 0:00 (or alternatively 0:00 a.m.)
씰 Beep tone: on
3.2 Basic settings
Page 22

Accu-Chek Active comes in 2 versions.
When you first turn on your Accu-Chek Active, please be sure to
check that the meter is set to display mmol/L (for millimoles per
litre) above the large numerals in the display (
888
). Ask your doctor
if you do not know which is the right unit for you. If this is not
displayed, please contact the Accu-Chek Customer Careline free on
0800 701000 (UK) or 1 800 709600 (Ireland) for a replacement
meter.
3.2 Basic settings
Page 23

If you see the correct unit, please enter the date and time as
described. Only then can your results be properly saved
in “memory” with the correct date and timestamp.
Page 24
3.2 Basic settings
Page 25

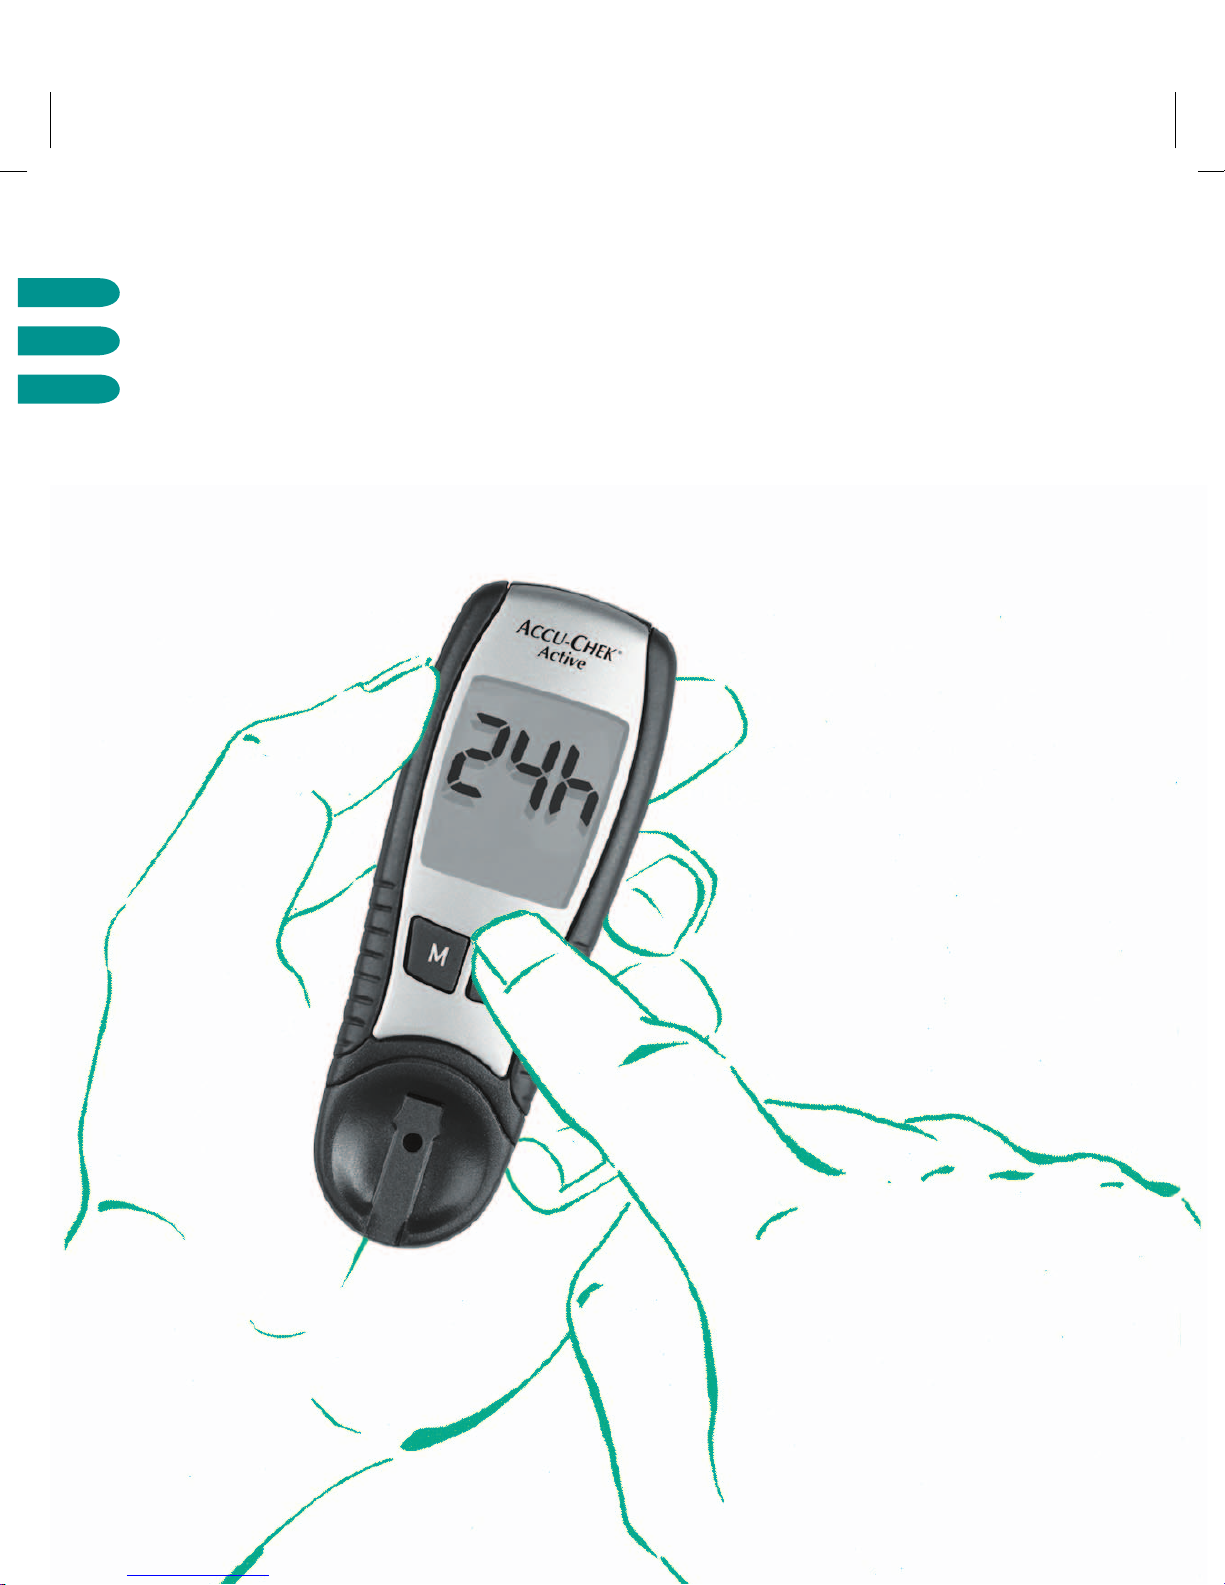
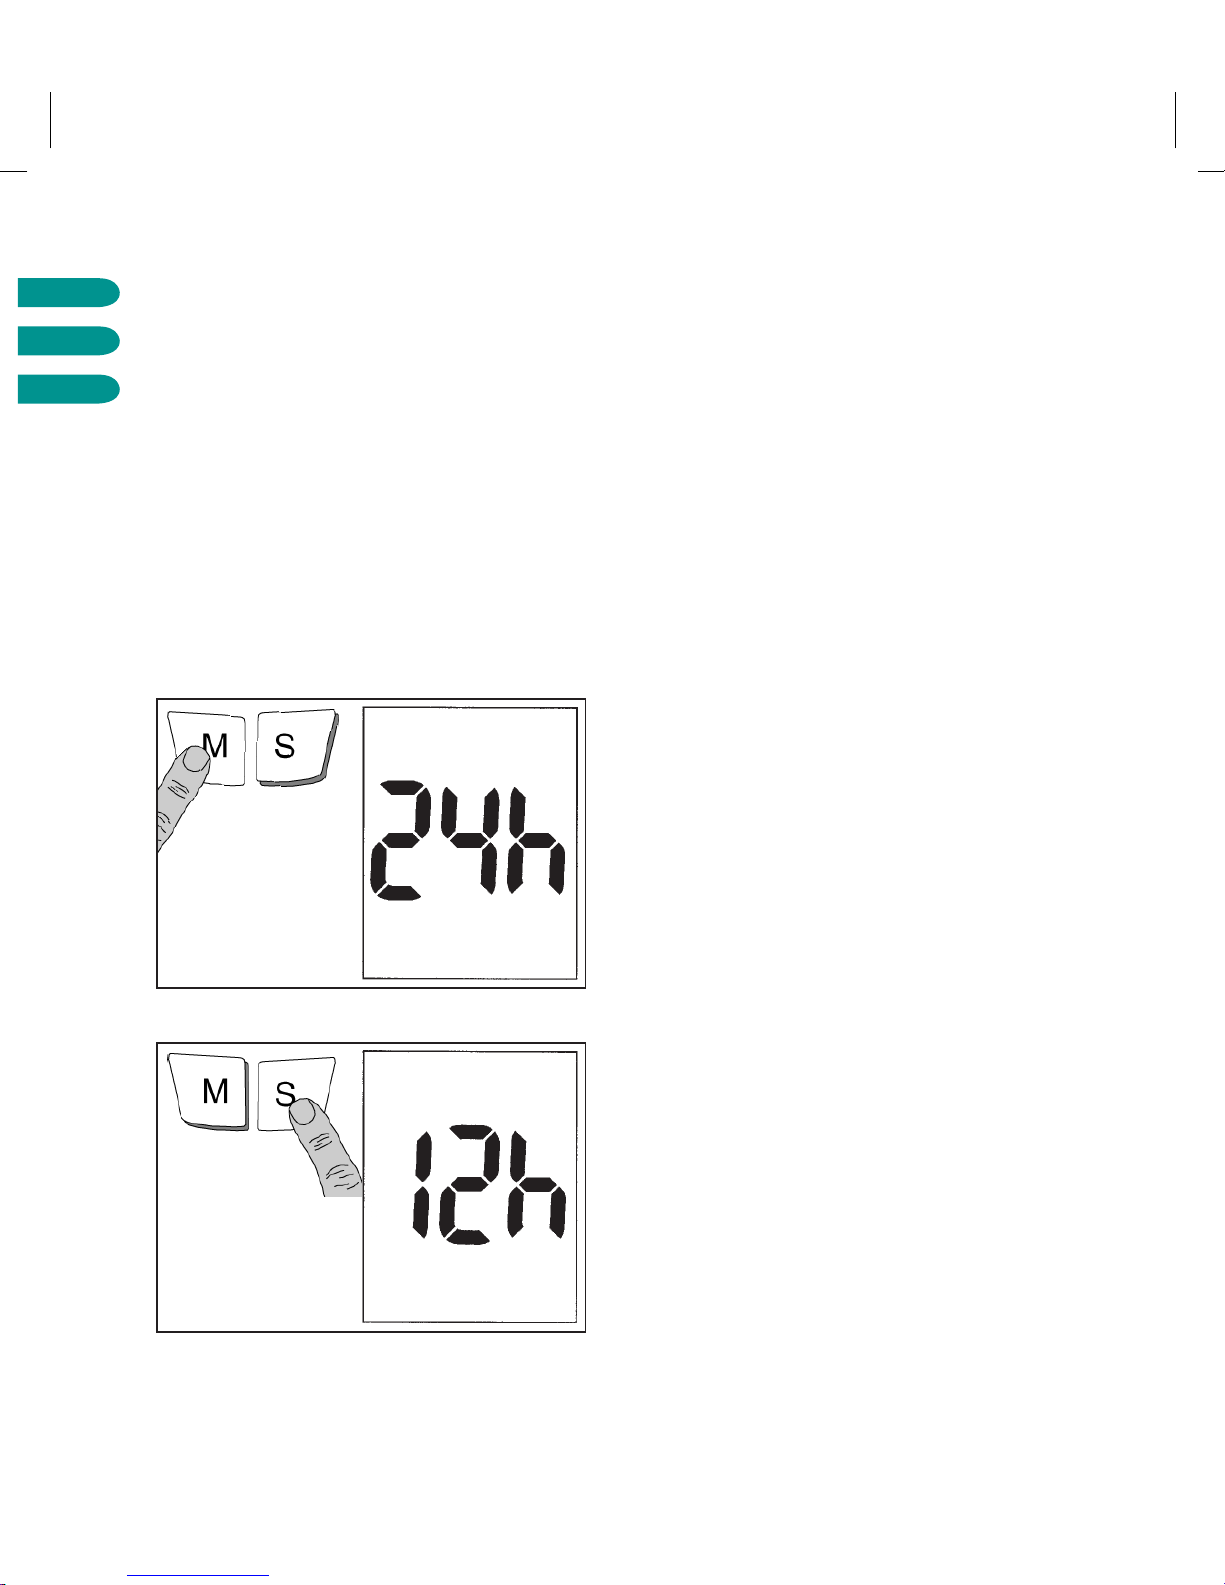
Turning the meter on in Set Mode
You use only the M and S buttons on the front of your Accu-Chek
Active to enter the desired settings.
씰 Briefly press the S button (for less than 3 seconds). Accu-Chek
Active is now turned on and in Set Mode.
In the display you see the following:
씰 the current time display format (24h/12h)
씰 flashing: the current time, or 0:00 (a.m.) when you turn on the
meter for the first time
씰 flashing: the current date, or 0.0 (0-0) when you turn on the
meter for the first time
Page 26
3.2 Basic settings
Page 27

The way in which the date and time are displayed from here on
depend on the chosen display format.
씰 If you wish to change the time display format, press the M
button now. This allows you to choose between 24h and 12h
display format.
씰 When you see the desired format, press the S button once to
proceed to the date and time settings.
Page 28
3.2 Basic settings
Page 29

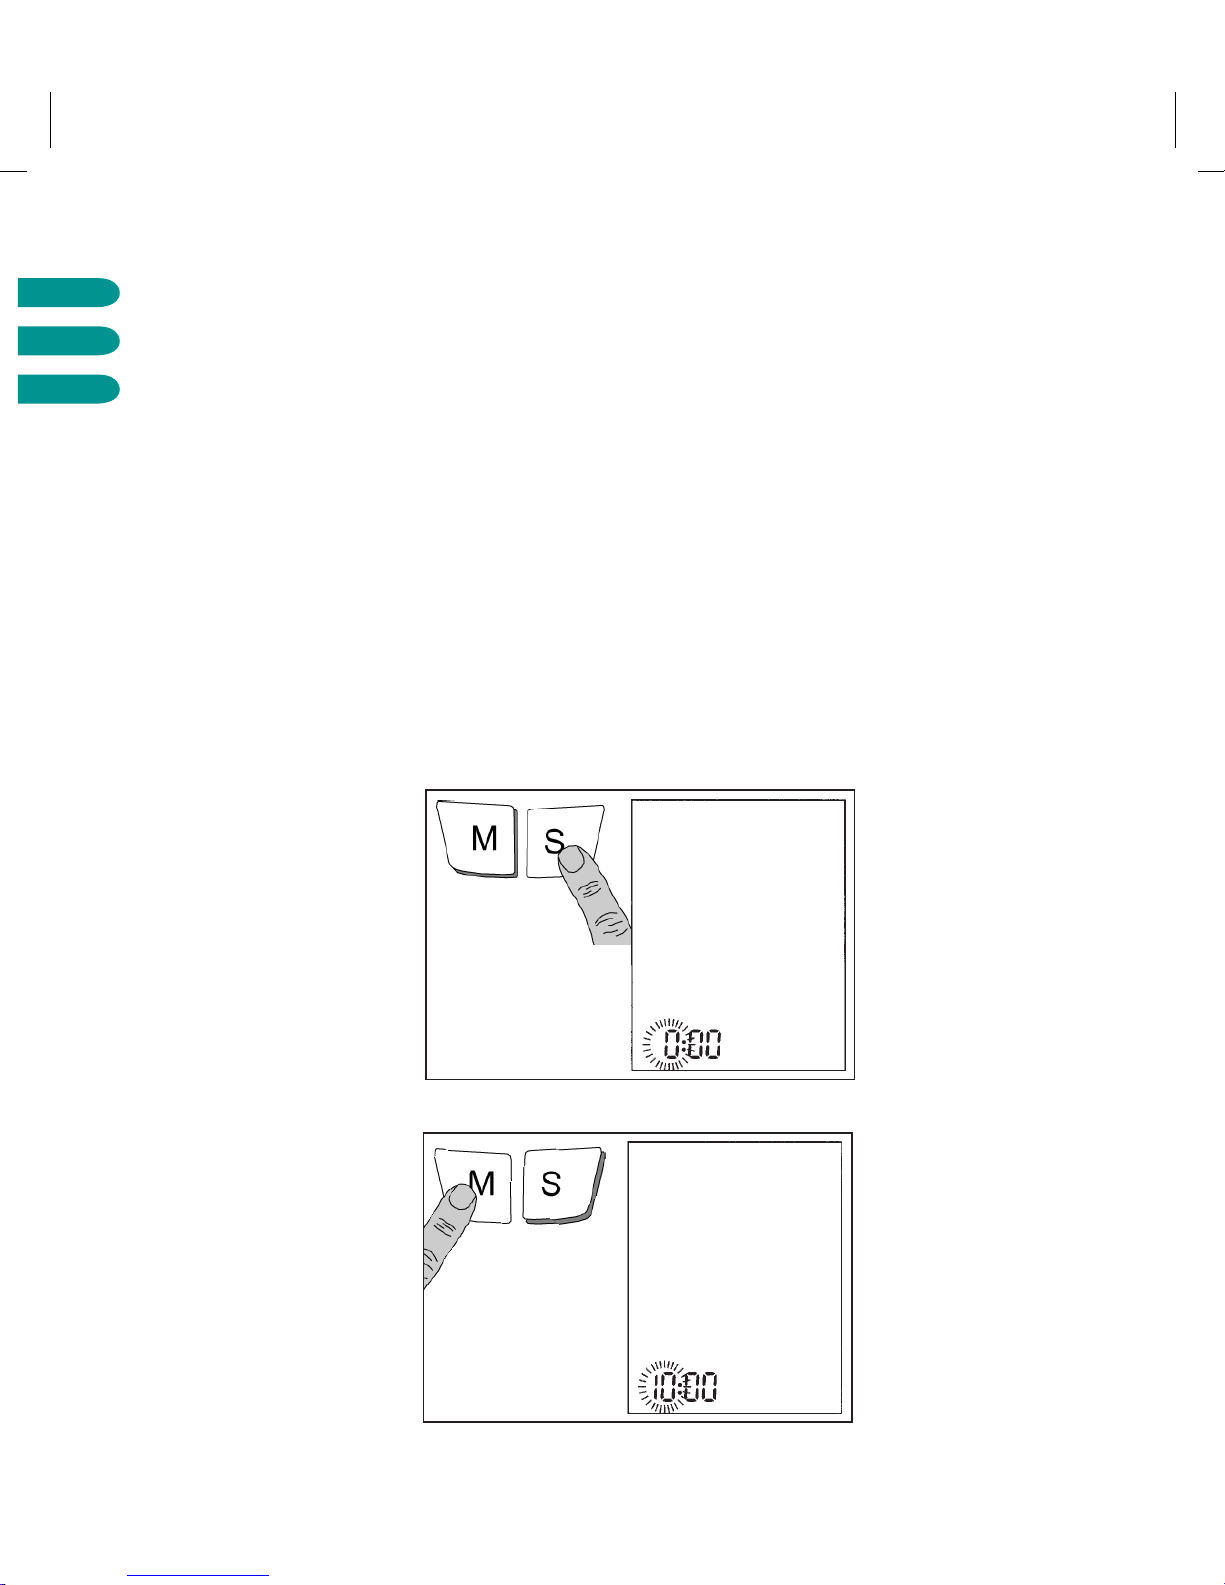
Setting the date and time
The procedure for setting the date and time is essentially the same
for all units of time (day, hour, etc.):
씰 Use the S button to select the unit of time you wish to change.
The unit will flash, indicating that it is ready to be changed.
씰 Use the M button to modify the unit of time selected.
씰 Pressing the M button once will increment the value of the unit
by one (one hour, one minute, etc.). Settings where there are
only two options (time format, beep tone) are simply toggled
backwards and forwards when you press the M button.
씰 Keeping the M button depressed enables you to fast-scroll the
value forward.
Page 30
3.2 Basic settings
Page 31

씰 Confirm the setting by pressing the S button again. The display
moves on automatically to the next unit of time, which again
flashes.
씰 Use the same procedure to set all the remaining units of time.
The date and time are set in the following sequence:
hours –> minutes –> year –> month –> day
The year is already set.
Press the S button to confirm.
The meter automatically recognises, and allows for, leap years.
Page 32

3.2 Basic settings
Page 33

Setting the beep tone
After you have set the day and pressed the S button, you can either
enable or disable the beep tone.
씰 Press the M button to turn the beep tone on and off.
씰 Press the S button to complete the settings procedure.
Check that all the settings now shown on the display are correct.
Press the S button again to turn off your Accu-Chek Active meter.
If any of the settings are incorrect, you may repeat the settings
procedure (after turning the meter on again).
Page 34

The properties of the Accu-Chek Active test strips you use with the
meter may differ very slightly from one pack to another (because of
batch-to-batch differences). Your Accu-Chek Active meter must be
programmed to allow for these differences in properties in a process
known as “coding”. All the information relating to the strips in a
particular pack of Accu-Chek Active test strips is held in the coding
chip that comes with that pack.
3.3 Coding
Page 35

Each time you open a new pack of test strips, you will need to
insert the coding chip that came with that pack into your meter.
Coding chips from other packs contain the wrong information
for your new strips, so test results will be incorrect. Leave the
coding chip in the meter until you have used up all of the test
strips from a particular pack.
Check that the three-digit code (e.g.
133
) printed on the chip
matches the code printed on the label of the container the test strips
came in. When coding is complete, your Accu-Chek Active meter will
display the code number.
Page 36

3.3 Coding
Page 37

Inserting the coding chip
When coding, leave your Accu-Chek Active meter turned off.
씰 Take the new coding chip from the pack of test strips.
씰 Gently slide the coding chip into the slot on the side of the
meter
➉
(see parts summary).
씰 Ensure that you push the coding chip fully home.
씰 That’s all there is to it!
When you subsequently perform your first blood glucose test with
the new coding chip (and new test strips), check that the code
number you see in the display is the same as the number printed on
the container the test strips came in. For further information please
refer to the next chapter.
Page 38

4.1 Materials for testing blood glucose
Please have the following items ready to carry out the test:
씰 your Accu-Chek Active meter with the coding chip inserted,
씰 the pack of Accu-Chek Active test strips you took the coding
chip from,
씰 a suitable finger pricker (such as the Accu-Chek Softclix
finger pricker and Accu-Chek Softclix Lancet).
With your Accu-Chek Active meter use only Accu-Chek Active
test strips. Any other test strips will give incorrect results.
Sometimes the error can be significant, causing the wrong
therapeutic decision to be taken and so producing adverse
health effects!
4 Testing blood glucose with your
Accu-Chek Active meter
Page 39

If you are not yet familiar with the concept of blood glucose selfmonitoring using a meter, practise first by carrying out a quality
control test as described in Chapter 6. A quality control test is carried
out in the same way as a normal test, but with control solution
(a standardized glucose solution) instead of blood.
씰 Carefully read the pack inserts that came with the test strips
and the finger pricker.
씰 Thoroughly wash and dry the site you intend to collect blood
from. Any moisture remaining can dilute the blood and so
produce an incorrect result.
씰 Remove a test strip from its container. Close the container
immediately. The cap contains a drying agent which ceases to
function if the container is left open, rendering the test strips
unusable.
4.2 Preparing for the blood glucose test
Page 40

4.3 Performing a blood glucose test
Page 41

Check the round control window on the back of the test strip with
the colour scale printed on the test strip container. The colour of the
control window must match that of the colour interval at the top
(0 mmol/L). If the test strip shows a different colour, do not use it.
Hold the test strip so that the application area and arrows are facing
upwards. Gently push the test strip in the direction of the arrows into
the test strip slot
➃
of your meter, until you hear it click into place.
Inserting the test strip automatically puts the meter in Test Mode.
Please remember that your meter automatically turns off after about
1–2 minutes of non-use (i.e. when no button is pressed).
If this happens, remove the test strip and repeat the procedure
described above with a new test strip.
Now watch the display.
Page 42

4.3 Performing a blood glucose test
Page 43

씰 The meter carries out a display test (for details see page 87),
then shows the code number. Is this the number printed on the
test strip container? If not, check that you really did insert the
coding chip from the new pack. If you are using the right coding
chip but the number in your display is wrong, please call the
Accu-Chek Customer Careline free on 0 800 701000 (UK) or
1 800 709600 (Ireland).
If “code” is flashing and you see three horizontal bars
(
---
) instead of a number, you have not inserted the coding
chip.
Page 44

4.3 Performing a blood glucose test
Page 45

씰 Check that the correct date and time are displayed.
Do not carry out any tests if the code number in the display is
not the same as the number on the test strip pack. Incorrect
coding produces incorrect results. Sometimes the error can be
significant, causing the wrong therapeutic decision to be taken
and so producing adverse health effects.
When the display test has been successfully completed and the code
number matches, your Accu-Chek Active meter is ready for testing.
씰 The flashing drop symbol is your cue to apply a drop of blood
(within two minutes). If you wish to apply blood while the test
strip is in the meter, please read on. For out-of-meter dosing
please see page 55.
Page 46

In-meter dosing
If you have opted for in-meter dosing, proceed as follows:
씰 Massage a fingertip to stimulate the circulation and make blood
collection easier.
씰 Use the finger pricker to prick the side of the massaged
fingertip.
씰 Without pressing too hard, encourage a small drop of blood
to form.
4.3 Performing a blood glucose test
Page 47

씰 Apply the drop of blood on to the middle of the orange-coloured,
square application area (pad). It is OK to touch this area when
applying blood, but do not attempt to spread the blood. If you
suspect the amount of blood may not suffice, you may apply a
second drop within 5 seconds.
씰 Your Accu-Chek Active meter beeps briefly (provided the beep
tone is enabled) to acknowledge application of blood and to
announce the start of testing. Make sure you do not move the
test strip during testing, or an incorrect result may be obtained.
Page 48

4.3 Performing a blood glucose test
Page 49

씰 The hourglass symbol indicates that testing is in progress.
씰 The meter beeps again after about 5 seconds to signal that
the test is complete. The result appears in the display and is
automatically saved together with the date and time.
씰 Remove the test strip from the meter, which will now
automatically turn off.
Page 50

4.3 Performing a blood glucose test
Page 51

Plausible results
Your Accu-Chek Active meter measures blood glucose within a
defined range (0.6-33.3 mmol/L). Values outside this range are
displayed as “Lo”- meaning the result is less than 0.6 mmol/L or “Hi”- meaning the result is greater than 33.3 mmol/L.
If you applied too little blood, please repeat the test with a new
test strip.
Now perform a plausibility check. It is important that this check be
performed within 30–60 seconds after blood was applied. Any later
than this and comparison is no longer possible owing to excessive
discolouration of the test strip. This colour comparison is solely for
the purpose of checking the result. Therapeutic decisions must be
based on the result given in the display.
Page 52

4.3 Performing a blood glucose test
Page 53

씰
Turn over the test strip to reveal the round control window on the
back.
씰
On the label of the test strip container is a colour scale with blood
glucose values printed alongside. Select the blood glucose value
that best approximates the reading you obtained.
씰
Compare the colour of the control window with the colour you
selected on the label.
The colours must be a fairly close match. If there is a great disparity,
repeat the test. If you cannot obtain a close match even after several
attempts at testing, please call the Accu-Chek Customer Careline.
If the colours match, the result is confirmed and the test successfully concluded. You can dispose of the used test strip with your
regular domestic waste.
Page 54

Implausible results
If the displayed result does not reflect the way you feel or seems
unusually high or low, or if colours do not match, please check
the following:
씰 With your Accu-Chek Active meter, are you using only
Accu-Chek Active test strips?
씰 Have you really used a test strip from a pack with the same
code number as that displayed by your Accu-Chek Active meter?
씰 Did you apply the drop of blood within 3 minutes after removing
the test strip from its container?
씰 Are both the test strip guide and measurement optics clean?
4.3 Performing a blood glucose test
Page 55

씰 Was the test strip container you are presently using kept
properly closed?
씰 Have the test strips expired?
씰 Have the test strips been kept under suitable temperature
conditions (i.e. not in a car in very hot or cold weather)?
If the answer to all these questions is “yes”, carry out a quality
control check with a new test strip as described in Chapter 6.
If this check confirms the meter is working properly, please read
the instructions in Chapter 4.3 again and perform another blood
glucose test with a new test strip. If you feel the new result is also
implausible, please speak to your doctor about it.
Page 56

4.3 Performing a blood glucose test
Page 57

Out-of-meter dosing
The test procedure is mostly identical with “Performing a blood
glucose test” on page 38. Follow the instructions given there up to
the point where you are instructed to apply blood.
씰 Clean and massage the site you intend to collect blood from
(for example, an ear lobe). This will stimulate the circulation
and make blood collection easier.
씰 Use the finger pricker to prick the selected site.
씰 Without pressing too hard, encourage a drop of blood to form.
Page 58

씰 Pull the strip out of the meter. The two symbols (blood drop and
test strip) are flashing. You now have 20 seconds to apply blood
to the test strip and re-insert it before the meter switches off.
After 15 seconds a beep tone once per second indicates that the
time for measurement has expired.
4.3 Performing a blood glucose test
Page 59

씰 Apply the drop of blood to the middle of the orange-coloured
pad. It is OK to touch this application area when applying blood,
but do not attempt to spread the blood.
씰 Gently push the test strip back into the test strip slot of your
Accu-Chek Active meter, until you feel it click into place.
씰 Your Accu-Chek Active meter beeps briefly to acknowledge
application of blood and to announce the start of testing.
Make sure you do not move the test strip during testing, or an
incorrect result will be obtained.
씰 The hourglass symbol indicates that testing is in progress.
Page 60

4.3 Performing a blood glucose test
Page 61

씰 The meter beeps again after about 10 seconds to signal that
the test is complete. The result appears in the display and is
automatically saved together with the date and time.
Testing by healthcare professionals
The out-of-meter dosing feature of the Accu-Chek Active meter
makes it ideal for testing in a professional environment. For each
patient use a separate lancet and finger pricker, or alternatively use
the specially developed Accu-Chek Softclix Pro, or Safe-T-Pro lancet
devices.
Collect used lancets and test strips in a sturdy sharps container with
lid. Be sure to observe all relevant Health and Safety regulations.
A potential infection risk exists. Medical staff and other
persons using Accu-Chek Active to test blood glucose from
more than one patient must be aware that any item coming into
contact with human blood is a potential source of infection.
(Please see “Protection of Laboratory Workers from Infectious
Diseases Transmitted by Blood, Body Fluids, and Tissues”;
Second Edition, Tentative Guideline, 1991, Document M29-T2,
Page 62

5.1 Results memory
Your Accu-Chek Active meter has a 200-value memory for saving
results together with date and time. You do not need to save a
result specially; the meter does it all for you. Once all the memory
locations are full, the meter automatically erases the oldest entry.
All results in memory are consecutively numbered from 1 (most
recent) to a maximum of 200 (oldest).
5 Using Accu-Chek Active as an electronic diary
Page 63

In addition to results, your meter also stores all relevant additional
information and display messages. For example, results flagged as
control results are displayed together with a bottle symbol
incorporating the letter “C”. Results obtained at a temperature
outside the permitted range are displayed together with a
thermometer symbol. Please refer to Chapter 8 for a complete list
of display messages and symbols.
Page 64

5.2 Retrieving results
Page 65

To use the memory functions of your Accu-Chek Active meter,
you must turn it on in Memory Mode.
씰 Briefly press the M button (for less than 3 seconds).
In the display you see the following:
씰 at top left, “mem” (short for “memory”)
씰 followed by the most recent result (in memory location “1”),
together with the time and date.
Page 66

5.2 Retrieving results
Page 67

To recall earlier results (in memory locations 2-200):
씰 Press the S button once to move back one result in time.
As long as you keep the button pressed, the number of the
memory location is displayed. As soon as you release the button,
the result appears.
씰 By holding down the S button, you can scroll quickly through the
results. As soon as you release the button, the result saved in
that location appears.
씰 When you reach the last memory location containing a result, the
display reverts to memory location “1”.
Page 68

5.2 Retrieving results
Page 69

Finding the 7 or 14 day average of glucose results
As well as just showing the results in memory, your Accu-Chek
Active meter can calculate and display average values for the last
7 or 14 days.
씰 Start by pressing the M button to turn on your
Accu-Chek Active meter in Memory Mode.
씰 Then press the M and S buttons at the same time.
The display shows “7 day ave” at top right. The figure shown is the
average of glucose results for the last 7 days.
Page 70

5.2 Retrieving results
Page 71

씰 Then press the M and S buttons again at the same time.
씰 The display changes; the figure shown is now the average value
for the last 14 days.
To exit from the “average” screen, press the S button. The display
reverts to the last result shown before the average value.
Averages can only be calculated as long as you have set the
date and time (see Chapter 3.2). Without these settings the
meter cannot identify the results from the last 7 or 14 days.
For safety reasons no average value can be displayed when
the date has been manipulated into the future.
When averages are being calculated, all control readings are
ignored.
Page 72

5.2 Retrieving results
longer than 3 seconds
Page 73

Clearing (erasing) results from memory
You can clear the current value (and only this) from memory. This
feature is useful, for instance, if you have obtained an implausible
result. Both the result and the time and date information are erased,
though the memory location remains occupied.
An average value cannot be displayed when the most recent result
has been erased from memory. Results arising after a value has
been erased are included in calculation of the average.
Clearing the current value:
씰 Turn on your Accu-Chek Active meter by keeping the S button
pressed for longer than 3 seconds.
씰 The display shows “Clr” and “mem” (flashing).
Page 74

5.2 Retrieving results
longer than 3 seconds
longer than 5 seconds
Page 75

씰 Keep the M and S buttons pressed together for longer than
3 seconds.
씰 The current result is displayed.
씰 Keep the M and S buttons pressed together for longer than
5 seconds. You will hear 5 beeps.
씰 All information relating to the current result is cleared and set to
zero. The memory location remains occupied.
Your Accu-Chek Active meter turns off automatically after you have
cleared the result.
Page 76

General information
about data downloading
Roche Diagnostics offers a variety of special software programs
(e.g. Accu-Chek Compass, and the Accu-Chek Smart Printer System)
to expand the memory functions integrated in your Accu-Chek Active
meter. Such programs enable you and your doctor to manage your
data more effectively and, through graph and table views, make it
easier for you to understand your self-testing data.
For further information please contact the Accu-Chek Customer
Careline 0800 701000 (UK) or 1 800 709600 (Ireland)
5.3 Downloading data to a PC
Page 77

For data downloading you need a suitable PC program as well
as the Accu-Chek Infrared Cable. For further information please
contact the Accu-Chek Customer Careline 0800 701000 (UK) or
1 800 709600 (Ireland) (see Chapter 10.4).
Data can only be evaluated on a PC as long as you have set the
full date and time (see Chapter 3.2).
Your Accu-Chek Active meter has an inbuilt infrared interface
11
(see illustration on pages 6–7), permitting cordless data downloading to a suitably equipped PC. All results in memory are
downloaded each time. After download the data are still in the
meter’s memory.
Page 78

5.3 Downloading data to a PC
longer than 3 seconds
Page 79

Downloading procedure
To download data, proceed as follows:
씰 Set up the program and infrared cable according to
manufacturer’s instructions so you can start data transfer
with a mouse click.
씰 Position your Accu-Chek Active meter about 10 cm from the
infrared cable. Point the two infrared windows towards one
another.
씰 Turn on your Accu-Chek Active meter by keeping the M button
pressed (for longer than 3 seconds) until “PC” appears
flashing in the display. This indicates the meter is ready to
communicate.
Page 80

5.3 Downloading data to a PC
Page 81

씰 Start downloading at the PC. The PC sends an instruction to the
Accu-Chek Active meter.
씰 During active downloading, “PC” remains constant in the display
씰 On completion of downloading, “End” appears in the display.
Following the download you can turn off your Accu-Chek Active
meter with the M button, if the PC has not already shut down the
meter. In the latter case the “End” message may not be displayed.
Page 82

6.1 Quality control testing with control solution
To ensure your results are always dependable, you must periodically
check the performance of your Accu-Chek Active meter.
Perform a quality control test:
6 Checking Accu-Chek Active
Page 83

씰 after you have opened a new pack of Accu-Chek Active test
strips and consequently replaced the coding chip,
씰 after you have inserted a new battery,
씰 after you have cleaned your Accu-Chek Active meter,
씰 if you have reason to doubt the validity of a result.
Page 84

6.2 Preparing for the quality control test
Page 85

For the quality control test, please have the following items ready:
씰 your Accu-Chek Active meter with the coding chip inserted,
씰 the pack of Accu-Chek Active test strips you took the coding
chip from,
씰 the Accu-Chek Active Control solutions.
Carefully read the pack inserts that came with the test strips and the
control solutions, and select a control solution.
Page 86

씰 Remove a test strip from its container. Close the container
immediately. The cap contains a drying agent which ceases to
function if the container is left open, rendering the test strips
unusable.
씰 Check the round control window on the back of the test strip
against the colour scale printed on the test strip container.
The colour of the control window must match that of the
colour interval at the top (0 mmol/L).
If the test strip shows a different colour, do not use it.
6.3 Quality control test procedure
Page 87

씰 Hold the test strip so that the application area and arrows are
facing upwards. Gently push the test strip in the direction of the
arrows into the test strip slot
➃
of your Accu-Chek Active meter,
until you hear it click into place.
Inserting the test strip automatically puts the meter in Test Mode.
Please remember that your Accu-Chek Active meter automatically
turns off after about 1–2 minutes of non-use (i.e. when no button
is pressed). If this happens, remove the test strip and repeat the
procedure described above with a new test strip.
Now watch the display.
Page 88

6.3 Quality control test procedure
Page 89

씰 The meter performs a display test lasting 2 seconds.
Check that all the segments making up the numerals (“
888
”
or “
88.8
”) are properly displayed. If a segment is missing,
test results may be displayed inaccurately (e.g. through
9
being
confused with
3
). If this happens, call your customer support
and service centre.
씰 The current code number then appears in the display. Is this
the number printed on the test strip container? If not, check
that you really did insert the coding chip from the new pack.
If “code” is flashing and you see three horizontal bars (
---
)
instead of a number, you have not inserted the coding chip.
You can still do this now (while the display is flashing).
씰 Check that the correct date and time are displayed.
Page 90

6.3 Quality control test procedure
Page 91

When the display test has been successfully completed and the
code number matches, your Accu-Chek Active meter is ready for
testing. The display screen that follows signals:
씰 That the test strip has been inserted.
씰 The flashing drop symbol is your cue to apply the control
solution (blood in the case of a real test).
To make quality control results stand out later from blood glucose
test results, you can place what is known as a “flag” against them.
씰 Press the S button once. In the display you see an hourglass
symbol along with the control test flag (a bottle with the letter
“C”). You can insert the flag at this point. If you pressed the
S button inadvertently, you can press it again (before testing is
complete) in order to remove the flag.
Page 92

6.3 Quality control test procedure
Page 93

씰 Apply one drop of the selected control solution to the test pad
of the strip.
씰 Your Accu-Chek Active meter beeps briefly to acknowledge
application of solution and to announce the start of testing.
씰 After 5 seconds a second beep tone indicates that testing is
complete, and the result appears in the display. If you have not
already flagged this quality control result, you may do so now.
The value displayed here is an example. The result shown on
your Accu-Chek Active meter will not necessarily agree.
Page 94

Now check that the displayed value is within the permitted range.
Examine the test strip container and locate the “Accu-Chek Active
Control” table.
The table has two rows listed as “1” and “2”, as well as two
columns giving ranges in mmol/L and mg/dL.
A
CCU
-
C
HEK® Active Control
mg/dL mmol/L
1 36 – 66 2,0 – 3,7
2 131 – 177 7 ,3 – 9,8
6.3 Quality control test procedure
Values are for illustration only.
Page 95

씰 If you performed the test with Accu-Chek Active Control 1,
refer to row 1 for the permitted range.
씰 If you performed the test with Accu-Chek Active Control 2,
refer to row 2 for the permitted range.
If the result is within the stated range, you need to still carry out a
visual plausibility test. It is important that this check be performed
within 30–60 seconds after control solution was applied. Any later
than this and comparison is no longer possible owing to excessive
discolouration of the test strip.
If the result is outside the stated range, perform a second quality
control test. If the second result is still outside the range, please call
your customer support and service centre.
씰 Pull the strip out of the meter. The result is saved as a control
reading (which is ignored when the averages are calculated),
and the meter switches off.
Page 96

6.3 Quality control test procedure
Page 97

씰 Turn over the test strip to reveal the round control window on
the back.
씰 On the label of the test strip container is a colour scale with
blood glucose values printed alongside. Select the blood glucose
value that best approximates the reading you obtained.
씰 Compare the colour of the control window with the colour you
selected on the label.
The colours must be a fairly close match. If there is a great disparity,
repeat the test. If you cannot obtain a close match even after several
attempts at testing, please call your customer support and service
centre.
If the colours are a close match, quality control testing of your
Accu-Chek Active meter has been successfully concluded.
The meter is now ready to perform further blood glucose tests.
If the measurement optics or any other part of your Accu-Chek
Active become soiled during testing, please clean the meter as
instructed in Chapter 7.1.
Page 98

6.4 Performing a full display check
longer than 3 seconds
Page 99

The standard power-on display test checks the most important
display elements. To verify that all of the elements are functioning
correctly, you can carry out a full test.
씰 Press and hold down the M and S buttons together for longer
than 3 seconds.
씰 All the elements of the liquid crystal display (LCD) are shown
at once. Either “mmol/L” or “mg/dL” will be visible depending
on the country-specific setting.
씰 Press any key to terminate the display test and turn off your
Accu-Chek Active meter. If you do not press a key, the meter
will shut off automatically after about 2 minutes.
Page 100

Your Accu-Chek Active meter has no moving parts and so will
not suffer any mechanical wear and tear. As with any precision
instrument, however, you will need to look after it carefully to keep
it at its best.
7 Keeping your meter in tip-top condition
 Loading...