

Page 1
17607 Universal a/C FlUsh Fitting Kit
WARNING
Wear protective equipment, including
•
safety goggles, when working with
refrigerants and solvents. Refrigerants
and solvents can cause injuries.
Do not use any solvent containing alcohol, lacquer
•
thinner, brake cleaner, or any other non-approved
solvent.
Do not look into the component to observe air ow
•
- injury may result!
Equipment must be operated by qualied personnel.
•
Operator must be familiar with air conditioning and
refrigeration systems, solvents, and the dangers of
pressurized components.
The operator is responsible for complying with any
•
and all applicable laws and regulations governing
the use of this equipment, as well as the disposal
of used solvents, oil, equipment, and components.
These instructions are intended as guidelines for general
operation of the Universal Flush Fitting Kit. Follow
the vehicle manufacturer’s instructions for ushing
A/C systems.
The clamp assemblies and support plates included in
this kit can be installed on most A/C line or tube ends
for attachment of the ushing apparatus being used.
Installation of the Sealing Cone:
1. After selecting the correct support plate to t
the tube or line tting, tighten the clamp screw
until the cone is seated tightly against the end of
the tube or line tting on the A/C component.
2. While holding the clamp screw by hand, rotate
the forcing nut an additional 1/8 to 1/4 turn. This
provides a leak-tight seal for the ushing operation.
To remove the clamp assembly, hold the clamp screw
and back off the forcing nut to free up the sealing cone
without damaging the end of the cone.
When using adapters on a tube or tting that is too
small for the sealing cone to enter, replace the cone-
shaped seal with the concave seal.
To replace the sealing cone, hold the forcing nut and
back out the clamp screw until the cone is pulled out
the end of the clamp screw. Insert the desired sealing
cone into the end of the clamp screw, and tighten the
screw until the cone bottoms in the screw, using the
non-slotted support plate against the end of the cone.
CAUTION : Do NOT use pliers or other tools to twist
the sealing cone out of the clamp screw, because it
could damage the sealing cone.
The support plates are slotted to allow for different size
tubes or line nuts to be supported against the lower
end of the sealing clamp. The chamfered area on the
support plates allow the ared end of the tubes to sit
level. This way the sealing cone can be seated without
slipping or damaging the end of the tube.
Seating of the sealing cone into the ttings or tube
ends does not require the use of wrenches or other
tools. Sealing cones damaged by tools must be replaced.
Included in this Kit:
(2) Clamp Assembly
(2) Support Plate (1/2" OD tube)
(2) Support Plate (5/8" OD tube)
(2) Support Plate (3/4" OD tube)
(2) Support Plate (7/8" OD tube)
(2) Support Plate (No slot)
Toll-free Technical Support Line:
1-800-822-5561
%
In all other locations, contact your local distributor.
Because of ongoing product improvements, we reserve the right
to change design, specications, and materials without notice.
in the U.S. and Canada
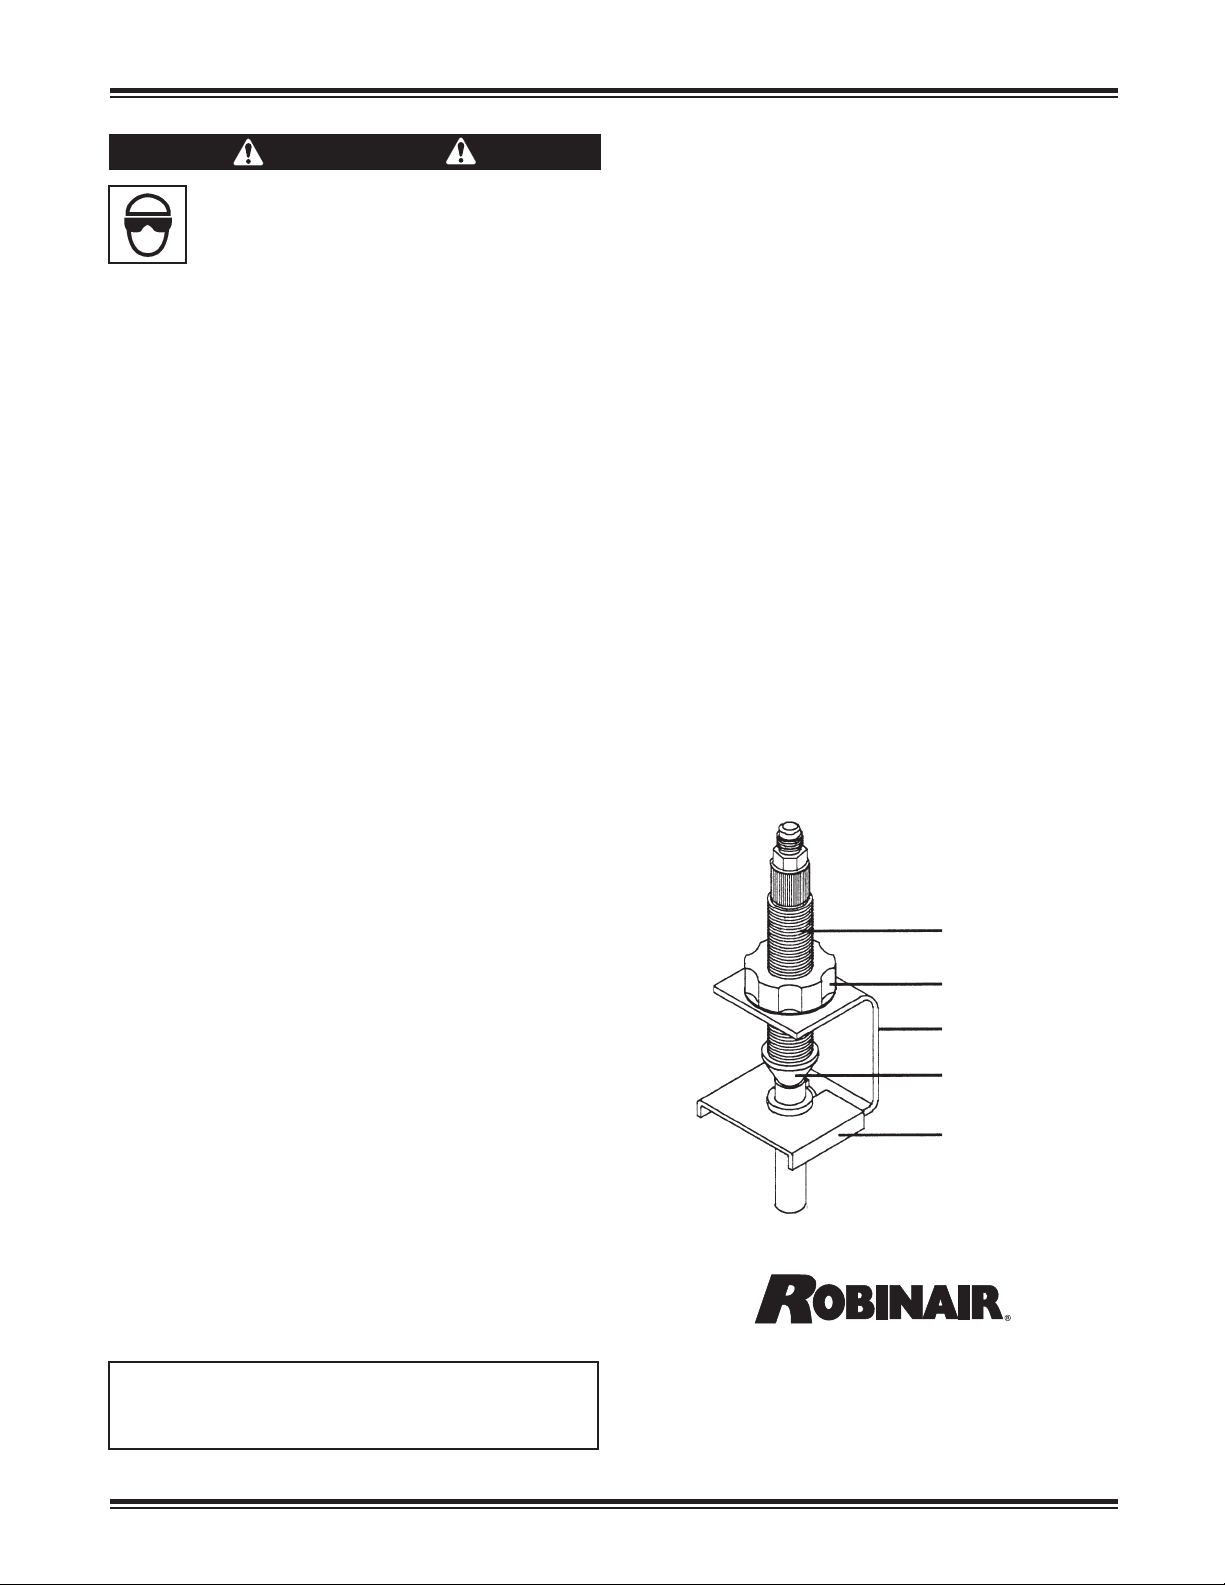
Clamp Screw
Forcing Nut
Clamp Assembly
Sealing Cone
Support Plate
655 Eisenhower Drive
Owatonna MN 55060
Customer Service: 1-800-533-6127
Fax : 1-800-322-2890
Technical Service : 1-800-822-5561
Fax : 1-866-259-1241
www.robinair.com
119366 (Rev. C, April 11, 2014) © Bosch Automotive Service Solutions LLC
 Loading...