

Page 1

43-473 .fm Page 1 Friday, August 13, 1999 9:21 AM
Telephone Cassette Recorder
Cat. No. 43-473
OWNER’S MANUAL
Please read before using this equipment.
TCR-200
Page 2

g
g
g
43-473 .fm Page 2 Friday, August 13, 1999 9:21 AM
FEATURES
Your RadioShack TCR-200 Telephone
Cassette Recorder is perfect for your
home or office. It records telephone calls
you make or recei ve and you can also
use it as a tape recorder to record di ctation or conversations during a meeting.
It includes these features:
Voice-Actuated (VOX) Recordin
—
records only when it receives sound, to
save power and prevent b lank sections
on the tape.
Re
ular Recordin
— lets you record
dictation or conversations at the touch of
a button.
Monitor
— lets you listen to a conversation through the telephone cassette recorder’s speaker as it is being recorded.
Automatic Stop
— releases the tapehandling parts when the tape reaches
the end while playing or recording.
Built-In Mi crophone
— lets you record
without connecting an external microphone.
Cue/Review Function
— lets you advance or rewind the tape during play to
find a specific section on the tape.
Two Powe r Sources
— let you power
the telephone cassette recorder from
AC power or four AA batteries.
Handset Adapter
— lets you record
conversations directly from the phone
you are talking on.
Earphone Jack
earphone with a
— lets you connect an
1
/8-inch plug for private
listening.
You need at leas t one cassette tape to
use the recorder. We recommend you
use a 30-minute incoming message
leaderless tape (RadioShack Cat. No.
43-410) so you do not miss the beginning of a call. You also need either 4 AA
batteries or an A C adapte r to power t he
recorder.
We suggest you write your recorder’s
serial number here. The number is on
the bottom of the recorder.
Serial Number __________________
This telephone cassette recorder has
been tested and found to comply with
applicable UL and FCC standards.
Important:
It is illegal in some states to
record a conversation without the consent of all parties involved in the conversation, including the phone company.
Check the laws in your area before using the telephone cassette recorder.
©
1997, 1998 Tandy Corporation.
RadioShack is a registered trademark used by Tandy Corporation.
All Rights Reserved.
2
Page 3
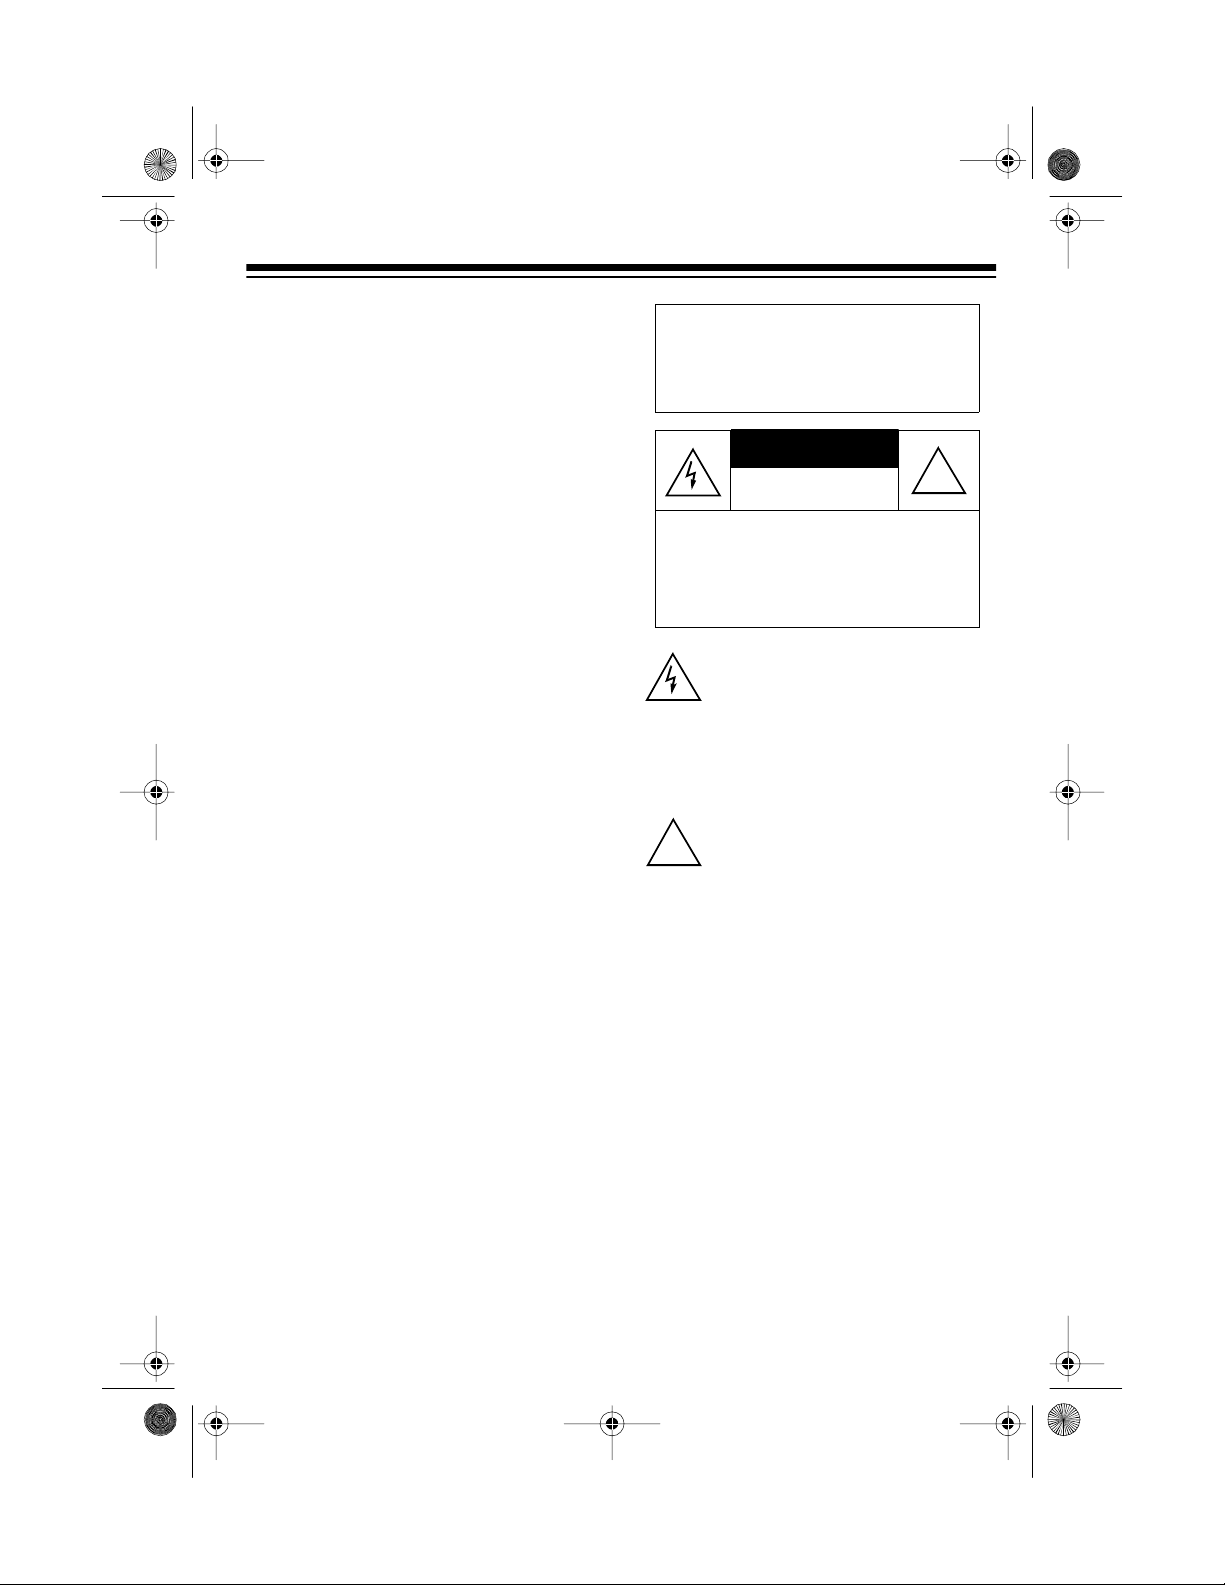
CAUTION
43-473 .fm Page 3 Fri da y, August 13, 1999 9:2 1 AM
READ THIS BEFORE
INSTALLATION
Each device that you connect to the
phone line draws power from the phone
line. We refer to this power draw a s the
devi ce ’s
REN. The REN is on the bottom o f your
telephone cassette recorder.
If you are using more than one device
on the line, add up all the RENs. If the
total is more than five, your phone mi ght
not ring and your telephone cassette recorder might not record. In rural areas, a
total REN of three might impair ringer
operation. If ringer operation is impaired,
disconnect one of the devices from the
line.
ringer equivalence number
, or
Warning
: To reduce the risk of
fire or shock hazard, do not expose this product to rain or moisture.
RISK OF ELECTRIC SHOCK.
DO NOT OPEN.
CAUTION
ELECTRIC SHOCK, DO NOT REMOVE
COVER OR BACK. NO USER-S ERVICEABLE PARTS INSIDE. REFER SERVICING TO QUALIFIED PERSONNEL.
: TO REDUCE THE RISK OF
This symbol is intended to alert you to
the presence of uninsulated dangerous vo ltage within the product’s enclosure that might be of sufficient
magnit ude t o con st itute a r isk of el ectric shock. Do not open the product’s
case.
!
FCC STATEMENT
Your telephone cassette recorder complies with Part 68 of
must, upon request, provide the FCC
registration number and the REN to your
phone company. Both numbers are on
the bottom of your telephone cassette
recorder.
Note:
You must not connect your tele-
phone cassette recorder to:
• coin-operated systems
• party-line syste ms
• most electronic key phone systems
FCC Rules
. You
This symbol is intended to inform you
that important operating and mainte-
!
nance i nstruct ions ar e incl uded in the
literature accompanying this product.
3
Page 4

43-473 .fm Page 4 Fri da y, August 13, 1999 9:2 1 AM
CONTENTS
Preparation ...... .............. ........................................... ............................ ................... 5
Connecting Power .............................................................................................. 5
Using AC Power ........................................................................................... 5
Using Battery Power .................................................................................... 5
Install a tion ............................................... ............................. ................................... 6
Connecting Directly to the Phone Line .......................................... .. .......... ....... .. 6
Connecting to A Phone ....................................................................................... 6
Using an Earphone ............................................................................................. 7
Listening Safely ............................................................................................ 7
Operation ....... .......................................... ............................. ................................... 8
Setting the Beep ................................................................................................. 8
Loading a Cassette Tape ............................................................................. ....... 8
Recording a Phone Conversation ....................................................................... 8
Setting the Record Mode ............................................................................. 9
Setting the Sensitivity L evel ......................................................................... 9
Setting the Recording Speed ..................................................................... 10
Listening While You Record ....................................................................... 10
Regular Recording ................................................. ....... .......... .. ....... .......... .. ..... 10
Playing a Tape .................................................................................................. 11
Fast-Forward and Rewind .......................................................................... 11
Using the Tape Counter ............................................................................. 11
Care and Maintenance .......................................................................................... 12
Tape Tips and Techniques ................................................................................ 13
Preventing Accidental Erasure ................................................................... 13
Restoring Tape Tensi on and Sound Quali ty ............................................... 13
Cleaning the Tape-Handling Parts ............................................................. 14
The FCC Wants You to Know ........................................................................... 14
Lightning ........................................................................................................... 14
4
Page 5
CAUTION
ALWAYS DISCONNEC
LINES FROM THE WA
SERVICING OR DISA
EQUIPMENT, OR REP
+
+
+
+
43-473 .fm Page 5 Fri da y, August 13, 1999 9:2 1 AM
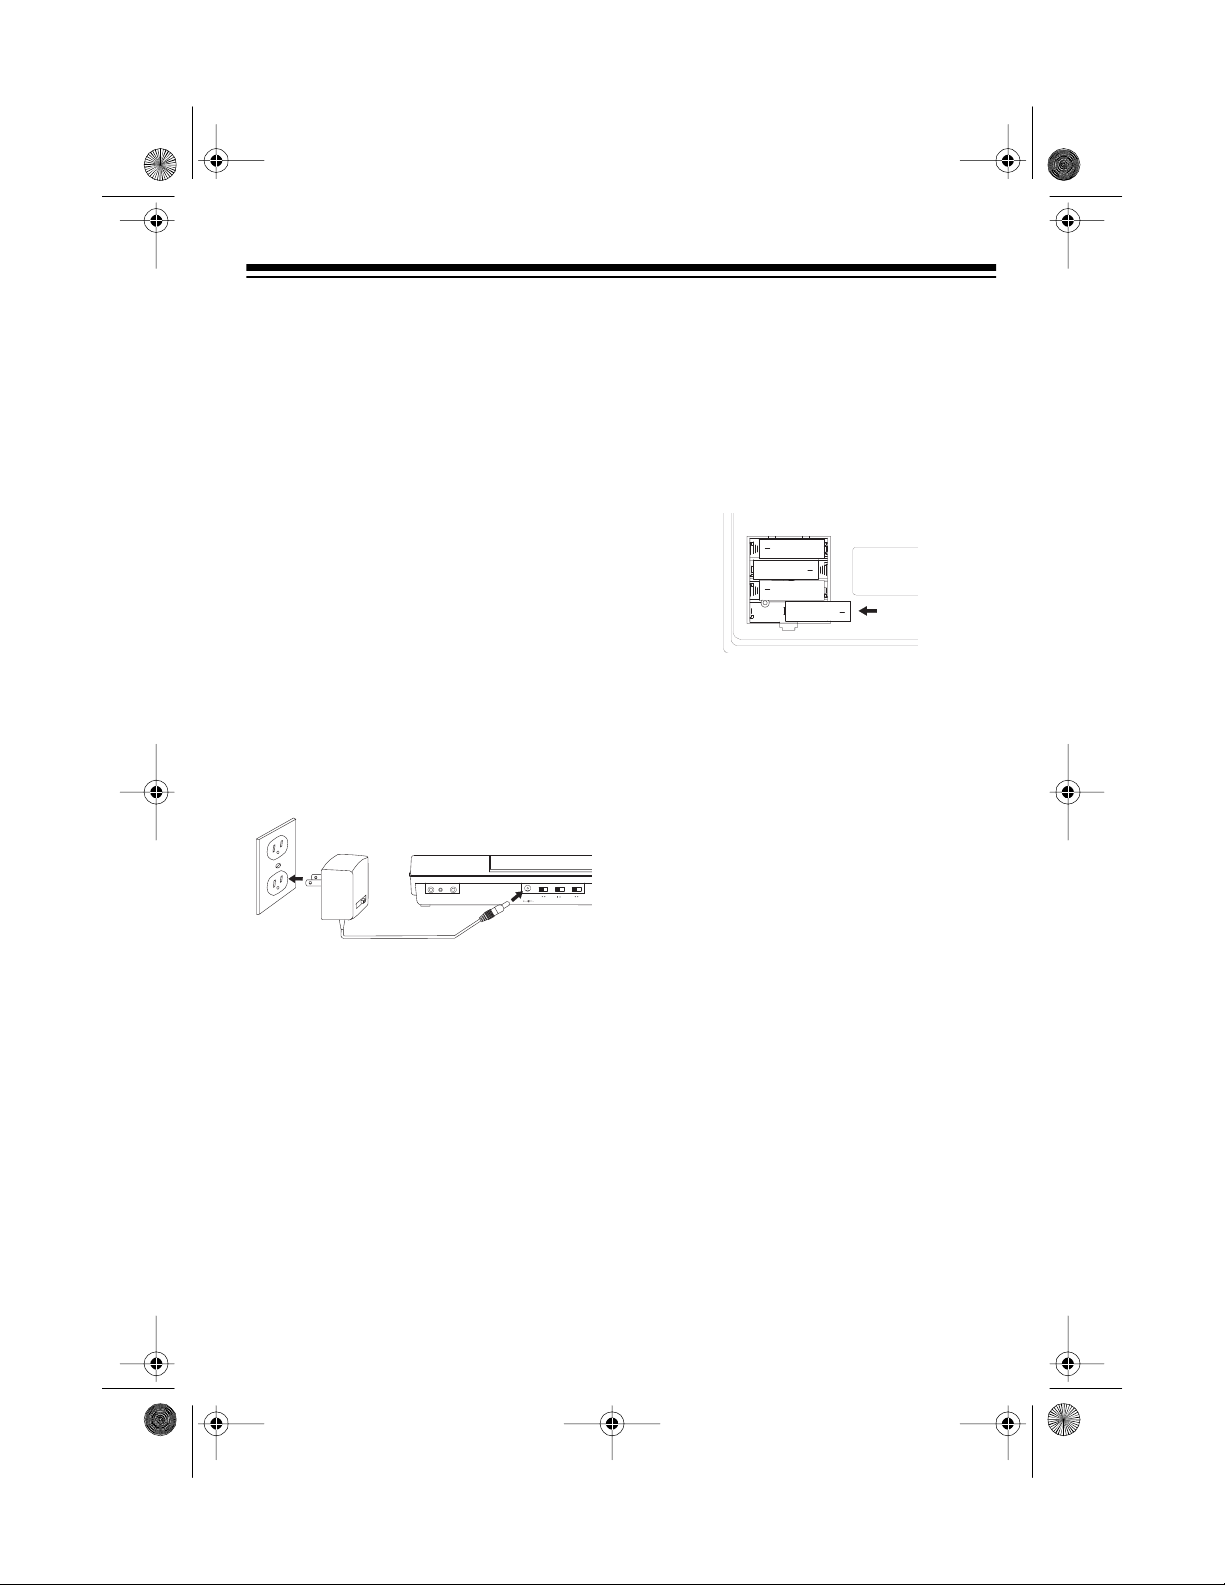
PREPARATION
CONNECTING POWER
Using AC Power
You can power your telephone cassette
recorder from AC power using an optional AC adapte r, such as RadioShack
Cat. No. 273-1662.
Caution:
DC adapter that delivers at least 300
milliamps. Its center tip must be set to
negative, and its plug must properly fit
the TCR-200’s
mended adapter meets these requirements. Using an adapter that does not
meet these requirements could damage
the telephone cassette recorder or the
adapter.
Follow these steps to connec t your telephone cassette recorder to AC power.
1. Set the AC adapter’s voltage switch
2. Insert the 5.5 mm outer diameter/
You must use a 120V A C/6V
DC 6V
jack. The recom-
MIC
EAR
TEL
DC 6V 300ma
STD EXT
VOX NORM
OFF ON
MONITOR
REC MODE
SPEED
to 6V.
2.1 mm inner diameter barrel plug
into the adapter’s cord to read TIP –.
Using Battery Power
Your telephone cassette recorder can
use four AA batteries (not supplied) for
power. For the best performance and
longest life, we recommend alkaline batteries, such as Cat. No. 23-552.
Follow these steps to install batteries.
1. Press the battery compartment
cover’s tab and lift off the cover.
2. Insert the batteries into the compartment, as indicated by the polarity
symbols (+ and –) marked inside the
compartment.
3. Replace the cover.
Caution:
ies, different types of batteries (standard, alkaline, or rechargeable), or
rechargeable batteries of different capacities.
Replace the batteries when the recording indicator dims.
Do not mix old and new batter-
3. Insert the plug into the telephone
DC 6V
cassette recorder’s
jack.
4. Plug the adapter into a standard AC
outlet.
5
Page 6

43-473 .fm Page 6 Fri da y, August 13, 1999 9:2 1 AM
INSTALLATION
You can connect the telepho ne c ass ette
recorder directly to the phone line or a
single phone. Select a location for your
telephone cassette recorder that is out
of the way of normal activities.
CONNECTING DIRECTLY
TO THE PHONE LINE
When connected to the phone line, the
recorder records phone conversations
on any phone on that line. Follow these
steps to connect the telephone cassette
recorder to the phone line.
MIC
EAR
TEL
Dual-Prong Cord
Dual-Prong Cord
1. Plug the supplied dual-prong cord
into the recorder’s
2. Insert the dual-prong cord’s modular
plug into a modular phone line jack.
Notes:
• If the phone line jack is not a
modular jack, you must update
the wiring. You can convert the
wiring yourself, using jacks and
adapters available at your local
RadioShack store, or you can let
the phone company update the
wiring for you.
DC 6V 300ma
OFF ON
MONITOR
TEL
VOX NORM
REC MODE
jacks.
STD EXT
SPEED
CONNECTING TO
A PHONE
You can use the supplied handset
adapter to connect the telephone cassette recorder to the same phone you
plan to talk on. When connected this
way, the recorder only records the
phone conversations on that phone.
Important:
quires that all parties on the phone line
be able to hear a beep indicating the
conversation is being recorded. If you
connect the telephone cassette recorder
to your phone using the supplied dualprong cord and handset adapter, all parties on the phone line might not hear a
beep during recording.
We recommend you check the laws in
your area. If it is unlawful to record without a beep sounding, or if you are unsure, connect the telephone cassette
recorder as described in “Connecting Directly to the Phone Line” to ensure the
beep will sound.
Note:
357 adapter m ight be requi red for som e
installa tion s.
1. Plug the supplied dual-prong cord
into the recorder’s
2. Insert the dual-prong cord’s modular
plug and the phone’s handset cord
into the handset adapter.
The law in some areas re-
The RadioShack Cat. No. 279-
TEL
jacks.
• The USOC n umber of the j ack to
be installed is RJ11C.
6
Page 7

43-473 .fm Page 7 Fri da y, August 13, 1999 9:2 1 AM
Handset Cord
Handset Cord
Handset Adapter
Handset Adapter
MIC
EAR
Dual-Prong Cord
Dual-Prong Cord
DC 6V 300ma
VOX NORM
OFF ON
MONITOR
REC MODE
MIC
EAR
TEL
STD EXT
SPEED
DC 6V 300mA
MONITOR
STD EXT
VOX NORM
OFF ON
REC MODE
SPEED
Note: Plug the dual-prong cord’s
plug into the larger modular jack and
the handset cord’s plug into the
smalle r jack .
3. Insert the handset adapter into the
telephone’s modular handset jack.
Handset Cord
Handset Cord
Handset Adapter
Handset Adapter
MIC
EAR
Dual-Prong Cord
Dual-Prong Cord
DC 6V 300ma
STD EXT
VOX NORM
OFF ON
MONITOR
REC MODE
SPEED
USING AN EARPHONE
To connect an earphone (not suppl ied),
insert the earphone’s
EAR
the
jack on the back of the telephone cassette rec order. Y ou c an find a
wide selection of earphones at your local RadioShack store.
1
/8-inch plug into
Note: The speaker automatically disconnects when you plug in an earphone.
Listening Safely
To protect your hearing, follow these
guidelines when you use an earphone.
• Do not listen at extremely high volume levels. Extended high-volume
listening can lead to permanent
hearing loss.
• Set the volume to its lowest level
before you begin listening. A f ter y ou
put on the earphone, adjust the volume to a comfortable listening level.
• Do not increase the volume once
you have established a comfortable
listening level. Over time, your ears
adapt to the volume level, so a volume level that does not cause discomfort might still damage your
hearing.
7
Page 8

43-473 .fm Page 8 Fri da y, August 13, 1999 9:2 1 AM
OPERATION
SETTING THE B EEP
You can set t he telephone cassette recorder to beep ev ery 15 seconds while
recording.
You might be legally required to
Note:
BEEP TONE
set
so all parties know the conversation is
being recorded. Check the laws in your
area.
1. Remove the battery compartment
cover and remove the batteries, if
installed.
2. Set
BEEP TONE
phone cassette recorder beeps every 15 seconds while recording.
DC 6V
(UM/SUM-3) X4
BEEP TONE
ON OFF
3. Replace the batteries and the cover.
to ON when recording,
to ON. The tele-
ALWAYS DISCONNECT ALL TELEPHONE
LINES FROM THE WALL OUTLETS BEFORE
SERVICING OR DISASSEMBLING THIS
+
---
---
+
+
---
---
+
EQUIPMENT, OR REPLACING BATTERIES.
2. Press
STOP/EJECT
to open the cassette compartment door. Put the
cassette in the compartment with
the cassette’s open e dge facin g y ou
and the full reel on the left.
MIC
VU
LEVEL
3. Close the door.
Notes:
• You can buy cassettes of varying
lengths at your local RadioShack
store.
• Replace the tape at least once a
year, or more often if it is used
heavily.
RECORDING A PHONE
CONVERSATION
LOADING A CASSETTE
TAPE
Follow these steps to install a cassette
tape (not supplied) in the recorder.
1. Turn the cassette’s hub with a pencil
to take up any tape slack.
8
You can record both sides of a conversation on any phone connected to the
same phone line as the recorder.
1. Set
REC MODE
SPEED
, and
, the sensit ivity le vel,
MONITOR
to the desired
settings. (See “Setting the Record
Mode” on Page 9, “Setting the Sensitivity Level” on Page 9, “Setting
the Recording Speed” on Page 10,
and “Listening While You Record”
on Page 10.)
Page 9

E
43-473 .fm Page 9 Fri da y, August 13, 1999 9:2 1 AM
2. Press
PLAY
RECORD
. Both
lock down. When
RECORD
RECORD
pressed down, every call made or
received is recorded.
Notes:
•If you set
REC MODE
to
when both parties are silent for
about 5 seconds, the recorder
stops recording until someone
starts speaking again.
• The
VOLUME
setting does not
affect the recording level.
• VU/LEVEL flashes during recording.
0 0 0
TCR-200 VOICE ACTIVATED
TELEPHONE CASSETTE RECORDER
VU
LEVEL
MIC
• To temporarily stop recording,
PAUSE
press
ing, press
RECORD
. To re sume record-
PAUSE
PLAY
REVIEW
CUE
FAST-FREWIND PAUSE
again.
STOP/EJECT
and
is
VOX
Setting the Record Mode
When
REC MODE
is se t to
corder begins recording when it receives
sound through the micropho ne or pho ne
line, and stops recording when it does
not receive sound for about 5 seconds.
,
DC 6V 300mA
REC MODE
Set
OFF ON
to
NORM
tinuously until the tape reaches the end
or you press
STOP/EJECT
VOX
VOX NORM
to record con-
.
Setting the Sensitivity Level
When you set
must set the se nsitivity level loc ated on
the bottom of the recorder.
the most sensitive setting and requires
only a soft sound to begin recording.
(low) is the least sensitive setting and
requires a louder sound to begin recording. If the tape does not stop after about
5 seconds of silence, set
M
(medium) or L (low).
SENSITIVITY
REC MODE
to
SENSITIVITY
, the re-
STD EXT
VOX
, you
H
(high) is
L
to
• If the tape reaches the end during
a recording, it automatically
releases
RECORD
and
PLAY
stops.
3. To stop recording, press
EJECT
.
, and
STOP/
L M H
CAUTION
ALWAYS DISCONNECT ALL TELEPHONE
LINES FROM THE WALL OUTLETS BEFOR
SERVICING OR DISASSEMBLING THIS
9
Page 10

D
D
43-473 .fm Page 10 Fri day, August 13, 1999 9:21 AM
Setting the Recording Sp eed
SPEED
Set
at a slower speed and a lower quality
than regular speed, but extend the recording time. Tapes recorded with
SPEED
set to
with the recorder set to
SPEED
Set
at regular speed. When you record with
SPEED
set to
the tape on this recorder (with
set to
STD
player.
C 6V 300mA
EXT
to
to
(extended) to record
EXT
must be played back
EXT
.
STD
(standard) to record
STD
, you can play back
SPEED
) or any other cassette tape
OFF ON
VOX NORM
STD EXT
Listening While You Record
MONITOR
Set
sation through the telephone cassette
recorder’s speaker as it is being rec orded. Slide
tening leve l.
to ON to listen to a conver-
VOLUME
to a comfortable lis-
REGULAR RECORDING
You can use your telephone cassette recorder as a regular cassette recorder for
recording dictation or conversations. For
regular recording, be sure the dualprong cord is not plugged in.
REC MODE
Set
recording, then press
RECORD
and
speak into the built-in microphone from
a distance of about 12 inches.
RECORD
Note:
press
press
To temporarily stop recording,
PAUSE
PAUSE
To stop recording, press
NORM
PLAY
to
PLAY
REVIEW
for continuous
RECORD
. Both
lock down. Then
CUE
STOP/EJECT
FAST-FREWIND PAUSE
. To resume recording,
again.
STOP/EJECT.
C 6V 300mA
While you re cord y our o w n ph one
Note:
OFF ON
conversation, set
VOX NORM
MONITOR
to
STD EXT
OFF
. Otherwise, it might cause a high-pitched
tone to sound through your telephone
handset or through the telephone cassette recorder’s speaker.
10
Page 11

43-473 .fm Page 11 Fri day, August 13, 1999 9:21 AM
PLAYING A TAPE
1. Set
2. Press
3. Adjust
4. Press
SPEED
to the desired tape
speed (see “Setting the Recording
Speed” on Page 10).
PLAY
. Playback begins.
Note:
Press
PAUSE
to temporarily
stop the tape while you play it. Press
PAUSE
again to resume play.
VOLUME
to a comfortable lis-
tening level.
STOP/EJECT
to stop play. If
the cassette tape pla ys to the end,
the cassette deck automatically
releases
PLAY
and stops.
Note:
The recorder automatically stops
when it reaches the end of the tape.
Using the Tape Counter
You can use the tape counter to mark
positions on a cassette tape during recording or playback. Bef ore you play a
cassette tape, rewind the cassette tape
and press the button to the right of the
tape counter to set it to
sette tape moves, the counter advances. Note the tape counter reading at the
position you want to return to later.
000
. As the cas-
Fast-Forward and R ewind
REVIEW
PLAY
RECORD
When the tape is stopped, press
FAS T-F
or
to wind the tape rapidly forwa rd
REVIEW/REWIND
idly backward. Press
stop the tape.
During play, hold down
REVIEW/REWIND
the tape fast-forwards or rewin ds to find
desired locations on a tape quickly.
When you release the button, the telephone cassette recorder returns to normal speed.
CUE
FAST-FREWIND PAUSE
STOP/EJECT
CUE/
to wind the tape rap-
STOP/EJECT
CUE/FAST-F
to
or
to hear playback as
0 0 0
TCR-200 VOICE ACTIVATED
TELEPHONE CASSETTE RECORDER
VU
LEVEL
MIC
11
Page 12

43-473 .fm Page 12 Fri day, August 13, 1999 9:21 AM
CARE AND MAINTENANCE
Your TCR-200 Telephone Cassette Recorder is an example of superior design and
craftsmanship. The following suggestions will help you care for your telephone cassette recorder so you can enjoy it for years.
Keep the telephone cassette recorder dry. If it gets wet, wipe it dry immediately. Liquids might contain minerals that can corrode the electronic circuits.
Use and store the telephone cassette recorder on ly in norm al tempe rature environments. Temperature extremes can shorten the life of electronic devices, damage batteries, and distort or melt plastic parts.
Keep the telephone cassette recorder away from dus t and dirt, which
can cause premature wear of parts.
Handle the telephone cassette recorder gently and carefully. Dropping
it can damage circuit boards and cases and can cause the telephone
cassette recorder to work improperly.
Use only fresh batteries of the required size and recommende d type.
Batteries can leak chemicals t hat dam age y our t elep hone cas set te recorder’s electronic parts.
Wipe the telephone cassette recorder with a damp cloth occasionally to
keep it looking new. Do not use harsh chemicals, cleaning solvents, or
strong detergents to clean the telephone cassette recorder.
Modifying or tampering with the telephone cassette recorder’s internal compon ents
can cause a malfunction and might invalidate its warranty and void your FCC authorization to operate it. If your telephone cassette recorder is not performing as it should,
take it to your local RadioShack store for assistance. If the trouble is affecting the
telephone lines, the phone company can ask you to disconnect your cassette recorder until you have resolved the problem.
12
Page 13

b
b
43-473 .fm Page 13 Fri day, August 13, 1999 9:21 AM
TAPE TIPS AND
TEC HNIQUES
The following tips can help you get the
best performance and the longest life
from your telephone cassette recorder.
Note:
Do not use endless or C-120 cassette tapes. C-120 t ape is very thin and
can tangle easily.
Preventing A ccid ent al Eras ure
Most cassette tapes have two eraseprotection tabs — one for each side of
the tape. When a tab is in place, you can
erase or record on that tape side. When
the tab is not in place, you cannot erase
or record on that side.
To prevent your recordings from being
accidentally erased or recorded over,
carefully break off the erase-protection
tabs using a screwdriver or similar tool.
Side A
Side A
Side A Ta
A
Side B Tab
Side B Tab
Side A Tab
If you later decide to erase or record
over the tape, you can place a p iece of
tape over the holes.
Tape Over Side A Tab
Note:
When covering the holes, cover
Side A Ta
only the portions that were originally protected by the plastic tabs.
Restoring Tape Tension and
Sound Quality
After you play a cassette tape several
times, the tape might become tightly
wound on the cassette reels. This can
cause playback sound quality to deteriorate.
To restore the sound quality, fast-forward the tape from the beg inning to the
end of one side, then completely rewi nd
it. Then loosen the tape reels by gently
tapping each side of the cassette’s outer
shell on a flat surface.
Caution:
cassette when tapping it. Do not touch
the exposed tape or allow any sharp objects near the cassette.
Be careful not to da mage the
13
Page 14

43-473 .fm Page 14 Fri day, August 13, 1999 9:21 AM
Cleaning the Tape-Handling
Parts
Dirt, dust, or particles of the tape’s coating can accumulate on the tape heads
and other parts that the tape touches.
This can greatly reduce the telephone
cassette recorder’s performance. Use
the following cleaning procedure after
about every 20 hours of operation.
1. Remove the batteries and disconnect the AC adapter.
2. Open the cassette compartment
door.
3. Hold down the protection tab sensor
in the tape compartment while you
RECORD
press
handling parts.
4. Use a swab dipped in tape head
cleaning solution or denatured alcohol to gently clean the record/play
head, pinch roller, capstan, erase
head, and tape guides.
Tape Guides
Rubber
Rubber
Pinch Roller
Pinch Roller
Capstan
Capstan
to expose the tape-
Cotton Swab
Cotton Swab
Record and
Erase Hea d s
Record and
THE FCC WANTS YOU TO
KNOW
In the unlikely event that your telephone
cassette recorder causes problems on
the phone line, the phone company can
disconnect your service. The phone
company attempts to notify you in advance. If advance n oti ce is not practical,
the phone company notifies you of your
right to file a complaint with th e FCC.
Also, the phone company can make
changes to its lines, equip ment, operations, or procedures that could affect the
operation of your telephone cass ette recorder. The phone company notifies you
of these changes in advance, so you
can take steps to prevent interruption of
your phone service.
LIGHTNING
Your telephone cassette recorder has
built-in protection circuits to red uce the
risk of damage from surges in phone
and power line current. These protection
circuits meet or exceed FCC requirements. However, lightning striking the
phone line or power lines can damage
your telephone cassette recorder.
5. When you finish cleaning, press
STOP/EJECT
and close the compart-
ment.
Your local RadioShack store carries a
complete line of tape head-cleaning accessories.
14
Lightning damage is not common. Nevertheless, if you live in a n area that has
frequent electrical storms, we suggest
that you unplu g your te lephon e c asset te
recorder during storms to reduce the
possibility of damage.
Page 15

43-473 .fm Page 15 Fri day, August 13, 1999 9:21 AM
NOTES
15
Page 16

43-473 .fm Page 16 Fri day, August 13, 1999 9:21 AM
Limited One-Year Warranty
This product is warrant ed by RadioShac k against man ufacturing d efects in materia l and workmanship under normal use for one (1) year from the date of purchase from RadioShack company-owned
stores and authorized RadioShack franchisees and dealers. EXCEPT AS PROVIDED HEREIN, RadioShack MAKES NO EXPRESS WARRANTIES AND ANY IMPLIED WARRANTIES, INCLUDING
THOSE OF MERCHANTABILITY AND FITNESS FOR A PARTICULAR PURPOSE, ARE LIMITED
IN DURATION TO THE DURATION OF THE WRITTEN LIMITED WARRANTIES CONTAINED
HEREIN. EXCEPT AS PROVI DED HEREIN, Rad ioShack SH ALL HAVE NO LIABILIT Y OR RESPONSIBILITY TO CUSTOMER OR ANY OTHER PERSON OR ENTITY WITH RESPECT TO ANY
LIABILITY, LO SS OR DAMAGE CAUSED DIRECTLY OR INDIRECTLY BY USE OR PERFORMANCE OF THE PRODUCT OR ARI SING OUT OF ANY BREACH OF THIS WARRANTY, INCLUDING, BUT NOT LIMITED TO, ANY DAMAGES RESULTING FROM INCONVENIENCE, LOSS
OF TIME, DATA, PROPERTY, REVENUE, OR P ROFIT OR ANY INDIRECT, SPECIAL, INCIDENTAL, OR CONSEQUENTIAL DAMAGES, EVEN IF RadioShack HAS BEEN ADVISED OF THE
POSSIBILITY OF SUCH DAMAGES.
Some states do not allow the limitations on how long an implied warranty lasts or the exclusion of incidental or consequential damages, so the above limitations or exclusions may not apply to you.
In the event of a product defect during the warran ty period, take the product and the RadioShack
sales receipt as proof of pur cha se date to any RadioS hack s tore. Radi oSha ck wil l, at its option, unless otherwise provided by law: (a) correct the defect by product repair without charge for parts and
labor; (b) replace the produc t with one of the same or similar design; or (c) refund the purchase
price. All replaced parts and pr oducts, and pro ducts on which a refund is made, become the property of RadioShack. New or rec onditioned parts and products may be used in the performance of
warranty service. Repa ired or replaced parts and produ cts are warranted for the remainder of the
original warranty period. You will be charged for repair or replacement of the product made after the
expiration of the warranty period.
This warranty does not cover: (a) damage or failure caused by or attributable to acts of God, abuse,
accident, misuse, impr oper or abnormal usa ge, failure to fol low i nstruct ions, improper instal lation or
maintenance, alterati on, lightning or other incidence of exc ess voltage or current; (b) any repairs
other than those provi ded by a RadioShack Autho rized Service Facility; ( c) consumables such as
fuses or batteries; (d ) cosmeti c dam age; (e) transp ortatio n, sh ipping or insuranc e c osts; or (f) cos ts
of product removal, installation, set-up service adjustment or reinstallation.
This warranty gives you specifi c legal rights, and you may also have oth er rights which vary from
state to state.
RadioShack Customer Relations, Dept. W, 100 Throckmorton St., Suite 600, Fort Worth, TX 76102
We Service What We Sell
3/97
RadioShack
A Division of Tandy Corporation
Fort Worth, Texas 76102
7A8 Printed in Hong Kong
 Loading...