


(1,1)
[ Edit: 2017/ 5/ 8 Model: AIVINJ-N ]
Table of Contents
1 Introduction
How to use this manual ....... 1-2
Safety information ................... 1-3
Regulatory information ....... 1-4
2 Getting started
Control buttons and touch
screen display ............................. 2-2
Starting system .......................... 2-6
Basic operation .......................... 2-6
System settings ...................... 2-13
3 Audio system
Audio
operation precautions .......... 3-2
Names and functions of
audio control buttons ....... 3-10
Audio operations ................... 3-11
Audio settings .......................... 3-33
CD/USB memory device care
and cleaning .............................. 3-34
4 Hands-Free Phone
Bluetooth® Hands-Free
Phone System ............................. 4-2
5 Information
Information menu .................... 5-2
NissanConnect
SM
Services (if
so equipped) ................................. 5-5
SiriusXM Travel Link (if
so equipped) .............................. 5-16
Apple CarPlay ........................... 5-21
Android Auto ............................. 5-23
6 Navigation (if so
equipped)
Safety information ................... 6-3
Navigation screen .................... 6-3
Map operation ............................ 6-4
Setting destination ............... 6-15
Route guidance ....................... 6-31
Viewing
traffic information ................. 6-45
Storing
a location/route ..................... 6-48
Navigation settings .............. 6-56
General information for
navigation system ................ 6-58
7 Voice recognition
Voice recognition ..................... 7-2
8 Troubleshooting guide
System unit ................................... 8-2
Audio system ............................... 8-3
Bluetooth® Hands-Free
Phone System .......................... 8-12
NissanConnect
SM
Services (if
so equipped) .............................. 8-15
Apple CarPlay ........................... 8-16
Android Auto ............................. 8-17
Navigation (if
so equipped) .............................. 8-18
Condition:

(2,1)
[ Edit: 2017/ 5/ 8 Model: AIVINJ-N ]
Voice recognition .................. 8-25
Condition:

(3,1)
[ Edit: 2017/ 5/ 8 Model: AIVINJ-N ]
Condition:

(4,1)
[ Edit: 2017/ 5/ 8 Model: AIVINJ-N ]
Foreword
Prologue
AIVINJN1-251BEBC1-23DC-4665-B405-18A0830C57B1
NISSAN CONSUMER AFFAIRS DEPARTMENT
AIVINJN1-0A572194-58C0-4CCD-A796-B7907E2D317D
For assistance or inquiries about the
NISSAN Navigation System, NISSAN warranty, service or general questions, contact the NISSAN Consumer Affairs
Department at:
For U.S. customers
Nissan North America, Inc.
Consumer Affairs Department
P.O. Box 685003
Franklin, TN 37068-5003
1-800-NISSAN-1
(1-800-647-7261)
For Canadian customers
Nissan Canada Inc.
5290 Orbitor Drive
Mississauga, Ontario L4W 4Z5
1-800-387-0122
Condition:

(5,1)
[ Edit: 2017/ 5/ 8 Model: AIVINJ-N ]
FOREWORD
AIVINJN1-801B9B40-26BD-49A7-A3FA-A8D4A5112094
Thank you for purchasing a NISSAN vehicle.
This user’s manual is for NissanConnect
SM
with Navigation and Services featuring
Apple CarPlay and Android Auto offered
in your NISSAN vehicle.
Operation instructions for the following
systems are included in this manual.
. Audio
. Hands-Free Phone
. NissanConnect
SM
Services
. Navigation
. Voice recognition
. Information and settings viewable on
NissanConnect
SM
Please read this manual carefully to ensure safe operation of NissanConnect
SM
with Navigation and Services featuring
Apple CarPlay and Android Auto.
. Because of possible specification
changes and optional equipment,
some sections of this manual may
not apply to your vehicle.
. All information, specifications and il-
lustrations in this manual are those in
effect at the time of printing. NISSAN
reserves the right to change specifications or design at any time without
notice.
. Do not remove this manual from the
vehicle when selling this vehicle. The
next user of the system may need the
manual.
Condition:

(6,1)
[ Edit: 2017/ 5/ 8 Model: AIVINJ-N ]
MEMO
Condition:

(7,1)
[ Edit: 2017/ 5/ 8 Model: AIVINJ-N ]
1 Introduction
How to use this manual ............................................................. 1-2
For safe operation .................................................................... 1-2
Reference symbols ................................................................... 1-2
Screen illustrations .................................................................. 1-2
Safety information .......................................................................... 1-3
Regulatory information ............................................................... 1-4
Laser product ............................................................................... 1-4
Bluetooth® devices .................................................................. 1-4
Condition:

(8,1)
[ Edit: 2017/ 5/ 8 Model: AIVINJ-N ]
1. Introduction
HOW TO USE THIS MANUAL
AIVINJN1-D8FFB8FA-A072-42AA-8D6D-9FEA0AD9B6F9
This manual uses special words, symbols,
icons and illustrations organized by function.
Please refer to the following items and
familiarize yourself with them.
FOR SAFE OPERATION
AIVINJN1-AF356C63-BA5E-4B54-878D-6D8BA7D7E683
WARNING
AIVINJN1-F375076F-362A-4309-A800-D1D6C6376A66
This is used to indicate the presence
of a hazard that could cause death or
serious personal injury. To avoid or
reduce the risk, the procedures must
be followed precisely.
CAUTION
AIVINJN1-FFAF409C-10E2-45AA-BD7F-A8B0005F7083
This is used to indicate the presence
of a hazard that could cause minor or
moderate personal injury or damage
to your vehicle. To avoid or reduce the
risk, the procedures must be followed
carefully.
NOTE:
Indicates items that help you understand and maximize the performance of
your vehicle. If ignored, they may lead to
a malfunction or poor performance.
REFERENCE SYMBOLS
AIVINJN1-A9CE57CF-4F6A-454A-9EF8-91C4E396725F
INFO:
This indicates information that is necessary for efficient use of your vehicle or
accessories.
Reference page:
This indicates the title and page that you
should refer to.
< >:
Indicates a button on the control panel.
[ ]:
This indicates a key/item displayed on the
screen.
Voice Command:
This indicates an operation by voice
command.
SCREEN ILLUSTRATIONS
AIVINJN1-5F699818-FF71-447B-881E-832E1898366B
. The illustrations in this manual are
representatives of various models
and may not be identical with the
design and specifications of your vehicle.
. Icons and menu items displayed on
the screen may be abbreviated or
omitted from the screen illustrations
when appropriate. The omitted icons
and menu items are described as
dotted lines as illustrated.
5GH0782X
Condition:
1-2

(9,1)
[ Edit: 2017/ 5/ 8 Model: AIVINJ-N ]
SAFETY INFORMATION
AIVINJN1-E215E2CD-5877-46AC-B4EF-5D0B6683FCA9
This system is primarily designed to help
you support pleasant driving as outlined
in this manual. However, you, the driver,
must use the system safely and properly.
Information and the availability of services
may not always be up to date. The system
is not a substitute for safe, proper and
legal driving.
Before using the system, please read the
following safety information. Always use
the system as outlined in this manual.
WARNING
AIVINJN1-43837604-6D3B-4A88-95CC-9A1143515BA5
. To operate the system, first park
the vehicle in a safe location and
set the parking brake. Operating
the system while driving can distract the driver and may result in a
serious accident.
. Exercise extreme caution at all
times so full attention may be
given to vehicle operation. If the
system doesn’t respond immediately, please be patient and keep
your eyes on the road. Inattentive
driving may lead to a crash resulting in serious injuries or death.
. Do not rely on route guidance
alone. Always be sure that all
driving maneuvers are legal and
safe in order to avoid accidents.
. Do not disassemble or modify this
system. If you do, it may result in
accidents, fire or electrical shock.
. If you notice any foreign objects in
the system hardware, spill liquid
on the system or notice smoke or a
smell coming from it, stop using
the system immediately and it is
recommended you contact a
NISSAN dealer. Ignoring such conditions may lead to accidents, fire
or electrical shock.
CAUTION
AIVINJN1-CABB1B9E-B526-42ED-BC3A-AF6F2878701B
. Some jurisdictions may have laws
limiting the use of video screens
while driving. Use this system only
where it is legal to do so.
. Extreme temperature conditions
[below −4°F (−20°C) and above
158°F (70°C)] could affect the performance of the system.
. The display screen may break if it
is hit with a hard or sharp object. If
the display screen breaks, do not
touch it. Doing so could result in an
injury.
NOTE:
Do not keep the system running with
the engine or the hybrid system
stopped. Doing so may discharge the
vehicle battery (12V battery). When you
use the system, always keep the engine
or the hybrid system running.
1. Introduction
Condition:
1-3

(10,1)
[ Edit: 2017/ 5/ 8 Model: AIVINJ-N ]
1. Introduction
REGULATORY INFORMATION
AIVINJN1-E1B76219-B24A-4588-A087-0985C8AA0D4C
LASER PRODUCT
AIVINJN1-415B0FE3-387A-46ED-8CD5-D088A6D68506
Complies with 21 CFR 1040.10 and 1040.11
Complies with 21 CFR Chapter 1, Subchap-
ter J
WARNING
AIVINJN1-A0667E60-909D-4DC4-8EE9-D1197E1F8DB1
Use of controls or adjustments or
performance of procedures other
than those specified herein may result
in hazardous radiation exposure.
BLUETOOTH® DEVICES
AIVINJN1-8A5804E2-2DFA-4F0E-BDCA-F37F6A4AFE93
FCC Regulatory information (for
U.S. and Canada)
AIVINJN1-21B88979-0E69-41AF-A95F-076B80E68827
Changes or modifications not expressly
approved by the party responsible for
compliance could void the user’s authority
to operate the equipment.
This device complies with part 15 of the
FCC Rules and Industry Canada licenseexempt RSS standard(s). Operation is
subject to the following two conditions:
(1) This device may not cause harmful
interference, and (2) this device must
accept any interference received, including interference that may cause unde-
sired operation.
Le présent appareil est conforme aux CNR
d’Industrie Canada applicables aux appareils radio exempts de licence. L’exploitation est autorisée aux deux conditions
suivantes : (1) l’appareil ne doit pas produire de brouillage, et (2) l’utilisateur de
l’appareil doit accepter tout brouillage
radioélectrique subi, même si le brouillage
est susceptible d’en compromettre le
fonctionnement.
Trademarks
AIVINJN1-9FC03AD0-EBF8-481D-A9E5-F229D1F2B583
Windows® and Windows Media® are registered trademarks and trademarks in the
United States of America and other countries of Microsoft Corporation of the USA.
Windows Media Player:
This product is protected by certain
intellectual property right of Microsoft.
Use or distribution of such technology
outside of this product is prohibited without a license from Microsoft.
5GA0227X
iPod® is a trademark of Apple Inc.
5GD0030X
Apple, iPad®, iPhone®, iPod®, and iPod
touch® are trademarks of Apple Inc.,
registered in the U.S. and other countries.
Apple CarPlay is a trademark of Apple Inc.
Use of the Apple CarPlay logo means that
a vehicle user interface meets Apple
performance standards. Apple is not responsible for the operation of this vehicle
or its compliance with safety and regulatory standards. Please note that the use of
this product with iPhone®, iPod®, or iPad®
may affect wireless performance.
5GA0023X
Bluetooth® is a trademark owned by
Bluetooth SIG, Inc. and licensed to Robert
Bosch GmbH.
5GA0018X
HD Radio Technology manufactured under license from iBiquity Digital Corporation. U.S. and Foreign Patents. HD Radio
TM
and the HD, HD Radio, and “Arc” logos are
proprietary trademarks of iBiquity Digital
Corp.
Condition:
1-4

(11,1)
[ Edit: 2017/ 5/ 8 Model: AIVINJ-N ]
5GA0017X
SiriusXM® services require a subscription
after trial period and are sold separately
or as a package. The satellite service is
available only in the 48 contiguous USA
and DC. SiriusXM satellite service is also
available in Canada; see www.siriusxm.ca.
5GH0156X
SiriusXM Satellite Radio and SiriusXM Traffic subscriptions are sold separately or as
a package, and are continuous until you
call SiriusXM to cancel. See SiriusXM Customer Agreement for complete terms at
www.siriusxm.com. SiriusXM Travel Link is
available in select markets. For more
information, call Listener Care at 1-877447-0011 or visit siriusxm.com/traffic.
5GH0157X
SiriusXM Satellite Radio and SiriusXM Travel Link subscriptions are sold separately
or as a package, and are continuous until
you call SiriusXM to cancel. See SiriusXM
Customer Agreement for complete terms
at www.siriusxm.com. SiriusXM Travel Link
is available in select markets. For more
information, call Listener Care at 1-877447-0011 or visit siriusxm.com/travellink.
App Store
Apple and the Apple logo are trademarks
of Apple Inc., registered in the U.S. and
other countries. App Store is a service
mark of Apple Inc.
Siri
Siri is a trademark of Apple Inc., registered
in the U.S. and other countries.
Google Play
TM
Google, Google Play are trademarks of
Google Inc.
Google
TM
Google is a trademark of Google Inc.
1. Introduction
Condition:
1-5

(12,1)
[ Edit: 2017/ 5/ 8 Model: AIVINJ-N ]
1. Introduction
MEMO
Condition:
1-6

(13,1)
[ Edit: 2017/ 5/ 8 Model: AIVINJ-N ]
2 Getting started
Control buttons and touch screen display ................. 2-2
Control panel ................................................................................ 2-2
Liquid crystal display .............................................................. 2-3
Steering wheel switches ..................................................... 2-4
USB (Universal Serial Bus) Connection Ports and
AUX (auxiliary) input jack ..................................................... 2-4
Starting system ................................................................................. 2-6
Start-up screen ........................................................................... 2-6
Basic operation ................................................................................. 2-6
Selecting menu from Launch Bar ................................ 2-6
Touch panel operation ......................................................... 2-7
Main screen operations ....................................................... 2-8
Adjusting settings ..................................................................... 2-9
How to input letters and numbers ............................. 2-9
How to view and operate HOME
MENU screen .............................................................................. 2-10
Functions disabled while driving ............................... 2-12
System settings ............................................................................. 2-13
Settings menu .......................................................................... 2-13
connections settings ........................................................... 2-16
Volume and Beeps settings ........................................... 2-19
Clock settings ........................................................................... 2-19
Display settings ....................................................................... 2-21
Language setting ................................................................... 2-21
Units settings ............................................................................ 2-21
Keyboard type settings ..................................................... 2-21
Return all settings to default ........................................ 2-21
Condition:

(14,1)
[ Edit: 2017/ 5/ 8 Model: AIVINJ-N ]
2. Getting started
CONTROL BUTTONS AND TOUCH SCREEN DISPLAY
AIVINJN1-1D7E0D66-C372-4533-A154-A968B3FBAE87
CONTROL PANEL
AIVINJN1-0F79FBFA-8617-4697-9F42-8714291E5E6B
5GH0761X
Models with navigation system
5GH0762X
Models without navigation system
< >:
Push to eject a CD.
“Compact Disc (CD) player”
(page 3-19)
<MENU>:
Push to display the HOME MENU
screen.
“How to view and operate HOME
MENU screen” (page 2-10)
<MAP> (models with navigation system):
Push to display the current location
map.
“Navigation screen” (page 6-3)
During route guidance with a map
screen displayed, push this button to
show/hide the split screen.
< >:
Push to switch between the day
screen (bright) and the night screen
(dark) and to adjust the level of screen
brightness. Push and hold the button
to turn off the display. Push the
button again to turn on the display.
<AUDIO>:
Push to display the audio screen.
When this button is pushed while the
audio screen is displayed, a screen to
select an audio source will be dis-
Condition:
2-2

(15,1)
[ Edit: 2017/ 5/ 8 Model: AIVINJ-N ]
played.
“Selecting audio source”
(page 3-11)
<VOLUME/ >:
Push to turn the power of the audio
system on and off. Turn to adjust the
volume.
CD slot:
Insert a CD into the slot.
“Compact Disc (CD) player”
(page 3-19)
< >/< >:
In audio operation, selecting and fast-
forwarding/rewinding tracks as well
as radio station/channel scanning
can be performed.
“Audio operations” (page 3-11)
<BACK>:
Pushing the button will display the
previous screen.
Push and hold to quit the voice
recognition session.
“7. Voice recognition”
<TUNE·SCROLL/OK>:
When a menu screen is displayed, turn
the dial to select items on the screen.
Push to confirm the selected item or
setting.
The button can also be used for audio
operations.
“Audio operations” (page 3-11)
Touch screen display:
Various information and operation
menus are displayed on the liquid
crystal display. Touch keys and icons
on the screen for operation.
“Touch panel operation”
(page 2-7)
Some of the information displayed on
the vehicle information display are
linked with the touch screen display.
< > (models without navigation
system):
Push to display phone screen.
“4. Hands-Free Phone”
LIQUID CRYSTAL DISPLAY
AIVINJN1-372A4E1B-44A4-402D-B2E2-BBC1C2EE95EA
The display is a liquid crystal display and
should be handled with care.
WARNING
AIVINJN1-BF8A0598-D125-4FF1-B357-47FEEE82AED5
Never disassemble the display. Some
parts utilize extremely high voltage.
Touching them may result in serious
personal injury.
Characteristics of liquid crystal display
AIVINJN1-606BA666-3A03-489B-86FB-CE0129A6D140
. If the temperature inside the vehicle is
especially low, the display will stay
relatively dim or the movement of the
images may be slow. These conditions
are normal. The display will function
normally when the interior of the
vehicle has warmed up.
. Some pixels in the display are darker or
brighter than others. This condition is
an inherent characteristic of liquid
crystal displays, and it is not a malfunction.
. A remnant of the previous display
image may remain on the screen. This
screen burn is inherent in displays, and
it is not a malfunction.
. The screen may become distorted by
strong magnetic fields.
Maintenance of display
AIVINJN1-A416EADC-8AF0-4234-BF0D-ADD3A5F4AF96
CAUTION
AIVINJN1-9B4AABC5-8311-4654-81B7-56927F60D9CA
. To clean the display screen, use a
dry, soft cloth. If additional cleaning is necessary, use a small
amount of neutral detergent with
a soft cloth.
2. Getting started
Condition:
2-3
(16,1)
[ Edit: 2017/ 5/ 8 Model: AIVINJ-N ]
2. Getting started
. Clean the display with the ignition
switch in the OFF position. If the
display is cleaned while the ignition switch is placed in the ON
position, unintentional operation
may occur.
. To clean the display, never use a
rough cloth, alcohol, benzine, thinner or any kind of solvent or paper
towel with a chemical cleaning
agent. They will scratch or deteriorate the panel.
. Do not splash any liquid such as
water or car fragrance on the display. Contact with liquid will cause
the system to malfunction.
To clean the display screen, use a dry, soft
cloth. If additional cleaning is necessary,
use a small amount of neutral detergent
with a soft cloth. Never spray the screen
with water or detergent. Dampen the
cloth first, then wipe the screen.
STEERING WHEEL SWITCHES
AIVINJN1-1B7CD1C1-5D48-4964-8816-2649513B59D0
5GH0763X
< + - >:
Push + or - side of the switch to adjust
the volume.
< > (Back):
Push to go back to the previous
screen while operating the voice recognition system.
Push and hold to end a voice recognition session.
< > (TALK):
Push to use the Voice Recognition
system. Push and hold to end the
Voice Recognition session.
“Giving voice commands”
(page 7-2)
When Apple CarPlay or Android Auto
is active, pushing and holding this
button will start a Siri or Talk to
Google voice control session.
“Siri operation” (page 5-22)
“Talk to Google operation”
(page 5-24)
< >
Push to receive a phone call. Push to
end an active call.
“4. Hands-Free Phone”
INFO:
Steering wheel switches are mainly for the
vehicle information display control and
may not be able to operate the touch
screen display depending on the conditions.
For other details of the vehicle information display, refer to the vehicle Owner’s
Manual.
USB (Universal Serial Bus) CONNECTION PORTS AND AUX (auxiliary) INPUT JACK
AIVINJN1-E9AC7D61-BCC2-48F6-87C6-43CA8EAE0D5D
Condition:
2-4

(17,1)
[ Edit: 2017/ 5/ 8 Model: AIVINJ-N ]
WARNING
AIVINJN1-657A56AD-13C7-4818-B036-02410624DCC8
Do not connect, disconnect or operate
the USB device while driving. Doing so
can be a distraction. If distracted you
could lose control of your vehicle and
cause an accident or serious injury.
CAUTION
AIVINJN1-36464817-8CB6-4B42-9865-591E40742C6D
. Do not force the USB device into
the USB connection port. Inserting
the USB device tilted or up-sidedown into the port may damage
the port. Make sure that the USB
device is connected correctly into
the USB connection port.
. Do not grab the USB connection
port cover (if so equipped) when
pulling the USB device out of the
port. This could damage the port
and the cover.
. Do not leave the USB cable in a
place where it can be pulled unintentionally. Pulling the cable may
damage the port.
The vehicle is equipped with a USB connection port and an AUX input jack. When
connected, the in-vehicle audio system
can play audio contents from the compatible device.
5GH0764X
USB connection port and the AUX input
jack are located on the lower part of the
instrument panel.
USB connection port:
Connect a compatible device to play
media such as iPod®, iPhone®, Android
device or a USB memory device.
AUX (Auxiliary) input jack:
Connect an audio player that accepts
a 1/8 in (3.5 mm) TRS connector (such
as an MP3 player etc.) to play music.
INFO:
Refer to your AUX and USB device manufacturer’s owner information regarding
the proper use and care of the device.
2. Getting started
Condition:
2-5

(18,1)
[ Edit: 2017/ 5/ 8 Model: AIVINJ-N ]
2. Getting started
STARTING SYSTEM
AIVINJN1-F7A7E93C-1CA4-4F06-A2C8-03063B07BE78
The system starts when the ignition
switch is placed in the ACC or ON position.
START-UP SCREEN
AIVINJN1-1CCFB241-BAB4-4C9C-8412-EF467F738826
The start-up screen is displayed when the
ignition switch is placed in the ACC or ON
position.
Models with NissanConnect
SM
Services:
After an animated start-up screen is
displayed, a message screen will be displayed. Touch [OK] after reading and
agreeing to the message displayed on
the screen. If you do not agree to the
message, some of the functions on the
system will be disabled.
Models with Intelligent Key:
When Intelligent key is detected in the
vehicle, the system will start up by pushing <VOLUME/
>.
NOTE:
Do not keep the system running with
the engine or the hybrid system
stopped. Doing so may discharge the
vehicle battery (12V battery). When you
use the system, always keep the engine
or the hybrid system running.
BASIC OPERATION
AIVINJN1-A9E6F207-4B16-4522-84EB-16B8F6F3D435
The system can be operated with the
touch panel as well as switches on the
control panel and the steering wheel.
This manual mainly describes the touch
panel operation.
SELECTING MENU FROM LAUNCH BAR
AIVINJN1-F5B8AC5D-C122-4534-9FC7-2A14ED1A68AA
5GH0765X
Models with navigation system
5GH0803X
Models without navigation system
Various system functions can be accessed
by touching the items on the Launch Bar
which is displayed on most of the main
menu screens. (The Launch Bar does not
appear on some screens such as scrolled
map screen, keyboard screen, etc.)
Touch the item on the Launch Bar to
display the corresponding screens.
The items on the Launch Bar differ
according to which button on the control
panel is pushed.
The following menus are available on the
Launch Bar.
When pushing <MENU>:
Displayed items may vary depending on
models and specifications.
Condition:
2-6

(19,1)
[ Edit: 2017/ 5/ 8 Model: AIVINJ-N ]
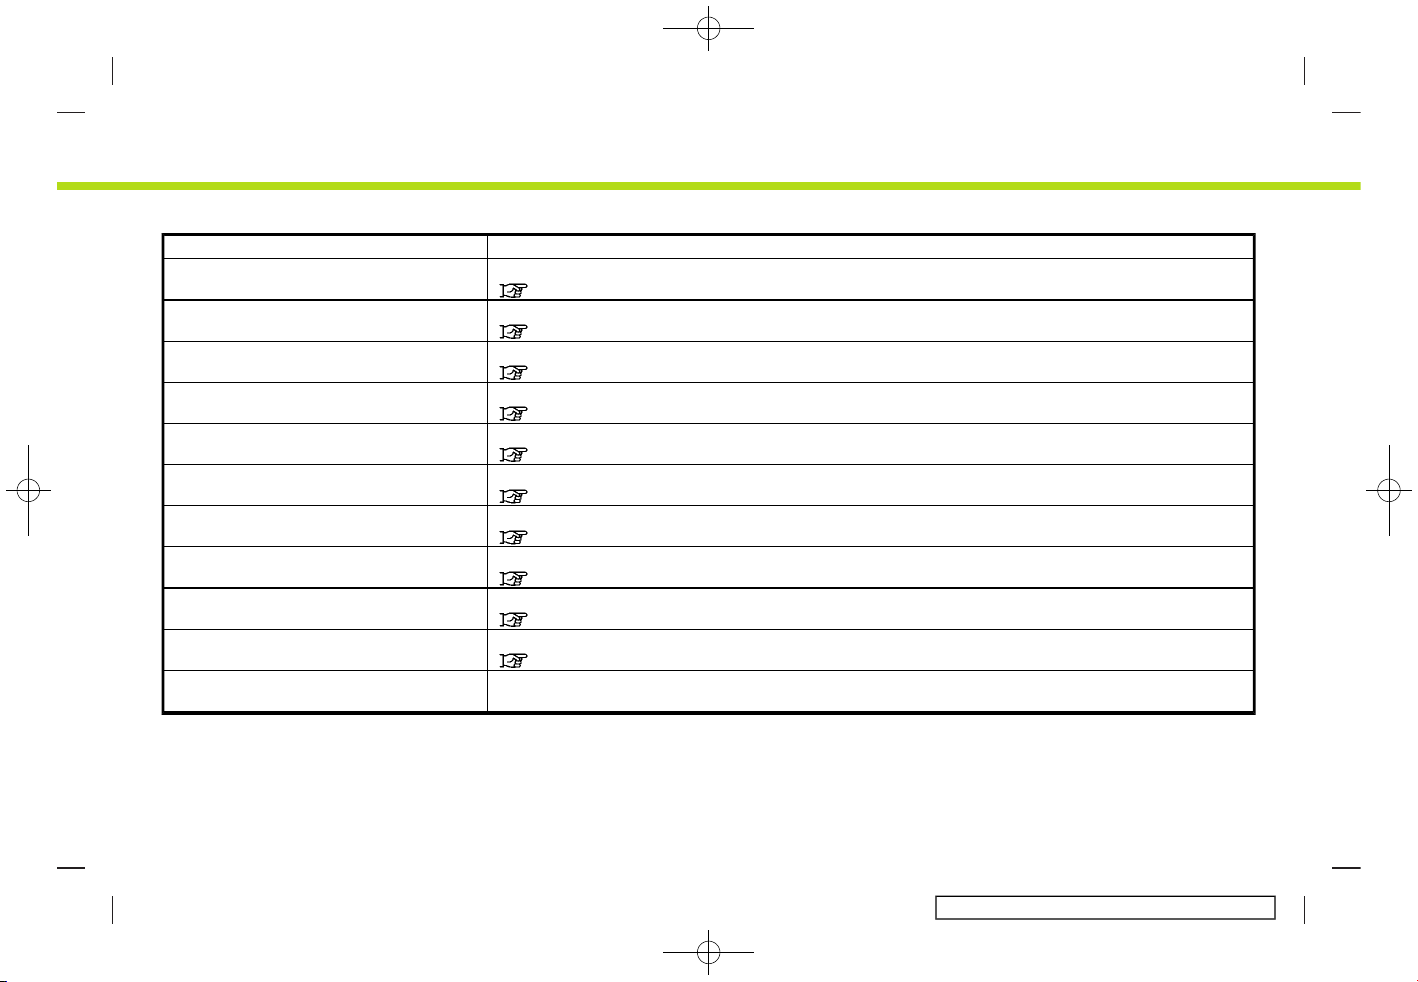
. [Phone]*
“Phone” (page 4-4)
. [Info]
“Information menu” (page 5-2)
. [Audio]
“Audio operations” (page 3-11)
. [MENU]
Touching [MENU] on the Launch Bar
will display the center page of the
HOME MENU screen.
. [Map]
“Launch Bar ” (page 6-3)
. [Connections]
“connections settings” (page 2-16)
. [Settings]
“System settings” (page 2-13)
When pushing <AUDIO>:
Displayed items may vary depending on
models and specifications.
“Selecting audio source” (page 3-11)
When pushing <MAP> (if so equipped):
“Launch Bar ” (page 6-3)
*: The key will be replaced by [CarPlay]
when the Apple CarPlay is active, and it
will be replaced by [Android Auto] when
Android Auto is active.
TOUCH PANEL OPERATION
AIVINJN1-A1BF9C2C-4643-4997-9E6E-93C94C9905EC
The system can be controlled mainly by
the touch panel operation.
The following operations are example of
the touch panel operation.
The map operations are also available
with touch panel operation.
“Map operation” (page 6-4)
. Touch
5GH0766X
Select the item on the screen to select
the item and to display the corresponding screen.
INFO:
Some keys function differently depending
on whether the key is touched briefly or
when it is being touched and held for a
few seconds.
. Swipe/Flick
5GH0767X
Menu screen pages will skip to the
next page when swiped/flicked horizontally.
Some of the list screens can also be
scrolled by swiping/flicking on the
screen vertically.
2. Getting started
Condition:
2-7

(20,1)
[ Edit: 2017/ 5/ 8 Model: AIVINJ-N ]
2. Getting started
MAIN SCREEN OPERATIONS
AIVINJN1-B2704A91-F2DB-44B4-827A-4CF2E650F379
The following operations are generally
available on the various screen.
. Displaying previous screen
5GH0768X
Touch [ ] to return to the screen
displayed previously.
. Horizontal scrolling
5GH0769X
Touch [<] to scroll to the previous
page.
Touch [>] to scroll to the next page.
Indicates the position of the currently
displayed page.
. Vertical scrolling
5GH0770X
Touch [ ] or [ ] to skip to the
previous or next page.
Touch [
] or [ ] to scroll the
message or list one item at a time.
Indicates the total number of items in
the list and the entry number of the
selected item.
INFO:
Depending on the screens, swiping on the
touch screen can scroll pages vertically or
horizontally.
Condition:
2-8

(21,1)
[ Edit: 2017/ 5/ 8 Model: AIVINJ-N ]
. Scrolling list by selecting alphabet
5GH0771X
Touch a preferred location within the
alphabetical list. The detailed alphabet list will be shown. Touch to scroll
the list items to the section that
begins with the letter selected. The
alphabet list can be scrolled by touching [
] or [ ].
INFO:
When [A-Z] is displayed on the list screen,
touching [A-Z] and turning <TUNE·SCROLL/OK> can also select a alphabet to
scroll.
ADJUSTING SETTINGS
AIVINJN1-7511E082-9116-41D3-90B0-85329BDCEE4D
5GH0773X
Touch adjustment keys, such as [-]/[+],
etc., to adjust each item. Each time a key is
touched, the indicator moves along the
bar.
For items with [ON] indicator, touch the
menu item to turn on/off the setting. The
indicator light will turn on when the
setting is turned on.
HOW TO INPUT LETTERS AND NUMBERS
AIVINJN1-95CCE032-178B-4697-8BFB-8BB9856AFD9C
Basic operations to enter letters and
numbers are explained here.
Character and number input screens vary
depending on the conditions.
Alphabet input screen
AIVINJN1-9244CA6E-8CE8-4E92-9F93-3F3D3E32096E
5GH0774X
Entered characters are displayed.
Touch to delete the last character
entered.
Touch and hold to delete all the
characters entered.
Touch to change the type of key-
board.
[A-Z]: Displays alphabet input screen.
[AEB]: Displays symbol input screen.
[123]: Displays number input screen.
Touch to switch between the upper-
case and lowercase character input
screen.
Touch to enter a space.
2. Getting started
Condition:
2-9

(22,1)
[ Edit: 2017/ 5/ 8 Model: AIVINJ-N ]
2. Getting started
Touch to enter a character.
Touch to confirm the entry.
Number input screen
AIVINJN1-BCECD62B-4D09-48C9-997D-360243F5586E
5GH0775X
Entered characters are displayed.
Touch to delete the last number
entered.
Touch and hold to delete all the
characters entered.
Touch to enter a number.
Touch to confirm the entry.
HOW TO VIEW AND OPERATE HOME MENU SCREEN
AIVINJN1-CA23AE87-F50B-4970-A7BD-D9932C5241AB
Push <MENU> to display the HOME MENU
screen.
The HOME MENU consists of 3 pages
which can display preferred Shortcuts
and Widgets.
5GH0776X
Shortcut icons:
Icons for frequently used menu items
can be placed on the HOME MENU
screens as Shortcuts.
Widget:
Useful information from primary
menu functions can be displayed as
Widgets. Depending on the contents
of the Widget, keys may be available
for operation of the menu function.
Customizing HOME MENU screen
AIVINJN1-6891DABF-54F5-4264-BFFC-F75F8C5E4B9B
The HOME MENU screen can be personalized by selecting which Shortcuts and
Widgets be display and where to place
them on the screen.
5GH0777X
1. Touch [Settings] on the Launch Bar.
2. Touch [Customize Home Menu].
3. Touch [Shortcuts] or [Widgets].
4. Drag the Shortcut or Widget icon
to
each page layout
.
If a different Shortcut or a Widget is
already located on the page layout
,
a message will be displayed. Touch
[Yes] to replace the Shortcut/Widget.
The page layout
can be changed by
dragging the icons.
Dragging an icon into the
can
delete the current Shortcut or Widget
Condition:
2-10

(23,1)
[ Edit: 2017/ 5/ 8 Model: AIVINJ-N ]
to create a blank spot.
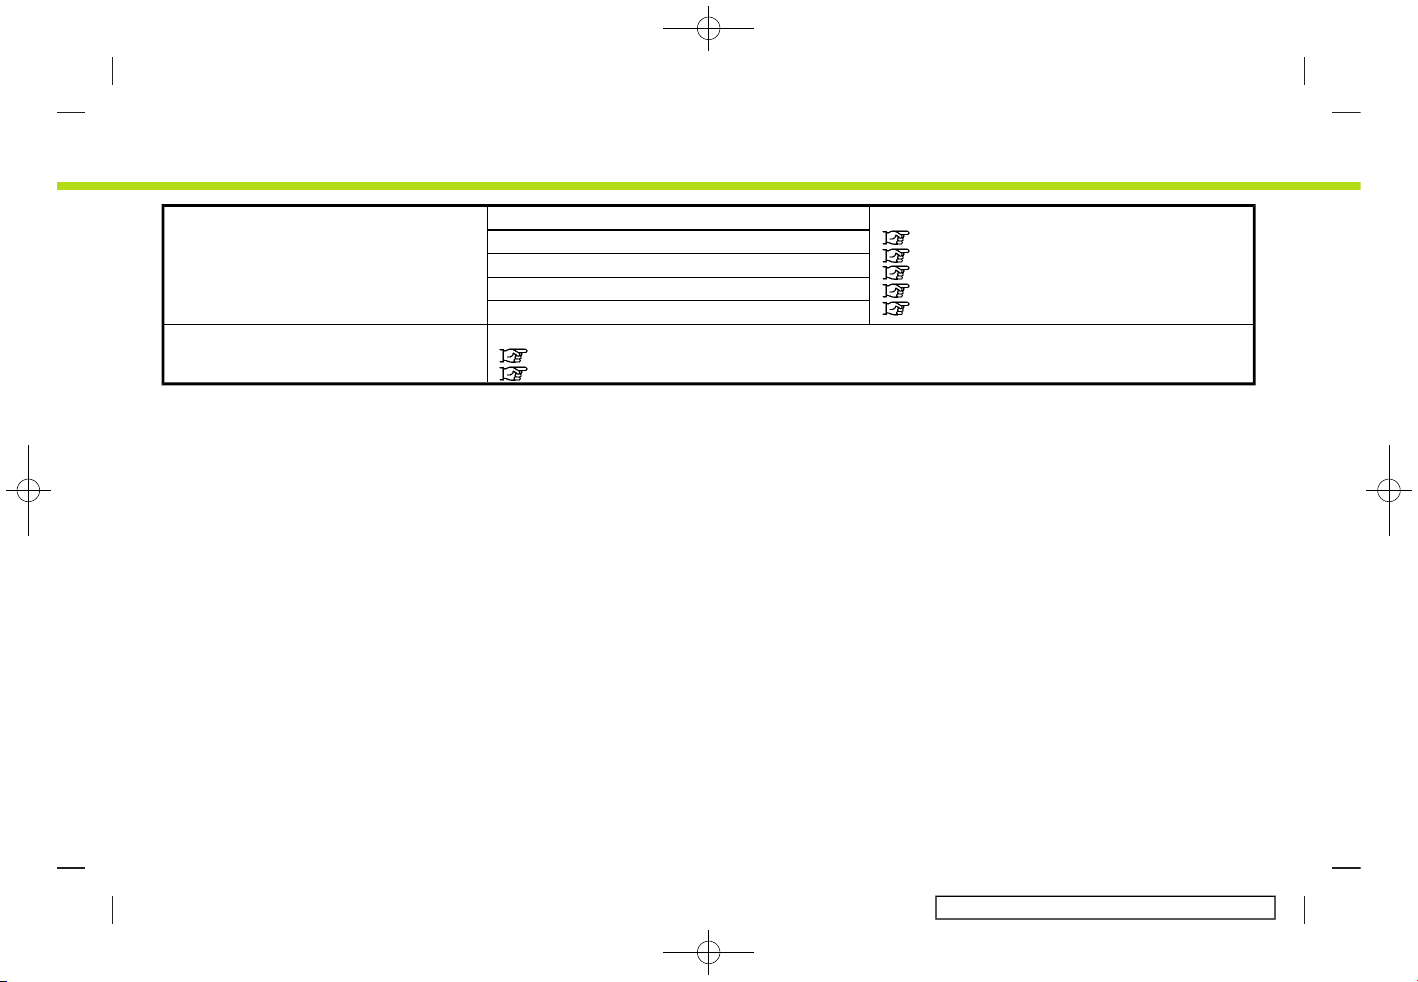
Available Shortcut categories:
[Audio]
[Route] (if so equipped)
[Phone]
[Settings]
[Info]
[Voice Recognition]
[Destination] (if so equipped)
Available Widgets:
[Phone]
[Audio]
[Turn by Turn] (if so equipped)
[Current Conditions] (if so equipped)
[5-Day Weather Forecast] (if so equipped)
[Hourly Forecast] (if so equipped)
[SXM Sports] (if so equipped)
[Clock]
INFO:
. The categories of Shortcuts can be
changed by touching [Category].
. Some widgets ([Audio], [Turn by Turn]
and [Clock]) can be selected from 2
shortcut spot size and 4 shortcut spot
size. All other Widgets require 4 short-
cuts spots to be displayed.
. HOME MENU screen can display up to
eight Shortcuts on a page.
. Touching [Settings] on the Launch Bar
and touching [Customize Home Menu]
will also display the Customize Home
Menu screen.
. Access to the SiriusXM Travel Link
services requires a SiriusXM subscription.
“SiriusXM Travel Link” (page 5-16)
2. Getting started
Condition:
2-11

(24,1)
[ Edit: 2017/ 5/ 8 Model: AIVINJ-N ]
2. Getting started
FUNCTIONS DISABLED WHILE DRIVING
AIVINJN1-96075C82-A5BC-42F2-A4C5-DF0BB2863C3F
5GH0804X
Example
To ensure safe driving, some functions
cannot be operated or have limited operation while the vehicle is in motion.
The on-screen text and keys for these
restricted functions will be “grayed-out” or
muted and cannot be selected while
driving. In some cases, a screen message
will appear indicating a restricted function.
Restricted functions while driving include:
. Character (letter and number) input
screen
. Scrolling and viewing of certain list
screens
. Displaying detailed information and
selecting items on some information
screens
. Adding/editing home location, ad-
dress book entries and current route
. Registering cellular phones
. Connecting Bluetooth® devices for the
first time
. Placing a call by dialing a number or
selecting a phonebook entry
. Setting phone, NissanConnect
SM
Services (if so equipped), Bluetooth® functions, etc.
Condition:
2-12

(25,1)
[ Edit: 2017/ 5/ 8 Model: AIVINJ-N ]
. Various other settings
These functions will become available
again when the vehicle is not in motion.
Some of the destination setting functions
that become unavailable while driving can
be operated by voice recognition system.
Available voice commands may differ
depending on the language setting.
SYSTEM SETTINGS
AIVINJN1-811B4F8E-8E41-435D-BA44-76204FB0B276
The system settings can be changed for
personal convenience.
SETTINGS MENU
AIVINJN1-12A7E9D2-EBD5-4390-9640-2629B7A307F5
Touch [Settings] on the Launch Bar and
touch a setting item you wish to adjust.
Available setting items may vary depending on models and specifications.
2. Getting started
Condition:
2-13
(26,1)
[ Edit: 2017/ 5/ 8 Model: AIVINJ-N ]
2. Getting started
Available setting items
Setting item Result
[Connections] Displays the Bluetooth®, Wi-Fi and USB setting screen.
“connections settings” (page 2-16)
[Phone] Displays the Phone & text message setting screen.
“Phone and text message assistant settings” (page 4-10)
[Navigation] Displays the navigation settings screen.
“Navigation settings” (page 6-56)
[Sound] Displays the audio settings screen.
“Audio settings” (page 3-33)
[Volume & Beeps] Displays the volume adjustment screen.
“Volume and Beeps settings” (page 2-19)
[Clock] Displays the clock adjustment screen.
“Clock settings” (page 2-19)
[Customize Home Menu] Displays the HOME MENU editing screen.
“Customizing HOME MENU screen” (page 2-10)
[Customize Audio Sources] Displays the Audio menu editing screen.
“Selecting audio source” (page 3-11)
[NissanConnect Services] Displays the NissanConnect
SM
Services settings screen.
“NissanConnectSMServices” (page 5-5)
[System Voice] Displays the system voice settings screen.
“System Voice settings” (page 7-12)
[Camera] Displays the Camera setting screen.
See vehicle Owner’s Manual for details of the monitor system.
Condition:
2-14
(27,1)
[ Edit: 2017/ 5/ 8 Model: AIVINJ-N ]
[Others] [Display] Displays other settings screens.
“Display settings” (page 2-21)
“Language setting” (page 2-21)
“Units settings” (page 2-21)
“Keyboard type settings” (page 2-21)
“Return all settings to default” (page 2-21)
[Language]
[Units]
[Keyboard Type]
[Return All Settings to Default]
[Apps] Displays the Apps settings screen.
“Apple CarPlay settings” (page 5-22)
“Android Auto settings” (page 5-25)
2. Getting started
Condition:
2-15

(28,1)
[ Edit: 2017/ 5/ 8 Model: AIVINJ-N ]
2. Getting started
CONNECTIONS SETTINGS
GUID-B1D6479B-2DE5-4B50-AD8F-54A4EC13EA7D
Changing the settings and viewing information of Bluetooth®, Wi-Fi and USB are
available on the Connections settings
screen.
Setting Bluetooth®
GUID-BEE172A8-E0E0-4F75-8762-230628E44312
Your vehicle is equipped with the Bluetooth® Hands-Free Phone System and
Bluetooth® audio device support. If you
are an owner of a compatible Bluetooth®
enabled cellular phone or Bluetooth®
audio device, you can set up the wireless
connection between your cellular phone
and the in-vehicle phone module or Bluetooth® audio device and in-vehicle audio
module. With Bluetooth® wireless technology, you can make or receive a telephone
call with your cellular phone in your
pocket and listen to Bluetooth® audio.
“Bluetooth® audio” (page 3-28)
“Bluetooth® Hands-Free Phone System” (page 4-2)
Connecting cellular phone/audio device:
5GH0778X
To use the Bluetooth® device with the invehicle system for the first time, the device
connection operation is required.
1. Touch [Settings] on the Launch Bar.
2. Touch [Connections].
3. Touch [Bluetooth] and touch [Add
New]. A message is displayed.
4. Touch [Yes] to connect a cellular
phone. Touch [No] to connect an audio
device and operate as guided by the
system. (Operations may differ depending on the device.)
NOTE:
Some cellular phones or other devices
may cause interference or a buzzing
noise to come from the audio system
speakers. Storing the device in a different location may reduce or eliminate the
noise.
INFO:
. The paired phone will be added to the
list on the Bluetooth® connection
screen.
. Touching another device name on the
list will switch the connected device.
. Touching [
] will allow the device to
be connected via Bluetooth® and be
used on the Hands-Free Phone System.
. Touching [
] will allow the device to
be connected via Bluetooth® and be
used for Bluetooth® Audio.
. Touching [
] will display the information of the phone device.
. Up to 6 Bluetooth® devices can be
connected. If 6 devices are already
connected, one of the devices must
first be deleted before another device
can be connected.
Condition:
2-16
(29,1)
[ Edit: 2017/ 5/ 8 Model: AIVINJ-N ]
. The pairing procedure of the cellular
phone varies according to each cellular phone. See the cellular phone Owner’s Manual for the details.
. Visit www.nissanusa.com/bluetooth/
for a recommended Bluetooth®
device.
Bluetooth® settings:
The Bluetooth® settings can be changed
according to your preference.
1. Touch [Settings] on the Launch Bar.
2. Touch [Connections].
3. Touch [Bluetooth].
4. Touch [
].
Available setting items
Setting item Action
[Bluetooth] Turns the Bluetooth®
connection on/off.
[Favorite
Phone]
Set the phone which
takes a priority to be
connected.
[Favorite Audio] Set the Bluetooth® audio
device which takes a
priority to be connected.
[Device Name] The device name can be
changed.
[PIN] The PIN code can be
changed.
INFO:
With [Device Name], the device name that
appears on the screen can be changed
and be renamed from the name set as
default to the preferred name (such as
“Steve’s Car” for example).
Deleting cellular phone/audio device:
Paired phones can be deleted from the
list.
1. Touch [Settings] on the Launch Bar.
2. Touch [Connections].
3. Touch [Bluetooth].
4. Touch [
] by the phone device name
you wish to delete.
5. Touch [Delete]. Touch [Yes] when a
message appears.
Wi-Fi Setting
GUID-58574DBB-6838-41C9-A054-FAC518DD656A
A Wi-Fi connection can be made to an
available Wi-Fi network or near the vehicle. Wi-Fi connectivity is useful for updating map data and system software, or
using online services such as Online
Search or Premium Traffic.
“Updating System software”
(page 5-4)
“How to update map data”
(page 6-64)
2. Getting started
Condition:
2-17

(30,1)
[ Edit: 2017/ 5/ 8 Model: AIVINJ-N ]
2. Getting started
Connecting to a Wi-Fi network:
5GH0779X
To use the Wi-Fi connection for the first
time, the following connecting procedures are required.
1. Touch [Settings] on the Launch Bar.
2. Touch [Connections].
3. Touch [Wi-Fi].
4. Touch the name of the device you
wish to connect.
5. Enter the network password and
touch [OK]. The device will be connected.
The connected Wi-Fi device will be
added to the list on the connection
screen.
If a listed device is in a status capable
of making Wi-Fi connection, touching
the device name on the list will start
the connection.
INFO:
. Touching the [
] will display the network information. Turning [Auto Connect] on will automatically connect the
vehicle to the network if the network is
available.
. Enabling the Wi-Fi hotspot functional-
ity of your smartphone may incur
additional charges from your cellular
provider. Consult your cellular provider
contract regarding the communication fee.
. The Wi-Fi hotspot communication is
not available on this system as of
September, 2017.
Wi-Fi settings:
The Wi-Fi settings can be changed according to your preference.
1. Touch [Settings] on the Launch Bar.
2. Touch [Connections].
3. Touch [Wi-Fi].
4. Touch [
].
5. Touch a preferred item.
Available setting items
Setting item Action
[Wi-Fi] Turns the Wi-Fi connec-
tion on/off.
[Security] Security standard setting
can be changed.
Deleting Wi-Fi network:
The connected Wi-Fi devices can be
deleted from the list.
1. Touch [Settings] on the Launch Bar.
2. Touch [Connections].
3. Touch [Wi-Fi].
4. Touch [
] by the name of the network
you wish to delete.
5. Touch [Delete]. Touch [Yes] when a
message appears.
Displaying USB device information
GUID-0410F8D5-4D74-4C02-A786-2D75AB254FEC
The information of the connected USB
device can be viewed.
“USB memory device player”
(page 3-21)
Condition:
2-18

(31,1)
[ Edit: 2017/ 5/ 8 Model: AIVINJ-N ]
5GH0780X
1. Touch [Settings] on the Launch Bar.
2. Touch [Connections].
3. Touch [USB].
4. Touch the name of the device you
wish to check. The name and the type
of the device are displayed.
VOLUME AND BEEPS SETTINGS
AIVINJN1-210F184A-892E-4546-8D2A-0868DA7C4F52
The volume of various functions including
audio, phone, navigation voice guidance,
and system beeps can be adjusted.
1. Touch [Settings] on the Launch Bar.
2. Touch [Volume & Beeps].
Available setting items may vary depending on models and specifications.
Available setting items
Setting item Action
[Audio Volume]
Adjusts the volume level
of the audio system.
[Guidance Volume]
Adjusts the volume level
of the guidance voice and
the voice recognition system voice responses.
[Ringtone] Adjusts the volume level
of the ringtone of incoming calls.
[Outgoing Call] Adjusts the outgoing call
volume.
[Button Beeps] Turns on/off the button
beep sound and alarm for
prohibited operations.
[Guidance
Voice]
Turns on/off the voice
guidance.
CLOCK SETTINGS
AIVINJN1-6FB05DB7-7A72-4B43-A7A5-4796C1370711
Clock settings of the system can be
changed.
1. Touch [Settings] on the Launch Bar.
2. Touch [Clock].
Available setting items may vary depend-
ing on models and specifications.
2. Getting started
Condition:
2-19

(32,1)
[ Edit: 2017/ 5/ 8 Model: AIVINJ-N ]
2. Getting started
Available setting items
Setting item Action
[On-Screen Clock] Sets the clock display on/off. When this item is on, the clock display appears.
[Clock Mode] [Auto]: Adjust clock time automatically using GPS.
[Time Zone]: Adjust clock time reflecting selected time zone.
[Manual]: Reflects [Set Clock Manually] settings.
[Clock Format] The clock can be set to 12 hours or 24 hours.
[Date Format] The display format of the day, month and year display can be selected.
[Offset (Hour)] Adjusts the offset value (hour). [Clock Mode] must be set to [Auto] or [Time Zone] for this
option.
Adjusts the offset value (minutes). [Clock Mode] must be set to [Auto] or [Time Zone] for this
option to be available.
[Offset (Min.)]
[Daylight Savings Time] Turns on/off the daylight saving time setting. This option only appears to be available when
Clock Mode is set to Time Zone.
[Time Zone] Select an appropriate time zone from the list. [Clock Mode] must be set to [Time Zone] for
this option.
[Set Clock Manually] Adjust the clock manually. Touch [+] or [-] to adjust the hours, minutes, day, month and year
up or down. [Clock Mode] must be set to [Manual] for this option.
INFO:
When the [On-Screen Clock] setting is turned on, the clock settings screen can also be displayed by touching the clock at the upper
right corner of the screen.
Condition:
2-20

(33,1)
[ Edit: 2017/ 5/ 8 Model: AIVINJ-N ]
DISPLAY SETTINGS
AIVINJN1-6BF6BB79-7BC5-47FC-AE67-09BC1505C4C5
Display settings can be adjusted.
1. Touch [Settings] on the Launch Bar.
2. Touch [Others].
3. Touch [Display].
4. Touch a preferred item to adjust the
setting.
Available setting items
Setting item Action
[Display] Turns the screen off.
Pushing and holding <
>
will also turn off the screen.
Push the <
> to turn the
screen back on.
[Brightness] Adjusts the brightness of
the display.
[Contrast] Adjusts the contrast of the
display.
[Black Level] Adjusts the black level of
the display.
LANGUAGE SETTING
AIVINJN1-D7E9171E-3B1C-414A-AD30-925AD34D89F6
This changes the language and measurement unit used in the system.
1. Touch [Settings] on the Launch Bar.
2. Touch [Others].
3. Touch [Language].
Selects the preferred system lan-
guage.
The language setting is applied to the
touch screen display, voice announcements, the voice recognition system. It
can also be applied to the vehicle information display.
INFO:
Do not change the position of the ignition
switch while changing the language.
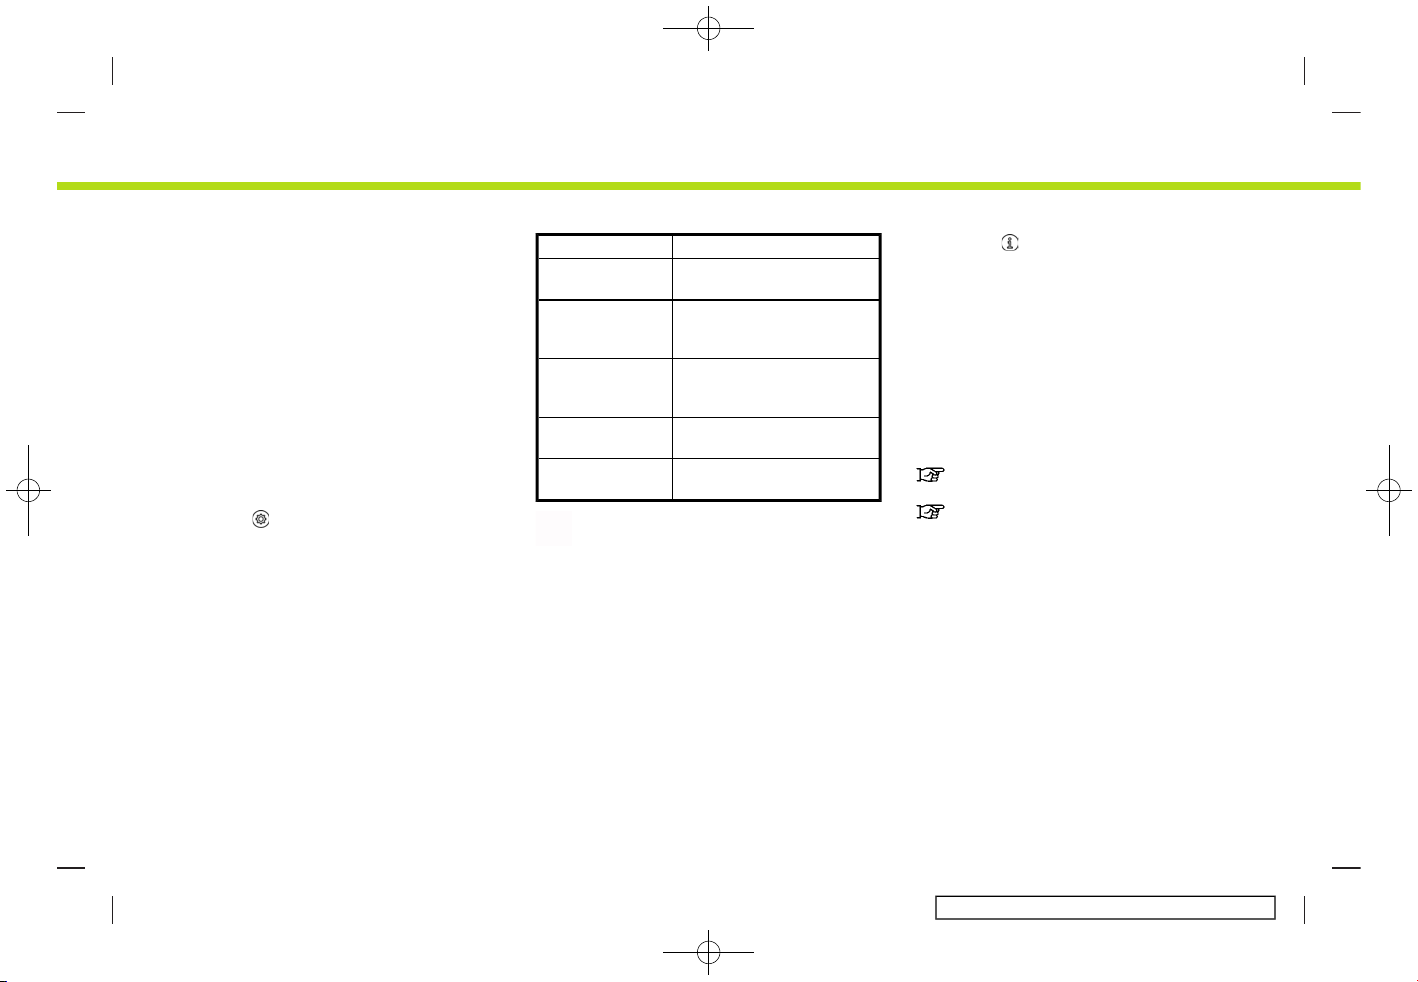
UNITS SETTINGS
GUID-5357F055-6C98-47D0-8C9F-E8D92E236164
This changes the units used in the system.
1. Touch [Settings] on the Launch Bar.
2. Touch [Others].
3. Touch [Units].
Setting item Action
[Distance] Select the distance
unit.
[Temperature] Select the tempera-
ture unit.
INFO:
. Do not change the position of the
ignition switch while changing the
distance or temperature.
. If the selected distance or tempera-
ture is also supported by the vehicle
information display, a confirmation
message asking if you would like to
also change the distance or temperature for the vehicle information display
is displayed. Select [Yes] to change the
distance or temperature on the vehicle
information display.
KEYBOARD TYPE SETTINGS
GUID-9DE94100-E084-401F-AEC3-2D71C2119A0B
The keyboard layout of the character
input screens can be selected.
1. Touch [Settings] on the Launch Bar.
2. Touch [Others].
3. Type of keyboard can be changed by
touching [ABC] or [QWERTY] displayed
by [Keyboard Type].
RETURN ALL SETTINGS TO DEFAULT
GUID-F8F3CD4E-6B1E-4129-A4B4-C7A452414D93
This resets others settings (display, language, etc.) to the default settings.
1. Touch [Settings] on the Launch Bar.
2. Getting started
Condition:
2-21

(34,1)
[ Edit: 2017/ 5/ 8 Model: AIVINJ-N ]
2. Getting started
2. Touch [Others].
3. Touch [Return All Settings to Default].
4. Touch [Yes].
Condition:
2-22

(35,1)
[ Edit: 2017/ 5/ 8 Model: AIVINJ-N ]
3 Audio system
Audio operation precautions ................................................. 3-2
Radio ................................................................................................... 3-2
Compact Disc (CD) player ................................................... 3-4
USB (Universal Serial Bus) connection ports ......... 3-5
Compressed Audio Files (MP3/WMA/AAC) ............ 3-5
Bluetooth® streaming audio ............................................ 3-9
Names and functions of audio
control buttons .............................................................................. 3-10
Audio main buttons ............................................................. 3-10
Audio control steering wheel switches ................ 3-11
Audio operations ........................................................................... 3-11
Audio main operation ......................................................... 3-11
Radio ................................................................................................ 3-12
Compact Disc (CD) player ................................................ 3-19
USB memory device player ............................................ 3-21
iPod® player ................................................................................ 3-24
Bluetooth® audio .................................................................... 3-28
Auxiliary (AUX) devices ....................................................... 3-31
Smartphone audio ................................................................ 3-32
Audio settings ................................................................................. 3-33
Audio adjustments with audio adjust bar .......... 3-34
CD/USB memory device care and cleaning ............ 3-34
CD ....................................................................................................... 3-34
USB memory device ............................................................. 3-34
Condition:

(36,1)
[ Edit: 2017/ 5/ 8 Model: AIVINJ-N ]
3. Audio system
AUDIO OPERATION PRECAUTIONS
AIVINJN1-B0DBBB37-B849-425F-902A-DDABE30FE9B4
CAUTION
AIVINJN1-EA479F95-2967-4EEA-8547-ECB13A8F56C8
. Operate the audio system only
when the vehicle engine or the
hybrid system is running. Operating the audio system for extended
periods of time with the engine or
the hybrid system turned off can
discharge the vehicle battery.
. Do not allow the system to get wet.
Excessive moisture such as spilled
liquids may cause the system to
malfunction.
RADIO
AIVINJN1-2E7BDA12-EFEE-40F2-BD7E-0C1AD5ECA109
Place the ignition switch in the ACC or ON
position before turning on the radio. If you
listen to the radio with the engine or the
hybrid system not running, the ignition
switch should be placed in the ACC
position.
Radio reception is affected by station
signal strength, distance from radio transmitter, buildings, bridges, mountains and
other external influences. Intermittent
changes in reception quality normally
are caused by these external influences.
Using a cellular phone in or near the
vehicle may influence radio reception
quality.
Radio reception
AIVINJN1-89FE3704-0B57-4447-88CD-7BD9D337A7DC
Your radio system is equipped with stateof-the-art electronic circuits to enhance
radio reception. These circuits are designed to extend reception range, and to
enhance the quality of that reception.
However there are some general characteristics of both FM and AM radio signals
that can affect radio reception quality in a
moving vehicle, even when the finest
equipment is used. These characteristics
are completely normal in a given reception area, and do not indicate any malfunction in your radio system.
Reception conditions will constantly
change because of vehicle movement.
Buildings, terrain, signal distance and
interference from other vehicles can work
against ideal reception. Described below
are some of the factors that can affect
your radio reception.
Some cellular phones or other devices
may cause interference or a buzzing noise
to come from the audio system speakers.
Storing the device in a different location
may reduce or eliminate the noise.
FM radio reception
AIVINJN1-275BC1BF-3C52-437B-9A90-2B55439E4402
SAA0306
Range: the FM range is normally limited to
25 to 30 miles (40 to 48 km), with
monaural (single station) FM having
slightly more range than stereo FM. External influences may sometimes interfere
with FM station reception even if the FM
station is within 25 miles (40 km). The
strength of the FM signal is directly related
to the distance between the transmitter
and receiver. FM signals follow a line-ofsight path, exhibiting many of the same
characteristics as light. For example they
will reflect off objects.
Fade and drift: As your vehicle moves
away from a station transmitter, the
Condition:
3-2

(37,1)
[ Edit: 2017/ 5/ 8 Model: AIVINJ-N ]
signals will tend to fade and/or drift.
Static and flutter: During signal interfer-
ence from buildings, large hills or due to
antenna position, usually in conjunction
with increased distance from the station
transmitter, static or flutter can be heard.
This can be reduced by lowering the treble
setting to reduce the treble response.
Multipath reception: Because of the reflective characteristics of FM signals, direct and reflected signals reach the
receiver at the same time. The signals
may cancel each other, resulting in momentary flutter or loss of sound.
AM radio reception
AIVINJN1-F3C8ECE4-EFC7-4ED4-9553-9C805FE5ED54
AM signals, because of their low frequency, can bend around objects and skip
along the ground. In addition, the signals
can bounce off the ionosphere and be
bent back to earth. Because of these
characteristics, AM signals are also subject to interference as they travel from
transmitter to receiver.
Fading: Occurs while the vehicle is passing
through freeway underpasses or in areas
with many tall buildings. It can also occur
for several seconds during ionospheric
turbulence even in areas where no obstacles exist.
Static: Caused by thunderstorms, electri-
cal power lines, electric signs and even
traffic lights.
HD RadioTMTechnology reception
(for U.S.)
AIVINJN1-633FD57A-547D-47B6-A341-C9B5BFCD27BD
HD Radio Technology reception needs to
be activated to receive HD Radio broadcasts.
“Radio Menu” (page 3-17)
This enables you to receive radio broadcasts digitally (where available), providing
a better quality sound with clear reception. When this feature is not activated or
HD Radio broadcasts are not available,
you will receive analog radio (AM/FM)
broadcasts.
Satellite radio reception
AIVINJN1-2273FD6D-FB06-452C-998D-A63512E7162F
When the satellite radio is used for the first
time or the battery has been replaced, the
satellite radio may not work properly. This
is not a malfunction. Wait more than 10
minutes with the satellite radio ON and
the vehicle outside of any metal or large
building for the satellite radio to receive all
of the necessary data.
SiriusXM services require a subscription
after trial period and are sold separately
or as a package. The satellite service is
available only in the 48 contiguous USA
and DC. SiriusXM satellite service is also
available in Canada; see www.siriusxm.ca.
The satellite radio performance may be
affected if cargo carried on the roof blocks
the satellite radio signal.
If possible, do not put cargo near the
satellite antenna.
A buildup of ice on the satellite radio
antenna can affect satellite radio performance. Remove the ice to restore satellite
radio reception.
3. Audio system
Condition:
3-3

(38,1)
[ Edit: 2017/ 5/ 8 Model: AIVINJ-N ]
3. Audio system
COMPACT DISC (CD) PLAYER
AIVINJN1-DC5E2611-026D-452C-A4AC-47F0F8806FC5
SAA0480
. Do not force a compact disc into the
CD insert slot. This could damage the
CD and/or CD player.
. Trying to load a CD with the CD door
closed could damage the CD and/or
CD player.
. During cold weather or rainy days, the
player may malfunction due to the
humidity. If this occurs, remove the CD
and dehumidify or ventilate the player
completely.
. The player may skip while driving on
rough roads.
. The CD player sometimes cannot
function when the passenger compartment temperature is extremely
high. Decrease the temperature before
use.
. Only use high quality 4.7 in (12 cm)
round discs that have the “COMPACT
disc DIGITAL AUDIO” logo on the disc or
packaging.
. Do not expose the CD to direct sun-
light.
. CDs that are of poor quality, dirty,
scratched, covered with fingerprints
or that have pin holes may not work
properly.
. The following CDs may not work
properly:
— Copy control compact discs (CCCD)
— Recordable compact discs (CD-R)
— Rewritable compact discs (CD-RW)
. Do not use the following CDs as they
may cause the CD player to malfunction.
— 3.1 in (8 cm) discs
— CDs that are not round
— CDs with a paper label
— CDs that are warped, scratched, or
have abnormal edges
. This audio system can only play pre-
recorded CDs. It has no capabilities to
record or burn CDs.
. If the CD cannot be played, one of the
following messages will be displayed.
Disc read error:
Indicates a CLV, Focus, TOC or Access
error. Check and reinsert the CD. Make
sure that it is inserted correctly.
Please eject disc:
Indicates a mechanism error. If the CD
can be ejected, eject and reinsert the
CD. If the CD cannot be ejected, it is
recommended you visit a NISSAN dealer for service.
Unplayable file:
Indicates that a readable file is not
found on the inserted CD. Check the
data in your CD.
Condition:
3-4

(39,1)
[ Edit: 2017/ 5/ 8 Model: AIVINJ-N ]
USB (Universal Serial Bus) CONNECTION PORTS
AIVINJN1-B14770CC-B357-4196-BAA4-5BEF948ED871
WARNING
AIVINJN1-D638FED5-E54C-411B-A0EC-FC59085277A5
Do not connect, disconnect or operate
the USB device while driving. Doing so
can be a distraction. If distracted you
could lose control of your vehicle and
cause an accident or serious injury.
CAUTION
AIVINJN1-29BDBF9A-FCE3-40F6-9211-F2C802EB06DC
. Do not force the USB device into
the USB connection port. Inserting
the USB device tilted or up-sidedown into the port may damage
the port. Make sure that the USB
device is connected correctly into
the USB connection port.
. Do not grab the USB connection
port cover (if so equipped) when
pulling the USB device out of the
port. This could damage the port
and the cover.
. Do not leave the USB cable in a
place where it can be pulled unintentionally. Pulling the cable may
damage the port.
The vehicle is not equipped with a USB
device. USB devices should be purchased
separately as necessary.
This system cannot be used to format
USB devices. To format a USB device, use a
personal computer.
In some states/areas, the USB device for
the front seats plays only sound without
images for regulatory reasons, even when
the vehicle is parked.
This system supports various USB memory devices, USB hard drives and iPod®
players. Some USB devices may not be
supported by this system.
. Partitioned USB devices may not be
played correctly.
. Some characters used in other lan-
guages (Chinese, Japanese, etc.) are
not displayed properly on the display.
Using English language characters
with a USB device is recommended.
General notes for USB use:
Refer to your device manufacturer’s owner information regarding the proper care
of the device.
Notes for iPod® use:
. Improperly plugging in the iPod® may
cause a checkmark to be displayed on
and off (flickering). Always make sure
that the iPod® is connected properly.
. Audiobooks may not play in the same
order as they appear on an iPod®.
COMPRESSED AUDIO FILES (MP3/ WMA/AAC)
AIVINJN1-59506932-77E0-4626-8C21-4A60DD222070
Explanation of terms
AIVINJN1-EB91730C-D0C7-441C-9028-C9C6F27A417B
. MP3 — MP3 is short for Moving Pictures
Experts Group Audio Layer 3. MP3 is
the most well-known compressed digital audio file format. This format
allows for near “CD quality” sound,
but at a fraction of the size of normal
audio files. MP3 conversion of an audio
track can reduce the file size by
approximately a 10:1 ratio (Sampling:
44.1 kHz, Bit rate: 128 kbps) with
virtually no perceptible loss in quality.
The compression reduces certain
parts of sound that seem inaudible to
most people.
. WMA — Windows Media Audio (WMA) is
a compressed audio format created by
Microsoft as an alternative to MP3. The
WMA codec offers greater file compression than the MP3 codec, enabling
storage of more digital audio tracks in
the same amount of space when
compared to MP3s at the same level
of quality.
3. Audio system
Condition:
3-5

(40,1)
[ Edit: 2017/ 5/ 8 Model: AIVINJ-N ]
3. Audio system
. Bit rate — Bit rate denotes the number
of bits per second used by a digital
music file. The size and quality of a
compressed digital audio file is determined by the bit rate used when
encoding the file.
. Sampling frequency — Sampling fre-
quency is the rate at which the samples of a signal are converted from
analog to digital (A/D conversion) per
second.
. Multisession — Multisession is one of
the methods for writing data to media.
Writing data once to the media is
called a single session, and writing
more than once is called a multisession.
. ID3/WMA tag — The ID3/WMA tag is the
part of the encoded MP3 or WMA file
that contains information about the
digital music file such as song title,
artist, album title, encoding bit rate,
track time duration, etc. ID3 tag information is displayed on the Album/
Artist/Track title line on the display.
. AAC — Advanced Audio Coding (AAC) is
a compressed audio format. AAC offers greater file compression than MP3
and enables music file creation and
storage at the same quality as MP3.
Playback order
AIVINJN1-2A8E94F5-2F22-4C97-ACEA-E869F1816CEF
SAA2494
. The folder names of folders not con-
taining compressed audio files are not
shown on the display.
. The playback order is the order in
which the files were written by the
writing software, so the files might not
play in the desired order.
. Music playback order of compressed
audio files is as illustrated.
Condition:
3-6

(41,1)
[ Edit: 2017/ 5/ 8 Model: AIVINJ-N ]
Specification chart for CD
AIVINJN1-AAC8B434-0F38-48A8-87BC-ED7696C5F421
Supported media CD, CD-R, CD-RW
Supported file systems CD, CD-R, CD-RW
Supported versions*1
MP3
Version MPEG1 Audio Layer3, MPEG2 Audio Layer3
Sampling frequency
MPEG1 Audio Layer3: 32kHz, 44.1kHz, 48kHz
MPEG2 Audio Layer3: 16kHz, 22.05kHz, 24kHz
Bit rate
MPEG1 Audio Layer3: 32 kbps - 320 kbps
MPEG2 Audio Layer3: 8 kbps - 160 kbps
WMA*2
Version WMA7, WMA8, WMA9, WMA9.1, WMA9.2
Bit rate/Sampling frequency
Bit rate: Ver7, Ver8: 32-192kbps Ver9,Ver9.1,Ver9.2:32-192kbps, VBR
Sampling frequency: Ver7, Ver8:8k/11.025k/16k/22k/32k/44.1k Ver9,Ver9.1,
Ver9.2:8k/11.025k/16k/22k/32k/44.1k/48 kHz
AAC*3
Bit rate/Sampling frequency
Bit rate: 8-256 kbps, VBR
Sampling frequency: 11.025-48kHz
Tag information (Song title, Artist name and Album
name)
ID3 tag VER1.0, VER1.1, VER2.2, VER2.3, VER2.4 (MP3 only)
WMA tag (WMA only)
AAC tag (AAC only)
Folder levels
CD, CD-R, CD-RW: Folder levels: 8, Folders: 255 (including root folder), Files: 510 (Max.
255 files for one folder)
Displayable character codes*4
01: SHIFT-JIS, ASCII, ISO-8859-1, UTF-8, UTF-16 BOM, UTF-16 Big Endian, UTF-16 Little
Endian, 02: UNICODE, 03: UTF-16
*1 Files created with a combination of 48 kHz sampling frequency and 64 kbps bit rate cannot be played.
*2 Protected WMA files (DRM) cannot be played.
*3 Made by iTunes.
3. Audio system
Condition:
3-7

(42,1)
[ Edit: 2017/ 5/ 8 Model: AIVINJ-N ]
3. Audio system
*4 Available codes depend on what kind of media, versions and information are going to be displayed.
Specification chart for USB
GUID-6D2C4A13-89EC-4642-A614-FF0B956F762C
Supported media USB2.0
Supported file systems FAT12, FAT16, FAT32
Folder levels Folder levels: 8, Files via folder: 255, Folders: 512 (including root folder), Files: 8000
Tag information (Song title, Artist name and
Album name)
ID3 tag VER1.0, VER1.1, VER2.2, VER2.3, VER2.4 (MP3 only)
WMA tag (WMA only)
AAC tag (AAC only)
Format Sampling frequency Supported bitrate
MP3 *1 MPEG1 Layer-3 32, 44.1, 48 kHz 32-320 kbps
MPEG2 16, 22.05, 24 kHz 8-160 kbps
WMA *2 8, 11.025, 16 ,22.05, 32, 44.1, 48 kHz 12-192 kbps
AAC (MPEG4) *3 (Extension “m4a” only) 11.025, 16, 22.05, 32, 44.1, 48 kHz 8-320 kbps
*1 MPEG2.5 is not supported.
*2 WMA7, WMA8, WMA9, WMA9.1, WMA9.2 are supported. (WMA9 Professional, Lossless, Voice are not supported.)
*3 Only AAC files encoded by iTunes are supported. HE-AAC (High-Efficiency) is not supported.
Condition:
3-8

(43,1)
[ Edit: 2017/ 5/ 8 Model: AIVINJ-N ]
BLUETOOTH® STREAMING AUDIO
AIVINJN1-24BDA0F9-283E-4615-995E-7F61FFF7F7B7
. Some Bluetooth® audio devices may
not be recognized by the in-vehicle
audio system.
. It is necessary to set up the wireless
connection between a compatible
Bluetooth® audio device and the invehicle Bluetooth® module before
using the Bluetooth® streaming audio.
. The Bluetooth® streaming audio may
stop playing when
— receiving a hands-free call.
— checking the connection to the
hands-free phone.
— connecting the hands-free phone or
the audio device.
— downloading the phonebook mem-
ory from the connected cellular
phone.
. Do not place a Bluetooth® audio de-
vice in an area surrounded by metal or
far away from the in-vehicle Bluetooth® module to prevent tone quality
degradation and wireless connection
disruption.
. While an audio device is connected
through a Bluetooth® wireless connection, the battery of the device
may discharge quicker than usual.
. This system supports the Bluetooth®
Advanced Audio Distribution Profile
(A2DP) and Audio/Video Remote Control Profile (AVRCP).
. Wireless LAN (Wi-Fi) and the Blue-
tooth® functions share the same frequency band (2.4 GHz). Using the
Bluetooth® and the wireless LAN functions at the same time may slow down
or disconnect the communication and
cause undesired noise. It is recommended that you turn off the wireless
LAN (Wi-Fi) when using the Bluetooth®
functions.
3. Audio system
Condition:
3-9

(44,1)
[ Edit: 2017/ 5/ 8 Model: AIVINJ-N ]
3. Audio system
NAMES AND FUNCTIONS OF AUDIO CONTROL BUTTONS
AIVINJN1-AABAE45E-5D0B-46C4-B8C5-63D6B3725503
AUDIO MAIN BUTTONS
AIVINJN1-BF54B88E-4C49-415B-A092-1CE4DFB2AE85
5GA0199X< >:
Push to eject a CD.
CD slot:
Insert a CD with the label side facing
up.
< >/< >:
Push to select and fast-forward/re-
wind tracks and to tune radio sta-
tions/channels.
<AUDIO>:
Push to display the audio screen.
Push again to display the audio
source select screen.
“Selecting audio source”
(page 3-11)
<VOLUME/ >:
Push to turn on/off the audio system.
Turn to adjust the volume.
<TUNE·SCROLL/OK>:
Turn to manually tune AM/FM, to
select SiriusXM channels or MP3/
WMA/AAC folders.
Push to select the highlighted item
when a menu screen is displayed.
When this button is pushed when no
item on the screen is highlighted, the
audio settings can be adjusted.
“Audio adjustments with audio
adjust bar” (page 3-34)
<BACK>:
Depending on the screen, pushing the
button will display the previous
screen.
Condition:
3-10

(45,1)
[ Edit: 2017/ 5/ 8 Model: AIVINJ-N ]
AUDIO CONTROL STEERING WHEEL SWITCHES
AIVINJN1-8D8B77B0-542F-4040-8910-08948E84EDF4
5GA0187X
< + -> (Volume control):
Push + or - side of the switch to adjust
the volume.
< >/< >:
Push while the audio system is turned
on to change tracks and radio preset
stations or channels.
INFO:
Steering wheel switches are mainly for the
vehicle information display control and
may not be able to operate the touch
screen display in all conditions.
AUDIO OPERATIONS
AIVINJN1-8910DA01-FA52-4035-BC56-AEEA46A2B06E
AUDIO MAIN OPERATION
AIVINJN1-21A3D1F2-D88E-4CCE-B170-B9485A368E7F
Turning audio system on/off
AIVINJN1-DEC1D39C-0B79-4535-9FBF-86BD31187CDD
The ignition switch must be in the ACC or
ON position to turn on the audio system.
Push <VOLUME/
> or <AUDIO> to turn
on the last audio source that was playing
immediately before the system was
turned off. To turn off the audio system,
push <VOLUME/
> again.
Selecting audio source
AIVINJN1-2A84B441-03C2-4E17-9A89-AC3DD54D9273
Selecting from source menu screen:
5GA0188X
1. Push <AUDIO> when the audio screen
is displayed.
2. Select an audio source you prefer to
play.
INFO:
. Touching [Source] on the upper left
corner of the audio screen will also
display the audio source menu screen.
. The audio source can change by
operating the vehicle information display. Refer to the vehicle Owner’s
Manual for the detail of the vehicle
information display.
Selecting from Launch Bar:
5GA0189X
The source icons are displayed on the
Launch Bar. Touch the icon to select the
preferred audio source.
Customizing audio Launch Bar:
The source icons displayed in the audio
Launch Bar can be customized.
3. Audio system
Condition:
3-11

(46,1)
[ Edit: 2017/ 5/ 8 Model: AIVINJ-N ]
3. Audio system
5GA0190X
1. Push <AUDIO> or touch [Source], while
the Audio screen is displayed.
2. Touch [Customize Audio Sources].
3. Drag the preferred source icon to the
Launch Bar.
4. Push <BACK> or touch
to confirm
the setting.
RADIO
AIVINJN1-952EDDB7-2BDB-4ADF-BF9F-C1407C8FAA3E
How to view radio screen
AIVINJN1-C7E211CC-F05B-44A2-86A6-770B8278B318
AM/FM screen:
Condition:
3-12

(47,1)
[ Edit: 2017/ 5/ 8 Model: AIVINJ-N ]
5GA0191X
[AM Menu]/[FM Menu]:
Touch to display the radio menu
screen.
“Radio Menu” (page 3-17)
[Source]:
Touch to display the audio source
screen to select another audio source.
“Selecting audio source”
(page 3-11)
Audio source indicator:
Indicates the currently selected audio
source.
Reception information display:
Reception information currently avail-
able such as frequency, station, name,
etc. are displayed.
Turn direction indicator (if so
equipped):
When a navigation route is set, turning direction and the distance to the
next turn is displayed.
Preset list:
To listen to a preset station, touch the
corresponding station from the preset list. If displayed, touch [ < ] or [ > ] to
scroll the preset list.
Touch and hold one of the keys in the
preset list to store the currently play-
3. Audio system
Condition:
3-13

(48,1)
[ Edit: 2017/ 5/ 8 Model: AIVINJ-N ]
3. Audio system
ing station to that key location.
“Presetting” (page 3-16)
HD Radio mode on/off key (for U.S.):
The HD Radio mode turns on and the
indicator comes on by touching it
while the AM or FM radio screen is
displayed.
SiriusXM screen:
5GA0192X
Condition:
3-14

(49,1)
[ Edit: 2017/ 5/ 8 Model: AIVINJ-N ]
[SXM Menu]:
Touch to display the SiriusXM menu
screen.
“Radio Menu” (page 3-17)
[Source]:
Touch to display the audio source
screen to select another audio source.
“Selecting audio source”
(page 3-11)
Audio source indicator:
Indicates the currently selected audio
source.
Reception information display:
The channel artwork will indicate the
currently tuned channel name. Also
the channel number, artist and title of
the currently played song is displayed.
Channel artwork:
Images or artwork displayed by the
currently playing channel.
[Replay]:
Up to 60 minutes of the broadcast of
the currently playing channel can be
replayed. Touching [Presets] will return to current SiriusXM reception.
Traffic & Weather Now indicator/
Sports flash indicator:
An indicator will be displayed when
audio traffic, weather, and sports
information is available for pre-registered cities and sports teams. The
indicator color signifies the current
status:
Traffic & Weather Now
Gray: not available
White: already read
Green: new information available
Red: replaying
Sports Flash
Gray: not available
White: favorite team(s) not playing
Green: favorite team(s) playing
Red: replaying
Preset list:
To listen to a preset channel, touch
the corresponding channel from the
preset list. [ < ] or [ > ] to scroll the
preset list. If displayed, touch and hold
one of the keys in the preset list to
store the currently playing station to
that key location.
“Presetting” (page 3-16)
Live Mode or Replay Mode indicator:
The Live Mode is displayed when
receiving the currently broadcasting
channel, and the Replay Mode is
displayed when replaying.
NOTE:
. The SiriusXM function will not oper-
ate without a subscription to SiriusXM Satellite Radio.
. HD Radio (for U.S.) reception needs to
be activated to receive HD Radio
broadcasts. This enables you to receive radio broadcasts digitally
(where available), providing a better
quality sound with clear reception.
When this feature is not activated or
HD Radio broadcasts are not available, you will receive analog radio
(AM/FM) broadcasts.
Radio operation
AIVINJN1-70A6C418-6C6D-4604-A521-AA2E6BCD59DC
Radio activation and band selection:
To listen to the radio, turn on the audio
system and select a preferred radio band.
“Selecting audio source” (page 3-11)
3. Audio system
Condition:
3-15

(50,1)
[ Edit: 2017/ 5/ 8 Model: AIVINJ-N ]
3. Audio system
INFO:
When the stereo broadcast signal is weak,
the radio will automatically change from
stereo to monaural reception.
Tuning:
To tune to stations/channels manually,
turn <TUNE·SCROLL/OK> until the preferred station is selected.
Seek tuning:
Push <
>/< > or push and hold
<
>/< > on the steering wheel to seek
up/down to the next receivable broadcast
station or channel.
Presetting:
Up to 6 for AM, 12 for FM and 18 for SXM
stations/channels can be registered in the
preset list.
1. Select a radio band (AM, FM or SXM).
2. Tune to the station/channel you wish
to store.
3. Touch and hold one of the preset
numbers in the preset list.
4. The information such as frequency
(AM/FM), channel number (SXM), etc.
will be displayed on the preset list.
To select and listen to the preset stations/
channels, push <
>/< > on the steering wheel briefly or touch a preferred
station/channel on the preset list on the
radio screen.
Condition:
3-16

(51,1)
[ Edit: 2017/ 5/ 8 Model: AIVINJ-N ]
Radio Menu
AIVINJN1-D950716C-9E53-45AA-A4AF-8EC5B4A2CD6E
Touch [FM Menu], [AM Menu], and [SXM Menu] on each radio screen to display the corresponding menu screen.
The following operations and settings are available.
[FM Menu]/[AM Menu]:
[SCAN] To scan tune the stations, touch [FM Menu] or [AM Menu] on the radio screen and
then touch [SCAN] or [Start Tune Scan]. The stations will be tuned from low to high
frequencies and stop at each broadcasting station for several seconds. Touching
[SCAN] again during this period of several seconds will stop scan tuning and the
radio will remain tuned to that station. Pushing and holding <
>/< > will also
scan tune the stations.
[Info] Display the radio station information.
[Refresh] Touch to update the station list displayed on the right side of the menu screen.
[Station List] Touch to select a station from the station list.
[SXM Menu]:
[Now Playing] Displays the current SXM screen.
[Channel List] Touch to display the channel list.
[Direct Tune] Touch to select a channel by entering channel number directly. Touch [Now Playing] to return to the
SXM screen.
[Tag Artist] Touch to save the current artist as a favorite.
[Tag Song] Touch to save the current song as a favorite.
[Categories] Touch to select a channel by selecting from the category list.
[Start Tune Scan] ZZZ
[Favorite Artists: History] Touch to display the favorite artist alert history.
[Favorite Songs: History] Touch to display the favorite song alert history.
[Sports Flash: History] Touch to display the sports flash alert history.
3. Audio system
Condition:
3-17

(52,1)
[ Edit: 2017/ 5/ 8 Model: AIVINJ-N ]
3. Audio system
[Edit Favorite Artists] Turn on/off the notification for favorite artists . Touching [Turn All Alerts ON]/[Turn All Alerts OFF] can
turn on/off for all artist at once. Touching [
] can delete a stored favorite artist and [Delete All Favorites]
deletes all stored artists.
[Edit Favorite Songs] Turn on/off the notification for favorite songs . Touching [Turn All Alerts ON]/[Turn All Alerts OFF] can
turn on/off for all song at once. Touching [
] can delete a stored favorite song and [Delete All Favorites]
deletes all stored song.
[Edit Sports Flash Teams] Turn on/off the notification for a favorite team. Touching [Turn All Alerts ON]/[Turn All Alerts OFF] can
turn on/off for all team at once. Touching [
] can delete a stored favorite team. [Add Team] can add a
new favorite team to the list.
[Edit Favorite TWN City] ZZZ
[Notification Settings] Touch to turn on/off the notifications for Artists, Songs, and Sports Flash.
Turning on [Alert on Non-Audio Screens] can also display the notification on menu screens other than
the audio screen.
[Customize Channel List] Touch to customize the channel list. Only the selected channels will be tuned in to when you seek or
scan the channels. You can select each item or select [Disable All Channels]/[Enable All Channels]. You
can also turn on/off [Mature Channels].
[Tune Start] Touch to turn on/off the tune start feature. This feature buffers the content playing on each of the
SiriusXM preset channels, so that when a preset channel is selected, the currently playing song always
starts playing from the beginning.
INFO:
. SiriusXM services require a subscrip-
tion after trial period and are sold
separately or as a package. The satellite service is available only in the 48
contiguous USA and DC. SiriusXM satellite service is also available in Canada; see www.siriusxm.ca.
. It may take some time to receive the
activation signal after the initiation of
the SiriusXM Satellite Radio subscription. After receiving the activation
signal, an available channel list will
automatically be updated in the radio.
Change the position of the ignition
switch from LOCK to ACC to update
the SiriusXM channel list.
Condition:
3-18

(53,1)
[ Edit: 2017/ 5/ 8 Model: AIVINJ-N ]
COMPACT DISC (CD) PLAYER
AIVINJN1-A28D720F-2D75-4FE8-83A3-198D5B21527C
How to view CD screen
AIVINJN1-E902B692-E481-4875-91FE-430C4B4967C6
5GA0193X[CD Menu]:
Touch to display the CD Menu screen.
“CD Menu” (page 3-21)
[Source]:
Touch to switch to the source select
screen.
“Selecting audio source”
(page 3-11)
Track information:
Track information such as the song
title, artist name and album name are
displayed.
Audio source indicator:
Indicates that CD is the currently
selected audio source.
Play time and progress bar:
The play time of the track is displayed.
The bar indicates the progress in
playing the current track.
Turn direction indicator (if so
equipped):
When a navigation route is set, turning direction and the distance to the
next turn is displayed.
CD operation keys:
Touch to control CD playback func-
tions.
3. Audio system
Condition:
3-19

(54,1)
[ Edit: 2017/ 5/ 8 Model: AIVINJ-N ]
3. Audio system
[ ] Each time [ ] is touched, the
repeat mode changes.
“Changing play mode”
(page 3-20)
[
] Touch once to return to the
beginning of the current track.
Touch again to select the previous track. Touch and hold to
rewind the current track.
[
] Touch to play the track.
[
] Touch to pause the track.
[
] Touch to select the next track.
Touch and hold to fast-forward
the track.
[
] Each time [ ] is touched, the
random mode changes.
“Changing play mode”
(page 3-20)
CD player operation
AIVINJN1-28CAF061-63D9-4EF3-8A20-5A9D2E94AB19
Loading:
Insert a CD into the slot with the label side
facing up. The CD will be guided automatically into the slot and start playing.
Activation and playing:
The CD mode can be also selected from
the source list with a CD loaded.
“Selecting audio source” (page 3-11)
Skipping tracks:
To skip the tracks, push<
>/< >,
touch [
]/[ ] on the screen, or push
<
>/< > on the steering wheel re-
peatedly until preferred track is selected.
INFO:
Depending on the condition, skipping to
the previous track may require pushing
the button or touching the key twice.
Pushing the button or touching the key
once may only restart the current track
from the beginning.
Changing folders:
To change folders, touch [CD Menu].
“CD Menu” (page 3-21)
Turn <TUNE·SCROLL/OK> to skip to different folders. If no folders are found,
tracks will be skipped.
Fast-forwarding/rewinding:
The following operation methods are
available for rewinding and fast-forwarding the track.
Push and hold <
>/< > or touch and
hold [
]/[ ] to fast-forward or rewind
the track.
Push and holding <
>/< > on the
steering wheel can also fast-forward or
rewind the track.
Changing play mode:
Repeat mode
Touch [
] on the CD screen to change
the repeat mode as follows.
. CD:
(off) ? Repeat All ? Repeat Track ?
(off)
. CD with compressed audio files:
(off) ? [Repeat Folder] ? [Repeat
Track] ? (off)
Random mode
Touch [
] on the CD screen to change
the random mode as follows.
(off) Û [Random]
Ejecting CD:
Push <
> to eject a CD. If the CD is
ejected and left unremoved, it will be
reloaded into the slot for protection.
Condition:
3-20

(55,1)
[ Edit: 2017/ 5/ 8 Model: AIVINJ-N ]
INFO:
The ignition switch must be placed in the
ACC or ON position in order for the CD to
eject.
CD Menu
AIVINJN1-BD38972D-E8A7-43E7-A28D-CE746107BE8D
Touch [CD Menu] on the CD screen to
display the CD menu screen.
The following items are available.
[Now Playing] Touch to return to the CD
screen.
Folder* and
track list
The folder and track list is
displayed.
Touch an item on the list to
select the folder or track.
Touch [
] and go back to
the previous screen.
*: Displayed only when available.
INFO:
Touching [A-Z] and turning <TUNE·SCROLL/OK> can scroll the list to the section
that begins with the letter selected.
USB MEMORY DEVICE PLAYER
AIVINJN1-4ECBAE05-C74A-4D4B-B183-1F4933C3C92B
Connecting USB memory device
AIVINJN1-8B4A7CDA-0428-4D60-A67E-D4AD0C453CB2
WARNING
AIVINJN1-7C36272E-AE1E-43BA-94B2-1E6C0F2EAB4A
Do not connect, disconnect or operate
the USB device while driving. Doing so
can be a distraction. If distracted you
could lose control of your vehicle and
cause an accident or serious injury.
CAUTION
AIVINJN1-CB76B5B0-513A-4CC4-AA5C-3FE7C3714282
. Do not force the USB device into
the USB connection port. Inserting
the USB device tilted or up-sidedown into the port may damage
the port. Make sure that the USB
device is connected correctly into
the USB connection port.
. Do not grab the USB connection
port cover (if so equipped) when
pulling the USB device out of the
port. This could damage the port
and the cover.
. Do not leave the USB cable in a
place where it can be pulled unintentionally. Pulling the cable may
damage the port.
Refer to your device manufacturer’s owner information regarding the proper use
and care of the device.
When compatible storage devices are
plugged into the port, compatible audio
files on the storage devices can be played
through the vehicle’s audio system.
For the location of the USB connection
port:
“USB (Universal Serial Bus) Connection Ports and AUX (auxiliary) input
jack” (page 2-4)
3. Audio system
Condition:
3-21

(56,1)
[ Edit: 2017/ 5/ 8 Model: AIVINJ-N ]
3. Audio system
How to view USB screen
AIVINJN1-E9144E87-0DC7-4702-9C76-7699BDDE627E
5GA0194X
[USB Menu]:
Touch to switch to the USB Menu
screen.
“USB Menu” (page 3-24)
[Source]:
Touch to switch to the source select
screen.
“Selecting audio source”
(page 3-11)
Track information:
Track information such as the song
title, artist name and album name are
displayed.
Device name indicator:
Indicates the name of the USB device
currently playing.
“Selecting audio source”
(page 3-11)
Album artwork
Album artwork is displayed when
available if the setting is turned on.
“USB Menu” (page 3-24)
When the album artwork display
setting is turned off, the turn direction
and the distance to the next turn (if so
equipped) are displayed when a route
is set.
Condition:
3-22

(57,1)
[ Edit: 2017/ 5/ 8 Model: AIVINJ-N ]
Play time and progress bar:
The play time of the track is displayed.
The bar indicates the progress in
playing a track.
USB operation keys:
Touch to control USB playback func-
tions.
[ ] Each time [ ] is touched, the
repeat mode changes.
“Changing play mode”
(page 3-23)
[
] Touch to return to the begin-
ning of the current track.
Touch again to select the previous track. Touch and hold to
rewind the current track.
[
] Touch to play the track.
[
] Touch to pause the track.
[
] Touch to select the next track.
Touch and hold to fast-forward
the track.
[
] Each time [ ] is touched, the
random mode changes.
“Changing play mode”
(page 3-23)
USB memory device player operation
AIVINJN1-D6F756B8-A874-4D4F-BD71-90C3D033F1C0
Activation and playing:
Connecting the USB memory device into
the port will start playing the USB memory.
USB memory device can also be played by
selecting the source on the audio source
menu screen.
“Selecting audio source” (page 3-11)
To pause playing the USB memory device,
touch [
]. To resume playing, touch
[
].
Selecting search method:
A list of search methods is displayed in the
USB menu. Touch [USB Menu] to display
the USB menu. Touch and select an item
to play the USB memory device in your
preferred settings.
Skipping tracks:
To skip the tracks, push <
>/< >,
touch [
]/[ ] on the screen, or push
<
>/< > on the steering wheel re-
peatedly until preferred track is selected.
INFO:
Depending on the condition, skipping to
the previous track may require pushing
the button or touching the key twice.
Pushing the button or touching the key
once may only restart the current track
from the beginning.
Fast-forwarding/rewinding:
To rewind or fast-forward the track, push
and hold <
>/< >, touch and hold
[
]/[ ], or push and hold < >/< >
on the steering wheel.
Changing play mode:
Repeat mode
Touch [
] on the screen to change the
repeat mode as follows.
(off) ? [Repeat Track] ? [Repeat List] ?
(off)
Random mode
Touch [
] on the screen to change the
random mode as follows.
(off) ? [Random] ? (off)
3. Audio system
Condition:
3-23

(58,1)
[ Edit: 2017/ 5/ 8 Model: AIVINJ-N ]
3. Audio system
USB Menu
AIVINJN1-D7405901-8E6D-4B27-8B77-BD50EA7A85CF
Touch [USB Menu] on the USB screen to
display the USB Menu screen.
The following items are available.
[Now Playing]
Touch to display the USB
screen.
[Folder List]*Touch to display the folder
list. Touch an item on the list
to select the folder.
The sub-folder or track list
will be displayed. Select a
sub-folder or track from the
list.
[Album Artwork]
Touch to turn on/off the
album artwork display on the
USB screen.
[Playlists] Touch to display the list ac-
cording to the selected item.
[Artists]
[Albums]
[Songs]
[Genres]
[Compo-
sers]
*: Displayed only when available.
INFO:
Touching [A-Z] and turning <TUNE·SCROLL/OK> can scroll the list to the section
that begins with the letter selected.
iPod® PLAYER
AIVINJN1-92F97DCC-8A7B-4962-B3EF-B537B5AA8CFE
Connecting iPod®
AIVINJN1-86159E90-EC5B-440C-8A60-183226DEE0E7
WARNING
AIVINJN1-C453A87C-64C0-4767-B2B9-1DFB0071D5E4
Do not connect, disconnect or operate
the USB device while driving. Doing so
can be a distraction. If distracted you
could lose control of your vehicle and
cause an accident or serious injury.
CAUTION
AIVINJN1-C6CBE390-ED4E-4097-B728-0BB7E93ABE0F
. Do not force the USB device into
the USB connection port. Inserting
the USB device tilted or up-sidedown into the port may damage
the port. Make sure that the USB
device is connected correctly into
the USB connection port.
. Do not grab the USB connection
port cover (if so equipped) when
pulling the USB device out of the
port. This could damage the port
and the cover.
. Do not leave the USB cable in a
place where it can be pulled unintentionally. Pulling the cable may
damage the port.
Connect the iPod® to the USB connection
port.
“USB (Universal Serial Bus) Connection Ports and AUX (auxiliary) input
jack” (page 2-4)
The battery of the iPod® will be charged
while the device is connected to the
vehicle if the iPod® supports charging via
a USB connection.
Depending on the device and firmware
version of the iPod®, the display on the
iPod® shows a NISSAN or Accessory Attached screen when the connection is
completed. When the iPod® is connected
to the vehicle, the iPod® music library can
only be operated by the vehicle audio
controls.
Compatibility:
Made for
. iPod touch® (5th generation)
. iPod touch® (4th generation)
. iPod classic® (6.2 generation)
Condition:
3-24

(59,1)
[ Edit: 2017/ 5/ 8 Model: AIVINJ-N ]
. iPod classic® (6.1 generation)
. iPod classic® (6th generation)
. iPod nano® (7th generation)
. iPod nano® (6th generation)
. iPod nano® (5th generation)
. iPhone® 6 Plus
. iPhone® 6
. iPhone® 5s
. iPhone® 5c
. iPhone® 5
. iPhone® 4s
INFO:
. Make sure that the iPod® firmware is
updated.
. The Lightning
TM
connector works with
iPhone® 5, iPod touch® (5th generation), and iPod nano® (7th generation).
The 30-pin connector works with
iPhone® 4s, iPod touch® (4th generation), iPod classic® and iPod nano® (5th
and 6th generation).
USB works with iPhone® 5, iPhone® 4s,
iPod touch® (4th and 5th generation)
iPod classic® and iPod nano® (5th
through 7th generation).
. Refer to your device manufacturer’s
owner information regarding the
proper use and care of the device.
3. Audio system
Condition:
3-25

(60,1)
[ Edit: 2017/ 5/ 8 Model: AIVINJ-N ]
3. Audio system
How to view iPod® screen
AIVINJN1-266AD5A0-1330-4370-8D3C-7E9AB4FC7E8E
5GA0195X
[iPod Menu]:
Touch to display the iPod® Menu
screen.
“iPod® Menu” (page 3-27)
[Source]:
Touch to switch to the source list
screen.
“Selecting audio source”
(page 3-11)
Track information:
Track information such as the song
title, artist name and album name are
displayed.
Device name indicator:
Indicates that iPod® is the currently
selected audio source.
Album artwork:
Album artwork is displayed when
available if the setting is turned on.
“iPod® Menu” (page 3-27)
When the album artwork display
setting is turned off, the turn direction
and the distance to the next turn (if so
equipped) are displayed when a route
is set.
Play time and progress bar:
The play time of the track is displayed.
The progress bar indicates the pro-
Condition:
3-26
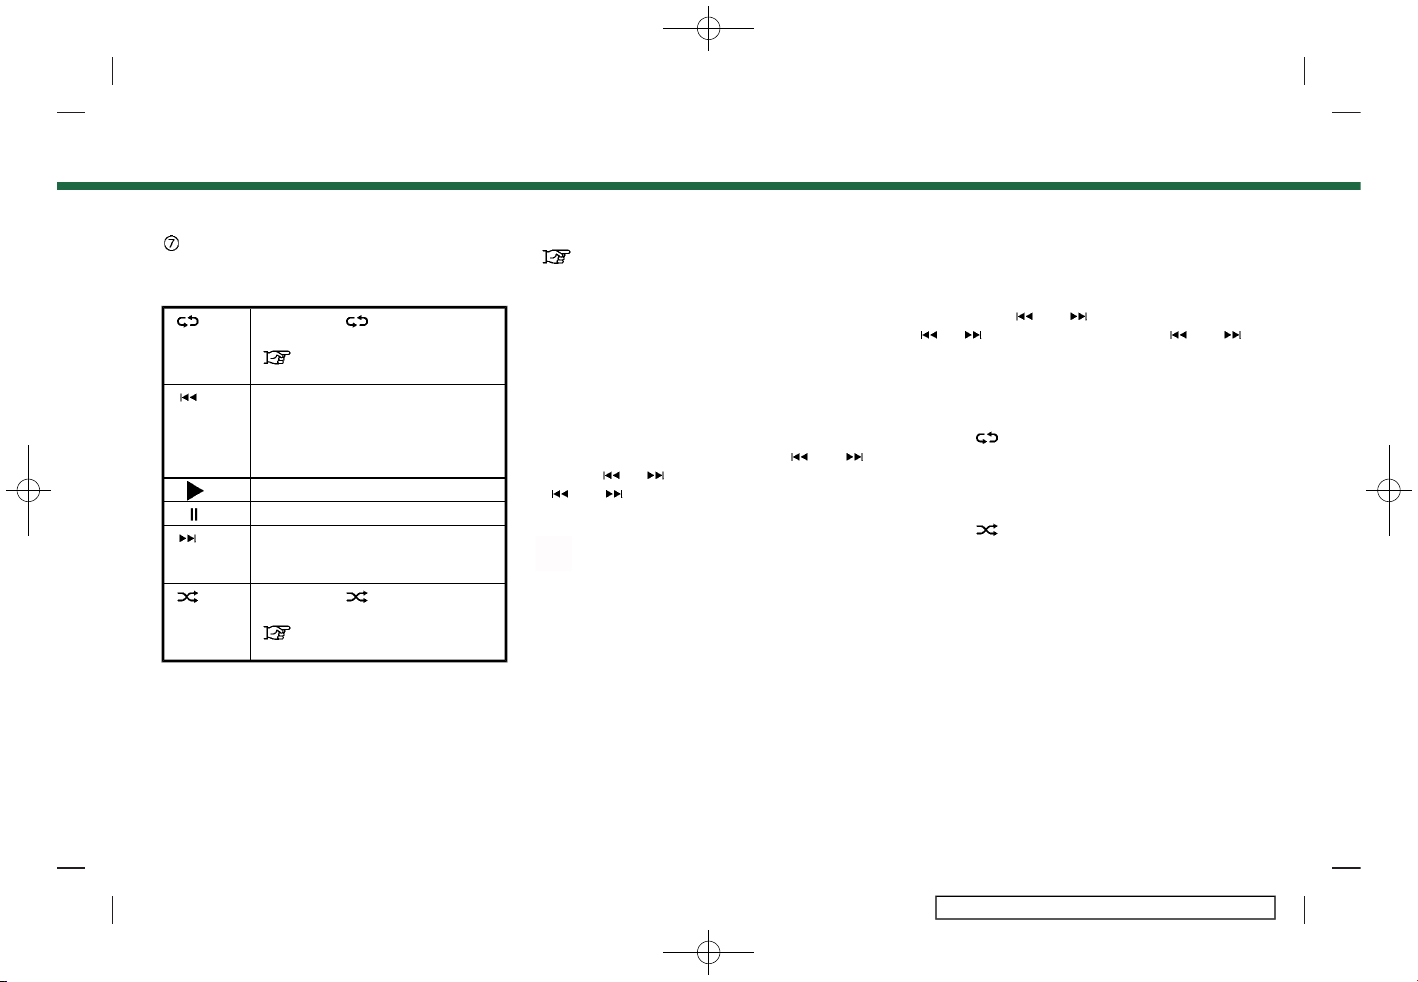
(61,1)
[ Edit: 2017/ 5/ 8 Model: AIVINJ-N ]
gress in playing the current track.
iPod® operation keys:
Touch to control iPod® playback func-
tions.
[ ] Each time [ ] is touched, the
mode changes.
“Changing play mode”
(page 3-27)
[
] Touch to return to the begin-
ning of the current track. Touch
again to select the previous
track. Touch and hold to rewind the current track.
[
] Touch to play the track.
[
] Touch to pause the track.
[
] Touch to select the next track.
Touch and hold to fast-forward
the track.
[
] Each time [ ] is touched, the
mode changes.
“Changing play mode”
(page 3-27)
iPod® player operation
AIVINJN1-28BF6832-2085-494B-A4E6-1813413B09C2
Activation and playing:
Connecting iPod® to the vehicle via USB
cable will activate the iPod® mode.
The iPod® can also be played by selecting
the source on the audio source menu
screen.
“Selecting audio source” (page 3-11)
Selecting search method:
A list of search methods is displayed in the
iPod® menu.
Touch [iPod Menu] to display the iPod®
menu. Touch and select an item to play
the iPod® in your preferred settings.
Skipping tracks:
To skip the tracks, push <
>/< >,
touch [
]/[ ] on the screen, or push
<
>/< > on the steering wheel re-
peatedly until preferred track is selected.
INFO:
Depending on the condition, skipping to
the previous track may require pushing
the button or touching the key twice.
Pushing the button or touching the key
once may only restart the current track
from the beginning.
Turning <TUNE·SCROLL/OK> while a track
is playing will also skip the tracks.
Fast-forwarding/rewinding:
To fast-forward or rewind the track, push
and hold <
>/< >, touch and hold
[
]/[ ], or push and hold < >/< >
on the steering wheel.
Changing play mode:
Repeat mode
Touch [
] on the screen to change the
repeat mode as follows.
(off) ? [Repeat List] ? (off)
Random mode
Touch [
] on the screen to change the
random mode as follows.
(off) ? [Random] ? (off)
iPod® Menu
AIVINJN1-1EDCB51F-8470-481B-BD52-A860687C05EA
Touch [iPod Menu] on the iPod® screen to
display the iPod® menu screen.
The following items are available.
3. Audio system
Condition:
3-27

(62,1)
[ Edit: 2017/ 5/ 8 Model: AIVINJ-N ]
3. Audio system
[Now
Playing]
Touch to display the iPod®
screen.
[Current
List]
Touch to display the menu list
which was displayed most recently.
[Album
Artwork]
Touch to turn on/off the album artwork display on the
iPod® screen.
[Playlists] Touch to display the list ac-
cording to the selected item.
[Artists]
[Albums]
[Songs]
[Genres]
[Compo-
sers]
[Audio-
books]
[Podcasts]
INFO:
On the list screen, touch and hold [
] or
[
] on the right side of the screen to
jump by letter for faster scrolling.
BLUETOOTH® AUDIO
AIVINJN1-6D822548-78A4-4D36-B8BE-13EE7D8B3971
Your vehicle is equipped with Bluetooth®
Audio.
If you have a compatible Bluetooth®
device with streaming audio capability
(A2DP profile), you can set up a wireless
connection between your Bluetooth® device and the in-vehicle audio system. This
connection allows you to listen to the
audio from the Bluetooth® device using
your vehicle speakers. It also may allow
basic control of the device for playing and
skipping audio files using the AVRCP Bluetooth® profile. Not all Bluetooth® devices
have the same level of controls for AVRCP.
Please consult the manual for your Bluetooth® device for more details.
Wireless LAN (Wi-Fi) and the Bluetooth®
functions share the same frequency band
(2.4 GHz). Using the Bluetooth® and the
wireless LAN functions at the same time
may slow down or disconnect the communication and cause undesired noise. It
is recommended that you turn off the
wireless LAN (Wi-Fi) when using the Bluetooth® functions.
Connecting Bluetooth® audio device
AIVINJN1-35FDD5DF-AF21-4074-8409-897CA408B2B2
A Bluetooth® audio device must be connected to the vehicle before operation.
“Setting Bluetooth®” (page 2-16)
Condition:
3-28

(63,1)
[ Edit: 2017/ 5/ 8 Model: AIVINJ-N ]
How to view Bluetooth® audio screen
AIVINJN1-7EB7CC01-4D10-4A62-9367-0139FAD07C36
5GA0196X
[BT Menu]:
Touch to display the Bluetooth® audio
menu screen.
“BT Menu” (page 3-31)
[Source]:
Touch to switch to the source list
screen.
“Selecting audio source”
(page 3-11)
Track information:
Track information such as the song
title, artist name and album name are
displayed.
Device name indicator:
Indicates the name of the Bluetooth
audio device currently playing.
Album artwork:
Album artwork is displayed when
available if the setting is turned on.
“BT Menu” (page 3-31)
When the album artwork display
setting is turned off, the turn direction
and the distance to the next turn (if so
equipped) are displayed when a route
is set.
Play time and Progress bar:
The play time of the track is displayed.
The Progress bar indicates the pro-
3. Audio system
Condition:
3-29

(64,1)
[ Edit: 2017/ 5/ 8 Model: AIVINJ-N ]
3. Audio system
gress in playing the current track.
Bluetooth® audio operation keys:
Touch to control Bluetooth® audio
playback.
[ ] Each time [ ] is
touched, the repeat
mode changes.
“Changing play
mode” (page 3-31)
[
] Touch to return to the
beginning of the current
track. Touch again to
select the previous
track. Touch and hold to
rewind the current track.
[
] Touch to play the track.
[
] Touch to pause the
track.
[
] Touch to select the next
track. Touch and hold to
fast-forward the track.
[
] Each time [ ] is
touched, the random
mode changes.
“Changing play
mode” (page 3-31)
INFO:
Depending on the audio device that is
connected to the vehicle, track information may not be displayed.
Bluetooth® audio operation
AIVINJN1-1383FDB6-EEAE-412C-8E8F-2D0CFC7AD013
The ability to pause, change tracks, fast
forward, rewind, randomize and repeat
music may be different between devices.
Some or all of these functions may not be
supported on each device.
INFO:
Depending on the Bluetooth® audio device that is connected, it may not be
possible to perform audio operations or
a delay may occur before music is played
back.
Activation and playing:
A Bluetooth® audio device can be played
by selecting the source on the audio
source menu screen.
“Selecting audio source” (page 3-11)
To pause playing the Bluetooth® audio,
touch [
]. Touch [ ] to resume
playing.
Skipping tracks:
Push <
>/< >, touch [ ]/[ ] on the
screen, or push <
>/< > on the steer-
ing wheel briefly to skip to the next or the
previous track.
INFO:
Depending on the condition, skipping to
the previous track may require pushing
the button or touching the key twice.
Pushing the button or touching the key
once may only restart the current track
from the beginning.
While a track is playing, turning <TUNE·SC-
ROLL/OK> will also skip the tracks.
Changing folders:
To change folders, touch [BT Menu].
“BT Menu” (page 3-31)
Turn <TUNE·SCROLL/OK> to skip to different folders. If no folders are found,
tracks will be skipped.
Fast-forwarding/rewinding:
To fast-forward or rewind the track, push
and hold <
>/< >, touch and hold
[
]/[ ], or push and hold < >/< >
on the steering wheel.
Condition:
3-30

(65,1)
[ Edit: 2017/ 5/ 8 Model: AIVINJ-N ]
Changing play mode:
Repeat mode
Touch [
] on the screen to change the
repeat mode.
Random mode
Touch [
] on the screen to change the
random mode.
INFO:
Available repeat/random modes change
depending on the connected device.
BT Menu
AIVINJN1-AAD511F7-A469-4A45-8111-0410E225502E
Touch [BT Menu] on the Bluetooth® audio
screen to display the Bluetooth® audio
menu screen.
The following items are available.
[Now Playing]
Touch to display the Bluetooth® audio screen.
[Album Artwork]
Touch to turn on/off the
album artwork display on the
Bluetooth® audio screen.
[Connections]
Touch to display the connections screen.
“connections settings”
(page 2-16)
Folder list * Touch to display the folder
list. Touch an item on the list
to select the folder.
[Current
List]
A list of the currently playing
track is displayed.
*: Displayed only when available.
AUXILIARY (AUX) DEVICES
AIVINJN1-7E4C982E-CE83-4819-8396-9601FE8561DB
Connecting auxiliary devices
AIVINJN1-9776C08E-803B-4D3E-857D-1723F8FE9887
The auxiliary input jack is located in the
media pocket.
“USB (Universal Serial Bus) Connection Ports and AUX (auxiliary) input
jack” (page 2-4)
The auxiliary input jack accepts any standard analog audio input such as from a
portable cassette player, CD player or MP3
player.
INFO:
Insert a 1/8 in (3.5 mm) stereo mini plug in
the audio input jack. If a cable with a mono
plug is used, the audio output may not
function normally.
AUX operation
AIVINJN1-8467D2B9-7D28-4DAB-8F80-11B9ACDD5164
Activation and playing:
Turn on an AUX device.
Connect an AUX cable to the AUX device
and the AUX jack. Select AUX mode from
the audio source menu screen.
“Selecting audio source” (page 3-11)
3. Audio system
Condition:
3-31

(66,1)
[ Edit: 2017/ 5/ 8 Model: AIVINJ-N ]
3. Audio system
How to view AUX screen
AIVINJN1-3A8A4717-B982-4AEC-B5FA-083909A32A94
5GA0197X
[Source]:
Touch to switch to the source list
screen.
“Selecting audio source”
(page 3-11)
Audio source indicator:
Indicates that the AUX source is
currently playing.
Turn direction indicator (if so
equipped):
When a navigation route is set, the
turn direction and the distance to the
next turn are displayed.
Volume Setting keys:
Touch one of the keys to select the
sound output gain from [Low], [Med-
ium] and [High].
SMARTPHONE AUDIO
GUID-09570053-D159-44C3-92FA-82928FDB59BA
You can also listen to music from your
compatible smartphone using Apple CarPlay or Android Auto.
“Apple CarPlay” (page 5-21)
“Android Auto” (page 5-23)
Connecting smartphone
GUID-85D99C1D-6F8E-4540-A0B8-CE584A4F7ED2
Connect the iPhone® or Android device to
the USB connection port.
“USB (Universal Serial Bus) Connection Ports and AUX (auxiliary) input
jack” (page 2-4)
Smartphone audio operation
GUID-869103BD-04F6-4DB6-95CA-436C13C02B75
1. Connect the iPhone® or Android device to the USB connection port and
activate CarPlay or Android Auto.
2. Push <AUDIO>.
3. Touch [Source].
4. Touch [Apple CarPlay] or [Android
Auto] in the audio source menu
screen, and the smartphone audio
starts activating.
“Selecting audio source”
(page 3-11)
Condition:
3-32

(67,1)
[ Edit: 2017/ 5/ 8 Model: AIVINJ-N ]
AUDIO SETTINGS
AIVINJN1-ECFE1718-B192-4A27-91B2-70E3D8B84B09
Audio settings can be adjusted or audio related functions can be turned on/off with the following procedure.
1. Touch [Settings] on the Launch Bar.
2. Touch [Sound].
Setting items
Action
[Bass]
Adjust the speaker tone quality and sound balance by touching [-]/[+], [L]/[R] or [R]/[F].
[Middle]
[Treble]
[Balance]
[Fade]
[Bass enhancer] When this item is turned on, system enhances bass sound.
[Speed-Sensitive Volume] Automatically adjusts the volume depending on the vehicle speed. Touch [-]/[+] to change
the sensitivity level.
3. Audio system
Condition:
3-33

(68,1)
[ Edit: 2017/ 5/ 8 Model: AIVINJ-N ]
3. Audio system
AUDIO ADJUSTMENTS WITH AUDIO ADJUST BAR
AIVINJN1-4037132B-707C-4A3D-B14B-B0CCB3B69C4B
5GA0198X
Sound quality can be adjusted with <TU-
NE·SCROLL/OK>. Push <TUNE·SCROLL/
OK>, when a list screen is not displayed,
and the audio adjust bar is displayed. Each
time <TUNE·SCROLL/OK> is pushed, the
selected setting item will change as follows.
[Bass] ? [Middle] ? [Treble] ? [Balance] ?
[Fade]
Turn <TUNE·SCROLL/OK> to adjust the
level of the selected setting item.
CD/USB MEMORY DEVICE CARE AND CLEANING
AIVINJN1-382E2C0C-F95D-4F32-83DB-7AC976003DF3
CD
AIVINJN1-2435A350-AAE3-4957-A686-FFDF46B8AF14
SAA0451
. Handle a CD by its edges. Never touch
the surface of the disc. Do not bend
the disc.
. Always place the discs in the storage
case when they are not being used.
. To clean a disc, wipe the surface from
the center to the outer edge using a
clean, soft cloth. Do not wipe the disc
using a circular motion.
Do not use a conventional record
cleaner or alcohol intended for industrial use.
. A new disc may be rough on the inner
and outer edges. Remove the rough
edges by rubbing the inner and outer
edges with the side of a pen or pencil
as illustrated.
USB MEMORY DEVICE
AIVINJN1-F355BB54-6B69-4B59-B94F-C82FA1BFE34F
. Never touch the terminal portion of
the USB memory device.
. Do not place heavy objects on the USB
memory device.
. Do not store the USB memory device
in highly humid locations.
. Do not expose the USB memory device
to direct sunlight.
. Do not spill any liquids on the USB
memory device.
Refer to the USB memory device Owner’s
Manual for the details.
Condition:
3-34

(69,1)
[ Edit: 2017/ 5/ 8 Model: AIVINJ-N ]
4 Hands-Free Phone
Bluetooth® Hands-Free Phone System .......................... 4-2
Indicators ......................................................................................... 4-3
Phone ................................................................................................. 4-4
Hands-free text messaging assistant ....................... 4-6
Phone and text message
assistant settings ................................................................... 4-10
Condition:

(70,1)
[ Edit: 2017/ 5/ 8 Model: AIVINJ-N ]
4. Hands-Free Phone
BLUETOOTH® HANDS-FREE
PHONE SYSTEM
AIVINJN1-99952F72-0167-4B11-9D0E-D9F1C385EEA8
WARNING
AIVINJN1-7F406CDD-BABB-46F8-BC69-A755B0FADFB7
. Use a phone after stopping your
vehicle in a safe location. If you
have to use a phone while driving,
exercise extreme caution at all
times so full attention may be
given to vehicle operation.
. If you find yourself unable to de-
vote full attention to vehicle operation while talking on the phone,
pull off the road to a safe location
and stop your vehicle before doing
so.
CAUTION
AIVINJN1-8975B6E7-2E20-43DC-92EC-4B59345EC04D
To avoid draining the vehicle battery,
use a phone only after starting the
engine or the hybrid system.
Your vehicle is equipped with Bluetooth®
Hands-Free Phone System. If you are an
owner of a compatible Bluetooth® enabled cellular phone, you can set up the
wireless connection between your cellular
phone and the in-vehicle phone module.
With Bluetooth® wireless technology, you
can make or receive a telephone call with
your cellular phone in your pocket.
Once a cellular phone is connected to the
in-vehicle phone module, the procedure
for connecting the phone does not need
to be performed again. Your phone will
automatically re-connect to the in-vehicle
phone module when the ignition switch is
placed in the ON position with the selected cellular phone turned on and
carried in the vehicle.
You can register up to 6 different Bluetooth® devices in the in-vehicle phone
module. However, you can talk on only
one cellular phone at a time.
The Voice Recognition system supports
phone and text message commands, so
dialing a phone number using your voice
is possible.
“7. Voice recognition”
Before using the Bluetooth® Hands-Free
Phone System, refer to the following
notes.
. Wireless LAN (Wi-Fi) and the Blue-
tooth® functions share the same frequency band (2.4 GHz). Using the
Bluetooth® and the wireless LAN functions at the same time may slow down
or disconnect the communication and
cause undesired noise. It is recommended that you turn off the wireless
LAN (Wi-Fi) when using the Bluetooth®
functions.
. Set up the wireless connection be-
tween a compatible cellular phone and
the in-vehicle phone module before
using the Bluetooth® Hands-Free
Phone System.
. Some Bluetooth® enabled cellular
phones may not be recognized by
the in-vehicle phone module. Visit the
website below for a recommended
phone list.
www.nissanusa.com/bluetooth/
. You will not be able to use a hands-
free phone under the following conditions:
— Your vehicle is outside of the tele-
phone service area.
— Your vehicle is in an area where it is
difficult to receive radio waves; such
as in a tunnel, in an underground
parking garage, behind a tall building or in a mountainous area.
— Your cellular phone is locked in
order to prevent dialing.
. When the radio wave condition is not
ideal or ambient sound is too loud, it
Condition:
4-2

(71,1)
[ Edit: 2017/ 5/ 8 Model: AIVINJ-N ]
may be difficult to hear the other
person’s voice during a call.
. Immediately after the ignition switch is
placed in the ON position, it may be
impossible to receive a call for a short
period of time.
. Do not place the cellular phone in an
area surrounded by metal or far away
from the in-vehicle phone module to
prevent tone quality degradation and
wireless connection disruption.
. While a cellular phone is connected
through the Bluetooth® wireless connection, the battery power of the
cellular phone may discharge quicker
than usual.
. Visit the website below for trouble-
shooting help if the Bluetooth® HandsFree Phone System seems to be malfunctioning.
www.nissanusa.com/bluetooth/
. Some cellular phones or other devices
may cause interference or a buzzing
noise to come from the audio system
speakers. Storing the device in a different location may reduce or eliminate the noise.
. Refer to the cellular phone Owner’s
Manual regarding the telephone pair-
ing procedure specific to your phone,
battery charging, cellular phone antenna, etc.
. The antenna display on the monitor
may not coincide with the antenna
display of some cellular phones.
. The battery display on the monitor
may not coincide with the battery
display of some cellular phones.
. Keep the interior of the vehicle as quiet
as possible to hear the caller’s voice
clearly as well as to minimize echo.
. If reception between callers is unclear,
adjusting the incoming or outgoing
call volume may improve the clarity.
“Volume and Beeps settings”
(page 2-19)
. The microphone is located near the
map light.
. Reduce background noise as much as
possible by closing windows and
pointing HVAC vents away from the
ceiling.
INDICATORS
AIVINJN1-DF17CCD9-47EB-42F9-B647-1A1218B25DA1
5GF0096X
When a cellular phone is connected
through the Bluetooth® wireless connection, indicators
for phone and text
messaging are displayed on the top of
the screen.
Indicates the number of unread
received messages.
Indicates the Bluetooth® device
that is.
Indicates the strength of the
signal the Bluetooth® device is
receiving.
Indicates the amount of remaining Bluetooth® device battery.
4. Hands-Free Phone
Condition:
4-3

(72,1)
[ Edit: 2017/ 5/ 8 Model: AIVINJ-N ]
4. Hands-Free Phone
PHONE
AIVINJN1-023A5F01-7310-424C-B3E9-547E1F8FC21F
Connecting Bluetooth® Handsfree Phone
AIVINJN1-46BD8347-EF56-4BDE-AE6B-DB97C7EC282D
A cellular phone device must be connected to the Bluetooth® Hands-Free
Phone System before operation. Up to 6
Bluetooth® devices can be connected to
the system.
“Setting Bluetooth®” (page 2-16)
Phone selection
AIVINJN1-205885D8-3C6A-48D8-97F0-5631F1B29D25
Follow the instructions below to select a
connected device for use with the Bluetooth® Hands-Free Phone System.
1. Models with navigation system:
Touch [Phone] on the Launch Bar.
Models without navigation system:
Push <
> on the control panel or
touch [Phone] on the Launch Bar.
2. Touch [Connections] and touch [Bluetooth]. A list of the connected cellular
phones is displayed.
3. Touch one of the connected cellular
phones from the list.
When the connection is successful,
"Connected" is displayed under the
device name.
If [
] displayed in gray, touch [ ].
INFO:
. When touching [
] next to the name,
the cellular phone can be selected as a
hands-free phone only.
. To select a phone, Bluetooth® of the
cellular phone needs to be turned on.
Making a call
AIVINJN1-A10664E4-4636-4046-949D-803558D90AF1
1. Models with navigation system:
Touch [Phone] on the Launch Bar.
Models without navigation system:
Push <
> on the control panel or
touch [Phone] on the Launch Bar.
2. Select one of the following methods to
make a call.
5GF0097X
[Quick Dial] :
Select a telephone number registered
as a Quick Dial number.
“Quick Dial” (page 4-12)
[Phone Book] :
Select a person and the phone number you wish to call from the phonebook.
Depending on the device, the phonebook will be downloaded from the
cellular phone automatically when it
is connected. If the automatic download does not take place, the telephone number must be transferred to
the hands-free phone system from the
cellular phone prior to using this
method.
“Phone settings” (page 4-10)
[Call History] :
Select a telephone number from recent incoming, outgoing or missed
calls.
[Dial Number] :
Enter the phone number manually
using the keypad displayed on the
screen.
“How to input letters and numbers” (page 2-9)
3. Dialing will start and the screen will
change to the call in progress screen.
Condition:
4-4

(73,1)
[ Edit: 2017/ 5/ 8 Model: AIVINJ-N ]
Receiving a call
AIVINJN1-309AF505-32BC-4C5C-80D1-0E512251C11B
5GF0098X
When you receive a phone call, display
switches to the Incoming Call screen and
a ring tone.
Taking a call:
To answer the call, take one of the
following actions.
. Push <
> on the steering wheel.
. Touch [Answer].
Rejecting a call:
To reject the call, take one of the following
actions.
. Push <
> on the steering wheel.
. Touch [Decline].
Holding a call:
To hold the call, touch [Hold Call].
INFO:
Operation for answering and rejecting a
received phone call is also available on the
vehicle information display. Refer to the
vehicle Owner’s Manual for details.
During a call
AIVINJN1-C160F19D-493E-4687-BE13-1F6A2E523B4E
5GF0099X
The call in progress screen will appear
during a call.
To hang up the phone, touch [Hang up].
Operations during a call:
There are some options available other
than hanging up a call or answering/
rejecting incoming calls.
Touch one of the following displayed keys
on the screen to take action.
Available
item
Action
[Use Handset] Transfer the call to the
cellular phone.
[Mute] When muted, your voice
will not be heard by the
person on the other end of
the line.
[Dial Number] Using the touch tone, send
digits to the connected
party for using services
such as voicemail.
[Switch Call]* Answer another incoming
call. The person you are
talking to will be placed on
hold. Push once more to
speak to the person on
hold again.
*: Available when a call is received while on
the line with another person. The availability of this function depends on the
phone device.
INFO:
To adjust the person’s voice to be louder
or quieter, push <+
-> on the steering
wheel or turn <VOLUME/
> while talk-
ing on the phone.
4. Hands-Free Phone
Condition:
4-5

(74,1)
[ Edit: 2017/ 5/ 8 Model: AIVINJ-N ]
4. Hands-Free Phone
Call from a second person:
5GF0100X
When another phone call is received
during a call, the Call Waiting screen will
appear.
Answering call from a second person:
To answer the call from the second
person and place the first caller on hold,
take one of the following actions.
. Push <
> on the steering wheel.
. Touch [Answer].
Rejecting call from a second person:
To reject a call from the second person
and continue the conversation with the
first caller, touch [Decline].
During a call with a second person:
5GF0101X
To hang up the phone and return to the
conversation with the first caller, touch
[Hang up].
To switch between two calls on line, touch
[Switch Call].
HANDS-FREE TEXT MESSAGING ASSISTANT
AIVINJN1-9092E6E3-0312-4427-83C9-7BCEA4744D55
WARNING
AIVINJN1-16484565-69F4-46E9-97B3-C1982598651E
. Use the text messaging feature
after parking your vehicle in a safe
location. If you have to use the
feature while driving, exercise extreme caution at all times so full
attention may be given to vehicle
operation.
. Laws in some jurisdictions may
restrict the use of “Text-toSpeech.” Check local regulations
before using this feature.
. Laws in some jurisdictions may
restrict the use of some of the
applications and features, such as
social networking and texting.
Check local regulations for any
requirements.
. If you are unable to devote full
attention to vehicle operation
while using the text messaging
feature, pull off the road to a safe
location and stop your vehicle.
CAUTION
AIVINJN1-6D008478-9197-44FF-B37B-98DEC75BD2FC
This feature is disabled if the connected device does not support it. See
the phone’s Owner’s Manual for details and instructions.
The system allows for the sending and
receiving of text messages through the
vehicle interface.
Condition:
4-6

(75,1)
[ Edit: 2017/ 5/ 8 Model: AIVINJ-N ]
Receiving a message
AIVINJN1-21DB93A3-3BB9-4A41-BD63-D9FB66E9ED45
5GF0102X
When the cellular phone connected to the
vehicle receives a text message, a notification will appear on the touch screen
display and on the vehicle information
display with a tone.
To check the message, touch [Read].
Touch [Ignore] to save the message to
be checked later.
If you want to respond using a predefined
message, touch the message for auto
reply
.
The text message for auto reply can be
edited.
“Phone settings” (page 4-10)
INFO:
. Depending on the cellular phone, no-
tification display setting needs to be
turned on the phone device.
. Operation for reading a new message
is also available on the vehicle information display. Refer to the vehicle
Owner’s Manual.
Displaying received message list
AIVINJN1-95452804-687D-42E4-A40B-91BFF2EC5D60
5GF0103X
1. Models with navigation system:
Touch [Phone] on the Launch Bar.
Models without navigation system:
Push <
> on the control panel or
touch [Phone] on the Launch Bar.
2. Touch [Text Message].
3. Touch an item on the list to read or
reply to the message.
INFO:
Up to 20 messages can be stored in the
message list.
Received message screen
AIVINJN1-C9EDB768-A890-45FB-A50B-C65A60FEEDEE
5GF0104X
Touching [Read] on the new message
notification screen or selecting a message
from the message list will show the details
of the received message on the display.
Available actions:
. [Prev.]:
Touch to read the previous message.
. [Next]:
Touch to read the next message.
. [Play]/[Stop]:
Touch [Play] to have the hands-free
phone system read out the received
message. Touch [Stop] to stop reading.
4. Hands-Free Phone
Condition:
4-7

(76,1)
[ Edit: 2017/ 5/ 8 Model: AIVINJ-N ]
4. Hands-Free Phone
. [Call]:
If the sender of the message is registered in the Phonebook, touch this
icon to make a call to the sender.
. [Reply]:
A reply message can be selected from
the template.
“Sending a text message”
(page 4-8)
INFO:
. Available keys may vary depending on
the situations.
. If the sender’s name and phone num-
ber is registered in the Phonebook, the
name of the sender is displayed when
a message is received.
. To adjust the message reading voice
volume, push <+
-> on the steering
wheel or turn <VOLUME/
>.
. Some of the operations are also avail-
able on the vehicle information display. Refer to the vehicle Owner’s
Manual for details.
Sending a text message
AIVINJN1-2F6880B3-BAEC-4B6F-91B4-5465323E6184
This function may not be supported
depending on the phone device.
5GF0109X
1. Models with navigation system:
Touch [Phone] on the Launch Bar.
Models without navigation system:
Push <
> on the control panel or
touch [Phone] on the Launch Bar.
2. Touch [Text Message].
3. Touch [Create Message].
Condition:
4-8

(77,1)
[ Edit: 2017/ 5/ 8 Model: AIVINJ-N ]
The following items are available.
Available item
Action
[To]
[Enter Number by Keypad] Enter the phone number of the recipient using the keypad. Touch [OK] to
confirm.
[Quick Dial] Select a recipient from the Quick Dial list.
[Phonebook] Select a contact from the Phonebook.
[Call History] Select a contact/phone number from call history.
[Select Text] [Predefined] Touch to display a list of pre-defined text messages.
[Customized] Touch to display a list of custom text message templates.
Custom text can be created or edited from the setting menu.
“Phone and text message assistant settings” (page 4-10)
[Send] Touch to send the message.
4. Hands-Free Phone
Condition:
4-9

(78,1)
[ Edit: 2017/ 5/ 8 Model: AIVINJ-N ]
4. Hands-Free Phone
PHONE AND TEXT MESSAGE ASSISTANT SETTINGS
AIVINJN1-1513E8E2-AF29-4D62-968F-3689E6A05889
Phone settings
AIVINJN1-113ACEB2-74B1-46EA-92C5-7C0462E956E7
Bluetooth® Hands-Free Phone System settings can be changed according to the user’s preference.
1. Touch [Settings] on the Launch Bar.
2. Touch [Phone].
The following phone setting items are available.
Setting item Action
[Connections]
Display the Connections screen. Phone connection, selection,
deletion or etc,, are available.
“connections settings” (page 2-16)
[Quick Dial] [Edit] Entries in the Quick Dial can be edited. Touch [Add New] to register
a new entry.
“Quick Dial” (page 4-12)
[Delete All] Deletes all of the phone number in the Quick Dial.
[Phone Book] [Download Entire Phone Book] All of the phone numbers that are stored in a phonebook of a
cellular phone that is connected to the vehicle are downloaded at
once.
[Auto Downloaded] Turns on/off automatic downloading of the phonebook from the
connected cellular phone.
[Sort Phonebook by] Changes the sorted order of contacts in the phonebook.
[Text Message] [Text Message] Turns the text message function on/off.
[Text Message Ringtone] Turns the incoming message sound on/off.
[Signature] Turns the signature setting for the outgoing text message on/off.
[Auto Reply] Turns on/off the automatic text message reply function.
[Auto Reply Text Message] Selects the text message to be used for the automatic reply
function.
[Edit Custom Text] Creates or edits a customized text message reply.
Condition:
4-10

(79,1)
[ Edit: 2017/ 5/ 8 Model: AIVINJ-N ]
[Notifications] [Driver Only] When this item is turned on, incoming call notification is displayed
only in the vehicle information display.
[Vehicle Ringtone] Turns the vehicle ringtone on/off.
[Automatic Hold] When this item turns on, an incoming phone call will be put on hold
automatically.
4. Hands-Free Phone
Condition:
4-11

(80,1)
[ Edit: 2017/ 5/ 8 Model: AIVINJ-N ]
4. Hands-Free Phone
Quick Dial
AIVINJN1-0FB27751-B822-433A-977A-435B2430D290
5GF0107X
Up to 20 Quick Dial entries can be
registered.
Quick Dial entries can be used to quickly
make a call or send text messages.
Registration:
1. Models with navigation system:
Touch [Phone] on the Launch Bar.
Models without navigation system:
Push <
> on the control panel or
touch [Phone] on the Launch Bar.
2. Touch [Quick Dial].
3. Touch [Edit].
4. Touch [Add New] to register a phone
number to the Quick Dial list.
5. Select a method for registration.
Available methods:
. [Copy from Call History]:
A phone number can be selected
from [All], [Incoming], [Outgoing], or
[Missed] call history lists.
. [Copy from Phone Book]:
A phone number can be selected
from the Phonebook.
. [Enter Number with Keypad]:
A phone number can be entered
manually using keypad.
INFO:
Available methods may vary depending on cellular phone support.
6. When a phone number has been
selected, the registration screen is
displayed. Enter the phone number
and edit the entry information as
necessary.
7. Touch [OK] to save the entry.
INFO:
Quick Dial entries can also be registered by touching [Settings] on the
Launch Bar and then selecting
[Phone].
“Phone settings” (page 4-10)
Voice Tag:
A voice tag can be recorded for each of
the registered Quick Dial numbers and
can be used to dial the number by speaking it.
5GF0108X
On the Quick Dial registration screen,
select [Relationship / Voice Tag].
. Select a preferred voice tag from the
list.
. Touch [Customize Voice Tag] and
touch [Record] to register your original
voice tag.
Condition:
4-12

(81,1)
[ Edit: 2017/ 5/ 8 Model: AIVINJ-N ]
INFO:
. Touch [Play] to play the recorded voice
tag.
. Touch [Delete] to delete the voice tag.
4. Hands-Free Phone
Condition:
4-13

(82,1)
[ Edit: 2017/ 5/ 8 Model: AIVINJ-N ]
4. Hands-Free Phone
MEMO
Condition:
4-14

(83,1)
[ Edit: 2017/ 5/ 8 Model: AIVINJ-N ]
5 Information
Information menu ........................................................................... 5-2
Updating System software ................................................ 5-4
NissanConnect
SM
Services (if so equipped) ................ 5-5
Subscription to NissanConnect
SM
Services .......... 5-5
Legal disclaimer ......................................................................... 5-5
NissanConnect
SM
Services features ........................... 5-5
NissanConnect
SM
Services Menus ............................... 5-9
Emergency support .............................................................. 5-13
NissanConnect
SM
Services settings ......................... 5-15
SiriusXM Travel Link (if so equipped) ............................. 5-16
Viewing SiriusXM Travel Link ......................................... 5-16
Notes on SiriusXM Traffic information .................. 5-16
Using Sirius XM Travel Link ............................................. 5-18
Apple CarPlay ................................................................................... 5-21
Compatibility .............................................................................. 5-21
Apple CarPlay operation ................................................... 5-21
Apple CarPlay settings ....................................................... 5-22
Apple CarPlay system limitations .............................. 5-22
Android Auto .................................................................................... 5-23
Compatibility .............................................................................. 5-23
Initial Android Auto settings .......................................... 5-23
Android Auto operation .................................................... 5-24
Android Auto settings ........................................................ 5-25
Android Auto system limitations ............................... 5-25
Condition:

(84,1)
[ Edit: 2017/ 5/ 8 Model: AIVINJ-N ]
5. Information
INFORMATION MENU
AIVINJN1-5E9B2C85-D229-414A-96FE-2A3389057A2B
The information screen sets or displays various information that is helpful for using the vehicle.
5GH0750X
Push <MENU> and then touch [Info] on the Launch Bar to display the Information menu.
Available items may vary depending on models and specifications.
Menu item Result
[NissanConnect Services] Display the NissanConnect
SM
Services menu screen.
“NissanConnectSMServices” (page 5-5)
[SXM Weather] Display the the SXM Weather screen.
“Using Sirius XM Travel Link” (page 5-18)
[Traffic Information] Display the Traffic Information screen.
“Viewing traffic information” (page 6-45)
[SXM Sports] Display the SXM Sports screen.
“Using Sirius XM Travel Link” (page 5-18)
[SXM Stocks] Display the SXM Stocks screen.
“Using Sirius XM Travel Link” (page 5-18)
[SXM Fuel Prices] Display the SXM Fuel Prices screen.
“Using Sirius XM Travel Link” (page 5-18)
[SXM Parking] Display the SXM Parking screen.
“Using Sirius XM Travel Link” (page 5-18)
Condition:
5-2

(85,1)
[ Edit: 2017/ 5/ 8 Model: AIVINJ-N ]
Menu item Result
[SXM Movie Listings] Display the SXM Movie Listings screen.
“Using Sirius XM Travel Link” (page 5-18)
[Vehicle] [Eco Drive Report] Displays the Eco Drive Report.
Your driving score will be displayed in real time, with 100 points
designated as the score for ideal eco-driving.
Touch [History] to view the Drive Report history. Touch [Reset] to clear the
past records.
To improve your score:
. When starting off, depress the accelerator gently.
. When cruising, accelerate and decelerate as little as possible.
. When decelerating, release the accelerator early.
[Energy Flow] Displays energy information. Touch [History] to display the Fuel Economy
History screen.
For details of the Energy Flow, refer to the vehicle Owner’s Manual.
[Where am I?] The name and distance of the next/previous street, and other informa-
tion that indicates the current vehicle location are displayed. GPS latitude
and longitude are shown on the bottom right.
[System Information] [Software Version] Displays the information of the overall version, vehicle ID, etc.
[Software Update] The System Software can be updated.
“Updating System software” (page 5-4)
[Map Update] The Map data can be updated.
“How to update map data” (page 6-64)
[SXM Information] Displays the SiriusXM information.
The signal quality, subscription status and SXM radio ID are displayed.
[Licence Information (OSS)] Displays the Open Source Software (OSS) licenses information.
[GPS Position] Displays GPS information, such as number of satellites, latitude/long-
itude, and approximate altitude, etc.
[Apps] [Apple CarPlay] Display the Apple CarPlay screen.
“Apple CarPlay” (page 5-21)
5. Information
Condition:
5-3

(86,1)
[ Edit: 2017/ 5/ 8 Model: AIVINJ-N ]
5. Information
Menu item Result
[Android Auto] Display the Android Auto screen.
“Android Auto” (page 5-23)
INFO:
A SiriusXM Travel Link or SiriusXM Traffic subscription is necessary to receive SiriusXM information services.
UPDATING SYSTEM SOFTWARE
GUID-C5812199-D226-4CAE-88BC-9850F5D75D4A
System software updates can be downloaded via Wi-Fi.
1. Connect the Wi-Fi device.
“Wi-Fi Setting” (page 2-17)
2. Push <MENU> on the control panel
and then touch [info] on the Launch
Bar.
3. Touch [System Information].
4. Touch [Software Update].
INFO:
When [Update Settings] is set to [Auto],
a notification is made in case that
software is updated.
5GH0781X
5. Touch [Start Software Update]. The
current software version and date of
last check are displayed.
6. To check for available updates, touch
[Check For and Update]. A message is
displayed when update availability is
confirmed.
7. Touch [Download] to download the
latest software update.
INFO:
. If updating software is unnecessary,
touch [OK] to return to the previous
screen.
. You will be charged separately
when the internet communication
is made via smartphones. Consult
your communication companies regarding the communication fee.
. [Export Software Update Informa-
tion] is not available on this system.
Condition:
5-4

(87,1)
[ Edit: 2017/ 5/ 8 Model: AIVINJ-N ]
NISSANCONNECTSMSERVICES
(if so equipped)
AIVINJN1-17324563-EABE-48D2-BF54-CA6C6411D90B
SUBSCRIPTION TO NISSANCONNECT
SM
SERVICES
AIVINJN1-79859816-B70D-4DAD-AB81-2CEDA8C9C449
Except for services received under Demonstration Mode, it is necessary to
subscribe to NissanConnect
SM
Services in
order to use NissanConnect
SM
Services.
To activate NissanConnect
SM
Services,
you can enroll via the NissanConnect
SM
Services Companion App, NissanConnect
SM
portal website, or a NISSAN dealer.
NissanConnect
SM
Services are offered by
SiriusXM or other third party vendors in
accordance with the terms and conditions and privacy policies outlined in a
Subscription Agreement.
LEGAL DISCLAIMER
AIVINJN1-738A7C04-99EB-48FC-9CCD-BDCCDF536ECB
Avoid operating NissanConnectSMServices in such a way that you are distracted
while driving. Except for services provided
under Demonstration Mode, a NissanConnect
SM
Services Subscription Agreement
is required to use this service.
Beginning on the date of purchase of your
vehicle, a trial period for the services is
included for a limited period of time. At the
expiration of the trial subscription period,
your credit card will be charged and your
service will automatically renew in accordance with the terms of your NissanConnect
SM
Services Subscription Agreement.
Services are dependent upon subscription
enrollment and the telematics device
being in operative condition, cellular connection availability, navigation map data,
and GPS satellite signal reception, which
can limit the ability to reach NissanConnect
SM
Services or to receive support. The
service requires a compatible GSM/GPRS
cellular network. Should the cellular provider terminate or restrict network service, services will not be available. Under
this circumstance, your service may be
suspended or terminated without notice
and without liability to NISSAN, NISSAN’s
third party service providers, the underlying wireless carrier or any third party
beneficiary. In the event that a change of
telecommunications systems or services
becomes necessary, you are solely responsible for replacing, as well as the cost
of replacing, any equipment in the vehicle
that is necessitated. Terms and conditions
of NissanConnect
SM
Services Subscription
Agreement apply.
NISSANCONNECTSMSERVICES
FEATURES
AIVINJN1-6C449EE6-7E5C-4FD6-9F16-E808A8403302
NissanConnectSMServices provides various types of information and services by
connecting your vehicle to the NissanConnect
SM
Services Data Center and Nis-
sanConnect
SM
Services Response Center
using the TCU (Telematics Control Unit)
installed in your vehicle.
WARNING
AIVINJN1-3351361F-A754-4DC9-B209-4D2EF539E24B
. Radio waves could adversely af-
fect electric medical equipment.
Individuals who use a pacemaker
should contact the device manufacturer regarding any possible
effects before using the system.
. The TCU antenna is installed inside
the upper central part of the instrument panel. An occupant
should not get any closer to the
antenna than specified by the
pacemaker manufacturer. The
radio waves from the TCU antenna
may adversely affect the operation of the pacemaker while using
the NissanConnect
SM
Services.
. Please note that the Automatic
Collision Notification (ACN) service
and Emergency Calling (E-Call)
5. Information
Condition:
5-5

(88,1)
[ Edit: 2017/ 5/ 8 Model: AIVINJ-N ]
5. Information
function cannot be used in the
following conditions:
— The vehicle moves outside the
NissanConnect
SM
Services area
and connection with the TCU
(Telematics Control Unit) is affected.
— The vehicle is in a location with
poor signal reception such as a
tunnel, underground parking,
behind a building or in a mountainous area.
. It may not be possible to make an
emergency call depending on the
severity of a collision and/or emergency.
. Emergency functions and services
will not be available without a paid
subscription to NissanConnect
SM
Services.
. The Automatic Collision Notifica-
tion (ACN) service may not function
properly depending on the severity of a collision and/or emergency.
INFO:
. NissanConnect
SM
Services features
are dependent upon subscription enrollment and the telematics device
being in operative condition, cellular
connectivity, navigation map data and
GPS satellite signal reception. Terms
and conditions of the NissanConnect
SM
Services Subscription Agree-
ment apply.
. Enrollment is required in order to
receive NissanConnect
SM
Services.
The services that can be received vary
depending on the plan in which you
are enrolled.
. A six-month trial is included beginning
on the date of purchase, however you
must still be enrolled and activated to
use services.
. After the trial period, you must enroll in
a paid subscription for NissanConnect
SM
Services to continue using the
features. The services that can be
received vary depending on the plan
to which you subscribe.
. Laws in some jurisdictions may restrict
the use of “Text-to-Speech.” Check
local regulations before using this
feature.
NissanConnect
SM
Services may be updated. The latest detailed information is
available on the following websites or
from the support line.
NissanConnect
SM
Services website:
For U.S.
www.nissanusa.com/connect
For Canada
www.nissan.ca/nissanconnect
(English)
www.nissan.ca/nissanconnect/fr
(French)
NissanConnect
SM
Services support
line:
1-855-426-6628
. Roadside Assistance Service:
Enhanced Roadside Assistance allows
you to receive assistance from the
Roadside Response Specialist for a
non-emergency incident that requires
a towing or third-party response service. The service is accessed by touching the Voice Menu button on the
navigation screen. Roadside Assistance may also be used in conjunction
with the Emergency Assistance service, if warranted.
“Emergency support” (page 5-13)
Condition:
5-6

(89,1)
[ Edit: 2017/ 5/ 8 Model: AIVINJ-N ]
. Emergency Calling (E-Call):
The Emergency Calling (E-Call) feature
provides emergency assistance by
connecting to a Response Specialist.
In the event of an emergency, by push
the in-vehicle <SOS> button to use this
feature. The Response Specialist provides various assistance depending on
the situation.
“Emergency support” (page 5-13)
. Automatic Collision Notification
(ACN):
The TCU (Telematics Control Unit)
generates a signal automatically to
the NissanConnect
SM
Services Response Center in the case of an
accident severe enough to trigger
one of the vehicle’s air bags. Upon
the signal, a Response Specialist receives the vehicle location and customer information and notifies the
proper authorities in accordance with
established policies and procedures.
. Curfew Alert:
Customers can set time interval for
acceptable and unacceptable operation of the vehicle via NissanConnect
SM
Portal Website and
NissanConnect
SM
Services Companion
App. If the time restrictions are violated, the customer will be automati-
cally notified (e-mail, text message, or
phone call).
. Remote Door Lock/Unlock:
The Remote Door Lock/Unlock feature
allows the customer to access the
vehicle remotely from the NissanConnect
SM
Services website or Companion
App to send lock or unlock commands
to the vehicle.
“Connecting to Interactive Voice
Menu” (page 5-10)
. Remote Sound Horn and Flash
Lights:
Customers can activate the vehicle’s
headlights and horn via the NissanConnect
SM
Services website or Com-
panion App.
. Remote Engine Start:
If the vehicle is equipped with both
TCU (Telematics Control Unit) and
Remote Start, customers can remotely
start the vehicle via the NissanConnect
SM
Services website or Companion
App.
. Alarm Notification:
Customers will be notified if the vehicle
alarm system is activated based on
their notification preferences (e-mail,
text, phone call).
. Boundary Alert:
Customers can set an area for the
vehicle to stay in or out of via the
NissanConnect
SM
Services website or
Companion App. Customers will be
notified when vehicle is out-of-bounds
based on their notification preferences (e-mail, text, phone call).
. Maintenance Alert/Reminder:
The center sends maintenance and
other relevant info. to registered email address (PC/Mobile) based on the
vehicle information (e.g. driving mileage and etc.) sent at the center access
timing. Details of vehicle information
are separately examined.
. Journey Planner:
Customers can create a multiple waypoint route via Journey Planner on the
NissanConnect
SM
Services website
and send the details directly to their
vehicle.
. Destination Download:
Customers can search for different
locations via the NissanConnect
SM
Services website and send them directly to their vehicle.
. Connected Search:
Customers can access Internet search
engines directly from the vehicle to
5. Information
Condition:
5-7

(90,1)
[ Edit: 2017/ 5/ 8 Model: AIVINJ-N ]
5. Information
find exact destinations to navigate to.
. Stolen Vehicle Locator:
In the event that the customer’s vehicle is stolen, after filing a police report
the customer can contact NissanConnect
SM
Services via phone and report
the vehicle stolen. At that point, NissanConnect
SM
Services emergency
support staff will work with authorities
to attempt to recover the vehicle.
. Valet Alert:
Customers will be notified if their
vehicle is driven more than 0.2 miles
once they activate Valet Alert via the
NissanConnect
SM
Services website or
Companion App.
Notice to Bluetooth® Hands-Free
Phone users
AIVINJN1-A3748C05-1F87-4558-96C7-C217C525367A
The Bluetooth® Hands-Free Phone System will be disabled and not be able to
take phone calls while the vehicle is
connected to the NissanConnect
SM
Services Response Specialists or the emergency support staff at the
NissanConnect
SM
Service Response Center. This is to avoid various services by
NissanConnect
SM
Services Response Specialists (such as Assisted Search) and
NissanConnect
SM
Services emergency
support staff being interrupted by incom-
ing calls. Incoming phone calls received
while the vehicle is connected to the
Service Center will not be listed in the call
history of the Bluetooth® Hands-Free
Phone System. However those incoming
calls may be listed in the call history of
your mobile phone, depending on its
capabilities. After disconnecting communication with the NissanConnect
SM
Services Response Specialist or
NissanConnect
SM
Services emergency
support staff, check the incoming call
history on your mobile phone when it is
safe to do so.
Service application
AIVINJN1-6DCCAA7A-ED81-4962-9108-ED1D69CB8EDF
A separately purchased NissanConnect
SM
Services subscription is required. For more
details, refer to the NissanConnect
SM
Services website or contact the NissanConnect
SM
Services support line.
NissanConnect
SM
Services website:
For U.S.
www.nissanusa.com/connect
For Canada
www.nissan.ca/nissanconnect
(English)
www.nissan.ca/nissanconnect/fr
(French)
NissanConnect
SM
Services support
line:
1-855-426-6628
INFO:
If the vehicle is owned by another person
and is resold, the subscription for this
service must be canceled and all data
stored on the device must be deleted.
Operating tips
AIVINJN1-1B98368B-E567-43F0-A4F2-C01EC0EA40F0
WARNING
AIVINJN1-D56B9698-6357-41FF-A5C7-FC6C7993EDEA
. Use NissanConnectSMServices
after stopping your vehicle in a
safe location. If you have to use
NissanConnect
SM
Services while
driving, exercise extreme caution
at all times so full attention may be
given to vehicle operation.
. If you are unable to devote full
attention to vehicle operation
while talking with the NissanConnect
SM
Services, pull off the road to
a safe location and stop your
vehicle.
. Do not use NissanConnect
SM
Services
with the engine or the hybrid system
stopped. Doing so may discharge the
Condition:
5-8

(91,1)
[ Edit: 2017/ 5/ 8 Model: AIVINJ-N ]
vehicle battery.
. NissanConnect
SM
Services cannot be
used under the following conditions:
— NissanConnect
SM
Services subscrip-
tion has expired.
— The vehicle is outside the area
where the cellular network service
is receivable.
— The vehicle is in a location with poor
signal reception such as tunnels,
underground parking garages, behind buildings or in mountainous
areas.
— The line is busy.
— The TCU (Telematics Control Unit) or
other systems of your vehicle are
not working properly.
— The NissanConnect
SM
Services net-
work system is disabled.
. Information Feeds download cannot
be used when the vehicle is connected
to the NissanConnect
SM
Services Data
Center and NissanConnect
SM
Services
Response Center.
. Communication with the NissanCon-
nect
SM
Services Data Center is related
to the data communication mode and
may cause occasional difficulty in
receiving signals, and the signal recei-
vable area may be limited compared
to regular mobile phones.
. You may hear clicks or experience
interruptions while speaking with the
NissanConnect
SM
Services Response
Specialists. This is due to a shift in the
connection zone and is not a malfunction.
. Depending on the line used, the sound
volume may decrease. Adjust the volume as necessary.
. Received sounds may be distorted or
ambient noise may sound like voices
of a crowd. This is due to the use of the
digital line and is not a malfunction.
. You may hear your own voice from the
speaker when talking with the NissanConnect
SM
Services Response Specialists due to a network disturbance.
When this occurs, reconnect the line
after a few minutes or at a different
location.
. This vehicle incorporates a communi-
cation device that is called a TCU
(Telematics Control Unit). The communication connection between this unit
and the NissanConnect
SM
Data Center
allows for various services. When the
system connects to the NissanConnect
SM
Data Center, an antenna icon
will appear in the upper right corner of
the screen. Use the service in a location where the symbol representing
good signal reception appears on the
screen.
: When the signal reception is good
: When the signal reception is bad
. NissanConnect
SM
Services uses the
TCU (Telematics Control Unit). Even if
the signal strength bar of the invehicle data communication module
indicates good reception, connection
to the NissanConnect
SM
Data Center
may be disabled. This does not indicate a malfunction. Operate the system again after a few minutes.
NISSANCONNECTSMSERVICES
MENUS
AIVINJN1-F0273C25-12FE-4DB7-B66D-1C90E9FC4E99
With NissanConnectSMServices, various
information can be received and displayed on the screen. The information
can also be announced by the system.
1. Push <MENU> and then touch [Info] on
the Launch Bar.
2. Touch [NissanConnect Services].
3. Select an item from the NissanConnect
SM
Services menu screens.
5. Information
Condition:
5-9

(92,1)
[ Edit: 2017/ 5/ 8 Model: AIVINJ-N ]
5. Information
Available items Content
[Call Nissan Assistance]
The system connects to the NissanConnect
SM
Services
center. Various services to support
your driving are
available by answering Interactive
Voice Menu.
“Connecting to
Interactive
Voice Menu”
(page 5-10)
[Connected Search] Searches for a des-
tination via the Internet and sets a
route using the vehicle navigation system.
“Searching by
connecting to
the internet”
(page 6-24)
[Destination Send to
Car]
Access a list of destinations sent to the
vehicle from the
NissanConnect
SM
Services center.
“Using Destination Send to
Car”
(page 6-24)
[Journey Planner] Sets a route plan
downloaded from
the NissanConnect
SM
Services
website.
“Using Journey
Planner”
(page 6-25)
[Message Box] Access the mes-
sages sent to the
vehicle from the
NissanConnect
SM
Data Center.
“Message Box”
(page 5-11)
[NissanConnect Services Settings]
NissanConnect
SM
Services settings
can be changed.
“NissanConnect
SM
Services
settings”
(page 5-15)
Connecting to Interactive Voice Menu
AIVINJN1-421A0B6E-1AA0-41D5-9584-32C3CFD22611
Various services to support your driving
are available by using the Interactive
Voice Menu. For more details, refer to the
NissanConnect
SM
Services website or
contact the NissanConnect
SM
Services
support line.
NissanConnect
SM
Services website:
For U.S.
www.nissanusa.com/connect
For Canada
www.nissan.ca/nissanconnect
(English)
www.nissan.ca/nissanconnect/fr
(French)
NissanConnect
SM
Services support
line:
1-855-426-6628
1. Push <MENU> and touch [Info] on the
Launch Bar.
2. Touch [NissanConnect Services].
3. Touch [Call Nissan Assistance].
4. The system connects to the NissanConnect
SM
Services center and menu
options will be announced. Speak your
preferred option.
. Destination Assistance
Set a destination using an Interactive operator system.
. Roadside Assistance
Connect to the Roadside Response
Specialist.
. Valet Alert
Turns on the Valet Alert function
and monitors the vehicle move-
Condition:
5-10

(93,1)
[ Edit: 2017/ 5/ 8 Model: AIVINJ-N ]
ment within a certain range.
5GB0697X
INFO:
. You can also connect to the Nissan-
Connect
SM
Services Interactive Voice
Menu by touching the Voice Menu
button
on the map.
. After selecting [Call Nissan Assistance],
it may take some time until the system
initiates connection, depending on the
technical environment and whether
the TCU (Telematics Control Unit) is
being used by other services.
. To avoid disconnecting the line, do not
turn off the engine or the hybrid
system.
Message Box
AIVINJN1-D3B19AAA-3DC2-4413-A9B6-ABCF17B88AC1
Messages previously received from the
NissanConnect
SM
Data Center are dis-
played in the Message Box.
1. Push <MENU> and then touch [Info] on
the Launch Bar.
2. Touch [NissanConnect Services].
3. Touch [Message Box].
4. A message list is displayed. Touch
preferred message from the list.
Viewing message box:
In addition to messages, the Message Box
also stores information feeds.
1. Push <MENU> and then touch [Info] on
the Launch Bar.
2. Touch [NissanConnect Services].
3. Touch [Message Box]. A list screen is
displayed.
4. Touch a preferred folder. A list of
messages is displayed. The content is
announced by the system (Text-toSpeech) while the vehicle is being
driven, or if parked, you can read the
content on the display.
INFO:
. Touch [Stop] during communication
with the NissanConnect
SM
Services
Data Center to cancel the connection.
. A message is displayed when the
communication is disconnected while
downloading information due to a
poor communication status. Select
[Yes] to restart the download.
. Laws in some jurisdictions may restrict
the use of “Text-to-Speech.” Check
local regulations before using this
feature.
. Some terminology such as personal
names, place names, special terms,
symbols, etc. may not be announced
correctly. This is not a malfunction.
. The system will pause announce-
ments when interrupted by the voice
guidance given by the navigation system. When the voice guidance finishes,
the system will restart the announcement.
. The volume can be adjusted when the
system announces the information.
“Volume and Beeps settings”
(page 2-19)
5. Information
Condition:
5-11

(94,1)
[ Edit: 2017/ 5/ 8 Model: AIVINJ-N ]
5. Information
. The selected content is read out while
the vehicle is being driven, or if parked,
you can read the content on the
display.
. Content settings can be made using
the NissanConnect
SM
Services website. For more details, refer to the
NissanConnect
SM
Services website or
contact the NissanConnect
SM
Services
support line.
NissanConnect
SM
Services website:
For U.S.
www.nissanusa.com/connect
For Canada
www.nissan.ca/nissanconnect
(English)
www.nissan.ca/nissanconnect/fr
(French)
NissanConnect
SM
Services support
line:
1-855-426-6628
Screen information:
When information is downloaded from the
NissanConnect
SM
Services Data Center,
the contents of the information are displayed while the vehicle is stopped.
5GH0805X
Contents:
The contents of the NissanConnect
SM
Services feed are displayed.
:
If the feed contains map information,
this icon is displayed. This location
can be set as the destination.
[ ]/[ ]:
Moves to the next or previous page if
the information has a number of
content pages.
:
If the feed contains phone number
information, this icon is displayed. It is
possible to make a phone call to this
number.
Menu:
Stops the Text-to-Speech voice an-
nouncements and displays the operation menu items on the right side of
the screen.
5GH0806X
After parking the vehicle in a safe location
and touching [Menu], the operation menu
is displayed on the right side of the screen.
Condition:
5-12

(95,1)
[ Edit: 2017/ 5/ 8 Model: AIVINJ-N ]
INFO:
The availability of the operation menu
items differs depending on the contents
of the selected information.
EMERGENCY SUPPORT
AIVINJN1-4CB95563-4BC2-4C4A-86CF-91272A2AE414
NissanConnectSMServices provides various services to support dealing with
emergencies of the subscribed vehicle
and the driver.
For example, in case of an illness or
serious injury, you can seek support by
pushing the in-vehicle <SOS> button and
connecting to NissanConnect
SM
Services.
NissanConnect
SM
Services can specify the
location of the vehicle via GPS, and the
information will be sent to the police or
other agencies as needed.
For information about other NissanConnect
SM
Services emergency support related services, refer to the
NissanConnect
SM
Services Services web-
site or contact the NissanConnect
SM
Ser-
vices support line.
NissanConnect
SM
Services website:
For U.S.
www.nissanusa.com/connect
For Canada
www.nissan.ca/nissanconnect
(English)
www.nissan.ca/nissanconnect/fr
(French)
NissanConnect
SM
Services support
line:
1-855-426-6628
WARNING
AIVINJN1-BA450A5A-1C21-4C29-B306-4BD13E19D061
. Please note that the Automatic
Collision Notification service and
Emergency Call function cannot be
used in the following conditions:
— Emergency functions and ser-
vices will not be available without a paid subscription to
NissanConnect
SM
Services.
— The NissanConnect
SM
Services
network system is disabled.
— The vehicle moves outside the
service area where the TCU
(Telematics Control Unit) is connected to the system.
— The vehicle is outside the area
where the cellular network service is receivable.
— The vehicle is in a location with
poor signal reception such as
tunnels, underground parking
garages, behind buildings or in
mountainous areas.
— The line is busy.
— The TCU (Telematics Control
Unit) or other systems of your
vehicle are not working properly.
— It may not be possible to make
an emergency call depending on
the severity of a collision and/or
emergency.
. Park the vehicle in a safe location
and set the parking brake before
operating <SOS>.
. Only use this service in case of an
emergency. There may be a penalty for inappropriate use of the
service.
. Radio waves could adversely af-
fect electric medical equipment.
Individuals who use a pacemaker
should contact the device manufacturer regarding any possible
effects before using the system.
. The TCU (Telematics Control Unit)
antenna is installed inside the
upper central part of the instrument panel. An occupant should
not get any closer to the antenna
than specified by the pacemaker
5. Information
Condition:
5-13

(96,1)
[ Edit: 2017/ 5/ 8 Model: AIVINJ-N ]
5. Information
manufacturer. The radio waves
from the TCU antenna may adversely affect the operation of the
pacemaker while using the NissanConnect
SM
Services.
Making an emergency call
AIVINJN1-A7409108-5244-4D39-8759-9D27EED8CD91
5GH0353X
1. Push <SOS>.
2. When the line is connected, speak to
the Response Specialist.
If you want to cancel the emergency call,
push and hold <SOS> for a few seconds.
INFO:
. After <SOS> is pushed, it may take
some time until the system initiates
connection, depending on the technical environment and whether the TCU
(Telematics Control Unit) is being used
by other services.
. An indicator light on <SOS> shows the
readiness of the emergency support
system. If the indicator light is not
illuminated, pushing <SOS> does not
connect your vehicle to the Response
Specialist.
The indicator light blinks while connected to the NissanConnect
SM
Ser-
vices Response Center.
. Even when the indicator light is illumi-
nated, connection to the NissanConnect
SM
Services Response Center may
not be possible. If this occurs in an
emergency situation, contact the
authorities by other means.
. To avoid disconnecting the line, do not
turn off the engine or the hybrid
system.
Condition:
5-14

(97,1)
[ Edit: 2017/ 5/ 8 Model: AIVINJ-N ]
NISSANCONNECTSMSERVICES SETTINGS
AIVINJN1-BBEF517A-55F1-402B-8D8A-30E8BDC9B301
The NissanConnectSMServices setting can be changed.
1. Push <MENU>.
2. Touch [Info] on the Launch Bar.
3. Touch [NissanConnect Services].
4. Touch [NissanConnect Services Settings].
INFO:
[NissanConnect Services] can also be accessed from [Settings] on the Launch Bar.
Menu Action
[Information Feed Setting] [Edit Feed List] [Sync All Feeds] The latest information feed list is received from the NissanCon-
nect
SM
Services center.
[Initialize Feed List] Returns the feed list to default.
[Delete Message Box] Deletes message box.
[Vehicle Data Sharing] [Share Vehicle Information] Turn the vehicle information sharing function on/off.
[Delete Shared Vehicle Information] Delete the shared vehicle information.
[Unit ID Information] Display the Unit ID, TCU (Telematics Control Unit) ID, SIM ID and VIN
Information necessary for user registration.
[Reset all NissanConnect Svcs. Settings to Default] All NissanConnect
SM
Services settings are returned to default.
[Vehicle Data Transmission Setting] When [OK] is touched, data transmission to the NissanConnect
SM
Data Center is enabled. Touch [Decline] to disable the NissanConnect
SM
Services functions.
5. Information
Condition:
5-15

(98,1)
[ Edit: 2017/ 5/ 8 Model: AIVINJ-N ]
5. Information
SiriusXM TRAVEL LINK (if so
equipped)
AIVINJN1-20002703-B1B8-4022-8CC0-3025C4D3EEF9
This service provides real-time information regarding current weather, fuel
prices, parking information, sports scores,
movie times and stock tickers. It is necessary to subscribe to use the SiriusXM
Travel Link information.
The SiriusXM Travel Link is broadcast to
the vehicle by SiriusXM Satellite Radio.
WARNING
AIVINJN1-BD315167-249E-4B86-8E38-351CD04B1F27
SiriusXM Travel Link information is not
a substitute for attentive driving.
Weather conditions change constantly and emergency situations
can arise without warning. Relying
only on SiriusXM Travel Link information could result in serious personal
injury.
VIEWING SiriusXM TRAVEL LINK
AIVINJN1-507BB217-A929-4212-B9B5-004348ACB884
SiriusXM Satellite Radio and SiriusXM Travel Link subscriptions are sold separately
or as a package, and are continuous until
you call SiriusXM to cancel. See SiriusXM
Customer Agreement for complete terms
at www.siriusxm.com (for U.S.) or www.
siriusxm.ca (for Canada). SiriusXM Travel
Link is available in select markets.
For more information, refer to the SiriusXM website or call Listener Care.
SiriusXM website:
For U.S.
www.siriusxm.com/travellink
For Canada
www.siriusxm.ca/siriusxm-traffic-
services/siriusxm-travel-link (English)
www.siriusxm.ca/fr/services-
siriusxm-traffic/siriusxm-travel-link
(French)
Listener Care:
For U.S.
1-877-447-0011
For Canada
1-877-438-9677
INFO:
. If a subscription is not active for
SiriusXM Travel Link, a message appears on the display and information
will not be available.
. SiriusXM Travel Link information (like
Weather, Fuel, Parking, etc.) is available
only for areas that provide this information to SiriusXM.
. Not all vehicles or devices are capable
of receiving all services offered by
SiriusXM. Data displays and individual
product availability vary by vehicle
hardware. Current information and
features may not be available in all
locations, or on all receivers. SiriusXM
is not responsible for any errors or
inaccuracies in the data services or
their use in the vehicle.
NOTES ON SiriusXM TRAFFIC INFORMATION
AIVINJN1-3C768737-3150-4B3D-BA4F-F358165C07E4
. The SiriusXM Traffic information ser-
vice is not provided for some cities. In
addition, the cities for which the traffic
information service is provided may be
changed.
. In some cases, infrastructure pro-
blems may prevent the complete display of the traffic information. This is
Condition:
5-16

(99,1)
[ Edit: 2017/ 5/ 8 Model: AIVINJ-N ]
not a malfunction.
. Due to infrastructure problems, or due
to the time when the traffic information service broadcast is received, the
displayed information may differ from
the actual traffic conditions.
. Depending on the traffic information, a
detour route may be slower than the
original route.
. SiriusXM Satellite Radio and SiriusXM
Traffic subscriptions are sold separately or as a package, and are continuous until you call SiriusXM to
cancel. See SiriusXM Customer Agreement for complete terms at the SiriusXM website.
SiriusXM website:
For U.S.
www. siriusxm.com
For Canada
www.siriusxm.ca (English)
www.siriusxm.ca/fr (French)
SiriusXM Travel Link is available in
select markets. For more information,
refer to the SiriusXM website or call
Listener Care.
SiriusXM website:
For U.S.
www.siriusxm.com/traffic
For Canada
www.siriusxm.ca/siriusxm-traffic-
services/siriusxm-travel-link (English)
www.siriusxm.ca/fr/services-
siriusxm-traffic/siriusxm-travel-link
(French)
Listener Care:
For U.S.
1-877-447-0011
For Canada
1-877-438-9677
. SiriusXM Traffic is available in over 130
metropolitan markets. For the most
current list of markets covered, please
refer to the SiriusXM website or call
Listener Care.
SiriusXM website:
For U.S.
www.siriusxm.com/siriusxmtraffic
For Canada
www.siriusxm.ca/siriusxm-traffic-
services/siriusxm-traffic (English)
www.siriusxm.ca/fr/services-
siriusxm-traffic/siriusxm-traffic
(French)
Listener Care:
For U.S.
1-877-447-0011
For Canada
1-877-438-9677
. Due to road maintenance, infrastruc-
ture problems (e.g. malfunction of
road sensors, outage of central computer of infrastructure) or natural disasters, there are times when some or
all traffic information may not be
available.
. Incident information is based on hu-
man collection. Not all incidents that
have happened are collected and
provided.
. Due to infrastructure problems, or
transmission delay, there are times
when the information may differ from
the actual condition. Always observe
safe driving practices and follow all
traffic regulations.
. Due to the coverage and quality of
traffic information and road conditions, it is not always possible for the
system to provide the shortest time
route even when traffic information is
considered.
5. Information
Condition:
5-17

(100,1)
[ Edit: 2017/ 5/ 8 Model: AIVINJ-N ]
5. Information
. Traffic information that is displayed
may differ from information from
other media (e.g., radio), as other
media may use different information
sources.
USING SIRIUS XM TRAVEL LINK
GUID-80D05B55-B3F4-42DD-B7AE-A3EF7A404962
1. Push <MENU>.
2. Touch [Info] on the Launch Bar.
Condition:
5-18
 Loading...