

Page 1
3 4
WOODEN HOME HI-FI SYSTEM WITH CD/
USB MP3 PLAYER, STEREO RADIO AND
USB/SD
Instruction manual
Bedienungsanleitung
Manuel d’instructions
Manuale d’istruzioni
Manual de instrucciones
HRA-1550USMP
Roadstar Management SA, via Passeggiata 7 CH 6883
NOVAZZANO (SWITZERLAND) www.roadstar.com
is a registered Trademark of Roadstar S.A. - Switzerland All rights reserved
www.roadstar.com
Page 2
English Page 1
Deutsch Seite 9
Français Page 17
Italiano Pagina 25
Español Página 33
HRA-1550USMP
INDEX
• Your new unit was manufactured and assembled
under strict ROADSTAR quality control.
Thank you for purchasing our product.
Before operating the unit, please read this instruction manual carefully. Keep it also handy for further
future references.
• Votre nouvel appareil a été fabriqué et monté en
étant soumis aux nombreaux tests ROADSTAR. Nous
espérons que cet appareil vous donnera entière satisfaction.
Avant de vous adonner à ces activités, veuillez lire
attentivement ce manuel d’instructions. Conservezle
à portée de main à fin de référence ultérieure.
• Vuestro nuevo sistema ha sido construido según las
normas estrictas de control de calidad ROADSTAR.
Le felicitamos y le damos las gracias por su elección
de este aparado. Por favor leer el manual antes de
poner en funcionamiento el equipo y guardar esta
documentación en case de que se necesite
nuevamente.
• Ihr neues Gerät wurde unter Beachtung der strengen
ROADSTAR-Qualitätsvorschriften gefertigt.
Wir danken Ihnen für den Kauf unseres Produktes.
Bitte lesen Sie diese Bedienungsanleitung durch,
und heben Sie sie auf, um jederzeit darin
nachschlagen zu können.
• Il vostro nuovo apparecchio è stato prodotto ed
assemblato sotto lo stretto controllo di qualitá
ROADSTAR.
Vi ringraziamo di aver acquistato un nostro prodotto.
Prima di procedere all'utilizzo dell'apparecchio,
leggete attentamente il manuale d’istruzioni e
tenetelo sempre a portata di mano per futuri
riferimenti.
• Seu novo aparelho foi construido e montado sob o
estrito controle de qualidade da ROADSTAR.
Agradecemos por ter comprado nosso produto para
a sua diversão.
Antes de usar esta unidade é necessário ler com
atençâo este manual de instruções pare que possa
ser usada apropriadamente; mantenha o manual
ao seu alcance para outras informações.
Page 3
EnglishEnglish
1 2
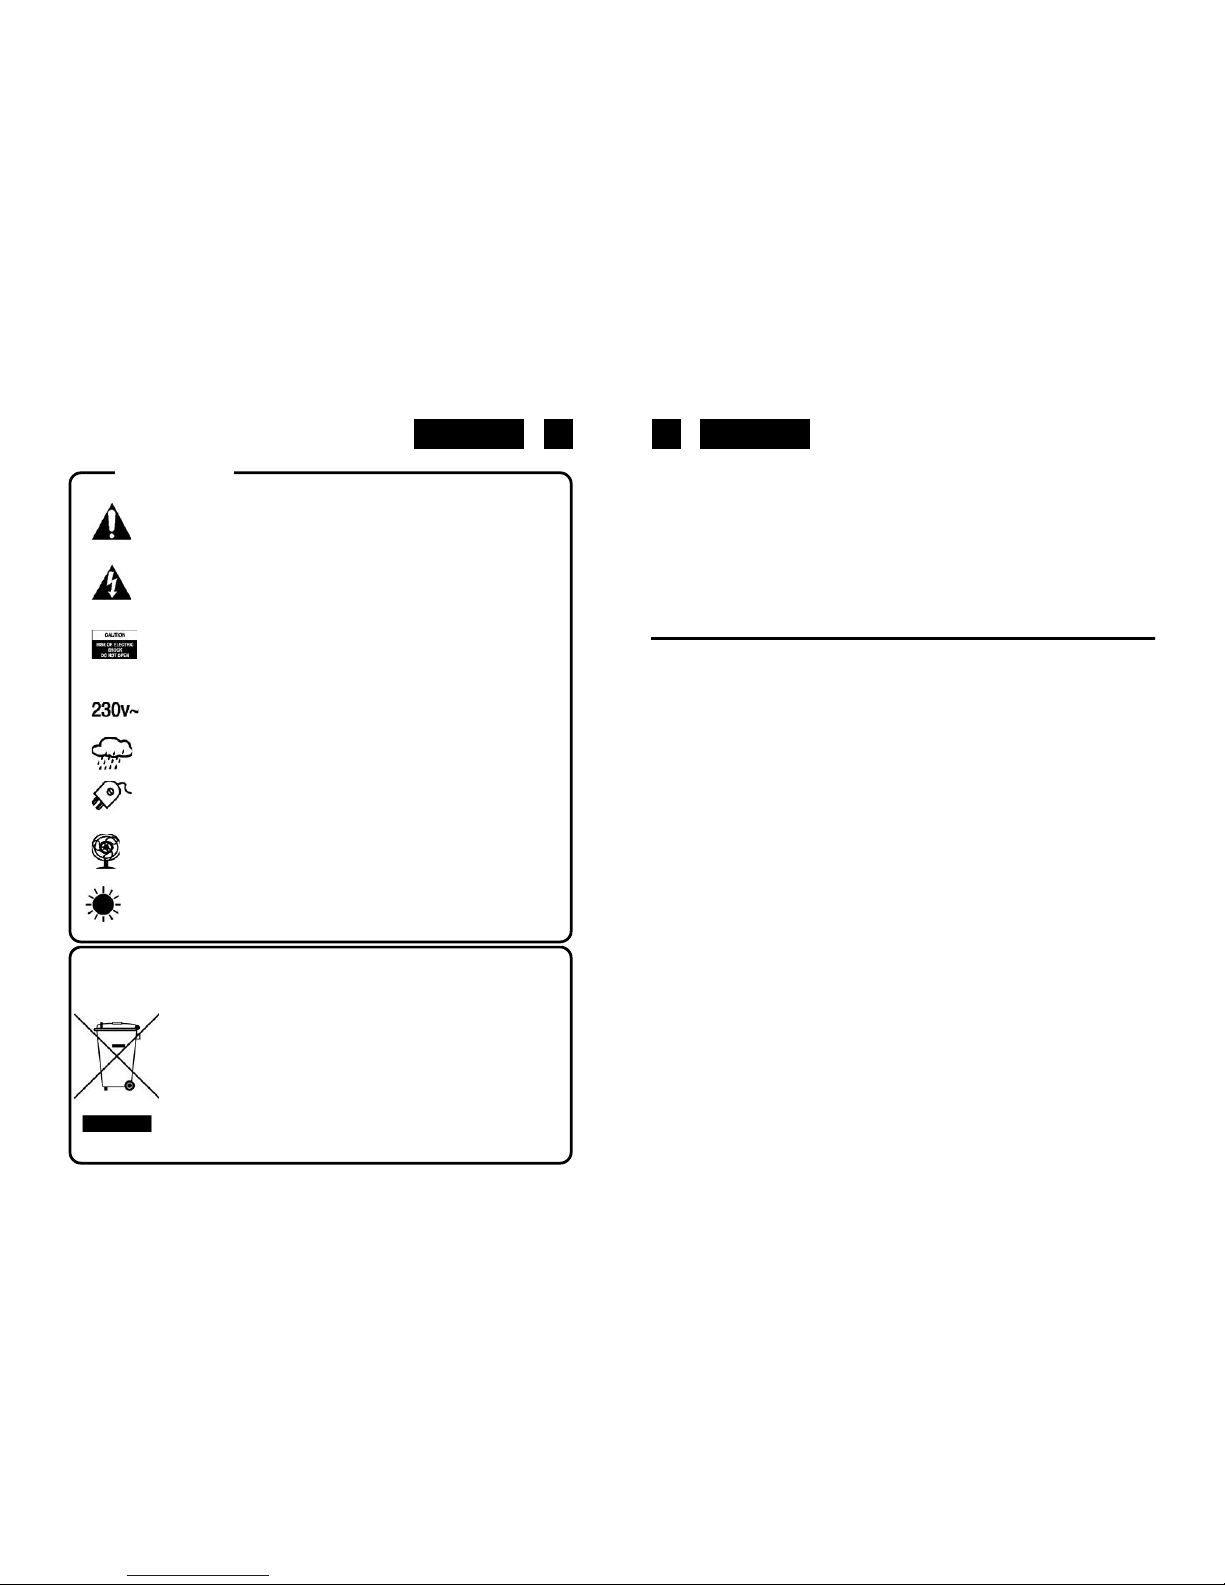
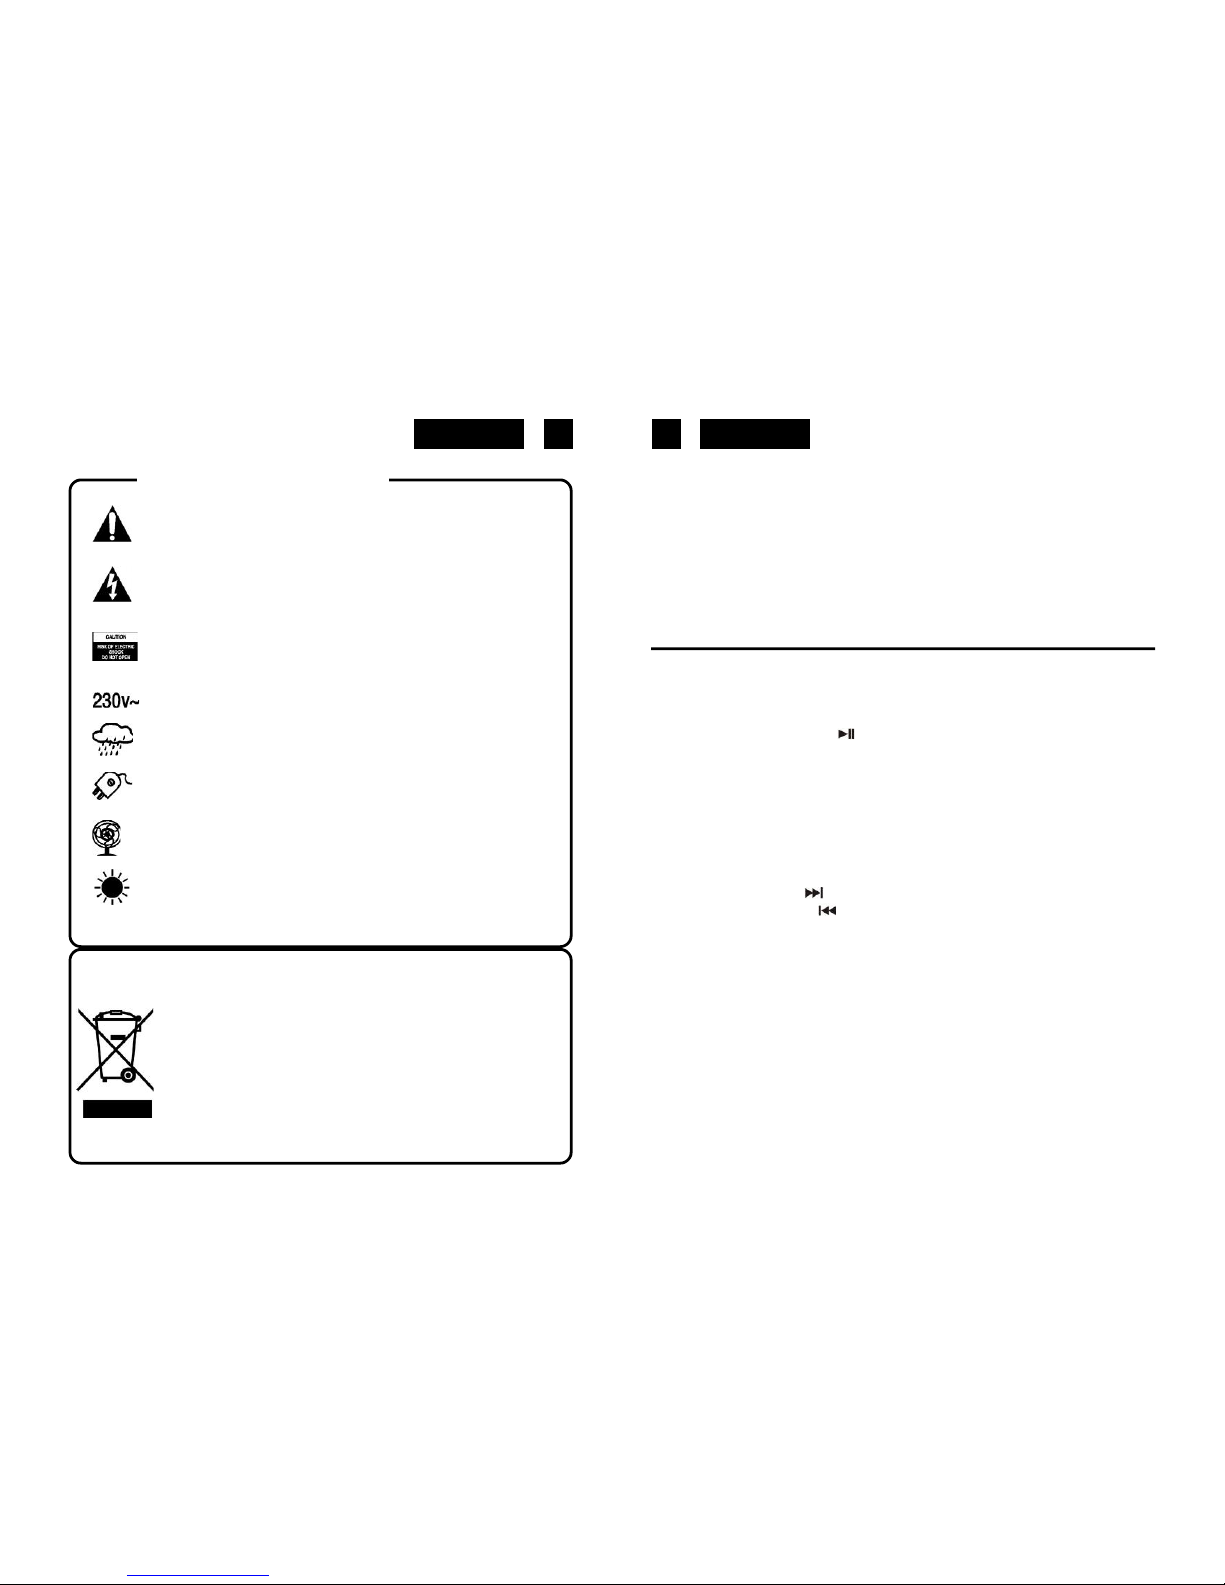
WARNINGS
The exclamation point within the triangle is a warning sign alerting the user of
important instructions accompanying the product.
The lightening flash with arrowhead symbol within the triangle is a warning
sign alerting the user of “dangerous voltage” inside the unit.
To reduce the risk of electric shock, do not remove the cover. No user
serviceable parts inside the unit. Refer all servicing to
qualified personnel.
This unit operates on 230V ~ 50Hz. If the unit is not used for a long period of
time, remove the plug from the AC mains.
This unit must not be exposed to moisture or rain.
The power switch in this unit is mounted on the secondary circuit and does
not disconnect the whole unit from the mains in OFF position.
Ensure all connections are properly made before operating the unit.
This unit should be positioned so that it is properly ventilated. Avoid placing it,
for example, close to curtains, on the carpet or in a built-in installation such as
a bookcase.
Do not expose this unit to direct sunlight or heat radiating sources.
HRA-1550USMP
NOSTALGIC HOME STEREO RADIO WITH CD/USB/SD MP3
PLAYER.
INSTRUCTION MANUAL
Please read this instruction manual carefully and familiarize yourself with your new HiFi system
before using it for the first time. Please retain this manual for future reference.
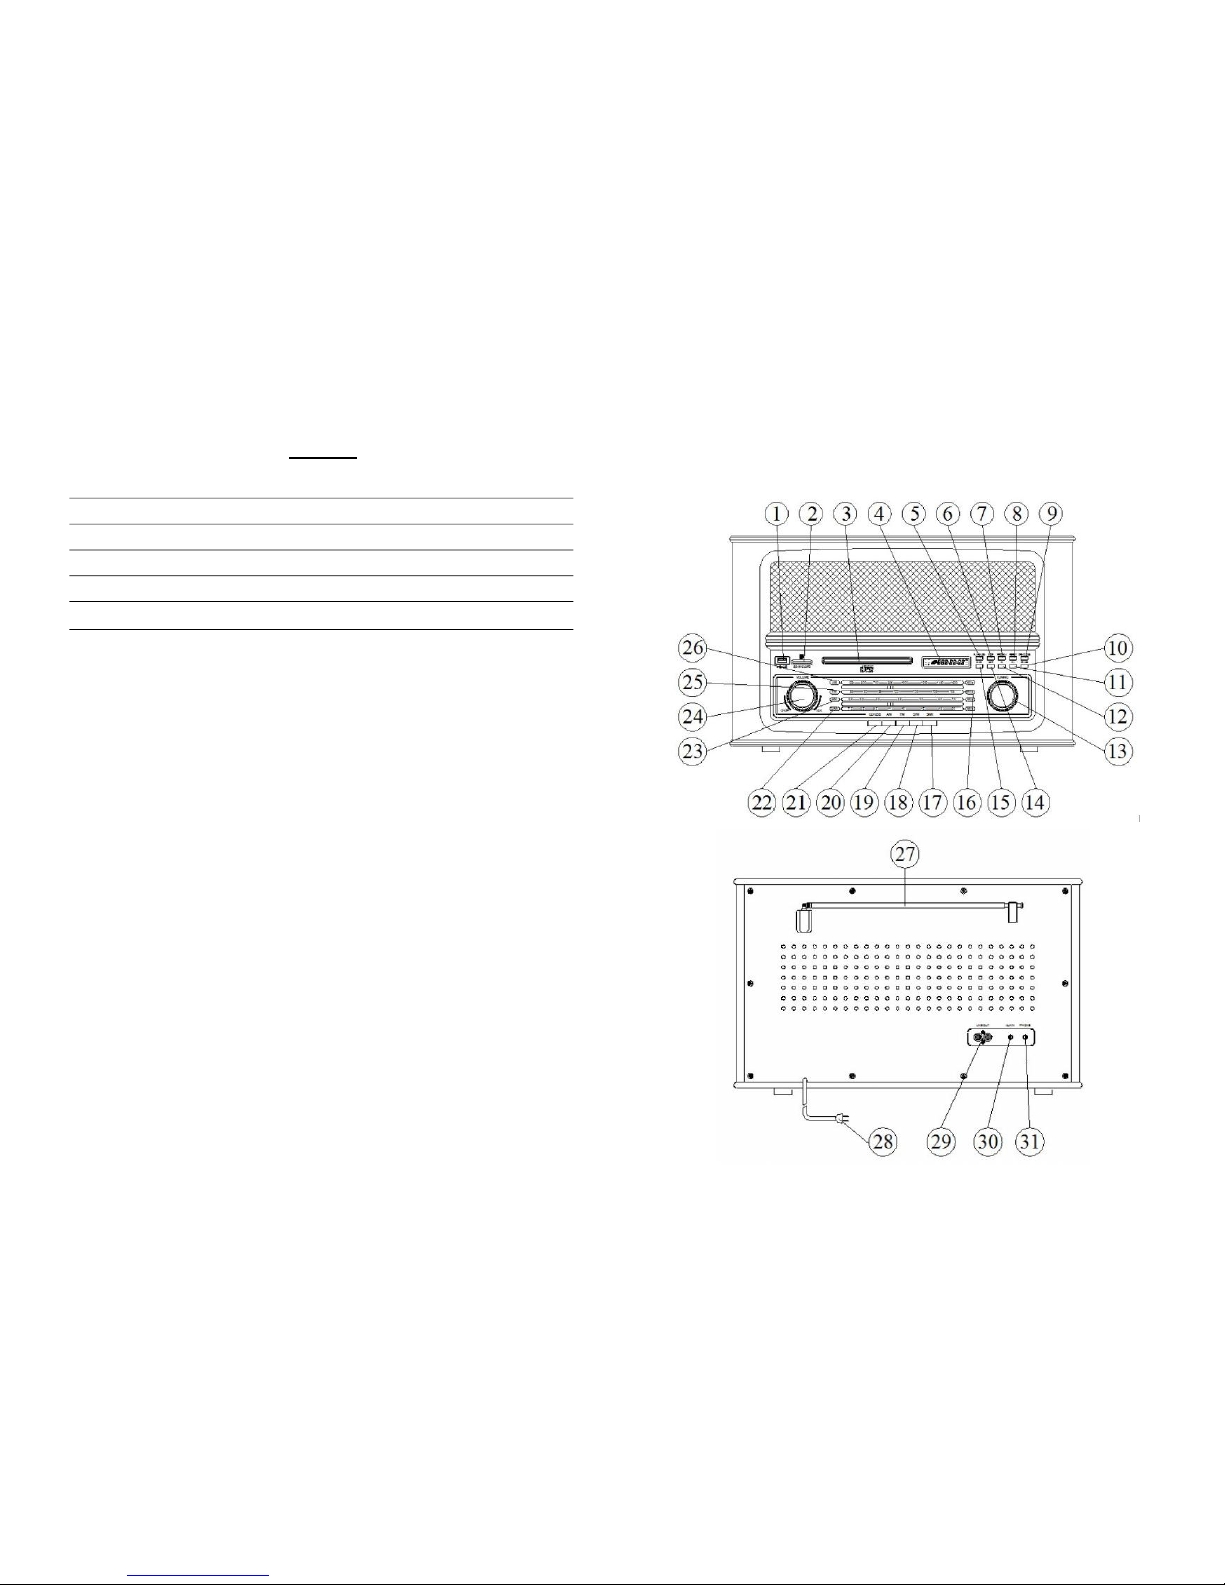
LOCATION OF CONTROLS
1. MP3/USB Port
2. SD/MMC card Port
3. CD Door
4. CD LED Display
5. CD/USB/SD Play/Pause Button
6. CD/USB/SD Stop Button
7. CD/USB/SD Program Button
8. CD/USB/SD Repeat Button
9. CD Open/Close Button
10. CD/USB/SD Turning Switch
11. CD/USB/SD 10+ Button
12. CD/USB/SD 10- Button
13. Tuning Knob
14. CD/USB/SD Next Button
15. CD/USB/SD Back Button
16. Power Indicator / FM Stereo Indicator
17. Shortwave 2 Button
18. Shortwave 1 Button
19. FM-ST Button
20. AM Button
21. CD/USB/SD Button
22. SW2 Station
23. SW1 Station
24. Volume on /off Knob
25. FM Station
26. AM Station
27. FM/SW1/SW2 Antenna
28. AC power cord
Correct Disposal of This Product
(Waste Electrical & Electronic Equipment)
This marking shown on the product or its literature, indicates that it should not be
disposed with other household wastes at the end of its working life. To prevent possible
harm to the environment or human health from uncontrolled waste disposal, please
separate this from other types of wastes and recycle it responsibly to promote the
sustainable reuse of material resources.
Household users should contact either the retailer where they purchased this product,
or their local government office, for details of where and how they can take this item
for environmentally safe recycling.
Business users should contact their supplier and check the terms and conditions
of the purchase contract. This product should not be mixed with other commercial
wastes for disposal.
Page 4

EnglishEnglish
3 4
29. Audio signal L/R output port
30. Audio signal L/R input port
31. 3.5mm Earphone jack
CONNECTING TO POWER
Before switching on make sure that the voltage of your electricity supply is the same as that
indicated on the rating plate.
For your own safety read the following instructions carefully before attempting to connect this
unit to the mains.
MAINS (AC) OPERATION
This unit is designed to operate on AC 230V 50Hz current only. Connecting it to other power
sources may damage the unit.
CAUTION
To prevent electric shock disconnect from the mains before removing cover. No user serviceable
parts inside. Refer servicing to qualified service personnel.
SAFETY PRECAUTION
Do not allow this unit to be exposed to rain or moisture.
Mains Supply: 230V 50Hz - AC only
This symbol means that this unit is double insulated. An earth connection is not required.
POWER SUPPLY
Remove the stereo carefully from the box, retaining the packaging for future use.
AC POWER OPERATION
Connect the plug to a mains power inlet 230V AC ~ 50 Hz.
Note: If the Audio from CD, USB, SD or AUX-IN input is missing for 15 or more than 15
minutes, the unit can switch OFF itself. If you want to turn the unit on after it switches
off itself, please turn the VOLUME ON/OFF Knob to OFF position first, and then turn
the unit on.
FM TUNER
note: If none of function buttons is pressed, the default state will be FM after the unit
is turn on.
1) Switch the function knob to AM/FM-ST/SW1/SW2 position.
2) Turn the Tuning Knob (13) to tune to your favourite station.
3) In order to receive a better FM-ST/SW1/SW2 program, extend the rod antenna (27) as long
as possible, and then rotate the antenna with 360 degrees, until it can receive the signal
clearly.
4. FM STEREO indicator (16), when it receives a clear and stable radio station of FM-ST, the
color of Power Indicator / FM Stereo Indicator will change to green blue from green, it is in
stereo state.
PLAYING COMPACT DISC
Note: If there is error during the playing of CD / USB / SD card occasionally, please turn
off the unit and restart it. Then it can return to normal playback.
Handle Compact Discs
To remove a CD from its storage case, press down on the centre of the case and lift the
disc out.
Hold the disc by the edges. Avoid touching the recorded side of the disc.
Loading CDs
Press the CD / USB button, then press OPEN / CLOSE button to open the CD door.
(Do not force to open the CD door by hand at any time.)
Place the CD in the compartment with the label side facing upwards.
Close the CD door by hand. When fully closed, there will be “LOAD” appears on LED
display and CD will turn after about ten seconds. Then the LED Display will indicate the
total number of tracks on the disc.
Please note:
Do not put anything other than a CD in the compartment. Other objects can damage the
mechanism.
Do not force to open/close the CD door by hand at any time.
Keep the CD door closed when not in use to prevent dirt and dust from getting into the
mechanism.
Never insert more than one CD at a time.
If a disc is deeply scratched or too dirty, it may not play.
Playing CD
When the disc is put into the unit, the unit will read the disc and display the total number of
the tracks.
If the disc is in CD format, the CD indicator will light.
If the disc is in MP3 format, the MP3 indicator will light.
If the disc is in WMA format, the WMA indicator will light. After displaying the total number
of the tracks, the unit will play from the 1st song automatically.
Press STOP button to stop playing.
After pressing STOP button, you can press OPEN/CLOSE button to open CD door to get
out of the CD disc at any time.
Page 5

EnglishEnglish
5 6
Pause
To stop a track temporarily, press Play/Pause Button. The disc will pause, LED Display
flashing at the current track position. The Play indicator light up.
To resume play, press Play/Pause Button again.
FAST FORWARD AND FAST BACKWARD
The BACK/NEXT function can be used at any time during playing.
Press NEXT button once to select next track. If it is the last track of the disc, the player will
move to track1.
Press BACK button once to select last track. If it is the first track of the disc, the player will
skip to the last track. It will stop playing automatically after finish playing the last track, and
the PLAY/PAUSE Indicator will not light. (If you want it continue to play, please press PLAY/
PAUSE button again. Then it will play from the first track.)
If there are many tracks in disc (MP3/WMA) or USB or SD card, you can press “10+
(FOLDER)” button or “10- (FOLDER)” button to select tracks quickly when it is playing. You
can press “10+ (FOLDER)” button or “10- (FOLDER)” button to select file to play tracks
when it stops playing. For example, if it displays “F 01”, it starts to play the first track that in
the first file.
Press “10+” or “10-” button to skip ten tracks forwards or backwards to play tracks when
it is playing. When it is in last few tracks, press “10+”button once, it will skip to the last
track.
When it stops playing, press “10+” or “10-” button every time, it will skip to next file or last
file to play tracks.
PROGRAM TO PLAY
Press “STOP” button to stop playing, it will display the total number of the tracks.
Press “PROGRAM” button once, it will display “P 01”.
Press “BACK” or “NEXT” button to choose the tracks that you want to listen to, and press
“PROGRAM” button once again.
At this time, the display will show “P02”, then you can program 2nd track.
(It can program 20 tracks at most if in CD format. It can program 99 tracks at most if in
MP3/WMA format)
Press PLAY/PAUSE button, Play indicator will light, and it will start to play from the first
trackthat you choose.
After finish playing all the programmed tracks that you choose, the CD will stop automatically.
If you want to cancel the tracks that you choose, press STOP button.
REPEAT, BACK, NEXT function can also work after program.
Note: 10- and 10+ Button cannot work when playing the programmed tracks.
REPEAT PLAYING
You can set repeat playing the disc or the tracks that you choose.
REPEAT PLAYING ONE TRACK
When CD/USB / SD CARD is playing:
Press REPEAT button, the REPEAT Indicator glitters. Then a selected song will be continuous
playing until you press STOP button to make the REPEAT Indicator off or press REPEAT
button twice.
The tracks you choose will repeat playing till you press STOP button to make REPEAT
indicator out, or press Repeat button twice to make REPEAT indicator out.
REPEAT PLAYING ALL TRACKS
When CD/USB/ SD is playing:
Press REPEAT button twice, REPEAT indicator will be on all the time.
It will repeat playing the tracks that in the disc/USB/SD till you press STOP button to make
REPEAT indicator out, or press REPEAT button once to make REPEAT indicator out.
REPEAT PLAYING PROGRAMED TRACKS
Choose the tracks that you want to program, press PLAY/PAUSE button to play programmed
tracks from the first one.
Press REPEAT button once, it will repeat playing the track that you choose, REPEAT indicator
will flash. The programmed track will be repeat playing till you press STOP button twice, or
press REPEAT button twice
Press REPEAT button twice, it will repeat playing all the programmed tracks and the
REPEAT indicator will be on all the time. All the programmed tracks will be repeat playing till
you press STOP button once, or press REPEAT button once.
Note: 10- and 10+ Button cannot work when repeat playing the programmed tracks.
USING OF USB/SD
Insert an USB/MP3 player/SD/MMC card first.
Press CD/USB function switch, then press CD/USB button to select to play USB or SD/
MMC card.
Page 6

EnglishEnglish
7 8
SPECIFICATIONS
Technical specifications
Power input 230V¡«50Hz
Volume Output 3.5 X 2 W
Power consumption 30W
product size 510£ª290£ª340mm
Net weight 8.2 kg
Radio frequency range
FM 87.5-108 MHz
AM 520-1600 KHz
SW1 2.5 – 7.0 MHZ
SW2 7.5 – 22 MHZ
CD player
Frequency Response 100Hz - 16 KHz
Headphones 3.5 mm stereo headphone plug
Design and specifications are subject to change without notice.
When it finish reading and display the total tracks, the machine will play from the first track
that in USB/SD/MMC card automatically. You also can use the functions (such as FAST
FORWARD, FAST BACKWARD, PROGRAM and REPEAT PLAYING).
CONVERSION OPERATION OF CD/USB/SD
While CD or USB or SD is playing, you can convert CD and USB/SD by pressing CD/USB
utton, CD and USB indicators be converted too. After finish converting, it will start to play from
the first song of CD/MP3 or USB or SD.
Note:
a. This unit doesn’t have charging function. If you want to play MP3 or other machine that with
batteries by this unit, please take out the batteries before you connect the MP3 or other
machine to USB port. Otherwise it will damage this unit.
b. It can not read all the MP3 machine which sell on the market.
c. Please stop playing USB or other operation before take out the USB to prevent destroying it.
USING OF AUX IN
When it is playing RADIO (FM/AM/SW1/SW2), plug the 3.5mm RCA cord into AUX IN port (30),
it will turn to Aux in function once RADIO (FM/AM/SW1/SW2) are disconnected. It can be
connected with external audios’ Line Out jacks.
Please adjust the volume of external audio to make sure the output volume in best quality.
Note: When AUX IN is not in use, please take out Aux in cord from the unit, otherwise
there will be no sounds from the unit while using other functions.
USING OF LINE OUT
When it is playing CD/USB/SD/RADIO (AM/FM-ST/SW1/SW2)/AUX, plug the 3.5mm RCA cord
into LINE OUT port (29). It can be connected with Aux in port of external audios’ amplifier.
USING OF HEADPHONE
When you put the headphone into the earphone jack, the sound will be output through headphone,
and no sounds from speakers.
Care & Maintenance
Cleaning CDs
* Use a soft cloth to wipe off any fingerprints and dust from the disc surface.
* Wipe in a straight line from the centre to the outside of the disc. Small dust particles and light
stains will not affect reproduction quality.
* Never use chemicals such as record sprays, anti-static sprays, benzene or thinners to clean
your CDs.
* To reduce the risk of scratches, always put CDs back in their cases after use.
* Do not expose CDs to direct sunlight, high humidity or high temperatures for long periods.
* Do not stick paper or write anything on either side of the CD.
* Only discs displaying this symbol can be played on this unit.
Cleaning the Lens
* A dirty lens will cause sound skipping. If the lens is very dirty, the CD may not work.
* Please use the cleaning disc.
Page 7
DeutschDeutsch
9 10
HRA-1550USMP
Nostalgische Musikanlage mit CD/MP3, und STEREO RADIO
BEDIENUNGSANLEITUNG
Bitte lesen Sie aufmerksam diese Bedienungsanleitung, um sich mit Ihrem neuen RadioPlattenspieler vertraut zu machen, bevor Sie ihn zum ersten Mal in Betrieb nehmen. Bitte
bewahren Sie diese Anleitung auf, um später jederzeit nachschlagen zu können.
LAGE DER BEDIENUNGSELEMENTE
SICHERHEITSHINWEISE
Das Ausrufezeichen im Dreieck weist den Benutzer auf wichtige
Bedienungs- und Wartungsanweisungen (Service) in diesem Handbuch
hin, die unbedingt zu befolgen sind.
Das Blitzsymbol im Dreieck weist den Benutzer auf “gefährliche
Spannungen” an einigen freiliegenden Bauteilen im Innem des Gerätes hin.
Um die Gefahr elektrischer Schläge auszuschliessen, Gehäuse auf keinen
Fall abnehmen. Im Innern befinden sich keine vom Benutzer selbst
instandsetzbaren Teile. Reparaturen dürfen nur von einer autorisierten
Fachwerkstatt durchgeführt werden.
Dieses Gerät ist für 230V ~ 50Hz Netzspannung ausgelegt. Bei längerer
Nichtbenutzung des Geräts ziehen Sie den Stecker aus der Steckdose.
Setzen Sie das Gerät weder Feuchtigkeit noch Regen aus.
Schalten Sie das System erst dann ein, wenn Sie alle Verbindungen genau
geprüft haben.
Stellen Sie das Gerät so auf, dass immer eine ungestörte Frischluftzufuhr
sichergestellt ist. Stellen Sie das Gerät keinesfalls auf Teppiche und in die
Nähe von Gardinenund bauen Sie es nicht in Bücherregale ein.
Setzen Sie das Gerät weder direkter Sonneneinstrahlung noch
Wärmequellen aus.
Korrekte Entsorgung dieses Produkts (Elektromüll)
Die Kennzeichnung auf dem Produkt bzw. auf der dazugehörigen Literatur gibt an,
dass es nach seiner Lebensdauer nicht zusammen mit dem normalen HaushaltsmüIl
entsorgt werden darf. Entsorgen Sie dieses Gerat bitte getrennt von anderen Abfallen,
um der Umwelt bzw. der menschlichen Gesundheit nicht durch unkontrollierte
Müllbeseitigung zu schaden. Recyceln Sie das Gerät, um die nachhaltige
Wiederverwertung von stofflichen Ressourcen zu fördern.
Private Nutzer sollten den Händler, bei dem das Produkt gekauft wurde, oder die
zuständigen Behörden kontaktieren, um in Erfahrung zu bringen, wie sie das Gerät
auf umweltfreundliche Weise recyceln können.
Gewerbliche Nutzer sollten sich an Ihren Lieferanten wenden und die Bedingungen
des Verkaufsvertrags konsultieren. Dieses Produkt darf nicht zusammen mit anderem
Gewerbemüll entsorgt werden.
1. MP3/USB Anschluss
2. SD/MMC Karten-Anschluss
3. CD Fach
4. LED CD Display
5. Taste CD/USB/SD Play/Pause
6. Taste Stop CD/USB/SD
7. Taste Programm CD/USB/SD
8. Taste Wiederholung CD/USB/SD
9. Taste Open/Close CD
10. CD/USB/SD Schalter
11. Taste CD/USB/SD 10+
12. Taste CD/USB/SD 10-
13. Einstellknopf
14.Taste neu CD/USB/SD
15.Taste zurück CD/USB/SD
16.Betriebsanzeige/ UKW Stereo Anzeige
17.Kurzwellentaste 1
18.Kurzwellentaste 2
19.UKW-ST Taste
20.Mittelwellen-Taste
21.Taste CD/USB/SD
22.Skala Sender SW2
23.Skala Sender SW1
24.Lautstärkeregler on/off
25.Skala Sender FM (Mittelwelle)
26.Skala Sender AM (Kurzwelle)
27. Antenne UKW/SW1/SW2
28. AC Kabel
Page 8

DeutschDeutsch
11 12
29. Audio-Ausgang L/R
30. Audio-Signaleingang L/R
31. Kopfhöreranschluss 3.5MM
Netzanschluss
Das Gerät muss mit einem geeigneten Kabel und einer passenden Steckdose angeschlossen
werden. Stecken Sie das Gerät an und schalten Sie es ein. Überprüfen Sie die Kompatibilität
der Netzspannung
Wenn das Gerät nicht in Gebrauch ist, drehen Sie den Lautstärkeregler / ON / OFF-Schalter
auf OFF und ziehen Sie den Stecker.
Hinweis: Wenn das Audio für CD, USB, SD und AUX-IN für mehr als 15 Minuten inaktiv ist,
schaltet sich die Einheit automatisch aus.
Wenn Sie die Einheit einschalten wollen, nachdem Sie sie ausgeschalten haben, drehen Sie
vor Inbetriebnahme der Einheit den Lautstärkeregler VOLUME ON / OFF in die Position OFF.
Pflege und Wartung
Säuberung der CD
Eventuelle Fingerabdrücke und Staub von der Oberfläche der Disc mit einem weichen
Tuch entfernen.
Wischen Sie in einer geraden Linie von der Mitte zur Außenseite der Scheibe hin. Kleine
Staubpartikel und kleine Flecken wirken sich nicht auf Wiedergabequalität aus.
Reinigen Sie die CD niemals mit Chemikalien wie Plattensprays, Antistatiksprays, Benzol
oder Verdünnern.
Um der Gefahr von Kratzern vorzubeugen, bewahren Sie CDs nach Gebrauch in ihren
Hüllen auf.
Setzen Sie die CD nicht direkter Sonneneinstrahlung, Feuchtigkeit oder hohen Temperaturen
aus.
Fügen Sie keine Aufkleber hinzu und beschriften Sie beide Seiten der CD nicht.
Auf diesem Gerät können nur Cds abgespielt werden, die folgendes Symbol aufweisen.
Reinigen der Linse
Schmutzige Linsen können Audio-Sprünge verursachen. Wenn das Objektiv stark
verschmutzt ist, kann die CD nicht gelesen werden.
Bitte benützen Sie saubere CDs.
Radio Betrieb
Tipp: Wenn Sie das Gerät einstellen, wird der Standard-Zustand UKW (FM) sein.
1. Stellen Sie den Funktionsschalter auf die Position AM/FM-ST/SW1/SW2.
2. Um Ihren Lieblingssender einzustellen, drehen Sie am Einstellknopf (13).
3. Um einen besseren Empfang von FM-ST/SW1/SW Programmen zu bekommen, verlängern
sie so weit wie möglich den Antennenstab (27), dann drehen Sie die Antenne um 360 Grad, bis
das Signal klar empfangen wird.
4. Die FM STEREO-Anzeige (16) wird, wenn sie einen klaren und stabilen Stereo-FM Sender
empfängt, die Power Anzeige / FM-Stereo-Anzeige von grün- blau auf grün wechseln.
Gebrauch des CD Players
Hinweis: Wenn bei der Wiedergabe von CD / USB / SD gelegentlich Probleme auftreten sollten,
schalten Sie das Gerät aus und starten Sie es neu, damit es wieder zur normalen Wiedergabe
kommt.
Benutzung der CDs
Um eine CD aus ihrer Hülle zu entfernen, üben Sie leichten Druck auf die Mitte des
Gehäuses aus und heben Sie die Disc heraus.
Halten Sie die Disc an den Rändern. Vermeiden Sie es, die bespielte Seite der Disc zu
berühren.
Einlegen einer CD
Drücken Sie den CD / USB Knopf, anschließend drücken Sie OPEN / CLOSE, um das
CD-Fach zu öffnen.
(Das CD-Fach nicht mit Gewalt manuell öffnen.)
Legen Sie die CD mit dem Etikett nach oben in das Fach ein.
Schließen Sie manuell das CD-Fach. Wenn es vollständig geschlossen ist, wird die LED-
Anzeige “LOAD” zeigen, nach etwa 10 Sekunden beginnt die CD zu drehen. Dann wird die
LED Anzeige die Gesamtzahl der Titel auf der Disc anzeigen.
Bitte beachten Sie:
Legen Sie in das CD-Fach ausschließlich CDs ein. Andere Gegenstände können den
Mechanismus beschädigen.
Öffnen / Schließen Sie nicht mit Gewalt das CD-Fach.
Wenn das Gerät nicht in Gebrauch ist, muss das CD-Fach geschlossen sein, um das
Eindringen von Schmutz und Staub in den Mechanismus zu verhindern.
Nicht mehr als eine CD einlegen.
Wenn eine CD verschmutzt oder stark zerkratzt ist, kann es sein dass sie nicht abgespielt
wird.
Disc Wiedergabe
Wenn sich die Disc im Laufwerk befindet, wird die Disc gelesen und die Gesamtzahl der
Titel wird angezeigt.
Page 9

DeutschDeutsch
13 14
Wenn die Disc im CD-Format ist, leuchtet die CD-Anzeige CD auf.
Wenn die Disc im MP3-Format ist, leuchtet die MP3-Anzeige auf.
Wenn die Disc in WMA-Format ist, leuchtet die WM-Anzeige auf. Nach der Anzeige der
Gesamtzahl der Titel wird das Gerät automatisch mit der Wiedergabe des ersten Titels
beginnen.
Drücken Sie die STOP-Taste, um die Wiedergabe zu stoppen.
Nach dem Drücken der STOP-Taste können Sie die OPEN / CLOSE-Taste drücken, um
das CD-Fach zu öffnen und die CD zu entnehmen.
Pause
Um die Wiedergabe eines Songs zu unterbrechen, drücken Sie die Play / Pause-Taste.
Die CD wird in den Pause-Modus übergehen, die LED-Anzeige wird die Position des aktuellen
Titels anzeigen. Die Wiedergabe Anzeige wird aufleuchten.
Um die Wiedergabe fortzusetzen, drücken Sie die Play / Pause-Taste.
SCHNELLER VORLAUF UND SCHNELLER RÜCKLAUF
Während des Betriebs kann jederzeit die Funktion BACK / NEXT verwendet werden.
Drücken Sie die NEXT-Taste, um einen neuen Track auszuwählen. Wenn es der letzte
Track auf der CD ist, wird der CD-Spieler zu Track 1 zurückgehen.
Drücken Sie die BACK-Taste, um den vorherigen Track auszuwählen. Falls dies der erste
Track auf der Disc ist, wird der CD-Spieler das letzte Lied überspringen. Die Wiedergabe wird
automatisch nach Abspielen des letzten Titels stoppen und die PLAY / PAUSE-Anzeige wird
nicht aufleuchten. (Wenn Sie die Wiedergabe fortsetzen möchten, drücken Sie die PLAY /
PAUSE-Taste. Die Wiedergabe wird ab dem ersten Titel starten.)
Wenn auf der Disc (MP3/WMA) der USB Einheit oder der SD-Karte viele Tracks vorhanden
sind, können Sie die Taste “10+ (FOLDER)” oder “10 – (FOLDER)” wählen, um schnell Tracks
während der Wiedergabe auszuwählen. Es ist möglich, die Taste “10+ (FOLDER)” oder “10 –
(FOLDER)” zu drücken, um die Datei auszuwählen, von der der Titel gespielt werden soll,
wenn das Gerät nicht im Wiedergabe Modus ist. Wenn zum Beispiel “F 01” angezeigt wird,
wird das Gerät den ersten Titel der ersten Datei abspielen.
Drücken Sie die “10 +”-Taste oder die “10 -” Taste, um 10 Tracks vorwärts oder rückwärts
zu springen, wenn das Gerät im Wiedergabe Modus ist. Wenn nur wenige Tracks übrig bleiben,
um gespielt zu werden, wird durch Drücken der “10 +” Taste der Player zum letzten Song
übergehen.
Wenn der Player angehalten ist, wird durch Drücken der “10 +”-Taste oder der “10 -” Taste
der Player die nächste Datei oder die letzte Datei abspielen.
PROGRAMMIERUNG DER WIEDERGABE
Drücken Sie die “STOP”-Taste, um die Wiedergabe zu stoppen, das Display wird die
Gesamtzahl der Titel anzeigen.
Drücken Sie die “PROGRAM” Taste einmal, das Display wird “P 01” anzeigen.
Drücken Sie die BACK “oder” NEXT-Taste, um den Song, den Sie hören wollen,
auszuwählen und drücken Sie die “PROGRAM” Taste erneut
An diesem Punkt wird die Anzeige “P02” anzeigen, dann wird es möglich sein, einen
zweiten Titel zu programmieren.
(Sie können 20 Titel für das CD-Format programmieren. Sie können 99 Titel für MP3/WMA
programmieren)
Durch Drücken der PAUSE / PLAY / Taste wird die Play-Anzeige aufleuchten und der
Player wird mit der Wiedergabe des ersten gewählten Liedes beginnen.
Nach Beendigung der Wiedergabe aller programmierten Titel wird die CD automatisch
stoppen.
Wenn Sie die Auswahl der Titel aufheben möchten, drücken Sie die STOP-Taste.
Nach der Programmierung kann man wieder auf die Funktionen REPEAT, BACK, NEXT
zugreifen.
Hinweis: Während der Wiedergabe der programmierten Titel sind die Tasten 10 - und 10 +
nicht in Betrieb.
WIEDERHOLUNG DER WIEDERGABE
Sie können die Wiedergabe der Disc oder ausgewählte Tracks wiederholen
WIEDERHOLUNG DER WIEDERGABE EINES TRACKS
Wenn CD / USB / SD-CARD IM Wiedergabe-Modus sind:
Drücken Sie die REPEAT-Taste, die Anzeige REPEAT wird aufscheinen. Der gewählte
Titel wird kontinuierlich abgespielt, bis die STOP-Taste gedrückt wird oder zweimal die REPEATTaste gedrückt wird, die REPEAT-Anzeige erlischt daraufhin.
Die ausgewählten Titel werden gespielt, bis die STOP-Taste gedrückt wird oder die REPEAT-
Taste zweimal gedrückt wird, woraufhin die REPEAT-Anzeige erlischt.
WIEDERHOLUNG DER WIEDERGABE ALLER TRACKS
Wenn CD / USB / SD-CARD gerade im Wiedergabe-Modus sind:
Wenn Sie die REPEAT-Taste zweimal drücken, wird die REPEAT-Anzeige dauerhaft
aufscheinen.
Die Wiedergabe der Titel auf CD / USB / SD wird wiederholt werden, bis die STOP-Taste
gedrückt wird oder die Taste REPEAT zweimal gedrückt wird, woraufhin die REPEAT-Anzeige
erlischt.
Page 10

DeutschDeutsch
15 16
WIEDERHOLTE WIEDERGABE ALLER PROGRAMMIERTEN TRACKS
l Wählen Sie die Titel, die Sie programmieren wollen, drücken Sie die PLAY / PAUSE-Taste,
um die programmierten Titel zu spielen, beginnend mit dem ersten.
l Durch Drücken der Taste REPEAT wird die Wiedergabe des ausgewählten Songs wiederholt
werden, die REPEAT-Anzeige wird blinken. Der programmierte Track wird wiederholt werden,
bis zweimal die STOP-Taste oder zweimal die REPEAT-Taste gedrückt wird.
l Durch zweimaliges Drücken der REPEAT-Taste wird die Wiedergabe aller programmierten
Titel wiederholt werden und die REPEAT-Anzeige wird dauerhaft aufscheinen. Alle
programmierten Titel werden gespielt werden, bis die STOP-Taste oder die Taste REPEAT
gedrückt werden.
Hinweis: Während der Wiedergabe der programmierten Titel werden die Tasten 10 - und 10 +
nicht in Betrieb sein.
VERWENDUNG USB / SD
l Schließen Sie einen USB/MP3 Player an oder legen Sie eine SD / MMC-Karte ein.
l Betätigen Sie den Schalter USB / CD, drücken Sie dann die Taste CD / USB, um die Wiedergabe
der USB-Einheit oder der SD / MMC-Karte zu wählen.
l Nach dem Lesen und der Visualisierung der Tracks wird das Gerät automatisch mit der
Wiedergabe des ersten Titels der USB Einheit oder der SD / MMC-Karte beginnen. Während
der Wiedergabe können Sie die Funktionen benutzen (FAST FORWARD Schnellvorlauf, FAST
BACKWARD Schnellrücklauf, PROGRAM Programmieren und REPEAT PLAYING Wiederholte
Wiedergabe)
ÄNDERUNG DES BETRIEBSMODUS CD / USB / SD
Während der Wiedergabe der Tracks der USB oder SD oder CD Einheit können Sie den CDModus und den USB/SD- Modus konvertieren, indem Sie die CD/USB Taste drücken, woraufhin
die Anzeige CD oder USB aufscheint. . Sobald Sie die Wiedergabe beendet haben, wird das
Gerät damit beginnen, den ersten Titel der CD/MP3 Einheit oder USB-oder SD-Einheit zu
spielen.
Hinweis :a. Dieses Gerät verfügt nicht über eine Ladefunktion. Wenn Sie die Titel einer MP3Einheit oder ähnlichem wiedergeben wollen, die über Batteriebetrieb verfügen, ist es notwendig,
vor der Verbindung mit dem USB-Anschluss die Batterien zu entfernen, da sonst das Gerät
beschädigt werden kann.
b. Diese Vorrichtung ist nicht in der Lage, alle am Markt erhältlichen MP3 Versionen zu
unterstützen.
c.Um eine Beschädigung des USB-Geräts zu verhindern, ist es notwendig, dass die
Wiedergabefunktion und jegliche andere Funktion abgeschlossen ist, bevor man es vom USBAnschluss entfernt
VERWENDUNG DES AUX IN-ANSCHLUSSES
Während des Betriebs des RADIOS (FM/AM/SW1/SW2) kann durch Verbindung des Kabels
RCA 3,5mm mit dem AUX IN-Anschluß (30), nach Unterbrechung des Radiobetriebs (FM/AM/
SW1/SW2) das System in die AUX-Funktion wechseln. Es kann mit der externen Audio-LineBuchse verbunden werden.
Bitte passen Sie die externe Lautstärke an um sicherzustellen, dass die Ausgangslautstärke
optimale Qualität hat.
Hinweis: Wenn Sie den AUX IN-Modus gewählt haben, entfernen Sie bitte das AUX-IN Kabel
vom Gerät, ansonsten kann das Gerät beim Benutzen anderer Funktionenn Stögeräusche
aussenden.
NUTZUNG DER LINE OUT
Wenn das Gerät bei der Wiedergabe von CD / USB / SD / RADIO (AM/FM-ST/SW1/SW2)/
AUX ist, kann durch das Anstecken des Kabels RCA 3,5 mm an den LINE OUT-Anschluss (29)
der externe Audio-Verstärker mit dem AUX IN-Anschluss verbunden werden.
Audio-Einstellung
Für die Audio-Einstellung betätigen Sie den Lautstärke Regler
VERWENDUNG VON KOPFHÖRERN
Durch das Anschliessen der Kopfhörer an die Kopfhörerbuchse wird das Audio nur auf die
Kopfhörer übertragen und die Lautsprecher senden keinen Ton aus.
ECHNISCHE DATEN
Technische Daten
Leistungsaufnahme 230V ¡«50Hz
Volume Output 3,5 X 2 W
Leistungsaufnahme 30W
Produktgröße 510 x 290 x 340mm
Nettogewicht 8,2 kg
Funkfrequenzbereich
FM 87,5 bis 108 MHz
AM 520-1600 KHz
SW1 2,5 bis 7,0 MHz
SW2 7,5 bis 22 MHz
CD-Player
Frequenzgang 100 Hz - 16 kHz
Kopfhörer 3,5 mm Stereo-Kopfhörerstecker
Auf Grund ständiger Verbesserungen bleibt die Änderung der technischen Daten und des
Designs ohne Vorankündigung vorbehalten.
Page 11

FrançaisFrançais
17 18
HRA-1550USMP
Système Musical Nostalgique avec lecteur CD/MP3/USB/SD et Radio Stereo.
MODE D’EMPLOI
Veuillez lire attentivement ce mode d’emploi, afin de familiariser avec votre nouvel appareil avant
de l’utiliser pour la première fois. Veuillez s’il vous plaît garder ce mode d’emploi comme référence
pour le futur.
POSITIONNEMENT DES COMMANDES
1. Porte MP3/USB
2. Porte pour cartes SD/MMC
3. Porte CD
4. Écran LED CD
5. Bouton CD/USB/SD Play/Pause
6. Bouton Stop CD/USB/SD
7. Bouton Programme CD/USB/SD
8. Bouton Répétition CD/USB/SD
9. Bouton Open/Close CD
10. Interrupteur CD/USB/SD
11. Bouton CD/USB/SD 10+
12. Bouton CD/USB/SD 10-
13. Manche de réglage
14. Bouton Nouveau CD/USB/SD
15. Bouton En arrière CD/USB/SD
16. Indicateur d’alimentation / Indicateur FM Stéréo
17. Bouton ondes courtes 2
18. Bouton ondes courtes 1
19. Bouton FM-ST
20. Bouton AM
21. Bouton CD/USB/SD
22. Station bande SW2
23. Station bande SW1
24. Manche Volume on /off
25. Station bande FM
26. Station bande AM
27. Antenne FM/SW1/SW2
28. Câble d’alimentation AC
29. Porte de la sortie du signal audio L/R
ATTENTION
Le symbole “point d’exclamation” à l’intérieur d’un triangle avertit
l’utilisateur que d’importantes instructions d’utilisation et de maintenance
sont contenues dans le mode d’emploi.
Le symbole “éclair” à l’intérieur d’un triangle sert à avertir l’utilisateur de
la présence du courant à l’intérieur du l’appareil qui pourrait constituer
un risque.
Afin de minimiser les risques, ne pas ouvrir le boîtier ni ôter le dos de
l’appareil. En case de panne, faites appel aux techniciens qualifiés pour
les réparations. L’appareil ne renferme aucune pièce reparable par
l’utilisateur.
Cet appareil a été conçu pour une tension d’alimentation de 230V ~
50Hz. Débranchez la prise de courant quand on prévoit de ne pas utiliser
l’appareil pendant un certain temps.
L’unité ne doit pas être exposée à l’humidité ou à la pluie.
Mettez l’appareil sous tension seulement après avoir vérifié que tous
les raccordements soient corrects.
L’appareil doit être gardé dans un endroit suffisamment ventilé. Ne le
gardez jamais par exemple près des rideaux, sur un tapis ou dans des
meubles, tels qu’une bibliothèque.
L’unité ne doit pas être exposée à la lumière directe du soleil ou à des
sources de chaleur.
Comment éliminer ce produit -
(déchets d'équipements électriques et électroniques)
Ce symbole sur le produit ou sa documentation indique qu'il ne doit pas être éliminé
en fin de vie avec les autres déchets ménagers. L'élimination incontrôlée des déchets
pouvant porter préjudice a l'environnement ou a la santé humaine, veuillez le séparer
des autres types de déchets et le recycler de
façon responsable. Vous favoriserez ainsi la réutilisation durable des ressources
matérielles.
Les particuliers sont invites a contacter le distributeur leur ayant vendu le produit
ou a se renseigner auprès de leur mairie pour savoir ou et comment ils peuvent
se débarrasser de ce produit afin qu'il soit recyclé en respectant l'environnement.
Les entreprises sont invitées a contacter leurs fournisseurs et a consulter les conditions
de leur contrat de vente. Ce produit ne doit pas être éliminé avec les autres déchets
commerciaux.
Page 12

FrançaisFrançais
19 20
30. Porte de l’entrée du signal audio L/R
31. Prise pour écouteur 3.5MM
BRANCHEMENT A LA SOURCE D’ALIMENTATION
Avant l’utilisation, vérifier que la tension électrique de votre source d’alimentation corresponde à
celle indiquée sur la plaque des caractéristiques techniques de l’appareil.Avant de brancher
l’appareil au réseau, il faut lire attentivement les instructions suivantes pour des raisons de
sécurité.
UTILISATION DU RESEAU (CA)
L’appareil est conçu pour fonctionner sur une tension de CA 230V, 50Hz seulement. S’il est
branché à d’autres sources d’alimentation cela peut endommager l’appareil.
Danger
Pour éviter tout risque de décharge électrique, débrancher l’appareil avant d’enlever la protection.
A l’intérieur il n’y a pas de parties utilisables. S’adresser au personnel qualifié pour toute opération
d’entretien.
Consignes de Sécurité
N’exposer cet appareil ni à la pluie ni à l’humidité.
Alimentation du réseau: CA 230Volt 50Hz - CC seulement
Ce symbole signifie que l’appareil a été doublement isolé. La connexion de terre n’est pas
nécessaire.
PREPARATION POUR L’UTILISATION
• Enlever le stéréo de son emballage avec attention et garder la boîte en cas
d’utilisation future.
• Avant la mise en service de l’appareil, lire attentivement le mode d’emploi
présent.
Utilisation source d’alimentation CA
• Brancher le cordon d’alimentation CA à votre prise murale CA et alimenter le
réseau. S’assurer que la tension est compatible, 230v 50 Hz.
L’appareil doit être connecté avec le câble et la prise appropriés. Brancher l’appareil et
allumer. Vérifier la compatibilité de la tension de réseau
Lorsque l’appareil n’est pas en cours d’utilisation, tourner le bouton de volume / ON / OFF
sur OFF et déconnecter.
Remarque : Si l’audio d’entrée CD, USB, SD ou AUX-IN est disparu pour plus de 15,
l’appareil s’éteint automatiquement.
Si on veut allumer l’appareil après l’avoir éteint, avant de mettre l’appareil en marche,
tourner la manche VOLUME ON / OFF en position OFF.
Utilisation de la Radio
Astuce : allumer l’appareil, si on n’a appuyé sur aucune des touches de fonction,
l’état par défaut sera FM.
1. Régler le bouton de fonction à la position AM/FM-ST/SW1/SW2.
2. Pour se brancher à la station préférée, tourner la manche de réglage (13).
3. Afin d’être en mesure d’avoir une meilleure réception des programmes FM-ST/SW1/SW2,
prolonger autant que possible la tige d’antenne (27), puis faire pivoter l’antenne à 360
degrés, jusqu’à ce qu’il soit reçu clairement le signal.
4. L’indicateur FM STÉRÉO (16), lorsqu’il reçoit une station radio stéréo FM-ST claire et
stable, la couleur de l’indicateur de l’alimentation / indicateur FM stéréo passera du vert bleu
au vert.
Utilisation du lecteur CD
Remarque : Si pendant la lecture de CD / USB / SD sont parfois présents des
problèmes, éteindre l’appareil et le redémarrer, en revenant ainsi à la lecture
normale.
Gestion des CD
Pour retirer un CD de son boîtier, appuyer sur le centre du boîtier et soulever le disque.
Tenir le disque par les bords. Éviter de toucher la face enregistrée du disque
Chargement des disques
Appuyer sur la touche CD / USB, puis appuyer sur la touche OPEN / CLOSE pour ouvrir la
porte des CD.
(Ne pas forcer pour ouvrir la porte du CD manuellement.)
Insérer le CD dans le compartiment avec l’étiquette vers le haut.
Fermer manuellement la porte du compartiment de CD. Lorsqu’il est complètement fermé,
l’écran LED affichera l’inscription « LOAD », après environ 10 secondes, le CD commencera
à tourner. Ensuite, l’écran LED affichera le nombre total de plages sur le disque.
Faire attention à :
Insérer dans le compartiment CD exclusivement CD. D’autres objets peuvent endommager
le mécanisme.
Ne pas forcer l’ouverture / fermeture manuelle de la porte du compartiment de CD.
Lorsque l’appareil n’est pas utilisé, garder la porte du compartiment CD fermée pour éviter
que la saleté et la poussière pénètrent dans le mécanisme.
Ne pas insérer plus d’un CD à la fois.
Si un disque est trop sale ou rayé profondément, il pourrait ne pas être reproduit.
Page 13

FrançaisFrançais
21 22
Lecture de CD
Lorsque le disque est dans le lecteur, le lecteur lira le disque et affichera le nombre total de
plages.
Si le disque est dans le format de CD, s’allumera l’indicateur CD.
Si le disque est un disque MP3, s’allumera l’indicateur MP3.
Si le disque est au format WMA, s’allumera l’indicateur WMA. Après l’affichage du nombre
total de plages, l’appareil commencera automatiquement la lecture de la première plage.
Appuyer sur la touche STOP pour arrêter la lecture.
Après avoir appuyé sur le bouton STOP, on peut appuyer sur la touche OPEN / CLOSE
pour ouvrir la porte du compartiment de CD pour tirer le CD.
Pause
Pour interrompre momentanément une plage, appuyer sur le bouton Play / Pause. Le
disque ira à l’état de pause, l’écran LED indiquera la position de la plage actuelle. S’allumera
l’indicateur de la reproduction.
Pour reprendre la lecture, appuyer sur le bouton Play / Pause.
AVANT ET ARRIÈRE RAPIDE
Pendant le fonctionnement peut être utilisée à tout moment la fonction BACK / NEXT.
Appuyer sur la touche NEXT pour sélectionner une nouvelle piste. Si c’est la dernière
plage du disque, le joueur se déplace sur la piste 1.
Appuyer sur le bouton BACK pour sélectionner la dernière piste. Si c’est la première
piste du disque, le lecteur sautera la dernière plage. La lecture s’arrêtera automatiquement
après la lecture de la dernière piste, et l’indicateur PLAY / PAUSE ne s’allumera pas. (Si on
souhaite poursuivre la reproduction, appuyer sur le bouton PLAY / PAUSE. La reproduction
commencera à partir de la première plage.)
Si sur le disque (MP3/WMA), la clé USB ou une carte SD, il y a beaucoup de pistes, il
est possible d’appuyer sur le bouton “10 + (FOLDER)” ou le bouton “10 - (FOLDER)” pour
sélectionner rapidement les pistes pendant la lecture. On peut appuyer sur le bouton “” 10 +
(FOLDER) “ou.” 10 - (FOLDER) “pour sélectionner le fichier à partir duquel lire les plages
lorsque l’appareil n’est pas en cours de lecture. Par exemple, on a affiché “ F 01 “ l’appareil
commencera à jouer la première piste du premier fichier.
Appuyer sur la touche «10 +» ou «10 -» pour avancer ou reculer de dix pistes à
reproduire lorsque l’appareil est en cours de reproduction. Quand il y a peu de pistes à jouer,
en appuyant sur le bouton “10 +”, le lecteur passe à la dernière plage.
Lorsque le lecteur est arrêté, en appuyant sur la touche «10 +» ou la touche «10 -», le
joueur va au fichier suivant ou le dernier fichier de pistes à reproduire.
PROGRAMMATION DE REPRODUCTION
Appuyer sur la touche « STOP » pour arrêter la lecture, l’écran affichera le nombre total
de plages.
Appuyer sur la touche « PROGRAM » une fois, l’écran affichera « P 01 ».
Appuyer sur la touche « BACK » ou « NEXT » pour sélectionner les plages qu’on
souhaite écouter et appuyer encore une fois sur le bouton « PROGRAM »
À ce stade, l’écran affichera « P02 », alors il sera possible de programmer une seconde
piste.
(On peut programmer 20 plages pour le format CD. Il est possible de programmer 99 plages
pour MP3/WMA)
En appuyant sur la touche PAUSE / PLAY /, s’allumera l’indicateur Play et le lecteur
commencera la lecture de la première plage sélectionnée.
Après avoir terminé la lecture de toutes les plages programmées, le CD s’arrêtera
automatiquement.
Si on souhaite annuler les pistes sélectionnés, appuyer sur la touche STOP.
Après la programmation, seront opérationnelles les fonctions REPEAT, BACK, NEXT.
Remarque : Pendant la lecture des plages programmées, les touches 10 - et 10 + ne seront
pas opérationnelles.
RÉPÉTITION DE LA REPRODUCTION
Il est possible de répéter la lecture du disque ou des pistes sélectionnées
RÉPÉTITION DE LA LECTURE D’UNE PISTE
Lorsque le CD / USB / SD CARD sont en cours de lecture :
Appuyer sur le bouton REPEAT, s’allumera l’indicateur REPEAT. Puis la piste
sélectionnée sera lue en continu jusqu’à ce que ne soit pas appuyé le bouton STOP ou deux
fois le bouton REPEAT, à ce point, l’indicateur REPEAT s’éteindra.
Les plages sélectionnées seront jouées jusqu’à ce que ne soit appuyé le bouton STOP
ou deux foix sur la touche REPEAT, à ce point, l’indicateur REPEAT s’éteindra.
LECTURE RÉPÉTÉE DE TOUTES LES PISTES
Lorsque le CD / USB / SD CARD sont en cours de lecture :
Appuyer sur le bouton REPEAT deux fois, l’indicateur REPEAT restera allumé.
Il sera répété la lecture des pistes sur le disque / USB / SD jusqu’à ce que ne soit
appuyé le bouton STOP ou deux fois le bouton REPEAT, à ce stade, l’indicateur REPEAT
s’éteindra.
LECTURE RÉPÉTÉE DE TOUTES LES PISTES PROGRAMMÉES
Sélectionner les plages qu’on souhaite programmer, appuyer sur le bouton PLAY /
PAUSE pour lire les plages programmées, à commencer par la première.
En appuyant sur la touche REPEAT, sera répétée la lecture de la plage sélectionnée,
l’indicateur REPEAT clignotera. La piste programmée sera répétée jusqu’à ce que l’on
appuie deux fois sur la touche STOP ou deux fois la touche REPEAT.
En appuyant sur la touche REPEAT deux fois, il sera répété la lecture de toutes les
plages programmées et l’indicateur REPEAT restera allumé. Toutes les pistes
programmées seront lues jusqu’à ce que le bouton STOP ou la touche REPEAT ne soient
Page 14

FrançaisFrançais
23 24
pas appuyés.
Remarque : Pendant la lecture des plages programmées, les touches 10 - et 10 et + ne
seront pas opérationnelles.
UTILISATION USB / SD
l Insérer un lecteur USB/MP3 ou une carte SD / MMC.
l Appuyer sur la commutation de fonction USB / CD, puis appuyer sur le bouton CD / USB
pour sélectionner la lecture de l’unité SB ou de la carte SD / MMC.
l Une fois terminés la lecture et l’affichage des pistes, l’appareil commencera
automatiquement la lecture de la première plage de l’unité USB / SD / MMC. Pendant la
lecture, on pourra utiliser les fonctions (FAST FORWARD, FAST BACKWARD, PROGRAM
et REPEAT PLAYING).
CONVERSION DU FONCTIONNEMENT CD / USB / SD
Pendant la lecture des pistes de la clé USB ou SD ou CD, on peut convertir le mode CD et
USB / SD, en appuyant sur le bouton CD / USB, en même temps s’allumera l’indicateur CD
ou USB. Une fois que la lecture est terminé, l’appareil commencera à jouer la première piste
du lecteur CD/MP3 ou USB ou SD.
Remarque : a. Cet appareil n’a pas de fonction de charge. Si on souhaite reproduire les
pistes sur un lecteur MP3 ou autre, fourni avec piles, avant la connexion à la porte USB, il
est nécessaire d’enlever les batteries, sinon ce dispositif pourrait être endommagé.
b. Ce dispositif n’est pas en mesure de supporter toutes les versions du MP3 sur le marché.
c. Pour éviter d’endommager le périphérique USB, avant de le retirer de la porte USB, il est
nécessaire que la reproduction ou toute autre fonction soit terminée
UTILISATION DE LA PORTE AUX IN
Pendant le fonctionnement de laRADIO (FM/AM/SW1/SW2), en insérant le câble de
connexion RCA 3.5mm RCA dans la porte AUX IN (30), une fois déconnectée la RADIO (FM/
AM/SW1/SW2), le système passera à la fonction AUX. Il peut être connecté à la prise de
ligne audio extérieure.
S’il vous plaît, régler le volume sonore extérieur pour s’assurer que le volume de sortie ait
une qualité optimale.
Remarque : Lorsqu’il est en cours le mode AUX IN, s’il vous plaît, retirer le câble AUX IN de
l’appareil, sinon lors de l’utilisation d’autres fonctions, l’appareil pourrait émettre des sons de
trouble.
UTILISATION DE LA LIGNE OUT
Lorsque l’appareil est en mode de lecture de CD / USB / SD / RADIO (AM/FM-ST/SW1
SW2) / AUX, en insérant le câble RCA de 3,5 mm dans la porte LINE OUT (29), il pourra être
connecté à la porte AUX IN via l’amplificateur audio extérieur.
Réglage audio
Pour régler l’audio, tourner la manche de volume
UTILISATION D’UN CASQUE
En insérant les écouteurs dans la prise pour casque, le son sera transmis uniquement aux
écouteurs, et les haut-parleurs n’émetteront pas de son.
Entretien et maintenance
Nettoyage des CD
* Pour enlever les traces de doigts et la poussière de la surface du disque, utiliser un chiffon
doux.
* Essuyer en ligne droite à partir du centre vers l’extérieur du disque. Des petites particules
de poussière et des petites taches n’affecteront pas la qualité de reproduction.
* Pour nettoyer les CD, ne jamais utiliser de produits chimiques : tels que des sprays pour
disques, des sprays antistatiques, du benzène ou des diluants.
* Afin de réduire les risques d’éraflures, après l’utilisation des CD, les stocker dans leurs
étuis.
* Ne pas exposer les CD directement au soleil, à une humidité élevée ou à des
températures élevées pendant de longues périodes de temps.
* Ne pas coller d’adhésifs ni écrire sur les deux côtés du CD.
* Sur cet appareil ne peuvent être lus que les CD qui affichent ce symbole.
Nettoyage de la lentille
* Les lentilles sales peuvent provoquer des sauts audio. Si la lentille est très sale, le CD
pourrait ne pas être lu.
* S’il vous plaît, utiliser des disques propres.
CARACTERISTIQUES TECHNIQUES
spécifications techniques
Puissance 2 30V ¡«50Hz
Volume de sortie 3,5 X 2 W
Consommation 30W
taille du produit 510 x 290 x 340mm
Poids net 8,2 kg
Gamme de fréquences de radio
FM 87,5-108 MHz
AM 520-1600 KHz
SW1 2,5 à 7,0 MHZ
SW2 7,5 à 22 MHz
Lecteur CD
Réponse en fréquence 100Hz - 16 KHz
Prise casque casque stéréo 3,5 mm
Caractéristiques sujets à modifications sans avis préalable.
Page 15

ItalianoItaliano
25 26
HRA-1550USMP
RADIO STEREO VINTAGE HI-FI CON LETTORE CD/MP3 E LETTORE USB/SD
INTRODUZIONE
Raccomandiamo la lettura accurata di questo manuale per potervi familiarizzare con il vostro
nuovo SISTEMA AUDIO prima di utilizzarlo per la prima volta. Raccomandiamo di conservare
questo manuale per futuri riferimenti
LOCALIZZAZIONE DEI CONTROLLI
1. Porta MP3/USB
2. Porta per schede SD/MMC
3. Porta CD
4. Display LED CD
5. Tasto CD/USB/SD Play/Pause
6. Tasto Stop CD/USB/SD
7. Tasto Programma CD/USB/SD
8. Tasto Ripetizione CD/USB/SD
9. Tasto Open/Close CD
10. Interruttore CD/USB/SD
11. Tasto CD/USB/SD 10+
12. Tasto CD/USB/SD 10-
13. Manopola sintonia
14. Tasto Nuovo CD/USB/SD
15. Tasto Indietro CD/USB/SD
16. Indicatore alimentazione / Indicatore FM Stereo
17. Tasto onde corte SW2
18. Tasto onde corte SW1
19. Tasto FM-ST
20. Tasto AM
21. Tasto CD/USB/SD
22. Scala Banda SW2
23. Scala Banda SW1
24. Manopola Volume on /off
25. Scala Banda FM
26. Scala Banda AM
27. Antenna FM/SW1/SW2
Il punto esclamativo all’interno di un triangolo avverte l’utente che il
libretto d’istruzioni contiene delle importanti istruzioni per l’uso e la
manutenzione.
Il simbolo del fulmine all’interno di un triangolo avverte l’utente della
presenza di una pericolosa tensione all’interno dell’apparecchio.
Per ridurre i rischi di scosse elettriche, non aprire l’apparecchio.
L’apparecchio non contiene parti riparabili dall’utente. In caso di
guasto fare appello a tecnici qualificati per le riparazioni.
Questo apparecchio è stato progettato per funzionare a 230V ~
50Hz. Se nonsi intende utilizzare l’apparecchio per un lungo periodo
di tempo, rimuovere la spina dalla presa di corrente.
Non esporre l’apparecchio alla pioggia o all’umidità.
Utilizzare l’apparecchio solo dopo aver verificato che tutte le
connessioni siano state eseguite correttamente.
Posizionare l’apparecchio in un luogo sufficientemente ventilato.
Evitare di sistemarlo vicino a tende, sul tappeto o all’interno di un
mobile quale, ad esempio, una libreria.
Non esporre l’apparecchio alla luce diretta del sole o a fonti di calore.
ATTENZIONE
Corretto smaltimento del prodotto - (rifiuti elettrici ed elettronici)
II marchio riportato sul prodotto e sulla sua documentazione indica che il prodotto
non deve essere smaltito can altri rifiuti domestici al termine del ciclo di vita. Per
evitare eventuali danni all'ambiente o alla salute causati dall'inopportuno smaltimento
dei rifiuti, si invita l'utente a separare questo prodotto da altri tipi di rifiuti e di riciclarlo
in maniera responsabile per favorire il riutilizzo sostenibile delle risorse materiali.
Gli utenti domestici sono invitati a contattare il rivenditore presso il quale e stato
acquistato il prodotto a l'ufficio locale preposto per tutte le informazioni relative alla
raccolta differenziata e al riciclaggio per questo tipo di prodotto.
Gli utenti aziendali sono invitati a contattare il proprio fornitore e verificare i termini
e le condizioni del contratto di acquisto. Questo prodotto non deve essere smaltito
unitamente ad altri rifiuti commerciali.
Page 16

ItalianoItaliano
27 28
28. Cavo di alimentazione AC
29. Porta uscita segnale audio L/R
30. Porta ingresso segnale audio L/R
31. Jack auricolare 3.5MM
COLLEGAMENTO ALLA FONTE DI ALIMENTAZIONE
Prima di accendere l’apparecchio assicurarsi che il voltaggio locale sia lo stesso di quello indicato
sulla targhetta dei dati di funzionamento.
Per la vostra propria sicurezza leggere le seguenti istruzioni accuratamente prima di cercare di
collegare questo apparecchio alla presa di corrente.
FUNZIONAMENTO A CA
Questo apparecchio è stato progettato per funzionare solo con una fonte di alimentazione di AC
230V 50Hz. Il collegamento ad un atro tipo di fonte di alimentazione potrebbe danneggiare
l’apparecchio.
Attenzione
Per prevenire le scariche elettriche, scollegare la spina prima di rimuovere il coperchio.
Fare riferimento al personale di un centro di servizi qualificato.
Precauzioni di Sicurezza
Non esporre l’apparecchio alla pioggia o all’umidità.
Fonte di Alimentazione Principale: solo AC 230V / 50Hz - AC
Questo simbolo significa che questo apparecchio è doppiamente isolato. Non è
richiesto un collegamento a terra.
ALIMENTAZIONE
Rimuovere accuratamente l’apparecchio dalla scatola, conservare l’imballaggio per un futuro
uso. Leggere accuratamente queste istruzioni prima dell’uso.
ALIMENTAZIONE CA
Collegare il cavo elettrico alla presa di corrente AC. Controllare che la vostra fonte di alimentazione
sia di 230V, 50 Hz.
L’unità deve essere collegata con idoneo cavo e presa. Collegare l’unità e accendere.
Assicurarsi che la compatibilità della tensione di rete.
Quando l’apparecchio non è in funzione, ruotare la manopola del volume / ON / OFF su
OFF e scollegare.
Nota: Se l’audio dell’ingresso CD, USB, SD o AUX-IN manca per più di 15 , l’unità si auto
spegne. Se si desidera attivare l’unità dopo averla spenta, prima di accendere l’unità, girare
la manopola VOLUME ON / OFF in posizione OFF .
Utilizzo della Radio
Suggerimento: all’accensione dell’unità, se non è stato premuto nessuno dei tasti funzione,
lo stato di default sarà FM.
1.Portate la manopola delle funzioni sulla posizione AM/FM-ST/SW1/SW2 .
2. Per sintonizzarsi sulla stazione preferita ruotare la manopola di sintonizzazione (13).
3.Per poter avere una migliore ricezione dei programmi FM-ST/SW1/SW2, estendere il più
possibile l’asta dell’antenna (27) , e quindi ruotare l’antenna di 360 gradi, fino a che non si
riceverà chiaramente il segnale.
4. L’indicatore FM STEREO (16), quando riceve una chiara e stabile stazione radio stereo
FM-ST, il colore dell’indicatore dell’alimentazione / indicatore FM stereo passerà da verde
blu a verde .
Utilizzo del lettore CD
Nota: Se durante la riproduzione di CD / USB / SD dovessero di tanto in tanto insorgere dei
problemi, spegnere l’apparecchio e riavviarlo, ritornando così alla riproduzione normale.
Gestione dei CD
Per rimuovere un CD dalla sua custodia, premere il centro della custodia e sollevare il
disco.
Tenere il disco per i bordi. Evitare di toccare il lato registrato del disco
Caricamento dei CD
Premere il pulsante CD / USB, quindi premere il pulsante OPEN / CLOSE per aprire lo
sportello del CD.
(Non forzare per aprire la porta del CD manualmente.)
Inserire il CD nel vano con il lato dell’etichetta rivolto verso l’alto.
Chiudere manualmente la porta del vano CD . Quando sarà completamente chiuso, sul
display LED apparirà la scritta “LOAD” , dopo circa 10 secondi il CD inizierà a girare. Poi il
display LED visualizzerà il numero totale di brani del disco.
Prestare attenzione a:
* Inserire nel vano CD solo ed esclusivamente CD. Altri oggetti potrebbero danneggiare il
meccanismo.
Non forzare l’apertura / chiusura manuale della porta del vano CD.
Quando l’unità non è in funzione tenere la porta del vano CD chiusa per prevenire che
sporco e polvere entrino nel meccanismo.
Non inserire più di un CD alla volta.
Se un disco è troppo sporco o profondamente graffiato , potrebbe no essere riprodotto.
Page 17

ItalianoItaliano
29 30
Riproduzione CD
l Quando il disco è inserito nell’unità, l’unità leggerà il disco e visualizzare il numero totale dei
brani.
l Se il disco è in formato CD, si illuminerà l’indicatore CD .
l Se il disco è in formato MP3, si illuminerà l’indicatore MP3.
l Se il disco è in formato WMA, si illuminerà l’indicatore WMA . Dopo aver visualizzato il numero
totale dei brani, l’apparecchio comincerà a riprodurre automaticamente il primo brano.
l Premere il pulsante STOP per interrompere la riproduzione.
l Dopo aver premuto il tasto STOP, è possibile premere il tasto OPEN / CLOSE per aprire la
porta del vano CD per estrarre il CD .
Pausa
l Per interrompere temporaneamente un brano, premere il tasto Play / Pause. Il disco passerà
allo stato di pausa, il display LED indicherà la posizione del brano corrente. Si accenderà
l’indicatore della riproduzione.
l Per riprendere la riproduzione, premere il pulsante Play / Pause.
AVANTI VELOCE E INDIETRO VELOCE
l Durante il funzionamento potrà essere utilizzata in qualsiasi momento la funzione BACK/
NEXT.
l Premere il pulsante NEXT per selezionare una nuova traccia. Se è l’ultima traccia del
disco, il riproduttore si porterà alla traccia 1.
l Premere il pulsante BACK per selezionare l’ultima traccia Se è la prima traccia del disco,
il riproduttore salterà l’ultimo brano. La riproduzione si fermerà automaticamente la
riproduzione dopo aver riprodotto l’ultima traccia, e l’indicatore PLAY / PAUSE non si
accenderà. (Se si desidera continuare la riproduzione, premere il tasto PLAY / PAUSE. La
RIPETIZIONE DELLA RIPRODUZIONE
È possibile ripetere la riproduzione del disco o le tracce selezionate
RIPETIZIONE DELLA RIPRODUZIONE DI UNA TRACCIA
Quando CD/USB / SD CARD sono in fase di riproduzione:
l Premere il pulsante REPEAT, si accenderà l’indicatore REPEAT . Quindi il brano
selezionato sarà riprodotto in continuo fino a quando non sarà premuto il tasto STOP o
due volte il tasto REPEAT, a questo punto l’indicatore REPEAT si spegnerà.
l I brani selezionati saranno riprodotti fino a quando non sarà premuto il tasto STOP o
due volte il tasto REPEAT, a questo punto l’indicatore REPEAT si spegnerà.
La riproduzione comincerà dal primo brano.)
l Se nel disco (MP3/WMA) unità USB o scheda SD sono presenti molte tracce, è possibile
premere il tasto “10+ (FOLDER)” o il tasto “10- (FOLDER)” per selezionare le tracce
rapidamente in fase di riproduzione. È possibile premere il tasto “”10+ (FOLDER)” o “10 (FOLDER)” per selezionare il file dal quale riprodurre i brani , quando l’unità non è in fase di
riproduzione. Ad esempio, è visualizzato “F 01” l’unità inizierà a riprodurre la prima traccia
del primo file.
l Premere il tasto “10 +” o il tasto “10 -” per saltare avanti o indietro dieci tracce da
riprodurre, quando l’unità è in fase di riproduzione. Quando sono rimaste poche tracce da
riprodurre, premendo il tasto “10 +” , il riproduttore passa all’ultimo brano.
l Quando il riproduttore è fermo, premendo il tasto “10 +” o il tasto “10 -” il riproduttore
passa al file successivo o all’ultimo file di tracce da riprodurre.
PROGRAMMAZIONE DELLA RIPRODUZIONE
l Premere il pulsante “STOP” per interrompere la riproduzione, il display visualizzerà il
numero totale dei brani.
l Premere il tasto “PROGRAM” una sola volta, il display visualizzerà “P 01”.
l Premere il tasto BACK” or “NEXT per scegliere i brani che si desidera ascoltare e premere
ancora una volta il tasto “PROGRAM”
l A questo punto, il display visualizzerà “P02”, quindi sarà possibile programmare una
seconda traccia.
(È possibile programmare 20 brani per il formato CD. È possibile programmare 99 brani per
il MP3/WMA)
l Premendo il tasto PAUSE / PLAY /, si illuminerà indicatore Play e il riproduttore inizierà a
riprodurre il primo brano selezionato.
l Dopo aver terminato la riproduzione di tutti i brani programmati , il CD si arresterà
automaticamente.
l Se si desidera annullare le tracce selezionate, premere il tasto STOP.
l Dopo la programmazione saranno operative le funzioni REPEAT, BACK, NEXT.
Nota: Durante la riproduzione dei brani programmati i tasti 10 – e 10 + non saranno
operativi.
RIPETIZIONE DELLA RIPRODUZIONE DI TUTTE LE TRACCE
Quando CD/USB / SD CARD sono in fase di riproduzione:
l Premere il pulsante REPEAT due volte, l’indicatore REPEAT resterà acceso.
l Sarà ripetuta la riproduzione delle tracce presenti nel disco / USB / SD fino a quando non
sarà premuto il tasto STOP o due volte il tasto REPEAT , a questo punto l’indicatore
REPEAT si spegnerà.
RIPETIZIONE DELLA RIPRODUZIONE DI TUTTE LE TRACCE PROGRAMMATE
l Selezionare i brani che si desidera programmare , premere il pulsante PLAY / PAUSE per
riprodurre i brani programmati , cominciando dal primo.
l Premendo il pulsante REPEAT , sarà ripetuta la riproduzione del brano selezionato,
l’indicatore REPEAT lampeggerà. Il brano programmato sarà ripetuta fino a quando non sarà
premuto due volte il tasto STOP o premuto per due volte il tasto REPEAT.
Page 18

ItalianoItaliano
31 32
l Premendo il tasto REPEAT due volte, sarà ripetuta la riproduzione di tutti i brani
programmati e l’indicatore REPEAT resterà acceso. Tutti i brani programmati saranno
riprodotti fino a quando non sarà premuto il tasto STOP o il tasto REPEAT.
Nota: Durante la riproduzione dei brani programmati i tasti 10 – e 10 e + non saranno
operativi.
UTILIZZO USB/SD
l Inserire un lettore USB/MP3 o una scheda SD/ MMC.
l Premere il commutatore della funzione USB / CD, quindi premere il tasto CD / USB per
selezionare la riproduzione dell’unità SB o della scheda SD / MMC .
l Una volta terminata la lettura e la visualizzazione delle tracce , il dispositivo comincerà a
riprodurre automaticamente il primo brano dell’unità USB / SD / MMC. Durante la
riproduzione sarà possibile utilizzare le funzioni (FAST FORWARD, FAST BACKWARD,
PROGRAM e REPEAT PLAYING).
CONVERSIONE FUNZIONAMENTO CD/USB/SD
Durante la riproduzione delle tracce delle unità USB o SD o CD , è possibile convertire le
modalità CD e USB / SD premendo il tasto CD / USB, contemporaneamente si accenderà
l’indicatore CD o USB . Una volta terminata la riproduzione, il dispositivo inizierà a
riprodurre la prima traccia dell’unità CD/MP3 o USB o SD.
Nota: a. Questo dispositivo non ha funzione di ricarica. Se si desidera riprodurre i brani di
un’unità MP3 o di altro genere, provvista di batterie, prima di collegarle alla porta USB è
necessario togliere le batterie, altrimenti questo dispositivo potrebbe danneggiarsi.
b. Questo dispositivo non è in grado di supportare tutte le versioni MP3 del mercato.
c. Per evitare di danneggiare l’unità USB , prima di estrarlo dalla porta USB è necessario
che la riproduzione e qualsiasi altra funzione sia terminata
UTILIZZO DELLA PORTA AUX IN
Durante il funzionamento della RADIO (FM/AM/SW1/SW2) , inserendo il cavo di
collegamento RCA 3.5mm nella porta AUX IN (30), una volta scollegata la RADIO (FM/AM/
SW1/SW2) , il sistema passerà alla funzione AUX . Può essere collegato con lo jack della
linea audio esterna .
Si prega di regolare il volume dell’audio esterno per assicurarsi che il volume di uscita abbia
una qualità ottimale.
Nota: Quando è in funzione la modalità AUX IN, si prega di togliere il cavo AUX IN dall’unità,
altrimenti durante l’utilizzo di altre funzioni , l’unità potrebbe emette suoni di disturbo.
UTILIZZO DELLA LINEA OUT
Quando il dispositivo è in fase di riproduzione di CD / USB / SD / RADIO (AM/FM-ST/SW1/
SW2) / AUX inserendo il cavo RCA 3,5 di millimetri nella porta LINE OUT (29)., potrà essere
collegato alla porta AUX IN tramite l’amplificatore audio esterno.
UTILIZZO DELLE CUFFIE
Inserendo le cuffie nel jack per le cuffie, l’audio sarà trasmesso solo alle cuffie , e gli
altoparlanti non emetteranno alcun suono.
Cura e Manutenzione
Pulizia dei CD
l Per rimuovere eventuali impronte digitali e polvere dalla superficie del disco utilizzare un
panno morbido.
l Pulire in linea retta dal centro verso l’esterno del disco. Piccole particelle di polvere e
piccole macchie non influenzeranno la qualità di riproduzione.
l Per la pulizia dei CD non utilizzare mai prodotti chimici: come spray per dischi, spray
antistatici, benzene o diluenti.
l Per ridurre il rischio di graffi, dopo l’utilizzo, riporre i CD nelle loro custodie .
l Non esporre i CD alla luce solare diretta, a elevata umidità o a temperature elevate per
lunghi periodi di tempo.
l Non incollare adesivi o scrivere su entrambi i lati del CD.
l Su questa unità potranno essere riprodotti solo CD che visualizzano questo simbolo.
Pulizia delle lenti
l Lenti sporche possono provocare balzi audio. Se l’obiettivo è molto sporco, il CD potrebbe
non essere letto.
l Si prega di utilizzare dischi puliti.
specifiche tecniche
Ingresso alimentazione 230V 50Hz
Volume di uscita 3,5 X 2 W
Consumo di energia 30W
Dimensioni del prodotto 510 x 290 x 340 millimetri
Peso netto 8,2 kg
Gamma di frequenza radio
FM 87.5-108 MHz
AM 520-1600 KHz
SW1 2,5-7,0 MHZ
SW2 7,5-22 MHZ
lettore CD
Risposta in frequenza 100Hz - 16 KHz
Spinotto delle cuffie Cuffie stereo da 3,5 mm
Specifiche soggette a variazioni senza preavviso.
Page 19

EspañolEspañol
33 34
HRA-1550USMP
REPRODUCTOR DE CD/MP3 CON RADIO ESTÉREO Y USB/SD
MANUAL INSTRUCCIONES
Recomendamos la lectura cuidadosa de este manual para poderse familiarizar con su nuevo
Radio-Tocadiscos antes de utilizarlo por la primera vez. Recomendamos conservar este manual
para futuras consultaciones.
LOCALIZACIÓN DE LOS CONTROLES
1. Puerto MP3/USB
2. Ranura para tarjetas SD/MMC
3. Ranura CD
4. Pantalla LED CD
5. Botón CD/USB/SD Play/Pause
6. Botón Stop CD/USB/SD
7. Botón programa CD/USB/SD
8. Botón Repetición CD/USB/SD
9. Botón Open/Close CD
10. Interruptor CD/USB/SD
11. Botón CD/USB/SD 10+
12. Botón CD/USB/SD 10-
13. Perilla de sintonía
14. Botón Nuevo CD/USB/SD
15. Botón retroceso CD/USB/SD
16. Indicador alimentación / Indicador FM estéreo
17. Botón Onda Corta 2
18. Botón Onda Corta 1
19. Botón FM-ST
20. Botón AM
21. Botón CD/USB/SD
22. Banda Emisora SW2
23. Banda Emisora SW1
24. Perilla Volúmen on /off
25. Banda Emisora FM
26. Banda Emisora AM
27. Antena FM/SW1/SW2
28. Cable de alimentación AC
29. Puerto salida audio L/R
El símbolo de exclamación dentro un triángulo tiene el objeto de
advertir al usuario de la presencia de instrucciones importantes de
funcionamiento y mantenimiento en la documentación adjunta con
el equipo.
El símbolo del rayo con punta de flecha dentro de un triángulo
advierte al usuario de la presencia de tensiones peligrosas en el
equipo.
Para reducir los riesgos de descargas eléctricas, no retire la
cubierta. La unidad no hay en su interior componentes que pueda
manipular el usuario. Encargue su reparación a personal cualificado.
Esta unidad funciona con 230V ~ 50Hz. Cuando el equipo vaya a
estar un tiempo prolongado sin utilizarse, desenchufar el cable de
alimentación.
La unidad no debería ser expuesta a lluvia o humedad.
No conecte la unidad hasta que no se hayan efectuado todas las
otras conexiones.
La unidad se debe instalar de forma que su posición no le impida
tener ventilación adecuada. Por ejemplo, el equipo no se debe
colocar cerca de cortinas o sobre el tapete, ni en una instalación
como puede ser un armario.
La unidad no debería ser expuesta a la luz solar directa ni a fuentes
emisora de calor.
ATENCIÓN
Eliminación correcta de este producto -
(material electrico y electrónico de descarte)
La presencia de esta marca en el producto o en el materiál informativo que lo
acompaña, indica que al finalizar su vida útil no deberá eliminarse junto con otros
residuos domésticos. Para evitar los posibles daños al medio ambiente o a la salud
humane que representa la eliminación incontrolada de residuos, separe este producto
de otros tipos de residuos y reciclelo correctamente para promover la reutilización
sostenible de recursos materiales. Los usuarios particulares pueden contactar con
el establecimiento donde adquirieron el producto, o con las autoridades locales
pertinentes, para informarse sobre cómo y dónde pueden lIevario para que sea sometido
a un reciclaje ecológico y seguro. Los usuarios comerciales pueden contactar con
su proveedor y consultar las condiciones del contrato de compra. Este produco no
debe eliminarse mezclado con otros residuos comerciales.
Page 20

EspañolEspañol
35 36
CONEXIÓNA LA FUENTE DE ALIMENTACIÓN
Antes de activar el aparato asegurarse de que el voltaje local corresponda al voltaje indicado en
la placa de los datos de funcionamiento.
Para su propia seguridad leer las siguientes instrucciones con cuidado antes de conectareste
aparato a la toma de corriente.
FUNCIONAMIENTO CON RED CA
Este aparato ha sido diseñado para que funcione con una fuente de alimentación de CA 230V,
50Hz. La conexión a otro tipo de fuente de alimentación podría dañar el aparato.
Atención
Para prevenir las descargas eléctricas desconectar la clavija antes de remover la tapa. No
emplear las partes utilizables en el interior. Dirigirse al personal de un centro de servicios calificado.
Precauciones de Seguridad
No exponer el aparato a la lluvia o a la humedad.
Fuente de Alimentación Principal: solamente CA 230V 50 Hz - CA
Este símbolo significa que este aparato está doblemente aislado. No se requiere una
conexión a tierra.
PREPARACIÓN AL USO
• Extraer con cuidado el aparato de la caja, conservar el embalaje para un eventual
uso futuro.
• Recomendamos una lectura cuidadosa de este manual de instrucciones antesde poner
en función el aparato.
Funcionamiento con Red CA
• Conectar el cable de alimentación a su toma de corriente doméstica y activar el
aparato. Asegurarse de que el voltaje sea compatible.
• Desconectar el cable de alimentación de la toma de corriente cuando no se
utilizará el aparato.
La unidad debe ser conectada con un cable y enchufe apropiados. Conectar el aparato y
encender. Comprobar la compatibilidad de la tensión de red.
Cuando el aparato no está en funcionamiento, girar la perilla de volúmen / ON / OFF en
OFF y desconecte.
Nota: Si la entrada de audio de CD, USB, SD o AUX-IN está desconectada por más de
15minutos, la unidad se apaga automáticamente.
30. Puerta entrada audio L/R
31. Toma de auriculares 3.5MM
Si se desea encender la unidad después de haberla apagado, antes de encender, girar la
perilla VOLÚMEN ON/OFF en posición OFF.
Uso de la Radio
Consejo: si al encender la unidad, no se ha pulsado ninguno de los botones de
función, el estado por defecto será FM.
1.Establezca la perilla de las funciones en la posición AM/FM-ST/SW1/SW2 .
2. Para sintonizar su emisora favorita gire la perilla de sintonización (13).
3. Con el fin de tener una mejor recepción de los programas de FM-ST/SW1/SW2, extender
el máximo posible la barilla de la antena (27) , y luego girar la antena 360 grados, hasta que
se reciba claramente la señal.
4. El indicador FM STEREO (16), cuando recibe una clara y estable emisora de radio
estéreo FM-ST, el color del indicador de alimentación/ indicador FM estéreo pasará de verde
azul a verde.
Uso del lector de CD
Nota: Si durante la reproducción de CD / USB / SD tuviera problemas ocasionales,
apargar el aparato y reiniciarlo, volviendo así a la reproducción normal.
Gestión de los CD
Para extraer un disco de su caja, presione el centro de la caja y levante el disco.
Sujete el disco por los bordes. Evite tocar la cara grabada del disco.
Unidad de carga del CD
Pulse el botón CD / USB, a continuación, pulse OPEN / CLOSE para abrir la ranura del
CD.
(No forzar manualmente la puerta del CD para abrirla.)
Introduzca el CD en la ranura de carga con la etiqueta hacia arriba.
Cerrar manualmente la puerta del compartimiento de CD. Cuando esté completamente
cerrada, la pantalla LED mostrará “LOAD”, después de unos 10 segundos, el CD empezará a
girar. A continuación, la pantalla LED mostrará el número total de pistas del disco.
Prestar atención a:
Introduzca en el compartimiento de CD exclusivamente CDs. Otros objetos podrían dañar
el mecanismo.
No forzar la apertura / cierre manual del compartimento de CD.
Cuando la unidad no esté en uso, mantener la puerta del compartimento de CD cerrada
para evitar que polvo y suciedad entren en el mecanismo.
No inserte más de un CD a la vez.
Si un disco está demasiado sucio o rayado, no podrá ser reproducido.
Reproducción CD
Cuando el disco está dentro de la unidad, la unidad leerá el disco y mostrará el número
Page 21

EspañolEspañol
37 38
total de pistas.
Si el disco está en formato CD, se ilumniará el indicador CD .
Si el disco está en formato MP3, se ilumniará el indicador MP3.
Si el disco está en formato WMA, se ilumniará el indicador WMA. Después de mostrar el
número total de pistas, la unidad comenzará a reproducir automáticamente la primera pista.
Pulsar el botón STOP para interrumpir la reproducción.
Después de pulsar el botón STOP, presione OPEN / CLOSE para abrir la puerta del
compartimiento del CD y extaer el CD.
Pausa
Para interrumpir temporalmente una pista, pulsar Play / Pause. El disco pasará al estado
de pausa, la pantalla LED indicará la posición actual de la pista. Se encenderán las luces
indicadoras de la reproducción.
Para reanudar la reproducción, pulse el botón Play / Pausa.
AVANZAR Y RETROCEDER RÁPIDAMENTE
Durante el funcionamiento se podrá utilizar en cualquier momento la función BACK /
NEXT.
Pulse el botón NEXT para seleccionar una nueva pista. Si se trata de la última pista del
disco, el reproductor se moverá a la pista 1.
Pulsar el botón BACK para seleccionar el último audio. Si es el primer audio del disco,
el reproductor saltará a la última pista. La reproducción se dentendrá automáticamente
después de haber reproducido el último audio, y el indicador PLAY / PAUSE no se
encenderá. (Si se desea continuar con la reproducción, pulsar el botón PLAY / PAUSE. La
reproducción comenzará desde la primera pista.)
Si el disco (MP3/WMA) unidad USB o tarjeta SD tiene una gran cantidad de audios, se
puede pulsar el botón “10 + (FOLDER)” o el “10 - (FOLDER)” para seleccionar pistas
rápidamente durante la reproducción. Puede pulsar el botón “” 10 + (FOLDER) “o.” 10 (FOLDER) para seleccionar el archivo del cuál quiere reproducir las pistas, cuando la
unidad no está en fase de reproducción .Por ejemplo, si se muestra “F 01” la unidad
empezará a reproducir el primer audio del primer archivo.
Pulse la tecla “10 +”, o el “10 -” para saltar hacia adelante o hacia atrás diez pistas para
reproducir, cuando la unidad está en fase de reproducción. Cuando quedan pocos audios
que reproducir, pulsando el botón “10 +” ,el reproductor pasa a la última pista.
Cuando el reproductor está detenido, pulsando el botón “10 +” o el botón “10 -”el
reproductor pasa al archivo siguiente o al último archivo de audios para reproducir.
PROGRAMACIÓN DE LA REPRODUCCIÓN
Pulse el botón “STOP” para detener la reproducción, la pantalla mostrará el número
total de pistas.
Presione el botón “PROGRAM” una vez, la pantalla mostrará “P 01”.
Pulse el botón NEXT o BACK para seleccionar las canciones que desea escuchar y
pulse de nuevo el botón “PROGRAM”.
En este punto, la pantalla mostrará “P02”, entonces será posible programar un segundo
audio.
(Se pueden programar 20 pistas para el formato CD y 99 pistas para el formato MP3/WMA)
Al presionar PAUSE / PLAY /, se iluminará el indicador Play y el reproductor comenzará
a reproducir la primera pista seleccionada.
Después de terminar la reproducción de todas las pistas programadas, el CD se
detendrá automáticamente.
Si usted desea cancelar las pistas seleccionadas, pulse el botón STOP.
l Despues de la programación estarán operativas las funciones REPEAT, BACK, NEXT.
Nota: Durante la reproducción de las pistas programadas, los botones 10 –y 10 + no
estarán operativos.
REPETICIÓN DE LA REPRODUCCIÓN
Es posible repetir la reproducción del disco o de las pistas seleccionadas.
REPETICIÓN DE LA REPRODUCCIÓN DE UN AUDIO
Cuando CD/USB / SD CARD están en fase de reproducción:
Presione el botón REPEAT, se encenderá el indicador REPEAT . A continuación, la pista
seleccionada se reproducirá continuamente hasta que se pulse el botón STOP o el botón
REPEAT dos veces, en este momento el indicador REPEAT se apagará.
Las pistas seleccionadas se reproducirán hasta que se pulse el botón STOP o el botón
REPEAT dos veces, en ese momento el indicador REPEAT se apagará.
REPETICIÓN DE LA REPRODUCCIÓN DE TODOS LOS AUDIOS
Cuando el CD/USB / SD CARD están en fase de reproducción:
Pulsar el botón REPEAT dos veces, el indicador REPEAT quedará encendido.
Se repetirá la reproducción de las pistas del disco / USB / SD hasta que se pulse el botón
STOP o el botón REPEAT dos veces, en ese momento el indicador REPEAT se apagará.
REPETICIÓN DE LA REPRODUCCIÓN DE TODOS LOS AUDIOS PROGRAMADOS
Seleccione las pistas que desee programar, pulse el botón PLAY / PAUSE para
reproducirlas, comenzando por la primera.
Al presionar el botón REPEAT se repite la reproducción de la pista seleccionada, el
indicador REPEAT parpadeará. La pista programada se repetirá hasta que se pulse el botón
STOP o REPEAT dos veces.
Al presionar el botón REPEAT dos veces, se repite la reproducción de todas las pistas
programadas y el indicador REPEAT quedará encendido. Todas las pistas programadas se
reproducirán hasta que se pulse el botón STOP o el botón REPEAT.
Page 22

EspañolEspañol
39 40
Nota :Durante la reproducción de las pistas programadas los botones 10 – e 10 e + no
estarán operativos.
USO DEL USB/SD
Introducir un lector USB/MP3 o una tarjeta SD/ MMC.
Presione el interruptor de la función USB / CD, a continuación, pulse el botón CD / USB
para seleccionar la unidad de reproducción SB o la tarjeta SD / MMC.
Una vez terminada la lectura y la visualización de los audios, el dispositivo comenzará a
reproducir automáticamente la primera pista de la unidad USB / SD / MMC. Durante la
reproducción será posible utilizar las funciones(FAST FORWARD, FAST BACKWARD,
PROGRAM y REPEAT PLAYING).
OPERACIÓN DE CONVERSIÓN CD/USB/SD
Durante la reproducción de los audios de la unidad USB o SD o CD , es posible convertir la
modalidad CD y USB / SD pulsando el botón CD / USB, contemporáneamente se
encenderá el indicador de CD o USB . Una vez terminada la reproducción, el dispositivo
iniciará a reproducir el primer audio de la unidad CD/MP3, USB o SD.
Nota: . a. Este dispositivo no tiene la función de carga. Si se desea reproducir las pistas en
un reproductor MP3 u otro , provista de batería, antes de conectar al puerto USB es
necesario quitar la batería, de lo contrario este dispositivo podría resultar dañado.
b. Este dispositivo no es capaz de soportar todas las versiones del mercado de MP3.
c. Para evitar dañar el dispositivo USB antes de extraerlo del puerto USB es necesario que
la reproducción o cualquier otra función haya terminado.
USO DEL PUERTO AUX IN
Durante el funcionamiento de la RADIO (FM/AM/SW1/SW2) ,introduciendo el cable de
conexión RCA 3.5mm en el puerto AUX IN (30), una vez conectada la RADIO (FM/AM/SW1/
SW2) ,el sistema pasará a la función AUX .Puede conectarse con la toma de audio externa.
Se ruega ajustar el volúmen del audio externo para asegurar que el volumen de salida tenga
una calidad óptima.
Nota: Cuando está en funcionamiento la modalidad AUX IN, se ruega desconectar el cable
AUX IN de la unidad, de otra forma durante el uso de otras funciones, la unidad podría emitir
sonidos distorsionados.
USO DE LA LÍNEA OUT
Cuando el dispositivo está en fase de reproducción de CD / USB / SD / RADIO (AM/FM-ST/
SW1/SW2) / AUX introduciendo el cable RCA de 3,5 milímetros en el puerto LINE OUT (29).,
podrá conectarse al puerto AUX IN mediante el amplificador de audio externo.
Ajuste audio
Para ajustar el audio girar la perilla del volúmen.
USO DE LOS AURICULARES
Introduciendo los auriculares en la toma para los auriculares, el audio se transmitirá sólo a
los auriculares, y los altavoces no emitirán ningún sonido.
Cuidado y Mantenimiento
Limpieza de los CD
l Para eliminar las huellas dactilares y el polvo de la superficie del disco usar un paño
suave.
l Limpiar en línea recta desde el centro hacia el exterior del disco. Las pequeñas partículas
de polvo y pequeñas manchas no afectarán a la calidad de reproducción.
l Para la limpieza de CDs, no utilice nunca productos químicos como sprays antiestáticos,
benceno o diluyentes.
l Para reducir el riesgo de rasguños después de usar, introducir los CDs en sus cajas.
l No exponga el CD a la luz directa del sol, alta humedad o altas temperaturas durante
largos períodos de tiempo.
l No pegue adhesivos ni escriba en ambos lados de la unidad de CD.
l En esta unidad se pueden reproducir sólo CD que muestren este símbolo.
Limpieza de las lentes
l Las lentes sucias pueden provocar saltos de audio. Si el objetivo está muy sucio, el CD
no se puede leer.
l Se ruega utilizar discos limpios
ESPECIFICACIONES TÉCNICAS
Entrada Alimentacion 230V ¡«50Hz
Output Audio 3,5 X 2 W
Consumo de energía 30W
tamaño del producto 510 x 290 x 340mm
Peso neto 8,2 kg
Rango de frecuencia de radio
FM 87.5-108 MHz
AM 520-1600 KHz
SW1 2,5-7,0 MHZ
SW2 7,5-22 MHz
reproductor de CD
Respuesta de frecuencia 100 Hz - 16 KHz
Clavija de los auriculares de los auriculares estéreo de 3,5 mm
Nota: Especificaciones y diseño sujetos a posibles modificaciones sin previo aviso.
 Loading...