

Page 1
SDM-2012 Calibration Station Operation
A
TURN ON
B
2
A B D E
C
BUMP TEST
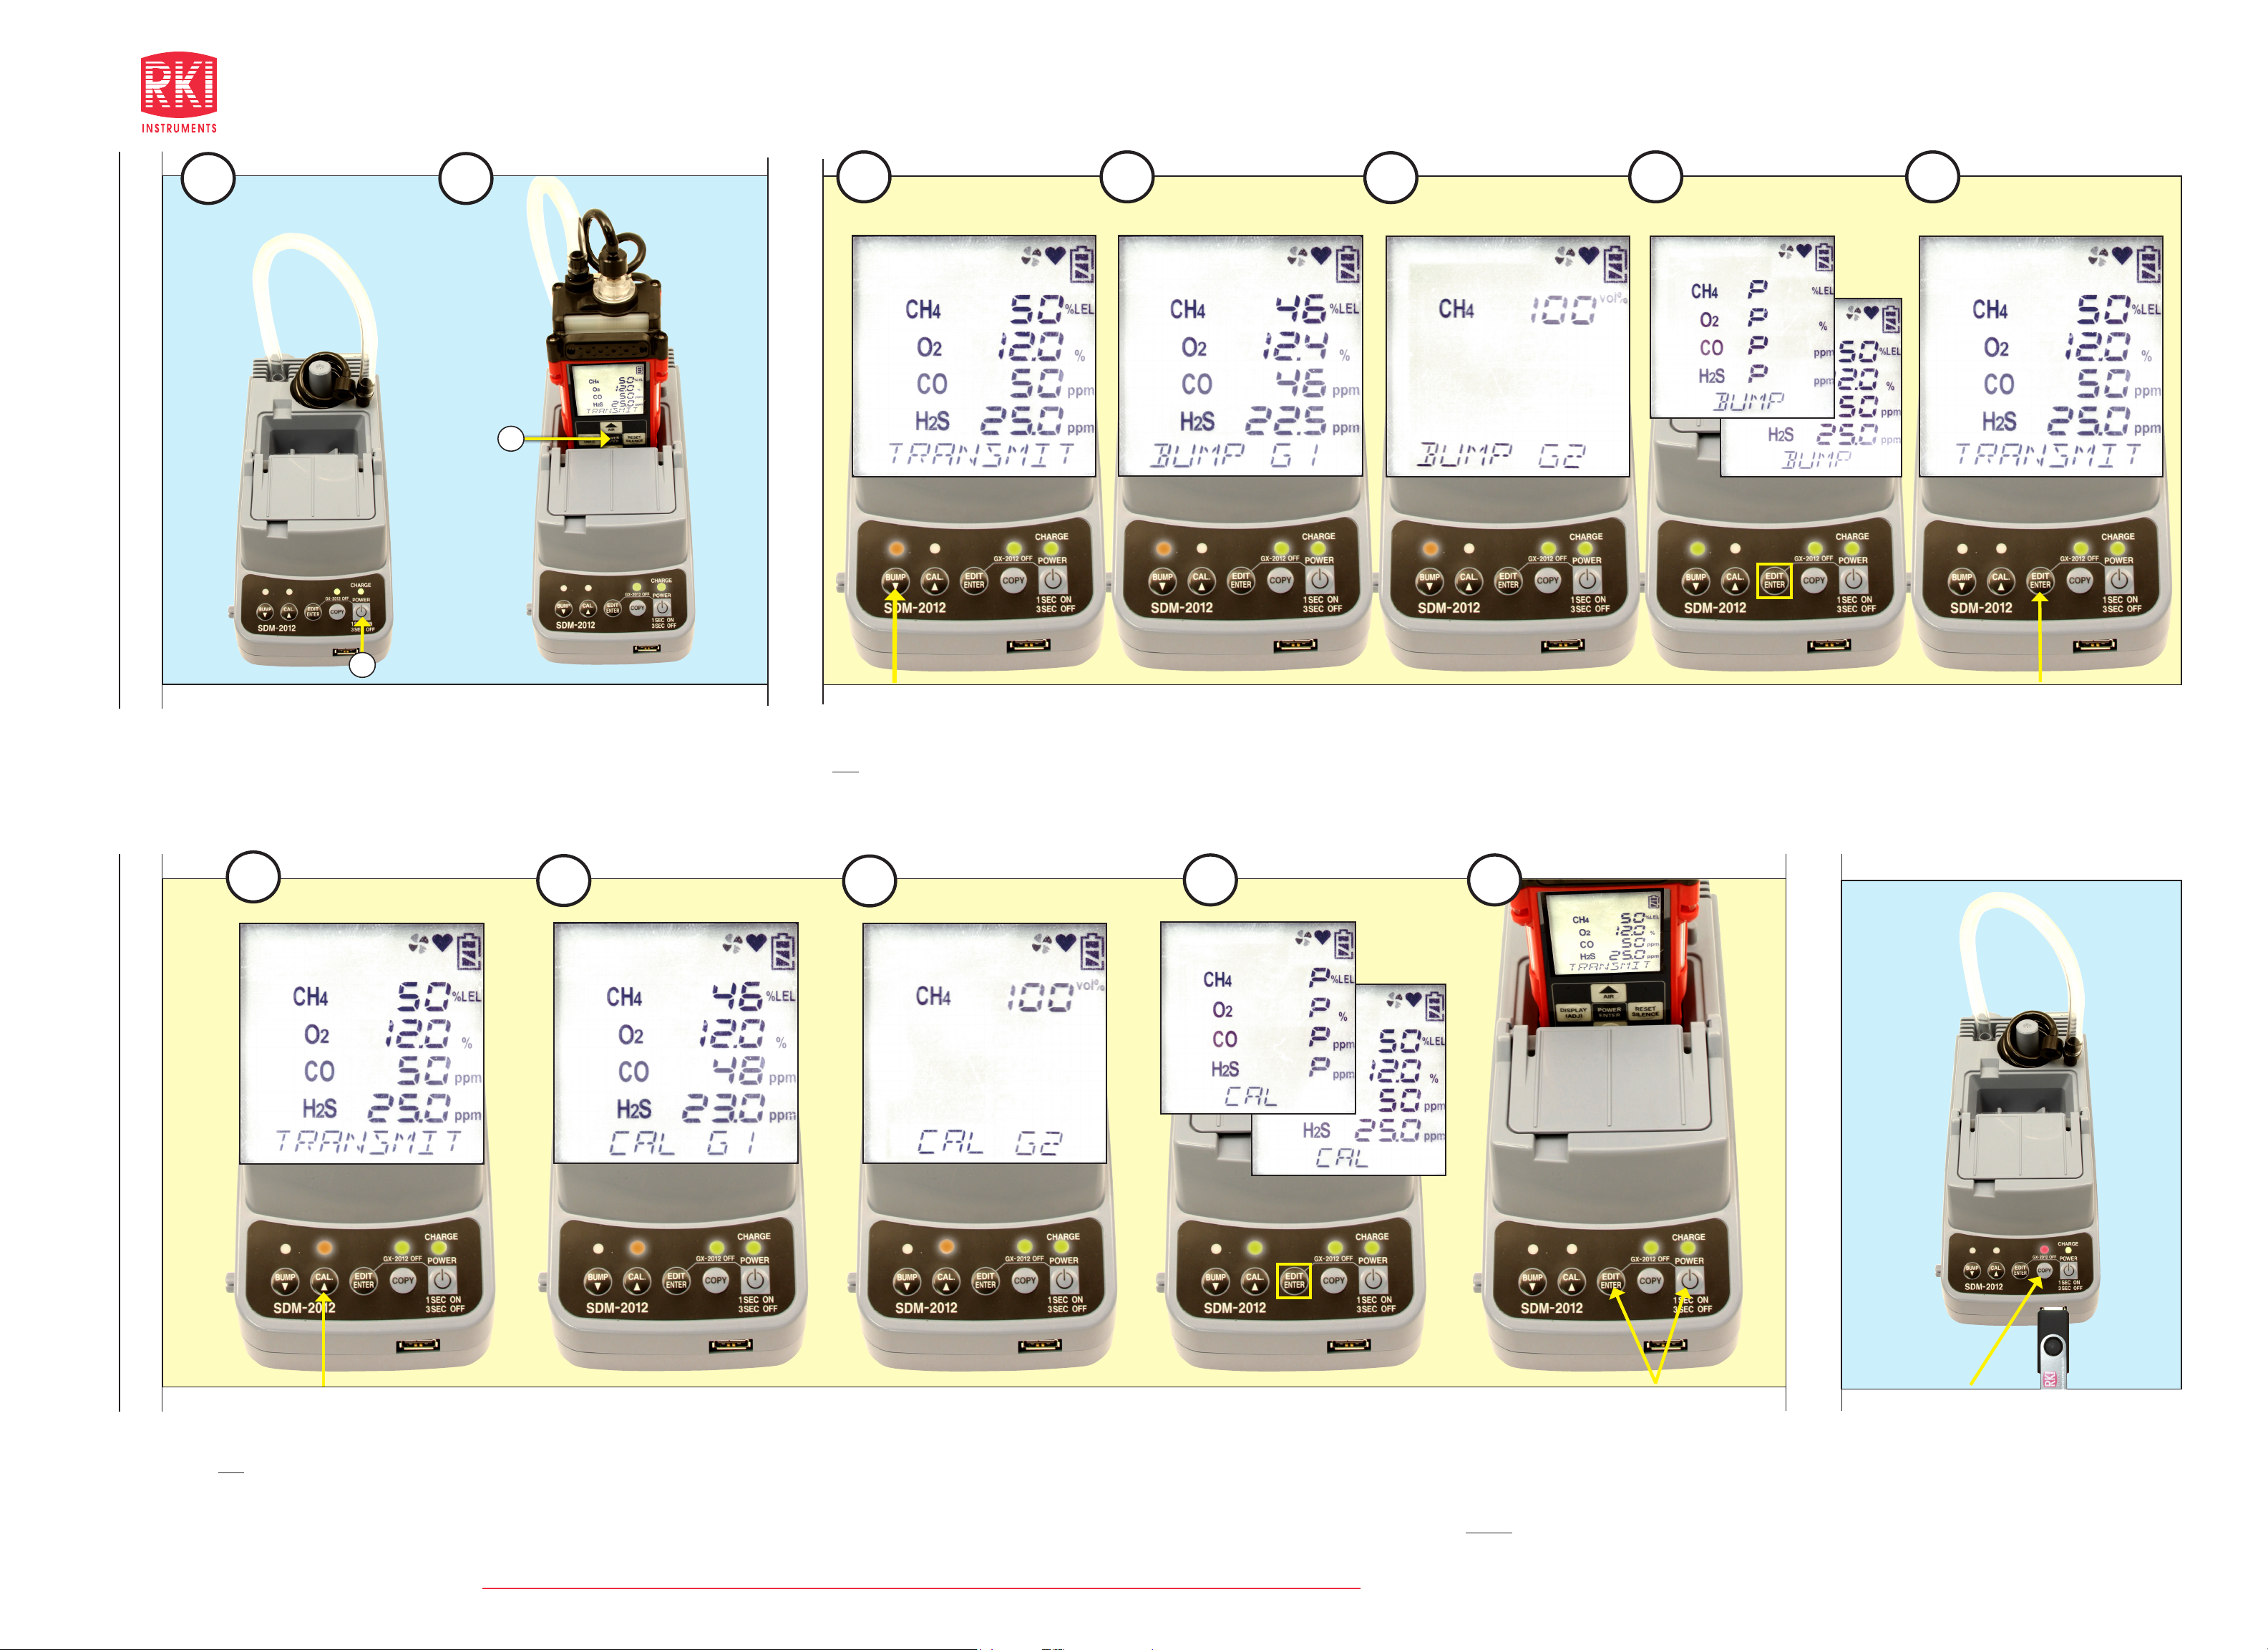
1
Turn Cal Station On
1. Press and hold the SDM-2012’s POWER button.
The LEDs will turn amber. When the BUMP and
CAL LEDs turn off, release the POWER button.
Seat a GX-2012 in the instrument cradle. The front
recess is for versions with a Li-ion battery pack. The
back recess is for instruments that have an alkaline
battery pack. Flip the plastic flap over if it is covering
the recess you need to use.
A
Instrument Connected
2. Connect hoses to GX-2012. Then press and
hold the POWER ENTER button on the GX-2012
until you hear a beep, then release it.
The GX-2012 will begin its power up sequence. If a
successful connection between the instrument and
the SDM-2012 occurs, the home screen will appear
displaying “TRANSMIT” and the auto cal values
on the instrument display at the end of the startup
sequence.
B
Bump Test
Press and hold the BUMP button until the
BUMP LED turns on then release it.
Note: Ensure appropriate calibration gas cylinder
is connected to a demand flow regulator and
then to the correct port (Gas 1 or Gas 2) on the
back of the cal station. Make sure calibration
gas concentrations match values shown on
display.
C
Standard 4 Sensors
Bump Gas Reading
The station will bump test the standard 4 sensors. During the bump test, the display shows
current gas reading and the bump
LED will flash amber.
D E
% Volume Sensor
Bump Gas Reading
If a % volume sensor is installed, the station
will bump test it using Gas 2 calibration gas.
Bump Results
The BUMP LED will stop blinking and become
steady green if the bump test passed or steady
red if the bump test failed. Display will alternate
between the gas readings and the bump test
results for each sensor (“P” for pass or “F” for
fail). If you have a % volume sensor installed,
press and release the EDIT ENTER button to
scroll between both sets of results.
Return to Home Screen
Press and hold the “EDIT/ENTER” button
until the home screen appears. See step
“E” below for turning off instrument after
completion of bump test.
CALIBRATION
Press and hold the CAL button until the CAL LED
turns on then release it.
Note: Ensure appropriate calibration gas cylinder is
connected to a demand flow regulator and then to the
correct port (Gas 1 or Gas 2) on the back of the cal
station. Make sure calibration gas concentrations
match values shown on display.
Calibrate
Standard 4 Sensors
Calibration Gas Readings
The station will calibrate the standard 4 sensors.
During calibration, the display shows current gas
readings. Typical calibration will take 3 minutes.
% Volume Sensor
Calibration Gas Readings
If a % volume sensor is installed, the station will
calibrate it using Gas 2 calibration gas.
The CAL LED will stop blinking and become steady
green if the calibration passed or steady red if the
calibration failed. The display will alternate between
the gas readings and the calibration results for each
sensor (“P” for pass or “F” for fail). If you have a
% volume sensor installed, press and release the
EDIT ENTER button to scroll between both sets of
results.
Calibration Results
RKI Instruments, Inc. • 33248 Central Ave. Union City, CA 94587 • Phone (800) 754-5165 • (510) 441-5656 • Fax (510) 441-5650
www.rkiinstruments.com
Removing from SDM-2012
After a successful bump test or calibration, the
GX-2012 will automatically turn off within 15 seconds.
If the calibration failed, the instrument will shut off after
10 minutes.
To turn off manually, press the SDM-2012 “Power”
and “Edit Enter” buttons simultaneously for about
one second and then release them.
Warning: Do not remove the GX-2012 before turning it off, and do not use the GX-2012’s power
button to power it down.
DATA TRANSFER
Data Transfer To USB Flash Drive
With USB flash drive installed and unit powered on,
press and hold the COPY button until the COPY LED
turns red, then release it. The COPY LED will become
solid red while the records in the calibration station’s
memory are copied to the flash drive. In addition, if the
flash drive has an LED, it will begin to blink.
When the COPY LED returns to its original color and
begins blinking again and the flash drive’s LED (if it
has one) stops blinking, the copy operation is complete. Remove the flash drive from the USB port.
Transfer data to PC with Single Module Data Viewer
software, following the instructions in the operator’s
manual.
Page 2

GX-2012 Calibration Station
User Guide
Model SDM-2012
PN 71-0263RK
 Loading...