

Rivera Primo Gear Set User Manual
Please read this entire installation/instruction sheet prior to assembly. We highly recommend using a
experienced v-twin mechanic to complete this installation, as improper installation could result in injury and/or
damage to the transmission that will void the warranty.
1216-0001
GEAR SET INSTALLATION INSTRUCTIONS
5 SPEED GEAR SET REMOVAL
NOTE: Leave the transmission case in the frame unless the case itself requires replacement.
1. Using the OE service manual, drain the transmission and remove all necessary parts to gain access to
both ends of the transmission as well as the top of the transmission.
2. Remove the transmission top cover, then remove the shifter cam and shifter fork assemblies.
3. Remove the bearing inner race from the transmission mainshaft using Jims tool part # 34902-84.
4. Remove the final drive pulley by removing the two screws and then the lock plate. Use Jim’s tool part #
94660-37A.
5. Remove the six socket head screws from the transmission trap door to free it from the transmission case.
Pull the side door, mainshaft and countershaft with gears from the transmission case as a single
assembly.
6. Remove and discard the door gasket.
1. Remove main drive gear using
2. Using Jim’s bearing remover tool part # 1720, remove the main drive bearing from the transmission case
and discard.
NOTE: DO NOT USE A HAMMER TO REMOVE THE SIDE DOOR
POWERDRIVE™ 6 SPEED GEAR SET INSTALLATION
1. Install a new main drive gear bearing per your OE service manual and using Jim’s main drive bearing
installation tool part # 35316-80.
2. Install a new retaining ring with the beveled edge facing outward. Install the main drive gear in the
transmission case using Jim’s 35316-80 main drive gear tool.
3. Shorten the shifter shaft sleeve .035” using a reamer & pilot. (See pictures below)
12450 Whittier Blvd., Whittier, CA 90602
562-907-2600 Voice 562-907-2606 fax
www.riveraprimoinc.com

4. Verify that the two locating dowels are in place on the right side of the transmission case and place a
new supplied gasket on the dowels. Inserting the mainshaft through the main drive gear, slide the entire
RPI PowerDrive™ gear assembly in until the trap door rests against the case. Tighten the four 5/16 inch
mounting screws to 13-16 ft-Ibs. Tighten the two 1/4 inch screws to 84-108 ln-Ibs.
5. With the spring side facing the transmission case, install the main drive gear seal using Jim’s main drive
gear seal installer part # 2256.
6. Check for sharp edges or burrs and remove if necessary, then install spacer sleeve on the main drive gear
with chamfer facing inboard.
7. Install the transmission sprocket.
8. Install the belt on the sprocket as the sprocket is installed on the main drive gear. Install the sprocket nut
tightening to 60 ft-lbs & then the sprocket nut lock plate. Align the two holes in the lock plate with the
threaded holes in the pulley. Use one drop of red thread locker on each bolt and then torque to 90-110 in.
lbs.
NOTE: The transmission sprocket nut has left handed threads. You must turn the nut counterclockwise to
install on the main drive gear. Do not loosen sprocket nut when attempting to align holes on the lock plate and
pulley.
9. Install the shifter cam and fork assemblies.
10. Install the top cover with vent tube & neutral safety switch using the new gasket supplied.
11. Install the bearing inner race on the transmission main shaft if using a primary chain drive, or omit this
step if using primary belt drive.
12. Install the pushrod end with the throw-out bearing in the right side of the mainshaft.
13. Install the clutch release assembly into the end cover per OE service manual.
14. Install end cover with new gasket supplied.
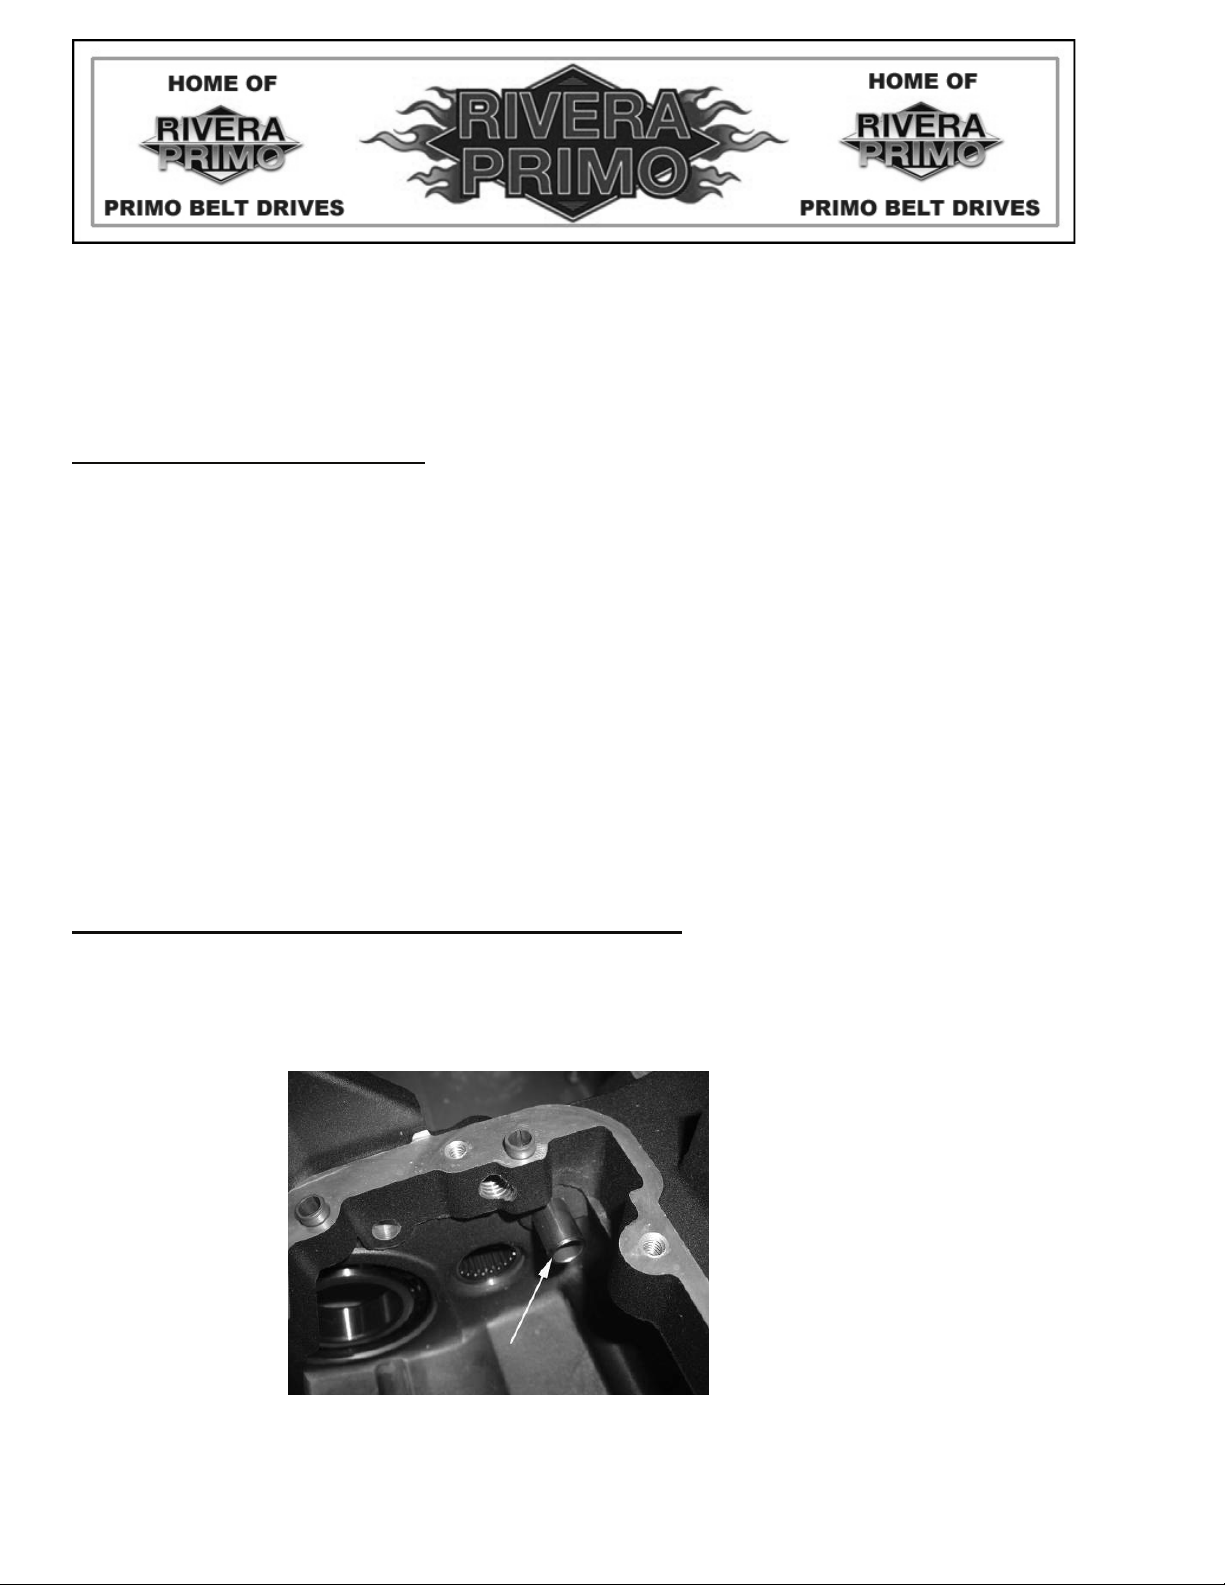
CASE MODIFICATIONS
It may be necessary on some models to make a minor modification to the stock case prior to final installation of
the PowerDrive™ gear set. Is some case there is a fitment issue in the upper right inside corner that requires
removal of some material. (See photo below). It may also be necessary to enlarge the dowel pin holes on some
OE cases to except the dowel pins in our trap door.
12450 Whittier Blvd., Whittier, CA 90602
562-907-2600 Voice 562-907-2606 fax
www.riveraprimoinc.com

 Loading...