

Rivera Primo 1116-0400 User Manual
INSTRUCTIONS
1116-0401 & 1116-0400 H4 LED REPLACEMENT BULB
12450 Whittier Blvd. Whittier Ca. 90602 (562)907-2600 Fax: (562)907-2606 riveraprimoinc.com
®
Rivera Primo’s
stability. This energy saving and environmentally friendly LED replacement bulb uses an advanced
thermoelectric separation process to provide the best heat dissipation and prolong the service life.
HedLED™ H4 replacement LED bulb provides unmatched brightness and
Features
• Integrated design
• Built in chip
• Silver-plating red copper LED stand
• Aluminum protective shield for heat
dissipation instead of the traditional fan
cooling system.
• Softer light than traditional halogen lamp
• Easy installation
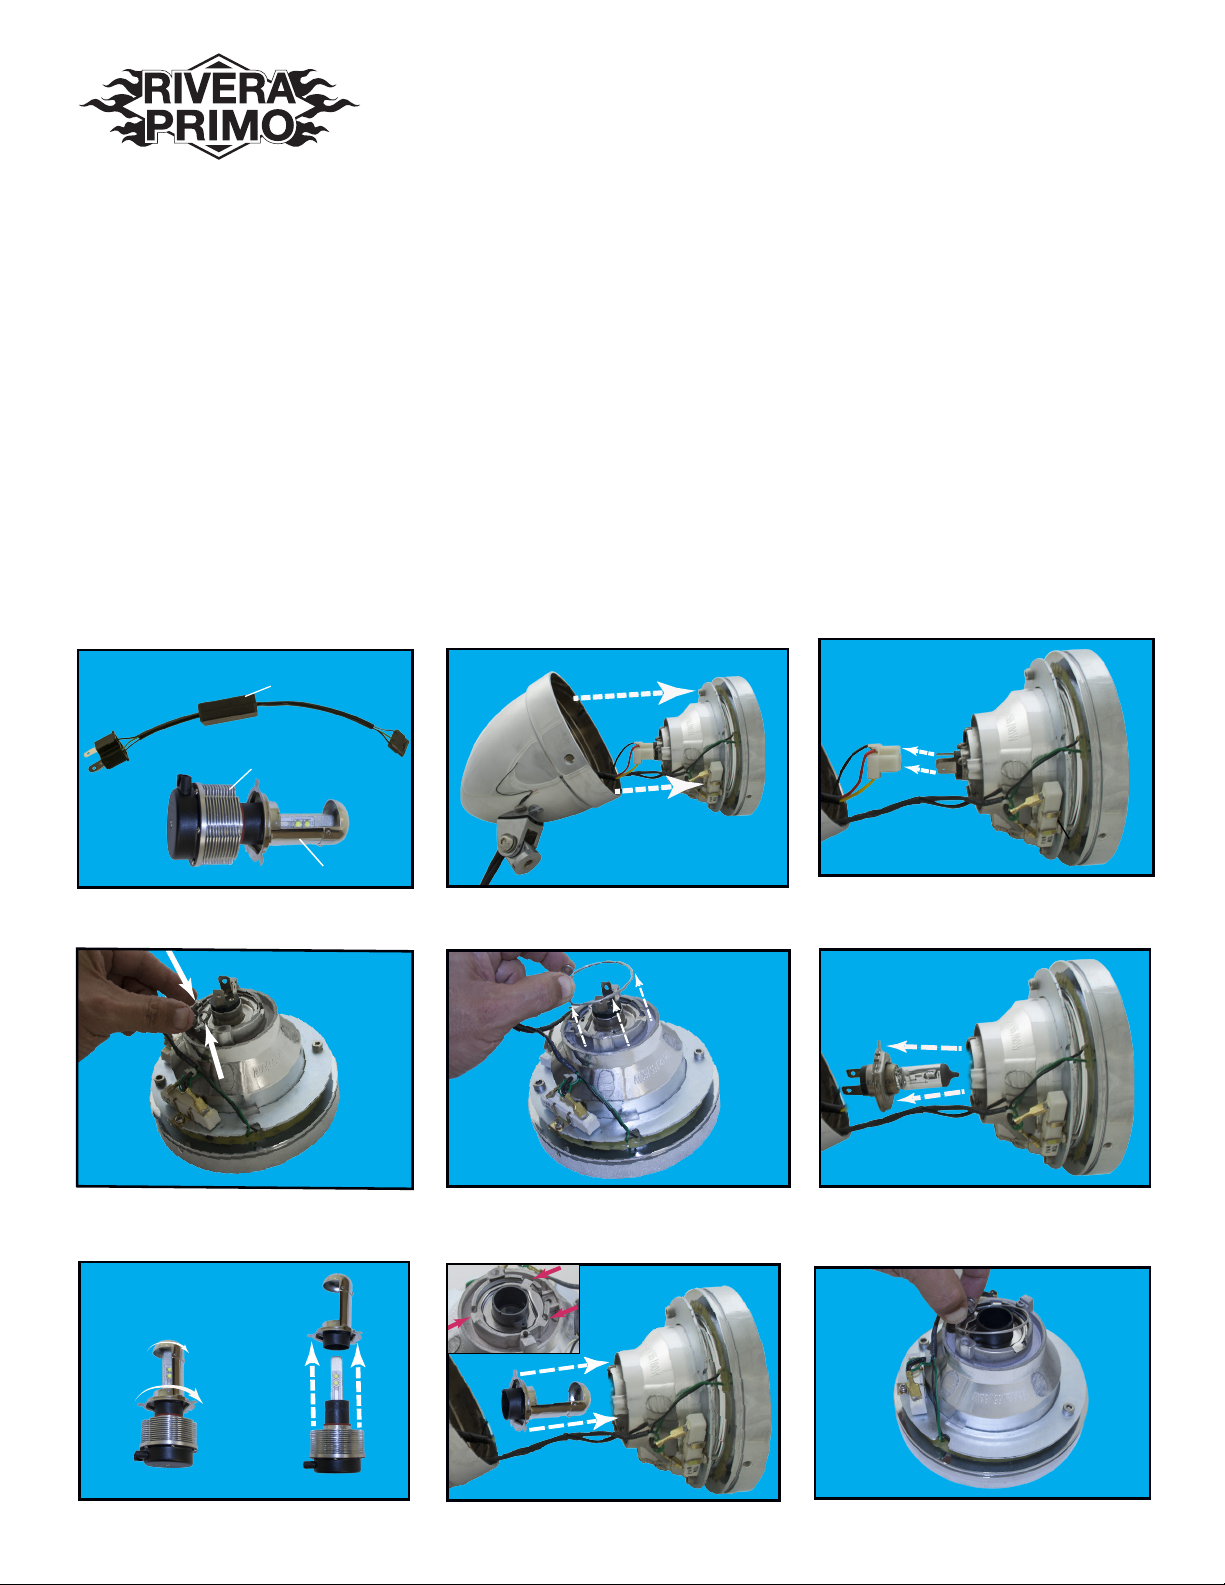
Removal of OE
2.
1.
The 1116-0401 Kit.
LED driver & harness
LED & cooling unit
Protective shield
4.
Remove the clip while holding the
halogen bulb in place.
Pull out the headlamp housing.
5. Remove the clip.
Specications
• Voltage: 12V-24V
• Waterproof: IP68
• Lifespan: Over 30,000 hours
• Material: Red copper & aluminum alloy
• Current: 1.5 (A)
• Lumen: 2,400
• Power: 20W.
3.
Remove the OE connector from
halogen bulb.
6. Remove the OE halogen bulb from
headlamp housing.
Installation
7. Twist & remove protective shield.
Please note that these pictures are for reference only and may not accurately represent your headlight
8. Insert protective shield into headlamp
housing while lining up the 3 prongs with
the 3 corresponding slots.
9. Replace clip to secure protective shield.
.
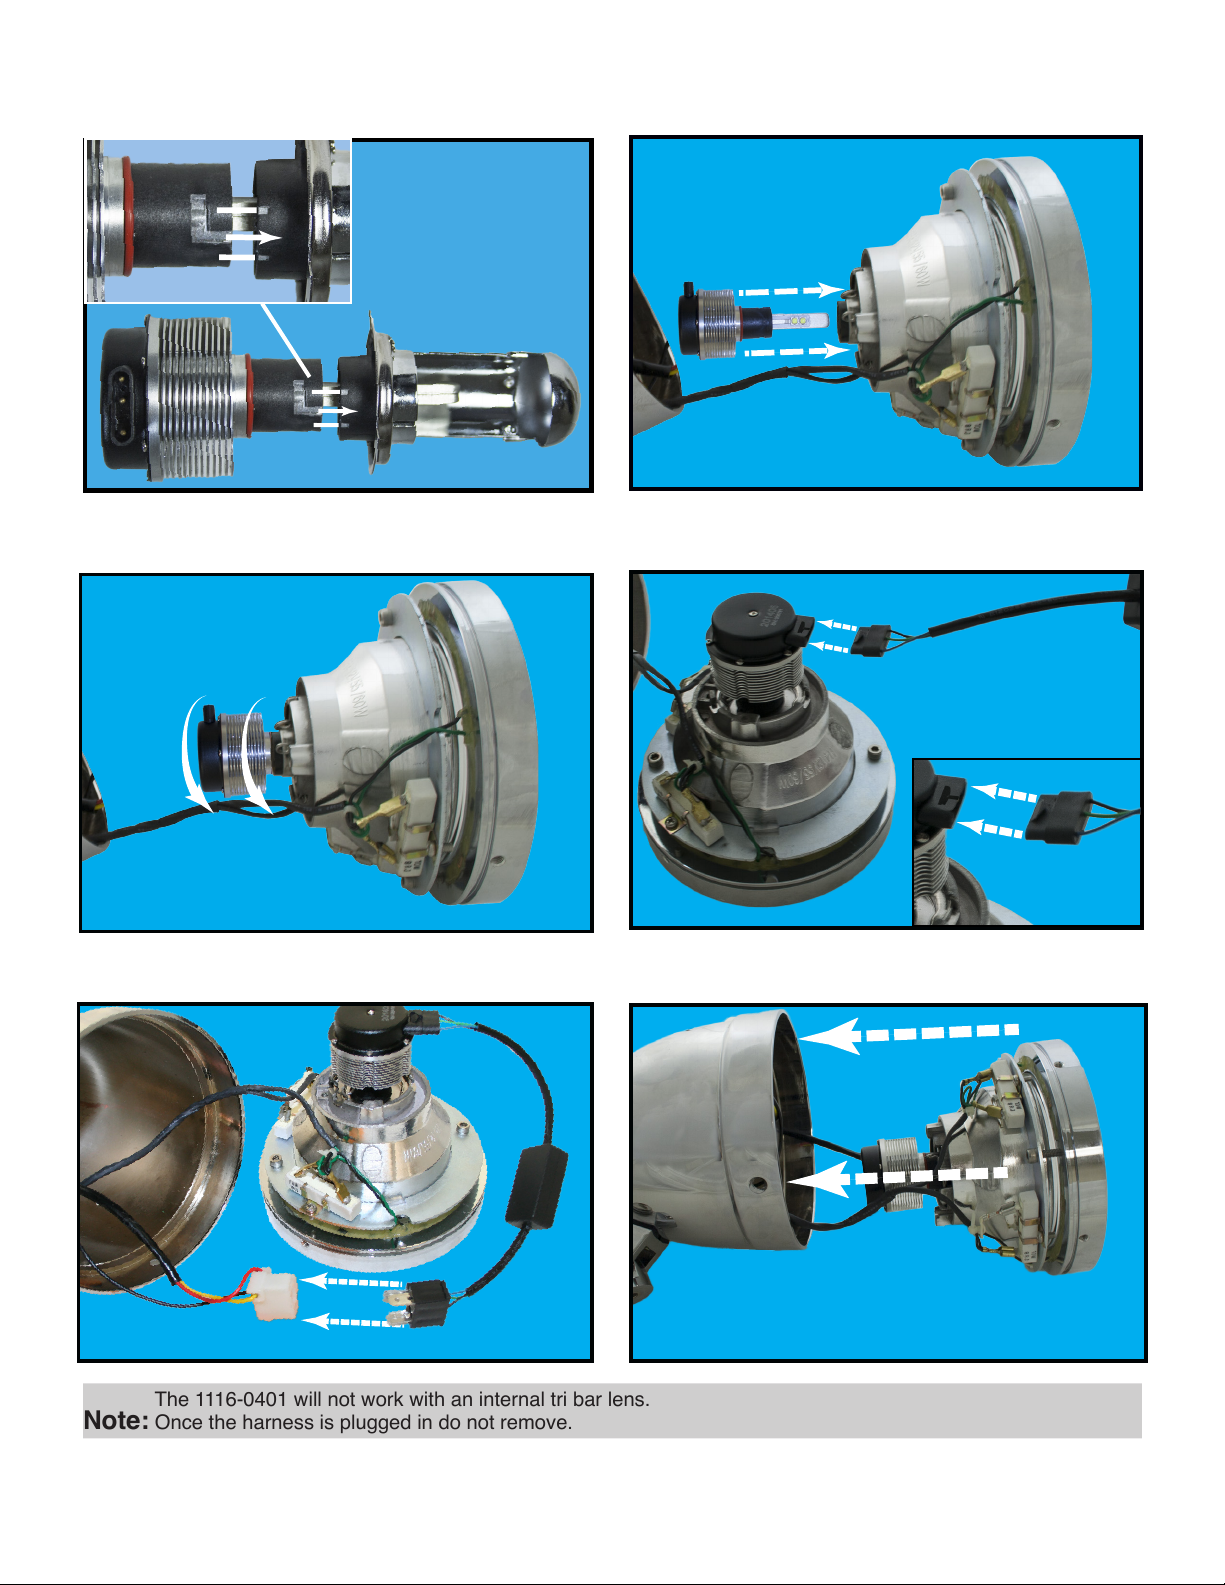
10.Center the L shaped groove on LED/cooling unit
with the two grooves on the protective shield.
12. Twist LED & cooling unit into headlamp housing.
11. Insert the LED/cooling unit into the headlight housing.
13. Plug included wire harness into bottom
of the LED/cooling unit.
14. Plug LED harness into stock 3 prong connector.
Note: The 1116-0401 will not work with an internal tri bar lens.
Note: Once the harness is plugged in do not remove.
15. Replace the headlamp housing into
the headlight bucket.
1108-0029
 Loading...