

Ricoh SP 200N, SP 200S, SP 200SF, SP 201S, SP 201SF Quick Installation Manual
...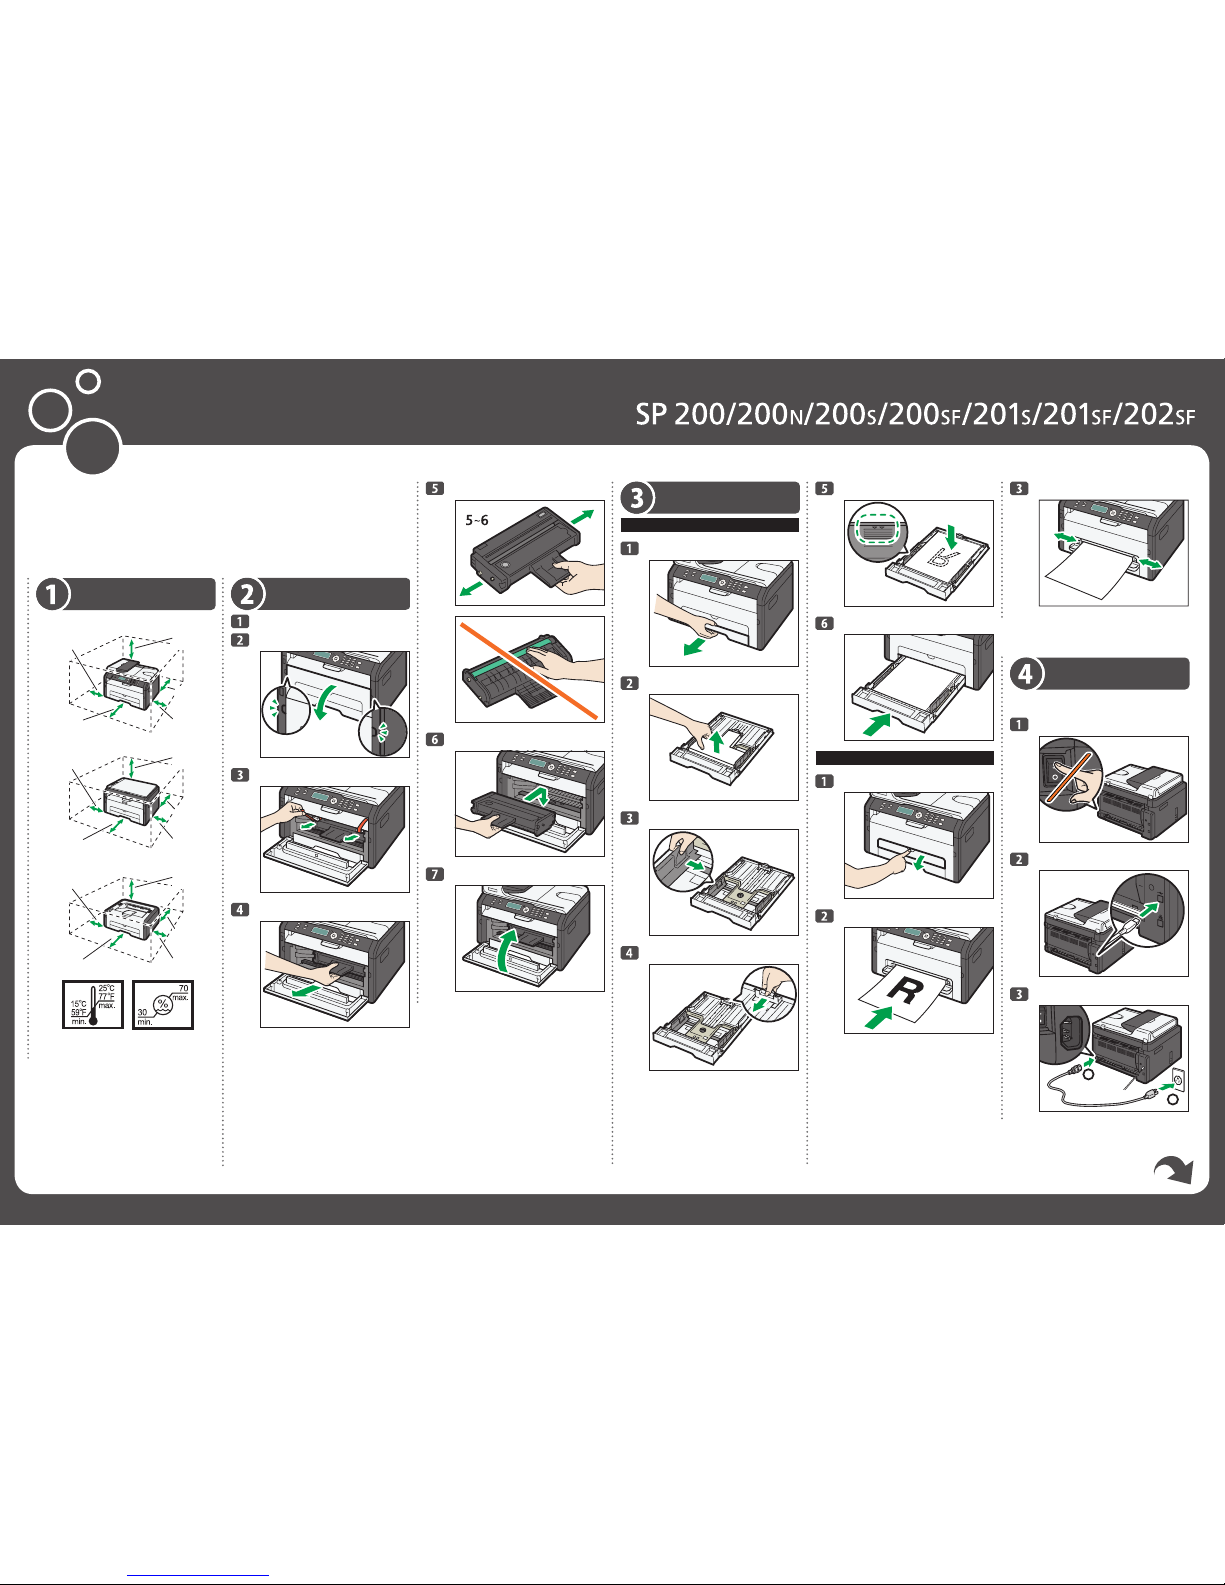
Quick Installation Guide
CTT050
CTT049
CTT048
CTT055
CTT033
Connection
For details about specifying network settings,
see "Software Installation Guide".
CTT136
CTT137
1
2
CTT139
CTT075
CTT029
Bypass tray
CTT063
CTT032
Loading Paper
tray1
CTT062
CTT148
CTT073
CTT074
Read this manual carefully before you use the product and keep it handy for future reference. For safe and correct use,
please be sure to read the Safety Information before using the machine. This manual briefl y describes the procedure for
installing this machine. For more details about other information, see User Guide in the CD-ROM.
Place to Install
SP 200SF/201SF/202SF
CTT021
10 cm
(4.0”)
45 cm
(17.8”)
20 cm
(7.9”)
20 cm
(7.9”)
40 cm
(15.8”)
SP 200S/201S
CTT019
10 cm
(4.0”)
45 cm
(17.8”)
10 cm
(4.0”)
20 cm
(7.9”)
40 cm
(15.8”)
SP 200/200N
CTT017
10 cm
(4.0”)
45 cm
(17.8”)
10 cm
(4.0”)
20 cm
(7.9”)
40 cm
(15.8”)
Power Source
220-240 V, 50/60 Hz, 5 A
Unpacking
Remove the adhesive tape.
CTT054
CTT096
CTT045
Quick Installation Guide
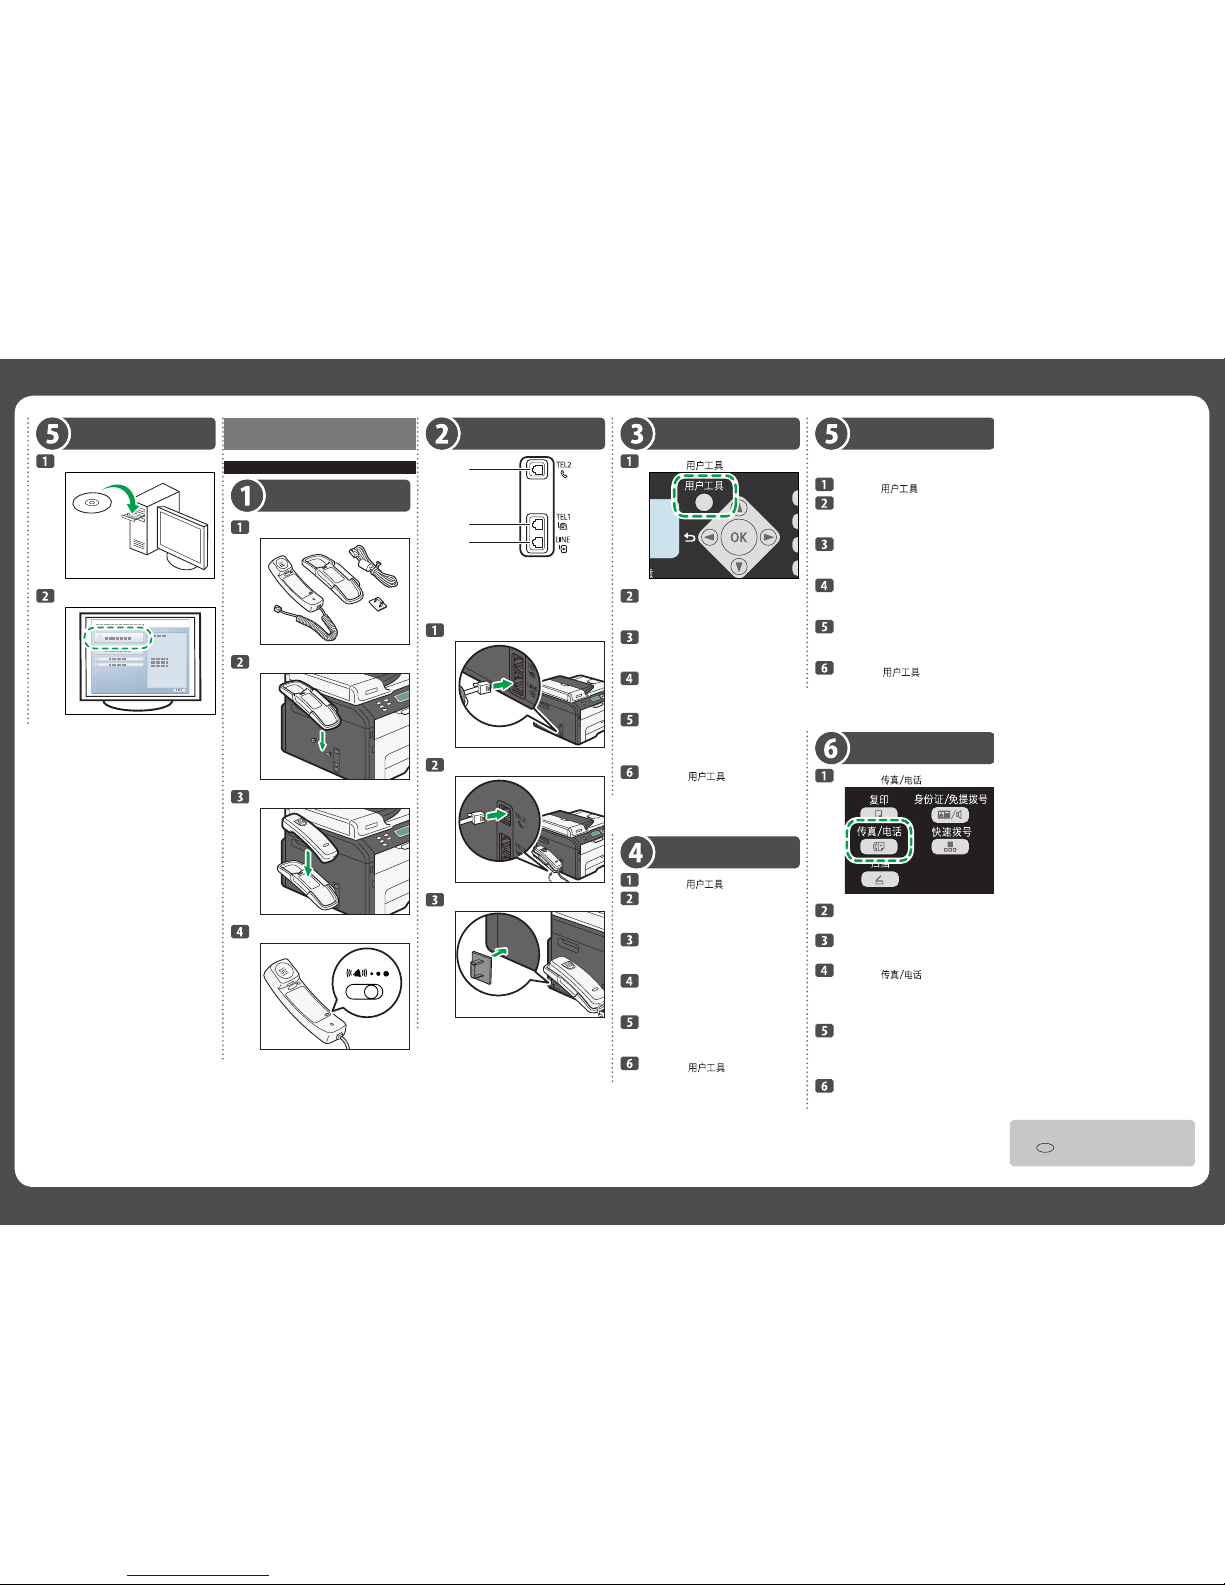
Using the Fax Function
SP 200SF/201SF/202SF Only
Connecting the Handset
CTT143
CTT052
CTT064
CTT078
Selecting the Telephone
Line Type
Press the [ ] key.
CTT006
Press the [▼] or [▲] keys to select [Fax
Features], and then press the [OK]
key.
Press the [▼] or [▲] keys to select
[Comm. Settings], and then press the
[OK] key.
Press the [▼] or [▲] keys to select
[Dial/Push Phone], and then press the
[OK] key.
Press the [▼] or [▲] keys to select the
telephone line type appropriate for
your telephone service, and then press
the [OK] key.
Press the [ ] key to return to
the initial screen.
Selecting the Telephone
Network Connection Type
Press the [ ] key.
Press the [▼] or [▲] keys to select [Fax
Features], and then press the [OK]
key.
Press the [▼] or [▲] keys to select
[Comm. Settings], and then press the
[OK] key.
Press the [▼] or [▲] keys to select
[PSTN / PBX], and then press the [OK]
key.
Press the [▼] or [▲] keys to select
[PSTN] or [PBX], and then press the
[OK] key.
Press the [ ] key to return to
the initial screen.
Connection
1
2
3
CTT093
1. Port For Handset
2. Port For External Telephone
3. Port For LINE
CTT071
CTT144
CTT097
Installing the Driver for
USB
CFT052
Click [USB Quick Install].
CTT059
Setting the Outside Line
Access Number
If you have selected PBX, use the following
procedure.
Press the [ ] key.
Press the [▼] or [▲] keys to select [Fax
Features], and then press the [OK]
key.
Press the [▼] or [▲] keys to select
[Comm. Settings], and then press the
[OK] key.
Press the [▼] or [▲] keys to select [PBX
Access Number], and then press the
[OK] key.
Enter the outside line access number
using the number keys, and then press
the [OK] key.
Press the [ ] key to return to
the initial screen.
Basic Operation for
Sending a Fax
Press the [ ] key.
CTT102
Place the original on the exposure glass
or in the ADF.
Enter the fax number using the number
keys.
Press the [ ] key.
When you place original on the exposure glass
and Memory Transmission mode is enabled,
perform the following steps to scan the subsequent pages of the original.
Press the [1] key within 60 seconds,
place the next original on the exposure
glass, and then press the [OK] key.
Repeat this step until all originals are scanned.
Press the [2] key to start sending the
fax.
© 2013
EN CN M133-8623
 Loading...