

Page 1
1
V2.0
RReeggiisstteerr yyoouurr HHoottSSppoott
Oppeerraattoorr’’ss
O
PPrriinntteerr ttooddaayy!! SSeeee pp1155..
Guuiiddee
G
CCoonntteennttss -- AAtt aa GGllaannccee
TTaabbllee ooff CCoonntteennttss ((ddeettaaiilleedd)
PPrreeffaaccee ............................................... 5
About This Guide ................................... 5
How to Read This Guide ....................... 6
Service & Support Resources ................ 7
I. IInnttrroodduuccttiioonn ................................... 9
How HotSpot Printing Works ................. 9
Marketing Toolkit ................................... 13
II. IInnssttaallllaattiioonn ..................................... 16
Step A: Install Printer .......................... 16
Step B: Register Printer ...................... 17
Step C: Check License Status ............ 19
Step D: Test Printer............................. 20
Step E: Install POP Display (opt.) ....... 21
Step F: Customize Service (opt.) ........ 22
III. MMaannaaggeemmeenntt ................................. 23
Home Page Overview .................... 25
Management Functions .................. 28
Web Pages ................................. 28
Languages .................................. 49
Printers ........................................ 51
Software ...................................... 60
Reports ....................................... 61
Administrators ............................. 62
Update Account .......................... 63
IV. AAddvvaanncceedd AAddmmiinniissttrraattiioonn ............ 64
System Information ........................ 64
Status Test ..................................... 65
Print Job Management ................... 66
User List Management ................... 67
HTTP Proxy Settings ...................... 67
Log File Settings ............................ 68
V. AAppppeennddiicceess ................................... 70
1: HotSpot Printer Operation .......... 71
2: Keypad Layout & Operation ....... 73
3: Check Device Status via WIM .... 75
4: HotSpot-compatible Models ....... 77
5: File Format Support ................... 78
6: WebPay 2.0 Overview ............... 80
7: Frequently Asked Questions ...... 83
8: Troubleshooting ......................... 87
) ............. 3
Copyright 2009 by Ricoh Americas Corporation. All rights reserved.
Page 2

2
Documentation revision 1; November, 2009
Copyright 2009 by Ricoh Americas Corporation. All rights reserved.
No part of this publ ication m ay be repro duced, tr ansm itted, trans cribed, stor ed in a re trieval s ystem, or translate d
into any language or computer language, in an y form or by any means, electroni c, mechanical, opt ical, chem ical,
manual or otherwise, without the prior written permission of Ricoh Americas Corporation.
HotSpot Printer a registered trademark of Ricoh Americas Corporation.
PrintSpots is a registered trademark of PrinterOn Corporation.
Blackberry is a registered trademark of Research in Motion Limited
iPhone is a registered trademark of Apple Computer Inc.
Windows and Internet Ex pl orer are registered trademarks of Microsoft Corporation.
®
is a registered trademark of Apple Computer, Inc.
Mac
®
Adobe
All other trademarks are the property of their respective owners.
The material in this docum ent is for information on ly and is subject to change without notice. W hile reasonable
efforts have been m ade in the preparation of this document to as sure its accurac y, Ricoh Americas Corporation,
its contractors and partner s, assume no liability resulting from errors or omissions in this docum ent or from the
use of the information contained herein.
Ricoh Americas Cor poration reserves the right to m ake changes in the product design without reservation and
without notification to its users.
All screens used within this guide are for illustration purposes only, as they may vary based on actual system
configuration.
and InDesign® are registered trademarks of Adobe Systems, Inc.
Page 3

HotSpot Printer Operator’s Guide
3
TTaabbllee ooff CCoonntteennttss
PREFACE ............................................................................................................................. 5
About This Guide ..................................................................................................................... 5
How to R ead This Guide .......................................................................................................... 6
Service & Support Resources ................................................................................................. 7
I. INTRODUCTION .............................................................................................................. 9
How HotSpot Printing Works .................................................................................................. 9
System Reliability ............................................................................................................... 10
Data Security ...................................................................................................................... 10
Your Service Subscription .................................................................................................. 11
Printer Configurations ......................................................................................................... 11
HotSpot Printer Applications ............................................................................................... 12
Marketing Toolkit ................................................................................................................... 13
Point-of-Purchase (POP) Display ....................................................................................... 13
Free Downloads ................................................................................................................. 13
HotSpot Printer Poster ........................................................................................................ 15
Additional Marketing Resources ......................................................................................... 15
II. INSTALLATION ............................................................................................................. 16
Step A: Install Printer ............................................................................................................ 16
Step B: Register Printer ........................................................................................................ 17
Step C: Check License Status .............................................................................................. 19
Step D: Test Printer ............................................................................................................... 20
Step E: Install POP Display (optional) ................................................................................. 21
Step F: Customize Service (optional) .................................................................................. 22
III. MANAGEMENT ............................................................................................................. 23
Administrator Log In / Log Out .............................................................................................. 24
Management Home Page Overview ...................................................................................... 25
Management Functions ......................................................................................................... 28
Web Pages ................................................................................................................. 28
About Web Pages Screen ........................................................................................... 29
Start Page Edit Screen ............................................................................................... 31
A. Brand Colors ......................................................................................................... 32
B. Company Logo & Headline Text ............................................................................ 33
C. About Your Printing Service .................................................................................. 34
D. User Information .................................................................................................... 35
E. Select Document Instructions ................................................................................ 36
F. Printing Email & Boarding Passes ......................................................................... 36
G. Business Center Branding ..................................................................................... 37
H. Help Text ............................................................................................................... 37
I. Additional Information (Web Site Links, Terms, Privacy) ......................................... 38
J. Printer Name .......................................................................................................... 40
Page 4

HotSpot Printer Operator’s Guide
4
K. Description of Your Printers ................................................................................... 40
Printing Options Screen .............................................................................................. 41
About Printing Options Screen .................................................................................... 42
Approve Print Job Screen ........................................................................................... 44
About Approve Print Job Screen ................................................................................. 45
Confirmation of Print Job Screen ................................................................................ 47
Languages .................................................................................................................. 49
Printers ....................................................................................................................... 51
About Manage your Printers Screen ........................................................................... 51
Configure Required Info, Printing Options & Pricing Options....................................... 53
About Required Info Screen ........................................................................................ 54
About Printing Options Screen .................................................................................... 55
About Pricing Options Screen ..................................................................................... 58
Software .................................................................................................................... 60
Reports ...................................................................................................................... 61
Administrators .......................................................................................................... 62
Update Account ........................................................................................................ 63
IV. ADVANCED ADMINISTRATION ................................................................................... 64
Administrator Log In .............................................................................................................. 64
About Service Status (Screen 1) ..................................................................................... 64
System Information ..................................................................................................... 64
Status Test ................................................................................................................. 65
About Service Status (Screen 2) ..................................................................................... 66
Print Job Management ................................................................................................ 66
User List Management ................................................................................................ 67
HTTP Proxy Settings .................................................................................................. 67
Log File Settings ......................................................................................................... 68
Administrator Log Out ........................................................................................................... 69
V. APPENDICES................................................................................................................ 70
Appendix 1: HotSpot Printer Operation ............................................................................... 71
Appendix 2: HotSpot Keypad Layout & Operation ............................................................. 73
Appendix 3: Check Device Status via Web Image Monitor................................................. 75
Appendix 4: HotSpot-Compatible Printer Models ............................................................... 77
Appendix 5: File Format Support ......................................................................................... 78
Appendix 6: WebPay 2.0 Plug-in Overview ......................................................................... 80
Appendix 7: Frequently Asked Questions ........................................................................... 83
Appendix 8: Troubleshooting ............................................................................................... 87
Page 5
HotSpot Printer Operator’s Guide
5
PPrreeffaaccee
Thank you for choosing a HotSpot Printer! Offering a unique combination of hardware and embedded
software, HotSpot Printers harness the Internet to deliver a secure, integrated solution for printing from
any computer (on any platform [PC, Mac or Linux]), cell phone or wireless handheld devices. With no
need for driver downloads or software installation, your HotSpot Printer is the plug-and-play solution for
printing anytime, anywhere.
About This Guide
To follow is a breakdown of the five sections in this guide. Each section provides an overview of content
and, if applicable, walks you through the common tasks of HotSpot Printer management and operation.
I. Introduction
This section lays the foundation for understanding your HotSpot Printer and PrinterOn’s hosted
Mobile Printing Service, including an explanation of exactly how your service works.
II. Installation
This section contains step-by-step instructions on how to install your HotSpot Printer, register your
Mobile Printing Service, and t hen test the printer.
III. Management
This section covers a wide range of optional customization functions that are available to HotSpot
Printer administrators. Learn how to personalize the service to reflect your corporate identity.
IV. Advanced Administration
This section covers tasks and settings that may be required, such as status testing, print job and
user list management, as well as proxy and log file parameters.
V. Appendices
This section contains useful references designed to answer questions you may have, including
HotSpot Printer and keypad operation, checking device status, HotSpot-compatible printer models,
file format support, optional WebPay 2.0 plug-in, frequently asked questions and troubleshooting.
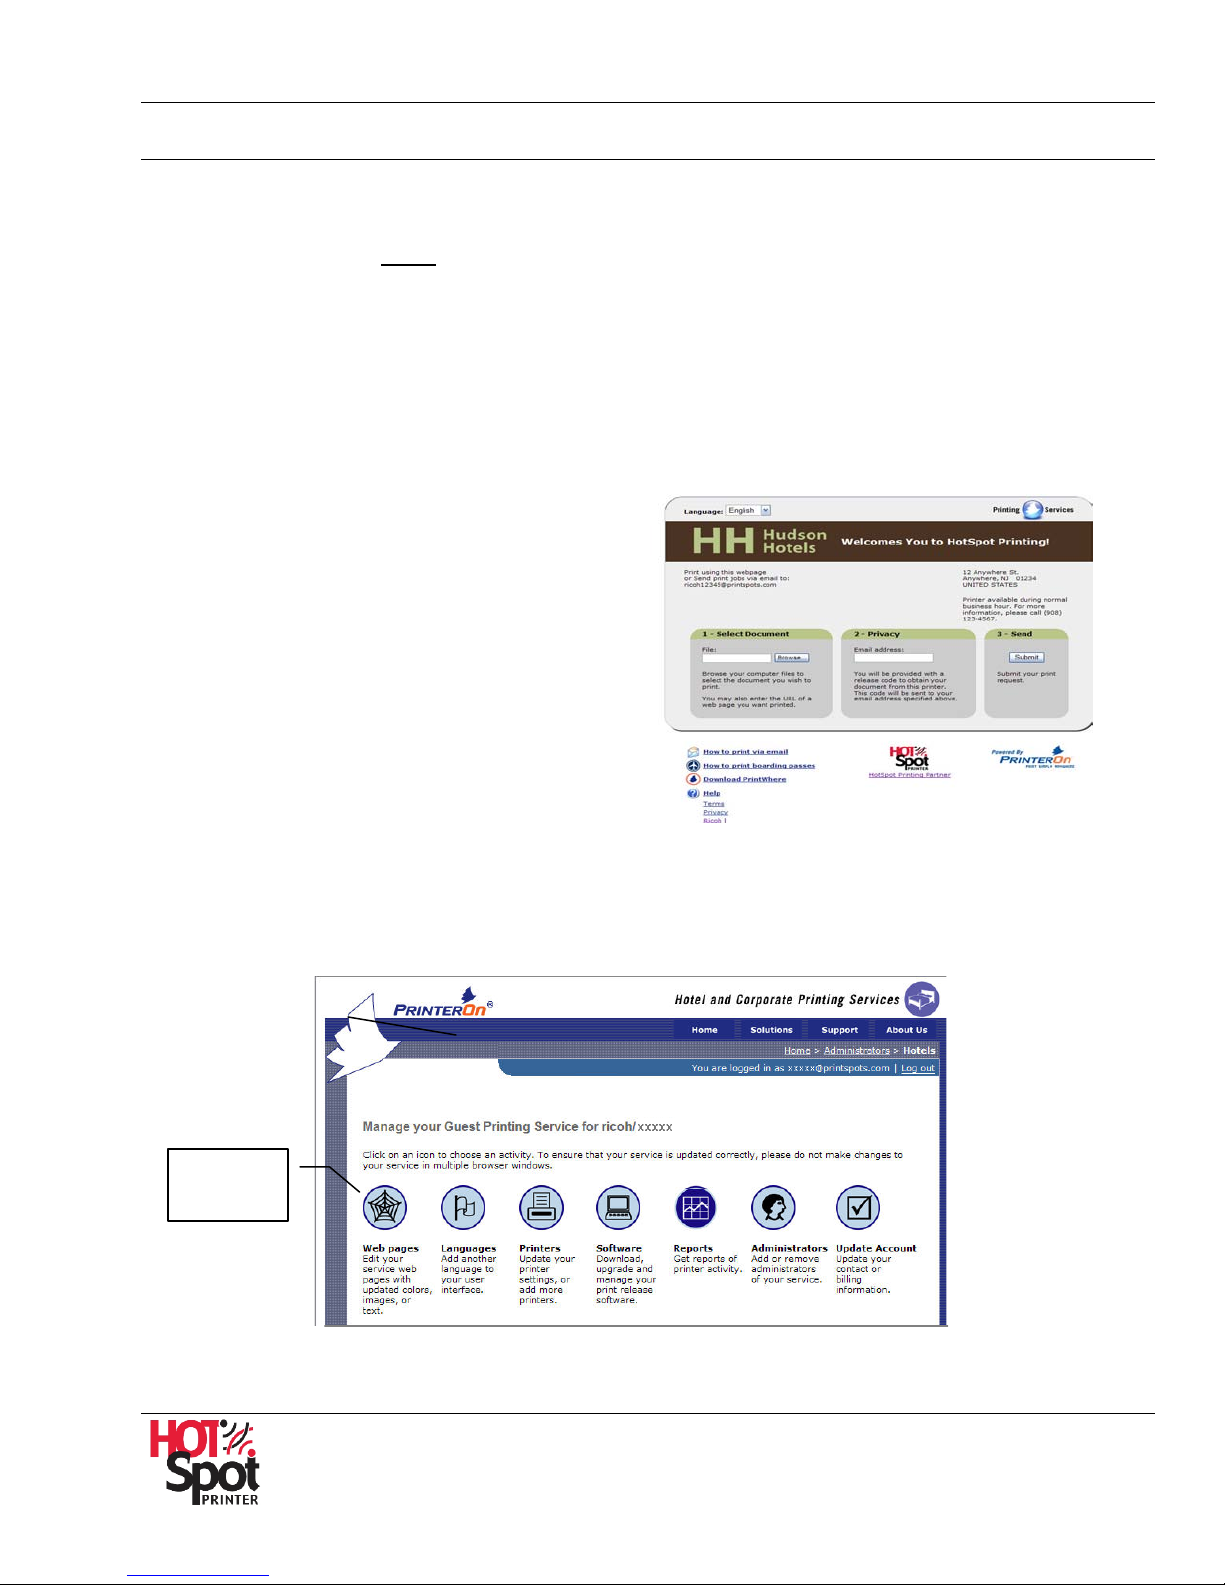
PrinterOn Web Page
Page 6
HotSpot Printer Operator’s Guide
6
How to Read This Guide
The following conventions, terms and acronyms are used in this guide.
Convention Description
Important: Indicates key information.
Example: Important: A network connection is required…
Note: Indicates supplementary information.
Example: Note: For more information…
Reference:
Bold face
[Button Name]
Term Description
HotSpot Printer™
HotSpot Keypad
PrinterOn® Corporation
PrintSpots™
Indicates where you can find additional information. Within the PDF file, click
on the link to go to that section or Web site.
Example: Reference: See
Indicates a specific action to be taken.
Example: Click Web Pages icon
Indicates a button/tab on the HotSpot keypad, printer control panel or
computer screen.
Example: Press [OK] on the HotSpot keypad.
Ricoh's name for its Network Laser Printers running the embedded
PrinterOn Print Delivery Software (PDS).
The HotSpot Printer component that enables release code entry. The
keypad also supports other functions, such as job reprint, delete, etc.
Ricoh’s partner that provides the software that runs on the HotSpot Printer
and hosts the Mobile Printing Service.
PrintSpots is the name of PrinterOn’s Mobile Printing Service. Print jobs
are sent to a “PrintSpots,” i.e., the URL or email address of a HotSpot
Printer.
IV. Advanced Administration.
.
Release Code
Tracking Number
Web Image Monitor
Also called Privacy Release Code, a 4- to 10-digit code generated by the
PrinterOn Server and communicated to the user. This code is entered on the
HotSpot keypad to release the print job.
An 8-digit code generated by the PrinterOn Server at the same time the
release code is assigned. This code is for troubleshooting purposes, not
release of print jobs at the printer.
Ricoh Web interface that is built into the controller of all Ricoh printers,
enabling the administrator to manage settings on the device. All that is
needed is a standard Web browser and the printer’s IP address.
for
Page 7
HotSpot Printer Operator’s Guide
7
Type
Description
Details
Acronym Description
DHCP
ESA™
HSIA
ISP
IT
HTTP
HTTPS
SSL
TLS
Dynamic Host Configuration Protocol. A protocol for assigning dynamic IP
addresses to devices connected to a network, for simplified network
administration.
Embedded Software Architecture. Ricoh’s Java platform that is required to
host PrinterOn’s Mobile Printing Service.
High Speed Internet Access is required for proper operation of the HotSpot
Printer.
Internet Service Prov ider. A company that provides access to the Internet.
Information Technology. A broad subject concerned with all aspects of
managing and processing inf orm at ion.
HyperText Transfer Protocol. Defines how messages are formatted and
transmitted via the Web. For example, when you enter a URL in your
browser, this sends an HTTP command to a server, directing it to locate
and transmit the requested Web page.
HyperText Transfer Protocol/Secure. URLs that require an SSL connection
start with https instead of http.
Secure Sockets Layer. SSL is encryption technology used for communication between a Web browser and server, ensuring the integrity and
privacy of data exchange. All major browsers, e.g., Internet Explorer, are
SSL enabled.
Transport Layer Security. An authentication prot ocol uti lized when you email
documents to a HotS pot Pri nter . The TLS protocol is designed to prevent
eavesdropping, tampering, or message forgery.
URL
Uniform Resource Locator. An addressing system that allows a user to
specify documents or resources anywhere on the Internet.
Service & Support Resources
Following is a summary of all HotSpot Printer-related resources, including important URLs, email
addresses and Help Desk resources. Keep this page handy for future reference.
Administrators
URL Current information on HotSpot
Printers, including free downloads
and other support services
URL Register HotSpot Printer www.printeron.net/register
URL Customize PrinterOn Web Pages www.printeron/net/administrators
www.ricoh-usa.com/hotspotprinters
Page 8

8
Type
Description
Details
Administrators Cont.
HotSpot Printer Operator’s Guide
URL Check service status
URL Web Image Monitor (view/change
HotSpot Printer settings)
http://PrinterIPAddress:8080/printeron/PDSJSP
Default credentials:
• User Name = hotspot
• Password = printeron
http://PrinterIPAddress. Default credentials:
• Login User Name: admin
• Login Password: leave field blank
Users
URL Locate active HotSpot Printers http://www.printspots.com
URL Print via Web upload (document or
Web page)
Email Print via email (message/
attachment)
Email Subscription renewal Contact your authorized HotSpot Printer sales
www.printeron.net/ricoh/xxxxx*
ricohxxxxx@printspots.com*
representative
* Note: xxxxx is the unique 5- or 6-digit HotSpot Printer ID located on the labels supplied with the device, as well
as the Mobile Printing subscription certificate. See
Your Subscription Certificate.
Ricoh Help Desk
United States: 1-800-RICOH38 (1-800-742-6438)
Canada: 1-800-263-0815
Page 9
HotSpot Printer Operator’s Guide
9
II.. IInnttrroodduuccttiioonn
How HotSpot Printing Work s
A HotSpot Printer is a hardcopy output solution that enables mobile users to print documents securely
across the Internet, without the need for a device-specific driver or special software. From any Internetenabled computer (laptop/notebook/desktop), cell phone or other wireless handheld device, HotSpot
users can send files directly to the printer. How? It is very simple.
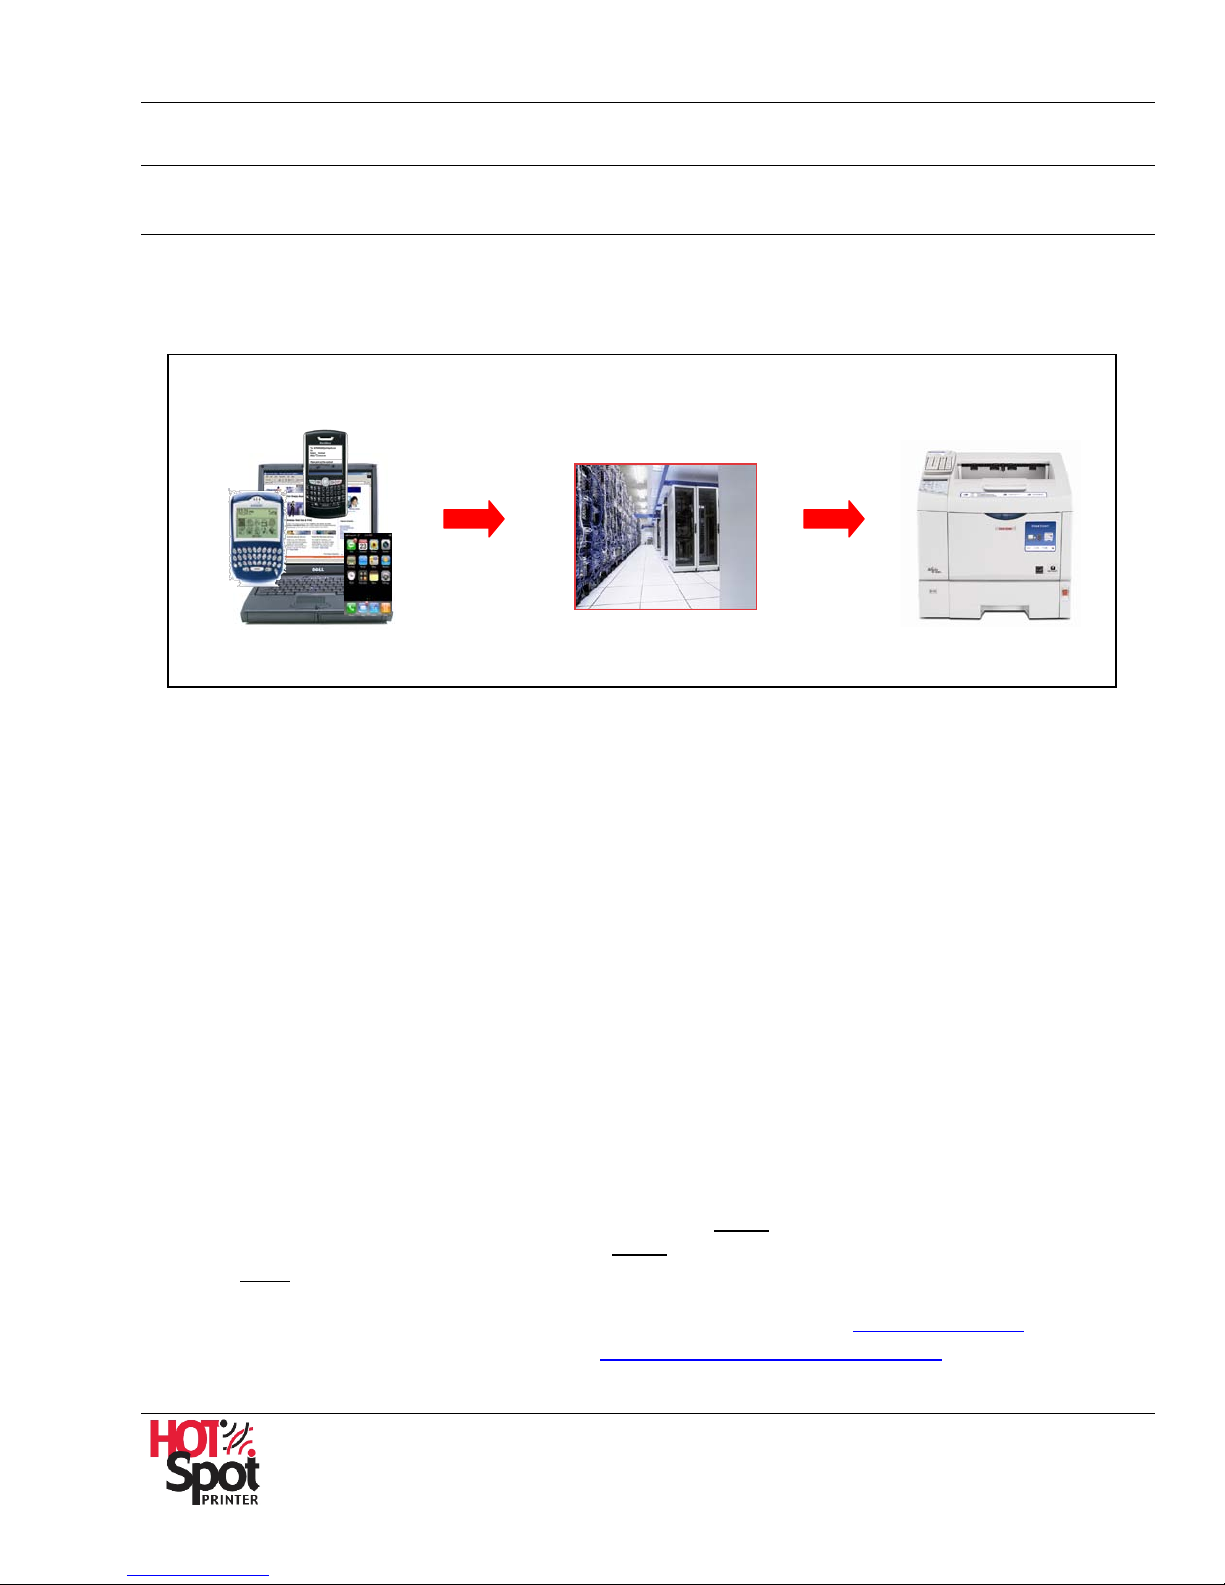
Input Processing Output
Documents, Web pages, email messages/attachments are sent from the Internet-enabled
device to the PrinterOn Ser ver, using 128-bit SSL (Secure Sockets Layer) encryption.
The Server generates a compressed printable data file that is automatically formatted for
the target HotSpot Printer, and then transmitted. For jobs submitted via the PrinterOn
Web Page, a private release code is generated and then displayed on the computer
screen. In addition, the release code is emailed to the supplied address.
The print job is received by the target HotSpot Printer, again using 128-bit SSL encrypt-
tion. The file resides safely in the printer hard disk drive until the user arrives at the printer
and enters the release code, via the attached HotSpot keypad. The file is decompressed
and printed.
Important:
• The print job downloads directly to the HotSpot Printer’s hard disk drive and remains there,
encrypted, for 72 hours. If the assigned release code is not entered into the device keypad within 72
hours, the file is automatically deleted from the printer’s hard disk drive.
• For the user’s convenience, up to five (5) reprints can be released at the HotSpot keypad, after the
first job is printed, for a total of six (6) copies. The reprint function times out after 20 minutes, after
which the file is automatically erased from the printer’s hard disk drive.
Note:
• The HotSpot Printer’s URL is www.printeron.net/ricoh/
• The HotSpot Printer’s email address is ricoh. xxxxx
- xxxxx is the unique 5- or 6-digit HotSpot Printer ID located on the lab els sup pl ie d with the device, as
well as the Mobile Printing Service subscription certificate.
- Printer URLs can also be found by searching PrinterOn’s directory at www.printeron.com.
Reference: For step-by-step instructions, see
xxxxx
@printspots.com.
Appendix 1: HotSpot Printer Operation.
Page 10

HotSpot Printer Operator’s Guide
10
System Reliability
To ensure uninterrupted service, your state-of-the-art Mobile Printing Service support an infrastructure
that incorporates critical redundancy factors, thus facilitating reliable, timely, accurate and secure file
processing, transfer, and output.
• Dual-Network Operation Centers – While we refer to the “PrinterOn Server,” for simplicity, in
actuality there are clusters of server farms for load balancing. Should one center be removed from
operation, the other is always available for undisrupted service.
• Three Inbound Internet Connections – These physically-distinct connections are managed by
two separate Internet Service Providers (ISPs). This prevents downtime caused by the loss of any
single connection or one of the ISPs.
• Battery Backup System – In the event of a power outage, each physical location incorporates
Battery Backup Systems to prevent the loss of print job data. Furthermore, the Battery Backup
Systems are supported by generators for longer-term outages, if battery backup is not sufficient.
Data Security
Your HotSpot Printer utilizes three forms of communication with the PrinterOn Server:
1. HTTP (HyperText Transfer Protocol) – HTTP communication takes place with the Server during
the license validation process, when you register your HotSpot Printer on line.
2. HTTPS (HyperText Transfer Protocol/Secure) – HTTPS communication occurs when a print job
is submitted through the PrinterOn Web Page. 128 -bit SSL encryption technology secures all
information exchange between your Web browser and the Server.
Note: Using both HTTP and HTTPS requires that data be allowed to pass through the firewall
using TCP ports 80 and 443. As most environments allow for secure Internet communications on
client computers, the HotSpot Printer does not require any special firewall configuration. If a
proxy server is used, the HotSpot Printer must be configured with a proxy user account.
Reference: See IV. Advanced Administration, About Service Status (Screen 2), HTTP Proxy
Settings.
3. TLS (Transport Layer Security) - When emailing messages/attachments, the PrinterOn Server
will accept requests for TLS authentication. The TLS protocol is designed for secure data and file
exchange over the Internet; the client/server prevents eavesdropping, tampering, or message
forgery.
Important: After the PrinterOn Server confirms successful file transfer, all records of the
print job on the Server are deleted.
Page 11
HotSpot Printer Operator’s Guide
11
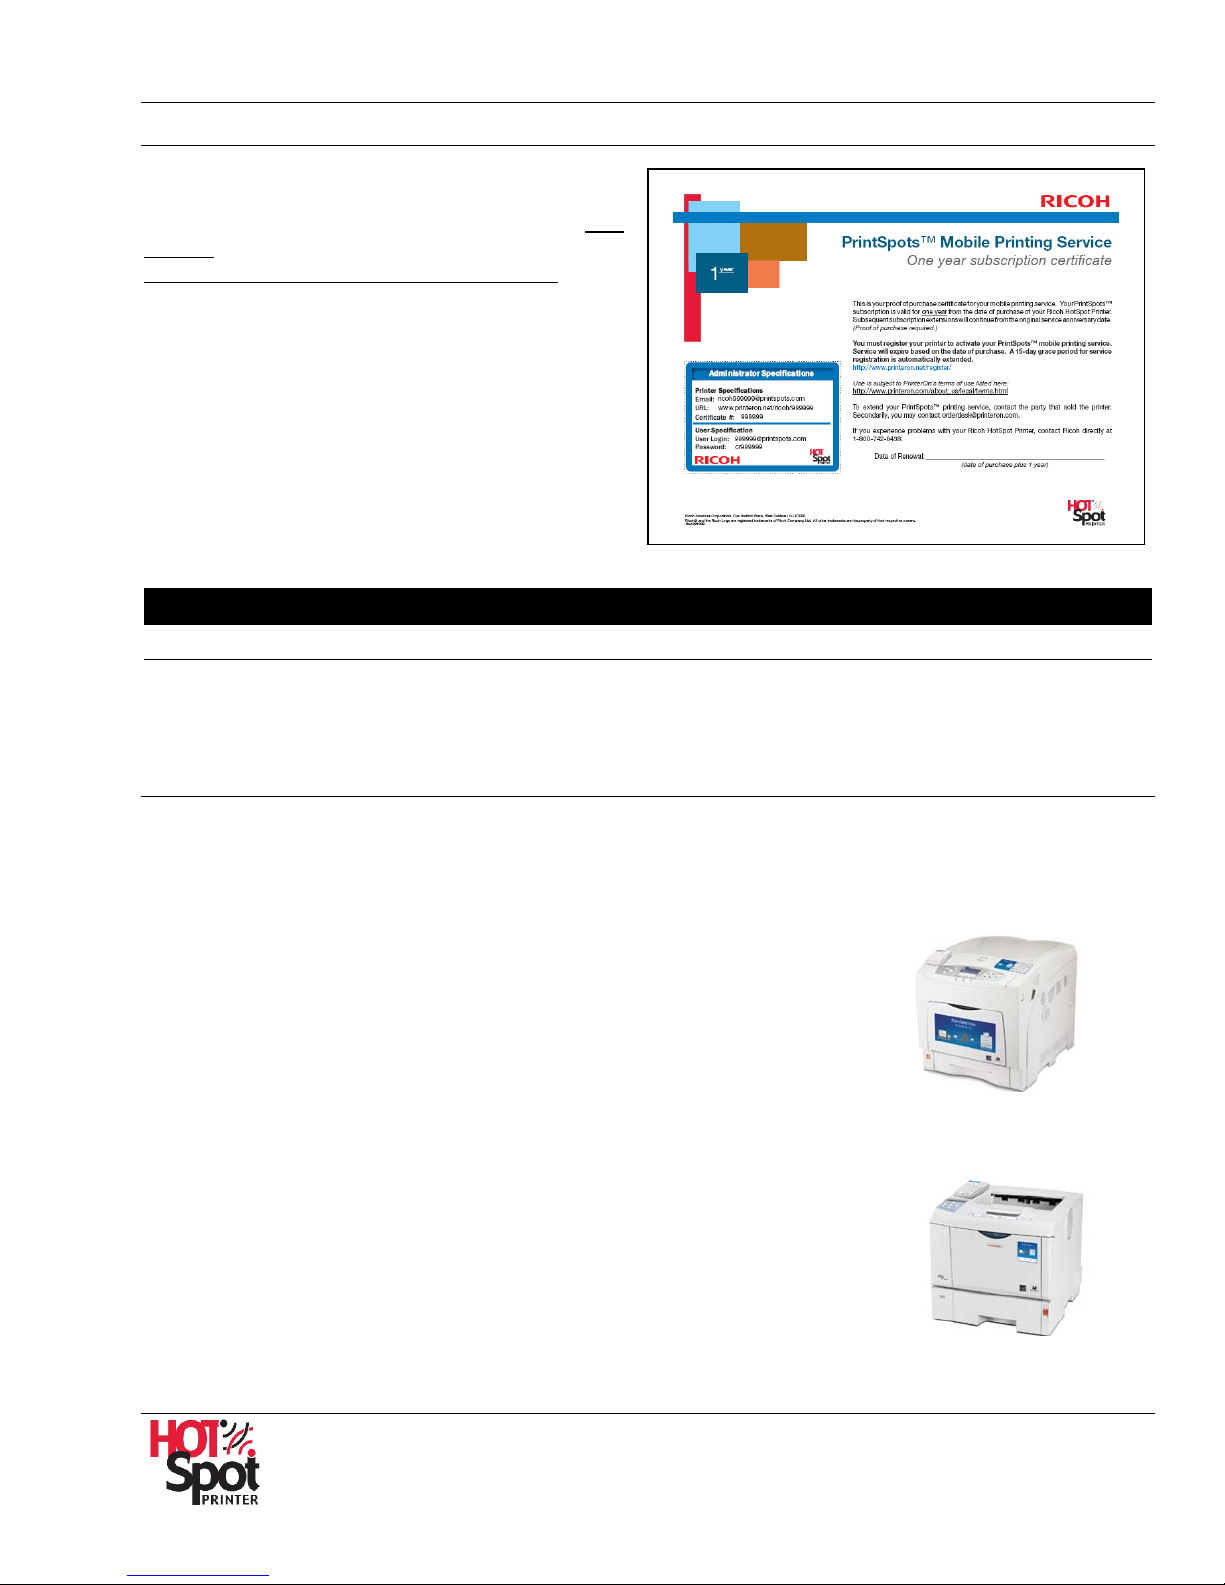
Your Service Subscription
Your new HotSpot Printer ships with a one-year
PrintSpots Mobile Printing Service subscription,
which also serves as your proof of purchase.
service
subscription starts on the date of purchase
register your HotSpot Printer today, in order to
take immediate advantage of your new mobile
printing capability.
Toward the end of the first year of service, Ricoh/
PrinterOn will send a subscription-renewal
reminder (to the registered email address). At
that time, a 2-, 3- or 4-year subscription
extension can be purchased.
Subscription Extensions – Part Numbers
2-year Extension 3-year Extension 4-year Extension
003357MIU 004813MIU 004814MIU
The
, so
Note: For more information and pricing, please contact your authorized HotSpot Printer sales
representative.
Printer Configurations
• Color Laser Printers
The Color HotSpot Printer ships with the following components pre-installed:
- Printer with 550-sheet Paper Tray, 100-sheet Bypass Tray, and standard Automatic Duplexing
- 512MB RAM
- 60GB hard disk drive
- USB host interface
- USB keypad and Velcro strips
- VM card with PrinterOn’s JAVA-based mobile printing software
- One-year Mobile Printing Service subscription (see previous section
for details)
• Black-and-White Laser Printers
The Black-and-White HotSpot Printer ships with the following components pre-installed:
- Printer with 500-sheet Paper Tray and 100-sheet Bypass Tray
- 256MB RAM
- 40GB hard disk drive
- USB host interface
- USB keypad and Velcro strips
- VM card with PrinterOn’s JAVA-based mobile printing software
- One-year Mobile Printing Service subscription (see previous section
for details)
Note: For more information on printer-related options and specifications, please refer to the
associated product brochure and/or your authorized HotSpot Printer sales representative.
Page 12
HotSpot Printer Operator’s Guide
12
For Print Release, Press OK
Option Prt. Jobs Supplies
K C M Y
P r i n t R e l e a s e
P r e s s O K
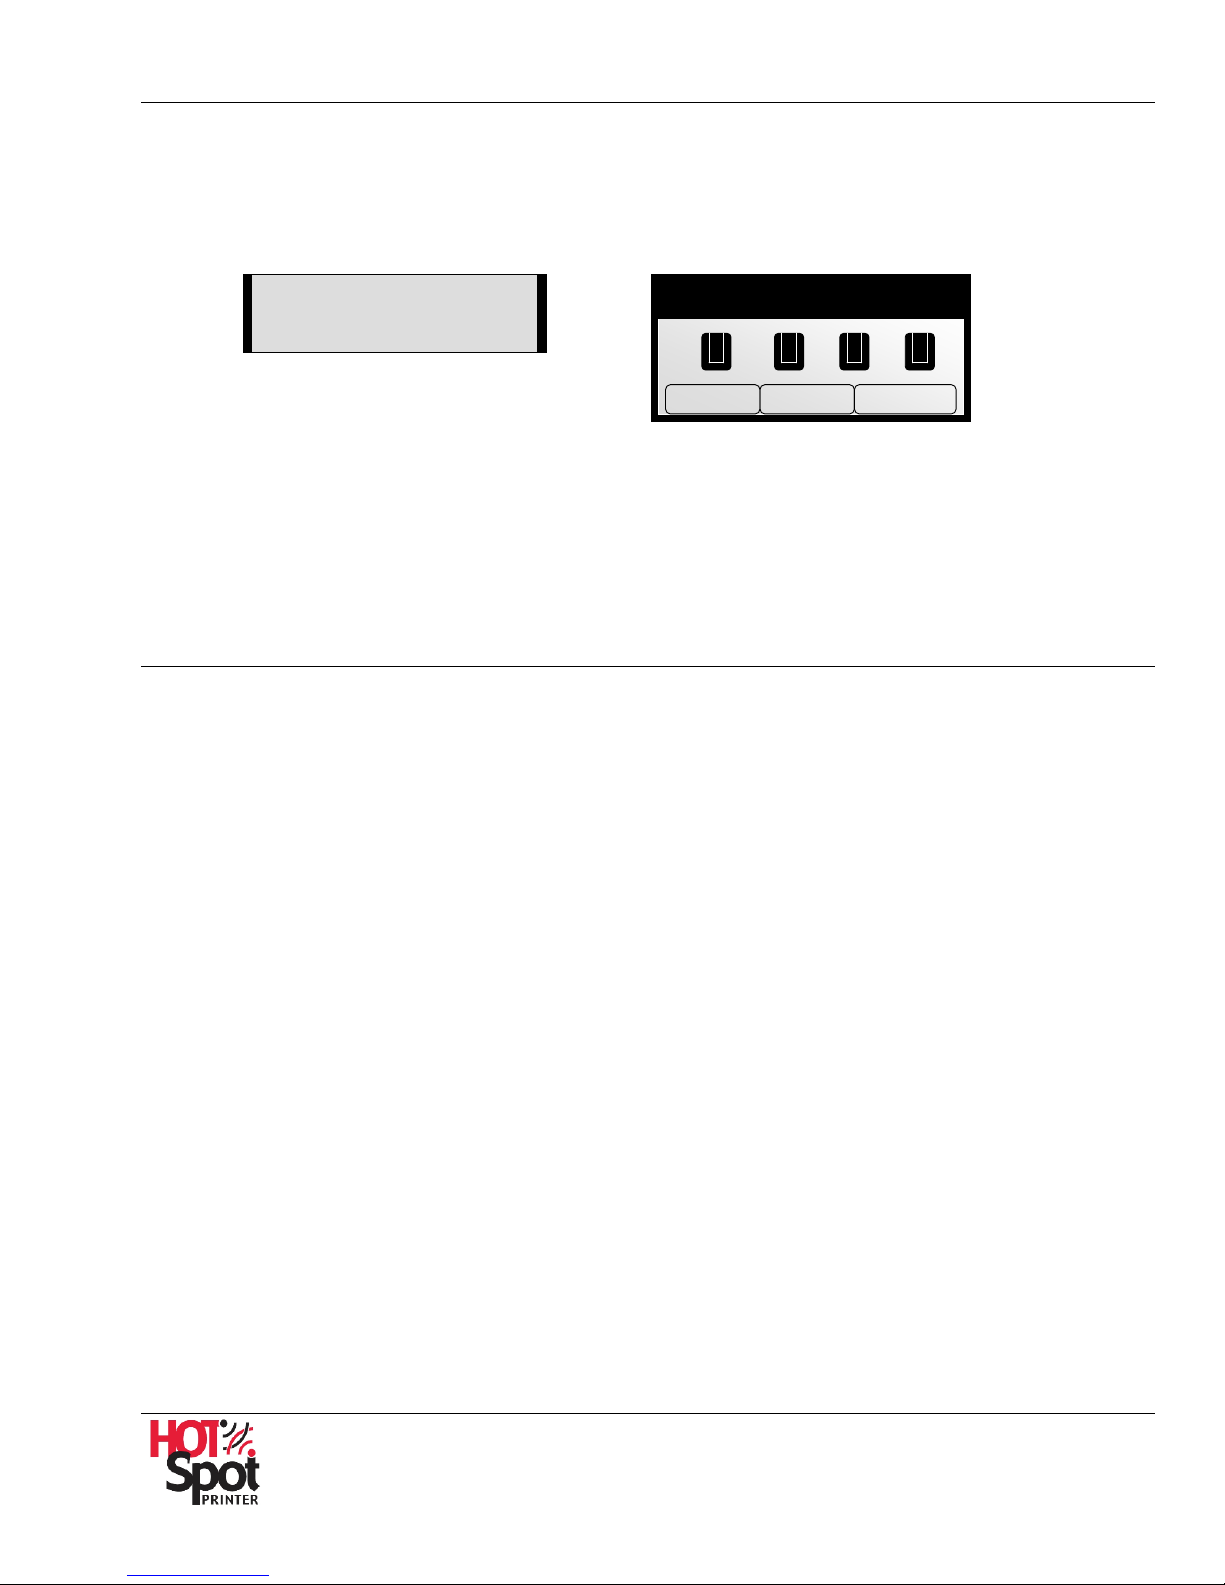
• Printer LCD Panel Design
HotSpot-enabled printers are designed with either a 2- or 4-line LCD panel, for Black-and-White
and Color Laser Printers, respectively. For illu stration purposes, the 4-line display is used in
this guide.
2-line LCD 4-line LCD
• Printer Restrictions
When the printer is accessed via the Mobile Printing Service, envelope printing, custom paper
sizes, special paper types, and other advanced printer driver features are not supported.
However, advanced driver features are available when the printer is being utilized as a standard
network printer.
HotSpot Printer Applications
Research has indicated that the tool knowledge workers miss most while away from the off ice is… the
printer. Indeed, business travelers and mobile professionals need to be able to print from the road,
satellite offices, library, hotel room, café or restaurant, as easily as they print documents at their home
or corporate office. As businesses must compete in a global marketplace, easy access to the printed
page – presentations, spec sheets, proposals, boarding passes, travel itinerary – has never been more
important….
• A hotel chain uses HotSpot Printers to enable guests (users) to print securely from their rooms
without the involvement of IT staff. Integration with the hotel's accounting system allows print charges
to be billed directly to guest (user) rooms.
• A coffee franchise uses HotSpot Printers to cater to their Web-surfing clientele. Having printers on
site lengthens customer stays, increasing revenues on refills. The ability to support cash payments
also increases revenue.
• A law firm uses HotSpot Printers to enable visiting attorneys and clients to print, as needed, without
IT support. Temporary and contract employees are directed to HotSpot Printers for security
purposes.
• A conference center uses HotSpot Printers to allow all guests (users) to print without setting up
accounts for each user/event at Guest Services – a logistics headache when trade shows come to
town.
• Any organization concerned with security, for example, the use of thumbnail drives to transfer files
prior to printing can utilize Hot Spot Printers to avoid exposure to information theft and alteration.
Page 13
HotSpot Printer Operator’s Guide
13
Marketing Toolkit
We have created exciting marketing tools that will allow you to effectively advertise your Mobile Printing
Services. These instructional resources and point-of-purchase (POP) display materials ensures
maximum visibility and end-user satisfaction.
Point-of-Purchase (POP) Display
Your new HotSpot Printer shipped with an envelope containing a point-of-purchase (POP) display and
two plastic holders, along with instructions on how to set up the display on your printer. For more
information, see II.Installation, Step E: Install POP Display (optional
Free Downloads
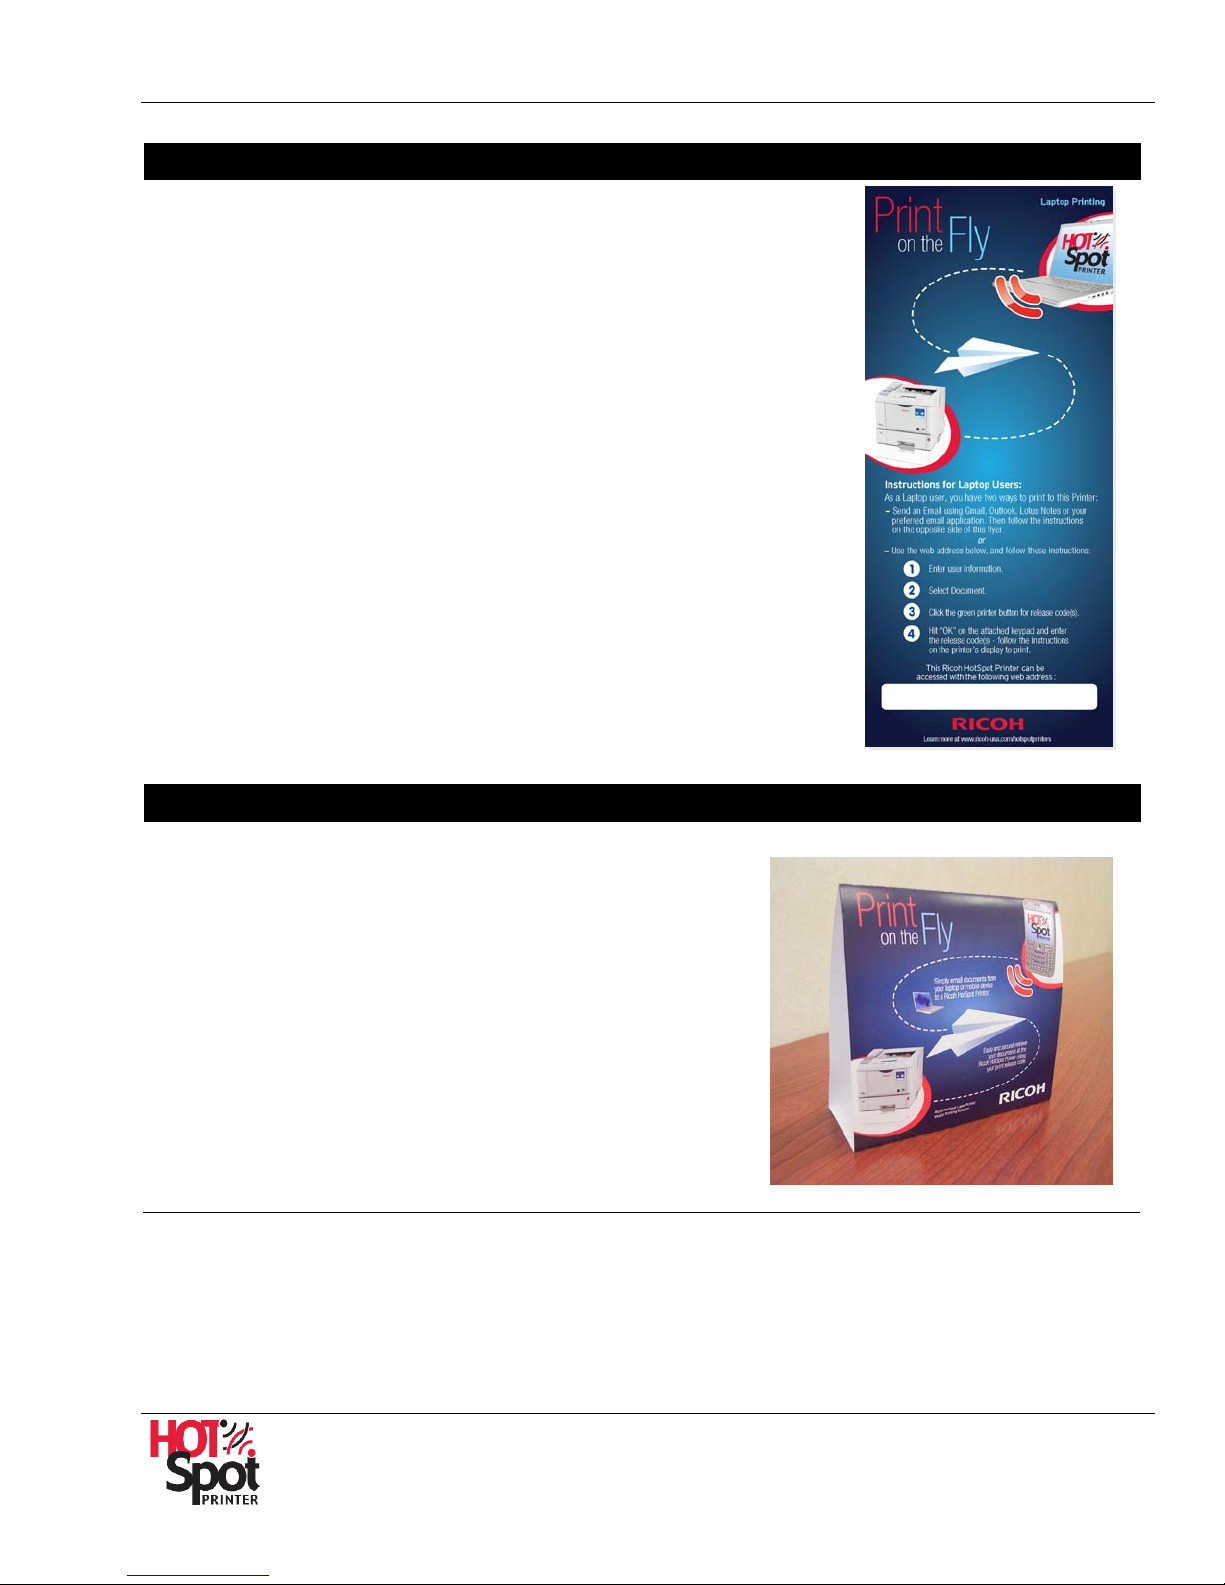
Free Marketing Toolkit downloads include an Email Blast, Slim Jim and Tent Card point-of-purchase
pieces. To download the files, please visit
Tools link.
www.ricoh-usa.com/hotspotprinters. Click on the HotSpot
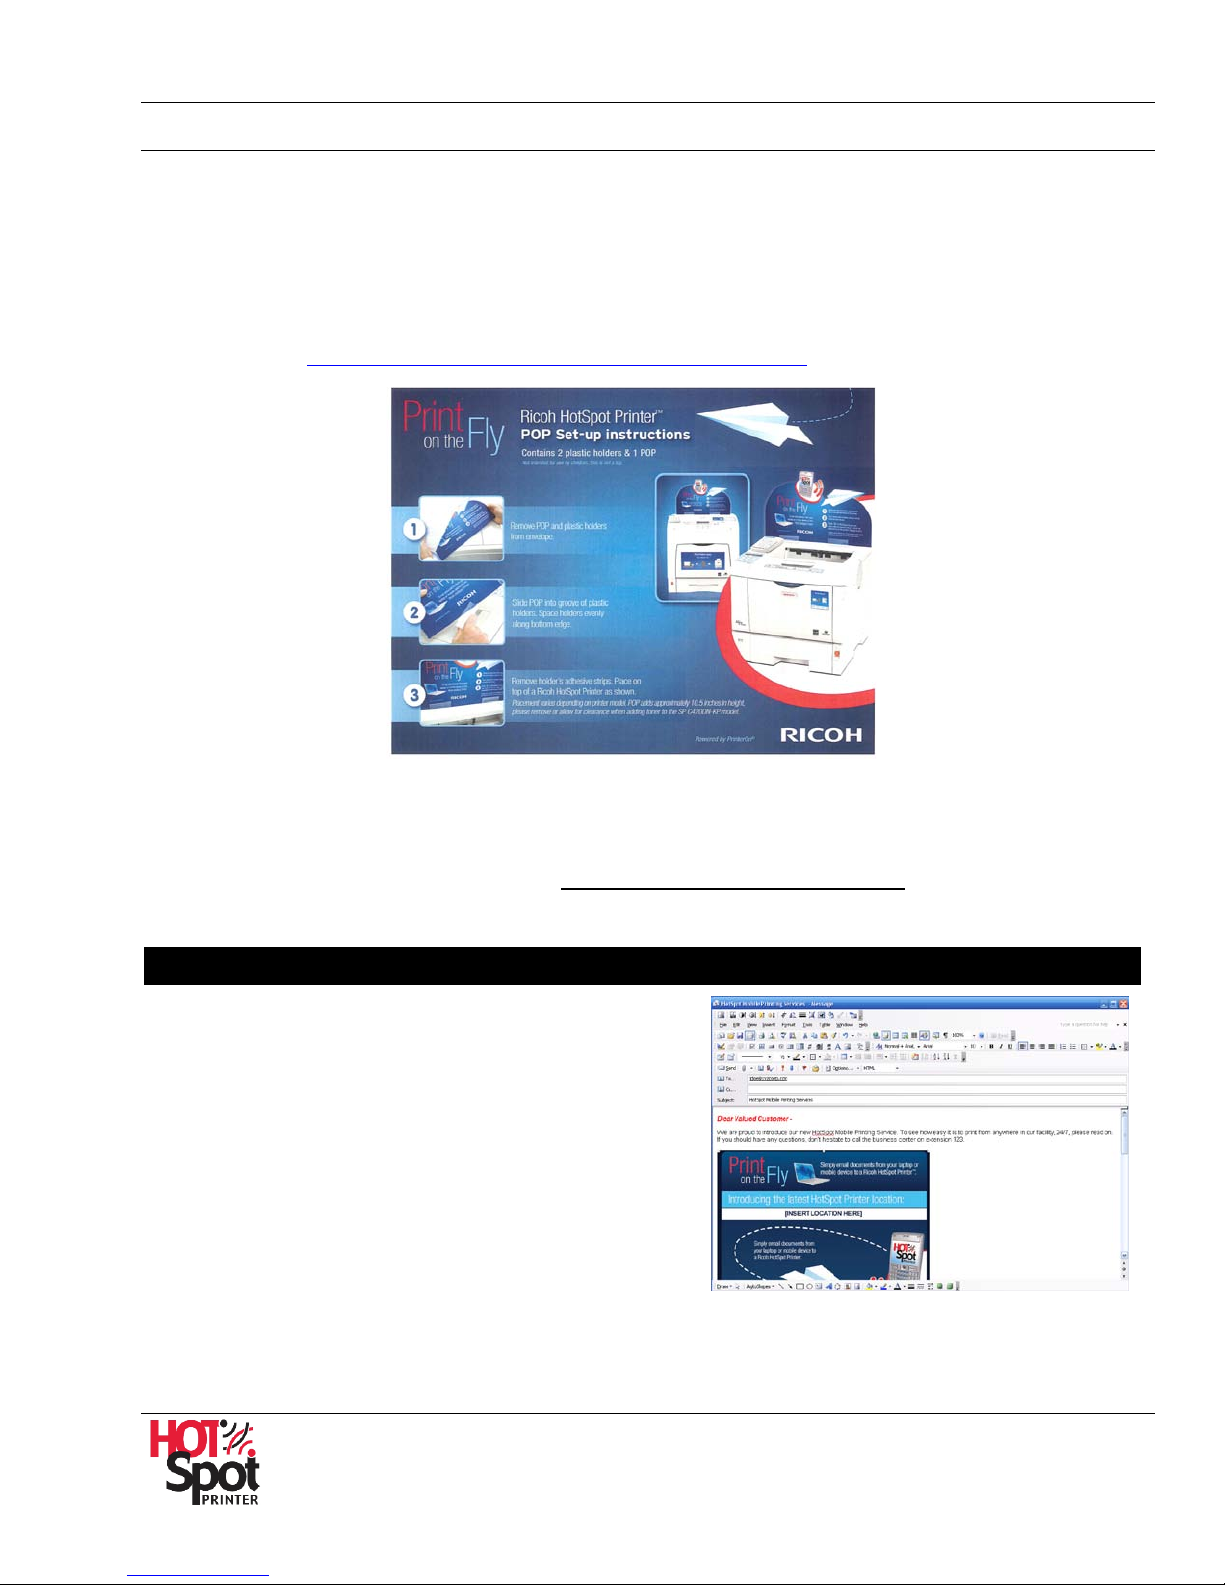
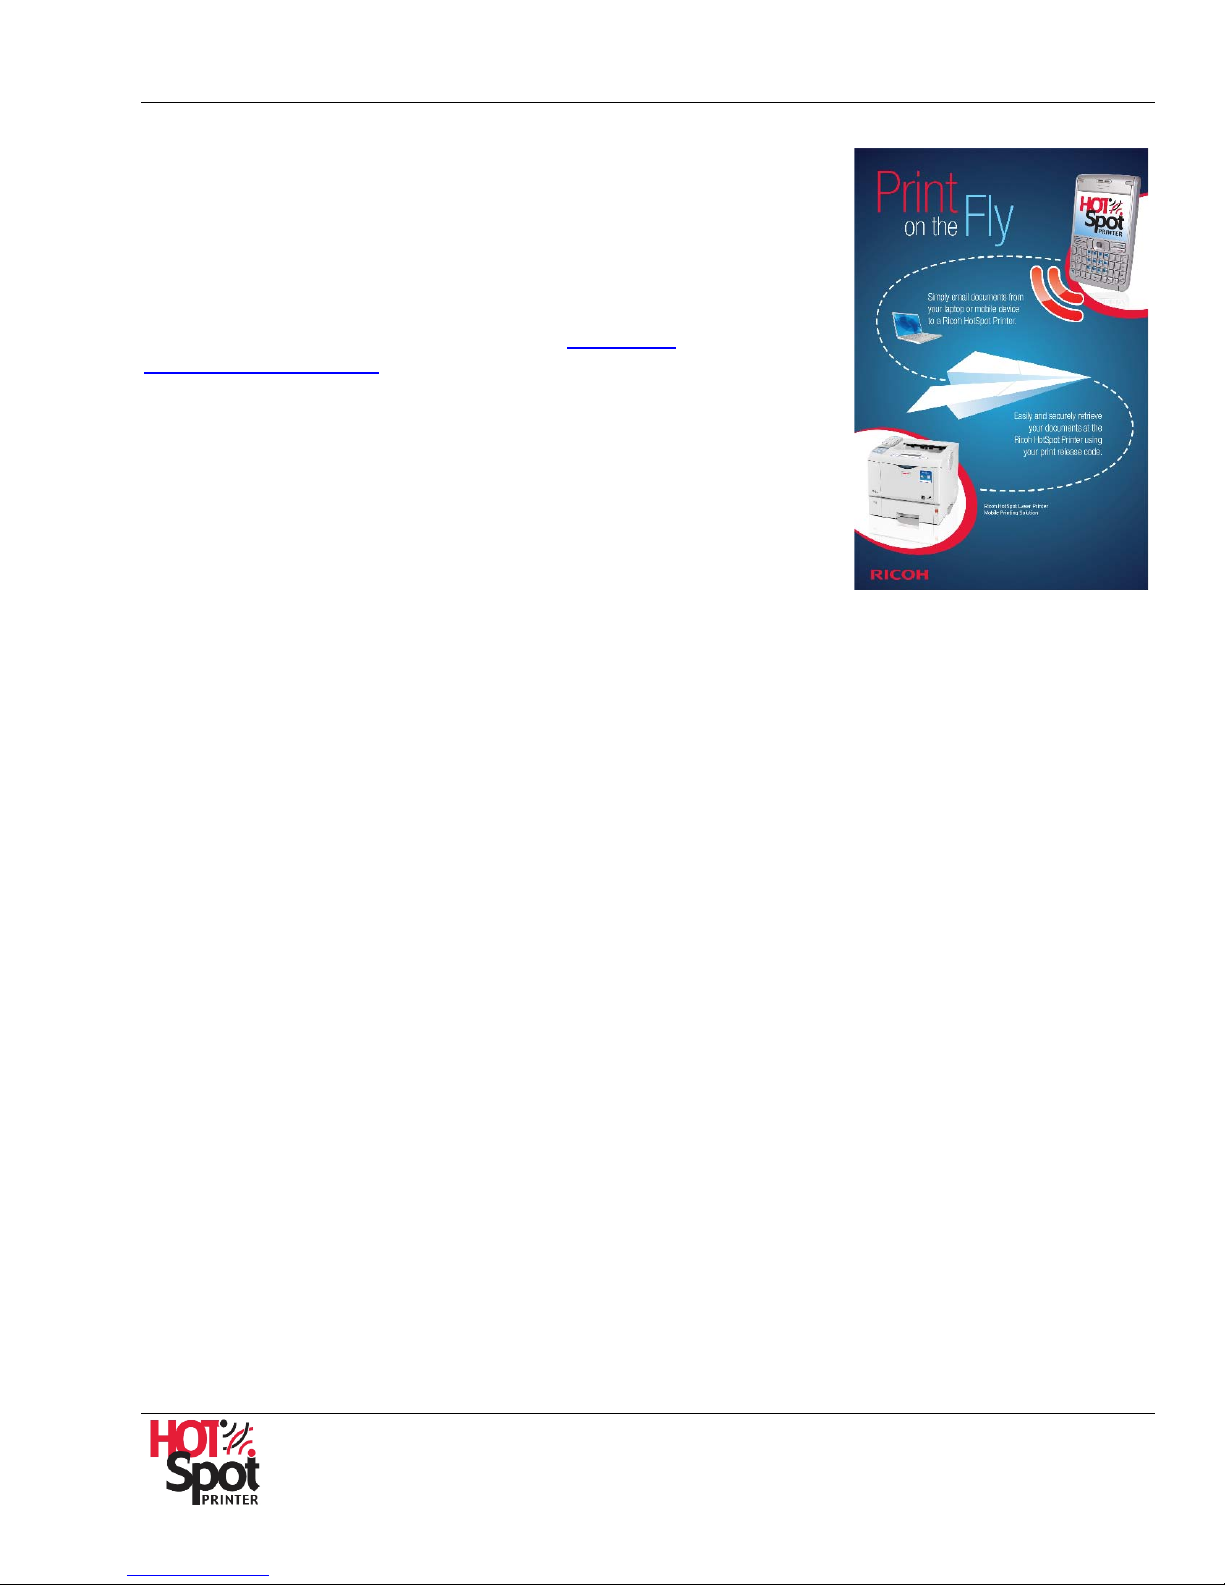
Email Blast
).
If you wish to reach out to potential customers
through email, we have designed an eye-catching
marketing piece that can be delivered by either
inserting the file into the email itself (as shown) or as
a file attachment. Craft a message to your target
audience, for maximum impact.
The Email Blast is available in three file formats PDF, PSD, HT ML and JPEG. Choose the format that
best suits your requirements.
Page 14
14
Slim Jim
The Slim Jim is a point-of-purchase display card that and is
available in PDF and Adobe InDesign format (fonts included).
Personalize the card with your business name/location, Web
and email addresses. Print this two-sided card in duplex mode
and trim to size, then place in plastic holders/display racks as
a take-away pamphlet.
Your customers, visitors or clients can learn how to use your
Mobile Printing Service, in three easy steps.
HotSpot Printer Operator’s Guide
Tent Card
Print and fold this card so that it is readable on either side of
the fold. This free-standing card can be placed on a table
top, counter or other flat surface. This is a great advertisement for your HotSpot Printer patrons who may wish to try
your new service.
Tent cards are available as either a generic tent card or a
tent card with fields for listing your HotSpot Printer's email
address and Web page address. The tent card files are
available in PDF and Adobe InDesign, with fonts included.
Page 15
HotSpot Printer Operator’s Guide
15
HotSpot Printer Poster
A HotSpot Printer poster is also available through your authorized
sales representative. This pre-printed advertising piece is the ideal
way to promote your HotSpot Printer service. Place the poster in
high-traffic area for maximum impact. Note: Please check with your
local representative for poster availability.
Additional Marketing Resources
Please check the HotSpot Printer Website (www.ricoh-
usa.com/hotspotprinters) for pricing and availability of future
marketing tools, including:
• 24” Vinyl Desktop Circle
• 38” Vinyl Floor Circle
• Hanging Ceiling Display
If you require additional customization, please work with your
authorized HotSpot sales representative. He/she will be able to direct you to marketing partners that
can assist.
Page 16
HotSpot Printer Operator’s Guide
16
IIII.. IInnssttaallllaattiioonn
This section contains step-by-step instructions on how to install your HotSpot Printer, register your
Mobile Printing Service, and then test the printer.
Step A: Install Printer
To install your HotSpot Printer, proceed as follows:
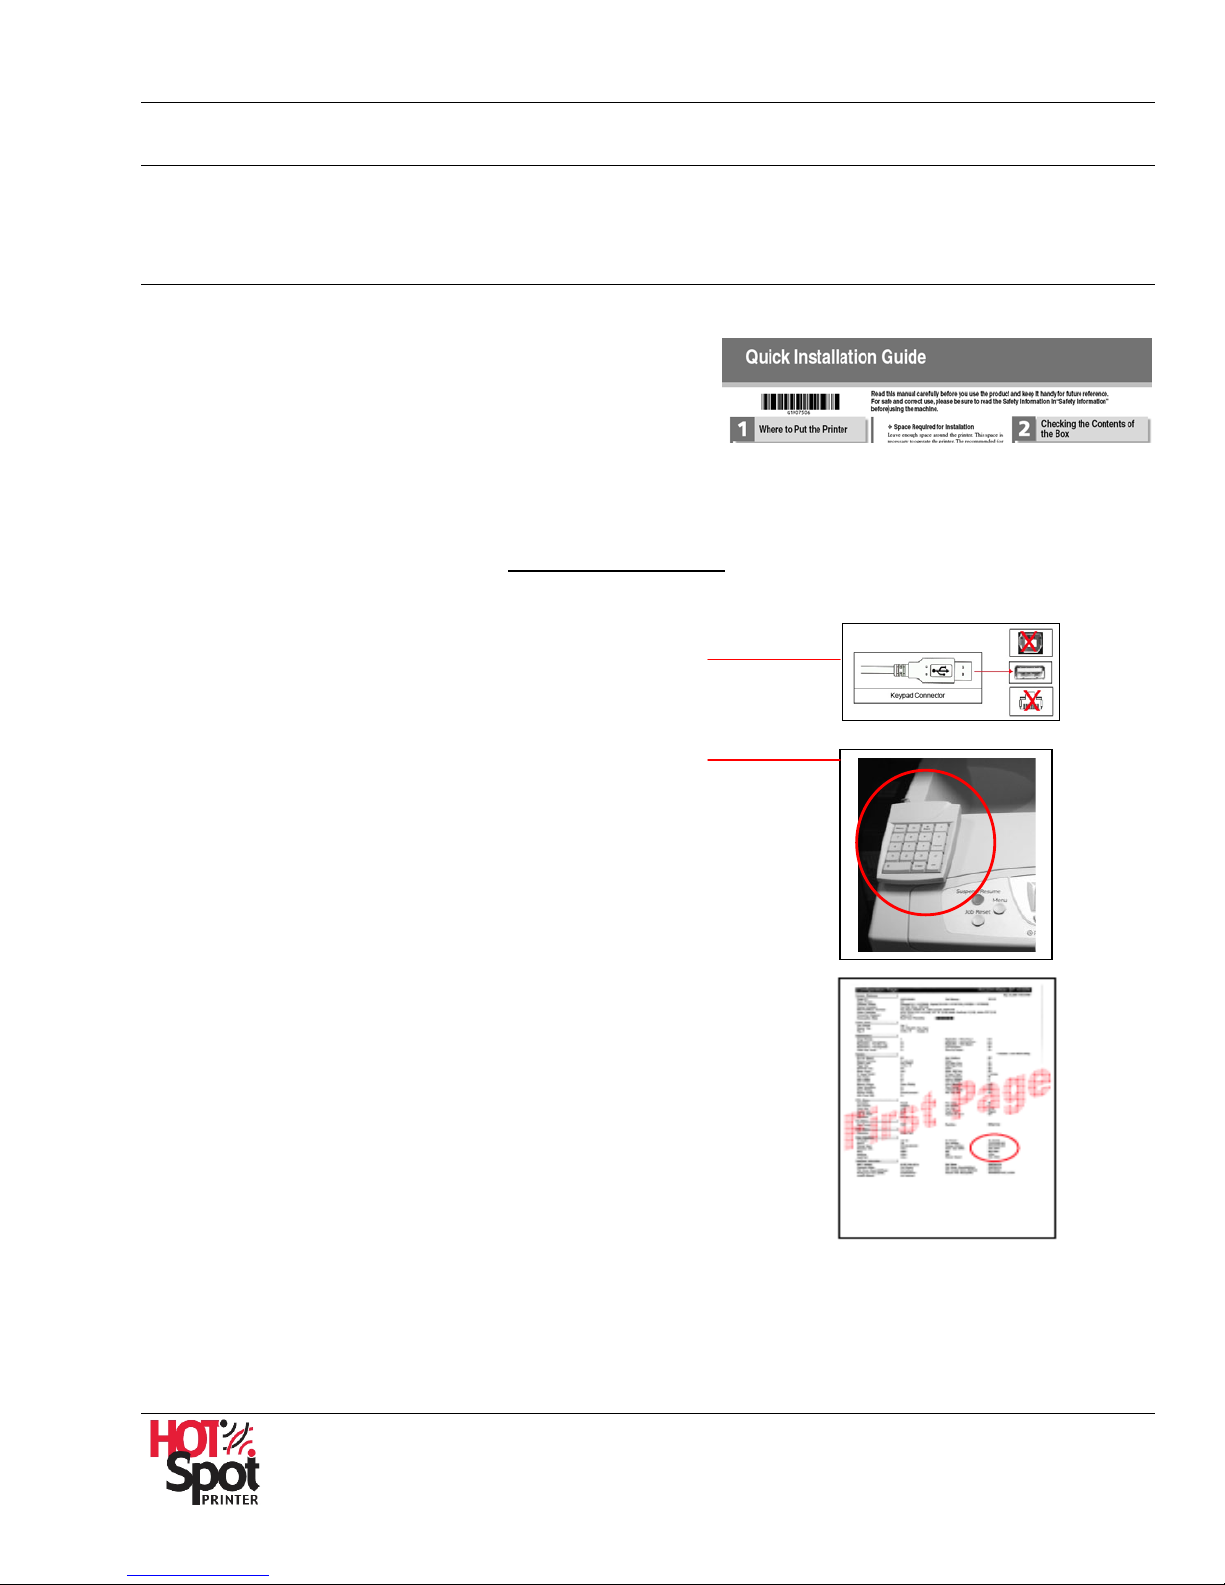
1. Unpack and connect printer. For detailed installation
instructions, refer to the printer’s Quick Installation
Guide, located in the box.
Important:
• A network connection is required before you activate your Mobile Printing Service. Ethernet settings
are detailed in the printer’s Quick Inst allation Guide. Should you need further assistance, contact
the Ricoh Help Desk (U.S.: 1-800-RICOH38 [1-800-742-6438]; Canada: 1-800-263-0815).
• It is strongly suggested that you do not disable DHCP
2. Turn printer OFF.
3. Attach HotSpot keypad into the USB port on the
rear of the printer.
4. Affix keypad to printer’s top cover with Velcro
Velcro strips. Place to left side, as shown.
5. Turn printer ON.
6. Print Configuration Page(s). The Configuration
Page(s) contain important printer information, such
as Unit Number (Serial Number) and IP Address.
a. Press [Menu] on printer control panel.
for initial setup and testing.
b. Scroll down [] to [List/Test Print], and then press [OK].
c. Scroll down [] to [Config. Page], and then press [OK].
Display reads: [Config. Page Printing…. Please wait].
d. Locate the Unit Number or Printer ID, which appears at the
top of the page. This is the printer’s Serial Number, which
you will need to have available for the next step, Step B.
Note: The Configuration Page also identifies your printer’s IPv4 Address (circled above),
which is required when using Web Image Monitor and PrinterOn Service Status utilities.
Page 17
HotSpot Printer Operator’s Guide
17
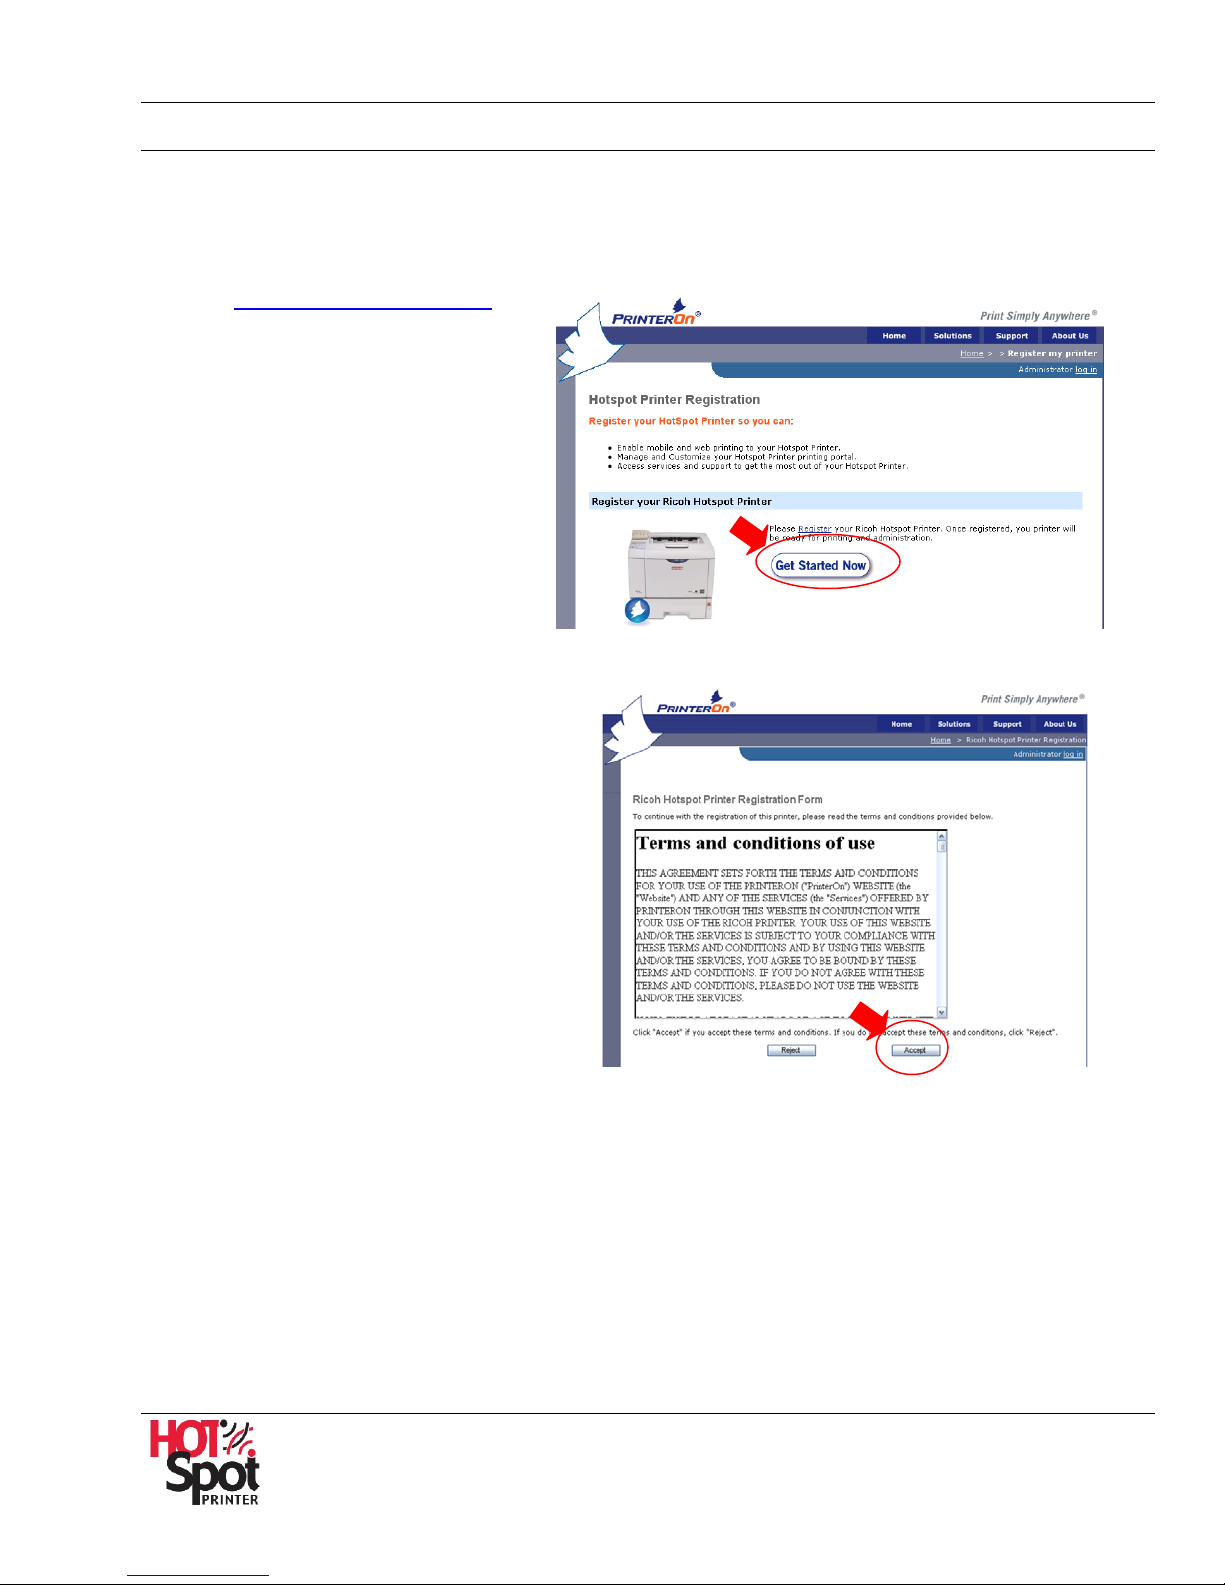
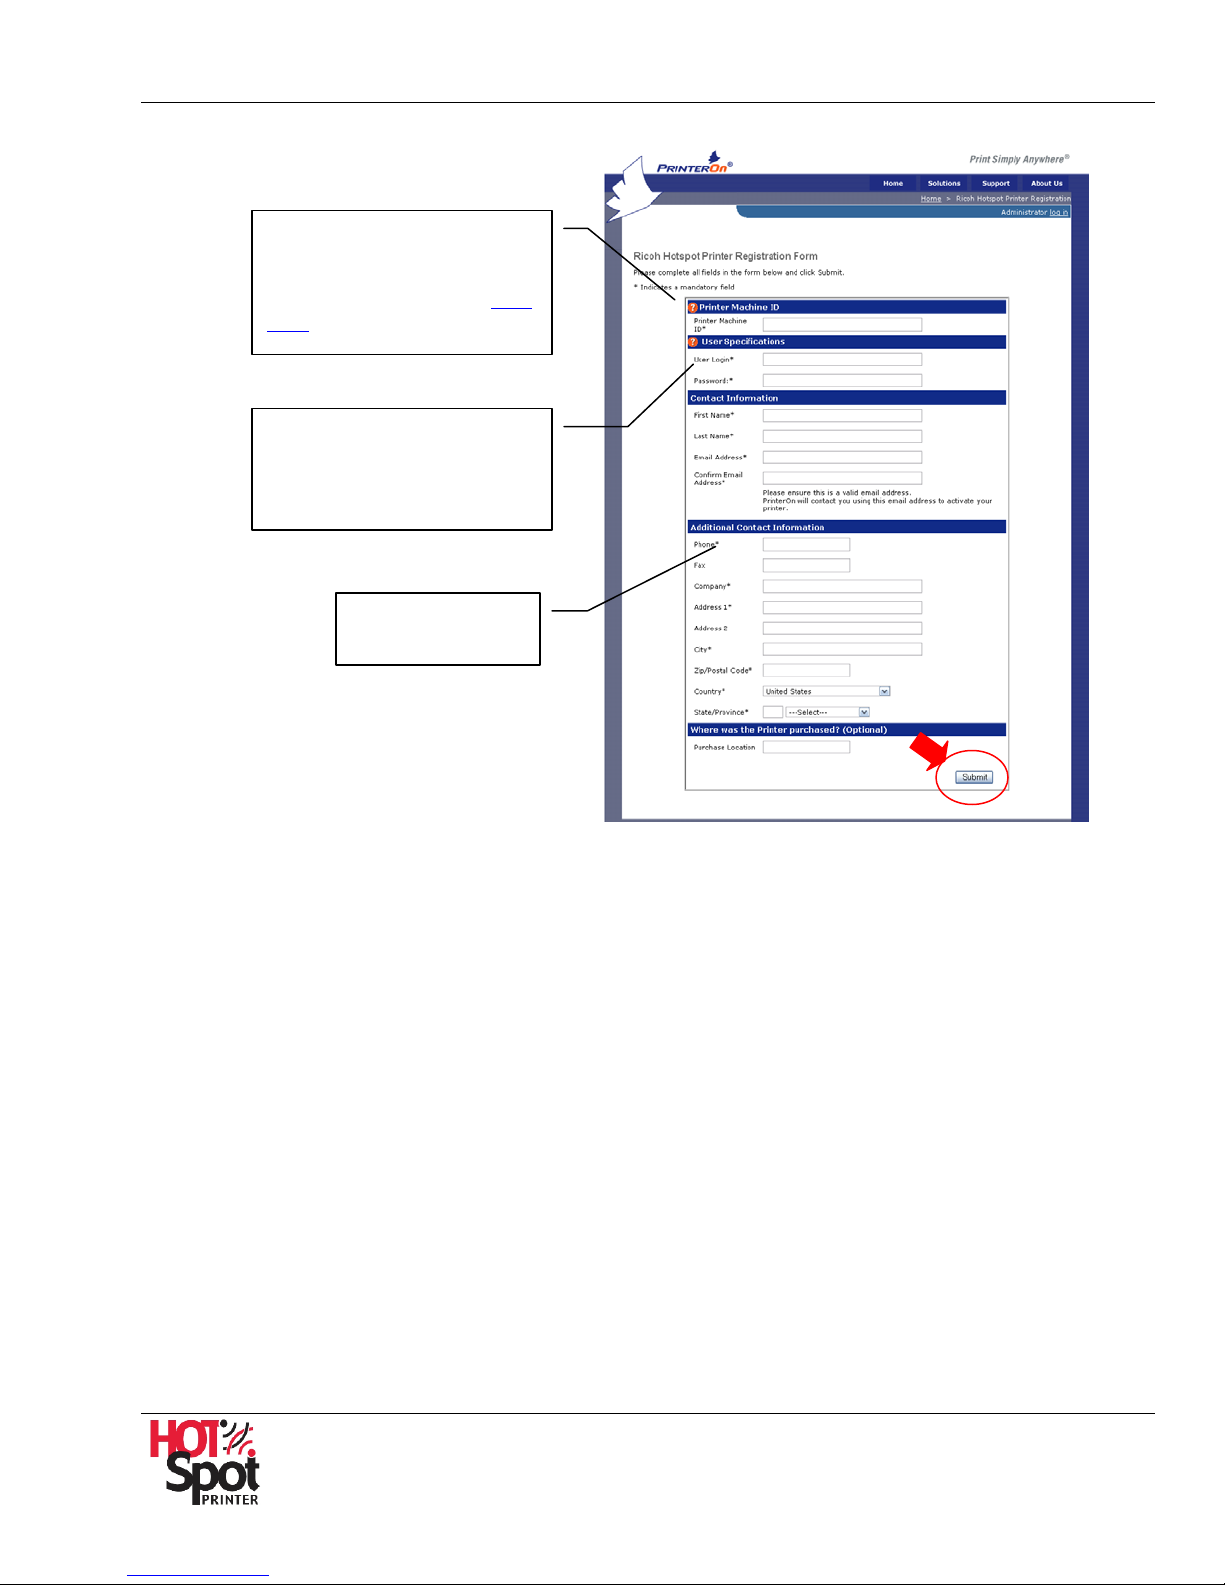
Step B: Register Printer
The HotSpot Printer Registration Service is available 24/7. To register a new printer from a computer
with Internet access, proceed as follows:
1. Open your Web browser.
2. Go to:
3. Click [Get Started Now].
4. Read Terms and conditions of use,
and then click [Accept].
http://printeron.net/register.
Page 18
HotSpot Printer Operator’s Guide
18
Printer Machine ID is the “Unit
User Login and Password are
Asterisk (*) ind icates
Number” (i.e., Serial Number)
located at the top of the
Configuration Page. See
A, 6).
Step
located on your Mobile Printing Service subscription certificate.
a required field.
5. Complete all required fields, and then
click [Submit].
Note: A confirmation email is sent to the specified email address to validate the address. You must
follow the instructions in the email in order to complete the registration process.
Page 19
HotSpot Printer Operator’s Guide
19
For Print Release, Press OK
Option Prt. Jobs Supplies
K C M Y
PrinterOn x.x LicenseValid
Option Prt. Jobs Supplies
K C M Y
HotSpot
HotSpot Keypad
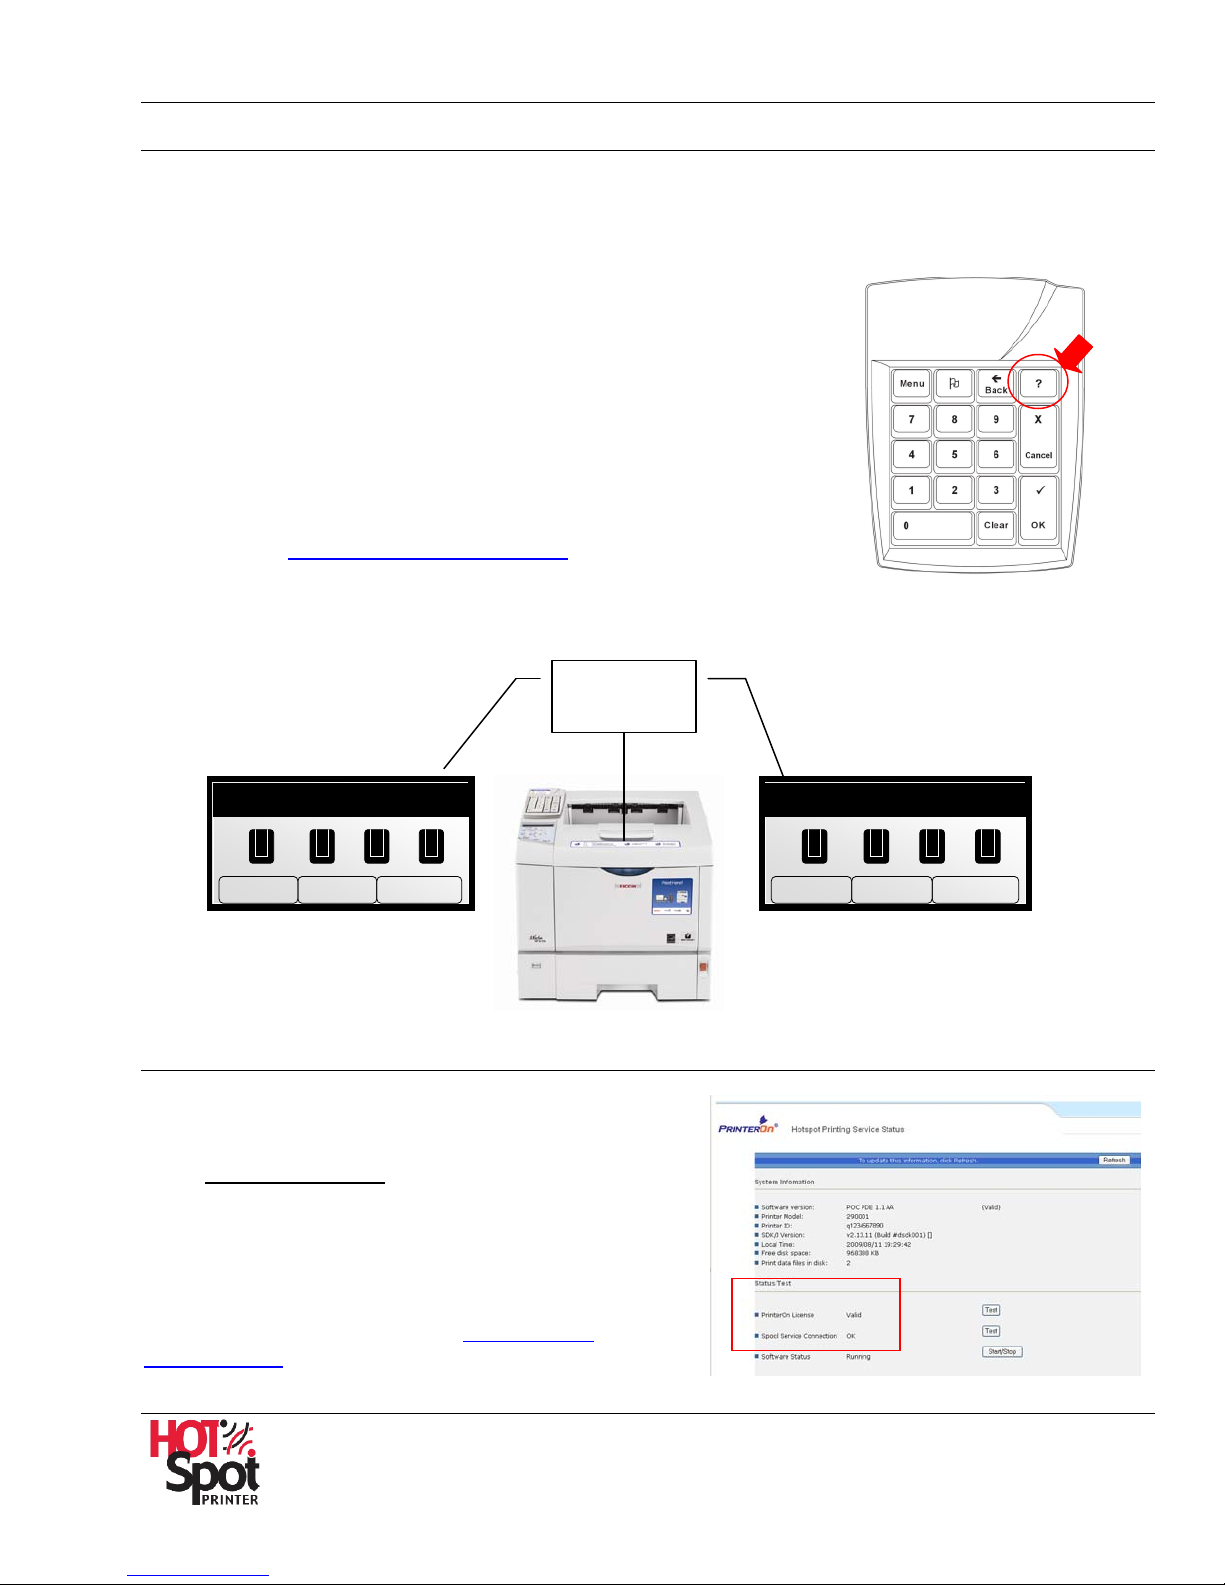
Step C: Check License Status
To confirm that your PrinterOn application is running properly, i.e., your license is valid, proceed as
follows:
1. Turn printer ON, if necessary.
Note: Approximately 90 seconds after [Ready] displays on the
printer’s LCD, the message [For Print Release, Press OK] should
appear (see Fig. 1). The HotSpot Printer is now in standby mode.
2. Press question mark button [?] on HotSpot keypad.
Important: The message [PrinterOn x.x LicenseValid] should
appear in the printer’s LCD (see Fig. 2). This indicates that the
application is working properly. If a different message appears,
e.g., [PrinterOn x.x NoLicense] or [PrinterOn x.x Internet
Down], see
Appendix 8: Troubleshooting.
3. Press [Cancel] on HotSpot Keypad to return to standby mode.
Printer LCD
Fig. 1
Remote Service Status Check
To check HotSpot Mobile Printing Service
status from any computer with an Internet
connection. Open your Web browser and enter:
http://
PrinterIPAddress
:8080/printeron/PDSJSP.
Default credentials:
• User Name = hotspot
• Password = printeron
Note: For more information, see
Administration.
IV. Advanced
Fig. 2
Page 20
HotSpot Printer Operator’s Guide
20
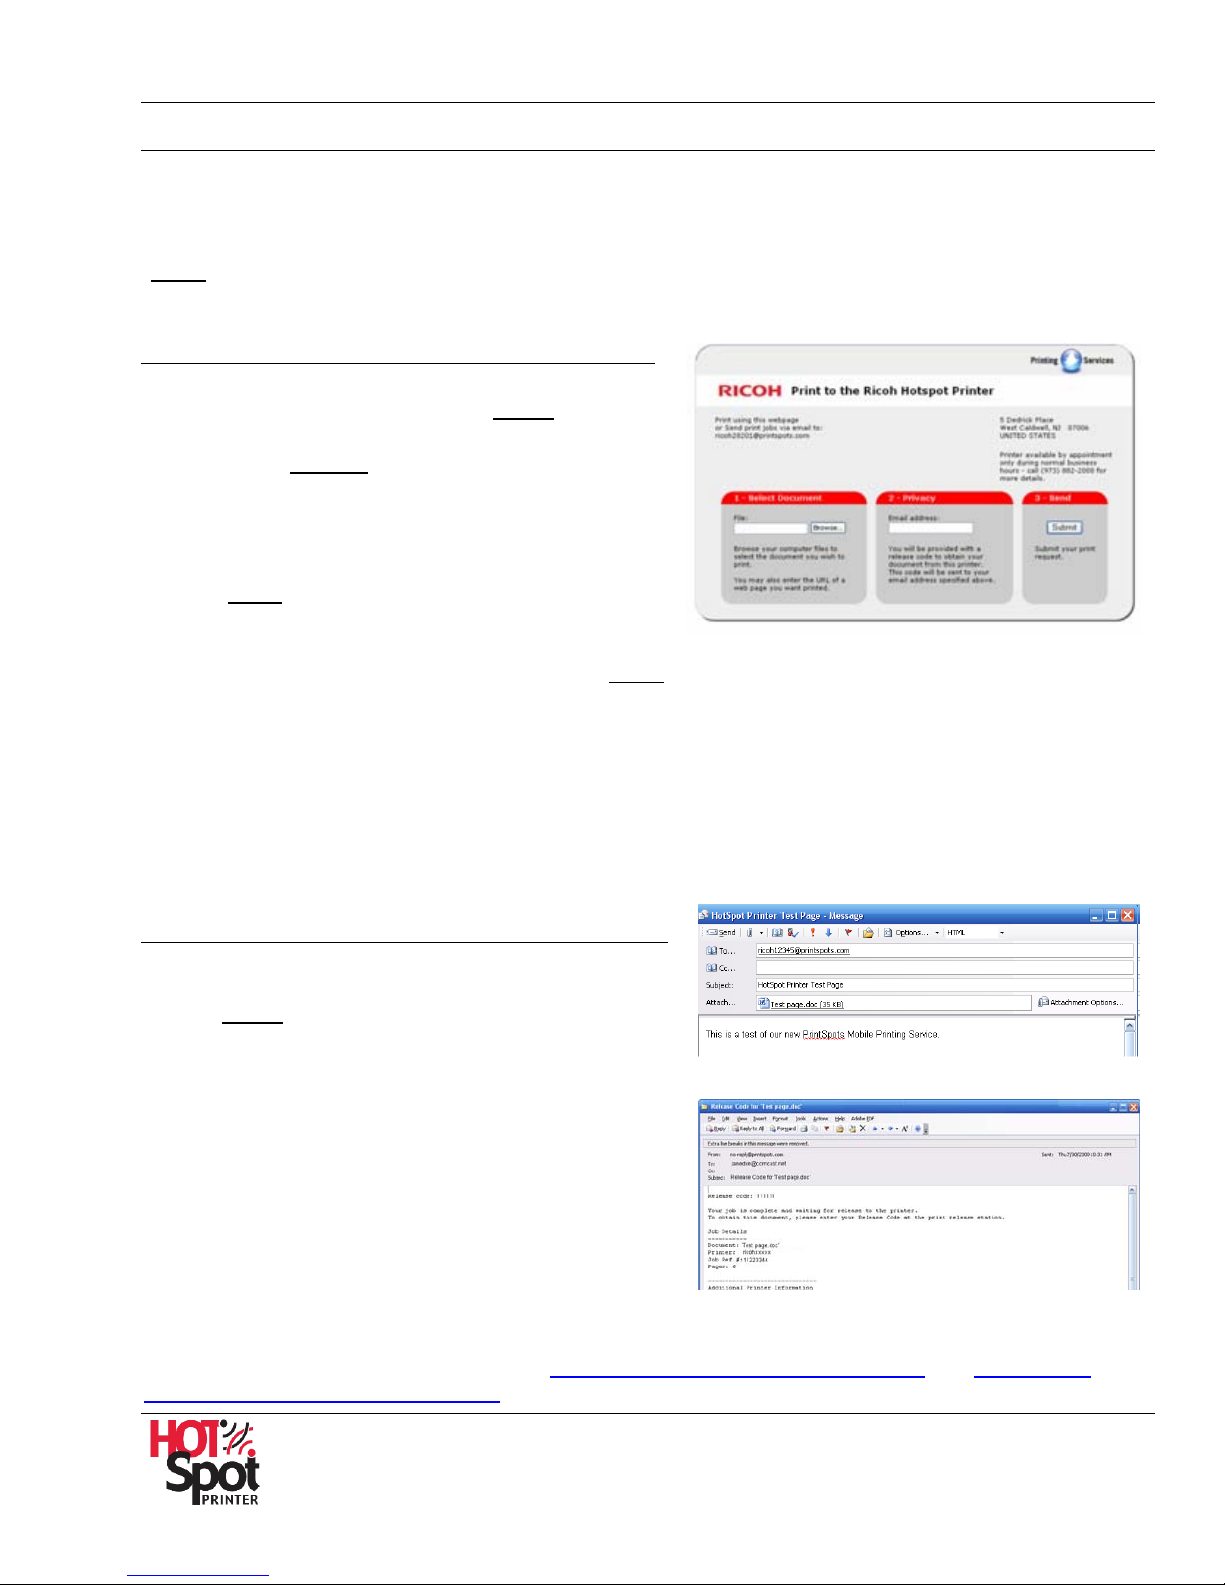
Step D: Test Printer
To test your HotSpot Printer, send a print job using Method A and/or Method B, outlined below. Note
that these instructions are general guidelines, as your configuration settings may vary.
Note: The URL and/or email address you use includes the HotSpot Printer’s unique 5- or 6-digit ID
(
xxxxx
), which is located on the label affixed to the printer, as well as the Mobile Printing Service
subscription certificate.
Method A: Print via Web Upload
1. Open your Web browser.
2. Go to: www.printeron.net/ricoh/
Note:
• This URL must be
typed in lower-case letters.
If typed in upper case, the screen reads [The
page you requested could not be found.].
Re-enter URL using lower-case letters.
• If you enter a URL using a non-existent printer
ID (
xxxxx
), the screen reads [The page you
requested could not be found.]. Re-enter
URL with correct ID.
• If you enter a URL using a valid printer ID (xxxxx
reads [Service offline]. Click [Back] and enter URL with ID of a registered printer.
3. Browse to your document or, if printing a Web page, e nter the complete URL.
4. Enter your email address.
5. Click [Submit].
Note: Your release code is displayed, along with a tracking number. In additional, this information is
emailed to the address entered in step 4.
6. Follow the instructions on the HotSpot Printer LCD to enter your release code and print the job.
Method B: Print via Email
xxxxx.
), but the unit is not yet registered, the screen
1. Open your email application.
2. Enter the printer’s email address:
ricoh
xxxxx
@printspots.com
3. Send email/attachments as you normally would.
4. The service replies with a confi r mation messag e
that includes your private release code and details
regarding the print job (as shown at right).
Note: If Method A: Print via Web Upload was
used to submit the job, the release code will
display on the computer screen as well.
5. Follow the instructions on the HotSpot Printer LCD
to enter your release code and print the job.
Important: Print speed may be affected by network,
application, or computer performance
.
Reference: For detailed instructions, see
Appendix 1: HotSpot Printer Operation and Appendix 2:
HotSpot Keypad Layout & Operation.
Page 21
HotSpot Printer Operator’s Guide
21
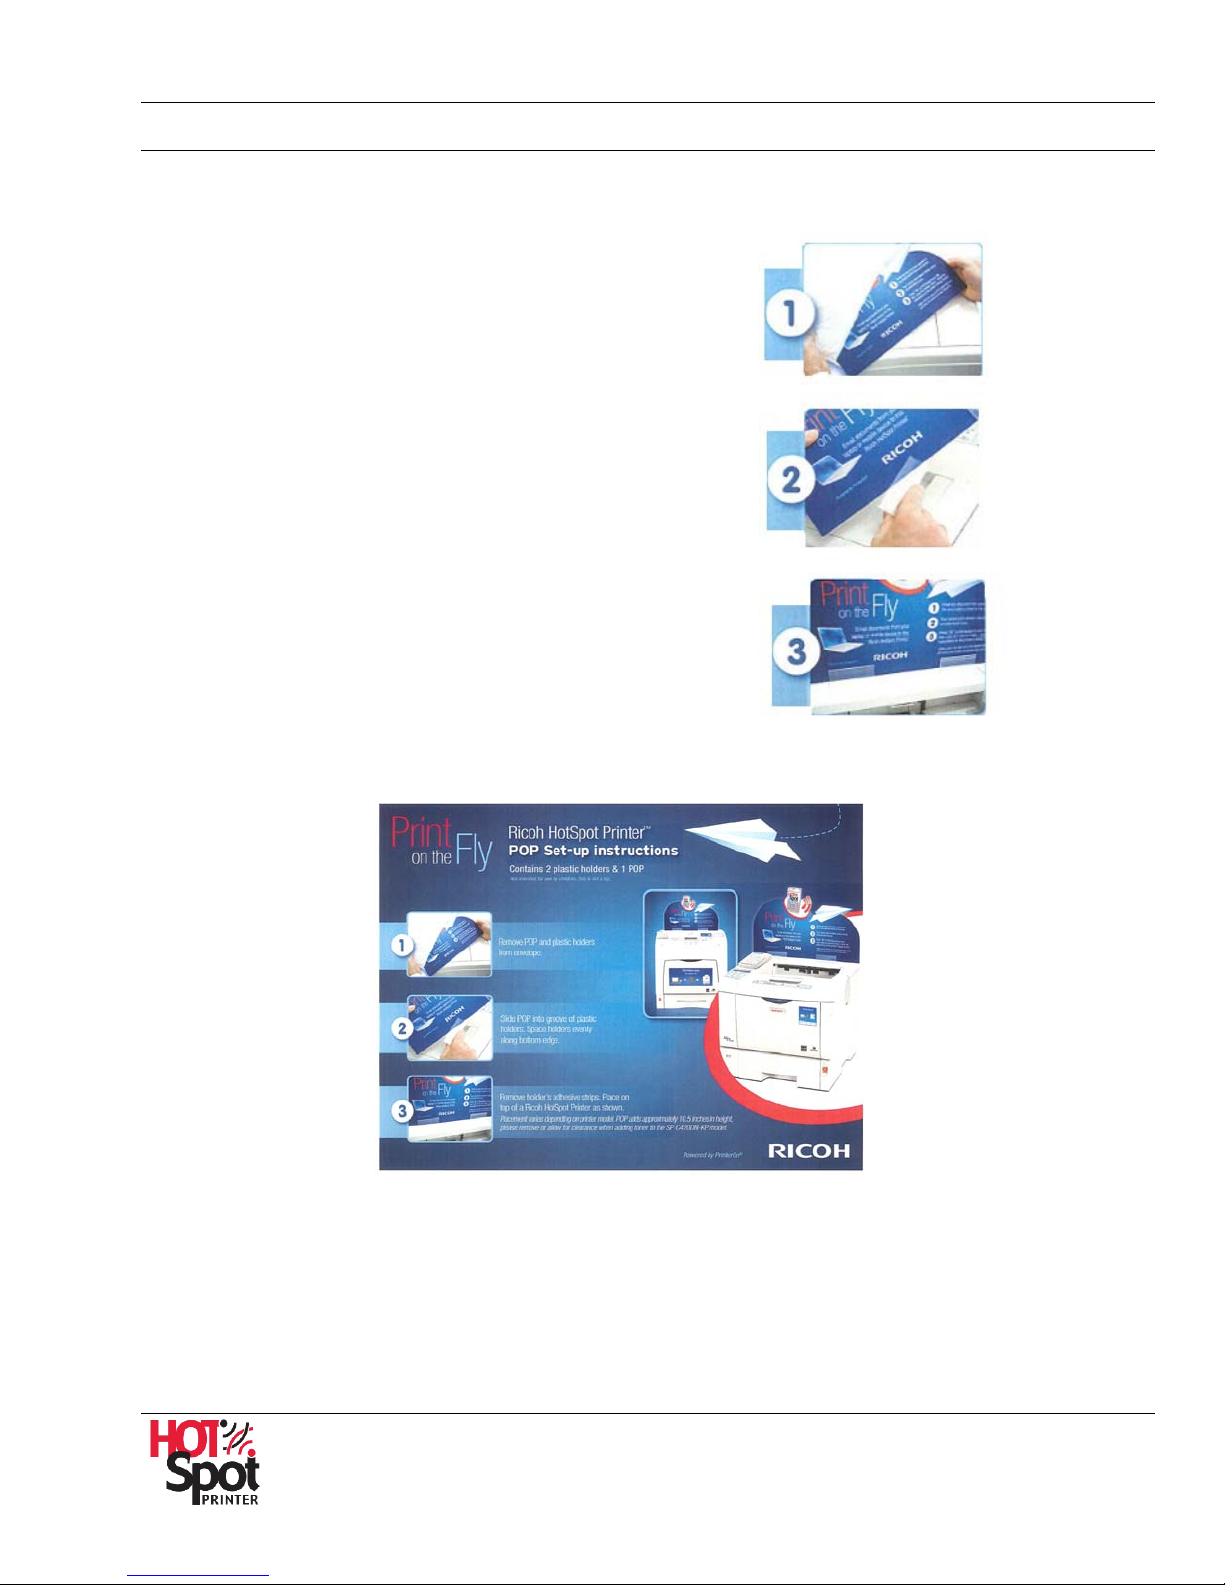
Step E: Install POP Display (optional)
Your new HotSpot Printer ships with an envelope containing a point-of-purchase (POP) display and
two plastic holders. In order to install the POP display, proceed as follows:
1. Remove POP display and plastic holders from envelope.
2. Slide POP display in groove of plastic holders. Space
holders evenly along bottom edge.
3. Remove holders’ adhesive strips. Place on top of the
HotSpot Printer, as shown in Fig. 3.
Fig. 3
Note:
• Placement of the POP display varies depending on the printer model.
• POP display adds approximately 10.5″ in height. When adding toner, remove the display or
allow for clearance.
Page 22

HotSpot Printer Operator’s Guide
22
Insert your logo
Tell users how to
Provide custom
Choose which langAdd a HotSpot Printing
Add your own
tion.
Step F: Customize Service (optional)
PrinterOn Web Pages are highly customizable. This means that you can edit the appearance of the
PrinterOn Website that hosts your Mobile Printing Service. Though customization is optional, we
suggest you review the key features of this flexible solution to learn how you can easily tailor the
service to your specific needs.
Note: Customization instructions are covered in the next section
Start Page
uages to display in
this drop-down.
and personal
headline text.
III. Management.
Indicate printer
location, pricing
and availability.
send print jobs to
your HotSpot
Printer.
instructions that
make print job
submission as
easy as 1-2-3.
Help text, e.g.,
contact informa-
Add your own Terms &
Conditions and Privacy
Policy statement.
After job is submitted, offer print
job options (e.g., #
of copies, pricing
info, job approval
screens, etc.
Partner’s logo.
Page 23
HotSpot Printer Operator’s Guide
23
Function
Customized Start Page
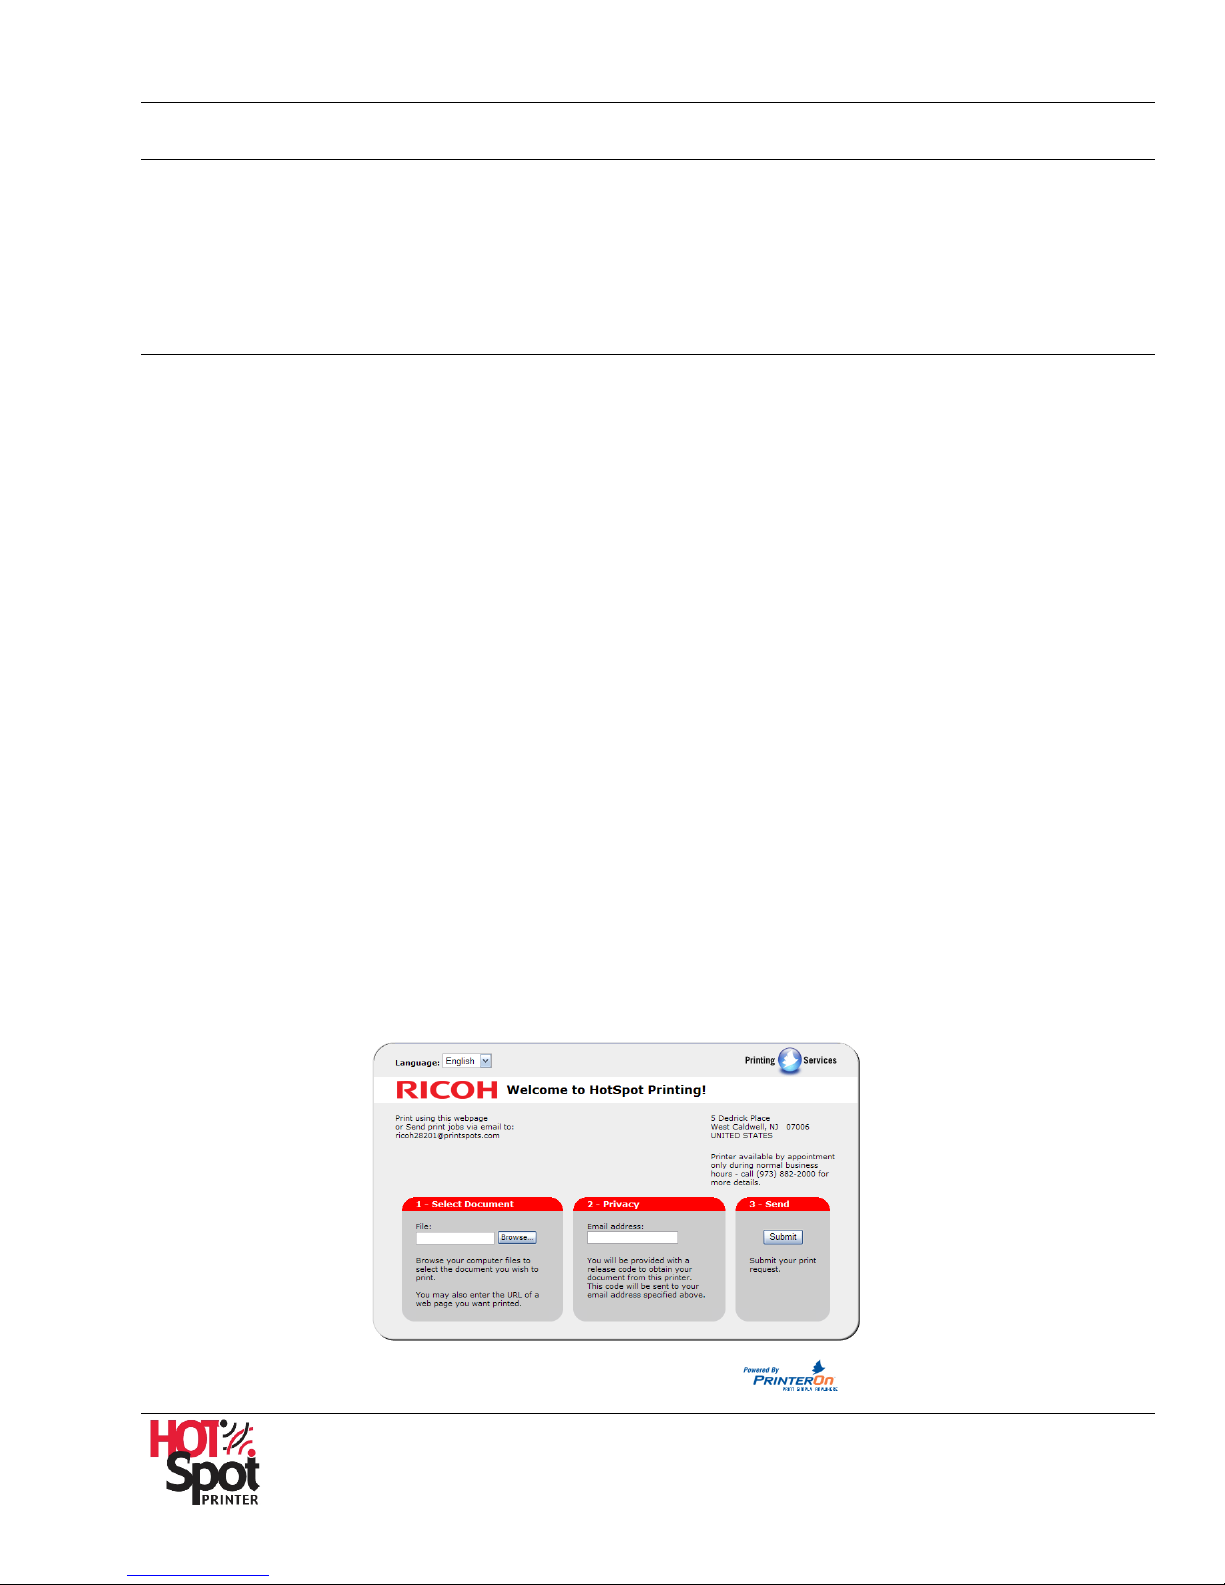
Fig. 4
IIIIII.. MMaannaaggeemmeenntt
Your Mobile Printing Service allows for extensive customization of the user interface (see Fig. 4). You
can add a company logo, headline text and color palette, as well as create personalized content directed
to your users. Users that visit the PrinterOn Web Page, using the HotSpot Printers unique URL (e.g.,
www.printeron.net/ricoh/xxxxx
chosen.
The authorized administrator simply logs in to the Management Home Page, and then selects t he
desired function icon (see Fig. 5). The following key features and functions are available, among many
others:
) can then view, and, if applicable, select those settings that you have
• Add company logo and colors
• Add partner logos and links
• Set printer defaults
• Add/remove printers
• Add/remove administrators
• Add/remove languages
• Add/edit Help text
• Modify contact information
• Set pricing/billing options
• Create a custom end-user survey
• View/export activity reports
• Add terms & conditions, privacy notice
Management Home Page
Icons
Fig. 5
Page 24
24
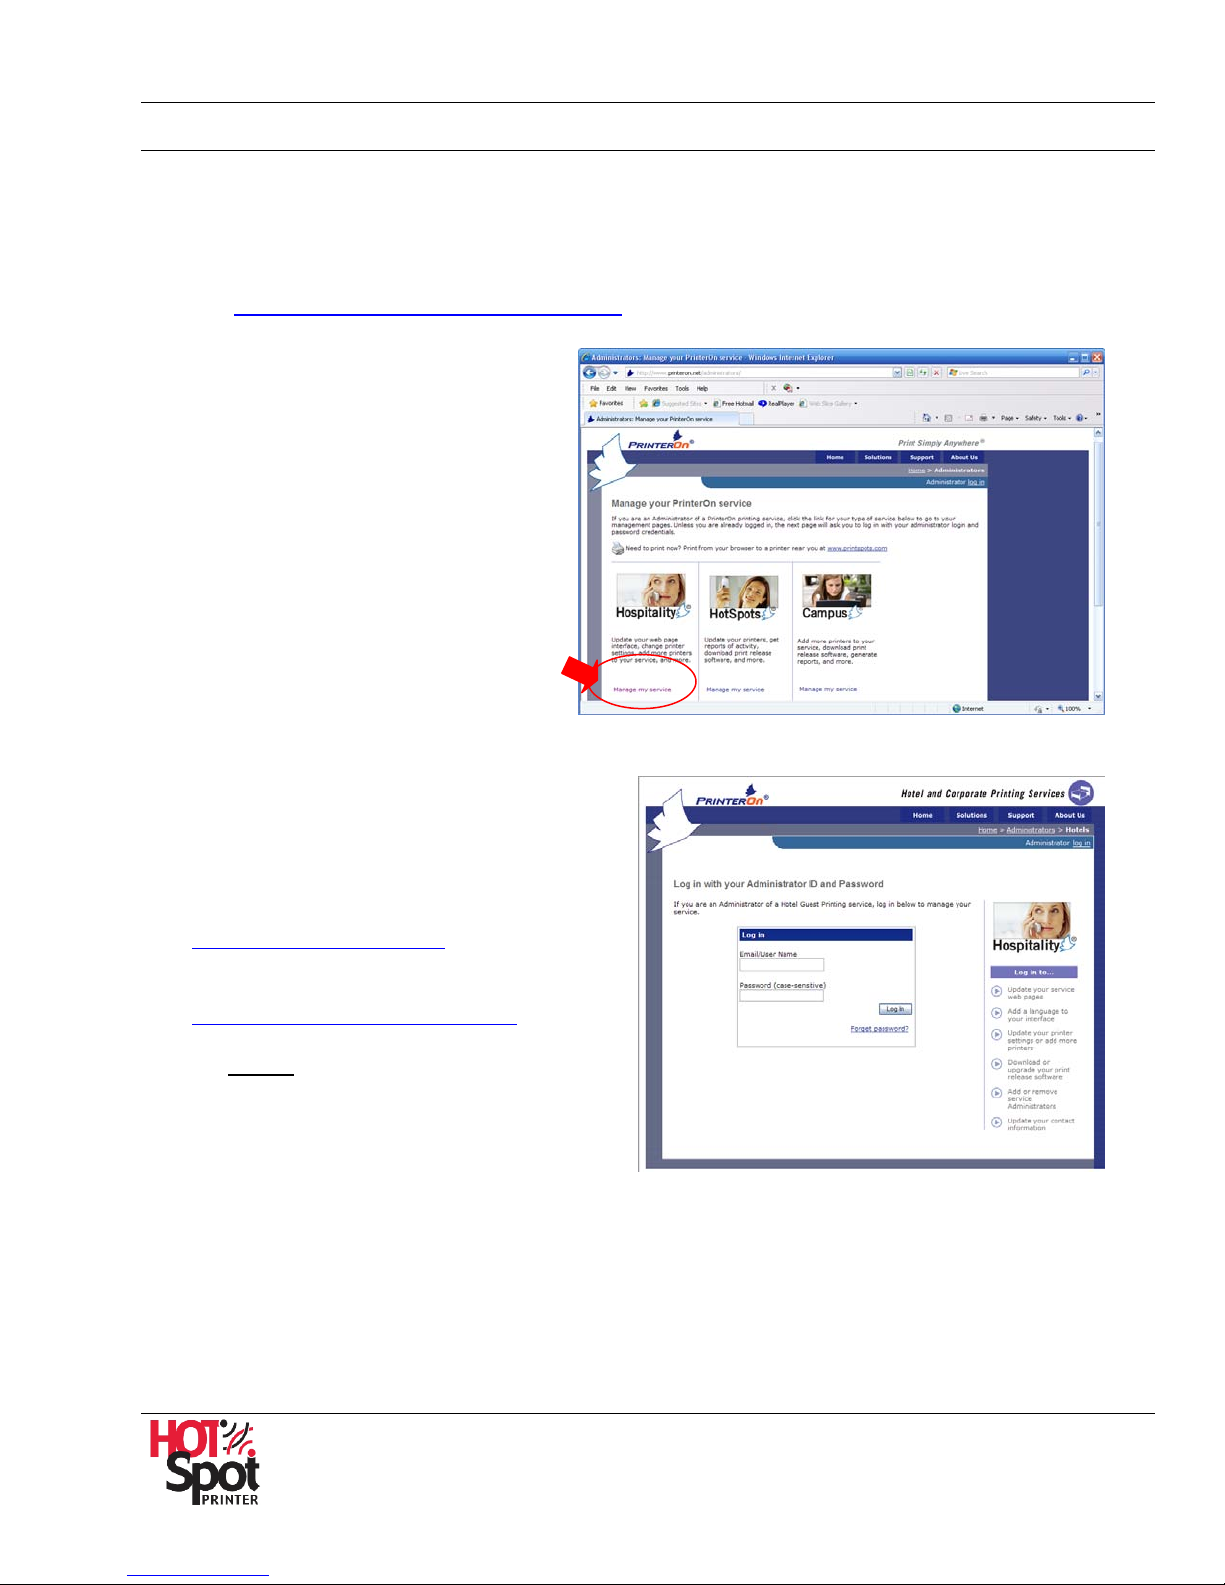
Administrator Log In / Log Out
Log In…
1. Open your Web browser.
2. Go to: https://www.printeron.net/administrators.
Important: To ensure that your
service is updated correctly, do not
make changes to your service in
multiple browser windows.
3. Under Hospitality, click
[Manage my service],
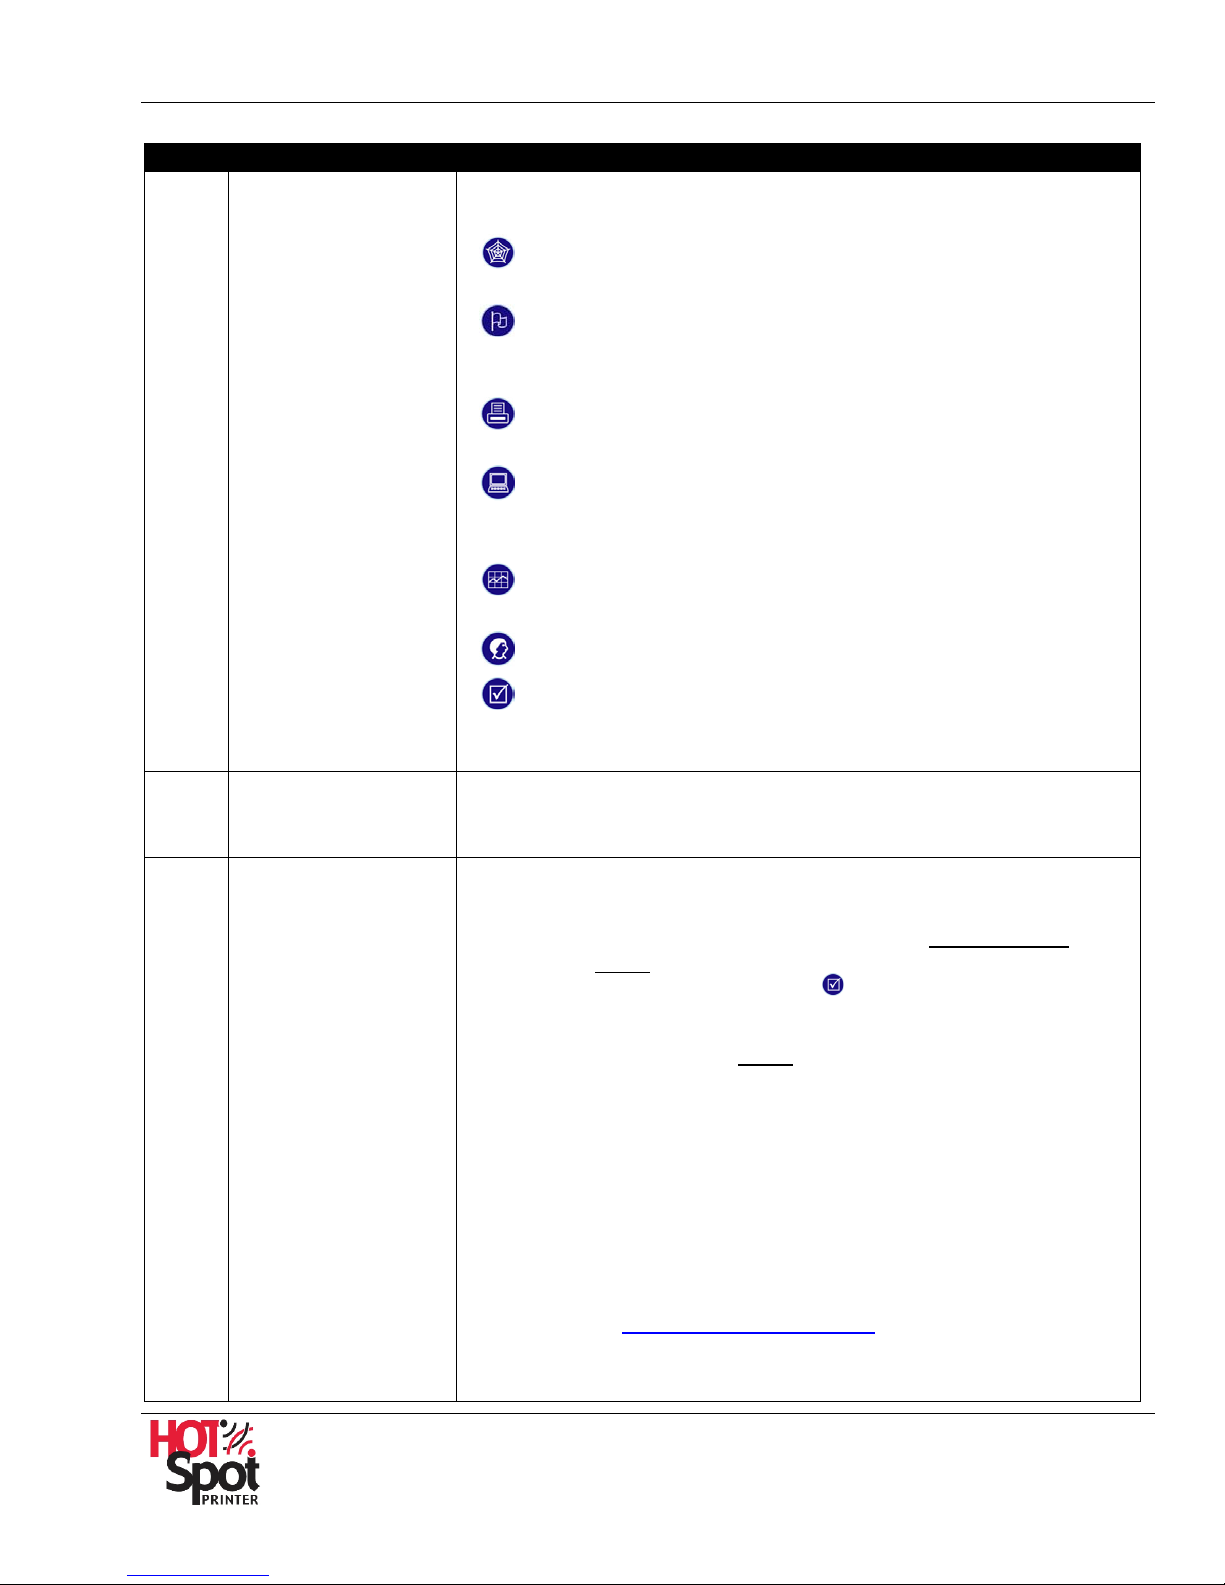
4. Enter Email/User Name and Password.
Note:
• The credentials are on the Mobile Printing
Service subscription certificate that
shipped with the printer. If necessary, see
Your Service Subscription.
Reference: To change credentials, see
Update your account preferences
5. Click [
Log In
Page displays. See Fig. 6.
]. The Management Home
.
HotSpot Printer Operator’s Guide
Page 25

HotSpot Printer Operator’s Guide
25
A
B
C
D
E
Log Out…
After modifying settings within the Management screens, you must log out in order to ensure that the
session has ended. To do so, click [
Log out
].
Management Home Page Overview
The Management Home Page is where you will select and set customization functions. Before doing
so, review the following description of Home Page functions. You will then be prepared to customize
your service, as outlined in the next section,
1. Open the Management Home Page. If necessary, see
2. Review the Management Home Page.
Management Functions.
Administrator Log In / Log Out.
Management Home Page
Fig. 6
Page 26
26
About Management Home Page
Feature
Description
associated with your service. To add more printers to your
HotSpot Printer Operator’s Guide
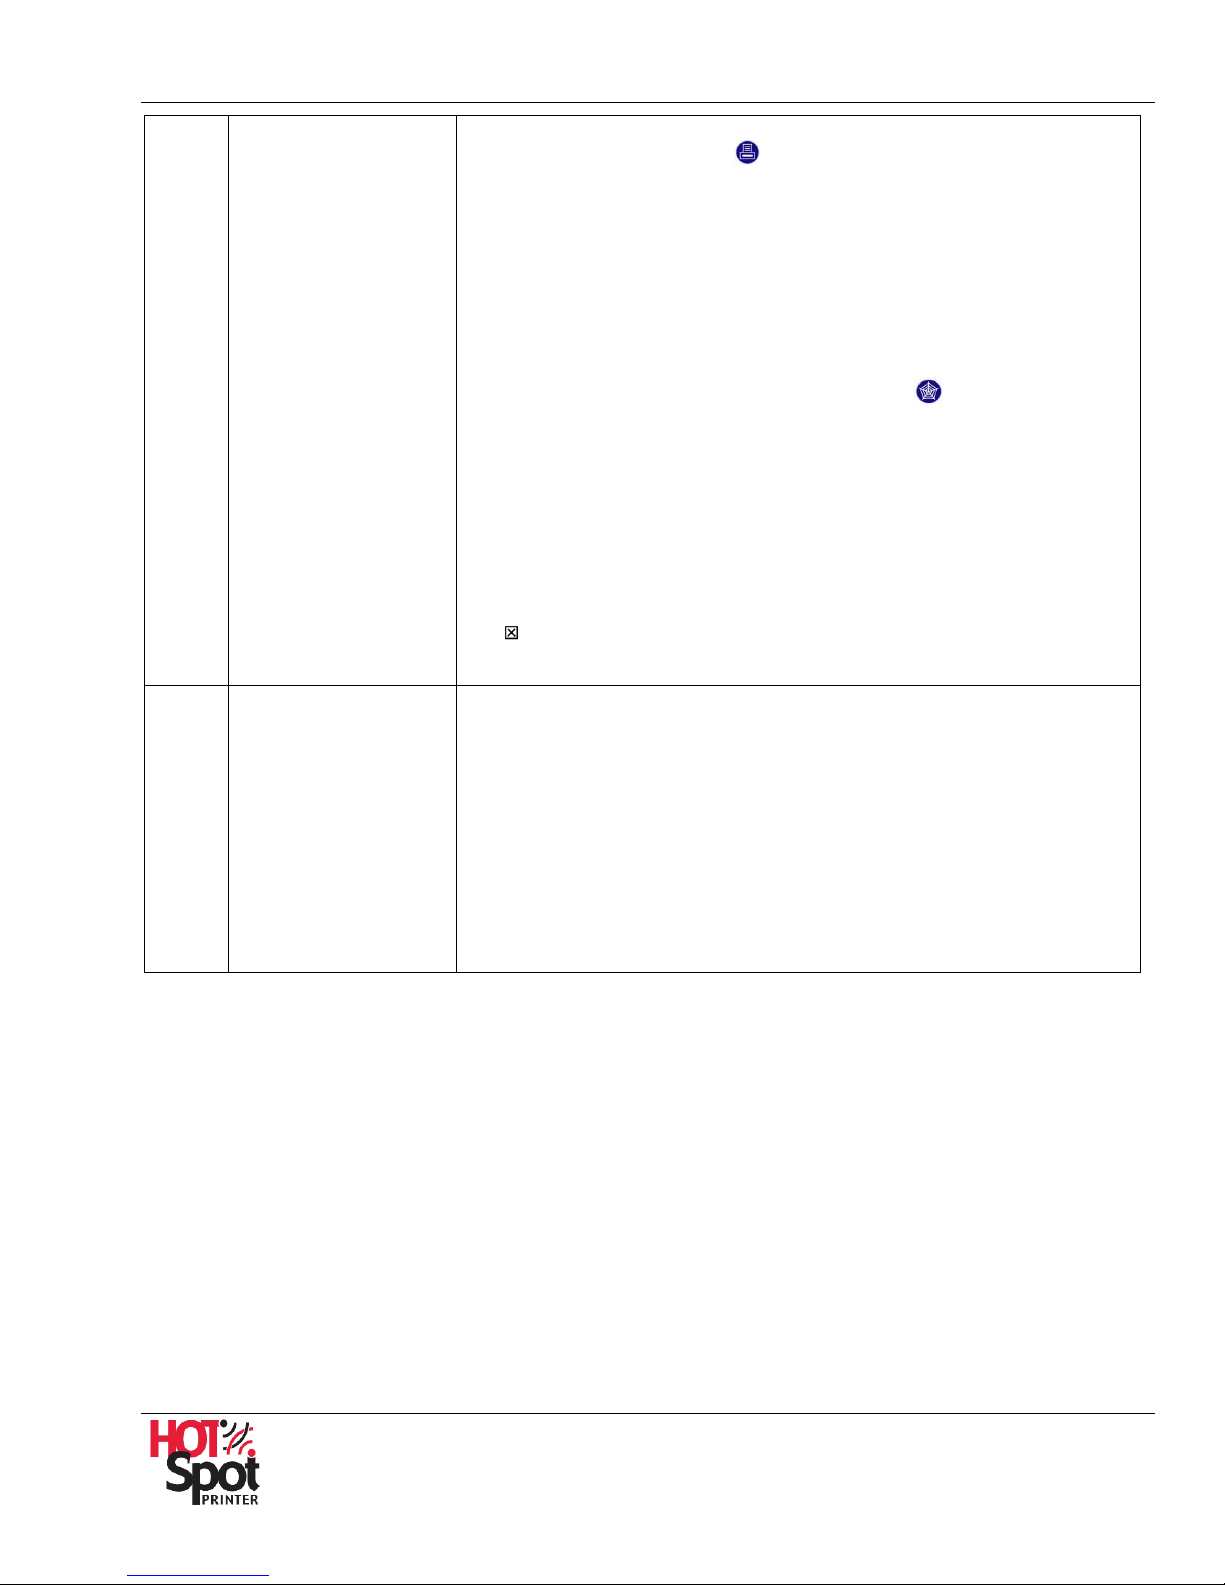
A Function Icons
This row of icons provides one-click access to the following
functions:
Web Pages – Edit PrinterOn Web Pages to reflect your own
brand colors, logo, text, etc.
Languages – Add another language (English, Spanish,
French, Dutch, German and/or Italian), which is userselectable from the PrinterOn Web Page.
Printers – Update your printer settings, add/remove printers,
set pricing and billing information, etc.
Software – Though this function icon is available, there is no
need to perform download, upgrade or manage your printer
release software.
Reports – View and export reports of printer activity. Create
your own end-user survey to gauge response.
Administrators – Add/remove administrators of your service.
Update Account – Update contact and/or billing address
information.
B Group Name
C Service Summary
All HotSpot Printers are automatically under the same "Group
Name,” so there is no need to create a Group.
• URL – Your PrinterOn Web Page URL (users will visit in
order to send a file) is created by combining the brand name
and unique 5- or 6-digit HotSpot Printer ID (
net/ricoh/xxxxx
[Update Account] function icon
). To change the name, do so through t he
.
www.printeron.
• Service Name – This is the brand/ID combination created for
your service, e .g ., ricoh/xxxxx
one Mobile Printing Service, each one will have a unique
Service Name. Each Service Name will be listed on the
Management Home Page for you to select the service to
manage.
. If you are managing more than
• Annual Renewal Date – The Renewal Date is the scheduled
expiration date of your subscription. Depending on the
subscription purchased, it can be 1, 3 or 4 years. If you wish to
renew your service, please contact your authorized HotSpot
Printer sales representative to purchase an extension. For
details, see
Your Service Subscription.
• Number of Printers – This is the number of printers you have
Page 27
HotSpot Printer Operator’s Guide
27
service, or to edit your printer information, do so through the
[Printers] function icon .
• Show/Hide your service in searches – You can restrict the
accessibility of your service by hiding it in searches, preventing
users from finding your service in Printer Directory searches.
• Set Online/Offline – If you need to temporarily make your
service unavailable, for printer maintenance, for example, you
can present users with a notification page when they browse to
your service Website. You can customize the text on this page
by clicking the [Web Pages] function icon
.
• Create a new service under a new group name – This
function is not applicable to HotSpot Printers.
• Clone this service – This function is not applicable to HotSpot
Printers.
• Get Guest Awareness Kit – This function is not applicable to
HotSpot Printers.
• Delete this S ervice – Warning! Do not click this button.
Doing so will permanently remove your Mobile Printing Service.
D Additional Services
• Update your account preferences – Allows you to update
login, including adding and removing email addresses and
updating your contact information.
• Hotel Administrator support page – Clicking this link open
the Support for Service Administrators page where you can
find PrinterOn FAQs and documentation.
• About Guest Printing Services – Click this link to view
information about the many benefits your Mobile Printing
Service offers users.
3. Return to the Management Home Page, if necessary.
Page 28
HotSpot Printer Operator’s Guide
28
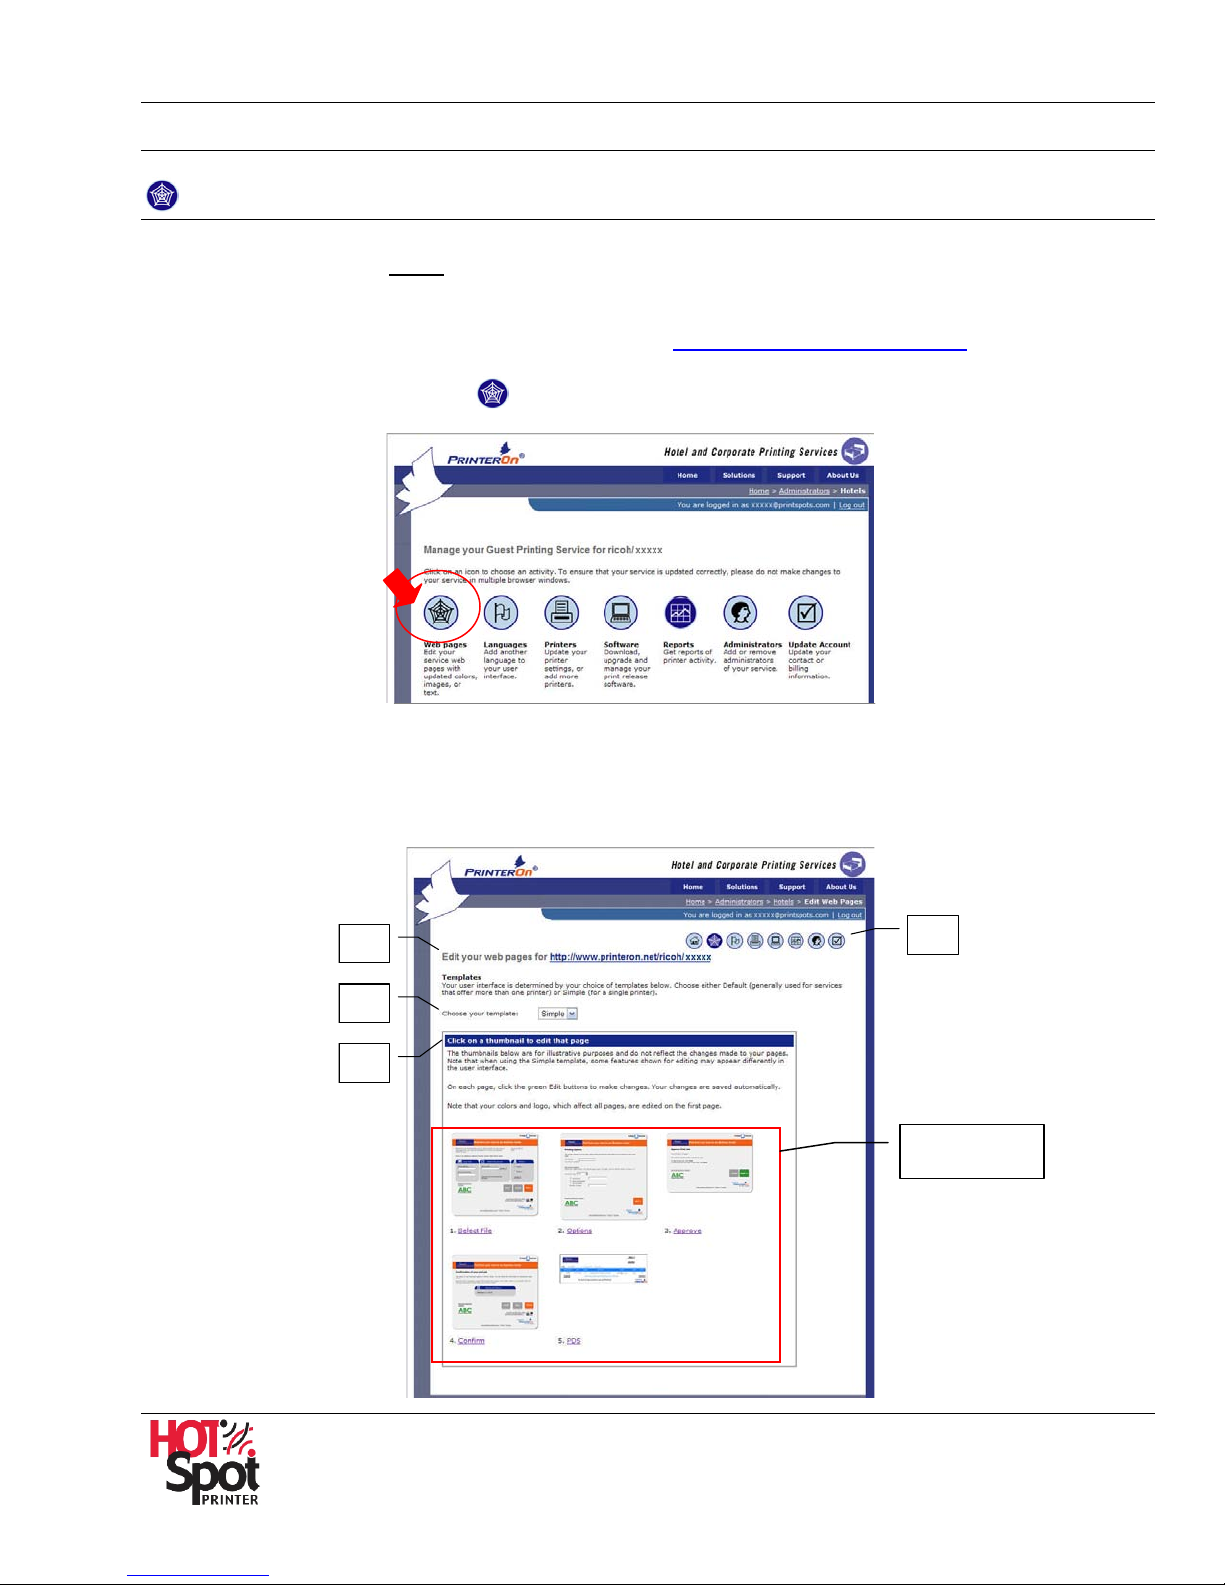
A
B
C
D
Thumbnails
Fig. 7
Management Functions
Web Pages
Web Pages are the screens presented to users after they open the HotSpot Printer URL
(www.printeron.net/ricoh/
follows:
1. Open Management Home Page. If necessary, see
2. Click Web Pages function icon .
3. Review the Web Pages screen, and then make any nece ssa r y changes.
xxxxx
). To edit the appearance and content of those pages, proceed as
Administrator Log In / Log Out.
Web Pages Screen
Page 29

29
About Web Pages Screen
Feature
Description
.
Simple Template is
Default Template
HotSpot Printer Operator’s Guide
A Printer URL
B Template Selection
• Edit your Web pages for http://www.printeron.net/
ricoh/xxxxx
Your HotSpot Printer URL displays here. This indicates that you
will be editing PrinterOn Web Pages related to this specific
printer. Click on this link to view the Start Page users see when
visiting the PrinterOn Website.
Start Page
• Choose your template – Click the drop-down to select
[Simple] or [Default].
Simple Template
the best choice for
most users.
Default Template
includes space for
multiple HotSpot
Printers. The user
selects the target
printer by clicking on
associated button.
Page 30

HotSpot Printer Operator’s Guide
30
C Thumbnail Selection
The thumbnails shown in Fig. 7 are for illustration purposes and
do not reflect changes made to a page.
Note:
• When u sing the [Simple] template, some features shown for
editing may appear differently in the user interface.
• On each page, click the green [Edit] buttons to make changes.
Your changes are saved automatically.
1. Select File – Click to view the first screen users will see, called
the Start Page, where he/she identifies themse lves, uploads a
document and selects a printer (if you have offered more than
one). This is also the screen where you can insert a company
logo, colors and text.
2. Options – Click to view the [Printing Options] screen. This
screen presents the user with options, such as page range and
number of copies for specific document types. Note that you
have the option of not offering this screen to users.
3. Approve – Click to view the [Approve Print Job] screen. This
is another optional screen you may offer to your users that
displays the page count for their print job, and costs
associated with the job. It gives the user the opportunity to
approve printing or cancel the job before it is printed.
4. Confirm – Click to view the [Confirmation of print job] screen.
This screen notifies the user that the document has been
processed, and allows the user to check the status of a job in
progress.
5. PDS – This function is not applicable to HotSpot Printers.
Reference: Detailed instructions for customization functions 1 – 4
(above) are covered in the sections to follow.
D Function Icons
Click on a function icon to navigate to another screen, e.g., the
Management Home P age
4. Return to the Management Home Page, if necessary.
.
Page 31

HotSpot Printer Operator’s Guide
31
D
B
C
A
E
F
G
H
I
J
K
Start Page Edit Screen
You can perform Star t Page customization functions from the Start Page Edit Screen. Again, the Start
Page is the first screen HotSpot Printer users will see when printing from their computer. It displays
instructions on how to use the service, as well as branding elements that personalize the service to
your specifications.
To open the Start Page Edit Screen, proceed as follows:
1. Open Management Home Page. If necessary, see
Administrator Log In / Log Out.
2. Click Web Pages function icon
.
3. Click [1.
Select File
]. See Fig. 7.
Note: Each alphabetic callout shown in Fig. 8 identifies a specific edit button available on the Start
Page Edit Screen. You will be asked to refer back to Fig. 8 as you proceed through this section.
Start Page Edit Screen
Fig. 8
Page 32

HotSpot Printer Operator’s Guide
32
On the headline
overlay color is white.
On the instruction
Instructions for up-
A. Brand Colors
Brand colors are those colors that are unique to your organization. Both the headline banner and
instruction pane headers can be customized. To do so, proceed as follows:
1. Click [Edit] button A . See Fig. 8.
2. Enter the hexadecimal value for the
primary and secondary colors to apply to
the PrinterOn Web Pages (e.g., Start
Page).
Note: If you do not know the hexadecimal
values of your colors, choose one from the
color palette by clicking the color.
3. Set the text overlaying each color to either
white or black.
Note: Fig. 9 illustrates how these settings are displayed on the Start Page.
Start Page
loading a new company logo and header
text is covered in the
next section.
banner, the primary
color is brown, text
pane header, the
secondary color is
green, text overlay
color is black.
Fig. 9
4. Click [Save] to save your settings and exit the screen. To exit, without saving settings, click
[Cancel].
Page 33

HotSpot Printer Operator’s Guide
33
Headline Text
B. Company Logo & Headline Text
To personalize the PrinterOn Web Pages, add/edit your company logo and headline text, proceed
as follows:
1. Click [Edit] button B . See Fig. 8.
2. Click [Browse] to locate and select the GIF
or JPG file.
Important: The file must be no more than
256 colors, and no larger than 100 pixels
high by 300 pixels wide.
3. If applicable, select [Remove Existing
Logo] box.
4. To add/edit change the Headline text, click in
the space provided and type your greeting, e.g., Welcomes You to HotSpot Printing!
5. Click [Save] to save your settings and exit the screen. To exit, without saving settings, click
[Cancel].
Note: Saved changes are immediately applied to the Start Page. To check, click the HotSpot
Printer URL link at the top of Web Pages’ main screen (http://www.printeron.net/ricoh/
xxxxx
).
See Fig. 10.
Start Page
Company Logo
Fig. 10
Page 34

34
C. About Your Printing Service
To customize the text that appears below the company logo and headline text on the Start Page, to
better describe your service, address and hours of operation, proceed as follows:
1. Click [Edit] button C . See Fig. 8.
2. Enter Description, Address and Hours of
operation information.
3. Click [Save] to save your settings and exit the
screen. To exit, without saving settings, click
[Cancel].
HotSpot Printer Operator’s Guide
Page 35

HotSpot Printer Operator’s Guide
35
D. User Information
User information is uniquely identifies the user’s print jobs; the user will need to input this
information before submitting their print job from the PrinterOn Web Page. For most applications,
the user’s email address is sufficient. However, you can create a custom field as well. For instance,
if you wish to track or identify jobs/users with something other than an email address, a custom field
is available. Also, if your Mobile Printing Service is integrated with a third-party billing system, such
as WebPay 2.0, you can enter a unique field, e.g., Payment Code; the entered number will be
automatically sent to your back-end billing system.
To add/edit User Information, proceed as follows:
1. Click [Edit] button D . See Fig. 8.
2. Select/enter one or more of the following:
• Email address: This is the default
setting. When selected, the user will be
required to enter his/her email address.
The release code will be sent to that
address.
• Other: This field is used if you do not
want to use Email address (default
setting) for tracking users. If selected,
enter Name of Field, e.g., Privacy
Release Code.
• Print Billing System: Select this box if
you are integrating your Mobile Printing
Service with a third-party print billing
systems. Enter Name of field, e.g.,
Billing Code or Dept. Cod e.
• Text: Optionally, you can edit default text
to explain to your users how their
information will be used.
3. Scroll down, if necessary, and click [Save] to save your settings and exit the screen. To exit,
without saving settings, click [Cancel].
Page 36

HotSpot Printer Operator’s Guide
36
E. Select Document Instructions
To add/edit the instructions users will see when submitting their print job from the PrinterOn Web
Page, proceed as follows:
1. Click [Edit] button E . See Fig. 8.
2. Enter/edit Text.
3. Click [Save] to save your settings and exit
the screen. To exit, without saving settings,
click [Cancel].
F. Printing Email & Boarding Passes
To add/edit text that explains how to print email and boarding passes, proceed as follows:
Important: If you do not wish to display this text, deselect the [Boarding] and [Emai l Text] boxes.
1. Click [Edit] button F . See Fig. 8.
2. Select settings and enter text.
3. Click [Save] to save your settings and exit the screen. To exit, without saving settings, click
[Cancel].
Page 37

37
G. Business Center Branding
Fig. 11
If you are partnering with other businesses, it is possible to display up to two logos and URLs to link
to those sites. It is an ideal way to support joint advertising and promotional initiatives. The logo(s)
and URL(s) will appear at the bottom of the Start Page (see Fig. 11).
1. Click [Edit] button G . See Fig. 8.
2. Upload Logo, and enter Name(s) and URL(s).
Note: Be sure that logos are GIF or JPG format, 256
colors, and no larger than 100 pixels high by 200 pixels
wide.
3. Click [Save] to save your settings and exit the screen. To exit, without saving
settings, click [Cancel].
H. Help Text
If you would like to add text explaining to users how to
contact the Mobile Printing Service administrator or key
operator, including, for example, a phone number, email
address and hours available, proceed as follows.
1. Click [Edit] button H See Fig. 8.
2. Enter Text.
HotSpot Printer Operator’s Guide
Note: Pressing the
Page, see Fig. 12) will display a pop-up window with text
you have entered here (see Fig. 13). If text is not
entered, only the content regarding file format support
and printing Web pages will display.
Help button (bottom of Start
Page 38

38
Fig. 12
Fig. 13
Start Page Pop-up Window
3. Click [Save] to save your settings and exit the screen. To exit, without saving settings, click
[Cancel].
I. Additional Information (Web Site Links, Terms, Privacy)
If you would like to insert links to your Web site and terms and conditions, as well as add/edit privacy
and security information, proceed as follows:
• Brand and Location Web Links
You can link from your Mobile Printing Service to associated Web pages, such as the home page
of your brand’s and location’s Web sites.
1. Click Web Site Links [Edit] button I .
See Fig. 8.
2. In the Brand web page URL enter the entire
URL, including the http prefix.
3. In the Location web page URL, enter the
location name for your Mobile Printing
Service.
4. Click [Save] to save your settings and exit the
screen. To exit, without saving settings, click
[Cancel].
HotSpot Printer Operator’s Guide
Page 39

HotSpot Printer Operator’s Guide
39
• Terms and Conditions Link
A pop-up window explains to users the restrictions of use for your Mobile P r int ing Service. If
required, enter a link to your own terms and conditions, as follows:
1. Click Terms [Edit] button I . See Fig. 8.
2. In the space provided, enter the complete URL to
your terms and conditions.
3. Click [Save] to save your settings and exit the
screen. To exit, without saving settings, click
[Cancel].
Note: Click the Terms link (bottom of Start Page) to
open this window.
• Privacy and Security Information
A pop-up window explains to users your privacy and security policies. This text can be edited to
reflect internal policies governing the security of your Mobile Printing Service.
1. Click Privacy [Edit] button I . See Fig. 8.
2. Modify the text, as needed.
3. Click [Save] to save your settings and exit the
screen. To exit, without saving settings, click
[Cancel].
Note: Click the Privacy link (bottom of Start
Page) to open this window.
Page 40

HotSpot Printer Operator’s Guide
40
Printer Name(s)
Description of Your Printer (s )
J. Printer Name
If you would like to identify your HotSpot Printer(s) using another printer name, e.g., change the
default printer model name to, for example, Lobby Printer, proceed as follows:
Note: The printer name only appears if you have chosen the Default Templat e (see Fig. 14). In that
event, when more than one printer is
displayed in the list, user s can select the
desired button to choose the target printer.
See
About Web Pages Screen, B. Template
Selection
.
1. Click [Edit] button J . See Fig. 8.
2. Enter the printer name(s). Note: The
maximum recommended length of the
printer name is 15 characters.
3. Click [Save] to save your settings and exit
the screen. To exit, without saving settings, click [Cancel].
K. Description of Your Printers
If you would like to enter additional printer information, such as description, location and pricing,
proceed as follows:
Note: The description only appears if you have chosen the Default Template (see Fig. 14).
See
About Web Pages Screen, B. Template Selection.
1. Click [Edit] button K . See Fig. 8.
2. Enter Text, as needed.
3. Click [Save] to save your settings and exit
the screen. To exit, without saving
settings, click [Cancel].
Default Template
Fig. 14
Page 41

HotSpot Printer Operator’s Guide
41
Printing Options Screen
The Printing Options screen is a screen that presents the user with selections, such as page range and
number of copies for specific document types.
To open the Printing Options screen, proceed as follows:
1. Open Management Home Page. If necessary, see
Administrator Log In / Log Out.
2. Click Web Pages icon .
3. Click [2.
Options
].
4. Click [Edit].
5. Review the Printing Options screen, and then
make any necessary changes.
Page 42

42
Printing Options Screen
Feature
Description
A
B
C
D
About Printing Options Screen
HotSpot Printer Operator’s Guide
Offer users
A
B Cover Pages
printing options
This box is selected by default, allowing you to offer users
printing options. If you do not wish to offer users printing options,
clear this box.
Select one or more of the following boxes to request the
associated information from the sender. These fields will be
displayed on the cover page:
Room Number
Name
Other (enter Name of Field in adjacent box)
Note:
• Cover pag es are required by default for your service printers.
• To turn off cover pages, you must update your printer's listing in
the Members > Printers area.
Page 43

HotSpot Printer Operator’s Guide
43
PowerPoint – Notes
C Document Options
Select one or more of the following options you would users to set
for their document:
Number of Copies (default = 1 copy)
Page Range (default = all pages [or the first worksheet])
Excel and PowerPoint Options:
• Excel – Entire Workbook
• Excel – Active Worksheet
• PowerPoint – Slides
•
D Delivery Options
6. Click [Save] to save your settings and exit the screen. To exit, without saving settings, click
[Cancel].
Delivery Options do not apply to Ricoh HotSpot Printers since the
print job owner must physically release the job.
Page 44

HotSpot Printer Operator’s Guide
44
Approve Print Job Screen
The Approve Print Job screen is an optional screen you may offer to your users that displays the page
count for their print job and pricing information, if applicable. This gives the user an opportunity to
approve the job before it is printed. In addition, when integrating your Mobile Printing Service with thirdparty billing systems, such as WebPay 2.0, you can identify applicable URL, authorization and
notification settings.
To open the Approve Print Job screen, proceed as follows:
1. Open Management Home Page. If necessary, see
Administrator Log In / Log Out.
2. Click Web Pages icon
.
3. Click [3.
Approval
].
4. Click [Edit].
5. Review the Approve Print Job screen,
and then make any necessary changes.
Page 45

45
Approve Print Job Screen
Feature
Description
job tracking and subsequent customer billing.
A
B
About Approve Print Job Screen
HotSpot Printer Operator’s Guide
Allow users to
A
B I am integrating
approve their
print jobs
my service with a
print billing
system
Select this option if you want to show users the page count and
price information before they print their documents. If you clear
this box, the Approve Print Job screen will not appear.
Select this box only if you are integrating your Mobile Printing
Service with any third-party print billing system (cost recovery
solution), other than WebPay 2.0. If selected, also set the
following:
• URL: Enter URL of the print billing system in the space
provided.
• Imprint: Select this box (below URL) if you wish to limit the
session to only those that contain an imprint from the print
billing system. Those users will be considered authorized. If
the box is unchecked, the imprint is received but is not
required; the user will be considered authorized.
• Send Blind Job Notices from: Select either:
- Print Delivery Station (i.e., HotSpot Printer): The Blind
Job Notice is sent when the job is released from the
printer.
- User’s Web Browser: The Blind Job Notice is sent from
the user’s Web browser when they approve the job to be
sent to the printer.
The Blind Job Notice application produces a printer activity
report, including the job owner and number of pages
printed. This enhancement confirms the secure release of
print jobs to the printer’s hard disk drive, enabling real-time
Page 46

HotSpot Printer Operator’s Guide
46
Note: When integrating your Mobile Printing Service with the
WebPay 2.0 third-party print bi lling system, a screen similar to
that shown below allows the user to input credit card billing
information. For more information, see
Plug-in Overview.
Appendix 6: WebPay 2.0
6. Click [Save] to save your settings and exit the screen. To exit, without saving settings, click
[Cancel].
Page 47

HotSpot Printer Operator’s Guide
47
A
B
C
Confirmation of Print Job Screen
This screen notifies the user that the document has been processed, and allo ws the user to check the
status of a job in progress. In addition, you can create an end-user Printing Service Survey, if desired.
To open the Confirmation of Print Job screen, proceed as follows:
1. Open Management Home Page. If necessary, see
Administrator Log In / Log Out.
2. Click Web Pages function icon
.
3. Click [4.
Confirm
].
4. Review the Confirmation of Print Job screen (see
Fig. 15), and then make any necessary changes.
Confirmation of Print Job Screen
Fig. 15
Page 48

48
About Confirmation of Print Job Screen
Feature
Description
HotSpot Printer Operator’s Guide
Confirmation of
A
Print Job
Information
B Delivery Options
C Printing Service
Survey
Add/edit instructions to your users for picking up their documents,
and then click [Save].
Delivery Options do not apply to Ricoh HotSpot Printers since the
print job owner must physically release the job.
If desired, create an end-user survey with up to 6 Yes/No
questions. Also, enter survey link text that users can click on,
should they choose to fill out the survey (after the print job is
submitted). If this scr een is modified, click [Save].
Note: To get a report of survey results, go to the Management
Home Page and click the
Reports link.
5. If necessary, click Back [] to return to Management Home Page.
Page 49

HotSpot Printer Operator’s Guide
49
Languages
The PrinterOn Web Pages can be displayed in one of six languages (English [default], Spanish,
French, Dutch, German and Italian). When more than one language is available, a drop-down (see
Fig. 16) gives a user the opportunity to select the desired display language. In Fig. 16, Spanish has
been selected.
When selecting another language, three setting changes are available, as follows:
• Web Pages: Procedures with instructions on next page. Note that changing the P rinterOn Web
Pages (Fig. 16) does not change the language of the administrative pages (
administrators). Those pages are English only.
www.printeron.net/
• HotSpot Printer LCD: Change the HotSpot Printer’s LCD language to match the PrinterOn Web
Pages, click the flag button on the HotSpot keypad (see Fig. 17) until the desired language appears
in the printer’s LCD. If necessary, see
Appendix 2: HotSpot Keypad Layout and Operation.
• Standard Printer LCD: The LCD language for non-HotSpot specific messages (see Fig. 18) can
also be modified using the Web Image Monitor (WIM) utility. Proceed as follows: Log in to WIM. If
necessary, see
under Device Settings, click [System] > click [General Settings] > click [Display Panel Language]
drop-down > select language > click [OK]. If necessary, reset printer by turning device off/on.
Fig. 16 Fig. 17 Fig. 18
Web Pages
To add/remove one or more language(s) from t he PrinterOn Web Pages, proceed as follows:
1. Open Management Home Page. If necessary, see
Appendix 3: Check Device Status via Web Image Monitor. Click [Configuration] >
Administrator Log In / Log Out.
2. Click Languages icon
.
Page 50

50
3. Click drop-down [] to view/select language:
Fig. 19
• English
• Espanol (Spanish)
• Francais (French)
• Netherlandse (Dutch)
• Deutsch (German)
• Italiano (Italian)
4. Click [Add Language].
5. Choose which languages you would
like to display by default, and which
languages you would like to make
available to users from the Start page
drop-down (see Fig. 16).
6. If making changes, click [Update].
7. Just as you selected a language in step 3,
you can perform the same function from this
screen (see Fig. 19). Click the drop-down to
view/select another language, e.g., Francais,
and click [Add Language]. The screen
refreshes, showing French added to
Languages available in your Service list.
8. To remove a language, click the associated
drop-down to select the language, if
necessary, and then click [Remove].
9. The Management Home Page displays.
Note: To remove another language, repeat
step 2, and then 8.
HotSpot Printer Operator’s Guide
Page 51

HotSpot Printer Operator’s Guide
51
Feature
Description
A
B
C
D
Printers
On the Printers page, you can view and edit settings made for the last printer you updated. Note,
however, that you must use a different PrinterOn Name for each printer. If you edit these settings, they
will become the default setting for the next printer you add to your service. Note that it may take several
minutes for some changes to be reflected in search results.
1. Open Management Home Page. If necessary, see Administrator Log In / Log Out.
2. Click Printers function icon
.
3. Review the Manage your Printers screen.
Manage your Printers Screen
About Manage your Printers Screen
Fig. 20
A Add a printer to
your Service
B Printer Name Performs same function as [A].
C Features
Click this link to open the Printer Configuration page when you can
add/delete printers, as well as set printing and pricing options.
If special settings have been made, for example, maximum page
count, duplex, etc., the information displays here, as well as a
legend. Click the Quick He lp icon
to view a description of legend
icons.
Page 52

HotSpot Printer Operator’s Guide
52
D Options
• Set printer hours – Choose the time zone and hours of printer
availability (weekdays, weekends and/or holidays).
• Take printer online/offline – If you need to temporarily make
your service unavailable (f or printer maintenance, for example),
you can present users with a notification page when they browse
to the PrinterOn Web Pages (www.printeron.net/ricoh/xxxxx
You can customize the text on this page by clicking the [Web
Pages] icon
.
4. If necessary, click Back [] to return to Manage your Printers screen.
).
Page 53

53
A
B
C
D
HotSpot Printer Operator’s Guide
Configure Required Info, Printing Options & Pricing Options
It is possible to add or remove a printer. When adding a printer, you can set printer options, such as
maximum page count, maximum page size (KB), supported paper sizes, etc. In addition, it is possible
to configure pricing information for your Mobile Printing Service.
Important: Fees can be associated with your service with or without the optional WebPay 2.0 plug-in.
The advantage of WebPay 2.0, however, is the ability to integrate your service with a credit card billing
system. For more information, see
Appendix 6: WebPay 2.0 Plug-in Overview.
Required Info
1. From the Manage your Printers screen, click [A], Add a Printer to your Service. If necessary,
see previous section.
2. Review the Required Info screen, and then make any necessary changes.
Required Info Screen
Fig. 21
Page 54

54
About Required Info Screen
Feature
Description
HotSpot Printer Operator’s Guide
A Printer Configura-
tion
B Using your printer
with PrintWhere
Your HotSpot Printer has been pre-configured, so leave the settings
as shown in Fig. 21.
Your HotSpot Printer has been pre-configured, so leave the settings
as shown in Fig. 21.
and Email Printing
C Autofind Hint
Your printer's IP address (or DNS name) enables guests (users) in
the vicinity of your service with an easy and quick way to find your
printer and use your service. Guests (users) simply browse to the
main PrintSpots page (
www.printspots.com) and the directory
matches the quest’s (user’s) IP Address with the printer's Search IP
Address. Enter the IP address of the network your printer is
connected to in the Search IP Address field. The IP A ddress of
your computer (or the network address it is using) is displayed in
the green box. If your service uses this same address, click the
button.
D Delete this printer Warning! Do not click this button. Doing so wil l r emove the
HotSpot Printer.
3. Click [Save] to save your settings and exit the screen. To exit, without saving settings, click
[Cancel].
Printing Options
1. To set printing options, click the Printing Options tab. See Fig. 21.
2. Review the Printing Options screen, and then make any necessary changes.
Page 55

HotSpot Printer Operator’s Guide
55
Feature
Description
A
B
C
D
E
Fig. 22
Printing Options Screen
About Printing Options Screen
A Releasing print
jobs
B Authorizing users
Your HotSpot Printer has been pre-configured, so leave the settings
as shown in Fig. 22.
Your HotSpot Printer has been pre-configured, so leave the settings
as shown in Fig. 22.
Page 56

HotSpot Printer Operator’s Guide
56
options.
C Output options Include a Cover Page with print jobs
Cover Pages identify the sender and the time of the print job, and
may include additional information.
This printer is monitored by an attendant
When checked, this tells the users of your printing service that
their print jobs will be held at the printer until the authorized user
is present to pick up (and possibly pay for) the print job.
Guests will be charged for printing
When checked, this box enables the Pricing Options tab, in
which you can specify the price for each selected paper size. The
prices will be displayed to your guests (users) in the printer
Details window of your service.
• Printer password
If a password is entered here, users must provide this password
to print to your HotSpot Printer. Jobs that are not supplied with
the correct password cannot be submitted.
• Max. page count
Specify the maximum number of pages a print job may use. Print
requests exceeding this limit will not be accepted. This includes
cover pages.
• Max. job size (KB)
Enter a number to specify the limit on a print job. Print requests
exceeding this limit will not be accepted. Note: The maximum file
size is 16MB.
• Duplexing
From the drop-down list, select your
duplexing preference. If you prefer to
let the printer control duplexing, select
"Not Managed".
• Paper sizes
From the drop-down list, select the valid page sizes for print jobs
and click [Add]. You can specify up to 7 paper sizes. To make
one of the paper sizes your default, select the paper size from
your list in the r ight-hand column and click [Set Default].
Note: To allow users to select different paper sizes during
printing, you must enable this function on the Printing Options
Screen. See
Printing Options Screen, A. Offer users printing
Page 57

HotSpot Printer Operator’s Guide
57
D Description of your
printing service
The following fields add detailed information to your listing to inform
your guests (users) about how they can pick up print jobs and who
to contact if there is a problem.
• Hours of operation: For example, Mon.-Fri.: 8:00am-6pm; Sat.-
Sun: Closed.
• Location: For example: 12 Anywhere St., Anywhere, NJ 01234
• Description: For example: HotSpot Printer – Hotel Lobby
• Assistance: For example: Contact front desk, ext. 123
Include in email to users
Select this box if you wish to include any or all of the above
information in email communications with your users.
E Print Delivery
This function is not applicable to HotSpot Printers.
Station
3. Click [Save] to save your settings and exit the screen. To exit, without saving settings, click
[Cancel].
Page 58

HotSpot Printer Operator’s Guide
58
A
B
C
D
Pricing Options
1. To set pricing options, click the Pricing Options tab. See Fig. 21.
2. Review the Pricing Options screen, and then make any necessary changes.
Note:
• Pay-for-pr int services are supported. And though integration with third-party billing applications
(see
Appendix 6: WebPay 2.0 Plug-in Overview) is also supported, it is not required in order to
set pricing parameters.
• The pricing f ie ld s will describe to users how they will be charged for print jobs. The prices will be
displayed to your guests (users) in the printer Details window of your service.
• If the screen reads “Printing is free” you must return to the Printing Options tab and select the
“
Guests will be charged for prints,” under Output Options. See previous section.
Pricing Options Screen
Fig. 23
About Pricing Options Screen
Feature Description
A Currency
B Media Size
C Minimum charge
per job
If necessary, select the currency from the drop-down list for
displaying and calculating your printing prices.
Displays the paper sizes you specified in the Printing Options tab.
Enter a price for each of these sizes.
If applicable, enter the minimum amount users must pay for
printing.
Page 59

HotSpot Printer Operator’s Guide
59
D Other Options
If applicable, select the following box(es):
Price includes all taxes: Indicates to users in the printer
description whether or not the prices you have listed include
applicable taxes, or whether you will be adding taxes to the price
when users pay for their documents.
Charge for cover page if cover pages are enabled: If your
printer requires users to include cover pages with their
documents (if your printer is available to all users and the printer
is attended or set to automatically release documents), you can
choose whether or not the cover page is free or whether users
are charged for this page according to your printing price for a
single page
.
3. Click [Save] to save your settings and exit the screen. To exit, without saving settings, click
[Cancel].
Page 60

HotSpot Printer Operator’s Guide
60
View Machine ID,
and Printers
Warning! Do not change
These functions are not
Software
Though the Software function icon is available, there is no need to download, upgrade and manage
software for your HotSpot Printer.
1. Open Management Home Page. If necessary, see
2. Click Software function icon .
Serial Number
Administrator Log In / Log Out.
Local IP Address or Port
settings!
applicable to your HotSpot Printer.
3. Close your Web browser [X] or click another function icon.
Page 61

HotSpot Printer Operator’s Guide
61
Reports
To view/export a Summary or Detailed Activity Report or Survey Response Report, proceed as follows:
1. Open Management Home Page. If necessary, see
2. Click Reports function icon .
3. Click [Create Report] for desired
category, Summary or Detailed (Activity
Report).
Note:
Administrator Log In / Log Out.
• When choosing Detailed, select the
HotSpot Printer, if more than one is
installed, and the period (Today,
Yesterday, Last 7 Days, Last 14 Days,
etc., up to the last three months).
• Export data from the Detailed (Activity
Report) screen by clicking [
Report
to open or save the report. Open the
.csv file in Microsoft
Notepad, etc.
]. Follow the pop-up messages
®
Excel, Word,
Export
• To create a report containing responses
to your survey, if applicable, click [ Report] . For more information on creating a survey, see
Printing Service Survey.
4. Close your Web browser [X] or click another function icon.
Page 62

HotSpot Printer Operator’s Guide
62
Administrators
Multiple administrators provide backup in the event that an administrator is not available, and is strongly
recommended. To add or remove administrators, proceed as follows.
1. Open Management Home Page. If necessary, see Administrator Log In / Log Out.
2. Click Administrators function icon .
3. To add an Administrator, enter his/her email
address, and then click [Add].
Note:
• The new administrator(s) will receive an
email from PrinterOn which includes a link
to complete the setup process. During
that process, you will be asked to create a
new password (6 – 20 characters) .
• If you enter an email address that already
exists, a pop-up window reads [User
already exist as an administrator for
this portal.]. Click [OK] to close the
window.
4. To remove an Administrator, click the drop-down and select the associated email address, and then
click [Remove].
Important:
• You may not remove yourself as an administrator.
• If the display reads [Unable to remove the user. The user is a super administrator of the site],
see
Appendix 8: Troubleshooting.
5. Close your Web browser [X] or click another function icon.
Page 63

HotSpot Printer Operator’s Guide
63
Update Account
To update your contact and/or billing address information, proceed as follows:
1. Open Management Home Page. If necessary, see Administrator Log In / Log Out.
2. Click Account Information function icon .
3. Change settings, as required.
Note: Asterisk (*) indicates a required
field.
4. Click [Update] to save settings. To exit,
without saving settings, click [Cancel].
Referral and Property Codes
are not applicable to your
Mobile Printing Service.
Page 64

HotSpot Printer Operator’s Guide
64
System
Java SDK.
A
B
IIVV.. AAddvvaanncceedd AAddmmiinniissttrraattiioonn
This section covers tasks and settings that may be required, such as pr int job and user list management, as well as proxy and log file parameters.
Administrator Log In
1. Open your Web browser.
2. Go to:
3. Review Service Status (Screen 1) system information and status testing capabilities, and then
perform any necessary testing procedures.
About Service Status (Screen 1)
http://PrinterIPAddress:8080/printeron/PDSJSP.
Service Status (Screen 1)
Fig. 24
Feature Description
A
Information
■ Software Version: Indicates the currently installed version of
your Mobile Printing Service software.
■ Printer Model: Indicates the printer model number.
■ Printer ID: Indicates the unique PrinterOn identifier used to
associate the physical printer with PrinterOn virtual printer
listing.
■ SDJ/J Version: Indicates the installed version of the supplied
Page 65

HotSpot Printer Operator’s Guide
65
■ Local Time: The current local time as reported by the printer.
the Mobile Printing Service software.
Note: For more information, see Appendix 8: Troubleshooting.
This value is used when performing secure network communications (SSL). If this value is significantly incorrect, the SSL
protocol may reject connections. The date and time can be set
on the printer control panel, if necessary. See
Appendix 8:
Troubleshooting.
■ Free Disk Space: Indicates the remaining free disk space
available on the HotSpot Printer’s hard disk drive. In low disk
space conditions, the service may not be able to download
additional print jobs.
■ Print data files in disk: Indicates the current number of print
jobs that reside on the printer and are available for release via
B
Status Test
To follow are fields and options available on the PrinterOn
administration pages related to the current software status and
testing options.
■ PrinterOn License: Indicates the results of the last license
query to the PrinterOn hosted services. The license can be
manually checked by clicking the adjacent [Test] button. The
PrinterOn license status will display one of the following three
values:
- Valid: Connection with the Mobi le Print ing Service is
successful, software is licensed.
- No License: Connection with the Mobile Printing Service is
successful, software is not licensed.
- No Comm: Unable to communicate with the PrinterOn’s
Mobile Printing Service.
■ Spool Service Connection: Indicates whether the software
was able to successfully communicate with the PrinterOn print
data spooling service. A typical cause of failure is the lack of
Internet connectivity. The connection can be manually tested
by clicking the adjacent [Test] button.
■ Softw are Status: Indicates whether the software is currently
running or not. The software can be started and stopped using
the adjacent [Start/Stop] button.
Internet Connection Test Tool: The Internet Connection Test
Tool provides facilities to test Internet connections to specific
URLs and reports the resulting http response contents. The
supplied input text box accepts a URL string up to 256 characters.
Pressing the [Test] button will perform an HTTP GET operation to
the supplied URL. This tool is provided to aid in troubleshooting
Internet connectivity and DNS issues. The URL provided can test
SSL and non-SSL connections by preceding the URL wit h the
appropriate http:// or https:// prefix.
Page 66

HotSpot Printer Operator’s Guide
66
Feature
Description
A
B
C
D
4. To man age print jobs and the user list, c lick [Log in], upper right corner (see. Fig. 24).
5. Enter credentials. Defaults:
• User Name = hotspot
• Password = printeron
6. Click [Login].
7. Review Service Status (Screen 2), and then make any necessary changes.
Service Status (Screen 2)
Fig. 25
About Service Status (Screen 2)
A
Print Job
Management
■ Print data files in disk Indicates the current number of print
jobs that reside on the printer and are available for release.
Clicking the adjacent [Delete All ] button will delete all print jobs
saved and accessible to the Mobile Printing Servi ce.
Page 67

HotSpot Printer Operator’s Guide
67
B
C
User List
Management
HTTP Proxy
Settings
This section allows you to modify the default User Name and
Password. It also provides facilities to create additional
administrator accounts.
Important:
• The User Name and Password must be numeric in order to
access Operator Mode from the HotSpot Printer control panel, as
the attached HotSpot Keypad only supports entry of numbers.
See
Appendix 2: HotSpot Keypad Layout & Operation.
• There is no password reset or restore capability.
The HTTP Proxy Settings section allows the user to configure the
Mobile Printing Service to work in network situations where all traffic
has to go through an HTTP Proxy. For network proxies that do not
use these particular features, the configured values on the Proxy
Tab are ignored, so the default values do not need to be changed.
Settings include the following:
■ Enable HTTP Proxy: Select desired box. When selected, the
following functions are enabled.
- Use Web Proxy Auto Discover: Allows you to attempt
automatic detection of proxy configuration information on
your local network using automatic detection protocols. If a
proxy is found, the application displays the proxy URL in the
Proxy Address field.
Authenticating proxies, (those that require username/
password credentials) are not supported with Web Proxy
Automatic Discovery. Manual Configuration must be used for
authenticating proxies. For non-authenticating proxies, any
username/password data is ignored.
- User Manual Configuration (default): Allows manual
configuration of proxy settings.
■ Proxy Address: Defines the address for the proxy server.
■ Proxy Port: Defines the TCP port for the proxy server.
■ User Name: Specifies the User Name for proxies which require
authentication.
■ Password: Specifies the Password for proxies that require
authentication.
■ Re-enter Password: Confirms the password entered in the
Password field is the same.
[Save Settings]: Click to save all setting s.
Page 68

68
HotSpot Printer Operator’s Guide
■ [Test Proxy]: Used to test your proxy configuration settings.
Depending on the proxy method used, the results of the test are
returned in the Proxy Test Results popup.
D
Log File Settings
The Log File settings are provided to assist in troubleshooting
potential problems. The following options are available to configure
and view log files.
[Save Log Level]: From the drop-down, select the desired level of
detail contained in the log, and then press this button. The log
contains data regarding each transaction processed via the
PrinterOn Server and HotSpot Printer.
• FINE (default)
• OFF: No logging activity
• INFO: Detailed information regarding normal operations (e.g.,
print job received)
• WARNING: serious problems that may interfere with normal
operations (e.g., disk/directory not found)
• SEVERE: only critical, system wide messages (e.g., expired
license, obsolete software version)
Page 69

HotSpot Printer Operator’s Guide
69
Important: Depending on the monitoring and troubleshooting
requirements, 6 log levels are provided. In most cases,
logging should be kept to a low level or not enabled at all.
[Refresh Log File List]: Multiple log files are used to ensure any
individual log file does not exceed a predetermined size.
This button can be used to refresh the list of available log files in the
log file drop down box.
[View Log File]: Click this button to open a new browser window
that will display the contents of the currently selected log file.
Note: The log filename consists of the date (year/month/day) time
(hour/minute/second) and log number.
Director20090811174238.123.log
Administrator Log Out
After viewing/modifying Service Status settings, you must log out in order to ensure that the session
has ended. To do so, click [
Log out ].
Page 70

HotSpot Printer Operator’s Guide
70
VV.. A
Appppeennddiicceess
Page 71

HotSpot Printer Operator’s Guide
71
Release Code
Tracking Number
AAppppeennddiixx 11:: HHoottSSppoott PPrriinntteerr OOppeerraattiioonn
When printing to your HotSpot Printer, the URL or email address that you use includes the printer’s
unique 5- or 6-digit ID (
xxxxx
). This number is located on the label affixed to the printer, as well as the
Mobile Printing Service subscription certificate.
Note: The exact steps taken to print a document may vary based on configuration settings. Also,
depending on the size and complexity of the submitted print job, it may take several minutes for the
printer to receive the file(s) from the PrinterOn Server.
Printing Instructions for Computer Users
PC/Mac users can print in one of two ways, as follows:
Method A: Print via Web Upload
Upload a document or Web page using the p rinter’s URL…
1. Open your Web browser.
2. Go to: www.printeron.net/ricoh/
xxxxx
.
3. Browse to and select the document to print or enter a Web page URL* to
print the associated page.
4. Enter required User Information, e.g., your email address.
5. Click [Submit].
Note:
• Printing Options screens may display, allowing you to, for example, select the
paper size, number of copies and document type (Excel, Word, PowerPoint,
etc.), and approve the job before it is sent to the HotSpot Printer.
• Your release code is displayed, along with a tracking number (see Fig. 26). In
addition, this information is emailed to the address entered in step 4. Write
down your tracking number should you need it for troubleshooting purposes.
6.
7.
8.
9.
Fig. 26
Page 72

HotSpot Printer Operator’s Guide
72
At the HotSpot Printer….
6. Press [OK] on the HotSpot keypad** attached to the printer.
7. Follow prompts on printer’s LCD panel to enter release code and print the job.
8. To print another document, select [
Print another document
], lower right corner (see Fig. 26).
Repeat from step 3.
Method B: Print via Email
Send email messages/attachments using any email application…
1. Open your email application.
2. Enter the printer’s email address: ricoh
xxxxx
@printspots.com.
3. Send email messages/attachments as you normally would.
Note: An email containing your release code(s) and tracking number
is sent to your email inbox.
At the HotSpot Printer ….
4. Press [OK] on the HotSpot keypad** attached to the printer.
5. Follow prompts on printer’s LCD panel to enter release code and print the job.
Printing Instructions for Handheld Device Users
Print from your Blackberry®, iPhone™ other mobile handheld devices – with Internet
access – by emailing messages/attachments to the HotSpot Printer’s email address.
See Method B: Print via Email.
* Interactive Websites that generate URLs based on user input, such as mapquest.com and amazon.
com, often contain long URLs that are not entirely visible in the Web browser. When pasting the URL
into the file or URL field, make sure you have copied the entire URL in order for the page to print.
** For information on additional HotSpot keypad functionality, e.g., reprinting or deleting a print job, see
Appendix 2: HotSpot Keypad Layout and Operation.
Page 73

HotSpot Printer Operator’s Guide
73
Key
Description
AAppppeennddiixx 22:: HHoottSSppoott KKeeyyppaadd LLaayyoouutt && OOppeerraattiioonn
Your HotSpot Printer comes with a keypad that is used for entry of the private release code, as well as
for other functions, such as reprinting or deleting a print job, setting the language for the printer’s LCD
panel, or checking your PrinterOn license status. Please take a moment to review these important
features.
HotSpot Keypad
A 10-keypad
B [Menu]
C Flag (Language
Selection)
Press to enter release code or other instruction.
Note: The maximum length of a release code is 10 digits.
Press to select function:
[Menu] + [1] = Print
[Menu] + [2] = Delete (Manually delete a print job)
[Menu] + [3] = Reprint (Up to five [5] reprints can be released at
the HotSpot keypad, after the first job is printed,
for a total of 6 copies. The reprint function times
out after 20 minutes, after which the file is
automatically erased from the printer’s hard disk
drive.)
[Menu] + [4] = Operator (for administrator use only). See IV.
Advanced Administration, User List Management
Hint: You can also press [Menu] repeatedly to reach associated
function, e.g., press [Menu] twice to delete a job in memory.
Press to select a different language for the printer’s LCD panel,
e.g., English (default), Spanish, French, Dutch, German and Italian.
All display text will appear in the selected language.
.
Page 74

HotSpot Printer Operator’s Guide
74
D [ Back]
E [?] Press to view license status. [PrinterOn x.x LicenseValid] should
If incorrect release code is entered, press to erase digits from right
to left.
display. If not , see
Appendix 8: Troubleshooting.
F [X Cancel]
G [ OK]
H [Clear]
Press to exit current function, without printing.
Press to confirm entry, e.g., after release code is entered.
Press to erase an entered release code, and try again.
Page 75

HotSpot Printer Operator’s Guide
75
AAppppeennddiixx 33:: CChheecckk DDeevviiccee SSttaattuuss vviiaa WWeebb IImmaaggee MMoonniittoorr
If you wish to check the status of your printer installation, use Web Image Monitor (WIM). WIM is
firmware built into all Ricoh printers that allows the administrator to use a standard Web browser to
remotely manage the device over the network. All you need is Internet access, administrative privileges,
and the printer’s IP Address; the IP Address on the Configuration Page. For information on printing the
Configuration Page, see
To view/edit configuration settings, proceed as follows:
1. Open your Web browser.
2. Go to: http://PrinterIPAddress.
3. Click [Login].
II. Installation, Step A: Install Printer.
4. Enter credentials. Defaults:
• Login User Name: admin
• Login Password: leave field blank
5. Click [Login].
Page 76

76
6. Click [Configuration].
7. When done, click [Logout].
HotSpot Printer Operator’s Guide
Page 77

HotSpot Printer Operator’s Guide
77
AAppppeennddiixx 44:: HHoottSSppoott--CCoommppaattiibbllee PPrriinntteerr MMooddeellss
Color Laser Printers
Ricoh Lanier Savin
• Aficio SP C420DN-KP • LP331cn-KP • CLP131DN-KP
• Aficio SP C410DN-KP • LP226cn-IP • CLP27DN-KP
Black-and-White Laser Printers
Ricoh Lanier Savin
• Af icio SP 4100N-KP • LP131n-KP • MLP31DN-KP
Important: Also check the Ricoh Website (www.ricoh-usa.com) for the most recent model
introductions.
Page 78

HotSpot Printer Operator’s Guide
78
Microsoft Word 2.x
Microsoft PowerPoint 4.x
Microsoft PowerPoint 97
OpenOffice 3.x Draw
PNG - Portable Network Graphic
TIFF-M MSB CCITT Group 4 Tiled
TIFF-M LSB CCITT Group 4 Tiled
TIFF-M LSB Raw Striped
AAppppeennddiixx 55:: FFiillee FFoorrmmaatt SSuuppppoorrtt
Your Mobile Printing Service supports over 100 file formats….
Microsoft Office Formats
Microsoft Word 6.x
Microsoft Word 95
Microsoft Word 97
Microsoft Word 2000
Microsoft Word XP
Microsoft Word 2003
Microsoft Word 2007
Microsoft Word 2008 for Mac
Microsoft Excel 2.x
Microsoft Excel 3.x
Microsoft Excel 4.x
Microsoft Excel 5.x
Microsoft Excel 95
Microsoft Excel 97
Microsoft Excel 2000
Microsoft Excel XP
Microsoft Excel 2003
Microsoft Excel 2007
Microsoft Excel 2008 for Mac
Microsoft PowerPoint 2000
Microsoft PowerPoint XP
Microsoft PowerPoint 2003
Microsoft PowerPoint 2007
Microsoft PowerPoint 2008 for Mac
Microsoft Visio 5
Microsoft Visio 2000
Microsoft Visio 2002
Microsoft Visio 2007
OpenOffice 1.x Writer
OpenOffice 1.x Calc
OpenOffice 1.x Draw
OpenOffice 1.x Impress
OpenOffice 2.x Writer
OpenOffice 2.x Calc
OpenOffice 2.x Draw
OpenOffice 2.x Impress
OpenOffice 3.x Writer
OpenOffice 3.x Calc
OpenOffice 3.x Impress
StarWriter 3.0
StarCalc 3.0
StarDraw 3.0
StarChart 3.0
StarWriter 4.0
StarCalc 4.0
StarImpress 4.0
StarChart 4.0
StarWriter 5.0
StarCalc 5.0
StarDraw 5 . 0
StarImpress 5.0
StarChart 5.0
StarWriter 7.0
StarCalc 7.0
StarDraw 7.0
StarImpress 7.0
StarChart 7.0
Adobe PDF
PDF - Portable Document Format
Text Formats
RTF - Rich Text Format; ASCII Text; Unicode Text - Little Endian; Unicode Text - Big Endian
Graphics Formats
PNG - Interlaced Portable Network Graphic
Windows BMP
OS/2 BMP
Windows BMP RLE4
Windows BMP RLE8
Windows BMP - Uncompressed bitmap
JPEG
JPEG 2000
JFIF - Baseline JPEG Good Compression
Progressive JPEG
JPEG 2000 - Code Stream
JBIG2
GIF - Graphics Interchange Format
TIFF LSB
TIFF MSB
TIFF-M MSB CCITT Group 4 Striped
TIFF-M LSB CCITT Group 4 Striped
TIFF-L MSB CCITT Group 4 Striped
TIFF-L LSB CCITT Group 4 Striped
TIFF-L MSB CCITT Group 4 Tiled
TIFF-L LSB CCITT Group 4 Tiled
TIFF-M MSB CCITT Group 4
TIFF-M LSB CCITT Group 4
TIFF-L MSB CCITT Group 4
TIFF-L LSB CCITT Group 4
TIFF-M MSB Raw CMYK
TIFF-M LSB Raw CMYK
TIFF-L MSB Raw CMYK
TIFF-L LSB Raw CMYK
TIFF-M MSB Raw Striped CMYK
TIFF-M LSB Raw Striped CMYK
TIFF-L MSB Raw Striped CMYK
TIFF-L LSB Raw Striped CMYK
TIFF-M MSB Raw
TIFF-M LSB Raw
TIFF-L MSB Raw
TIFF-L LSB Raw
TIFF-M MSB Raw Striped
Page 79

79
TIFF-L LSB Raw Striped
Graphics Formats Cont.
TIFF-L MSB Raw Striped
TIFF-M LSB Striped Packbits
TIFF-L MSB Striped Packbits
TIFF-M MSB LZW CMYK
HotSpot Printer Operator’s Guide
TIFF-M MSB Raw Tiled
TIFF-M LSB Raw Tiled
TIFF-L MSB Raw Tiled
TIFF-L LSB Raw Tiled
TIFF-M MSB CCITT Group 3 Tiled
TIFF-M LSB CCITT Group 3 Tiled
TIFF-L MSB CCITT Group 3 Tiled
TIFF-L LSB CCITT Group 3 Tiled
TIFF-M MSB CCITT Group 3
TIFF-M LSB CCITT Group 3
TIFF-L MSB CCITT Group 3
TIFF-L LSB CCITT Group 3
TIFF-M MSB Striped Packbits
TIFF-L LSB Striped Packbits
TIFF-M MSB NRLE
TIFF-M LSB NRLE
TIFF-L MSB NRLE
TIFF-L LSB NRLE
TIFF-M MSB CCITT Group 3 2D
TIFF-M LSB CCITT Group 3 2D
TIFF-L MSB CCITT Group 3 2D
TIFF-L LSB CCITT Group 3 2D
TIFF-M MSB JPEG
TIFF-M LSB JPEG
TIFF-L MSB JPEG
TIFF-L LSB JPEG
Page 80

HotSpot Printer Operator’s Guide
80
AAppppeennddiixx 66:: WWeebbPPaayy 22..00 PPlluugg--iinn OOvveerrvviieeww
Ricoh has collaborated with PrinterOn and WebPay Services Aps (WPS), a Danish company
specializing in Web payment processing services, to provide a secure hosted billing solution called
WebPay 2.0. Fully-integrated into HotSpot Printers and the PrinterOn Mobile Printing Service,
WebPay 2.0 is an optional plug-in that brings eCommerce capability to your HotSpot Service.
WebPay 2.0 seamlessly integrates with your HotSpot Mobile Printing Service, enabling easy Web or
email job submission. In the background, WebPay 2.0 counts the number of pages in each job,
calculates the job cost and initiates a credit card billing sequence just like any other eCommerce
transaction. The rest of the HotSpot printing process, i.e., entering a release code, etc., remains
unchanged. This offers a unique opportunity to turn your HotSpot Printer into a revenue-generating
service.
WebPay 2.0 Benefits
• Totally Secure – Every print job and financial transaction is guaranteed secure. Private release
codes are generated for each job. All jobs are erased after leaving a server or being printed.
• 100% Automated – There’s nothing for employees to do but make sure paper is in the printer.
The system is self-service to all walk-in customers.
• Extremely Easy to Use – That means no IT or customer support requirements. No
administration is required. The user simply sends the file, approves the charge request, and
enters the release code at the printer. It’s that simple.
• Affordable & Profitable –The syst em is tur n-key, and the first year of the PrinterOn Mobile
Printing Service is included in the printer’s price. The WebPay 2.0 service costs only $30 per
printer per month, (annual commitment required), and generates new revenues and offsets the
cost of printer ownership.
WebPay 2.0 Enhancements
WebPay 2.0 includes several enhancements that address the expanding use of Mobile Printing
Services.
• Global Administration, Accounting, and
Reporting
WebPay 2.0 now provides a secure portal for printer
administration and reporting over multiple locations
and a limitless number of devices. An administrator
tasked with monitoring HotSpot activity across an
entire organization can do so from a centralized
portal. They can view all HotSpot printers installed
under the account, monitor volumes and activity by
device and see network totals. With this information
companies can identify and redeploy underutilized
printers or change the promotion of the HotSpot
service to increase visibility/use. Further, the
WebPay service is completely scalable, allowing
you to easily install additional devices to expand the
– service or meet demand in high volume locations.
Page 81

HotSpot Printer Operator’s Guide
81
6.750.50
26/16/2009 7:50Hotspot printer NetherlandsPrint job
7.251.5066/12/2009 12:15Hotspot printer USAPrint job
8.751.2556/4/2009 9:30Hotspot printer GermanyPrint job
10.0010.006/4/2009 8:04WebPay deposit order 544-8663Deposit
BalanceCostPagesDate/TimeDetailsJob
• Personal Print Accounts
This feature allows business travelers and mobile executives to securely print from any computer
or mobile device to any HotSpot Printer at any location on a HotSpot Printer provider’s network
by establishing a WebPay 2.0
Personal pre-paid debit account
with the HotSpot Printer service
provider. Using a standard credit
card, a user deposits funds into a
WebPay account. Then, whenever
a document is printed, the job cost
is debited from the account. The
user simply logs into their prepaid
account rather than entering a
credit card number for each
transaction. Imagine you are a
sales representative covering
several states or even European
countries, and you often stay at
Hilton hotels that offer the HotSpot Mobile Printing Service and WebPay, as illustrated in Fig. 27.
Fig. 27
For the end-user, the advantages of having a WebPay account include the ability to print to any
HotSpot Printer on the provider’s network, not having to enter a credit card number for each print
job, plus the ability to charge all printing expenses to the same account no matter where the pages
are output. You can also log into your account, see transaction details, check balances, easily refund the account, and print a consolidated report for expense reimbursement. This feature is
extremely useful for hotel chains, Wi-Fi providers, coffee shop chains, and other similar businesses
with multiple locations.
Page 82

HotSpot Printer Operator’s Guide
82
• Support for Cash Payments and Vouchers
WebPay 2.0 opens the door to greater revenue generating
opportunities by allowing walk-in customers to purchase printing
services for cash at the register, or for retailers to issue
vouchers/coupons for quantities of printed pages as a free promotion.
For instance, a café may provide patrons with $1 of free printing with
every latte. Similar to Personal Print Accounts, this is another way to
make mobile printing easy and affordable, but tailored for the retail
environment. Vouchers can only be issued by
the owner of the printer. When a retailer
subscribes to the WebPay service, they will be
able to sell vouchers in $1, $5, and $10
denominations to cash paying customers. The
voucher is printed with a code that the user
enters into their PC or mobile device to submit
the print job.
• Integration with Back-end Third Party Accounting Systems.
WebPay 2.0 now supports the ability to integrate with third party accounting systems. This is
especially critical in t he hospitality industry. When the hotel property offers HotSpot Mobile Printing
and WebPay payment services, guests can route all printing charges directly to their hotel bill, just
as with in-room movies and room service charges. This enhancement makes HotSpot solutions an
attractive, maintenance-free service.
Note: For more information on WebPay 2.0, please contact your authorized HotSpot Printer sales
representative.
Page 83

HotSpot Printer Operator’s Guide
83
AAppppeennddiixx 77:: FFrreeqquueennttllyy AAsskkeedd QQuueessttiioonnss
Q1. How does the Ricoh / PrinterOn® Corporation partnership work?
A1. Founded in 2000, PrinterOn Corporation is a Canadian company recognized as an industry leader
and pioneer of Mobile Printing Services. By partnering with Ricoh, the two companies merge their
core competencies to deliver the industry’s first completely embedded secure mobile printing
solution.
Ricoh provides the robust, reliable printer hardware that addresses the needs of business
professionals with the highest standards for image quality. PrinterOn provides the software
mechanism to enable users to print any document to any device with total data security. Ricoh’s
Embedded Software Architecture™ completes the picture by actually integrating mobile printing
capabilities into the printer controller.
For more information about PrinterOn Corporation’s products and services, please visit their
.
Website at
http://www.printeron.com
Q2. What is a HotSpot Printer ?
A2. A HotSpot Printer is a secure, customizable mobile printing solution that enables a user to print
documents securely across the Internet, from any Internet-enabled computer, cell phone or
wireless handheld device.
Q3. What is PrintSpot™?
A PrintSpot™ is simply PrinterOn’s Server that receives your print instructions and files, and then
A3.
generates compressed printable data file that is directed back to the specified HotSpot Printer.
You simply upload or email your document to the secure PrinterOn Server via the URL or email
address of the HotSpot Printer. This information is printed on a label affixed to the printer.
Q4. How do I register and activate the printer?
Your HotSpot Printer ships with a subscription certificate this is needed in order to register the
A4.
Mobile Printing Service. You must first unpack and connect the printer, and then register the
device with PrinterOn at
Registering the printer upon installation activates the service. You will also be asked to provide
email contact information as well.
Note: Step-by-step instructions for installing, registering, testing and customizing the Printer On
Web Pages are included in this Operator’s Guide. See
www.printeron.net/register.
II. Installation.
Page 84

HotSpot Printer Operator’s Guide
84
Q5. Where do I turn for service and support?
A5. A new HotSpot Printer is supported by a standard one-year warranty on the printer itself, along
with a one-year subscription to PrinterOn’s PrintSpots Mobile Printing Service. For first-line
technical support, in the U.S., call 1-800-RICOH-38 (1-800-742-6438), in Canada, call 1-800-263-
0815. If the issue appears related to PrinterOn, PrinterOn Corporation’s technical support will be
engaged directly to help resolve the issue. PrinterOn stands ready to help achieve the greatest
satisfaction and performance from your Mobile Printing Service.
Q6. How do I renew or extend the Mobile Printing Service?
A6. When your HotSpot Mobile Printing Service is nearing the expiration of its prepaid one-year
subscription, contact your authorized HotSpot sales representative. You will then have the option
to purchase a 2-, 3- or 4-year Mobile Printing Service Extension from Ricoh:
• 2-year Extension: Part #: 003357MIU
• 3-year Extension: Part #: 004813MIU
• 4-year Extension: Part #: 004814MIU
Upon purchase of the Service Extension, you will receive a Certificate with an Extension Code as
well as instructions for extending the service.
Q7. How does HotSpot printing work?
A7. You send a document from your Internet-enabled computer, cell phone or wireless handheld
device to the PrinterOn Server, using the URL or email address assigned to the HotSpot Printer.
After the document is submitted, the Server generates a compressed printable data file and
securely communicates the file back to the destination printer. You then receive a private release
code (on your computer or PDA) that is entered via the HotSpot keypad, attached to the printer.
The document prints. It is that easy!
Q8. What types of mobile printing methods are supported?
A8. There are two methods of mobile printing integrated into your HotSpot Printer:
1. Driverless Web-based Printing: You enter the URL of the HotSpot Printer's Web page and
send documents and Web content to the HotSpot Printer. The URL (e.g., www.printeron.net/
ricoh/xxxxx
2. Email Printing: Also driverless, this method allows you to forward email
messages/attachments (from any computer or handheld device [BlackBerry, iPhone or
Internet-enabled cellphone]) to the email address assigned to the HotSpot Printer. The email
address (e.g., ricohxxxxx
*Note: xxxxx represents the unique 5- or 6-digit ID assigned to your HotSpot Printer.
Important: Both mobile printing methods require Internet access and nothing more. There is no
software for the user to download and install to print to a HotSpot Printer.
)* is printed on a label affixed to the HotSpot Printer.
@printspots.com)* is printed on a label affixed to the HotSpot Printer.
Page 85

HotSpot Printer Operator’s Guide
85
Q9. What is “driverless” printing?
A9. “Driverless” refers to a system’s ability to request a print job without opening the document or
choosing print parameters inside a printer driver. Driverless printing is desirable because it allows
you to send files for output without access to the authoring application, such as when a Microsoft
Word document is sent as an email attachment to a cell phone or PDA. In short, driverless
printing requires that the receiving server prepare the file for output, not the sending device, thus
enabling you to access convenient printing whenever you are away from your desk.
Q10. When sending a document to a HotSpot Printer, is the file transfer process
secure?
A10. For complete data protection, every step of the file transfer process is encrypted using 128-bit
SSL encryption technology. Each file is erased from the PrinterOn Server immediately after
transfer to the target HotSpot Printer. Further, every job is locked safely on the printer’s hard disk
drive, until the user arrives at the printer and enters their private 4- to 10-digit release code via
the attached HotSpot keypad.
Q11. How can I search for printer locations?
A11. Visit the PrinterOn Web sit e at http://www.printeron.com/index to locate PrintSpots, i.e.,
accessible HotSpot Printers in your area.
Q12. How will I know where to send the file?
A12. As mentioned, labels are affixed to the front of each HotSpot Printer clearly ident if ying t he URL
and email address of each printer. You can also check the PrinterOn Web site at
http://www.printeron.com/index to search for local HotSpot Printers.
Q13. Do HotSpot Printers support third-party billing/accounting systems?
A13. Yes. Ricoh has collaborated with PrinterOn and WPS to enable a hosted billing solution called
WebPay 2.0, which counts the number of pages, calculates the job cost, and initiates a secure
credit card billing sequence just like any other e-transaction. The rest of the printing process
(entering a release code, etc.) is identical to the free process.
Reference: See
Appendix 6: WebPay 2.0 Plug-in Overview.
Q14. What languages are support by the HotSpot Printer and PrinterOn We b Pages?
A14. For global travelers, multinational enterprises and hotel chains, HotSpot Printers and the
PrinterOn Web Pages support English (default), Spanish, French, German, Dutch and Italian.
Page 86

HotSpot Printer Operator’s Guide
86
Q15. What document file formats are supported?
A15. Your Mobile Printing Service supports over 100 file types, including:
• Microsoft® Word 2.0 > 20 07
• Microsoft Excel 2.0 > 2007
• Microsoft PowerPoint 4.0 > 2007
• Microsoft Visio 5 > 2007
• OpenOffice.org
• Adobe PDF files
• Web pag es (htm, html, mhtml)
• Text and RTF files
• JPEG, TIFF, BMP, PNG, and GIF picture files
Reference: For a complete File Format Support list, see
Q16. Can I brand my Mobile Printing Service?
A16. Yes. You can change the design of the PrinterOn Web Pages using a simple online editor to
incorporate your company colors, logo and text. This allows you to take greater ownership of the
solution as a branded service to your customers, guests and employees. In this way it can help
you expand this unique offering and differentiate yourself from competitors who do not offer
mobile printing.
Q17. Is there a maximum file size limit for HotSpot Printers?
A17. Yes. The maximum file size the HotSpot printer can process is 16MB.
Appendix 5.
Page 87

HotSpot Printer Operator’s Guide
87
AAppppeennddiixx 88:: TTrroouubblleesshhoooottiinngg
No. Issue Action
1 Service is not
running, i.e.,
default printer
display message
does not
read: [For
Print Release,
Press OK]
• Perform the following steps to restart the service:
1. Turn printer power OFF.
2. Disconnect the USB keypad cable (from rear of printer).
3. Turn printer power ON.
4. Wait approx. 90 seconds after [Ready] is displayed on printer LCD.
5. Turn printer power OFF.
6. Reconnect the USB keypad cable.
7. Turn printer power ON.
8. Wait approx. 90 seconds after [Ready] is displayed on printer LCD. The message [Print
Release Press OK] should appear on the LCD.
9. To determine service status, go to 2.
2 Cannot print
• To check service status press the [?] key on the HotSpot keypad. The printer LCD will display
one of the following messages:
- [PrinterOn x.x LicenseValid]. Indicates that Mobile Printing Service application is working
properly.
- [PrinterOn x.x InternetDown]. This indicates that the printer cannot get proper connection
to the Mobile Printing Service Server. Please check printer network settings (IPv4, DHCP,
DNS, etc.). See Quick Installation Guide. Also see Item 3, below.
- [PrinterOn x.x NoLicense]. This indicates that the application cannot get a valid license
from the Mobile Printing Service Server. Please check printer’s network settings (IPv4,
DHCP, DNS, etc.). See Quick Installation Guide. Please check that the printer’s time and
date are set correctly. See Item 4.
Ricoh Help Desk: U.S.:1-800-RICOH38 (1-800-742-6438), Canada: 1-800-263-0815
Page 88

HotSpot Printer Operator’s Guide
88
AAppppeennddiixx 88:: TTrroouubblleesshhoooottiinngg CCoonntt..
No. Issue Action
3 Service status
reads: [PrinterOn
x.x InternetDown]
(Note: To check
service status, press
[?] on HotSpot
keypad)
• Confirm that there is Internet connectivity from another device (e.g., computer, laptop, etc.) by
using the same Ethernet cable and physical port connection.
• Confirm that there a no authentication requirements for accessing the Internet (e.g.,
username/password, “click here to connect” messages, etc.
• Ping or HTTP the HotSpot Printer’s IPv4 Address. For the IPv4 Address, print a Configuration
Page from the device control panel. For instructions, see
II. Installation, Step A: Install Printer.
• Contact your IT department or ISP (Internet Service Provider) to confirm that the TCP/IP
settings used by the HotSpot Printer are valid.
• Has DHCP been disabled? If so, static DNS values must be entered.
About DHCP
The HotSpot Printer’s default DHCP setting is “On”, in order for the DHCP Server to
automatically assign an IP Address, Subnet Mask, Gateway Address and DNS Address. If,
for example, the printer is turned off and moved to a new location, with DHCP set to “On,”
as shown below, the correct network settings are automatically assigned.
The problem arises when the printer settings are changed to DHCP “Off” and an IP Address is
manually assigned. If DHCP is “Off,” then the IP Address, Subnet Mask, Gateway Address
and DNS Address must be manually set. If any of these addresses are set incorrectly or
omitted, then the printer will not be able to communicate with the PrinterOn Server and vice
versa. This typically results in an "Internet Down" error message on the printer's LCD Panel.
With the Internet Down error, users are able to submit jobs to the PrinterOn Server, receive
their release code but, the job never downloads to the Printer because the printer can't
communicate over the Internet.
Page 89

HotSpot Printer Operator’s Guide
89
AAppppeennddiixx 88:: TTrroouubblleesshhoooottiinngg CCoonntt..
No. Issue Action
3 Service status
reads: [PrinterOn
x.x InternetDown]
Cont.
To correct the problem, proceed as follows:
Step 1: From the printer’s control panel, assign IP Address, Subnet Mask, Gateway Address
values. Note: Reboot the printer by turning the power off for at least five seconds.
Reference: For more information, refer to the printer’s Hardware Guide >
Configuration, located on the Manual CD-ROM included with the printer.
Step 2: From Web Image Monitor, change the DNS Server values to match those entered via
the printer’s control panel. Important: Assign both primary and back-up DNS
Addresses.
a. Make sure you have Internet access on an unrestricted network line.
b. Open your Web browser
c. Go to: http://PrinterIPAddress.
d. Enter login credentials. Defaults:
• Login User Name: admin
• Password: leave blank
e. Click [Login].
f. Click [Configuration] link, left sidebar.
g. Under Network, click [IPv4].
h. Under Details, click [Specify] button
adjacent to [Auto Obtain (DHCP)].
Important: If the DNS server is set
to [Specify], enter the values for the
Primary (DNS Server1) and
Secondary (DNS Server2) servers.
i. Click [OK] to save changes.
Page 90

HotSpot Printer Operator’s Guide
90
AAppppeennddiixx 88:: TTrroouubblleesshhoooottiinngg CCoonntt..
No. Issue Action
3 Service status
reads: [PrinterOn
x.x InternetDown]
Cont.
Step 3: Reboot the printer. This step is critical, as the changes will not take effect until
after the device is reset.
a. Turn printer OFF and remove network cable and HotSpot keypad.
b. Turn printer ON. Wait until [Ready] appears in the display.
c. Turn printer OFF and reconnect network cable and HotSpot keypad.
Turn printer ON. Approx. 90 seconds after [Ready] appears in the display, the message [For
Print Release, Press OK]. You’re ready to print.
4 Service status
reads: [PrinterOn
x.x NoLicense]
• This indicates that the Mobile Printing Service application running on the printer cannot get
a valid license from the PrinterOn Server. Please check printer network settings (IPv4,
DHCP, DNS etc.). Also check that the time and date are set correctly. To do so, proceed
as follows:
1. At printer control panel, press [Menu].
2. Select [Maintenance], and press [OK].
3. Select [Timer Settin gs], and press [OK].
4. Select [Set Date], and press [OK].
5. If necessary, enter correct month, day, year, and press [OK].
6. Select [Set Time], and press [OK].
7. If necessary, enter correct hour, minute, second, and press [OK].
8. Press [Menu] to exit.
Note: Steps may very slightly, based on printer model.
5 Job is sent and
release code
received, but
document does
not print.
• To check service status, press [?] on Hot-Spot keypad.
• If the license status reads [PrinterOn x.x LicenseValid], but you still cannot release a print job,
there are other possible issues:
1. Firewall, authentication and/or redirection is preventing HTTP/HTTPS communication.
2. A change has occurred in the TCP/IP environment. Turn the printer OFF/ON to restart the
HotSpot Service.
3. Make sure that you are not entering the tracking number instead of the release code.
Page 91

HotSpot Printer Operator’s Guide
91
AAppppeennddiixx 88:: TTrroouubblleesshhoooottiinngg CCoonntt..
No. Issue Action
6 Unavailable
printer features
• When the printer is accessed via the Mobile Printing Service, envelope printing, custom
paper sizes, special paper types, and other advanced printer driver features are not
supported. However, advanced driver features are available when the printer is being
utilized as a standard network printer.
7 A Web page will
not print
• Interactive Web sit es that generate URLs based on user input, such as mapquest.com and
amazon.com, often contain long URLs that aren't entirely visible in the Web browser. When
pasting the URL into the File or URL field, make sure you have copied the entire URL in
order for the page to print.
8 Cannot reprint a
job (via the
[Menu] key on the
HotSpot keypad)
• You have attempted to reprint more than five (5) copies, the maximum number available for
reprint, and/or 20 minutes has elapsed since the first print was released. After 20 minutes,
the reprint function times out and the file is erased from the printer’s hard disk drive.
9 Trying to open
PrinterOn Web
Page, but screen
reads [Service
offline]
• You have entered t he URL (www.printeron.net/ricoh/xxxxx) using a valid printer ID (xxxxx
Reference: See
),
but the unit is not yet registered. Register the printer and try again.
II. Installation, Step B: Register Printer.
10 Trying to open
PrinterOn Web
Page, but screen
reads [The page
you request could
not be found.]
• You have entered a URL using a non-existent printer ID (xxxxx
• You typed the URL in upper case. Re-enter URL using all lower-case letters.
). Re-enter URL with correct
ID.
Page 92

HotSpot Printer Operator’s Guide
92
AAppppeennddiixx 88:: TTrroouubblleesshhoooottiinngg CCoonntt..
No. Issue Action
11 Trying to remove
an administrator,
but screen reads
[Unable to remove
the user. The user
is a super administrator of the site]
Super Administrators are members of Ricoh's manufacturing and technical support
departments that require login privileges for troubleshooting purposes. As such, a Super
Administrator cannot be removed.
###
Page 93

93
Ricoh Americas Corporation
Five Dedrick Place, West Caldwell, NJ 07006
Phone (973) 882-2000
www.ricoh-usa.com
11/09 Rev. 1
 Loading...