

Rand McNally tnd 760 Install Manual

For Sales Information Please Contact RoadTrucker Inc (www.RoadTrucker.com)
8312 Sidbury Rd.; Wilmington, NC 28411 - (800) 507-0482 / (910) 686-4281
Introduction
This guide addresses the installation procedures for the Rand McNally TND™ 760 in-cab mobile
communication device. We recommend reviewing the entire guide before beginning installation. If
you would like more information about installation, system registration or troubleshooting, please
contact Customer Support:
Call Us: 1-800-641-RAND (7263)
Email us: fleetsupport@randmcnally.com
Write to Us:
Rand McNally
Attn: TNDTM 760 Fleet Edition
Customer Support
9855 Woods Drive
Skokie, IL 60077
Installation Kit
For your quick reference, the contents of your installation kit are summarized below.
1. TND 760 Device
2. Suction Cup Mount
3. 9-Pin Power Cable
4. Cable Tires
For Sales Information Please Contact RoadTrucker Inc (www.RoadTrucker.com)
8312 Sidbury Rd.; Wilmington, NC 28411 - (800) 507-0482 / (910) 686-4281
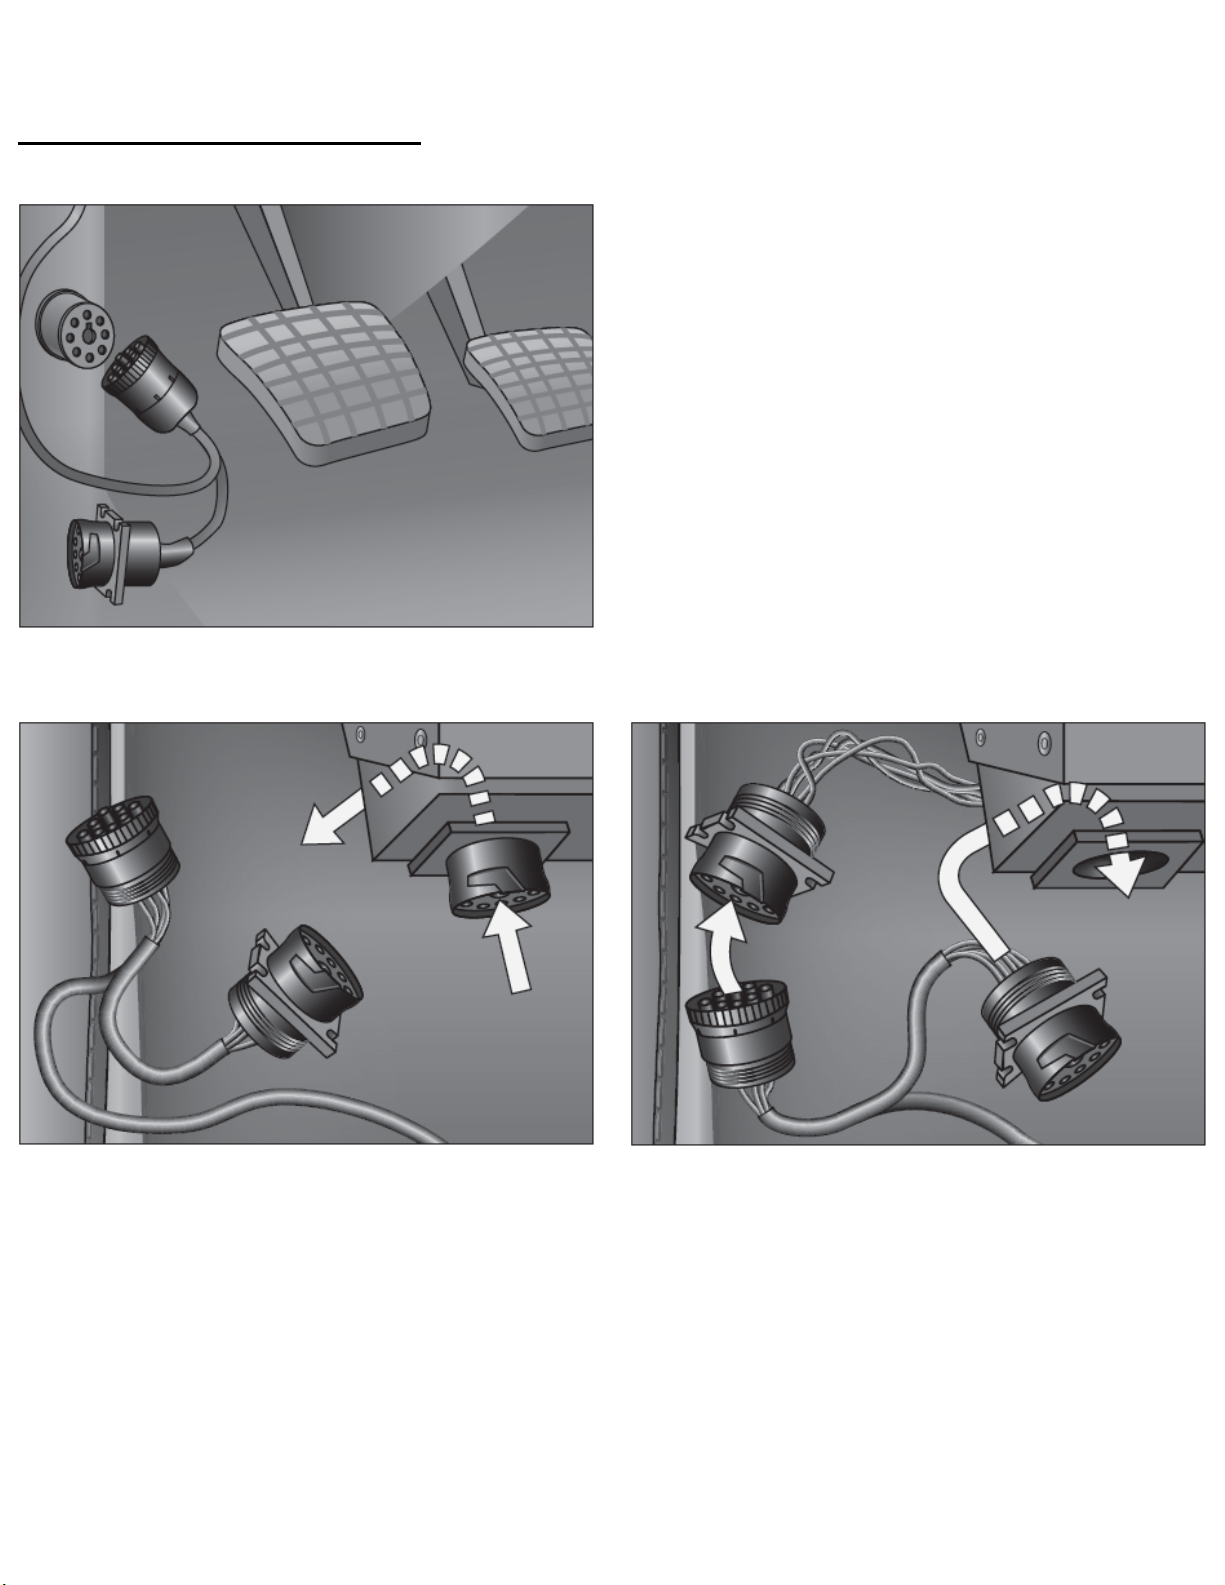
Installation Instruction
Connector: Visible Option
Connector: Concealed Option
Remove the plastic paneling near the trucks
diagnostic connector. Unscrew the truck’s
diagnostic connector (socket) from a metal
bracket that holds it in place (if
applicable).
After that is unfastened, insert the Y
cable’s socket end into the now vacant
bracket (where the trucks connector was
located). Fasten the Y cable socket into the
bracket – this makes it externally identical
to the truck’s original connector.
Locate the truck’s diagnostic port. Remove the
plug on the diagnostic port, connect the cable,
and lock the collar in place. Choose the best
way to route your cable after you plug your
cable into the diagnostic port.
Take the plug side of the Y cable and attach
it to the truck’s diagnostic connector
(socket end). Twist the lock on the connector
to ensure there is a secure connection. A
minor click means it is fully fastened.
Tuck the extra cable, using a twist tie to
keep the cable organized, into an empty area
near the trucks diagnostic connector socket.
Finish the process by re-installing the
plastic dash panel.
 Loading...