

Rademacher 32501381 User guide
DuoFern HomeTimer 9498-UW / 9498-AL
EN
Instruction manual for the electrical connection and for commissioning
Item no.:
3250 13 71 (ultra-white)
3250 13 81 (aluminium)
VBD 593-2 (08.16)
i
Dear Customer,
With your purchase of a DuoFern HomeTimer, you have chosen a quality product manufac-
tured by RADEMACHER. Thank you for the trust you have placed in us.
The DuoFern HomeTimer has been designed in order to provide optimal convenience and
operability as well as to ensure solidity and durability. Having applied uncompromising
quality standards and thorough testing, we are proud to be able to present this innovative
product to you.
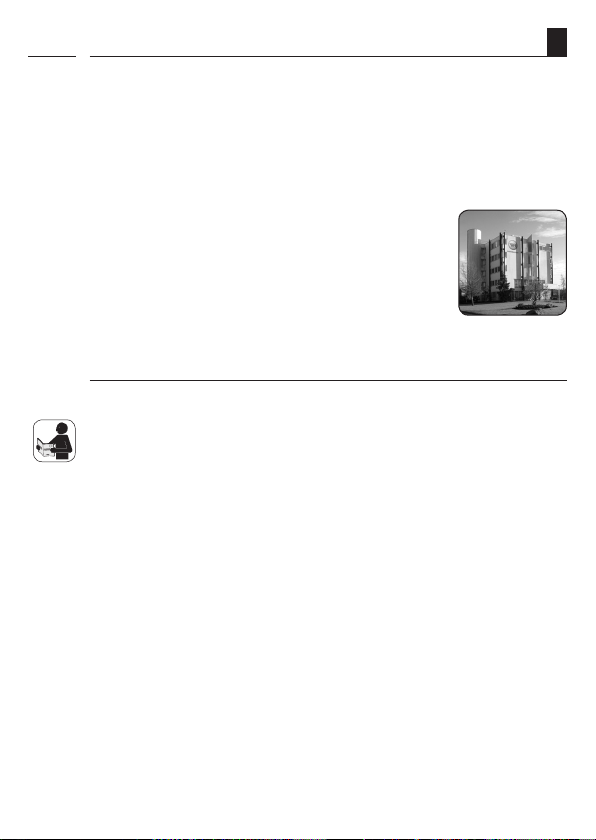
It’s brought to you by all the highly-qualified personnel here
at RADEMACHER.
These instructions...
...describe how to install and operate your DuoFern HomeTimer.
Before you begin, please read these instructions through completely and follow all the safety
instructions.
This manual is a component of the product. Please store it in an easily accessible place. When
passing the DuoFern HomeTimer on to a third party, this manual must be passed on as well.
Damage resulting from non-compliance with these instructions and safety instructions will
void the guarantee. We assume no liability for any consequential damage.
EN
2
i
Table of Contents
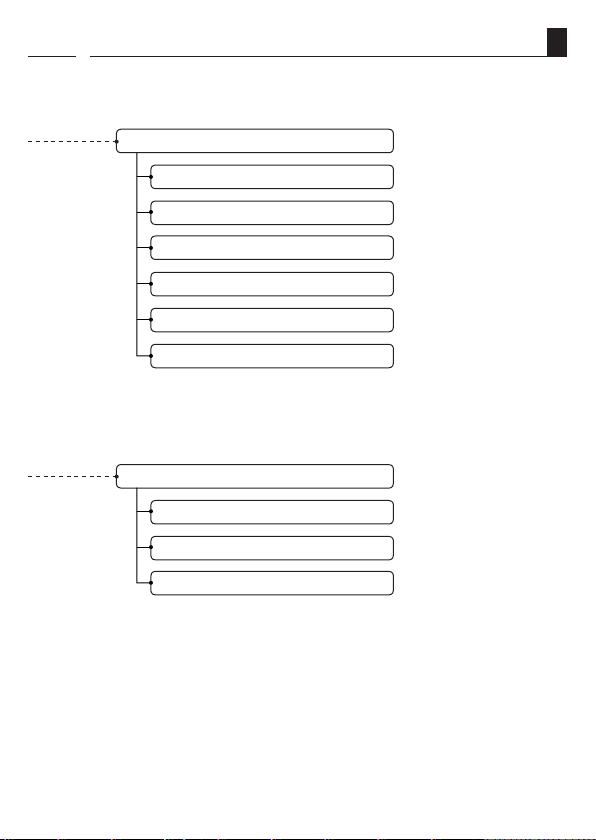
EN
i Dear Customer, ...............................................2
1. Included in delivery ....................................... 4
2. General view - operating unit ......................... 5
2.1 General view - back /
exchanging the battery ......................... 5
3. Brief description of the keys ............................ 6
4. Display symbol legend .................................... 7
5. Menu overview - main menu and
system settings ............................................... 8
5.1 Menu overview - menu 9.8 /
menu 9.9 ............................................... 9
6. Key to symbols ............................................. 10
7. General safety information ........................... 10
8. Proper use .............................................. 11
9. Improper use .............................................. 11
10. Brief description ........................................... 12
10.1 Compatible switch ranges ................... 13
10.2 Overview of features ........................... 14
11. Assembly .............................................. 16
12. Important information prior to
initial commissioning ................................... 17
13. Brief description of the standard
display and main menu ................................ 17
13.1 Opening and closing
the menus (example) .......................... 19
13.2 Group and single control ..................... 20
14. Initial commissioning with the help of
the installation wizard .................................. 20
15. Manual operation ......................................... 25
15.1 Manual operation - jog mode .............. 26
16. DuoFern settings ........................................... 27
16.1 Menu 9.9.1 - Logging
DuoFern actuators on/off .................... 28
16.2 DuoFern radio code ............................. 31
16.3 Remote log on / off.............................. 33
17. Menu overview / main menu ........................ 34
17.1 [ AUTO ] Automatic mode .................... 34
17.2 Menu 1- Automatic mode on / off ....... 35
17.3 Switching times [ / ] ...................... 36
17.4 Menu 2 - Configuration of opening
and closing times [ / ] ................... 38
17.5 Switch the automatic timer on/off
for individual DuoFern actuators ......... 41
17.6 Automatic dusk function ..................... 42
17.7 Menu 3 - Customising the automatic
dusk function [ ]. ............................. 42
17.8 Automated solar function .................... 44
17.9 Menu 4 - Switching the automated
solar function on/off [ ]. .................. 44
17.9.1 Setting the local
sunshine position. .................. 45
17.10 Automatic dawn function [ ] ........... 46
17.11 Menu 5 - Customising the auto-
matic dawn time [ ]......................... 46
17.12 Menu 6 - Configuring the
random function [ ] ........................ 48
18. Menu 9 - System settings [ ] .................... 49
18.1 Menu 9.1 - Set time and date [ ]..... 50
18.2 Menu 9.2 - Configure motor
running time ....................................... 50
18.3 Menu 9.3 - Configure
ventilation position [ ] ...................... 52
18.4 Menu 9.4 - Set postcode [ PLZ ] ........... 53
18.5 Select Menu 9.5 - Switching
time programme [ ]........................ 54
18.6 Menu 9.7 - Set jog mode [ T ] ...............55
18.7 Menu 9.8 - Device settings [ ];
menu overview ................................... 56
18.7.1 Menu 9.8.1 - Automatic
summer/winter
changeover on/off ................. 57
18.7.2 Menu 9.8.3 -
Set display backlighting ......... 57
18.7.3 Menu 9.8.5 -
Switch key lock on/off ............ 58
18.7.4 Menu 9.8.7 - Switch reversal
of rotation direction on/off .... 59
18.7.5 Menu 9.8.9 - Configuration
of end points for the
tubular motor ........................ 60
18.7.6 Menu 9.8.0 - Display
software version .................... 61
3
i
Table of Contents
EN
19. Software reset (restore factory settings). ...... 62
20. Dismantling .............................................. 63
21. Simplified EU Declaration of Conformity ....... 63
22. Technical Specifications ................................ 64
i
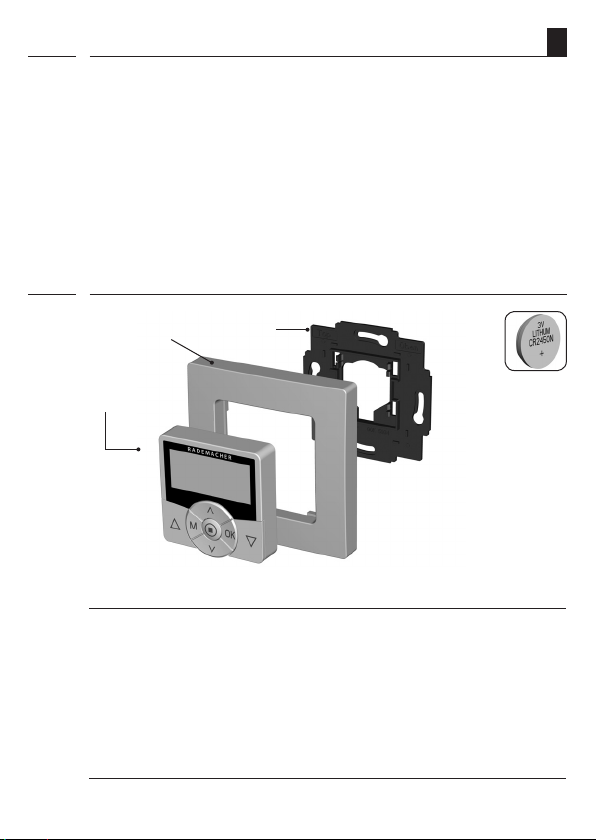
1. Included in delivery
2. 3.
1.
Legend
1. Control unit (50 x 50 mm)
2. Frame
3. Wall bracket
4. 1 x battery (type CR2450)
1 x double-sided adhesive strip (not illustrated)
Operating instructions (not illustrated)
23. Factory settings ............................................ 64
24. Time zone table ............................................ 65
25. Warranty conditions ..................................... 67
4.
Installation, see page 16
4
i
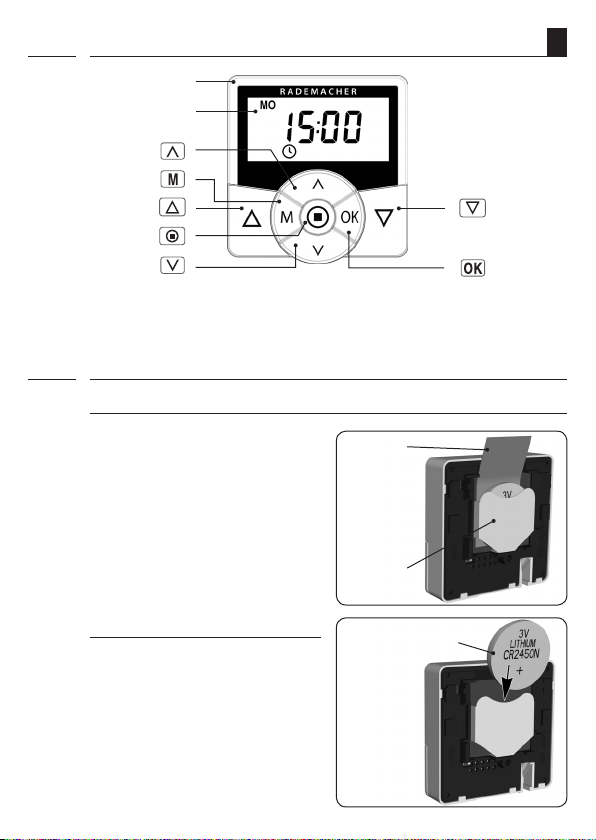
2. General view - operating unit
[ 1 ] Operating unit
Display
Set key
Menu key
Up key
SET/Stop key
Set key
i
2.1 General view - back / exchanging the battery
Initial commissioning
EN
Down key
OK key
The battery is factory-fitted in the battery
compartment together with a separating
film. Carefully pull out the separating film.
Subsequently the operational demonstrator
starts up automatically, see page 20.
Battery replacement
Carefully slide the battery out of the battery
compartment using a flat, non-conductive
object (e.g. a plastic rod).
Pay attention to the correct polarity when
inserting a new battery.
Separating
film
Battery com-
partment
The positive terminal
should point outwards.
5
i
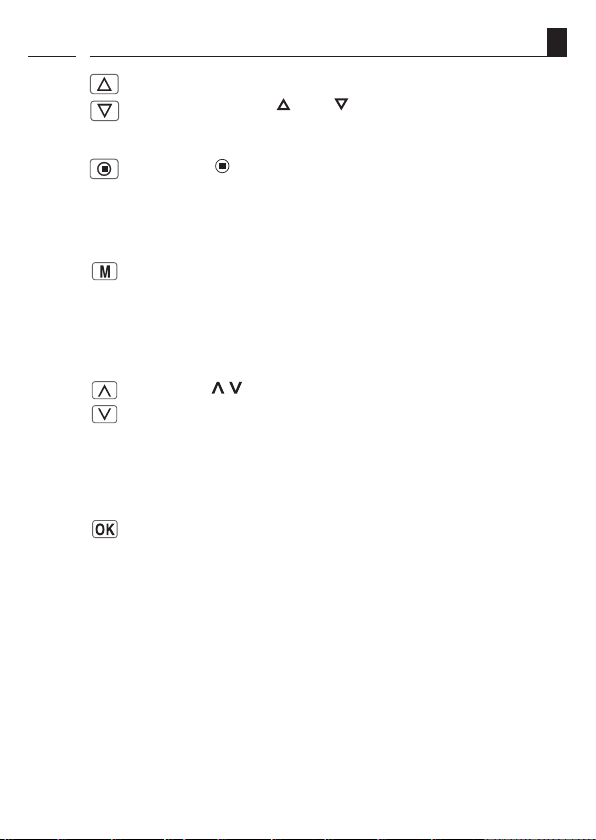
3. Brief description of the keys
Operating keys [ Up / Down ]
◆ Manual operation [ Up / Down ] or [ On / Off ].
SET/Stop key, [ ]
◆ Manual roller shutter stop or manual [ Off ].
◆ Key lock on/off (press for 4 seconds, only if key lock is active).
Menu key, [ M ]
◆ Open / close the main menu.
◆ Go back one step (e.g. to close a menu)
◆ Back to standard display (press for 1 second).
The set keys, [ / ]
◆ Select actuators (devices) (individually or group control).
◆ Select the desired menu item.
◆ Setting the parameters (increase / decrease) / pressing and holding a key for an
extended period causes the digits to change more quickly.
[ OK ] key
◆ Toggle auto/manual mode (press for 1 second).
◆ Confirms and opens the selected menu.
◆ Confirm entry.
◆ Continue to next entry.
EN
6
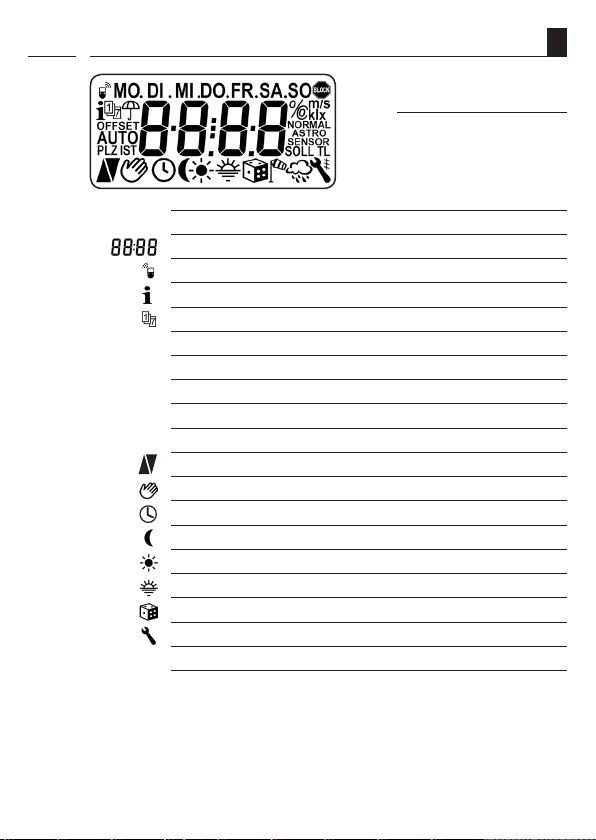
i
4. Display symbol legend
EN
Setting display illumination,
see page 57.
[ MO ... SO ]
[ OFFSET ]
[ SET ]
[ AUTO ]
[ PLZ ]
[ IST ]
[ T ]
[ NORMAL ]
[ ASTRO ]
Week days (MON...SUN)
Time / setting parameters
DuoFern icon
Information
Switching time programme
OFFSET (for Astro time)
Setting
Automatic operation
Postcode
ACTUAL value
Direction of travel - up / down
Automatic mode off
Timer periods
Automatic dusk function
Automated solar function
Automatic dawn function
Random function
System settings
Jog mode
Switching modes
7
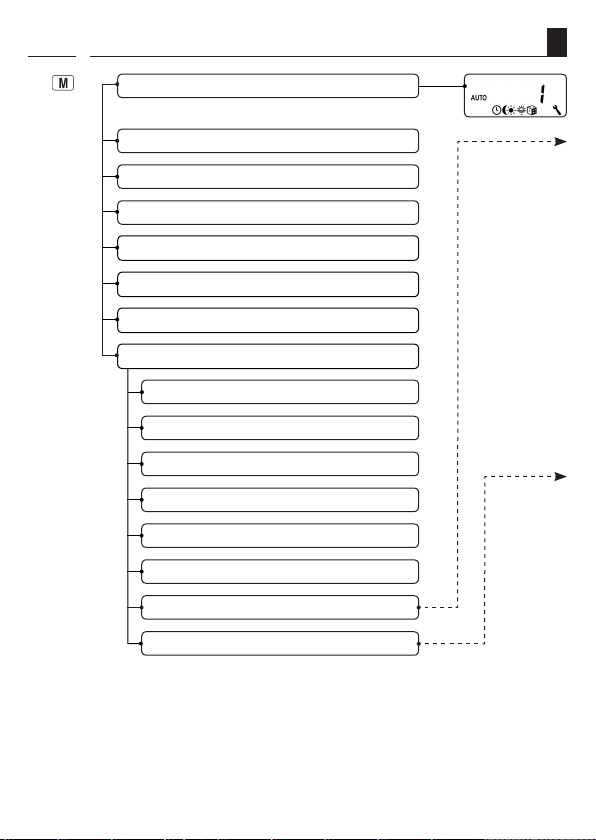
i
5. Menu overview - main menu and system settings
Main menu page 17
[1] Automatic mode page 34
[ 2 ] Switching times page 36
[ 3 ] Automatic dusk function page 42
[ 4 ] Automated solar function page 44
[ 5 ] Automatic dawn function page 46
[ 6 ] Random function page 48
[ 9 ] System settings page 49
> 9.1 Time/date p. page 50
> 9.2 Motor running time page 50
> 9.3 Ventilation position page 52
> 9.4 Postcode page 53
> 9.5 Switching time program page 54
> 9.7 Jog mode page 55
> 9.8 Device settings page 56
EN
> 9.9 DuoFern settings page 26
8
i
5.1 Menu overview - menu 9.8 / menu 9.9
> 9.8 Device settings page 56
> 9.8.1 Summer / Winter changeover page 57
> 9.8.3 Display backlighting page 57
> 9.8.5 Key lock page 58
> 9.8.7 Reversal of rotation direction page 59
> 9.8.9 End points page 60
> 9.8.0 Software version page 61
> 9.9 DuoFern settings page 26
> 9.9.1 Logging on/off page 28
> 9.9.7 DuoFern radio code page 31
> 9.9.8 Remote login/off page 33
EN
9
i
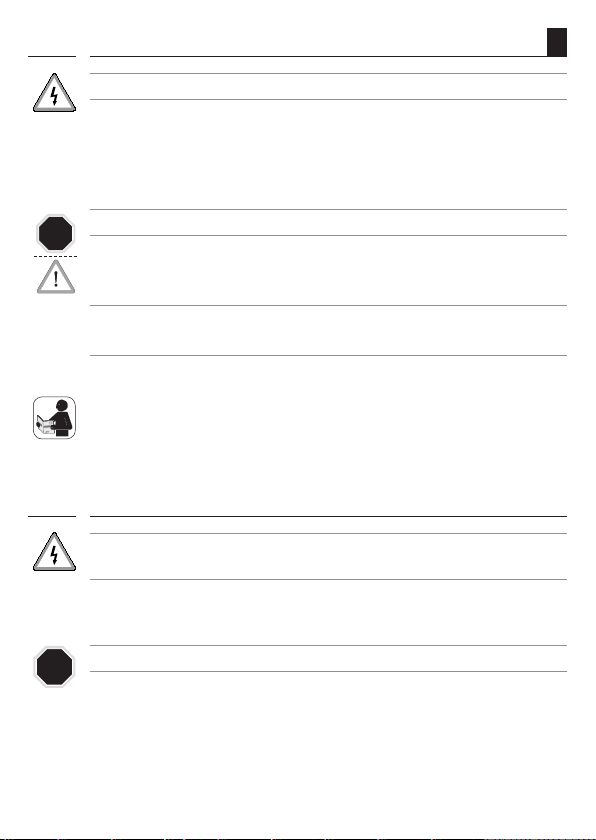
6. Key to symbols
Risk of fatal electric shock.
This sign warns of danger when working on electrical connections, components, etc. It requires
that safety precautions be taken to protect the life and health of the person concerned.
This concerns your safety.
STOP
Please pay particular attention and carefully follow all instructions marked with this symbol.
NOTE / IMPORTANT / CAUTION
This is to draw your attention to information that is important for trouble-free operation.
Please read the operating instructions for external actuators described at this point, (e.g. a
tubular motor).
i
7. General safety information
The use of defective equipment can lead to personal injury and damage to property
(malfunction).
◆ Never use defective or damaged equipment. Please contact our Customer Service depart-
ment in the event of faults, see page 68.
EN
10
Incorrect use leads to an increased risk of injury.
STOP
◆ Children may not be permitted to play with the DuoFern HomeTimer.
◆ Train all personnel to use the DuoFern HomeTimer safely.
◆ Avoid allowing persons with limited abilities to operate the equipment and prevent
children from playing with fixed controllers.

8. Proper use
i
Only use the DuoFern HomeTimer for controlling DuoFern actuators (e.g. DuoFern tubular
motor actuators / universal actuators, etc.) for:
◆ Roller shutters
◆ Venetian blinds and slats
◆ Awnings
or
◆ lamps and other electrical appliances
Operating conditions:
◆ The associated tubular motor must be fitted with a mechanical or electronic end posi-
tion switch.
◆ Only use the DuoFern HomeTimer in dry rooms.
◆ The DuoFern HomeTimer is battery-operated. It is not possible to connect it to the mains.
◆ The installation and operation of the DuoFern HomeTimer is only permitted for those
systems and devices where a malfunction in the transmitter or receiver would not cause
a danger to personnel or property or where this risk is already covered by other safety
equipment.
IMPORTANT
Radio systems which transmit on the same frequency can cause interference.
i
9. Improper use
Using the DuoFern HomeTimer for purposes other than previously mentioned is
impermissible and is regarded as improper use.
◆ Never use the DuoFern radio system and its components (e.g. DuoFern HomeTimer) for
remote control of devices and systems with heightened safety-relevant requirements or
where there is a heightened risk of accidents. This shall require additional safety equipment. Observe the respective statutory regulations for the installation of such systems.
◆ Do not install the DuoFern HomeTimer outside.
EN
11

i
10. Brief description
The battery-operated DuoFern HomeTimer serves for controlling and configuring up to 20
DuoFern actuators. The DuoFern HomeTimer offers the option of manually controlling and
setting a pair of switching times for all registered DuoFern actuators.
The DuoFern receivers (actuators) and transmitters must be connected to the
DuoFern network.
NOTE
You can find a detailed description of the various functions, configuration options and possible
combinations for the DuoFern system at:
http://www.rademacher.de/duofern.
The following DuoFern devices cannot be registered, configured or controlled
with the DuoFern HomeTimer:
◆ DuoFern sensors
◆ DuoFern transmitters
Mounting with existing switches
The DuoFern HomeTimer can be integrated into many commercially available switch ranges.
Suitable switch ranges are detailed in the following section.
EN
12

i
10.1 Compatible switch ranges (www.rademacher.de)
Manufacturer Switch range
BERKER Arsys / K1 / S1
BUSCH-JAEGER Busch-Duro 2000 Si / Reflex Si / alpha exclusive / alpha nea /
solo / impuls
GIRA Standard-System / S-Color-System / stainless steel range /
Standard 55
JUNG CD 500 / ST 550 / LS 990 / CDplus as per CD but with coloured rings
MERTEN M1 / Atelier / Artec / Trancent / Antik Neu
PEHA Standard / Dialog / Aura
LEGRAND Creo / Tenara
VEDDER Alessa (plus)
NOTE
◆ It may be necessary to use an adapter frame 50 x 50 * (DIN 49075), depending on the
respective switch range used.
* not included
EN
13

i
10.2 Overview of features
◆ Display background illumination
◆ Installation wizard for easy commissioning.
◆ Manual operation on site
◆ Group or single control possible
◆ Switching automatic mode on/off
◆ Easy configuration with menu-driven operation
◆ Timer periods
■ Configurable opening [ ] and closing times [ ]
◆ Switching time programme:
■ [ 1 ] Weekly switching times
– One switching time pair [ / ] for [ MO...SO ] (MON...SUN)
■ [ 2 ] Weekday and weekend switching times
– One switching time pair [ / ] for [ MO...FR ] (MON...FRI)
– One switching time pair [ / ] for [ SA + SO ] (SAT...SUN)
■ [ 3 ] Individual day switching times
– One switching time pair [ / ] for every day of the week
[ MO / DI / MI / DO / FR / SA / SO ] (MON / TUE / WED / THU / FRI / SAT / SUN)
◆ Automatic dusk function with "Astro" programme
◆ Switch the automated solar function on/off
■ Setting the sunshine position for the selected actuator
◆ Automatic dawn function with the "Astro" programme
◆ Random function (random delay of 0 to 30 minutes)
◆ Setting the motor running time
◆ Ventilation position
◆ End point setting
◆ Key lock
◆ Jog mode for Venetian blinds
◆ Switching reversal of rotation direction on/off
◆ Automatic summer / winter changeover
◆ Permanent storage of the settings
EN
14

i
10.2 Overview of features
Description and configuration of the individual functions.
A precise description of the individual functions and settings is included starting on page
17.
DuoFern settings
The settings required for operating the equipment in a DuoFern network are specified
starting on page 26.
EN
15
i
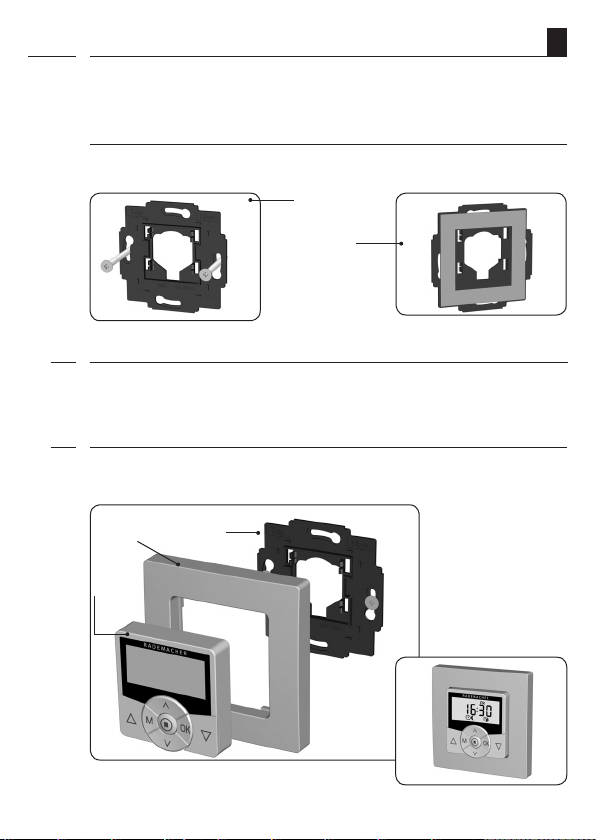
11. Assembly
The DuoFern HomeTimer is intended for surface-mounting. The supplied wall bracket [ 3 ]
can be screwed in place or bonded to the wall.
Installation procedure:
Mount the wall bracket in the desired mounting position.
1.
Screws *
or
adhesive
* not included
Carefully remove the separating film from the battery compartment, see page 5.
2.
Please ensure that none of the buttons are pressed during the mounting process.
Finally, apply slight pressure to insert the operating unit [ 1 ] and covering frame [ 2 ] into
3.
the wall bracket [ 3 ].
EN
2.
3.
1.
16

i
12. Important information prior to initial commissioning
IMPORTANT
◆ Prior to initial commissioning of the DuoFern HomeTimer, it must be ensured that the
end points are configured for all connected tubular motors and belt winders if they are
being used for controlling roller shutters / Venetian blinds.
◆ If the end points have not yet been configured, it is vital that both end points are config-
ured for all tubular motors and belt winders, as failure to do so can lead to malfunctions.
◆ In order to do so, follow the information provided in the operating manual for the respec-
tive tubular motor or belt winder.
◆ For electronic RADEMACHER tubular motors from year of manufacture 2000 onwards, the
end points can be configured with the help of the DuoFern HomeTimer, see page 60.
i
13. Brief description of the standard display and main menu
The standard display (example)
◆ Displays the current day of the week and time.
◆ Displays the activated functions.
◆ Manual operation of the DuoFern HomeTimer is only possible from the standard
display.
EN
17
i
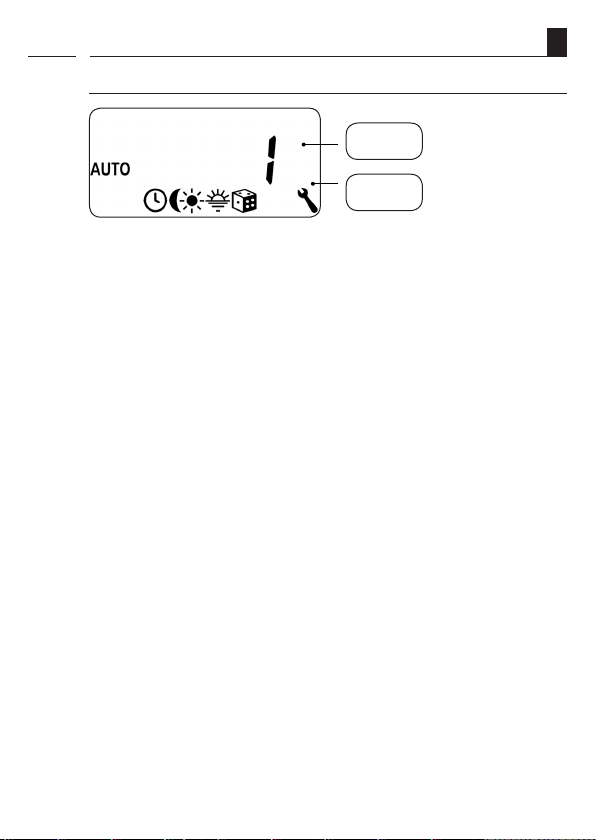
13. Brief description of the standard display and main menu
The main menu
Menu
number
Functions /
menus
◆ Enables display and selection of the individual functions and menus.
◆ Manual operation is not possible from the main menu.
◆ No automatic control commands will be executed during the configuration process.
◆ If no key is pressed within 120 seconds, the display automatically changes from the active
menu back to the standard display. Changes to settings are nevertheless saved.
EN
18
i
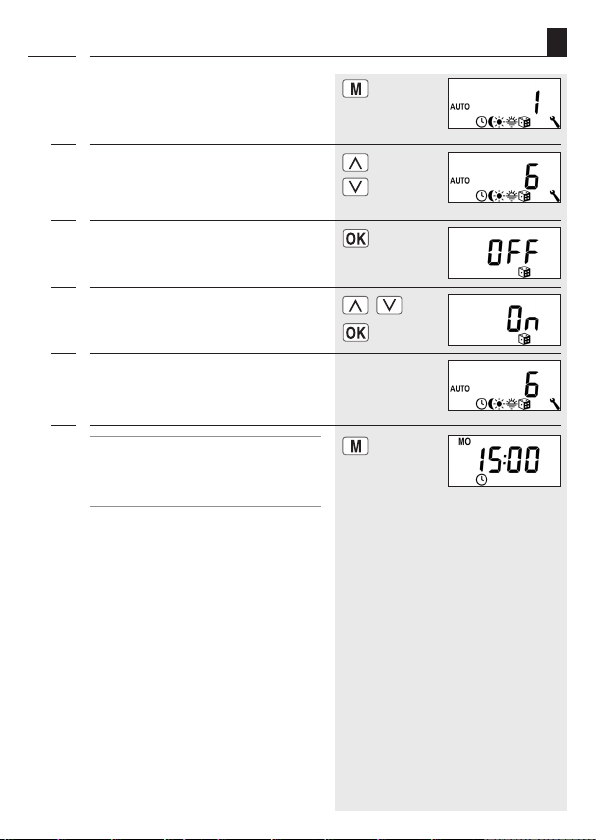
13.1 Opening and closing the menus (example)
Calling up the main menu.
1.
By pressing the [ M ] key in the standard
display.
Select the desired menu or menu number.
2.
The selected menu is indicated by a flashing icon.
Open the menu by pressing the [ OK ]
3.
button.
Select the desired setting and confirm with
4.
[ OK ].
Subsequently the main menu will be
5.
displayed again.
NOTE
Pressing the [ M ] key from any of the menus
will return you to the standard display.
EN
approx.
1 sec.
19
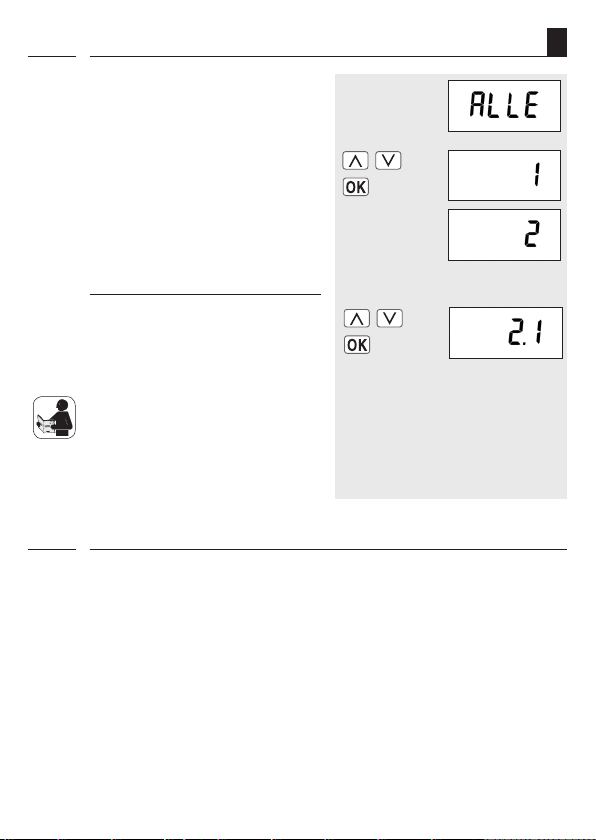
13.2 Group and single control
i
The DuoFern HomeTimer offers the option
of simultaneously controlling [ ALLE ] (ALL)
registered DuoFern actuators.
Alternatively, it is also possible to select
individual actuators to be controlled.
Adjustment and control of multichannel DuoFern actuators.
Multi-channel actuators enable you to select
and control each channel independently from
the others.
Please read the respective operating manual
for the registered DuoFern actuator to find
out which control signals and functions are
supported.
i
14. Initial commissioning with the help of the installation wizard
An installation wizard is available in order to help you configure the DuoFern HomeTimer
quickly and easily. The wizard automatically guides you through the configuration process for
initial commissioning or after a software reset (see page 62).
Quitting the installation wizard
Pressing the [ M ] key for one second causes the installation wizard to be cancelled prematurely.
Readiness for operation
The DuoFern HomeTimer is ready for use as soon as the installation wizard has finished. In
addition, you can individually customise your settings and make changes at any time from
the main menu and the system settings menu.
EN
Example
20

i
14. Initial commissioning with the help of the installation wizard
Configuration sequence for the installation wizard:
> Time [ 12:00 ]
> Date [ Day.Month ]
> Year [ 2013 ]
> Postcode [ 46 ]
> Assign actuator [ 01 - nn ]
> Select switching time mode for opening time / [ NORMAL / ASTRO / OFF ]
> Opening time [ ]
> Select switching time mode for closing time / [ NORMAL / ASTRO / OFF ]
> Closing time [ ]
> DONE
Set and confirm the time.
1.
NOTE
Pressing a setting key for an extended period
causes the numbers to progress more quickly.
Set and confirm the date.
2.
Set and confirm the year.
3.
EN
[ Day.Month ] )
Set and confirm the first two digits of your
4.
German postcode [ PLZ ] or the desired
international time zone.
Time zone table,
see page 65
21
 Loading...