

Page 1

User’s Guide User’s Guide User’s Guide User’s Guide User’s Guide
Quantum Scalar 50
Quantum Scalar 50
Scalar Series
81-81768-02 A01
Page 2

Quantum Scalar 50 User’s Guide, 81-81768-02 A01, July 2008, Made in USA.
Quantum Corporation provides this publication “as is” without warranty of any kind, either express or
implied, including but not limited to the implied warranties of merchantability or fitness for a particular
purpose. Quantum Corporation may revise this publication from time to time without notice.
COPYRIGHT STATEMENT
Copyright 2008 by Quantum Corporation. All rights reserved.
Your right to copy this manual is limited by copyright law. Making copies or adaptations without prior
written authorization of Quantum Corporation is prohibited by law and constitutes a punishable violation of
the law.
TRADEMARK STATEMENT
DLT, SDLT, DLTtape III, DLTtape IV and Super DLTtape I are all trademarks of Quantum Corporation.
Other trademarks may be mentioned herein which belong to other companies.
Page 3

Contents
Preface xvii
StorageCare Guardian...................................................................................xxii
Chapter 1 Library Description 1
Overview............................................................................................................. 2
Tape Drives......................................................................................................... 5
Tape Drive Types........................................................................................ 5
Library Features................................................................................................. 8
Front Panel................................................................................................... 8
Internal Layout.......................................................................................... 10
Back Panel.................................................................................................. 11
DLTSage™ Tape Security............................................................................... 13
Mixed Media Support ..................................................................................... 13
Capacity on Demand....................................................................................... 13
Enabling Capacity on Demand............................................................... 14
Library Scalability (Stacked Configurations)............................................... 15
Multiple Library Stack Requirements ................................................... 15
Getting Started ................................................................................................. 18
Installing the Quantum Scalar 50........................................................... 18
Cabling the Quantum Scalar 50 Series .................................................. 19
Loading Tape Cartridges......................................................................... 20
Initial Configuration................................................................................. 20
Quantum Scalar 50 User’s Guide iii
Page 4

Contents
Chapter 2 Basic Library Operations 21
Installing Tape Cartridges .............................................................................. 21
Taking ESD Precautions ..........................................................................23
SDLT Cartridges ....................................................................................... 24
LTO Cartridges .........................................................................................26
Cleaning Cartridges..................................................................................28
Preparing the Library for Operation............................................................. 30
Close the Cabinet Doors and Access Panels .........................................30
Connecting to Host Workstations ..........................................................31
Turning the Library On and Off .................................................................... 36
Turning On the Library............................................................................ 36
Turning Off the Library ...........................................................................37
Placing the Library On-line or Off-line.................................................. 37
Using the OCP.................................................................................................. 37
Home Screen.............................................................................................. 37
OCP Buttons .............................................................................................. 38
OCP Components ............................................................................................ 38
Info Screen ................................................................................................. 40
Operations Screen..................................................................................... 45
Setup Screen...............................................................................................50
Diags Screen .............................................................................................. 57
Load Port Configuration................................................................................. 60
Chapter 3 Quantum Scalar 50 Remote Management 63
Quantum Scalar 50 Web Pages ......................................................................64
Quantum Scalar Web Page Menu Items................................................ 64
Accessing Scalar 50 Web Pages...............................................................67
Using the Quantum Scalar 50 Web Pages............................................. 67
Quick Status............................................................................................... 68
Status.................................................................................................................. 70
Overview Page .......................................................................................... 70
Hardware Status Page..............................................................................71
Event Log Page.......................................................................................... 72
Statistics Page ............................................................................................ 73
Operations......................................................................................................... 77
Accessing the Operations Page............................................................... 77
Find Page....................................................................................................78
Move Page.................................................................................................. 80
Inventory Page ..........................................................................................82
Drives Page................................................................................................ 83
Quantum Scalar 50 User’s Guide iv
Page 5

Contents
Setup .................................................................................................................. 84
Accessing the Setup Page ........................................................................85
Identification..............................................................................................86
Users ........................................................................................................... 87
Key Users ................................................................................................... 88
SCSI/Fibre .................................................................................................91
iSCSI Bridge............................................................................................... 92
Network .....................................................................................................93
Events .........................................................................................................95
Date & Time...............................................................................................99
Library......................................................................................................101
Partitions ..................................................................................................102
Field Service............................................................................................. 108
Setup Wizard........................................................................................... 108
Secure Key.......................................................................................................113
Protection Mode for Cartridges............................................................ 115
Enable/Disable Secure Key for Drives................................................ 116
Select Secure Key for Library................................................................ 117
Assign Secure Key to Cartridge............................................................117
Create Secure Key Name/Secure Key Pair......................................... 118
Delete Secure Key Name .......................................................................119
Backup Secure Key File.......................................................................... 120
Upload Secure Key File.......................................................................... 121
Secure Key Best Practices and Tape Migration .........................................122
Best Practices ...........................................................................................122
Key Migration Scenarios........................................................................ 122
Utilities ............................................................................................................124
Library......................................................................................................125
System Tests ............................................................................................ 127
Maintenance ............................................................................................ 129
Logs...........................................................................................................131
Tasks .........................................................................................................133
Reference .........................................................................................................134
Logout..............................................................................................................136
Chapter 4 SNMP Trap List 137
Chapter 5 Troubleshooting 164
Common Problems and Solutions...............................................................164
Quantum Scalar 50 User’s Guide v
Page 6

Contents
Start-up Problems ...................................................................................165
OCP Problems .........................................................................................166
Robotics (Hand) Problems.....................................................................166
Operating Problems ............................................................................... 168
Interpreting System LED Status .................................................................. 170
Operator Control Panel (OCP) LED Status......................................... 171
System Controller Board (SCB) LED Status........................................171
Power Supply LED Status .....................................................................175
Tape Drive LED Status...........................................................................176
Appendix A Specifications 177
Physical Specifications ..................................................................................178
Performance Specifications........................................................................... 179
Reliability Specifications...............................................................................180
Tape Drive Specifications .............................................................................180
Environmental Specifications.......................................................................181
Noise Levels.............................................................................................181
SCSI Specifications.........................................................................................181
Appendix B SDLTtape Cartridge Maintenance 182
Handling DLTtape Cartridges.....................................................................182
Visual Inspection of DLTtape Cartridges...................................................183
When To Visually Inspect a DLTtape Cartridge................................183
Visual Inspection Procedure .................................................................183
Appendix C Installing the Scalar 50 Library 187
Selecting an Installation Location................................................................187
Rack Space Requirements...................................................................... 188
Environmental Conditions....................................................................189
Preparing for the Installation ....................................................................... 189
Providing Necessary Tools and Equipment .......................................189
Taking ESD Precautions ........................................................................189
Installing the Library.....................................................................................190
Locating the Mounting Position ...........................................................190
Installing the Library.............................................................................. 192
Loading the Tape Cartridges ................................................................207
Quantum Scalar 50 User’s Guide vi
Page 7

Contents
Initial Configuration...............................................................................207
Emergency Library Access ........................................................................... 213
Appendix D Repacking the Scalar 50 Library 216
Removing the Library from the Rack..........................................................217
Installing the Internal Shipping Restraints ................................................220
Packing the Library for Shipment ............................................................... 224
Appendix E Firmware Upgrade Instructions for Stacked Libraries 226
Changing the Library Stack Role.................................................................227
Uploading Library Firmware.......................................................................228
Returning the Library Stack Role ................................................................ 233
Appendix F Regulatory Statements 235
Laser Statement....................................................................................... 238
Glossary 259
Index 261
Quantum Scalar 50 User’s Guide vii
Page 8

Figures
Figure 1 Scalar 50......................................................................................... 2
Figure 2 Slot Numbering, Scalar 50 SDLT ............................................... 3
Figure 3 Slot Numbering, Scalar 50 LTO.................................................. 4
Figure 4 Scalar 50 Front Panel.................................................................... 8
Figure 5 Scalar 50 Internal Layout .......................................................... 10
Figure 6 Scalar 50 Back Panel................................................................... 12
Figure 7 Multiple Library Stack (Cross Section..................................... 16
Figure 8 Rack Space Requirements......................................................... 19
Figure 9 Connecting the Library to the Local Area Network ............. 20
Figure 10 Inserting a Barcode Label (SDLT)............................................ 25
Figure 11 SDLT Cartridges......................................................................... 26
Figure 12 LTO Cartridges........................................................................... 28
Figure 13 SDLT Cleaning Cartridges........................................................ 29
Figure 14 LTO Cleaning Cartridges.......................................................... 29
Figure 15 Closing the Scalar 50 Front Doors............................................ 30
Figure 16 Scalar 50 Cable Configuration (SCSI Full Height Drives).... 32
Figure 17 Scalar 50 Cable Configuration (Native Fibre Channel Full
Height Drives) ............................................................................ 32
Quantum Scalar 50 User’s Guide viii
Page 9

Figures
Figure 18 Scalar 50 Cable Configuration (SCSI Half-Height Drives)... 33
Figure 19 Scalar 50 Cable Configuration (SAS Half-Height Drives).... 33
Figure 20 Scalar 50 Cable Configuration (Native Fibre Channel Half-
Height Drives)............................................................................. 34
Figure 21 Scalar 50 Cable Configuration (Stacked)................................. 35
Figure 22 Turning On the Library ............................................................. 36
Figure 23 OCP Home Screen......................................................................38
Figure 24 OCP Component Tree................................................................39
Figure 25 Info Screen...................................................................................40
Figure 26 Overview Screen.........................................................................41
Figure 27 Hardware Screen........................................................................ 42
Figure 28 Event Log Screen........................................................................43
Figure 29 Statistics Screen...........................................................................44
Figure 30 Operations Screen....................................................................... 45
Figure 31 Library Operations Screen ........................................................ 46
Figure 32 Match Label Screen ....................................................................47
Figure 33 Move From Screen...................................................................... 48
Figure 34 Drive Operations Screen ........................................................... 49
Figure 35 Setup Screen ................................................................................51
Figure 36 Cabinet Setup Screen ................................................................. 51
Figure 37 Partitions Setup Screen.............................................................. 53
Figure 38 Security Screen............................................................................54
Figure 39 Network Screen ..........................................................................55
Figure 40 Date and Time Screen................................................................ 57
Figure 41 Diagnostic Screen .......................................................................57
Figure 42 System-level Test Screen ...........................................................58
Figure 43 Subsystem Tests Screen............................................................. 59
Figure 44 Component Tests Screen ........................................................... 60
Figure 45 Load Port Settings ......................................................................62
Quantum Scalar 50 User’s Guide ix
Page 10

Figures
Figure 46 Quantum Scalar 50 Web Page Menu Items............................65
Figure 47 Quantum Tape Security and Tape Encryption Menus......... 66
Figure 48 Overview Page............................................................................ 67
Figure 49 Status Page ..................................................................................70
Figure 50 Hardware Status Page ............................................................... 71
Figure 51 Event Log Page ...........................................................................72
Figure 52 Statistics Page.............................................................................. 76
Figure 53 Operations Page..........................................................................77
Figure 54 Find Page ..................................................................................... 78
Figure 55 Move Page ...................................................................................81
Figure 56 Inventory Page............................................................................ 82
Figure 57 Drives Page.................................................................................. 83
Figure 58 Setup Page ...................................................................................85
Figure 59 Users Page ................................................................................... 87
Figure 60 Create Key User..........................................................................89
Figure 61 Remove Secure User .................................................................. 89
Figure 62 Change Key User Password......................................................90
Figure 63 SCSI Page..................................................................................... 91
Figure 64 iSCSI Page....................................................................................93
Figure 65 Network Page .............................................................................94
Figure 66 Events Page ................................................................................. 96
Figure 67 SNMP Section of Event Page ....................................................99
Figure 68 Date & Time Page..................................................................... 100
Figure 69 Library Page..............................................................................101
Figure 70 Native Fibre Channel Partition Example.............................. 103
Figure 71 Partitions Page ..........................................................................105
Figure 72 Setup Wizard............................................................................. 109
Figure 73 Setup Wizard (Library Offline) .............................................. 109
Figure 74 Setup Wizard (Date and Time)...............................................110
Quantum Scalar 50 User’s Guide x
Page 11

Figures
Figure 75 Setup Wizard (Configure Devices)........................................111
Figure 76 Setup Wizard (Configuring Load Ports)............................... 111
Figure 77 Setup Wizard (Configuring Partition)...................................112
Figure 78 Setup Wizard (Wizard Completed).......................................113
Figure 79 Secure Key Page........................................................................ 114
Figure 80 Protection Mode for Cartridges..............................................115
Figure 81 Enable/Disable Secure Key for Drives.................................. 116
Figure 82 Select Secure Key for Library.................................................. 117
Figure 83 Assign Secure Key to Cartridge ............................................. 117
Figure 84 Create Secure Key Name/Secure Key Pair .......................... 118
Figure 85 Delete Secure Key Name.........................................................119
Figure 86 Backup Secure Key File ........................................................... 120
Figure 87 Upload Secure Key File ...........................................................121
Figure 88 Utilities Page ............................................................................. 124
Figure 89 Library Page..............................................................................125
Figure 90 Selftest Page...............................................................................127
Figure 91 System Tests Page .................................................................... 128
Figure 92 Maintenance Page .................................................................... 129
Figure 93 Logs Page...................................................................................132
Figure 94 View Log Page .........................................................................132
Figure 95 Tasks Page ................................................................................. 133
Figure 96 Task List Example ....................................................................134
Figure 97 Reference Page..........................................................................135
Figure 98 About Page................................................................................ 135
Figure 99 Location of the Reel Locks and the Hub ............................... 184
Figure 100 Opening the Tape Cartridge Door.........................................185
Figure 101 Write Protect Switch ................................................................ 186
Figure 102 Rack Space Requirements .......................................................188
Figure 103 Rail Adapter Orientation......................................................... 194
Quantum Scalar 50 User’s Guide xi
Page 12

Figures
Figure 104 Assembling the Left-Hand Rack Mount Shelves................. 195
Figure 105 Assembling the Right-Hand Rack Mount Shelves .............. 196
Figure 106 Installing the Rack Mount Shelves......................................... 197
Figure 107 Back Mounting Brackets..........................................................199
Figure 108 Installing the Scalar 50 in the Rack ........................................200
Figure 109 Securing the Back of the Library............................................201
Figure 110 Scalar 50 Tape Drive Numbering...........................................202
Figure 111 Scalar 50 Cable Configuration (SCSI Full Height Drives)..203
Figure 112 Scalar 50 Cable Configuration (Native Fibre Channel Full
Height Drives)........................................................................... 204
Figure 113 Scalar 50 Cable Configuration (SCSI Half-Height Drives) . 204
Figure 114 Scalar 50 Cable Configuration (SAS Half-Height Drives).. 205
Figure 115 Scalar 50 Cable Configuration (Native Fibre Channel Half-
Height Drives)........................................................................... 205
Figure 116 Scalar 50 Cable Configuration (Stacked)...............................206
Figure 117 Turning On the Library ........................................................... 208
Figure 118 Setup Screen..............................................................................210
Figure 119 Library Options Screen............................................................210
Figure 120 Date and Time Screen..............................................................211
Figure 121 Network Screen ........................................................................212
Figure 122 Opening the Right and Left Magazine Access Doors .........214
Figure 123 Removing the Magazines........................................................ 215
Figure 124 Removing the Scalar 50 Library .............................................219
Figure 125 Opening the Right and Left Magazine Access Doors .........221
Figure 126 Installing the Hand Restraint.................................................. 222
Figure 127 Installing the Restraining Bolt................................................223
Figure 128 Preparing the Library for Shipping .......................................225
Figure 129 Setup Screen..............................................................................227
Figure 130 Cabinet Screen .......................................................................... 227
Figure 131 Connecting to the Library SCB...............................................229
Quantum Scalar 50 User’s Guide xii
Page 13

Figures
Figure 132 Overview Page.......................................................................... 230
Figure 133 Utilities Page ............................................................................. 231
Figure 134 Maintenance Page .................................................................... 232
Figure 135 Setup Screen..............................................................................233
Figure 136 Cabinet Screen .......................................................................... 233
Quantum Scalar 50 User’s Guide xiii
Page 14

Tables
Table 1 DLT-S4 Performance Characteristics......................................... 5
Table 2 Quantum LTO-3 (Half- Height) Performance Characteristics
6
Table 3 HP LTO-3 (Full Height) Performance Characteristics............ 6
Table 4 HP LTO-4 (Half- Height) Performance Characteristics.......... 7
Table 5 HP LTO-4 Performance Characteristics.................................... 7
Table 6 Front Panel Features .................................................................... 9
Table 7 Scalar 50 Capacity Levels.......................................................... 14
Table 8 Capacity, Scalar 50 Multiple Library Stack - LTO (42U High
Rack)17
Table 9 Capacity, Scalar 50 Multiple Library Stack - SDLT (42U High
Rack)............................................................................................. 17
Table 10 Hardware Information.............................................................. 42
Table 11 Library Operations Options...................................................... 46
Table 12 Drive Options ............................................................................. 50
Table 13 Cabinet Setup.............................................................................. 52
Table 14 Partitions Setup .......................................................................... 53
Table 15 Security Setup............................................................................. 54
Quantum Scalar 50 User’s Guide xiv
Page 15

Tables
Table 16 Import/Export Option Settings................................................ 61
Table 17 Quick Status Library Health Conditions ................................ 68
Table 18 Quick Status Health Messages ................................................. 68
Table 19 Statistics Information.................................................................74
Table 20 Identification Information......................................................... 86
Table 21 User Information........................................................................88
Table 22 Native Fibre Channel Configuration Options........................ 92
Table 23 Network Configuration Fields .................................................95
Table 24 Email Notification ......................................................................97
Table 25 Send Email Test ..........................................................................97
Table 26 SNMP Trap Selections............................................................... 99
Table 27 Library Configuration.............................................................. 101
Table 28 Capacity on Demand Configuration..................................... 102
Table 29 Creating a Partition..................................................................106
Table 30 Configuration File Types......................................................... 130
Table 31 Start-up Problems..................................................................... 165
Table 32 OCP Problems........................................................................... 166
Table 33 Robotics (Hand) Problems......................................................167
Table 34 Problems During Library Operation.....................................168
Table 35 OCP LED States........................................................................171
Table 36 SCSI SCB LED........................................................................... 172
Table 37 Surrogate SCB LED .................................................................. 173
Table 38 Fibre Channel SCB LED ..........................................................174
Table 39 Power Supply LEDs................................................................. 175
Table 40 Tape Drive LEDs ......................................................................176
Table 41 Unit Dimensions/Weight .......................................................178
Table 42 Capacities................................................................................... 178
Table 43 Performance Specifications..................................................... 179
Table 44 Library Performance................................................................179
Quantum Scalar 50 User’s Guide xv
Page 16

Tables
Table 45 Reliability Specifications ......................................................... 180
Table 46 Tape Drive Specifications........................................................180
Table 47 Power .........................................................................................181
Table 48 Climate.......................................................................................181
Table 49 Rack Hole Types.......................................................................190
Table 50 Scalar 50 Rail Hole Patterns and Mounting Positions ........191
Table 51 Library Mounting Hardware..................................................192
Table 52 Back Mounting Bracket Orientation...................................... 198
Table 53 Setting Up the Cabinet.............................................................211
Quantum Scalar 50 User’s Guide xvi
Page 17

Preface
Audience
Purpose
Document Organization
This document is written for operators of the Scalar 50 tape library.
This document explains how to use the Scalar 50 tape library.
This document is organized as follows:
• Chapter 1, Library Description, provides an overview of the Scalar 50
library.
• Chapter 2, Basic Library Operations, introduces the library OCP
screens and explains how to use them to perform basic library
operations such as moving tape cartridges within the library,
removing the tape cartridge magazines, and viewing library
information.
• Chapter 3, Quantum Scalar 50 Remote Management, explains how to
change the library configuration and manage the library using the
remote GUI.
• Chapter 4, SNMP Trap List, lists the SNMP traps supported by the
Scalar 50 library.
• Chapter 5, Troubleshooting, discusses problems you may encounter
during the setup and operation of the Scalar 50 library.
Quantum Scalar 50 User’s Guide xvii
Page 18

Preface
• Appendix A, Specifications, lists the specifications for the Scalar
50 library.
Appendix B, SDLTtape Cartridge Maintenance, provides
•
guidelines for handling SDLT
cartridges and visually
inspecting them if necessary.
Appendix C, Installing the Scalar 50 Library, provides installation
•
information for the Scalar 50 library.
Appendix D, Repacking the Scalar 50 Library, provides repacking
•
information for the Scalar 50 library.
•
Appendix E, Firmware Upgrade Instructions for Stacked Libraries,
provides procedures for upgrading library firmware to
stacked
libraries.
Appendix F, Regulatory Statements, provides regulatory
•
information for the Scalar 50 library.
This document concludes with a glossary and a detailed index.
Notational Conventions
This manual uses the following conventions:
Note: Notes emphasize important information related to the main
topic.
Caution: Cau
Warning: Wa
tions indicate potential hazards to equipment and are
included to prevent damage to equipment.
rnings indicate potential hazards to personal safety and
are included to prevent injury.
This manual uses the following:
• Right side of the library — Refers to the
right side as you face
the component being described.
• Left side of the library — Refers to the left
side as you face the
component being described.
Quantum Scalar 50 User’s Guide xviii
Page 19

Preface
Related Documents
Documents related to the Scalar 50 tape library are shown below:
Quantum Scalar 50 Documentation
Document No. Title Description
81-81767
81-81769
81-81770
81-81539
81-81771
Scalar 50 Quick Start Pr
installing the Scalar 50
library in a rack.
Scalar 50 Tape Drive
nstallation Instructions
I
Scalar 50 Tape Drive
Re
placement Instructions
TC2201 iSCSI Bridge
User’s Guide
Scalar 50 Magazine
Upgrade Instructions
Provides information on
installing tape drives in
the
Provides information on
replacing tape drives in
the
Provides web
interface information for
the TC2201 iSCSI bridge.
Provides installation
information for both the
SDLT and LTO tape
magazines.
ovides information on
Scalar 50 library.
Scalar 50 library.
and serial
0
6311658
81-81627
Refer to the appropriate product manuals fo
tape drives and cartridges.
Quantum Scalar 50 User’s Guide xix
SNMP Integration Guide Pr
Scalar 50 Series
DLTSage™ Secure Tape
Quick Start Guide
ovides integration
information for SNMP.
Provides information on
creating secure keys on
your library.
r information about your
Page 20

Preface
SCSI-2 Specification 0
The SCSI-2 communications specification is the proposed American
National Standard for information systems, dated March 9, 1990. Copies
may be obtained from:
Global Engineering Documents
15 Inverness Way, East
Englewood, CO 80112
(800) 854-7179 or (303) 397-2740
Contacts
Quantum company contacts are listed below.
Quantum Corporate Headquarters 0
To order documentation on the DXi7500 or other products contact:
Quantum Corporation (Corporate Headquarters)
1650 Technology Drive, Suite 700
San Jose, CA 95110-1382
Technical Publications 0
To comment on existing documentation send e-mail to:
doc-comments@quantum.com
Quantum Home Page 0
Visit the Quantum home page at:
http://www.quantum.com
Getting More Information or
Help
StorageCare™, Quantum’s comprehensive service approach, leverages
advanced data access and diagnostics technologies with crossenvironment, multi-vendor expertise to resolve backup issues faster and
at lower cost.
Accelerate service issue resolution with these exclusive Quantum
StorageCare services:
Quantum Scalar 50 User’s Guide xx
Page 21

Preface
• Service and Support Website - Register products, license software,
browse Quantum Learning courses, check backup software and
operating system support, and locate manuals, FAQs, firmware
downloads, product updates and more in one convenient location.
Benefit today at:
http://www.quantum.com/ServiceandSupport/
index.aspx
• eSupport - Submit online service requests, update contact
information, add attachments, and receive status updates via email.
Online Service accounts are free from Quantum. That account can
also be used to access Quantum’s Knowledge Base, a comprehensive
repository of product support information. Sign up today at:
http://
www.quantum.com/ServiceandSupport/eSupport/Index.aspx.
• StorageCare Guardian - Securely links Quantum hardware and the
diagnostic data from the surrounding storage ecosystem to
Quantum's Global Services Team for faster, more precise root cause
diagnosis. StorageCare Guardian is simple to set up through the
internet and provides secure, two-way communications with
Quantum’s Secure Service Center. More StorageCare Guardian
information can be found at:
http://www.quantum.com/
ServiceandSupport/Services/GuardianInformation/Index.aspx.
For further assistance, or if training is desired, contact Quantum
Technical Assistance Center:
North America: +1-800-284-5101
UK, France and Germany 00800 4 QUANTUM
EMEA +44 1256 848 766
For worldwide support: http://www.quantum.com/ServiceandSupport/
eSupport/Index.aspx
Quantum Scalar 50 User’s Guide xxi
Page 22

Preface
StorageCare Guardian
StorageCare Guardian 0
StorageCare Guardian is a remote monitoring and diagnostic solution that
enables Quantum to proactively monitor the
products, use diagnostic data to predict possible failures, and determine
whether or not the problem involves a Quantum product or other critical
component in the environment.
health of Quantum
Benefits
More Reliable Backups
Faster Resolution Time
StorageCare Guardian gives the customer added assurance that Quantum
will make sure its products are running optimally to ensure maximum
operational efficiency. Deploying this solution is easy and enables
customers to minimize the costs associated with system downtime and
service issues should a problem arise.
Through continuous 24x7x365 monitoring, StorageCare Guardian
proactively checks Quantum systems for common errors and alerts the
customer when a Quantum product is underperforming. By proactively
identifying red flags, the risk of failed backups and machine downtime
can be mitigated.
When the system is down, StorageCare Guardian provides the necessary
diagnostics data that enables Quantum to identify the root cause and
expedite the problem resolution process. Problems that used to take days
to fix can now be fixed in minutes. When problems require onsite
support, field engineers will have better information along with the right
parts necessary to fix the problem.
StorageCare Guardian allows Quantum to
• Monitor diagnostic data related to Quantum products
0
• Receive alarms that notify Quantum of issues
• Run diagnostic utilities to more quickly determine the root cause of
i
ssues
Quantum Scalar 50 User’s Guide xxii
at the customer site
Page 23

Preface
StorageCare Guardian
• Initiate remote connection to remote management interface to get
more in-depth information about the health of your Quantum
product.
• Distribute software/firmware upgrades - this will be available as a
future enhancement
Product Features 0
• Continuous Monitoring - Proactive 7x24x365 monitoring of Quantum
products enabling Quantum Support to be alerted on events such as
errors or marginal conditions that are defined by the user.
• Root Cause Diagnosis - Allows Quantum to quickly isolate and
identify the root cause of a problem.
• Rapid Problem Resolution- Quantum can rapidly recommend and/
or implement the corrective actions needed to resolve a problem
ensuring minimal impact to the IT environment.
• Quantum Remote Software Update - Distributed software update
capability allows fast updates to agent software and Quantum
hardware installed at customer sites
• Real-time Data Collection - Instant on-demand or scheduled
diagnostic data collection from Quantum products as well as the
ability to run user-defined data collection scripts from agent.
• Access Management - Customer has full control over Quantum's
access rights and privileges.
• Audit Logging - Audit logs are kept for all communications to and
from the agent.
How it works: 0
1 Customers can download the StorageCare Guardian agent software
from
http://www.quantum.com/guardiandownload.
2 Customer installs the StorageCare Guardian agent on any Windows
2000/2003/XP or Solaris 8/9 server located at the customer’s site.
3 The StorageCare Guardian agent monitors Quantum products, and
provides information and updates to the Quantum Enterprise Server
that resides at Quantum Support.
Quantum Scalar 50 User’s Guide xxiii
Page 24

Preface
StorageCare Guardian
4 If an error or problem is detected, Quantum queues a request to the
StorageCare Guardian agent for data collection or real-time access to
the system.
5 The StorageCare Guardian agent checks access policy settings to
determine if access is allowed.
6 If approved, the information is transferred to Quantum, or a remote
connection is initiated.
7 Quantum Support will diagnose the problem and, if necessary, send
the needed parts and/or field personnel to resolve the issue.
8 Quantum can identify if the backup problem is not associated with
the Quantum device and then direct the customer to resolve the issue
with appropriate third-party vendor.
Quantum Scalar 50 User’s Guide xxiv
Page 25

Chapter 1
1Library Description
This chapter provides an overview of the Scalar 50 and is divided into
the following sections:
• Overview
• Tape Drives
• Library Features
• DLTSage™ Tape Security
• Mixed Media Support
• Capacity on Demand
• Library Scalability (Stacked Configurations)
• Getting Started
Quantum Scalar 50 User’s Guide 1
Page 26

Overview
Figure 1 Scalar 50
Chapter 1 Library Description
Overview
The Quantum Scalar 50 tape library (see figure 1) is an automated tape
storage and retrieval device that may consist
to 32 SDLT or 38 LTO tape cartridges. Cartridges are stored in two
removable cartridge magazines and two fixed slots. Both SDLT and LTO
tape cartridges can be installed in a single library as long as the
appropriate magazines and drives are installed.
of up to 4 tape drives and up
# Tape
Drives # Magazines
SDLT 0 - 2 2 (15 slots per
magazine)
LTO 0 - 4 2 (18 slots per
magazine)
Quantum Scalar 50 User’s Guide 2
# Fixed
Slots
232
238
#
Cartridges
Page 27

Figure 2 Slot Numbering,
0000
0030
0001
0002
0003
0004
0005
0006
0007
0008
0009
0010
0011
0012
0013
0014
0015
0016
0017
0018
0019
0020
0021
0022
0023
0024
0025
0026
0027
0028
0029
0031
Tape
drive 2
Tape
drive 1
Hand
To p
Fixed cartridge slotsSDLT magazines have 15 cartridges
Mag 1
Mag 2
Scalar 50 SDLT
Chapter 1 Library Description
Overview
Quantum Scalar 50 User’s Guide 3
Page 28

Figure 3 Slot Numbering,
0027
0017
0036
0037
0000
0001
0002
0003
0004
0006
0007
0008
0009
0010
0012
0013
0014
0015
0016
0019
0020
0021
0022
0023
0025
0026
0029
0031
0032
0033
0034
0035
0005 0011
003000240018
0028
Tape
drive 1
Tape
drive 2
Hand
To p
Fixed cartridge slots
LTO magazines have 18 cartridges
Mag 1
Mag 2
Scalar 50 LTO
Chapter 1 Library Description
Overview
Quantum Scalar 50 User’s Guide 4
Page 29

Tape Drives
Chapter 1 Library Description
Tape Drives
Scalar 50 tape libraries are equipped with either SCSI or native Fibre
Channel tape drives. SCSI buses are SCSI-2 fast/wide (8/16 bit), Ultra 3
SCSI, Ultra 160, or Ultra 320 SCSI, depending on the drives installed.
Tape Drive Types 1
Table 1 DLT-S4 Performance
Characteristics
LVD SCSI configurations have a maximum allowab
meters. To determine the cable length of the bus, measure the lengths of
the SCSI cables connecting each device to that bus and add those lengths
together. To that total length, add 12.25 inches (31.10 cm) for the internal
SCSI cable length of each SCSI tape drive.
The Scalar 50 tape library support the following tape drives:
• Quantum DLT-S4 (SCSI and Native Fibre Channel)
• Quantum Half-Height LTO-3 (SCSI
• HP LTO-3 (SCSI and Native Fibre Channel)
• HP LTO-4 (SCSI and Native Fibre Channel)
• HP Half-Height LTO-4 (SAS)
Scalar 50 library can support mixed media types, mixed
(Fibre Channel and SCSI) as well as mixed form factors within the same
library. Example: The Scalar 50 can contain both LTO full height drives
with LTO half-height drives in the same library.
Refer to the following tables for tape
Both SDLT and LTO tape drive can exist in the same library as long as the
appropriate magazines are installed in the library.
Quantum Scalar 50 DLT-S4 Model (drives/slots) 2/32
and Native Fibre Channel)
drive performance characteristics.
le bus length of 12
interface types
Capacity in Terabytes (TB) (800 GB per cartridge) 25.6
*Compressed Capacity in TB (1600 GB per cartridge) 51.2
Throughput (GB/hr) based on 60 MB/sec transfer rate
(2 tape drives installed)
*Compressed Throughput (GB/hr) based on 120 MB/
sec transfer rate (2 tape drives installed)
Quantum Scalar 50 User’s Guide 5
432
864
Page 30

Chapter 1 Library Description
* Compressed capacity assumes a 2:1 compression ratio.
Tape Drives
Table 2 Quantum LTO-3 (HalfHeight) Performance
Characteristics
Table 3 HP LTO-3 (Full Height)
Performance Characteristics
Quantum Scalar 50 Quantum LTO-3 Half-Height Model
(drives/slots) 4/38
Capacity in Terabytes (TB) (400 GB per cartridge) 15.2
*Compressed Capacity in TB (800 GB per cartridge) 30.4
Throughput (TB/hr) based on 80 MB/sec transfer rate (4
tape drives installed)
*Compressed Throughput (TB/hr) based on 160 MB/sec
transfer rate (4 tape drives installed)
* Compressed capacity assumes a 2:1 compression ratio.
Quantum Scalar 50 HP LTO-3 Model (drives/slots) 2/38
Capacity in Terabytes (TB) (400 GB per cartridge) 15.2
*Compressed Capacity in TB (800 GB per cartridge) 30.4
Throughput (TB/hr) based on 80 MB/sec transfer rate (2
tape drives installed)
1.1
2.3
.576
*Compressed Throughput (TB/hr) based on 160 MB/sec
1.1
transfer rate (2 tape drives installed)
* Compressed capacity assumes a 2:1 compression ratio.
Quantum Scalar 50 User’s Guide 6
Page 31

Chapter 1 Library Description
Tape Drives
Table 4 HP LTO-4 (HalfHeight) Performance
Characteristics
Table 5 HP LTO-4
Performance Characteristics
Quantum Scalar 50 HP LTO-4 Half-Height Model
(drives/slots) 1/38
Capacity in Terabytes (TB) (800 GB per cartridge) 30.4
*Compressed Capacity in TB (1600 GB per cartridge) 60.8
Throughput (TB/hr) based on 80 MB/sec transfer rate (4
tape drives installed)
*Compressed Throughput (TB/hr) based on 160 MB/sec
transfer rate (4 tape drives installed)
* Compressed capacity assumes a 2:1 compression ratio.
Quantum Scalar 50 HP LTO-4 Model (drives/slots) 2/38
Capacity in Terabytes (TB) (800 GB per cartridge) 30.4
*Compressed Capacity in TB (1600 GB per cartridge) 60.8
Throughput (TB/hr) based on 120 MB/sec transfer rate (2
tape drives installed)
1.1
2.3
.864
*Compressed Throughput (TB/hr) based on 240 MB/sec
1.7
transfer rate (2 tape drives installed)
If a drive experiences read/write errors when the AutoClean function is
enabled, the library issues an error message stating that drive cleaning is
required. Without user intervention, the library hand replaces the data
cartridge with a cleaning cartridge. When the cleaning procedure
finishes, the library hand returns the data cartridge to the drive.
Note: When a cleaning cartridge has completed its 20-use limit, it is
automatically exported from the library, requiring a new one
to be loaded through the load port.
Quantum Scalar 50 User’s Guide 7
Page 32

Library Features
Scalar 50
Operator control panel (OCP)
Chapter 1 Library Description
Library Features
Front Panel 1
Figure 4 Scalar 50 Front Panel
Figure 4 illustrates the features of the Scalar 50 library front panel.
These features are described in
table 6.
Quantum Scalar 50 User’s Guide 8
Page 33

Table 6 Front Panel Features
Feature Description
Chapter 1 Library Description
Library Features
Operator
control panel
(OCP)
Magazine
access doors
The operator control panel consists of the following elements:
• OCP display The OCP displays library status information and allows you to
access the library menus. These menus allow you to view or
change the library settings and run diagnostic tests.
•Five OCP
buttons
The OCP is discussed in detail in chapter 2
These buttons in combination with the OCP are used to scroll
through screens and select options or commands. The
.
functionality of these buttons changes depending on the
currently displayed OCP screen. The power button is used to
turn the library on and off.
• Light emitting
diode (LED)
indicator
The operator control panel has one LED indicators:
• Steady green - indicates a idle state
• Flashing green - indicates a busy state
• Flashing amber - indicates an attention state
• Steady amber - indicates an error
These doors protect the data cartridge magazines.
Quantum Scalar 50 User’s Guide 9
Page 34

Chapter 1 Library Description
Elevator
2 fixed bins
Right cartridge
magazine
Tape drives
Hand
Left cartridge
magazine
Library Features
Internal Layout 1
Figure 5 Scalar 50 Internal
Layout
Figure 5 illustrates the internal layout of a Scalar 50 library.
Quantum Scalar 50 User’s Guide 10
Page 35

Chapter 1 Library Description
Library Features
Each cartridge magazine holds 15 SDLT cartridges or 18 LTO cartridges.
The bins in the left magazines are numbered from 1 through 15 (18 in
LTO libraries) from front to back. The bins in the right magazines are
numbered from 1 through 15 (18 in LTO libraries) from back to front. The
Scalar 50 has two fixed slots behind the right magazine.
A bar code reader is attached to the library’s robotic hand. This bar code
reader automatically identifies the cartridges in the library, if the
cartridges are fitted with acceptable bar code labels.
Back Panel 1
The library back panel provides access to the following items:
• System Controller Board (SCB)
• Power Supplies
• CPCI Card Cage
• Tape Drives
System Controller Board (SCB) 1
The system controller board (SCB) contains the library firmware and
processor. Two Ethernet ports. One port for remote management and the
other for internal communications with add-on CPCI cards such as the
TC2201 iSCSI bridge.
Power Supplies 1
The power supplies provide redundant power to the library. The Scalar
50 can contain up to two power supplies (one power supply in the base
unit).
CPCI Card Cage 1
The CPCI (compact PCI) card cage provides space for option cards such
as the TC2201 iSCSI bridge. The Scalar 50 can contain one option card.
Quantum Scalar 50 User’s Guide 11
Page 36

Figure 6 Scalar 50 Back Panel
Tap e
drives
CPCI card cage
System controller board
Power connectorsPower supply
Warning: Hazardous Moving Parts.
Keep Fingers and Other Body
Parts Away When Removing
and Installing Tape
Drives.
Warning: Hazardous Moving Parts.
Keep Fingers and Other Body
Parts Away When Removing
and InstallingTape
Drives.
Warnung: Gefährliche bewegliche
Teile. Halten Sie die
Finger und andere
Körperteile weg, wenn
Sie Bandlaufwerke
entfernen und
anbringen.
Warnung: Gefährliche bewegliche
Teile. Halten Sie die
Finger und andere
Körperteile weg, wenn
Sie Bandlaufwerke
entfernen und
anbringen.
Chapter 1 Library Description
Library Features
Tape Drives 1
The Scalar 50 can contain up to four tape drives.
Figure 6 illustrates the back panel of the Scalar 50 library.
Quantum Scalar 50 User’s Guide 12
Page 37

DLTSage™ Tape Security
The Scalar tape library with DLT-S4 tape drives are capable of utilizing
DLTSage Tape security. DLTSage Tape
designed to prevent unauthorized access to tape cartridges which is
particularly valuable when protecting tapes that are transported offsite.
DLTSage Tape Security is a firmware feature designed into the DLT-S4
tape drive which uses an electronic key to prevent or allow reading and
writing of data on to a tape cartridge. This key is managed through the
remote management pages of the Scalar 50 tape library (see chapter
“Quantum Scalar 50 Remote Management,”). DLTSage Tape Security is
available at no additional cost as an int
tape drive and Scalar 50 tape library.
Mixed Media Support
Chapter 1 Library Description
DLTSage™ Tape Security
Security is a unique solution
3,
egrated feature in of the DLT-S4
The Scalar 50 tape library is capable of supporting mixed media (SDLT
and LTO media) and a mixture of tape drives in the same library frame.
You must have at least one magazine type (SDLT or LTO) for each tape
drive type (SDLT or LTO).
Capacity on Demand
Capacity on demand provides the ability to upgrade the storage capacity
of a library by using a software capacity key that grants access to
additional magazine slots. The Scalar 50 library has two capacity levels
(see table
•
•
Quantum Scalar 50 User’s Guide 13
7):
Level 1 - default capacity (four magazine columns starting with the
three columns of the left-hand magazine and including the back
column of the right-hand magazine)
Level 2 - full capacity (all six columns of the left and right magazines
and all physical slots in the system including stacked libraries)
Page 38

Chapter 1 Library Description
Capacity on Demand
The two fixed slots located in every library are always available for use.
Table 7 Scalar 50 Capacity
Levels
Enabling Capacity on Demand 1
Licensed Capacity (Slot Count)
Capacity Level LTO SDLT
Level 1 26 22
Level 2 38 32
Note: Partitioning cannot be used unless all libraries are at
FULL
capacity.
Note: If your libraries are in a stacked configuration, all libraries
must be at
FULL capacity. PX502 libraries are automatically at
full capacity.
Contact your Quantum Sales representative to acquire additional license
keys.
If your Quantum Scalar 50 has not already been enabled with the full slot
capacity, you must complete the following procedure:
1 Retrieve and record the Scalar 50 library serial number.
2 Access the COD website and follow the instructions by providing the
Library serial number to obtain your new License Key for your
additional capacity purchase.
The COD website URL is: www.quantum.com/capacity/scalar50.
3 Record your new License Key and then install it into the Library to
increase your slot capacity (see
Library on page 101 for more
information on enabling capacity on demand).
Quantum Scalar 50 User’s Guide 14
Page 39

Library Scalability (Stacked Configurations)
Library Scalability (Stacked Configurations)
The Scalar 50 library modules can be used as stand-alone libraries, or
combined with other Scalar 50 library modules in a standard 19-inch rack
to form a larger library system (called a multiple library stack). The
multiple library or stacked configuration appears as a single large
capacity library (or multiple libraries if partitioned) to the host (see
figure 7).
Chapter 1 Library Description
Multiple Library Stack Requirements 1
To ensure the proper operation of your multiple library stack, review the
following list of multiple library stack requirements:
• Multiple library stacks that contain a Scalar 50 can NOT exceed two
library cabinets.
• The Scalar 50 must be the Master library in a multiple library stack
containing PX502 libraries.
• The Master library must always be in the bottom most position in the
library stack.
• If a Scalar 50 is stacked with PX502 libraries, the PX502 can NOT
contain an HP LTO-2 tape drive or a FC1202 Fibre Channel bridge.
These devices are not supported by Scalar 50.
• All Scalar 50 libraries must have full capacity enabled.
• A library that contains SAS drives cannot be shared with SCSI or
Fibre Channel libraries.
• If your Scalar 50 is not already enabled with full slot capacity, you
must initially configure the Scalar 50 libraries and enable
capacity with a
Master and Slave libraries (see
Key information).
Capacity Key before configuring the cabinets as
Library on page 125 for more Capacity
Full
Quantum Scalar 50 User’s Guide 15
Page 40

Figure 7 Multiple Library
Bottom hand lifting pass
through into top library
Pass through in top
library
Top hand
Stack (Cross Section
Chapter 1 Library Description
Library Scalability (Stacked Configurations)
Table 8 lists the capacities of all the sizes of multiple library
stacks created using LTO Scalar 50 library modules.
Table 9 lists
the capacities of all the sizes of multiple library stacks created
using SDLT Scalar
Quantum Scalar 50 User’s Guide 16
50 library modules.
Page 41

Table 8 Capacity, Scalar 50
Multiple Library Stack - LTO
(42U High Rack)
Chapter 1 Library Description
Library Scalability (Stacked Configurations)
# of
# of Scalar
50 Library
Modules
T
1 2 full height/
Max. # of
ape Drives
Cartridges
*
Quantum/HP LTO Gen 3 HP LTO Gen 4
LTO
Native Compressed
38 15.2 30.4 32 64
Capacity (in TB)
†
Native Compressed
4 half height
2 4 full height/
height
8 half
*.The values in the # of Cartridges and Capacity columns assume that all the magazines and fixed cartridge slots are fully
populated with data cartridges.
†
Compressed values assume 2:1 compression ratios.
Table 9 Capacity, Scalar 50
Multiple Library Stack - SDLT
(42U High Rack)
76 28.8 57.6 64 128
# of
Cartridges
*
Capacity (in TB)
*
†
# of Scalar
50 Library
Modules
Ta
1 2 full height/
Max. # of
pe Drives
SDLT
Native Compressed
32 26.4 52.8
DLT-S4
†
4 half height
2 4 full height/
alf height
8 h
*.The values in the # of Cartridges and Capacity columns assume that all the magazines and fixed cartridge slots are fully populated
with data cartridges.
†
Compressed values assume 2:1 compression ratios.
Quantum Scalar 50 User’s Guide 17
64 52.8 105.6
Page 42

Getting Started
Chapter 1 Library Description
Getting Started
This chapter describes the procedures necessary to get your Quantum
Scalar 50 library up and running. Have the following equipment and
accessories available before installing the library:
• SCSI cables to support 1 host bus adapter (HBA) per two tape drives
• SCSI, SAS, or Fibre Channel HBAs in the host
•2 tape drives per SCSI bus
Note: Quantum ships sufficient SCSI cables and terminators
with the libraries to set up two-drives per SCSI bus. One
tape drive per SCSI bus may be necessary for optimum
performance. Refer to your tape drive documentation.
• Power source (see appendix A on page 177 for power requirements)
• Tape cartridges (LTO and/or SDLT)
After the Quantum Scalar 50 is in it’s final location, the following steps
are required to complete the installation:
• Installing the Quantum Scalar 50
• Cabling the Quantum Scalar 50 Series
• Loading Tape Cartridges
• Initial Configuration
Installing the Quantum
Scalar 50 1
Quantum Scalar 50 User’s Guide 18
The Scalar 50 library modules fit into a standard 19-inch wide rack. Refer
to
figure 8 for rack space requirements. Complete mounting information
is provided in the Quantum Scalar 50 Series Quick Start (PN 81-81767).
Page 43

Figure 8 Rack Space
*1U = 1.75 in ( 44.45 mm)
.625 in ( 15.9 mm)
.625 in ( 15.9 mm)
.5 in ( 1 2.7 mm)
.625 in ( 15.9 mm)
.625 in ( 15.9 mm)
Top of rack
.312 in ( 7.92 m m)
.5 in ( 1 2.7 mm)
Hole pattern
1 Scalar 50 library
module (4U)
Requirements
Chapter 1 Library Description
Getting Started
Warning: If the rack is empty at the time of installation, do NOT
install the Scalar 50 modules too high in the rack. The
combined weight of the components may cause the rack
to become “top heavy” and unstable if installed in the top
of an empty rack. If installing a multiple library stack,
begin installing the bottom library module first.
Cabling the Quantum Scalar 50 Series 1
After the Quantum Scalar 50 is in its final location, the tape drives and
system controller board must be connected to the backup host system(s).
To cable the Quantum Scalar 50:
Quantum Scalar 50 User’s Guide 19
Page 44

Chapter 1 Library Description
Ethernet port System controller boardInternal communication
with TC2201 CPCI card
Getting Started
1 The Scalar 50 tape drives and system controller board are accessed
from the back of the library (refer to
Connecting to Host
Workstations on page 31).
Figure 9 Connecting the
Library to the Local Area
Network
Loading Tape Cartridges 1
Initial Configuration 1
2 Connect Ethe
system controller board to the local area network (see figure
rnet port located on the back of the library on the
9).
Before operating the library, load the appropriate tape cartridges (LTO or
SDLT) into the library starting with the left-hand magazine (see figure
and figure
3 for slot locations).
2
The Quantum Scalar 50 must be initially configured with an IP address
before the remote management software is available. Refer to
Using the
OCP on page 37 for information on configuring your Scalar 50 network
information and preparing for operation.
Quantum Scalar 50 User’s Guide 20
Page 45

Chapter 2
2Basic Library Operations
This chapter describes the following basic library operating procedures:
• Installing Tape Cartridges
• Preparing the Library for Operation
• Turning the Library On and Off
• Using the OCP
• Load Port Configuration
Installing Tape Cartridges
To install tape cartridges:
1 Label each cartridge (see “SDLT Cartridges” on page 24 and “LTO
Cartridges” on page 26 for information on cartridge labels).
2 Set the write-protect switch to either write protect or write enable
(see
“SDLT Cartridges” on page 24 and “LTO Cartridges” on
page 26 for information on write-protect switches).
Quantum Scalar 50 User’s Guide 21
Page 46

Chapter 2 Basic Library Operations
Installing Tape Cartridges
3 Place cartridges (right side up) in the fixed slots and magazines:
a Open the
library doors (see “Library Operations” on page 45 to
open the library doors).
b Remove
the magazines (see “Library Operations” on page 45 to
release the magazines).
Note: You
have approximately 10 seconds to open the doors and
remove the magazines. If you did not complete the
operation, repeat the steps.
c Load the
tape cartridges in the magazines and fixed bins. It is
recommended to start loading tape cartridges in magazine 1, bin
0000 (see figure
2 on page 3 and figure 3 on page 4 for magazine
and bin locations).
Warning: Do
NOT reach into the library to load tape cartridges
into the fixed bins. Use the
Operations tab from the remote management pages
(see chapter
3 on page 63) to move tape cartridges
Move page located on the
from the magazines into the fixed bins.
d Repl
ace the magazines in the library.
e Close the library doors.
Caution: Pl
acing the cartridges in the bins upside down can
cause damage to the library (see figure
cartridges and figure
12 for LTO cartridges).
11 for SDLT
Caution: Handle tape cartridges with care.
Do not drop or bang
them, or place them near sources of electromagnetic
interference. Rough handling can displace the tape
leader, making the cartridge unusable and potentially
hazardous to the tape drives. If a tape is dropped,
discard and replace with a new tape. Loss of data
could result from damaged tape cartridges inserted in
tape drives.
Quantum Scalar 50 User’s Guide 22
Page 47

Chapter 2 Basic Library Operations
Unplug all AC cords to remove power from equipment.
Installing Tape Cartridges
Taking ESD Precautions 2
Components within the Scalar 50 contain static-sensitive parts. To
prevent damage to these parts while performing installation,
maintenance, or replacement procedures, observe the following
precautions:
• Keep the cabinet turned off during all installation, maintenance, and
placement procedures.
re
• Keep the cabinet power cord connected to a grounded power outlet
exce
pt when working with AC electrical components.
Warning: A
• Use an antistatic wrist strap when touching internal cabinet
components. To use the wrist strap properly, place the band around
your wrist and attach the clip to the cabinet frame. Keep the strap on
until you are ready to close the cabinet doors.
void contact with the power supplies, EMI filter, and all
other AC electrical components while the cabinet is
connected to a power outlet.
• Keep static-sensitive parts in their shippin
installation.
• Do not place static-sensitive parts on any
put down a static-sensitive part, place it inside its protective shipping
bag or on a grounded antistatic mat.
• Avoid direct contact with static-sensitive par
connectors and discrete components.
• Close cabinet door and access panel when not working on the
cabinet.
g containers until ready for
metal surface. If you need to
ts. Avoid touching
Quantum Scalar 50 User’s Guide 23
Page 48

Chapter 2 Basic Library Operations
Installing Tape Cartridges
• Be very careful when installing the cabinet or handling components
in dry climates or environments where cold weather heating is used.
Environments such as these with lower relative humidity have
greater potential to produce static electricity.
Note: In environments with high potential for static electricity,
take additional precautions such as the use of an antistatic
smock or a grounded antistatic mat.
SDLT Cartridges 2
The following section shows you how to label SDLT tape cartridges, as
well as setting the write-protect switch and proper orientation.
Note: Quantum highly recommends using barcode labels provided
by Quantum. Also, use the appropriate barcode labels for your
drive type. Do not use older barcode labels on tape cartridges
for newer drive types.
Labeling 2
The Scalar 50 is a multi-media library, meaning multiple drive and tape
cartridge types can be present in a single library. Barcode labels are
attached to each tape cartridge to differentiate the different tape cartridge
types (SDLT, LTO, and cleaning cartridges).
The SDLT cartridge label has eight characters (e.g. AAANNNS#). The
first six characters are called the volume identifier which is made up of
three alpha characters and three numeric characters. These characters
allow each cartridge to have a unique identifier. The last two characters
are called the media identifier and indicate the following media types:
•V4 = DLT-V4
• S1 = SDLT 220
• S2 = SDLT 320
• S3 = SDLT 600
•S4 = DLT-S4
Quantum Scalar 50 User’s Guide 24
Page 49

Chapter 2 Basic Library Operations
Slide-in slot
Installing Tape Cartridges
Figure 10 Inserting a Barcode
Label (SDLT)
Note: You cannot choose
the sequence of labels inside the bar code
label packs. No two packs are ever the same to avoid issues
with duplicate bar code IDs.
Place the label in the slide-in slot on the front of the cartridge (see
10).
figure
Note: Only use barcode labels that have been designed for
cartridges. Do not adhere labels to a cartridge anywhere
except the slide-in slot.
Setting the Write-Protect Switch 2
Each tape cartridge has a write-protect switch similar to that shown in
11. This switch determines whether new data can be written to the
figure
cartridge (write-enabled) or
whether data on the cartridge is protected
from being erased or overwritten (write-protected). Set the write-protect
switch to enabled when inserting new cartridges into the library. Set the
write-protect switch to protected archiving tape cartridges.
Quantum Scalar 50 User’s Guide 25
Page 50

Figure 11 SDLT Cartridges
Barcode label
Insertion arrow
I
n
s
e
r
t
th
i
s
e
n
d
i
n
t
o
th
e
s
l
o
t
Orange
window
Write
protect
Write
enable
(SDLT cartridge shown)
Slide right (default)
Slide left
Chapter 2 Basic Library Operations
Installing Tape Cartridges
Proper Insertion Orientation 2
Refer to figure 11 for proper label placement, write protection settings
and insertion orientation.
LTO Cartridges 2
Quantum Scalar 50 User’s Guide 26
LTO tape cartridges are different in size to the SDLT cartridges as well as
in the barcode labeling and write-protect switch setting (see figure
Note: Quantum highly re
12).
commends using barcode labels provided
by Quantum. Also, use the appropriate barcode labels for your
drive type. Do not use older barcode labels on tape cartridges
for newer drive types.
Page 51

Chapter 2 Basic Library Operations
Installing Tape Cartridges
Labeling 2
The Scalar 50 is a multi-media library, meaning multiple drive and tape
cartridge types can be present in a single library. Barcode labels are
attached to each tape cartridge to differentiate the different tape cartridge
types (SDLT, LTO, and cleaning cartridges).
The LTO cartridge label has eight characters (e.g. AAANNNL#). The first
six characters are called the volume identifier which is made up of three
alpha characters and three numeric characters. These characters allow
each cartridge to have a unique identifier. The last two characters are
called the media identifier and indicate the following media types:
• L1 = LTO generation 1 (LTO)
• L2 = LTO generation 2 (LTO-2)
• L3 = LTO generation 3 (LTO-3)
• L4 = LTO generation 4 (LTO-4)
Note: You cannot choose the sequence of labels inside the bar code
label packs. No two packs are ever the same to avoid issues
with duplicate bar code IDs.
Adhesive-backed barcode labels are used on LTO tape cartridges. Refer
to
figure 12 for proper label placement, write protection settings and
insertion orientation.
Quantum Scalar 50 User’s Guide 27
Page 52

Figure 12 LTO Cartridges
A B C 1 2 3 L 1
Barcode label
Insertion arrow
In
se
r
t
t
h
is
en
d
in
t
o
t
h
e s
lo
t
Write
protect
Write
enable
Slide left (default)
Slide right
Chapter 2 Basic Library Operations
Installing Tape Cartridges
Caution: LTO tape drive media cannot be degaussed due to the fact
that it uses "magnetic servos." Do not attempt to degauss
LTO tape drive media. If this media is degaussed, it will
no longer work.
Cleaning Cartridges 2
Quantum Scalar 50 User’s Guide 28
Cleaning cartridges are used when a tape drive within the library
requires cleaning. When Autoclean is enabled (either through the OCP or
remote management screens), the library will automatically clean the
tape drive when needed. A fixed bin (see figure
on page 4 for bin locations) is generally used
however, the cartridge can be placed anywhere in the library. When the
li
location so it will be available when a tape drive requires cleaning.
brary completes the inventory, the system stores the cleaning cartridge
Note: You mu
st attach the appropriate cleaning cartridge barcode
2 on page 3 and figure 3
to store a cleaning cartridge,
label (SDLT or LTO) to the cleaning cartridge or the library
will mark it as unrecognizable media.
Page 53

Chapter 2 Basic Library Operations
Installing Tape Cartridges
SDLT and LTO cleaning cartridge labels begin with CLN (see figure 13
for SDLT and figure
14 for LTO):
Figure 13 SDLT Cleaning
Cartridges
Figure 14 LTO Cleaning
Cartridges
• SDLT cleaning cartridge labels
CLN###S#
• LTO cleaning cartridge tables
CLN###L#
are in the following format:
are in the following format:
Quantum Scalar 50 User’s Guide 29
Page 54

Preparing the Library for Operation
Right door
Left door
To prepare the cabinet for operation:
•
Close the Cabinet Doors and Access Panels
• Connecting to Host Workstations
Chapter 2 Basic Library Operations
Preparing the Library for Operation
Close the Cabinet Doors
and Access Panels 2
Figure 15 Closing the Scalar
50 Front Doors
The Scalar 50 library has doors covering the tape cartridge magazines.
1 Close the fr
ont doors until they latch (see figure 15)
Quantum Scalar 50 User’s Guide 30
Page 55

Chapter 2 Basic Library Operations
Preparing the Library for Operation
Connecting to Host Workstations 2
Connect the SCSI, SAS or Fibre Channel cables as shown in the following
figures:
•
Scalar 50 Cable Configuration (SCSI Full Height Drives)
• Scalar 50 Cable Configuration (Native Fibre Channel Full Height
Drives)
• Scalar 50 Cable Configuration (SCSI Half-Height Drives)
• Scalar 50 Cable Configuration (SAS Half-Height Drives)
• Scalar 50 Cable Configuration (Native Fibre Channel Half-Height
Drives)
Note: Quantum ships sufficient SCSI cables and terminators with the
libraries to set up two-drives per SCSI bus.
Caution: The SCSI cables used to connect to the library system
controller board MUST have an offset connector. Using a
straight-in SCSI connector may damage the system
controller board.
Stacked Configuration
2
• Scalar 50 Cable Configuration (Stacked)
Quantum Scalar 50 User’s Guide 31
Page 56

Figure 16 Scalar 50 Cable
Back of Library
SCSI hostEthernet
Power
System Controller Board
Tape drive 1Tape drive 2
Back of Library
Ethernet
Power
Tape drive 2 Tape drive 1
LTO Tape drives
shown. SDLT drives
have a single FC port
Fibre Channel
host/SAN
Fibre Channel
host/SAN
Fibre Channel host/SAN
Configuration (SCSI Full Height
Drives)
Chapter 2 Basic Library Operations
Preparing the Library for Operation
Figure 17 Scalar 50 Cable
Configuration (Native Fibre
Channel Full Height Drives)
Quantum Scalar 50 User’s Guide 32
Page 57

Figure 18 Scalar 50 Cable
Ethernet
Power
Back of Library
SCSI host
Terminator
Tape drives
1 and 2
Tape drives
3 and 4
SCSI host
Terminator
SCSI System Controller Board
SCSI hostSCSI host
Back of Library
Ethernet
Power
SAS hosts
Tape drives
1 and 2
Surrogate Mode System
Controller Board ONLY
SAS hosts
Tape drives
3 and 4
Configuration (SCSI HalfHeight Drives)
Chapter 2 Basic Library Operations
Preparing the Library for Operation
Figure 19 Scalar 50 Cable
Configuration (SAS Half-Height
Drives)
Quantum Scalar 50 User’s Guide 33
Page 58

Figure 20 Scalar 50 Cable
Back of Library
Ethernet
Power
Fibre Channel
host/SAN
Fibre Channel
host/SAN
Tape drives
1 and 2
Tape drives
3 and 4
Fibre Channel host/SAN
Configuration (Native Fibre
Channel Half-Height Drives)
Chapter 2 Basic Library Operations
Preparing the Library for Operation
Quantum Scalar 50 User’s Guide 34
Page 59

Figure 21 Scalar 50 Cable
Scalar 50 (master library)
Scalar 50 (slave library)
Host computer
Ta pe
drive 2
Tape
drive 1
Tape
drive 1
Ta pe
drive 2
Host computer
Ethernet
The library
host and
Ethernet
network are
connected only
to the Master
library.
Configuration (Stacked)
Chapter 2 Basic Library Operations
Preparing the Library for Operation
Quantum Scalar 50 User’s Guide 35
Page 60

Turning the Library On and Off
Power button
OCP
This section explains:
•
Turning On the Library
• Turning Off the Library
• Placing the Library On-line or Off-line
Chapter 2 Basic Library Operations
Turning the Library On and Off
Turning On the Library 2
Figure 22 Turning On the
Library
To turn on the library:
1 Verify tha
t:
• Power cables are firmly in place
• All doors are closed
2 Pu
sh the power button located in the lower left-hand corner of the
OCP (see figure
22).
During the power up sequence, the library performs an inventory.
The
power up sequence can take several minutes.
Quantum Scalar 50 User’s Guide 36
Page 61

Chapter 2 Basic Library Operations
Using the OCP
Turning Off the Library 2
Placing the Library Online or Off-line 2
Using the OCP
To turn off the library:
1 Push the power button located on the front of the library and hold for
approximately 1 second (see
The library begins the shutdown sequence. The shutdown sequence
can take up to two minutes to complete.
With the library turned on, press the button corresponding to Ops on the
OCP to access the
Library on/offline to turn the library off-line. Select Yes or No to confirm
the library state change. For more information on the
see
“Library Operations” on page 45.
The operator control panel (OCP) is located on the front of the library.
The menus on the OCP allow you to obtain information about the library,
execute library commands, and test library functions. Before using the
OCP to perform library functions, familiarize yourself with the:
Operations screen. Select Library Operations and then
figure 22).
Operations screen,
• Home Screen
• OCP Buttons
Home Screen 2
Quantum Scalar 50 User’s Guide 37
The first screen the OCP displays after library initialization is the main
screen. This screen displays library status and provides information on
the number of tape drives, slots, and serial number (see
figure 23).
Page 62

Figure 23 OCP Home Screen
Quantum Scalar 50
Power
button
Library
status
Button
labels
Push
buttons
Press this
button
To s e l ec t t hi s
function
Chapter 2 Basic Library Operations
OCP Components
OCP Buttons 2
OCP Components
Quantum Scalar 50 User’s Guide 38
At the bottom of each OCP screen are four button labels. These labels
indicate the functions of the four push buttons below the OCP. To select a
function, press the push button directly below the button label on the
OCP screen. The OCP also contains a power button for turning the library
on and off.
The OCP allows the user to perform various functions on the Quantum
Scalar 50 library.
available from the
Figure 24 provides a list of the OCP functionality
Home screen.
Page 63

Figure 24 OCP Component
Info menu
Overview
Firmware Information
Firmware revision
Date and time of rev.
Network Information
IP address
Network Mask
Gateway
System
Doors
Power Supply
Robotics
OCP
Drives
Hard Events
Soft Events
Code Update Events
Boot Events
Hardware Information
Event Logs
Library on/offline
Release Magazines
Park for Shipping
Library Operations
Search for label
Search for media ID
Find Tape
ElapsTm
Pcycles
SlotGet
SlotPut
SltRetG
SltRetP
DrvGet
DrvPut
DrvRetG
DrvRetP
Statistics
Health test
Self test
Calibration stats
Random load/unload
Random (slots only)
Random (drive focus)
Sequential bins
Sequential drives
System-level tests
Host bus
Stack role
Left load port
Right load port
Drive FUP from tape
Full Inventory
Cabinet
Barcode swap
Emulation
Auto clean
Configure Slots
Partitions
Set admin PIN
Set operator PIN
Security
DHCP
IP address
Subnet mask
Default gateway
Ethernet 0
Network
Time zone
Standard time
Daylight savings time
Date and Time
DrvLdR
DrvUnlR
XYmove
Zmove
Pmove
Rmove
XYretry
Zretry
Pretry
Rretry
Ops menu Setup menu Diags menu
Left mag(s)
Right mag(s)
MoveTape
Drives
Hand/Top Passthru
Drive Operations
Scan Inventory
Drive(s)
Pwr on
Pwr off
reset
Drive Type
Serial Number
Firmware Revision
XY test
Z test
Rotation stats
Translation test
Camera test
Temperature test
Home position
Component tests
XYZ test
Hand assembly test
Subsystem tests
Tree
Chapter 2 Basic Library Operations
OCP Components
Quantum Scalar 50 User’s Guide 39
Page 64

Chapter 2 Basic Library Operations
Enter
OCP Components
The following sections provide information on each function available
from the Quantum Scalar 50 OCP:
•
Info Screen
• Operations Screen
• Setup Screen
• Diags Screen
Info Screen 2
Figure 25 Info Screen
The Info screen provides access to library information such as hardware
status, event logs, and statistics.
To access the
displays the
Info screen, press Info from the Home screen. The OCP
Info screen (see figure 25):
The Info screen provides the following choices:
•
Overview Information
• Hardware Information
• Event Logs
• Statistics Information
Quantum Scalar 50 User’s Guide 40
Page 65

Figure 26 Overview Screen
Chapter 2 Basic Library Operations
OCP Components
Overview Information 2
To view overview information:
1 Fr
om the Info screen, use the up and down arrows to highlight
Overview and press Enter.
The
Overview screen displays (see figure 26):
The Overview screen displays the following information about the
library:
•Firmware revision
• Time and date the firmware was built
2 Pres
s Back or Next to review the network information such as the
current IP address, network mask, and gateway information.
3 When you
return to the
Quantum Scalar 50 User’s Guide 41
are finished viewing overview information, press Exit to
Info screen.
Page 66

Figure 27 Hardware Screen
Exit
Chapter 2 Basic Library Operations
OCP Components
Hardware Information 2
To view hardware information:
1 Fr
om the Info screen, use the up and down arrows to highlight
Hardware and press Enter.
The
Hardware screen displays (see figure 27):
The Hardware screen displays the following information (see
10):
table
Table 10 Hardware
Information
Hardware
Information Description
System System information displays the overall sensor
details for the library.
Doors Door information displays the door sensor details.
Power Supply Power supply information displays the power
supply sensor details.
Robotics Robotics information displays the robotic sensor
details.
OCP OCP information displays the OCP sensor details.
Drives Drives information displays the tape drive sensor
details.
Quantum Scalar 50 User’s Guide 42
Page 67

Chapter 2 Basic Library Operations
Exit
OCP Components
2 Use the up and down arrows to highlight the information you wish
to display and press
Enter.
Figure 28 Event Log Screen
3 When
you are finished viewing the hardware information, press Exit
to return to the
Info screen.
Event Logs
To view the event logs:
1 Fr
om the Info screen, use the up and down arrows to highlight Event
Logs
and press Enter.
The
Event Log screen displays (see figure 28).
2 Use the up and down arrows to highlight the event type you wish to
Hardware, Software, Code updates, or Boot events).
view (
2
The OCP displays the event severity list.
3 Use
the up and down arrows to highlight the severity type you wish
to view (
The OCP displays the event or list of ev
All, Critical, Warning, and Informational).
ents in the specific severity
category. Use the Back and Next buttons to move between events.
4 When
you are finished viewing the event logs, press Exit to return to
Info screen. Refer to chapter 4 on page 137 for detailed event
the
information.
Statistics Information
To view statistics information:
Quantum Scalar 50 User’s Guide 43
2
Page 68

Figure 29 Statistics Screen
Exit
Chapter 2 Basic Library Operations
OCP Components
1 From the Info screen, use the up and down arrows to highlight
Statistics and press Enter.
The
Statistics screen displays (see figure 29):
The Statistics screen displays the following information about the
library:
• ElapsTm – seconds since boot.
• PCycles – total number of powe
r cycles or reboots.
• SlotGet – count of cartridge retrievals from slots.
• SlotPut – count of cartridg
e deliveries to slots.
• SltRetG – count of retries in retrievals from slots.
• SltRetP – count of retries in deliveries to slots.
• DrvGet – count of cartridge retri
• DrvPut – count of cartridge
evals from drives.
deliveries to drives.
• DrvRetG – count of retries in retrievals from drives.
• DrvRetP – count of retries in deliveries to drives.
• DrvLdR – count of retries for cartridge loads in drives.
• DrvUnlR – count of retries for cartridge unloads in drives.
• XYmove – count of horizontal moves.
• Zmove – count of vertical moves.
• Pmove – count of extension moves.
• Rmove – count of rotation moves.
Quantum Scalar 50 User’s Guide 44
Page 69

Chapter 2 Basic Library Operations
Exit
• XYretry – count of horizontal move retries.
• Zretry – count of vertical move retries.
• Pretry – count of extension move retries.
• Rretry – count of rotation move retries.
OCP Components
Operations Screen 2
Figure 30 Operations Screen
When you are finished viewing the statisti
to return to the
Info screen.
cs information, press Exit
The Operations (Ops) screen allows the user to view the status and issue
commands to the cabinet and tape drives.
To access the
OCP displays the
Operations screen, press Ops from the Home screen. The
Operations screen (see figure 30):
The Ops screen provides the following choices:
•
Library Operations
• Find Tape
• Move Tape
• Drive Operations
• Scan Inventory
Library Operations 2
To view library operations information:
Quantum Scalar 50 User’s Guide 45
Page 70

Figure 31 Library Operations
Screen
Chapter 2 Basic Library Operations
OCP Components
1 From the Ops screen, use the up and down arrows to highlight
Library Operations and press Enter.
The
Library Operations screen displays (see figure 31):
The following library operations options are available (see table 11):
Table 11 Library Operations
Options
Library Operations
Options Description
Library on/offline When the cabinet is
for host communication and for backup jobs
to proceed. When the cabinet is
host is no longer able to communicate with
the library. Self tests, diagnostics, and
inventory can only be performed when the
library is
offline.
Use the up and down arrows to highlight
Library on/offline and press Enter to toggle the
online or offline. Press Yes to confirm
No to cancel.
Release magazines
library
the command or
Use the up and down arrows to highlight
Release magazines and press Enter to view the
release magazines screen. Select the magazine
you wish to release and press
to cancel.
Note: If there are no magazines installed or if
the magazines are configured as load ports,
this line will not display.
online, the library is ready
offline, the
Enter. Press Exit
Quantum Scalar 50 User’s Guide 46
Page 71

Chapter 2 Basic Library Operations
OCP Components
Library Operations
Options Description
Park for shipping Note: You must remove all tape cartridges
from the library prior to parking the library
robotics for shipment.
Figure 32 Match Label Screen
Use the up and down arrows to highlight
for shipping
and press Enter to move the robot
to a safe position for transport. After the robot
is in it’s final position, the library shuts down.
After the library is shut down, you must
complete the repacking procedure before
transporting the library (see appendix D
on
page 216).
2 When you are finished viewing the library operations information,
Exit to return to the Ops screen.
press
Find Tape
To view media or tape cartridge information:
1 Fr
om the Ops screen, use the up and down arrows to highlight Find
Tape
and press Enter.
The
Match Label screen displays (see figure 32):
Park
2
2 Use the up and down arrows to cycle through the alpha, numeric, or
wildcard (?) characters to enter the tape cartridge label. After each
character, press
Quantum Scalar 50 User’s Guide 47
Enter.
Page 72

Chapter 2 Basic Library Operations
OCP Components
If a match is found, the cartridge type and location displays.
Figure 33 Move From Screen
3 If more
than one match is found, a list of matching cartridges
displays. Select the tape cartridge from the list and press
The tape cartridge type and location displays.
Move Tape
To view the move tape screen:
1 Fr
om the Ops screen, use the up and down arrows to highlight Move
Tape
and press Enter.
The
Move From screen displays (see figure 33):
Enter.
2
To move a tape cartridge within the library:
Note: If this is a master library in a multiple library stack, you
cannot move cartridges from one library into another. You
can only move cartridges manually from one library into
another via the remote management pages (see chapter 3
on page 63).
2 Use the u
slot group and press
The
p and down arrows to select a magazine, tape drive, or fixed
Enter.
Move from screen displays a list of storage bins within the
selected magazine, tape drive, fixed slot group, and hand/top
passthru.
3 Use the
occupied bin and press
Quantum Scalar 50 User’s Guide 48
up and down arrows to select a tape cartridge from an
Enter.
Page 73

Chapter 2 Basic Library Operations
OCP Components
The Move to screen displays a list of magazine, tape drive, or fixed
slot groups.
Figure 34 Drive Operations
Screen
4 Use the u
slot group to receive the cartridge and press
The
p and down arrows to select a magazine, tape drive, or fixed
Enter.
Move to screen displays a list of storage elements within the
selected magazine, tape drive, or fixed slot group.
5 Use
6 When you are finished
the up and down arrows to select an empty bin to receive the
tape cartridge and press
The
Move in progress screen displays. When the tape cartridge has
completed the move, a
Enter.
Success screen displays.
moving tape cartridges, press Exit to return to
Ops screen.
the
Drive Operations
To perform a drive operation:
1 Fr
om the Ops screen, use the up and down arrows to highlight Drive
Operations
The
and press Enter.
Drive Operations screen displays (see figure 34):
2
1 Use the up and down arrows to select a tape drive and press Enter.
The following drive options are available (see table
Caution: Ens
ure that the tape drive does not contain a tape
12):
cartridge prior to powering down the tape drive.
Quantum Scalar 50 User’s Guide 49
Page 74

Chapter 2 Basic Library Operations
OCP Components
Table 12 Drive Options
Device Options Description
Drive Pwr on
This option powers on a specific tape drive
within the cabinet.
Pwr off
This option shuts down a specific tape
drive within the cabinet in preparation for
tape drive removal.
Reset
This option re initializes a specific tape
drive within the cabinet.
Drive Type Displays the tape drive type (DLT or LTO)
Serial
Displays the tape drive serial number.
Number
Firmware
Displays the tape drive firmware revision.
Revision
2 When you are finished viewing tape drive information, press Exit to
return to the
Ops screen.
Scan Inventory 2
To perform an inventory of the library:
1 From the Ops screen, use the up and down arrows to highlight Scan
Inventory
and press Enter.
The Success screen displays. Press Done to complete.
Setup Screen 2
The Setup screen allows the user to view or edit various library settings
such as date and time, network and host bus information.
To access the Setup screen, press Setup from the Home screen. The OCP
displays the
Quantum Scalar 50 User’s Guide 50
Setup screen (see figure 30):
Page 75

Figure 35 Setup Screen
Enter
Chapter 2 Basic Library Operations
The Setup screen provides the following choices:
•
Cabinet Setup
• Partitions Setup
• Security
• Network
• Date and Time
OCP Components
Cabinet Setup 2
To view the cabinet setup screen:
1 Fr
om the Setup screen, use the up and down arrows to highlight
Cabinet Setup and press Enter.
The
Cabinet Setup screen displays (see figure 36):
Figure 36 Cabinet Setup
Screen
The Cabinet Setup screen displays the following options (see
13):
table
Quantum Scalar 50 User’s Guide 51
Page 76

Chapter 2 Basic Library Operations
OCP Components
Table 13 Cabinet Setup
Cabinet Setup Description
Host bus
Select the host bus option to view or edit the SCSI
IDs for the changer (library) and tape drives. The
Host bus option also allows you to set the Fibre
Channel settings for any Fibre Channel tape drives
installed. Loop ID, topology, and speed for each tape
drive can be set.
NOTE: SAS tape drives do not require a SCSI ID and
cannot be configured. Use the default tape drive
configuration information.
Stack role Select the stack role option to view or set the library
stack role (stand alone, master, or slave).
Left load port
Select the left load port options to enable/disable the
left load port and also to designate one column or the
entire magazine as a load port.
Right load port
Select the right load port options to enable/disable
the right load port and also to designate one column
or the entire magazine as a load port.
Drive FUP
from tape
Select the magazine or fixed that contains the
firmware update cartridge (FUP) and then the
specific tape drive to update. The library must be
offline to update the tape drive firmware.
Full Inventory When full inventory is on, the library will complete a
full inventory of the tape cartridges whenever a door
is opened. When full inventory is off and a load port
is accessed, the library will only inventory the load
port and not the entire library.
2 When you are finished viewing the cabinet setup information, press
Exit to return to the Setup screen.
Partitions Setup 2
To view or edit the partition information:
Quantum Scalar 50 User’s Guide 52
Page 77

Figure 37 Partitions Setup
Screen
Chapter 2 Basic Library Operations
OCP Components
1 From the Setup screen, use the up and down arrows to highlight
Partitions and press Enter.
The
Partitions Setup screen displays (see figure 37):
The Partitions Setup screen displays the following options (see
14):
table
Table 14 Partitions Setup
Partitions Setup Description
Barcode swap Select the barcode swap to change the barcode
swap option (enable/disable). When enabled, the
media type prefix is swapped from the back of
barcode to the beginning.
Emulation
Select the emulation option to change the library
emulation mode
. Emulation options are: Scalar 50,
PX500, or P2000.
Auto clean
Select the auto clean option to change the library
toclean mode (enable/disable). When enabled,
au
the library will automatically load a cleaning
cartridge when a tape drive requests a cleaning.
Configure Slots The configured slots option allows you to
designate the number of slots available and
reported to the host. Use the up and down arrows
to highlight
the number of configured slots and press
Configure Slots and press Enter. Enter
Enter.
The library will reconfigure with the new slot
count.
Quantum Scalar 50 User’s Guide 53
Page 78

Chapter 2 Basic Library Operations
OCP Components
2 When you are finished viewing/editing the library setup
information, press
Exit to return to the Setup screen.
Figure 38 Security Screen
Table 15 Security Setup
Security
To view or edit the security information:
1 Fr
om the Setup screen, use the up and down arrows to highlight
Security and press Enter.
The
Security screen displays (see figure 38):
The Security screen displays the following options (see table 15):
Security Setup Description
2
Set admin PIN
The admin PIN allows access to all areas of the
OCP.
Select
Set admin PIN and use the up and down
arrows to cycle through the PIN numbers. Press
Enter to accept each digit and press Enter twice after
the last digit of the PIN. You must verify the PIN
number. The admin PIN can be 0 to 8 characters
long, numbers only.
Quantum Scalar 50 User’s Guide 54
Page 79

Security Setup Description
Chapter 2 Basic Library Operations
OCP Components
Set operator
PIN
The operator PIN only allows access to the Info or
Ops menus of the OCP. The operator cannot change
any library settings. Select
Set operator PIN to set
the operator PIN. use the up and down arrows to
cycle through the PIN numbers. Press
accept each digit and press
Enter twice after the last
digit of the PIN. You must verify the PIN number.
The operator PIN can be 0 to 8 characters long,
numbers only.
Note: OCP passwords are independent of the remote
management passwords.
2 When you are finished viewing/editing the security setup
information, press
Exit to return to the Setup screen.
Network
To view or edit the network information:
1 Fr
om the Setup screen, use the up and down arrows to highlight
Network and press Enter.
The
Network screen displays (see figure 39):
Enter to
2
Figure 39 Network Screen
Quantum Scalar 50 User’s Guide 55
Page 80

Chapter 2 Basic Library Operations
OCP Components
The Network screen allows you to view or edit the following network
settings:
Note: The network settings (IP address, subnet mask, and
default gateway) are only active when DHCP is disabled.
•DHCP (default setting)
•IP address
•Subnet mask
• Default gateway
•Ethernet 0
2 Use the up and down arrows to select the network setting you wish
to view or edit and press
Enter.
a To enable/disable DHCP, press Yes to enable DHCP or No to
disable DHCP. If your library is not connected to a network
which uses a DHCP server to assign IP information, disable this
function.
b To set the IP address, subnet mask, and gateway, use the up and
down arrows to select the appropriate number and press
Enter to
accept.
Note: For the network information such as the IP address to be
active, the library must reboot. To reboot the library, see
“Reboot Library”
on page 126.
3 When you are finished viewing/editing the network information,
press
Exit to return to the Setup screen.
Date and Time 2
To view or edit the date and time information:
1 From the Setup screen, use the up and down arrows to highlight Date
and Time
and press Enter.
The Date and Time screen displays (see figure 40):
Quantum Scalar 50 User’s Guide 56
Page 81

Figure 40 Date and Time
Enter
Screen
Chapter 2 Basic Library Operations
OCP Components
2 Use the up and down arrows to view or edit the date and time
information. Press
edited the final setting (seconds), press
Enter to advance to the next choice. After you have
Save to accept the new
settings.
Diags Screen 2
Figure 41 Diagnostic Screen
3 When you
information, press
are finished viewing/editing the date and time
Exit to return to the Setup screen.
The Diagnostics screen allows the user to perform diagnostic tests on the
library.
To access the
OCP displays the
Diagnostics screen, press Diags from the Home screen. The
Diagnostics screen (see figure 41):
The Diagnostics screen provides the following choices:
•
System-level Tests
• Component Tests
• Subsystem Tests
Quantum Scalar 50 User’s Guide 57
Page 82

Figure 42 System-level Test
Screen
Chapter 2 Basic Library Operations
OCP Components
System-level Tests 2
To execute a system-level test:
1 Fr
om the Diags screen, use the up and down arrows to highlight
System-level Test and press Enter.
The
System-level Test screen displays (see figure 42):
The System-level Test screen provides the following diagnostic tests:
•Health test
•Self tests
• Calibration stats
• Random Load/Unload
• Random (Slots Only)
•Random (Drive Focus)
• Sequential bins
• Sequential drives
2 Use
the up and down arrows to select the system test and press Enter
to execute.
3 When you
return to the
are finished executing system-level tests, press Exit to
Diags screen.
Subsystem Tests
To execute a subsystem test:
Quantum Scalar 50 User’s Guide 58
2
Page 83

Figure 43 Subsystem Tests
Screen
Chapter 2 Basic Library Operations
OCP Components
1 From the Diags screen, use the up and down arrows to highlight
Subsystem Tests and press Enter.
The
Subsystem Tests screen displays (see figure 43):
The Subsystem Tests screen provides the following diagnostic tests:
• XYZ assembly test
• Hand assembly test
2 Use
3 When you are f
the up and down arrows to select the subsystem test and press
Enter to execute.
inished executing subsystem tests, press Exit to return
Diags screen.
to the
Component Tests
To execute a component test:
1 Fr
om the Diags screen, use the up and down arrows to highlight
Component Tests and press Enter.
The
Component Tests screen displays (see figure 44):
2
Quantum Scalar 50 User’s Guide 59
Page 84

Figure 44 Component Tests
Screen
Chapter 2 Basic Library Operations
Load Port Configuration
The Component test screen provides the following diagnostic tests:
• XY test
•Y tests
• Rotation stats
• Translation test
• Camera test
• Temperature test
• Home position
2 Use
3 When you
the up and down arrows to select the component test and press
Enter to execute.
are finished executing component tests, press Exit to
return to the
Diags screen.
Load Port Configuration
Load ports are used to import or export tape cartridges from the library.
When configured as a load port, your backup application will
automatically use these bins when exporting or importing tape
cartridges. The bottom left and right magazines in each library can be
configured to provide the following load port elements:
Caution: When placing
that the tape cartridges are completely in the slot before
sliding the magazine back into the library.
Quantum Scalar 50 User’s Guide 60
tape cartridges in the load port slots, ensure
Page 85

Chapter 2 Basic Library Operations
Load Port Configuration
• Single column load port (5 slots SDLT/6 slots LTO)
• Magazine load port (15 slots SDLT/18 Slots LTO)
Table 16 Import/Export Option
Settings
Tech Tip: Deciding bet
ween a single column and an entire
magazines as a load port depends on the amount of tape
cartridges you typically import/export from the library. If
you generally import or export small numbers of tape
cartridges to and from the library, a single column should
be sufficient. If you import or export large numbers of
tape cartridges, an entire magazine as a load port would
be beneficial.
Each of the load ports are configured independently so that
one load port
can be configured as a column and the other load port can be configured
as a column or as a magazine.
When set for a single column load port, the magazine is physically
cted to allow access to the first column in the magazine only.
restri
When set for a 15-slot load port, the entire
magazine can be removed (the
same for a 18-slot LTO magazine).
The load port option is set using the operator control panel
The settings are listed in table
16 and illustrated in figure 45.
Setup menu.
Setting Manual Access SCSI Element
None None Storage element
Single column Single column Import/Export element
Magazine Entire magazine Import/Export element
Quantum Scalar 50 User’s Guide 61
Page 86

Figure 45 Load Port Settings
Single column load port
Full magazine load port
Mag 1
Mag 1
Chapter 2 Basic Library Operations
Load Port Configuration
Enabling load ports will reduce the number of storage elements in the
library. For example, if the library is set to the default capacity (left
magazine only) and a single column is set aside as a load port, the storage
capacity is reduced by the number of slots in that first column. The
number of storage slots would be reduced by five for an SDLT magazine
and six slots in a LTO magazine.
Quantum Scalar 50 User’s Guide 62
Page 87

Chapter 3
3Quantum Scalar 50 Remote
Management
The Quantum Scalar 50 library utilizes a web-based interface which
allows you to configure and manage the library from a remote
workstation on the same network. The Quantum Scalar 50 library is
managed through the following web pages (accessible using Internet
browser software installed on the host computer):
• Status allows you to view the following: hardware status, event logs,
and statistics
• Operations allows you to perform cabinet operations remotely such
as cartridge movement and inventory requests and drive operations
• Setup allows you to setup cabinet identification, user information,
SCSI IDs, network information, events, date and time information,
partitioning, secure tape, and tape encryption information.
• Utilities allows the user to run cabinet utilities remotely.
• Reference links to related sites.
• Logout allows the user to log out of the library remote management
pages.
Quantum Scalar 50 User’s Guide 63
Page 88

Quantum Scalar 50 Web Pages
The internet browser software is not supplied with the Quantum Scalar
50 library; you must obtain and install it independently. The Quantum
Scalar 50 library supports the following internet browsers:
• Microsoft Internet Explorer 6.1 or later
You can download this software from
http://www.microsoft.com.
Note: To optimize performance, all browsers should have both
cookies and pop-ups enabled. This allows the refresh activities
of the remote management web pages to work appropriately.
Java 1.4.2 or above available from http://www.java.com
should also be installed to support applets that automatically
refresh pages and display pop-ups for warnings and critical
events.
• Mozilla Suite 1.7 on Solaris 10
You can download this software from
http://www.mozilla.org
Chapter 3 Quantum Scalar 50 Remote Management
Quantum Scalar 50 Web Pages
• Firefox 1.0.6 on Windows
You can download this software from
http://www.mozilla.org
• Java Plug-in 1.4.2 or later
You can download this software from
http://www.java.com
Quantum Scalar Web Page Menu Items 3
Quantum Scalar 50 User’s Guide 64
The following figures depict the menu items available from the Quantum
Scalar 50 Web Pages:
• Figure 46 provides the default menus for the Scalar 50 web pages
• Figure 47 provides an additional menu for the tape security feature
available with the DLT-S4 tape drives. When this feature is enabled,
the menu will display as part of the
Setup page.
Page 89

Figure 46 Quantum Scalar 50
Setup
Logout
Setup Cont.
Identification
Library Information
Model
Serial Number
Library Name
Contract Number
Location
Description
Position
Business Inform.
Company
Address
Users
Users List
SCSI/Fibre
Cabinet
Device
SCSI ID
LUN
Vendor
Model
Serial Number
Revision
Connectivity
Remove Users
User Information
Full Name
User Name
Password
Network
Network Infor.
Hostname
Field Service
Setup Wizard
Library Offline
Date and Time
Configuring Devices
Configuring Load Ports
Configuring Partition
Setup Wizard Complete
Domain
IP Address
Default Mask
Obtain DHCP
Email server Infor.
From:
Email server
Primary DNS
Secondary DNS
Verify password
User Name
Assign Role
Operator
Administrator
Address
Phone
Fax
Pager
Email
Add to Event List
Status
Overview
Date and Time
Model number
Software Version
Hardware Status
Event Log
Cabinet
Serial number
Power Supply
SCB temp.
View Events
From: date/time
To: date/time
Category
Cabinet
All errors
Cabinet #
Hard errors
Soft errors
Update errors
Boot errors
Doors
Left mag. door
Right mag. door
BackPlane status
Drives
Drive #
Drive present
Drive serial #
State
Drive Activity
Drive Status
Drive Power
Drive Reg. tmp
Drive fan RPM
BackPlane temp.
System power...
SCB volt. (1.2v)
SCB volt. (1.8v)
SCB volt. (2.5v)
SCB volt. (3.3v)
SCB volt. (5.0v)
cPCI card (12v)
OCP
OCP status
OCP temp.
Library Statistics
Cabinet #
Power on time
# of power cycles
# slot/port gets
# slot/port puts
# slot/port get retries
# drive get retries
# drive put retries
# drive load retries
# drive unload retries
# XY motor moves
# Z motor moves
# slot/port put retries
# drive gets
# drive puts
# picker moves
# rot. motor moves
# XY motor retries
# Z motor retries
# picker retries
# rot. motor retries
Power Supply #
Pwr sply pres.
Pwr sply (24v)
Fan sp. (RPM)
Events
Email
Message Type
Library
Library Config.
Load ports (L/R)
Partitions
Partition List
Remove All
Partition Config.
Name
Cabinets
Magazines
Drives
Load Ports
Surrogate Drive
Partion Options
Configured Slots
Recipients
Non-recipients
E-mail
Send test
SNMP
Comm. Names
Trap Dest.
Critical
Warning
Informational
Event Types
Critical
Warning
Informational
Date and Time
Date
Time
Current time
Time zone
Auto adjust.
En. Auto Cln.
Em. P-Series
En. Bar. Swap
Em.Scalar 50
Operations
Find
Find Barcode
Find Media
Logical Map
Physical Map
Inventory
Partition
Logical Map
Physical Map
Move
Source
Logical Map
Physical Map
Partition
Utilities
Library
Online/Offline
Reboot Library
Fib. Bridge Rescan
System Tests
Health Test
Select Cabinet
Start Test
Maintenance
Conf. Files
Upload Firmware
Action
Cabinet
Browse
Upload Drive Image
Drive Type
Drive Number
Cabinet
Browse
Browse
Logs
Tasks
Drive Log
View Log
FA Log
Retrieve
Cabinet
System Tests
Test Type
Action
Previous Results
Lib. Level Tests
Sys. Level Tests
Health Tests
Sub-Sys. Tests
Comp. Tests
Partition
Cabinet
Runs
Start Test
Continuous
Park for Shipping
Partition
Element
Position
Destination
Partition
Element
Position
Drives
Drive Operations
Logical Map
Physical Map
Partition
Action
Pwr Off
Pwr On
Reset
Drive #
Reference
Links
About
Library Information
Model
Software Version
Serial Number
IEEE ID
MAC Address
IP Address
Subnet Mask
Default Gateway
IEEE ID
MAC Address
Cabinet Information
Cabinet
Slots
Drives
Load Ports
Serial Number
Web Page Menu Items
Chapter 3 Quantum Scalar 50 Remote Management
Quantum Scalar 50 Web Pages
Quantum Scalar 50 User’s Guide 65
Page 90

Figure 47 Quantum Tape
Setup
Secure Key
Protection Mode
Never write...
Only write...
Write to all...
Enable/Disable...
Enable all drives
Disable all drives
Select drives
Select Secure Key
Sec. Key Name
Date Created
Assign Secure Key
Find Sec. Cart.
Sec. Name, Date
Barcode
Create Secure Key
Sec. Key Name
Verify Sec. Key
Secure Key
Delete Secure Key
Unused Keys
Active Keys
Inactive Keys
Upload Secure Key
Encryption Key
File Name
Backup Secure Key
Encryption Key
Verify Encr. Key
Security and Tape Encryption
Menus
Chapter 3 Quantum Scalar 50 Remote Management
Quantum Scalar 50 Web Pages
Quantum Scalar 50 User’s Guide 66
Page 91

Chapter 3 Quantum Scalar 50 Remote Management
Content area
Navigation area
Quick status
Banner area
Quantum Scalar 50 Web Pages
Accessing Scalar 50 Web Pages 3
Figure 48 Overview Page
To access the Quantum Scalar 50 web pages:
1 On
the host computer, open the internet browser software.
2 In the
Address field, type http://IPaddress/ where IP address is the IP
address for the Quantum Scalar 50. (see
3 Enter
the username and password and click OK.
Note: The
The
Overview page displays (see figure 48):
default username and password is admin.
“Setup” on page 84).
Using the Quantum Scalar 50 Web Pages 3
The first page that displays when you access the Quantum Scalar 50 web
pages is the Quantum Scalar 50
Overview page (see figure 48). This page
includes information on the Quantum Scalar 50 such as library
date and time, and includes a dynamic graphic which changes colors
depending on the library health.
Quantum Scalar 50 User’s Guide 67
name,
Page 92
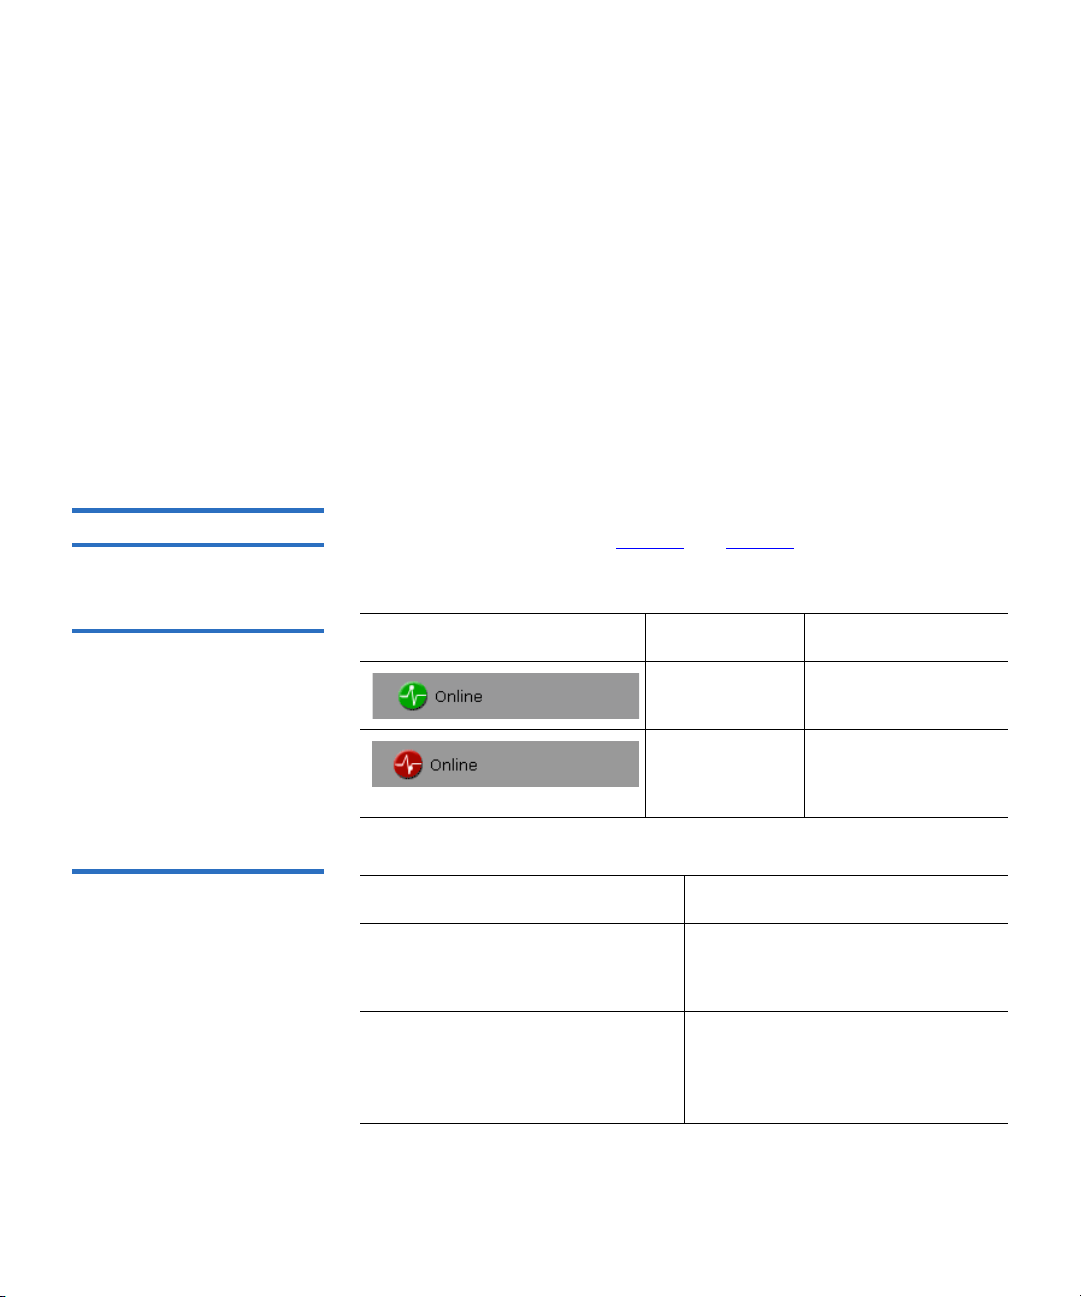
Chapter 3 Quantum Scalar 50 Remote Management
Quantum Scalar 50 Web Pages
The Overview page is divided into five distinct sections:
• Banner
• Quick status
• Navigation area
• Content area
The banner frame displays the corporate logo and product name. The
contents frame displays a list of the Quantum Scalar 50 web pages. To
view a page, click its corresponding link. The management frame
displays the page you selected.
To return to a previous web page, click the browser’s Back button.
Quick Status 3
Table 17 Quick Status Library
Health Conditions
Table 18 Quick Status Health
Messages
The Quick Status icon provides the current health status for the library.
Refer to the following tables (
table 17 and table 18) for quick status library
health conditions.
Quick Status Icon Library Health Description
Library health:
OK.
Library health:
Critical
The library health is
OK.
The library health is
in a
Critical state
(needs attention)
Quick Status Messages Description
Online and Offline These messages indicate the
current availability status of the
library.
Init Error
The library has failed to initialize.
Review the hardware status page
and contact Quantum Customer
Support if necessary.
Quantum Scalar 50 User’s Guide 68
Page 93

Chapter 3 Quantum Scalar 50 Remote Management
Quantum Scalar 50 Web Pages
Quick Status Messages Description
Stopped
Door Open
Tape Cleaning
Moving
Code Update
Initializing
Power Down
Communication Down
Over Temp
The hand has stopped. Check the
error log and contact Quantum
Customer Support if necessary.
A library door is open.
A tape drive is being cleaned.
A tape cartridge is being moved.
The library is in the process of
upgrading the system code. Wait
until the process is complete
The library is in the process of
coming online. Wait until the
library becomes online.
The library is powering down.
Wait for the unit to shutdown.
The library is in the process of
shutting down. Library
communication will resume
when the library powers on.
The library has exceeded the
maximum temperature threshold.
Review the hardware status page
and contact Quantum Customer
Support if necessary.
Diagnostic
The library is executing a
diagnostic test. Wait for the test to
complete.
Quantum Scalar 50 User’s Guide 69
Page 94

Status
Chapter 3 Quantum Scalar 50 Remote Management
Status
The Status page displays the general status or health of the library as well
as specific hardware status. The page also provides access to event logs as
well as library statistics.
Status page is divided into the following sections:
The
•
Overview Page
• Hardware Status Page
• Event Log Page
• Statistics Page
Overview Page 3
Figure 49 Status Page
To access the Overview page, from any page, click Status from the
navigation bar.
The management frame displays the
Status page (see figure 49).
Quantum Scalar 50 User’s Guide 70
Page 95

Chapter 3 Quantum Scalar 50 Remote Management
Hardware
components
Status
Hardware Status Page 3
Figure 50 Hardware Status
Page
The Hardware status page displays the library component status within
the library.
To access the
Hardware page, from the Status page, click on the Hardware
tab at the top of the page.
The
Hardware Status page displays (see figure 50):
Quantum Scalar 50 User’s Guide 71
Library components within the library are displayed in a tree-like
fashion. A red background indicates critical or failed condition. Related
values or error messages are listed under details.
To view the status of a library component
1 Click
on a plus sign to expand a branch and display the status of
related subcomponents. Click on a minus sign to collapse a branch.
Expand All/Collapse All to expand or collapse all branches.
Click
Some components, such as drives, are
displayed as a link. Clicking on
the link will open a detail window displaying all data related to the
component.
Page 96

Chapter 3 Quantum Scalar 50 Remote Management
Status
Event Log Page 3
Figure 51 Event Log Page
The Event Log page allows the user to view events that occur on the
library. These events are divided into the following categories:
• All - views all events in all categories
• Hard - views only hardware related events
• Soft - views only software related events
• Update - views only events related to library update functions
• Boot - views only events related to library boot sequence
To access the
Event Log page, from the Status page, click on the Event Log
tab at the top of the page.
The
Event Log page displays (see figure 51):
Quantum Scalar 50 User’s Guide 72
Page 97

Chapter 3 Quantum Scalar 50 Remote Management
To view an Event Log:
1 In the Event Log page, change the From and To areas to reflect the
time range of the event log you wish to view. Click the up and down
arrows to change the hour and/or minute values by increments of
one. Double-clicking will increment or decrement the value by 5. You
may also type in a valid hour (0 - 24) or minute (0 - 59).
Note: The default date/time range is one hour prior to the
current time and day.
2 Select desired categories and priority levels (critical, warning, or
informational) for the event list.
3 Click View to display the list.
Note: Search time will vary depending on the time range
entered.
A smaller window displays the information matching the range,
category, and priority specified.
Status
Statistics Page 3
The Statistics page allows the user to view library statistics for the entire
library or certain components within the library.
The following table shows the statistics available from the Statistics page:
Quantum Scalar 50 User’s Guide 73
Page 98

Chapter 3 Quantum Scalar 50 Remote Management
Status
Table 19 Statistics Information
Cabinet or Component Statistical Information
Cabinet (library) Time since last power-on (seconds)
Time processing robot commands
(seconds)
Estimated number of power cycles
Attempted slot/port picks
Attempted slot/port places
Attempted drive picks
Attempted drive places
Number of individual horizontal moves
Number of individual vertical moves
Number of individual extension moves
Number of individual hand moves
Number of individual depth moves
Number of individual rotary moves
Number of horizontal retries
Number of vertical retries
Quantum Scalar 50 User’s Guide 74
Page 99

Chapter 3 Quantum Scalar 50 Remote Management
Cabinet or Component Statistical Information
Number of extension retries
Number of hand retries
Number of depth retries
Number of rotary retries
Number of drive place retries
Number of drive pick retries
Number of partially gripped cartridge
retries
Number of drive load retries
Number of barcode scan retries
Number of slot/port pick retries
Number of slot/port place retries
Status
To access the Statistics page, from the Status page, click on the Statistics
tab at the top of the page.
The Statistics page displays (see figure 52):
Quantum Scalar 50 User’s Guide 75
Page 100

Figure 52 Statistics Page
Chapter 3 Quantum Scalar 50 Remote Management
Status
Note: Statistics for individual elements (a specific drive, slot, or port) are
included in the element detail window and can be viewed by
clicking on a drive, slot, or port link from zoom windows accessed
via the
Operations pages. The zoom windows are opened by
clicking on the panel or cluster name from physical or logical
maps.
Quantum Scalar 50 User’s Guide 76
 Loading...