


Quantum Scalar i6000 Drive
Replacement
Use this procedure to replace a tape drive in a Scalar i6000 library.
If a drive fails, the library will issue a ticket. From the Details screen, write down the Repair Link or Error Code number. You’ll need it when you contact Quantum Service.
WARNING: Before performing any of the steps listed in this document, contact Quantum Service for help diagnosing the problem.
WARNING: To use this procedure, all drives must be connected to an Ethernet
Expansion Blade (EEB) or an FC I/O blade.
Refer to the following sections and follow the steps in the document to replace a drive in your Scalar i6000 library:
•Locating a Drive on page 2
•Remove and Replace the Drive on page 4
•Update the Drive Firmware Using Firmware Images on page 8
© 2013 Quantum Corporation. All rights reserved. Quantum, the Quantum logo, DLT, DLTtape, the DLTtape logo, SuperLoader, Scalar, DXi, StorageCare, StorNext, GoProtect, and Vision are registered trademarks of Quantum Corporation and its affiliates in the United States and/or other countries. All other trademarks are the property of their respective owners. Quantum specifications are subject to change.
6-67999-01 Rev A, October 2013
*6-67999-01 A*
Quantum Scalar i6000: Drive Replacement
6-67999-01 Rev A
October 2013
Locating a Drive
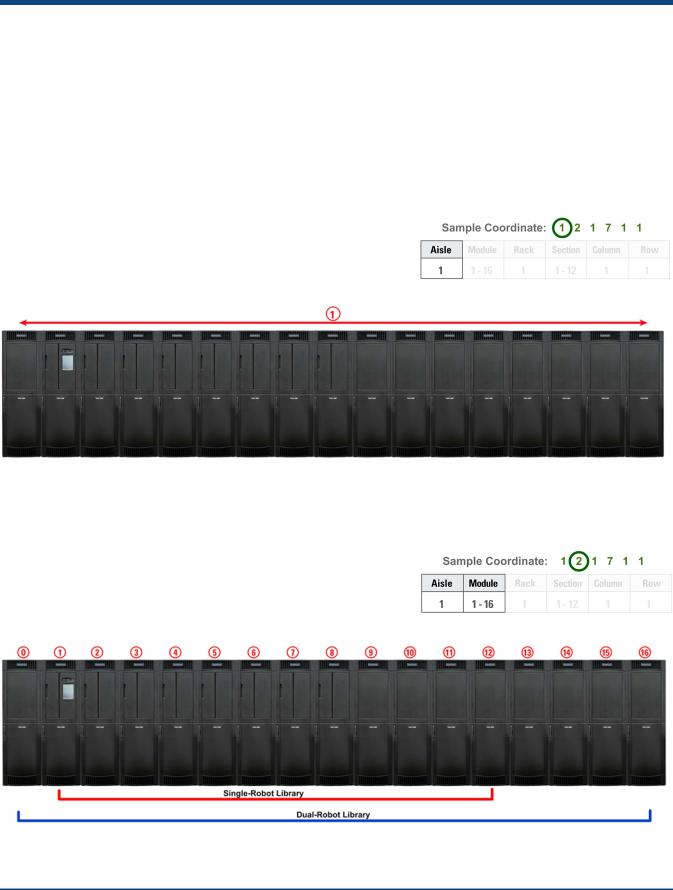
When a drive fails, a ticket is generated by the library that will identify the malfunctioning drive using a coordinate system. This section will explain the basics of locating a drive using the coordinate system so when you are replacing the drive, you will be able to identify the correct drive. Removing a drive incorrectly can impact data on your library.
The drive coordinate system has six (6) numbers, for example: 1, 2, 1, 7, 1, 1. The first number identifies the aisle. The Scalar i6000 is a single aisle library only so this number is always 1.
The second number identifies the module. The module number can be from 1- 16. This applies to both singleand dual-robot libraries. The left parking module (module 0) is only for dual-robot libraries and cannot contain drives. A highdensity expansion module (HDEM) also cannot contain drives.
2 |
Locating a Drive |

Quantum Scalar i6000: Drive Replacement
6-67999-01 Rev A
October 2013
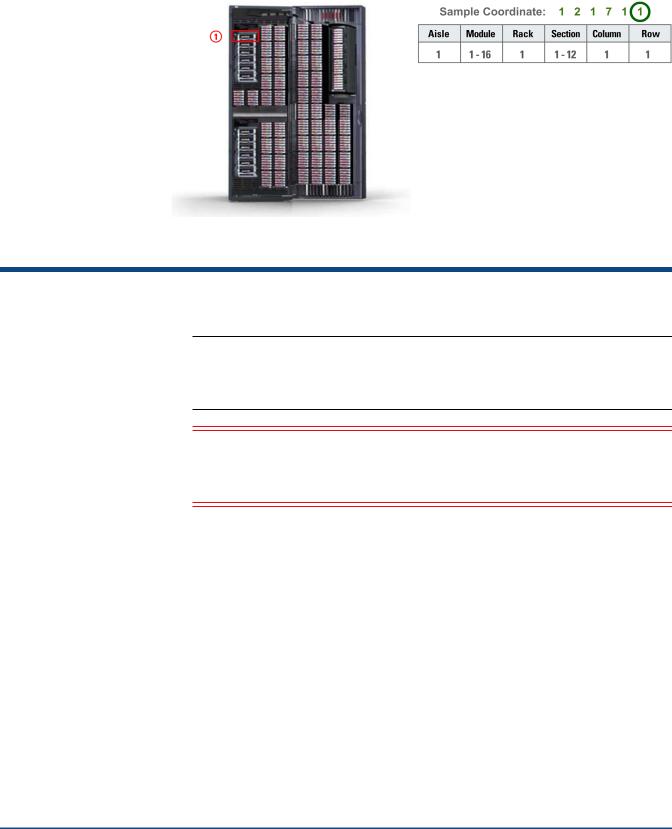
The third number in the sequence represents the rack. Since drives can only be contained in rack 1, this number will always be 1.
The fourth number indicates the section. Each module can contain 12 drives so with drives, this number can range from 1-12. Drives are counted from bottom to top.
The fifth number in the sequence identifies the column. Since drives can only be contained in a single column, they will always reside in column 1.
Locating a Drive |
3 |
Quantum Scalar i6000: Drive Replacement
6-67999-01 Rev A
October 2013
The sixth number denotes the row and will always be 1. Drives have a connection point at the lower portion of the drive sled that connects to the library. Therefore, the sled is logically in row 1.
Remove and Replace the Drive
Note: This procedure is used to replace a drive with the same drive model. Drive upgrades must be performed by Quantum service personnel. If the failed drive is an EDLM drive, it must be replaced by Quantum service personnel.
Caution: Before starting this procedure, verify that you have received the same make and model drive as the drive you are replacing. The outside of the box will indicate the drive make and model that was shipped.
Required tool: Phillips screwdriver - use this if the thumbscrews are too tight
1Stop any processes on the host that are communicating with the drive that is being replaced.
2Log on as the administrator from the library’s touch screen (LMC).
3Locate the drive identified as needing replacement on your call with Quantum Service:
aSelect View > Physical Library.
bSelect Tools > Drives. The Drives screen displays.
4 |
Remove and Replace the Drive |
 Loading...