

Page 1
Q-SEE IP CAMERA MODEL QSTC201/211 QUICK INSTALLATION GUIDE
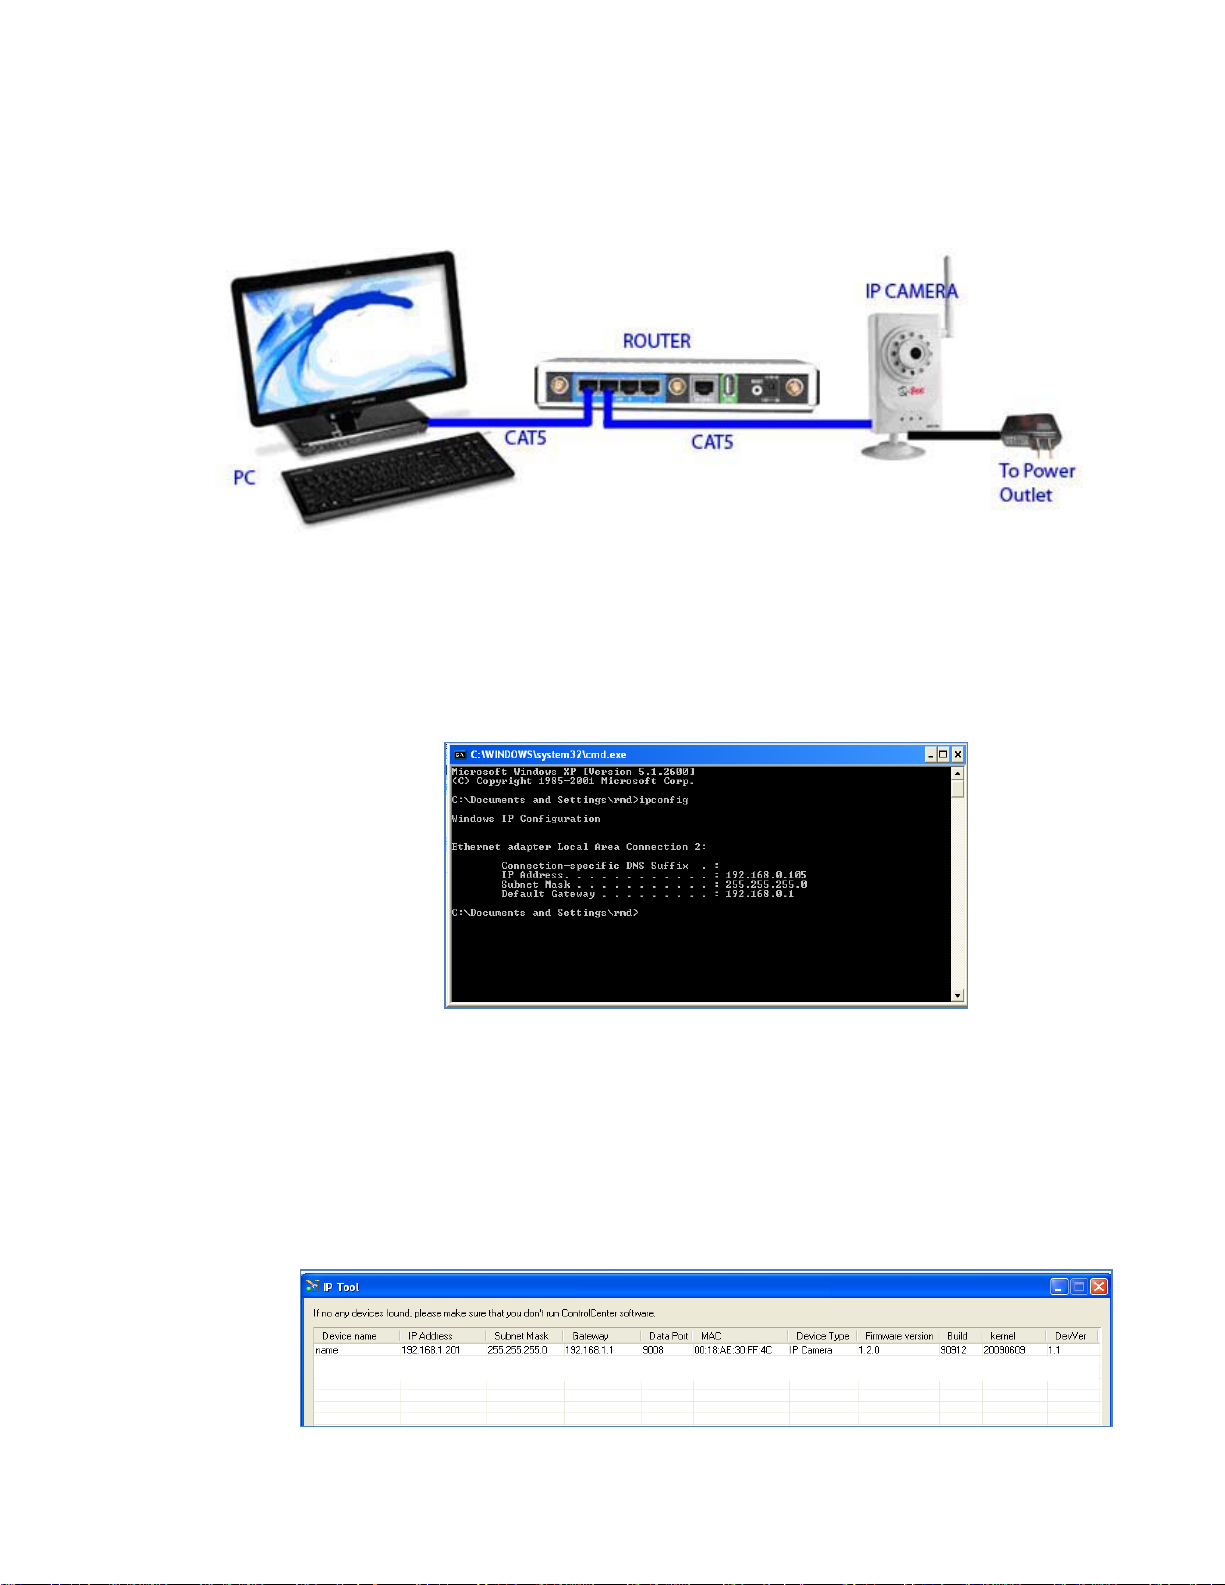
1. Connection Diagram
a. Connect the Q-See IP camera to the same Router as your PC.
2. Setting up the Connection on a PC
a. Find the IP address of the PC: To do this:
Go to Start – Run (XP) and type CMD. In Vista, type CMD in Search. You will get the Command prompt
screen. Type in “IPCONFIG”. Note the IP Address, Subnet Mask Address and Default Gateway Address
listed on your command screen and write these down for future reference. See example below (Figure
1).
the Subnet Mask is 255.255.255.0 and the Default Gateway is 192.168.0.1
b. Insert the installation CD for the Q-See IP camera and Install the Q-See IP Camera as prompted by the
pop-up menu that appears on your screen.
c. Once the Q-See IP Camera Software is installed:
Go to: Start-All Programs-ControlCenter-IPTOOL. You will see a dialog box listing all connected IP
Cameras with the appropriate Addresses listed. See example below (Figure 2).
*Note that the example of this IPTOOL screen above lists an IP Camera with the Device Name of “name”,
an IP Address of 192.168.1.201, a Subnet Mask of 255.255.255.0 and a Gateway of 192.168.1.1
(Figure 1)
*Note the IP Address for this example is 192.168.0.105,
(Figure 2)
Page 2
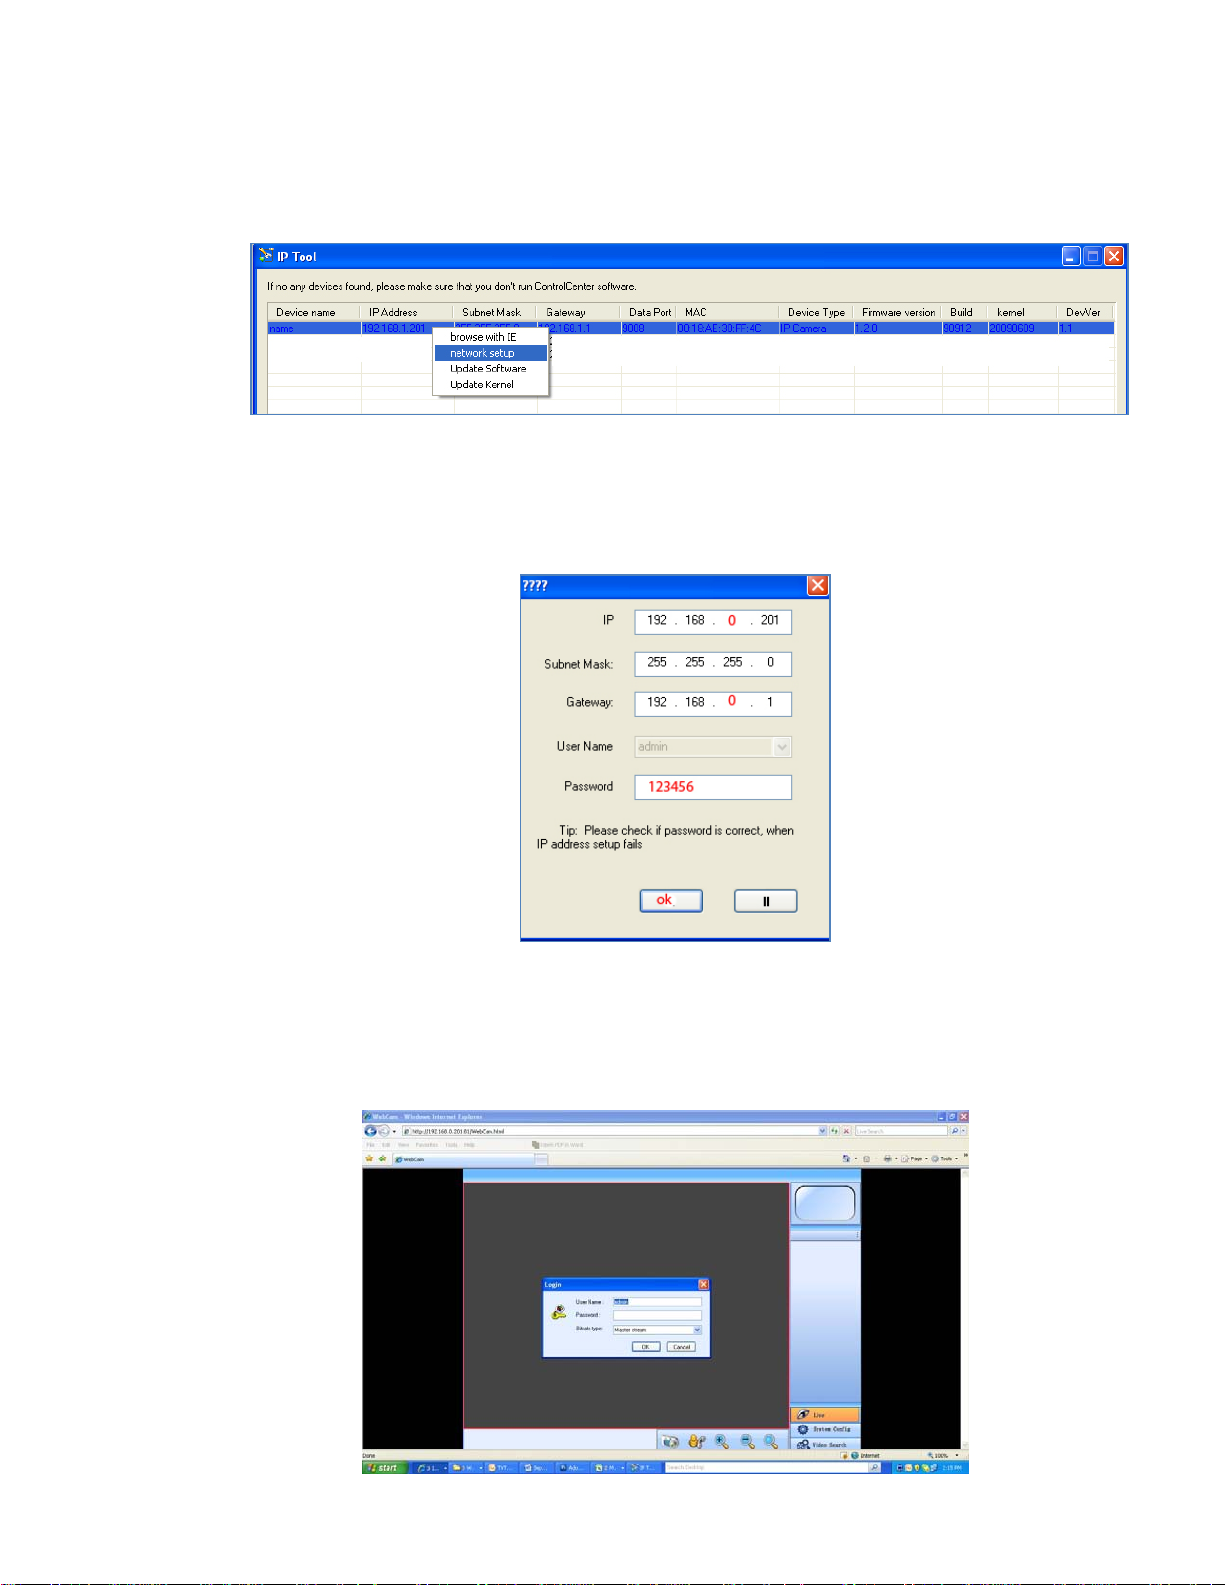
d. If the IP Address, Subnet Mask and Gateway Address listed in the IPTOOL dialog box is different than
those listed in your Command Screen (See Figure 1), then the IPTOOL Addresses and Subnet Mask must
be changed accordingly. To do this, right click on the name of the Device with the Addresses you want to
change (in this example below, the Device Name is “name”) and choose “network setup” from the right
click dialog box (Figure 3).
(Figure 3)
e. A pop up dialog box will appear as shown in the example below (Figure 4). Change the IP Address,
Subnet Mask and the Gateway Address to the Addresses you obtained from your Command Screen (See
Figure 1). Input Password 123456, hit OK and the pop up dialog box will close and you will be returned
to the IPTOOL screen (Figure 2).
(Figure 4)
f. The address you just inputted should now be listed on your IPTOOL screen next to your device. Right
click one more time on the Device (in our example, Device Name is “name”) and choose “Browse with
IE” (Figure 3). You will then be prompted to log in. Enter User Name “admin” and Password “123456”
(See Figure 5). Once logged in, you will be able to view a live feed from your video as shown in Figure 6.
(Figure 5)
Page 3

3. Setting up the Wireless Function of the Camera
a. In your Internet Explorer Browser window (See Figure 7), click on the “System Config” button on the
bottom right hand side of your screen.
b. A Menu Box will appear (See Figure 7). In this Menu Box, choose the “Wireless config” option nested
under “Network config” on the left hand side (circled in red in Figure 7).
c. Check the “Wireless Switch” box located at the top of your Menu Box.
d. Click the “Refresh” button in your Menu Box (as indicated in Figure 7) and your system will now detect
the wireless router connected to your computer. The name of your router will appear in your list of
routers under the column “SSID”. Clicking on the router will reveal the IP, Gateway, DNS and Subnet
Mask Addresses on lower right hand side of your Menu Box.
(Figure 6)
(Figure 7)
Page 4

i. If your Router is encrypted, then you will need to set all the addresses manually with the
addresses listed on your IPTOOL screen (See Figure 4). To do this, check the “Use the Following
IP Address” box on your Menu Box (Figure 7) and enter the information manually.
e. Once you have completed the set up, click the “Save” button at the bottom of the screen on your Menu
Box.
f. Once you have saved your settings, you can now disconnect the Cat-5 cable from the camera and place
the camera anywhere within the range allowed by your wireless router. Please note that each router
will afford you different ranges of connectivity and you should refer to your Router’s manual for more
accurate and detailed information.
g. Run the IPTOOL program again to ensure that your new Q-See IP Camera is detected by your Router. If
not, station your camera closer to your Router.
Questions or Comments?
Contact Us:
Mailing Address: Customer Service:
DPS Inc. Phone: 877-998-3440 x 538
8015 E. Crystal Dr. Email: cs@dpsi-usa.com
Anaheim, CA 92807 Live Chat from our Website
Website: Tech Support:
http://www.q-see.com Phone: 877-998-3440 x 539
Fax: Email: ts@dpsi-usa.com
714-998-3509 Live Chat from our Website
*We recommend that you place this camera in a room that has enough air circulation to avoid overheating
*To see this camera over the Internet you need to forward port 80 and 9008 in the Router. For more details about Port
Forwarding, please refer to the User Manual.
 Loading...