

Page 1
Ladegerät LG/A2
DE
GB
FR
IT
ES
NL
DK
SE
CZ
TR
Manual
PL
RUS
Page 2
Deutsch
Beim Lesen der Gebrauchsanleitung
Bildseiten herausklappen.
English
Fold out the picture pages
when reading the user intructions.
Français
Lorsque vous lisez le manuel d’utilisation,
veuillez déplier les pages d’illustration
.
Italiano
Per leggere le istruzioni per l’uso
aprire le pagine ripiegate contenenti le fi gure.
Español
Al consultar el manuel de instrucciones
abrir la hoja plegable.
Nederlands
Bij het lezen van de gebruiksaanwijzing
pagina´s met afbeeldingen uitklappen.
Dansk
Når brugsanvisningen læses,
skal billedsiderne klappes ud.
Svenska
Vid läsning av bruksanvisningen,
fall ut bildsidoma.
Èesky
Pří čtení návodu k obsluze rozložit
stránky s obrázky.
Türkçe
Kullanma Talimatının okunması esnasında
resim sayfalarını dişarı çıkartın.
Polski
Przy czytaniu instrukcji obslugi otworzyç
strony ze zdj´ciami.
Pyccкий
При чтении руководства по зксплуатации
просьба открывать страницы с рисунками.
DE
GB
FR
IT
ES
NL
DK
SE
CZ
TR
PL
RUS
4
6
8
10
12
14
16
18
20
22
24
26
- 2 -
Page 3
1
4
3
2
- 3 -
Page 4

Original-Betriebsanleitung
DE
LG/A2
Warnung!
Lesen Sie alle Sicherheitshinweise
und Anweisungen!
Versäumnisse bei der Einhaltung der
Sicherheitshinweise und Anweisungen können
elektrischen Schlag, Brand und/oder schwere
Verletzungen verursachen zur Folge haben.
Bewahren Sie alle Sicherheitshinweise und
Anweisungen für die Zukunft auf.
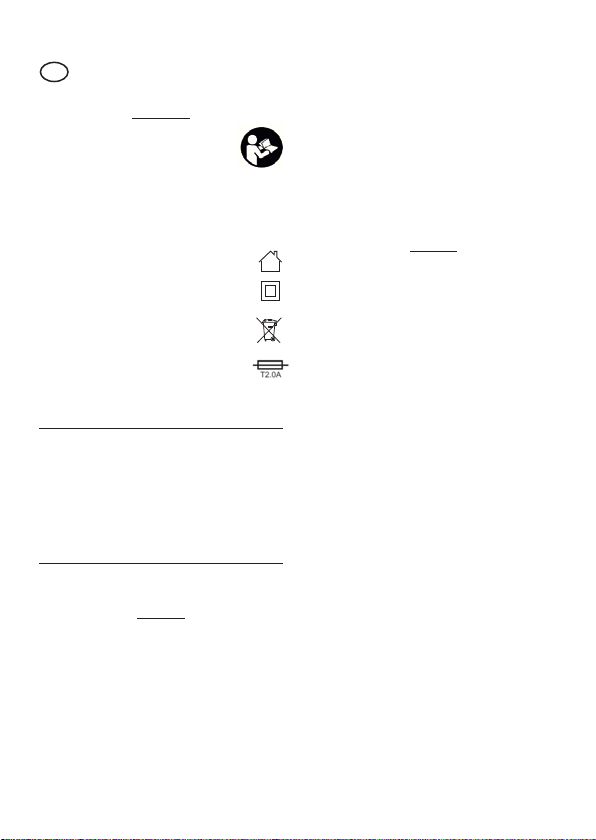
Nur zum Gebrauch in trockenen Räumen
Schutzklasse II-Gerät
Elektrowerkzeug, Ladegerät oder Akku
nicht über den Hausmüll entsorgen!
Sicherung 2A
1 Technische Daten
Gewicht: ca. 340 g
Netzspannung: 100-240V~50/60Hz
Ausgangsspannung: 12,6 V
Ladestrom: 2 A
2 Inbetriebnahme und Bedienung
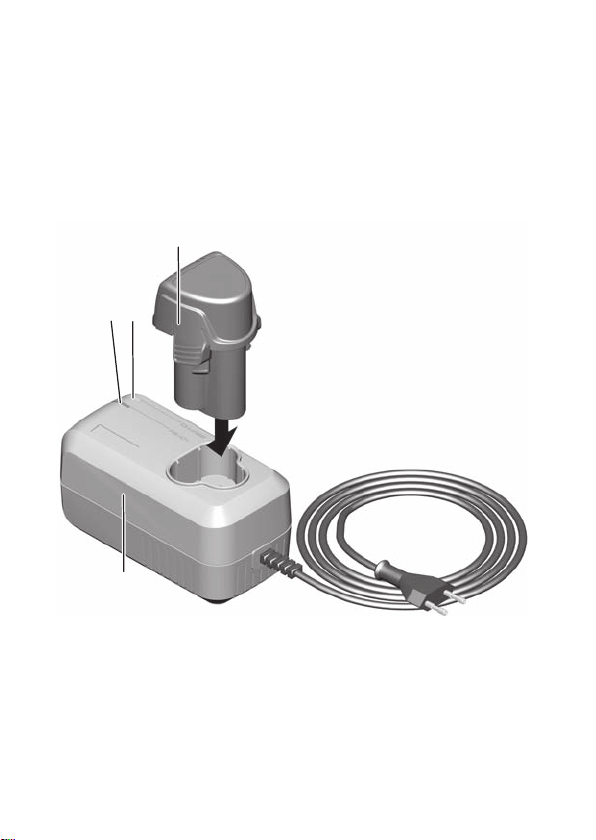
Laden des Akkus (Fig. 1)
Achtung!
Lesen Sie vor der Inbetriebnahme die Warnhinweise und Aufschriften, die an dem Ladegerät
und dem Akku angebracht sind!
• Akku nicht zerlegen oder das Gehäuse
zerbrechen! Elektrolyt könnte austreten und
Verletzungen verursachen! Sollte Elektrolyt in
Ihre Augen gelangen, waschen Sie diese mit
sauberem Wasser aus und begeben Sie sich
unverzüglich in ärztliche Behandlung!
• Akku vor Überhitzung schützen! Defekte
können die Folge sein.
• Akku niemals kurzschließen! Starke Ströme
können eine Überhitzung des Akkus bewirken.
Verbrennungen oder ein Defekt sind die
möglichen Folgen. Stellen Sie bei der Lagerung des Akkus sicher, dass die elektrischen
Kontakte keine leitende Verbindung bekommen können.
• Akku niemals in offenes Feuer geben! Der
Akku kann explodieren.
• Setzen Sie den Akku niemals Flüssigkeiten aus!
Bitte beachten Sie, dass Ihr ProxxonLadegerät LG/A2 nur mit den passenden
Proxxon-Akkus (Li/A2, No. 29896) betrieben
werden darf!
Die jeweiligen Proxxon-Komponenten sind
optimal aufeinander abgestimmt.
Bitte beachten Sie: Gerät, Akku und Ladegerät
sind auch separat im Handel erhältlich!
Im Auslieferungzustand ist der Akku teilgeladen
und muss vor der Inbetriebnahme des Gerätes
voll aufgeladen werden. Dazu gehen Sie wie
folgt vor:
1. Stecker des Ladegerätes einstecken.
2. Akku 1 in das Ladegerät 2 einfügen wie in
Fig. 1 gezeigt.
3. Die gelbe Leuchtdiode 3 signalisiert den
Ladevorgang. Ist dieser abgeschlossen,
leuchtet die grüne Leuchtdiode 4 auf.
4. Vollgeladenen Akku aus dem Ladegerät
entnehmen.
Um den Akku beim Arbeiten vor schädlicher
Tiefentladung zu schützen, wird der Ladezustand permanent elektronisch überwacht und
das Gerät vor dem Erreichen des kritischen
Entladungszustands abgeschaltet. Nun muss
Achtung:
- 4 -
Page 5

der Akku wieder aufgeladen werden. Versuchen
Sie nicht, das Gerät wieder mit entladenem
Akku in Betrieb zu nehmen!
Der Ladevorgang kann jederzeit unterbrochen
und wieder neu aufgenommen werden, ohne
dass der Akku Schaden nimmt.
Wenn sich die Betriebszeiten nach dem Ladevorgang drastisch verkürzen, deutet das darauf
hin, dass der Akku erneuert erden muss!
Falls nach dem Einstecken des Akkus in die
dafür vorgesehene Öffnung die gelbe Leuchtdiode nicht permanent leuchtet, sondern blinkt,
ist die Ursache möglicherweise eine zu hohe
Temperatur, ein Defekt oder die Tiefentladung
des Akkus.
• Ist der Akku zu heiß, wird nach dem Abkühlen
der Ladevorgang automatisch gestartet.
• Ist der Akku dagegen normal temperiert, aber
tiefentladen, wird vom Ladegerät geprüft, ob
er noch Strom aufnimmt oder bereits defekt ist.
• Wenn der Akku wiederherstellbar ist, leuchtet
die gelbe Leuchtdiode nach einiger Zeit kontinuierlich und signalisiert den erfolgreichen
Ladevorgang.
• Blinkt die gelbe Leuchtdiode, ist der Akku
defekt und muss entsorgt werden.
Entsorgung
Bitte entsorgen Sie das Gerät nicht über den
Hausmüll! Das Gerät enthält Wertstoffe, die
recycelt werden können. Bei Fragen dazu wenden
Sie sich bitte an Ihre lokalen Entsorgungsunternehmen oder andere entsprechenden kommunalen Einrichtungen.
Achtung:
3 CE-Konformitätserklärung
Name und Anschrift des Herstellers, bzw.
Inverkehrbringers:
PROXXON S.A.
6-10, Härebierg
LU-6868 Wecker
Produktbezeichnung: Ladegerät LG/A2
Artikel Nr.: 29880
Wir erklären in alleiniger Verantwortung, dass
dieses Produkt mit den folgenden Richtlinien und
normativen Dokumenten übereinstimmt:
2014/35/EG Niederspannungsrichtlinie
DIN EN 60335-1/10.2012
DIN EN 60335-2-29/06.2019
2014/30/EU EMV-Richtlinie
DIN EN 55014-1/08.2018
DIN EN 55014-2/01.2016
DIN EN 61000-3-2/03.2015
DIN EN 61000-3-3/03.2014
Datum: 12.08.2019
Dipl.-Ing. Jörg Wagner
PROXXON S.A.
Geschäftsbereich Gerätesicherheit
Der CE-Dokumentationsbevollmächtigte ist
identisch mit dem Unterzeichner.
- 5 -
Page 6
Translation of the Original
GB
Operating Instructions LG/A2
WARNING!
Read through all safety guidelines
and instructions!
Failure to adhere to safety guidelines
and instructions can result in electrical shock,
fi re and/or serious injuries as consequence.
Store all safety guidelines and instructions
for the future.
Only for use in dry rooms
Protection class II device
Do not dispose of the power tool, charger
or battery with household rubbish!
Fuse 2A
1 Technical data
Weight: Approx. 340 g
Mains voltage: 100-240V~50/60Hz
Output voltage: 12.6 V
Charging current: 2 A
2 Commissioning and operation
Charging the battery (Fig. 1)
Caution!
Before starting up, read the warning instructions and the labels attached to the charger and
the battery!
• Do not disassemble the battery or break
the housing! Electrolytes could leak out and
cause injuries! If electrolyte gets into your
eyes, rinse them with clean water and seek
medical attention immediately!
• Protect battery from overheating! Defects
could be the result.
• Never short-circuit the battery! Strong
currents could overheat the battery. Burns or
a defect could be the possible result. When
storing the batteries, ensure that the electric
contacts cannot establish a conductive
connection.
• Do not put the battery in open fi re! The
battery can explode.
• Never subject the battery to liquids!
Caution!
Please note that your Proxxon charger LG/
A2 may only be operated with the appropriate Proxxon batteries (Li/A2, No. 29896)!
The respective Proxxon components are optimally coordinated.
Please note: The device, battery and charge are
also separately available at retailers!
When delivered, the battery is partially charged
and must be charged completely before
commissioning the device. To do so, proceed
as follows:
1. Insert the plug of the charger.
2. Insert battery 1 in the charger 2 as shown
in Fig. 2.
3. The yellow light-emitting diode 3 signals
the charging process. When completed, the
green light-emitting diode 4 lights up.
4. Remove the completely charged battery
from the charger.
To protect the battery from harmful total
discharge while in operation, the charge status
is permanently monitored electronically and
the device will switch off before it reaches the
critical discharge condition. The battery will
now need to be recharged. Do not attempt
to put the device back into operation with a
discharged battery!
The charging process can be interrupted at
any time and continued without damage to the
battery.
- 6 -
Page 7

Caution!
Drastically reduced operating times after the
charging process indicates that the battery
needs to be replaced!
If after inserting the battery into its designated
opening the light-emitting diode fl ashes instead
of glowing yellow continuously, the cause may
be a too high temperature, a defect, or the total
discharge of the battery.
• If the battery is too hot, the charging process
will start automatically after it cools down.
• If, on the other hand, the battery has a normal temperature but is totally discharged, the
charger will check if it still draws power or it
if is already defective.
• If the battery can be recovered, the yellow
light-emitting diode will glow continuously
after some time, signalling the successful
charging process.
• If the yellow light-emitting diode fl ashes, the
battery is defective and needs to be disposed of.
Disposal
Please do not dispose of the device in domestic
waste! The device contains valuable substances
that can be recycled. If you have any questions
about this, please contact your local waste
management enterprise or other corresponding
municipal facilities.
3 CE Declaration of conformity
Name and address of the manufacturer or distributor:
PROXXON S.A.
6-10, Härebierg
LU-6868 Wecker
Product designation: Charger LG/A2
Article No.: 29880
On our sole responsibility, we declare that this
product conforms to the following directives
and normative documents:
2014/35/EC Low-voltage directive
DIN EN 60335-1/10.2012
DIN EN 60335-2-29/06.2019
2014/30/EU EMC directive
DIN EN 55014-1/08.2018
DIN EN 55014-2/01.2016
DIN EN 61000-3-2/03.2015
DIN EN 61000-3-3/03.2014
Date: 12.08.2019
Dipl.-Ing. Jörg Wagner
PROXXON S.A.
Appliance Safety Division
The CE document authorized agent is identical
with the signatory.
- 7 -
Page 8
Traduction de la notice
FR
d’utilisation originale LG/A2
Lire toutes les consignes de sécurité et les instructions.
Tout manquement au respect des
consignes de sécurité et des instructions peut
être cause d’électrocution, d’incendie et/ou de
graves blessures.
Conserver toutes les consignes de sécurité
et les instructions pour l’avenir.
Utiliser uniquement dans des locaux secs.
Appareil de classe de protection
Ne pas éliminer l’outil électrique, le chargeur ou l’accumulateur avec les déchets
domestiques !
Fusible 2A
Attention !
1 Caractéristiques techniques
Poids: env. 340 g
Tension réseau: 100-240V~50/60Hz
Tension de sortie: 12,6 V
Courant de charge: 2 A
2 Mise en service et commande
Chargement de l’accumulateur (Fig. 1)
Attention !
Avant la mise en service, lire les avertissements et les étiquettes qui se trouvent sur le
chargeur et l’accumulateur !
• Ne pas démonter l’accumulateur ou ne pas
casser le boîtier ! Il pourrait s’ensuivre une
fuite d’électrolyte causant des blessures ! Si
de l’électrolyte éclabousse dans les yeux, les
laver à l’eau propre et consulter immédiatement un médecin !
• Protéger l’accumulateur de la surchauffe !
Cela pourrait entraîner des défauts.
• Ne jamais court-circuiter l’accumulateur !
Les courants forts peuvent entraîner une
surchauffe de l’accumulateur. Cela pourrait
entraîner des brûlures ou un défaut. Lors du
rangement de l’accumulateur, s’assurer que
les contacts électroniques ne peuvent pas
établir de liaison conductrice.
• Ne jamais jeter la batterie au feu !
• L’accumulateur peut exploser.
• Ne jamais exposer l’accumulateur aux liquides !
Attention !
Veuillez noter que le chargeur Proxxon LG/
A2 ne peut être utilisé qu'avec les Proxxonbatteries appropriées (Li/A2, No. 29896)!
Les différents composants Proxxon sont parfaitement accordés les uns aux autres.
Attention: l’appareil, l’accumulateur et le chargeur sont aussi en vente séparément !
À la livraison, l’accumulateur est chargé partiellement et doit être chargé complètement
avant la mise en service de l’appareil. Procéder
comme suit :
1. Brancher la fi che du chargeur.
2. Mettre l’accumulateur 1 en place dans le
chargeur 2 comme indiqué en Fig. 2.
3. La diode lumineuse jaune 3 signale que
le chargement est en cours. Une fois le
chargement terminé, la diode lumineuse
verte 4 s’allume.
4. Retirer l’accumulateur complètement
chargé du chargeur.
Pour protéger, lors du travail, l’accumulateur
d’une décharge profonde qui l’endommagerait,
l’état de charge est surveillé en permanence
électroniquement, et l’appareil est désactivé
avant que l’état de décharge critique ne soit
atteint. Dès lors, l’accumulateur devra être
rechargé. Ne pas chercher à remettre l’appareil
en marche avec l’accumulateur déchargé !
- 8 -
Page 9

Le chargement peut être interrompu à tout moment, puis poursuivi sans que cela endommage
l’accumulateur.
Attention !
Si après le chargement, les durées de fonctionnement sont sensiblement plus courtes, cela
signifi e que l’accumulateur doit être remplacé !
Au cas où, après que l’accumulateur a été
introduit dans l’ouverture prévue à cet effet,
la diode lumineuse jaune ne s’allumerait pas
en permanence mais clignoterait, il est possible que la cause soit une température trop
élevée, un défaut ou la décharge profonde de
l’accumulateur.
• Si l’accumulateur est trop chaud, le chargement ne démarrera qu’après refroidissement.
• Si, en revanche, l’accumulateur est à température ambiante mais profondément déchargé, le chargeur contrôlera s’il est encore
en mesure d’absorber du courant ou s’il est
déjà abîmé.
• Si l’accumulateur peut être restauré, la diode
lumineuse s’allumera en jaune en permanence au bout d’un certain temps, signalant
ainsi que le chargement est en cours.
• Si la diode lumineuse jaune clignote,
l’accumulateur est abîmé et doit être éliminé.
Élimination
N’éliminez pas l’appareil en même temps que
les ordures ménagères ! L’appareil comporte
des matériaux recyclables. Si vous avez des
questions à ce sujet, adressez-vous aux
entreprises locales d’élimination des déchets
ou à d’autres institutions communales correspondantes.
3 Déclaration de conformité CE
Nom et adresse du fabricant ou du responsable
de la mise en circulation :
PROXXON S.A.
6-10, Härebierg
LU-6868 Wecker
Désignation du produit : Chargeur LG/A2
Réf. : 29880
Nous déclarons en toute responsabilité que ce
produit est conforme aux directives et documents normatifs suivants :
Directive sur la basse tension 2014/35/CE
DIN EN 60335-1/10.2012
DIN EN 60335-2-29/06.2019
Directive CEM 2014/30/UE
DIN EN 55014-1/08.2018
DIN EN 55014-2/01.2016
DIN EN 61000-3-2/03.2015
DIN EN 61000-3-3/03.2014
Date : 12.08.2019
Dipl.-Ing. Jörg Wagner
PROXXON S.A.
Secteur d’activités Sécurité des appareils
Le responsable de la documentation CE est
identique au signataire.
- 9 -
Page 10
Traduzione delle istruzioni per
IT
l’uso originali LG/A2
Leggere tutte le avvertenze di sicurezza e le istruzioni!
L’inosservanza delle avvertenze di
sicurezza e delle istruzioni può determinare
scosse elettriche e avere come conseguenza
incendi e/o lesioni gravi.
Conservare per un utilizzo futuro le avvertenze di sicurezza e le istruzioni.
Solo per l’utilizzo in ambienti asciutti
Dispositivo di classe di protezione II
L’utensile elettrico, il caricabatteria o la
batteria non vanno smaltiti insieme ai
rifi uti domestici!
Fusibile 2A
Avvertenza!
1 Dati tecnici
Peso: ca. 340 g
Tensione di rete: 100-240V~50/60Hz
Tensione di uscita: 12,6 V
Corrente di carica: 2 A
2 Messa in funzione e utilizzo
Caricamento della batteria (Fig. 1)
Attenzione!
Prima della messa in funzione, leggere le avvertenze e le scritte presenti sul caricabatteria
e sulla batteria!
• Non scomporre la batteria o romperne il corpo! Potrebbe fuoriuscire l’elettrolita e causare lesioni! Se l’elettrolita dovesse entrare a
contatto con gli occhi, sciacquarli con acqua
pulita e affi darsi immediatamente alle cure di
un medico!
• Proteggere la batteria dal surriscaldamento!
Questo potrebbe causare difetti.
• Non cortocircuitare mai la batteria! Correnti
forti possono causare un surriscaldamento della batteria. Le possibili conseguenze
sono ustioni o un difetto. In occasione dello
stoccaggio della batteria, assicurarsi che tra i
contatti elettrici non possa esserci alcun collegamento conduttivo.
• Non gettare mai la batteria nel fuoco! La batteria può esplodere.
• Non esporre mai la batteria a liquidi!
Attenzione!
Si prega di notare che il caricabatterie
Proxxon LG/2A può essere utilizzato solo
con batterie Proxxon (Li/A2, No. 29896)!
I rispettivi componenti Proxxon sono armonizzati in modo ottimale.
Nota: l’apparecchio, la batteria e il caricabatteria sono disponibili in commercio anche separatamente!
Allo stato di consegna, la batteria è parzialmente carica e deve essere caricata completamente
prima della messa in funzione dell’apparecchio.
A tale scopo procedere come segue:
1. collegare la spina del caricabatteria.
2. Introdurre la batteria nel caricabatteria
come mostrato nella Fig. 2.
3. Il diodo luminoso 3 giallo segnala il proces-
so di carica. Quando questo è terminato si
accende il diodo luminoso verde.
4. Prelevare la batteria completamente carica
dal caricabatteria.
Per proteggere la batteria durante il lavoro da
una dannosa scarica profonda, lo stato di carica viene continuamente controllato elettronicamente e l’apparecchio viene spento prima
di raggiungere lo stato di scarica critico. Ora è
- 10 -
Page 11

necessario ricaricare la batteria. Non tentare di
rimettere in funzione l’apparecchio con la batteria scarica!
Il processo di carica può essere interrotto e ripreso in ogni momento senza che la batteria
subisca danni.
Attenzione!
Se i tempi di funzionamento si riducono drasticamente dopo il processo di carica, ciò è il
segno che la batteria deve essere sostituita!
Se, dopo l’inserimento della batteria
nell'apertura prevista, il diodo luminoso giallo
non si accende in modo permanente, ma lampeggia, la causa è probabilmente una temperatura troppo elevata, un difetto o la scarica
profonda della batteria.
• Se la batteria è troppo calda, dopo il raffreddamento il processo di carica viene avviato
automaticamente.
• Se, per contro, la batteria presenta una temperatura normale, ma è scarica, il caricabatteria verifi ca se assorbe ancora corrente o è
già difettosa.
• Se la batterie è ripristinabile, dopo un certo
tempo il diodo luminoso giallo rimane continuamente acceso e segnala il processo di
carica riuscito.
• Se il diodo luminoso giallo lampeggia, la batteria è difettosa e deve essere smaltita.
Smaltimento
Non smaltire l’apparecchio con i rifi uti domestici. L’apparecchio contiene dei materiali che
possono essere riciclati. In caso di domande
in proposito rivolgersi all’azienda locale per lo
smaltimento oppure ai corrispondenti enti comunali.
3 Dichiarazione di conformità CE
Nome ed indirizzo del produttore o distributore
PROXXON S.A.
6-10, Härebierg
LU-6868 Wecker
Denominazione prodotto: Caricabatteria LG/A2
N. articolo: 29880
Dichiariamo sotto la propria esclusiva responsabilità, che il prodotto è conforme alle seguenti
direttive e documenti normativi:
2014/35/CE Direttiva Bassa Tensione
DIN EN 60335-1/10.2012
DIN EN 60335-2-29/06.2019
2014/30/UE Direttiva EMC
DIN EN 55014-1/08.2018
DIN EN 55014-2/01.2016
DIN EN 61000-3-2/03.2015
DIN EN 61000-3-3/03.2014
Data: 12.08.2019
Ing. Jörg Wagner
PROXXON S.A.
Settore sicurezza apparecchi
Il responsabile della documentazione CE è
identico al sottoscritto.
- 11 -
Page 12

Traducción de las instrucciones
ES
de servicio originales LG/A2
¡Advertencia!
¡Lea todas las indicaciones de seguridad y las instrucciones!
Omisiones durante el cumplimiento
de las indicaciones de seguridad y las instrucciones pueden tener como consecuencia
descargas eléctricas, incendios y/o lesiones de
gravedad.
Conserve todas las indicaciones de seguridad en instrucciones para el futuro.
Sólo para el uso en ambientes secos
Dispositivo de clase de protección-II
¡No eliminar la herramienta eléctrica, el
cargador o el acumulador a través de los
residuos domésticos!
Fusible 2A
1 Datos técnicos
Peso: aprox. 340 g
Tensión de red: 100-240V~50/60Hz
Tensión de salida: 12,6 V
Corriente de carga: 2 A
2 Puesta en servicio y manejo
Carga del acumulador (fi g. 1)
¡Atención!
¡Antes de la puesta en servicio lea las indicaciones de advertencia y rótulos que están aplicados en el cargador o el acumulador!
• ¡No desarmar el acumulador o la carcasa!
¡El electrolito podría fugarse y ocasionar lesiones! ¡En caso de que electrolito alcanzara
los ojos, enjuague estos con agua limpia y
encamínese inmediatamente a un tratamiento médico!
• ¡Proteger el acumulador contra sobrecalentamiento! Las consecuencias podrían ser
defectos.
• ¡No poner jamás el acumulador en cortocircuito! Corrientes intensas pueden provocar
un sobrecalentamiento del acumulador. Las
consecuencias podrían ser quemaduras o un
defecto. Asegure en caso de un almacenaje
del acumulador que los contactos eléctricos
no puedan entrar en contacto con elementos
conductivos.
• ¡Jamás arrojar el acumulador al fuego! El
acumulador puede explotar
• ¡No exponga jamás el acumulador a líquidos!
¡Atención!
Tenga en cuenta que su cargador Proxxon
LG/2A sólo puede funcionar con la batería
Proxxon (Li/A2, Nº 29896)!
Los componentes Proxxon están ajustados óptimamente entre sí.
Por favor, observe: ¡Dispositivo, acumulador y
cargador también pueden ser adquiridos por
separado en el comercio!
En estado de suministro el acumulador está
cargado parcialmente y antes de la puesta
en servicio del dispositivo debe ser cargado
totalmente. Para ello proceda de la siguiente
manera:
1. Enchufar la clavija del cargador.
2. Introducir el acumulador 1 en el cargador 2
como se muestra en la fi g. 2.
3. El diodo luminoso amarillo 3 señaliza el
procedimiento de carga. Cuando este esté
concluido, brilla el diodo luminoso verde 4.
4. Extraer el acumulador precargado del car-
gador.
Para proteger durante el trabajo el acumulador
de descarga total dañina, el estado de carga se
supervisa permanentemente de forma electrónica y el dispositivo se desconecta antes de
alcanzar el estado de descarga crítico. Ahora
el acumulador debe volver a ser cargado. ¡No
- 12 -
Page 13

intente poner nuevamente en servicio el dispositivo con el acumulador descargado!
El procedimiento de carga puede ser interrumpido en todo momento y reiniciado nuevamente
sin que el acumulador sufra daños.
¡Atención!
¡Si los tiempos de servicio tras el procedimiento de carga se acortan drásticamente, esto es
un signo de que el acumulador tiene que ser
renovado!
En caso que al enchufar el acumulador en la
abertura prevista para ello el diodo luminoso
amarillo no brilla permanentemente sino parpadea, la causa probablemente sea una temperatura demasiado elevada, un defecto o la
descarga total del acumulador.
• Si el acumulador está demasiado caliente,
tras su enfriamiento se inicia automáticamente el procedimiento de carga.
• Si el acumulador por el contrario está normalmente atemperado, pero con descarga
total, el cargador comprueba si aún admite
corriente o ya está defectuoso.
• Cuando el acumulador es recuperable, tras
un tiempo se enciende el diodo luminoso
amarillo de forma continua y señaliza un procedimiento de carga exitoso.
• Si el diodo luminoso amarillo parpadea, el
acumulador está defectuoso y debe ser eliminado.
Eliminación
¡Por favor, no deseche el aparato con la basura
doméstica! El aparato contiene materiales que
se pueden reciclar. En caso de dudas diríjase
a su centro de reciclado u otras instituciones
comunales correspondientes.
3 Declaración de conformidad CE
Nombre y dirección del fabricante, o del
distribuidor:
PROXXON S.A.
6-10, Härebierg
LU-6868 Wecker
Denominación del producto: Cargador LG/A2
Artículo nº: 29880
Declaramos bajo nuestra exclusiva responsabilidad que este producto coincide con las
siguientes directivas y documentos normativos:
2014/35/CE Directiva de baja tensión
DIN EN 60335-1/10.2012
DIN EN 60335-2-29/06.2019
2014/30/UE Directiva CEM (Compatibilidad
electromagnética)
DIN EN 55014-1/08.2018
DIN EN 55014-2/01.2016
DIN EN 61000-3-2/03.2015
DIN EN 61000-3-3/03.2014
Fecha: 12.08.2019
Ing.Dipl. Jörg Wagner
PROXXON S.A.
Área comercial Seguridad de aparatos
El delegado para la documentación CE es idéntico con el fi rmante.
- 13 -
Page 14

Vertaling van de originele
NL
gebruiksaanwijzing LG/A2
Waarschuwing!
Lees alle veiligheidsinstructies
en aanwijzingen! Het niet correct
opvolgen van de veiligheidsinstructies en aanwijzingen kan leiden tot elektrische
schokken, brand en/of ernstig lichamelijk letsel.
Bewaar alle veiligheidsinstructies en aanwijzingen voor toekomstig gebruik.
Alleen voor gebruik in droge ruimten
Beschermingsklasse II-apparaat
Elektrisch apparaat, oplader of accu niet
met het huishoudelijk afval verwijderen!
Zekering 2A
1 Technische gegevens
Gewicht: ca. 340 g
Netspanning: 100-240 V~5060Hz
Uitgangsspanning: 12,6 V
Laadstroom: 2 A
2 Inbedrijfname en bediening
Laden van de accu (fi g. 1)
Let op!
lees voor de inbedrijfname de waarschuwingen
en opschriften die op de oplader en de accu zijn
aangebracht!
• Accu niet demonteren of de behuizing stukbreken! Elektrolyt kan uittreden en lichamelijk letsel veroorzaken! Als er elektrolyt in uw
ogen komt, wast u ze met schoon water uit
en laat u zich onmiddellijk medisch behandelen!
• Accu tegen oververhitting beveiligen! Dit kan
een defect tot gevolg hebben.
• Accu nooit kortsluiten! Sterke stroom kan tot
oververhitting van de accu leiden. Verbranding of defect kunnen hieruit voortvloeien.
Verzeker u er zich bij de opslag van de accu
van dat de elektrische contacten geen geleidende verbinding kunnen vormen.
• Accu nooit in open vuur gooien! De accu kan
exploderen.
• Breng de accu nooit in contact met vloeistoffen!
Let op!
Houd er rekening mee dat uw Proxxon
LG/2A lader alleen met de juiste Proxxonbatterij (Li/A2, nr. 29896) mag worden gebruikt!
Deze Proxxon-componenten zijn optimaal op
elkaar afgestemd.
Let op het volgende: apparaat, accu en oplader
zijn afzonderlijk in de handel verkrijgbaar!
Bij de levering is de accu gedeeltelijk opgeladen en moet voor de inbedrijfname van de
machine volledig worden opgeladen. U gaat
daarvoor als volgt te werk:
1. stekker van de oplader in stopcontact ste-
ken.
2. accu 1 in de oplader 2 steken zoals weer-
gegeven in fi g. 2.
3. De gele lichtdiode 3 geeft het oplaadniveau
aan. Als deze volledig is, gaat de groene
lichtdiode 4 branden.
4. Volledig opgeladen accu uit de oplader
trekken.
Om de accu bij het werken tegen schadelijke
totale ontlading te beschermen, wordt het oplaadniveau permanent elektronisch beveiligd
en schakelt de machine uit voordat de kritische
ontlading is bereikt. Nu moet de accu weer
worden opgeladen. Probeer niet de machine
met ontladen accu in bedrijf te nemen!
Het opladen kan op elk moment worden onderbroken en weer worden opgenomen, zonder
dat de accu schade ondervindt.
- 14 -
Page 15

Let op!
Als de werkingstijden na het opladen drastisch
korter zijn, duidt dat erop dat u de accu moet
vervangen!
Indien na het aansluiten van de accu in de daarvoor bestemde opening, de gele lichtdiode niet
permanent brandt, maar knippert, is de oorzaak
mogelijk een te hoge temperatuur, een defect of
een totale ontlading van de accu.
• Als de accu te heet is, wordt na het afkoelen
het opladen automatisch gestart.
• Als de accu echter een normale temperatuur
heeft, maar totaal ontladen is, wordt door de
oplader gecontroleerd of de accu nog stroom
opneemt of al defect is.
• Als de accu kan worden hersteld, gaat de
gele lichtdiode na enige tijd continu branden
waarmee aangegeven wordt dat het opladen
gelukt is.
• Knippert de gele lichtdiode, dan is de accu
defect en moet worden verwijderd.
Afval afvoeren
Voer het toestel niet via de huisafval af! Het
toestel omvat grondstoffen die recyclet kunnen worden. Bij vragen hieromtrent richt u zich
alstublieft aan uw plaatselijk afvalbedrijf of aan
andere passende gemeentelijke voorzieningen.
Afdeling veiligheid apparatuur
3 EG-conformiteitsverklaring
Naam en adres van de fabrikant, resp. distributeur:
PROXXON S.A.
6-10, Härebierg
LU-6868 Wecker
Productaanduiding: Oplader LG/A2
Artikelnr.: 29880
Wij verklaren alleen verantwoordelijk te zijn dat
dit product met de volgende richtlijnen en normatieve documenten overeenstemt:
2014/35/EG laagspanningsrichtlijn
DIN EN 60335-1/10.2012
DIN EN 60335-2-29/06.2019
2014/30/EU EMC-richtlijn
DIN EN 55014-1/08.2018
DIN EN 55014-2/01.2016
DIN EN 61000-3-2/03.2015
DIN EN 61000-3-3/03.2014
Datum: 12.08.2019
Dipl.-Ing. Jörg Wagner
PROXXON S.A.
Afdeling Apparaatveiligheid
De gevolmachtigde voor de CE-documentatie is
dezelfde als de ondergetekende.
- 15 -
Page 16

Oversættelse af den originale
DK
brugsanvisning LG/A2
Advarsel!
Læs alle sikkerhedsoplysninger og
-instruktioner! Hvis sikkerhedso-
plysningerne og instruktionerne ikke
overholdes, kan det føre til elektrisk stød, brand
og/eller svære personskader.
Opbevar alle sikkerhedsoplysninger og instruktioner til fremtidig brug.
Må kun anvendes i tørre rum
Beskyttelsesklasse II-maskine
Elværktøj, oplader og batteri må ikke
bortskaffes sammen med almindeligt
husholdningsaffald!
Sikring 2A
1 Tekniske data
Vægt: ca. 340 g
Netspænding: 100-240V~50/60Hz
Udgangsspænding: 12,6 V
Ladestrøm: 2 A
2 Ibrugtagning og betjening
Opladning af batteriet (fi g. 1)
OBS!
Læs altid advarslerne og teksten, der er anbragt
på opladeren og batteriet, inden du tager maskinen i brug!
• Batteriet må ikke skilles ad, og huset må ikke
brækkes i stykker! Der ville være risiko for
elektrolytudslip, som kan forårsage tilskadekomst! Skulle du få elektrolyt i øjnene, skal
du skylle øjnene med rent vand og omgående
kontakte en læge!
• Beskyt batteriet mod overophedning! Det kan
føre til defekte batterier.
• Kortslut aldrig batteriet! Kraftig strøm kan
forårsage overophedning af batteriet. Dette
kan resultere i forbrændinger eller en defekt.
Kontrollér ved opbevaring af batteriet, at de
elektriske kontakter ikke kan få ledende forbindelse.
• Batteriet må ikke komme i kontakt med åben
ild! Batteriet kan eksplodere.
• Batteriet må aldrig udsættes for væske!
OBS!
Bemærk, at din Proxxon-oplader LG/2A kun
må bruges med passende Proxxon-batterier (Li/A2, nr. 29896)!
De enkelte Proxxon-komponenter er tilpasset
optimalt i forhold til hinanden.
Bemærk: Maskine, batteri og oplader kan også
købes separat!
I leveringstilstand er batteriet ladet delvist op,
og det skal lades helt op, inden maskinen tages
i brug. Dette gøres på følgende måde:
1. Sæt opladerens stik i.
2. Sæt batteriet 1 ind i opladeren 2, som vist
i fi g. 2.
3. Den gule lysdiode 3 signalerer opladning.
Når opladningen er afsluttet, lyser den
grønne lysdiode 4.
4. Tag det fuldt opladte batteri ud af opladeren.
For at beskytte batteriet mod skadelig dybdeafl adning under arbejdet overvåges ladetilstanden konstant elektronisk, og maskinen slukkes,
inden den når den kritiske afl adningstilstand.
Nu skal batteriet lades op igen. Prøv ikke at
bruge maskinen igen med afl adt batteri!
Opladningen kan afbrydes og genoptages til
enhver tid, uden at batteriet tager skade.
- 16 -
Page 17

OBS!
Hvis funktionstiden afkortes drastisk efter opladningen, tyder det på, at batteriet skal skiftes ud!
Hvis den gule lysdiode ikke lyser konstant, men
blinker, når batteriet sættes i den dertil beregnede åbning, kan årsagen være for høj temperatur, defekt eller dybdeafl adning af batteriet.
• Hvis batteriet er for varmt, starter opladningen automatisk, når batteriet er kølet af.
• Hvis batteriet derimod har en normal temperatur, men er dybdeafl adet, kontrollerer opladeren, om batteriet stadig optager strøm eller
allerede er defekt.
• Hvis batteriet stadig kan oplades, lyser den
gule lysdiode efter et stykke tid konstant og
signalerer dermed, at opladningen er lykkedes.
• Hvis den gule lysdiode blinker, er batteriet
defekt og skal bortskaffes.
Bortskaffelse
Maskinen må ikke smides i husholdningsaffaldet! Maskinen indeholder råstoffer, der kan
recycles. Hvis De har spørgsmål til dette emne,
bedes De kontakte den lokale genbrugsstation
eller andre relevante instanser.
3 CE-overensstemmelseserklæring
Producentens eller distributørens navn og adresse:
PROXXON S.A.
6-10, Härebierg
LU-6868 Wecker
Produktnavn: Oplader LG/A2
Artikel nr.: 29880
Vi erklærer på eget ansvar, at dette produkt er i
overensstemmelse med følgende direktiver og
normative dokumenter:
2014/35/EF lavspændingsdirektiv
DIN EN 60335-1/10.2012
DIN EN 60335-2-29/06.2019
2014/30/EU EMC-direktiv
DIN EN 55014-1/08.2018
DIN EN 55014-2/01.2016
DIN EN 61000-3-2/03.2015
DIN EN 61000-3-3/03.2014
Dato: 12.08.2019
Dipl.-ing. Jörg Wagner
PROXXON S.A.
Forretningsområde maskinsikkerhed
Den ansvarlige for CE-dokumentationen er
identisk med undertegnede
- 17 -
Page 18

Översättning av
SE
originalbruksanvisningen LG/A2
Varning!
Läs alla säkerhetsanvisningar
och övriga anvisningar.
Om säkerhetsanvisningarna och de
övriga anvisningarna inte följs kan det leda till
elektriska stötar, brand och/eller allvarliga personskador.
Förvara alla säkerhetsanvisningar och andra anvisningar för framtida användning.
Får endast användas i torra utrymmen
Skyddsklass II-apparat
Lägg inte elverktyg, laddare eller batteri
bland hushållsavfall!
Säkring 2A
1 Tekniska data
Vikt: ca 340 g
Nätspänning: 100 - 240V~50/60Hz
Utgående spänning: 12,6 V
Laddström: 2 A
2 Idrifttagning och handhavande
Ladda batteriet (fi g. 1)
Observera!
Läs före idrifttagning varningsanvisningarna och texterna som sitter på laddaren och
batteriet!
• Ta inte isär batteriet eller öppna höljet! Elektrolyt skulle kunna tränga ut och orsaka
personskador! Om du skulle få elektrolyt i
ögonen ska du skölja dessa med rent vatten
och direkt uppsöka läkare!
• Skydda batteriet mot överhettning! Defekter
kan bli följden.
• Kortslut aldrig batteriet! Starka strömmar kan
medföra att batteriet överhettas. Brännskador eller en defekt kan bli följden. Se vid förvaring av batteriet till att de elektriska kontakterna inte kan få en elektrisk förbindelse.
• Utsätt aldrig batteriet för öppen låga! Batteriet kan explodera.
• Utsätt aldrig batteriet för vätskor!
Observera!
Observera att din Proxxon-laddare LG/A2
endast får användas med lämpliga Proxxon-batterier (Li/A2, nr 29896)!
De olika Proxxon-komponenterna är optimalt
anpassade till varandra.
Observera: Verktyg, batteri och laddare kan
även köpas separat!
Vid leveransen är batteriet delladdat och måste
laddas fullt innan verktyget tas i drift. Gå tillväga på följande sätt:
1. Sätt i laddarens stickpropp.
2. Sätt batteri 1 i laddaren 2 som fi g. 2 visar.
3. Den gula lysdioden 3 indikerar laddning.
När laddningen är klar tänds den gröna
lysdioden 4.
4. Fulladdat batteri ska tas ut ur laddaren.
För att under arbete skydda batteriet mot
skadlig djupurladdning överkas laddtillståndet
permanent elektroniskt och verktyget stängs
av innan det kritiska urladdningstillståndet nås.
Nu måste batteriet laddas upp igen. Försök inte
att åter ta verktyget i drift med urladdat batteri!
Laddningen kan när som helst avbrytas och
påbörjas igen utan att batteriet tar skada.
- 18 -
Page 19

Observera!
Om drifttiderna minskar drastiskt efter laddningen är det ett tecken på att batteriet måste
bytas ut!
Om den gula lysdioden inte lyser permanent
efter att batteriet har skjutits in i öppningen
utan blinkar så är orsaken möjligen en för hög
temperatur, en defekt eller att batteriet är djupurladdat.
• Om batteriet är för varmt startar laddningen
igen efter att det har svalnat.
• Om batteriet däremot har normal temperatur
men är djupurladdat så kontrollerar laddaren
huruvida batteriet tar upp ström eller redan
är defekt.
• Om batteriet går att ladda lyser den gula lysdioden efter en stund och indikerar att laddningen fungerar.
• Om den gula lysdioden blinkar är batteriet
defekt och måste avfallshanteras.
Avfallshantering
Kasta inte maskinen i hushållssoporna! Maskinen innehåller material som kan återvinnas. Vid
frågor angående detta, var god vänd dig till ett
lokalt återvinningsföretag eller renhållningen i
din kommun.
3 CE-Försäkran om överensstämmelse
Tillverkarens resp. distributörens namn och
adress:
PROXXON S.A.
6-10, Härebierg
LU-6868 Wecker
Produktbenämning: Laddare LG/A2
Artikelnr: 29880
Vi förklarar under ensamt ansvar att denna produkt uppfyller följande direktiv och standarder.
2014/35/EG lågspänningsdirektivet
DIN EN 60335-1/10.2012
DIN EN 60335-2-29/06.2019
2014/30/EG EMC-direktivet
DIN EN 55014-1/08.2018
DIN EN 55014-2/01.2016
DIN EN 61000-3-2/03.2015
DIN EN 61000-3-3/03.2014
Datum: 12.08.2019
Civ.ing. Jörg Wagner
PROXXON S.A.
Affärsområde maskinsäkerhet
Befullmäktigat ombud för CE-dokumentation är
identisk med undertecknaren.
- 19 -
Page 20

Překlad návodu k použití
CZ
LG/A2
Varování!
Přečtěte si veškeré bezpečnostní
pokyny a instrukce! Při nedodržení
bezpečnostních pokynů a instrukcí
může dojít k zasažení elektrickým proudem, požáru anebo vážným úrazům.
Uschovejte si veškeré bezpečnostní pokyny a
instrukce do budoucna.
Určeno pro provoz pouze v suchém prostoru
Třída ochrany přístroj II
Elektrický nástroj, nabíječku ani akumulátor
nevyhazujte do domovního odpadu!
Pojistka 2A
1 Technické údaje
Hmotnost: cca 340 g
Síové napětí: 100-240 V~50/60Hz
Výstupní napětí: 12,6 V
Nabíjecí proud: 2 A
2 Uvedení do provozu a obsluha
Nabíjení akumulátoru (Obr. 1)
Pozor!
Přečtěte si před uvedením do provozu výstražná
upozornění a nápisy na nabíječce a akumulátoru!
• Nerozebírejte akumulátor ani nerozbíjejte
pouzdro! Mohl by vytéct elektrolyt a způsobit
zranění! Vnikne-li vám elektrolyt do očí, vymyjte si je čistou vodou a odeberte se neprodleně
k lékařskému ošetření!
• Chraňte akumulátor před přehřátím! Násled-
kem mohou být závady.
• Nikdy akumulátor nezkratujte! Silné prou-
dy mohou způsobit přehřátí akumulátoru.
Možnými následky jsou popáleniny nebo závada. Při uskladnění akumulátoru se ujistěte,
že se elektrické kontakty nemohou dostat do
vodivého spojení.
• Nikdy nevhazujte akumulátor do otevřeného
ohně! Akumulátor může vybuchnout.
• Nevystavujte akumulátor kapalinám!
Vezměte prosím na vědomí, že vaše nabíječka
Proxxon LG/A2 může být provozována pouze
s vhodnou baterií Proxxon (Li/A2, č. 29896)!
Příslušné komponenty Proxxon jsou na sebe
vzájemně optimálně vyladěné.
Pamatujte na: Přístroj, akumulátor a nabíječka
jsou k dostání i samostatně v obchodě!
Ve stavu při expedici je akumulátor částečně
nabitý a musí se před uvedením přístroje do provozu zcela nabít. K tomu postupujte následovně:
1. Zasuňte zástrčku nabíječky.
2. Vsate akumulátor 1 do nabíječky 2 podle
3. Žlutá světelná dioda 3 signalizuje proces
4. Vyjměte zcela nabitý akumulátor z nabíječky.
Na ochranu akumulátoru před škodlivým hlubokým vybitím při práci je stav nabití permanentně
elektronicky sledován a přístroj se před
dosažením kritického stavu vybití vypne. Nyní se
musí akumulátor znovu nabít. Nepokoušejte se
přístroj znovu uvést do provozu s vybitým akumulátorem!
Proces nabíjení lze kdykoliv přerušit a znovu
zahájit, aniž by akumulátor utrpěl škodu.
Pozor!
vyobrazení na obr. 2.
nabíjení. Je-li proces dokončený, rozsvítí se
zelená světelná dioda 4.
- 20 -
Page 21

Pozor!
Pokud se doby provozu po procesu nabíjení
drasticky zkrátí, poukazuje to na to, že se musí
akumulátor vyměnit!
Pokud po vsunutí akumulátoru do k tomu
určeného otvoru žlutá světelná dioda
permanentně nesvítí, nýbrž bliká, je příčinou
možná příliš vysoká teplota, závada nebo hluboké vybití akumulátoru.
• Je-li akumulátor příliš horký, spustí se proces
nabíjení automaticky po vychladnutí.
• Má-li akumulátor oproti tomu normální teplotu,
avšak je hluboce vybitý, nabíječka zkontroluje, zda
ještě přijímá proud nebo je již vadný.
• Lze-li akumulátor obnovit, svítí žlutá světelná
dioda po nějaké době nepřetržitě a signalizuje
úspěšný proces nabíjení.
• Bliká-li žlutá světelná dioda, je akumulátor vadný a
musí se zlikvidovat.
Likvidace
Prosím nevyhazujte přístroj do domovního odpadu! Přístroj obsahuje hodnotné látky, které mohou být recyklovány. Pokud budete mít dotazy,
obrate se prosím na místní podnik pro likvidaci
odpadu nebo jiné podobné místní zařízení.
3 CE prohlášení o shodě
Jméno a adresa výrobce, resp. osoby uvádějící
do oběhu:
PROXXON S.A.
6-10, Härebierg
LU-6868 Wecker
Označení výrobku: Nabíječka LG/A2
Č. výrobku: 29880
Na vlastní odpovědnost prohlašujeme, že tento
výrobek vyhovuje následujícím směrnicím a normativním předpisům:
Směrnice o nízkém napětí 2014/35/ES
DIN EN 60335-1/10.2012
DIN EN 60335-2-29/06.2019
Směrnice EMC 2014/30/EU
DIN EN 55014-1/08.2018
DIN EN 55014-2/01.2016
DIN EN 61000-3-2/03.2015
DIN EN 61000-3-3/03.2014
Datum: 12.08.2019
Dipl.-Ing. Jörg Wagner
PROXXON S.A.
oddělení bezpečnosti přístrojů
Zmocněnec pro dokumentaci CE je shodný s podepisující osobou.
- 21 -
Page 22

Orijinal iºletim kılavuzunun
TR
çevirisi LG/A2
Uyarı!
Tüm güvenlik uyarılarını ve talimatları
okuyunuz!
Güvenlik bilgilerine ve talimatlara uyulmasında yapılan hatalar, elektrik
çarpmasına, yangına ve/veya ağır yaralanmalara neden
olabilir.
Tüm güvenlik uyarılarını ve talimatları, gelecekte
kullanılabilmesi için itinayla muhafaza ediniz.
Yalnızca kuru odalarda kullanım için
Koruma sınıfı II cihaz
Elektrikli aleti, şarj aletini veya bataryayı evsel
atıklarla birlikte imha etmeyiniz!
Sigorta 2A
1 Teknik özellikler
Ağırlık:
yakl. 340 g
ªebeke gerilimi:
Çıkıº voltajı:
ªarj akımı:
100-240 V~50/60Hz
12,6 V
2 A
2 ݺletime alma ve kullanım
Bataryayı doldurma (Şek. 1)
Dikkat!
İşletime almadan önce şarj aletinde ve bataryada takılı
olan uyarıları ve etiketleri okuyunuz!
• Bataryayı parçalamayınız veya mahfazayı
kırmayınız! Elektrolit dışarı sızabilir ve yaralanmalara yol açabilir! Elektrolit gözlerle temas
ettiğinde temiz suyla yıkayınız ve derhal bir doktora başvurunuz!
• Bataryayı aşırı ısınmaya karşı koruyunuz! Arızalara
neden olabilir.
• Bataryayı hiçbir zaman kısa devre yapmayınız!
Güçlü akımlar bataryanın aşırı ısınmasına etki
edebilir. Yanmalara veya bir arızaya neden olabilir.
Bataryayı depolarken elektrik temaslarının iletken
bağlantı kurmamasını sağlayınız.
• Bataryayı hiçbir zaman açık ateşe atmayınız! Batarya patlayabilir.
• Bataryayı hiçbir zaman sıvılara atmayınız!
Lütfen Proxxon ºarj cihazınızın LG/A2 cihazının
yalnızca uygun Proxxon pillerle çalıºtığından emin
olun (Li/A2, No. 29896)!
İlgili Proxxon bileşenleri birbirleriyle mükemmel bir
şekilde uyumludur.
Lütfen dikkat ediniz: Cihazı, batarya ve şarj aleti ayrı
olarak da temin edilebilir!
Teslimat durumunda batarya kısmen şarj edilmiştir ve
cihaz işletime alınmadan önce tamamen şarj edilmelidir.
Bunun için izlenecek yöntem:
1. Şarj aletinin fi şini takınız.
2. Bataryayı 1, Şek. 2’de gösterildiği gibi şarj aletine
2 takınız.
3. Sarı ışıklı diyodu 3 doldurma işlemini gösterir.
Şarj işlemi tamamlandığında yeşil ışıklı diyodu
4 yanar.
4. Tamamen şarj edilmiş bataryayı şarj aletinden
çıkartınız.
Bataryayı çalışma esnasında zararlı derin deşarja karşı
korumak için şarj durumu elektrikli olarak sürekli denetlenir ve cihaz kritik deşarj durumuna ulaşmadan
kapatılır. Batarya artık şarj edilmelidir. Cihazı boşalmış
bataryayla yeniden işletime almaya çalışmayınız!
Batarya zarar görmeksizin şarj işlemi her zaman iptal
edilebilir ve yeniden başlatılabilir.
Dikkat!
- 22 -
Page 23

Dikkat!
Şarj işleminden sonra işletim saatleri kısalırsa
bataryanın yeniden topraklanması gerekir!
Batarya bunun için öngörülen deliğe takıldıktan sonra
sarı ışıklı diyot sürekli yanmazsa sadece yanıp sönerse
bunun nedeni muhtemelen aşırı sıcaklık, bir arıza veya
bataryanın derin deşarjıdır.
• Batarya aşırı ısınmışsa şarj işlemi soğuduktan
sonra otomatik başlar.
• Batarya normal sıcaklıktaysa ancak derin deşarj
olmuşsa şarj aleti tarafından hala elektrik alıp
almadığı veya arızalı olup olmadığı kontrol edilir.
• Batarya yeniden üretilebiliyorsa sarı ışıklı diyot bir
süre sonra kesintisiz olarak yanar ve şarj işleminin
başarılı olduğunu gösterir.
• Sarı ışıklı diyot yanıp sönerse batarya arızalıdır ve
imha edilmelidir.
Cihacın ortadan kaldırılması (Atılması)
Lütfen cihazı normal çöp içine atmayınız! Cihaz içerisinde geri dönüşümü mümkün parçalar vardır. Bu konuyla
ilgili sorularınızı lütfen çöp toplama kuruluşuna veya
diğer belediye kurumlarına yöneltebilirsiniz.
3 CE uygunluk beyanı
Üreticinin veya piyasaya sürenin adı ve adresi:
PROXXON S.A.
6-10, Härebierg
LU-6868 Wecker
Ürün adı: Şarj aleti LG/A2
Ürün No: 29880
İşbu ürünün aşağıda yazılı direktifl er ve standart belgelere uygun olduğunu, mesuliyeti tarafımıza ait olmak
üzere beyan ederiz:
2014/35/AT Alçak gerilim direktifi
DIN EN 60335-1/10.2012
DIN EN 60335-2-29/06.2019
2014/30/AB EMU direktifi
DIN EN 55014-1/08.2018
DIN EN 55014-2/01.2016
DIN EN 61000-3-2/03.2015
DIN EN 61000-3-3/03.2014
Tarih: 12.08.2019
Yüks. Müh. Jörg Wagner
PROXXON S.A.
Makine Güvenliği Bölümü
CE dokümantasyon yetkilisi ile imza eden kişi aynı
kişidir.
- 23 -
Page 24

Tłumaczenie oryginalnej
PL
instrukcji obsługi LG/A2
Należy przeczytać wszystkie zasady bezpieczeństwa oraz instrukcje!
Zaniedbania w zakresie przestrzegania zasad bezpieczeństwa i instrukcji mogą
skutkować porażeniem elektrycznym, pożarem i/
lub ciężkimi obrażeniami.
Zasady bezpieczeństwa i instrukcje należy
zachować w celu późniejszego wykorzystania.
Urządzenie można stosować tylko w suchych pomieszczeniach.
Urządzenie klasy ochrony II
Nie wyrzucać elektronarzędzia, ładowarki
ani akumulatora do odpadów z gospodarstw domowych!
Zabezpieczenie 2A
Ostrzeżenie!
1 Dane techniczne
Ciężar: ok. 340 g
Napięcie sieci: 100–240 V~50/60 Hz
Napięcie wyjściowe: 12,6 V
Prąd ładowania: 2 A
2 Uruchomienie i obsługa
Ładowanie akumulatora (Rys. 1)
Uwaga!
Przed uruchomieniem należy przeczytać wskazówki ostrzegawcze i napisy umieszczone na
ładowarce i akumulatorze!
• Nie rozkładać akumulatora i nie łamać obu-
dowy! Elektrolit mógłby wyciec i spowodować
obrażenia! W przypadku przedostania się elek-
trolitu do oczu należy przemyć je czystą wodą
i niezwłocznie skonsultować się z lekarzem!
• Chronić akumulator przed przegrzaniem! Ina-
czej może dojść do defektów.
• Nigdy nie zwierać akumulatora! Silne prądy
mogą spowodować przegrzanie akumulatora. W konsekwencji mogą powstać oparzenia
lub defekt. Podczas przechowywania akumulatora należy upewnić się, że styki elektryczne nie mogą mieć kontaktu z połączeniami
przewodzącymi prąd.
• Nigdy nie wrzucać akumulatora w otwarty
ogień! Akumulator może wybuchnąć.
• Nigdy nie narażać akumulatora na działanie
cieczy!
Należy pamiętać, że ładowarka Proxxon LG/
A2 działa tylko z odpowiednimi akumulatorami Proxxon (Li/A2, nr 29896)!
Poszczególne komponenty Proxxon są optymalnie do siebie dopasowane.
Uwaga: Urządzenie, akumulator i ładowarka są
dostępne w sprzedaży również oddzielnie!
Przy dostawie akumulator jest częściowo
naładowany i przed uruchomieniem urządzenia
należy go naładować do pełna. W tym celu
należy postąpić w następujący sposób:
1. Włożyć wtyczkę ładowarki.
2. Włożyć akumulator 1 do ładowarki 2, tak jak
pokazano na Rys. 2.
3. Żółta dioda 3 sygnalizuje proces ładowania.
Po jego zakończeniu dioda 4 zaświeci się na
zielono.
4. Naładowany do pełna akumulator wyjąć z
ładowarki.
W celu ochrony akumulatora przed szkodliwym
całkowitym rozładowaniem podczas pracy poziom naładowania jest stale kontrolowany elektronicznie i przed osiągnięciem krytycznego stanu
rozładowania urządzenie zostaje wyłączone. W
takim przypadku należy ponownie naładować
Uwaga!
- 24 -
Page 25

akumulator. Nie wolno próbować uruchamiania
urządzenia z rozładowanym akumulatorem!
Proces ładowania można w każdej chwili
przerwać i rozpocząć na nowo. Akumulator nie
zostanie uszkodzony.
Uwaga!
Jeśli po procesie ładowania drastycznie
skrócą się czasy eksploatacji, informuje to o
konieczności wymiany akumulatora!
Jeśli po włożeniu akumulatora w przeznaczony
do tego otwór żółta dioda nie będzie się stale
świecić, lecz migać, przyczyną jest prawdopodobnie zbyt wysoka temperatura, defekt lub
całkowite rozładowanie akumulatora.
• Jeśli akumulator jest zbyt gorący, proces
ładowania rozpocznie się automatycznie po
schłodzeniu.
• Jeśli jednak akumulator ma normalną
temperaturę, lecz jest całkowicie rozładowany,
ładowarka sprawdzi, czy pobiera on jeszcze
prąd lub jest już uszkodzony.
• Jeśli możliwe jest przywrócenie poprawnego
stanu akumulatora, żółta dioda zaświeci się po
pewnym czasie światłem ciągłym i zasygnalizuje prawidłowy proces ładowania.
• Jeśli żółta dioda miga, akumulator jest
całkowicie uszkodzony i należy go zutylizować,
patrz również „Wskazówka dotycząca.
Utylizacja:
Narzędzia proszę nie wyrzucać do śmieci domowych! Urządzenie zawiera surowce, nadające
się do ponownego wykorzystania. W przypadku
pytań dotyczących utylizacji prosimy zwrócić się
do najbliższego zakładu utylizacji odpadów lub
do właściwej jednostki komunalnej.
3 Deklaracja zgodności CE
Nazwa i adres producenta lub podmiotu
wprowadzającego do obrotu:
PROXXON S.A.
6-10, Härebierg
LU-6868 Wecker
Oznaczenie produktu: Ładowarka LG/A2
Nr artykułu: 29880
Oświadczamy na własną odpowiedzialność, że
ten produkt jest zgodny z następującymi dyrektywami i dokumentami normatywnymi:
2014/35/WE dyrektywa niskonapięciowa
DIN EN 60335-1/10.2012
DIN EN 60335-2-29/06.2019
2014/30/UE dyrektywa EMC
DIN EN 55014-1/08.2018
DIN EN 55014-2/01.2016
DIN EN 61000-3-2/03.2015
DIN EN 61000-3-3/03.2014
Data: 12.08.2019
Dipl.-Ing. Jörg Wagner
PROXXON S.A.
Dział Bezpieczeństwa Urządzeń
Pełnomocnik ds. dokumentacji CE jest identyczny z sygnatariuszem.
- 25 -
Page 26

Перевод оригинального
RUS
руководства по эксплуатации
LG/А
Предостережение!
Прочитайте все указания по
безопасности и положения
инструкции! Небрежность при
выполнении указаний по безопасности и
положений инструкции может привести к
поражению электрическим током, пожару и/или
серьезным травмам.
Сохраните все указания по безопасности
и положения инструкции для будущего
использования.
Только для эксплуатации в сухих
помещениях.
Устройство класса защиты II
Не
выбрасывайте электроинструмент,
зарядное устройство и аккумулятор вместе
с бытовыми отходами!
Предохранитель 2 А
1 Технические данные
Масса:
ок. 340 г
Напряжение сети:
Выходное напряжение:
Ток зарядки:
100–240 В ~50/60 Гц
12,6 В
2 А
2 Пуск в эксплуатацию и эксплуатация
Зарядка аккумулятора (рис. 1)
Внимание!
Перед пуском в эксплуатацию прочитайте
предупредительные указания и надписи,
размещенные на зарядном устройстве и
аккумуляторе!
• Не разбирайте аккумулятор и не разбивайте
корпус! Электролит может вытечь и нанести
травмы! При попадании электролита в глаза
промойте их чистой водой и незамедлительно
обратитесь за медицинской помощью!
• Предохраняйте аккумулятор от перегрева! В
результате этого могут возникнуть дефекты.
• Ни при каких обстоятельствах не замыкайте
аккумулятор накоротко! Сильные токи
могут
привести к перегреву аккумулятора.
Возможными последствиями могут быть
ожоги и дефекты. Следите за тем, чтобы
при хранении аккумулятора была исключена
возможность электропроводного соединения
электрических контактов.
• Ни при каких обстоятельствах не допускайте
попадания аккумулятора в открытый огонь!
Аккумулятор может взорваться.
• Ни при каких обстоятельствах не подвергайте
аккумулятор воздействию жидкостей!
Внимание!
Обратите внимание, что ваше зарядное
устройство Proxxon LG/A2 может работать
только с соответствующими аккумуляторами
Proxxon (Li/A2, № 29896)!
Cоответствующие компоненты Proxxon
оптимально совместимы друг с другом.
Обратите внимание: устройство, зарядное
устройство и аккумулятор также имеются в
продаже отдельно!
В состоянии поставки аккумулятор заряжен
частично, и перед пуском в эксплуатацию
устройства его необходимо полностью зарядить.
Для
этого выполните следующее.
1. Вставьте штекер зарядного устройства.
2. Вставьте аккумулятор 1 в зарядное
устройство 2, как показано на рис. 2.
3. Желтый светодиод 3 сигнализирует о
процессе зарядки. Когда этот процесс
завершен, загорается зеленый светодиод 4.
4. Выньте полностью заряженный аккумулятор
из зарядного устройства.
- 26 -
Page 27

Чтобы во время работы защитить аккумулятор
от переразряда, состояние зарядки постоянно
контролируется электроникой, и при достижении
критического состояния разрядки устройство
отключается. Теперь аккумулятор необходимо
зарядить заново. Не пытайтесь снова включать
инструмент с разряженным аккумулятором!
Процесс зарядки можно прерывать и
возобновлять в любое время без повреждения
аккумулятора.
Внимание!
Если время работы после
сокращается, это означает, что аккумулятор
необходимо заменить!
Если после установки аккумулятора в специально
предусмотренное отверстие желтый светодиод не
горит постоянно, а мигает, возможной причиной
может быть слишком высокая температура,
дефект или переразряд аккумулятора.
• Если аккумулятор слишком горячий, после
охлаждения процесс зарядки запускается
автоматически.
• Если же аккумулятор, наоборот, имеет
нормальную температуру, но переразряжен,
зарядное устройство проверяет, принимает ли
аккумулятор ток или же он неисправен.
• Если аккумулятор может быть восстановлен,
через некоторое время желтый светодиод
начинает гореть непрерывно и сигнализирует
об успешном процессе зарядки.
• Если желтый светодиод мигает, то аккумулятор
поврежден и подлежит утилизации.
Утилизация:
Не утилизируйте устройство вместе с бытовым
мусором! Устройство содержит материалы,
пригодные для вторичной переработки. Если у
вас возникнут вопросы, касающиеся данного
аспекта, просим обращаться к местным
предприятиям, специализирующимся на
утилизации отходов, или в другие коммунальные
службы соответствующего профиля.
зарядки значительно
3 Заявление о соответствии требованиям ЕС
Наименование и адрес изготовителя и
поставщика комплектующих:
PROXXON S.A.
6-10, Härebierg
LU-6868 Wecker
Наименование изделия: Устройство зарядное
LG/A
Артикул №: 29880
Настоящим мы под свою единоличную
ответственность заявляем, что данное изделие
соответствует требованиям следующих директив
и нормативных документов:
Директива ЕС по низковольтному оборудованию
2014/35/EG
DIN EN 60335-1/10.2012
DIN EN 60335-2-29/06.2019
Директива об электромагнитной
совместимости 2014/30/EU
DIN EN 55014-1/08.2018
DIN EN 55014-2/01.2016
DIN EN 61000-3-2/03.2015
DIN EN 61000-3-3/03.2014
Дата: 12.08.2019
Дипл. инженер Йорг Вагнер
PROXXON S.A.
Подразделение безопасности оборудования
Лицом, уполномоченным на составление
Документации ЕС, является лицо, подписавшее
настоящий
документ.
- 27 -
Page 28

Notizen
- 28 -
Page 29

Notizen
- 29 -
Page 30

Notizen
- 30 -
Page 31

DK
Service henvisning
Alle produkter fra PROXXON kontrolleres omhyggeligt
efter produktionen. Hvis der alligevel skulle være en
defekt, så kontakt den forhandler, hvor du har købt
produktet. Det er kun ham, der er ansvarlig for afviklingen
af den lovmæssige reklamationsret, som udelukkende
gælder for materiale- og produktionsfejl.
Forkert brug som f.eks. overbelastning, beskadigelse på
grund af udefra kommende påvirkninger og normal
slitage hører ikke ind under reklamationsretten.
Du kan fi nde yderligere oplysninger om „Service og
reservedele“ å www.proxxon.com.
SE
Service-Garanti
Alla PROXXON-produkter genomgår noggranna
kontroller efter tillverkningen. Om det ändå skulle inträffa
någon defekt ska ni kontakta återförsäljaren som ni köpte
produkten av. Det är endast återförsäljaren som är
tillgänglig för hantering av garantianspråk, som
uteslutande rör material- och tillverkningsfel.
Felaktig användning som t.ex. överbelastning, skador på
grund av yttre påverkan och normalt slitage utesluts från
garantin.
Ytterligare information gällande ”Service och reservdelar”
fi nns på www.proxxon.com.
Servisní upozornění
CZ
Všechny výrobky PROXXON se po výrobě pečlivě
kontrolují. Pokud přesto dojde k závadě, obrate se
prosím na prodejce, u kterého jste výrobek koupili. Jen
tento prodejce může vyřídit veškeré zákonné nároky vyplývající ze záruky, které se vztahují pouze na
materiálové a výrobní vady.
Záruka se nevztahuje na závady způsobené nesprávným
používáním, např. přetížením, poškození cizím vlivem
nebo normálním opotřebením.
Další informace k tématu „Servis a náhradní díly“ najdete
na adrese www.proxxon.com.
TR
Tüm PROXXON ürünleri üretimden sonra özenle test
edilir. Buna rağmen bir arıza meydana gelirse, lütfen
ürünü satın aldığınız satış temsilcisine başvurunuz.
Sadece o yalnızca malzeme ve üretici hatalarıyla
ilişkili yasal garanti taleplerinin işleme alınmasından
sorumludur.
Aşırı yüklenme, yabancı etkisiyle hasar ve normal
aşınma gibi uygunsuz kullanım garanti kapsamına
dahil değildir.
„Servis ve yedek parçalar“ konusuyla ilgili
açıklamaları www.proxxon.com sayfasından bulabilirsiniz.
PL
Wszystkie produkty firmy PROXXON są poddawane
starannej kontroli fabrycznej. Jeżeli jednak mimo
wszystko wystąpią defekty, prosimy o kontakt ze
sprzedawcą produktu. Tylko on jest odpowiedzialny za
realizację wszystkich ustawowych uprawnień gwarancyjnych, wynikających wyłącznie z wad materiałowych i
produkcyjnych.
Nieprawidłowe użycie, np. przeciążenie, uszkodzenie
przez wpływy obce oraz normalne zużycie nie są objęte
gwarancją.
Więcej informacji na temat „Serwisu oraz części
zamiennych” można znaleźć pod adresem
www.proxxon.com.
RUS
Все изделия компании PROXXON после
изготовления проходят тщательный контроль.
Если все же обнаружится дефект, обратитесь к
Продавцу, у которого приобретено изделие.
Именно он отвечает по всем предусматриваемым
законом претензиям по гарантийным обязательствам, касающимся исключительно дефектов материалов и изготовления.
Гарантия не распространяется на ненадлежащее
применение, такoе, например, как перегрузка,
повреждение вследствие постороннего воздействия, а также естественный износ.
Дополнительные указания по теме „Сервисное
обслуживание и запчасти“ см. Hа сайте www.prox-
xon.com.
Satıș Sonrası Hizmet Bilgisi
Wskazówki dotyczące serwisu
Сервисное обслуживание
- 31 -
Page 32

DE
Service-Hinweis
Alle PROXXON-Produkte werden nach der Produktion
sorgfältig geprüft. Sollte dennoch ein Defekt auftreten,
wenden Sie sich bitte an den Händler, von dem Sie das
Produkt gekauft haben. Nur dieser ist für die Abwicklung
aller gesetzlicher Gewährleistungsansprüche zuständig,
die sich ausschließlich auf Material- und Herstellerfehler
beziehen.
Unsachgemäße Anwendung wie z.B. Überlastung,
Beschädigung durch Fremdeinwirkung und normaler
Verschleiß sind von der Gewährleistung ausgeschlossen.
Weitere Hinweise zum Thema „Service und Ersatzteilwesen“ fi nden Sie auf www.proxxon.com.
GB
Service note
All PROXXON products are thoroughly inspected after
production. Should a defect occur nevertheless, please
contact the dealer from whom you purchased the product. Only the dealer is responsible for handling all
legal warranty claims which refer exclusively to material
and manufacturer error.
Improper use, such as capacity overload, damage due to
outside infl uences and normal wear are excluded from
the warranty.
You will fi nd further notes regarding „Service and Spare
Parts Management“ at www.proxxon.com.
FR
Instruction en cas de réclamation
Tous les produits PROXXON font l‘objet d‘un contrôle
soigneux à l‘issue de leur fabrication. Si toutefois un
défaut devait apparaître, veuillez contacter le revendeur
chez qui vous avez acheté le produit. Il est seul habilité à
gérer la procédure de traitement de toutes les prétentions
légales en matière de dommages et intérêts relevant
exclusivement des défauts de matériaux ou de
fabrication.
Toute utilisation non conforme, comme la surcharge ou
les dommages provoqués par exercice d‘une contrainte
extérieure, ainsi que l‘usure normale, sont exclus de la
garantie.
Vous trouverez de plus amples informations concernant
le « Service après-vente et les pièces détachées », à
l‘adresse www.proxxon.com.
IT
Avvertenze per l’assistenza
Dopo la produzione tutti i prodotti PROXXON vengono
sottoposti ad un controllo accurato. Qualora si dovesse
comunque verifi care un difetto, si prega di rivolgersi al
proprio rivenditore dal quale si è acquistato il prodotto.
Solo questo è autorizzato a rispondere dei diritti di
garanzia previsti dalla legge che si riferiscono
esclusivamente a difetti di materiale ed errori del
produttore.
È escluso dalla garanzia qualsiasi utilizzo improprio quale
ad es. un sovraccarico, un danneggiamento per effetti
esterni e la normale usura.
Ulteriori avvertenze sul tema „Assistenza e pezzi di
ricambio“ sono disponibili all’indirizzo
www.proxxon.com.
ES
Garantías y Reparaciones
Todos los productos PROXXON se verifican
cuidadosamente tras la producción. Si a pesar de ello
presentara algún defecto, diríjase por favor al distribuidor
dónde haya adquirido el producto. Solo éste, es
responsable de la gestión de todos los derechos legales
de garantía que se refi eren exclusivamente a fallos de
material y de fabricación.
El uso indebido como p.ej. sobrecarga, daños por
acciones externas y desgaste normal están excluidos de
la garantía.
Encontrará más información sobre „Servicio técnico y
gestión de repuestos“ en www.proxxon.com.
NL
Voor service
Alle PROXXON-producten worden na de productie
zorgvuldig getest. Mocht er toch een defect optreden,
dan kunt u contact opnemen met de leverancier van wie
u het product hebt gekocht. Alleen de leverancier is voor
de afwikkeling van alle wettelijke garantieclaims die
uitsluitend materiële of fabricagefouten betreffen,
verantwoordelijk.
Ondeskundig gebruik zoals overbelasting, beschadiging
door inwerking van vreemde stoffen en normale slijtage
zijn uitgesloten van de garantie.
Verdere aanwijzingen over het thema “Service en
reserveonderdelen“ vindt u op www.proxxon.com.
Art.-Nr. 29880-99 PR707719701S
- 32 -
Änderungen, die dem technischen Fortschritt dienen, bleiben vorbehalten.
 Loading...