


INSTRUCTION MANUAL


LED TV
PLEDV1945A
|
Contents |
Caution & Important Safety Precautions |
1-2 |
Desktop TV Bracket Installation & Assembly |
3-4 |
Getting Started |
5 |
Front View |
5 |
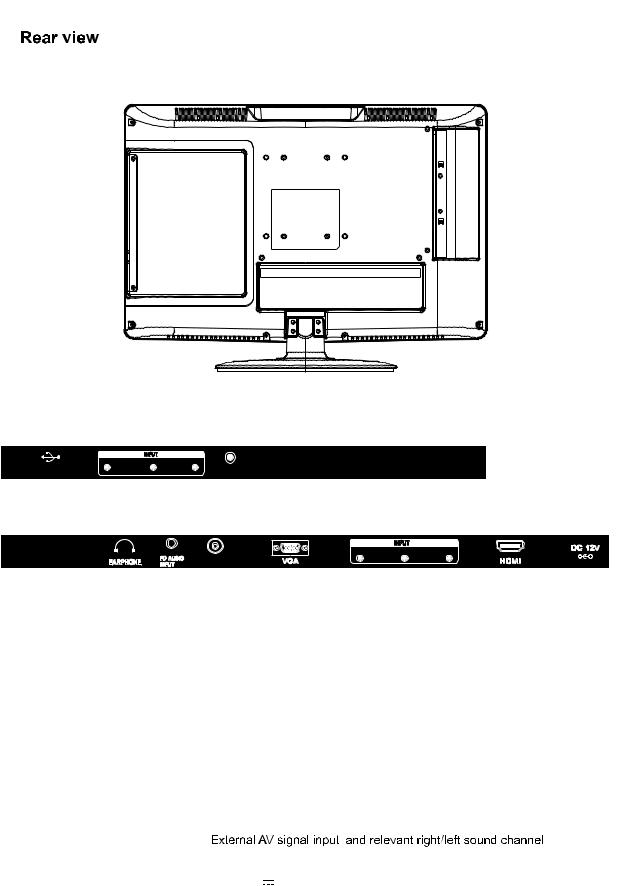
Rear View |
6 |
Remote Control Key Functions |
7 |
Select input source |
8 |
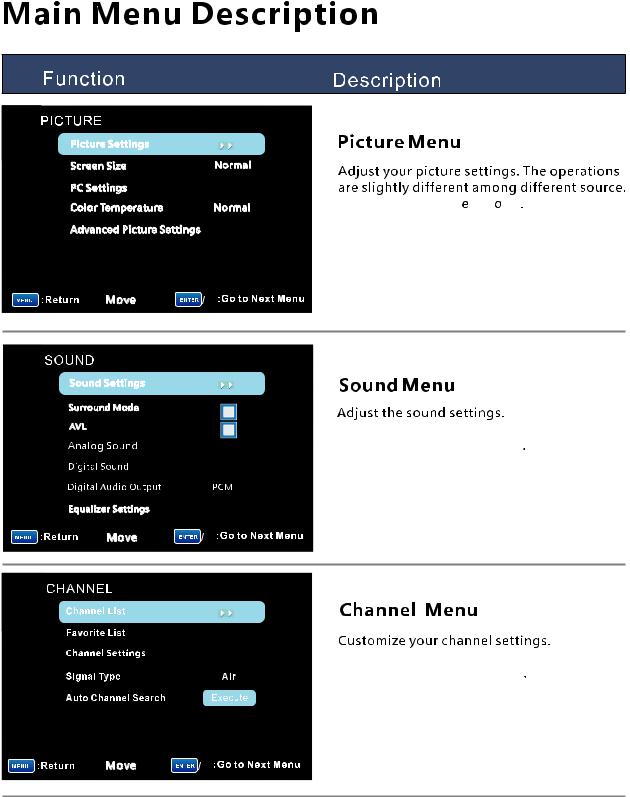
Main Menu Description |
9-10 |
Picture menu |
11 |
Picture Settings |
12 |
PC Settings |
13 |
Advanced Picture Settings |
14 |
SOUND MENU |
15-17 |
Sound Settings |
16 |
Equalizer Settings |
17 |
CHANNEL MENU |
18-21 |
Channel List |
19 |
Favorite List |
19 |
Auto Channel Search |
20 |
Channel Setting |
21 |
|
|
PARENTAL CONTROL |
22-26 |
V-CHIP |
23 |
TV Rating |
24 |
|
|
Canada V-CHIP |
25 |
CHANGE PASSWORD |
26 |

Setup Menu
Closed Caption
Menu Language
Digital CC Style
Clock
OTHERS MENU
Blue Back
No Signal Power Off
All Reset
Audio Only
DVD
Help
Specifications
Contents
27
27
27
28
29
30
30
30
30
30
31-32
33
34
Caution
Caution
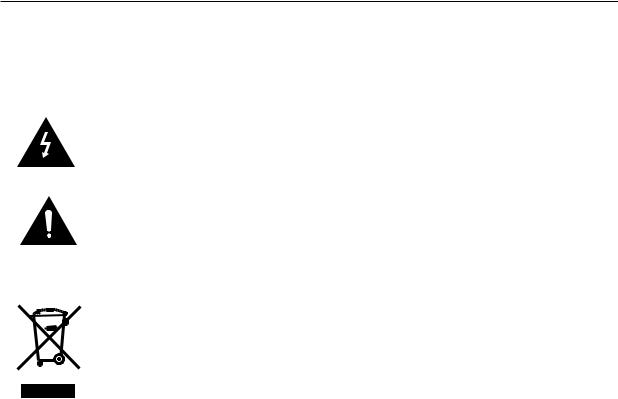
The lightening flash with arrowhead symbol, within an equilateral triangle is intended to alert the user to the presence of un-insulated "dangerous voltage" within the products enclosure that may be of sufficient magnitude to constitute a risk of electric shock to the persons.
The exclamation point within an equilateral triangle is intend to alert the user to the presence of important operating and maintenance (servicing) instructions in the literature accompanying the appliance.
Correct disposal of this Product
W aste Electrical & Electronic Equipment (WEEE)
Your product is designed and manufactured with high quality materials and components which can be recycled and reused.
This symbol means that electrical and electronic equipment, at their end-of-life, should be disposed of separately from your household waste.
Please dispose of this equipment at your local community waste collection/recycling centre.
In the European Union there are separate collection systems for used electrical and electronic products. Please help us to conserve the environment we live in!
1

Important Safety Precautions
Caution:
 To reduce the risk of fire or electric shock, do not expose this apparatus to rain or moisture.2
19)Do not place any sources of danger on the apparatus (e.g. liquid filled objects, lighted candles).
20)Wall or Ceiling Mounting - The appliance should be mounted to a wall or ceiling only as recommended by the manufacturer.
These servicing instructions are for use by qualified service personnel only. To reduce the risk of electric shock do not perform any servicing other than that contained in the operating instructions.
unless you are qualified to do so.
2
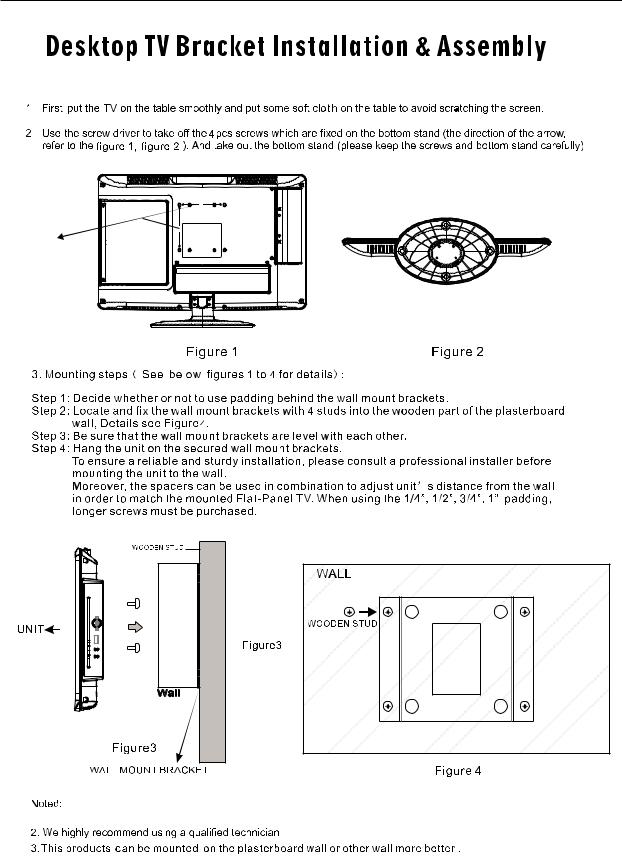
Desktop TV Bracket Installation & Assembly
100MM
 ,wall mount is not included in this package.
3
Desktop TV Bracket Installation & Assembly
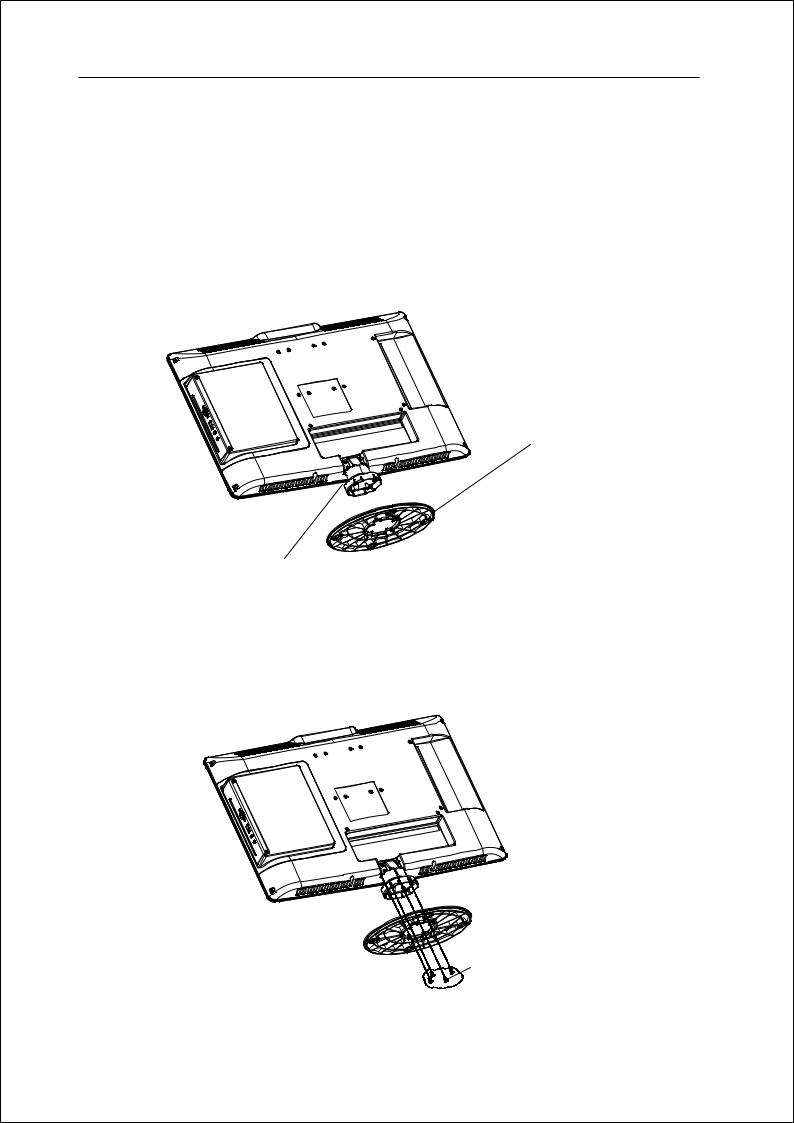
Note:Instruction manual for the TV stand assembly.
1 To assemble the stand, the hooks on the stand poles should be fully inserted into the square holes on the stand base. (Please make sure keep same direction of the square holes and the hooks).
stand base
stand poles
2. Fix the stand and the stand poles with 4 pieces of BB3*8 screws
 screws
4
Getting Started
Getting started
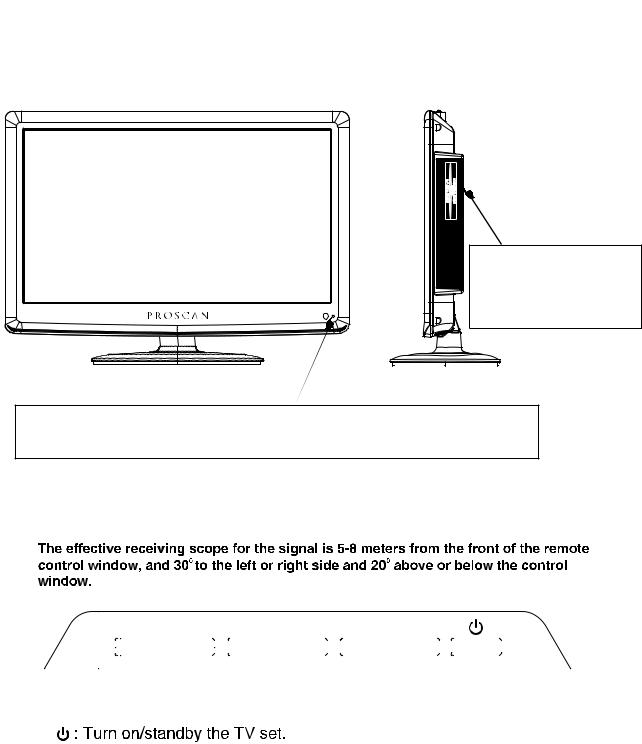
Front view
DVD
Insert disc with shiny side facing the front of TV.
(IR) Infrared Receiver: Receives IR signals from the remote control. (Power on/Standby) LED Indicator: Press to turn on and off
Indicator on(Red) |
Standby mode |
Indicator on(Green) |
Power on mode |
|
VOL+ VOLCH+ |
CHMENU SOURCE |
|
|
|
||||||||
|
|
|
|
|
|
|
|
|
|
|
|
|
|
|
|
|
|
|
|
|
|
|
|
|
|
|
|
|
|
|
|
|
|
|
|
|
|
|
|
|
|
 The functions of the buttons on the TV are as follows:
SOURCE External signal input selection and confirm the item selected.
MENU: 1.Press Menu.
2.Press SOURCE to enter. 3.Use CH+/- to shift UP/DOWN.
4.Press SOURCE to confirm,then press VOL+/-to adjust. 5.Press SOURCE to confirm
CH+/-:When watching TV: select channels.
VOL
5
Getting Started
Y |
Pb |
Pr |
Service Port
COAXIAL
(Left Side)
VIDEO |
R |
L |
RF
(Back Side)
Name |
Function Description |
Service Port |
For Upgrade Use. |
YPBPR |
Connect to the composite terminal of your DVD/VCR |
COAXIAL |
Digital Audio Output |
|
|
EARPHONE |
Earphone output |
|
|
PC AUDIO IN |
PC audio input |
|
|
ANT 75Ω |
Connect to ANT or cable source |
|
|
VGA IN |
VGA signal from computer output |
AV INPUT |
|
|
|
HDMI IN |
Connect to HDMI of DVD or other equipment |
POWER SOCKET |
DC 12V 4A |
6

Remote Control Key Functions
SLEEP: Select amount of time before TV turn off automatically.
S.MODE: Press to cycle through the different sound settings
P.MODE: Press to cycle through the different picture settings
MTS / MP3PROG:
Press to select the audio mode,you can select stereo,Mono, or SAP(second audio program)./MP3 program.
EPG:  D.Setup:
CH +/- : Press to scan through or to select a channel.
V +/-: Press to increase / decrease the sound level.
D.MENU:
D.TITLE: GOTO:
GOTO:
D.DISP:
STEP Play for single frame image
A-B During the playback,press this button to repeat playback of a specific section on a disc.
|
|
|
Press "-" to enter a program number for multiple program |
|
|
|
channel, such as 2-1 etc. |
P.MODE |
S.MODE |
SLEEP |
|
MENU |
|
|
SOURCE |
|
ENTER |
|
|
|
|
|
DVD |
EXIT |
|
|
DISPLAY |
|
MTS / MP3PROG |
|
|
|
|
EPG |
|
|
D.setup |
|
|
FAV |
|
FAV+ |
FAV- |
REV |
FWD |
PREV |
NEXT |
ZOOM |
ANGLE |
AUDIO |
SUBTITLE |
Zoom |
Angle |
Audio |
Subtitle |
|
|
|
ZOOM In DVD source adjust DVD picture size |
D.MENU |
D.TITLE |
GOTO |
D.DISP |
D.Menu |
D.Title |
Goto |
D.Disp |
PROG |
STEP |
REPEAT |
A-B |
PROG |
STEP |
REPEAT |
A-B |
Universal remote code
This is the code for remote control of PLEDV1945A,if you want to change to a universal remote control,you can edit
this code into your universal remote control.
(1)Open the battery compartment cover on the back side
(2)Insert two 1.5V batteries of AAA type with correct polarity
(3)Close the battery compartment cover on the back side
Universal Remote Control code:007F
(Universal Remote control is not included)
7
SELECT INPUT SOURCE


 SOURCE


YPbPr
DVD
BASIC OPERATION
8


 11
11 14
14


 15
15 17
17


 18
18 21
21
9
 Loading...