


ProMa r i ne r™
ProMa r i ne r™
SMT-DIGITAL
ProSportSeries
Heavy Duty Recreational Grade On-Board Marine Battery Charger
Owner's Manual and Installation Guide
WATERPROOF
a n d
SALTWATER
T E S T E D
TWO YEAR |
Constructed to: |
WARRANTY |
Marine UL 1236 |
|
FCC Class A Part 15 |
D i s t r i b u t e d - O n - D e m a n d ™ C h a r g i n g
Fully Automatic / Electronic Multi-Stage Marine Battery Chargers
|
|
Total Amps |
Use with # |
Battery |
Models |
Part No. Bank Config. |
Distributed |
of Batteries |
System |
Professional Mariner, LLC
200 International Drive, STE 195 Portsmouth, New Hampshire 03801 TEL: 603-433-4440
FAX: 603-433-4442 www.promariner.com
specifications subject to change without notice |
06/10 E SMT-Digital |
ProSport6 |
42006 |
Single |
6 Amps |
1 |
12 VDC |
ProSport8 |
42008 |
Dual |
8 Amps |
2 |
12/24 VDC |
ProSport12 |
42012 |
Dual |
12 Amps |
2 |
12/24 VDC |
ProSport20 |
42020 |
Dual |
20 Amps |
2 |
12/24 VDC |
ProSport20 Plus |
42021 |
Triple |
20 Amps |
3 |
12/24/36 VDC |
IMPORTANT NOTICE
Please save and read all safety, operating and installation instructions before installing or applying AC power to your ProMariner ProSport On-Board Marine Battery Charger.
Your Satisfaction is Important to Us!
Do not return this product to your local retail location. Please call ProMariner at the number below for any service or warranty requirements.
Please visit our website at www.promariner.com for any warranty, service or installation assistance and FAQ's or call our Customer Care Department at 800-824-0524 from 8:30 am to 5pm (Eastern Time).
PLEASE RECORD YOUR: |
|
|
Model Number: |
Serial Number: |
Date of Purchase: |
(Serial number can be located on the top side of the mounting flange.)

ProMa r i ne r™
 Table Of Contents
Safety Instructions... |
pages 1-2 |
ProSport Overview... |
pages 3-6 |
Selecting a Charging Profile & Understanding Battery Types |
page 7 |
Installation Guidelines... |
pages 7-9 |
4 Steps to Wire your ProSport Charger Correctly |
page 10 |
DC Wiring Diagrams |
pages 11-18 |
Charging Your Batteries... |
page 19 |
Maintenance... |
page 20 |
Trouble Shooting... |
page 21 |
Specifications & Accessories... |
page 22 |
Customer Service & Warranty... |
page 23 |
 Introduction
Thank you from all of us at Professional Mariner and congratulations on your recent purchase of the ProMariner ProSport On-Board Marine Battery Charger.
Powered and designed by ProMariner™, a leader in the marine charging industry for over 30 years; ProSport, the first choice in waterproof on-board marine battery chargers, has been re-engineered to deliver the latest in multi-stage charging and industry leading features like our: All new digitally controlled battery type selector, expanded LED status center and Distributed-On-Demand ™ Charging Technology for faster charging.
Please save and read this manual carefully and fully understand the safety instructions before installing your new ProSport Marine Battery Charger.
S a f e t y I n s t r u c t i o n s
1
 General Safety Instructions
Before connecting your batteries or applying AC power, read all instructions and cautionary markings on the battery charger, cables, and batteries.
CAUTION - To reduce the risk of injury, charge only Lead-acid type rechargeable batteries; Flooded(Lead-acid),Sealed(Lead-acid),GEL(GelledElectrolyteLead-acid)andAGM(Absorbed Glass Mat). Other types of batteries may burst, causing personal injury. The ProSport is factory set for standard Flooded (Lead-acid) /AGM (Absorbed Glass Mat) batteries.
Use of attachments not recommended or sold by Professional Mariner, LLC may result in a risk of fire, electrical shock or personal injury.
Do not operate the charger if it has received a sharp blow, direct hit of force, been dropped or otherwise damaged in any way. Do not install if any protective AC and DC cable insulation, DC fuse holders and/or ring terminals have been damaged or compromised. Call ProMariner for repair service to avoid risk of fire, short circuits or electrical shock.
Do not disassemble the battery charger. If service or repair is required please contact customer careat1-800-824-0524.Incorrectreassemblyorcablemodificationsmayresultinariskofelectrical shock, fire or explosion.
To reduce the risk of electrical shock, remove AC power from the charger prior to any maintenance or cleaning.
WARNING: RISK OF EXPLOSIVE GASES
WORKING IN THE VICINITY OF A LEAD-ACID BATTERY IS DANGEROUS. BATTERIES GENERATE EXPLOSIVE GASES DURING NORMAL BATTERY OPERATION. FOR THIS REASON IT IS OF EXTREME IMPORTANCE THAT EACH TIME BEFORE USING YOUR CHARGER YOU FOLLOW THESE SAFETY INSTRUCTIONS.
 WARNINGAVOIDSERIOUSINJURYORDEATHFROMFIRE,EXPLOSION,ORELECTRICALSHOCK
-Make your AC power connection in an open atmosphere free of explosive fumes.
-Make your AC power connection in a secure manner that will avoid contact with water.
Toreduceriskofbatteryexplosion,followtheseinstructionsandthosepublishedbythebatterymanufacturer, andofanyequipmentyouintendtouseinthevicinityofabattery.Reviewallcautionarymarkingsandlabels.
 Personal Safety Precautions
a)Someone should be within the range of your voice or close enough to come to your aid when working near a Lead-acid battery.
b)Have plenty of soap and water nearby in case battery acid comes in contact with skin, clothes, or eyes.
c)Wear complete eye protection and clothing protection. Avoid touching eyes while working near battery(s).
d)If battery acid contacts skin or clothing, wash immediately with soap and water. If acid enters eye, immediately flood eye with running cold water for at least 10 minutes and get medical attention immediately.

S a f e t y I n s t r u c t i o n s
2
 Personal Safety Precautions Continued
e) NEVER smoke or allow a spark or flame in the vicinity of a battery or engine.
CAUTION - To reduce the risk of injury, charge only Lead-acid type rechargeable batteries; Flooded(Lead-acid),Sealed(Lead-acid),GEL(GelledElectrolyteLead-acid)andAGM(Absorbed Glass Mat). Other types of batteries may burst, causing personal injury. The ProSport is factory set for standard Flooded (Lead-acid) /AGM (Absorbed Glass Mat) batteries.
Incorrect assembly or modification may result in risk of electrical shock, fire, or explosion.
f)Be extra cautious to reduce risk of dropping a metal tool onto the battery. It might spark or short-circuit a battery or other electrical hardware which may cause an explosion or fire.
g)Remove all personal metal items such as rings, bracelets, necklaces, watches, and jewelry when working near a battery. A battery can produce a short circuit current high enough to weld a ring or any other metal, causing serious burns.
Use your ProSport On-Board Marine Battery Charger to charge: Flooded (Lead -acid)/AGM (Absorbed Glass Mat) GEL (Gelled Electrolyte Lead-acid) Batteries. It is not intended to supplylowvoltageelectricalsystemsotherthaninamarineapplication.Donotuseyourmarine battery charger to charge dry cell batteries that are commonly used with home appliances. These batteries may burst and cause injury to persons and property.
Never charge a frozen battery
 Safety Precautions Prior to Charging Batteries
Ifnecessarytoremoveabatteryfromaboattocharge,alwaysremovethe groundednegative terminalfromthebatteryfirst.Makesureallaccessoriesintheboatareoff,astonotcauseanarc.
Be sure the area around the charger and batteries is well ventilated while the batteries are being charged. Gases can be forcefully blown away using a piece of cardboard or other nonmetallic material as a fan.
Clean battery terminals with full eye protection to prevent corrosive material from coming in contact with eyes.
Add distilled water in each cell until electrolyte reaches levels specified by the battery manufacturer. This helps purge excessive gases from cells. Do not overfill. For batteries without caps, carefully follow manufacturer's recharging instructions.
Study all manufacturer’s specific precautions, such as removing or not removing cell caps while charging, in addition to battery type for proper rate of charge.
Extension cords should be industrial grade / heavy duty UL approved and grounded. Check extension cord before use for damage, bent prongs, and cuts. Replace if damaged.
Always make your extension cord connection on the charger side first. After connecting the extension cord to the charger proceed to plug the extension cord to a nearby 120 VAC GFCI protected (Ground Fault Circuit Interrupt) outlet.
Always remove the extension cord from the 120 VAC outlet first when charging is completed followed by unplugging the charger.
P r o S p o r t O v e r v i e w
3
 General Overview
The ProSport Charger is an Advanced Electronic and Fully Automatic Multi-Stage On-Board Marine Battery Charger. ProSport is pre-wired for easy installation and is 100% waterproof for fresh and salt water applications.
ProSport’s Sequential Multi-Stage Charging process delivers three sequenced modes of operation that include: Charging, Conditioning, and Maintenance of each battery. This process is proven to extend the life of your batteries and will fully charge your batteries each time.
ProSport's Heavy Duty extruded aluminum housing delivers increased power and performance while providing improved durability and heat transfer.
The ProSport's Distributed-On-Demand™ Charging Technology will automatically sense and distribute 100% of the available charging amps (model specific) to any one battery or combination of all batteries. Each battery charger output is fully isolated.
ProSport's easy to view LED indicators will provide at a glance status of: AC power, Battery Type, Charging, and Ready Status. The LED Status Center can be seen on the top of the unit when installed.
Note: ProSport Waterproof Marine Battery Chargers are designed for any combination of group 24,27,30 and 31 batteries. Each Battery Charger DC output cable must be connected to one (1) 12 Volt DC battery (even if batteries are configured for 24 Volt DC or 36Volt DC trolling Motor or System Applications). Most specifically you do not have to remove series or parallel jumper cables to use your ProSport Charger. See typical wiring diagrams for these systems in the installation section of this manual.
Note (1): If your application is for 4D or 8D large capacity batteries, please refer to ProMariner's website www.promariner.com and view our ProTech-i and ProNautic C3 Line of Dry Compartment Chargers. Using our online selector guide, choose a model that best fits your application for this class of batteries.
Note (2): ProSport Marine Battery Chargers can not be used as a stand alone power supply. The ProSport Battery Charger and each DC jacketed bank cable must be properly connected to an "individual 12V battery". Number of DC jacketed bank cables MUST equal the number of batteries that must be individually connected. For example a 3 bank ProSport 20 Plus must be connected to 3 individual 12V batteries, as illustrated on Pages 10-18.
P r o S p o r t O v e r v i e w
4
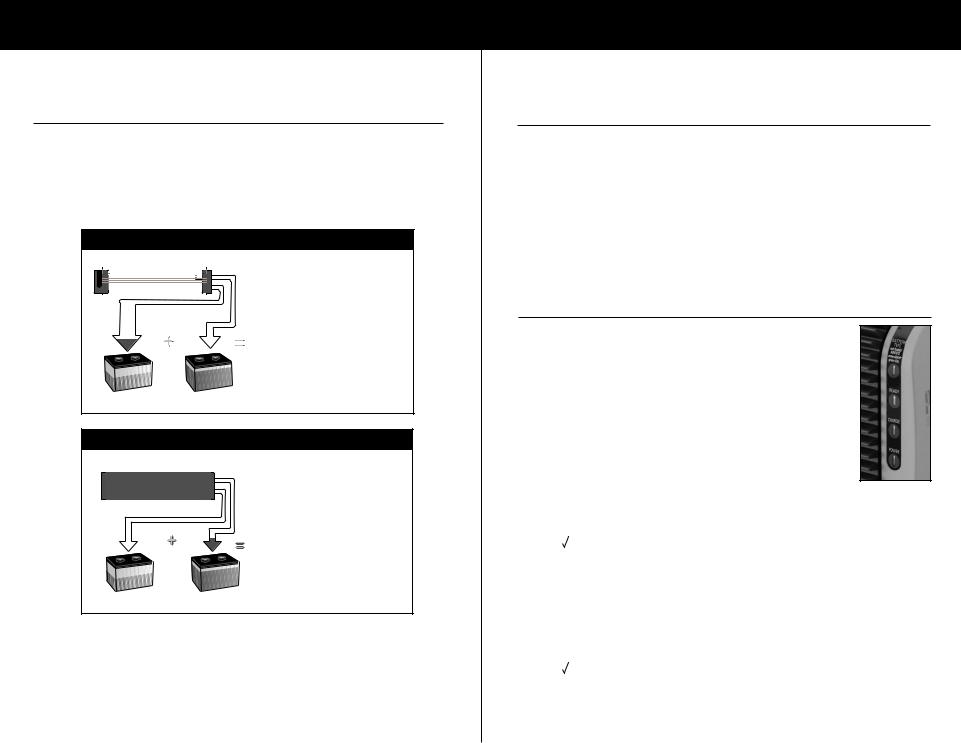
 Distributed-On-Demand™ Charging Versus Standard Chargers.
ProSport's "Distributed-On-Demand™" feature will automatically distribute 100% of its available charging amps to any one battery or combination of all batteries. This feature ensures all available charging amps are used, unlike other 2 and 3 bank On-Board Chargers with a fixed amp limit per charger bank / DC output cable.
Distributed-On-Demand™ Technology Advantage versus Leading Fixed Amp per Bank Chargers*
Distributed-On-Demand™ Multi-Stage Charging Output
|
ProSport12 12 Amp Charger |
|
|
|
™ |
||||||
|
|
|
|
|
|
|
|
|
|
|
ProSport's Distributed-On-Demand |
|
|
|
|
|
|
|
|
|
|
|
Charging Technology ensures 100% of |
|
|
|
|
|
|
|
|
|
|
|
|
|
12 Amps Fully Distributed |
|
|
|
DISTRIBUTED |
the available charging amps are fully |
|||||
|
|
|
|
|
|
|
|
|
|
|
utilized to meet the demand of each |
|
|
|
|
|
|
|
|
|
|
|
battery on-board. Let’s say your engine |
|
|
|
|
|
|
|
|
|
|
|
start battery only needs 2 amps from |
|
|
|
|
|
|
|
|
|
|
|
your “ProSport 12” (6/6) 2 bank charger; |
|
|
10 |
|
|
|
|
|
|
|
FULLY |
No problem. The unused 4 amps will |
|
|
|
|
|
2 |
|
|
|
be automatically Distributed-On- |
||
|
|
|
|
|
|
|
|
|
|
|
™ |
|
|
|
|
|
|
|
|
|
|
AMPS |
Demand to battery bank #1 providing |
|
|
|
|
|
|
|
|
|
|
a total of 10 amps to the trolling motor |
|
|
|
|
|
|
|
|
|
|
|
battery versus only 5 amps that the |
|
|
|
Bank No. 1 |
|
|
|
Bank |
No. 2 |
12 |
conventional 5/5 charger would |
||
|
|
|
|
|
|
||||||
|
|
|
|
|
|
Engine |
|
|
provide. The competitive 5/5 charger |
||
|
|
Trolling |
|
|
|
|
|
has a 5 amp limit per bank . |
|||
|
|
Battery 1 |
|
|
Start Battery 2 |
|
|
|
|||
Typical Leading Competitive Charging Output
Competitive 5/5 10 amp charger
|
|
|
AMPS7without |
TechnologyDemand-On-Distributed |
Competitive chargers have an amp |
Up to 5 Amps per Bank |
limitation per bank. As illustrated the |
||||
|
|
(5/5) |
|
|
(5/5) 10 amp charger can not transfer |
|
|
|
|
the unused 3 amps not required by |
|
|
|
|
|
|
|
|
|
|
|
|
the engine start battery, leaving only |
|
|
|
|
|
a maximum of 5 amps for the trolling |
|
|
|
|
|
motor battery. |
5 |
|
2 |
|
|
|
|
|
|
. 2 |
|
|
Bank |
No. 1 |
Ba |
nk No |
|
|
|
|
|
|||
Trolling |
Engine |
|
|
||
Battery 1 |
Start Battery 2 |
|
|
||
Note: Above illustration reflects typical battery usage after a day of fishing. Trolling motor batteries are 50% discharged and not usable. Engine start battery is 90% charged from the engine charging system.
P r o S p o r t O v e r v i e w
5
 General Operation
Install your ProSport On-Board Marine Battery Charger to the guidelines in this manual.
Make sure your charger and batteries are properly vented. Connect your extension cord with no AC Power present to the ProSport and proceed to plug your extension cord in at a nearby 120 VAC GFCI protected (Ground Fault Circuit Interrupt) outlet.
With your ProSport plugged in properly, it will automatically / fully charge your batteries while it conditions and extends the life of your batteries. When you’re not at home, always leave your charger plugged in to reduce sulfate build-up allowing your batteries to be fully charged and maintained for your next fishing trip.
For long term or winter storage/ maintenance of batteries, ProMariner recommends that every 30 days: AC Power is removed by unplugging your extension cord at the GFCI outlet first, check battery electrolyte levels. Re-apply AC power to your ProSport Charger. This practice will properly maintain your batteries resulting in extended battery life and use.
 LED Status Center - Normal Operation & Display
The ProSport Series includes four (4) LEDs as shown:
1.Top LED is Battery Type: Red for standard Flooded (Lead-acid)/AGM, Amber for AGM HP (High Performance) and Green for GEL
2.Ready LED: Illuminates Green
3.Charging LED: Illuminates Red
4.Bottom Power LED: Illuminates Blue
LED Status Center Operation after Applying AC Power to Discharged Batteries
(Example below is for the factory setting of Flooded (Lead-acid) batteries). All LEDs will self test, followed by:
The Blue AC Power LED will illuminate followed by the Red Charging LED and Red Battery Type LED (Factory Setting for standard Flooded (Lead-acid)/AGM Batteries). The combination of these three LEDs turning on indicates ProSport has started its Sequential Multi-Stage Charging process.
When the Sequential Multi-Stage Charge Process is completed you will observe the following:
 Battery Type Red LED goes OFF
Charging Red LED goes OFF
 Ready Green LED turns ON
The only LEDs on after the Sequential Multi-Stage Charge process is completed are the Blue AC Power LED and the Green Ready LED
LED Status Center Operation after Applying AC Power to Fully Charged Batteries
The Blue AC Power LED will illuminate followed by the Green Ready Indicator turning ON For this application, the following LEDs are in the OFF state.
 Battery Type (factory set) Red LED Turns OFF Charging Red LED Turns OFF.
*Distributed On-Demand™ Charging not available on single output models |
The only LEDs on, if the charger is maintaining fully charged batteries, are the Blue |
|
AC power LED and the Green Ready LED. |
P r o S p o r t O v e r v i e w
6
 Sequential Multi-Stage Charging Overview
Upon applying AC power to your ProSport On-Board Marine Battery Charger, the following will be observed (all LEDs will flash as a self test):
The Blue AC Power LED will illuminate followed by the Red Charging LED and Red Battery Type LED (Factory setting for standard Flooded (Lead-acid)/AGM batteries). The combination of these three LED’s turning on indicates ProSport has started its Sequential Multi-Stage Charging process. When the Charge Process is completed, only the Green READY and Blue AC Power LEDs will be illuminated.
ProSport’s Sequential Multi-Stage Charging process delivers three sequenced modes of operation that include: Charging, Conditioning and Maintenance of each battery. This process is proven to extend the life of your batteries and will fully charge your batteries each time.
Stage 1: ProSport Charging
During this mode, the ProSport will use its available charging amps (as controlled by temperature) until battery voltage is raised to 14.6 VDC (Factory setting for standard Flooded (Lead-acid) / AGM batteries).
Stage 2: ProSport Conditioning
The ProSport will hold batteries at 14.6 VDC (Factory setting for Flooded (Lead-acid) / AGM batteries) providing a 100% charge to each battery, while conditioning batteries by desulfating each battery. Upon completion, the ProSport will go to into its maintenance mode.
Stage 3: ProSport Ready / Maintenance Mode
During this mode, the Red Charging LED and the RED Battery Type LED (Factory set charge profile for standard Flooded (Lead-acid / AGM Batteries) will turn off indicating the Charge Process is completed, followed by the Green READY LED turning On.
The Green READY LED and the Blue AC POWER LED will remain on indicating that your batteries are fully charged and are being maintained with a precision 13.4 Volts DC Finishing Voltage (Factory set charge profile for standard Flooded (Lead-acid / AGM Batteries). ProSport’s Ready/Maintenance Mode is perfect for short or long term storage and will never overcharge your batteries.
Note: Only the Green READY LED and the Blue AC POWER LED will remain on when the ProSport is in its Ready/Maintenance Mode.
Average Voltage - Standard Flooded (Lead-acid) / AGM Charger Profile
|
|
|
|
14.6V |
|
14 |
|
|
|
DC |
|
|
|
13.4V |
13 |
|
|
|
|
Volts |
|
|
|
|
12 |
|
|
|
|
|
|
|
|
|
|
11 |
Charging |
Conditioning |
Maintenance / Float Mode |
|
|
|
|
Performance Tip: For long term or winter storage/ maintenance of batteries, ProMariner recommends that every 30 days: AC power is removed by unplugging your extension cord at the GFCI outlet first, check battery electrolyte levels. Re-apply AC power to your ProSport Charger. This practice will properly maintain your batteries resulting in extended battery life and use.
Selecting a Charging Profile & Understand Battery Types
7
 Selecting a Charging Profile & Understanding Battery Types
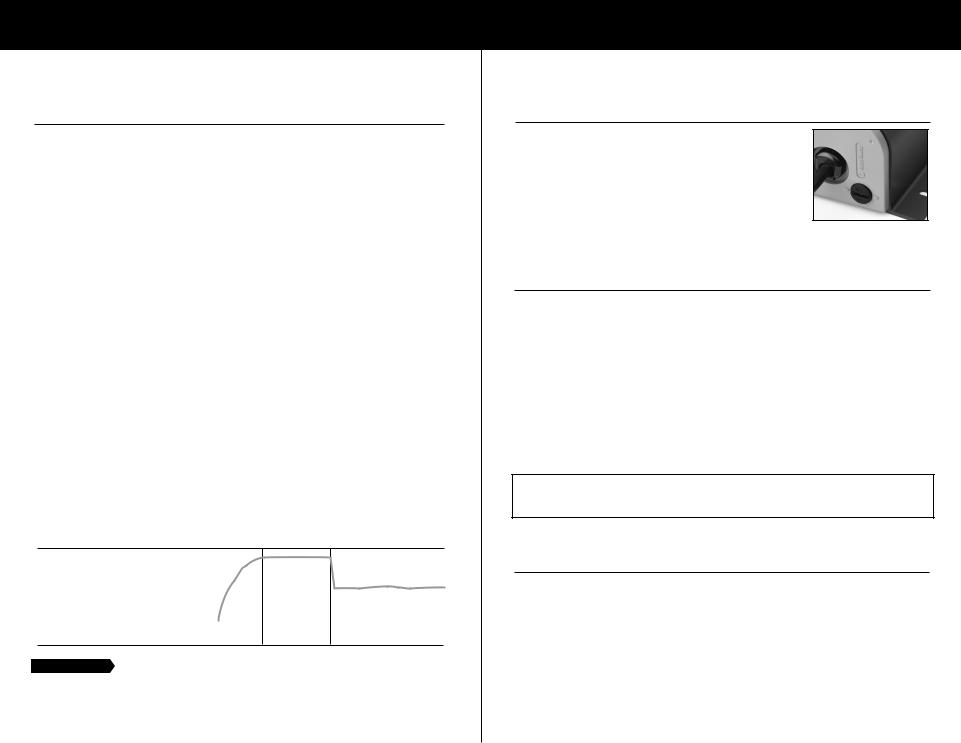
Your Battery Charger is equipped with a user programmable battery type selector that is factory set for standard Flooded (Lead-acid) / AGM (Absorbed Glass Mat) batteries.
To set your charger for high performance AGM or GEL batteries simply remove the black programming cap and replace it with either the red AGM HP or gray GEL programming cap. Any time you reprogram or change the cap, apply marine silicone to the threads of the cap being installed.
Note: It is the color and internal design of the cap that determines the charge profile, not the alignment of the debossed letters for the battery type on the caps.
Please be sure to keep your unused programming cap.
 Understanding Battery Types & Charger Settings
There are three primary types of batteries in the marketplace today; standard Flooded (Lead-acid), AGM (Absorbed Glass Mat), high performance AGM and GEL cell (Gelled Electrolyte Lead-acid).
Traditionally, the most common type of batteries used are Flooded (Lead-acid) batteries. Almost all GEL cell batteries will state that they are GEL cell on the battery case or labels. Shown below are typical battery voltages at absorption and float levels.
LED color |
Battery Type |
Charging Profile |
Cap |
|
Red |
Standard Flooded (Lead-acid) - |
14.6 VDC Absorption, 13.4 VDC Float |
Black |
|
|
with or without fill caps |
|
|
|
|
AGM (Absorbed Glass Mat) -Sealed |
|
|
|
Green |
GEL Cell - Sealed Gray Cap |
14.1 VDC Absorption, 13.8 VDC Float |
Gray |
|
Amber |
AGM High Performance |
14.7 VDC Absorption 13.6 VDC Float |
Red |
|
|
(Absorbed Glass Mat) - Sealed |
|
|
|
NOTE:AGM(AbsorbedGlassMat)batteriesarenotGEL(GelledElectrolyteLead-acid)batteriesand requireacompletelydifferentchargeprofilethatmustbeselectedversustheoutoftheboxfactory setting. AGM batteries can accept the same charging profile as Flooded (Lead-acid) batteries.
***If you are still unsure what kind of battery(s) you have, we recommend that you contact the manufacturer of the battery(s).
 Installation
All ProSport Battery Chargers are designed to be permanently mounted on-board, and should be mounted with extruded fins placed horizontally.
Always mount your ProSport in a compartment area that can be properly ventilated during use.
Do NOT mix battery types on-board. All batteries should be of the same age and in good operating condition.
Do NOT make any electrical connections to the ProSport or batteries until the following steps are completed:
11 Easy to follow installation steps:
1. Select a mounting location that allows for free air ventilation with a minimum of 8 inches
 Loading...