


PMDT

Owner’s Manual
PMDT
Modular DVD
Transport
WARNING: TO REDUCE THE RISK OF FIRE OR ELECTRIC SHOCK, DO
NOT EXPOSE THIS APPLIANCE TO RAIN OR MOISTURE.
CAUTION
RISK OF ELECTRIC SHOCK
DO NOT OPEN
CAUTION: TO REDUCE THE RISK OF ELECTRICAL SHOCK, DO
NOT REMOVE COVER. NO USER-SERVICEABLE PARTS INSIDE.
REFER SERVICING TO QUALIFIED PERSONNEL.
The lightning flash with arrowhead symbol, within an equilateral triangle, is intended
to alert the user to the presence of uninsulated “dangerous voltage” within the
product’s enclosure that may be of sufficient magnitude to constitute a risk of electric
shock to persons.
The exclamation point within an equilateral triangle is intended to alert the user to the
presence of important operating and maintenance (servicing) instructions in the literature
accompanying the appliance.
2
Marking by the “CE” symbol (shown left) indicates compliance of this device with the EMC
(Electromagnetic Compatibility) and LVD (Low Voltage Directive) standards of the
European Community.
NOTICES
This equipment has been tested and found to comply with the limits for a Class B digital device, pursuant to Part 15 of
the FCC Rules. These limits are designed to provide reasonable protection against harmful interference in a residential
installation. This equipment generates, uses and can radiate radio frequency energy and, if not installed and used in
accordance with the instructions, may cause harmful interference to radio communications. However, there is no guarantee
that interference will not occur in a particular installation. If this equipment does cause interference to radio or television
reception, which can be determined by turning the equipment on and off, the user is encouraged to try to correct the
interference by one or more of the following measures:
• Reorient or relocate the receiving antenna;
• Increase the separation between the equipment and the receiver;
• Connect the equipment into an outlet on a circuit different from that to which the receiver is connected;
• Consult the dealer or an experienced radio/TV technician for help.
CAUTION: Changes or modifications to this equipment not expressly approved by the manufacturer could void the user’s
authority to operate the equipment.
This product incorporates copyright-protected technology that is protected by method claims of certain U.S. patents and
other intellectual property rights owned by Macrovision Corporation and other rights owners. Use of this copyrightprotected technology must be authorized by Macrovision Corporation, and is intended for home and other limited viewing
uses only unless otherwise authorized by Macrovision Corporation. Reverse engineering or disassembly is prohibited.
The information contained in the manual is subject to change without notice. The most current version of this manual will
be posted on our Website at http://www.madrigal.com.

Important Safety Instructions
Please read all instructions and precautions carefully and completely before operating your Proceed® Modular
DVD Transport.
1. ALWAYS disconnect your entire system from the AC mains before connecting or disconnecting
any cables, or when cleaning any component.
2. This product is equipped with a three-conductor AC mains power cord which includes an
earth ground connection. To prevent shock hazard, all three connections must ALWAYS be
used. If your electrical outlets will not accept this type of plug, an adapter may be purchased.
If an adapter is necessary, be sure it is an approved type and is used properly, supplying an
earth ground. If you are not sure of the integrity of your home electrical system, contact a
licensed electrician for assistance.
3. AC extension cords are not recommended for use with this product. If an extension cord must
be used, be sure it is an approved type and has sufficient current-carrying capacity to power
this product.
4. NEVER use flammable or combustible chemicals for cleaning audio components.
5. NEVER operate this product with any covers removed.
6. NEVER wet the inside of this product with any liquid.
7. NEVER pour or spill liquids directly onto this unit.
8. NEVER block air flow through ventilation slots or heatsinks.
9. NEVER bypass any fuse.
10. NEVER replace any fuse with a value or type other than those specified.
11. NEVER attempt to repair this product. If a problem occurs, contact your Proceed retailer.
12. NEVER expose this product to extremely high or low temperatures.
13. NEVER operate this product in an explosive atmosphere.
14. ALWAYS keep electrical equipment out of the reach of children.
15. ALWAYS unplug sensitive electronic equipment during lightning storms.
3

From all of us at Madrigal Audio Laboratories, thank you for choosing this
Proceed product.
4
A great deal of effort went into the design and construction of this precision
device. Used properly, it will give you many years of enjoyment.

Table of Contents
Unpacking and Placement ....................................................................... 7
Unpacking the PMDT ......................................................................................... 7
Placement of the PMDT .................................................................................... 7
Operating Voltage & Frequency ............................................................... 8
voltage label ...............................................................................................
A Quick Start ............................................................................................... 9
check & connect ac power .....................................................................
quick video connection ............................................................................
quick audio connection ............................................................................
loading a disc .............................................................................................
Warmup/break-in period .................................................................................. 9
Special Design Features........................................................................... 11
Modular hardware .......................................................................................... 11
Updatable software ........................................................................................ 11
No-compromise audio .................................................................................... 11
Unexcelled video techniques ........................................................................ 12
Ease of use ....................................................................................................... 12
Industrial design ............................................................................................... 13
Front Panel, PMDT...................................................................................... 14
Rear Panel, PMDT ...................................................................................... 20
trigger tip polarity .....................................................................................
IR input tip polarity ....................................................................................
building a link cable .................................................................................
The PMDT Remote Control........................................................................ 25
The PMDT Menus ....................................................................................... 32
Using the menus ............................................................................................... 32
Video setup ...................................................................................................... 32
TV type .......................................................................................................
composite setup .......................................................................................
component setup ....................................................................................
black level .................................................................................................
white level .................................................................................................
chroma ......................................................................................................
dvd pause .................................................................................................
Audio setup ...................................................................................................... 35
spoken .......................................................................................................
subtitles ......................................................................................................
favorite multichannel ...............................................................................
alternative sound .....................................................................................
audio delay ...............................................................................................
96kHz enabled ..........................................................................................
CD Record ................................................................................................
Disc behavior ................................................................................................... 38
after load ...................................................................................................
Disc Status .................................................................................................
play key .....................................................................................................
, keys ................................................................................................
stop dvd ....................................................................................................
power user tip ...........................................................................................
use ESP ......................................................................................................
User preferences .............................................................................................. 41
key feedback ...........................................................................................
21
21
21
32
32
32
34
34
34
34
35
36
36
37
37
37
38
38
39
39
39
40
40
40
41
8
9
9
9
9
5

OSD position ..............................................................................................
background ..............................................................................................
link options .................................................................................................
display time ...............................................................................................
auto standby ............................................................................................
screen saver ..............................................................................................
Information preferences ................................................................................. 43
disc time ....................................................................................................
sound type ................................................................................................
camera angle ...........................................................................................
a/v processor ............................................................................................
play status .................................................................................................
time of day ................................................................................................
set clock ....................................................................................................
Technical menu ............................................................................................... 45
teach IR commands ................................................................................
restore defaults .........................................................................................
delete programs .......................................................................................
41
41
42
43
43
43
44
44
44
44
44
45
45
45
45
46
Programming the PMDT............................................................................ 47
Electronically saved preferences (ESP™) ...................................................... 47
audio, language ......................................................................................
subtitles ......................................................................................................
subtitle on/off ............................................................................................
aspect ratio ...............................................................................................
black level .................................................................................................
audio delay ...............................................................................................
save settings ..............................................................................................
Ad hoc programming ..................................................................................... 49
6
ad hoc program menu ............................................................................
47
48
48
48
48
48
48
49
Troubleshooting......................................................................................... 51
Care & Maintenance................................................................................ 53
U.S. and Canadian Warranty ................................................................... 54
90-Day limited warranty .................................................................................. 54
five year extended warranty ......................................................................... 54
Obtaining Service ..................................................................................... 55
Specifications ............................................................................................ 56
Dimensions: PMDT ..................................................................................... 57
Rack Mount Kit .......................................................................................... 58

Unpacking and Placement
Unpacking the PMDT Unpack your PMDT modular DVD transport and remove all accessories from
the carton.
The accessories include:
• an AC mains cable
• the PMDT remote control
• 4 AAA alkaline batteries for the remote control
• a 2-meter link cable for use with the Proceed AVP/AVP2
(necessary only for interoperation between the two units)
Important! Keep all packing materials for future transport of your PMDT.
Shipping your new component in anything other than its
purpose-designed packing material may result in damage
that is not covered by the warranty.
Placement of the PMDT The PMDT should be placed close to your audio and video processors, thus
keeping interconnect cabling reasonably short. It may be placed on a shelf or
in a cabinet where it is convenient to operate.
Drawings are included in this manual to facilitate special installations and custom cabinetry (see Dimensions, page 57).
7
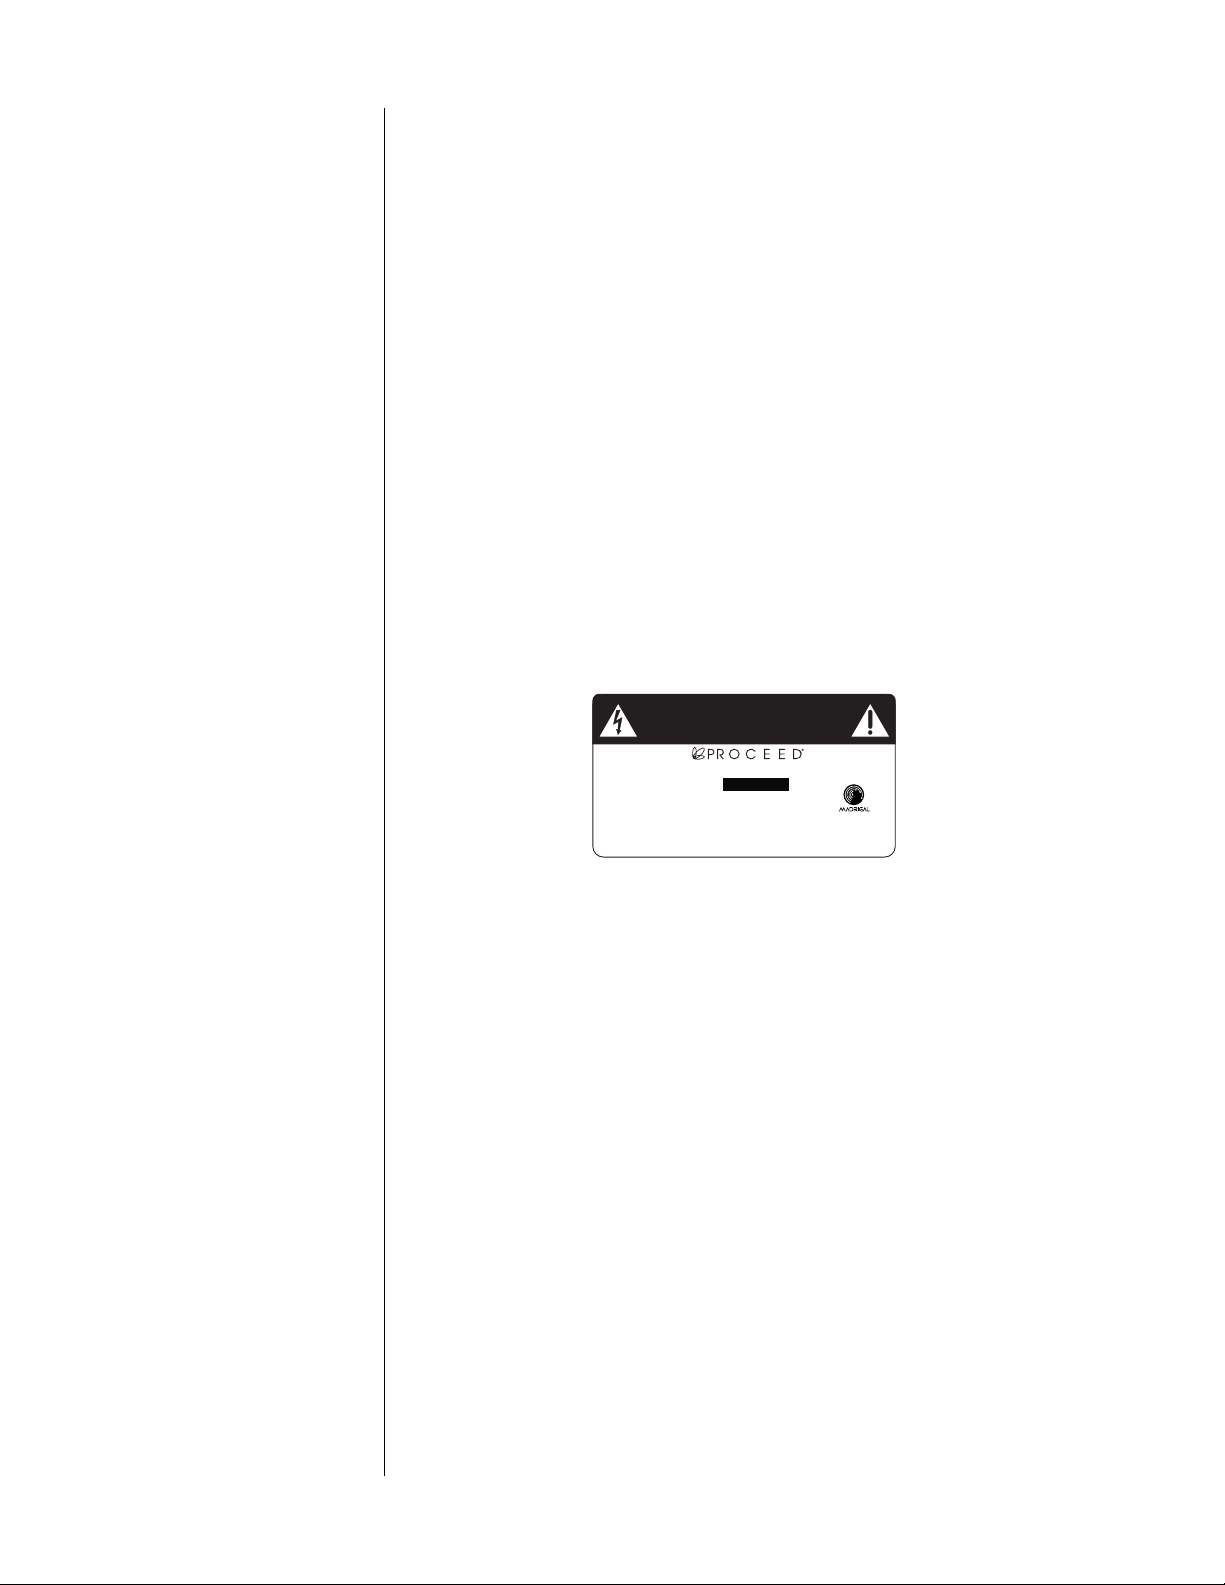
Voltage label
Operating Voltage
& Frequency
The PMDT is set at the factory (internally) for 100V, 120V, 200V, 220V or 240V
AC mains operation as appropriate for the country in which it is to be sold.
(230V/50Hz only in European Union countries, in compliance with CE
regulations.) Make sure that the label on the rear panel of the PMDT (beside
the AC input receptacle) indicates the correct AC operating voltage for your
location. Attempting to operate the PMDT at an incorrect voltage can damage
the unit.
The PMDT modular DVD transport is also set at the factory for operation
on either 50Hz or 60Hz AC line frequencies, as appropriate for the country
in which it is to be sold. It will not operate if it senses an incorrect line
frequency.
Neither the voltage nor the line frequency setting may be changed by the user.
BEFORE ATTEMPTING TO OPERATE THIS
WARNING:
DEVICE, REFER TO OWNER'S MANUAL FOR PROPER
OPERATING INSTRUCTIONS AND SAFETY PRECAUTIONS.
HAZARDOUS VOLTAGE AVAILABLE INSIDE; DISCONNECT
AC ~ MAINS CABLE BEFORE OPENING UNIT.
modular DVD transport
8
No User Serviceable Components Inside.
Laboratories or an Authorized Dealer. Any modifications to this equipment will void all warranties.
S/N
designed and manufactured in USA
www.madrigal.com
Apparatus Claims of U.S. Patent Nos. 4,631,603; 4,577,216;
4,819,098 and 4,907,093 licensed for limited viewing uses only.
For service, contact Madrigal Audio
If the AC mains voltage or frequency indicated on your PMDT is incorrect,
please contact your local, authorized Proceed dealer or distributor.
The PMDT can easily be powered by a normal 15-Ampere AC mains line. If
other devices are also powered from the same AC line, their additional power
consumption should be taken into account.

A Quick Start…
Out of the box, the PMDT is designed to operate much as a fully featured CD
transport when playing compact discs, and much like other DVD players
when playing DVD discs (with the exception, of course, that the PMDT is a
transport – it has only digital audio outputs).
check & connect ac power
quick video connection
quick audio connection
If you have not already done so, check the voltage label on the rear of your
PMDT to ensure that it matches the AC mains supply in your area. (See
previous page.) If your PMDT matches the power in your AC outlets, attach the
detachable power cord to the rear panel receptacle of your PMDT, and then to
the AC mains plug in the wall.
Once this is accomplished, depress the latching power button mounted in the
base (or plinth) of the PMDT, on the right side. The PMDT will run through
some self-testing diagnostics, and enter standby when satisfied that all is well.
All video outputs on your PMDT are active at all times. Select component
(Y/Pb/Pr), S-Video, or composite (on either RCA or BNC), as needed by your
display device, and make the appropriate connection(s). For example, if you
have an S-Video-equipped Proceed AVP/AVP2, you would probably want to
set up an S-Video input on the AVP/AVP2, and rely on the AVP/AVP2 to then
get the signal to the television. If your television also has component (Y/Pb/
Pr) inputs, you should take advantage of the higher quality that connection
standard offers and also run a direct connection from the PMDT to your
television. Then, when you want the best possible picture quality from your
PMDT, remember to switch your TV to its component input.
All the digital audio outputs on your PMDT are active at all times. Select the
one that matches the available input on your A/V processor, and make the
audio connection. If you have a choice, the best options are either the
AES/EBU output (the one using an xlr connector), or the bnc output. These
digital transmission interfaces have a slight performance edge over S/PDIF on
an RCA, and a larger edge over EIAJ (sometimes called “Toslink™”).
9
loading a disc
Warmup/break-in period Although your Proceed PMDT modular DVD transport delivers outstanding
Pressing drawer at this point, on either the front panel or the remote control,
will “wake up” the PMDT (bring it out of standby) and open the drawer so
you can load a disc. Select either a CD or a DVD and press play to start
enjoying your PMDT.
performance straight out of the box, you should expect to hear it continue to
improve as it reaches its normal operating temperatures and its various components “break-in.” It has been our experience that the greatest changes occur
within the first few hours as the PMDT reaches thermal equilibrium. Depending on how cold the PMDT was when you first connected it to AC power, full
thermal equilibrium might take as long as a day or so. After this initial break-in
period, its performance will remain quite constant, assuming that the unit is
toggled between operate and standby (rather than being turned fully off).

The only exception to this rule is if power is removed from the unit for a few
hours, allowing it to cool down. Depending on the degree of cooling involved, you should expect a brief warm-up period before the PMDT’s sound
quality is at its best. Unless your PMDT was allowed to become quite chilled,
subsequent thermal restabilization should not take long.
10

Special Design Features
Modular hardware Perhaps the most obvious distinction of the PMDT is its card-cage design. With
seven slots on a powerful and flexible backplane, the PMDT represents an investment in avoiding premature obsolescence in state-of-the-art DVD playback. With the exception of the power supplies (there are four of them), all
important circuitry resides on these easily replaced cards.
These cards include the MPEG decoder and transport interface (immediately
adjacent to the transport loader); a component video output card; a composite
and S-Video output card; a digital audio output card; and the communications/
control card. This leaves two slots open for future expansion. After all, what
good does an “expandable” design such as this do if there is no room to expand?
Updatable software Less obvious, but every bit as important, is the degree of software modularity
built into the PMDT. We chose not to accept the standard DVD navigation
software that comes with a laser transport mechanism, with all its limitations
and confusion. Instead, we rewrote all of the software from an extremely low
level on up. While this was a huge undertaking, the benefits seemed more
than worth the effort: we would be able to address many of the failings found
in the typical DVD user experience, making the PMDT a pleasure to use; we
would also be able to incorporate new technologies more easily as they were
developed.
11
Thus, if standards evolve to the point that a new transport is required to read
new data formats on discs, we can swap out the necessary hardware, and
make some new “connections” between it and our own software. Rather than
having to start all over again, we can continue to use the infrastructure we
have developed, and our customers can continue to enjoy the benefits of what
we hope you’ll agree is a superior user experience. Just as important, movie
enthusiasts don’t have to throw away everything they own and start over something that cannot be said for products that do not have equivalent hardware and software modularity.
No-compromise audio For DVD machines, audio is usually an afterthought. The usual assumption is
that people are buying DVD for the video quality and that the audio is good
enough. The result is that often little effort is put into optimizing DVD systems
for exceptional audio performance.
Madrigal’s roots and its reputation are inseparable from audio. The PMDT uses
techniques developed for Mark Levinson Reference products to ensure the
best possible recovery and transmission of digital audio signals. The PMDT is
a digital audio transport – it has no analog audio outputs. It is designed to
read DVD video discs (including 24-bit/96kHz music recordings on this format) as well as standard compact discs. The transport is compatible with
Dolby® Digital and DTS®. With hardware and software changes, the PMDT can
be reconfigured to read future DVD Audio discs.
Madrigal’s CLJR™ (Closed Loop Jitter Reduction™) system is employed to optimize performance by minimizing jitter in the digital output, regardless of

whether from CD or DVD sources. In other machines, the audio clock is
slaved to the video – not to the audio data. This is done to keep audio synchronized with video. In the PMDT, the audio is optimized, independent of
the video, while maintaining proper synchronization. The PMDT even lets you
delay audio to compensate for recordings where the video is not synchronized
with the audio. This same feature can correct for systems where video processors delay the video signal by such a degree that the audio is no longer in
sync.
Digital audio outputs are provided on four different connector standards: EIAJ
(Toslink), S/PDIF on RCA and BNC, and AES/EBU on XLR.
Unexcelled video techniques Many people think good video performance is a given when it comes to DVD.
While it’s true that even the most basic DVD players deliver much higher performance than VHS tape, many fall short of the full potential of the format.
The PMDT is designed to extract video information from the disc with the
greatest fidelity, preserving the digital signal, converting to analog and buffering the analog output with the greatest care. The PMDT achieves superior
video performance through attention to detail. Careful selection of parts and
construction details – such as trimming circuit elements by hand – allow us to
achieve better results. This is the same approach that distinguishes our audio
designs and contributes to both their cost and their value.
12
The PMDT uses a 5-part-per-million TCXO (temperature-controlled crystal oscillator – the same type used for our digital audio) to ensure low-jitter recovery of the digital video signal.
The PMDT uses 10-bit, oversampled video DACs (rather than the standard 8bit variety) for highest resolution. An active I-V (current-to-voltage) converter,
phase-accurate analog filters and broadcast-quality analog output buffers combine to form a system where all aspects of the video path are well balanced.
Analog video outputs include composite on RCA and BNC, S-Video, and Component (BNC). The optional PVP cards provide a 480p (y, pb, pr) output and
video processing for additional video inputs.
Ease of use For all of the advantages that DVD can bring to audio and video performance,
the frustrating difficulty of the format has been its user interface. DVD players
tend to be difficult and awkward to use – and no two seem to work the same
way. The operation of most players even varies from disc to disc, complicating
the operation of an otherwise familiar player.
The PMDT makes significant progress in this area. It allows the setting of system defaults to help automate basic selections such as language, surround format and aspect ratio. System defaults are easily overridden for individual discs
with different, preferred settings. What’s more, the PMDT can automatically
recall the settings of a DVD from the last time it was used – with no additional
programming required.
People around the world are listening to DVDs with Dolby Pro Logic® because
they don’t know that they need to select Dolby Digital, sometimes for their
player, sometimes for each disc they play, sometimes each time they play it.

This simple example points to the problem the PMDT solves. System defaults
are used to bypass the usual navigation of DVDs as much as possible. You
could simply tell the PMDT that if English, Dolby Digital and a 16:9 aspect ratio are available, those are your preferences. Load your discs and press play –
the PMDT “navigates” for you.
Since some discs will undoubtedly be played using different options (such as
subtitles on the occasional foreign film) than your system defaults, the PMDT
is capable of remembering the unique settings you choose for this disc. The
next time this disc is loaded, the PMDT overrides the system defaults and
plays the disc using the settings you have saved. The PMDT can remember
how you want to play each disc. These electronically saved preferences
(ESP™) eliminate much of the day-to-day annoyance of using DVD players.
Programming is also available to permanently record settings for individual
discs. This method allows the PMDT to recognize when you have preferences
that you want remembered, regardless of how the disc was last used. Other
programming features, such as reordering or skipping titles/chapters/tracks,
are included as well.
On-screen menus simplify the navigation of discs and programming of system
and disc defaults. A help menu is offered to guide users through more advanced functions.
The PMDT is intuitive to use. It works like a CD player (with advanced features) when playing CDs, and like a well-designed DVD player when playing
DVDs. Our goal has been to allow the use of multiple formats without requiring the user to fully understand the navigation and confusing options on different discs. Load the disc, press play and get what you want – that’s the way
the PMDT works. That is a high-performance user interface.
13
Industrial design The PMDT shares the handsome industrial design of other Proceed compo-
nents such as the AVP/AVP2 audio/video processor. Dark buttons against a
light face simplify the operation of the PMDT, even in a dimly lit room.
The large, easily read display provides information as to the operational status
of the PMDT from across the room, making the supplied remote control more
genuinely useful than on products lacking such a display.
In keeping with its sophisticated design, the PMDT also incorporates a Madrigal-designed loading mechanism. Contrasting strongly with the bulky, plastic
drawers commonly used, the slim drawer is machined from a solid piece of
aluminum and rides on highly polished steel and Teflon® bearings. Its variable-speed design opens and closes quickly, but without jarring the disc contained within or risking a jam from dislodging it.
쐃 쐇쐋쐏 쐄 쐂 쐆 쐊 쐎 쐅 쐈 씈씉씊씋씌
쐉
14
standby stop
PR O C E E D
modular DVD transport
previous play next pause
drawer
title/track chap/index
display
intensity
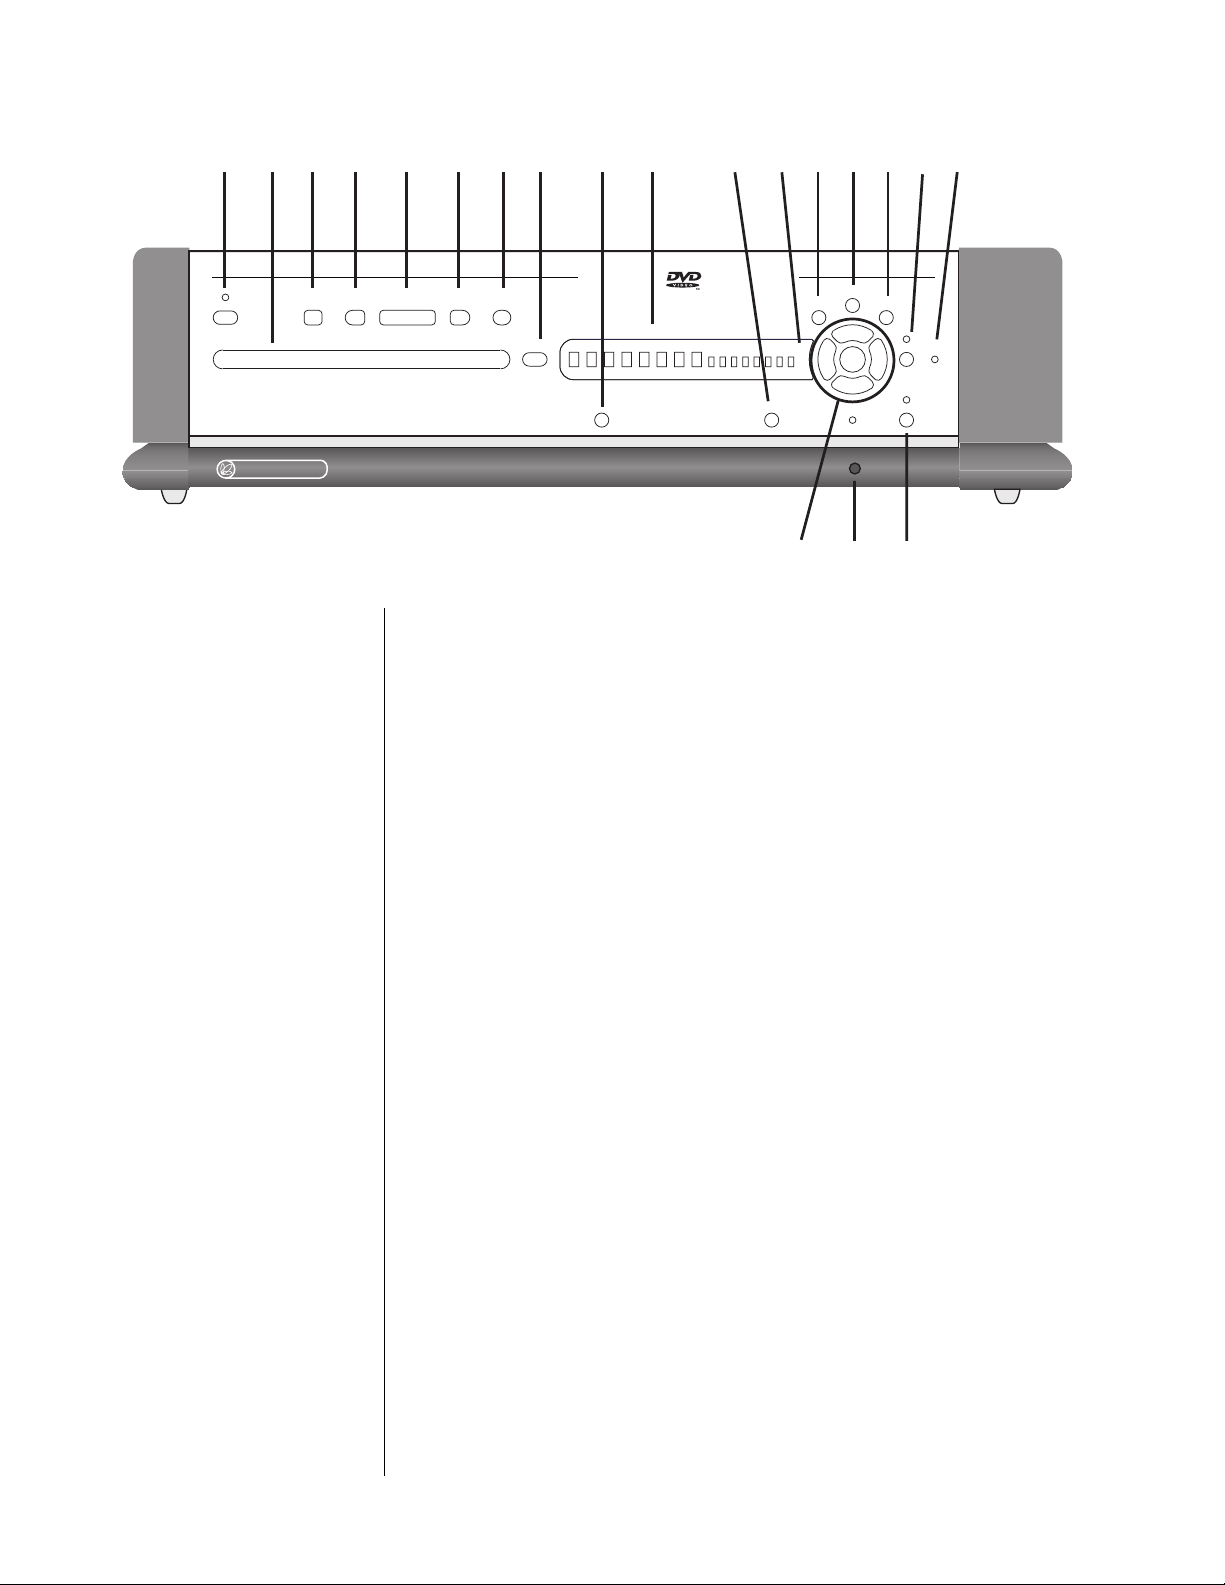
Front Panel, PMDT
1 STANDBY BUTTON AND INDICATOR
Pressing this button places the PMDT in standby mode, turning off the
display and disengaging all control functions. The internal circuitry remains on in order to maximize performance on demand by virtue of all
circuits remaining thermally stable. Lest you think this is wasteful, you
should know that the PMDT draws about the same power as a light
bulb, whether in standby or fully on. The benefits of having it always
warmed up and ready to go (and always able to respond to the remote
control commands) far outweigh the small amount of power used. We
recommend using the front panel power switch (19) only when you will
be away from home for an extended period of time, such as during vacation.
menu
씎씍
power
power
enter
program
repeat
씏
return
time
display mode
modular DVD transport face art part#501xxx
fonts used: Avant Garde 5.28.98
for color and material information see mechanical print
shuffle
2 DRAWER
The PMDT employs an elegant, slim drawer that is machined from a
solid piece of aluminum. It is opened and closed by pressing the drawer
button, either on the front panel or on the remote control. If opened, it
may also be closed simply by gently pushing the front edge inward (as
though you were going to close it manually). The PMDT will interpret
this as a request to close the drawer and take over for you, smoothly
closing the drawer.

If the PMDT senses an obstruction during opening of the drawer mechanism, it will attempt to reclose. If successful, it will read the disc’s table
of contents and display the disc’s number of titles & chapters (or tracks
on a CD) and total time (followed by the playlist’s track and time information, if one exists). If for any reason the drawer does not close fully,
it will stop where it is and wait for your intervention. After removing the
obstruction, press the drawer button again to close the drawer normally.
Similarly, if the PMDT senses an obstruction during the closing of its
drawer (as might be caused by an inquisitive child’s finger), it will stop
immediately and attempt to reopen. If the obstruction prevents this also,
it will stop where it is and wait for your intervention. After removing the
obstruction, press the drawer button again to close the drawer.
3 STOP BUTTON
Unfortunately, DVD players and CD players often treat the stop button
differently. This can be confusing. We allow you to make the PMDT
work the way you think it should (see the section on Disc Behavior on
page 37). However, by default,
• Pressing stop once with a CD will actually stop the disc from
spinning (introducing a slight delay upon pressing play, as
the disc spins up).
• Pressing stop once with a DVD will actually pause the disc
with a blank screen, allowing you to resume where you left
off in a movie quickly and easily by pressing play.
4 PREVIOUS BUTTON
If you are playing a DVD, pressing this button momentarily will return
you to the beginning of the current chapter and in the case of a CD, to
the beginning of the previous track. To return to the beginning of a track
on a CD, simply tap the play button. Pressing the previous button
repeatedly will move you backward through the available chapters/
tracks, one at a time. Note that some DVD discs may prevent you from
using this button (and others) at certain times.
5 PLAY BUTTON
Press this button in order to play a disc. If a programmed sequence of
tracks exists for that particular disc, the program will be played from its
beginning. Also, as you might expect, you may press the play button immediately after placing a disc in the PMDT’s drawer; the drawer will
close and the PMDT will enter the play mode as soon as it has read the
disc’s table of contents.
6 NEXT BUTTON
Pressing the next button momentarily will advance the PMDT to the beginning of the next track. Pressing it repeatedly will move you forward
through the available chapters/tracks, one at a time. Note that some DVD
discs may prevent you from using this button (and others) at certain
times.
15

7 PAUSE BUTTON
Pressing this button during play will pause the PMDT at that point within
the track; the time display will show a “double quotation mark” (") as a
reminder that you are in the pause mode.
8 DRAWER BUTTON
The PMDT employs an elegant, slim drawer that is machined from a
solid piece of aluminum. It is normally opened and closed by pressing
the drawer button located to its right. If opened, it may also be closed
simply by gently pushing the front edge inward (as though you were going to close it manually). The PMDT will interpret this as a request to
close the drawer and take over for you, smoothly closing the drawer.
If the PMDT senses an obstruction during opening of the drawer mechanism, it will stop where it is and wait for your intervention. After removing the obstruction, press either the play or the drawer button again to
close the drawer normally.
Similarly, if the PMDT senses an obstruction during the closing of its
drawer (as might be caused by an inquisitive child’s finger), it will stop
immediately and attempt to reopen. If the obstruction prevents this also,
it will stop where it is and wait for your intervention. After removing the
obstruction, press the drawer button again to close the drawer.
16
9 DISPLAY INTENSITY BUTTON
Pressing the display intensity button will cycle the PMDT’s display
through the four available levels of brightness: high, medium, low and
off. For example, during bright daytime hours you may wish to use high;
in the evening, in a dimly lit room, a low setting is probably easier on
the eyes.
10 DISPLAY WINDOW
This window contains eight large and eight smaller alphanumeric characters that provide information on the current status of the PMDT. The information it displays depends on the type of disc being played:
• with DVDs, it provides the title, chapter and time information
for the disc being played;
• with CDs, it provides track, index and time information.
There is a legend above the display window that describes the information normally displayed.
In addition, this window displays a number of messages designed to
keep you informed as to the status of the PMDT, including SELF-TEST
(during initial connection to the AC mains), LOADING (with a spinning
slash, during disc spinup), and other cues to help you get along with the
on-screen display should you be playing a CD without the television on.

11 DISPLAY MODE BUTTON
The time section of the display can be set to display any of the following
four indications of time in minutes and seconds: time elapsed on title/
disc
, time remaining on title/disc, time elapsed on chapter/track, time
remaining on chapter/track
(depending on whether you have loaded a
DVD or a CD). These four options are accessed by pressing the display
mode
button, which cycles through the four modes of time display, using both the onscreen display and the front panel display window to indicate which mode is chosen at any moment.
12 INFRARED TRANSMITTER (WITHIN DISPLAY)
The PMDT has the ability to teach a learning remote control its own
commands from an IR transmitter located in this area. (See Teach IR
Commands on page 45 for more information.)
13 RETURN BUTTON
Used in both DVD and CD navigation, the return button will also return
you to where you were on the disc after a stop command. It may also be
used by a DVD disc author for navigating the on-screen menu system.
14 MENU BUTTON
In the DVD standard, there are provisions for both disc menus and
player menus, which can get confusing. When you first press the menu
button, you will be presented with a choice on the on-screen display:
Disc Menu
Player Menu
Help Menu
About…
(In the front panel display window, you will see only the currently selected menu.)
Note: If you have the optional PVP cards installed, your menu
options will be different. Please refer to your PVP owner’s
manual.
Subsequent presses of the menu button will cycle through your options.
When you have highlighted the one you want to use, press enter.
Note that using this system, you can (for example) access the player
menu to check on your PMDT’s setup at any time, without having to
stop the disc.
Once you are working in the player’s menu system, the menu button
acts like a “cancel” button on your computer, allowing you to exit a particular menu item without having made any changes.
17

18
Since some DVD discs use the menu button as part of their internal navigation, when you are already within a disc menu, the list of choices presented on screen will change to:
Send MENU command to disc
Player Menu
Help Menu
About…
Pressing enter while the first item on the above menu is highlighted will
issue the menu command that some discs require for navigation. Note
that the menu shown immediately above only appears when you are
within the DVD’s own menu structure - not while watching a movie, or
while stopped, or while listening to a CD. The PMDT is smart enough to
be context-sensitive. That is, it will give you access to the things you
might need, when you might need them.
15 ENTER BUTTON
As you might expect, the enter button allows you to explicitly save any
changes you might make in the menu system. It may also be used by
DVD discs as part of their own navigation system.
16 PROGRAM BUTTON AND INDICATOR
The program button on the front panel duplicates the function of the
prog button on the remote control. Pressing either generates a popup
menu on the on-screen display containing the following:
Add Item
Delete Item
Save Program
Delete Program
Turn Program On
(or Turn Program Off, depending on which mode you are in)
Pressing program repeatedly cycles you through the listed options. The
currently selected option is highlighted on the screen, and appears in the
front panel display. For more information on programming your PMDT,
see Programming the PMDT on page 47.
The program indicator LED is lit when the PMDT’s program mode is
engaged; e.g., while a programmed playlist is being played. If a program
has been saved for the current disc, you may toggle the program on and
off by pressing program (or prog on the remote), moving the highlight
to turn Program On or turn Program Off (the last item on the popup list),
and pressing enter. For more information on programming your PMDT,
see Programming the PMDT on page 47.
Pressing and holding the program button will activate the ESP menu.
It’s functions are described on page 47.
 Loading...