

Page 1
© 2016 Pitney Bowes Inc. All rights Reserved
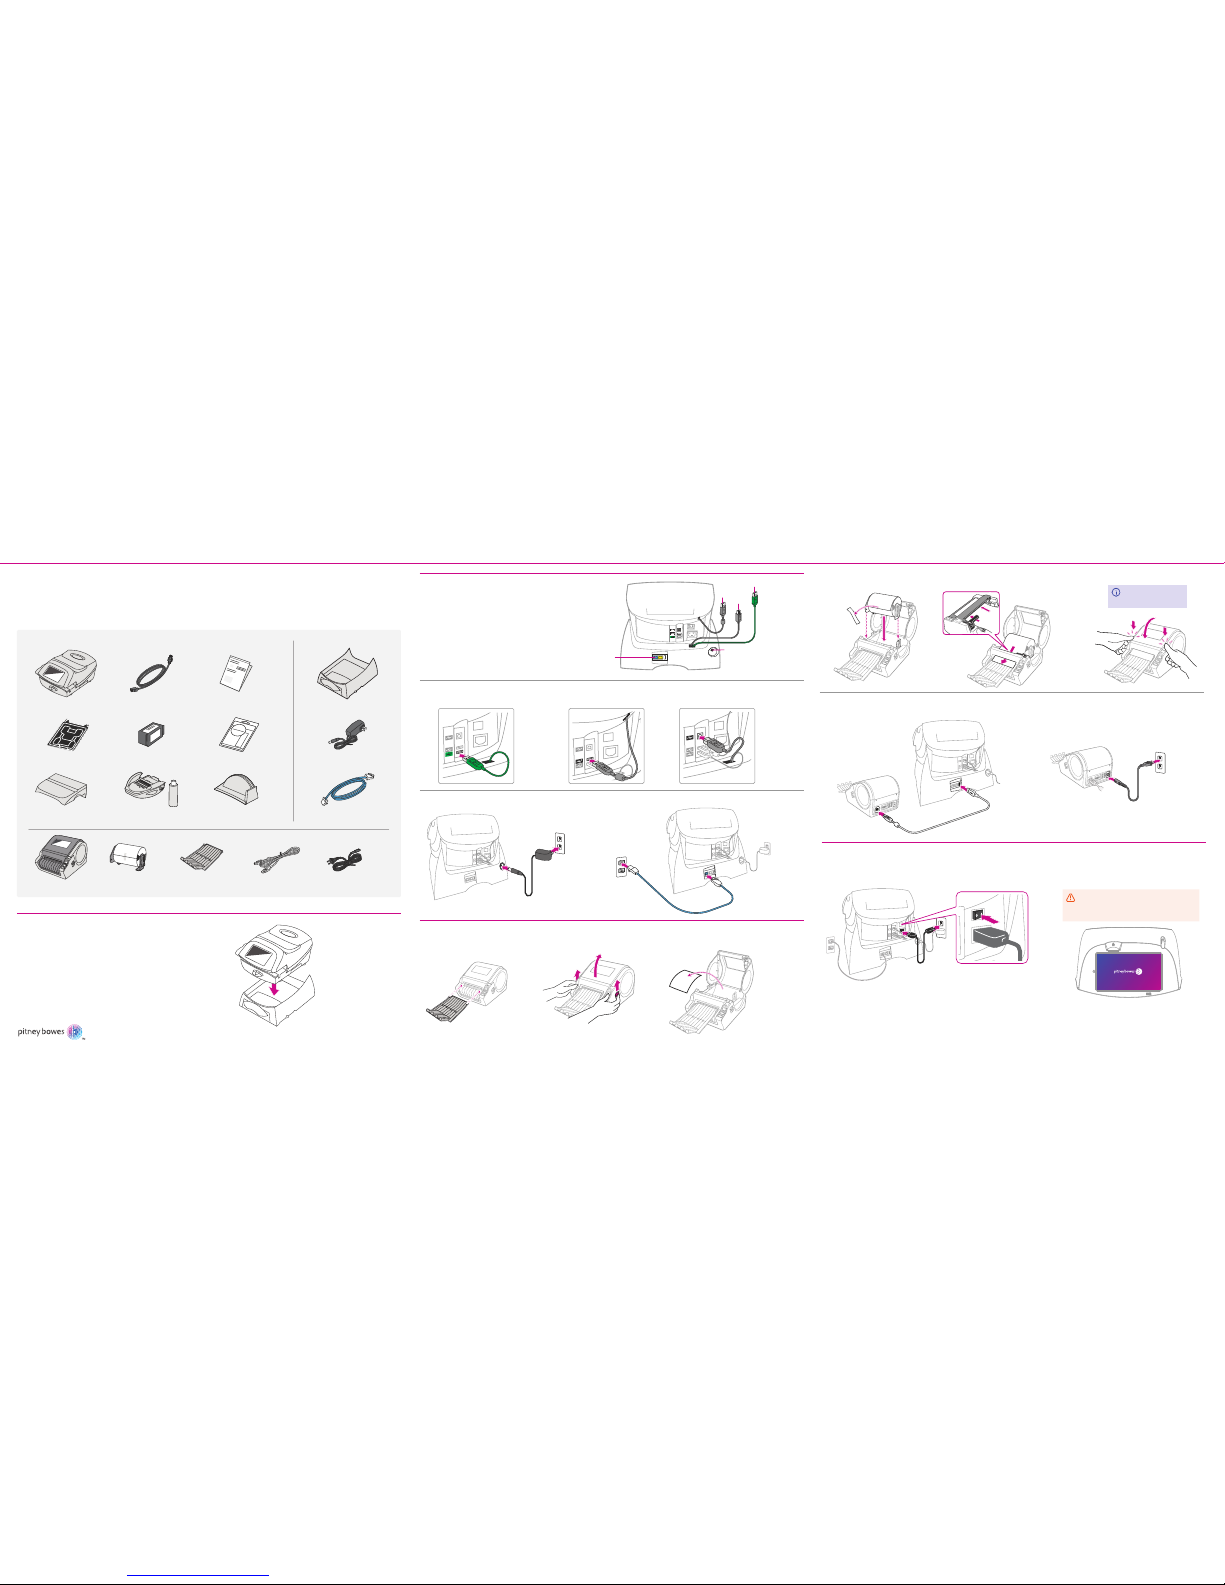
1.
Assemble your meter and lifter base.
Watch an online tutorial.
Installation setup instructions
For a tutorial of the installation, visit: pitneybowes.com/us/support/
As you follow these steps, also follow the screen prompts on your meter.
2.
Connect the cables to your meter.
3.
Connect your label printer to your meter.
4.
Connect your meter to a power source.
Quick Install Guide
SendPro™ 300
Mailing Systems
3a. Attach the stacker tray. 3b. Open the cover. 3c. Remove the protective sheet.
2b. Connect USB to
the middle port.
2d. Connect power adapter 2. 2e. Connect the Internet cable to blue jack.
2a. Connect USB (green cable) to
the bottom port.
Lifter base
Label printer Power adapter 3 Sheet roll Stacker tray USB cable
Internet cable
Power adapter 2
What’s in the box
SendPro 300
Print head
StackerMoistener and EZ SealScale
Power adapter 1
Ink Tape sheet
Quick install guide
2c
2a
3g. Connect your label printer to your meter
with the USB cable.
4a. Connect your meter to a power source, and turn on the
power switch at the back.
3e. Make sure the sheet is fed properly.
3h. Connect your label printer to a power source.
3d. Insert the sheet roll. 3f. Close the cover.
2e
2d
Put your meter on top of the lifter base.
Make sure it clicks
into place.
Look on the back side of your meter. You'll see
several attached USB cables. Connect them to
the appropriate ports as shown.
4b. When you see the touchscreen come
on you can continue with setup
Wait until you see the touchscreen
turn on. This can take up to 30
seconds.
2c. Connect USB to
the top port.
Click
Click
2b
Page 2
AW32067 Rev. C 07/16
© 2016 Pitney Bowes Inc. All rights Reserved
Printed in the USA
*AW32067REVC*
Quick Install Guide
SendPro™ 300
Mailing Systems
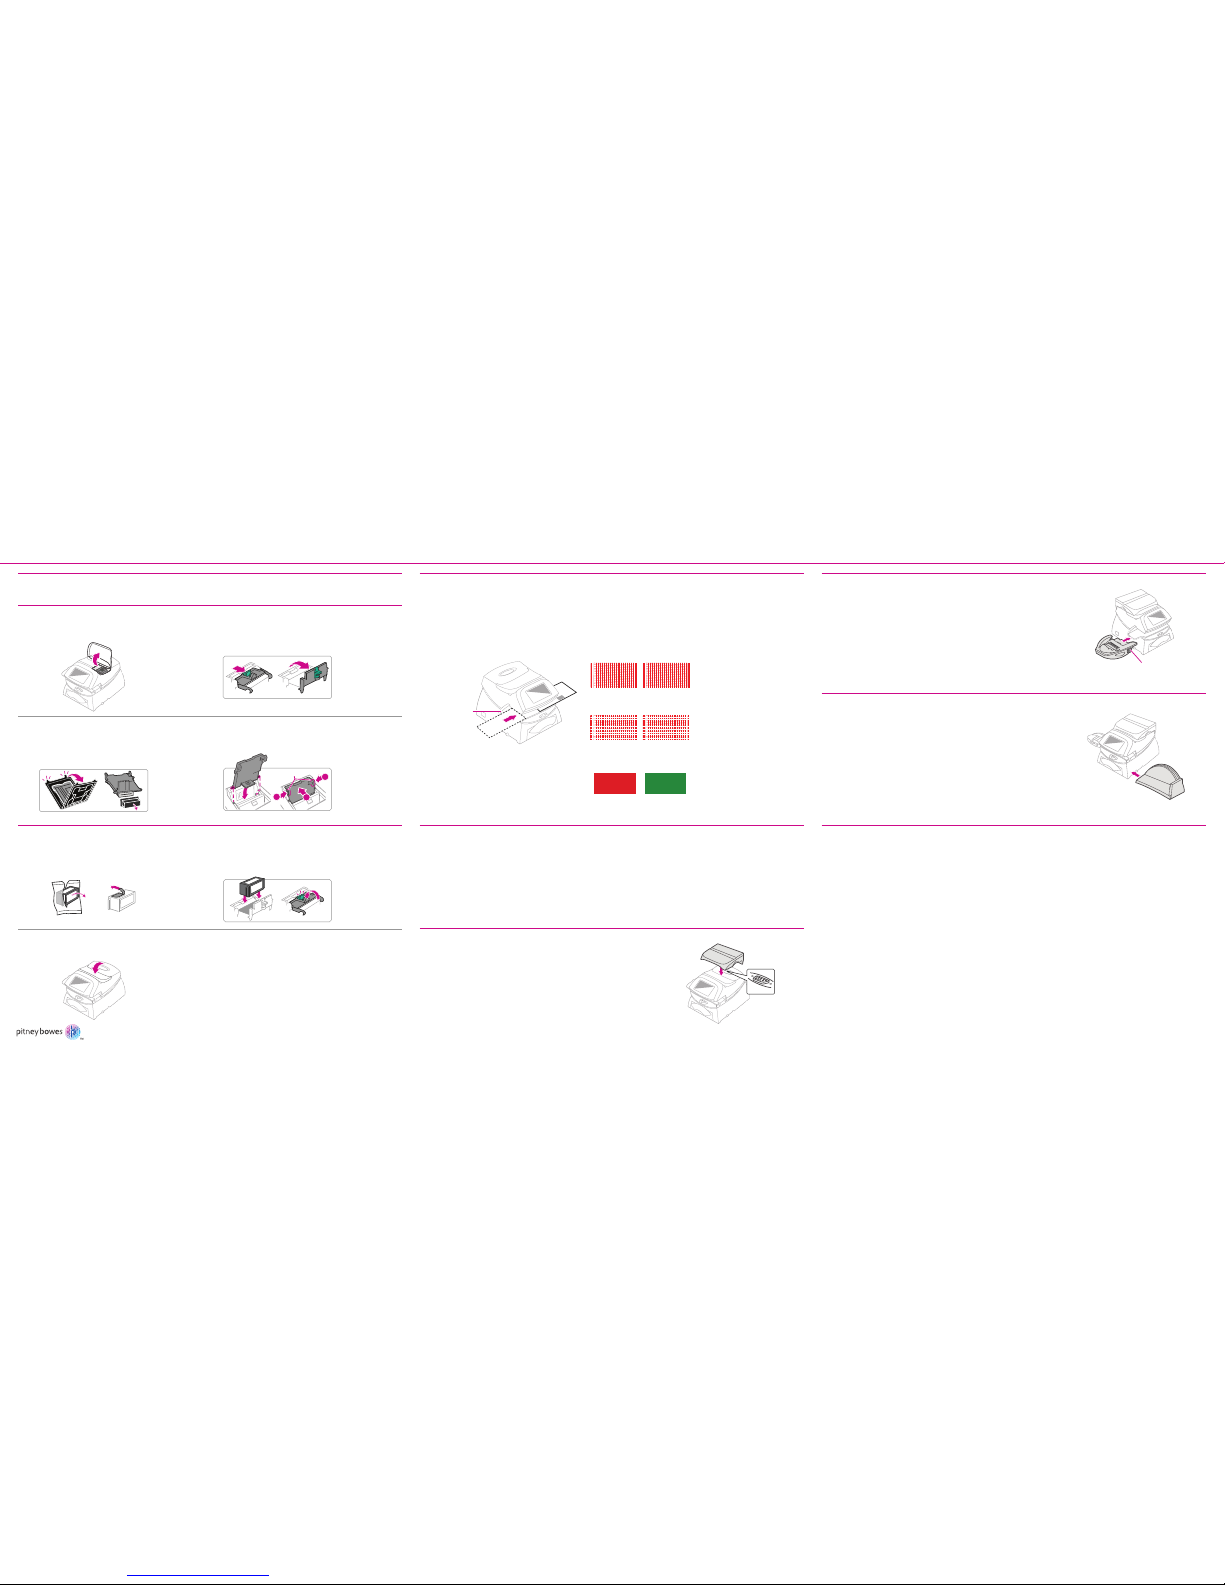
8. Create a test print.5. Select local time.
6. Install the print head.
Good test print - no missing inside lines.
Poor test print.
No Yes
Be sure to set the time correctly - this will affect the operation of the meter.
9. Check your account balance and add postage.
Your meter will automatically connect to Pitney Bowes to get your available funds for adding postage.
Key in a postage amount to add, then press Enter.
Follow the remaining on-screen prompts to complete the installation. If you receive an UPDATE
REQUIRED message then follow the screen prompts to perform the update.
10. Install the scale. (if purchased as option)
Position the scale as shown.
You’ll need a scale code to calibrate the scale. If you have just attached
your scale, key in the correct scale code for your location.
Scale codes can be found in the separated sheet came with the scale or
at pitneybowes.com/us/support/DM100i
The stacker is a tray that catches your processed mail. Position the
stacker next to the system as shown. Just slide it into place. It does
not connect mechanically to the system.
11. Install the moistener. (if purchased as option)
The optional moistener allows you to moisten, seal, and apply postage
to your envelopes - all in one smooth step.
Position the moistener on the left side of the deck as shown. Hold
down the blue release lever and slide the moistener from left to right,
withthe lip of the moistener above the deck.
Fill the moistener reservoir with Pitney Bowes E-Z Seal sealing
solution. You may fill it later if you don't plan on moistening and
sealing envelopes right now.
When prompted, insert a spare envelope or a tape sheet for a test print.
If the test print is good, press the green Yes
button on the front of the meter.
If the test print is poor, press No to perform
additional maintenance.
For proper printing, position mail flat against
registration wall and gently slide mail to the right on feed deck. The system will
detect the envelope and automatically pull it through the printing mechanism.
12. Install the stacker.
Release
Lever
Unlatch and flip up the ink cartridge guard.
Remove the print head from its packaging
and remove the plastic cap from the bottom
of the print head.
Slide the print head pegs into the lower set of
grooves, squeeze the tabs, and push the print
head flush against the walls.
Open the top cover of the meter.
6a. 6b.
6c. 6d.
Registration
Wall
Link your meter to Pitney Bowes. to check account balance and add postage.
Congratuations! You’re ready to start
using your postage meter!
Once activated, you get:
• Automatic software and postage rate updates
• The ability to manage your meter through a secure Web portal
• Funds transfer to your meter from your computer
• Customized time and cost savings insights
• One-click supply ordering
• Support and error troubleshooting
To link your meter to Pitney Bowes and get all these benefits, visit:
pitneybowes.com/signin
If you do not wish to link your meter at this time, follow the on-screen prompts to add postage.
Scale Connector
Tabs
2
1
1
7. Install the ink cartridge.
Find the included ink cartridge and remove
the silver foil strip from its bottom.
Drop the cartridge in next to the print head. The
label on the top of the cartridge should face front.
Close the guard and click to secure.
Close the top cover. The meter will automatically
prepare the ink cartridge for use.
7a. 7b.
7d.
 Loading...