

Pioneer X-EM12 User Manual
X-EM22
X-EM12
CD Receiver System
Discover the benefits of registering your product online at
http://www.pioneer.co.uk
Operating Instructions
(or
http://www.pioneer.eu
).
WARNING
Store small parts out of the reach of children and
infants. If accidentally swallowed, contact a doctor
immediately.
WARNING
This equipment is not waterproof. To prevent a fire or
shock hazard, do not place any container filled with
liquid near this equipment (such as a vase or flower
pot) or expose it to dripping, splashing, rain or
moisture.
D3-4-2-1-3_A1_En
WARNING
To prevent a fire hazard, do not place any naked flame
sources (such as a lighted candle) on the equipment.
D3-4-2-1-7a_A1_En
Operating Environment
Operating environment temperature and humidity:
+5 °C to +35 °C (+41 °F to +95 °F); less than 85 %RH
(cooling vents not blocked)
Do not install this unit in a poorly ventilated area, or in
locations exposed to high humidity or direct sunlight (or
strong artificial light)
D3-4-2-1-7c*_A1_En
VENTILATION CAUTION
When installing this unit, make sure to leave space
around the unit for ventilation to improve heat radiation
(at least 10 cm at top, 10 cm at rear, and 10 cm at each
side).
WARNING
Slots and openings in the cabinet are provided for
ventilation to ensure reliable operation of the product,
and to protect it from overheating. To prevent fire
hazard, the openings should never be blocked or
covered with items (such as newspapers, table-cloths,
curtains) or by operating the equipment on thick carpet
or a bed.
D3-4-2-1-7b*_A1_En
This product is for general household purposes. Any
failure due to use for other than household purposes
(such as long-term use for business purposes in a
restaurant or use in a car or ship) and which requires
repair will be charged for even during the warranty
period.
K041_A1_En
CAUTION
This product is a class 1 laser product classified
under the Safety of laser products, IEC 60825-1:2007.
CLASS 1 LASER PRODUCT
D58-5-2-2a_A1_En
CAUTION
TO PREVENT THE RISK OF ELECTRIC SHOCK, DO NOT
REMOVE COVER (OR BACK). NO USER-SERVICEABLE
PARTS INSIDE. REFER SERVICING TO QUALIFIED
SERVICE PERSONNEL.
D3-4-2-1-1_B1_En
CAUTION
The
STANDBY/ON switch on this unit will not
completely shut off all power from the AC outlet.
Since the power cord serves as the main disconnect
device for the unit, you will need to unplug it from the
AC outlet to shut down all power. Therefore, make
sure the unit has been installed so that the power
cord can be easily unplugged from the AC outlet in
case of an accident. To avoid fire hazard, the power
cord should also be unplugged from the AC outlet
when left unused for a long period of time (for
example, when on vacation).
D3-4-2-2-2a*_A1_En
POWER-CORD CAUTION
Handle the power cord by the plug. Do not pull out the
plug by tugging the cord and never touch the power
cord when your hands are wet as this could cause a
short circuit or electric shock. Do not place the unit, a
piece of furniture, etc., on the power cord, or pinch the
cord. Never make a knot in the cord or tie it with other
cords. The power cords should be routed such that they
are not likely to be stepped on. A damaged power cord
can cause a fire or give you an electrical shock. Check
the power cord once in a while. When you find it
damaged, ask your nearest PIONEER authorized
service center or your dealer for a replacement.
S002*_A1_En
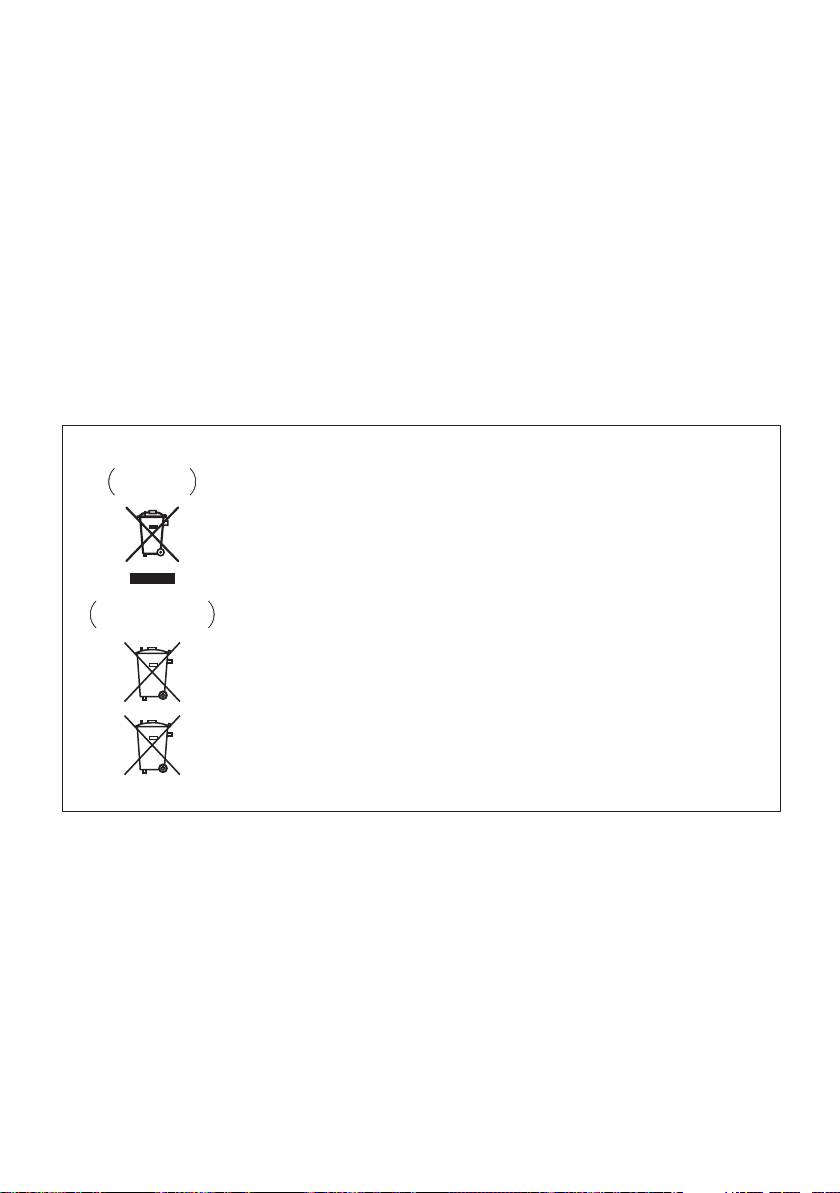
Information for users on collection and disposal of old equipment and used batteries
These symbols on the products, packaging, and/or accompanying documents mean
that used electrical and electronic products and batteries should not be mixed with
general household waste.
For proper treatment, recovery and recycling of old products and used batteries,
please take them to applicable collection points in accordance with your national
legislation.
By disposing of these products and batteries correctly, you will help to save valuable
resources and prevent any potential negative effects on human health and the
environment which could otherwise arise from inappropriate waste handling.
For more information about collection and recycling of old products and batteries,
please contact your local municipality, your waste disposal service or the point of sale
where you purchased the items.
These symbols are only valid in the European Union.
For countries outside the European Union:
If you wish to discard these items, please contact your local authorities or dealer and
ask for the correct method of disposal.
K058a_A1_En
Symbol examples
for batteries
Symbol for
equipment
Pb
Condensation
If the unit is moved suddenly from a cold place into a
warm room (in winter, for example) or if the temperature
in the room in which the player is installed rises
suddenly due to a heater, etc., water droplets
(condensation) may form inside (on operating parts and
the lens). When condensation is present, the player will
not operate properly and playback is not possible. Let
the player stand at room temperature for 1 or 2 hours
with the power turned on (the time depends on the
extent of condensation). The water droplets will
dissipate and playback will become possible.
Condensation can also occur in the summer if the
player is exposed to the direct wind from an
air-conditioner. If this happens, move the player to a
different place.
S005_A1_En
Radio wave caution
X-EM22 only
This unit uses a 2.4 GHz radio wave frequency, which is
a band used by other wireless systems (Microwave
ovens and Cordless phones, etc.). In this event noise
appears in your television image, there is the possibility
this unit (including products supported by this unit) is
causing signal interference with the antenna input
connector of your television, video, satellite tuner, etc. In
this event, increase the distance between the antenna
input connector and this unit (including products
supported by this unit).
• Pioneer is not responsible for any malfunction of the
compatible Pioneer product due to communication
error/malfunctions associated with your network
connection and/or your connected equipment.
Please contact your Internet service provider or
network device manufacturer.
• A separate contract with/payment to an Internet
service provider is required to use the Internet.

Thank you for buying this Pioneer product.
Please read through these operating instructions so that you will know how to operate your model properly. After you
have finished reading the instructions, put them in a safe place for future reference.
Contents
01 Before you start
Introduction . . . . . . . . . . . . . . . . . . . . . . . . . . . . . . . . . . . 5
What’s in the box . . . . . . . . . . . . . . . . . . . . . . . . . . . . . . . 5
Loading the battery in the remote control . . . . . . . . . . . 5
02 Part names and functions
Overview of the main unit . . . . . . . . . . . . . . . . . . . . . . . . 7
Overview of the remote control . . . . . . . . . . . . . . . . . . . . 8
03 Connections
Speaker connection . . . . . . . . . . . . . . . . . . . . . . . . . . . . . 9
FM antenna installation . . . . . . . . . . . . . . . . . . . . . . . . . 10
Connect power . . . . . . . . . . . . . . . . . . . . . . . . . . . . . . . . 10
04 Getting started
Turning on. . . . . . . . . . . . . . . . . . . . . . . . . . . . . . . . . . . . 11
APS mode. . . . . . . . . . . . . . . . . . . . . . . . . . . . . . . . . . . . . .11
Setting the clock. . . . . . . . . . . . . . . . . . . . . . . . . . . . . . . 11
Selecting a source . . . . . . . . . . . . . . . . . . . . . . . . . . . . . 11
05 Playing
Playing a disc . . . . . . . . . . . . . . . . . . . . . . . . . . . . . . . . . 12
Playing from a USB storage device . . . . . . . . . . . . . . . 12
Controlling playback . . . . . . . . . . . . . . . . . . . . . . . . . . . 12
Programming tracks . . . . . . . . . . . . . . . . . . . . . . . . . . . 13
For a CD . . . . . . . . . . . . . . . . . . . . . . . . . . . . . . . . . . . . . . .13
For WMA/MP3 files . . . . . . . . . . . . . . . . . . . . . . . . . . . . . .13
Erasing the program . . . . . . . . . . . . . . . . . . . . . . . . . . . . .13
06
Bluetooth
® Audio playback (X-EM22
only)
Music playback using Bluetooth wireless
technology. . . . . . . . . . . . . . . . . . . . . . . . . . . . . . . . . . . . 14
Remote control operation . . . . . . . . . . . . . . . . . . . . . . . 14
Pairing with the unit (Initial registration) . . . . . . . . . . . 14
Listen to music on the unit from a Bluetooth
capable device . . . . . . . . . . . . . . . . . . . . . . . . . . . . . . . . 15
Radio wave caution . . . . . . . . . . . . . . . . . . . . . . . . . . . . 15
Scope of operation. . . . . . . . . . . . . . . . . . . . . . . . . . . . . . .15
Radio wave reflections . . . . . . . . . . . . . . . . . . . . . . . . . . . 16
Precautions regarding connections to products
supported by this unit . . . . . . . . . . . . . . . . . . . . . . . . . . . .16
07 Listening to the FM radio
Tuning to an FM radio station . . . . . . . . . . . . . . . . . . . . 17
Programming radio stations . . . . . . . . . . . . . . . . . . . . . 17
Tuning to a preset radio station . . . . . . . . . . . . . . . . . . 17
Display RDS information . . . . . . . . . . . . . . . . . . . . . . . . 17
08 Other features
Turn on automatically . . . . . . . . . . . . . . . . . . . . . . . . . . 18
Setting the sleep timer. . . . . . . . . . . . . . . . . . . . . . . . . . 18
Routing audio from other devices. . . . . . . . . . . . . . . . . 18
Through the AUDIO IN socket . . . . . . . . . . . . . . . . . . . . .18
USB 500 mA charge. . . . . . . . . . . . . . . . . . . . . . . . . . . . 18
Setting and deactivating the DEMO mode . . . . . . . . . 18
09 Additional information
USB playability information. . . . . . . . . . . . . . . . . . . . . . 19
Supported MP3 disc formats . . . . . . . . . . . . . . . . . . . . 19
RDS program types . . . . . . . . . . . . . . . . . . . . . . . . . . . . 19
Troubleshooting . . . . . . . . . . . . . . . . . . . . . . . . . . . . . . . 20
Cautions on use . . . . . . . . . . . . . . . . . . . . . . . . . . . . . . . 21
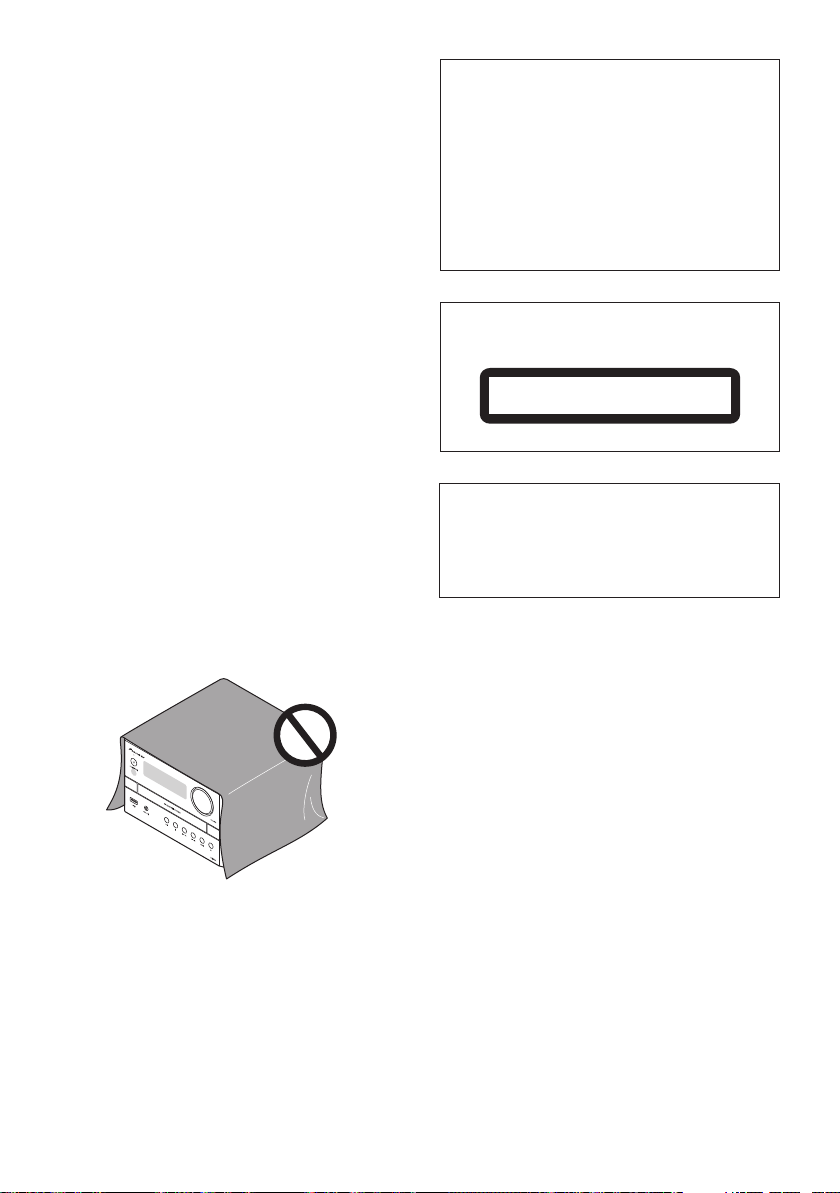
When moving this unit . . . . . . . . . . . . . . . . . . . . . . . . . . . 21
Place of installation. . . . . . . . . . . . . . . . . . . . . . . . . . . . . . 21
Do not place objects on this unit . . . . . . . . . . . . . . . . . . . 21
Cleaning the product. . . . . . . . . . . . . . . . . . . . . . . . . . . . . 22
Cleaning the lens. . . . . . . . . . . . . . . . . . . . . . . . . . . . . . . . 22
Handling discs . . . . . . . . . . . . . . . . . . . . . . . . . . . . . . . . 22
Storing . . . . . . . . . . . . . . . . . . . . . . . . . . . . . . . . . . . . . . . . 22
Cleaning discs . . . . . . . . . . . . . . . . . . . . . . . . . . . . . . . . . . 22
About specially shaped discs. . . . . . . . . . . . . . . . . . . . . .22
Specifications . . . . . . . . . . . . . . . . . . . . . . . . . . . . . . . . . 23
4
En
Before you start 01
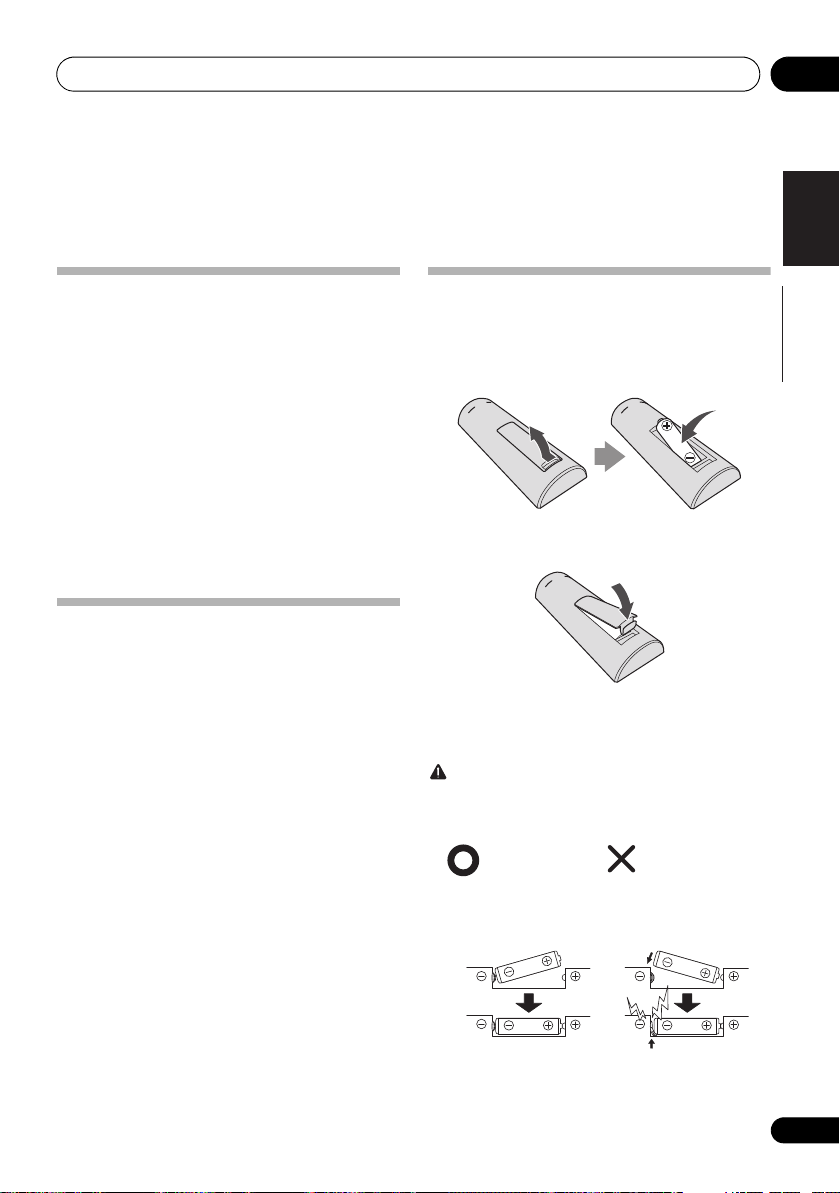
Insert the battery by
aligning the pole
against the remote
control’s
terminal
If a battery pushes and
bends the
terminal out
of shape, there is
possibility of the alkaline
battery shorting out
The terminal is bent
out of shape
Chapter 1:
Before you start
Introduction
With this system, you can:
• enjoy audio from discs, USB storage devices, and other
external devices
• listen to FM radio stations
• enjoy audio from Bluetooth wireless technology enabled
device (X-EM22 only)
Playable media:
• Discs: CD-DA, CD-R, CD-RW, MP3-CD, WMA-CD
• Files: .mp3, .wma
•USB storage device
– Compatibility: USB 1.1/2.0 (Full Speed)
– Class support: MSC (Mass Storage Class)
– File system: FAT12, FAT16, FAT32
– Maximum number of albums/folders: 99
– Maximum number of tracks/files: 999
– Maximum level of directory: 8
What’s in the box
Check and identify the contents of the package:
• Main unit
• Speaker unit x 2
• Remote control
• AAA battery (R03)
• Warranty card
• Operating Instructions (this document)
Loading the battery in the remote
control
1 Open the rear lid and load the battery as
illustrated below.
2 Close the rear lid.
The battery included with the unit has been provided to allow
you check product operation and may not last long. We
recommend using an alkaline battery that has a longer life.
CAUTION
• When inserting the battery, make sure not to damage
the spring on the battery’s terminal. This can cause
the battery to leak or overheat.
English
Français Español
5
En

Before you start01
• Do not use any battery other than the one specified.
• When loading the battery into the remote control, set it
in the proper direction, as indicated by the polarity marks
( and ).
• Do not heat the battery, disassemble it, or throw it into
flames or water.
• To prevent leakage of battery fluid, remove the battery if
you do not plan to use the remote control for a long
period of time (1 month or more). If the fluid should leak,
wipe it carefully off the inside of the case, then insert a
new battery. If a battery should leak and the fluid should
get on your skin, flush it off with large quantities of water.
• When disposing of a used battery, please comply with
governmental regulations or environmental public
institution’s rules that apply in your country/area.
• WARNING
Do not use or store batteries in direct sunlight or other
excessively hot place, such as inside a car or near a
heater. This can cause batteries to leak, overheat,
explode or catch fire. It can also reduce the life or
performance of batteries.
6
En
Part names and functions 02
1
2 14
3
4
5 6 7 8
10
9
11
12
13
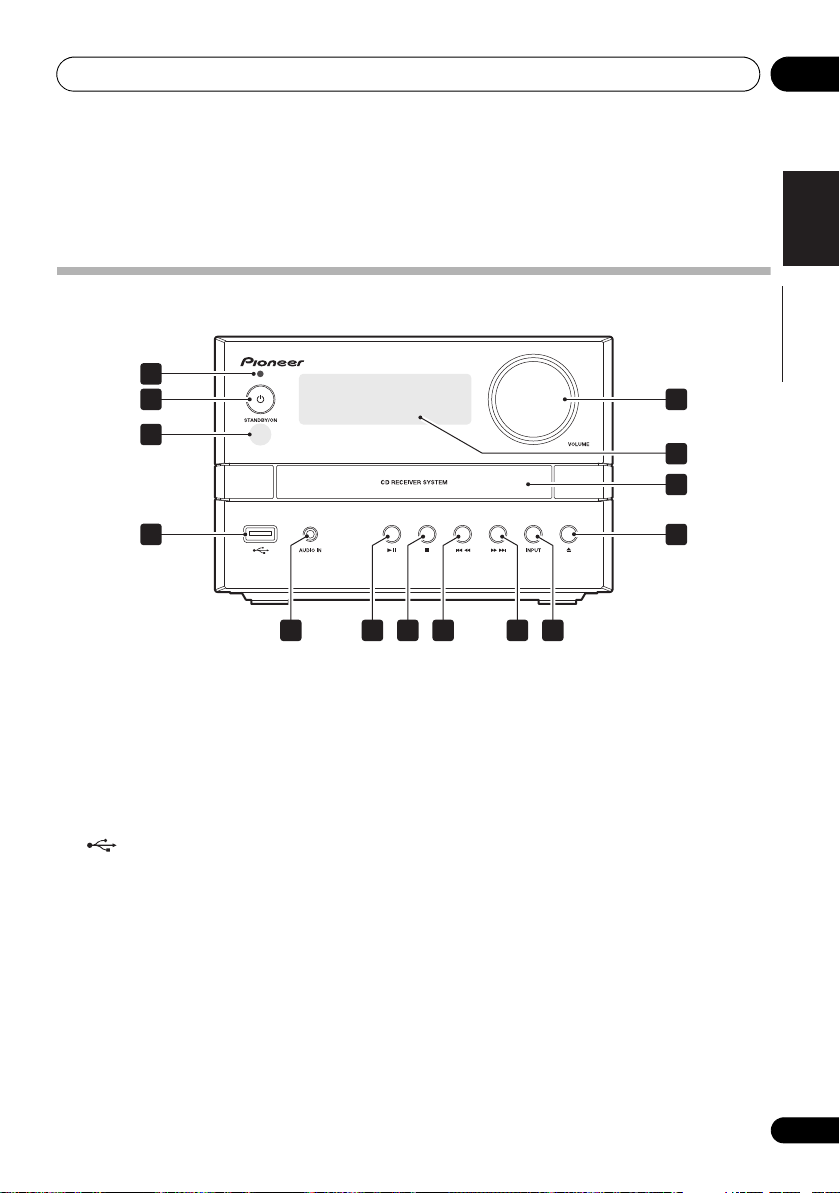
Chapter 2:
Part names and functions
Overview of the main unit
1 Bluetooth indicator (X-EM22 only)
2
STANDBY/ON
• Switch between standby and on.
3 Remote control sensor
• Point the remote control to this, and then operate it
within approximately 7 m. The product may have trouble
capturing remote control signals if there is a fluorescent
light nearby. If this happens, move the product away
from the fluorescent light.
4
• Connect to a USB storage device.
5
AUDIO IN
• Connect to the audio output socket (usually the
headphones socket) of an external device.
6
• Use to play, pause, or resume playback.
7
• Use to stop playback.
8
• Skip to the previous track.
• Press and hold to play reverse quickly within a track.
• Tune to the previous radio station.
• Press and hold to search the previous radio station
automatically.
9
• Skip to the next track.
• Press and hold to play forward quickly within a track.
• Tune to the next radio station.
• Press and hold to search the next radio station
automatically.
10
INPUT
• Press repeatedly to select the input source.
11
• Open or close the disc tray.
12 Disc tray
• Place the disc with the label side up.
13 Main display
VOLUME
14
• Rotate to increase or decrease the volume level.
English
Français Español
7
En
Part names and functions02
13
15
14
12
1
2
3
4
8
7
5
6
3
9
11
10
16
4
5
VOLUME +/–
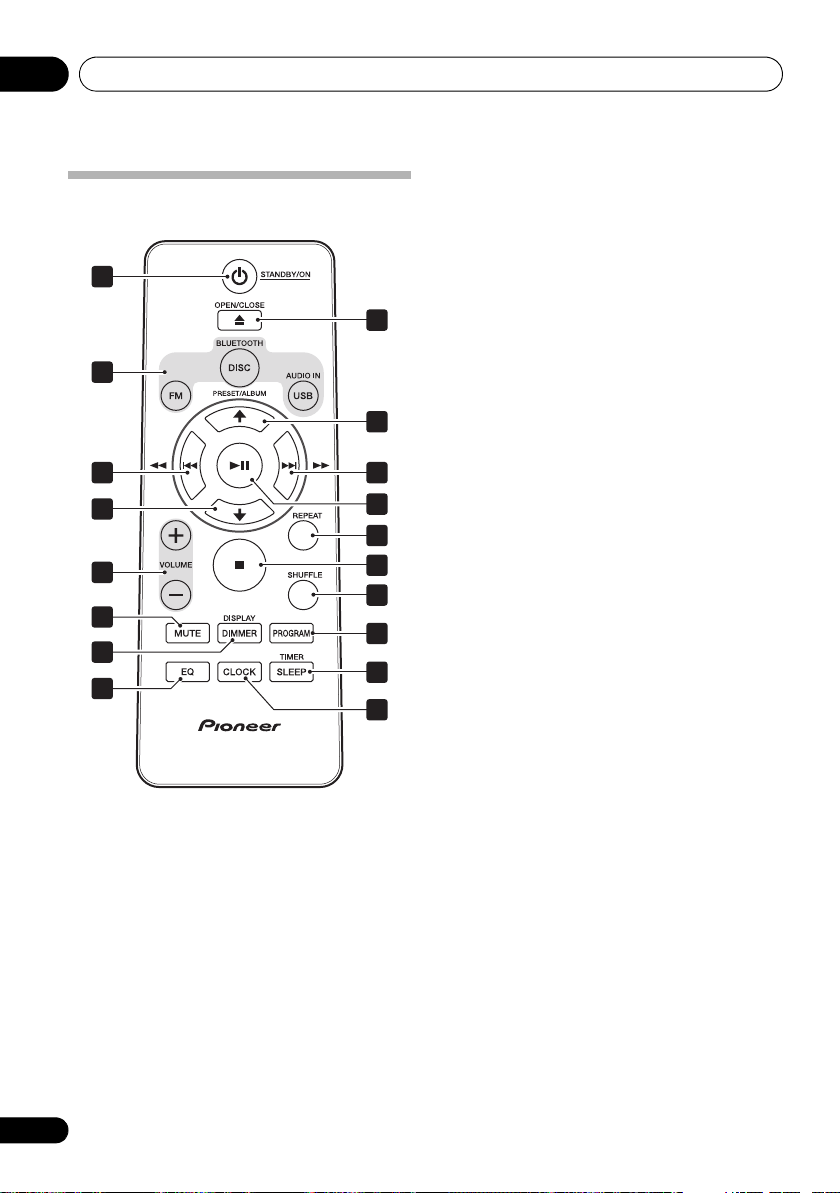
Overview of the remote control
1
STANDBY/ON
• Switch between standby and on.
2 Input function buttons
• Use to select the input source (DISC, BT (X-EM22 only),
USB, AUDIO IN, TUNER).
3
• Skip to the track.
• Press and hold to play quickly within a track.
• Tune to the station.
• Press and hold to search the radio station automatically.
4
/
• Skip to the previous or next album.
• Select a preset radio station.
8
En
• Use to set the listening volume.
6
MUTE
• Use to mute or restore volume.
7
DIMMER/DISPLAY
• Display the current status or media information.
• Display the available ID3 information of MP3 tracks.
• Press and hold to dim or brighten the display. The
brightness can be controlled in three steps. However the
brightness cannot be controlled during FM entry.
• Display the available information of an RDS radio
station.
8
EQ
• Use to select EQ.
[FLAT] [ROCK] [CLASSIC] [POP] [JAZZ]
(Back to beginning)
9
OPEN/CLOSE
• Open or close the disc tray.
10
• Use to play, pause, or resume playback.
• Use to confirm actions.
11
REPEAT
• Use to select the repeat mode of each input source.
•[CD]/[BT]
Repeat 1 [REP ONE] Repeat all [REP ALL] (Back
to beginning)
•[USB]
Repeat 1 [REP ONE] Repeat album [REP ALB]
Repeat all [REP ALL] (Back to beginning)
12
•Use to stop playback.
13
SHUFFLE
• Shuffled order of track playback from a DISC, USB.
14
PROGRAM
• Use to program audio tracks.
• Use to program radio stations.
15
SLEEP/TIMER
• Set the sleep timer in the working mode.
• Set alarm timer in the standby mode.
16
CLOCK
• In the working mode or standby mode, press to display
the clock for a while.
• In the standby mode, press and hold to set the clock.
Connections 03
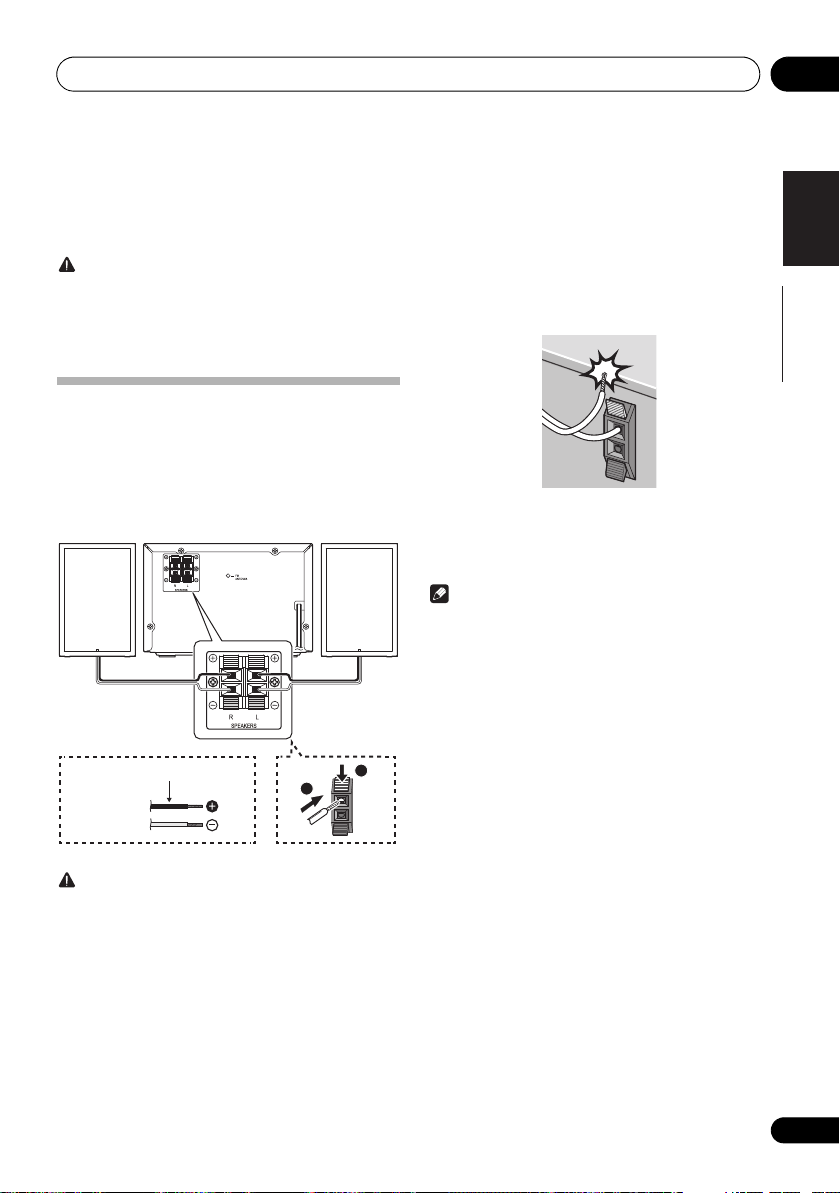
1
2
Right speaker
Left speaker
This unit
’s rear panel
Red cord
Supplied
speaker wire
Chapter 3:
Connections
CAUTION
• Be sure to turn off the power and unplug the power cord
from the power outlet whenever making or changing
connections.
• Connect the power cord after all the connections
between devices have been completed.
Speaker connection
• Push open the tabs and insert exposed wire.
• Use the provided speaker wires to connect this unit with
the speakers. Connect the tip of the red wire to the (+)
terminal and the tip of the black wire to the (–) terminal.
• Both speakers can be used on either the right or the left
side.
• Make sure that the speaker cable cores do not become
exposed and make contact with other cable cores. This
may cause malfunction of the product.
• Do not allow the speaker cable core to come into contact
with the receiver body.
• If the speaker cable core comes into contact with any
metal portion of the receiver’s body, it may damage the
speakers and cause smoke and fire.
Insert speaker cables securely into the terminals and
check that the cable does not come out of easily.
Note
• There is no difference between L and R speakers.
English
Français Español
CAUTION
• These speaker terminals carry HAZARDOUS LIVE
voltage. To prevent the risk of electric shock when
connecting or disconnecting the speaker cables,
disconnect the power cord before touching any
uninsulated parts.
• Do not connect any speakers other than those supplied
to this system.
• Do not connect the supplied speakers to any amplifier
other than the one supplied with this system.
Connection to any other amplifier may result in
malfunction or fire.
• Do not attach these speakers to the wall or ceiling. They
may fall off and cause injury.
9
En
 Loading...