

Page 1

MD RECORDER
MJ-HX700/2000
MJ-HX3000/5000
MJ-HX33/55/77
MJ-HMD01/03
Operating Instructions
Page 2
Thank you for buying this Pioneer product.
Please read through these operating instructions so you
will know how to operate your model properly.
After you have finished reading the instructions, put
them away in a safe place for future reference.
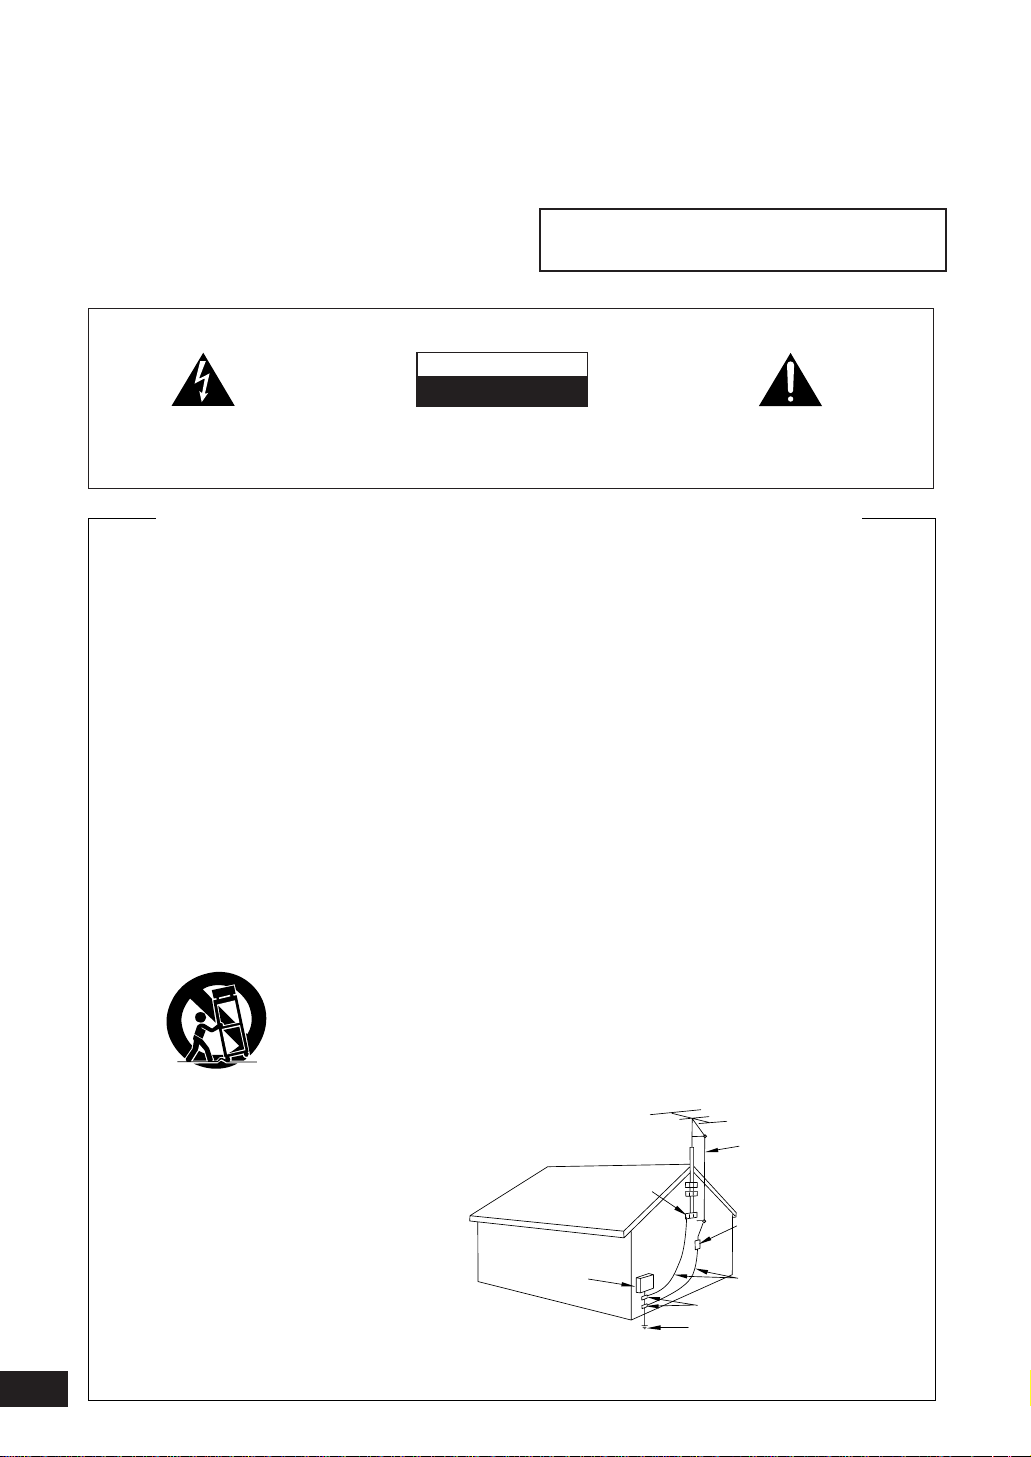
IMPORTANT
The lightning flash with arrowhead symbol, within an
equilateral triangle, is intended to alert the user to the
presence of uninsulated "dangerous voltage" within the
product's enclosure that may be of sufficient magnitude
to constitute a risk of electric shock to persons.
CAUTION:
TO PREVENT THE RISK OF ELECTRIC SHOCK, DO NOT
REMOVE COVER (OR BACK). NO USER-SERVICEABLE
PARTS INSIDE. REFER SERVICING TO QUALIFIED
SERVICE PERSONNEL.
IMPORTANT SAFETY INSTRUCTIONS
READ INSTRUCTIONS — All the safety and operating
instructions should be read before the product is
operated.
RETAIN INSTRUCTIONS — The safety and operating
instructions should be retained for future reference.
HEED WARNINGS — All warnings on the product and
in the operating instructions should be adhered to.
FOLLOW INSTRUCTIONS — All operating and use
instructions should be followed.
CLEANING — Unplug this product from the wall outlet
before cleaning. The product should be cleaned only
with a polishing cloth or a soft dry cloth. Never clean
with furniture wax, benzine, insecticides or other
volatile liquids since they may corrode the cabinet.
ATTACHMENTS — Do not use attachments not
recommended by the product manufacturer as they
may cause hazards.
WATER AND MOISTURE — Do not use this product
near water — for example, near a bathtub, wash
bowl, kitchen sink, or laundry tub; in a wet basement;
or near a swimming pool; and the like.
ACCESSORIES — Do not place this product on an
unstable cart, stand, tripod, bracket, or table. The
product may fall, causing serious injury to a child or
adult, and serious damage to the product. Use only
with a cart, stand, tripod, bracket, or table
recommended by the manufacturer, or sold with
the product. Any mounting of the product should
follow the manufacturer’s instructions, and should
use a mounting accessory recommended by the
manufacturer.
CART — A product and cart combination should be
moved with care. Quick stops, excessive force, and
uneven surfaces may cause the product and cart
combination to overturn.
VENTILATION — Slots and openings in the cabinet are
provided for ventilation and to ensure reliable
operation of the product and to protect it from
overheating, and these openings must not be
blocked or covered. The openings should never be
blocked by placing the product on a bed, sofa, rug,
or other similar surface. This product should not be
placed in a built-in installation such as a bookcase or
rack unless proper ventilation is provided or the
manufacturer’s instructions have been adhered to.
POWER SOURCES — This product should be operated
only from the type of power source indicated on the
marking label. If you are not sure of the type of
power supply to your home, consult your product
dealer or local power company.
LOCATION – The appliance should be installed in a
stable location.
NONUSE PERIODS – The power cord of the appliance
should be unplugged from the outlet when left unused for a long period of time.
2
WARNING: TO PREVENT FIRE OR SHOCK HAZARD, DO
NOT EXPOSE THIS APPLIANCE TO RAIN OR MOISTURE.
This product complies with the Low Voltage Directive
(73/23/EEC), EMC Directives (89/336/EEC, 92/31/EEC)
and CE-Marking Directive (93/68/EEC).
CAUTION
RISK OF ELECTRIC SHOCK
DO NOT OPEN
GROUNDING OR POLARIZATION
÷ If this product is equipped with a polarized alternating
current line plug (a plug having one blade wider than
the other), it will fit into the outlet only one way. This
is a safety feature. If you are unable to insert the plug
fully into the outlet, try reversing the plug. If the plug
should still fail to fit, contact your electrician to
replace your obsolete outlet. Do not defeat the
safety purpose of the polarized plug.
÷ If this product is equipped with a three-wire
grounding type plug, a plug having a third (grounding)
pin, it will only fit into a grounding type power outlet.
This is a safety feature. If you are unable to insert the
plug into the outlet, contact your electrician to
replace your obsolete outlet. Do not defeat the
safety purpose of the grounding type plug.
POWER-CORD PROTECTION — Power-supply cords
should be routed so that they are not likely to be
walked on or pinched by items placed upon or
against them, paying particular attention to cords at
plugs, convenience receptacles, and the point where
they exit from the product.
OUTDOOR ANTENNA GROUNDING — If an outside
antenna or cable system is connected to the product,
be sure the antenna or cable system is grounded so
as to provide some protection against voltage surges
and built-up static charges. Article 810 of the National
Electrical Code, ANSI/NFPA 70, provides information
with regard to proper grounding of the mast and
supporting structure, grounding of the lead-in wire
to an antenna discharge unit, size of grounding
conductors, location of antenna-discharge unit,
connection to grounding electrodes, and
requirements for the grounding electrode. See Figure
A.
LIGHTNING — For added protection for this product
during a lightning storm, or when it is left unattended
and unused for long periods of time, unplug it from
the wall outlet and disconnect the antenna or cable
system. This will prevent damage to the product
due to lightning and power-line surges.
POWER LINES — An outside antenna system should
not be located in the vicinity of overhead power lines
or other electric light or power circuits, or where it
can fall into such power lines or circuits. When
installing an outside antenna system, extreme care
should be taken to keep from touching such power
lines or circuits as contact with them might be fatal.
OVERLOADING — Do not overload wall outlets,
extension cords, or integral convenience receptacles
as this can result in a risk of fire or electric shock.
GROUND
CLAMP
ELECTRIC
SERVICE
EQUIPMENT
Fig. A
The exclamation point within an equilateral triangle is
intended to alert the user to the presence of important
operating and maintenance (servicing) instructions in the
literature accompanying the appliance.
OBJECT AND LIQUID ENTRY — Never push objects of
any kind into this product through openings as they
may touch dangerous voltage points or short-out
parts that could result in a fire or electric shock.
Never spill liquid of any kind on the product.
SERVICING — Do not attempt to service this product
yourself as opening or removing covers may expose
you to dangerous voltage or other hazards. Refer all
servicing to qualified service personnel.
DAMAGE REQUIRING SERVICE — Unplug this product
from the wall outlet and refer servicing to qualified
service personnel under the following conditions:
÷ When the power-supply cord or plug is damaged.
÷ If liquid has been spilled, or objects have fallen into
the product.
÷ If the product has been exposed to rain or water.
÷ If the product does not operate normally by following
the operating instructions. Adjust only those controls
that are covered by the operating instructions as an
improper adjustment of other controls may result in
damage and will often require extensive work by a
qualified technician to restore the product to its
normal operation.
÷ If the product has been dropped or damaged in any
way.
÷ When the product exhibits a distinct change in
performance — this indicates a need for service.
REPLACEMENT PARTS — When replacement parts
are required, be sure the service technician has used
replacement parts specified by the manufacturer or
have the same characteristics as the original part.
Unauthorized substitutions may result in fire, electric
shock, or other hazards.
SAFETY CHECK — Upon completion of any service or
repairs to this product, ask the service technician to
perform safety checks to determine that the product
is in proper operating condition.
WALL OR CEILING MOUNTING — The product should
not be mounted to a wall or ceiling.
HEAT — The product should be situated away from heat
sources such as radiators, heat registers, stoves, or
other products (including amplifiers) that produce
heat.
ANTENNA
LEAD IN
WIRE
ANTENNA
DISCHARGE UNIT
(NEC SECTION 810-20)
GROUNDING CONDUCTORS
(NEC SECTION 810-21)
GROUND CLAMPS
POWER SERVICE GROUNDING
ELECTRODE SYSTEM
(NEC ART 250, PART H)
NEC — NATIONAL ELECTRICAL CODE
Page 3
INFRINGEMENT TO COPYRIGHT
Recording and playback of copyrighted material may require consent.
See the Copyright, Design and Patents Act 1988.
[FOR EUROPEAN MODEL]
CAUTION
The following caution label appear on your player.
Location: rear of the player
This product contains a laser diode of higher
class than 1. To ensure continued safety, do not
remove any covers or attempt to gain access to
the inside of the product.
Refer all servicing to qualified personnel.
This equipment has been tested and found to comply with the limits for a Class B digital device, pursuant to Part 15 of the FCC Rules.
These limits are designed to provide reasonable protection against harmful interference in a residential installation. This equipment
generates, uses, and can radiate radio frequency energy and, if not installed and used in accordance with the instructions, may cause
harmful interference to radio communications. However, there is no guarantee that interference will not occur in a particular
installation. If this equipment does cause harmful interference to radio or television reception, which can be determined by turning
the equipment off and on, the user is encouraged to try to correct the interference by one or more of the following measures:
– Reorient or relocate the receiving antenna.
– Increase the separation between the equipment and receiver.
– Connect the equipment into an outlet on a circuit different from that to which the receiver is connected.
– Consult the dealer or an experienced radio/TV technician for help.
CLASS 1
LASER PRODUCT
Information to User
Alteration or modifications carried out without appropriate authorization may invalidate the user's right to operate the equipment.
CAUTION : USE OF CONTROLS OR ADJUSTMENTS OR PERFORMANCE OF PROCEDURES OTHER THAN THOSE
SPECIFIED HEREIN MAY RESULT IN HAZARDOUS RADIATION EXPOSURE.
CAUTION : THE USE OF OPTICAL INSTRUMENTS WITH THIS PRODUCT WILL INCREASE EYE HAZARD.
CAUTION:
This product satisfies FCC regulations when shielded
cables and connectors are used to connect the unit to
other equipment. To prevent electromagnetic interference
with electric appliances such as radios and televisions,
use shielded cables and connectors for connections.
IMPORTANT NOTICE
[For U.S.and Canadian models]
The serial number for this equipment is located on the
rear panel.
Please write this serial number on your enclosed
warranty card and keep it in a secure area. This is for
your security.
[For Canadian model]
This Class B digital apparatus meets all
requirements of the Canadian Interference Causing Equipment Regulations.
[Pour le modèle Canadien]
Cet appareil numérique de la Classe B
respecte toutes les exigences du Règlement
sur le matériel brouilleur du Canada.
3
Page 4

Table of Contents
PREPARATIONS.............................. 5
Checking Package Contents ....................5
Disc Handling Instructions ......................6
Layout Options .........................................7
Connecting the MD Recorder to the CD/
Receiver System..................................8
What’s What............................................10
Opening/Closing the Front Door...........12
Turning On/Off the Power......................13
Setting the Date and Time .....................14
Changing the Language Used in
Messages ...........................................16
Registering the Sound Scape Disc .......17
LISTENING TO MUSIC ................. 18
Listening to MDs ....................................18
MIXED PLAYBACK........................ 22
Listening to the Sound Scape Disc.......22
Mixed Playback of the
Sound Scape Disc .............................24
RECORDING ON AN MD.............. 26
EDITING AN MD ........................... 34
Editing an MD.........................................34
Rearranging the Sequence of Tracks
(Move) ................................................35
Combining Two Tracks into One
(Combine) ..........................................36
Splitting One Track into Two Tracks
(Divide)...............................................37
Erasing Single Tracks .............................38
Erasing All Tracks ...................................39
Naming an MD .......................................40
Naming a Track.......................................42
TIMER OPERATION ...................... 44
Wake-up Timer: set playback to start
at a specified time .............................44
Timer-Based Recording of Radio
Broadcasts .........................................45
APPENDIX ..................................... 47
Troubleshooting .....................................47
Error Messages ......................................50
Maintenance ...........................................51
Specifications .........................................51
MD Basics ...............................................26
Recording a CD.......................................28
Recording Radio Broadcasts .................31
Recording from Other Audio
Equipment .........................................32
4
Page 5

PREPARATIONS
Checking Package Contents
Make sure that all of the following components
are present after unpacking your Pioneer MD
Recorder.
MD recorder
Sound Scape disc
Documentation
• Read me first
• Warranty card
• Operating Instructions (this document)
CD/MD cable
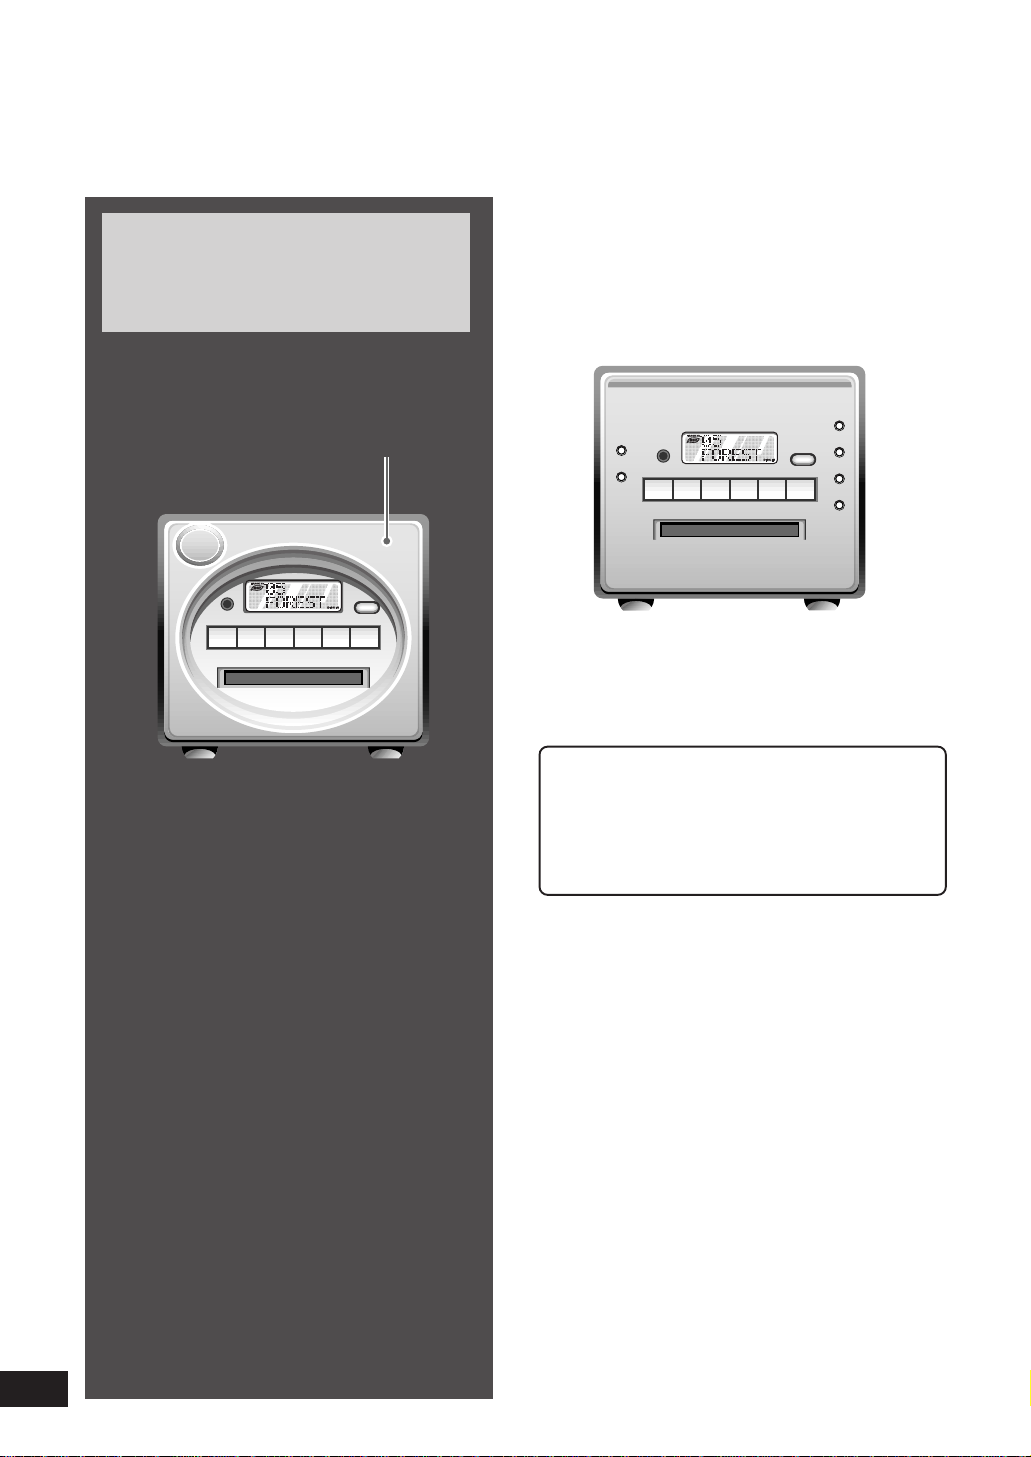
There are two front panel types:
and
Oval type
Both types include the same functions and
operate in the same way. The illustrations in
this manual are of the oval type.
Square type
PREPARATIONS
Sound Scape Disc
The Sound Scape disc accessory lets you
record ambient music or other effects for
mixed playback with the main program
selection on your system. “Mixed
playback” means that your CD/receiver
system’s speakers will output the Sound
Scape recording together with your favorite
CD or radio program, so that there’s no
need to hook up any additional audio
equipment. Have fun trying out
combinations, like listening to your favorite
music in the background while catching the
news on the radio.
Caution
Be sure to register your Sound Scape disc
before using it (see page 17).
5
Page 6

Disc Handling Instructions
MD types
Caution
• Avoid touching the disc surface.
• Avoid unnecessary opening of the disc
shutter.
• Do not disassemble the disc cartridge.
Disc
Shutter
Cartridge
Use only discs
that bear this
logo.
Storage
• Store discs in a disc case.
• Avoid storing discs in the following types of
locations.
— Hot and/or humid locations
— Locations exposed to direct sunlight
— Sandy or dusty locations
Cartridge maintenance
To clean dirty cartridges, wipe them gently with
a dry cloth.
There are two types: playback only and recordplayback.
♦ Playback only MDs (not recordable)
These are made using optical discs, similar to
CDs.
Label
♦ Record-playback
These are made using magneto-optical discs
which can be recorded and re-recorded.
How to protect discs from erasure
Slide the erase-protect tab to the open position
to prevent discs from being erased or recorded
upon.
Shutter is on back side
Shutters on both sides
Applying labels
Note the following diagrams when applying
labels. Improper positioning of labels may
cause disc eject problems.
• Apply the label within the outlined label area.
• Do not apply several labels on top of each
other.
• Replace the label if it is loose or peeling.
6
To remove erasure protection, slide the tab
back to the closed position.
Page 7

PREPARATIONS
Layout Options
This MD reorder is designed exclusively for the
X-HX700/2000/3000/5000, X-HX05/33/55/77/99
and X-HMD01/03 CD/Receiver System (called
just “CD/Receiver System” hereinafter). It
allows your CD/Receiver System to be
configured as the MD/CD Micro System.
Please note the caution points below before
deciding how to set up your system.
Note with caution that when all four components (CD/receiver, MD recorder, and two
speakers) of the MD/CD Micro System are
stacked vertically, they are not very stable and
can easily fall over if bumped. We therefore do
not recommend such vertical stacking without a
rack.
Layout Precautions
Storage locations
• Make sure the location is secure and stable.
Avoid unsteady stands or tables that may
cause the MD recorder to fall and become
damaged.
• Do not set up the MD recorder in an area that
is exposed to direct sunlight or is close to a
heater.
The component case may become warped or
faded or other damage may occur when the
MD recorder is stored in such areas.
Warnings
Whether you are stacking the MD recorder
and the CD/Receiver System components,
setting them in a rack, or along a wall,
always be sure to leave enough space
around the components to allow ventilation.
Avoid the following types of setup
locations, which tend to block the
ventilation holes. Improper ventilation
causes heat buildup which could eventually
start a fire.
• Setting components on their backs or
sides
• Inserting components into narrow spaces
with poor ventilation
• Setting components on top of soft
materials such as pillows or blankets
• Covering components with a tablecloth or
other material while in use
PREPARATIONS
Do not set the MD recorder on its
side.
Be sure that the MD recorder is set upright on
their footpads. Setting it in any other position
may result in MD playback problems.
Stay within cable connection
ranges for CD/receiver and MD
recorder.
Be sure to choose a setup location that enables
the system cables to be connected to the rear
side of the CD/receiver and MD recorder.
If using a cordless phone
Noise may occur when a cordless phone is used in close
proximity to the MD recorder. To avoid this, do not
approach the system when using a cordless phone.
7
Page 8

Connecting the MD Recorder to the
CD/Receiver System
Before making or changing the connections, switch off the power and disconnect the power cord
from the AC outlet.
Speaker cords
CD/receiver
FM antenna
System cable A
1
1
1
AM loop
antenna
CD/MD
cable
2
Power cord
System cable B
MD recorder
8
Page 9

Connect CD/receiver and MD re-
12
corder
1
Pull off the connector covers of the CD/
receiver (not applicable for the X-
Connect power cord
Insert the power cord of the CD/receiver
into a wall outlet.
HMD01 or X-HMD03).
2
Connect system cables.
Connect the two system cables (A and B)
from back of the MD recorder to the CD/
receiver, as shown in the diagrams below
and on page 8.
Insert the cable with the pink stripe facing
upward. The cable connectors will not fit
properly if you try to insert them up-side
down. Do not press hard when plugging in
the connectors.
When connecting the power cord for the first
time after the MD recorder is connected to the
CD/Receiver System
The time flashes in the CD/receiver’s display panel and
the date appears in the MD recorder’s display panel.
CD/receiver’s display panel
Time display
(flashing)
MD recorder’s display panel
PREPARATIONS
Pink stripe
on top
System cable A
3
Connect CD/MD cable (supplied) to CD/
System cable B
receiver and MD recorder.
CD/receiver
MD recorder
Date display (ON)
See the instructions on setting the data and time on page
14.
♦ How to unplug system cable connectors
Grasp the top and
bottom of the connector
and pull the connector
straight out.
9
Page 10

What’s What
MD Recorder
CD3MD REC button
(pp. 28 to 30)
REC button
(pp. 31 to 33)
38 button
Display Panel
7 button
SOUND SCAPE indicator
(p.17, pp.22 to 25)
Display panel
4 / ¢ (+ / –) buttons
MD loading slot (p.18)
EJECT button (p.19)
DISPLAY (LANGUAGE) button
(p.16)
MD EDIT button (pp.35 to 43)
ENTER button
CANCEL button
SOUND SCAPE button
(p.17, pp.22 to 25)
MODE button (pp.20 to 23)
ON when operation status
or message is displayed as
ON when track number is
ON when set to Group Play
mode during mixed
ON when set to Single
Content mode during mixed
ON when set to Random
Play mode during mixed
ON when set to Full Content
mode during mixed
10
text or numbers
displayed
playback
playback
playback
playback
ON when displaying
total recording time
ON when displaying
remaining recording
time
ON when MD total
program time is 1000
minutes or longer
ON when reading or
writing TOC
ON during MD editing
ON when recording via
CD3MD REC button
ON when recording via
REC button
ON when MD has been
loaded
Page 11
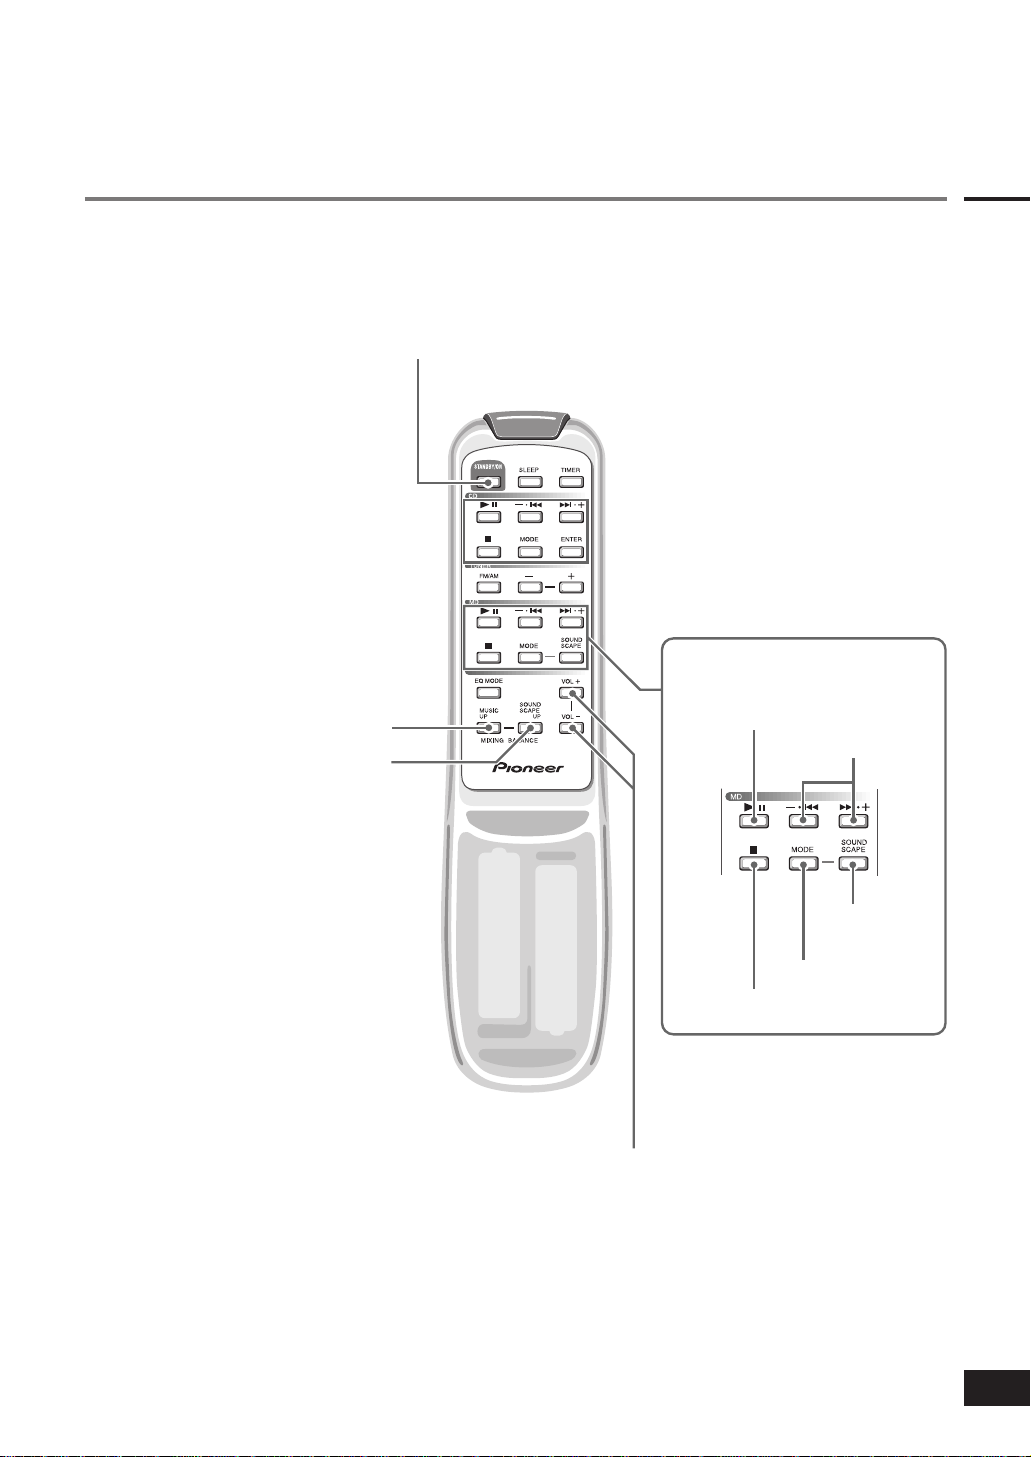
Remote Control
This remote control is supplied with the CD/
Receiver System. Here, only the buttons for
operating the MD recorder are illustrated.
STANDBY/ON button
PREPARATIONS
MD section
MUSIC UP button (p.25)
SOUND SCAPE UP button (p.25)
38 button
4 / ¢ buttons
SOUND
SCAPE button
MODE button
7 button
VOL + / – button
11
Page 12
Opening/Closing the Front Door
,,,,,,
,,,,,,
,,,,,,
The MD recorder has an area on its front door
Various buttons are located behind
the front door on the MD recorder.
Open the front door to use these
buttons.
PUSH OPEN
that is marked “PUSH OPEN”. Gently press on
that area to open the door (door opens slowly).
Do not pull the front door open.
Forcing the door open by other means such as pulling
the door can damage the equipment.
Front panel with the front door open
To close the front door
As you are closing the door, gently press on the area
marked “PUSH OPEN” until you hear the door click shut.
Note on illustrations in this manual
In the rest of this manual, all MD recorder illustrations show the front of the MD recorder as it
appears when the front door is open. Note that
although the opened front door is not shown in the
illustrations, it is not possible to completely remove
the front door.
12
Page 13

Turning On/Off the Power
The MD recorder’s power supply can
be switched on and off using the
POWER button on the CD/receiver or
the STANDBY/ON button on the
remote control.
CD/receiver
POWER button
STANDBY indicator
MD recorder
Display panel
Turning on the power
Press the POWER button on the CD/
receiver or the STANDBY/ON button on
the remote control.
This turns on the system’s power. A greeting
(“HELLO”) appears in the display panel of the
MD recorder.
This message appears
when the time has not
yet been set.
Greeting
The displayed greeting changes according to the time of
day.
This greeting can be displayed in six different languages.
Initially, it is shown in English.
See page 16 for instructions on changing the language of
the message.
The following are the English messages corresponding
to different times of day.
Morning (4:00 AM to 9:59 AM): “Good morning”
Afternoon (10:00 AM to 5:59 PM): “Good afternoon”
Evening (6:00 PM to 3:59 AM): “Good evening”
Auto brightness adjustment
After the time is set, the brightness of the display also
changes according to the time of day which is set with
the CD/receiver. It is brighter during the morning and
afternoon hours than during the evening hours.
PREPARATIONS
STANDBY/ON button
Turning off the power
Press the POWER button on the CD/
receiver again to switch off the power.
When the power is switched off, the MD
recorder’s display panel shows a greeting
before the power is shut off.
Standby mode
After the power is switched off, the equipment enters
Standby mode, during which a very small amount of
current continues to flow for faster power-on operation
when the power is switched back on. The CD/receiver’s
STANDBY indicator is ON during Standby mode.
When power is switched back on
The settings at the time when the power was switched
off are restored automatically. For example, if the
system was being used for radio reception when it was
switched off, the same radio station will be heard when
the power is switched back on. Likewise, if you switched
off the power while playing a MD (playback-only MD or
MD with erasure protection), the same playback function
is resumed when you switch the power back on.
13
Page 14

Setting the Date and Time
Turn the system’s power off before making the
The date is indicated on the MD
recorder’s display panel.
The first time the power cord is
connected, the display panel flashes
to indicate that the date needs to be
set. Use the CD/receiver’s buttons to
do this as described below.
CD/receiver
Display panel: shows current time
date and time settings.
If the power is currently on, press the POWER
button on the CD/receiver to switch it off.
Example: To set the date as September 15
1
Press and hold the TIMER SETTING
button on the CD/receiver for at least
three seconds.
The system turns on.
MD recorder’s display panel
The “Month” flashes.
2 Use the CD/receiver’s + and/or –
buttons to set the month, then press
its ENTER button.
14
CANCEL button
ENTER button
TIMER SETTING button
+ / – buttons
MD recorder
Display panel: shows the current date
The “Date” flashes.
3
Use the + and/or – buttons to set the
date, then press the ENTER button.
MD recorder’s display panel
CD/receiver’s display panel
The “Hour” flashes.
4
Use the + and/or – buttons to set the
hour, then press the ENTER button.
Display panel
The “Minute” flashes.
Page 15
5
Use the + and/or – buttons to set the
minute.
One way to ensure an accurate time setting
is to temporarily set a time that is slightly
faster than the actual time, then use the time
announcements on the radio or TV to set the
time. After doing this, go on to Step 6
below.
6
Press the ENTER button.
Display panel
The CD/receiver turns off, then the clock
starts to run.
How to cancel
Press the CANCEL button on the CD/receiver while
setting the date and time (before pressing ENTER at Step
6). This resets the date and time to its status prior to
Step 1.
Leap years
The MD recorder’s date function cannot be set to
automatically include February 29 (leap year day). This
means that during a leap year, March 1 is displayed
instead of February 29. When this occurs, manually reset
the date to February 29.
PREPARATIONS
Date display
The date display does not appear when the system’s
power is on.
You must reset the date and time settings
in the following situations:
• The power plug of the CD/receiver has been
disconnected from the wall outlet, such as when
moving the system.
• A system cable has been disconnected.
• A power outage has occurred.
• The date is one day off due to a leap year.
15
Page 16

Changing the Language Used in
Messages
First, set the time and date.
The MD recorder’s factory setting is
for English to be displayed in the
messages that appear when the
power is turned on and off, in the
date display, etc. In addition to
English, you may choose to display
Japanese, French, German, Italian,
or Spanish.
CD/receiver
POWER button
The language used in messages cannot be changed until
the time and date have been set.
1
Press the CD/receiver’s POWER button
to turn on the power.
2
Open the MD recorder’s front door.
See page 12 for instructions on opening the
front door.
3
Press and hold the MD recorder’s
DISPLAY button for at least three
seconds.
“ENGLISH” is displayed as the default
setting.
4
Press the DISPLAY button repeatedly
until the desired language is indicated.
This cycles through the available languages,
which appear in the following order.
JAPANESE
FRENCH
GERMAN
ITALIAN
SPANISH
ENGLISH
16
MD recorder
DISPLAY button
Page 17

Registering the Sound Scape Disc
IMPORTANT!
Before listening to another MD, load
the supplied Sound Scape disc into
the MD recorder and follow the
instructions on this page.
CD/receiver
POWER button
The following must be done to
enable playback in the way
unique to the Sound Scape disc.
Set up Sound Scape Disc
Registration
When the MD recorder is set as described
below, the loaded MD will be registered as a
Sound Scape disc. Once the Sound Scape disc
has been registered, the system will be automatically set to Mixed Playback mode the next
time that MD is loaded.
For further description of mixed playback, see
page 24.
1
Press the CD/receiver’s POWER button
to turn on the power.
2
Make sure that there is not a disc in the
MD recorder, then load the supplied
Sound Scape disc into the MD recorder.
See page 18 for instructions on loading
MDs.
PREPARATIONS
MD recorder
SOUND SCAPE indicator
SOUND SCAPE button
3
Press the Sound Scape button on the
MD recorder.
Make sure the SOUND SCAPE indicator
(green) is lit.
How to do this if a playback-only
MD was loaded first
If you pressed the SOUND SCAPE button while
a playback-only MD other than the Sound
Scape disc was loaded in the MD recorder, it
may not be possible to play some of the tracks
on the playback-only disc. In such cases,
unplug the power cord from the wall outlet,
then plug it back in again and perform the steps
described above.
If the power cord was unplugged
Set the date and time. See the instructions on page 14
for date and time setting.
17
Page 18

LISTENING TO MUSIC
Listening to MDs
When the supplied Sound Scape
disc, a playback-only MD, or an MD
with erasure protection is loaded
into the MD recorder, playback starts
automatically.
CD/receiver
DISPLAY button
SOURCE button
VOL + / – buttons
MD recorder
38 button
EJECT button
Starting playback
The MD recorder repeatedly plays an MD from
start to end.
1
Load an MD into the MD recorder.
With the label side of the MD facing upward
and the arrow pointing toward the MD
loading slot, gently insert the MD part of the
way. At a certain point, the MD recorder will
automatically pull the disc in the rest of the
way.
Label side
Arrow
The MD recorder reads the MD’s TOC
information.
See page 26 for description of the TOC.
TOC information is displayed when using a
Sound Scape disc, playback-only MD, or
recordable MD with erasure protection.
Playback begins automatically soon afterward.
See page 6 for description of erasure protection.
See page 22 for instructions on listening to the
Sound Scape disc.
18
38 button
7 button
7 button
4 / ¢ buttons
4 / ¢ buttons
VOL + / – buttons
2
If the loaded MD is a recordable MD
(without erasure protection), press the
38 button on the MD recorder.
This starts playback.
3
Use the VOL + / – buttons on the CD/
receiver or remote control to adjust the
volume level.
Page 19

Stopping playback
Press the 7 (STOP) button.
Removing the MD
Press the EJECT button to remove the current MD.
Locating a particular point quickly
Press and hold the 4 or ¢ button during
playback to locate a particular point quickly.
Normal playback is resumed when you release
the button.
Pause
Press the 38 button.
Press the 38 button once again to resume
playback.
Go back/forward to start of track
Press the 4 button once quickly to start
playback from the start of the current track;
press multiple times to move backward to the
start of previous tracks.
Press the ¢ button once quickly to start
playback from the start of the next track; press
multiple times to move forward to subsequent
tracks.
Display panel
The information shown in the display panel can be
switched as described below by pressing the
DISPLAY button while playing an MD in any mode.
Current track number and total elapsed playback
time
Current track number and current track’s remaining
playback time
Title of current track (if titles have been registered)
(The display flows from right to left when a
registered title has six or more numbers or letters.)
LISTENING TO MUSIC
19
Page 20

Listening to MDs
,,,,,,
,,,,,,
,,,,,,
,,,,,,
You can play a single track from an
MD, play all of the tracks in random
order, or play only the specified
tracks.
38 button
4 / ¢ buttons
CANCEL button
MODE button
ENTER button
Repeat playback of
current track
You can set a favorite track to be played back
repeatedly.
While the desired track is playing, press
the MODE button until “ONE” appears in
the display panel.
To return to repeat playback of all
tracks
Press the MODE button several times until
“ALL” appears in the display panel.
Repeat playback of selected track
number
During Stop mode, press the MODE button
until “ONE” appears in the display panel, then
press the 4 or ¢ button until the desired
track number is displayed. Finally, press the
38 button.
20
38
button
ENTER
button
4 / ¢ buttons
MODE button
Random Play mode
When in Random Play mode, the MD’s tracks
are played in random order. Since the order
changes each time, this mode adds an interesting twist by making the next track unpredictable.
1
Press the MODE button repeatedly
until “RANDOM” appears in the display
panel.
2
If the MD is in Stop mode, press the 38
button.
To return to repeat playback of all
tracks
Press the MODE button repeatedly until “ALL”
appears in the display panel.
Page 21

Programmed play
Play your favorite tracks in any desired order
using Programmed Play mode.
A sequence of up to 32 tracks can be
programmed, with tracks appearing more than
once in the sequence, if you like.
1
During Stop mode, press the MODE
button repeatedly until “PGM” appears
in the display panel.
2
Use the 4 and ¢ buttons to select
the first track to play, then press the
ENTER button. Repeat this for the
second track to be played, the third
track, and so on.
3
After selecting the last programmed
track, press the 38 button.
When programmed play ends
When programmed play of all selected tracks
ends, playback resumes with the first programmed track.
Any of the following actions will clear the
programmed tracks
• Removing the MD
• Pressing the MODE button to switch to
another mode, such as repeat playback of
one track.
• Starting mixed playback
Programmed play selections will not be cleared
when the power is shut off, such as when the
POWER button or STANDBY/ON button is
pressed.
To check programmed tracks
During Stop mode, press the + button to display the track
numbers of the programmed tracks in the programmed
order.
LISTENING TO MUSIC
Track number
Order of track during
programmed play
‘
The total playing time of all programmed
tracks is automatically displayed.
If you select the wrong track, press the CANCEL
button to clear the most recent track selection.
If you press and hold the CANCEL button for at
least three seconds, all selected tracks are
cleared.
The total programmed playing time is not
displayed if it exceeds 1,000 minutes.
21
Page 22

MIXED PLAYBACK
,,,,,,
,,,,,,
,,,,,,
,,,,,,
No.1
No.2
No.3
No.4
No.5
No.6
No.7
No.8
No.9
No.10
No.11
No.45
Listening to the Sound Scape Disc
What is the Sound Scape disc ?
The supplied Sound Scape disc is an
MD on which 45 kinds of sound
effects including ambient sound
(music for relaxing a listener) are
recorded. First of all, let’s listen to
this Sound Scape disc only.
45 kinds of ambient sound are recorded on the
Sound Scape disc. Each one is called a “content.”
45 pieces of contents are divided into five groups:
Content
Group 1
(Content No. 1
to content No.
9)
MD recorder
4 / ¢ buttons
SOUND SCAPE indicator
7 button
7 button
SOUND SCAPE button
MODE button
4 / ¢ buttons
Group 2
(Content No.
10 to content
No. 18)
Recorded contents vary depending on the model
you purchased. Refer to the information supplied in
the disc case for details of contents recorded on
your Sound Scape disc.
Listening to the Sound
Scape Disc
Before listening to the Sound
Scape Disc
Be sure to register your Sound Scape disc
before listening to it.
See page 17 for how to register the Sound Scape disc.
Load the Sound Scape disc into the MD
recorder.
The SOUND SCAPE indicator light is green.
After the MD recorder reads the TOC of the
loaded Sound Scape disc, it automatically plays
it.
See page 26 for description of the TOC.
22
MODE button
SOUND SCAPE
button
While the Sound Scape disc is playing
The content number appears on the display panel on the
MD recorder.
To stop the Sound Scape disc playback that is in progress
Press the 7 button.
To select the content playback method
Four methods for playing a content are provided:
“Listening to one content”, “Listening all contents,”
“ Listening to one group of contents” and “Listening
to contents in random order.”
Page 23

Listening to one content
only
The MD recorder plays your desired content
repeatedly, so the same content seems to play
continuously.
While the Sound Scape disc is playing,
press the MODE button repeatedly until
“ONE” appears on the display panel.
To listen to another content
Press the 4 or ¢ button while the Sound
Scape disc is playing.
Listening to all contents
The MD recorder plays all contents repeatedly.
Listening to another group of
contents
While the Sound Scape disc is playing, press
and hold down the 4 or ¢ button for at
least two seconds. Release the button only
after the previously displayed group name
changes to another one on the display panel.
Listening to another content of the
same group
Press the 4 or ¢ button while the Sound
Scape disc is playing.
Listening to contents in
random order
You can set the MD recorder to automatically
play each content in random order. This is
called “Random Playback mode.” Since the
order changes each time, this mode adds an
interesting twist by making the next content
unpredictable.
MIXED PLAYBACK
While the Sound Scape disc is playing,
press the MODE button repeatedly until
“ALL” appears on the display panel.
Playback time for one content
The playback time for one content is 5 minutes or more,
unless “ONE” is selected and displayed on the display
panel.
Listening to a group of
contents
The MD recorder plays each group of contents
recorded on the Sound Scape disc.
While the Sound Scape disc is playing,
press the MODE button repeatedly until
“GROUP” appears on the display panel.
While the Sound Scape disc is playing,
press the MODE button repeatedly until
“WARP” appears on the display panel.
To listen to another content
Press the ¢ button while the Sound Scape
disc is playing.
Notes on the Sound Scape disc
• A special technique is used playing a short sound
repeatedly, so that it seems to play continuously
without stopping. If this disc is played as a normal MD
when the Sound Scape indicator is not lit, the unique
playback feature of the Sound Scape disc cannot be
utilized. To play this unique sound, load the Sound
Scape disc into the MD recorder immediately after
connecting the power cord into a wall outlet. Next, be
sure to press the Sound Scape button to light the
Sound Scape indicator.
• The sound of a content may be output differently
depending on which of the following you choose:
– to listen to just one content or contents in random
order, or
– to listen to a group of contents or all contents.
23
Page 24

Mixed Playback of the Sound Scape
Disc
While the MD recorder is playing the
Sound Scape disc, you can also
listen to a CD, radio, or even the
sound played with the audio equipment connected to this system: this
is called “Mixed Playback”.
CD/receiver
MUSIC UP button
VOL + / – buttons
SOUND SCAPE
UP button
MD recorder
SOUND SCAPE indicator
Starting mixed playback
1
Load the Sound Scape disc into the MD
recorder.
If the SOUND SCAPE indicator does not
light
Press the SOUND SCAPE button to light the
SOUND SCAPE indicator. “SOUND SCAPE
ON” appears on the display panel of the MD
recorder.
If you load an MD other than the Sound
Scape disc
Press the SOUND SCAPE button. “MIXING
ON” appears on the display panel of the MD
recorder to indicate that the system is ready
to perform mixed playback.
If “MIXING ON” appears on the display
panel even though the Sound Scape disc is
loaded in the MD recorder
Your Sound Scape disc has not been registered correctly.
See page 17 for how to register the Sound Scape
disc.
2
Play the content used for mixed
playback. Next, press the MODE button
repeatedly until the desired playback
method (i.e., “ONE”, “ALL”, “GROUP”
or “WARP”) appears on the display
panel.
See page 22 for how to select the content playing
method.
We recommend that you select “ONE” to
allow the MD recorder to play one content
repeatedly. However, you can select
another method if you like.
24
7 button
MODE button
MUSIC UP button
SOUND SCAPE button
SOUND SCAPE
button
VOL + / – buttons
SOUND SCAPE UP button
3
Play the sound you want to listen to
along with the sound recorded on the
Sound Scape disc.
See the CD/Receiver system’s Operating Instructions
for how to play the sound source.
From the speakers, you can hear the sound
recorded on the Sound Scape disc over the
sound you selected in step 3.
To adjust the volume of mixed
playback
In the same manner as normal playback, press
the VOL + / – buttons to adjust the volume of
mixed playback. The balance of sound from
the Sound Scape disc and sound of another
Page 25

source remains the same with the only change
occuring in the overall volume.
To stop mixed playback
Press the 7 button of the MD recorder to
stop the MD recorder playback.
When performing mixed playback the next
time
When Mixed playback mode is not set to “WARP”
(playback in random order) and the SOUND SCAPE
indicator lights, the system memorizes the last content
played even after you turn off the power or stop mixed
playback. When you perform mixed playback, the
system plays the memorized content.
To adjust the volume
balance
During mixed playback, you can emphasize the
sound played from the Sound Scape disc or
sound you selected to play.
To emphasize the sound played
from the Sound Scape disc
Press the SOUND SCAPE UP button.
Level of sound you
selected to play
To emphasize the sound you
selected to play
Press the MUSIC UP button.
Range and sound condition you can adjust
Immediately after you load the Sound Scape disc into the
MD recorder, the volume balance between the sound
from the Sound Scape disc (S) and the selected sound
source (M) is set so that both sound volumes are the
same as one another (M50 - S50). You can adjust the
balance from M100 - 0S (the selected sound source
volume becomes the maximum) to M0 - 100S (the Sound
Scape disc volume becomes the maximum). If you select
the volume of either one of these as the maximum, the
sound of the other one will not be audible.
Level of sound played from
the Sound Scape disc
If you change the sound source while the
system is in Mixed Playback mode
The volume balance remains the same even though you
change the sound source with the SOURCE button of the
CD/receiver.
When changing the volume balance
Be sure to change the volume balance only if you can
hear both the sound played from the Sound Scape disc
and that from the source you selected. If the level of the
Sound Scape disc is set very low (example: M95-5S),
when you start playing another source in Mixed
Playback mode, you may find the overall volume is much
louder than you expected.
Tips on mixed playback
This system allows you to perform mixed playback
of not only the Sound Scape disc but also an MD
you recorded, CD, radio and sound played with the
audio equipment connected to this system.
To perform mixed playback for a recorded
MD
Slide the erase-protect tab of your MD to the open
position (see page 6).
Examples of mixed playback recordings
• Sounds in the mountain or town you happen to
visit while you are traveling,
• Sounds at a party, or
• Sounds from a scene in your favorite movie
Note on mixed playback
You cannot select “GROUP” for mixed playback of
an MD you have recorded. When you select “ONE,”
only the selected content is played back repeatedly,
but the recorded sound may not smoothly loop.
When you select “ALL,” the MD recorder plays all
contents you have recorded. When you select
“WARP,” the recorded contents play in random
order.
For your added enjoyment
You can enjoy mixed playback of an MD and a
commercial CD on which ambient music is recorded.
Mixed playback using the Wake-up Timer
After you set the Wake-up Timer with the CD/
Receiver System (see the CD/Receiver System
Operating Instructions for the Wake-up Timer), if the
SOUND SCAPE indicator lights up just before you
turn off the system’s power, Mixed Playback mode is
automatically set when the system’s power is turned
on again by this timer.
MIXED PLAYBACK
25
Page 26

RECORDING ON AN MD
MD Basics
The following are some points to
consider before recording onto an
MD or editing MD recordings.
Recording on an MD
How MD recording differs from
cassette tape recording
While both MDs and cassette tapes are able to record
music or other audio output, MDs differ from cassettes in
the following ways.
• MDs record on one side only.
• Recording automatically starts from the next empty
location on the MD. Previously recorded tracks are not
erased. (The erase function is used to intentionally
erase recorded tracks.)
• You can check how much recording time is left on the
MD before recording onto it.
TOC (Table Of Contents)
When you record a track onto an MD, information such
as the track number and recording location is also
recorded (onto a separate inner section of the MD). This
information is used to play back or edit the recorded
tracks.
The MD’s TOC is updated when:
• the MD is removed.
• the system’s power is turned off.
Track numbers
Track numbers are assigned automatically as tracks are
recorded. Each subsequent recording is given the nexthigher track number.
When recording from a CD
A track number is assigned to each CD track as it is
recorded, and is displayed where the CD track number is
displayed when playing a CD. However, the track
number of each track recorded on the MD will not
necessarily be the same as its track number on the CD.
When recording from the radio
A track number is assigned to each continuous recording
session. The track number is incremented if you press
the pause button and then resume recording.
MD lock during recording
While recording on an MD, the MD is locked and cannot
be ejected.
If a power outage occurs when
recording
If the power cord is disconnected or a power outage
occurs while the MD recorder is recording on an MD, the
recordings done until that time are automatically erased,
since their information has not been registered in the
TOC. If recording a new track onto an MD that contains
previously recorded tracks, only the additionally
recorded track is erased.
Caution
The recording function is disabled in the
following cases.
• If you attempt to record onto a playback-only MD
(such as a commercial music recording) or onto
the Sound Scape disc
• If the loaded MD has been set for erasure protection
• If “TOC FULL” appears in the display panel
• If the TOC contains errors
Caution
Do not unplug the power cord or move the MD
recorder while the MD recorder is registering the
TOC (while “TOC” is flashing in the display panel).
Such actions can cause incorrect TOC recording,
which may prevent correct playback.
How to check available recording
time
When you load an MD, the TOC information is automatically checked and the disc’s available recording time is
shown in the display panel.
If there is no TOC data
All of the MD’s recording time is available.
If TOC data exists
Number of tracks
Total time recorded
To determine the MD’s available recording time, subtract
the total time recorded so far from the MD’s maximum
recording time.
For example, 74 minutes (maximum recording time) - 20
minutes and 17 seconds (total time recorded) = 53
minutes and 43 seconds (available recording time).
If the TOC is full
The following appears in the display panel if you attempt
to record onto an MD with a full TOC.
26
US and foreign patents licensed from Dolby
Laboratories Licensing Corporation.
Nothing can be recorded on the MD. To enable recording, erase one or more previously recorded tracks by
using the “track erasing” function (see pages 38 to 39).
Page 27

MD System Restrictions
The recording method for MDs differs from the methods used for cassette tape or DAT recordings. Consequently, some
of the phenomena described below may occur, depending on the recording method and editing operations being used.
These phenomena are not malfunctions, but restrictions in the system.
Phenomena
“TOC FULL” is displayed even
when there is still some available
recording time on the MD.
“DISC FULL” is displayed even
when there is still some available
recording time on the MD.
Available recording time does not
increase no matter how many
short tracks are erased.
The amount of recorded time and
the amount available recording
time do not add up to the maximum recording time.
Two songs cannot be combined by
editing.
When cuing a recorded track back
or forward, the sound output
sometimes pauses.
System restrictions
The MD’s TOC contains a record of where each track has been recorded on the
MD. If many tracks have been recorded, erased, and/or edited on the MD, the
TOC information sector may become full (which prevents further recording) even
if less than 255 tracks have been recorded. To record a new track on such an MD
disc, use the “track erasing” function (see page 38 to 39).
The disc may be damaged in one or more sections, which would automatically
reduce the amount of time available for recording.
Short tracks that are less than about 15 seconds long are not always counted as
tracks.
Normally, the smallest storage unit on the MD is a “cluster” which corresponds
to about two seconds of recording time. Therefore, when each track is recorded,
the storage units used for recording the track are rounded out to the nearest
cluster, so the displayed amount of available recording time may be greater than
the actual amount. Also, the disc may be damaged in one or more sections,
which would automatically reduce the amount of time available for recording.
(When such damage is detected, “DEFECT” appears in the display panel and the
track number is automatically incremented.)
The combination function may not work on an MD that has been repeatedly
recorded and/or edited.
Such pausing can occur when cuing back or forward if the MD has been repeatedly recorded and/or edited.
RECORDING ON AN MD
Cautions concerning digital copies
When recording from a CD to an MD using this system, the recording function uses digital signals. However, the MD that
has the digital recording cannot be used as a source for copying to another MD or a DAT tape. This restriction is
imposed by the Serial Copy Management System (SCMS).
CD/receiver
CD: Digital signals
Digital recording
MD recorder
Digital
recording
MD: Digital signals
Analog recording
Cannot record to another
MD or DAT deck via a
digital connection.
Can record to another MD
or DAT deck using analog
signals.
27
Page 28

Recording a CD
,,,,,,
,,,,,,
,,,,,,
,,,,,,
You can make a digital recording of a
CD on an MD while playing the CD
on the CD/receiver.
CD/receiver
4 / ¢ buttons
MODE button
7 button
There are three ways to record a CD onto an
MD:
• Record all of the CD tracks in the original
order
(See “Recording all tracks” below)
• Record a single CD track
(See “Recording single tracks” on page 29)
• Record selected tracks in the selected order
(See “Programmed recording” on page 30)
When using any of the above methods, once
you have set up the recording session, just
press a certain button to simultaneously start
playing and recording the CD.
First things to check
Make sure the target MD is a record/playback type MD.
Make sure that the MD’s erase-protect tab is in the closed
position.
See page 6 for description of the erase-protect tab.
TOC information is written whenever the MD is
removed
After recording, when you remove the MD from the MD
recorder, TOC information on the recorded contents is
stored.
See page 26 for description of TOC.
MD recorder
CD 3 MD REC button
REC button
7 button
7 button
7 button
EJECT button
When CD is in Random Play mode
A CD cannot be recorded onto an MD when the CD is in
Random Play mode. To record, first press the MODE
button until “RANDOM” no longer appears in the display
panel.
Recording all tracks
1
Load a recordable MD into the MD
recorder.
See page 18 for MD loading instructions.
2
Load the CD to be recorded into the
CD/receiver.
See the CD/Receiver System’s Operating Instructions
for CD loading instructions.
3
Press the CD/receiver’s 7 button to
stop playback.
You cannot record if the audio source is
anything other than “CD.” If necessary,
press the SOURCE button on the CD/
receiver repeatedly until “CD” appears in
the display panel on the CD/receiver. See
the CD/Receiver System’s Operating Instructions for how to select the sound source.
28
Page 29

4
Press the CD3MD REC button on the
MD recorder.
This simultaneously starts the CD play and
MD recording operations.
Display panel on MD recorder.
When recording of all tracks is complete
The CD playback function automatically stops.
To stop a recording that is in
progress
Press the 7 button on the remote control, MD
recorder, or CD/receiver.
If the MD’s available recording time is less than
the CD’s total playback time
The CD is recorded until the MD’s available recording
time is used up, at which point CD playback is automatically stopped.
Recording single tracks
When recording of the track is complete
The CD playback function automatically stops.
To record from a selected location within a
track
If you start recording by pressing the CD3MD REC
button, the recording always starts at the beginning
of a track. Perform the following steps when you
want to record at another location within a track.
1
As you listen to the CD play, press the CD/
receiver’s 38 button to pause playback at the
place where you want to start recording.
2
Press the MD recorder’s REC button.
This simultaneously starts playing and recording the
CD. To stop recording, press the MD recorder’s 7
button.
How to read the MD recorder’s display
panel
If you press the MD recorder’s DISPLAY button while
recording all of a CD’s tracks, the following appears
in the display panel.
Track number being recorded and track’s elapsed
recording time
RECORDING ON AN MD
1
Load a recordable MD into the MD
recorder.
See page 18 for MD loading instructions.
2
Load the CD to be recorded into the
CD/receiver.
See the CD/Receiver System’s Operating Instructions
for CD loading instructions.
3
Press the CD/receiver’s 7 button to
stop playback.
4
Press the CD/receiver’s MODE button
repeatedly until “ONE” appears in the
display panel.
5
Press the 4 or ¢ button on the CD/
receiver to display the track number of
the track to be recorded.
6
Press the CD3MD REC button on the
MD recorder.
This simultaneously starts the CD play and
MD recording operations.
Track number being recorded and MD’s available
recording time
29
Page 30

Recording a CD
,,,,,,
,,,,,,
,,,,,,
,,,,,,
You can program the CD/receiver so
that it plays back the CD tracks in
any particular order to be recorded
on an MD.
CD/receiver
MODE button
CANCEL button
ENTER button
MD recorder
CD 3 MD REC button
4 / ¢ buttons
7 button
EJECT button
Programmed recording
1
Load a recordable MD into the MD
recorder.
See page 18 for MD loading instructions.
2
Load the CD to be recorded into the
CD/receiver.
See the CD/Receiver System’s Operating Instructions
for CD loading instructions.
3
Press the CD/receiver’s 7 button to
stop playback.
4
Press the CD/receiver’s MODE button
repeatedly until “PROGRAM” appears
in the display panel.
5
Press the CD/receiver’s 4 or ¢
button to display the track number of
the first track to be recorded, then
press its ENTER button. Repeat this for
the second, third, and other tracks to
be recorded.
If you select the wrong track, press the CD/
receiver’s CANCEL button to clear the most
recent track selection.
6
Press the CD/receiver’s 7 button to
store the program selection in memory.
30
7
Press the CD3MD REC button on the
MD recorder.
This simultaneously starts the CD play and
MD recording operations.
When recording of the track is complete
The CD playback function automatically stops.
Page 31

Recording Radio Broadcasts
,,,,,,
,,,,,,
,,,,,,
,,,,,,
1
Load a recordable MD into the MD
You can record radio broadcasts
onto MDs. These recordings are
made via the analog inputs.
recorder.
See page 18 for instructions on loading MDs.
2
Tune in the station to be recorded.
See the CD/Receiver System’s Operating Instructions
for instructions on tuning the radio.
CD/receiver
Reception of broadcast station to be recorded
MD recorder
REC button
3
When you want to start recording,
press the REC button on the MD
recorder.
4
To stop recording, press the 7 button.
How to pause recording
Press the 38 button on the MD recorder.
Editing a recorded radio program
Each recorded program becomes a track on the MD.
You can edit the recorded material later using the
various editing functions.
An example of this editing is shown below.
• Divide the track contents into songs, talk, and
commercial messages (CMs).
See page 37 for instructions on dividing tracks.
Talk
Talk
Song 1
Song 1
CM
CM
Song 2
Song 2
RECORDING ON AN MD
38 button
38 button
7 button
7 button
• Delete undesired parts (in this case, talk and CM).
See page 38 for instructions on deleting single
tracks.
Talk Song 1
Song 1
• Arrange the sequence of tracks.
See page 35 for instructions on arranging the
sequence of tracks.
CM
Song 2
Song 2
31
Page 32

,,,
,,,
,,,
,,,,,,
,,,,,,
,,,,,,
,,,,,,
Recording from Other Audio
Equipment
Output from other audio equipment
that is connected to the CD/receiver’s
AUX terminals can be recorded onto
MDs. These recordings are made via
the analog inputs.
CD/receiver
SOURCE button
MD recorder
REC button
Connection of other audio
equipment
Use an audio cord (commercially available) to
connect the audio equipment to the CD/
receiver’s AUX terminals.
See the CD/Receiver System’s Operating Instructions for
instructions on connecting other audio equipment.
Recording setup
Set up for playback from the connected audio
equipment.
Adjust the volume level
First, play the radio or a CD to check and adjust
the CD/receiver’s volume level. Next, set a low
volume level on the connected audio equipment, start playback, then gradually increase
the volume to the desired level. To hear
playback from the connected audio equipment,
press the CD/receiver’s SOURCE button until
“AUX” appears in the display panel. See the
CD/Receiver System’s Operating Instructions
for how to select the sound source.
32
38 button
38 button
7 button
7 button
Page 33

Record output from connected audio equipment
1
Load a recordable MD into the MD
recorder.
See page 18 for instructions on loading MDs.
2
Set up playback from the connected
audio equipment.
Make sure that “AUX” is shown in the CD/
receiver’s display panel. If it is not shown,
press the SOURCE button on the CD/
receiver repeatedly until “AUX” appears.
See the CD/Receiver System’s Operating Instructions
for instructions on connecting audio equipment.
3
Start playback of the connected
equipment.
See the Operating Instructions that is supplied with
the audio equipment.
4
Press the REC button on the MD
recorder.
This starts recording onto the MD.
5
Press the 7 button on the MD recorder
when you want to stop recording.
RECORDING ON AN MD
To pause recording
Press the 38 button on the MD recorder.
Auto mark function
When recording analog signals output from audio
equipment connected to the AUX terminals on the CD/
receiver, any quiet section that lasts at least 1.5 seconds
is regarded as a break between tracks, and a new track
number is assigned at that point. This function cannot be
turned off.
33
Page 34

EDITING AN MD
1234
1234
A
B
C
D
5
E
A
C
D
E
Editing an MD
After tracks are recorded onto an
MD, they can be edited as described
below.
Rearrange sequence of tracks
(move)
Any track can be moved to any place in the
track sequence.
After tracks are moved, they are automatically
renumbered sequentially.
Example: Move the fourth track (D) to become
the second track.
1234
A
1234
A
B
D
C
B
D
C
Combine two tracks into one
(combine)
Two tracks can be combined into a single track
as shown below. Afterward, the subsequent
tracks are automatically renumbered
sequentially.
Example: Connect the third track (C) with the
fourth track (D) to make a combined
track C.
1234
A
B
C
D
Erase a track
Any track can be erased from an MD.
Afterward, the subsequent tracks are automatically renumbered sequentially.
Example: Erase the second track (B).
Erase all tracks
You can also erase all recorded tracks at once.
If a disc name has been assigned to the MD,
that is also erased.
Name an MD
A disc name can be assigned to each MD.
When an MD that has an assigned disc name is
loaded into the MD recorder, the name is
shown in the MD recorder’s display panel.
Name a track
Names can also be assigned to individual tracks
recorded on an MD. When a track is being
played, its name is shown in the MD recorder’s
display panel.
123
A
Split one track into two tracks
(divide)
A track can be split at any place to create two
divided tracks as shown below. Afterward, the
subsequent tracks are automatically renumbered sequentially.
Example: Split the third track (C) into two parts
which become the third and fourth
tracks.
123
A
1234
A
34
BC
C
C
D
B
B
When an MD is set for programmed play
MDs cannot be edited if the MD recorder is set to
Programmed Play mode. Press the MODE button to
cancel Programmed Play mode.
Which MDs can be edited?
Only record/playback type MDs can be edited.
To enable editing, the disc’s erase-protect tab must be
closed (no erase protection).
See page 6 for description of the erase-protect tab.
See page 26 for a basic description of MDs.
TOC data is written when MD is removed
When an edited MD is removed from the MD recorder,
the TOC information is written to reflect the changes
made by editing.
See page 26 for further description of TOC data.
Page 35

Rearranging the Sequence of Tracks
,,,,,,
,,,,,,
,,,,,,
,,,,,,
(Move)
4
Press the + or – button to select the
Tracks recorded on an MD can be
moved to any place in the track
sequence.
MD recorder
38 button
+ / – buttons
MD EDIT button
destination track number.
Example: Move the third track to become
the first track.
5
Press the ENTER button within 10
seconds.
“COMPLETE” is scrolled from right to left
across the display panel.
To intentionally cancel the move
operation
Instead of pressing the ENTER button (at step 5
above), press the CANCEL button to cancel the
move operation.
EJECT button
1
Load the MD to be edited.
See page 18 for instructions on loading MDs.
2
Press the 38 button when the track to
be moved is playing. The MD recorder
enters Pause mode.
3
Press the MD EDIT button repeatedly
until “MOVE” appears in the MD
recorder’s display panel, then press the
ENTER button within 10 seconds.
CANCEL button
ENTER button
Moving tracks when the MD recorder is in Stop mode
After using the + or – button to select the track
to be moved, press the MD EDIT button repeatedly until “MOVE” appears in the display panel.
Next, press the ENTER button and then follow
the above instructions starting at step 4.
EDITING AN MD
If the ENTER button is not pressed within 10
seconds
The move operation is automatically canceled.
35
Page 36

Combining Two Tracks into One
,,,,,,
,,,,,,
,,,,,,
,,,,,,
(Combine)
4
Press the ENTER button.
Two tracks can be combined into a
single track.
MD recorder
38 button
+ / – buttons
EJECT button
1
Load the MD to be edited.
See page 18 for instructions on loading MDs.
2
Press the 38 button when playing the
track that will be combined with the
previous track (such as the third track
when combining the second and third
tracks). This sets Pause mode.
3
Press the MD EDIT button repeatedly
until “COMBINE” appears in the MD
recorder’s display panel, then press the
ENTER button within 10 seconds.
MD EDIT button
CANCEL
button
ENTER button
Example: Combine the second and third
tracks.
5
Press the ENTER button within 10
seconds.
“COMPLETE” is scrolled from right to left
across the display panel.
If the ENTER button is not pressed within 10
seconds
The combine operation is automatically canceled if:
• the ENTER button is not pressed within 10 seconds
after “COMBINE” appears at step 3 above, or
• the ENTER button is not pressed within 10 seconds
after “?” for confirmation appears at step 4 above.
To intentionally cancel the combine
operation
Instead of pressing the ENTER button (at step 5
above), press the CANCEL button to cancel the
combine operation.
Combining tracks when the MD
recorder is in Stop mode
After using the + or – button to select the track
to be combined with the previous track, press
the MD EDIT button repeatedly until “COMBINE” appears in the display panel, then press
the ENTER button within 10 seconds. When
“?” appears in the display panel, press the
ENTER button within 10 seconds.
Track names
If a track name has been assigned to each track being
combined or only to the first track, the first track’s name
is used for the combined track. If a track name has been
assigned only to the second track, the second track’s
name is used for the combined track.
Short tracks (less than 15 seconds)
If the duration of either or both of the tracks being
combined is less than 15 seconds, the tracks may not be
combined.
36
Page 37

Splitting One Track into Two Tracks
,,,,,,
,,,,,,
,,,,,,
,,,,,,
(Divide)
5
Press the ENTER button within 10
You can split a track at any place to
create two divided tracks.
MD recorder
38 button
MD EDIT button
seconds.
The display panel changes as shown below.
6
Press the ENTER button again within
10 seconds.
“COMPLETE” is scrolled from right to left
across the display panel.
If the ENTER button is not pressed within 10
seconds
The divide operation is automatically canceled if:
• the ENTER button is not pressed within 10 seconds
after “DIVIDE” appears at step 4 above, or
• the ENTER button is not pressed within 10 seconds
after “?” for confirmation appears at step 5 above.
EJECT button
CANCEL
button
ENTER button
1
Load an MD into the MD recorder.
See page 18 for instructions on loading MDs.
2
Play the track to be divided.
3
Press the 38 button when playback
reaches the division point. This sets
Pause mode.
4
Press the MD EDIT button repeatedly
until “DIVIDE” appears in the MD
recorder’s display panel.
To intentionally cancel the divide
operation
Instead of pressing the ENTER button (at step 6
above), press the CANCEL button to cancel the
divide operation.
Track names
If a track name has been assigned to the track being
divided, the track’s name is used for both of the divided
tracks.
Number of tracks per disc
Tracks can be divided as long as the total number of
tracks on the MD does not exceed 255 tracks.
Short tracks (less than 15 seconds)
If the duration of the track being divided is less than 15
seconds, it may not be possible to divide the track.
EDITING AN MD
37
Page 38

Erasing Single Tracks
,,,,,,
,,,,,,
,,,,,,
,,,,,,
5
Any track can be erased from an MD.
Afterward, the track’s recording time
is automatically added to the available recording time. Note with
caution that erased tracks cannot be
restored (they must be re-recorded).
Caution regarding erased tracks
Once the ENTER button is pressed at step 5, the erased
track cannot be restored.
Press the ENTER button again within
10 seconds.
“COMPLETE” is scrolled from right to left
across the display panel.
MD recorder
38 button
MD EDIT button
EJECT button
1
Load an MD into the MD recorder.
See page 18 for instructions on loading MDs.
2
Press the 38 button while playing the
track to be erased. This sets Pause
mode.
CANCEL
button
ENTER button
If the ENTER button is not pressed within 10
seconds
The erase operation is automatically canceled if:
• the ENTER button is not pressed within 10 seconds
after “ERASE” appears at step 3 above, or
• the ENTER button is not pressed within 10 seconds
after “?” for confirmation appears at step 4 above.
To intentionally cancel the erase
operation
Instead of pressing the ENTER button (at step 5
above), press the CANCEL button to cancel the
erase operation.
Erasing tracks when the MD recorder is in Stop mode
After using the + or – button to select the track
to be erased, press the MD EDIT button repeatedly until “ERASE” appears in the display
panel, then press the ENTER button within 10
seconds. When “?” appears in the display
panel, press the ENTER button within 10
seconds.
Track numbers
The subsequent tracks are automatically renumbered
sequentially.
If a disc name has been assigned (see page 40)
If all recorded tracks are erased from an MD that has
been assigned a disc name, the disc name is also erased.
38
3
Press the MD EDIT button repeatedly
until “ERASE” appears in the display
panel.
4
Press the ENTER button within 10
seconds.
The display panel changes as shown below.
Page 39

Erasing All Tracks
,,,,,,
,,,,,,
,,,,,,
,,,,,,
You can erase all recorded tracks at
once, which makes the MD a blank
MD. Note with caution that once all
tracks have been erased, they cannot
be restored (they must be rerecorded).
5
Press the ENTER button again within
10 seconds.
“COMPLETE” is scrolled from right to left
across the display panel.
Caution regarding erased tracks
Once the ENTER button is pressed at step 5, the erased
tracks cannot be restored.
MD recorder
7 button
EJECT button
CANCEL button
1
Load an MD into the MD recorder.
See page 18 for instructions on loading MDs.
MD EDIT button
ENTER button
If the ENTER button is not pressed within 10
seconds
The erase operation is automatically canceled if:
• the ENTER button is not pressed within 10 seconds
after “ALL ERASE” appears at step 3 above, or
• the ENTER button is not pressed within 10 seconds
after “?” for confirmation appears at step 4 above.
To intentionally cancel the erase
operation
Instead of pressing the ENTER button (at step 5
above), press the CANCEL button to cancel the
erase operation.
If the MD has a full TOC
If the MD has a full TOC, it cannot be recorded upon even
if it has some available recording time. However, such
MDs can be erased using either the single-track or alltracks erase operation.
EDITING AN MD
2
Press the 7 button to stop playback.
3
Press the MD EDIT button repeatedly
until “ALL ERASE” appears in the
display panel.
4
Press the ENTER button within 10
seconds.
The display panel changes as shown below.
39
Page 40

Naming an MD
,,,,,,
,,,,,,
,,,,,,
,,,,,,
A disc name can be assigned to each
MD. When an MD that has an assigned disc name is loaded into the
MD recorder, the name is shown in
the display panel.
MD EDIT button
7 button
+ / – buttons
DISPLAY button
4
Press the ENTER button within 10
seconds.
The alphabet (first five upper case letters) appears
in the display panel.
If the ENTER button is not pressed within
10 seconds
The disc name assignment operation is automatically
canceled.
5
Press the DISPLAY button to select the
type of characters.
Pressing the DISPLAY button cycles through
the following settings.
Upper case letters = lower case letters =
numbers/symbols = Japanese letters
6
Press the + or – button to select a
character, then press the ENTER button.
MODE button
EJECT button
CANCEL button
ENTER button
1
Load an MD into the MD recorder.
See page 18 for instructions on loading MDs.
2
Press the 7 button on the MD recorder
to stop playback.
3
Press the MD EDIT button repeatedly
until “DISC NAME” appears in the
display panel.
Entered
character
7
Repeat steps 5 and 6 to enter the rest
of the disc name.
Approximately 100 characters can be
entered.
See page 41 for description of characters that can be
entered.
8
Press the MD EDIT button.
“COMPLETE” is scrolled from right to left
across the display panel.
To enter a space between characters
After selecting the type of character in step 5, press the
“-” button once. This causes a flashing cursor to appear
with no character above it. This is a space. Press the
ENTER button to enter the space into the disc name.
To intentionally cancel the disc
name assignment operation
Instead of pressing the MD EDIT button (at step
8 above), press the CANCEL button to cancel
the disc name assignment operation.
40
Page 41

How to change entered characters
The following explains how to change disc
name characters that have already been entered.
1
Press the + or – button to select the (correct)
character to be entered.
2
Press the MODE button.
This moves the cursor to the entered character.
3
Press the + or – button to select the (incorrect)
character to be replaced, then press the ENTER
button.
4
Press the CANCEL button.
This replaces the selected (incorrect) character with the
entered (correct) character.
5
Press the MODE button to return to Character
Entry mode.
6
When you have finished making corrections, press
the MD EDIT button.
How to erase an entered character
When entering characters, you can erase
incorrectly entered characters via the following
steps.
1
Press the MODE button.
This moves the cursor to the entered character.
2
Press the + or – button to select the (incorrect)
character to be replaced.
3
Press the CANCEL button.
This erases the selected (incorrect) character.
4
Press the MODE button to return to Character
Entry mode.
5
When you have finished making corrections, press
the MD EDIT button.
How to erase an MD disc name
You can erase MD disc names via the following
steps.
1
Load the MD whose name you want to erase.
See page 18 for instructions on loading MDs.
2
Press the 7 button on the MD recorder to stop
playback.
3
Press the MD EDIT button repeatedly until “DISC
NAME” appears in the display panel.
4
Press the ENTER button within 10 seconds.
5
Press the MODE button.
6
Press and hold the CANCEL button for at least
three seconds.
7
Press the ENTER button within 10 seconds.
How to change an entered disc
name
1
Load the MD whose name you want to change.
See page 18 for instructions on loading MDs.
2
Press the 7 button on the MD recorder to stop
playback.
3
Press the MD EDIT button repeatedly until “DISC
NAME” appears in the display panel.
4
Press the ENTER button within 10 seconds.
5
Perform steps 1 to 6 shown under “How to change
entered characters” on this page.
EDITING AN MD
List of characters that can be entered
7 Alphabet letters (upper case)
7 Alphabet letters (lower case)
7 Numbers and symbols
7 Japanese letters
(space)
(space)
(space)
(space)
41
Page 42

Naming a Track
,,,,,,
,,,,,,
,,,,,,
,,,,,,
A track name can be assigned to
each track on an MD. When a track
that has an assigned track name is
played, the track name is shown in
the display panel.
MD recorder
MD EDIT button
38 button
+ / – buttons
DISPLAY button
4
Press the ENTER button within 10
seconds.
The alphabet (first five upper case letters)
appears in the display panel.
If the ENTER button is not pressed within 10
seconds
The track name assignment operation is automatically
canceled.
5
Press the DISPLAY button to select the
type of characters.
Pressing the DISPLAY button cycles through
the following settings.
Upper case letters = lower case letters =
numbers/symbols = Japanese letters
6
Press the + or – button to select a
character, then press the ENTER button.
MODE button
EJECT button
CANCEL button
ENTER button
1
Load the target MD into the MD
recorder.
See page 18 for instructions on loading MDs.
2
Press the 38 button when the track
to be named is being played. This
sets Pause mode.
3
Press the MD EDIT button repeatedly
until “TRACK NAME” appears in the
display panel.
Entered
character
7
Repeat steps 5 and 6 to enter the rest
of the track name.
Approximately 100 characters can be
entered.
See page 41 for description of characters that can be
entered.
8
Press the MD EDIT button.
“COMPLETE” is scrolled from right to left
across the display panel.
To enter a space between characters
After selecting the type of character in step 5, press the
“-” button once. This causes a flashing cursor to appear
with no character above it. This is a space. Press the
ENTER button to enter the space into the track name.
To intentionally cancel the track
name assignment operation
Instead of pressing the MD EDIT button (at step
8 above), press the CANCEL button to cancel
the track name assignment operation.
42
Page 43

How to change entered characters
The following explains how to change track
name characters that have already been
entered.
1
Press the + or – button to select the (correct)
character to be entered.
2
Press the MODE button.
This moves the cursor to the entered character.
3
Press the + or – button to select the (incorrect)
character to be replaced, then press the ENTER
button.
4
Press the CANCEL button.
This replaces the selected (incorrect) character with the
entered (correct) character.
5
Press the MODE button to return to Character
Entry mode.
6
When you have finished making corrections, press
the MD EDIT button.
How to erase an entered character
When entering characters, you can erase
incorrectly entered characters via the following
steps.
1
Press the MODE button.
This moves the cursor to the entered character.
2
Press the + or – button to select the (incorrect)
character to be replaced.
3
Press the CANCEL button.
This erases the selected (incorrect) character.
4
Press the MODE button to return to Character
Entry mode.
5
When you have finished making corrections, press
the MD EDIT button.
How to erase a track name
You can erase track names via the following
steps.
1
Load the MD whose track’s name you want to
erase.
See page 18 for instructions on loading MDs.
2
When the track whose name is to be erased is
being played, press the MD EDIT button repeatedly
until “TRACK NAME” appears in the display panel.
3
Press the ENTER button within 10 seconds.
4
Press the MODE button.
5
Press and hold the CANCEL button for at least
three seconds.
6
Press the ENTER button within 10 seconds.
How to change an entered track
name
1
Load the MD whose track’s name you want to
change.
See page 18 for instructions on loading MDs.
2
Press the 38 when the target track is being
played. This sets Pause mode.
3
Press the MD EDIT button repeatedly until “TRACK
NAME” appears in the display panel.
4
Press the ENTER button within 10 seconds.
5
Perform steps 1 to 6 shown under “How to change
entered characters” on this page.
EDITING AN MD
MD editing functions
The editing function that is selected by pressing the MD EDIT button differs according to the current operation
status. See the following table of MD editing functions.
YES: Possible NO: Not possible
Move Combine Divide Erase track Erase all tracks Name an MD Name a track
During Stop mode, when
the total number of tracks
is displayed
During Stop mode, when
the track number is
displayed
During playback
Pause mode (during
playback)
*Cannot be selected if the current track is the first track
NO NO NO NO YES YES NO
YES YES* NO YES NO NO YES
NO NO NO NO NO NO YES
YES YES YES YES NO NO YES
43
Page 44

TIMER OPERATION
Wake-up Timer: set playback to start
at a specified time
You can specify a time setting for starting
playback of an MD. This “Wake-up Timer”
function lets you wake up to your favorite MD
program instead of a noisy alarm clock. See the
CD/Receiver System’s Operating Instructions
for how to use the “Wake-up Timer” function.
If you want to start mixed playback or the
Sound Scape disc only:
Follow steps 1-10 of the “Wake-up Timer”
setting instructions on pages 28 to 29 of the CD/
Receiver System’s Operating Instructions, then
continue with the instructions below.
7To set up Wake-up Timer for
mixed playback
Load the Sound Scape disc into the MD
recorder. Make sure that the SOUND SCAPE
indicator is lit, then press the CD/receiver’s
POWER button to turn off the power.
7To set up playback of the Sound
Scape disc only
Load the Sound Scape disc into the MD
recorder. Make sure that the SOUND SCAPE
indicator is lit, then hold down the SOUND
SCAPE button until “M00 - 100S” appears on
the display panel. Next, press the CD/receiver’s
POWER button to turn off the power.
After following the instruction on the left, press
the POWER button of the CD/receiver (or the
STANDBY/ON button on the remote control) to
turn off the system’s power.
The TIMER button of the CD/receiver should be
lit.
Make sure that the system’s power is off.
The Wake-up Timer will not operate unless the
system’s power is off.
44
Page 45

Timer-Based Recording of Radio
,,,,,,
,,,,,,
,,,,,,
,,,,,,
Broadcasts
Setup
You can set up the MD recorder to
record radio broadcasts on an MD
from a specified start time to a
specified end time.
CD/receiver
TIMER SETTING button
POWER button
Before setting the timer, make sure that your time setting
is accurate.
See page 14 for instructions on setting the time.
Setting the start and end
times
1
Load the MD to be used for recording.
See page 18 for instructions on loading MDs.
2
Select the radio station to be recorded.
Select the FM (UKW) or AM (MW/LW) band,
then tune in to the desired station.
See the CD/Receiver System’s Operating Instructions
for instructions on tuning the radio.
3
Press the TIMER SETTING button on
the CD/receiver twice.
This causes “REC” to flash in the display
panel.
CANCEL button
ENTER button
MD recorder
STANDBY/ON
button
+ / – buttons
7 button
4
Press the ENTER button on the CD/
receiver.
The “Hour” flashes.
5
Press the + or – button on the CD/
receiver to set the “hour” for the
recording start time, then press the
ENTER button on the CD/receiver.
6
Press the + or – button on the CD/
receiver to set the “minute” for the
recording start time, then press the
ENTER button on the CD/receiver.
7
Press the + or – button on the CD/
receiver to set the “hour” for the
recording end time, then press the
ENTER button on the CD/receiver.
TIMER OPERATION
45
Page 46

8
Press the + or – button on the CD/
receiver to set the “minute” for the
recording end time, then press the
ENTER button on the CD/receiver.
This causes “OK” to flash in the display
panel.
9
Press the ENTER button on the CD/
receiver.
Sometimes, a green lamp lights on the
TIMER button on the CD/receiver at this
step. Even in such cases, be sure to
perform steps 10 and 11 below also.
10
Press the TIMER button repeatedly
until “REC” appears in the display
panel on the CD/receiver.
The TIMER button’s green lamp goes on.
11
Press the POWER button on the CD/
receiver (or the STANDBY/ON button
on the remote control) to turn off the
system’s power.
Make sure that the system’s power is off
The recording timer will not operate unless
the system’s power is off.
Now the MD recorder will start recording at the
specified start time and will stop recording at
the specified end time.
To cancel a timer setting (before
completing the setting)
Press the CANCEL button on the CD/receiver
instead of the ENTER button at step 9 above.
Stored setting for timer-based
recording
Once you have set up timer-based recording,
the selected radio station and the recording
start and end times remain stored in the
system’s memory until these settings are either
changed or canceled.
To reset the timer-based recording function to
operate the next day at the same time, press
the TIMER button on the CD/receiver, which
causes “REC” to appear in the display panel.
As before, the last step is to turn off the system’s power.
To stop a timer-based recording in
progress
Press the MD recorder’s 7 button.
To check the timer-based recording
setting
While the system’s power is off, press the CD/
receiver’s DISPLAY button. This causes “REC”
to appear in the display panel on the CD/
receiver, after which the following information
appears at one-second intervals.
Recording start time setting = Recording end
time setting = Radio station frequency
Finally, “END” appears, then the display panel
goes blank after a moment.
If the specified recording start and end times
are the same
The TIMER button on the CD/receiver will not light after
you press it, and the timer-based recording function will
not operate.
Volume setting during timer-based recording
The volume level for speaker output is automatically set
at zero. Although nothing can be heard via the speakers,
the recording volume is automatically adjusted to ensure
proper recording. To hear the radio via the speakers
during timer-based recording, use the VOL+ button on
the CD/receiver to increase the speaker volume.
If the volume is not adjusted during timerbased recording
After timer-based recording ends, “VOL 7” is automatically set as the volume level the first time an audio
source is played.
46
Page 47

APPENDIX
Troubleshooting
If your MD recorder seems to be operating abnormally, check the troubleshooting charts below.
In addition, an error message may appear in the display panel. In such cases, see the error message
descriptions on page 50.
If the trouble cannot be rectified even after exercising the checks listed below, ask your nearest
PIONEER authorized service center or your dealer to carry out repair work.
Problem
No sound output
Power shuts off while
using the system
Whole system
Cannot change audio
source
Does not operate normally.
Cannot record
MD recorder
“TOC FULL” is displayed
even when there is still
some available recording
time on the MD, and the
MD cannot be used for
recording.
Possible causes
• Power plug has been removed
from the wall outlet.
• System components are not
properly connected.
• Audio source has not been
selected.
• Ventilation holes are blocked.
• An MD is being recorded.
• Pause mode has been set while
recording from a CD to an MD.
• MD recorder is not connected
properly.
• MD is erase-protected.
• Playback-only MD has been
loaded.
• Sound Scape disc has been
loaded.
• TOC is full. (This may occur if
the MD has been recorded and/
or edited many times.)
• CD/receiver has been set to
Random Play mode.
• The MD’s TOC is full. (This may
occur if the MD has been
recorded and/or edited many
times.)
Corrective actions
• Insert the power cord plug into the wall
outlet
• See connection instructions (on page 8)
of this manual and the CD/Receiver
System’s Operation Instructions to
check the connections.
• Press the SOURCE button to select the
desired audio source (CD, MD, etc.).
• Set up the system so that the ventilation holes are not blocked.
• The audio source cannot be changed
while recording. Pause or stop the
recording operation before changing
the audio source.
• If you are recording from a CD to an
MD, you cannot change the audio
source even when the recording
operation has been set to Pause mode.
• See connection instructions (on page 8)
to check the connection.
• Close the erase-protect tab (see page 6).
• Load a recordable MD.
• You can erase all tracks on an MD with
a full TOC to enable recording (see page
39).
• Press the MODE button repeatedly until
“ALL” appears in the display panel.
• If many tracks have been recorded,
erased, and/or edited on the MD, the
TOC information sector may become
full (which prevents further recording)
even if less than 255 tracks have been
recorded. This is a characteristic of MDs
and is not a malfunction.
APPENDIX
47
Page 48

Troubleshooting
Problem
“DISC FULL” is displayed
even when there is still
some available recording
time on the MD, and the
MD cannot be used for
recording.
MD cannot be edited.
“NO DISC” appears in the
display panel even
though an MD has been
loaded.
Pauses occur during
playback.
Available recording time
does not increase after a
track is erased.
MD recorder
The amount of recorded
time and the amount
available recording time
do not add up to the
maximum recording time.
Cannot combine two
songs by editing or divide
one song into two.
Possible causes
• The MD is damaged.
• Programmed Play mode has
been set.
• The MD is damaged.
• The MD is out of specification.
• Condensation has occurred in
the MD recorder.
• Pauses may occur when cuing
back or forward if the MD has
been repeatedly recorded and/or
edited.
• If the track is only about 12
seconds or less, it may not be
counted as a track.
• The smallest storage unit on the
MD corresponds to about two
seconds of recording time. When
each track is recorded, the time
used for recording is rounded
out to the nearest two seconds,
so the displayed available
recording time may be greater
than the actual amount.
• The disc is damaged in one or
more sections, which prevents
recording in those sections.
(When such damage is detected,
“DEFECT” appears in the display
panel and the track number is
automatically incremented.)
• The TOC is full. (Combination or
division function may not work
on an MD that has been repeatedly recorded and/or edited.)
Corrective actions
• If the MD is damaged, the damaged
part cannot be recorded upon, which
reduces the available recording time.
• Press the MODE button on the MD
recorder repeatedly until “ALL”
appears in the display panel.
• The damaged MD cannot be used. Use
another MD.
• Use another MD.
• Wait for about an hour and then try
playing it again.
• This is a characteristic of MDs and is
not a malfunction.
• This is a characteristic of MDs and is
not a malfunction.
• This is a characteristic of MDs and is
not a malfunction.
• This is a characteristic of MDs and is
not a malfunction.
• This is a characteristic of MDs and is
not a malfunction.
48
Page 49

Problem
Cannot perform mixed
playback.
Other
Contents described in
Sound Scape disc case do
not match contents
displayed when playing
the disc.
Possible causes
• SOUND SCAPE button was not
pressed.
• The volume balance setting for
mixed playback has been set as
zero for the audio source or
Sound Scape disc.
• The MD used for personal
recording is not an MD that is
disabled as source for recording.
• Sound Scape disc has not been
properly registered.
• SOUND SCAPE button was not
pressed.
Corrective actions
• Press the SOUND SCAPE button.
• Adjust the volume balance setting for
the audio source or Sound Scape disc
(see page 23).
• Close the erase-protect tab (see page
6).
• Register the Sound Scape disc again
(see page 17).
• Press the SOUND SCAPE button so that
the SOUND SCAPE indicator lights in
green.
Cannot change language
setting for display panel.
• Color distortion or other problems may occur in a TV that is placed next to the MD recorder. This is most likely to
occur when using an indoor TV antenna. To correct the problem, either use an outdoor TV antenna or move the MD
recorder farther away from the TV.
• Abnormal functioning of this unit may be caused by static electricity or other external interference. To restore
normal operation, turn the power off and then on again, or unplug the AC power cord and then plug it in again.
• If the system’s power cord has been unplugged, the date and time must be reset (see page 14) and the Sound
Scape disc must be registered again (see page 17).
• The audio output may be affected when a portable telephone is used near the MD recorder. In such cases, avoid
using a portable telephone near the system.
• The time has not been set.
• Set the time, then try setting the
language (see page 14).
APPENDIX
49
Page 50

Error Messages
Various messages are displayed in the MD recorder’s display panel. Some of these messages are
error messages that are shown when operation errors occurs. These error messages are described
below for your reference.
Error message
NO DISC
DISC ERROR
TOC FULL
BLANK DISC
NAME FULL
PROTECTED
MECHA ERROR
Can’t Edit
00 0:00
DISC FULL
PLAYBACK MD
Possible meanings
• MD has not been loaded.
• Cannot read data on MD.
• Disc is damaged.
• Cannot read data on MD.
• No TOC on MD or error exists in TOC data.
• There is no more space for recording
characters (for disc names, track names,
etc.).
• Nothing has been recorded onto the
loaded MD (no disc name either).
• Maximum number of characters have
been entered for disc name or track name.
• The erase-protect tab is open.
• MD recorder is not operating correctly.
• Cannot edit.
• Nothing has been recorded on the loaded
MD.
• No space for more recording.
• Recording or editing was attempted using
a playback-only MD.
Corrective actions
• Load an MD.
• Load the MD again.
• Load an MD.
• Erase all of the tracks on the MD. If it still
cannot be recorded, the MD is unusable.
Use another MD.
• Use another recordable MD.
• Use a recorded MD for playback.
• Enter a shorter disc name or track name.
• Close the erase-protect tab (see page 6).
• Turn off the power, then remove the loaded
MD.
• Change the pause position in the track and
try again to edit it.
• Use a recorded MD for playback.
• Use another MD or erase unnecessary
sections.
• Use a recordable MD.
50
Page 51

Maintenance
Specifications
Product maintenance
Be sure to remove the power plug from the wall
outlet before starting any maintenance.
Usually, it is best to use a soft dry cloth for
cleaning.
If the equipment is especially dirty, dip a soft
cloth in a solution of five or six parts water to
one part detergent and wring the cloth well
before wiping the equipment. Afterward, use a
dry cloth to remove remaining moisture from
the equipment. Do not use volatile cleaning
fluids such as alcohol, benzine, thinner, or
insecticide, as these products may remove
printed or painted marks. Also, any equipment
case surface may become damaged if it remains in direct contact with plastic or rubber
materials over a long period.
Carefully read the precautions on the label of
any chemically-treated cleaning cloths or other
materials before using them.
• Specifications and design subject to possible
modification without notice, due to
improvements.
Type..................... Mini disc digital audio system
Medium .........................................Mini disc (MD)
Frequency characteristics
.................................. 20 Hz to 20 kHz (+/– 3 dB)
Error correction method
....Advanced Cross Interleave Code (ACIRC)
Solomon code
Coding ..... Adaptive Transform Acoustic
Coding (ATRAC)
Power supply voltage .................DC 5 V, 230 mA
DC 9 V, 14 mA
External dimensions
...................... 145 (W) × 137 (H) × 235 (D) mm
3
(5
/4 × 5 1/2 × 9 3/8 inches)
Weight............................................. 1.4 kg (3.3 lb)
Condensation
If the MD recorder is exposed to sudden
temperature changes, such as when it is carried
from a cold room into a warm room, condensation may occur on some of its operating mechanisms and may impede performance.
In such cases, wait about an hour for the
equipment to acclimatize before operating it.
APPENDIX
51
Page 52

Selecting fine audio equipment such as the unit you’ve just purchased is only the start of your musical enjoyment. Now it’s time to
consider how you can maximize the fun and excitement your equipment offers. This manufacturer and the Electronic Industries
Association’s Consumer Electronics Group want you to get the most
out of your equipment by playing it at a safe level. One that lets the
sound come through loud and clear without annoying blaring or
distortion-and, most importantly, without affecting your sensitive
hearing.
Sound can be deceiving. Over time your hearing “comfort level”
adapts to higher volumes of sound. So what sounds “normal” can
actually be loud and harmful to your hearing. Guard against this by
setting your equipment at a safe level BEFORE your hearing adapts.
To establish a safe level:
÷ Start your volume control at a low setting.
÷ Slowly increase the sound until you can hear it comfortably and
clearly, and without distortion.
Once you have established a comfortable sound level:
÷ Set the dial and leave it there.
Taking a minute to do this now will help to prevent hearing damage or loss in the future. After all, we want you listening for a lifetime.
We Want You Listening For A Lifetime
Used wisely, your new sound equipment will provide a lifetime
of fun and enjoyment. Since hearing damage from loud noise is
often undetectable until it is too late, this manufacturer and the Electronic Industries Association’s Consumer Electronics Group recommend you avoid prolonged exposure to excessive noise. This
list of sound levels is included for your protection.
Decibel
Level Example
30 Quiet library, soft whispers
40 Living room, refrigerator, bedroom away from traffic
50 Light traffic, normal conversation, quiet office
60 Air conditioner at 20 feet, sewing machine
70 Vacuum cleaner, hair dryer, noisy restaurant
80 Average city traffic, garbage disposals, alarm clock
at two feet.
THE FOLLOWING NOISES CAN BE DANGEROUS
UNDER CONSTANT EXPOSURE
90 Subway, motorcycle, truck traffic, lawn mower
100 Garbage truck, chain saw, pneumatic drill
120 Rock band concert in front of speakers, thunderclap
140 Gunshot blast, jet plane
180 Rocket launching pad
Information courtesy of the Deafness Research Foundation.
Published by Pioneer Electronic Corporation.
Copyright © 1999 Pioneer Electronic Corporation.
All rights reserved.
PIONEER ELECTRONIC CORPORATION 4-1, Meguro 1-Chome, Meguro-ku, Tokyo 153-8654, Japan
PIONEER ELECTRONICS [USA] INC.
PIONEER ELECTRONICS OF CANADA, INC.
PIONEER ELECTRONIC [EUROPE] N.V.
PIONEER ELECTRONICS AUSTRALIA PTY. LTD.
PIONEER ELECTRONICS DE MEXICO S.A. DE C.V.
<99C00EE0Z00> Printed in China <66780-MDU>
P.O. BOX 1540, Long Beach, California 90801-1540
300 Allstate Parkway, Markham, Ontario L3R OP2, Canada
Haven 1087, Keetberglaan 1, 9120 Melsele, Belgium TEL: 03/570.05.11
178-184 Boundary Road, Braeside, Victoria 3195, Australia, TEL: [03] 9586-6300
San Lorenzo Num 1009 3er piso Desp. 302 Col. Del Valle, Mexico D.F. C.P. 03100 TEL: 5-688-52-90
 Loading...