

Pioneer DVR-105 Owners manual

Pioneer DVR-105
Installation Guide
And
User’s Manual

Trademark:
All of the company or product names mentioned in this manual are the trademarks or
registered trademarks of their respective holders.
Disclaimer:
All of the contents in this manual are subject to change without prior notice.
The manufacturer makes no representations or warranties with regard to the contents
hereof and reserves the right to revise this manual without obligation to notify any
person. Manufacturer shall not be liable for any technical or editorial errors or
omissions contained in this manual, or for any damage, direct or indirect, from
discrepancies between the manual and the product it describes. Manufacturer
assumes no responsibility, directly or indirectly, for financial losses or claims from
third persons resulting from the use of this product and any of its functions.
Safety Notice:
1. This equipment should not be exposed to water or other liquids in order to avoid
danger of electric shock.
2. Place the power cord such a way that people cannot step on it.
3. Do not place anything over the power cord.
4. Do not cover the openings; the openings on the equipment are for air convection
hence protects the equipment from overheating.
5. Do not attempt to remove the cover of this equipment.
6. If any of the following situations arises, have the equipment checked by a service
personnel:
The USB connector is damaged.
The power cord or connector is damaged.
Liquid has penetrated into the equipment.
The equipment has dropped and damaged.
The equipment has obvious sign of breakage.

Limited Warranty
This product is warranted against manufacturing defects for the period of one year.
The warranty period commences on the date of purchase from the authorized
reseller/retailer.
Your original purchase invoice, showing the date of purchase of the product is your proof
of the date of purchase.
During the warranty period, defective parts will be repaired or replaced. There will be no
charge for labor or parts during the one-year warranty period from the date of purchase.
Any shipping or other cost such as customs incurred costs, etc… is customers’
responsibility.
This warranty does not cover any failure resulting in loss to software, data, lost profits,
lost savings, any incidental damages or other economic consequential damages due to
accident, abuse, misuse, negligence and acts of God.
Technical Support and Service
For warranty service and assistance, it is recommended that you contact the place of
purchase to arrange for return and/or repair of the product.
Introduction
Thank you for purchasing DVR-105. In this manual, we will explain how to install your
drive. Please read this manual carefully before usage.
Note: the front panel and rear panel shown on the pictures below may not look exactly as
the product.
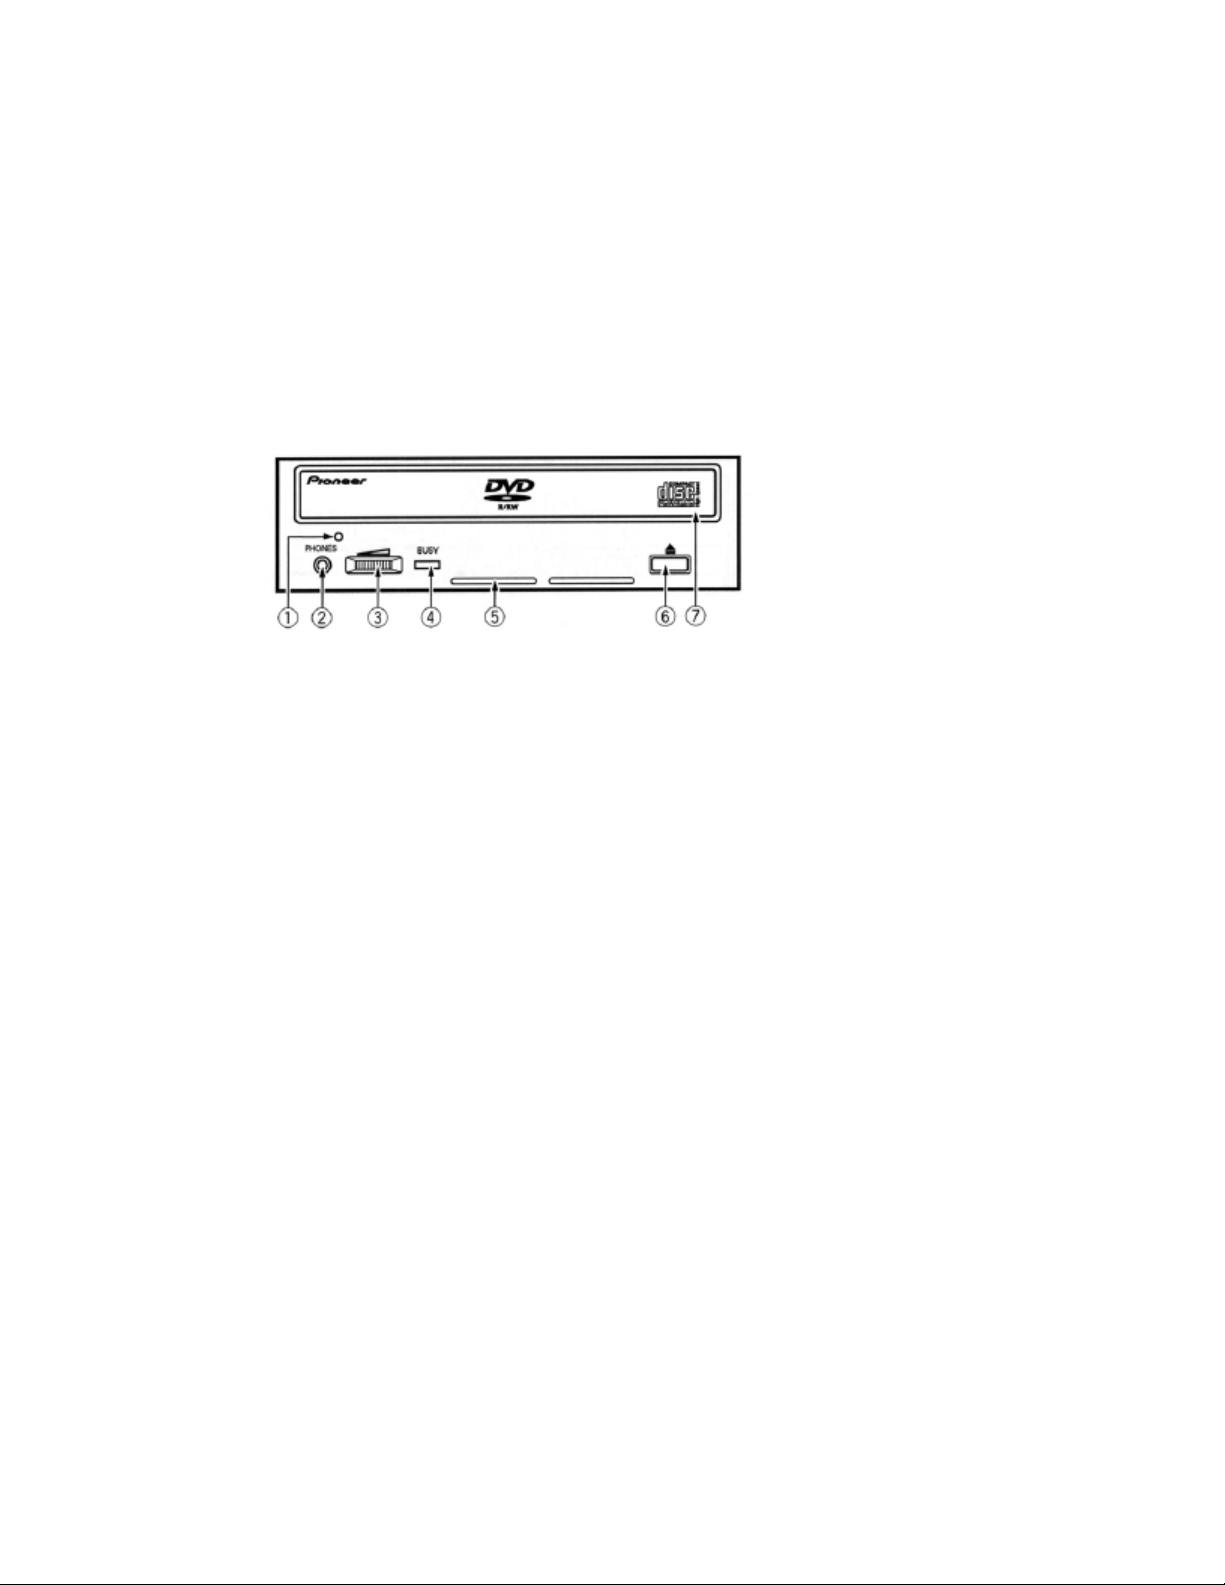
Front Panel
1. Emergency Eject Hole
When the drive cannot eject disc tray due to power failure or any other reasons,
use a 2-inch long thin pole & push the emergency eject hole on the front panel to
eject. (This function is only to be used in emergency cases. Do not use this
function as a normal practice to prevent mechanical damage. Make sure the
system is off when you do this).
2. Headphone Jack
To connect a headphone
3. Volume Control
To adjust volume output of headphone jack only. It has no affect to audio output
connectors on the rear panel.
4. Busy Indicator LED
When a disc is being accessed, the light will shine or flash.
5. Ventilation Holes — do not block
6. Eject Button
Eject or bring in the disc tray
7. Disc Tray
This is the tray for the disc
 Loading...