

Page 1
Instruction Manual
Models DVD-204 and DVD-212
Control Units for Pioneer DVD Players
New with Version 2.03
On-Screen Programming
See Addendum at back of this manual
Issued Febrary 2002
Revised May 2003
Museum
Technology
Source, Inc.
323 Andover Street
Wilmington Massachusetts 01887
phone 800.729.6873
978.657.3898
fax 978.657.7132
info@museumtech.com
www.museumtech.com
Page 2
SETUP SHEET
DVD-204 AND DVD-212 CONTROL UNITS
FOR USE WITH PIONEER DVD PLAYERS
Introduction:
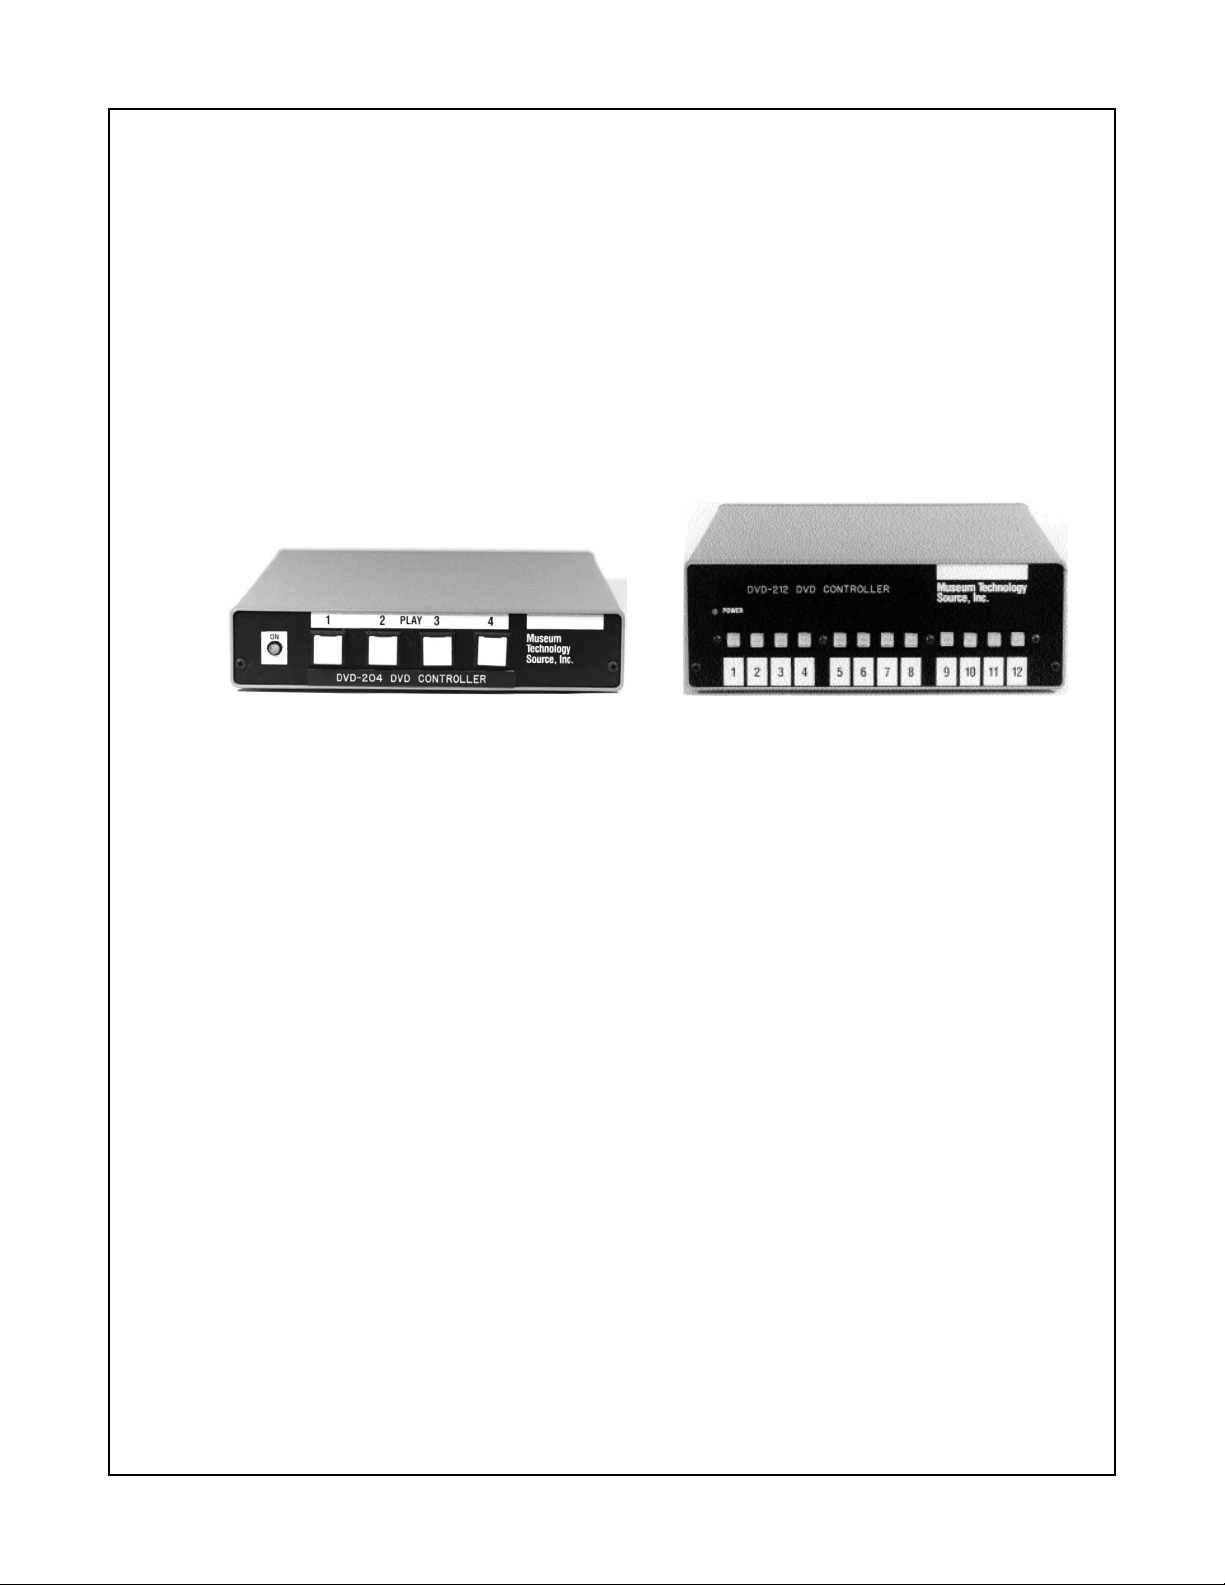
The DVD-204 and DVD-212 are controllers for use with the Pioneer DVD-7200 and DVD-7400 Industrial DVD
Players. The DVD-204 and DVD-212 are identical except for the number of selection pushbuttons: 4 vs 12.
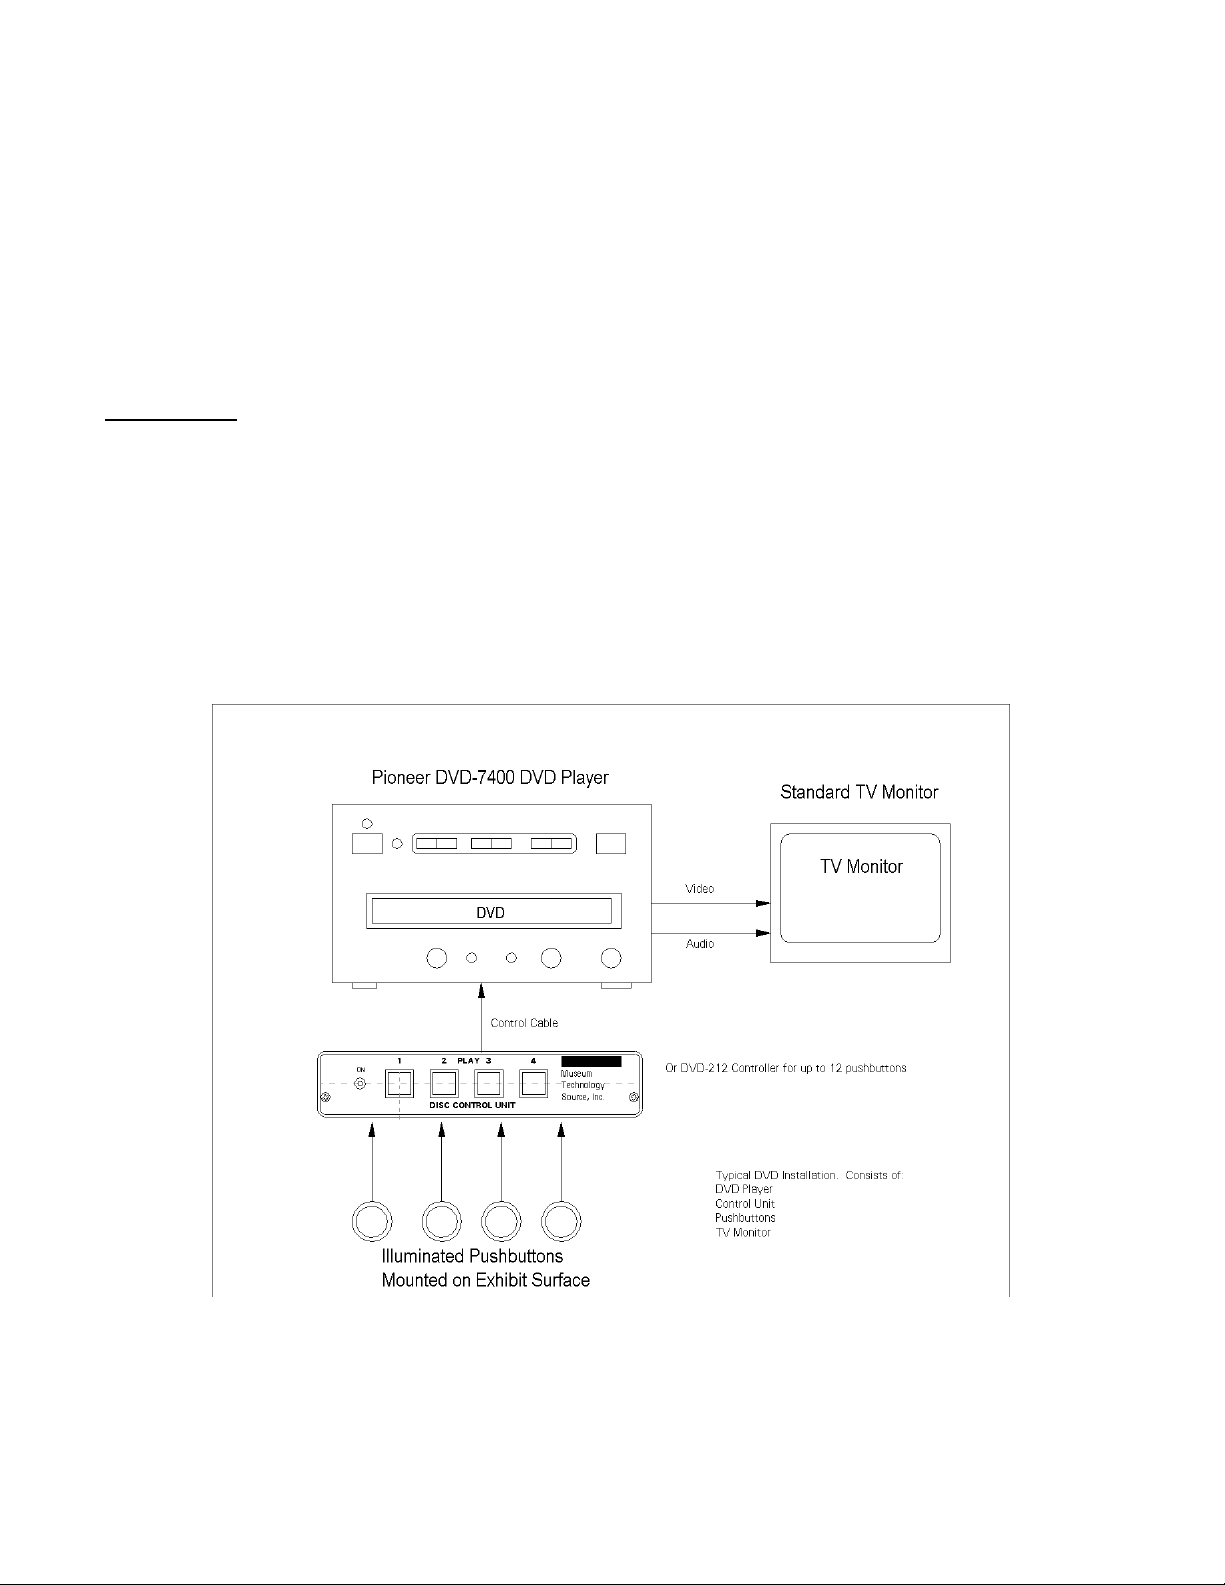
Typically, the controller is mounted out of sight in close proximity to the DVD player. Activation is by means of
pushbuttons mounted on the exhibit surface, where they are accessible to the viewing public.
When pushed, each pushbutton will cause the Pioneer DVD player to play a particular video selection. When a
selection is not playing in response to a button push, the DVD-204 / 212 can be set to play another selection to
serve as an attract loop. Pushing any button will interrupt the attract loop and the unit will immediately begin playing the new selection.
Typical Installation showing Controller, Pushbuttons, Player and
Monitor. Power connections not shown.
Page 3

Connection to the external pushbuttons is made via standard telephone RJ-11 modular connectors. Two of the 4 wires
(Green and Red) are used to start the selection, while the other two wires (Yellow and Black) provide 12 volts DC to illuminate the pushbutton lamp.
Connection to the Pioneer DVD player is via the supplied cable, with a 3 pin DIN circular connector on one end, and a
15 pin male “D” connector on the Pioneer end. Communication between the controller and the player is RS-232 serial
data at 9600 Baud.
Prior to final installation, two steps must be taken: setting up the Pioneer player, and programming the DVD-204 or
DVD-212 with the desired frame numbers or chapters taken from the DVD disc being used.
Pioneer DVD Setup:
It is necessary to configure the Pioneer DVD player to work in this application. As shipped from Pioneer, the factory
default settings need to be changed. This settings are all in the Pioneer’s Advanced Setup menu. It would be a good
idea to review the Pioneer manual for more detail, however, the basic technique to to hold down the SETUP button on
the Pioneer remote control until the following menu appears on the screen. Use the UP and DOWN buttons to scroll
through the menu, and use the RIGHT and LEFT buttons to change a setting. Press ENTER to save the settings.
Remove the DVD disc from the player before changing the settings. If the disc is in, the settings will not be
saved. Keep in mind that the DVD-204 or DVD-212 will not work until the Pioneer player is configured. For
instance, the DVD-204/212 operate at 9600 Baud, while Pioneer’s factory default setting is 4800 Baud. Here are the
required settings:
Settings for the Pioneer 7200 (not in production as of Feb. 2000) are basically the same as for the 7400. To access the
7200’s menu, hold down the MENU button on the remote control. Settings are as follows:
ADV SETUP page 1 /2
WEEKLY TIMER OFF
POWER ON START T00:C00
TITLE PLAY MODE SINGLE
REPEAT MODE OFF
BAUD RATE 9600bps
TRAY LOCK OFF
BLACKBOARD LOCK OFF
STACK MODE OSD ON
REV STEP/REV PLAY VOBU
ADV SETUP page 2 /2
PLAYER CONTROL PANEL SELECTABLE
SETUP LOCK (MOUSE) ON
EXTERNAL OPTION SW STANDARD
SYNCH OUT (DURING SQ) ON
EXTERNAL SYNC OFF
AV SYNC COMPENSATE ON
Settings for Pioneer 7400 DVD Player
Page 4

MENU PAGE 1 /2
WEEKLY TIMER OFF
POWER ON START T01:C01
TITLE PLAY MODE SINGLE
REPEAT MODE OFF
BAUD RATE 9600bps
TRAY LOCK OFF
STILL MODE FIELD
D.R. COMP OFF
MENU PAGE 2 / 2
MARK FRAME SQUELCH OFF
SQUELCH DURING SEARCH ON
SYNC OUT (DURING SQ) ON
STACK MODE OSD OFF
Settings for Pioneer 7200 DVD Player
Preparing for Programming:
Reviewing the DVD Disc:
Connect the Pioneer player to the video monitor such that the DVD disc may be viewed normally. Place the disc
in the player and press the Play button, either on the player itself or on the Pioneer remote control. Press the
DISPLAY button. Pressing the DISPLAY button a second time should display the frame number count. Scan
through the disc, writing down the starting and ending frame numbers for each desired selection. If an attract loop
is to be used, make note of the start and stop frame numbers also. These numbers will be assigned to the buttons on the DVD-204/DVD-212.
If no video is to be played between button pushes, locate a frame of black and make a note of the number. This
will be entered as a still frame. These numbers will be assigned to the buttons on the DVD-204/DVD-212.
If chapters are being used, make a note of the desired chapter numbers. Keep in mind when using chapters that
there must be one more chapter on the disc than will actually be played. This is because of the Pioneer command protocol. For example, to play chapter 3, the player is instructed to seek to the beginning of chapter 3, and
play to the beginning of chapter 4. Hence, there must always be an extra chapter at the end. If your disc does
not have this, then use the frame mode of addressing.
In preparing the disc, a minimium of “authoring” is required. No commands should be encoded on the disc. All
control functions are taken care of by the DVD-204/DVD-212. Problems arise if a disc has been authored to
“have a mind of its own”; in other words to have been set up such that the disc may be accessed, using the
remote control, via a title screen. In this case all the “intelligence” resides in the DVD-204/212. Discs that are
authored to play on their own will frequently present will conflicts as to who is in charge.
Page 5

Configuring the computer used for programming:
Double click on the Hypertrm.exe icon. The program will open with a New Connection dialog box, with the instruction to
enter a name and select an icon. Enter a name of your choosing, such as DVD-204, or the name of the product you are
about to program. Choice of icon is immaterial. Click OK.
The next dialog box will ask for a phone number. Go to the 4thbox down, CONNECT USING, and select DIRECT TO
COM1. (This assumes that COM port 1 is free on your machine, sometimes the internal modem occupies this position.
If this is the case, select COM2). Click OK
The next dialog box is entitled PORT SETTINGS. Use the following settings:
Baud Rate 9600
Data Bits 8
Parity None
Stop Bits 1
Flow Control None
.
Click OK. The main screen will appear, and at the bottom left the message “Connected” will appear.
Connect the PC-9 programming cable from the 9 pin COM port on the back of the PC to the 5 pin circular connector on
the back of the Museum Technology product. Make sure power is connected. Press the red PROGRAM button on the
back of the Museum Technology control unit; the red LED should illuminate, and the programming menu should appear
on the computer screen.
Trouble Shooting:
In virtually all cases, problems may be traced to having the wrong COM port selected. If the computer has more than
one 9 pin connector on the back, try the other one.
If gibberish appears, this is generally due to having the wrong baud rate selected.
Keep in mind that the Museum Technology box just sends the main menu immediately after the red PROGRAM button
has been pushed; to get the main menu again, merely press the RESET button and then the PROGRAM button.
If any changes are made in Hyperterminal, they will not take effect until a disconnect has been made, and a reconnection established. To do disconnect, click on the icon of a phone off the hook. The message on the lower left of the
screen will now say Disconnected. Reconnect by clicking on the icon of the phone on hook.
Programming the DVD-204 /DVD-212
Once communication has been established between the PC and the DVD-204 / DVD-212 it is a simple matter to type in
the frame or chapter numbers, as well as to set the desired options. Please refer to the following programming example
for the available commands and settings. In this example, what appears on the computer screen is on the left side of
the page in courier while the description is on the right.
Page 6

Museum Technology Source, Inc.
DVD Controller model DVD-204
Player: Pioneer DVD-V7200/7400
Firmware version 1.22
(C)2000 Museum Technology Source Inc.
For further information contact:
Museum Technology Source Inc.
323 Andover Street
Wilmington, MA 01887
Phone: (800)729-6873 or (978)657-7132
Fax: (978) 657-7132
Email: info@museumtechnology.com
———- Main Menu ———A = select address mode (FRAME, CHAPTER, or
CHAPTER start/FRAME end)
B = view or edit a Button’s selection
I = view or edit the Idle selection
T = Test the buttons and lamps
O = go to Options menu
Please choose a command: A
Current addressing mode is: CHAPTER.
Would you like to change this (Y/N)? Yes
C = CHAPTER
F = FRAME
S = CHAPTER start, FRAME end
Please choose a command: F
— Resetting Defaults —
*** Programming: done ***
Current addressing mode is: FRAME.
———- Main Menu ———A = select address mode (FRAME, CHAPTER, or
CHAPTER start/FRAME end)
B = view or edit a Button’s selection
I = view or edit the Idle selection
T = Test the buttons and lamps
O = go to Options menu
Please choose a command: B
Which button’s selection do you want to
view or edit?
Button 1 plays from frame 1000 to frame 1100.
Do you want to change this (Y/N)? Yes
Enter the start FRAME for the button
and press RETURN: 12
Enter the end FRAME for the button
and press RETURN: 600
*** Programming: done ***
Programming Example
DVD-204 / DVD-212
Pressing the red “Program” button on the back
of the DVD-204 / DVD-212 will cause this
main menu to appear
Units are shipped set to work with Chapters. In
this instance, we wish to use Frame Numbers,
hence typing A will allow us to select Frame mode by typing
F. In general Frame mode offers the most versatility. In the
following examples frame numbers will be used. If the disc
has been prepared with Chapters, they may also be used.
Chapter Start / Frame end is primarily used with the older
Pioneer 7200 players, which were much slower seeking
frames than chapters. The Pioneer 7400 model overcame
this issue.
Selecting Chapter
, Frame, or
Chapter Start/Frame End
Having already determined by Start and Stop frame numbers for each selection, it is a simple matter to enter them.
Type B for the Button Menu, then type the number of the
Button you wish to program.
Enter the Start frame number and press enter on the keyboard. Then type the Stop frame and press Enter again.
The new frame numbers are displayed.
In this example frame 12 is entered as the new Start frame,
while from 600 is the new stop frame.
Programming the Buttons
Page 7

Button 1 plays from frame 12 to frame 600.
———- Main Menu ———A = select address mode (FRAME, CHAPTER, or
CHAPTER start/FRAME end)
B = view or edit a Button’s selection
I = view or edit the Idle selection
T = Test the buttons and lamps
O = go to Options menu
Please choose a command: B
Which button’s selection do you want to
view or edit? 2
Button 2 plays from frame 2000 to frame 2100.
Do you want to change this (Y/N)? Yes
Enter the start FRAME for the button
and press RETURN: 650
Enter the end FRAME for the button
and press RETURN: 1500
*** Programming: done ***
Button 2 plays from frame 650 to frame 1500.
———- Main Menu ———A = select address mode (FRAME, CHAPTER, or
CHAPTER start/FRAME end)
B = view or edit a Button’s selection
I = view or edit the Idle selection
T = Test the buttons and lamps
O = go to Options menu
Please choose a command: I
When idle, the player plays from FRAME 13000
to FRAME 13100.
Do you want to change this (Y/N)? Yes
When no selection is running,
the player can freeze on a single frame
or play moving video.
Do you want the player to
play moving video (Y/N)? Yes
Enter the start FRAME for the idle selection
and press RETURN: 7000
Enter the end FRAME for the idle selection
and press RETURN: 7500
*** Programming: done ***
When idle, the player plays from FRAME 7000
to FRAME 7500.
———- Main Menu ———A = select address mode (FRAME, CHAPTER, or
CHAPTER start/FRAME end)
B = view or edit a Button’s selection
I = view or edit the Idle selection
T = Test the buttons and lamps
O = go to Options menu
Main Menu (again)
Here Button 2 is being set to play from
frame 650 to 1500
Main Menu
Programming the Idle or
Attract Loop
When not playing in response to a Button press, the
DVD-204 / 212 will cause the player to repeatedly play
a selection of the disc. This can be either moving video
or a still frame. If a black screen is desired, locate a
frame of black on the DVD and program it in as a still
frame.
For moving video, start and stop frame numbers are
entered as above in the button programming example.
In this example, the unit is set to play from frame 7000
to frame 7500 while awaiting a button press.
Confirmation of settings
Page 8

Please choose a command: T
Testing buttons and lamps.
Type any letter to stop.
Button 1 pressed...released.
Button 2 pressed...released.
Button 3 pressed...released.
Button 4 pressed...released.
Done testing buttons.
———- Main Menu ———A = select address mode (FRAME, CHAPTER, or
CHAPTER start/FRAME end)
B = view or edit a Button’s selection
I = view or edit the Idle selection
T = Test the buttons and lamps
O = go to Options menu
Please choose a command: O
——— Options Menu ——L = view or edit button 1 Lamp inversion
I = view or edit Interruptibility
R = view or edit button 4 Reset
S = view or edit Slave Delay
C = Clear all button selections
M = go back to Main menu
Please choose a command: L
Button 1’s lamp is now normal.
Do you want to change this (Y/N)? Yes
Do you want button 1’s lamp to be inverted
(Y/N)? Yes
*** Programming: done ***
Button 1’s lamp is now inverted.
——— Options Menu ——L = view or edit button 1 Lamp inversion
I = view or edit Interruptibility
R = view or edit button 4 Reset
S = view or edit Slave Delay
C = Clear all button selections
M = go back to Main menu
——— Options Menu ——L = view or edit button 1 Lamp inversion
I = view or edit Interruptibility
R = view or edit button 4 Reset
S = view or edit Slave Delay
C = Clear all button selections
M = go back to Main menu
Please choose a command: I
Button selections can be uninterruptible (they
always play to the end) or interruptible (they can
be interrupted by pressing another button). If
Testing the Lamps and Buttons
Typing the letter T enables the button and lamp test function.
When this is done, pressing any of the front panel buttons
will cause the button to illuminate. This function can be useful in testing buttons mounted remotely. It is also useful as a
quick check of the computer - controller connection.
Options Menu
List of Options
Button 1 Lamp Inversion
Normally, the pushbutton lights when it has been pressed, to
indicate which selection is playing. In special circumstances
it might be desirable to have button 1 illuminated when it is
not playing. This is useful when the button is located in a
darkened room. Since this function only applies to button 1,
it is best used in single-button applications.
Interruptibility or Button Lock-out Function.
Page 9

interruptible, a safe time can be set, specifying
the minimum amount of time before a selection can be
interrupted.
Selections are now interruptible
after 0 seconds.
Do you want to change this (Y/N)? Yes
Do you want button selections to be
interruptible (Y/N)? No
*** Programming: done ***
Selections are now uninterruptible.
——— Options Menu ——L = view or edit button 1 Lamp inversion
I = view or edit Interruptibility
R = view or edit button 4 Reset
S = view or edit Slave Delay
C = Clear all button selections
M = go back to Main menu
Please choose a command: R
Button 4 can be either a normal
button or an instant reset button. If it is
an instant reset button, then pressing it will
immediately stop any other button’s program,
regardless
of the interruptibility and safe time settings.
Button 4 is now a normal button.
Do you want to change this (Y/N)? Yes
Do you want button 4 to be
an instant reset button (Y/N)? Yes
*** Programming: done ***
Button 4 is now an instant reset button.
——— Options Menu ——L = view or edit button 1 Lamp inversion
I = view or edit Interruptibility
R = view or edit button 4 Reset
S = view or edit Slave Delay
C = Clear all button selections
M = go back to Main menu
Please choose a command: S
Slave Delay is set to 0 tenths of seconds
Do you want to change this (Y/N)? Yes
How many tenths of seconds delay would you like? 10
*** Programming: done ***
——— Options Menu ——L = view or edit button 1 Lamp inversion
I = view or edit Interruptibility
R = view or edit button 4 Reset
S = view or edit Slave Delay
C = Clear all button selections
M = go back to Main menu
Interruptibility refers to the action of the pushbuttons
while a selection is playing. If the buttons are set to
be non-interruptible, they remain locked out while the
selection is playing. If the buttons are set to be interruptible, a press of a button while any selection is
playing will cause the system to immediately play the
new selection. It is also possible to set a “safe time”
during which the buttons are locked out, becoming
active again after the “safe time” period.
Button 4 (or Button 12) Reset
This function converts the last pushbutton (#4 on
the DVD-204; #12 on the DVD-212) from a normal
selection button to an “instant reset” function.
When configured for instant reset, pressing the button will cause the player to revert immediately to its
Idle function. Instant reset over-rides any button
lock-out settings. This function can be useful when
the selections are of great length, and the buttons
have been set to non-interruptable (locked out)
confirming button 4 is now instant reset
Slave Delay
Multiple Player Inst
allations
When a DVD-204 / DVD-212 is used to drive more
than one DVD player ( using a special cable) the
Slave Delay should be set for 1 second (10 tenths).
This is to ensure that the slowest of the players had
had sufficient time to carry out its instructions. Slave
Delay refers to the amount of time that the players
sit on their first frame before actually starting to play.
If only one player is used, Slave Delay should be set
to zero.
Page 10

This completes the programming of the control unit. Unplug the Programming Cable from the back of the unit,
and store it away for the next programming session. Connect the supplied LDV cable (3 pin round to 15 pin)
from the player to the controller. At this point it is recommended that both the controller and the player have their
power shut off for 10 seconds. When they are turned back on, the DVD-204 /DVD-212 will wait 45 seconds
before sending any commands to the player. This is to ensure that the player has had time to spin up. During this
time, the red “Program” light on the back of the controller will wink. When it goes out, the player will go to its Idle
(or Attract) sequence, and the pushbuttons will be enabled. Note that the pushbuttons will only illuminate once the
player is up to speed.
Player and Programming Cable Pinouts
PC-9 Programming Cable
Page 11

Rear Panel Connections, DVD-204 and DVD-212
Page 12

ON-SCREEN PROGRAMMING
Addendum to DVD-204 / DVD-212 Manual
Effective with version 2.03, most programming tasks can be
accomplished without having to connect the DVD-204 /DVD-212
to a computer. Using only a DVD-204 /DVD-212, a Pioneer
7200 /7400 DVD player, and a video monitor, it is possible
to program the DVD-204 /DVD212. Please note that only
frame numbers (not chapters) can be used when programming
on-screen. Many of the other setup options may be implemented by the on-screen technique.
First, set up the DVD player, the video monitor, and the
DVD-204 /DVD212. The DVD to be used must be in the player.
Apply power to all three components. Make sure that the
DVD player and video monitor are turned on. Press the red
"Program" button on the back of the DVD-204 /DVD-212. The
monitor screen should now display the model and version
number as well as information on how to contact Museum
Technology Source. A few seconds later, the screen will
display:
At this point, pressing
button 1 on the front of the DVD-204 /DVD-212 will
instruct the DVD-204 /DVD-212 that you wish to place new
frame numbers into memory, or to determine what frame numbers are currently stored. Note: whenever a button can be
usefully pressed, it will be flashing: here, buttons 1
though 4 are chasing.
Note:
"PROGRAM button" refers to the red button on the
rear panel of the DVD-204 or DVD-212
1
***Main Menu***
View or Edit...
1-Button Program
2-Idle Program
3-Button 4 Reset
4-Option Menu
PROGRAM button-Exit & Run
Button Idle Reset Options
1 2 3 4
Page 13

Upon pressing button 1, the following message will appear
on the screen:
Press the BUTTON
you would like to VIEW
or EDIT:
> Press a Button <
In this example let's say that we wish to program button
number 3; we simply press button 3 to do so. The screen
will now say:
Button 3 Plays
Frames: 3000 to 3100.
Change this?
Yes No
123 4
Button: 3
Select new START frame.
Use player front panel
or remote control
Press 1 to select.
Start
1234
2
This indicates that button #3’s memory is at the factory
default setting. If the unit had been previously
programmed, the start and stop frame numbers would appear
instead of “Frames: 3000 to 3100.” Since we do indeed
wish to change this, we press button #1 to answer “Yes” to
the question. In response, the screen will display:
Page 14

At this point, you may use the Pioneer DVD player's controls as you normally would, to find the exact frame on
the disc to begin your button sequence. In this example,
let's say frame "5678". After the start frame is located
on the DVD, press button 1 on the DVD-204 /DVD-212. As
mentioned earlier, only button 1 will be flashing now.
Upon pressing button 1, the following screen will appear:
Button: 3
Select new END frame.
Use player front panel
or remote control
Press 1 to select.
End
1 2 3 4
Using the same procedure as used in finding the start
frame, use the player's controls to locate the last frame
of the sequence. For this example, let's say frame "5800".
Press button 1, which will be flashing, when you are done.
In this example, the screen will now be reading:
Button 3 plays
Frames: 5678 to 5800.
Change this?
Yes No
1 2 3 4
Since these are the desired settings, we press button 4 to
indicate that no change is desired (Here, frames 5678 and
5800 are used as an example, in reality, the actual frame
numbers would be displayed).
The screen will now revert to the main menu where we
began. Use the above technique to program the remaining
buttons. It is not necessary to program more buttons than
you are using. If your application calls for just one button, that is all that needs to be programmed. When you
have finished all programming, return to the main menu and
press the red "Program" button on the back of the DVD-204
/DVD-212, which
3
Page 15

is the Exit and Run command. The player will now revert to it's normal
state, ready for use.
You may wish to program what the DVD does between plays. This is done on
the main menu by pressing button 2 to bring up the Idle program. By following the steps shown on-screen, you may have the video freeze on a
still frame until a button is pushed, play from a start frame to an end
frame over and over, or do nothing.
From the main menu, pressing button 4 will take you to the Option menu,
which includes the Interruptability, slave delay, and button test functions. These are described earlier in this manual.
Issued:
February 20, 2002
Museum Technology Source, Inc.
Info@museumtech.com
www.museumtech.com
(800)729-6873 or (978)657-3898
Page 16

VIDEO
VIDEO
Master Player
All Players Must Be Set
To 9600 Baud
LDV-2 Splitter Cable
OR: LDV-3 for 3 players
LDV-4 for 4 players
Note: SLAVE DELAY setting
provides a time delay in case
the Slave player is slower in
seeking back to the start
frame than the master player.
MONITOR
OR PROJECTOR
Pioner DVD Players
Models DVD-7400, DVD-7300, or DVD-7200
DVD DVD
DVD-204 OR DVD-212 CONTROL
SET "SLAVE DELAY" TO 1 SECOND
OR PROJECTOR
MONITOR
Slave Player "A"
Note: Although only 2 players are shown, the
hookup for 3 or 4 players is similar.
For Continuous (Repeat) Play:
Program control unit's "Idle" function to desired
Chapter (or start and stop frames).
System will then repeatedly play selection.
System will start automatically when power
is applied.
If Slave player does not start
increase Slave Delay time.
Usually 1 second (10 tenths)
is adequate.
MARCH 98 MPC
Revised December 21 1999
Revised and Issued 4-21-2001
LDV_2_DVD.FCW
"Slave Delay" introduces a slight pause at the
beginning. This allows extra time for the "slave"
players to be ready to play, should one or more
of them take longer to seek to the start point than
the "Master" took. This is virtually always less
than one second.
Minor revision July 1 2004
Multi-Player Hookup
Museum Technology Source Inc.
323 Andover St. Wilmington MA 01887
800-729-6873 www.museumtech.com
Page 17

Museum Technology Source, Inc.
NOTES ON PROGRAMMING
MUSEUM TECHNOLOGY CONTROL
UNITS WITH A WINDOWS BASED PC
All versions of Windows contain a terminal program, HYPERTERMINAL, which
works quite well for programming Museum Technology control units, such as HD
and DVD (and also VDC controllers when being used with a long-play video disc
or a Sony player).
If you are using Windows 98 or XP, from the START menu (lower left of screen
usually), go to the PROGRAMS menu, then to the ACCESSORIES menu, then to
COMMUNICATIONS, then to HYPERTERMINAL.
If you are using Windows 95, the steps are the same, except there is no COMMU -
NICATIONS menu. Go directly to HYPERTERMINAL from ACCESSORIES.
Double click on the HYPERTERM.EXE icon (may just say HYPERTRM). The program will open with a NEW CONNECTION dialogue box which asks you to enter
a name and select and icon. Enter the name of the product you are about to program, such as DVD-204. The choice of icon is immaterial. Click OK.
The next dialog box will ask for a phone number. Go to the fourth box down,
CONNECT USING, and select DIRECT TO COM1 (This assures that COM1 Port
is free on your machine. Sometimes the internal modem occupies this position. If
this is the case, select COM2). Click OK.
The next dialog box is entitled PORT SETTINGS. Use the following settings for
all DVD Controllers:
Baud 9600
Data Bits 8
Parity None
Stop Bits 1
Flow Control None
Note: For the LT-12, use a Baud setting
For HD-204 and HD-212 Adtec Hard Disc Controllers the Baud Rate is
38,400
323 Andover Street Wilmington, MA, 01887
800-729-6873 / 978-657-3898 Fax: 978-657-7132
www.museumtech.com / info@museumtech.com
Revised 7/03
Page 18

For Video Disc Controllers , such as the VDC-200A and VDC-212, use the same settings
except the Baud Rate is 1200. Click OK. Main screen will appear and at the bottom left
message “Connected” will appear.
Connect the programming cable from the 9-pin COM port on the back of the PC to the 5pin circular connector on the back of the Museum Technology product. Make sure power
is connected. Press the red PROGRAM button on the back of the Museum Technology
control unit. The red LED should illuminate and the programming menu should appear
on the computer screen.
Trouble Shooting
In virtually all cases, problems may be traced to having the wrong COM Port selected. If
the computer has more than one 9-pin connector on the back, try the other one.
If gibberish appears, it is generally due to having the wrong Baud Rate selected.
Keep in mind that the Museum Technology box just sends the main menu immediately
after the red PROGRAM button has been pushed; to get to the main menu again, merely
press the RESET button and the the PROGRAM button.
Any changes made in HYPERTERMINAL will not take effect until a disconnect has been
made and a reconnection established. To disconnect, click on the icon of a phone off the
hook. The message on the lower left of the screen will now say “Disconnected.”
Reconnect by clicking on the icon of the phone off the hook.
October, 1999
Revised March, 2000
Revised November, 2000
Revised July, 2003
323 Andover Street Wilmington, MA, 01887
800-729-6873 / 978-657-3898 Fax: 978-657-7132
www.museumtech.com / info@museumtech.com
Page 19

Addendum
Setup Instructions
Pioneer DVD-V5000 Player
April 2005
Like the Pioneer DVD-V7400 Player mentioned in the DVD-204 and DVD-212 Instruction
Manual, the Pioneer DVD-V5000 Player must also be configured prior to use. In order
for the player to be able to communicate with the control unit certain settings must be
made. The system will not work until these are done.
Locate the remote control supplied with the
Pioneer player, and install the batteries that
came with it.
Connect the player’s video output to the video
monitor using the appropriate cables.
Turn on the player and the monitor. Make
sure that there is no disc in the player.
Press and hold the HOME MENU button for
one second. The monitor screen will now
show the Advanced Setup Menu
(ADV.SETUP)
DVD-V5000
Remote Control
The Advanced
Setup Menu is
covered in
detail in
Chapter 9 of
the Pioneer
Instruction
Manual
Using the UP and DOWN arrow keys,
move to line 2 POWER ON START. Press
ENTER, and scroll down to 2. TITLE.
While TITLE flashes, use the UP and
DOWN buttons to input the number 1.
Press ENTER, and while CHAPTER is
flashing, use the UP and DOWN keys to
input the number 1. Press ENTER again to
confirm settings, then press RETURN to go
Page 20

Using the same technique,
make the following settings:
Title Play Mode Single
Key Lock OFF
Repeat Mode OFF
SERIAL PORT 15 Pin
BAUD RATE 9600 bps
EXTEND TERMINAL Standard
SYNC OUT (DURING SQ) OFF
The player is now set such
that when power is applied
to it, it will automatically
“wake up” on Title 1,
Chapter 1.
This completes the setup for the Pioneer DVD player.
Press the SETUP button to exit the menu. The player is now ready for use. Complete the
rest of the installation following the instructions in the DVD-204 / DVD-212 Manual
Created and issued April 21 2005
Museum Technology Source Inc.
www.museumtech.com
800-729-6873
 Loading...