


Pinnacle Studio for Dazzle
Version 1.0
Your Life in Movies
Copyright ©2013 Corel Corporation. All rights reserved.
Please respect the Rights of Artists and Creators. Content such as music, photos, video and celebrity images are protected by the laws of many countries. You may not use other people’s content unless you own the rights or have the permission of the owner.
This product or portions thereof are protected in the United States by one or more of the following United States Patents: 5,495,291; 6,469,711; 6,532,043; 6,901,211; 7,124,366; 7,165,219; 7,286,132; 7,301,092 and 7,500,176; and in Europe by one or more of the following European Patents: 0695094 and 0916136. Other patents are pending.
Mpegable DS 2.2 ©2004 Dicas Digital Image Coding GmbH. Portions of this product were created using LEADTOOLS ©1991-2006, LEAD Technologies, Inc. All rights reserved. Portions utilize Windows Media Technologies ©1999-2005 Microsoft Corporation MPEG Layer II Audio by QDesign Corp. This product is based in part on the work of the Independent JPEG Group.
No part of this manual may be copied or distributed, transmitted, transcribed, stored in a retrieval system, or translated into any human or computer language, in any form by any means, electronic, mechanical, magnetic, manual, or otherwise, without the express written permission of Corel Corporation.
Corel Corporation
385 Ravendale Drive
Mountain View, CA 94043, USA
2 |
Pinnacle Studio |
Table of contents
BEFORE YOU START |
IX |
Abbreviations and conventions .............................................................. |
ix |
Help and on-line help ............................................................................. |
xi |
CHAPTER 1: USING PINNACLE STUDIO |
1 |
The Library.............................................................................................. |
3 |
The Movie Editor and the Disc Editor..................................................... |
6 |
The media editors .................................................................................... |
7 |
The Player................................................................................................ |
8 |
Pinnacle Studio Projects .......................................................................... |
9 |
CHAPTER 2: THE LIBRARY |
11 |
Understanding the Library ..................................................................... |
14 |
Location tabs ......................................................................................... |
16 |
The Asset Tree ...................................................................................... |
17 |
Collections ............................................................................................ |
19 |
Managing Library assets ....................................................................... |
21 |
The Browser ......................................................................................... |
24 |
Thumbnails and details ......................................................................... |
25 |
Optional indicators and controls ........................................................... |
28 |
The Library preview ............................................................................. |
31 |
Using the Library .................................................................................... |
35 |
Choosing what to display ...................................................................... |
35 |
Tags ...................................................................................................... |
38 |
Correcting media ................................................................................... |
41 |
Video scene detection ........................................................................... |
42 |
Table of contents |
3 |
CHAPTER 3: THE MOVIE EDITOR |
51 |
The project timeline ................................................................................. |
55 |
Timeline fundamentals ......................................................................... |
55 |
The timeline toolbar .............................................................................. |
60 |
The timeline track header ..................................................................... |
67 |
Timeline audio functions ...................................................................... |
69 |
Editing movies ......................................................................................... |
69 |
Adding clips to the timeline .................................................................. |
71 |
Title Editor, voice-over ......................................................................... |
75 |
Deleting clips ........................................................................................ |
76 |
Clip operations ...................................................................................... |
76 |
Using the Clipboard .............................................................................. |
88 |
Speed .................................................................................................... |
89 |
Movies within movies ........................................................................... |
91 |
Transitions ............................................................................................ |
92 |
Clip effects ............................................................................................ |
98 |
Clip context menus ............................................................................... |
99 |
CHAPTER 4: MEDIA EDITING: CORRECTIONS |
101 |
Media editing overview ...................................................................... |
103 |
Correcting photos .................................................................................. |
108 |
Photo editing tools .............................................................................. |
109 |
Photo corrections ................................................................................ |
110 |
Correcting video .................................................................................... |
115 |
Video tools .......................................................................................... |
116 |
Video corrections ................................................................................ |
119 |
Correcting audio .................................................................................... |
122 |
CHAPTER 5: MEDIA EDITING: EFFECTS |
123 |
Effects in the media editors ................................................................ |
125 |
Effects on the timeline ........................................................................ |
129 |
The Settings panel .............................................................................. |
131 |
Working with keyframes .................................................................... |
133 |
Video and photo effects ...................................................................... |
135 |
Working with transitions .................................................................... |
140 |
4 |
Pinnacle Studio |
Pan-and-zoom ..................................................................................... |
141 |
CHAPTER 6: MONTAGE |
145 |
Note: Montage is disabled in the Pinnacle Studio for Dazzle version; upgrade to Pinnacle Studio 16 to use the Montage feature.
The Montage section of the Library ................................................... |
147 |
Using Montage templates ...................................................................... |
148 |
Montage clips on the timeline ............................................................. |
149 |
Anatomy of a template ........................................................................ |
151 |
Montage Editing .................................................................................... |
154 |
Using the Montage Editor ................................................................... |
155 |
CHAPTER 7: THE TITLE EDITOR |
157 |
Launching (and leaving) the Title Editor |
............................................ 159 |
The Library ............................................................................................ |
160 |
Creating and editing titles ..................................................................... |
166 |
Background settings ........................................................................... |
168 |
Look settings ...................................................................................... |
169 |
The Edit window ................................................................................ |
173 |
Text and text settings .......................................................................... |
175 |
The Layer List ....................................................................................... |
181 |
Working with the Layer List ............................................................... |
182 |
CHAPTER 8: SOUND AND MUSIC |
191 |
The Audio Editor ................................................................................... |
193 |
Audio on the timeline ............................................................................ |
204 |
Timeline audio functions .................................................................... |
204 |
Audio creation tools ............................................................................... |
211 |
The Voice-over tool ............................................................................ |
214 |
Table of contents |
5 |
CHAPTER 9: DISC PROJECTS |
217 |
Disc menus ......................................................................................... |
218 |
Adding disc menus ............................................................................. |
221 |
Previewing disc menus ....................................................................... |
223 |
Menu editing on the timeline ................................................................ |
225 |
Timeline menu markers |
225 |
Authoring tools |
226 |
The Chapter Wizard ............................................................................ |
229 |
The Menu Editor ................................................................................... |
232 |
Menu buttons ...................................................................................... |
233 |
The Disc Simulator ................................................................................ |
235 |
CHAPTER 10: THE IMPORTER |
237 |
Using the Importer .............................................................................. |
238 |
Importer panels ..................................................................................... |
240 |
The Import From panel ....................................................................... |
240 |
The Import To panel ........................................................................... |
243 |
The Mode panel .................................................................................. |
246 |
The Scene Detection Options window ................................................ |
249 |
The Filename panel ............................................................................ |
251 |
Selecting assets for import .................................................................... |
253 |
Import from file .................................................................................. |
253 |
Selecting files for Import .................................................................... |
254 |
Scan for assets .................................................................................... |
260 |
Import from DV or HDV camera ........................................................ |
261 |
Import from analog sources ................................................................ |
265 |
Import from DVD or Blu-ray Disc ..................................................... |
266 |
Import from digital cameras ............................................................... |
267 |
Snapshot ............................................................................................. |
269 |
6 |
Pinnacle Studio |
CHAPTER 11: THE EXPORTER |
273 |
Output to disc or memory card ............................................................ |
276 |
Output to file .......................................................................................... |
280 |
Output to cloud ...................................................................................... |
289 |
Output to a device ................................................................................. |
293 |
CHAPTER 12: SETUP |
297 |
Watchfolders ....................................................................................... |
298 |
Audio device ....................................................................................... |
298 |
Event logging ...................................................................................... |
298 |
Import ................................................................................................. |
298 |
Keyboard ............................................................................................ |
300 |
Preview ............................................................................................... |
301 |
Project settings .................................................................................... |
303 |
Storage locations ................................................................................. |
304 |
APPENDIX A: TROUBLESHOOTING ............................... |
305 |
Contacting support ................................................................................ |
306 |
Top support issues ................................................................................. |
307 |
Compatibility with past content .......................................................... |
307 |
Capture hardware compatibility .......................................................... |
310 |
Serial number information .................................................................. |
311 |
Error or crash while installing ............................................................. |
312 |
Hangs or crashes while launching ....................................................... |
314 |
Troubleshooting software crashes ...................................................... |
315 |
Export problems .................................................................................. |
320 |
Disc playback problems ...................................................................... |
321 |
Resources, tutorials and training ......................................................... |
323 |
APPENDIX B: VIDEOGRAPHY |
325 |
Creating a shooting plan ..................................................................... |
325 |
Editing ................................................................................................ |
326 |
Rules of thumb for video editing ........................................................ |
329 |
Soundtrack production ........................................................................ |
331 |
Title ..................................................................................................... |
332 |
Table of contents |
7 |
APPENDIX C: GLOSSARY |
333 |
APPENDIX D: KEYBOARD SHORTCUTS |
347 |
APPENDIX E: THE INSTALLATION MANAGER |
353 |
The Welcome Screen .......................................................................... |
355 |
Plugs-ins and bonus content ............................................................... |
357 |
Equipment requirements ..................................................................... |
358 |
INDEX |
361 |
viii |
Pinnacle Studio |

Before you start
Thank you for purchasing Pinnacle Studio. We hope you enjoy using the software.
If you are new to Pinnacle Studio, we recommend that you keep the manual handy for reference even if you don’t actually read it all the way through.
In order to ensure that your movie-making experience gets off on the right foot, please review the topics below before continuing to
Chapter 1: Using Pinnacle Studio. We also recommend consideration of the product’s equipment requirements, which are given on page 358 in Appendix E: The Installation Manager.
Abbreviations and conventions
This guide uses the following conventions to help organize the material.
Common terms
AVCHD: A video data format used by some high-definition camcorders, and for creating DVD discs that can be read on Blu-ray players. Successful editing of AVCHD files requires more computing power than other formats supported by Pinnacle Studio.
DV: This term refers to DV and Digital8 camcorders, VCRs and tapes.
HDV: A ‘high-definition video’ format that allows video in frame sizes of 1280x720 or 1440x1080 to be recorded in MPEG-2 format on DV media.
Before you start |
9 |
1394: The term ‘1394’ applies to OHCI-compliant IEEE-1394, FireWire, DV or i.LINK interfaces, ports and cables.
Analog: The term ‘analog’ applies to 8mm, Hi8, VHS, SVHS, VHS- C or SVHS-C camcorders, VCRs and tapes, and to Composite/RCA and S-Video cables and connectors.
Buttons, menus, dialog boxes and windows
Names of buttons, menus and related items are written in italics to distinguish them from the surrounding text, whereas window and dialog names are written with initial capital letters. For example:
Click the Edit menu button to open your menu in the Menu Editor.
Choosing menu commands
The right arrowhead symbol () denotes the path for hierarchical menu items. For example:
Select File Burn Disc Image.
Context menus
A ‘context menu’ is a pop-up list of commands that appears when you click with the right mouse-button on certain areas of the application interface. Depending where you click, a context menu may pertain either to an editable object (like a clip on an editing timeline), to a window, or to a zone such as a control panel. Once open, context menus behave just like the ones on the main menu bar.
Context menus are available in most parts of the Pinnacle Studio interface. Our documentation generally takes for granted that you know how to open and use them.
Mouse clicks
When a mouse click is required, the default is always a left-click unless otherwise specified, or unless the click is to open a context menu:
Right-click and select Title Editor. (Or, one might say, “Select Title Editor from the context menu.”)
x |
Pinnacle Studio |
Key names
Key names are spelled with an initial capital and are underlined. A plus sign denotes a key combination. For example:
Press Ctrl+A to select all the clips on the timeline.
Please refer to Appendix D: Keyboard shortcuts for a comprehensive table of available shortcuts.
Help and on-line help
Immediate help is available while you are working in Pinnacle Studio, both inside the program and on-line.
Help file: To open the Pinnacle Studio help file, press F1, or click the help button in the main menu bar and choose Help.
Tool tips: To find out what a button or other Studio control does, pause your mouse pointer over it. A ‘tool tip’ pops up, like ‘Help (F1)’ in the illustration above, to explain the control’s function.
Enhanced tool tips: For some features, more information is available through enhanced tool tips, which you can turn on by clicking the help button and choosing Show enhanced tool tips. These provide links to video tutorials with in-depth information If you don’t wish to have the link displayed, click the x button in the extended tool tip, or uncheck the option in the Help menu.
The extended tool tip for the Library tab.
Click the video icon to start the tutorial.
Before you start |
1 |
CHAPTER 1:
Using Pinnacle Studio
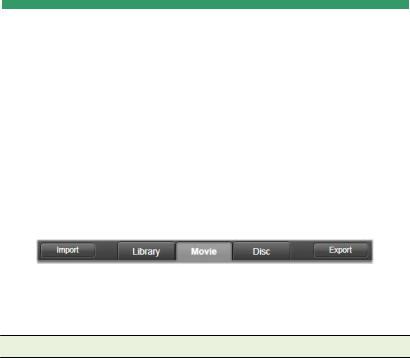
For a simple outline of the digital movie-making process, you don’t have to look any further than the central tab group of Pinnacle Studio’s main window. The same steps apply to any type of production, from an unpretentious slideshow with dissolves between each frame to a 3D extravaganza containing hundreds of carefullyarranged clips and effects.
Pinnacle Studio’s main control bar summarizes the movie-making process.
The Importer
Import, on the left, is a preparatory step. It involves procedures like ‘capturing’ video from your analog or DV camcorder, bringing in photos from a digital camera, and copying media files to your local hard drive from a network location.
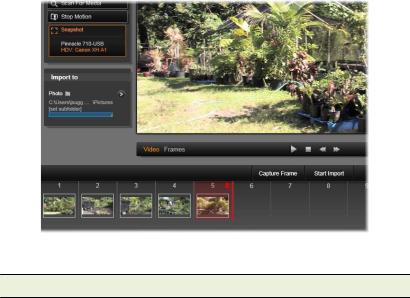
The Pinnacle Studio Importer provides tools for these tasks, along with a Snapshot feature for grabbing frames from video files, and a Stop motion tool for building up video frame-by-frame. See Chapter 10: The Importer for details.
File menu import commands: Choosing Import from the file menu has the same effect as clicking the Import tab: it opens the Importer. The menu provides three other import-related choices as well. Each
Chapter 1: Using Pinnacle Studio |
1 |
of these opens a Windows file dialog to permit import of files from a hard drive or other local storage.
•Import previous Pinnacle Studio Projects lets you load movie projects created with earlier versions of Studio.
•Import Studio for iPad App Projects lets you bring in projects exported from Studio’s companion app for the iPad.
•Quick Import lets you directly select ordinary media files – photo, video, audio and project – for import.
Principal controls in the Importer’s Snapshot tool.
The Exporter
At the other end of the movie-making process is Export. By the time you get to this stage, the hard part of the task is behind you. The creative energy that went into making your movie has paid off in a production that now lacks only one ingredient – an audience.
The Pinnacle Studio Exporter helps you over that last hurdle with tools for taking your movie to its viewers, whoever and wherever they might be. Create a digital movie file in the format of your choice, burn a DVD, or upload directly to destinations in the Cloud like YouTube and Vimeo, or to your personal Cloud-based storage area in Box.
2 |
Pinnacle Studio |

Like the Importer, the Exporter opens in a separate window, and returns to the main window after its work is done. Turn to Chapter 11: The Exporter to learn more.
Preparing to create a video file in the Exporter.
The central tabs
The three central tabs, Library, Movie and Disc, are where most of your work in Pinnacle Studio takes place. The first of these opens the main view of the Library, where you can ‘curate’ your media collections.
The other tabs open the two project editors, one for digital movies, and the other for disc projects, which are digital movies enhanced with interactivity in the form of DVD menus.
The Library
The Library is a cataloguing and management tool for all the filebased resources – or assets – that you can draw on when authoring. Almost all of the materials of your movie – video footage, music and audio files, and many specialized resources such as transitions and effects – originate as assets in the Library. Many Library assets are
Chapter 1: Using Pinnacle Studio |
3 |

supplied with Pinnacle Studio, and are available for royalty-free use. These include professionally-designed titles, DVD menus, and Montages in both 2D and stereoscopic 3D.
The Library uses watchfolders for keeping up automatically with the changing population of media files on your system. On the watchfolders page of the Pinnacle Studio Setup control panel, enter the names of your media directories, especially those that you update frequently. Thereafter the Library will scan those directories regularly for changes, and update itself as needed. See “Watchfolders” on page 298 for details.
Main view: When you click the Library tab, the Library takes over the main window. This ‘main view’ gives you spacious access to a number of cataloguing and search tools, including those for categorizing assets by means of ratings and tags, and those for creating user-defined asset collections.
Compact view: The ‘compact view’ of the Library squeezes virtually the whole functionality of the main view into a panel embedded within certain other windows, such as the Movie Editor and the Disc Editor. The primary purpose of the compact view is to allow assets to be brought into a movie or disc project from the Library by drag-and-drop.
The main view of the Library consists of navigation controls for exploring the catalog structure (left) and a browser for examining and selecting assets (right).
4 |
Pinnacle Studio |
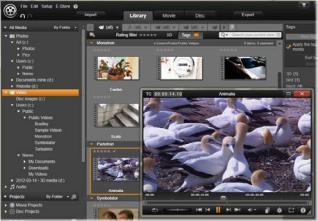
Player: The tools available from within the Library include the Player, a viewer that works for all media types handled by the application. When used from the main view of the Library, the Player opens in a separate window. When the compact Library is used, an embedded version of the Player appears in the same window. See “The Player” on page 8 for further information.
Previewing a Library video asset in the resizable Player window, with full transport controls including a shuttle wheel. You can work in the main window while the pop-up Player is open.
For comprehensive coverage of the Library and its uses, please see
Chapter 2: The Library.
The next step
The next step, once you know your way around the Library and have made any changes needed to the default set-up, is to start creating a movie.
Chapter 1: Using Pinnacle Studio |
5 |
The Movie Editor and the Disc Editor
Once you have gathered your materials together and organized them to your satisfaction in the Library, it’s time to get to work on a video or a slideshow. If you are working on a disc production specifically, you can immediately start work in the Disc Editor, which is just like the Movie Editor but has extra tools for creating and setting up DVD menus. The Disc Editor is described in Chapter 9: Disc projects.
If you aren’t planning on creating a disc, or aren’t sure, or if disc is only one of the output media you are targeting, the Movie Editor is the right place to start. Once your movie is completed, you can export it to the Disc Editor and add the menus.
The Movie Editor and the Disc Editor exist side-by-side, but apart from the export feature just mentioned, they do not interact. If you want, you can have a regular movie project and a disc project loaded simultaneously, and switch from one to another at will.
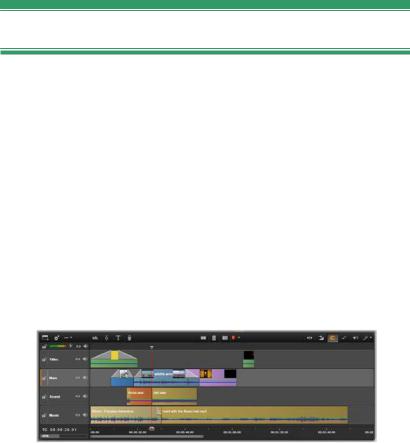
In both the Movie Editor and the Disc Editor, a multitrack timeline occupies the lower part of the display. Most of the ‘clips’ on the timeline come from the Library; a few types, like automatic background music, are generated with special tools.
6 |
Pinnacle Studio |

Both project editors include embedded versions of the Library and the Player in addition to the timeline display. To build a project, drag assets from the Compact Library onto the timeline tracks or Storyboard area of the project editor, where they are known as ‘clips’. Both the Movie Editor and the Disc Editor can be used with stereoscopic 3D as well as 2D material.
The preview type control above the Player lets you switch between viewing the current Library asset (‘source’) and the current timeline clip. In the Disc Editor, an additional preview type (‘menu’) lets you use the Player as an editor for linking disc menus to points on the timeline.
Timeline editing, a central activity in project authoring, is covered in detail in Chapter 3: The Movie Editor.
The media editors
Additional windows are often needed for working with particular types of media. In general, you can open an editor window appropriate to any asset or clip by double-clicking the item.
Corrections from the Library: The editors for the standard media types of video, photo and audio are particularly important. When invoked from the Library (by double-clicking an asset), each of these editors provides a suite of correction tools appropriate to its media type. These tools can be applied directly to Library assets in order to remove camera shake from video, trim unwanted material from a photo, or suppress audio hiss, to give just a few examples.
When a correction is applied to a Library asset, the media file is not modified. Instead the correction parameters are saved in the Library database. They can be altered at any time, or removed, as your needs dictate. The corrections you make in the Library are brought with the asset when you add it to your timeline as a clip.
Corrections from the timeline: When you open one of the standard media editors by double-clicking a timeline clip, the correction tools
Chapter 1: Using Pinnacle Studio |
7 |

are again available, but in this context they apply only to the clip in the project, not to the underlying Library asset.
Transitions and Effects: When they are invoked from a project’s timeline, the media editors also offer a wide-range of enhancements for all three media types in the transition in, transition out, and effects groups.
Transitions let you punctuate the passage of one clip to the next with anything from a barely perceptible dissolve to an audienceawakening flare.
Effects range from the practical (Brightness and contrast) to the theatrical (Fractal fire). They can be animated with keyframed parameters to any degree of complexity, providing innumerable ways to add creative interest to your productions. Some effects are particularly designed for 3D material, and it is even possible to give a 3D appearance to 2D footage (using the S3D depth control).
Pan-and-zoom: The Photo Editor provides one more tool, pan-and- zoom, of its own. Like the effects just discussed, pan-and-zoom can be animated with keyframes to create any desired combination of simulated pan and zoom camera moves within the boundaries of a single photo.
The Correction tools, and the media editors in general, are the subject of Chapter 4: Media editing: Corrections. The effects, and the pan-and-zoom tool, are described in Chapter 5: Media editing: Effects.
The Player
The Player is a preview screen in which you can examine Library media, play back your movie project, work on disc menus, and much more. In each window or context in which it is used, the Player exhibits somewhat different controls.
For an introduction to the Player and its basic controls, please see “The Library preview” on page 31. The various stereoscopic 3D viewing modes are discussed on page 34. For the use of the Player in
8 |
Pinnacle Studio |
trim mode on the timeline, see “Clip operations” on page 76. For information on using the Player with Montage, see “The Montage Editor” on page 154. For the use of the Player in editing disc menus, see “Previewing disc menus” on page 223.
Pinnacle Studio Projects
The movies and discs that you create in Pinnacle Studio are distilled from the projects that you build on the timeline of the Movie Editor or the Disc Editor.
To manage projects, Studio must keep track of everything that goes onto your timeline, and all the editing decisions you make with regard to trimming, adding effects, and much more. Much of this information is stored in the project file, which is in axp (Studio Movie) format.
In order to conserve hard drive space when dealing with files that can be very large, the project file does not include the media items in your movie. For these, only their location in the Library is stored.
The axp project file is the default file format for the File Open, File Save and File Save As menu commands. It may be the only one you need.
Sometimes, however, it is convenient to have all the resources recruited for a project gathered into a single, manageable unit for hassle-free archiving, file transfer or upload. This is the purpose of an alternative file format, the axx (Studio Project Package), which contains in a single file all the materials your project uses, including media items. Of necessity, files in this format are considerably larger than standard project files.
Although it is not possible to directly edit a project in the package format, Pinnacle Studio lets you open a project package with File Open by selecting axx in the file extension box. Studio seamlessly unpacks the project, creates a new Library entry for the unpacked version, and opens it for editing.
Chapter 1: Using Pinnacle Studio |
9 |
CHAPTER 2:
The Library
The Pinnacle Studio Library, or simply ‘the Library’, is a cataloguing and management tool for all the file-based resources you can draw on when authoring. Its purpose is to let you choose and use the video segments, photos, sound bites, transition effects, titles and other ‘assets’ (as they are often called) for your movies as easily, rapidly and intuitively as possible.
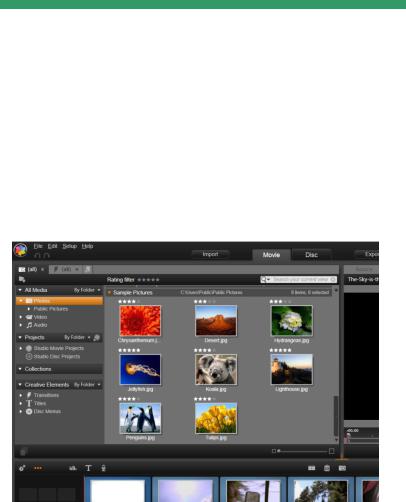
The Pinnacle Studio Media Library opened on a folder of graphic images.
The Library’s classification scheme resembles what you might see in a file-system viewer. While the viewer groups files under their physical storage locations such as hard drives, the Library groups
Chapter 2: The Library |
11 |

assets under their type – video, photo, and so on. In other respects, the tree view concept for accessing subgroups of assets is virtually identical and should feel immediately familiar.
In addition to audio, photo and video files in standard formats, the Library includes specialized auxiliary media like titles and disc menus. They are found, along with transitions, filters and other effects, in the main category called Creative Elements.
The Library can easily manage large media holdings such as are often found nowadays even on a home system. All of the dozens of media file types usable in Pinnacle Studio can be browsed, organized and previewed within its integrated interface.
Assets are displayed either as icons or text records within collapsible folders that stack up in the Library Browser. The folders may correspond either to real directories in your computer’s file system, or to virtual groupings based on ratings, file type, creation date, or membership in a user-defined Collection.
Adding assets to a project
The Library is displayed as a panel, either docked (as in the Movie and Disc project editors) or floating (as in the Title Editor). The Compact view retains the full functionality of the Library. Its
12 |
Pinnacle Studio |

primary purpose is to allow you to bring assets into a movie or disc project with drag and drop.
The current set of Library tabs, and the contents of the Browser, are common to all views of the Library. For instance, if you are browsing in a particular folder of disc menus in the Movie Editor, that same folder will be open if you now switch to the Title Editor.
Correcting media files
With regard to technical quality, media files are not all created equal. Occasionally, you do come across the perfect photo, clip, or sound effect. More often, though, the photo needs cropping, the video is shaky, or the sound starts with an annoying hiss. Pinnacle Studio’s media correction tools let you fix these and similar issues by applying correction filters to a problem clip after you have placed it on the timeline of your project.
Often, however, an even better solution is to apply the correction to the Library asset itself, before adding it to a project. That way, any production using the asset will start with the corrected version, not the unsatisfactory original. Such corrections can quickly be made by opening media editors from the Library. The file underlying the corrected asset is not modified: instead, the correction parameters are stored in the Library database and reapplied whenever the item is displayed or used.
Chapter 2: The Library |
13 |
UNDERSTANDING THE LIBRARY
The Studio Library lets you manage and efficiently use the entire pool of media and other assets available for use in your productions.
What exactly does the Library contain?
The full range of assets that you can draw on for your projects is summarized by the four main branches of the Asset Tree. Each branch is further divided into more specialized subsections.
The All Media branch contains the standard media files on your system in subsections named Photos, Video, and Audio. Many standard file types are supported. The purpose of the fourth subsection, Missing media, is described below.
The Projects branch of the Asset Tree contains your own Pinnacle Studio movie and disc projects. You can open a project right from the Library and begin editing it, or you can add it to the timeline of another project to serve as an ordinary clip.
Collections are custom groupings of Library media. The more time you spend on media management, the more you will probably use Collections. They can serve as temporary holding places while you work, or for classifying and setting aside media for later use. Collections may be automatically
generated, but most are user defined. Hierarchically-organized Collections are also supported. The top-level Collections in the hierarchy are used as subsections of the Collections branch.
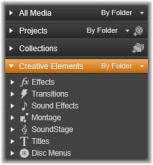
The Creative Elements branch is shown open in the illustration at right, revealing its subsections. Each is either a type of special effect (Effects and Transitions), or
a special media type. Ready-to-use, royalty-free collections of all seven types are included with Pinnacle Studio.
14 |
Pinnacle Studio |

Storage of Library assets
Every asset in the Library – every clip, sound, transition, and so on – corresponds to a file somewhere in the local storage of your computer system. The Library doesn’t ‘own’ these files, and never modifies them unless specifically requested to do so. Rather, it keeps track of their names, locations and properties in an internal database. The information stored also includes any tags and ratings with which you have annotated particular items, and the parameters of any correction filters you have applied.
The database
The files that make up the Library database are stored in a folder with single-user rather than shared access rights under Microsoft Windows. If Pinnacle Studio is used on your computer by multiple users with individual log-ins, a separate Library will be created for each.
Missing media
Operations like adding, removing and renaming a Library asset are database operations that have no effect on the media file itself. When you remove an asset from the Library, an option on the confirmation dialog box does let you go one step further and delete the actual file as well, but the option is off by default – you have to specifically request the action.
By the same token, when you delete or move an asset file in Windows Explorer or another application outside of Pinnacle Studio, the database record of the file continues to exist. Since the Library can’t actually access the file, however,
an error graphic is added to the file’s listing. If the file still exists, but has simply been moved to another folder or device, relinking it to the Library is easy. Double-click the item to pop up a standard File Open dialog with which you can point the way to the file’s new location.
Chapter 2: The Library |
15 |
Incidentally, to check if there are missing media anywhere in the Library, look in the special subsection All media Missing media of the Asset Tree. The Asset Tree is described below (page 17).
Location tabs
Editing a video project involves coordinating the various media and other assets at your disposal. As you proceed, it’s likely that you’ll find yourself browsing repeatedly in various parts of the Library that are relevant to the project. No doubt you will also change your viewing and filtering options from time to time, depending on the material you’re reviewing.
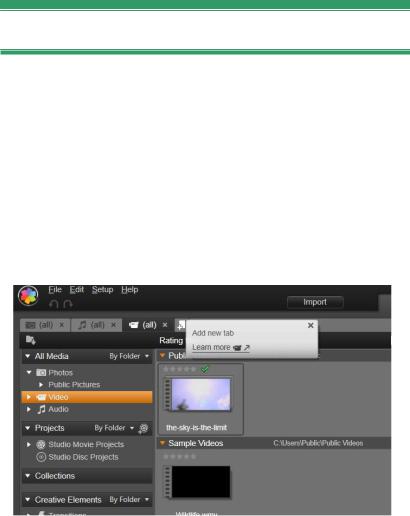
Like a web browser that uses a row of tabs to allow flipping effortlessly amongst multiple open web sites, the Library lets you create and configure location tabs as you work. The tabs provide direct access to each of the various locations in which you are currently working.
Here three tabs give access to media required by different parts of a movie project. The mouse pointer is poised to create a new tab. To close a tab, click the x icon to the right of the tab caption.
16 |
Pinnacle Studio |
To set the location of the current tab, click a name in the Asset Tree. Changes you make to viewing and filtering options while the tab is active are retained between accesses.
The Asset Tree
The entire gamut of Library assets is organized into a folder tree whose structure and general usage should be familiar from filesystem tools like Windows Explorer. When you select a location in the Asset Tree, the folder name appears on the caption of the active location tab, and its contents are displayed in the neighboring Browser.
The four main ‘branches’ of the Asset Tree were introduced above (page 14).
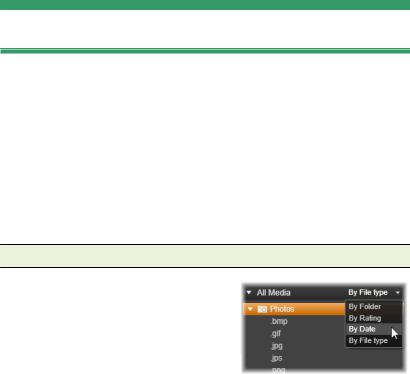
The Group By menu
The header line of the All media branch offers a small dropdown menu of options to control how the groupings within each subsection of the branch are created.
When you group by folder (the
default), the folder structure corresponds to actual directories on
Chapter 2: The Library |
17 |
your hard drive, flash drive, or other file-system device. Some standard folders are included by default; you can add others at will using the watchfolder system. Grouping by folder is shown in the Main Library illustration above.
When you use another grouping, by rating, by date or by file type, exactly the same asset files are listed within each subsection as with the by folder grouping. However, instead of classifying them by the file system folders in which they are stored, the Asset Tree groups them into ‘virtual folders’ according to the chosen property.
Grouping by rating, for example, divides each subsection into six virtual folders. Five of them display media files to which you have given star ratings; the sixth is for those you haven’t rated yet. See “The Browser” (page 24) for more information about file ratings and their uses.
In the inset illustration above, the Photos subsection of the All Media branch is shown grouped by file type. The virtual folders have names like bmp, gif and jpg – one virtual folder for each recognized file extension in the subsection’s media files.
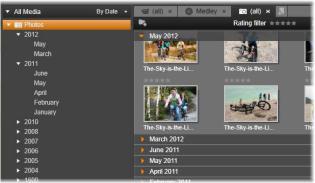
The Library with grouping By Date selected in the All Media branch of the Asset Tree. The bottom-level folders in the Asset Tree are displayed in the Browser (right). These ‘virtual’ folders each represent all the photos whose file date falls within a particular month.
Under group by date, the folders represent the year of the file’s creation; within these, the files are further grouped by month.
18 |
Pinnacle Studio |
 Loading...