

Philips RQ 1280 User Manual [zh]

Question?
有疑问?
Contact Philips
请联系飞利浦
RQ1290
RQ1280
RQ1260
RQ1250
User manual / 用户手册

1


ENGLISH 6
简体中文 32
RQ1290, RQ1280, RQ1260, RQ1250

6
ENGLISH
Introduction
Congratulations on your purchase and welcome
to Philips! To fully benet from the support that
Philips offers, register your product at
www.philips.com/welcome.
Please read this user manual, as it contains information
about the features of this shaver as well as some tips
to make shaving easier and more enjoyable.
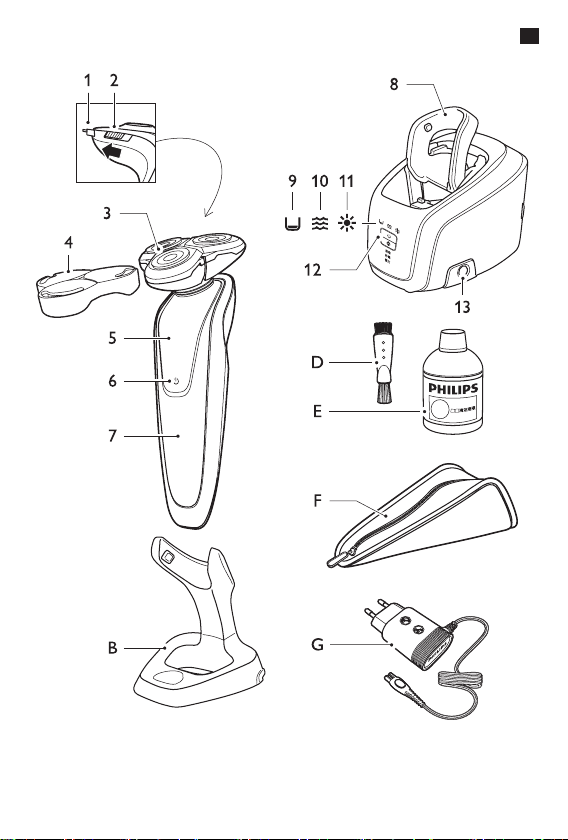
General description (Fig. 1)
A Shaver (RQ1290/RQ1280/RQ1260/RQ1250)
1 Trimmer
2 Trimmer on/off slide
3 Shaving unit
4 Protection cap
5 Shaver
6 Shaver on/off button
7 Display
B Charger
C Jet Clean System (RQ1008/RQ1007) (specic
types only)
1 Shaver holder
2 ’Cleaning chamber empty’ symbol
3 Cleaning symbol
4 Drying symbol
5 Jet Clean System on/off button (RQ1008 only:
and up/down button for program selection)
6 Cleaning chamber release button
D Cleaning brush
E Cleaning uid
F Pouch
G Adapter
ENGLISH 7
Important
Read this user manual carefully before you use the
shaver, the Jet Clean System (specic types only)
and the charger. Save the user manual for future
reference.
General
Danger
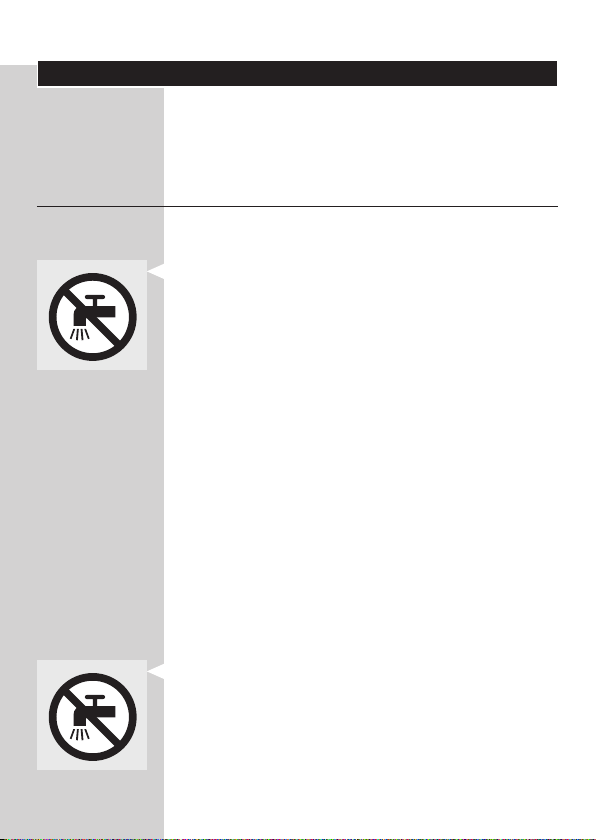
- Keep the adapter dry.
- This symbol means: Forbidden to clean under a
running tap.
Warning
- The adapter contains a transformer. Do not cut
off the adapter to replace it with another plug, as
this causes a hazardous situation.
- The shaver and the Jet Clean System are not
intended for use by persons (including children)
with reduced physical, sensory or mental
capabilities, or lack of experience and knowledge,
unless they have been given supervision or
instruction concerning use of these appliances by
a person responsible for their safety.
- Children should be supervised to ensure that they
do not play with the shaver and the Jet Clean
System.
Caution
- Never immerse the shaver and the Jet Clean
System in water.
- This symbol means that the Jet Clean System and
the charger must be kept dry. Keep the Jet Clean
System and the charger away from water and do
not rinse them under the tap.
- The shaver, the Jet Clean System, the charger and
the other accessories are not dishwasher-proof.

ENGLISH8
- Never use water hotter than 80°C to rinse the
shaver.
- Be careful with hot water when you clean the
shaver. Always check if the water is not too hot, to
prevent your hands from getting burnt.
- Water may leak from the socket at the bottom
of the shaver when you rinse it. This is normal
and not dangerous because all electronics are
enclosed in a sealed power unit inside the shaver.
- Never use compressed air, scouring pads, abrasive
cleaning agents or aggressive liquids such as petrol
or acetone to clean the shaver, the charger and
the Jet Clean System.
- Use, charge and store the shaver at a temperature
between 5°C and 35°C.
- Always put the protection cap on the shaver
to protect the shaving heads when you are
travelling.
- Only use the adapter, the charger and the
accessories supplied.
- The adapter transforms 100-240 volts to a safe
low voltage of less than 24 volts.
- Do not use the shaver, the Jet Clean System, the
charger or the adapter if it is damaged.
- If the adapter or the charger is damaged, always
have it replaced with one of the original type in
order to avoid a hazard.
Jet Clean system (specic types only)
Caution
- Only use the Jet Clean System with the original
HQ200 cleaning uid.
- Always place and use the Jet Clean System on a
stable, level and horizontal uid-resistant surface
to prevent leakage.
ENGLISH 9
- Only use and store the Jet Clean System at a
temperature between 5°C and 35°C.
- Empty the cleaning chamber and clean it
thoroughly by rinsing it with hot tap water every
15 days.
- The Jet Clean System thoroughly cleans but does
not disinfect your shaver, therefore do not share
the shaver with others.
- The cleaning chamber of the Jet Clean System is
not dishwasher-proof.
- When the Jet Clean System is ready for use, do
not move it to prevent leakage of cleaning uid.
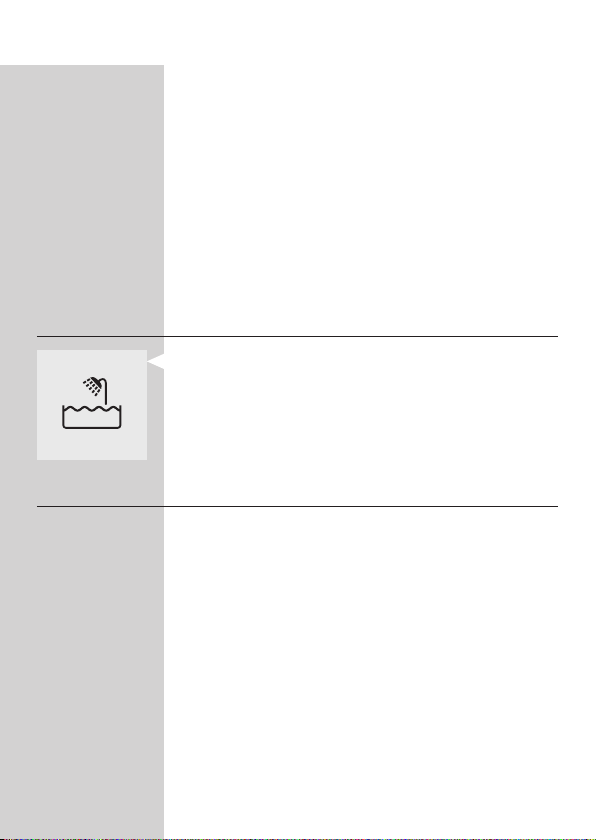
General
- This symbol means: Suitable to be used in the
shower.
- It is allowed to use the shaver close to a bathtub,
shower or other containers lled with water.
Compliance with standards
- The shaver and the Jet Clean System comply
with all standards regarding electromagnetic elds
(EMF). If handled properly and according to the
instructions in this user manual, they are safe to
use based on scientic evidence available today.
- The shaver and the Jet Clean System comply with
the applicable IEC safety standards.
ENGLISH10
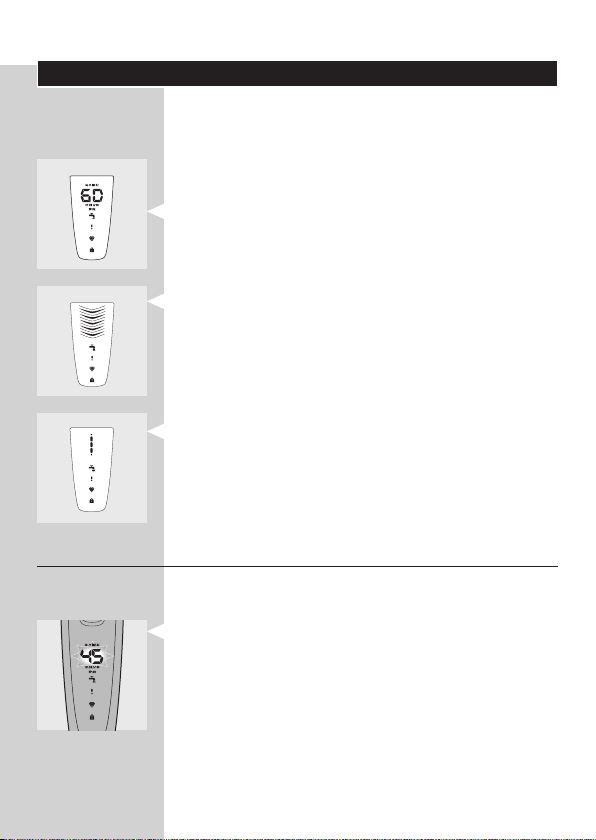
The display
Note: Before you use the shaver for the rst time,
remove the protective foil from the display.
The four shaver types (RQ1290, RQ1280, RQ1260
and RQ1250) have different displays, which are
shown in the gures below.
- RQ1290/RQ1280
- RQ1260
- RQ1250
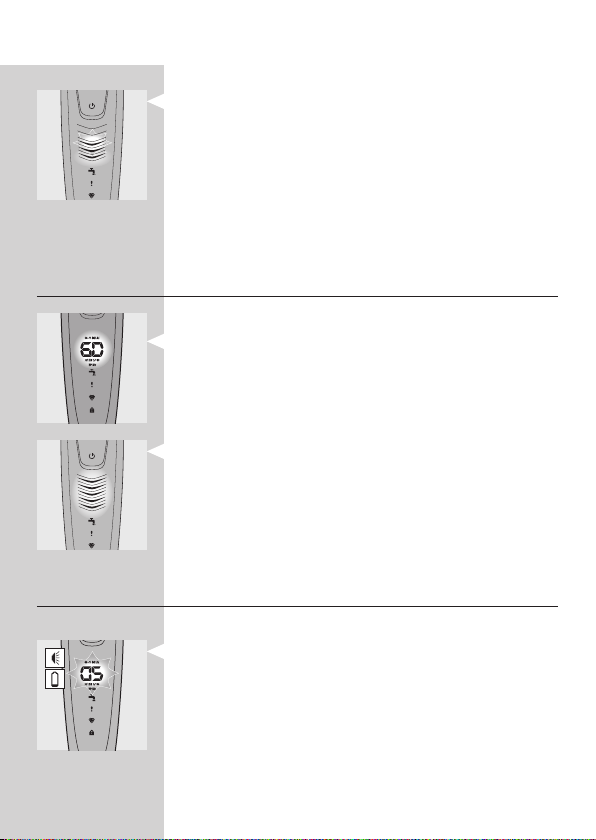
Charging
- Charging takes approx. 1 hour.
RQ1290/RQ1280
- When the shaver is charging, the minutes
indication ashes.
- The shaving minutes increase until the shaver is
fully charged.
- Quick charge: When the shaver contains enough
energy for one shave, the display shows 5 minutes
in red.
ENGLISH 11
RQ1260/RQ1250
- When the shaver is charging, rst the bottom
charging light ashes, then the second charging
light, and so on until the shaver is fully charged.
Note: The displays of types RQ1260 and RQ1250 look
different, but the charging lights work in the same way.
- Quick charge: When the shaver contains enough
energy for one shave, the bottom charging light
alternately ashes orange and white.
Battery fully charged
RQ1290/RQ1280
- When the battery is fully charged, the minutes
indication lights up continuously. After approx.
30 minutes the display automatically switches off
again.
RQ1260/RQ1250
- When the battery is fully charged, all charging
lights light up continuously. After approx. 30
minutes the display automatically switches off
again.
Note: The displays of types RQ1260 and RQ1250 look
different, but the charging lights work in the same way.
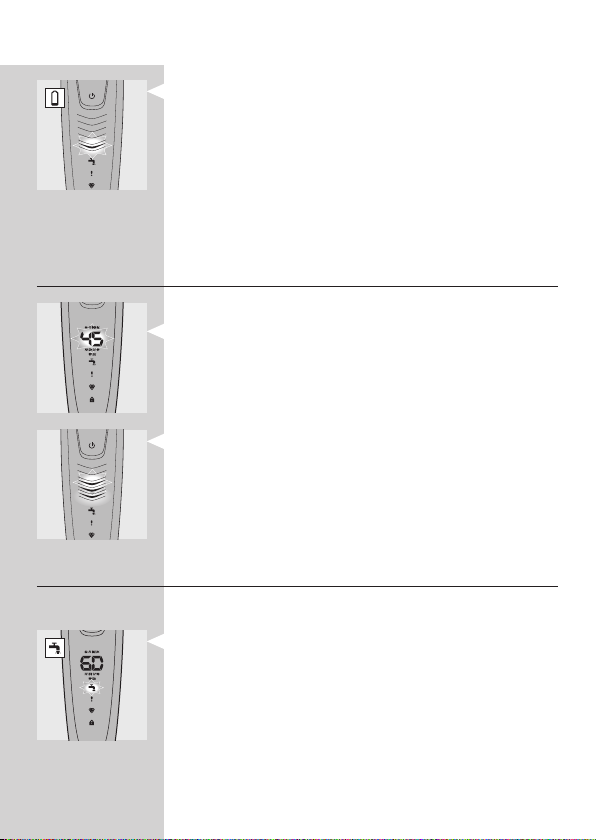
Battery low
RQ1290/RQ1280
- When the battery is almost empty (when there
are only 5 or fewer shaving minutes left), the
minutes indication starts to ash.
- When you switch off the shaver, the shaving
minutes continue to ash for a few more seconds.
You hear a beep when there are no shaving
minutes left.
ENGLISH12
RQ1260/RQ1250
- When the battery is almost empty (when there
are only 5 or fewer shaving minutes left), the
bottom charging light ashes orange.
- When you switch off the shaver, the bottom
charging light continues to ash orange for a few
seconds.
Note: The displays of types RQ1260 and RQ1250 look
different, but the charging lights work in the same way.
Remaining battery capacity
RQ1290/RQ1280
- The remaining battery capacity is indicated by the
number of shaving minutes shown on the display.
RQ1260/RQ1250
- The remaining battery capacity is indicated by the
ashing charging lights.
Note: The displays of types RQ1260 and RQ1250 look
different, but the charging lights work in the same way.
Clean shaver
For optimal shaving performance, we advise you to
clean the shaver after every use.
- The tap symbol ashes to remind you to clean the
shaver.
Note: The displays of types RQ1290, RQ1280, RQ1260
and RQ1250 look different, but show the same symbol.
ENGLISH 13
Replace shaving unit
For maximum shaving performance, we advise you
to replace the shaving unit every year.
- To remind you to replace the shaving unit, the
shaving unit symbol ashes (all types) and you
hear a beep when you switch off the shaver
(RQ1290/RQ1280 only). This happens at the end
of 7 successive shaves.
Note: The displays of types RQ1290, RQ1280, RQ1260
and RQ1250 look different, but show the same symbol.
Travel lock (RQ1280/RQ1260/RQ1250 only)
You can lock the shaver when you are going to
travel. The travel lock prevents the shaver from being
switched on by accident.
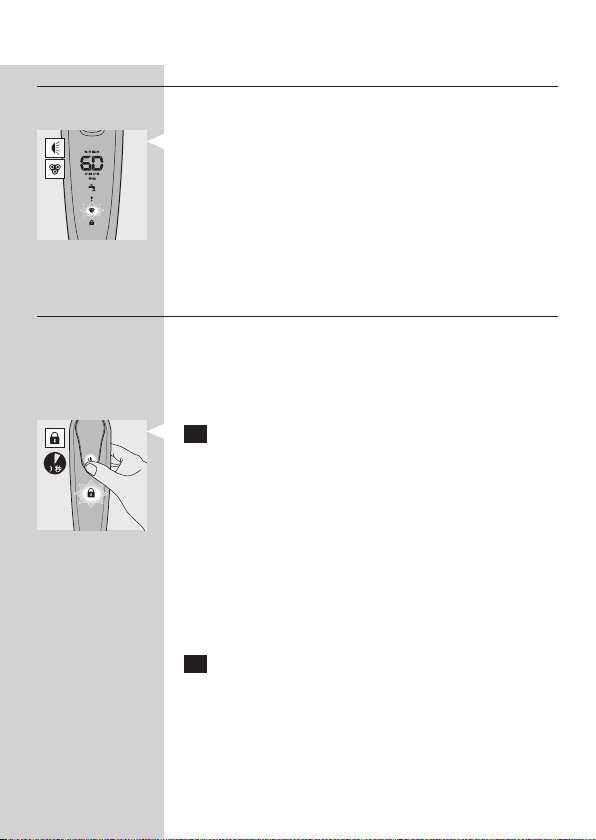
Activating the travel lock
1 Press the on/off button for 3 seconds to enter
the travel lock mode.
, RQ1280: The display starts to count down
from 3. At 1, the appliance beeps to indicate that
it is locked.
, The lock symbol lights up on the display. After a
few seconds it goes out.
Note: The displays of types RQ1280, RQ1260 and
RQ1250 look different, but show the same symbol.
Deactivating the travel lock
1 Press the on/off button for 3 seconds.
, The motor starts running to indicate that the
travel lock has been deactivated.
The shaver is now ready for use again.
ENGLISH14
Note: When you place the shaver in the pluggedin charger or Jet Clean System, the travel lock is
automatically deactivated.
Power-saving mode (RQ1290 only)
The appliance is equipped with an automatic powersaving mode. When the shaver enters the powersaving mode, the light in the on/off button goes out
to save energy.
- If you move the appliance for 5 minutes without
switching it on, it automatically goes into powersaving mode.
, The lock symbol ashes on the display to
indicate that the appliance is in power-saving
mode.
- To deactivate the power-saving mode, simply press
the on/off button.
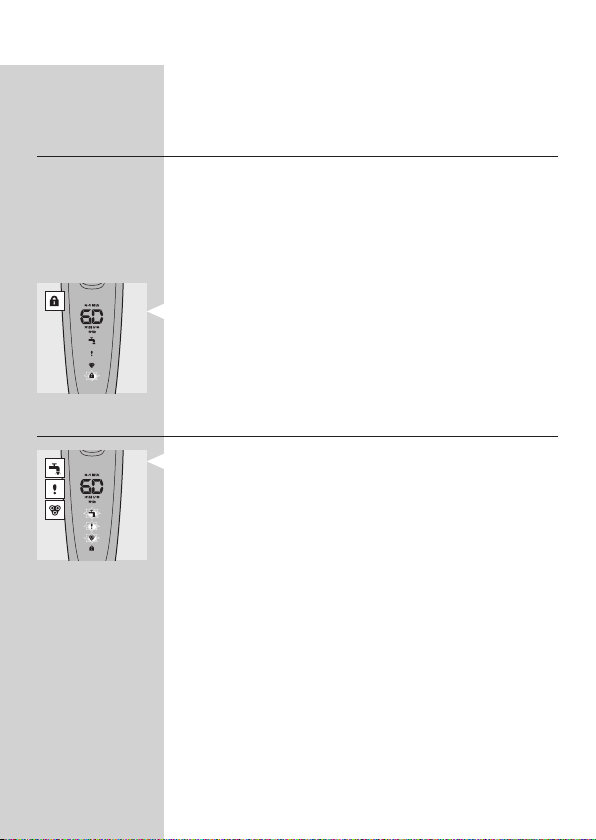
Blocked shaving heads
- If the shaving heads are blocked, the shaving unit
symbol, the tap symbol and the exclamation mark
ash. In this case, the motor cannot run because
the shaving heads are soiled or damaged.
Note: The displays of types RQ1290, RQ1280, RQ1260
and RQ1250 look different, but show the same
symbols.
- When this happens, you have to clean the shaving
unit or replace it.
- The shaving unit symbol, the tap symbol and
the exclamation mark continue to ash until you
unblock the shaving heads.
ENGLISH 15
Charging
Charging takes approx. 1 hour.
RQ1290/RQ1280/RQ1260: A fully charged shaver
has a shaving time of up to 60 minutes/20 days.
RQ1250: A fully charged shaver has a shaving time of
up to 50 minutes/16 days.
The actual shaving time is calculated by the shaver.
If you have a heavy beard, the shaving time may be
less than expected. The shaving time may also vary
over time, depending on your shaving behaviour and
beard type.
Charge the shaver before you use it for the rst
time and when the display indicates that the battery
is almost empty (see section ‘Battery low’ in chapter
‘The display’).
Quick charge
After the shaver has charged for 5 minutes,
it contains enough energy for one shave.
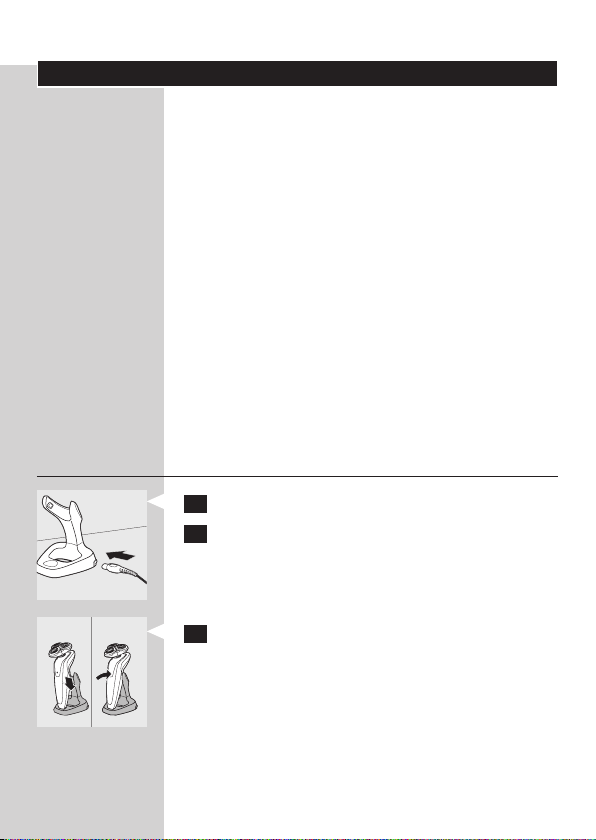
Charging in the charger
1 Put the small plug in the charger.
2 Put the adapter in the wall socket.
3 Put the shaver in the charger and push it
backwards (‘click’).
, The display shows that the shaver is charging
(see chapter ‘The display’).
ENGLISH16
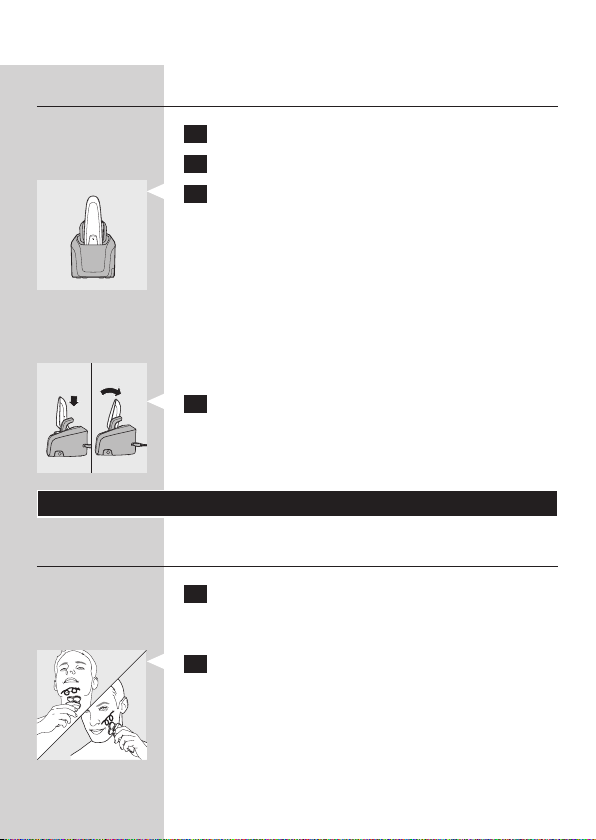
Charging in the Jet Clean System (specic
types only)
1 Put the small plug in the Jet Clean System.
2 Put the adapter in the wall socket.
3 Place the shaver upside down in the holder
with the display pointing towards the front of
the Jet Clean System.
Note: The shaver cannot be placed in the Jet Clean
System when the protection cap is on the shaving unit.
Note: RQ1290 only: when you turn the shaver upside
down, the minutes indication on the display is also
turned upside down so you can still see to what level
the battery is charged.
4 Press the shaver tightly into the holder to lock
it into place.
, The display shows that the shaver is charging
(see section ‘Charging’ in chapter ‘The display’).
Using the shaver
Shaving
1 Press the on/off button once to switch on the
shaver.
, The display lights up for a few seconds.
2 Move the shaving heads over your skin.
Make circular movements.
- Do not make straight movements.
- Your skin may need 2 or 3 weeks to get
accustomed to the Philips shaving system.

ENGLISH 17
3 Press the on/off button once to switch off the
shaver.
, The display lights up for a few seconds and then
shows the remaining battery capacity.
Wet shaving
You can also use this shaver on a wet face with
shaving foam or shaving gel.
To shave with shaving foam or shaving gel, follow the
steps below:
1 Apply some water to your skin.
2 Apply shaving foam or shaving gel to your skin.
3 Rinse the shaving unit under the tap to ensure
that the shaving unit glides smoothly over your
skin.
4 Press the on/off button once to switch on the
shaver.
5 Move the shaving heads in circular movements
over your skin.
Note: Rinse the shaver under the tap regularly to
ensure that it continues to glide smoothly over your
skin.
6 Dry your face and thoroughly clean the
shaver after use (see chapter ‘Cleaning and
maintenance’).
Note: Make sure you rinse all foam or shaving gel off
the shaver.
ENGLISH18
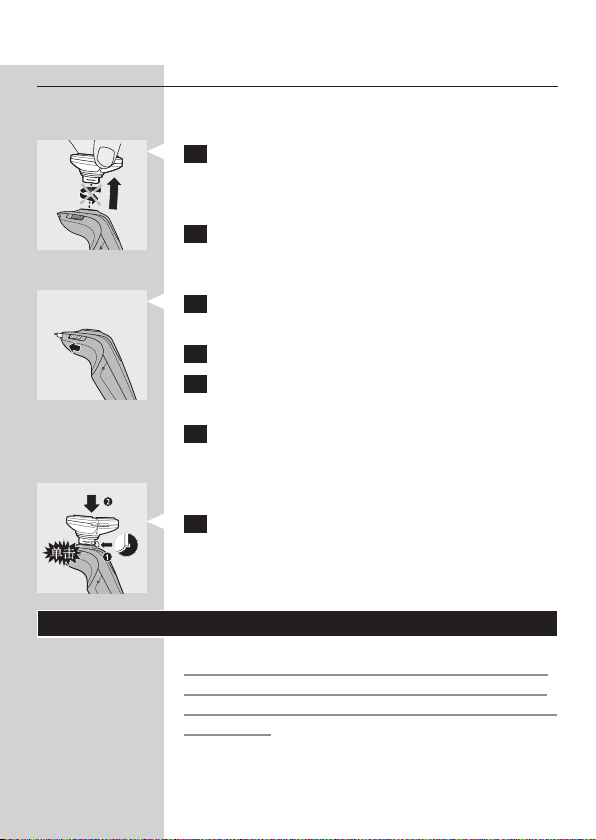
Trimming
You can use the trimmer to groom your sideburns
and moustache.
1 Pull the shaving unit straight off the shaver.
Note: Do not turn the shaving unit while you pull it off
the shaver.
2 Press the on/off button once to switch on the
shaver.
, The display lights up for a few seconds.
3 Press the trimmer slide forwards to slide out
the trimmer.
4 You can now start trimming.
5 Press the trimmer slide backwards to retract
the trimmer.
6 Press the on/off button once to switch off the
shaver.
, The display lights up for a few seconds and
shows the remaining battery capacity.
7 Insert the lug of the shaving unit into the slot
in the top of the shaver (1). Then press the
shaving unit downwards (2) to attach it to the
shaver (‘click’).
Cleaning and maintenance
Never use scouring pads, abrasive cleaning agents
or aggressive liquids such as petrol or acetone to
clean the shaver and the Jet Clean System (specic
types only).
- The best and most hygienic way to clean the
shaver is in the Jet Clean System (specic types
only). You can also rinse the shaver under the tap
or clean it with the cleaning brush supplied.
 Loading...