

RC9800i
Quick Start Guide
Congratulations on the purchase of your
new RC9800i Touch Screen Remote
Control! This device is a “must have” if
you want to enjoy a real state-of-the-art
home entertainment experience. You will
see that using the RC9800i is very easy.
This Quick Start Guide will assist you in
setting up your RC9800i. The RC9800i will
automatically switch to setup mode when
you turn it on for the first time. Setting up
the RC9800i will take 30 minutes or
longer, depending on the number of
devices that you want to control with it.
1
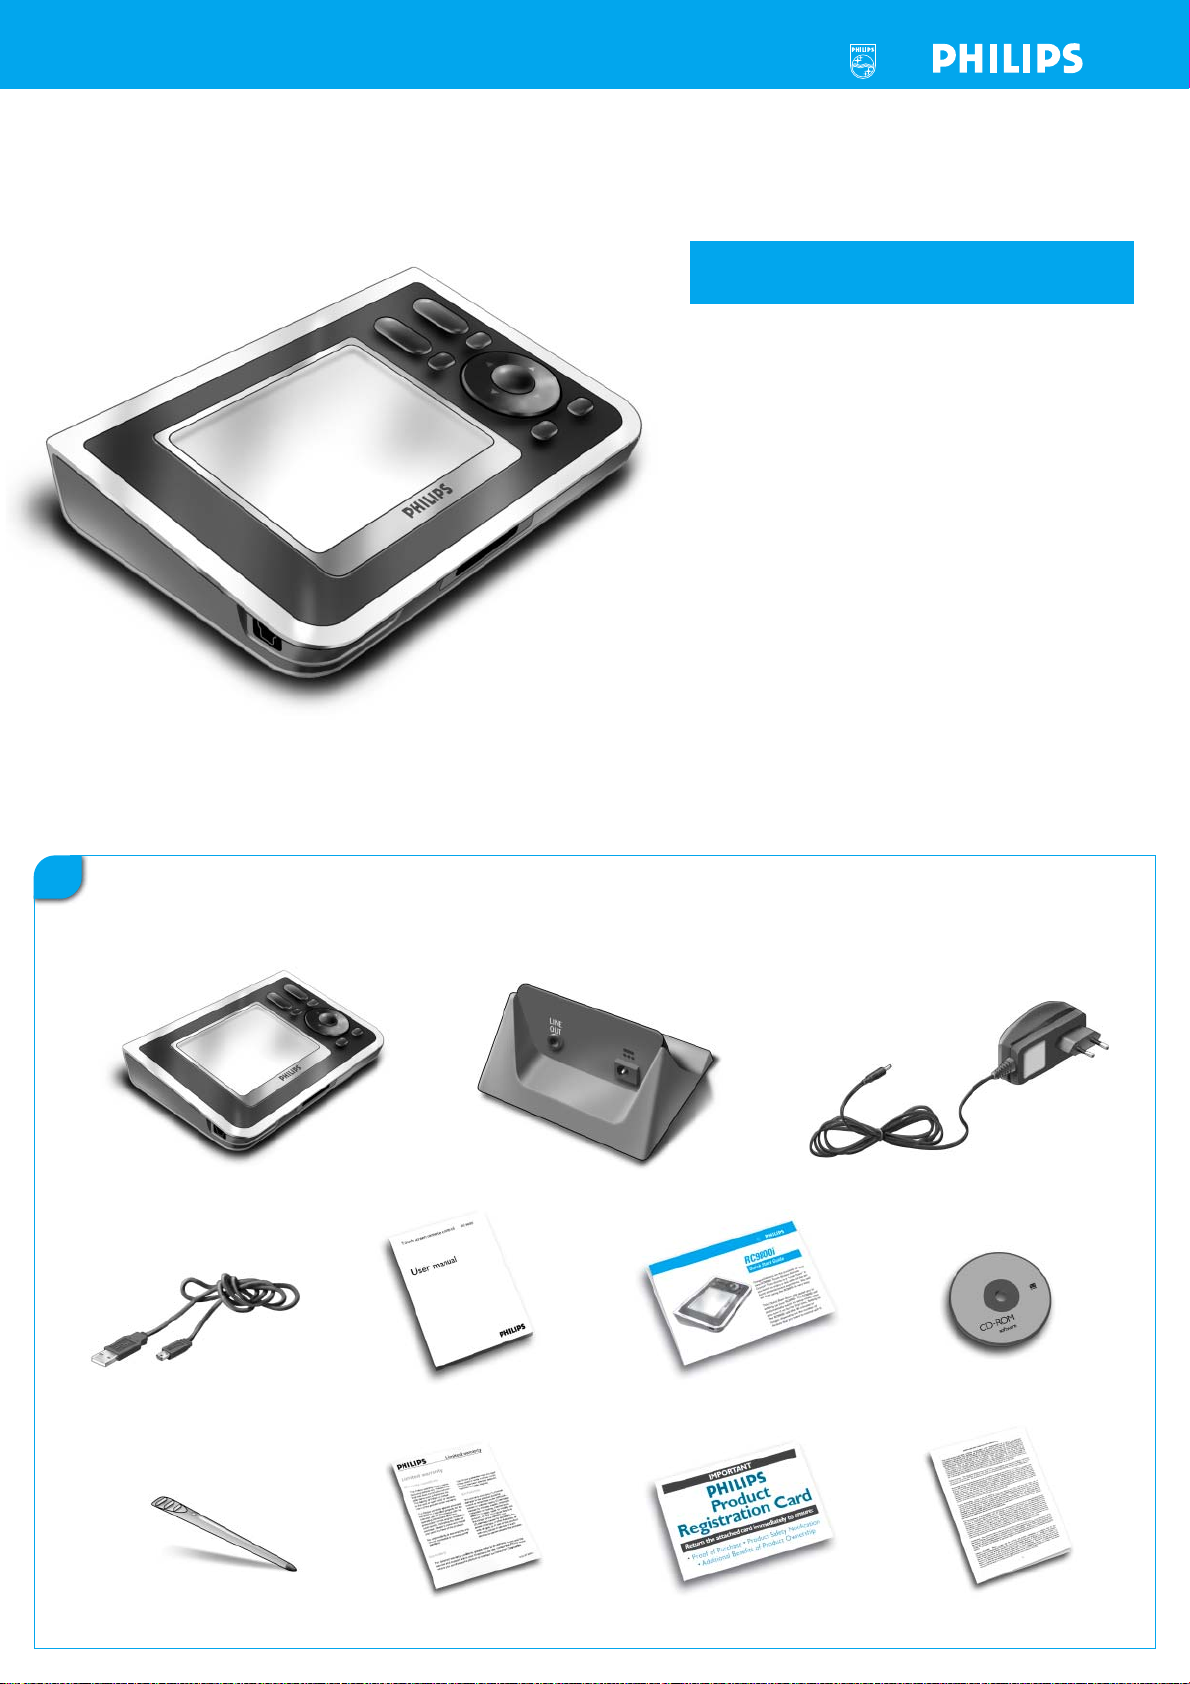
Package Contents
The RC9800i Touch Screen Remote Control box contains the following items:
RC9800i
USB cable
User Manual
(EN, FR, ES)
Cradle
Quick Start Guide
(EN, FR, ES)
Power adapter
Media Manager Software
Stylus
Warranty information
Warranty Registration Card
End User License Agreement
3104 205 3336.3
2
Turn on the RC9800i
Turn on the RC9800i with the On/Off Switch (I=ON, 0=OFF), located at the back of
the RC9800i.
Tip : You can use the stylus to move the switch from one position to the other.
3
Charge the battery
Connect the Power adapter to the Cradle and dock the RC9800i. It takes about
3 hours to fully charge the battery. You can continue the setup procedure below
while charging.
4
Update your RC9800i to the Latest Software
Before setting up it is advisable to update your RC9800i to the latest software.
On your PC, open your Internet browser and go to
http://www.homecontrol.philips.com/downloads and follow the instructions.
www.homecontrol.philips.com/
downloads
5
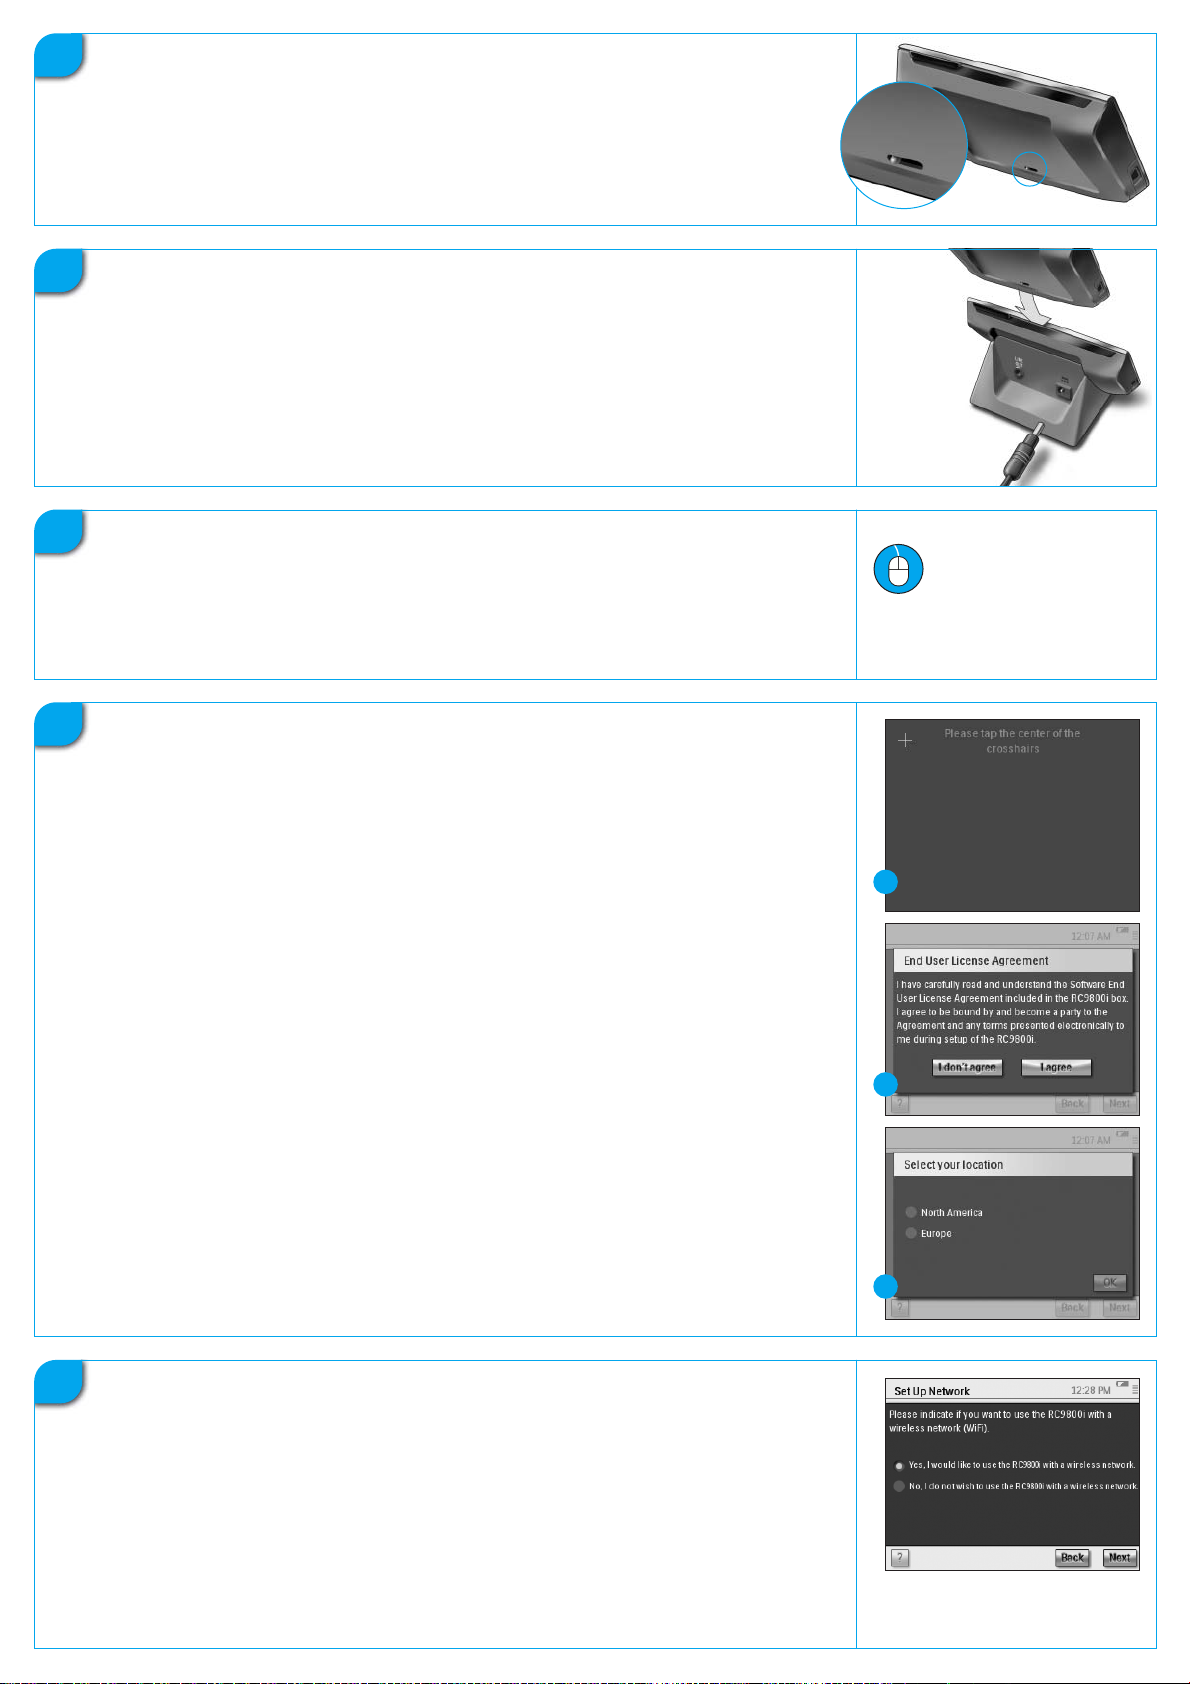
Calibrate the touch screen, Check the
End User License Agreement (EULA)
A Tap the crosshairs to calibrate the touch screen (fig. 1). Please use the stylus to
calibrate the touch screen as this will yield better results.
B Read the EULA carefully. Your use of the RC9800i is subject to your agreement
to be bound by and become a party to the Software End User License
Agreement included in the RC9800i box and any terms presented to you
electronically during setup of the RC9800i (fig. 2).
C Select your location (fig. 3).
1
2
3
6
Wireless operation
Some functions of the RC9800i are only available when you use it in a wireless
network (e.g. browse digital media files that reside on a PC in the wireless
network).
Are you going to use the RC9800i in a wireless network?
If yes, proceed with Part 7 Network settings.
If no, proceed with Part 8
Date and time settings.
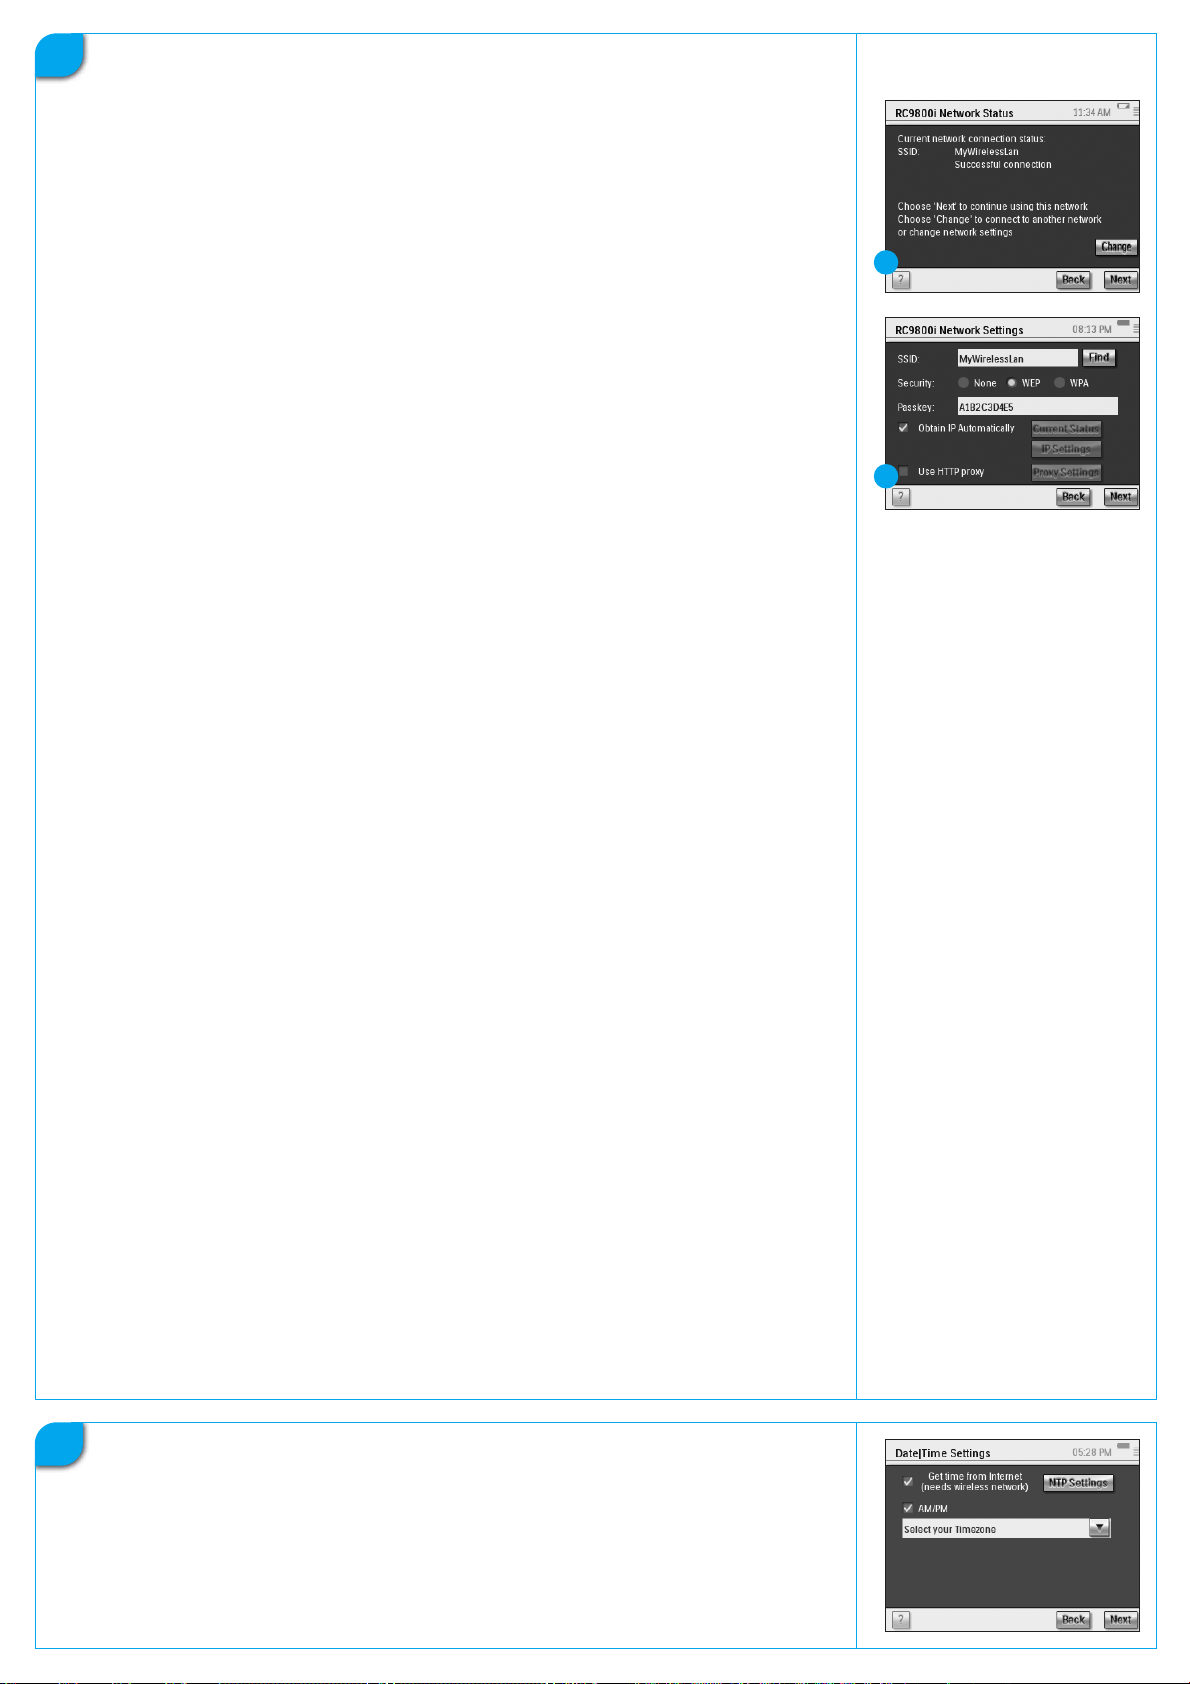
7
Network settings
In the presence of a wireless network without encryption the RC9800i will
automatically connect to it. In all other cases the RC9800i will not automatically
connect; you will have to perform a few additional settings as explained below.
A Do you want to use the current network settings (fig. 1)?
If yes, choose Next on the RC9800i, and proceed with
Part 8 Date and time settings.
If no, choose Change to enter the settings of your Wireless Access Point (WAP).
Then, proceed with step B below.
Note: It is advisable to have your WAP Settings at hand as you will need this information in the next steps.
B Enter your Wireless Access Point’s (WAP) name in the text field SSID (when you tap
the text field, a keyboard will pop up), or choose Find to scan for available networks
(fig. 2).
Then, proceed with step C below.
Note: Make sure that your Wireless Access Point operates in infrastructure mode. Please see the User Manual of
your Wireless Access Point on how to set your WAP to infrastructure mode.
Note: In case you use a 802.11g Wireless Access Point, make sure that it operates in mixed mode. Please see the
User Manual of your Wireless Access Point on how to set your WAP to mixed mode.
Note: In case your Wireless Access Point does not broadcast its name (SSID), you need to manually enter it,
since Find will not display your WAP’s SSID.
Note: In case your Wireless Access Point filters MAC addresses, please add your RC9800i’s MAC address to your
WAP’s list of allowed MAC addresses. Otherwise your RC9800i is unable to connect to your wireless network.
To find your RC9800i’s MAC address, choose Change in the network setup screen, followed by Current Status.
To add your RC9800i’s MAC address to the list of allowed MAC addresses, please see the User Manual of your
Wireless Access Point.
1
2
C Choose the Security Settings that apply to your network (fig. 2). These Security
Settings are dependent on the configuration of your Wireless Access Point.
■ Choose None if your network does not use any encryption.
■ Choose WEP if your network encodes all communication using a WEP encryption
key (‘passkey’). This passkey consists of:
■ 10 hexadecimal characters (0…9, A…F) in case of a 64-bit encryption;
■ 26 hexadecimal characters (0…9, A…F) in case of a 128-bit encryption.
Keep in mind that the RC9800i makes use of a WEP passkey (0…9, A…F), NOT a
passphrase, which may be any human readable sentence.
Note: When you enter the passkey, please double-check for typing errors.
■ Choose WPA if your network encodes all communication using a WPA
passphrase. This passphrase consists of minimally 8 and maximally 63
alphanumeric characters.
Then, proceed with step D below.
D When you select Obtain IP automatically (fig. 2), your WAP will automatically
assign dynamic IP addresses to your devices.
However, if you want to assign a fixed IP address to the RC9800i, do not select
Obtain IP automatically, but instead select IP Settings and fill out the necessary
fields.
Then, proceed with step E below.
E Select Use HTTP Proxy if your Internet Service Provider uses one (fig. 2), and click
Proxy Settings to enter the necessary information. Usually, you can leave Use HTTP
Proxy unselected.
F Choose Next to apply your network settings.
8
Date and time settings
Set date and time.
If you operate your RC9800i in a wireless network that has a connection to the
Internet, you can instruct the RC9800i to retrieve time information from the
Internet. You can also set date and time manually.

9
Set up Rooms & AV Devices: Rooms
Add one or more rooms containing audio-video equipment that you want to
control with your RC9800i.
Tip : Initially only add the room that you want to set up first. At a later time, you can return to setup mode and add
other rooms.
10
Set up Rooms & AV Devices: AV Devices
A For each room, add all devices you want to control with the RC9800i (fig. 1). For
each device that you add, a number of additional questions will be asked.
B Device type
You can choose any of the below types of devices (fig. 2):
Amplifier Media Center PC
CD (CDR) player PVR (DVR, Tivo, Replay TV, …)
Cable Box (no PVR) Projector
DVD Player Receiver (Amplifier + Tuner)
DVDR (+HDD) Satellite Receiver (no PVR)
DVD - VCR TV
Game Console Tuner (Radio)
Home Cinema / Home Theater VCR
Media Adapter
1
2
Note: If you are adding a cable box or satellite receiver that is equipped with a PVR function, please
choose ‘PVR’.
C Brand selection
Use the alphabet buttons to jump to the appropriate brand list (fig. 3).
Note: These buttons work like buttons on a cell phone: press a button once to jump to a brand list starting with
the first character, press it twice for a list that starts with the second character, three times for the third
character, and so on.
Select the brand of the device and choose Next.
D Model number
Enter a model number if you have this information (fig. 4). If you don’t have this
information, leave the text field blank and choose Next.
Note: If you have multiple devices of the same brand and type, we strongly advise you to fill out the model
number. This way, the RC9800i will automatically copy all relevant device information when you add the next
device of the same type, saving you setup time.
E Remote control codes
The RC9800i uses an infrared sensor to learn infrared codes. This sensor is
located at the top of the RC9800i and is marked with two white bars. When
learning IR codes, make sure that:
■ You aim your device’s original remote control to the RC9800i’s infrared
sensor. Keep it at a distance of approximately 5 cm / 2 inches (fig. 5);
■ You aim at the area between the two white stripes at the top of the RC9800i;
■ You press the button on your original remote control for about 2 seconds;
■ You point the RC9800i away from lighting sources like fluorescent lamps.
3
4
5
There are 3 different ways to learn the remote control codes used by your AV
device (fig. 6):
■ If you have the original remote control for the device, choose Learn & Match.
■ If you don’t have the original remote control or if Learn & Match didn’t find
matching remote control codes, choose Autoscan.
■ If neither Learn & Match or Autoscan found matching codes, choose
Select & Try.
continued
6

continued
F Power on
The RC9800i will determine the best method to power on your device. Follow
the on-screen instructions (fig. 7).
G Channel selection
Note: This step will only appear for devices that have a built-in tuner.
The RC9800i will now prompt you with questions to find the best method for
tuning to 1, 2 and 3-digit channels. Follow the on-screen instructions (fig. 8).
H Input selection
Note: This step will only appear for devices that accept inputs from external devices.
You will be asked a few questions on external inputs i.e. audio-video input
sources that feed audio-video signals into your device (fig. 9). These may be
labeled AV1, AV2, EXT1, EXT2, etc (fig. 10).
Tip : Turn on all input sources.
When asked, add the input source’s label to the list. Please make sure that:
■ you read through all the options carefully (fig. 9). Some options look very
similar, but differ considerably. Choose the input selection method that best
matches your situation.
■ you list ALL inputs (fig. 11), also those that you never actually use or to
which currently no external devices are connected. The RC9800i needs to
know exactly the actual sequence of your device’s input sources in order to
correctly control your equipment.
7
8
9
Repeat steps A through H in Part 10 for every device that you want to control with
the RC9800i.
11
Set up Activities
The RC9800i will now collect information on the activities for which your
AV equipment is used (e.g. Watch a DVD, listen to a CD, etc.).
Make sure all A/V devices involved are properly connected before proceeding. Select
all activities that you want to configure on your RC9800i; you can always redo this
step at a later time.
Note: If you want to know more about Activities and Activity-Based Control, please read ‘What You Should Know About
Activity-Based Control’ on page 12 of the User Manual. This background information is not mandatory for completing the
Activity Setup.
In the course of the Activities Setup, all activities will be configured room by room.
10
11
12
Electronic Program Guide (EPG)
Your RC9800i comes with a 1 year free-of-charge subscription to the Philips
Internet EPG Service. Before you can use the EPG application on the RC9800i, you
first must perform a few service-related settings. Some of these service-related
settings are to be performed on a PC using a Web browser, NOT on the RC9800i.
Please refer to p. 46-50 the User Manual for instructions on how to setup the EPG.
www.homecontrol.philips.com/
epg
13
Your RC9800i is now ready for use
You can now start using your RC9800i. Whenever necessary, you can change the
settings that you made during setup: first choose , then choose Settings.
Before proceeding to Part 14
equipment.
14
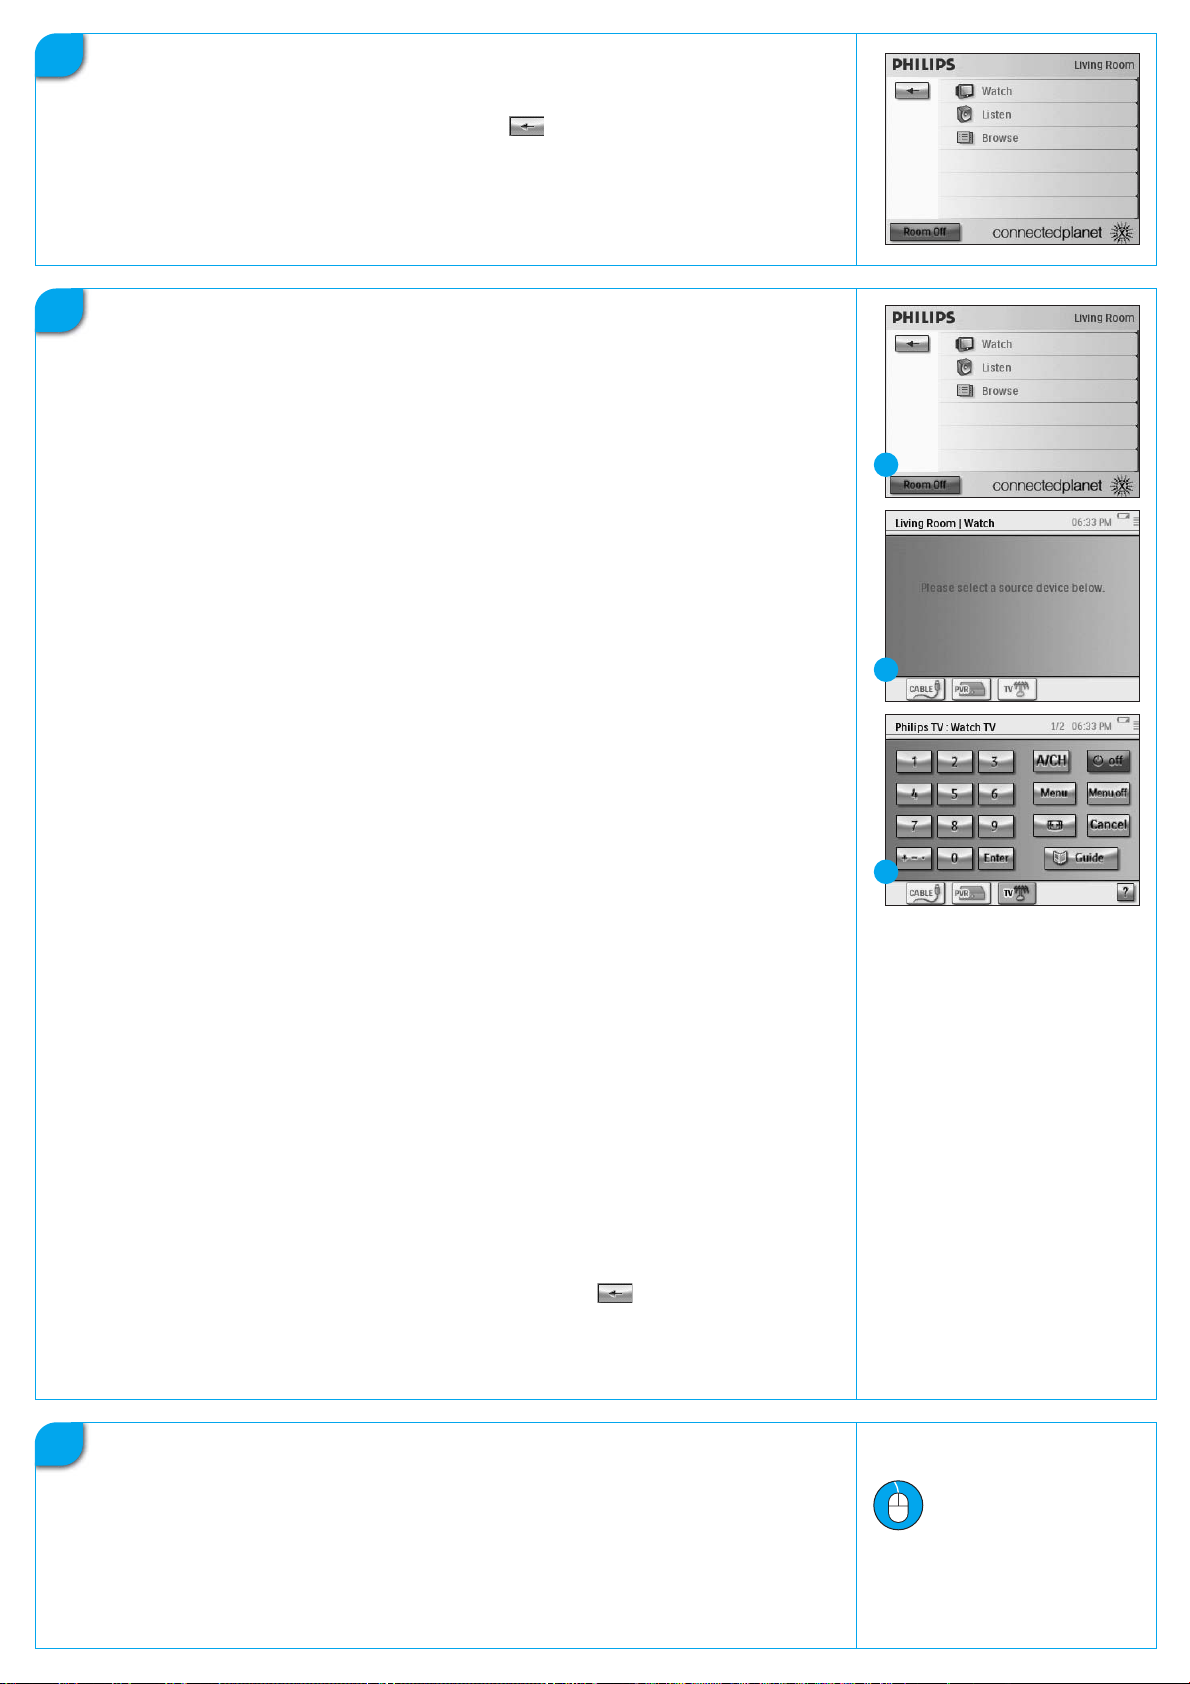
Using the RC9800i
Activity control
When you are done with the setup, the RC9800i ‘Homepage’ will appear automatically
(fig. 1). From this screen you can start Watch and Listen activities by tapping the
corresponding line. In the next screen (fig. 2) you can choose activities (e.g. Watch TV,
Watch DVD, …) by tapping the corresponding icon in the bottom bar. As the RC9800i
has collected all relevant information during setup, the activity is fully automated:
■ The RC9800i will turn on all devices involved, will select the correct inputs and
will tune to the correct channels.
■ The RC9800i screen will display the control buttons relevant for the activity of
your choice (fig. 3).
For most activities, several screens with control buttons are available. You can
cycle through these ‘activity-control’ screens using the Page hard key (fig. 3).
At any time you can choose another activity by choosing the proper icon in the
bottom bar.
To return to the Homepage, use the Home hard key.
Using the RC9800i, please turn off all your A/V
1
2
Synchronization wizard
When the RC9800i sends remote control commands to the various devices involved in
an activity, it may happen that something blocks the ‘line of sight’ between the
RC9800i and the controlled device (e.g. somebody passing in front of the controlled
device). In that case the remote control signals will not reach the device they are
supposed to control. Consequently, your system may be desynchronized:
■ a device is powered off instead of on; or
■ a wrong input has been selected; or
■ a device has tuned to the wrong channel.
When such a situation occurs you can choose the question mark icon in the bottom
right corner of the screen. This will start the synchronization wizard, which brings up a
screen that holds a few buttons that allow you, depending on the activity, to change
inputs, change channels and turn devices on and off. With these buttons, you will be
able to resynchronize your system.
Individual Device Control
With Individual Device Control you can control a single device outside of the context
of activities. Individual Device Control screens offer you less frequently used functions
than the activity control screens that you get when controlling activities.
To access Individual Device Control, on the Homepage, tap , then choose
Individual Device Control. A list of available devices that you can watch or listen to in
the current room will appear.
3
15
Support
Need help fast? Read the User Manual first for quick tips that make using your
Philips product more enjoyable. If you have read your instructions and still need
assistance, you may access our online help at www.usasupport.philips.com or call
1-888-PHILIPS (744-5477) while with your product.
www.usasupport.philips.com
✆1-888-PHILIPS (744-5477)
 Loading...