

Philips HR7710/80 User Manual [es]

HR 7710

English Page 4
• Keep page 3 open when reading these
operating instructions.
Français Page 11
• Pour le mode d'emploi: dépliez la page 3.
Deutsch Seite 18
• Schlagen Sie beim Lesen der
Gebrauchsanweisung Seite 3 auf.
Nederlands Pagina 25
• Sla bij het lezen van de gebruiksaanwijzing
pagina 3 op.
Español Página 32
• Desplegar la página 3 al leer las instrucciones
de manejo.
2

1
G
F
H
M
K
E
I
A
D
L
J
C
B
General description (fig. 1)
A Motor unit
B Bowl
C Cover of bowl
D Ridge of cover (locks and unlocks the
built-in safety lock)
E Safety lock
F Metal blade £
G Slicing / grating disc ≠
H Kneading accessory ^
I Drive shaft
J Food chute
K Pusher
L Switches
I = On / Off#
M = "Moment" (release = stop)
Y1 = minimum speed, W2 = maximum
speed
M Cord storage
Graphic instructions
Left to the symbols of the various applications
you can see a picture of the accessory to be
used.
On the top line is adviced to switch on selecting
either M (“Moment”) or I (“Continuous”), in
combination with speed setting Y1 (“minimum
speed”) or W 2 (“maximum speed”).
Please also refer to the tables.
Positioning the bowl
- Position the bowl as indicated in fig. 2.
- Move the handle in the direction of the arrow
until it stops (fig. 3).
English
Important
• Read the instructions in conjunction with
the illustrations before using the
appliance. Keep page 3 folded out when
reading.
• Do not leave the appliance operating
unattended.
• Do not allow children to operate the
appliance.
• Care must be taken when handling the
metal blade and the slicing disc as these
are very sharp.
• Remove the protective cap from the
metal blade before use.
• Let the rotating parts come to a complete
stop before opening the cover.
• Never put your fingers or e.g. a spatula
into the food chute while operating.
• Remove the mains plug from the wall
socket after use.
• If the mains cord of this appliance is
damaged, it must only be replaced by
Philips or their service representative, as
special tools and/or parts are required.#
• Prior to initial use, wash all the parts
which come into contact with food.
• Never immerse the motor unit in water or
any other liquid. Do not rinse either.
• When mixing or blending fluids, do not
fill above the maximum level indication
on the bowl.
• Do not exceed the maximum quantities
and processing times indicated in the
tables.
• Place the lid on the bowl in the right
manner. The built-in safety lock then
becomes unlocked and the appliance can
be switched on.
• Keep these instructions for future
reference.
4
2
3
Metal blade £
Take care: the cutting edges are very sharp!
• The metal blade is suitable for chopping,
mixing, blending, puréeing and making dough
for pastry and shortbread.
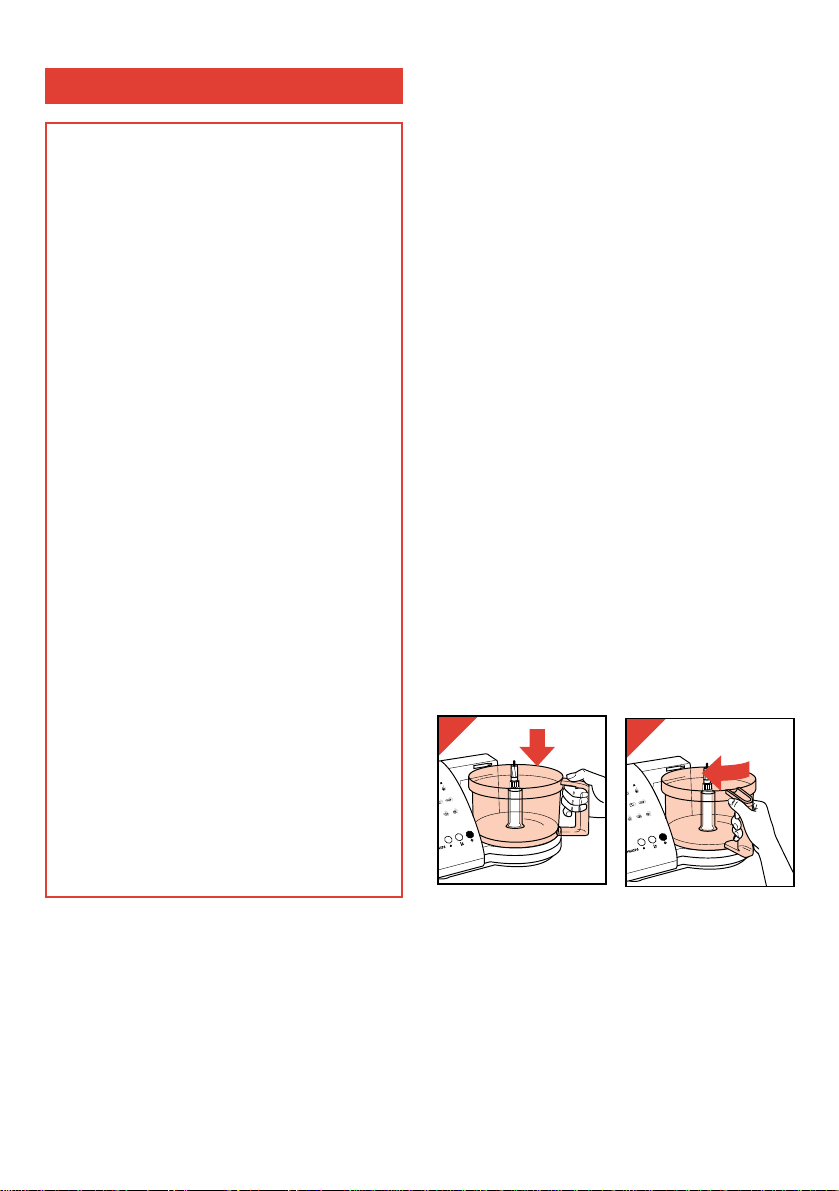
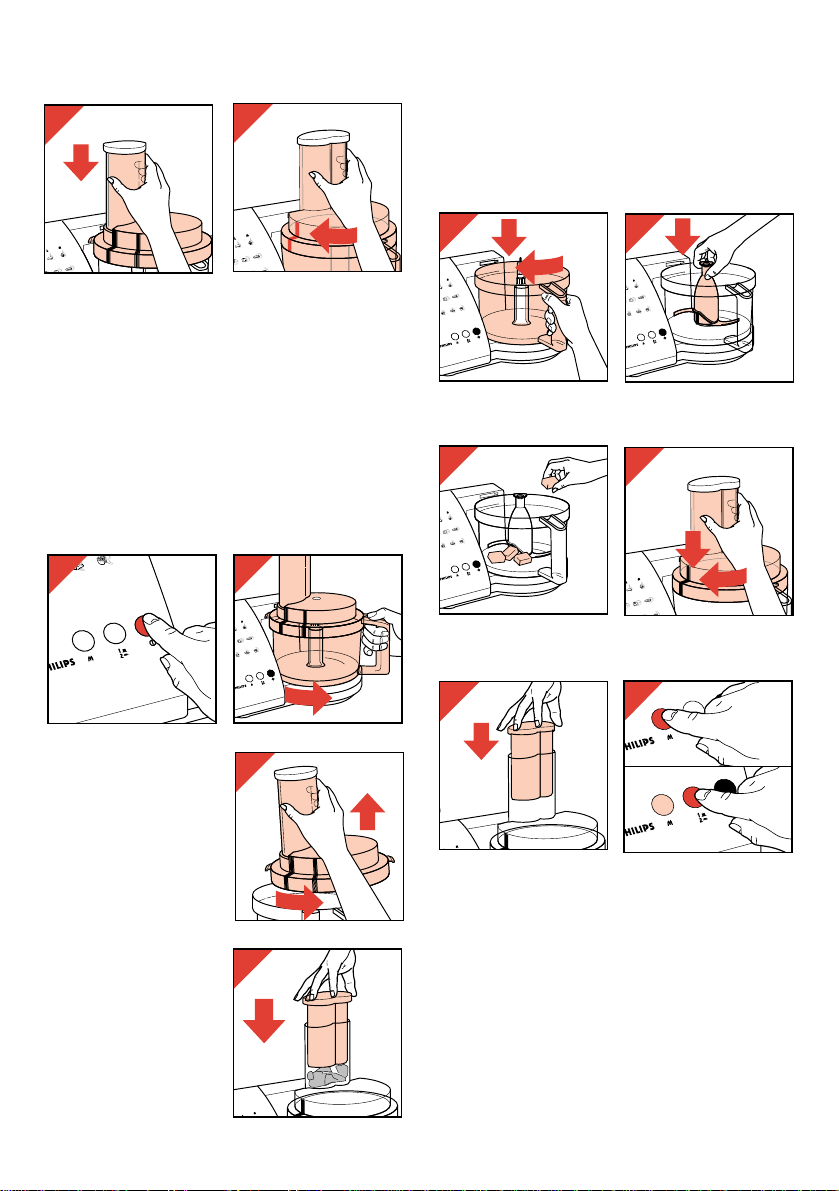
- Position the bowl (fig. 10) and then the metal
blade (fig. 11).
- Put the ingredients into the bowl (fig. 12).
- Place the cover (fig. 13)
and put the pusher into the food chute (fig. 14).
- Switch on selecting M in combination with Y1
or W2 (fig. 15).
Please refer to the tables.
Tips:
• Pre-cut large pieces into cubes of about
3 cm (or 1").
• Avoid overprocessing due to excessive
operation. (Also when using the M setting.)
• When chopping (hard) cheese, take care not to
keep the motor running too long. Then the
cheese could get warm and turn lumpy.
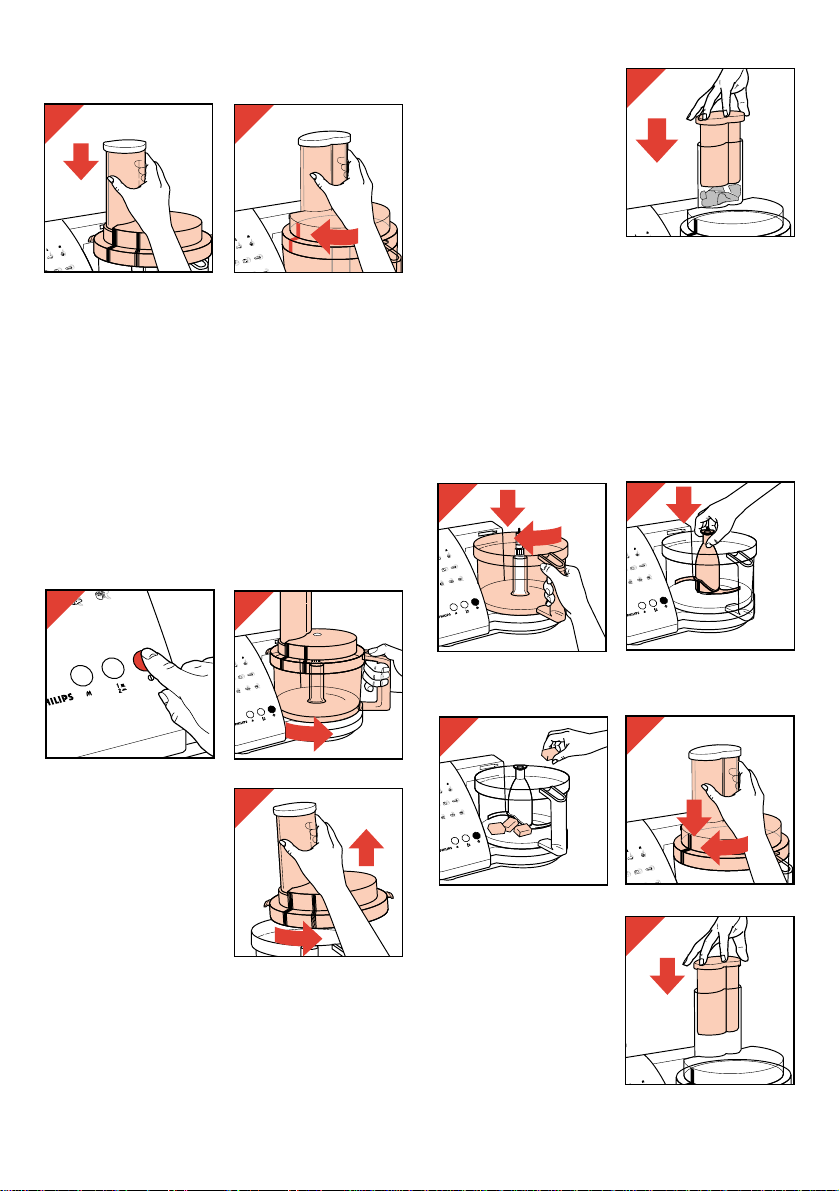
Positioning the cover
- Position the cover as indicated in fig. 4.
- Move the cover firmly in the direction of the
arrow until it stops and the markings on the
cover and on the bowl (handgrip) meet (fig. 5).
Built-in safety lock
Only if the cover has been screwed correctly
onto the bowl, the built-in safety lock is released
so that the appliance can be switched on.
After use
- Switch off (fig. 6).
- Remove the bowl from
the appliance (fig. 7)
- Release the cover
from the bowl (fig. 8).
Food chute and
pusher
• Use the pusher to feed
ingredients through the
food chute (fig. 9).
• You can keep the
pusher in the food
chute to serve as a
stopper while
operating. This will
prevent splashing and
making dust.
5
5
4
6
7
10
1
2
12
14
11
13
1
2
15
8
2
1
9

• If food should get caught around the metal
blade, or when particles of food should stick to
the inside of the bowl:
- first switch the appliance off,
- take the cover from the bowl
- and remove the food from the metal blade or
from the bowl using the spatula.
• Do not chop very hard ingredients, such as
coffee beans, nutmeg and lumps of ice: these
would blunt the metal blade.
Slicing / grating disc ≠
Take care: the cutting edges of the slicing
side are very sharp!
Therefore, always hold the disc by its central
plastic holder.
- Position the bowl (fig. 16).
- Position the disc with the side to be used facing
upwards (fig. 17).
- Place the cover (fig.
18).
- For grating switch on
selecting I in
combination with W2
(fig. 19).
- For slicing switch on
selecting M in
combination with Y1
or W2 (fig. 20).
(Also refer to the
tables.)
- Feed the ingredients into the food chute
(fig. 21).
- Press the ingredients downwards using the
pusher (fig. 22). Apply steady and moderate
pressure.
Tips :
• Pre-cut large pieces to make them feed into the
chute.
• Fill the food chute evenly for the best results.
• Empty the bowl every now and then when
processing large amounts.
Kneading accessory ^
• The kneading accessory is suitable for
kneading bread dough and mixing batters.
- Place the bowl (fig. 23) and then the kneading
accessory (fig. 24).
- Put the dry ingredients into the bowl (fig. 25)
and place the cover (fig. 26).
6
18
19
22
23
24
25
20
21
16
17
26
1
2
1
2
1
2
1
2
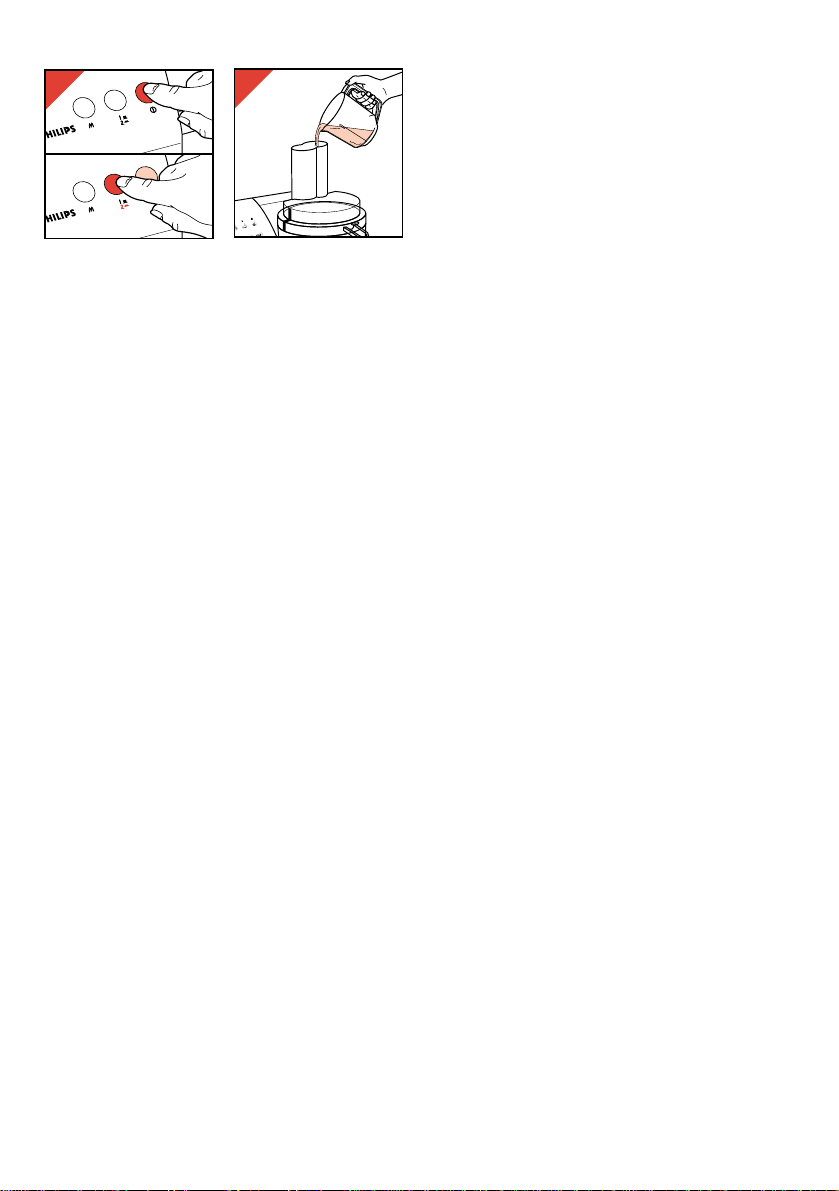
- Switch on selecting I in combination with W2
(fig. 27).
- Add the water via the food chute (fig. 28).
Cleaning
• Always remove the plug from the wall socket
before cleaning the motor unit.
The motor unit may be wiped with a damp
cloth.
Never immerse the motor unit in water. Never
pour water over it.
• Wash the items which have been in contact
with the food in warm soapy water immediately
after use. Do not clean in a dishwasher.
• Take care when cleaning the metal blade and
slicing disc: the cutting edges are very sharp!
• Ensure that the cutting edges do not come into
contact with hard objects as this might make
them blunt.
• Do not use scourers, abrasives, etc.
For U.K. only:
Fitting a different plug
This appliance is fitted with a BS 1363 13 Amp.
plug.
Should you need to replace the plug, connect the
wires as follows:
Brown wire to the Live (L) terminal of the new
plug.
Blue wire to the Neutral (N) terminal of the new
plug.
Always fit the same value of fuse as that
originally supplied with your appliance.
Only use BS 1362 approved fuses.
As a guide only: Appliances under 700 W can
have a 3 Amp. fuse (red) and all others should
have a 13 Amp. fuse (brown).
When disposing of an old plug (particularly the
moulded type which has been cut from the mains
cord) always remove the fuse as the plug could
be dangerous if ever inserted in a live socket.
7
28
27

Tabel Engels
neemt 3 pag.’s
in beslag
Tabel in
RagTime
formaat apart
uitdraaien
8910


Description générale (fig. 1)
A Bloc moteur
B Bol
C Couvercle du bol
D Ergot du couvercle (verrouille et
déverrouille l'interrupteur de sécurité)
E Interrupteur de sécurité
F Couteau £
G Disque à émincer/râper ≠
H Accessoire de pétrissage ©
I Entraîneur
J Cheminée de remplissage
K Poussoir
L Commandes
I = Marche/Arrêt, M = "Moment"
(relâché = arrêt)
Y 1 = vitesse minimum
W 2 = vitesse maximum
M Rangement du cordon d'alimentation
Instructions graphiques
A gauche des symboles des diverses
applications se trouve une représentation de
l'accessoire à utiliser.
La ligne du haut indique le mode d'utilisation
préférable : appui sur M (fonctionnement
intermittent), sur I (fonctionnement continu ) en
combinaison avec Y 1 ou W 2.
Reportez-vous également aux tableaux.
Mise en place du bol
- Placez le bol comme indiqué fig. 2.
- Tournez la poignée dans le sens de la flèche
jusqu'à blocage (fig. 3).
Français
Important
• Lisez ces instructions en vous reportant
aux illustrations avant d'utiliser
l'appareil. Gardez la page 3 dépliée en
lisant les instructions.
• Ne laissez pas l'appareil fonctionner
sans surveillance.
• Ne laissez pas les enfants utiliser
l'appareil.
• Faites très attention en prenant le
couteau et les disques tranchants car ils
sont très aiguisés.
• Enlevez la gaine du couteau avant
utilisation
• Attendez l'arrêt complet des pièces
rotatives avant d'ouvrir le couvercle.
• Ne mettez jamais vos doigts ni tout
autre objet, par exemple une spatule,
dans la cheminée de remplissage
pendant le fonctionnement de l'appareil.
• Débranchez l'appareil après utilisation.
• Si le cordon d'alimentation de l'appareil
est endommagé, vous devez le
remplacer. Adressez-vous pour cela à
Philips ou à un réparateur agréé Philips
car cette opération nécessite des pièces
et/ou des outils spéciaux.
• Avant la première utilisation, nettoyez
toutes les parties en contact avec les
aliments.
• Ne plongez jamais le bloc moteur dans
l'eau ni dans aucun autre liquide. Ne le
rincez pas non plus. Lorsque vous
mixez ou mélangez des liquides, ne
dépassez pas le repère de remplissage
maximum du bol.
• Ne dépassez pas les quantités
maximum et les temps d'utilisation
indiqués dans les tableaux.
• Placez correctement le couvercle du bol
pour qu'il déverrouille l'interrupteur de
sécurité permettant ainsi la mise en
marche du moteur.
• Conservez ces instructions. Elles
pourront vous servir plus tard.
11
2
3
Cheminée de
remplissage et
poussoir
- Utilisez le poussoir
pour faire descendre
les ingrédients dans la
cheminée (fig. 9).
- Vous pouvez
conserver le poussoir
à l'intérieur de la cheminée de remplissage
pour servir d'obturateur. Vous éviterez ainsi les
éclaboussures et l'expulsion de poussières.
Couteau £
Faites attention : Les lames sont très
coupantes !
- Le couteau vous permet de hacher, mixer,
mélanger, réduire en purée et faire des pâtes
à pain ou à gâteau.
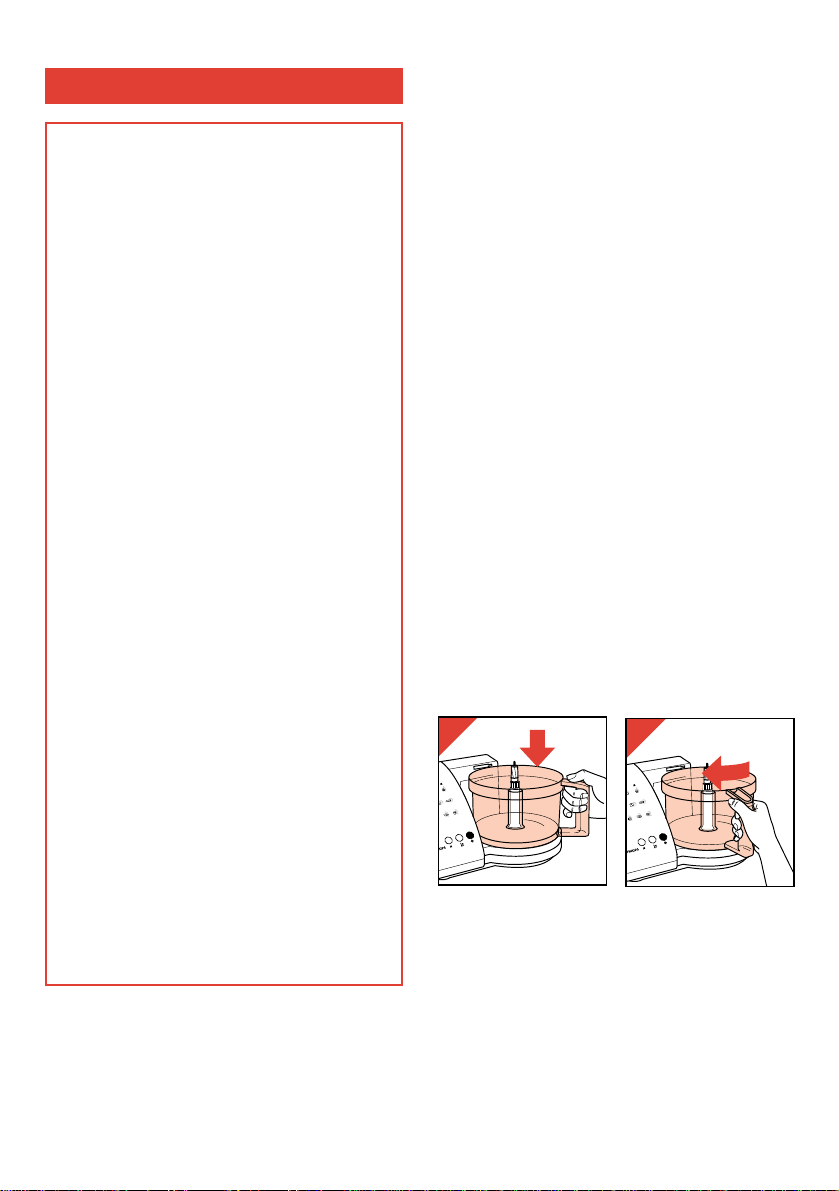
- Mettez en place le bol (fig. 10), puis le couteau
(fig. 11).
- Placez les
ingrédients à
l'intérieur du bol
(fig. 12).
- Mettez le couvercle
en place (fig. 13) et
insérez le poussoir
dans la cheminée de
remplissage (fig. 14).
Mise en place du couvercle :
- Placez le couvercle comme indiqué fig. 4.
- Tournez le couvercle fermement dans le sens
de la flèche jusqu'à blocage. Assurez-vous
que les repères du couvercle et du bol
(poignée) coïncident (fig. 5).
Interrupteur de sécurité intégré
L'interrupteur de sécurité est déverrouillé et
l'appareil ne peut être mis en marche
uniquement si le couvercle a été correctement
vissé sur le bol.
Après utilisation
- Appuyez sur le bouton
d'arrêt (fig. 6).
- Retirez le bol de
l'appareil (fig. 7).
- Déverrouillez et
enlevez le couvercle
du bol (fig. 8).
12
5
4
10
1
2
9
11
6
7
12
8
2
1
13
1
2
14
 Loading...