

© 2017 Koninklijke Philips N.V.
All rights reserved
4239 001 07201
>75% recycled paper
>75% papier recyclé
User Manual
Mode d’emploi
Manual do utilizador
ﺮﺑﺭﺎﮐ ﯼﻨﻫﺍﺭ
ﻡﺪﺨﺘﺴﳌﺍ ﻞﻴﻟﺩ
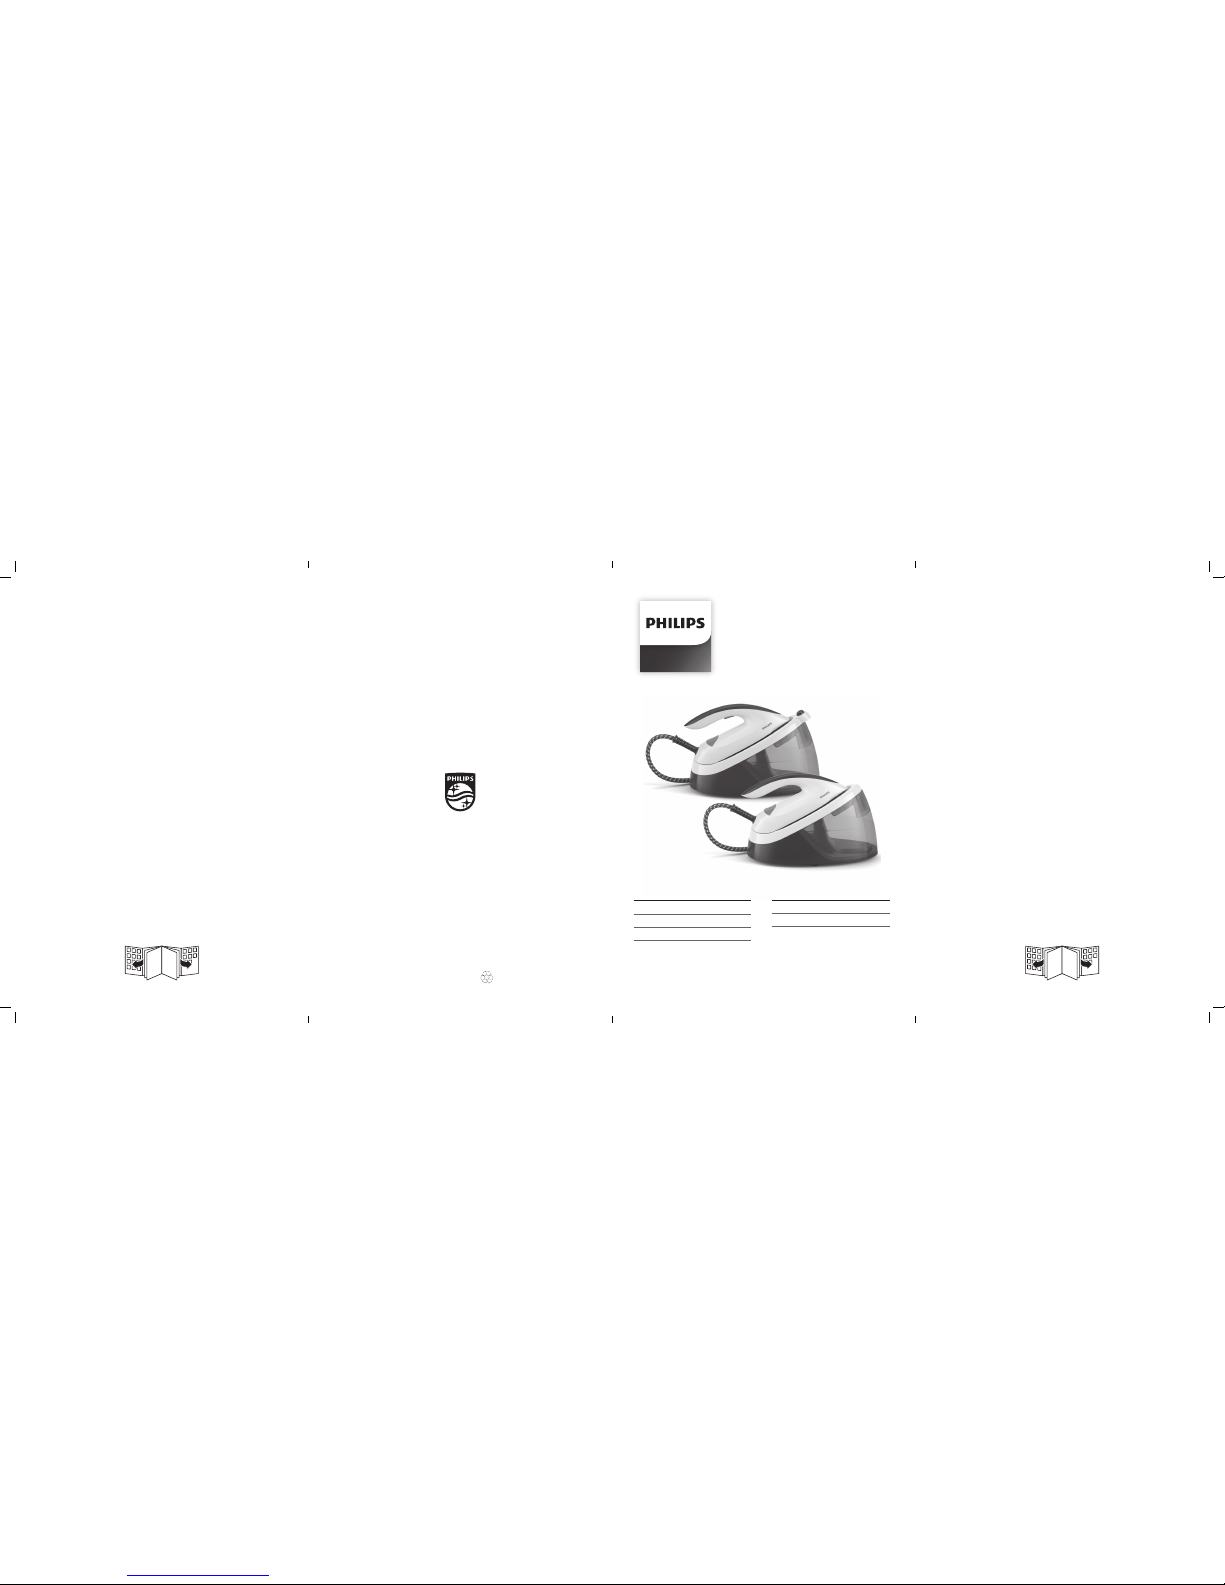
GC6802
GC6804
2x
2 sec.
2 min.
2
6
10
14
18
22 23 24 25
19 20 21
15 16 17
11 12 13
7 8 9
3 4 5
32 41
5 6 7
8 9
10
12
11
1

English 6
Français 12
Português 19
ﯽﺳﺭﺎﻓ 30
ﺔﻴﺑﺮﻌﻟﺍ 35

6
Introduction
Congratulations on your purchase and welcome to Philips! To fully benet from the support that
Philips oers, register your product at www.philips.com/welcome.
Read this user manual, the important information leaet, and the quick start guide carefully before
you use the appliance. Save them for future reference.
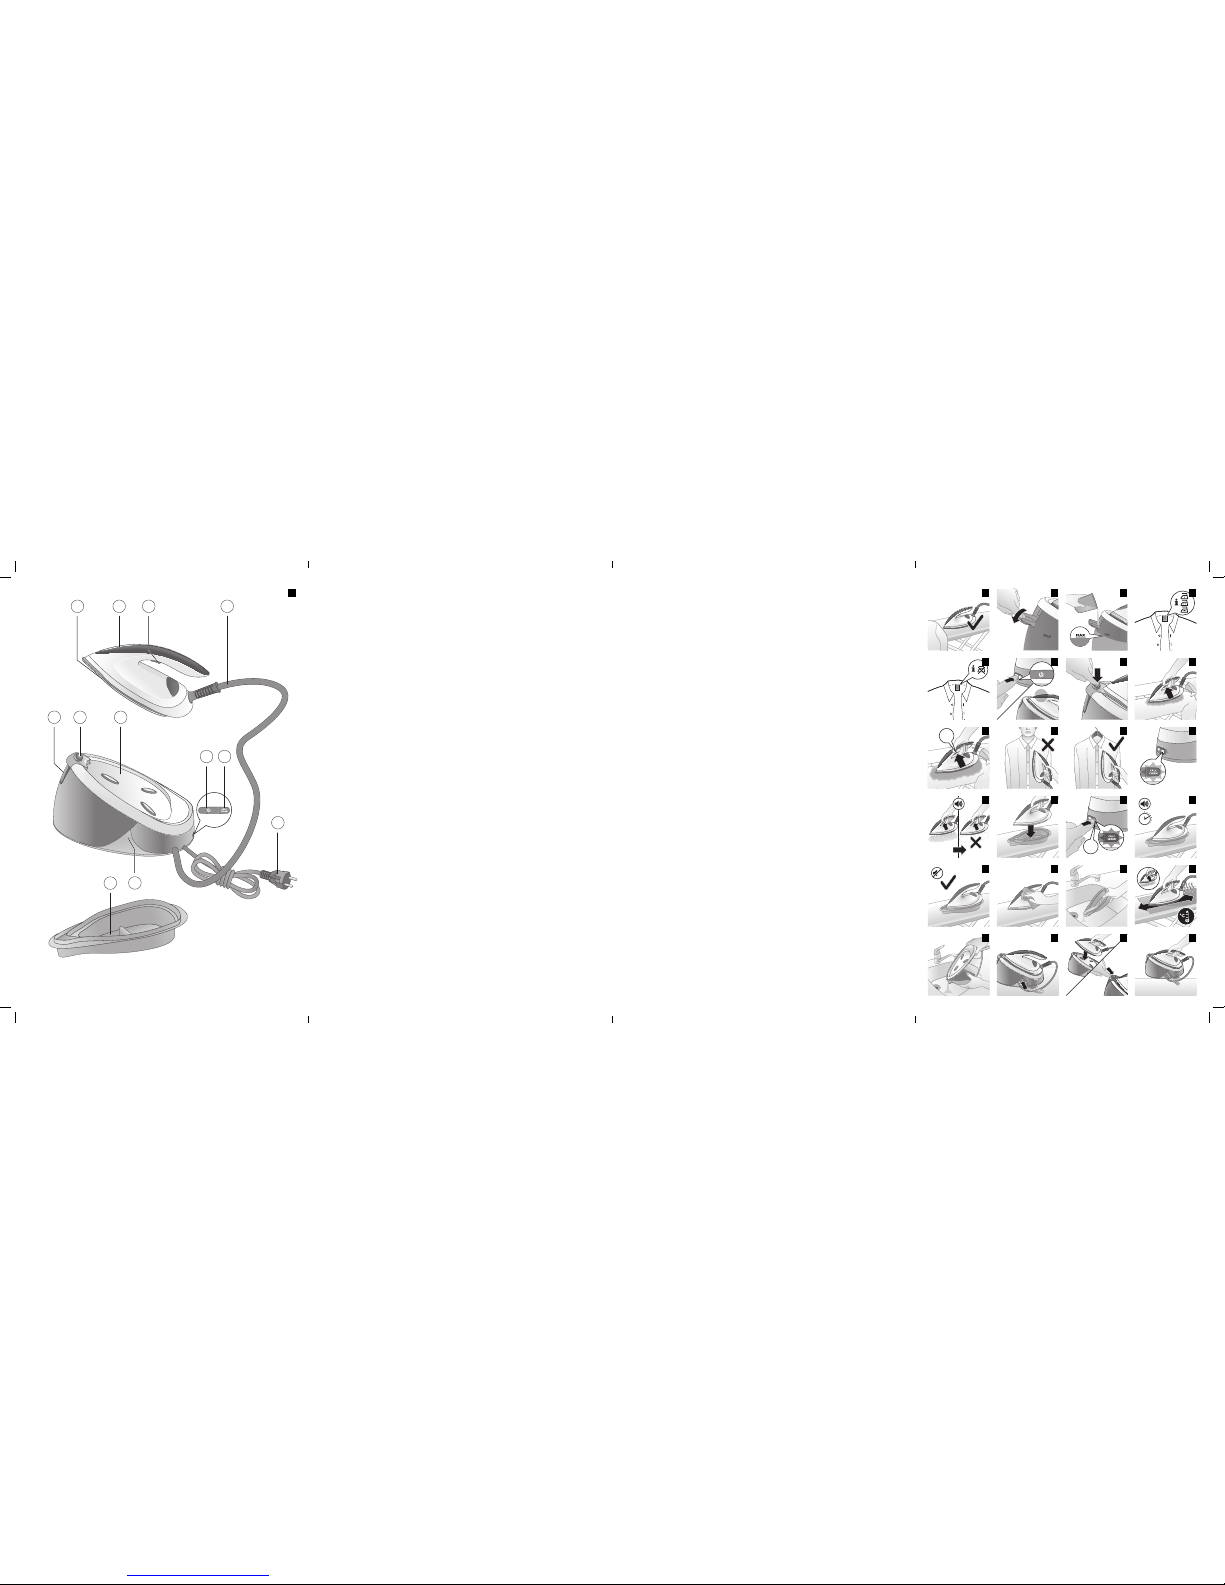
Product overview (Fig. 1)
1 Soleplate
2 ‘Iron ready’ light
3 Steam trigger/Steam boost
4 Water supply hose
5 Water tank lling door
6 Carry lock release button (GC6819, GC6820 and GC6830 series only)
7 Iron platform
8 On/o button with pwer on and shut-o light
9 CALC-CLEAN button with light
10 Mains cord with plug
11 Water supply hose and mains cord storage compartment
12 Smart Calc-Clean container
Exclusive technology from Philips
OptimalTEMP technology
The OptimalTEMP technology enables you to iron all types of ironable fabrics, in any order, without
adjusting the iron temperature and without sorting your garments.
It is safe to just rest the hot soleplate directly on the ironing board (Fig. 2) without putting back to the
iron platform. This will help reduce the stress on your wrist.
This iron has been approved by The Woolmark Company
Pty Ltd for the ironing of wool-only products, provided that
the garments are ironed according to the instructions on the
garment label and those issued by the manufacturer of this
iron. R1701. The Woolmark symbol is a certication mark in
many countries.
Compact ProVelocity technology
This technology delivers continuous steam that penetrates deeply to remove creases easily. At the
same time, it keeps the appliance more compact and lighter than traditional steam generators, for
easier storage.
Preparing for use
Type of water to use
This appliance has been designed to be used with tap water. However, if you live in an area with hard
water, fast scale build-up may occur. Therefore, it is recommended to use distilled or demineralized
water to prolong the lifetime of the appliance.
English

7
Warning: Do not use perfumed water, water from the tumble dryer, vinegar, starch,
descaling agents, ironing aids, chemically descaled water or other chemicals, as they
may cause water spitting, brown staining or damage to your appliance.
Filling the water tank
Fill the water tank before every use or when the water level in the water tank drops below the
minimum level. You can rell the water tank at any time during use.
1 Open the water tank lling door (Fig. 3).
2 Fill the water tank up to the MAX indication (Fig. 4).
3 Close the water tank lling door (‘click’).
Using the appliance
Ironable fabrics
Do not iron non-ironable fabrics.
- Fabrics with these symbols (Fig. 5) are ironable, for example linen, cotton, polyester, silk, wool,
viscose and rayon.
- Fabrics with this symbol (Fig. 6) are not ironable. These fabrics include synthetic fabrics such
as Spandex or elastane, Spandex-mixed fabrics and polyolens (e.g. polypropylene). Prints on
garments are not ironable either.
Ironing
1 Place the appliance on a stable and even surface.
Note: In order to ensure safe ironing we recommend to always place the base on a stable ironing
board.
2 Make sure that there is enough water in the water tank.
3 Remove the mains cord and water supply hose from the storage compartment.
4 Put the mains plug in an earthed wall socket and press the on/o button to switch on the
appliance.Wait until the ‘iron ready’ light lights up continuously (Fig. 7). This takes about 2 minutes.
5 For GC6819, GC6820 and GC6830 series only: press the carry lock release button to unlock the iron
from the iron platform (Fig. 8).
6 Press and hold the steam trigger to start ironing (Fig. 9).
Note: For best ironing results, after ironing with steam, perform the last strokes without steam.
Warning: Never direct steam at people.
Note: When you use the appliance for the rst time, it may take 30 seconds for steam to come out
of the appliance.
Note: The pump is activated each time you press the steam trigger. It produces subtle rattling
sound, which is normal. When there is no water in the water tank, the pump sound is louder. Fill up
the water tank with water when the water level drops below the minimum level.
Steam boost function
1 Press the steam trigger twice quickly to release a powerful boost of steam for 3 seconds (Fig. 10).
Note: It is recommended to use the steam boost function only for stubborn crease.
English

8
Vertical ironing
Warning: Hot steam is emitted from the iron. Never attempt to remove wrinkles
from a garment while someone is wearing it (Fig. 11). Do not apply steam near your or
someone else’s hand.
You can use the steam iron in vertical position to remove wrinkles from hanging fabrics.
1 Hold the iron in vertical position, press the steam trigger and touch the garment lightly with the
soleplate and move the iron up and down (Fig. 12).
Safe rest
Resting the iron while rearranging your garment
While rearranging your garment, you can rest the iron either on the iron platform or horizontally on the
ironing board (Fig. 2). The OptimalTEMP technology ensures the soleplate will not damage the ironing
board cover.
Auto shut-o
- The appliances enters the standby mode if it has not been used for 5 minutes. The light of the on/
o button starts to ash.
- To activate the appliance again, press the on/o button or the steam trigger. The appliance starts
to heat up again.
- The appliance switches o automatically if it has not been used for another 10 minutes after it
enters the standby mode. The light in the on/o button goes o.
Warning: Never leave the appliance unattended when it is connected to the mains.
Always unplug the appliance after use.
Cleaning and maintenance
Smart Calc-Clean System
Your appliance has been designed with a Smart Calc-Clean system to ensure that descaling and
cleaning is done regularly. This helps to maintain a strong steam performance and prevents dirt and
stains coming out of the soleplate over time. To ensure that the cleaning process is performed, the
appliance gives regular reminders.
Sound and light Calc-Clean reminder
After 1 to 3 months of use, the Calc-Clean light starts ashing and the appliance starts beeping to
indicate that you have to perform the Calc-Clean process (Fig. 13).
Besides that, a second defense step to protect the appliance from scale is integrated: the steam
function gets disabled if descaling is not done (Fig. 14). After descaling is done, the steam function will
be restored. This takes place regardless of the type of water used.
Note: The Calc-Clean process can be performed at any time, even when the sound and light reminder
is not activated yet.
English

9
Performing the Calc-Clean process with the Calc-Clean
container
Warning: Do not leave the appliance unattended during the Calc-Clean process.
Caution: Always perform the Calc-Clean process with the Calc-Clean container. Do not interrupt
the process by lifting the iron up from the Calc-Clean container, as hot water and steam will come
out of the soleplate.
1 Fill up the water tank halfway.
Note: Make sure that the appliance is plugged in and switched ON during the Calc-Clean process.
2 Place the Calc-Clean container on the ironing board or any other even, stable surface.
3 Place the iron stably on the Calc-Clean container (Fig. 15).
4 Press and hold the CALC-CLEAN button for 2 seconds until you hear short beeps (Fig. 16).
Note: The Calc-Clean container has been designed to collect scale particles and hot water during
the Calc-Clean process. It is perfectly safe to rest the iron on this container during the entire
process.
5 During the Calc-Clean process, you hear short beeps and a pumping sound (Fig. 17).
6 Wait approximately 2 minutes for the appliance to complete the process (Fig. 18). When the
Calc-Clean process is completed, the iron stops beeping and the CALC-CLEAN light stops ashing.
7 Wipe the iron with a piece of cloth and put it back on the base station (Fig. 19).
Caution: The iron is hot.
8 As the Calc-Clean container becomes hot during the Calc-Clean process, wait about 5 minutes
before you touch it. Then carry the Calc-Clean container to the sink, empty it and store it for future
use (Fig. 20).
9 If necessary, you can repeat steps 1 to 8. Make sure that you empty the Calc-Clean container
before you start the Calc-Clean process.
Note: During the Calc-Clean process, clean water may come out of the soleplate if no scale has
accumulated inside the iron. This is normal.
For more information on how to carry out the Calc-Clean process, refer to the videos in this link:
http://www.philips.com/descaling-iron.
Cleaning the soleplate
To properly maintain your appliance, clean it regularly.
1 Clean the appliance with a moist cloth.
2 To easily and eectively remove stains, let the soleplate heat up and move the iron over a moist
cloth (Fig. 21).
Tip: Clean the soleplate regularly to ensure smooth gliding.
Storage
1 Switch o the appliance and unplug it.
2 Pour the water out of the water tank into the sink (Fig. 22).
3 Fold the mains cord and water supply hose together. Push them into the storage compartment
(Fig. 23).
4 For GC6819, GC6820 and GC6830 series only: push the carry lock to lock the iron onto the iron
platform (Fig. 24). You can carry the appliance by the handle of the iron when it is locked onto the
iron platform (Fig. 25).
English

10
Troubleshooting
This chapter summarizes the most common problems you could encounter with the appliance. If you
are unable to solve the problem with the information below, visit www.philips.com/support for a list
of frequently asked questions or contact the Consumer Care Center in your country.
Problem Possible cause Solution
The iron does not
produce any steam.
There is not enough water in
the water tank.
Fill the water tank beyond the MIN
indication. Press and hold the steam
trigger until steam comes out. It may
take up to 30 seconds until steam
comes out.
You did not press the steam
trigger.
Press and hold the steam trigger until
steam comes out.
The steam function has
been disabled until you have
performed the Calc-Clean
process.
Perform the Calc-Clean process to
restore the steam function. (see chapter '
Cleaning and maintenance')
At the start of your ironing
session, the steam trigger
has not been pressed long
enough.
Press and hold the steam trigger until
steam comes out. It may take up to 30
seconds until steam comes out.
The light of the CALC
CLEAN button ashes
and the appliance
beeps.
This is the Calc-Clean
reminder.
Perform the Calc-Clean after the CalcClean reminder is given (see chapter
‘Cleaning and maintenance’).
No steam comes out of
the soleplate, the light
of the CALC CLEAN
button ashes and the
appliance beeps.
You have not done or have
not completed the Calc-Clean
process.
Perform the Calc-Clean process to
enable the steam function again (see
chapter ‘Cleaning and maintenance’).
The appliance has
switched o.
The auto shut-o function is
activated automatically. The
appliance enters the standby
mode if has not been used for
5 minutes and swiches o if it
has not been used for another
10 minutes.
To activate the appliance again, press
the on/o button. The appliance starts
to heat up again.
The appliance produces
a loud pumping sound.
The water tank is empty. Fill the water tank with water and press
the steam trigger until the pumping
sound becomes softer and steam comes
out of the soleplate.
Water droplets come out
of the soleplate.
After the Calc-Clean process
remaining water may drip out
of the soleplate.
Wipe the soleplate dry with a piece of
cloth. If the Calc-Clean light still ashes
and the appliance still beeps, perform
the Calc-Clean process (see chapter
‘Cleaning and maintenance’).
You have used the steam
boost function too frequently.
Use the steam boost function only for
stubborn creases. It is recommended not
to use it for more than 5 times within 3
minutes.
English

11
Problem Possible cause Solution
The Calc-Clean process has
not been completed.
You have to perform the Calc-Clean
process again (see chapter ‘Cleaning and
maintenance’).
Steam condenses into water
in the hose when you use
steam for the rst time or
have not used it for a long
time.
This is normal. Hold the iron away from
the garment and press the steam trigger.
Wait until steam instead of water comes
out of the soleplate.
Dirty water and
impurities come out of
the soleplate.
Impurities or chemicals
present in the water have
deposited in the steam vents
and/or soleplate.
Perform the Calc-Clean process
regularly (see chapter ‘Cleaning and
maintenance’).
Steam condenses into water
in the hose when you use
steam for the rst time or have
not used it for a long time.
This is normal. Hold the iron away from
the garment and press the steam trigger.
Wait until steam instead of water comes
out of the soleplate.
Water ushes out of the
soleplate.
You have accidentally started
the Calc-Clean process
(see chapter 'Cleaning and
maintenance').
Switch o the appliance. Then switch it
back on again. Let the iron heat up until
the ‘iron ready’ light lights up steadily.
The Calc-Clean process
does not start.
You have not pressed the
CALC-CLEAN button for 2
seconds until the appliance
started beeping.
See chapter ‘Cleaning and maintenance’.
The iron leaves a shine
or an imprint on the
garment.
The surface to be ironed was
uneven, for instance because
you were ironing over a seam
or a fold in the garment.
PerfectCare is safe on all garments. The
shine or imprint is not permanent and
will come o if you wash the garment.
Avoid ironing over seams or folds or you
can place a cotton cloth over the area to
be ironed to avoid imprints.
There was not enough felt in
the ironing board cover.
Put an extra layer of felt material under
the ironing board cover.
The ironing board cover
becomes wet, or there
are water droplets on
the oor/garment.
Steam has condensed on the
ironing board cover after a
long ironing session.
Replace the ironing board cover if the
foam or felt material has worn out.
You can also add an extra layer of felt
material under the ironing board cover
to prevent condensation on the ironing
board.
You have an ironing board
that is not designed to cope
with the high steam rate of
the appliance.
Put an extra layer of felt material under
the ironing board cover to prevent
condensation on the ironing board.
English

12
Introduction
Félicitations pour votre achat et bienvenue dans l'univers Philips ! Pour proter pleinement de
l'assistance oerte par Philips, enregistrez votre produit à l'adresse www.philips.com/welcome.
Lisez attentivement ce mode d’emploi, la brochure « Informations importantes » et le guide de mise en
route avant d’utiliser l’appareil. Conservez-les pour un usage ultérieur.
Présentation du produit (g. 1)
1 Semelle
2 Voyant « Fer prêt »
3 Gâchette vapeur/Eet pressing
4 Tuyau d'arrivée d'eau
5 Ouverture de remplissage du réservoir d'eau
6 Bouton de déverrouillage du fer (séries GC6819, GC6820 et GC6830 uniquement)
7 Support du fer à repasser
8 Bouton marche/arrêt avec voyant d’arrêt et d’alimentation
9 Bouton CALC CLEAN avec voyant
10 Cordon d’alimentation avec che secteur
11 Tuyau d’arrivée d’eau et compartiment de rangement du cordon d’alimentation
12 Réservoir anticalcaire intelligent
Technologie exclusive de Philips
Technologie OptimalTEMP
La technologie OptimalTEMP vous permet de repasser tous les types de tissus repassables, dans
l'ordre que vous souhaitez, sans avoir à régler la température du fer ni à trier vos vêtements.
Vous pouvez laisser la semelle reposer directement sur la planche à repasser (g. 2) sans remettre le
fer en place sur son support. Cela permettra de réduire la pression exercée sur votre poignet.
Ce fer a été approuvé par The Woolmark Company Pty Ltd
pour le repassage de vêtements en laine à condition que
ceux-ci soient repassés selon les instructions indiquées sur
l’étiquette du vêtement et celles fournies par le fabricant
du fer. R1701. Le symbole Woolmark est une marque de
certication dans de nombreux pays.
Technologie Compact ProVelocity
Cette technologie ore un débit vapeur continu qui pénètre en profondeur pour éliminer facilement
les faux plis. Simultanément, il permet à l'appareil d'être plus compact et plus léger que les centrales
vapeur traditionnelles, pour un rangement facilité.
Avant utilisation
Type d'eau à utiliser
Cet appareil a été conçu pour être utilisé avec de l'eau du robinet. Cependant, si vous habitez dans
une zone où l'eau est très calcaire, des dépôts peuvent se former rapidement. Par conséquent, il est
recommandé d'utiliser de l'eau distillée ou déminéralisée pour prolonger la durée de vie de l'appareil.
Français

13
Avertissement : n'utilisez pas d'eau parfumée, d'eau provenant du sèche-linge, de
vinaigre, d'amidon, de détartrants, de produits d'aide au repassage ou d'autres agents
chimiques dans le réservoir d'eau car ils peuvent entraîner des projections d'eau, des
taches marron ou des dommages à votre appareil.
Remplissage du réservoir
Remplissez le réservoir d'eau avant chaque utilisation ou lorsque le niveau d'eau dans le réservoir
descend sous le niveau minimal. Vous pouvez remplir le réservoir d'eau à tout moment pendant le
repassage.
1 Ouvrez l'ouverture de remplissage du réservoir d'eau (g. 3).
2 Remplissez le réservoir d'eau jusqu'au niveau MAX (g. 4).
3 Fermez l’ouverture de remplissage du réservoir d’eau (clic).
Utilisation de l'appareil
Tissus repassables
Ne repassez pas des tissus non repassables.
- Les tissus avec les symboles suivants (g. 5) sont repassables. Par exemple, le lin, le coton, le
polyester, la soie, la laine, la viscose et la rayonne (soie articielle).
- Les tissus avec les symboles suivants (g. 6) ne sont pas repassables. Ces tissus incluent les
bres synthétiques comme le Spandex ou l’élastane, les tissus mélangés à base de Spandex
et les polyoléns (le polypropylène, par exemple). Les imprimés sur les vêtements ne sont pas
repassables.
Repassage
1 Placez l'appareil sur une surface stable et plane.
Remarque : pour un repassage en toute sécurité, nous vous recommandons de toujours placer la
base sur la planche à repasser stable.
2 Assurez-vous qu'il y a susamment d'eau dans le réservoir.
3 Retirez le cordon d’alimentation et le tuyau d’arrivée d’eau du compartiment de rangement.
4 Branchez le cordon d’alimentation sur une prise secteur mise à la terre, puis appuyez sur le bouton
marche/arrêt pour allumer l’appareil. Attendez que le voyant « Fer prêt » reste allumé (g. 7).
L’opération prend environ 2 minutes.
5 Pour les séries GC6819, GC6820 et GC6830 uniquement : appuyez sur le bouton de déverrouillage
du fer pour déverrouiller le fer de son support (g. 8).
6 Appuyez sur la gâchette vapeur pour commencer le repassage (g. 9).
Remarque : pour un repassage impeccable, après le repassage à la vapeur, eectuez les derniers
passages sans vapeur.
Avertissement : ne dirigez en aucun cas le jet de vapeur vers des personnes.
Remarque : lorsque vous utilisez l'appareil pour la première fois, patientez environ 30 secondes
avant que la vapeur s'échappe de l'appareil.
Remarque : la pompe est activée à chaque fois que vous appuyez sur la gâchette vapeur. Elle
produit un léger cliquetis, ce qui est normal. Lorsqu’il n’y a pas d’eau dans le réservoir d’eau, la
Français

14
pompe est plus bruyante. Remplissez le réservoir d’eau avec de l’eau lorsque le niveau d’eau passe
sous le repère minimum.
Fonction Eet pressing
1 Appuyez deux fois rapidement sur la gâchette vapeur pour émettre un jet de vapeur puissant
pendant 3 secondes (g. 10).
Remarque : il est recommandé d'utiliser la fonction Eet pressing uniquement pour éliminer les
faux plis.
Repassage vertical
Avertissement : le fer émet de la vapeur chaude. N'essayez jamais d'enlever les plis
d'un vêtement lorsque quelqu'un le porte (g. 11). N'appliquez pas de vapeur près de
vos mains ou de celles de quelqu'un d'autre.
Vous pouvez utiliser le fer vapeur en position verticale an d'enlever les plis des vêtements sur cintre.
1 Maintenez le fer en position verticale, appuyez sur la gâchette vapeur et eeurez le vêtement avec
la semelle tout en déplaçant le fer vers le haut et vers le bas (g. 12).
Support de sûreté
Support du fer lors du repositionnement de votre vêtement
Tout en repositionnant votre vêtement, vous pouvez poser le fer à repasser sur son support ou
horizontalement sur la planche à repasser (g. 2). La technologie OptimalTEMP permet d'éviter que la
semelle endommage la housse de la planche à repasser.
Arrêt automatique
- L'appareil passe en mode veille s'il n'a pas été utilisé pendant 5 minutes. Le voyant du bouton
marche/arrêt commence à clignoter.
- Pour réactiver l’appareil, appuyez sur le bouton marche/arrêt ou sur la gâchette vapeur. L’appareil
recommence à chauer.
- L’appareil s’éteint automatiquement s’il n’a pas été utilisée pendant 10 minutes après avoir basculé
en mode veille. Le voyant du bouton marche/arrêt s’éteint.
Avertissement : ne laissez jamais l'appareil sans surveillance lorsqu'il est branché.
Débranchez toujours l'appareil après utilisation.
Nettoyage et entretien
Système anticalcaire intelligent
Votre appareil a été pourvu d'un système anticalcaire intelligent an d'assurer un détartrage et un
nettoyage réguliers et, ainsi, maintenir des performances élevées de vapeur et éviter que saletés et
taches s'échappent de la semelle au l du temps. Pour garantir l'exécution du procédé de nettoyage,
l'appareil indique des rappels réguliers.
Rappel sonore et visuel Calc-Clean
Après 1 à 3 mois d'utilisation, le voyant Calc Clean commence à clignoter et l'appareil commence à
émettre des signaux sonores pour indiquer que vous devez exécuter le traitement anticalcaire (g. 13).
Français

15
En outre, un deuxième dispositif de protection contre le calcaire est intégré : la fonction vapeur est
désactivée si le détartrage n’a pas été eectué (g. 14). Une fois le détartrage eectué, la fonction
vapeur est rétablie. Ceci se produit indépendamment du type d’eau utilisé.
Remarque : la procédure de détartrage peut être eectuée à tout moment, même lorsque le rappel
lumineux et sonore n'est pas encore activé.
Exécution du traitement anticalcaire avec le réservoir
anticalcaire
Avertissement : ne laissez pas l'appareil sans surveillance pendant la procédure de
détartrage.
Attention : exécutez toujours la procédure de détartrage avec le réservoir anticalcaire.
N'interrompez pas le processus en relevant le fer du réservoir anticalcaire car de l'eau chaude et de
la vapeur sortent de la semelle.
1 Remplissez le réservoir d'eau à moitié.
Remarque : assurez-vous que l'appareil est branché et allumé pendant le traitement anticalcaire.
2 Placez le réservoir anticalcaire sur la planche à repasser ou sur une autre surface plane et stable.
3 Placez le fer de manière stable sur le réservoir anticalcaire (g. 15).
4 Maintenez enfoncé le bouton CALC CLEAN pendant 2 secondes jusqu’à ce que de brefs signaux
sonores retentissent (g. 16).
Remarque : le réservoir anticalcaire est conçu pour récupérer les résidus de calcaire et l'eau chaude
générés par le processus de détartrage. Il est parfaitement sûr de laisser le fer posé sur ce réservoir
durant toute l'opération.
5 Pendant le traitement anticalcaire, vous entendez de brefs signaux sonores et un bruit de pompe
(g. 17).
6 Patientez environ 2 minutes que l’appareil termine le processus (g. 18). Une fois que le processus
anticalcaire est terminé, le fer cesse d’émettre des signaux sonores et le voyant CALC CLEAN cesse
de clignoter.
7 Essuyez le fer avec un chion et replacez-le sur la base (g. 19).
Attention : le fer est chaud.
8 Le réservoir anticalcaire devenant chaud pendant le traitement anticalcaire, patientez environ
5 minutes avant de le toucher. Transportez ensuite le réservoir anticalcaire vers l'évier, videz-le et
rangez-le pour un usage ultérieur (g. 20).
9 Si nécessaire, répétez les étapes 1 à 8. Assurez-vous de vider le réservoir anticalcaire avant de
commencer le traitement anticalcaire.
Remarque : pendant la procédure de détartrage, de l'eau propre peut s'écouler de la semelle si
aucun résidu de calcaire ne s'est accumulé dans le fer. Ce phénomène est normal.
Pour plus d'informations sur comment eectuer la procédure de détartrage, reportez-vous aux vidéos
de ce lien : http://www.philips.com/descaling-iron.
Nettoyage de la semelle
Pour entretenir votre appareil, nettoyez-le régulièrement.
1 Nettoyez l'appareil avec un chion humide.
2 Pour enlever facilement et ecacement des taches, faites chauer la semelle et passez le fer sur
un chion humide (g. 21).
Conseil : nettoyez la semelle régulièrement pour garantir une glisse optimale.
Français

16
Rangement
1 Arrêtez l'appareil et débranchez-le.
2 Versez l'eau du réservoir d'eau dans l'évier (g. 22).
3 Pliez le cordon d’alimentation et le tuyau d’arrivée d’eau ensemble. Insérez-les dans le
compartiment de rangement (g. 23).
4 Pour les séries GC6819, GC6820 et GC6830 uniquement : appuyez sur le bouton de verrouillage
pour verrouiller le fer sur son support (g 24). Vous pouvez transporter l’appareil par la poignée du
fer à repasser lorsqu’il est verrouillé sur son support (g. 25).
Dépannage
Cette rubrique présente les problèmes les plus courants que vous pouvez rencontrer avec votre
appareil. Si vous ne parvenez pas à résoudre le problème à l'aide des informations ci-dessous,
rendez-vous sur www.philips.com/support pour consulter les questions fréquemment posées ou
contactez le Service Consommateurs de votre pays.
Problème Cause possible Solution
L'appareil ne produit pas
de vapeur.
Il n'y a pas assez d'eau dans le
réservoir d'eau.
Remplissez le réservoir d'eau au-delà de
l'indication MIN. Maintenez la gâchette
vapeur enfoncée jusqu'à ce que la
vapeur s'échappe de l'appareil. Il peut se
passer jusqu'à 30 secondes avant que la
vapeur ne sorte.
Vous n'avez pas appuyé sur la
gâchette vapeur.
Maintenez la gâchette vapeur enfoncée
jusqu'à ce que la vapeur s'échappe de
l'appareil.
La fonction vapeur reste
désactivée jusqu'à ce
que vous ayez eectué la
procédure de détartrage.
Eectuez la procédure de détartrage
pour réactiver la fonction vapeur. (voir le
chapitre « Nettoyage et entretien »)
Au début de votre séance de
repassage, la gâchette vapeur
n'a pas été enfoncée assez
longtemps.
Maintenez la gâchette vapeur enfoncée
jusqu'à ce que la vapeur s'échappe
de l'appareil. Il peut se passer jusqu'à
30 secondes avant que la vapeur ne
sorte.
Le voyant du bouton
CALC CLEAN clignote et
l'appareil émet un signal
sonore.
Ceci est le rappel de
détartrage.
Exécutez le traitement anticalcaire après
avoir reçu le rappel de détartrage (voir le
chapitre « Nettoyage et entretien »).
La vapeur ne s'échappe
pas de la semelle, le
voyant du bouton
CALC CLEAN clignote et
l'appareil émet un signal
sonore.
Vous n'avez pas exécuté
ou terminé le traitement
anticalcaire.
Exécutez le traitement anticalcaire pour
réactiver la fonction vapeur (voir le
chapitre « Nettoyage et entretien »).
Français

17
Problème Cause possible Solution
L'appareil s'est éteint. La fonction d'arrêt
automatique s'active
automatiquement. L'appareil
bascule en mode veille s'il
n'a pas été utilisé pendant
5 minutes et s'éteint s'il
n'a pas été utilisé pendant
10 minutes supplémentaires.
Pour activer de nouveau l'appareil,
appuyez sur le bouton marche/arrêt.
L'appareil recommence à chauer.
Le fer produit un bruit de
pompe.
Le réservoir d'eau est vide. Remplissez le réservoir d'eau avec de
l'eau et appuyez sur la gâchette vapeur
jusqu'à ce que le bruit de pompe
s'atténue et que de la vapeur s'échappe
de la semelle.
Des gouttes d'eau
s'écoulent de la semelle.
Après le traitement CalcClean, de l'eau peut s'écouler
de la semelle.
Essuyez la semelle à l'aide d'un chion.
Si le voyant Calc Clean continue de
clignoter et si l'appareil continue
d'émettre des signaux sonores, exécutez
le traitement anticalcaire (voir le chapitre
« Nettoyage et entretien »).
Vous avez utilisé la
fonction Eet pressing trop
fréquemment.
Utilisez la fonction Eet pressing
uniquement pour éliminer les faux plis
tenaces. Il est recommandé de ne pas
l'utiliser plus de 5 fois dans un délai de
3 minutes.
Le traitement Calc-Clean n'a
pas été mené jusqu'à son
terme.
Vous devez exécuter à nouveau le
traitement anticalcaire (voir le chapitre
« Nettoyage et entretien »).
La vapeur se condense en
eau dans le cordon lorsque
vous utilisez la vapeur pour la
première fois ou lorsque vous
ne l'avez pas utilisée pendant
longtemps.
Ce phénomène est normal. Éloignez
le fer du vêtement et appuyez sur la
gâchette vapeur. Patientez jusqu'à
ce que de la vapeur, et non de l'eau,
s'échappe de la semelle.
De l'eau sale et des
impuretés s'écoulent de
la semelle.
Des impuretés ou dépôts de
calcaire se sont formés sur
les évents à vapeur et/ou la
semelle.
Exécutez régulièrement le traitement
anticalcaire (voir le chapitre « Nettoyage
et entretien »).
La vapeur se condense en
eau dans le cordon lorsque
vous utilisez la vapeur pour la
première fois ou lorsque vous
ne l'avez pas utilisée pendant
longtemps.
Ce phénomène est normal. Éloignez
le fer du vêtement et appuyez sur la
gâchette vapeur. Patientez jusqu'à
ce que de la vapeur, et non de l'eau,
s'échappe de la semelle.
De l'eau s'écoule de la
semelle.
Vous avez accidentellement
démarré le traitement
anticalcaire (voir le chapitre
« Nettoyage et entretien »).
Éteignez l'appareil. Puis rallumez-le.
Laissez chauer le fer jusqu'à ce que le
voyant « Fer prêt » s'allume de manière
xe.
Français

18
Problème Cause possible Solution
Le traitement Calc-Clean
ne démarre pas.
Vous n'avez pas appuyé
sur le bouton CALC CLEAN
pendant 2 secondes jusqu'à
ce que l'appareil commence à
émettre des signaux sonores.
Voir le chapitre « Nettoyage et
entretien ».
Le fer laisse un voile
ou une marque sur le
vêtement.
La surface à repasser était
non plane, par exemple parce
que vous repassiez sur une
couture ou un pli dans le
vêtement.
PerfectCare peut être utilisé sur tous les
vêtements. Le voile ou la marque n'est
pas permanent(e) et partira si vous lavez
le vêtement. Évitez de repasser sur les
coutures ou plis, ou placez un chion en
coton sur la zone à repasser an d'éviter
des marques.
La housse de la planche à
repasser ne contenait pas
assez de feutre.
Mettez une couche supplémentaire de
feutre sous la housse de la planche à
repasser.
La housse de la planche
à repasser devient
humide ou des gouttes
d'eau apparaissent sur le
sol/le vêtement.
La vapeur s'est condensée
sur la housse de la planche
à repasser après une longue
séance de repassage.
Remplacez la housse de la planche à
repasser si la mousse ou la couche de
feutre est usée. Vous pouvez ajouter
une couche de feutre sous la housse de
la planche à repasser pour empêcher la
condensation sur la planche à repasser.
Votre planche à repasser
n'est pas conçue pour résister
au débit élevé de vapeur de
l'appareil.
Mettez une couche supplémentaire
de feutre sous la housse de la
planche à repasser pour empêcher la
condensation sur la planche à repasser.
Français

19
Português
Introdução
Parabéns pela sua compra e seja bem-vindo à Philips! Para usufruir de todas as vantagens da
assistência oferecida pela Philips, registe o seu produto em:www.philips.com/welcome.
Leia cuidadosamente este manual do utilizador, o folheto de informações importantes e o manual de
início rápido antes de utilizar o aparelho. Guarde-o para consultas futuras.
Descrição do produto (g. 1)
1 Base
2 Luz de “ferro pronto”
3 Botão do vapor/jacto de vapor
4 Mangueira de fornecimento de água
5 Abertura de enchimento do depósito de água
6 Botão de desencaixe do bloqueio de transporte (apenas nos modelos das séries GC6819, GC6820
e GC6830)
7 Plataforma do ferro
8 Botão de ligar/desligar com luz indicadora
9 Botão CALC-CLEAN com luz
10 Cabo de alimentação com cha
11 Mangueira de fornecimento de água e compartimento para arrumação do cabo de alimentação
12 Recipiente Calc-Clean inteligente
Tecnologia exclusiva da Philips
Tecnologia OptimalTemp
A tecnologia OptimalTemp permite-lhe passar a ferro todos os tipos de tecidos que podem ser
engomados, sem ajustar a temperatura do ferro e sem ter de separar as suas peças de roupa.
É seguro deixar a base quente directamente sobre a tábua de engomar (g. 2) sem colocar o ferro de
volta na plataforma. Isto irá ajudar a reduzir o esforço efectuado pelo pulso.
O ferro foi aprovado pela The Woolmark Company Pty Ltd
para engomar produtos totalmente em lã, desde que estas
peças de roupa sejam passadas a ferro de acordo com
as indicações na etiqueta da peça de roupa e de acordo
com as instruções fornecidas pelo fabricante deste ferro.
R1701. O símbolo da Woolmark é uma marca de certicação
em muitos países.
Tecnologia Compact ProVelocity
Esta tecnologia emite vapor contínuo que penetra em profundidade para remover facilmente os
vincos. Ao mesmo tempo, mantém o aparelho mais compacto e mais leve do que os tradicionais
geradores de vapor, para facilitar o armazenamento.
Preparar para a utilização
Tipo de água a utilizar
Este aparelho foi concebido para ser utilizado com água canalizada. No entanto, se residir numa
área com água dura, poderá ocorrer uma acumulação rápida de calcário. Por isso, recomenda-se a
utilização de água destilada ou desmineralizada para prolongar a vida útil do aparelho.

20
Aviso: não utilize água perfumada, água da máquina de secar roupa, vinagre,
goma, agentes anticalcário, produtos para ajudar a engomar, água descalcicada
quimicamente nem outros produtos químicos, pois estes podem causar expelição de
água, manchas castanhas ou danos no aparelho.
Encher o depósito de água
Encha o depósito da água antes de cada utilização ou quando o nível de água no depósito for inferior
ao nível mínimo. Pode reabastecer o depósito da água em qualquer altura, durante a utilização.
1 Abra a abertura de enchimento do depósito de água (g. 3).
2 Encha o depósito com água até à indicação MAX (g. 4).
3 Feche a abertura de enchimento do depósito de água (ouve-se um estalido).
Utilizar o aparelho
Tecidos que podem ser passados a ferro
Não passe a ferro tecidos que não podem ser passados a ferro.
- Os tecidos com estes símbolos (g. 5) podem ser passados a ferro. Por exemplo, linho, algodão,
poliéster, seda, lã, viscose e rayon.
- Os tecidos com este símbolo (g. 6) não podem ser passados a ferro. Estes tecidos incluem tecidos
sintéticos como Spandex ou elastano, tecidos com uma percentagem de Spandex e poliolenas
(por exemplo, polipropileno). As impressões em peças de roupa também não podem ser passadas
a ferro.
Engomar
1 Coloque o aparelho numa superfície estável e nivelada.
Nota: para garantir um engomar seguro, recomendamos que coloque sempre a base de
carregamento numa tábua de engomar estável.
2 Certique-se de que o depósito tem água suciente.
3 Retire o cabo de alimentação e a mangueira de fornecimento de água do compartimento de
arrumação.
4 Ligue a cha de alimentação a uma tomada com ligação à terra e prima o botão de ligar/desligar
para ligar o aparelho. Aguarde até a luz de “ferro pronto” car continuamente acesa (g. 7). Isto
demora cerca de 2 minutos.
5 Apenas para modelos das séries GC6819, GC6820 e GC6830: prima o botão de desencaixe do
bloqueio de transporte para libertar o ferro da respectiva plataforma (g. 8).
6 Mantenha o botão de vapor premido para começar a engomar (g. 9).
Nota: para obter melhores resultados de engomar, depois de passar com vapor, efectue as últimas
passagens sem vapor.
Aviso: nunca direccione o vapor para as pessoas.
Nota: quando utilizar o aparelho pela primeira vez, pode demorar 30 segundos até o aparelho
produzir vapor.
Nota: a bomba é activada cada vez que prime o botão de vapor. Este produz um subtil som de
chocalhar, o que é normal. Quando não há água no depósito de água, a bomba emite um som
mais elevado. Encha o depósito de água com água quando o nível de água for inferior ao nível
mínimo.
Português

21
Função de jacto de vapor
1 Prima rapidamente o botão de vapor duas vezes para libertar um jacto potente de vapor durante 3
segundos (g. 10).
Nota: recomenda-se que utilize a função de jacto de vapor apenas para vincos difíceis.
Passar a ferro na vertical
Aviso: o ferro emite vapor quente. Nunca tente remover vincos de uma peça de roupa
enquanto alguém a tem vestida (g. 11). Não aplique vapor perto da sua mão ou da
mão de outra pessoa.
Pode utilizar o ferro a vapor numa posição vertical para eliminar vincos em tecidos pendurados.
1 Segure o ferro na posição vertical, prima o botão de vapor e toque ligeiramente na peça de roupa
com a base e passe o ferro para cima e para baixo (g. 12).
Suporte seguro
Pousar o ferro para organizar a sua peça de roupa
Enquanto organiza a peça de roupa, pode colocar o ferro na respectiva plataforma ou
horizontalmente na tábua de engomar (g. 2). A tecnologia OptimalTemp garante que a base não
danica a protecção da tábua de engomar.
Desligar automático
- Os aparelhos entram no modo de espera se não forem utilizados durante 5 minutos. A luz do
botão de ligar/desligar começa a piscar.
- Para activar novamente o aparelho, prima o botão de ligar/desligar ou o botão de vapor. O
aparelho começa novamente a aquecer.
- O aparelho desliga-se automaticamente se não for utilizado durante outros 10 minutos depois de
entrar no modo de espera. A luz no botão de ligar/desligar apaga-se.
Aviso: nunca abandone o aparelho enquanto este estiver ligado à corrente eléctrica.
Desligue sempre da corrente após cada utilização.
Limpeza e manutenção
Sistema Calc-Clean inteligente
O seu aparelho foi concebido com um sistema Calc-Clean inteligente para garantir que a
descalcicação e a limpeza são efectuadas regularmente. Isso ajuda a manter o bom desempenho do
vapor e evita que, com o tempo, a sujidade e as manchas atravessem a base e passem para a roupa.
Para garantir que o processo de limpeza é executado, o aparelho emite alertas regulares.
Alerta Calc-Clean sonoro e luminoso
Depois de 1 a 3 meses de utilização, a luz Calc-Clean começa a piscar e o aparelho começa a emitir
sinais sonoros para indicar que tem de executar o processo Calc-Clean (g. 13).
Além disso, o aparelho inclui um segundo passo de protecção contra o calcário: a função de vapor
ca desactivada se a descalcicação não for realizada (g. 14). Depois de a remoção do calcário
ser efectuada, a função de vapor é reactivada. Isto acontece independentemente do tipo de água
utilizado.
Português

22
Nota: o processo Calc-Clean pode ser executado a qualquer momento, mesmo quando os alertas
sonoros e luminosos ainda não tiverem sido activados.
Execução do processo Calc-Clean com o recipiente
Calc-Clean
Aviso: não abandone o aparelho durante o processo Calc-Clean.
Cuidado: execute sempre o processo Calc-Clean com o recipiente Calc-Clean. Não interrompa o
processo levantando o ferro do recipiente Calc-Clean, visto que a base irá libertar água quente e
vapor.
1 Encha o depósito de água até meio.
Nota: certique-se de que a cha do aparelho está inserida na tomada e de que o aparelho está
ligado durante o processo Calc-Clean.
2 Coloque o recipiente Calc-Clean na tábua de engomar ou em qualquer outra superfície nivelada e
estável.
3 Coloque o ferro, de forma estável, no recipiente Calc-Clean (g. 15).
4 Mantenha o botão CALC-CLEAN premido durante 2 segundos até ouvir breves sinais sonoros
(g. 16).
Nota: o recipiente Calc-Clean foi concebido para recolher as partículas de calcário e água quente
durante o processo Calc-Clean. É perfeitamente seguro deixar o ferro pousado sobre este
recipiente durante todo o processo.
5 Durante o processo Calc-Clean, ouvirá breves sinais sonoros e um som de bombeamento (g. 17).
6 Aguarde cerca de 2 minutos para que o processo seja concluído (g. 18). Quando o processo
Calc-Clean estiver concluído, o ferro pára de emitir sinais sonoros e a luz CALC-CLEAN deixa de
piscar.
7 Limpe o ferro com um pano e volte a colocá-lo na estação de base (g. 19).
Atenção: o ferro está quente.
8 Visto que o recipiente Calc-Clean aquece durante o processo Calc-Clean, aguarde
aproximadamente 5 minutos antes de lhe tocar. Transporte o recipiente Calc-Clean até ao lavaloiça, esvazie-o e guarde-o para utilizações futuras (g. 20).
9 Se necessário, repita os passos 1 a 8. Certique-se de que esvazia o recipiente Calc-Clean antes de
iniciar o processo Calc-Clean.
Nota: durante o processo Calc-Clean, pode sair água limpa pela base se não houver calcário
acumulado dentro do ferro. É normal.
Para obter mais informações sobre como executar o processo Calc-Clean, consulte os vídeos nesta
ligação: http://www.philips.com/descaling-iron.
Limpar a base
Para efectuar a manutenção correcta do seu aparelho, limpe-o regularmente.
1 Limpe o aparelho com um pano húmido.
2 Para remover manchas de forma simples e ecaz, deixe a base aquecer e passe o ferro sobre um
pano húmido (g. 21).
Sugestão: limpe regularmente a base para assegurar um deslizar suave.
Português

23
Armazenamento
1 Desligue o aparelho e retire a cha da tomada eléctrica.
2 Verta a água do depósito de água para o lava-loiça (g. 22).
3 Dobre em conjunto o cabo de alimentação e a mangueira de fornecimento de água. Coloque-os
no compartimento de arrumação (g. 23).
4 Apenas para modelos das séries GC6819, GC6820 e GC6830: prima o botão de desencaixe do
bloqueio de transporte para bloquear o ferro na respectiva plataforma (g. 24). Pode transportar o
aparelho pela pega do ferro quando este estiver bloqueado na respectiva plataforma (g. 25).
Resolução de problemas
Este capítulo resume os problemas mais comuns que podem surgir no aparelho. Se não conseguir
resolver o problema com as informações fornecidas a seguir, visite www.philips.com/support para
consultar uma lista com as perguntas mais frequentes ou contacte o Centro de Apoio ao Cliente no
seu país.
Problema Possível causa Solução
O ferro não produz
vapor.
Não existe água suciente no
depósito da água.
Encha o depósito com água acima da
indicação MIN. Mantenha o botão de
vapor premido até sair vapor. Pode
demorar até 30 segundos para sair
vapor.
Não premiu o botão de vapor. Mantenha o botão de vapor premido até
sair vapor.
A função de vapor foi
desactivada até o processo
Calc-Clean ser executado.
Execute o processo Calc-Clean para
restaurar a função de vapor. (consulte o
capítulo "Limpeza e manutenção")
No início da sua sessão de
engomar, o botão do vapor
não foi premido o tempo
suciente.
Mantenha o botão de vapor premido
até sair vapor. Pode demorar até 30
segundos para sair vapor.
A luz do botão CALCCLEAN pisca e o
aparelho emite sinais
sonoros.
Trata-se do alerta Calc-Clean. Execute o processo Calc-Clean depois
de o alerta Calc-Clean ser emitido
(consulte o capítulo "Limpeza e
manutenção").
Não sai vapor pela base
do ferro, a luz do botão
CALC-CLEAN pisca e o
aparelho emite um sinal
sonoro.
Ainda não executou ou não
conclui o processo CalcClean.
Execute o processo Calc-Clean para
activar novamente a função de vapor
(consulte o capítulo "Limpeza e
manutenção").
O aparelho desligou-se. A função de desactivação
automática é activada
automaticamente. O aparelho
entra no modo de espera se
não for utilizado durante 5
minutos e desliga-se se não
for utilizado durante outros 10
minutos.
Para activar novamente o aparelho,
prima o botão de ligar/desligar. O
aparelho começa novamente a aquecer.
Português

24
Problema Possível causa Solução
O aparelho produz
um som elevado de
bombeamento.
O depósito de água está
vazio.
Encha o depósito de água e prima
o botão de vapor até o som de
bombeamento se tornar mais suave e
sair vapor pela base.
A base liberta gotas de
vapor.
Depois do processo CalcClean, a água restante pode
sair em forma de gotas
através da base.
Seque a base com um pano. Se a luz
Calc-Clean continuar intermitente e
o aparelho continuar a emitir sinais
sonoros, execute o processo CalcClean (consulte o capítulo "Limpeza e
manutenção").
Utilizou a função de jacto de
vapor demasiadas vezes.
Utilize a função de jacto de vapor
apenas para os vincos persistentes.
Recomendamos que não utilize esta
função mais de 5 vezes num intervalo de
3 minutos.
O processo Calc-Clean não foi
concluído.
Tem de executar novamente o processo
Calc-Clean (consulte o capítulo
"Limpeza e manutenção").
O vapor condensa-se
formando água na mangueira
quando utiliza vapor pela
primeira vez ou se não o
tiver utilizado durante algum
tempo.
É normal. Afaste o ferro da peça de
roupa e prima o botão de vapor.
Aguarde até sair vapor em vez de água
pela base.
Saem impurezas e água
suja da base do ferro.
Podem ter-se depositado no
depósito do vapor e/ou na
base impurezas ou químicos
presentes na água.
Execute regularmente o processo CalcClean (consulte o capítulo "Limpeza e
manutenção").
O vapor condensa-se
formando água na mangueira
quando utiliza vapor pela
primeira vez ou se não o
tiver utilizado durante algum
tempo.
É normal. Afaste o ferro da peça de
roupa e prima o botão de vapor.
Aguarde até sair vapor em vez de água
pela base.
A base liberta água. Iniciou acidentalmente o
processo Calc-Clean (consulte
o capítulo "Limpeza e
manutenção").
Desligue o aparelho. Em seguida,
volte a ligá-lo. Deixe o ferro aquecer
até a luz de "ferro pronto" car acesa
continuamente.
O processo Calc-Clean
não é iniciado.
Não premiu o botão CALCCLEAN durante 2 segundos
até o aparelho começar a
emitir sinais sonoros.
Consulte o capítulo "Limpeza e
manutenção".
O ferro deixa brilho
ou marcas na peça de
roupa.
A superfície para passar a
ferro era irregular, por ex.,
passou o ferro sobre uma
costura ou uma dobra na
peça de roupa.
O PerfectCare é seguro em todas as
peças de roupa. O brilho ou a marca
não é permanente e sairá quando lavar
a peça de roupa. Evite passar o ferro
sobre costuras ou dobras ou coloque
um pano de algodão sobre a área a
passar a ferro para evitar marcas.
Português

25
Problema Possível causa Solução
Não existe feltro suciente
na protecção da tábua de
engomar.
Coloque uma camada extra de feltro sob
a protecção da tábua de engomar.
A protecção da tábua
ca húmida ou surgem
gotas de água no chão/
na peça de roupa.
O vapor condensou-se na
protecção da tábua depois
de uma sessão de engomar
prolongada.
Substitua a protecção da tábua de
engomar se a espuma ou o feltro
estiverem gastos. Também pode colocar
uma camada extra de feltro sob a
protecção da tábua de engomar para
evitar a condensação na tábua.
A sua tábua de engomar não
é adequada ao uxo de vapor
elevado do aparelho.
Coloque uma camada extra de feltro
sob a protecção da tábua para evitar a
condensação na tábua.
Português

26
یسراف
ﻝﺎﮑﺷﺍﯽﻟﺘﺣﺍ ﺖﻠﻋﻞﺣ ﻩﺍﺭ
.ﺖﺳﺍ ﻩﺪﺷ ﺵﻮﻣﺎﺧ ﻩﺎﮕﺘﺳﺩ ﻝﺎﻌﻓ ﺭﺎﮐﺩﻮﺧ ﺭﻮﻃ ﻪﺑ ﺭﺎﮐﺩﻮﺧ ﻥﺪﺷ ﺵﻮﻣﺎﺧ ﺩﺮﮑﻠﻤﻋ
ﻩﺩﺎﻔﺘﺳﺍ ﺩﺭﻮﻣ ﻪﻘﯿﻗﺩ ۵ ﺕﺪﻣ ﻪﺑ ﻩﺎﮕﺘﺳﺩ ﺮﮔﺍ .ﺩﻮﺷ ﯽﻣ
ﺮﮔﺍ ﻭ ﺩﻮﺷ ﯽﻣ ﺭﺎﮐ ﻪﺑ ﻩﺩﺎﻣﺁ ﺖﻟﺎﺣ ﺩﺭﺍﻭ ﺩﺮﯿﮕﻧ ﺭﺍﺮﻗ
ﻩﺎﮕﺘﺳﺩ ،ﺩﻮﺸﻧ ﻩﺩﺎﻔﺘﺳﺍ ﻥﺁ ﺯﺍ ﻢﻫ ﺮﮕﯾﺩ ﻪﻘﯿﻗﺩ ۱۰
.ﺩﻮﺷ ﯽﻣ ﺵﻮﻣﺎﺧ
.ﺪﯿﻫﺩ ﺭﺎﺸﻓ ﺍﺭ ﺵﻮﻣﺎﺧ/ﻦﺷﻭﺭ ﻪﻤﮐﺩ ،ﻩﺎﮕﺘﺳﺩ ﺩﺪﺠﻣ ﻥﺩﺮﮐ ﻝﺎﻌﻓ ﯼﺍﺮﺑ
.ﺪﻨﮐ ﯽﻣ ﻥﺪﺷ ﻡﺮﮔ ﻪﺑ ﻉﻭﴍ ًﺍﺩﺪﺠﻣ ﻩﺎﮕﺘﺳﺩ
ﺩﺎﺠﯾﺍ ﻥﺩﺮﮐ ﭗﻤﭘ ﺪﻨﻠﺑ ﯼﺍﺪﺻ ﻩﺎﮕﺘﺳﺩ
.ﺪﻨﮐ ﯽﻣ
.ﺖﺳﺍ ﯽﻟﺎﺧ ﺏﺁ ﻥﺰﺨﻣ ﻪﮑﯿﻧﺎﻣﺯ ﺎﺗ ﺪﯿﻫﺩ ﺭﺎﺸﻓ ﺍﺭ ﺭﺎﺨﺑ ﯼﺭﺎﺸﻓ ﻪﻤﮐﺩ ﻭ ﻩﺩﺮﮐ ﺮﭘ ﺍﺭ ﺏﺁ ﻥﺰﺨﻣ
.ﺩﻮﺷ ﺝﺭﺎﺧ ﻮﺗﺍ ﻒﮐ ﺯﺍ ﺭﺎﺨﺑ ﻭ ﻩﺪﺷ ﺮﺗ ﻢﯾﻼﻣ ﭗﻤﭘ ﯼﺍﺪﺻ
.ﺪﻧﻮﺷ ﯽﻣ ﺝﺭﺎﺧ ﻮﺗﺍ ﻒﮐ ﺯﺍ ﺏﺁ ﯼﺎﻫ ﻩﺮﻄﻗ ﺏﺁ ﺖﺳﺍ ﻦﮑﻤﻣ ،ﯽﯾﺍﺩﺯ ﺏﻮﺳﺭ ﺪﻨﯾﺍﺮﻓ ﻡﺎﺠﻧﺍ ﺯﺍ ﺲﭘ
.ﺪﻨﮐ ﻪﮑﭼ ﻮﺗﺍ ﻒﮐ ﺯﺍ ﻩﺪﻧﯿﻗﺎﺑ
ﻥﺎﻨﭽﻤﻫ ﯽﯾﺍﺩﺯ ﺏﻮﺳﺭ ﻍﺍﺮﭼ ﺮﮔﺍ .ﺪﯿﻨﮐ ﺰﯿ ﺍﺭ ﻮﺗﺍ ﻒﮐ ﻪﭼﺭﺎﭘ ﻪﮑﺗ ﮏﯾ ﺎﺑ
ﻡﺎﺠﻧﺍ ﺍﺭ ﯽﯾﺍﺩﺯ ﺏﻮﺳﺭ ﺪﻨﯾﺍﺮﻓ ،ﺪﻧﺯ ﯽﻣ ﻕﻮﺑ ﻩﺎﮕﺘﺳﺩ ﻭ ﺪﻧﺯ ﯽﻣ ﮏﻤﺸﭼ
.(ﺪﯿﻨﮐ ﻪﻌﺟﺍﺮﻣ 'ﻩﺎﮕﺘﺳﺩ ﺯﺍ ﺖﺒﻗﺍﺮﻣ ﻭ ﻥﺩﺮﮐ ﺰﯿ' ﺶﺨﺑ ﻪﺑ) ﺪﯿﻫﺩ
.ﺪﯾﺍ ﻩﺩﺮﮐ ﻩﺩﺎﻔﺘﺳﺍ ﺩﺎﯾﺯ ﯽﻠﯿﺧ ﺭﺎﺨﺑ ﺶﯾﺍﺰﻓﺍ ﺩﺮﮑﻠﻤﻋ ﺯﺍ .ﺪﯿﻨﮐ ﻩﺩﺎﻔﺘﺳﺍ ﻖﯿﻤﻋ ﯼﺎﻫ ﮎﻭﺮﭼ ﯼﺍﺮﺑ ﻂﻘﻓ ،ﺭﺎﺨﺑ ﺶﯾﺍﺰﻓﺍ ﺩﺮﮑﻠﻤﻋ ﺯﺍ
ﺩﺮﮑﻠﻤﻋ ﻦﯾﺍ ﺯﺍ ﻪﺒﺗﺮﻣ ۵ ﺯﺍ ﱰﺸﯿﺑ ،ﻪﻘﯿﻗﺩ ۳ ﺕﺪﻣ ﺭﺩ ﺩﻮﺷ ﯽﻣ ﺩﺎﻬﻨﺸﯿﭘ
.ﺩﻮﺸﻧ ﻩﺩﺎﻔﺘﺳﺍ
.ﺖﺳﺍ ﻩﺪﺸﻧ ﻞﻣﺎﮐ ﯽﯾﺍﺩﺯ ﺏﻮﺳﺭ ﺪﻨﯾﺍﺮﻓ ﻭ ﻥﺩﺮﮐ ﺰﯿ' ﺶﺨﺑ ﻪﺑ) ﺪﯿﻫﺩ ﻡﺎﺠﻧﺍ ًﺍﺩﺪﺠﻣ ﺪﯾﺎﺑ ﺍﺭ ﯽﯾﺍﺩﺯ ﺏﻮﺳﺭ ﺪﻨﯾﺍﺮﻓ
.(ﺪﯿﻨﮐ ﻪﻌﺟﺍﺮﻣ 'ﻩﺎﮕﺘﺳﺩ ﺯﺍ ﺖﺒﻗﺍﺮﻣ
ﻪﮑﻨﯾﺍ ﺎﯾ ﺪﯿﻨﮐ ﯽﻣ ﻩﺩﺎﻔﺘﺳﺍ ﺭﺎﺑ ﻦﯿﻟﻭﺍ ﯼﺍﺮﺑ ﺭﺎﺨﺑ ﺯﺍ ﺮﮔﺍ
ﺭﺩ ،ﺪﯿﺷﺎﺑ ﻩﺩﺮﮑﻧ ﻩﺩﺎﻔﺘﺳﺍ ﯽﻧﻻﻮﻃ ﺕﺪﻣ ﻪﺑ ﻥﺁ ﺯﺍ
.ﺩﻮﺷ ﯽﻣ ﻞﯾﺪﺒﺗ ﺏﺁ ﻪﺑ ﺭﺎﺨﺑ ،ﻪﻟﻮﻟ
ﺍﺭ ﺭﺎﺨﺑ ﯼﺭﺎﺸﻓ ﻪﻤﮐﺩ ﻭ ﻪﺘﻓﺮﮔ ﺱﺎﺒﻟ ﺯﺍ ﺭﻭﺩ ﺍﺭ ﻮﺗﺍ .ﺖﺳﺍ ﯼﺩﺎﻋ ﺮﻣﺍ ﻦﯾﺍ
ﺝﺭﺎﺧ ﺭﺎﺨﺑ ،ﺏﺁ ﯼﺎﺟ ﻪﺑ ﻮﺗﺍ ﻒﮐ ﺯﺍ ﻪﮑﯿﻧﺎﻣﺯ ﺎﺗ ﺪﯿﻧﺎ ﺮﻈﺘﻨﻣ .ﺪﯿﻫﺩ ﺭﺎﺸﻓ
.ﺩﻮﺷ
ﺝﺭﺎﺧ ﻮﺗﺍ ﻒﮐ ﺯﺍ ﻒﯿﺜﮐ ﺏﺁ ﯼﺎﻫ ﻩﺮﻄﻗ
.ﺪﻧﻮﺷ ﯽﻣ
ﺭﺩ ،ﺏﺁ ﺭﺩ ﺩﻮﺟﻮﻣ ﯽﯾﺎﯿﻤﯿﺷ ﺩﺍﻮﻣ ﻭ ﺎﻫ ﯽﺼﻟﺎﺧﺎﻧ
.ﺪﻨﻨﮐ ﯽﻣ ﺏﻮﺳﺭ ﻮﺗﺍ ﻒﮐ ﺎﯾ/ﻭ ﺭﺎﺨﺑ ﯼﺎﻫ ﯽﺟﻭﺮﺧ
ﺖﺒﻗﺍﺮﻣ ﻭ ﻥﺩﺮﮐ ﺰﯿ' ﺶﺨﺑ ﻪﺑ) ﺪﯿﻫﺩ ﻡﺎﺠﻧﺍ ًﺎﺒﺗﺮﻣ ﺍﺭ ﯽﯾﺍﺩﺯ ﺏﻮﺳﺭ ﺪﻨﯾﺍﺮﻓ
.(ﺪﯿﻨﮐ ﻪﻌﺟﺍﺮﻣ 'ﻩﺎﮕﺘﺳﺩ ﺯﺍ
ﻪﮑﻨﯾﺍ ﺎﯾ ﺪﯿﻨﮐ ﯽﻣ ﻩﺩﺎﻔﺘﺳﺍ ﺭﺎﺑ ﻦﯿﻟﻭﺍ ﯼﺍﺮﺑ ﺭﺎﺨﺑ ﺯﺍ ﺮﮔﺍ
ﺭﺩ ،ﺪﯿﺷﺎﺑ ﻩﺩﺮﮑﻧ ﻩﺩﺎﻔﺘﺳﺍ ﯽﻧﻻﻮﻃ ﺕﺪﻣ ﻪﺑ ﻥﺁ ﺯﺍ
.ﺩﻮﺷ ﯽﻣ ﻞﯾﺪﺒﺗ ﺏﺁ ﻪﺑ ﺭﺎﺨﺑ ،ﻪﻟﻮﻟ
ﺍﺭ ﺭﺎﺨﺑ ﯼﺭﺎﺸﻓ ﻪﻤﮐﺩ ﻭ ﻪﺘﻓﺮﮔ ﺱﺎﺒﻟ ﺯﺍ ﺭﻭﺩ ﺍﺭ ﻮﺗﺍ .ﺖﺳﺍ ﯼﺩﺎﻋ ﺮﻣﺍ ﻦﯾﺍ
ﺝﺭﺎﺧ ﺭﺎﺨﺑ ،ﺏﺁ ﯼﺎﺟ ﻪﺑ ﻮﺗﺍ ﻒﮐ ﺯﺍ ﻪﮑﯿﻧﺎﻣﺯ ﺎﺗ ﺪﯿﻧﺎ ﺮﻈﺘﻨﻣ .ﺪﯿﻫﺩ ﺭﺎﺸﻓ
.ﺩﻮﺷ
.ﺪﻧﻮﺷ ﯽﻣ ﺝﺭﺎﺧ ﻮﺗﺍ ﻒﮐ ﺯﺍ ﺏﺁ ﻉﻭﴍ ﺍﺭ ﯽﯾﺍﺩﺯ ﺏﻮﺳﺭ ﺪﻨﯾﺍﺮﻓ ﯽﻓﺩﺎﺼﺗ ﺭﻮﻃ ﻪﺑ ﺷ
'ﻩﺎﮕﺘﺳﺩ ﺯﺍ ﺖﺒﻗﺍﺮﻣ ﻭ ﻥﺩﺮﮐ ﺰﯿ' ﺶﺨﺑ ﻪﺑ) ﺪﯾﺍ ﻩﺩﺮﮐ
.(ﺪﯿﻨﮐ ﻪﻌﺟﺍﺮﻣ
ﺪﯿﻫﺩ ﻩﺯﺎﺟﺍ .ﺪﯿﻨﮐ ﻦﺷﻭﺭ ﺍﺭ ﻥﺁ ﻩﺭﺎﺑﻭﺩ ﺲﭙﺳ .ﺪﯿﻨﮐ ﺵﻮﻣﺎﺧ ﺍﺭ ﻩﺎﮕﺘﺳﺩ
ﻦﺷﻭﺭ ﺖﺑﺎﺛ ﺭﻮﻃ ﻪﺑ 'ﻮﺗﺍ ﻥﺩﻮﺑ ﻩﺩﺎﻣﺁ' ﻍﺍﺮﭼ ﻪﮐ ﯽﺘﻗﻭ ﺎﺗ ﺩﻮﺷ ﻡﺮﮔ ﻮﺗﺍ
.ﺪﻧﺎ
.ﺩﻮﺷ ﯽ ﻉﻭﴍ ﯽﯾﺍﺩﺯ ﺏﻮﺳﺭ ﺪﻨﯾﺍﺮﻓ ﻪﻤﮐﺩ ،ﺪﻨﮐ ﻥﺩﺯ ﻕﻮﺑ ﻪﺑ ﻉﻭﴍ ﻩﺎﮕﺘﺳﺩ ﻪﮑﯿﻧﺎﻣﺯ ﺎﺗ ﺪﯾﺎﺑ
.ﺪﯿﻫﺩ ﺭﺎﺸﻓ ﻪﯿﻧﺎﺛ ۲ ﺕﺪﻣ ﻪﺑ ﺍﺭ ﯽﯾﺍﺩﺯ ﺏﻮﺳﺭ
ﺪﯿﻨﮐ ﻪﻌﺟﺍﺮﻣ 'ﻩﺎﮕﺘﺳﺩ ﺯﺍ ﺖﺒﻗﺍﺮﻣ ﻭ ﻥﺩﺮﮐ ﺰﯿ' ﺶﺨﺑ ﻪﺑ
ﯽﻗﺎﺑ ﺮﺛﺍ ﺎﯾ ﺩﺯﺍﺪﻧﺍ ﯽﻣ ﻕﺮﺑ ﺱﺎﺒﻟ ﯼﻭﺭ ﻮﺗﺍ
.ﺩﺭﺍﺬﮔ ﯽﻣ
ﯼﻭﺭ ﺍﺭ ﺱﺎﺒﻟ ﻝﺎﺜﻣ ﯼﺍﺮﺑ ،ﺖﺴﯿﻧ ﻑﺎﺻ ﯽﺸﮐﻮﺗﺍ ﺢﻄﺳ
.ﺪﯿﻧﺯ ﯽﻣ ﻮﺗﺍ ﺭﺍﻮﻤﻫﺎﻧ ﻞﺤﻣ ﮏﯾ ﺎﯾ ﺯﺭﺩ
ﯼﻭﺭ ﺮﺛﺍ ﺎﯾ ﻕﺮﺑ .ﺖﺳﺍ ﻦﻤﯾﺍ ﺎﻫ ﺱﺎﺒﻟ ﻪﻤﻫ ﯼﺍﺮﺑ PerfectCare
ﻥﺩﺮﮐ ﻮﺗﺍ ﺯﺍ .ﺩﻭﺭ ﯽﻣ ﻦﯿﺑ ﺯﺍ ﺪﯿﯾﻮﺸﺑ ﺍﺭ ﺱﺎﺒﻟ ﯽﺘﻗﻭ ﻭ ﺖﺴﯿﻧ ﯽﺍﺩ ﺱﺎﺒﻟ
ﯽﺨﻧ ﻪﭼﺭﺎﭘ ﮏﯾ ﺪﯿﻧﺍﻮﺗ ﯽﻣ ﺎﯾ ﺪﯿﻨﮐ ﯼﺭﺍﺩﺩﻮﺧ ﺭﺍﻮﻤﻫﺎﻧ ﻞﺤﻣ ﺎﯾ ﺯﺭﺩ ﯼﻭﺭ
.ﺪﻧﺎ ﺎﺟ ﻪﺑ ﯼﺮﺛﺍ ﺎﺗ ﺪﯿﻨﮐ ﻮﺗﺍ ﻭ ﺪﯿﻫﺩ ﺭﺍﺮﻗ ﺱﺎﺒﻟ ﯼﻭﺭ
.ﺩﺭﺍﺪﻧ ﺭﺍﺮﻗ ﻮﺗﺍ ﺰﯿﻣ ﺶﮐﻭﺭ ﺭﺩ ﯽﻓﺎﮐ ﯼﺪ ﻪﯾﻻ.ﺪﯿﻫﺩ ﺭﺍﺮﻗ ﻮﺗﺍ ﺰﯿﻣ ﺶﮐﻭﺭ ﺮﯾﺯ ﺭﺩ ﺮﮕﯾﺩ ﯼﺪ ﻪﯾﻻ ﮏﯾ
ﺏﺁ ﺕﺍﺮﻄﻗ ﺎﯾ ﺩﻮﺷ ﯽﻣ ﺲﯿﺧ ﻮﺗﺍ ﺰﯿﻣ ﺶﮐﻭﺭ
.ﺩﻮﺷ ﯽﻣ ﻪﺘﺨﯾﺭ ﻦﯿﻣﺯ/ﺱﺎﺒﻟ ﯼﻭﺭ
ﻮﺗﺍ ﺰﯿﻣ ﺶﮐﻭﺭ ﯼﻭﺭ ﺭﺎﺨﺑ ،ﯽﻧﻻﻮﻃ ﯽﺸﮐﻮﺗﺍ ﺯﺍ ﺪﻌﺑ
.ﺩﻮﺷ ﯽﻣ ﻥﺎﻌﯿﻣ
.ﺪﯿﻨﮐ ﺾﯾﻮﻌﺗ ﺍﺭ ﺎﻬﻧﺁ ،ﺪﻧﺍ ﻩﺪﺷ ﻩﺪﯿﺳﻮﭘ ﻮﺗﺍ ﺰﯿﻣ ﯼﺪ ﯼﺎﻫ ﻪﯾﻻ ﺎﯾ ﻡﻮﻓ ﺮﮔﺍ
ﺪﯿﻫﺩ ﺭﺍﺮﻗ ﻮﺗﺍ ﺰﯿﻣ ﺶﮐﻭﺭ ﺮﯾﺯ ﺭﺩ ﺮﮕﯾﺩ ﯼﺪ ﻪﯾﻻ ﮏﯾ ﺪﯿﻧﺍﻮﺗ ﯽﻣ ﻦﯿﻨﭽﻤﻫ
.ﺩﻮﺷ ﯼﺮﯿﮔﻮﻠﺟ ﻮﺗﺍ ﺰﯿﻣ ﯼﻭﺭ ﻥﺎﻌﯿﻣ ﺩﺎﺠﯾﺍ ﺯﺍ ﺎﺗ
.ﺖﺳﺍ ﻩﺪﺸﻧ ﯽﺣﺍﺮﻃ ﻻﺎﺑ ﻪﺟﺭﺩ ﺎﺑ ﺭﺎﺨﺑ ﯼﺍﺮﺑ ﻮﺗﺍ ﺰﯿﻣ ﻥﺎﻌﯿﻣ ﺩﺎﺠﯾﺍ ﺯﺍ ﺎﺗ ﺪﯿﻫﺩ ﺭﺍﺮﻗ ﻮﺗﺍ ﺰﯿﻣ ﺶﮐﻭﺭ ﺮﯾﺯ ﺭﺩ ﺮﮕﯾﺩ ﯼﺪ ﻪﯾﻻ ﮏﯾ
.ﺩﻮﺷ ﯼﺮﯿﮔﻮﻠﺟ ﻮﺗﺍ ﺰﯿﻣ ﯼﻭﺭ

27
یسراف
.ﺖﺳﺍ ﻍﺍﺩ ﻮﺗﺍ :ﻁﺎﯿﺘﺣﺍ
8 ﯼﺍﺮﺑ ﻥﺁ ﺯﺍ ﻭ ﻩﺩﺮﮐ ﯽﻟﺎﺧ ﮏﻨﯿﺳ ﺭﺩ ﺍﺭ ﯽﯾﺍﺩﺯ ﺏﻮﺳﺭ ﻪﻈﻔﺤﻣ ﺲﭙﺳ .ﺪﯿﻨﮐ ﺲﳌ ﺍﺭ ﻥﺁ ﻪﻘﯿﻗﺩ 5 ﺯﺍ ﺲﭘ ،ﺩﻮﺷ ﯽﻣ ﻍﺍﺩ ﯽﯾﺍﺩﺯ ﺏﻮﺳﺭ ﺪﻨﯾﺍﺮﻓ ﺕﺪﻣ ﺭﺩ ﯽﯾﺍﺩﺯ ﺏﻮﺳﺭ ﻪﻈﻔﺤﻣ ﻪﮑﯿﯾﺎﺠﻧﺁ ﺯﺍ
.(20 ﻞﮑﺷ) ﺪﯿﻨﮐ ﯼﺭﺍﺪﻬﮕﻧ ﯼﺪﻌﺑ ﯼﺎﻫ ﻩﺩﺎﻔﺘﺳﺍ
9 .ﺪﺷﺎﺑ ﻩﺪﺷ ﯽﻟﺎﺧ ﯽﯾﺍﺩﺯ ﺏﻮﺳﺭ ﻪﻈﻔﺤﻣ ﺪﯾﻮﺷ ﱧﻤﻄﻣ ،ﯽﯾﺍﺩﺯ ﺏﻮﺳﺭ ﺪﻨﯾﺍﺮﻓ ﻉﻭﴍ ﺯﺍ ﻞﺒﻗ .ﺪﯿﻨﮐ ﺭﺍﺮﮑﺗ ﺍﺭ 8 ﺎﺗ 1 ﻞﺣﺍﺮﻣ ﺪﯿﻧﺍﻮﺗ ﯽﻣ ،ﺯﺎﯿﻧ ﺕﺭﻮﺻ ﺭﺩ
.ﺖﺳﺍ ﯼﺩﺎﻋ ﺮﻣﺍ ﻦﯾﺍ .ﺩﻮﺷ ﺝﺭﺎﺧ ﺰﯿ ﺏﺁ ﻮﺗﺍ ﻒﮐ ﺯﺍ ﺖﺳﺍ ﻦﮑﻤﻣ ،ﺪﺷﺎﺑ ﻩﺪﺸﻧ ﻪﺘﺷﺎﺒﻧﺍ ﻮﺗﺍ ﺭﺩ ﯽﺑﻮﺳﺭ ﺮﮔﺍ ،ﯽﯾﺍﺩﺯ ﺏﻮﺳﺭ ﺪﻨﯾﺍﺮﻓ ﺕﺪﻣ ﺭﺩ :ﻪﺟﻮﺗ
.http://www.philips.com/descaling-iron :ﺪﯿﻨﮐ ﻪﻌﺟﺍﺮﻣ ﺮﯾﺯ ﮏﻨﯿﻟ ﺭﺩ ﺩﻮﺟﻮﻣ ﯼﺎﻫﻮﯾﺪﯾﻭ ﻪﺑ ،ﯽﯾﺍﺩﺯ ﺏﻮﺳﺭ ﯼﺍﺮﺟﺍ ﻩﺭﺎﺑﺭﺩ ﱰﺸﯿﺑ ﺕﺎﻋﻼﻃﺍ ﯼﺍﺮﺑ
ﻮﺗﺍ ﻒﮐ ﻥﺩﺮﮐ ﺰﯿ
.ﺪﯿﻨﮐ ﺰﯿ ﺍﺭ ﻥﺁ ًﺎﺒﺗﺮﻣ ،ﻩﺎﮕﺘﺳﺩ ﺯﺍ ﯼﺭﺍﺪﻬﮕﻧ ﯼﺍﺮﺑ
1 .ﺪﯿﻨﮐ ﺰﯿ ﺏﻮﻃﺮﻣ ﻪﭼﺭﺎﭘ ﮏﯾ ﺎﺑ ﺍﺭ ﻩﺎﮕﺘﺳﺩ
2 .( 21 ﻞﮑﺷ) ﺪﯿﺸﮑﺑ ﺏﻮﻃﺮﻣ ﻪﭼﺭﺎﭘ ﯼﻭﺭ ﺍﺭ ﻮﺗﺍ ﻭ ﻩﺪﺷ ﻡﺮﮔ ﻮﺗﺍ ﻒﮐ ﺪﯿﻫﺩ ﻩﺯﺎﺟﺍ ،ﺎﻫ ﻪﮑﻟ ﺮﺛﻮﻣ ﻭ ﻥﺎﺳﺁ ﻥﺩﺮﺑ ﻦﯿﺑ ﺯﺍ ﯼﺍﺮﺑ
.ﺪﯿﻨﮐ ﺰﯿ ًﺎﺒﺗﺮﻣ ﺍﺭ ﻮﺗﺍ ﻒﮐ ،ﻮﺗﺍ ﻥﺎﺳﺁ ﻥﺩﺭﻮﺧ ﴎ ﯼﺍﺮﺑ :ﻪﺘﮑﻧ
ﯼﺭﺍﺪﻬﮕﻧ
1 .ﺪﯿﻨﮐ ﺝﺭﺎﺧ ﺰﯾﺮﭘ ﺯﺍ ﺍﺭ ﻥﺁ ﻭ ﻩﺩﺮﮐ ﺵﻮﻣﺎﺧ ﺍﺭ ﻩﺎﮕﺘﺳﺩ
2 .( 22 ﻞﮑﺷ) ﺪﯿﻨﮐ ﯽﻟﺎﺧ ﮏﻨﯿﺳ ﺭﺩ ﺍﺭ ﺏﺁ ﻥﺰﺨﻣ ﻥﻭﺭﺩ ﺏﺁ
3 .(23 ﻞﮑﺷ) ﺪﯿﻫﺩ ﺭﺍﺮﻗ ﯼﺭﺍﺪﻬﮕﻧ ﻪﻈﻔﺤﻣ ﺭﺩ ﺍﺭ ﺎﻬﻧﺁ .ﺪﯿﻨﮐ ﺎﺗ ﻢﻫ ﺎﺑ ﺍﺭ ﺏﺁ ﻪﻟﻮﻟ ﻭ ﻕﺮﺑ ﻢﯿﺳ
4 ﻮﺗﺍ ﯽﺘﻗﻭ ﺪﯿﻧﺍﻮﺗ ﯽﻣ .(24 ﻞﮑﺷ) ﺩﻮﺷ ﻞﻔﻗ ﻮﺗﺍ ﻩﺎﮕﯾﺎﺟ ﺭﺩ ﻮﺗﺍ ﺎﺗ ﺪﯿﻫﺩ ﺭﺎﺸﻓ ﺍﺭ ﻞﻤﺣ ﻞﻔﻗ ﻥﺩﺮﮐ ﺯﺎﺑ ﻪﻤﮐﺩ :GC6830 ﻭ GC6820 ،GC6819 ﯼﺎﻫ ﯼﴎ ﯼﺍﺮﺑ ﻂﻘﻓ
.(25 ﻞﮑﺷ) ﺪﯿﻨﮐ ﻞﻤﺣ ﺍﺭ ﻥﺁ ،ﻮﺗﺍ ﻪﺘﺳﺩ ﻓﺮﮔ ﺎﺑ ،ﺖﺳﺍ ﻪﺘﻓﺮﮔ ﺭﺍﺮﻗ ﻩﺎﮕﯾﺎﺟ ﺭﺩ
ﯽﺑﺎﯾ ﺐﯿﻋ
،ﺪﯿﻨﮐ ﻑﺮﻃﺮﺑ ﺮﯾﺯ ﺕﺎﻋﻼﻃﺍ ﺎﺑ ﺍﺭ ﻞﮑﺸﻣ ﺪﯿﻧﺍﻮﺗ ﯽ ﺮﮔﺍ .ﺖﺳﺍ ﻩﺪﺷ ﻩﺪﻧﺎﺠﻨﮔ ﺶﺨﺑ ﻦﯾﺍ ﺭﺩ ﺪﯾﺁ ﺶﯿﭘ ﺷ ﯼﺍﺮﺑ ﻩﺎﮕﺘﺳﺩ ﺎﺑ ﺭﺎﮐ ﻡﺎﮕﻨﻫ ًﻻﻮﻤﻌﻣ ﺖﺳﺍ ﻦﮑﻤﻣ ﻪﮐ ﯽﺗﻻﺎﮑﺷﺍ ﺯﺍ ﯼﺍ ﻪﺻﻼﺧ
.ﺪﯾﺮﯿﮕﺑ ﺱﺎ ﺩﻮﺧ ﺭﻮﺸﮐ ﺭﺩ ﯼﱰﺸﻣ ﺕﺎﻣﺪﺧ ﺰﮐﺮﻣ ﺎﺑ ﺎﯾ ﺪﯿﻨﮐ ﺪﯾﺩﺯﺎﺑ www.philips.com/support ﺖﯾﺎﺳ ﺯﺍ ،ﻝﻭﺍﺪﺘﻣ ﺕﻻﺍﺆﺳ ﺖﺴﯿﻟ ﻩﺪﻫﺎﺸﻣ ﺖﻬﺟ
ﻝﺎﮑﺷﺍﯽﻟﺘﺣﺍ ﺖﻠﻋﻞﺣ ﻩﺍﺭ
.ﺪﻨﮐ ﯽ ﺪﯿﻟﻮﺗ ﯼﺭﺎﺨﺑ ﭻﯿﻫ ﻮﺗﺍ.ﺩﺭﺍﺪﻧ ﺩﻮﺟﻭ ﺏﺁ ﻥﺰﺨﻣ ﺭﺩ ﯽﻓﺎﮐ ﺏﺁ ﺍﺭ ﺭﺎﺨﺑ ﯼﺭﺎﺸﻓ ﻪﻤﮐﺩ .ﺪﯿﻨﮐ ﺮﭘ MIN ﺖﻣﻼﻋ ﺯﺍ ﱰﺸﯿﺑ ﺍﺭ ﺏﺁ ﻥﺰﺨﻣ
ﺖﺳﺍ ﻦﮑﻤﻣ ﺭﺎﮐ ﻦﯾﺍ .ﺩﻮﺷ ﺝﺭﺎﺧ ﺭﺎﺨﺑ ﻪﮑﯿﻧﺎﻣﺯ ﺎﺗ ﺪﯾﺭﺍﺩ ﻪﮕﻧ ﻭ ﻩﺩﺍﺩ ﺭﺎﺸﻓ
.ﺪﻣﺎﺠﻧﺎﯿﺑ ﻝﻮﻃ ﻪﺑ ﻪﯿﻧﺎﺛ ۳۰
.ﺪﯾﺍ ﻩﺩﺍﺪﻧ ﺭﺎﺸﻓ ﺍﺭ ﺭﺎﺨﺑ ﯼﺭﺎﺸﻓ ﻪﻤﮐﺩ ﺝﺭﺎﺧ ﺭﺎﺨﺑ ﻪﮑﯿﻧﺎﻣﺯ ﺎﺗ ﺪﯾﺭﺍﺩ ﻪﮕﻧ ﻭ ﻩﺩﺍﺩ ﺭﺎﺸﻓ ﺍﺭ ﺭﺎﺨﺑ ﯼﺭﺎﺸﻓ ﻪﻤﮐﺩ
.ﺩﻮﺷ
ﺩﺮﮑﻠﻤﻋ ،ﺩﻮﺸﻧ ﺍﺮﺟﺍ ﯽﯾﺍﺩﺯ ﺏﻮﺳﺭ ﺪﻨﯾﺍﺮﻓ ﻪﮑﯿﻧﺎﻣﺯ ﺎﺗ
.ﺪﻧﺎﻣ ﯽﻣ ﯽﻗﺎﺑ ﻝﺎﻌﻓﺮﯿﻏ ﺭﺎﺨﺑ
ﺶﺨﺑ ﻪﺑ) .ﺪﯿﻨﮐ ﺍﺮﺟﺍ ﺍﺭ ﯽﯾﺍﺩﺯ ﺏﻮﺳﺭ ﺪﻨﯾﺍﺮﻓ ،ﺭﺎﺨﺑ ﺩﺮﮑﻠﻤﻋ ﯽﺑﺎﯾﺯﺎﺑ ﺖﻬﺟ
(ﺪﯿﻨﮐ ﻪﻌﺟﺍﺮﻣ 'ﻩﺎﮕﺘﺳﺩ ﺯﺍ ﺖﺒﻗﺍﺮﻣ ﻭ ﻥﺩﺮﮐ ﺰﯿ'
ﯼﺭﺎﺸﻓ ﻪﻤﮐﺩ ﻪﮐ ﯽﻧﺎﻣﺯ ﺕﺪﻣ ،ﯽﺸﮐﻮﺗﺍ ﻉﻭﴍ ﻡﺎﮕﻨﻫ
.ﺖﺳﺍ ﻩﺩﻮﺒﻧ ﯽﻓﺎﮐ ﺪﯾﺍ ﻩﺩﺍﺩ ﺭﺎﺸﻓ ﺍﺭ ﺭﺎﺨﺑ
ﺝﺭﺎﺧ ﺭﺎﺨﺑ ﻪﮑﯿﻧﺎﻣﺯ ﺎﺗ ﺪﯾﺭﺍﺩ ﻪﮕﻧ ﻭ ﻩﺩﺍﺩ ﺭﺎﺸﻓ ﺍﺭ ﺭﺎﺨﺑ ﯼﺭﺎﺸﻓ ﻪﻤﮐﺩ
.ﺪﻣﺎﺠﻧﺎﯿﺑ ﻝﻮﻃ ﻪﺑ ﻪﯿﻧﺎﺛ ۳۰ ﺖﺳﺍ ﻦﮑﻤﻣ ﺭﺎﮐ ﻦﯾﺍ .ﺩﻮﺷ
ﻭ ﺪﻧﺯ ﯽﻣ ﮏﻤﺸﭼ ﯽﯾﺍﺩﺯ ﺏﻮﺳﺭ ﻪﻤﮐﺩ ﻍﺍﺮﭼ
.ﺪﻨﮐ ﯽﻣ ﻥﺩﺯ ﻕﻮﺑ ﻪﺑ ﻉﻭﴍ ﻩﺎﮕﺘﺳﺩ
.ﺪﺷﺎﺑ ﯽﻣ ﯽﯾﺍﺩﺯ ﺏﻮﺳﺭ ﺭﻭﺁﺩﺎﯾ ﺩﺮﮑﻠﻤﻋ ﻦﯾﺍ ﻪﺑ) ﺪﯿﻫﺩ ﻡﺎﺠﻧﺍ ﯽﯾﺍﺩﺯ ﺏﻮﺳﺭ ﺭﻭﺁﺩﺎﯾ ﺖﻓﺎﯾﺭﺩ ﺯﺍ ﺲﭘ ﺍﺭ ﯽﯾﺍﺩﺯ ﺏﻮﺳﺭ
.(ﺪﯿﻨﮐ ﻪﻌﺟﺍﺮﻣ 'ﻩﺎﮕﺘﺳﺩ ﺯﺍ ﺖﺒﻗﺍﺮﻣ ﻭ ﻥﺩﺮﮐ ﺰﯿ' ﺶﺨﺑ
ﻪﻤﮐﺩ ﻍﺍﺮﭼ ،ﺩﻮﺷ ﯽ ﺝﺭﺎﺧ ﻮﺗﺍ ﻒﮐ ﺯﺍ ﺭﺎﺨﺑ
ﻩﺎﮕﺘﺳﺩ ﻭ ﺪﻧﺯ ﯽﻣ ﮏﻤﺸﭼ ﯽﯾﺍﺩﺯ ﺏﻮﺳﺭ
.ﺪﻧﺯ ﯽﻣ ﻕﻭﺮﺑ
ﺍﺭ ﻥﺁ ﺎﯾ ﺪﯾﺍ ﻩﺩﺍﺪﻧ ﻡﺎﺠﻧﺍ ﺍﺭ ﯽﯾﺍﺩﺯ ﺏﻮﺳﺭ ﺪﻨﯾﺍﺮﻓ ﺷ
.ﺪﯾﺍ ﻩﺩﺮﮑﻧ ﻞﻣﺎﮐ
ﻪﺑ) ﺪﯿﻫﺩ ﻡﺎﺠﻧﺍ ﺭﺎﺨﺑ ﺩﺮﮑﻠﻤﻋ ﺩﺪﺠﻣ ﻥﺩﺮﮐ ﻝﺎﻌﻓ ﯼﺍﺮﺑ ﺍﺭ ﯽﯾﺍﺩﺯ ﺏﻮﺳﺭ
.(ﺪﯿﻨﮐ ﻪﻌﺟﺍﺮﻣ 'ﻩﺎﮕﺘﺳﺩ ﺯﺍ ﺖﺒﻗﺍﺮﻣ ﻭ ﻥﺩﺮﮐ ﺰﯿ' ﺶﺨﺑ

28
ﻦﻤﯾﺍ ﻩﺎﮔ ﻪﯿﮑﺗ
ﺱﺎﺒﻟ ﻥﺩﺮﮐ ﺐﺗﺮﻣ ﻦﯿﺣ ﺭﺩ ﻮﺗﺍ ﻥﺩﺍﺩ ﺭﺍﺮﻗ
ﻪﺑ ﻮﺗﺍ ﻒﮐ ،OptimalTEMP ﯼﺭﻭﺎﻨﻓ ﺎﺑ .(2 ﻞﮑﺷ) ﺪﯾﺭﺍﺬﮕﺑ ﻮﺗﺍ ﺰﯿﻣ ﯼﻭﺭ ﯽﻘﻓﺍ ﺕﺭﻮﺻ ﻪﺑ ﺎﯾ ﺪﯿﻫﺩ ﺭﺍﺮﻗ ﻮﺗﺍ ﻩﺎﮕﯾﺎﺟ ﯼﻭﺭ ﺍﺭ ﻮﺗﺍ ﺪﯿﻧﺍﻮﺗ ﯽﻣ ،ﺪﯿﻨﮐ ﯽﻣ ﺐﺗﺮﻣ ﺍﺭ ﺱﺎﺒﻟ ﻪﮐ ﯽﻟﺎﺣ ﺭﺩ
.ﺪﻧﺎﺳﺭ ﯽ ﯽﺒﯿﺳﺁ ﻮﺗﺍ ﺰﯿﻣ ﺶﮐﻭﺭ
ﺭﺎﮐﺩﻮﺧ ﻥﺪﺷ ﺵﻮﻣﺎﺧ
- .ﺪﻨﮐ ﯽﻣ ﻥﺩﺯ ﮏﻤﺸﭼ ﻪﺑ ﻉﻭﴍ ﺵﻮﻣﺎﺧ/ﻦﺷﻭﺭ ﻪﻤﮐﺩ ﻍﺍﺮﭼ .ﺩﻮﺷ ﯽﻣ ﺭﺎﮐ ﻪﺑ ﻩﺩﺎﻣﺁ ﺖﻟﺎﺣ ﺩﺭﺍﻭ ،ﺩﻮﺸﻧ ﻩﺩﺎﻔﺘﺳﺍ ﻪﻘﯿﻗﺩ 5 ﺕﺪﻣ ﻪﺑ ﻩﺎﮕﺘﺳﺩ ﺯﺍ ﺮﮔﺍ
- .ﺪﻨﮐ ﯽﻣ ﻥﺪﺷ ﻡﺮﮔ ﻪﺑ ﻉﻭﴍ ًﺍﺩﺪﺠﻣ ﻩﺎﮕﺘﺳﺩ .ﺪﯿﻫﺩ ﺭﺎﺸﻓ ﺍﺭ ﺭﺎﺨﺑ ﯼﺭﺎﺸﻓ ﻪﻤﮐﺩ ﺎﯾ ﺵﻮﻣﺎﺧ/ﻦﺷﻭﺭ ﻪﻤﮐﺩ ،ﻩﺎﮕﺘﺳﺩ ﺩﺪﺠﻣ ﻥﺩﺮﮐ ﻝﺎﻌﻓ ﯼﺍﺮﺑ
- ﺵﻮﻣﺎﺧ ،ﺵﻮﻣﺎﺧ/ﻦﺷﻭﺭ ﻍﺍﺮﭼ .ﺩﻮﺷ ﯽﻣ ﺵﻮﻣﺎﺧ ﺭﺎﮐﺩﻮﺧ ﺭﻮﻃ ﻪﺑ ،ﺩﺮﯿﮕﻧ ﺭﺍﺮﻗ ﻩﺩﺎﻔﺘﺳﺍ ﺩﺭﻮﻣ ،ﺪﺷ ﺭﺎﮐ ﻪﺑ ﻩﺩﺎﻣﺁ ﺖﻟﺎﺣ ﺩﺭﺍﻭ ﻪﮑﻨﯾﺍ ﺯﺍ ﺪﻌﺑ ﻪﻘﯿﻗﺩ 10 ﺕﺪﻣ ﻪﺑ ﻩﺎﮕﺘﺳﺩ ﺮﮔﺍ
.ﺩﻮﺷ ﯽﻣ
.ﺪﯿﺸﮑﺑ ﺰﯾﺮﭘ ﺯﺍ ﻩﺩﺎﻔﺘﺳﺍ ﺯﺍ ﺲﭘ ﺍﺭ ﻥﺁ ﻪﺸﯿﻤﻫ .ﺪﯿﻨﮑﻧ ﺎﻫﺭ ﺍﺭ ﻥﺁ ،ﺖﺳﺍ ﻞﺼﺘﻣ ﻕﺮﺑ ﺰﯾﺮﭘ ﻪﺑ ﻩﺎﮕﺘﺳﺩ ﻪﮐ ﯽﻣﺎﮕﻨﻫ :ﺭﺍﺪﺸﻫ
ﻩﺎﮕﺘﺳﺩ ﺯﺍ ﺖﺒﻗﺍﺮﻣ ﻭ ﻥﺩﺮﮐ ﺰﯿ
ﯽﯾﺍﺩﺯ ﺏﻮﺳﺭ ﺪﻨﻤﺷﻮﻫ ﻢﺘﺴﯿﺳ
ﺯﺍ ﻭ ﺪﻧﺎ ﯽﻗﺎﺑ ﺖﺑﺎﺛ ﺭﺎﺨﺑ ﺩﺮﮑﻠﻤﻋ ﺢﻄﺳ ﺩﻮﺷ ﯽﻣ ﺚﻋﺎﺑ ﺭﺎﮐ ﻦﯾﺍ .ﺩﻮﺷ ﯽﻣ ﻡﺎﺠﻧﺍ ﺐﺗﺮﻣ ﺭﻮﻃ ﻪﺑ ﻩﺎﮕﺘﺳﺩ ﻥﺩﺮﮐ ﺰﯿ ﻭ ﯽﯾﺍﺩﺯ ﺏﻮﺳﺭ ﻭ ﻩﺩﻮﺑ ﯽﯾﺍﺩﺯ ﺏﻮﺳﺭ ﺪﻨﻤﺷﻮﻫ ﻢﺘﺴﯿﺳ ﯼﺍﺭﺍﺩ ﻩﺎﮕﺘﺳﺩ
.ﺪﻨﮐ ﯽﻣ ﯼﺭﻭﺁﺩﺎﯾ ﺷ ﻪﺑ ﺐﺗﺮﻣ ﺭﻮﻃ ﻪﺑ ﻩﺎﮕﺘﺳﺩ ،ﯼﺯﺎﺳ ﮎﺎﭘ ﺪﻨﯾﺍﺮﻓ ﯼﺍﺮﺟﺍ ﺯﺍ ﻥﺎﻨﯿﻤﻃﺍ ﯼﺍﺮﺑ .ﺩﻮﺷ ﯼﺮﯿﮔﻮﻠﺟ ﻮﺗﺍ ﻒﮐ ﺯﺍ ﯽﮔﺩﻮﻟﺁ ﺝﻭﺮﺧ
ﺍﺪﺻ ﻭ ﺭﻮﻧ ﺎﺑ ﻩﺍﺮﻤﻫ ﯽﯾﺍﺩﺯ ﺏﻮﺳﺭ ﺭﻭﺁﺩﺎﯾ
ﻥﺩﺯ ﻕﻮﺑ ﻪﺑ ﻉﻭﴍ ﻩﺎﮕﺘﺳﺩ ﻭ ﻥﺩﺯ ﮏﻤﺸﭼ ﻪﺑ ﻉﻭﴍ ﯽﯾﺍﺩﺯ ﺏﻮﺳﺭ ﻍﺍﺮﭼ ،ﺩﻮﺷ ﯼﺭﻭﺁﺩﺎﯾ ﺷ ﻪﺑ ﯽﯾﺍﺩﺯ ﺏﻮﺳﺭ ﺩﺮﮑﻠﻤﻋ ﯼﺍﺮﺟﺍ ﻪﮑﻨﯾﺍ ﯼﺍﺮﺑ ،ﻩﺎﮕﺘﺳﺩ ﺯﺍ ﻩﺩﺎﻔﺘﺳﺍ ﻩﺎﻣ 3 ﺎﺗ 1 ﺯﺍ ﺲﭘ
.(13 ﻞﮑﺷ) ﺪﻨﮐ ﯽﻣ
ﺯﺍ ﺲﭘ .(14 ﻞﮑﺷ) ﺩﻮﺷ ﯽﻣ ﻝﺎﻌﻓﺮﯿﻏ ﺭﺎﺨﺑ ﺩﺮﮑﻠﻤﻋ ،ﺪﺷﺎﺑ ﻩﺪﺸﻧ ﻡﺎﺠﻧﺍ ﻩﺎﮕﺘﺳﺩ ﯽﯾﺍﺩﺯ ﺏﻮﺳﺭ ﺮﮔﺍ :ﺩﻮﺷ ﯽﻣ ﻡﺎﺠﻧﺍ ﺏﻮﺳﺭ ﺮﺑﺍﺮﺑ ﺭﺩ ﻩﺎﮕﺘﺳﺩ ﺯﺍ ﺖﻇﺎﻔﺣ ﺖﻬﺟ ﻡﻭﺩ ﻡﺎﮔ ،ﻦﯾﺍ ﺮﺑ ﻩﻭﻼﻋ
.ﺩﺩﺮﮔ ﯽﻣ ﻡﺎﺠﻧﺍ ،ﺩﻮﺷ ﯽﻣ ﻩﺩﺎﻔﺘﺳﺍ ﻪﮐ ﯽﺑﺁ ﻉﻮﻧ ﻪﺑ ﻪﺟﻮﺗ ﻥﻭﺪﺑ ﺭﺎﮐ ﻦﯾﺍ .ﺩﻮﺷ ﯽﻣ ﯽﺑﺎﯾﺯﺎﺑ ﺭﺎﺨﺑ ﺩﺮﮑﻠﻤﻋ ،ﺪﺷ ﻡﺎﺠﻧﺍ ﯽﯾﺍﺩﺯ ﺏﻮﺳﺭ ﻪﮑﻨﯾﺍ
.ﺪﺷﺎﺑ ﻩﺪﺸﻧ ﻝﺎﻌﻓ ﺯﻮﻨﻫ ﺭﻮﻧ ﻭ ﺍﺪﺻ ﺭﺍﺪﺸﻫ ﯽﺘﻗﻭ ﯽﺘﺣ ،ﺩﻮﺷ ﯽﻣ ﻡﺎﺠﻧﺍ ﻥﺎﻣﺯ ﺮﻫ ﺭﺩ ﯽﯾﺍﺩﺯ ﺏﻮﺳﺭ ﺪﻨﯾﺍﺮﻓ :ﻪﺟﻮﺗ
ﯽﯾﺍﺩﺯ ﺏﻮﺳﺭ ﻪﻈﻔﺤﻣ ﺎﺑ ﯽﯾﺍﺩﺯ ﺏﻮﺳﺭ ﺪﻨﯾﺍﺮﻓ ﯼﺍﺮﺟﺍ
.ﺪﯿﻨﮑﻧ ﺎﻫﺭ ﺍﺭ ﻩﺎﮕﺘﺳﺩ ،ﯽﯾﺍﺩﺯ ﺏﻮﺳﺭ ﺪﻨﯾﺍﺮﻓ ﺕﺪﻣ ﺭﺩ :ﺭﺍﺪﺸﻫ
ﻒﮐ ﺯﺍ ﻍﺍﺩ ﺭﺎﺨﺑ ﻭ ﺏﺁ ﺭﺎﮐ ﻦﯾﺍ ﺎﺑ ﺍﺮﯾﺯ ﺪﯿﻨﮑﻧ ﻊﻄﻗ ﺍﺭ ﺕﺎﯿﻠﻤﻋ ،ﯽﯾﺍﺩﺯ ﺏﻮﺳﺭ ﻪﻈﻔﺤﻣ ﺯﺍ ﻮﺗﺍ ﻥﺩﺮﮐ ﺍﺪﺟ ﺎﺑ .ﺪﯿﻫﺩ ﻡﺎﺠﻧﺍ ﯽﯾﺍﺩﺯ ﺏﻮﺳﺭ ﻪﻈﻔﺤﻣ ﺎﺑ ﺍﺭ ﯽﯾﺍﺩﺯ ﺏﻮﺳﺭ ﺪﻨﯾﺍﺮﻓ ﻪﺸﯿﻤﻫ :ﻁﺎﯿﺘﺣﺍ
.ﺩﻮﺷ ﯽﻣ ﺝﺭﺎﺧ ﻮﺗﺍ
1 .ﺪﯿﻨﮐ ﺮﭘ ﻪﻤﯿﻧ ﺎﺗ ﺍﺭ ﺏﺁ ﻥﺰﺨﻣ
.ﺪﺷﺎﺑ ﻦﺷﻭﺭ ﯽﯾﺍﺩﺯ ﺏﻮﺳﺭ ﺪﻨﯾﺍﺮﻓ ﺕﺪﻣ ﺭﺩ ﻭ ﻞﺼﺘﻣ ﻪﺧﺎﺷﻭﺩ ﻪﺑ ﻩﺎﮕﺘﺳﺩ ﺪﯾﻮﺷ ﱧﻤﻄﻣ :ﻪﺟﻮﺗ
2 .ﺪﯿﻫﺩ ﺭﺍﺮﻗ ﺮﮕﯾﺩ ﺖﺑﺎﺛ ﻭ ﻑﺎﺻ ﺢﻄﺳ ﺮﻫ ﺎﯾ ﻮﺗﺍ ﺰﯿﻣ ﯼﻭﺭ ﺍﺭ ﯽﯾﺍﺩﺯ ﺏﻮﺳﺭ ﻪﻈﻔﺤﻣ
3 .(15 ﻞﮑﺷ) ﺪﯿﻫﺩ ﺭﺍﺮﻗ ﯽﯾﺍﺩﺯ ﺏﻮﺳﺭ ﻪﻈﻔﺤﻣ ﯼﻭﺭ ﺖﺑﺎﺛ ﺭﻮﻃ ﻪﺑ ﺍﺭ ﻮﺗﺍ
4 .(16 ﻞﮑﺷ) ﺪﯾﻮﻨﺸﺑ ﻩﺎﺗﻮﮐ ﻕﻮﺑ ﺪﻨﭼ ﻪﮑﯿﻧﺎﻣﺯ ﺎﺗ ﺪﯾﺭﺍﺩ ﻪﮕﻧ ﻭ ﻩﺩﺍﺩ ﺭﺎﺸﻓ ﻪﯿﻧﺎﺛ 2 ﺕﺪﻣ ﻪﺑ ﺍﺭ ﯽﯾﺍﺩﺯ ﺏﻮﺳﺭ ﻪﻤﮐﺩ
ﺖﯿﻨﻣﺍ ﺎﺑ ،ﺪﻨﯾﺍﺮﻓ ﺕﺪﻣ ﻡﺎ ﺭﺩ ﺪﯿﻧﺍﻮﺗ ﯽﻣ .ﺪﻨﮐ ﯼﺭﻭﺁ ﻊﻤﺟ ﺍﺭ ﻍﺍﺩ ﺏﺁ ﻭ ﺏﻮﺳﺭ ﺕﺍﺭﺫ ،ﯽﯾﺍﺩﺯ ﺏﻮﺳﺭ ﺪﻨﯾﺍﺮﻓ ﺕﺪﻣ ﺭﺩ ﻪﮐ ﺖﺳﺍ ﻩﺪﺷ ﯽﺣﺍﺮﻃ ﯼﺭﻮﻃ ﯽﯾﺍﺩﺯ ﺏﻮﺳﺭ ﻪﻈﻔﺤﻣ :ﻪﺟﻮﺗ
.ﺪﯿﻫﺩ ﺭﺍﺮﻗ ﻪﻈﻔﺤﻣ ﯼﻭﺭ ﺍﺭ ﻮﺗﺍ ﻞﻣﺎﮐ
5 .(17 ﻞﮑﺷ) ﺪﯾﻮﻨﺷ ﯽﻣ ﺍﺭ ﻥﺪﺷ ﭗﻤﭘ ﯼﺍﺪﺻ ﻭ ﻩﺎﺗﻮﮐ ﯼﺎﻫ ﻕﻮﺑ ﯼﺍﺪﺻ ،ﯽﯾﺍﺩﺯ ﺏﻮﺳﺭ ﺕﺪﻣ ﺭﺩ
6 ﻒﻗﻮﺘﻣ ﯽﯾﺍﺩﺯ ﺏﻮﺳﺭ ﻍﺍﺮﭼ ﻥﺩﺯ ﮏﻤﺸﭼ ﻭ ﻊﻄﻗ ﻮﺗﺍ ﻕﻮﺑ ﯼﺍﺪﺻ ،ﺪﺷ ﻞﻣﺎﮐ ﯽﯾﺍﺩﺯ ﺏﻮﺳﺭ ﺪﻨﯾﺍﺮﻓ ﯽﺘﻗﻭ .(18 ﻞﮑﺷ) ﺪﻨﮐ ﻞﻣﺎﮐ ﺍﺭ ﺕﺎﯿﻠﻤﻋ ﻩﺎﮕﺘﺳﺩ ﺎﺗ ﺪﯿﻧﺎ ﺮﻈﺘﻨﻣ ﻪﻘﯿﻗﺩ 2 ﺩﻭﺪﺣ
.ﺩﻮﺷ ﯽﻣ
7 .(19 ﻞﮑﺷ) ﺪﯿﻫﺩ ﺭﺍﺮﻗ ﯽﻠﺻﺍ ﻩﺎﮕﯾﺎﺟ ﺭﺩ ﻭ ﻩﺩﺮﮐ ﺰﯿ ﺍﺭ ﻮﺗﺍ ﻪﭼﺭﺎﭘ ﻪﮑﺗ ﮏﯾ ﺎﺑ
یسراف

29
ﺏﺁ ﻥﺰﺨﻣ ﻥﺩﺮﮐﺮﭘ
.ﺪﯿﻨﮐ ﺮﭘ ًﺍﺩﺪﺠﻣ ﺍﺭ ﺏﺁ ﻥﺰﺨﻣ ﺪﯿﻧﺍﻮﺗ ﯽﻣ ﻩﺩﺎﻔﺘﺳﺍ ﺕﺪﻣ ﺭﺩ .ﺪﯿﻨﮐ ﺮﭘ ﺍﺭ ﺏﺁ ﻥﺰﺨﻣ ،ﺪﺷﺎﺑ ﺏﺁ ﻥﺍﺰﯿﻣ ﻞﻗﺍﺪﺣ ﺯﺍ ﱰﻤﮐ ﻥﺰﺨﻣ ﺭﺩ ﺏﺁ ﺢﻄﺳ ﯽﺘﻗﻭ ﺎﯾ ﻩﺩﺎﻔﺘﺳﺍ ﺮﻫ ﺯﺍ ﻞﺒﻗ
1 .(3 ﻞﮑﺷ) ﺪﯿﻨﮐ ﺯﺎﺑ ﺍﺭ ﺏﺁ ﻥﺰﺨﻣ ﻩﺪﻨﻨﮐﺮﭘ ﺏﺭﺩ
2 .(4 ﻞﮑﺷ) ﺪﯿﻨﮐ ﺮﭘ MAX ﺖﻣﻼﻋ ﺎﺗ ﺍﺭ ﺏﺁ ﻥﺰﺨﻣ
3 .('ﮏﯿﻠﮐ ﯼﺍﺪﺻ') ﺪﯾﺪﻨﺒﺑ ﺍﺭ ﺏﺁ ﻥﺰﺨﻣ ﻩﺪﻨﻨﮐﺮﭘ ﺏﺭﺩ
ﻩﺎﮕﺘﺳﺩ ﺯﺍ ﻩﺩﺎﻔﺘﺳﺍ
ﻮﺗﺍ ﻞﺑﺎﻗ ﯼﺎﻫ ﺱﺎﺒﻟ
.ﺪﯿﻨﮑﻧ ﻮﺗﺍ ﺍﺭ ﻮﺗﺍ ﻞﺑﺎﻗﺮﯿﻏ ﯼﺎﻫ ﻪﭼﺭﺎﭘ
- .ﻥﻮﯾﺭ ﻭ ﺯﻮﮑﺴﯾﻭ ،ﯽﻤﺸﭘ ،ﯽﻤﺸﯾﺮﺑﺍ ،ﱰﺳﺍ ﯽﻠﭘ ،ﯽﺨﻧ ،ﻥﺎﺘﮐ ﻝﺎﺜﻣ ﯼﺍﺮﺑ ،ﺪﻨﺘﺴﻫ ﻥﺩﺮﮐ ﻮﺗﺍ ﻞﺑﺎﻗ (5 ﻞﮑﺷ) ﺪﻧﺭﺍﺩ ﺍﺭ ﺮﯾﺯ ﯼﺎﻫ ﺖﻣﻼﻋ ﻪﮐ ﯽﯾﺎﻫ ﺱﺎﺒﻟ
- ﻭ ﺲﮐﺪﻧﺎﭙﺳﺍ ﺎﺑ ﯽﺒﯿﮐﺮﺗ ﯼﺎﻫ ﻪﭼﺭﺎﭘ ،ﺳﻻﺍ ﺎﯾ ﺲﮐﺪﻧﺎﭙﺳﺍ ﻝﺎﺜﻣ ﯼﺍﺮﺑ ،ﺪﻨﺘﺴﻫ ﯽﻋﻮﻨﺼﻣ ﺩﺍﻮﻣ ﯼﻭﺎﺣ ﺎﻫ ﺱﺎﺒﻟ ﻦﯾﺍ .ﺪﻨﺘﺴﯿﻧ ﻥﺩﺮﮐ ﻮﺗﺍ ﻞﺑﺎﻗ (6 ﻞﮑﺷ) ﺪﻧﺭﺍﺩ ﺍﺭ ﺮﯾﺯ ﺖﻣﻼﻋ ﻪﮐ ﯽﯾﺎﻫ ﺱﺎﺒﻟ
.ﺖﺴﯿﻧ ﻮﺗﺍ ﻞﺑﺎﻗ ﺰﯿﻧ ﺱﺎﺒﻟ ﯼﻭﺭ ﭖﺎﭼ .(ﻦﻠﯿﭘﻭﺮﭘ ﯽﻠﭘ ًﻼﺜﻣ) ﻦﯿﻔﻟﻮﯿﻠﭘ
ﻥﺩﺮﮐ ﻮﺗﺍ
1 .ﺪﯿﻫﺩ ﺭﺍﺮﻗ ﺖﺑﺎﺛ ﻭ ﻑﺎﺻ ﺢﻄﺳ ﮏﯾ ﯼﻭﺭ ﺍﺭ ﻩﺎﮕﺘﺳﺩ
.ﺪﯿﻫﺩ ﺭﺍﺮﻗ ﺖﺑﺎﺛ ﺢﻄﺳ ﯼﻭﺭ ﺍﺭ ﻩﺎﮕﺘﺳﺩ ﻪﯾﺎﭘ ﻪﺸﯿﻤﻫ ،ﻦﻤﯾﺍ ﯽﺸﮐﻮﺗﺍ ﯼﺍﺮﺑ :ﻪﺟﻮﺗ
2 .ﺪﺷﺎﺑ ﯽﻓﺎﮐ ﺏﺁ ﻥﺰﺨﻣ ﺭﺩ ﺏﺁ ﺪﯾﻮﺷ ﱧﻤﻄﻣ
3 .ﺪﯿﻨﮐ ﺍﺪﺟ ﻩﺎﮕﺘﺳﺩ ﯼﺭﺍﺪﻬﮕﻧ ﻪﻈﻔﺤﻣ ﺯﺍ ﺍﺭ ﺏﺁ ﻪﻟﻮﻟ ﻭ ﻕﺮﺑ ﻢﯿﺳ
4 ،ﺩﻮﺷ ﺵﻭﺭ ﺖﺑﺎﺛ ﺭﻮﻃ ﻪﺑ 'ﻮﺗﺍ ﻥﺩﻮﺑ ﻩﺩﺎﻣﺁ' ﻍﺍﺮﭼ ﻪﮑﯿﻧﺎﻣﺯ ﺎﺗ .ﺩﻮﺷ ﻦﺷﻭﺭ ﻩﺎﮕﺘﺳﺩ ﺎﺗ ﺪﯿﻫﺩ ﺭﺎﺸﻓ ﺍﺭ ﺵﻮﻣﺎﺧ/ﻦﺷﻭﺭ ﻪﻤﮐﺩ ﺲﭙﺳ ،ﺪﯿﻧﺰﺑ ﻦﯿﻣﺯ ﻝﺎﺼﺗﺍ ﯼﺍﺭﺍﺩ ﺰﯾﺮﭘ ﻪﺑ ﺍﺭ ﻪﺧﺎﺷﻭﺩ
.ﺪﺸﮐ ﯽﻣ ﻝﻮﻃ ﻪﻘﯿﻗﺩ 2 ﺩﻭﺪﺣ .(7 ﻞﮑﺷ) ﺪﯿﻧﺎ ﺮﻈﺘﻨﻣ
5 .(8 ﻞﮑﺷ) ﺩﻮﺷ ﺍﺪﺟ ﻮﺗﺍ ﻩﺎﮕﯾﺎﺟ ﺯﺍ ﻮﺗﺍ ﺎﺗ ﺪﯿﻫﺩ ﺭﺎﺸﻓ ﺍﺭ ﻞﻤﺣ ﻞﻔﻗ ﻥﺩﺮﮐ ﺯﺎﺑ ﻪﻤﮐﺩ :GC6830 ﻭ GC6820 ،GC6819 ﯼﺎﻫ ﯼﴎ ﯼﺍﺮﺑ ﻂﻘﻓ
6 .(9 ﻞﮑﺷ) ﺪﯿﻨﮐ ﻮﺗﺍ ﻪﺑ ﻉﻭﴍ ﺲﭙﺳ ،ﺪﯾﺭﺍﺩ ﻪﮕﻧ ﻭ ﻩﺩﺍﺩ ﺭﺎﺸﻓ ﺍﺭ ﺭﺎﺨﺑ ﯼﺭﺎﺸﻓ ﻪﻤﮐﺩ
.ﺪﯿﻫﺩ ﻡﺎﺠﻧﺍ ﺭﺎﺨﺑ ﻥﻭﺪﺑ ﺍﺭ ﻮﺗﺍ ﯼﺎﻫ ﺖﮐﺮﺣ ﻦﯾﺮﺧﺁ ،ﺭﺎﺨﺑ ﺎﺑ ﯽﺸﮐﻮﺗﺍ ﺯﺍ ﺲﭘ ،ﱰﻬﺑ ﻪﺠﯿﺘﻧ ﯼﺍﺮﺑ :ﻪﺟﻮﺗ
.ﺪﯾﺮﯿﮕﻧ ﺩﺍﺮﻓﺍ ﺖﻤﺳ ﻪﺑ ﻢﯿﻘﺘﺴﻣ ﺍﺭ ﺭﺎﺨﺑ ﺰﮔﺮﻫ :ﺭﺍﺪﺸﻫ
.ﺩﻮﺷ ﺝﺭﺎﺧ ﻩﺎﮕﺘﺳﺩ ﺯﺍ ﺭﺎﺨﺑ ﺎﺗ ﺪﺸﮑﺑ ﻝﻮﻃ ﻪﯿﻧﺎﺛ 30 ﺖﺳﺍ ﻦﮑﻤﻣ ،ﺪﯿﻨﮐ ﯽﻣ ﻩﺩﺎﻔﺘﺳﺍ ﻩﺎﮕﺘﺳﺩ ﺯﺍ ﺭﺎﺑ ﻦﯿﻟﻭﺍ ﯼﺍﺮﺑ ﯽﺘﻗﻭ :ﻪﺟﻮﺗ
ﯽﺘﻗﻭ .ﺩﻮﺷ ﯽﻣ ﺮﺗﺪﻨﻠﺑ ﭗﻤﭘ ﯼﺍﺪﺻ ،ﺪﺷﺎﺒﻧ ﺏﺁ ،ﻥﺰﺨﻣ ﺭﺩ ﻪﮑﯿﺗﺭﻮﺻ ﺭﺩ .ﺖﺳﺍ ﯽﻌﯿﺒﻃ ﻪﮐ ﺩﻮﺷ ﯽﻣ ﺪﯿﻟﻮﺗ ﯽﯾﺍﺪﺻ .ﺩﻮﺷ ﯽﻣ ﻝﺎﻌﻓ ﭗﻤﭘ ،ﺪﯿﻫﺩ ﯽﻣ ﺭﺎﺸﻓ ﺍﺭ ﺭﺎﺨﺑ ﻪﻤﮐﺩ ﻪﮐ ﺭﺎﺑ ﺮﻫ :ﻪﺟﻮﺗ
.ﺪﯿﻨﮐ ﺮﭘ ﺍﺭ ﻥﺁ ،ﺪﺷﺎﺑ ﺏﺁ ﻥﺍﺰﯿﻣ ﻞﻗﺍﺪﺣ ﺯﺍ ﱰﻤﮐ ﻥﺰﺨﻣ ﺭﺩ ﺏﺁ ﺢﻄﺳ
ﺭﺎﺨﺑ ﺶﯾﺍﺰﻓﺍ ﺩﺮﮑﻠﻤﻋ
1 .(10 ﻞﮑﺷ) ﺪﯿﻫﺩ ﺭﺎﺸﻓ ﻊﯾﴎ ﺭﺎﺑ ﻭﺩ ﺍﺭ ﺭﺎﺨﺑ ﯼﺭﺎﺸﻓ ﻪﻤﮐﺩ ،ﺩﻮﺷ ﺝﺭﺎﺧ ﻩﺎﮕﺘﺳﺩ ﺯﺍ ﻪﯿﻧﺎﺛ 3 ﺕﺪﻣ ﻪﺑ ﱰﺸﯿﺑ ﺕﺪﺷ ﺎﺑ ﻭ ﯽﺸﯾﺍﺰﻓﺍ ﺭﻮﻃ ﻪﺑ ﺭﺎﺨﺑ ﻪﮑﻨﯾﺍ ﯼﺍﺮﺑ
.ﺩﻮﺷ ﻩﺩﺎﻔﺘﺳﺍ ﻖﯿﻤﻋ ﯼﺎﻫ ﮎﻭﺮﭼ ﯼﺍﺮﺑ ﻂﻘﻓ ،ﺭﺎﺨﺑ ﺶﯾﺍﺰﻓﺍ ﺩﺮﮑﻠﻤﻋ ﺯﺍ ﺩﻮﺷ ﯽﻣ ﺩﺎﻬﻨﺸﯿﭘ :ﻪﺟﻮﺗ
ﯼﺩﻮﻤﻋ ﯽﺸﮐﻮﺗﺍ
ﺩﺍﺮﻓﺍ ﺎﯾ ﺩﻮﺧ ﺖﺳﺩ ﯽﮑﯾﺩﺰﻧ ﺭﺩ ﺭﺎﺨﺑ ﺯﺍ .(11 ﻞﮑﺷ) ﺪﯿﻨﮑﻧ ﻑﺮﻃﺮﺑ ﺍﺭ ﻥﺁ ﮎﻭﺮﭼ ،ﺖﺳﺍ ﻩﺪﺷ ﻩﺪﯿﺷﻮﭘ ﺱﺎﺒﻟ ﯽﺘﻗﻭ .ﺩﻮﺷ ﯽﻣ ﺝﺭﺎﺧ ﻮﺗﺍ ﺯﺍ ﻍﺍﺩ ﺭﺎﺨﺑ :ﺭﺍﺪﺸﻫ
.ﺪﯿﻨﮑﻧ ﻩﺩﺎﻔﺘﺳﺍ ﺮﮕﯾﺩ
.ﺪﯾﱪﺑ ﻦﯿﺑ ﺯﺍ ﺍﺭ ﺰﯾﻭﺁ ﯼﺎﻫ ﻪﭼﺭﺎﭘ ﯼﺎﻫ ﮎﻭﺮﭼ ﻭ ﻩﺩﺮﮐ ﻩﺩﺎﻔﺘﺳﺍ ﯼﺩﻮﻤﻋ ﺕﺭﻮﺻ ﻪﺑ ﺭﺎﺨﺑ ﯼﻮﺗﺍ ﺯﺍ ﺪﯿﻧﺍﻮﺗ ﯽﻣ
1 .(12 ﻞﮑﺷ) ﺪﯿﻫﺩ ﺖﮐﺮﺣ ﻦﯿﯾﺎﭘ ﻭ ﻻﺎﺑ ﺖﻤﺳ ﻪﺑ ﺍﺭ ﻮﺗﺍ ﻭ ﺪﯿﻨﮐ ﺲﳌ ﺍﺭ ﺱﺎﺒﻟ ﯽﻣﺍﺭﺁ ﻪﺑ ،ﻮﺗﺍ ﻒﮐ ﺎﺑ ﻭ ﻩﺩﺍﺩ ﺭﺎﺸﻓ ﺍﺭ ﺭﺎﺨﺑ ﯼﺭﺎﺸﻓ ﻪﻤﮐﺩ ،ﺪﯾﺮﯿﮕﺑ ﯼﺩﻮﻤﻋ ﺕﺭﻮﺻ ﻪﺑ ﺍﺭ ﻮﺗﺍ
یسراف

30
ﻪﻣﺪﻘﻣ
ﺭﺩ ﺍﺭ ﺩﻮﺧ ﻩﺎﮕﺘﺳﺩ ،Philips ﺵﻭﺮﻓ ﺯﺍ ﺲﭘ ﺕﺎﻣﺪﺧ ﺯﺍ ﻪﻨﯿﻬﺑ ﻩﺩﺎﻔﺘﺳﺍ ﯼﺍﺮﺑ !ﻢﯿﯾﻮﮔ ﯽﻣ ﮏﯾﱪﺗ ﻝﻮﺼﺤﻣ ﻦﯾﺍ ﺪﯾﺮﺧ ﯼﺍﺮﺑ ﺷ ﻪﺑ !ﺪﯾﺪﻣﺁ ﺵﻮﺧ Philips ﺕﻻﻮﺼﺤﻣ ﯼﺎﯿﻧﺩ ﻪﺑ
.ﺪﯿﻨﮐ ﻡﺎﻧ ﺖﺒﺛ www.philips.com/welcome ﺖﯾﺎﺳ
ﻪﮕﻧ ﺩﻮﺧ ﺩﺰﻧ ﯼﺪﻌﺑ ﺕﺎﻌﺟﺍﺮﻣ ﯼﺍﺮﺑ ﺍﺭ ﺎﻬﻧﺁ .ﺪﯿﻨﮐ ﻪﻌﻟﺎﻄﻣ ﺖﻗﺩ ﻪﺑ ﻩﺎﮕﺘﺳﺩ ﺯﺍ ﻩﺩﺎﻔﺘﺳﺍ ﺯﺍ ﻞﺒﻗ ﺍﺭ ﻊﯾﴎ ﻉﻭﴍ ﯼﻨﻫﺍﺭ ﻭ ﺮﺑﺭﺎﮐ ﯼﻨﻫﺍﺭ ،ﻢﻬﻣ ﺕﺎﻋﻼﻃﺍ ﺭﻮﺷﺮﺑ ،ﺮﺑﺭﺎﮐ ﯼﻨﻫﺍﺭ ﻦﯾﺍ
.ﺪﯾﺭﺍﺩ
(1 ﻞﮑﺷ) ﻩﺎﮕﺘﺳﺩ ﯽﻠﮐ ﯼﺎ
1 ﻮﻃﺍ ﻒﮐ
2 'ﻮﺗﺍ ﻥﺩﻮﺑ ﻩﺩﺎﻣﺁ' ﻍﺍﺮﭼ
3 ﺭﺎﺨﺑ ﺶﯾﺍﺰﻓﺍ/ﺭﺎﺨﺑ ﯼﺭﺎﺸﻓ ﻪﻤﮐﺩ
4 ﺏﺁ ﻪﻟﻮﻟ
5 ﺏﺁ ﻥﺰﺨﻣ ﻩﺪﻨﻨﮐﺮﭘ ﺏﺭﺩ
6 (GC6830 ﻭ GC6820 ،GC6819 ﯼﺎﻫ ﯼﴎ ﻂﻘﻓ) ﻞﻤﺣ ﻞﻔﻗ ﻥﺩﺮﮐ ﺯﺎﺑ ﻪﻤﮐﺩ
7 ﻮﺗﺍ ﻩﺎﮕﯾﺎﺟ
8 ﻥﺪﺷ ﺵﻮﻣﺎﺧ ﻭ ﻦﺷﻭﺭ ﻍﺍﺮﭼ ﺎﺑ ﺵﻮﻣﺎﺧ/ﻦﺷﻭﺭ ﻪﻤﮐﺩ
9 ﺭﺍﺩ ﻍﺍﺮﭼ ﯽﯾﺍﺩﺯ ﺏﻮﺳﺭ ﻪﻤﮐﺩ
10 ﻪﺧﺎﺷﻭﺩ ﻭ ﻕﺮﺑ ﻢﯿﺳ
11 ﺏﺁ ﻪﻟﻮﻟ ﻭ ﻕﺮﺑ ﻢﯿﺳ ﯼﺭﺍﺪﻬﮕﻧ ﻪﻈﻔﺤﻣ
12 ﯽﯾﺍﺩﺯ ﺏﻮﺳﺭ ﺪﻨﻤﺷﻮﻫ ﻪﻈﻔﺤﻣ
Philips ﺩﺮﻓ ﻪﺑ ﴫﺤﻨﻣ ﯼﺭﻭﺎﻨﻓ
OptimalTEMP ﯼﺭﻭﺁ ﻦﻓ
.ﺪﯿﻨﮐ ﻮﺗﺍ ﯽﺒﯿﺗﺮﺗ ﺮﻫ ﻪﺑ ﺍﺭ ﻮﺗﺍ ﻞﺑﺎﻗ ﯼﺎﻫ ﺱﺎﺒﻟ ﻉﺍﻮﻧﺍ ،ﺎﻫ ﺱﺎﺒﻟ ﻥﺩﺮﮐ ﺐﺗﺮﻣ ﻭ ﺎﻣﺩ ﻢﯿﻈﻨﺗ ﻪﺑ ﺯﺎﯿﻧ ﻥﻭﺪﺑ ﺪﻫﺩ ﯽﻣ ﻥﺎﮑﻣﺍ ﺷ ﻪﺑ OptimalTEMP ﯼﺭﻭﺎﻨﻓ
.ﺪﺑﺎﯾ ﯽﻣ ﺶﻫﺎﮐ ﭻﻣ ﯼﻭﺭ ﺭﺎﺸﻓ ﺭﺎﮐ ﻦﯾﺍ ﺎﺑ .ﺪﯿﻫﺩ ﺭﺍﺮﻗ (2 ﻞﮑﺷ) ﻮﺗﺍ ﺰﯿﻣ ﯼﻭﺭ ًﯿﻘﺘﺴﻣ ﺍﺭ ﻮﺗﺍ ﻒﮐ ،ﺪﯿﻧﺍﺩﺮﮔﺮﺑ ﻮﺗﺍ ﻩﺎﮕﯾﺎﺟ ﻪﺑ ﺍﺭ ﻮﺗﺍ ﺪﺷﺎﺑ ﺯﺎﯿﻧ ﻪﮑﻧﺁ ﻥﻭﺪﺑ ﺪﯿﻧﺍﻮﺗ ﯽﻣ
ﯽﻤﺸﭘ ﯼﺎﻫ ﺱﺎﺒﻟ ﯽﺸﮐﻮﺗﺍ ﯼﺍﺮﺑ ﻂﻘﻓ The Woolmark Company Pty Ltd ﻂﺳﻮﺗ ﻮﺗﺍ ﻦﯾﺍ
ﯼﺎﻫﺭﺎﮑﻫﺍﺭ ﻭ ﺱﺎﺒﻟ ﺐﺴﭼﺮﺑ ﯼﻭﺭ ﯼﺎﻫ ﻞﻤﻌﻟﺍﺭﻮﺘﺳﺩ ﻖﺒﻃ ﺮﺑ ﺎﻫ ﺱﺎﺒﻟ ﯽﺸﮐﻮﺗﺍ ﻪﮑﻧﺁ ﻁﴍ ﻪﺑ ﺖﺳﺍ ﻩﺪﺷ ﺪﯿﯾﺄﺗ
ﺯﺍ ﯼﺭﺎﯿﺴﺑ ﺭﺩ ﯽﻫﺍﻮﮔ ﺖﻣﻼﻋ ﮏﯾ The Woolmark ﺖﻣﻼﻋ .R1701 .ﺩﻮﺷ ﻡﺎﺠﻧﺍ ﻮﺗﺍ ﻦﯾﺍ ﻩﺪﻧﺯﺎﺳ
.ﺪﺷﺎﺑ ﯽﻣ ﺎﻫﺭﻮﺸﮐ
ProVelocity ﻢﺠﺣ ﻢﮐ ﯼﺭﻭﺎﻨﻓ
،ﯽﻤﯾﺪﻗ ﺭﺎﺨﺑ ﯼﺎﻫﻮﺗﺍ ﻪﺑ ﺖﺒﺴﻧ ،ﺮﺗ ﻥﺎﺳﺁ ﯼﺭﺍﺪﻬﮕﻧ ﯼﺍﺮﺑ ﻩﺎﮕﺘﺳﺩ ﻦﯾﺍ ،ﻦﯿﻨﭽﻤﻫ .ﺩﺮﺑ ﯽﻣ ﻦﯿﺑ ﺯﺍ ﺍﺭ ﺎﻫ ﮎﻭﺮﭼ ﯽﻧﺎﺳﺁ ﻪﺑ ﻭ ﻩﺩﺮﮐ ﺫﻮﻔﻧ ﻖﯿﻤﻋ ﻭ ﻪﺘﺳﻮﯿﭘ ﺭﻮﻃ ﻪﺑ ﺭﺎﺨﺑ ،ﯼﺭﻭﺎﻨﻓ ﻦﯾﺍ ﺭﺩ
.ﺪﺷﺎﺑ ﯽﻣ ﺮﺗ ﮏﺒﺳ ﻭ ﺮﺗ ﻢﺠﺣ ﻢﮐ
ﻩﺩﺎﻔﺘﺳﺍ ﯼﺍﺮﺑ ﯼﺯﺎﺳ ﻩﺩﺎﻣﺁ
ﻩﺩﺎﻔﺘﺳﺍ ﺩﺭﻮﻣ ﺏﺁ ﻉﻮﻧ
.ﺩﻮﺷ ﻦﯿﺸﻧ ﻪﺗ ﻩﺎﮕﺘﺳﺩ ﺭﺩ ﺕﺎﺑﻮﺳﺭ ﺖﻋﴎ ﻪﺑ ﺖﺳﺍ ﻦﮑﻤﻣ ﺖﺳﺍ ﺖﺨﺳ ﻪﻟﻮﻟ ﺏﺁ ﻪﮐ ﺪﯿﻨﮐ ﯽﻣ ﯽﮔﺪﻧﺯ ﯼﺍ ﻪﻘﻄﻨﻣ ﺭﺩ ﺮﮔﺍ .ﺖﺳﺍ ﻩﺪﺷ ﯽﺣﺍﺮﻃ ﻪﻟﻮﻟ ﺏﺁ ﺎﺑ ﻩﺩﺎﻔﺘﺳﺍ ﺖﻬﺟ ﻩﺎﮕﺘﺳﺩ ﻦﯾﺍ
.ﺩﻮﺷ ﺮﺗ ﯽﻧﻻﻮﻃ ﻩﺎﮕﺘﺳﺩ ﺮﻤﻋ ﻝﻮﻃ ﺎﺗ ﺪﯿﻨﮐ ﻩﺩﺎﻔﺘﺳﺍ ﯽﻧﺪﻌﻣ ﺡﻼﻣﺍ ﻥﻭﺪﺑ ﺏﺁ ﺎﯾ ﺮﻄﻘﻣ ﺏﺁ ﺯﺍ ﺩﻮﺷ ﯽﻣ ﻪﯿﺻﻮﺗ ،ﻦﯾﺍﺮﺑﺎﻨﺑ
ﯽﯾﺎﯿﻤﯿﺷ ﺩﺍﻮﻣ ﺮﯾﺎﺳ ﺎﯾ ﯽﯾﺎﯿﻤﯿﺷ ﺩﺍﻮﻣ ﺎﺑ ﻩﺪﺷ ﯽﯾﺍﺩﺯ ﺏﻮﺳﺭ ﺏﺁ ،ﻮﺗﺍ ﯽﮑﻤﮐ ﺩﺍﻮﻣ ،ﺍﺩﺯ ﺏﻮﺳﺭ ﺩﺍﻮﻣ ،ﻪﺘﺳﺎﺸﻧ ،ﻪﮐﴎ ،ﻦﮐ ﮏﺸﺧ ﺏﺁ ،ﺮﻄﻌﻣ ﺏﺁ ﺯﺍ ﻩﺩﺎﻔﺘﺳﺍ ﺯﺍ :ﺭﺍﺪﺸﻫ
.ﺩﻮﺷ ﻩﺎﮕﺘﺳﺩ ﻪﺑ ﺐﯿﺳﺁ ﺎﯾ ﯼﺍ ﻩﻮﻬﻗ ﯼﺎﻫ ﻪﮑﻟ ﺩﺎﺠﯾﺍ ،ﺏﺁ ﻥﺪﺷ ﮏﺸﺧ ﺚﻋﺎﺑ ﺖﺳﺍ ﻦﮑﻤﻣ ﻥﻮﭼ ﺪﯿﻨﮐ ﯼﺭﺍﺩﺩﻮﺧ
یسراف

31
ﺔﻴﺑﺮﻌﻟﺍ
ﺔﻠﻜﺸﳌﺍﻞﻤﺘﺤﳌﺍ ﺐﺒﺴﻟﺍﻞﺤﻟﺍ
.ﺍًﺪﺟ ﺭﺮﻜﺘﻣ ﻞﻜﺸﺑ ﺭﺎﺨﺒﻟﺍ ﺰﻳﺰﻌﺗ ﺔﻔﻴﻇﻭ ﺖﻣﺪﺨﺘﺳﺍ ﺪﻘﻟ ﻡﺪﻌﺑ ﴅﻮﻳ .ﻂﻘﻓ ﺔﺒﻌﺼﻟﺍ ﺪﻴﻋﺎﺠﺘﻟﺍ ﲆﻋ ﺭﺎﺨﺒﻟﺍ ﺰﻳﺰﻌﺗ ﺔﻔﻴﻇﻭ ﻲﻣﺪﺨﺘﺳﺍ
.ﻖﺋﺎﻗﺩ 3 ﻥﻮﻀﻏ ﰲ ﺕﺍﺮﻣ 5 ﻦﻣ ﻛﺃ ﺎﻬﻣﺍﺪﺨﺘﺳﺍ
.ﺲﻠﻜﻟﺍ ﻒﻴﻈﻨﺗ ﺔﻴﻠﻤﻋ ﻞﻤﺘﻜﺗ ﻒﻴﻈﻨﺘﻟﺍ" ﻞﺼﻔﻟﺍ ﻲﻌﺟﺍﺭ) ﺍًﺩﺪﺠﻣ ﺲﻠﻜﻟﺍ ﻒﻴﻈﻨﺗ ﺔﻴﻠﻤﻋ ﺀﺍﺮﺟﺇ ﺐﺠﻳ
.("ﺔﻧﺎﻴﺼﻟﺍﻭ
ﺪﻨﻋ ﻡﻮﻃﺮﺨﻟﺍ ﰲ ﻩﺎﻴﻣ ﱃﺇ ﻝﻮﺤﺘﻴﻟ ﺭﺎﺨﺒﻟﺍ ﻒّﺜﻜﺘﻳ
ﻞﻳﻮﻃ ﺖﻗﻭ ﺭﻭﺮﻣ ﺪﻨﻋ ﻭﺃ ﱃﻭﻷﺍ ﺓﺮﻤﻠﻟ ﺭﺎﺨﺒﻟﺍ ﻡﺍﺪﺨﺘﺳﺍ
.ﻪﻟ ﻚﻣﺍﺪﺨﺘﺳﺍ ﲆﻋ
ﻞّﻐﺸﻣ ﲆﻋ ﻲﻄﻐﺿﺍﻭ ﺲﺑﻼﳌﺍ ﻦﻋ ﺍًﺪﻴﻌﺑ ﺓﺍﻮﻜﳌﺍ ﺴﻣﺍ .ﻲﻌﻴﺒﻃ ﺮﻣﺃ ﺍﺬﻫ
.ﺓﺍﻮﻜﳌﺍ ﺓﺪﻋﺎﻗ ﻦﻣ ﻩﺎﻴﳌﺍ ﻦﻣ ًﻻﺪﺑ ﺭﺎﺨﺒﻟﺍ ﺝﺮﺨﻳ ﻰﺘﺣ ﻱﺮﻈﺘﻧﺍ .ﺭﺎﺨﺒﻟﺍ
ﺓﺪﻋﺎﻗ ﻦﻣ ﺔﺛﻮﻠﳌﺍ ﺩﺍﻮﳌﺍﻭ ﺔﺨﺳﻮﻟﺍ ﻩﺎﻴﳌﺍ ﺝﺮﺨﺗ
.ﺓﺍﻮﻜﳌﺍ
ﰲ ﺓﺩﻮﺟﻮﳌﺍ ﺔﻴﺋﺎﻴﻤﻴﻜﻟﺍ ﺩﺍﻮﳌﺍ ﻭﺃ ﺔﺛّﻮﻠﳌﺍ ﺩﺍﻮﳌﺍ ﺖﺒّﺳﺮﺗ
.ﺓﺍﻮﻜﳌﺍ ﺓﺪﻋﺎﻗ ﻭﺃ/ﻭ ﺭﺎﺨﺒﻟﺍ ﺕﺎﺤﺘﻓ ﱃﺇ ﻩﺎﻴﳌﺍ
ﻒﻴﻈﻨﺘﻟﺍ" ﻞﺼﻔﻟﺍ ﻲﻌﺟﺍﺭ) ﻡﺎﻈﺘﻧﺎﺑ ﺲﻠﻜﻟﺍ ﻒﻴﻈﻨﺗ ﺔﻴﻠﻤﻋ ﺀﺍﺮﺟﺈﺑ ﻲﻣﻮﻗ
.("ﺔﻧﺎﻴﺼﻟﺍﻭ
ﺪﻨﻋ ﻡﻮﻃﺮﺨﻟﺍ ﰲ ﻩﺎﻴﻣ ﱃﺇ ﻝﻮﺤﺘﻴﻟ ﺭﺎﺨﺒﻟﺍ ﻒّﺜﻜﺘﻳ
ﻞﻳﻮﻃ ﺖﻗﻭ ﺭﻭﺮﻣ ﺪﻨﻋ ﻭﺃ ﱃﻭﻷﺍ ﺓﺮﻤﻠﻟ ﺭﺎﺨﺒﻟﺍ ﻡﺍﺪﺨﺘﺳﺍ
.ﻪﻟ ﻚﻣﺍﺪﺨﺘﺳﺍ ﲆﻋ
ﻞّﻐﺸﻣ ﲆﻋ ﻲﻄﻐﺿﺍﻭ ﺲﺑﻼﳌﺍ ﻦﻋ ﺍًﺪﻴﻌﺑ ﺓﺍﻮﻜﳌﺍ ﺴﻣﺍ .ﻲﻌﻴﺒﻃ ﺮﻣﺃ ﺍﺬﻫ
.ﺓﺍﻮﻜﳌﺍ ﺓﺪﻋﺎﻗ ﻦﻣ ﻩﺎﻴﳌﺍ ﻦﻣ ًﻻﺪﺑ ﺭﺎﺨﺒﻟﺍ ﺝﺮﺨﻳ ﻰﺘﺣ ﻱﺮﻈﺘﻧﺍ .ﺭﺎﺨﺒﻟﺍ
.ﺓﺍﻮﻜﳌﺍ ﺓﺪﻋﺎﻗ ﻦﻣ ﻩﺎﻴﳌﺍ ﺝﺮﺨﺗ ﻲﻌﺟﺍﺭ) ﺪﺼﻗ ﻏ ﻦﻋ ﺲﻠﻜﻟﺍ ﻒﻴﻈﻨﺗ ﺔﻴﻠﻤﻋ ﺕﺃﺪﺑ ﺪﻘﻟ
.("ﺔﻧﺎﻴﺼﻟﺍﻭ ﻒﻴﻈﻨﺘﻟﺍ" ﻞﺼﻔﻟﺍ
ﺀﴤﻳ ﻰﺘﺣ ﻰﻤﺤﺘﻟ ﺓﺍﻮﻜﳌﺍ ﺮﺗﺍ .ﺍًﺩﺪﺠﻣ ﻪﻴﻠﻐﺷ ﻢﺛ .ﺯﺎﻬﺠﻟﺍ ﻞﻴﻐﺸﺗ ﻲﻔﻗﻭﺃ
.ﺮﻤﺘﺴﻣ ﻞﻜﺸﺑ "ﺓﺰﻫﺎﺟ ﺓﺍﻮﻜﳌﺍ" ﻥﺃ ﱃﺇ ﺸﻳ ﻱﺬﻟﺍ ﺀﻮﻀﻟﺍ
.ﺲﻠﻜﻟﺍ ﻒﻴﻈﻨﺗ ﺔﻴﻠﻤﻋ ﺃﺪﺒﺗ ﻻ ﻒﻴﻈﻨﺗ) CALC-CLEAN ﺭﺯ ﲆﻋ ﻲﻄﻐﻀﺗ
ﺕﺎﻬﻴﺒﻨﺗ ﺭﺍﺪﺻﺈﺑ ﺯﺎﻬﺠﻟﺍ ﺃﺪﺒﻳ ﻰﺘﺣ ﺘﻴﻧﺎﺜﻟ (ﺲﻠﻜﻟﺍ
.ﺔﻴﺗﻮﺻ
."ﺔﻧﺎﻴﺼﻟﺍﻭ ﻒﻴﻈﻨﺘﻟﺍ" ﻞﺼﻔﻟﺍ ﻲﻌﺟﺍﺭ
ﺔﻌﻄﻗ ﲆﻋ ﺔﻣﻼﻋ ﻭﺃ ﺔﻌﻣﻻ ﺔﻌﺒﻃ ﺓﺍﻮﻜﳌﺍ ﻙﱰﺗ
.ﺲﺑﻼﳌﺍ
،ﺎًﻳﻭﺎﺴﺘﻣ ﺎﻬّﻴﻛ ﺐﺠﻳ ﻲﺘﻟﺍ ﺲﺑﻼﳌﺍ ﺔﻌﻄﻗ ﺢﻄﺳ ﻦﻜﻳ
ﰲ ﺔّﻴﻃ ﻭﺃ ﺓﺯﺭﺩ ﻕﻮﻓ ّﻟﺍ ﱃﺇ ًﻼﺜﻣ ﻚﻟﺫ ﺩﻮﻌﻳ ﺪﻗﻭ
.ﺔﻌﻄﻘﻟﺍ
ﻭﺃ ﻥﺎﻌﻤﻠﻟﺍ ﻥﺇ .ﺲﺑﻼﳌﺍ ﻞﻛ ﲆﻋ ﺎﻬﻣﺍﺪﺨﺘﺳﻻ ﺔﻨﻣﺁ PerfectCare ﻥﺇ
ﻕﻮﻓ ّﻟﺍ ﻱﺩﺎﻔﺗ .ﺲﺑﻼﳌﺍ ﻞﺴﻏ ﺪﻨﻋ ﻝﻭﺰﺘﺳﻭ ﺔﺍﺩ ﺖﺴﻴﻟ ﺓﺍﻮﻜﳌﺍ ﺭﺎﺛﺁ
ﻲﺘﻟﺍ ﺔﻘﻄﻨﳌﺍ ﻕﻮﻓ ﺔﻴﻨﻄﻗ ﺵﻗ ﺔﻌﻄﻗ ﻊﺿﻭ ﻚﻨﻜ ﻭﺃ ﺕﺎّﻴﻄﻟﺍ ﻭﺃ ﺕﺍﺯﺭﺪﻟﺍ
.ﺏﺎﻴﺜﻟﺍ ﲆﻋ ﺓﺍﻮﻜﳌﺍ ﺭﺎﺛﺁ ﻱﺩﺎﻔﺘﻟ ﺎﻬّﻴﻛ ﻦﻳﺪﻳﺮﺗ
.ّﻟﺍ ﺡﻮﻟ ﺀﺎﻄﻏ ﰲ ﺔﻴﻓﺎﻛ ﻦﻜﺗ ﺩﺎﺒﻠﻟﺍ ﺓﺩﺎﻣ.ّﻟﺍ ﺡﻮﻟ ﺀﺎﻄﻏ ﺖﺤﺗ ﺩﺎﺒﻠﻟﺍ ﺓﺩﺎﻣ ﻦﻣ ﺔﻴﻓﺎﺿﺇ ﺔﻘﺒﻃ ﻲﻌﺿ
ﻂﻗﺎﺴﺘﺗ ﻭﺃ ﺎًﺒﻃﺭ ّﻟﺍ ﺡﻮﻟ ﺀﺎﻄﻏ ﺢﺒﺼﻳ
.ﺲﺑﻼﳌﺍ/ﺽﺭﻷﺍ ﲆﻋ ﻩﺎﻴﻣ ﺕﺍﺮﻄﻗ
.ﺔﻠﻳﻮﻃ ّ ﺔﺴﻠﺟ ﺪﻌﺑ ّﻟﺍ ﺡﻮﻟ ﺀﺎﻄﻏ ﲆﻋ ﺭﺎﺨﺒﻟﺍ ﻒّﺜﻜﺗ ﺎًﻀﻳﺃ ﻚﻨﻜ .ﺩﺎﺒﻠﻟﺍ ﺩﺍﻮﻣ ﻭﺃ ﺞﻨﻔﺳﻻﺍ ﻒﻠﺗ ﻝﺎﺣ ﰲ ّﻟﺍ ﺡﻮﻟ ﺀﺎﻄﻏ ﱄﺪﺒﺘﺳﺍ
ﲆﻋ ﻒّﺜﻜﺘﻟﺍ ﻊﻨﳌ ّﻟﺍ ﺡﻮﻟ ﺀﺎﻄﻏ ﺖﺤﺗ ﺩﺎﺒﻠﻟﺍ ﺩﺍﻮﻣ ﻦﻣ ﺔﻴﻓﺎﺿﺇ ﺔﻘﺒﻃ ﻊﺿﻭ
.ّﻟﺍ ﺡﻮﻟ
ﺭﺎﺨﺒﻟﺍ ﻝﺪﻌﻣ ﻊﻣ ﻒّﻴﻜﺘﻴﻟ ﻢﻤﺼﻣ ﻏ ّ ﺡﻮﻟ ﻚﻳﺪﻟ
.ﺯﺎﻬﺠﻟﺎﺑ ﺹﺎﺨﻟﺍ ﻊﻔﺗﺮﳌﺍ
ﲆﻋ ﻒّﺜﻜﺘﻟﺍ ﻊﻨﳌ ّﻟﺍ ﺡﻮﻟ ﺀﺎﻄﻏ ﺖﺤﺗ ﺩﺎﺒﻠﻟﺍ ﺩﺍﻮﻣ ﻦﻣ ﺔﻴﻓﺎﺿﺇ ﺔﻘﺒﻃ ﻲﻌﺿ
.ّﻟﺍ ﺡﻮﻟ

32
ﺔﻴﺑﺮﻌﻟﺍ
ﺓﺍﻮﻜﳌﺍ ﺓﺪﻋﺎﻗ ﻒﻴﻈﻨﺗ
.ﻡﺎﻈﺘﻧﺎﺑ ﻪﻔﻴﻈﻨﺗ ﺐﺠﻳ ،ﺢﻴﺤﺻ ﻞﻜﺸﺑ ﻙﺯﺎﻬﺟ ﲆﻋ ﻅﺎﻔﺤﻠﻟ
1 .ﺔﺒﻃﺭ ﺵﻗ ﺔﻌﻄﻗ ﺔﻄﺳﺍﻮﺑ ﺯﺎﻬﺠﻟﺍ ﻲﻔّﻈﻧ
2 .(21 ﺓﺭﻮﺼﻟﺍ) ﺔﺒﻃﺭ ﺵﻗ ﺔﻌﻄﻗ ﲆﻋ ﺓﺍﻮﻜﳌﺍ ﺮﺣﻭ ﻰﻤﺤﺘﻟ ﺓﺍﻮﻜﳌﺍ ﺓﺪﻋﺎﻗ ﺮﺗﺍ ،ﺔﻴﻟﺎﻌﻓﻭ ﺔﻟﻮﻬﺴﺑ ﻊﻘﺒﻟﺍ ﺔﻟﺍﺯﻹ
.ﺲﻠﺴﻟﺍ ﻕﻻﺰﻧﻻﺍ ﻥﻀﻟ ﻡﺎﻈﺘﻧﺎﺑ ﺓﺍﻮﻜﳌﺍ ﺓﺪﻋﺎﻗ ﻲﻔّﻈﻧ :ﺢﻴﻤﻠﺗ
ﻦﻳﺰﺨﺘﻟﺍ
1 .ﻪﻨﻋ ﺔﻗﺎﻄﻟﺍ ﻞﺼﻔﺑﻭ ﺯﺎﻬﺠﻟﺍ ﻞﻴﻐﺸﺗ ﻑﺎﻘﻳﺈﺑ ﻢﻗ
2 .(22 ﺓﺭﻮﺼﻟﺍ) ﺔﻠﺴﻐﳌﺍ ﰲ ﻩﺎﻴﳌﺍ ﻥﺍﺰﺧ ﻦﻣ ﻩﺎﻴﳌﺍ ﻲﻏﺮﻓﺃ
3 .(23 ﺓﺭﻮﺼﻟﺍ) ﻦﻳﺰﺨﺘﻟﺍ ﺓﺮﺠﺣ ﻞﺧﺍﺩ ﱃﺇ ﻬﻴﻌﻓﺩﺍﻭ .ﺎًﻳﻮﺳ ﻩﺎﻴﳌﺎﺑ ﺩﺍﺪﻣﻹﺍ ﻡﻮﻃﺮﺧﻭ ﴘﻴﺋﺮﻟﺍ ﺔﻗﺎﻄﻟﺍ ﻚﻠﺳ ﻱﻮﻃﺍ
4 ﺯﺎﻬﺠﻟﺍ ﻞﻤﺣ ﻚﻨﻜ .(24 ﺓﺭﻮﺼﻟﺍ) ﺓﺍﻮﻜﳌﺍ ﺔﺼﻨﻣ ﲆﻋ ﺓﺍﻮﻜﳌﺍ ﺖﻴﺒﺜﺘﻟ ﻩﺮﻳﺮﺤﺗﻭ ﻞﻣﺎﺤﻟﺍ ﺖﻴﺒﺜﺗ ﺭﺯ ﲆﻋ ﻲﻄﻐﺿﺍ :ﻂﻘﻓ GC6830ﻭ GC6820ﻭ GC6819 ﺕﻼﺴﻠﺴﻠﻟ
.(25 ﺓﺭﻮﺼﻟﺍ) ﺓﺍﻮﻜﳌﺍ ﺔﺼﻨﻣ ﲆﻋ ﻪﺘﻴﺒﺜﺗ ﺪﻨﻋ ﺓﺍﻮﻜﳌﺍ ﺾﺒﻘﻣ ﺔﻄﺳﺍﻮﺑ
ﺎﻬﺣﻼﺻﺇﻭ ﺀﺎﻄﺧﻷﺍ ﻑﺎﺸﻜﺘﺳﺍ
ﺓﺭﺎﻳﺰﺑ ﲇﻀﻔﺘﻓ ،ﻩﺎﻧﺩﺃ ﺓﺩﺭﺍﻮﻟﺍ ﺕﺎﻣﻮﻠﻌﳌﺍ ﺔﻄﺳﺍﻮﺑ ﺔﻠﻜﺸﳌﺍ ّﻞﺣ ﻦﻣ ﻲﻨﻜﻤﺘﺗ ﻝﺎﺣ ﰲ .ﺯﺎﻬﺠﻟﺍ ﻡﺍﺪﺨﺘﺳﺍ ﺪﻨﻋ ﺎﻬﻓﺩﺎﺼﺗ ﺪﻗ ﻲﺘﻟﺍ ًﺎﻋﻮﻴﺷ ﻛﻷﺍ ﻞﻛﺎﺸﳌﺍ ﻞﺼﻔﻟﺍ ﺍﺬﻫ ﺺّﺨﻠﻳ
.ﻙﺪﻠﺑ ﰲ ﻚﻠﻬﺘﺴﳌﺍ ﺔﻣﺪﺧ ﺰﻛﺮ ﲇﺼﺗﺍ ﻭﺃ ﺔﻟﻭﺍﺪﺘﳌﺍ ﺔﻠﺌﺳﻷﺍ ﺔﺤﺋﻻ ﲆﻋ ﻉﻼﻃﻼﻟ www.philips.com/support
ﺔﻠﻜﺸﳌﺍﻞﻤﺘﺤﳌﺍ ﺐﺒﺴﻟﺍﻞﺤﻟﺍ
.ﺭﺎﺨﺑ ﻱﺃ ﺓﺍﻮﻜﳌﺍ ﺪّﻟﻮﺗ ﻻ.ﻩﺎﻴﳌﺍ ﻥﺍﺰﺧ ﰲ ﺔﻴﻓﺎﻛ ﻩﺎﻴﻣ ﻦﻣ ﺎﻣ .(ﺩﻷﺍ ﺪﺤﻟﺍ) MIN ﴍﺆﻣ ﻰﻄﺨﺘﻳ ﻯﻮﺘﺴﻣ ﱃﺇ ﻩﺎﻴﳌﺍ ﻥﺍﺰﺧ ﻱﻸﻣﺍ
ﻕﺮﻐﺘﺴﻳ ﺪﻗ .ﺭﺎﺨﺒﻟﺍ ﺝﺮﺨﻳ ﻰﺘﺣ ﺭﺎﺨﺒﻟﺍ ﻞّﻐﺸﻣ ﲆﻋ ﺭﺍﺮﻤﺘﺳﺎﺑ ﻲﻄﻐﺿﺍ
.ﺔﻴﻧﺎﺛ 30 ﺔﻳﺎﻐﻟ ﺭﺎﺨﺒﻟﺍ ﺝﻭﺮﺧ
.ﺭﺎﺨﺒﻟﺍ ﻞّﻐﺸﻣ ﲆﻋ ﻲﻄﻐﻀﺗ .ﺭﺎﺨﺒﻟﺍ ﺝﺮﺨﻳ ﻰﺘﺣ ﺭﺎﺨﺒﻟﺍ ﻞّﻐﺸﻣ ﲆﻋ ﺭﺍﺮﻤﺘﺳﺎﺑ ﻲﻄﻐﺿﺍ
ﻒﻴﻈﻨﺗ ﺔﻴﻠﻤﻋ ﺀﺍﺮﺟﺇ ﻰﺘﺣ ﺭﺎﺨﺒﻟﺍ ﺔﻔﻴﻇﻭ ﻞﻴﻄﻌﺗ ﻢﺗ
.ﺲﻠﻜﻟﺍ
ﻲﻌﺟﺍﺭ) .ﺭﺎﺨﺒﻟﺍ ﺔﻔﻴﻇﻭ ﺓﺩﺎﻌﺘﺳﻻ ﺲﻠﻜﻟﺍ ﻒﻴﻈﻨﺗ ﺔﻴﻠﻤﻋ ﺀﺍﺮﺟﺈﺑ ﻲﻣﻮﻗ
("ﺔﻧﺎﻴﺼﻟﺍﻭ ﻒﻴﻈﻨﺘﻟﺍ" ﻞﺼﻔﻟﺍ
ﺭﺎﺨﺒﻟﺍ ﻞّﻐﺸﻣ ﲆﻋ ﻂﻐﻀﻟﺍ ﻢﺘﻳ ،ّﻟﺍ ﺔﺴﻠﺟ ﺔﻳﺍﺪﺑ ﰲ
.ٍﻑﺎﻛ ﺖﻗﻮﻟ
ﻕﺮﻐﺘﺴﻳ ﺪﻗ .ﺭﺎﺨﺒﻟﺍ ﺝﺮﺨﻳ ﻰﺘﺣ ﺭﺎﺨﺒﻟﺍ ﻞّﻐﺸﻣ ﲆﻋ ﺭﺍﺮﻤﺘﺳﺎﺑ ﻲﻄﻐﺿﺍ
.ﺔﻴﻧﺎﺛ 30 ﺔﻳﺎﻐﻟ ﺭﺎﺨﺒﻟﺍ ﺝﻭﺮﺧ
CALC-CLEAN ﺭﺯ ﺀﻮﺿ ﺾﻣﻮﻳ
ﺕﺍﺭﺎﺷﺇ ﺯﺎﻬﺠﻟﺍ ﺭﺪﺼﻳﻭ (ﺲﻠﻜﻟﺍ ﻒﻴﻈﻨﺗ)
.ﺔﻴﺗﻮﺻ
.ﺲﻠﻜﻟﺍ ﻒﻴﻈﻨﺘﻟ ﻛﺬﺗ ﻪﻧﺇ ﻲﻌﺟﺍﺭ) ﺲﻠﻜﻟﺍ ﻒﻴﻈﻨﺗ ﻛﺬﺗ ﺪﻌﺑ ﺲﻠﻜﻟﺍ ﻒﻴﻈﻨﺗ ﺔﻴﻠﻤﻋ ﺀﺍﺮﺟﺈﺑ ﻲﻣﻮﻗ
.("ﺔﻧﺎﻴﺼﻟﺍﻭ ﻒﻴﻈﻨﺘﻟﺍ" ﻞﺼﻔﻟﺍ
ﺾﻣﻮﻳﻭ ،ﺓﺍﻮﻜﳌﺍ ﺓﺪﻋﺎﻗ ﻦﻣ ﺭﺎﺨﺒﻟﺍ ﺝﺮﺨﻳ ﻻ
ﻒﻴﻈﻨﺗ) CALC-CLEAN ﺭﺯ ﺀﻮﺿ
.ﺔﻴﺗﻮﺻ ﺕﺍﺭﺎﺷﺇ ﺯﺎﻬﺠﻟﺍ ﺭﺪﺼﻳﻭ (ﺲﻠﻜﻟﺍ
.ﺎﻬﻴﻠﻤﻜﺗ ﻭﺃ ﺲﻠﻜﻟﺍ ﻒﻴﻈﻨﺗ ﺔﻴﻠﻤﻋ ﻱﺮﺠﺗ ﻲﻌﺟﺍﺭ) ﺍًﺩﺪﺠﻣ ﺭﺎﺨﺒﻟﺍ ﺔﻔﻴﻇﻭ ﻜﻤﺘﻟ ﺲﻠﻜﻟﺍ ﻒﻴﻈﻨﺗ ﺔﻴﻠﻤﻋ ﺀﺍﺮﺟﺈﺑ ﻲﻣﻮﻗ
.("ﺔﻧﺎﻴﺼﻟﺍﻭ ﻒﻴﻈﻨﺘﻟﺍ" ﻞﺼﻔﻟﺍ
.ﺯﺎﻬﺠﻟﺍ ﻞﻴﻐﺸﺗ ﻑﺎﻘﻳﺇ ﻢﺗ ﺓﺭﻮﺼﺑ ﺎﻘﻠﺘﻟﺍ ﻞﻴﻐﺸﺘﻟﺍ ﻑﺎﻘﻳﺇ ﺔﻔﻴﻇﻭ ﻂﻴﺸﻨﺗ ﻢﺘﻳ
ﻡﺪﻋ ﻝﺎﺣ ﰲ ﺩﺍﺪﻌﺘﺳﻻﺍ ﻊﺿﻭ ﰲ ﺯﺎﻬﺠﻟﺍ ﻞﺧﺪﻳ .ﺔﻴﺋﺎﻘﻠﺗ
ﻝﺎﺣ ﰲ ﻞﻴﻐﺸﺘﻟﺍ ﻦﻋ ﻒﻗﻮﺘﻳﻭ ﻖﺋﺎﻗﺩ 5 ﺓﺪﳌ ﻪﻣﺍﺪﺨﺘﺳﺍ
.ﻚﻟﺫ ﺪﻌﺑ ﻖﺋﺎﻗﺩ 10 ﺓﺪﳌ ﻪﻣﺍﺪﺨﺘﺳﺍ ﻡﺪﻋ
ﺃﺪﺒﻳﻭ .ﻞﻴﻐﺸﺘﻟﺍ ﻑﺎﻘﻳﺇ/ﻞﻴﻐﺸﺘﻟﺍ ﺭﺯ ﲆﻋ ﻲﻄﻐﺿﺍ ،ﺍًﺩﺪﺠﻣ ﺯﺎﻬﺠﻟﺍ ﻂﻴﺸﻨﺘﻟ
.ﺍًﺩﺪﺠﻣ ﺀﺣﻹﺎﺑ ﺯﺎﻬﺠﻟﺍ
.ﻱﻮﻗ ﺦﺿ ﺕﻮﺻ ﺯﺎﻬﺠﻟﺍ ﺭﺪﺼﻳ .ﻍﺭﺎﻓ ﻩﺎﻴﳌﺍ ﻥﺍﺰﺧ ﺦﻀﻟﺍ ﺕﻮﺻ ﺢﺒﺼﻳ ﻰﺘﺣ ﺭﺎﺨﺒﻟﺍ ﻞّﻐﺸﻣ ﲆﻋ ﻲﻄﻐﺿﺍﻭ ﻩﺎﻴﳌﺍ ﻥﺍﺰﺧ ﻱﻸﻣﺍ
.ﺓﺍﻮﻜﳌﺍ ﺓﺪﻋﺎﻗ ﻦﻣ ﺭﺎﺨﺒﻟﺍ ﺝﺮﺨﻳﻭ ﻒﺧﺃ
.ﺓﺍﻮﻜﳌﺍ ﺓﺪﻋﺎﻗ ﻦﻣ ﻩﺎﻴﳌﺍ ﺕﺍﺮﻄﻗ ﺝﺮﺨﺗ ﺔﻴﻘﺒﺘﳌﺍ ﻩﺎﻴﳌﺍ ﺏّﴪﺘﺗ ﺪﻗ ،ﺲﻠﻜﻟﺍ ﻒﻴﻈﻨﺗ ﺔﻴﻠﻤﻋ ﺪﻌﺑ
.ﺓﺍﻮﻜﳌﺍ ﺓﺪﻋﺎﻗ ﻦﻣ
ﺀﻮﺿ ﺮﻤﺘﺳﺍ ﻝﺎﺣ ﰲ .ﺵﻗ ﺔﻌﻄﻗ ﺔﻄﺳﺍﻮﺑ ﺎﻬﻔﻴﻔﺠﺘﻟ ﺓﺍﻮﻜﳌﺍ ﺓﺪﻋﺎﻗ ﻲﺤﺴﻣﺍ
ﺭﺍﺪﺻﺈﺑ ﺯﺎﻬﺠﻟﺍ ﺮﻤﺘﺳﺍﻭ ﺾﻴﻣﻮﻟﺎﺑ (ﺲﻠﻜﻟﺍ ﻒﻴﻈﻨﺗ) Calc-Clean
ﻞﺼﻔﻟﺍ ﻲﻌﺟﺍﺭ) ﺲﻠﻜﻟﺍ ﻒﻴﻈﻨﺗ ﺔﻴﻠﻤﻋ ﺀﺍﺮﺟﺈﺑ ﻲﻣﻮﻗ ،ﺔﻴﺗﻮﺻ ﺕﺎﻬﻴﺒﻨﺗ
.("ﺔﻧﺎﻴﺼﻟﺍﻭ ﻒﻴﻈﻨﺘﻟﺍ"

33
ﺔﻴﺑﺮﻌﻟﺍ
ﺎﻘﻠﺘﻟﺍ ﻞﻴﻐﺸﺘﻟﺍ ﻑﺎﻘﻳﺇ
- .ﺾﻴﻣﻮﻟﺎﺑ ﻞﻴﻐﺸﺘﻟﺍ ﻑﺎﻘﻳﺇ/ﻞﻴﻐﺸﺘﻟﺍ ﺭﺯ ﺀﻮﺿ ﺃﺪﺒﻳﻭ .ﻖﺋﺎﻗﺩ 5 ﺓﺪﳌ ﻪﻣﺍﺪﺨﺘﺳﺍ ﻡﺪﻋ ﻝﺎﺣ ﰲ ﺩﺍﺪﻌﺘﺳﻻﺍ ﻊﺿﻭ ﰲ ﺯﺎﻬﺠﻟﺍ ﻞﺧﺪﻳ
- .ﺍًﺩﺪﺠﻣ ﺀﺣﻹﺎﺑ ﺯﺎﻬﺠﻟﺍ ﺃﺪﺒﻳﻭ .ﺭﺎﺨﺒﻟﺍ ﻞّﻐﺸﻣ ﲆﻋ ﻭﺃ ﻞﻴﻐﺸﺘﻟﺍ ﻑﺎﻘﻳﺇ/ﻞﻴﻐﺸﺘﻟﺍ ﺭﺯ ﲆﻋ ﻲﻄﻐﺿﺍ ،ﺍًﺩﺪﺠﻣ ﺯﺎﻬﺠﻟﺍ ﻂﻴﺸﻨﺘﻟ
- .ﻞﻴﻐﺸﺘﻟﺍ ﻑﺎﻘﻳﺇ/ﻞﻴﻐﺸﺘﻟﺍ ﺭﺯ ﺀﻮﺿ ﺊﻔﻄﻨﻳﻭ .ﺩﺍﺪﻌﺘﺳﻻﺍ ﻊﺿﻭ ﰲ ﻪﻟﻮﺧﺩ ﺪﻌﺑ ﺔﻴﻓﺎﺿﺇ ﻖﺋﺎﻗﺩ 10 ﺓﺪﳌ ﻪﻣﺍﺪﺨﺘﺳﺍ ﻢﺘﻳ ﻝﺎﺣ ﰲ ﺎًﻴﺋﺎﻘﻠﺗ ﺯﺎﻬﺠﻟﺍ ﻞﻴﻐﺸﺗ ﻑﺎﻘﻳﺇ ﻢﺘﻳ
.ﻡﺍﺪﺨﺘﺳﻻﺍ ﺪﻌﺑ ﺯﺎﻬﺠﻟﺍ ﻦﻋ ﺔﻗﺎﻄﻟﺍ ﻞﺼﻔﺑ ًﺎﺍﺩ ﻢﻗ .ﺔﻴﺴﻴﺋﺮﻟﺍ ﺔﻗﺎﻄﻟﺍ ﺬﺧﺄ ًﻼﺼﺘﻣ ﻥﻮﻜﻳ ﺎﻣﺪﻨﻋ ﻕﻼﻃﻹﺍ ﲆﻋ ﺔﺒﻗﺍﺮﻣ ﻥﻭﺩ ﻦﻣ ﺯﺎﻬﺠﻟﺍ ﻙﱰﺗ ﻻ :ﺮﻳﺬﺤﺗ
ﺔﻧﺎﻴﺼﻟﺍﻭ ﻒﻴﻈﻨﺘﻟﺍ
Smart Calc-Clean ﺲﻠﻜﻟﺍ ﻒﻴﻈﻨﺘﻟ ﺫ ﻡﺎﻈﻧ
ﺝﻭﺮﺧ ﻊﻨﻭ ﻱﻮﻘﻟﺍ ﺭﺎﺨﺒﻟﺍ ﺀﺍﺩﺃ ﲆﻋ ﻅﺎﻔﺤﻟﺍ ﰲ ﺮﻣﻷﺍ ﺍﺬﻫ ﺪﻋﺎﺴﻳ .ﻡﺎﻈﺘﻧﺎﺑ ﻒﻴﻈﻨﺘﻟﺍﻭ ﺲﻠﻜﻟﺍ ﺔﻟﺍﺯﺇ ﻥﻀﻟ Smart Calc-Clean ﺲﻠﻜﻟﺍ ﻒﻴﻈﻨﺘﻟ ﺫ ﻡﺎﻈﻨﺑ ﺯﺎﻬﺠﻟﺍ ﺪﻳﻭﺰﺗ ﻢﺗ
.ﺔﻤﻈﺘﻨﻣ ﺕﺍﻛﺬﺘﺑ ﺯﺎﻬﺠﻟﺍ ﻙﺩّﻭﺰﻳ ،ﻒﻴﻈﻨﺘﻟﺍ ﺔﻴﻠﻤﻋ ﺀﺍﺮﺟﺇ ﻥﻀﻟﻭ .ﺖﻗﻮﻟﺍ ﺭﻭﺮﻣ ﻊﻣ ﺓﺍﻮﻜﳌﺍ ﺓﺪﻋﺎﻗ ﻦﻣ ﻊﻘﺒﻟﺍﻭ ﺥﺎﺳﻭﻷﺍ
ﺀﻮﻀﻟﺍﻭ ﺕﻮﺼﻟﺍ ﺔﻄﺳﺍﻮﺑ ﺲﻠﻜﻟﺍ ﻒﻴﻈﻨﺘﻟ ﻛﺬﺗ
ﺔﻴﻠﻤﻋ ﺀﺍﺮﺟﺇ ﺓﺭﻭﴐ ﱃﺇ ﺓﺭﺎﺷﻺﻟ ﺔﻴﺗﻮﺻ ﺕﺎﻬﻴﺒﻨﺗ ﺭﺍﺪﺻﺈﺑ ﺯﺎﻬﺠﻟﺍ ﺃﺪﺒﻳﻭ ﺾﻴﻣﻮﻟﺎﺑ (ﺲﻠﻜﻟﺍ ﻒﻴﻈﻨﺗ) Calc-Clean ﺀﻮﺿ ﺃﺪﺒﻳ ،ﺮﻬﺷﺃ 3ﻭ ﺮﻬﺷ ﺑ ﺡﻭﺍﱰﺗ ﺓﱰﻔﻟ ﺯﺎﻬﺠﻟﺍ ﻡﺍﺪﺨﺘﺳﺍ ﺪﻌﺑ
.(13 ﺓﺭﻮﺼﻟﺍ) ﺲﻠﻜﻟﺍ ﻒﻴﻈﻨﺗ
ﻢﺘﺘﺳ ،ﺲﻠﻜﻟﺍ ﺔﻟﺍﺯﺇ ﺪﻌﺑ .(14 ﺓﺭﻮﺼﻟﺍ) ﺲﻠﻜﻟﺍ ﺔﻟﺍﺯﺇ ﻢﺘﺗ ﻝﺎﺣ ﰲ ﺭﺎﺨﺒﻟﺍ ﺔﻔﻴﻇﻭ ﻞﻴﻄﻌﺗ ﻝﻼﺧ ﻦﻣ ﻲﻫﻭ ،ﺔﻴﺴﻠﻜﻟﺍ ﺕﺎﺒﺳﱰﻟﺍ ﻦﻣ ﺯﺎﻬﺠﻟﺍ ﺔﻳﺤﻟ ﺔﻴﻧﺎﺛ ﺓﻮﻄﺧ ﻤﻀﺗ ﻢﺗ ،ﻚﻟﺫ ﱃﺇ ﺔﻓﺎﺿﻹﺎﺑ
.ﺔﻣﺪﺨﺘﺴﳌﺍ ﻩﺎﻴﳌﺍ ﻉﻮﻧ ﻦﻋ ﺮﻈﻨﻟﺍ ﺾﻐﺑ ﻚﻟﺫ ﺙﺪﺤﻳﻭ .ﺭﺎﺨﺒﻟﺍ ﺔﻔﻴﻇﻭ ﺓﺩﺎﻌﺘﺳﺍ
.ﺀﻮﻀﻟﺍﻭ ﺕﻮﺼﻟﺍ ﺔﻄﺳﺍﻮﺑ ﻛﺬﺘﻟﺍ ﻂﻴﺸﻨﺗ ﻞﺒﻗ ﻰﺘﺣ ،ﺖﻗﻭ ﻱﺃ ﰲ ﺲﻠﻜﻟﺍ ﻒﻴﻈﻨﺗ ﺔﻴﻠﻤﻋ ﺀﺍﺮﺟﺇ ﻦﻜ :ﺔﻈﺣﻼﻣ
ﺲﻠﻜﻟﺍ ﻒﻴﻈﻨﺗ ﺔﻳﻭﺎﺣ ﻊﻣ ﺲﻠﻜﻟﺍ ﻒﻴﻈﻨﺗ ﺔﻴﻠﻤﻋ ﺀﺍﺮﺟﺇ
.ﺲﻠﻜﻟﺍ ﻒﻴﻈﻨﺗ ﺔﻴﻠﻤﻋ ﺀﺎﻨﺛﺃ ﺔﺒﻗﺍﺮﻣ ﻥﻭﺩ ﻦﻣ ﺯﺎﻬﺠﻟﺍ ﺍًﺪﺑﺃ ﱰﺗ ﻻ :ﺮﻳﺬﺤﺗ
ﺭﺎﺨﺒﻟﺍﻭ ﺔﻨﺧﺎﺴﻟﺍ ﻩﺎﻴﳌﺍ ﺝﺮﺨﺘﺳ ﺫﺇ ﺲﻠﻜﻟﺍ ﻒﻴﻈﻨﺗ ﺔﻳﻭﺎﺣ ﻦﻋ ﺓﺍﻮﻜﳌﺍ ﻊﻓﺭ ﻖﻳﺮﻃ ﻦﻋ ﺔﻴﻠﻤﻌﻟﺍ ﻲﻌﻃﺎﻘﺗ ﻻ .ﺎًﺍﺩ ﺲﻠﻜﻟﺍ ﻒﻴﻈﻨﺗ ﺔﻳﻭﺎﺣ ﻡﺍﺪﺨﺘﺳﺎﺑ ﺲﻠﻜﻟﺍ ﻒﻴﻈﻨﺗ ﺔﻴﻠﻤﻋ ﺬﻴﻔﻨﺗ ﺐﺠﻳ :ﻪﻴﺒﻨﺗ
.ﺓﺍﻮﻜﳌﺍ ﺓﺪﻋﺎﻗ ﻦﻣ
1 .ﻩﺎﻴﳌﺍ ﻥﺍﺰﺧ ﻒﺼﻧ ﻱﻸﻣﺍ
.ﺲﻠﻜﻟﺍ ﻒﻴﻈﻨﺗ ﺔﻴﻠﻤﻋ ﺀﺎﻨﺛﺃ ﻞﻴﻐﺸﺘﻟﺍ ﺪﻴﻗ ﻪﻧﺃﻭ ﺔﻗﺎﻃ ﺭﺪﺼ ﻞﺼﺘﻣ ﺯﺎﻬﺠﻟﺍ ﻥﺃ ﻦﻣ ﻱﺪﻛﺄﺗ :ﺔﻈﺣﻼﻣ
2 .ﺮﻘﺘﺴﻣﻭ ٍﻮﺘﺴﻣ ﺮﺧﺃ ﺢﻄﺳ ﻱﺃ ﻭﺃ ّﻟﺍ ﺡﻮﻟ ﲆﻋ ﺲﻠﻜﻟﺍ ﻒﻴﻈﻨﺗ ﺔﻳﻭﺎﺣ ﻲﻌﺿ
3 .(15 ﺓﺭﻮﺼﻟﺍ) ﺲﻠﻜﻟﺍ ﻒﻴﻈﻨﺗ ﺔﻳﻭﺎﺣ ﲆﻋ ﺓﺍﻮﻜﳌﺍ ﻲﺘّﺒﺛ
4 .(16 ﺓﺭﻮﺼﻟﺍ) ﺓﺼﻗ ﺔﻴﺗﻮﺻ ﺕﺎﻬﻴﺒﻨﺗ ﻲﻌﻤﺴﺗ ﻰﺘﺣ ﺘﻴﻧﺎﺜﻟ (ﺲﻠﻜﻟﺍ ﻒﻴﻈﻨﺗ) CALC-CLEAN ﺭﺯ ﲆﻋ ﺭﺍﺮﻤﺘﺳﺎﺑ ﻲﻄﻐﺿﺍ
ﺔﻳﻭﺎﺤﻟﺍ ﻩﺬﻫ ﲆﻋ ﺓﺍﻮﻜﳌﺍ ﻊﺿﻭ ﺎًﻣﺎ ﻦﻣﻵﺍ ﻦﻣ ّﺪﻌُﻳﻭ .ﺲﻠﻜﻟﺍ ﻒﻴﻈﻨﺗ ﺔﻴﻠﻤﻋ ﺀﺎﻨﺛﺃ ﺔﻨﺧﺎﺴﻟﺍ ﻩﺎﻴﳌﺍﻭ ﺔﻴﺴﻠﻜﻟﺍ ﺕﺎﺒﺳﱰﻟﺍ ﺕﻴﺴﺟ ﻊﻤﺠﻟ ﺲﻠﻜﻟﺍ ﻒﻴﻈﻨﺗ ﺔﻳﻭﺎﺣ ﻢﻴﻤﺼﺗ ﻢﺗ :ﺔﻈﺣﻼﻣ
.ﺎﻬﻠﻤﻛﺄﺑ ﺔﻴﻠﻤﻌﻟﺍ ﺀﺎﻨﺛﺃ
5 .(17 ﺓﺭﻮﺼﻟﺍ) ﺦﺿ ﺕﻮﺻﻭ ﺓﺼﻗ ﺔﻴﺗﻮﺻ ﺕﺎﻬﻴﺒﻨﺗ ﻌﻤﺴﺘﺳ ،ﺲﻠﻜﻟﺍ ﻒﻴﻈﻨﺗ ﺔﻴﻠﻤﻋ ﺀﺎﻨﺛﺃ
6 CALC- ﺀﻮﺿ ﻒﻗﻮﺘﻳﻭ ﺔﻴﺗﻮﺼﻟﺍ ﺕﺎﻬﻴﺒﻨﺘﻟﺍ ﺭﺍﺪﺻﺇ ﻦﻋ ﺓﺍﻮﻜﳌﺍ ﻒﻗﻮﺘﺗ ،ﺲﻠﻜﻟﺍ ﻒﻴﻈﻨﺗ ﺔﻴﻠﻤﻋ ﻝﺘﻛﺍ ﺪﻨﻋ .(18 ﺓﺭﻮﺼﻟﺍ) ﺔﻴﻠﻤﻌﻟﺍ ﺯﺎﻬﺠﻟﺍ ﻞﻤﻜﻳ ﻰﺘﺣ ﺎًﺒﻳﺮﻘﺗ ﺘﻘﻴﻗﺩ ﻱﺮﻈﺘﻧﺍ
.ﺾﻴﻣﻮﻟﺍ ﻦﻋ (ﺲﻠﻜﻟﺍ ﻒﻴﻈﻨﺗ) CLEAN
7 .(19 ﺓﺭﻮﺼﻟﺍ) ﺓﺪﻋﺎﻘﻟﺍ ﱃﺇ ﺎﻬﻳﺪﻴﻋﺃﻭ ﺵﻗ ﺔﻌﻄﻗ ﺔﻄﺳﺍﻮﺑ ﺓﺍﻮﻜﳌﺍ ﻲﺤﺴﻣﺍ
.ﺔﻨﺧﺎﺳ ﺓﺍﻮﻜﳌﺍ :ﻪﻴﺒﻨﺗ
8 ﺎﻬﻴﻧﺰﺧﻭ ﺎﻬﻴﻏﺮﻓﺃﻭ ﺔﻠﺴﻐﳌﺍ ﱃﺇ ﺲﻠﻜﻟﺍ ﻒﻴﻈﻨﺗ ﺔﻳﻭﺎﺣ ﲇﻤﺣﺍ ﻢﺛ .ﺎﻬﺴﳌ ﻞﺒﻗ ﺎًﺒﻳﺮﻘﺗ ﻖﺋﺎﻗﺩ 5 ﺓﺪﳌ ﻱﺮﻈﺘﻧﺍ ،ﻚﻟﺬﻟ .ﺲﻠﻜﻟﺍ ﻒﻴﻈﻨﺗ ﺔﻴﻠﻤﻋ ﺀﺎﻨﺛﺃ ﺔﻨﺧﺎﺳ ﺲﻠﻜﻟﺍ ﻒﻴﻈﻨﺗ ﺔﻳﻭﺎﺣ ﺢﺒﺼﺗ
.(20 ﺓﺭﻮﺼﻟﺍ) ﻖﺣﻻ ﺖﻗﻭ ﰲ ﺎﻬﻣﺍﺪﺨﺘﺳﻻ
9 .ﺲﻠﻜﻟﺍ ﻒﻴﻈﻨﺗ ﺔﻴﻠﻤﻋ ﺀﺪﺑ ﻞﺒﻗ ﺲﻠﻜﻟﺍ ﻒﻴﻈﻨﺗ ﺔﻳﻭﺎﺣ ﻍﺍﺮﻓﺇ ﻦﻣ ﻱﺪﻛﺄﺗ .ﺮﻣﻷﺍ ﻡﺰﻟ ﺍﺫﺇ ،8 ﱃﺇ 1 ﻦﻣ ﺕﺍﻮﻄﺨﻟﺍ ﺭﺍﺮﻜﺗ ﻚﻨﻜ
.ﻲﻌﻴﺒﻃ ﺮﻣﺃ ﺍﺬﻫ .ﺓﺍﻮﻜﳌﺍ ﻞﺧﺍﺩ ﺲﻠﻜﻟﺍ ﻢﻛﺍﺮﺗ ﻡﺪﻋ ﻝﺎﺣ ﰲ ﺓﺍﻮﻜﳌﺍ ﺓﺪﻋﺎﻗ ﻦﻣ ﺔﻔﻴﻈﻧ ﻩﺎﻴﻣ ﺝﺮﺨﺗ ﺪﻗ ،ﺲﻠﻜﻟﺍ ﻒﻴﻈﻨﺗ ﺔﻴﻠﻤﻋ ﺀﺎﻨﺛﺃ :ﺔﻈﺣﻼﻣ
:ﻁﺎﺒﺗﺭﻻﺍ ﺍﺬﻫ ﰲ ﻮﻳﺪﻴﻔﻟﺍ ﻊﻃﺎﻘﻣ ﻲﻌﺟﺍﺭ ،ﺲﻠﻜﻟﺍ ﻒﻴﻈﻨﺗ ﺔﻴﻠﻤﻋ ﺀﺍﺮﺟﺇ ﺔﻴﻔﻴﻛ ﻝﻮﺣ ﺕﺎﻣﻮﻠﻌﳌﺍ ﻦﻣ ﺪﻳﺰﳌﺍ ﲆﻋ ﻝﻮﺼﺤﻠﻟ
.http://www.philips.com/descaling-iron

34
ﺔﻴﺑﺮﻌﻟﺍ
2 .(4 ﺓﺭﻮﺼﻟﺍ) (ﴡﻗﻷﺍ ﺪﺤﻟﺍ) MAX ﴍﺆﻣ ﻰﺘﺣ ﻩﺎﻴﳌﺍ ﻥﺍﺰﺧ ﻱﻸﻣﺍ
3 .(“ﺔﻘﻄﻘﻃ” ﺕﻮﺻ ﻉﺳ ﻰﺘﺣ) ﻩﺎﻴﳌﺍ ﻥﺍﺰﺧ ﺔﺌﺒﻌﺗ ﺔﺤﺘﻓ ﻲﻘﻠﻏﺃ
ﺯﺎﻬﺠﻟﺍ ﻡﺍﺪﺨﺘﺳﺍ
ّ
ﻠﻟ ﺔﻠﺑﺎﻘﻟﺍ ﺔﺸﻤﻗﻷﺍ
.ّﻠﻟ ﺔﻠﺑﺎﻘﻟﺍ ﻏ ﺲﺑﻼﳌﺍ ّ ﻡﺪﻋ ﺐﺠﻳ
- .ﻥﻮﻳﺍﺮﻟﺍﻭ ﺯﻮﻜﺴﻴﻔﻟﺍﻭ ﻑﻮﺼﻟﺍﻭ ﺮﻳﺮﺤﻟﺍﻭ ﱰﺴﻴﻟﻮﺒﻟﺍﻭ ﻦﻄﻘﻟﺍﻭ ﻥﺎﺘﻜﻟﺍ ﻝﺎﺜﳌﺍ ﻞﻴﺒﺳ ﲆﻋ ،ّﻠﻟ ﺔﻠﺑﺎﻗ ﻥﻮﻜﺗ (5 ﺓﺭﻮﺼﻟﺍ) ﺯﻮﻣﺮﻟﺍ ﻩﺬﻫ ﻞﻤﺤﺗ ﻲﺘﻟﺍ ﺔﺸﻤﻗﻷﺍ ﻥﺇ
- ﻊﻣ ﺔﺟﻭﺰﻤﳌﺍ ﺔﺸﻤﻗﻷﺍﻭ ،ﺘﺳﻻﻷﺍ ﻭﺃ ،ﺲﻜﻳﺪﻧﺎﺒﺴﻟﺍ ﻞﺜﻣ ﺔﻴﻋﺎﻨﺼﻟﺍ ﺔﺸﻤﻗﻷﺍ ،ﺔﺸﻤﻗﻷﺍ ﻩﺬﻫ ﻦّﻤﻀﺘﺗﻭ .ّﻠﻟ ﺔﻠﺑﺎﻗ ﻏ ﻥﻮﻜﺗ (6 ﺓﺭﻮﺼﻟﺍ) ﺰﻣﺮﻟﺍ ﺍﺬﻫ ﻞﻤﺤﺗ ﻲﺘﻟﺍ ﺔﺸﻤﻗﻷﺍ ﻥﺇ
.ﺎًﻀﻳﺃ ّﻠﻟ ﺔﻠﺑﺎﻗ ﻏ ﺲﺑﻼﳌﺍ ﲆﻋ ﺓﺮﻓﻮﺘﳌﺍ ﺕﺎﻌﺒﻄﻟﺍﻭ ﺵﻮﻘﻨﻟﺍ ﻥﺇ .(ﻠﻴﺑﻭﱪﻴﻟﻮﺒﻟﺍ ﻞﺜﻣ) ﻔﻟﻭﺃ ﱄﻮﺒﻟﺍﻭ ،ﺲﻜﻳﺪﻧﺎﺒﺴﻟﺍ
َ
ﻟﺍ
1 .ٍﻮﺘﺴﻣﻭ ﺮﻘﺘﺴﻣ ﺢﻄﺳ ﲆﻋ ﺯﺎﻬﺠﻟﺍ ﻲﻌﺿ
.ﺮﻘﺘﺴﻣ ّ ﺡﻮﻟ ﲆﻋ ﺎًﺍﺩ ﺓﺪﻋﺎﻘﻟﺍ ﻊﺿﻮﺑ ﴆﻮﻧ ،ﺔﻨﻣﺁ ّ ﺔﻴﻠﻤﻋ ﻥﻀﻟ :ﺔﻈﺣﻼﻣ
2 .ﻥﺍﺰﺨﻟﺍ ﰲ ﻩﺎﻴﳌﺍ ﻦﻣ ﺔﻴﻓﺎﻛ ﺔﻴﻤﻛ ﺮﻓﻮﺗ ﻦﻣ ﻱﺪﻛﺄﺗ
3 .ﻦﻳﺰﺨﺘﻟﺍ ﺓﺮﺠﺣ ﻦﻣ ﻩﺎﻴﳌﺎﺑ ﺩﺍﺪﻣﻹﺍ ﻡﻮﻃﺮﺧﻭ ﺔﻴﺴﻴﺋﺮﻟﺍ ﺔﻗﺎﻄﻟﺍ ﻚﻠﺳ ﲇﻳﺯﺃ
4 “ﺓﺰﻫﺎﺟ ﺓﺍﻮﻜﳌﺍ” ﻥﺃ ﱃﺇ ﺸﻳ ﻱﺬﻟﺍ ﺀﻮﻀﻟﺍ ﺀﴤﻳ ﻰﺘﺣ ﻱﺮﻈﺘﻧﺍ .ﺯﺎﻬﺠﻟﺍ ﻞﻴﻐﺸﺘﻟ ﻞﻴﻐﺸﺘﻟﺍ ﻑﺎﻘﻳﺇ/ﻞﻴﻐﺸﺘﻟﺍ ﺭﺯ ﲆﻋ ﻲﻄﻐﺿﺍﻭ ﺽّﺭﺆﻣ ﻂﺋﺎﺣ ﺬﺧﺄﻣ ﰲ ﺔﻴﺴﻴﺋﺮﻟﺍ ﺔﻗﺎﻄﻟﺍ ﺲﺒﻘﻣ ﻲﻌَﺿ
.ﺘﻘﻴﻗﺩ ﱃﺍﻮﺣ ﺔﻴﻠﻤﻌﻟﺍ ﻕﺮﻐﺘﺴﺗ .(7 ﺓﺭﻮﺼﻟﺍ) ﺮﻤﺘﺴﻣ ﻞﻜﺸﺑ
5 .(8 ﺓﺭﻮﺼﻟﺍ) ﺎﻬﺘﺼﻨﻣ ﻦﻣ ﺓﺍﻮﻜﳌﺍ ﺖﻴﺒﺜﺗ ﺀﺎﻐﻟﻹ ﻩﺮﻳﺮﺤﺗﻭ ﻞﻣﺎﺤﻟﺍ ﺖﻴﺒﺜﺗ ﺭﺯ ﲆﻋ ﻲﻄﻐﺿﺍ :ﻂﻘﻓ GC6830ﻭ GC6820ﻭ GC6819 ﺕﻼﺴﻠﺴﻠﻟ
6 .(9 ﺓﺭﻮﺼﻟﺍ) ّﻟﺍ ﺀﺪﺒﻟ ﺭﺎﺨﺒﻟﺍ ﻞّﻐﺸﻣ ﲆﻋ ﺭﺍﺮﻤﺘﺳﺎﺑ ﻲﻄﻐﺿﺍ
.ﺭﺎﺨﺒﻟﺍ ﻡﺍﺪﺨﺘﺳﺍ ﻥﻭﺩ ﻦﻣ ﺓﺧﻷﺍ ﺕﺍﺮﻳﺮﻤﺘﻟﺎﺑ ﻲﻣﻮﻗ ،ﺭﺎﺨﺒﻟﺎﺑ ّﻟﺍ ﺪﻌﺑﻭ ،ّﻟﺍ ﺞﺋﺎﺘﻧ ﻞﻀﻓﺃ ﲆﻋ ﻝﻮﺼﺤﻠﻟ
.ﺹﺎﺨﺷﻷﺍ ﲆﻋ ﺭﺎﺨﺒﻟﺍ ﺍًﺪﺑﺃ ﻲﻬّﺟﻮﺗ ﻻ :ﺮﻳﺬﺤﺗ
.ﺔﻴﻧﺎﺛ 30 ﻪﻨﻣ ﺭﺎﺨﺒﻟﺍ ﺝﻭﺮﺧ ﻕﺮﻐﺘﺴﻳ ﺪﻗ ،ﱃﻭﻷﺍ ﺓﺮﻤﻠﻟ ﺯﺎﻬﺠﻟﺍ ﻡﺍﺪﺨﺘﺳﺍ ﺪﻨﻋ :ﺔﻈﺣﻼﻣ
.ﲆﻋﺃ ﺔﺨﻀﳌﺍ ﺕﻮﺻ ﺢﺒﺼﻳ ،ﻩﺎﻴﳌﺍ ﻥﺍﺰﺧ ﻦﻣ ﻩﺎﻴﳌﺍ ﻍﺮﻔﺗ ﺎﻣﺪﻨﻋ .ﻱﺩﺎﻋ ﺮﻣﺃ ﻮﻫﻭ ،ﺎًﻔﻴﻔﺧ ﺎًﻧﺎﻧﺭ ﺎًﺗﻮﺻ ﺭﺪﺼﺗﻭ .ﺭﺎﺨﺒﻟﺍ ﻞّﻐﺸﻣ ﲆﻋ ﺎﻬﻴﻓ ﻄﻐﻀﺗ ﺓﺮﻣ ﻞﻛ ﰲ ﺔﺨﻀﳌﺍ ﻂﻴﺸﻨﺗ ﻢﺘﻳ :ﺔﻈﺣﻼﻣ
.ﺩﻷﺍ ﺪﺤﻟﺍ ﻦﻋ ﻩﺎﻴﳌﺍ ﻯﻮﺘﺴﻣ ﻞﻘﻳ ﺎﻣﺪﻨﻋ ﻩﺎﻴﳌﺍ ﻥﺍﺰﺧ ﻱﻸﻣﺍ
ﺭﺎﺨﺒﻟﺍ ﺰﻳﺰﻌﺗ ﺔﻔﻴﻇﻭ
1 .(10 ﺓﺭﻮﺼﻟﺍ) ٍﻥﺍﻮﺛ 3 ﺓﺪﳌ ﻱﻮﻗ ﺭﺎﺨﺑ ﺰﻳﺰﻌﺗ ﺭﺍﺪﺻﻹ ﺔﻋﴪﺑ ﺗﺮﻣ ﺭﺎﺨﺒﻟﺍ ﻞّﻐﺸﻣ ﲆﻋ ﻲﻄﻐﺿﺍ
.ﻂﻘﻓ ﺔﺒﻌﺼﻟﺍ ﺪﻴﻋﺎﺠﺘﻟﺍ ﲆﻋ ﺭﺎﺨﺒﻟﺍ ﺰﻳﺰﻌﺗ ﺔﻔﻴﻇﻭ ﻡﺍﺪﺨﺘﺳﺎﺑ ﴅﻮﻳ :ﺔﻈﺣﻼﻣ
ﻱﺩﻮﻤﻌﻟﺍ ّﻟﺍ
ﺪﻳ ﻭﺃ ﻙﺪﻳ ﻦﻣ ﺏﺮﻘﻟﺎﺑ ﺭﺎﺨﺒﻟﺍ ﻲﻣﺪﺨﺘﺴﺗ ﻻ .(11 ﺓﺭﻮﺼﻟﺍ) ﺎﻬﺋﺍﺪﺗﺭﺍ ﺀﺎﻨﺛﺃ ﺲﺑﻼﳌﺍ ﻦﻋ ﺪﻴﻋﺎﺠﺘﻟﺍ ﺔﻟﺍﺯﺇ ﺍًﺪﺑﺃ ﱄﻭﺎﺤﺗ ﻻ .ﺓﺍﻮﻜﳌﺍ ﻦﻣ ﻦﺧﺎﺳ ﺭﺎﺨﺑ ﺚﻌﺒﻨﻳ :ﺮﻳﺬﺤﺗ
.ﺮﺧﺁ ﺺﺨﺷ
.ﺔﻘّﻠﻌﳌﺍ ﺔﺸﻤﻗﻷﺍ ﻦﻋ ﺪﻴﻋﺎﺠﺘﻟﺍ ﺔﻟﺍﺯﻹ ﺔﻳﺩﻮﻤﻋ ﺔﻴﻌﺿﻮﺑ ﺔﻳﺭﺎﺨﺒﻟﺍ ﺓﺍﻮﻜﳌﺍ ﻡﺍﺪﺨﺘﺳﺍ ﻚﻨﻜ
1 .(12 ﺓﺭﻮﺼﻟﺍ) ﻞﻔﺳﻷﺍﻭ ﲆﻋﻷﺍ ﱃﺇ ﺓﺍﻮﻜﳌﺍ ﺮﺣﻭ ﻖﻓﺮﺑ ﺲﺑﻼﳌﺍ ﺲﻣﻼﺗ ﺓﺍﻮﻜﳌﺍ ﺓﺪﻋﺎﻗ ﻲﻋﺩ ﻢﺛ ﺭﺎﺨﺒﻟﺍ ﻞّﻐﺸﻣ ﲆﻋ ﻲﻄﻐﺿﺍﻭ ﺔﻴﻘﻓﺃ ﺔﻴﻌﺿﻮﺑ ﺓﺍﻮﻜﳌﺍ ﺴﻣﺍ
ﺔﻨﻣﺁ ﺪﻨﺳ ﺔﻘﻳﺮﻃ
ﺏﺎﻴﺜﻟﺍ ﺐﻴﺗﱰﺑ ﻣﻮﻘﺗ ﻨﻴﺑ ﺓﺍﻮﻜﳌﺍ ﺩﺎﻨﺳﺇ
ّﻟﺍ ﺡﻮﻟ ﺀﺎﻄﻏ ﺓﺍﻮﻜﳌﺍ ﺓﺪﻋﺎﻗ ﺽّﺮﻌﺗ ﻦﻟ ،OptimalTEMP ﺔﻴﻨﻘﺗ ﻞﻀﻔﺑ .(2 ﺓﺭﻮﺼﻟﺍ) ّﻟﺍ ﺡﻮﻟ ﲆﻋ ﺔﻴﻘﻓﺃ ﺔﻴﻌﺿﻮﺑ ﻭﺃ ﺎﻬّﺘﺼﻨﻣ ﲆﻋ ﺓﺍﻮﻜﳌﺍ ﻊﺿﻭ ﻚﻨﻜ ،ﺏﺎﻴﺜﻟﺍ ﺐﻴﺗﺮﺗ ﺀﺎﻨﺛﺃ
.ﻒﻠﺘﻠﻟ

35
ﺔﻴﺑﺮﻌﻟﺍ
ﺔﻣﺪﻘﻣ
.www.philips.com/welcome ﲆﻋ ﻚﺠﺘﻨﻣ ﻞّﺠﺳ ،Philips ﻪﻣﺪﻘﺗ ﻱﺬﻟﺍ ﻢﻋﺪﻟﺍ ﻦﻣ ﻞﻣﺎﻜﻟﺎﺑ ﺓﺩﺎﻔﺘﺳﻼﻟ !Philips ﰲ ﻚﺑ ًﺎﺒﺣﺮﻣﻭ ،ﺞﺘﻨﳌﺍ ﻚﺋﺍﴍ ﲆﻋ ﺎﻨﻴﻧﺎﻬﺗ
.ﻞﺒﻘﺘﺴﳌﺍ ﰲ ﻬﻴﻟﺇ ﻉﻮﺟﺮﻠﻟ ﻬﺑ ﻲﻈﻔﺘﺣﺍﻭ .ﺯﺎﻬﺠﻟﺍ ﻡﺍﺪﺨﺘﺳﺍ ﻞﺒﻗ ﺔﻗﺪﺑ ﻊﻳﴪﻟﺍ ﺀﺪﺒﻟﺍ ﻞﻴﻟﺩﻭ ﺔﻤﻬﳌﺍ ﺕﺎﻣﻮﻠﻌﳌﺍ ﺐّﻴﺘﻛﻭ ﺍﺬﻫ ﻡﺪﺨﺘﺴﳌﺍ ﻞﻴﻟﺩ ﻱﺃﺮﻗﺍ
(1 ﺓﺭﻮﺼﻟﺍ) ﺞﺘﻨﳌﺍ ﻝﻮﺣ ﺔﻣﺎﻋ ﺔﺤﳌ
1 ﺓﺍﻮﻜﳌﺍ ﺓﺪﻋﺎﻗ
2 ”ﺓﺰﻫﺎﺟ ﺓﺍﻮﻜﳌﺍ„ ﻥﺃ ﱃﺇ ﺸﻳ ﺀﻮﺿ
3 ﺭﺎﺨﺒﻟﺍ ﺰﻳﺰﻌﺗ/ﺭﺎﺨﺒﻟﺍ ﻞّﻐﺸﻣ
4 ﻩﺎﻴﳌﺎﺑ ﺩﺍﺪﻣﻹﺍ ﻡﻮﻃﺮﺧ
5 ﻩﺎﻴﳌﺍ ﻥﺍﺰﺧ ﺔﺌﺒﻌﺗ ﺔﺤﺘﻓ
6 (ﻂﻘﻓ GC6830ﻭ GC6820ﻭ GC6819 ﺕﻼﺴﻠﺴﻟﺍ) ﻩﺮﻳﺮﺤﺗﻭ ﻞﻣﺎﺤﻟﺍ ﺖﻴﺒﺜﺗ ﺭﺯ
7 ﺓﺍﻮﻜﳌﺍ ﺔﺼﻨﻣ
8 ﻞﻴﻐﺸﺘﻟﺍ ﻑﺎﻘﻳﺇﻭ ﻞﻴﻐﺸﺘﻟﺍ ﴍﺆﻣ ﻊﻣ ﻞﻴﻐﺸﺘﻟﺍ ﻑﺎﻘﻳﺇ/ﻞﻴﻐﺸﺘﻟﺍ ﺭﺯ
9 ﺀﻮﺿ ﻊﻣ (ﺲﻠﻜﻟﺍ ﻒﻴﻈﻨﺗ) CALC-CLEAN ﺭﺯ
10 ﺲﺒﻘ ﻊﻣ ﺔﻴﺴﻴﺋﺮﻟﺍ ﺔﻗﺎﻄﻟﺍ ﻚﻠﺳ
11 ﴘﻴﺋﺮﻟﺍ ﺔﻗﺎﻄﻟﺍ ﻚﻠﺳﻭ ﻩﺎﻴﳌﺎﺑ ﺩﺍﺪﻣﻹﺍ ﻡﻮﻃﺮﺧ ﻦﻳﺰﺨﺗ ﺓﺮﺠﺣ
12 Smart Calc-Clean ﺬﻟﺍ ﺲﻠﻜﻟﺍ ﻒﻴﻈﻨﺗ ﺔﻳﻭﺎﺣ
Philips ﻦﻣ ﺔﻳﴫﺣ ﺔﻴﻨﻘﺗ
OptimalTEMP ﺔﻴﻨﻘﺗ
ﻂﺒﺿ ﻥﻭﺪﺑﻭ ﻥﺎﻛ ﺐﻴﺗﺮﺗ ﻱﺄﺑ ّﻠﻟ ﺔﻠﺑﺎﻘﻟﺍ ﺔﺸﻤﻗﻷﺍ ﻉﺍﻮﻧﺃ ﻞﻛ ّ ﻦﻣ OptimalTEMP ﺔﻴﻨﻘﺗ ﻚﻨّﻜ
.ﺲﺑﻼﳌﺍ ﺯﺮﻓ ﻥﻭﺪﺑﻭ ﺓﺍﻮﻜﳌﺍ ﺓﺭﺍﺮﺣ ﺔﺟﺭﺩ
ﺓﺍﻮﻜﳌﺍ ﺓﺩﺎﻋﺇ ﱃﺇ ﺔﺟﺎﺤﻟﺍ ﻥﻭﺩ ﻦﻣ (2 ﺓﺭﻮﺼﻟﺍ) ﺓﴍﺎﺒﻣ ّﻟﺍ ﺡﻮﻟ ﲆﻋ ﺔﻨﺧﺎﺴﻟﺍ ﺓﺍﻮﻜﳌﺍ ﺓﺪﻋﺎﻗ ﻊﺿﻭ ﻦﻣﻵﺍ ﻦﻣ
.ﻚﻤﺼﻌﻣ ﲆﻋ ﻂﻐﻀﻟﺍ ﻦﻣ ﻒﻔﺨﻴﺳ ﺎﻣ .ﺎﻬﺘّﺼﻨﻣ ﱃﺇ
ّﻟ The Woolmark Company Pty Ltd ﻞﺒﻗ ﻦﻣ ﺓﺍﻮﻜﳌﺍ ﻩﺬﻫ ﲆﻋ ﺔﻘﻓﺍﻮﳌﺍ ﺖ
ﻦﻣ ﺓﺩّﻭﺰﳌﺍ ﻚﻠﺗﻭ ﺏﺎﻴﺜﻟﺍ ﻖﺼﻠﻣ ﲆﻋ ﺓﺮﻓﻮﺘﳌﺍ ﺕﺍﺩﺎﺷﺭﻺﻟ ﺎًﻘﻓﻭ ﺲﺑﻼﳌﺍ ّ ﻢﺘﻳ ﻥﺃ ﻁﴩﺑ ،ﻂﻘﻓ ﻑﻮﺼﻟﺍ ﺕﺎﺠﺘﻨﻣ
.ﻥﺍﺪﻠﺒﻟﺍ ﻦﻣ ﺜﻜﻟﺍ ﰲ ﺓﺩﺎﻬﺷ ﺔﻣﻼﻋ ﻮﻫ Woolmark ﺰﻣﺭ ﻥﺇ .R1701 .ﺓﺍﻮﻜﳌﺍ ﻩﺬﻫ ﻊّﻨﺼﻣ ﻞﺒﻗ
ﺔﺠﻣﺪﳌﺍ ProVelocity ﺔﻴﻨﻘﺗ
ﻚﻟﺫﻭ ،ﺔﻳﺪﻴﻠﻘﺘﻟﺍ ﺭﺎﺨﺒﻠﻟ ﺓﺪّﻟﻮﳌﺍ ﻱﻭﺎﻜﳌﺎﺑ ًﺔﻧﺭﺎﻘﻣ ﻒﺧﺃ ﻥﺯﻭﻭ ﺮﻐﺻﺃ ﻢﺠﺤﺑ ﺯﺎﻬﺠﻟﺍ ﲆﻋ ﻆﻓﺎﺤﺗ ،ﻪﺴﻔﻧ ﺖﻗﻮﻟﺍ ﰲ .ﺔﻟﻮﻬﺴﺑ ﺪﻴﻋﺎﺠﺘﻟﺍ ﺔﻟﺍﺯﻹ ﻖﻤﻌﺑ ﻞﻐﻠﻐﺘﻳ ﺍًﺮﻤﺘﺴﻣ ﺍًﺭﺎﺨﺑ ﺔﻴﻨﻘﺘﻟﺍ ﻩﺬﻫ ﻡّﺪﻘﺗ
.ﻞﻬﺳﺃ ﻦﻳﺰﺨﺘﻟ
ﻡﺍﺪﺨﺘﺳﻼﻟ ﻀﺤﺘﻟﺍ
ﻪﻣﺍﺪﺨﺘﺳﺍ ﺐﺠﻳ ﻱﺬﻟﺍ ﻩﺎﻴﳌﺍ ﻉﻮﻧ
ﻡﺍﺪﺨﺘﺳﺎﺑ ﴅﻮﻳ ،ﱄﺎﺘﻟﺎﺑﻭ .ﺔﻴﺴﻠﻜﻟﺍ ﺕﺎﺒﺳﱰﻠﻟ ﻊﻳﴎ ﻢﻛﺍﺮﺗ ﱃﺇ ﻚﻟﺫ ﻱﺩﺆﻳ ﺪﻘﻓ ،ﺓﴪﻋ ﻤﻴﻘﺗ ﺚﻴﺣ ﺔﻘﻄﻨﳌﺍ ﰲ ﻩﺎﻴﳌﺍ ﺖﻧﺎﻛ ﺍﺫﺇ ﻦﻜﻟ ،ﺔﻴﻔﻨﺤﻟﺍ ﻩﺎﻴﻣ ﻊﻣ ﻡﺍﺪﺨﺘﺳﻼﻟ ﺯﺎﻬﺠﻟﺍ ﺍﺬﻫ ﻢﻴﻤﺼﺗ ﻢﺗ
.ﺯﺎﻬﺠﻠﻟ ﴈﺍﱰﻓﻻﺍ ﺮﻤﻌﻟﺍ ﺔﻟﺎﻃﺇ ﻑﺪﻬﺑ ﺎﻬﻨﻣ ﻥﺩﺎﻌﳌﺍ ﺔﻟﺍﺯﺇ ﺖ ﻭﺃ ﺓﺮﻄﻘﻣ ﻩﺎﻴﻣ
ﺲﻠﻜﻟﺍ ﺔﻟﺍﺯﺇ ﺖ ﻲﺘﻟﺍ ﻩﺎﻴﳌﺍﻭ ّﻟﺍ ﲆﻋ ﺓﺪﻋﺎﺴﳌﺍ ﺩﺍﻮﳌﺍ ﻭﺃ ﺲﻠﻜﻟﺍ ﺔﻟﺍﺯﺇ ﺩﺍﻮﻣ ﻭﺃ ﺀﺎﺸﻨﻟﺍ ﻭﺃ ﻞﺨﻟﺍ ﻭﺃ ﺲﺑﻼﳌﺍ ﻒﻴﻔﺠﺗ ﺔﻟﺁ ﻩﺎﻴﻣ ﻭﺃ ﺓﺮﻄﻌﳌﺍ ﻩﺎﻴﳌﺍ ﻲﻣﺪﺨﺘﺴﺗ ﻻ :ﺮﻳﺬﺤﺗ
.ﺯﺎﻬﺠﻟﺎﺑ ﺭﴬﻟﺍ ﻕﺎﺤﻟﺇ ﱃﺇ ﻭﺃ ﺔﻴﻨﺑ ﻊﻘﺑ ﺭﻮﻬﻇ ﻭﺃ ﻩﺎﻴﳌﺍ ﺝﺍﺮﺧﺈﺑ ﺐﺒﺴﺘﺗ ﺪﻗ ﺫﺇ ،ﺔﻴﺋﺎﻴﻤﻴﻜﻟﺍ ﺩﺍﻮﳌﺍ ﻦﻣ ﺎﻫﻏ ﻭﺃ ﺎًﻴﺋﺎﻴﻤﻴﻛ ﺎﻬﻨﻣ
ﻩﺎﻴﳌﺍ ﻥﺍﺰﺧ ﺔﺌﺒﻌﺗ
.ﻡﺍﺪﺨﺘﺳﻻﺍ ﺀﺎﻨﺛﺃ ﺖﻗﻭ ﻱﺃ ﰲ ﻩﺎﻴﳌﺍ ﻥﺍﺰﺧ ﺔﺌﺒﻌﺗ ﺓﺩﺎﻋﺇ ﻚﻨﻜ .ﺩﻷﺍ ﺪﺤﻟﺍ ﻦﻋ ﻪﻴﻓ ﻩﺎﻴﳌﺍ ﻯﻮﺘﺴﻣ ﻞﻘﻳ ﺎﻣﺪﻨﻋ ﻭﺃ ﻡﺍﺪﺨﺘﺳﺍ ﻞﻛ ﻞﺒﻗ ﻩﺎﻴﳌﺍ ﻥﺍﺰﺧ ﻱﻸﻣﺍ
1 .(3 ﺓﺭﻮﺼﻟﺍ) ﻩﺎﻴﳌﺍ ﻥﺍﺰﺧ ﺔﺌﺒﻌﺗ ﺔﺤﺘﻓ ﻲﺤﺘﻓﺍ

 Loading...