

Page 1

Service Manual
Service
Service
Mini System
12/2/2013
www.nostatatech.nl
World of free manuals
Service
Service
Service
FW-C700/21
TABLE OF CONTENTS
Page
Location of pc boards & Version variations................1-2
Technical Specifications .............................................1-3
Measurement setup ....................................................1-4
Service Aids, Safety Instruction, etc...........................1-5
Disassembly Instructions & Service positions ...........2-1
Service Test Programs ...............................................3-1
Set Block diagram ......................................................4-1
Set Wiring diagram .....................................................4-2
Front Control Board .......................................................5
Front Display Board ....................................................... 6
ECO6 Tuner Board : Systems Non-Cenelec.............. 7A
ETF7 ND Tape Module ..................................................9
3CDC-LLC-DA11 Module ............................................10
Power 2001 Module (30-70W Version) ....................... 11
AF9 Board .................................................................... 12
Set Mechanical Exploded view & parts list ................. 13
COMPACT
DIGITAL AUDIO
CLASS 1
©
Copyright 2001 Philips Consumer Electronics B.V. Eindhoven, The Netherlands
All rights reserved. No part of this publication may be reproduced, stored in a retrieval system or
transmitted, in any form or by any means, electronic, mechanical, photocopying, or otherwise
without the prior permission of Philips.
Published by BB 0139 Service Audio Printed in The Netherlands Subject to modification
Version 1.0
LASER PRODUCT
GB
3139 785 30012
Page 2

LOCATION OF PRINTED CIRCUIT BOARDS
12/2/2013
www.nostatatech.nl
World of free manuals
KEY-CDC BOARD
FRONT
DISPLAY
BOARD
IR-EYE
VU
METER
BOARD
BOARD
HEADPHONE
BOARD
FRONT CONTROL
BOARD
1-2
CD
BOARD
MAINS
BOARD
TUNER
BOARD
AF9
BOARD
MAINS SOCKET
BOARD
VERSION VARIATIONS:
Type /Versions: FW-C700
Features &
Board in used:
Aux in /CDR in x
Line Out x
Surround Out
Subwoofer Out
Digital Out x
Matrix Surround
CD Text
Dolby B
RDS
News
Dolby Pro Logic (DPL)
Incredible Surround x
Karaoke Features
Voltage Selector x
ECO Power Standby (Clock Display Off)
ECO6 Tuner Board - Systems Non-Cenelec x
ECO6 Tuner Board - Systems Cenelec
Center/Surround Channel
ETF7
BOARD
/21
POWER
BOARD
Page 3

SPECIFICATIONS
12/2/2013
www.nostatatech.nl
World of free manuals
1-3
GENERAL:
Mains voltage : 110-127V/220-240V Switchable
Mains frequency : 50/60Hz
Power consumption : 15W at Standby
: 100W at Active
Clock accuracy : < 4 seconds per day
Dimension centre unit : 265 x 310 x 390mm
TUNER:
FM
Tuning range : 87.5-108MHz
Grid : 50kHz
IF frequency : 10.7MHz ± 25kHz
Aerial input : 75Ω coaxial
Sensitivity at 26dB S/N : < 7µV
Selectivity at 600kHz bandwidth : > 25dB
Image rejection : > 25dB
Distortion at RF=1mV, dev. 75kHz : < 3%
-3dB Limiting point : < 8µV
Crosstalk at RF=1mV, dev. 40kHz : > 18dB
MW
Tuning range : 531-1602kHz / 530-1700kHz
Grid : 9kHz / 10kHz
IF frequency : 450kHz ± 1kHz
Aerial input : Frame aerial
Sensitivity at 26dB S/N : < 4.0mV/M
Selectivity at 18kHz bandwidth : > 18dB
IF rejection : > 45dB
Image rejection : > 28dB
Distortion at RF=50mV, m=80% : < 5%
CASSETTE RECORDER:
Number of track : 2 x 2 stereo
Tape speed : 4.76 cm/sec ± 2%
Wow and flutter : < 0.4% DIN
Fast-wind/Rewind time C60 : 130 sec
Bias system : 75kHz ± 10kHz
Rec/Pb frequency response within 8dB: 80Hz - 12.5kHz
Signal to Noise Ratio (Type I) : > 48dBA
COMPACT DISC:
Measurement done at output conn. of the CDC module.
Frequency response : < ±1.5dB for 20Hz-20kHz
Output Voltage (in Vrms) : 550mV ± 2dB unloaded
Signal to Noise Ratio (A-weighted) : > 80dBA
Distortion at 1kHz : < 0.02%
Channel Unbalance : < ±1dB
Channel Separation (1kHz) : >60dB
De-emphasis : 0 or 15/50 mS (Switched by subcode
on the disc)
AMPLIFIER:
Output power (6Ω, 1kHz, 10% THD)
L & R : 2 x 60W RMS
Frequency response within -3dB : 50Hz-20kHz
Incredible Surround : ON/OFF
WOOX : Level 1, 2, 3 & OFF
Digital Sound Control (DSC) : Digital, Rock, Pop,
Newage, Classic, Electric
Virtual Ambience Control (VAC): Hall, Concert, Cinema,
Disco, Arcade, Cyber
Input sensitivity
Aux in : 500mV ± 3dB at 1kHz
CDR in : 1V ± 3dB at 1kHz
Output sensitivity
Line out (Left/Right) : 450mV ± 2dB at 22kΩ
Digital out : IEC 958, 44.1kHz
Headphone output at 32Ω : 15mW ± 1dB
Page 4
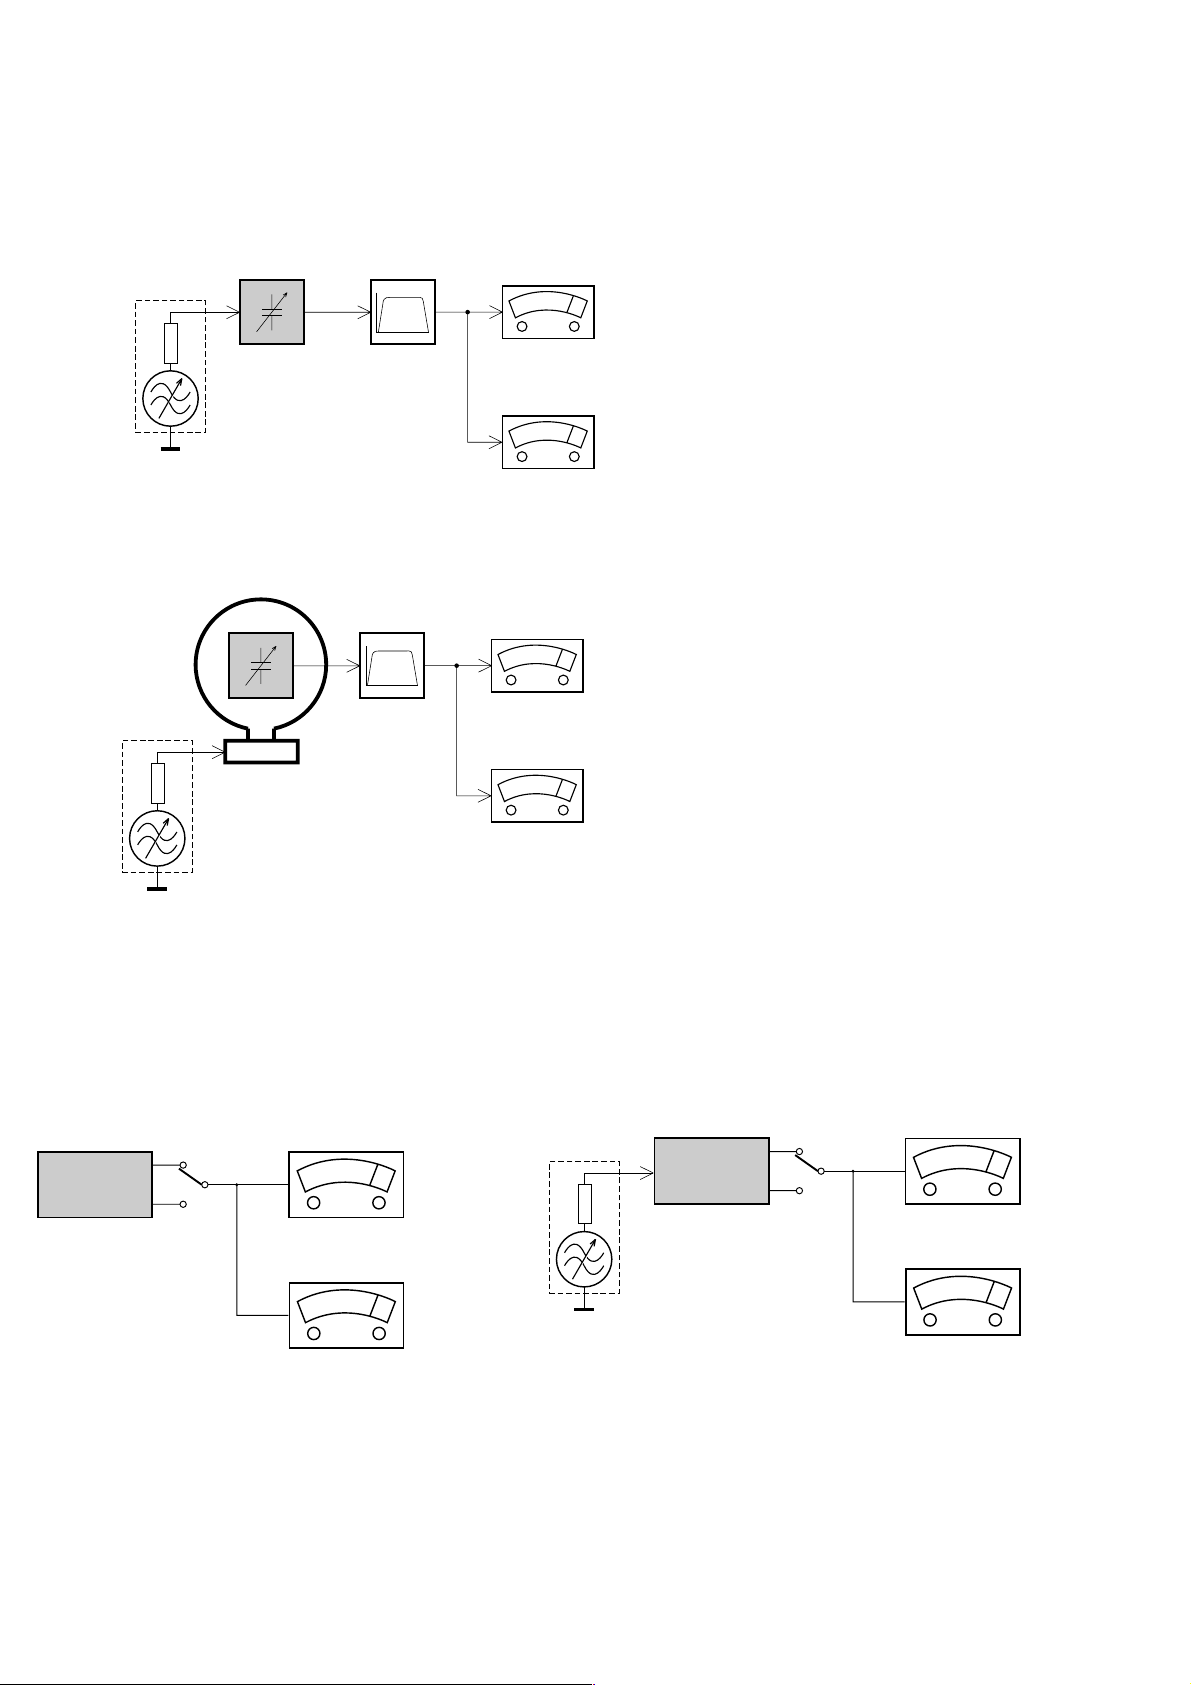
MEASUREMENT SETUP
12/2/2013
www.nostatatech.nl
World of free manuals
Tuner FM
1-4
Bandpass
LF Voltmeter
e.g. PM2534
RF Generator
e.g. PM5326
DUT
250Hz-15kHz
e.g. 7122 707 48001
Ri=50Ω
S/N and distortion meter
e.g. Sound Technology ST1700B
Use a bandpass filter to eliminate hum (50Hz, 100Hz) and disturbance from the pilottone (19kHz, 38kHz).
Tuner AM (MW,LW)
RF Generator
e.g. PM5326
Ri=50Ω
DUT
Frame aerial
e.g. 7122 707 89001
Bandpass
250Hz-15kHz
e.g. 7122 707 48001
LF Voltmeter
e.g. PM2534
S/N and distortion meter
e.g. Sound Technology ST1700B
To avoid atmospheric interference all AM-measurements have to be carried out in a Faraday´s cage.
Use a bandpass filter (or at least a high pass filter with 250Hz) to eliminate hum (50Hz, 100Hz).
CD
Use Audio Signal Disc
(replaces test disc 3)
DUT
L
R
SBC429 4822 397 30184
S/N and distortion meter
e.g. Sound Technology ST1700B
LEVEL METER
e.g. Sennheiser UPM550
with FF-filter
Recorder
Use Universal Test Cassette CrO2 SBC419 4822 397 30069
or Universal Test Cassette Fe SBC420 4822 397 30071
LF Generator
e.g. PM5110
DUT
L
R
S/N and distortion meter
e.g. Sound Technology ST1700B
LEVEL METER
e.g. Sennheiser UPM550
with FF-filter
Page 5
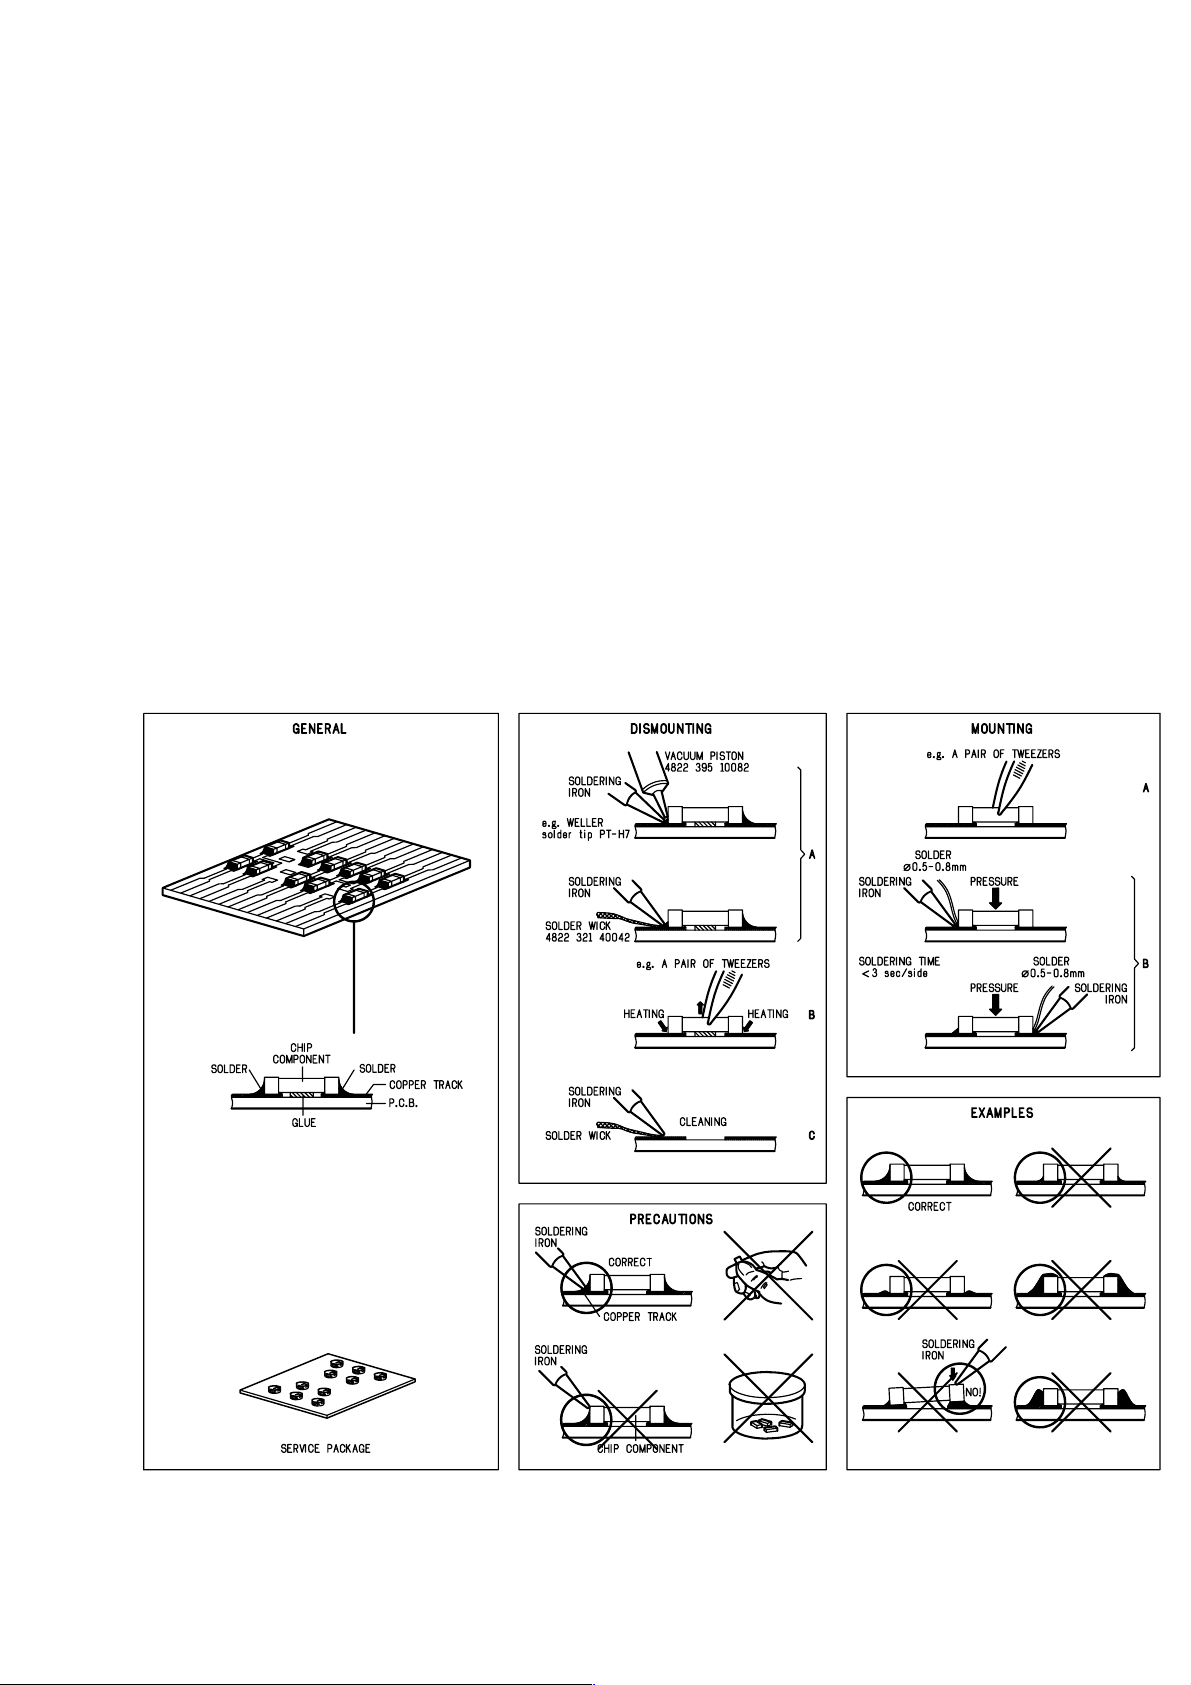
SERVICE AIDS
12/2/2013
www.nostatatech.nl
World of free manuals
1-5
Service Tools:
Universal Torx driver holder .................................. 4822 395 91019
Torx bit T10 150mm ............................................. 4822 395 50456
Torx driver set T6 - T20 ......................................... 4822 395 50145
Torx driver T10 extended ...................................... 4822 395 50423
Cassette:
SBC419 Test cassette CrO2 ................................. 4822 397 30069
SBC420 Test cassette Fe ..................................... 4822 397 30071
MTT150 Dolby level 200nWb/M ............................ 4822 397 30271
Compact Disc:
SBC426/426A Test disc 5 + 5A ............................ 4822 397 30096
SBC442 Audio Burn-in Test disc 1kHz ................. 4822 397 30155
SBC429 Audio Signals disc .................................. 4822 397 30184
Dolby Pro-logic Test Disc ...................................... 4822 395 10216
HANDLING CHIP COMPONENTS
ESD Equipment:
Anti-static table mat - large 1200x650x1.25mm ... 4822 466 10953
Anti-static table mat - small 600x650x1.25mm ..... 4822 466 10958
Anti-static wristband .............................................. 4822 395 10223
Connector box (1MΩ) ............................................ 4822 320 11307
Extension cable
(to connect wristband to conn. box) .................. 4822 320 11305
Connecting cable
(to connect table mat to conn. box) .................. 4822 320 11306
Earth cable (to connect product to mat or box) .... 4822 320 11308
Complete kit ESD3
(combining all above products) ......................... 4822 320 10671
Wristband tester .................................................... 4822 344 13999
Page 6
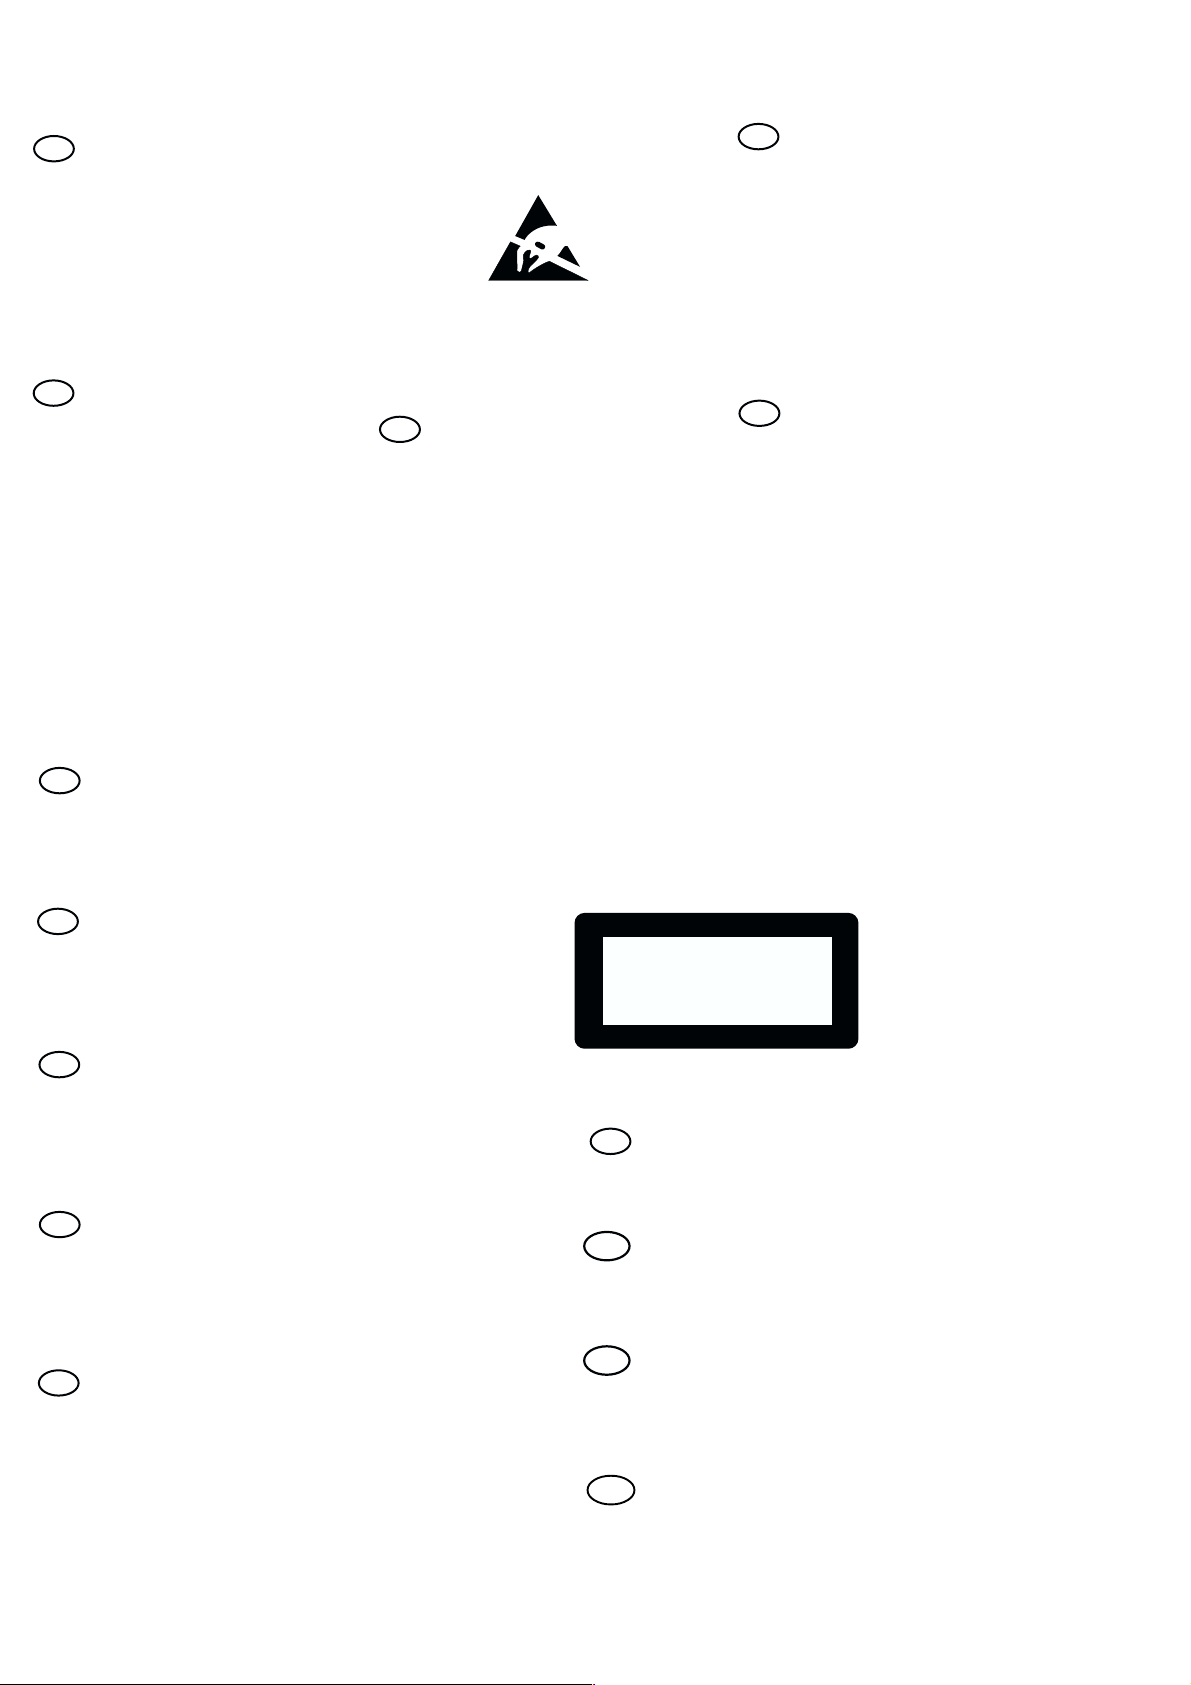
WARNING
12/2/2013
www.nostatatech.nl
World of free manuals
GB
All ICs and many other semi-conductors are
susceptible to electrostatic discharges (ESD).
Careless handling during repair can reduce life
drastically.
When repairing, make sure that you are
connected with the same potential as the mass
of the set via a wrist wrap with resistance.
Keep components and tools also at this
potential.
F
ATTENTION
Tous les IC et beaucoup d’autres
semi-conducteurs sont sensibles aux
décharges statiques (ESD).
Leur longévité pourrait être considérablement
écourtée par le fait qu’aucune précaution n’est
prise à leur manipulation.
Lors de réparations, s’assurer de bien être relié
au même potentiel que la masse de l’appareil et
enfiler le bracelet serti d’une résistance de
sécurité.
Veiller à ce que les composants ainsi que les
outils que l’on utilise soient également à ce
potentiel.
1-6
ESD
D
WARNUNG
Alle ICs und viele andere Halbleiter sind
empfindlich gegenüber elektrostatischen
Entladungen (ESD).
Unsorgfältige Behandlung im Reparaturfall kan
die Lebensdauer drastisch reduzieren.
Veranlassen Sie, dass Sie im Reparaturfall über
ein Pulsarmband mit Widerstand verbunden
sind mit dem gleichen Potential wie die Masse
des Gerätes.
Bauteile und Hilfsmittel auch auf dieses gleiche
Potential halten.
WAARSCHUWING
NL
Alle IC’s en vele andere halfgeleiders zijn
gevoelig voor electrostatische ontladingen
(ESD).
Onzorgvuldig behandelen tijdens reparatie kan
de levensduur drastisch doen verminderen.
Zorg ervoor dat u tijdens reparatie via een
polsband met weerstand verbonden bent met
hetzelfde potentiaal als de massa van het
apparaat.
Houd componenten en hulpmiddelen ook op
ditzelfde potentiaal.
I
AVVERTIMENTO
Tutti IC e parecchi semi-conduttori sono
sensibili alle scariche statiche (ESD).
La loro longevità potrebbe essere fortemente
ridatta in caso di non osservazione della più
grande cauzione alla loro manipolazione.
Durante le riparazioni occorre quindi essere
collegato allo stesso potenziale che quello della
massa dell’apparecchio tramite un braccialetto
a resistenza.
Assicurarsi che i componenti e anche gli utensili
con quali si lavora siano anche a questo
potenziale.
GB
Safety regulations require that the set be restored to its original
condition and that parts which are identical with those specified,
be used.
NL
Veiligheidsbepalingen vereisen, dat het apparaat bij reparatie in
zijn oorspronkelijke toestand wordt teruggebracht en dat onderdelen,
identiek aan de gespecificeerde, worden toegepast.
F
Les normes de sécurité exigent que l’appareil soit remis à l’état
d’origine et que soient utiliséés les piéces de rechange identiques
à celles spécifiées.
D
Bei jeder Reparatur sind die geltenden Sicherheitsvorschriften zu
beachten. Der Original zustand des Geräts darf nicht verändert werden;
für Reparaturen sind Original-Ersatzteile zu verwenden.
“Pour votre sécurité, ces documents
doivent être utilisés par des spécialistes agréés, seuls habilités à réparer
votre appareil en panne”.
CLASS 1
LASER PRODUCT
GB
Invisible laser radiation when open.
Avoid direct exposure to beam.
Osynlig laserstrålning när apparaten är öppnad och spärren
är urkopplad. Betrakta ej strålen.
Warning !
S
Varning !
3122 110 03420
I
Le norme di sicurezza esigono che l’apparecchio venga rimesso
nelle condizioni originali e che siano utilizzati i pezzi di ricambio
identici a quelli specificati.
"After servicing and before returning set to customer perform a
leakage current measurement test from all exposed metal parts to
earth ground to assure no shock hazard exist. The leakage current
must not exceed 0.5mA."
Varoitus !
SF
Avatussa laitteessa ja suojalukituksen ohitettaessa olet alttiina
näkymättömälle laserisäteilylle. Älä katso säteeseen!
DK Advarse !
Usynlig laserstråling ved åbning når sikkerhedsafbrydere er
ude af funktion. Undgå udsaettelse for stråling.
Page 7
2-1 2-1
12/2/2013
www.nostatatech.nl
World of free manuals
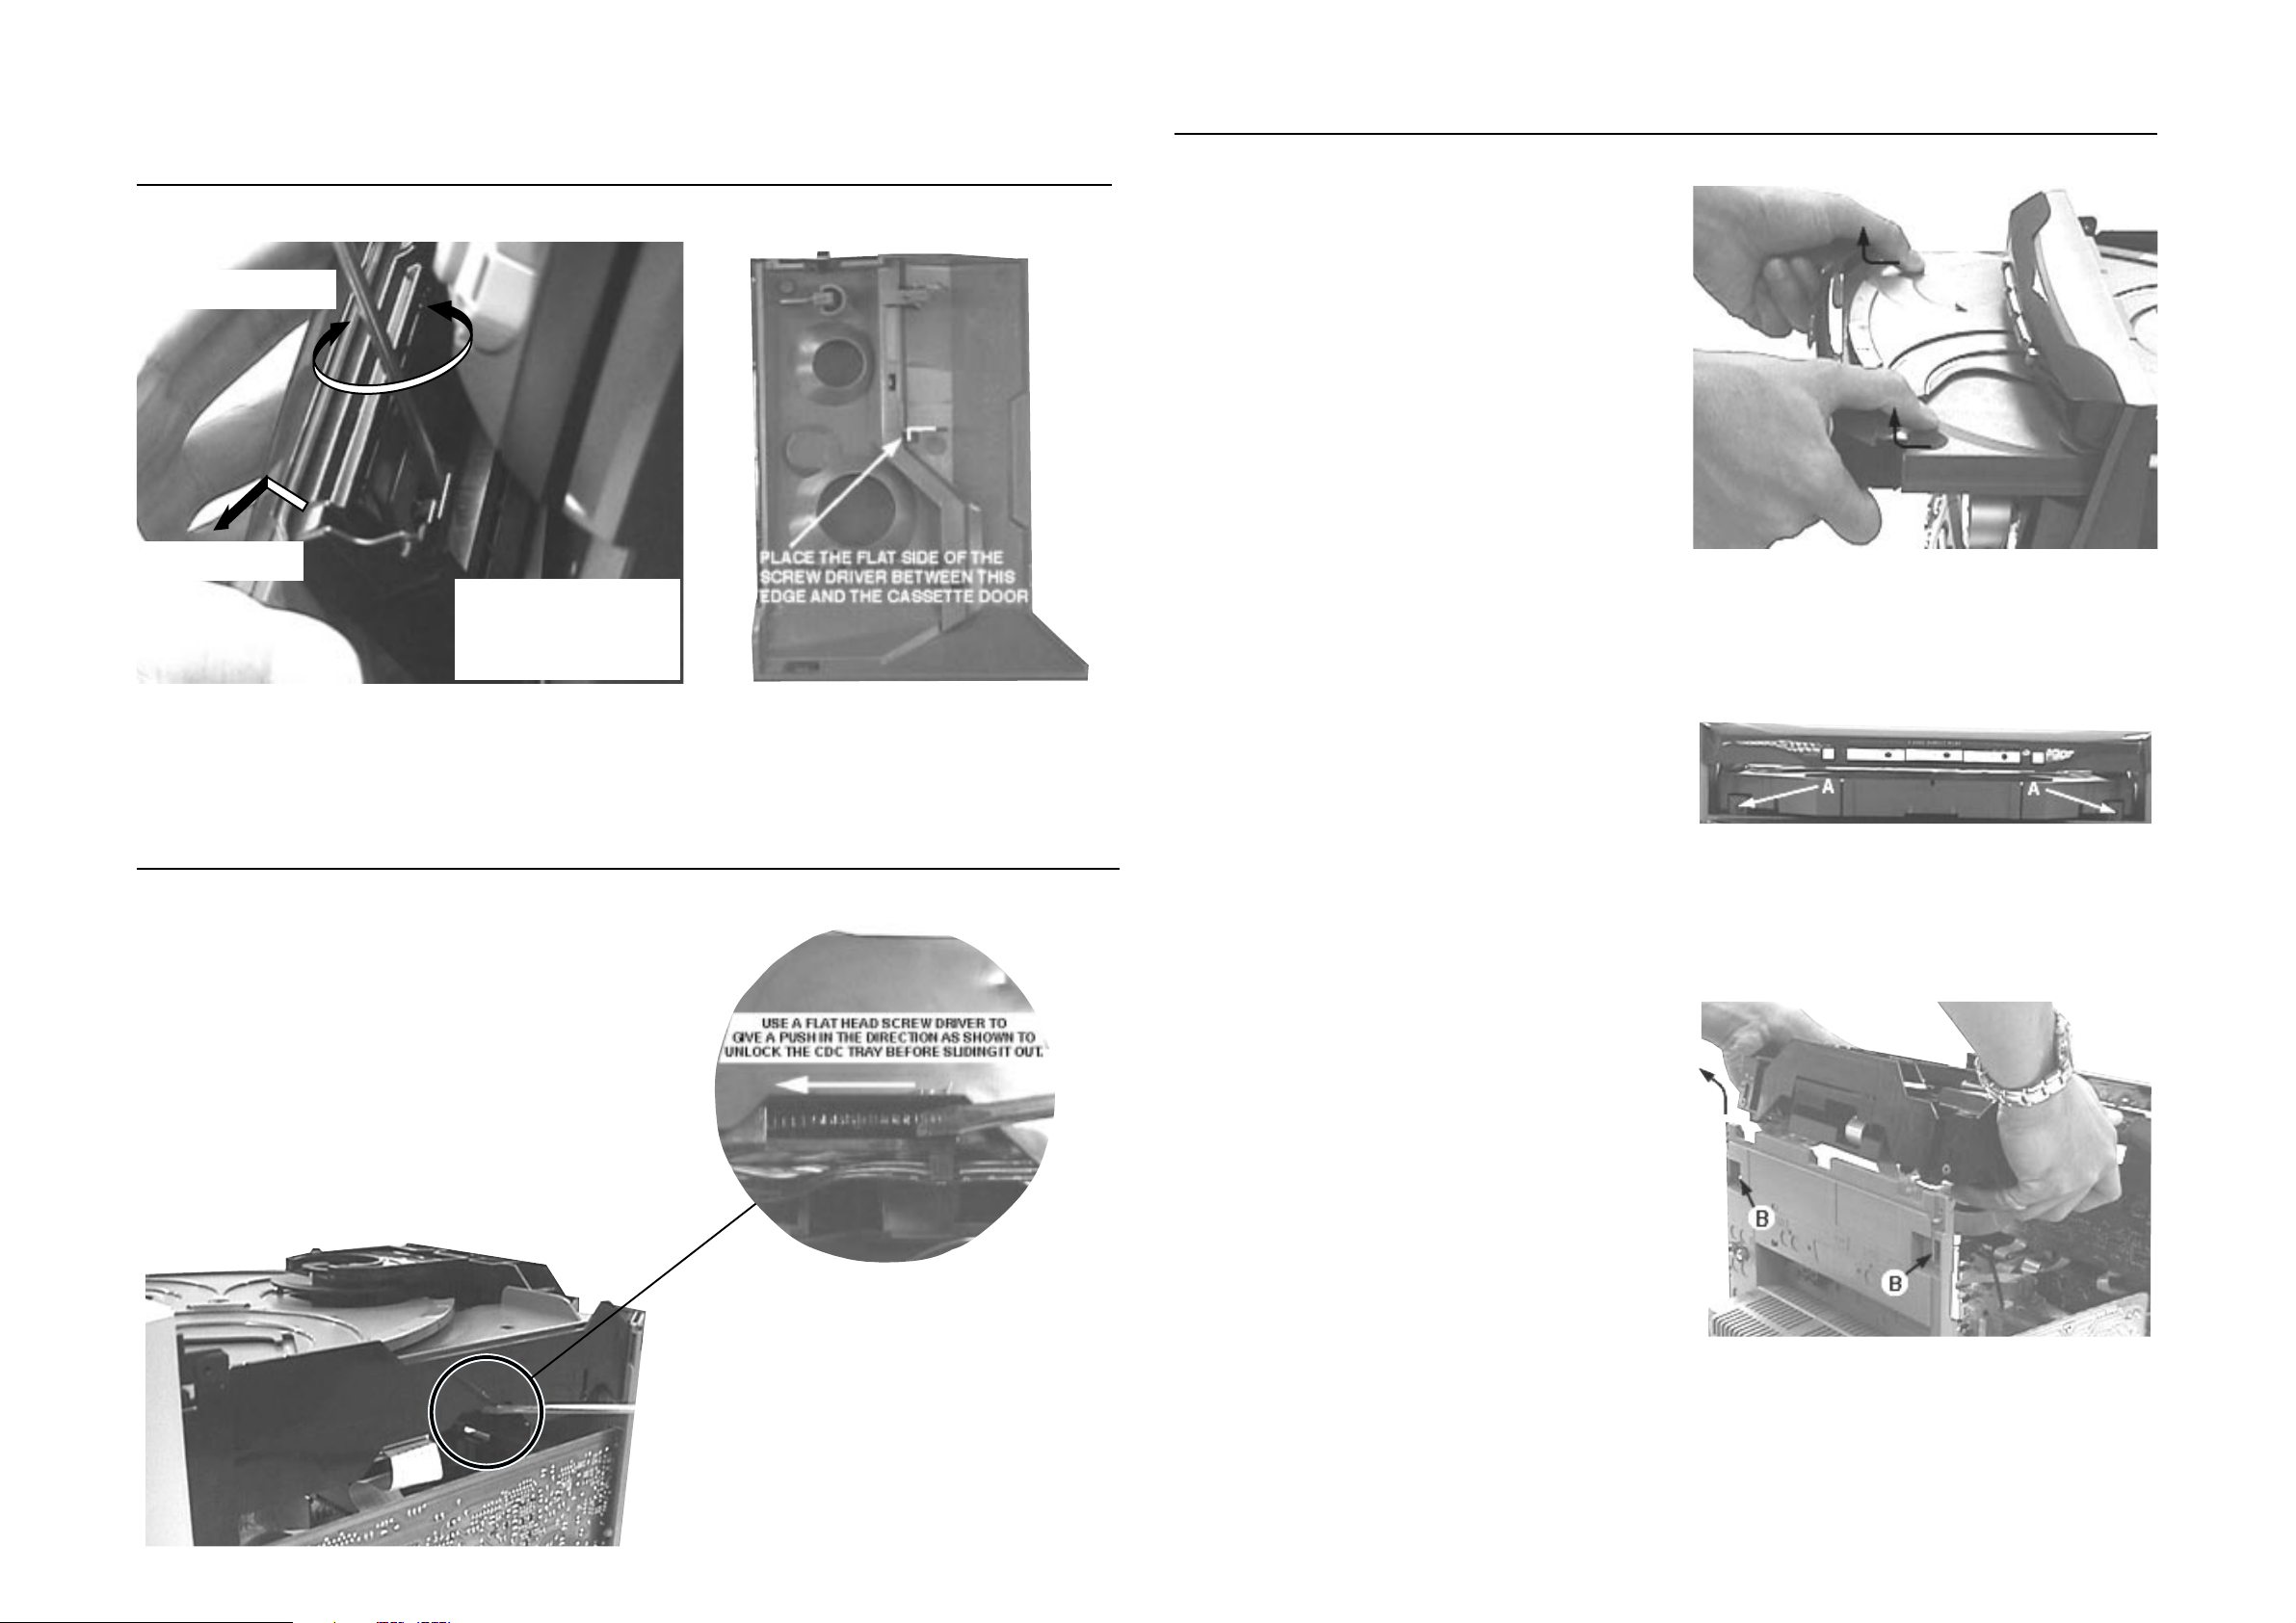
DISMANTLING INSTRUCTIONS
Dismantling of the Cassette Cover
2. Twist screw driver
3. Lift up and out
Dismantling of the CDC Module and Front Panel
4) Remove the Cover Tray CDC (pos 106) as indicated.
Remove Cover Tray CDC
1. Place screw driver
(flat side) between
the cassette cover
& cassette door
Remove Cassette Cover
Dismantling of the CDC Module and Front Panel
1) Loosen 4 screws to remove the Cover Top (pos 255) of the
set.
2) Loosen 2 screws to remove the Panel Left (pos 253) and
2 screws to remove the Panel Right (pos 254) of the set.
3) Slide out the CDC Tray as shown in the diagram below with
the help of a flat head screw driver.
Cassette Cover
5) Loosen 2 screws A and 2 screws B to remove the CDC
Module (pos 1105) as indicated.
6) Remove 2 screws (pos 226) at the bottom to separate the
Front Panel Assembly from the Plate Bottom (pos 265).
Front View CDC
Sliding out the CDC Tray
Remove CDC Module
Page 8

2-2
12/2/2013
www.nostatatech.nl
World of free manuals
2-2
Dismantling of Rear PortionDismantling of the Front Display Board and Front Control Board
1) Remove 1 screw C as indicated to loosen the Headphone
Board (pos 1101-B).
2) Remove 5 screws D as indicated to loosen the Front
Display Board (pos 1101-A).
3) Remove 9 screws E as indicated to loosen the Front
Control Board (pos 1107-A).
4) Remove 1 screw F as indicated to loosen the IR-Eye
Board (pos 1107-D).
5) Remove 3 screws N as indicated to loosen the VU Meter
Board (pos 1107-C).
1) Remove 3 screws J and uncatch M1 as indicated to
loosen the AF Board (pos 1102-A).
2) Remove 3 screws K and uncatch M2 as indicated to
loosen the Tuner Board (pos 1103).
3) Remove 4 screws L as indicated to loosen the Panel
Rear (pos 256).
Remove AF Board
Remove Front Display Board and Headphone Board
Remove VU Meter Board
Dismantling of the ETF Tape Module
1) Remove 6 screws G as indicated to loosen the ETF Tape
Module (pos 1104).
Remove Front Control Board and IR-Eye Board
Repair Hints
1) The Knob Volume Rotary (pos 117) can be remove by
inserting a strong string into the slot and pull it out in the
direction as indicated. See picture 1.
2) The Knob Jog Rotary (pos 140) can be remove by
inserting a strong string into the slot and pull it out in the
direction as indicated. See picture 2.
Picture 1
Picture 2
Page 9

Repair Hints
12/2/2013
www.nostatatech.nl
World of free manuals
2-3 2-3
3) During repair it is possible to disconnect the Tuner board
and CDC Module completely unless the fault is suspected to be in that area. This will not affect the
performance of the rest of the set.
4) Due to the short flex cable wires in the ETF Module, the
pc board should be disconnected and reconnected on
the reverse side of the tape mechanism to keep it
electrically connected during repair. See picture 3.
Note: The flex cables are very fragile, care should be taken
not to damage them during repair. After repair, be
very sure that the flex cables are inserted properly
into the flex sockets before encasing, otherwise faults
may occurs.
Service pos A
Picture 3
Service pos C
Service pos B
Service pos D
Page 10
3-1 3-1
12/2/2013
www.nostatatech.nl
World of free manuals
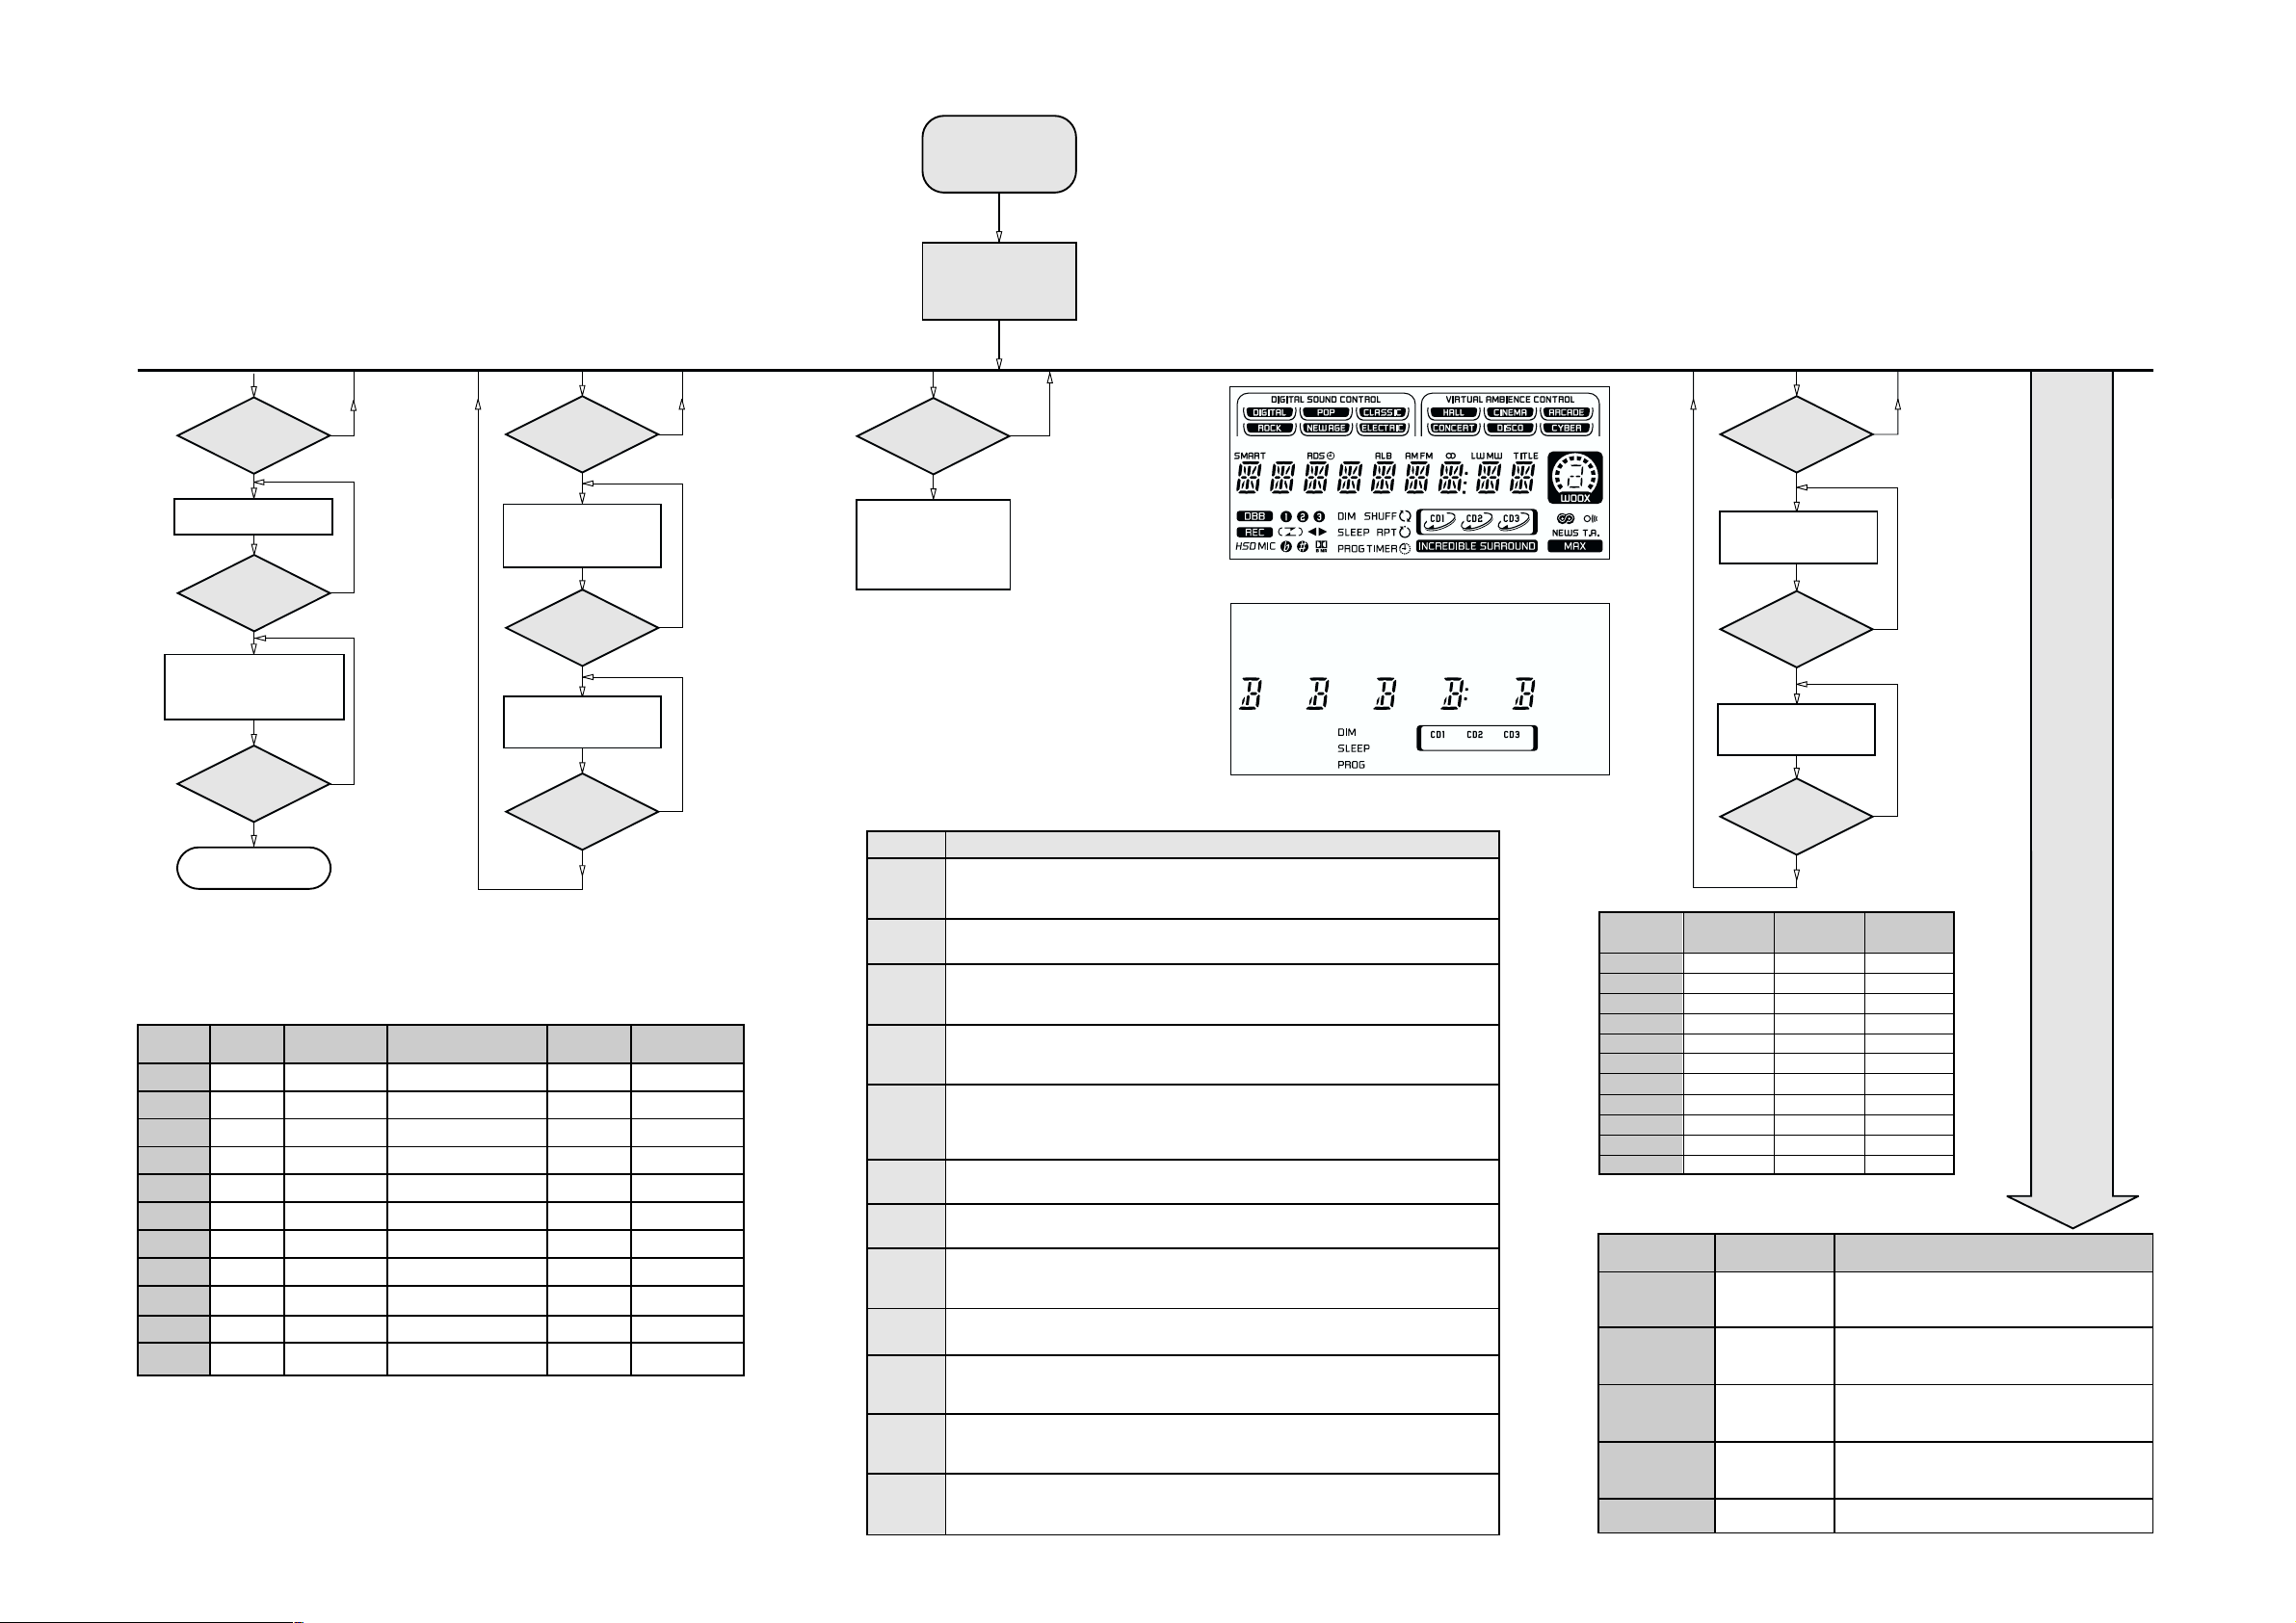
SERVICE TEST PROGRAM
TUNER
TEST
TUNER
Button pressed?
Y
Display Tuner Version
"ccc"
TUNER
Button pressed?
Service frequencies are
copied to the RAM (see Table 1)
Tuner works normally except:
PROGRAM button
Disconnect
Mains cord ?
Y
Service Mode left
PRESET
10
11
Europe
"EUR"
1
87.5MHz
2
108MHz
3
531kHz
4
1602kHz
5
558kHz
6
1494kHz
7
153kHz
8
279kHz
9
198kHz
98MHz
87.5MHz
Note: * Depending on the selected grid frequency (9 or 10kHz)
By holding the TUNER and R buttons depressed while switching on the Mains supply, one
of the undermentioned features will be activated:
- the tuning grid frequency is toggled between 9kHz and 10kHz for the Oversea (/21) version.
- the extended FM1 (65.81MHz - 74MHz) is toggled on and off for East Eur. (/34) version.
N
N
N
East Eur.
"EAS"
87.5MHz
108MHz
531kHz
1602kHz
558kHz
1494kHz
87.5MHz
87.5MHz
87.5MHz
87.5MHz
98MHz
East Eur. Extended-band
65.81MHz
108MHz
74MHz
87.5MHz
531kHz
1602kHz
558kHz
1494kHz
98MHz
70.01MHz
65.81MHz
Table 1
QUARTZ
TEST
Output at (Front Display Board)
pin 19 of uP = 2048Hz
Output at (Front Display Board)
pin 19 of uP = 2,929.6875Hz
"EAS"
O
Button pressed?
Y
Display shows
32K
O
Button pressed?
Y
Display shows
12M
9
Button pressed?
Y
USA
"USA"
87.5MHz
108MHz
530kHz
1700kHz
560kHz
1500kHz
98MHz
87.5MHz
87.5MHz
87.5MHz
87.5MHz
N
N
N
Oversea
"OSE"
87.5MHz
108MHz
531/530kHz*
1602/1700kHz*
558/560kHz*
1494/1500kHz*
87.5/98MHz*
87.5MHz
87.5MHz
87.5MHz
98/87.5MHz*
To start service test program
hold
depressed while
plugging in the mains cord
Display shows the
ROM version
"S-Vyy"
(Main menu)
SERVICE
PLAY MODE
STANDBY-ON
Button pressed?
Y
Set is in Service PLAY Mode.
In case of failures, error
codes according to Table 2
will be displayed.
The Service Play Mode is intended to
detect and identify the failures in the CD Mode.
In this mode the electronics will still function
even when an error is detected so that
repair activities can be carried out.
Error code
E1000
E1001
E1002
E1003
E1005
E1006
E1007
E1008
E1020
E1070
E1071
E1079
Error Description
Focus Error
Triggered when the focus could not be found within a certain time when starting up the CD
or when the focus is lost for a certain time during play.
Radial Error
Triggered when the radial servo is off-track for a certain time during play.
Sledge In Error
The sledge did not reach its inner position (inner-switch is still close) before approximately
6 Sec. have passed by. Inner-switch or sledge motor problem.
Sledge Out Error
The sledge did not come out of its inner position (inner-switch is still open) before approximately
250 mSec. have passed by. Inner-switch or sledge motor problem.
Jump-offtrack error
Triggered in normal play when the jump destination could not be found within a certain time.
When this error occurred, software will try to recover by initiating the jump command again.
If it is recoverable, the disc will continue to play.
Subcode Error
Triggered when a new subcode was missing for a certain time during play.
PLL Error
The Phase Lock Loop could not lock within a certain time.
Turntable Motor Error
Generated when the CD could not reached 75% of speed during startup within a certain time.
Discmotor problem.
Focus Search Error
The focus point has not been found within a certain time.
The carousel switch is not open within certain time. This can happen when either the switch is
defective and closed all the time, or when the carousel is blocked when located exactly at a
disc position.
The carousel position switch did not close within a certain time. This can happen when the
switch is defective and never closes electrically, or when the carousel is blocked in between
two disc positions. The time-out is approximately 5 Sec.
The drawer could not enter the inside position is opening again. This can be caused because
the drawer is blocked by something and cannot go fully inside, or the drawer switch is defective
and does not close.
™
& Aux
N
S refers to Service Mode
V refers to Version
yy refers to Software version number of the uProcessor
(counting up from 01 to 99)
Table 2
Figure 1
Figure 2
DISPLAY
TEST
2
Button pressed?
Y
Display shows Figure 1 and
switch all LEDs on (except ECO
POWER & VU Volume LEDs),
and full VU deflection.
2
Button pressed?
Y
Display shows Figure 2
and switch alternate LEDs on
(see Table 3),
and partial VU deflection.
9
Button pressed?
Y
LEDs
FW-C500 , FW-C550
FW-C555
DISC 1
DISC 3
TAPE
TUNER
CENTRE
SURROUND LEFT
STEREO RIGHT
VAC
DBB
VU BACK LIGHT
VU VOLUME
TEST
EEPROM TEST A test pattern will be sent to the EEPROM.
FW-C700 , FW-C720
FW-C780 , FW-C785
FW-C788 , FW-C798
On
On
On
On
On
On
On
On
Table 3
Activated with
R
9 to Exit
TEST
DEMO TOGGLE
ROTARY
ENCODER TEST
LEAVE SERVICE
TESTPROGRAM
QEEPROM FORMAT
DSC
Rotary Volume Knob
or
Jog Shuttle Knob
Disconnect
mains cord
N
N
N
FW-P750
On
On
On
On
On
On
On
On
On
On
On
On
On
On
On
On
On
On
other Tests
ACTION
"PASS" is displayed if the uProcessor read back the
test pattern correctly, otherwise "FAIL" will be displayed.
Load default data. Display shows "NEW" for 1 second.
Caution!
All presets from the customer will be lost!!
Pressing this button will toggle between DEMO ON and
DEMO OFF. The DEMO status will scroll once across
the Display.
Display shows value for 2 seconds.
Values increases or decreases in steps of 1 until 0 (Min.)
or 40 (Max.) is reached.
Mini2001/Mini2002 FW-C5xx/7xx Service Test Program (dd wk0136)
Various
Page 11
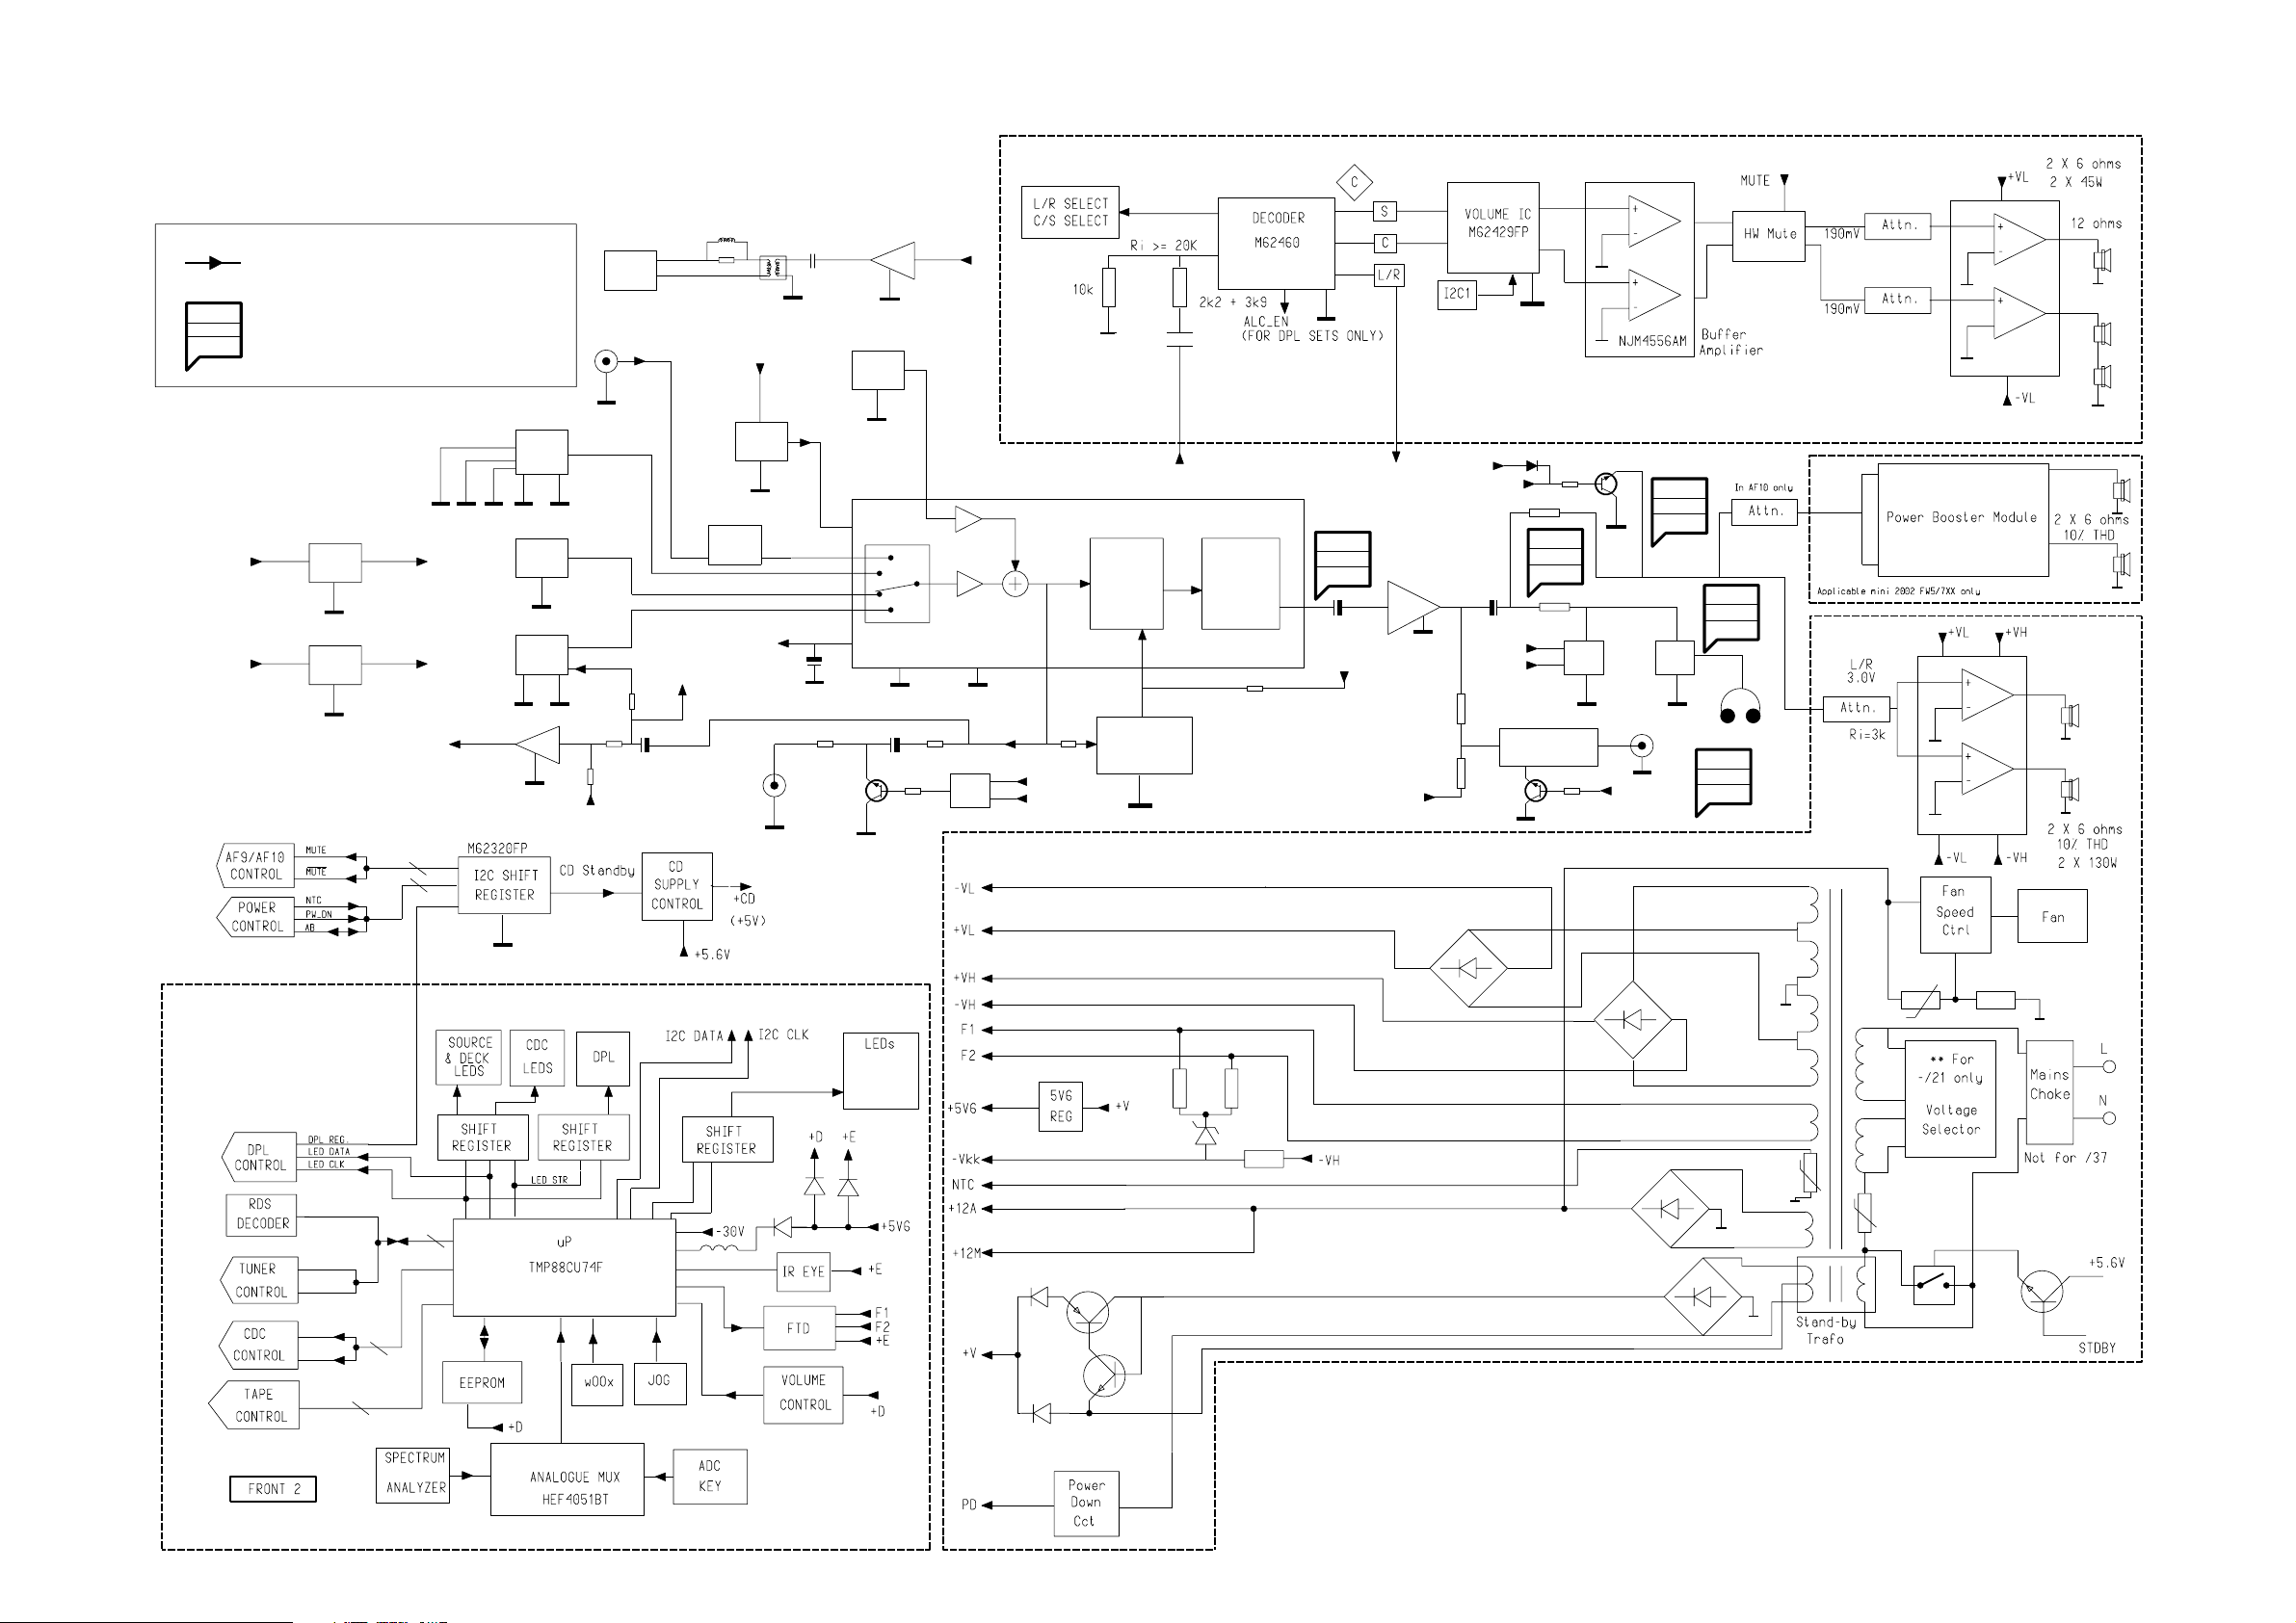
SET BLOCK DIAGRAM
12/2/2013
www.nostatatech.nl
World of free manuals
4-1 4-1
NOTE :
MAIN SIGNAL PATH
MEASUREMENTS ARE IN AUX MODE :
XX mV
YY dBA
ZZ dB
LEVELS AT MAX VOL
S/N AT 500mW
HEADROOM (1% THD) WRT TO LEVEL AT MAX VOL
-VKK
-CMOS
REG.
A
LOW_PW_SPLY
+5V
REG.
A
D
-CMOS
-9V
+5V6
CON
SA_OUT
2.1V
75 ohm
Vpp 0.5V
DIG
OUT
AUX
AUX 500mV
CDR 1V
DIG
+12V_A
COAX1 (FROM CDC)
DIG
A
A
D
MIC
A
A
Attn
-8.5 dB
VREF
Line Out
500mV
+9V1
REG.
DPL
H/P Amp
From other
Chan.
Mute_SW
Mute_SW_FR
A
-Vkk
Mute1
2.50V
85dBA
3dB
Mute
CCT
SUBWOOFER
CCT
A
1.90V
67dBA
A
3dB
H/P
A
S/W OUT
A
Mute_SW_FR
A
650mV
78dBA
3.2dB
1.25V
86dBA
3.5dBA
775mV
H/P
FIS or
SIS Filter
CCT
A
SSL
Audio
Signal
Proc.
500mV
76dBA
16dB
DPL
A
DPL/
IS
Interface
A
A
AD
Mute
CCT
A
-Vkk
Mute2
CDC
D
DIG
TUNER
250mV
M
A
125mV
A
125mV
TAPE
26mV
SSL
M
A
A
From other
Chan.
D
(Blue Strip)
(wOOx)
(BassTreble)
Block_Diagram (3139 119 33780) dd wk0138
Page 12
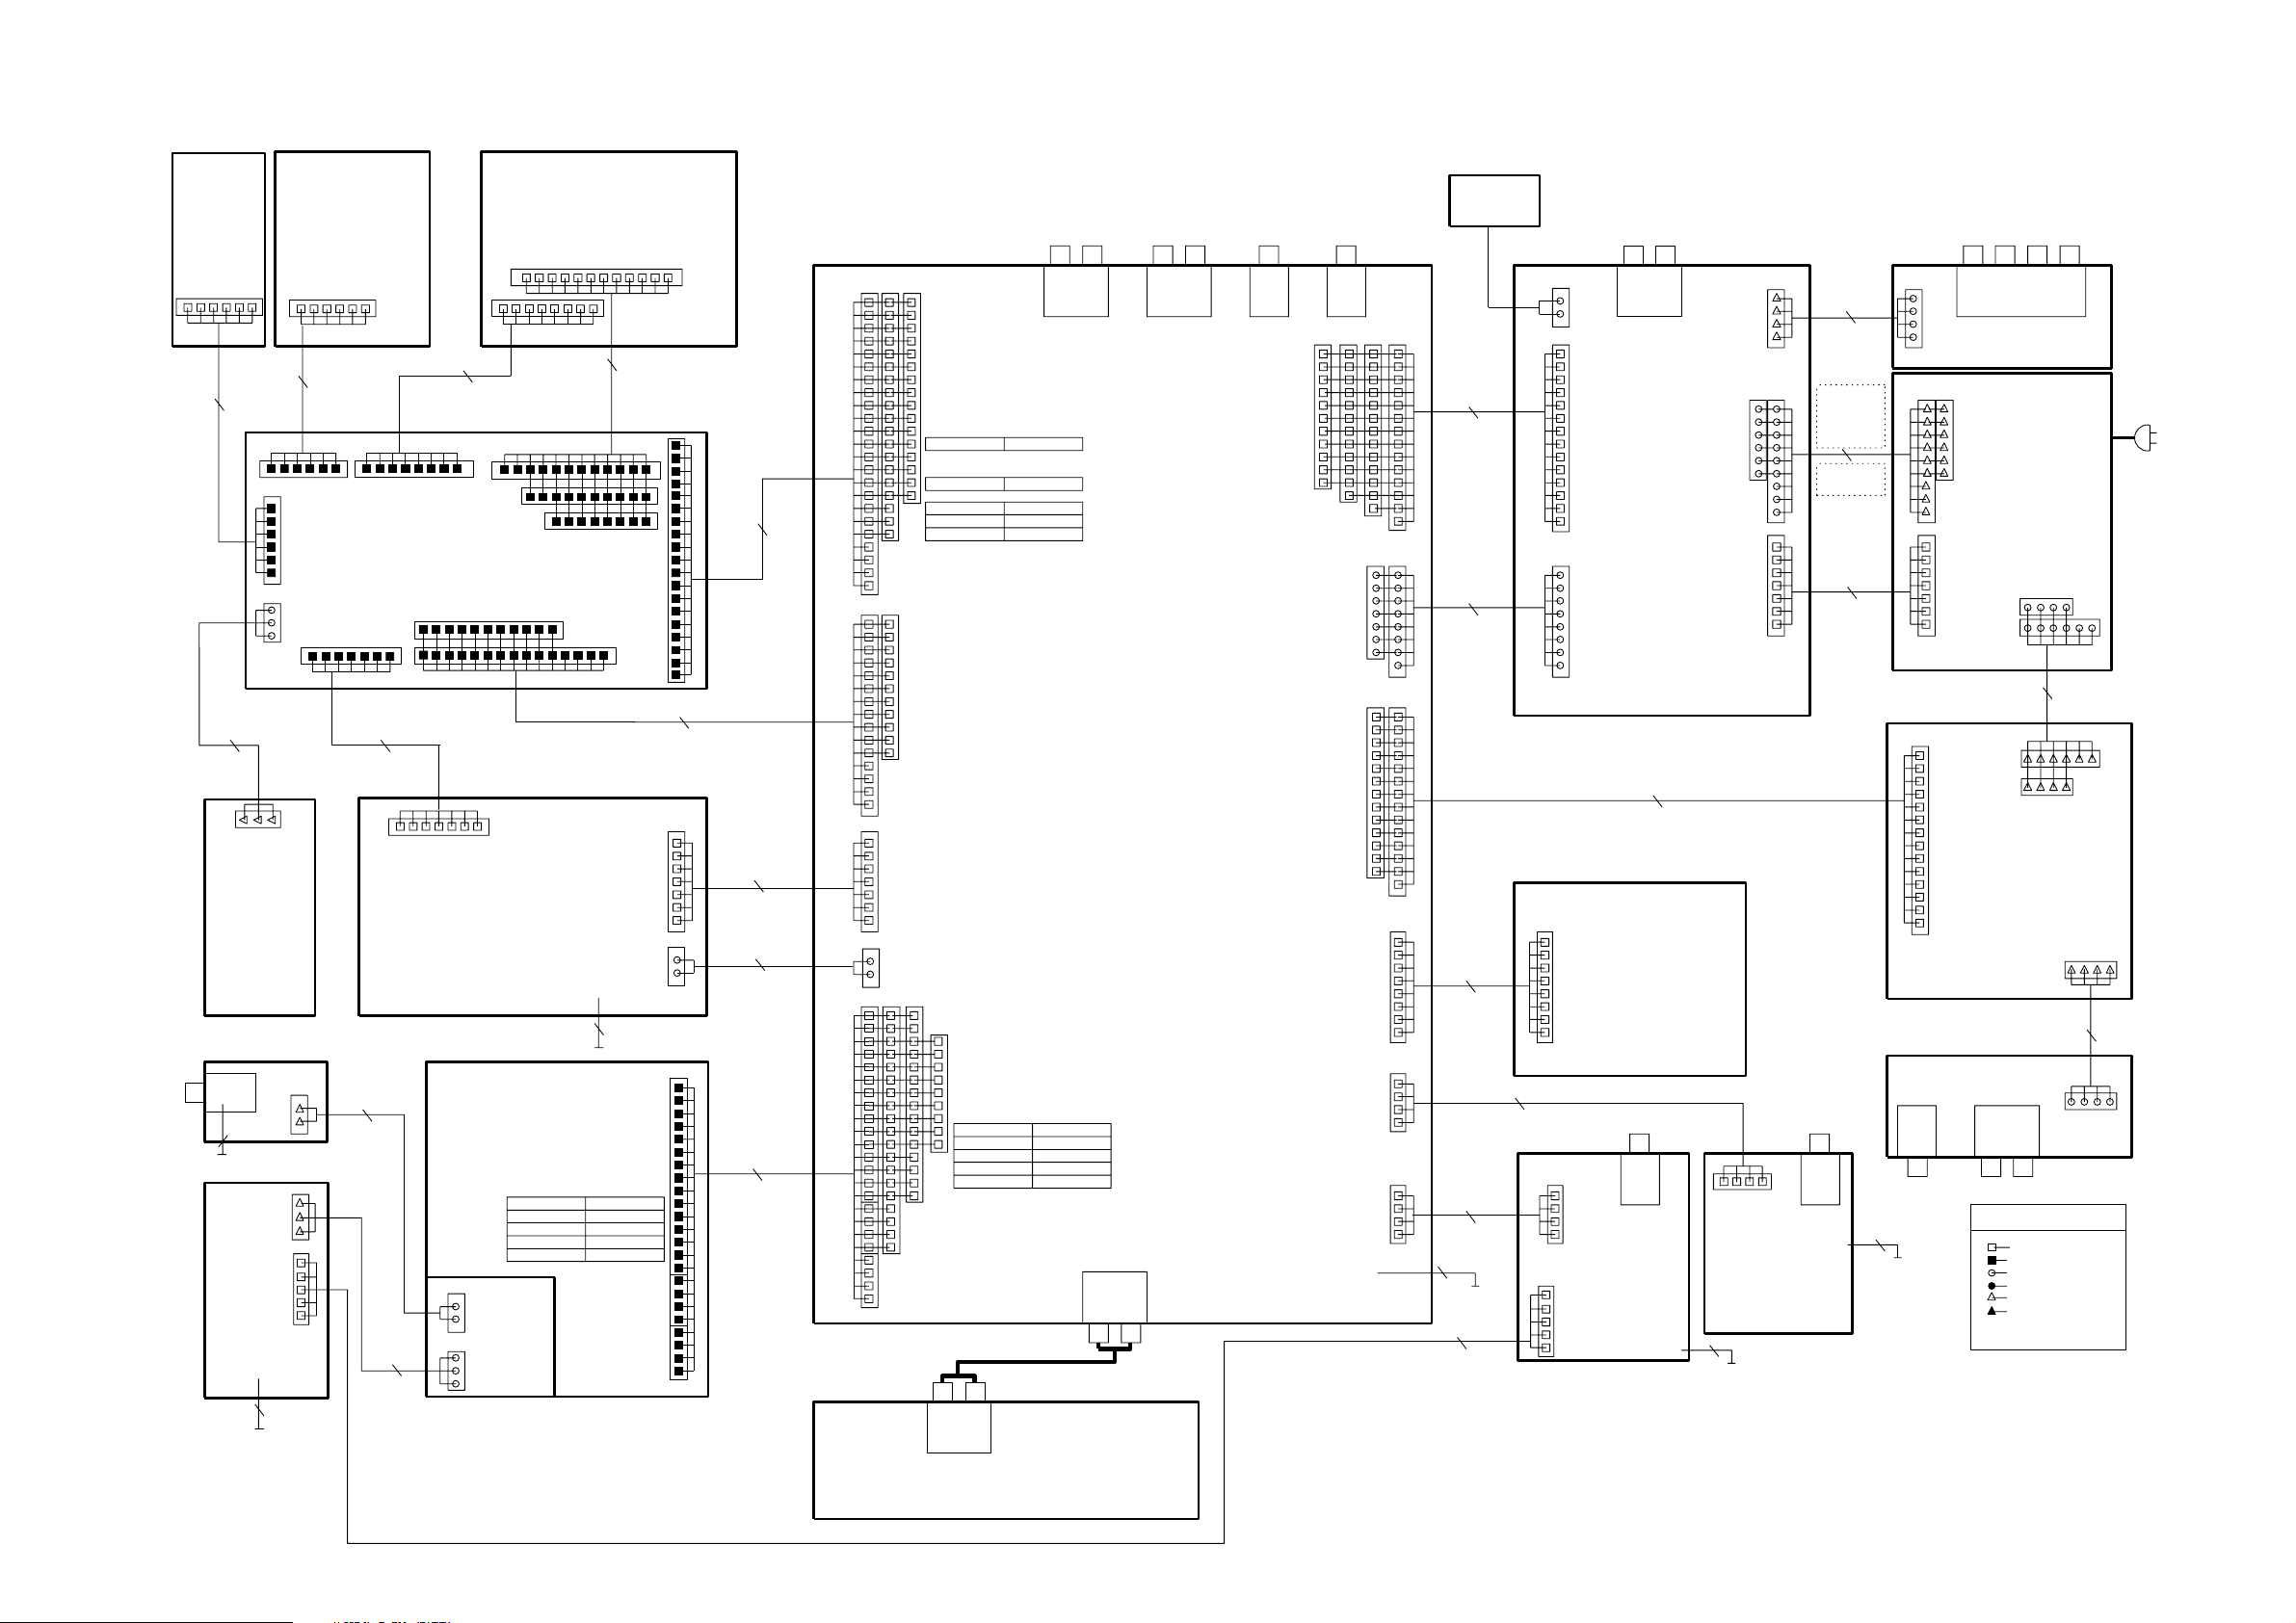
SET WIRING DIAGRAM
12/2/2013
www.nostatatech.nl
World of free manuals
4-2
4-2
1
HR 3p/100/3p OE
VCD OUT
(CVBS)
FRONT
VU Meter
( 1107 )
Bit1
GND__D
GND_D
+5V6
VUmeter
Bit0
1
1840
1407
FFC AD 06p 140
11
1409
1408
1408
RC5
GND_B
+5V6_Con
20
1
( 1107 ) ( 1104 )
IR Receiver
AF9
( 1102 )
1803
CVBS
GND_D
1809
CBLE STO-8 1P/280/1P OE
ECHO I/P
MPEG GND
MIC_DET
+KARA
VCD_IN1
AGND
VCD_IN2
MIC_DET
1705
VCD GND ISOLATOR
(1109)
FRONT
CDC KEYS
( 1107 )
Cdc3Lit
GND_D
Cdc2Lit
1403
FFC AD 06p 180
1400
TP_ADC2
TP_ADC1
GND
1
20
1
HR 2P/280/2P
1
48
1
5
GND-B
Key_Con
Cdc1Lit
1800
Key1
Key2
GND-B
TP_SH_DATA
TP_SH_STR
TP_SH_CLK
+F
7
1407
1406
FFC AD 07p 180
1
TAPE DD
ETF7
1509
1508
HR 3P/280/3P
FRONT
CONTROL/KEYS
1405
FFC AD 08p 120
1402
8
CD Led
GND_D
Aux Led
Tape Led
Tuner Led
FRONT
DISPLAY/u-P
( 1101 )
1
+F
GND
TP_ADC1
TP_ADC2
TP_SH_CLK
TP_SH_STR
TP_SH_DATA
CD-CHANGER
3CDC-LC / 3CDC-L2C
1603
1
CVBS
GND_D
1602
ECHO I/P
MPEG GND
MIC_DET
( 1107 )
wOOx A
1
1
1
1412
1403
1411
1706
( 1105 )
SHR_DATA
DSA_DATA
GND_D_VCD
MPEG01B
VAC Led
wOOx B
1602
1404
1
DSA_ACK
DSA_STR
DSC Led
1405
+5V6
1600 (12p)
1603 (10p)
1601 (8p)
12
1404
FFC AD 10p 120 (For C 5xx, 7xx Low pwr)
FFC AD 12p 120 (For C7xx High pwr only)
FFC AD 12p 120 (For P750 only)
1
1406
19p
1402
FFC AD 11p 180
( For C5xx & C7xx only )
or
FFC AD 15p 180
( For P750 only )
1701
SICL
SILD
SRDT
1703
1805
1
1
23
1
TP_REC_LEFT
TP_REC_RIGHT
GND_A_TP
TP_LEFT
+11V_A
TP_RIGHT
-CMOS
GND_M
+11V_M
1901
SMF 1P/180/1P SRA
CD_Left
GND_A_CD
CD_Right
+5V_CD
GND_M
+11V_M
SW_INFO
CD_SH_STR
CD_SH_CLK
CD_SH_DATA
GND_D_CD
CD_PORE
GND_D_CD
COAX1
COAX2
SHIELD
GND_D_COAX
DQSY
uP_CLK
GND_D_CDTEXT
JOG B
GND_D
JOG A
IS Led / LedShData
Max / wOOx / LedShClk
DBB / LedShStr
GND_D
1401
FFC AD 19p 180
1702
FFC AD 07p 220
1701
HR 02p/180/02p HR
1503
FFC BD 15p 180
( For C5xx & P750 )
or
FFC BD 19p 180
( For C7xx only )
1403 1401 1405
1
16
19
23
1404 1402
1
11
15
1531
1
TP_REC_LEFT
TP_REC_RIGHT
GND_A_TP
TP_LEFT
+11V_A
TP_RIGHT
-CMOS
7
1506
1
GND_M
+11V_M
15211522 1523
1
23
Power Booster In
NTC
GND_D_I2C
I2C_DATA
I2CCLOCK
GND_D
+5V6_CON
+11V
+5V6
-Vkk
F1
F2
CD_SH_DATA
CD_SH_CLK
CD_SH_STR
GND_D_CD
SW_INFO
SICL
SILD
GND_D
uP_CLK
DQSY
SRDT
GND_D_CDTEXT
TU_STEREO
TU_CLK
TU_DATA
TU_ENAB
GND_A_TU
HP_DET
SA_IN
PWR_DN
CLIP
L_PWR_CTRL
MIC_DET
DPL_VOL_CLK
DPL_CLK
DPL_DATA
GND_D_DPL
1525
1
9
15
19
DSA_DATA
GND_D_VCD
SHR_DATA
DSA_ACK
DSA_STR
CD_Left
GND_A_CD
CD_Right
+5V_CD
GND_M
+11V_M
SW_INFO
CD_SH_STR
CD_SH_CLK
SICL
CD_SH_DATA
SILD
GND_D_CD
CD_PORE
GND_D_CD
COAX1
COAX2
SHIELD
GND_D_COAX
SRDT
DQSY
uP_CLK
GND_D_CDTEXT
Power Booster Out
AUX IN
1501
LINE OUT
1504
AF9/AF10
( 1102 )
AF10 for Mini 2002 Power Booster Model only
SHR_DATA
DSA_DATA
DSA_ACK
GND_D_VCD
DSA_STR
1550
SUBWOOFER
OUT
1691 1801
AMP_LEFT
GND_AA
AMP_RIGHT
LOW_PWR_CTRL
VCD_ON/CDR_ON
NTC
PWR_DN
CLIPPING
AMP_ON
-VKK
AMP_CS_DC
DVD_ON
LOW_PWR_SPLY
DPL_VOL_CLK
AMP_CS_DC
COAX
1206
1203 1205
F1
F2
+11V_A
GND_A
+11V_M
GND_M
+5V6
GND_D
5V_VCD
DPL_LEFT
GND_A
DPL_RIGHT
SS_RIGHT
GND_A
SS_LEFT
+11V_A
DPL_STR
GND_D
DPL_DATA
DPL_CLK
AMP_ON
TU_LEFT
GND_A_TU
TU_RIGHT
+11V_A
TU_ENAB
TU_DATA
TU_CLK
TU_STEREO
HP_LEFT
GND_A
HP_RIGHT
HP_DET
+11V_A
GND_A
MIC_DET
SMF 1P/090/1P STO-8
DIGITAL OUT
1201
1204 1202
1542 1541
1520
1603
1503
MIC
1902
1
FFC AD 11p 220
( For C 5xx & 7xx )
FFC AD 12p 220
( For P750 only )
*FFC AD 13p 220
11
( For VCD only )
12
13
14
1
HR 07p/220/07p HR
( For C5xx & C7xx )
*HR 08p/220/08p HR
( For VCD only )
7
8
1
14
1
FFC AD 08p 220
8
1
4
1
FFC BD 04p 180
4
FFC AD 5p 180
#1300
#1301
1201
1601
1502
1507
1202
or
or
or
FAN
MOTOR
1
1259/60/61 (11p/12p/13p )
1
14
*1306 (13p)
1262/3 (7p/8p)
1
8
*1310 (8p)
1
1120
1501
FFC BD 04p 400
4
1
1702
1
5
* For POWER 2001 Module (30-70W Version) Only.
# For VCD Only.
Note : Some values may varies, see respective parts list for correct value.
LS SL/SR
( Only for FW-C720 )
MATRIX SURR
*1203
1912
MAINS BOARD
A1
B1
GND_D
GND_D
B2
A2
+D
GND
+D2
-VKK
F1
F2
PWR_DN
NTC
L_PWR_CTRL
L_PWR_S
HR 04p/280/04p OE
DPL_LEFT
GND_A
DPL_RIGHT
SS_RIGHT
GND_A
SS_LEFT
+11V_A
DPL_STR
DPL_VOL_CLK
GND_D
DPL_DATA
DPL_CLK
AMP_MUTE
AMP_CS_DC
HR 04p/280/04p OE
LS SL/SRLS C
LEGEND
( 1108 )
( 1106 )
GND_D
GND_D
A1
B1
*1201
1
1911
1304
1
10
A1
B1
GND_D
GND_D
CTR
11
1305
1314
FFC TOP ENTRY
FFC SIDE ENTRY
EH TOP ENTRY
EH SIDE ENTRY
DIPMATE
SPARE
PROVISIONP
B2
B2
GND_C
1300
+FAN
GND
AMP_LEFT
GND_AA
AMP_RIGHT
NTC
LOW_PWR_CTRL
PWR_DN
CLIPPING
AMP_ON
-VKK
F1
F2
AMP_CS_DC
VCD_ON
DVD_ON
LOW_PWR_SPLY
+11V_A
GND_A
+11V_M
GND_M
+5V6
GND_D
5V_VCD
TU_LEFT
GND_A_TU
TU_RIGHT
+11V_A
TU_ENAB
TU_DATA
TU_CLK
TU_STEREO
1701
+11V_A
MIC
GND_A
MIC_DET
( For C780/33 & VCD
+KARA
VCD_IN1
AGND
VCD_IN2
MIC_DET
LS
1321
*1307
L_PWR_CTRL
L/R+SUP/POWER-BOARD
1801
FFC AD 14p 220
TUNER
ECO6
( 1103 )
MIC
1700
FRONT
MIC-AMP.
Version only )
( 1107 )
1330
*1308
*1302
12511250
A1
B1
GND_D
GND_D
B2
A2
+D
GND
+D2
-VKK
F1
F2
PWR_DN
NTC
L_PWR_S
1252
*1304
( 1106 )
1
4
GND_A
HP_DET
HP_LEFT
HP_RIGHT
FRONT
HEADPHONE
1504
STO-5 1P/280/1P STO-8
1
1
1
H/P
1850
( 1101 )
*1200
HR 04p/340/04p HR
For 100 W version
8906
HR 06p/340/06p OE
and
8909
HR 09p/340/09p OE
*1205
HR 06p/400/06p HR
*1204
1203
FFC AD 07p 340
1851
1315
1
1913
1
1
1914
*1209
1700
1
14
DPL
C/S AMP
( 1106 )
( 1108 )
1903
SMF 1P/180/1P STO-8
A2
P
A2
GND_S
SURR
1
1
STO-5 1P/280/1P STO-8
1510
Power Booster Module
For Mini 2002 FW-C798, FW-V795 Only
Wiring_Diagram (3139 119 33780) dd wk0138
Page 13

5-1
12/2/2013
www.nostatatech.nl
World of free manuals
FRONT CONTROL BOARD
5-1
REMARKS :
TABLE OF CONTENTS
Front Control Board - Component & Chip layout ............5-2
Front Control Board - Circuit diagram .............................5-3
IR-Eye Part - Layout & Circuit diagram ........................... 5-3
Key-CDC Part - Layout & Circuit diagram....................... 5-4
VU Meter Part - Layout & Circuit diagram....................... 5-4
Karaoke Part - Layout & Circuit diagram ........................ 5-5
Electrical parts list............................................................ 5-5
Page 14

5-2
12/2/2013
www.nostatatech.nl
World of free manuals
FRONT CONTROL BOARD - COMPONENT LAYOUT
5-2
This assembly drawing shows a summary of all possible versions. For components used in a specific version see schematic diagram and respective parts list.
FRONT CONTROL BOARD - CHIP LAYOUT
3139 113 3446 pt2 dd wk0116
This assembly drawing shows a summary of all possible versions. For components used in a specific version see schematic diagram and respective parts list.
3139 113 3446 pt2 dd wk0116
Page 15

5-3
This assembly drawing shows a summary of all possible versions.
For components used in a specific version see schematic diagram and respective parts list.
3139 113 3446 pt2 dd wk0116
12/2/2013
www.nostatatech.nl
World of free manuals
5-3
FRONT CONTROL BOARD - CIRCUIT DIAGRAM
1600 F1
1653 C3
1654 C3
1655 C2
1656 D3
1657 D3
1658 D3
1659 D2
1660 D5
1661 D4
1662 C5
1663 C6
1664 C6
1665 C7
1666 C5
1601 H2
1602 D1
1603 H1
1650 D2
1651 C2
1652 C3
1234567
A
JOG_A
JOG_B
1690
EC16
MT14MT2
5
B
Gnd Gnd
1667 C4
1668 C4
1669 C4
1670 C6
1671 D6
1672 D6
1673 D5
1
3
1674 D5
2605 B4
2606 B2
2607 B2
2608 C7
2613 D6
2615 A4
2620 F3
10K
2622 F6
2623 F7
2624 G4
2625 G4
3600 G2
3604 A4
3605 A4
Woox_A
Woox_B
1675 D4
1690 B1
1691 A3
2600 G5
2603 G5
2604 B4
10K
3606
3607
2
10n
10n
2607
2606
Gnd
3606 A2
3607 A2
3608 G5
3609 G4
3610 C2
3611 C3
3612 C3
1691
EC12
MT14MT2
Gnd
3613 C3
3614 C4
3615 C4
3616 C5
3617 C5
3618 C6
3619 C6
1
5
3620 C7
3621 E4
3622 E4
3623 E4
3624 E4
3630 D2
3631 D3
3604
3
2
2604
Gnd
10n
10K
+5V6
6602
3605
2605
Gnd
3632 D3
3633 D3
3634 D4
3635 D4
3636 D4
3637 D5
3638 D5
1N4148
10K
10n
2615
Gnd
3639 D6
3640 D6
3643 G6
3644 G6
3645 G6
3646 H7
3647 H6
47u
3648 G3
3649 F3
3650 F3
3651 H3
3652 H3
3653 H3
3654 H3
6620 G7
3655 H6
6604 E4
6605 E4
4600 G2
6606 E4
4605 H5
6610 H3
4606 H6
6611 H3
5601 F5
6612 H3
6602 A4
6613 H3
6603 E4
Note : Some values may varies, see respective
parts list for correct value.
6621 G7
6622 G7
6623 H7
6624 H7
7601 F5
7602 H7
7650 F3
9610 G2
9618 G2
# : Provision
IR-EYE BOARD - COMPONENT LAYOUT IR-EYE BOARD - CHIP LAYOUT
This assembly drawing shows a summary of all possible versions.
For components used in a specific version see schematic diagram and respective parts list.
A
3139 113 3446 pt2 dd wk0116
B
3610
150R
C
FE-ST-VK-N
D
E
F
G
1602
1600
FE-ST-VK-N
1
2
3
4
5
6
7
8
9
10
11
12
FE-ST-VK-N
1
2
3
4
5
6
7
8
1603
Key2
Key1
1
2
3
4
5
6
7
8
9
10
1601
FE-ST-VK-N
Tuner
Tape
1
2
3
4
5
6
7
8
1651
GND-B
GND-B
GND-B
Gnd
Woox_A
Woox_B
Vac
DSC
9618
# 3600
470R
Max_Woox_LedShClk
+5V6
JOG_A
Gnd
PLAY
3630
150R
1650
S_fwd
Gnd
9610
H
3613
3611
3612
220R
270R
1653
1652
1655
CD
TAPE
GND-B
GND-B
GND-B
3632
3631
220R
270R
1658
1659
GND-B GND-B
DBB_ShStr
IS_ShData
4600
VacJOG_B
DSC
DBB_Led
IS_Led
S_back
GND-B
6610
6611
6612
6613
+5V6
2620
3648
Gnd
Green-Led
10K
3649
STOP
GND-B GND-B
10u
10K
390R
AUX
3633
390R
1657
Tap eCD
Aux
TunerAux
CD
7650
BC847B
3654 120R
GND-B
NEXT
220R3651
220R3652
270R3653
1654
3650
Gnd
+5V6
1656
3614
560R
4K7
TUNER
3621
120R
3622
120R
3623
120R
3624
120R
1669
GND-B
3634
560R
PREV
10K
Gnd
1675
GND-B
Tape
Aux
Tuner
CD
220p
3609
Gnd
WOOX_A
1668
GND-B
3635
820R
NEWS
6603
6604
6605
6606
Max_Woox_LedShClk
2624
3615
820R
Max/DPL
1661
Green-Led
Gnd
DBB_ShStr
IS_ShData
220p
Gnd
GND-B
3636
1K2
RDS
1667
2625
1660
GND-B
5601
220p
Gnd
WOOX_B
GND-B
3637
1K8
2u2
2600
3616
1662
Dolby NR
GND-B
10K
Gnd
4605
1K2
DBB
1674
3608
3617
1K8
1666
IS
GND-B
3638
2K7
DISPLAY
GND-B
7601
74HC4094D
15
EN1
1
STB
3
2
D1
2603
220p
1673
SRG8
1664
GND-B
3639
4K7
PROG
16
8
Gnd
3618
2K7
DSC
GND-B
1672
1663
GND-B
3640
4
5
6
7
14
13
12
11
9
10
3619
4K7
4K7
CLK
GND-B
3643 180R
3644
4606
VAC
1671
1670
GND-B
180R
180R3645
3647
180R
3655
1K
3620
10K
Dubbing
2613
AUTO REV
GND-B
+5V6
2622
100n
Gnd
Max_Led(Amber)
Dpl_surr_R
6621
6622
6620
6624
1665
GND-B
100p
2623
Gnd
Gnd
REC
100n
7602
BC847B
Dpl_surr_C
Dpl_left
Dpl_right
Vac
DSC
DBB_Led
+5V6
Gnd
Dpl_surr_L
6623
2608
GND-B
100p
3646180R
IR-EYE BOARD - CIRCUIT DIAGRAM
C
20 A1 2860 A2 2861 B1 2862 A1 3860 A1 3861 A2 3862 B2 7800 A2
D
123
Note : Some values may varies, see respective parts list for correct value.
E
20
Gnd
100R
3860
Gnd
47n2n2
2862
Gnd
3862
2861
Gnd
1K
47u
2860
Gnd
10K
7800
TSOP2236
3861
VS2
OUT1
DEM
CTRL
CIRCUIT
BAND
PASS
INP
AGC
GND3
3139 118 54530...for 89660...3446 pt2 dd wk0116
PIN
A
B
A
1
2
3
F
DIPMATE
G
B
H
123
3139 118 54530...for 89600...3446 pt2 dd wk0116
1234567
Page 16
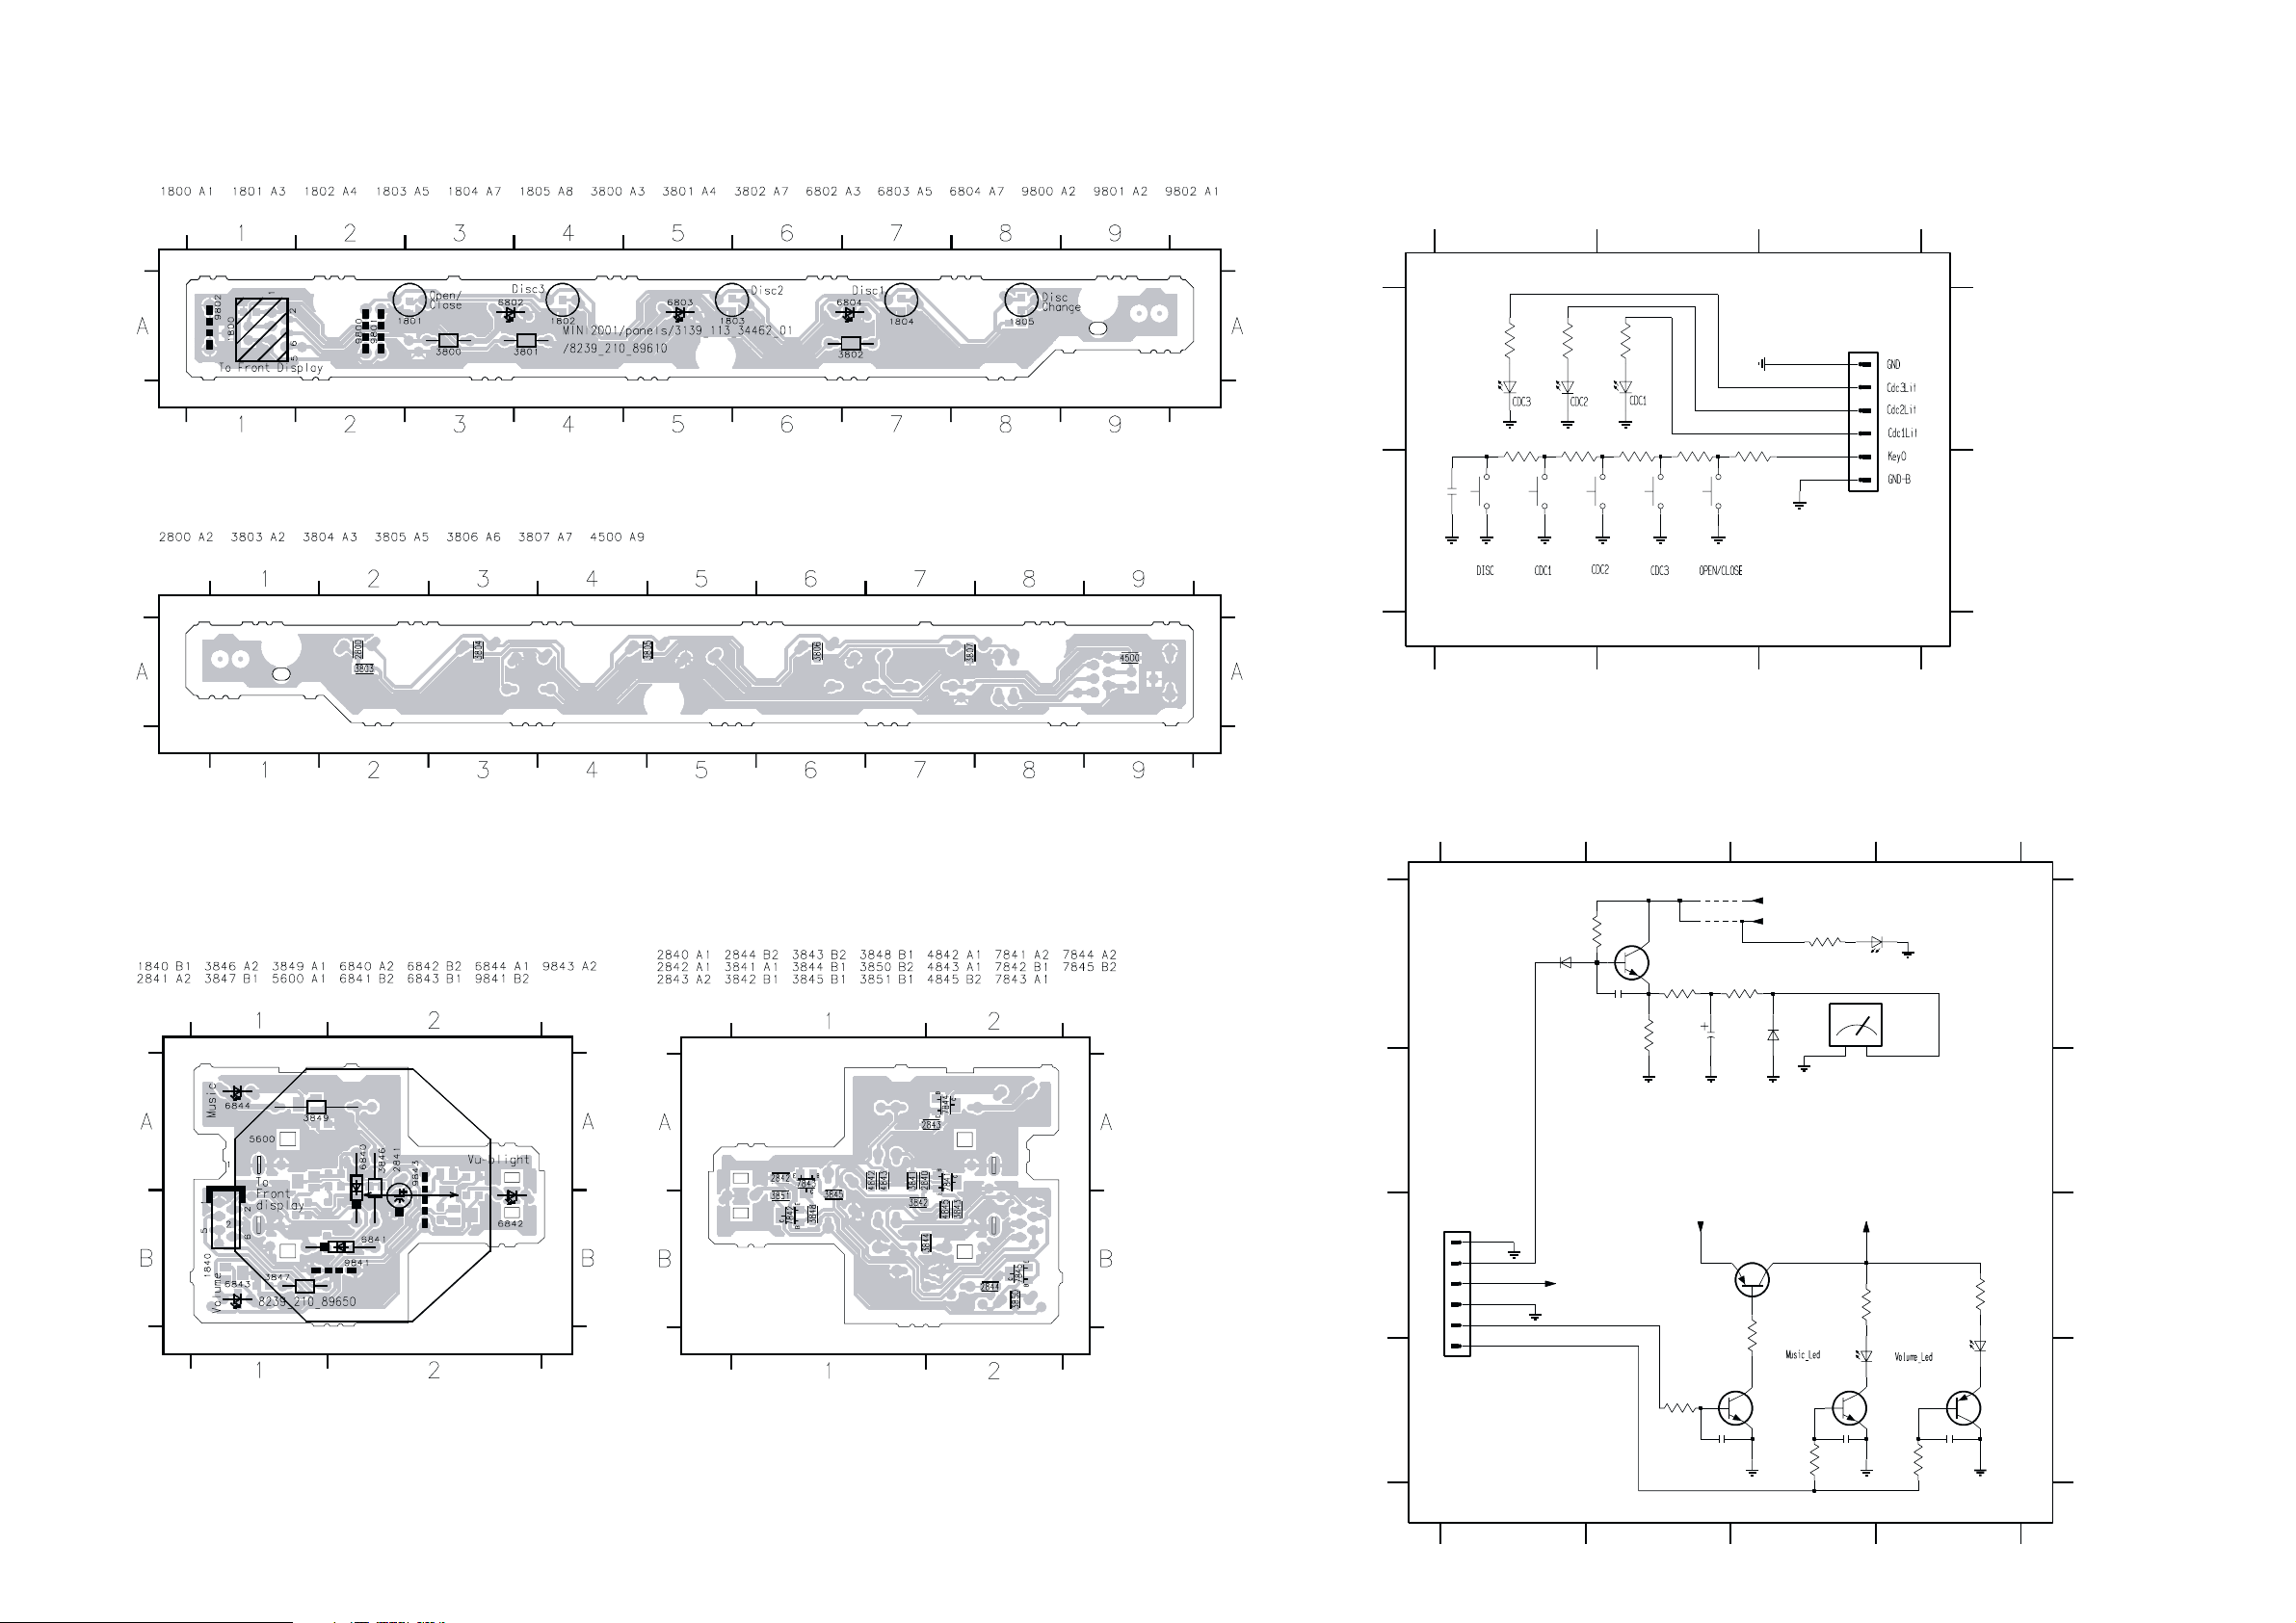
5-4
12/2/2013
www.nostatatech.nl
World of free manuals
5-4
KEY-CDC BOARD - CIRCUIT DIAGRAMKEY-CDC BOARD - COMPONENT LAYOUT
This assembly drawing shows a summary of all possible versions. For components used in a specific version see schematic diagram and respective parts list.
KEY-CDC BOARD - CHIP LAYOUT
3139 113 3446 pt2 dd wk0116
1800 A3
1801 B2
1802 B2
1803 B2
1804 B1
1805 B1
2800 B1
3800 A1
3801 A1
3802 A2
123
Note : Some values may varies, see respective parts list for correct value.
3800
220R
3801
220R
3802
220R
A
6804
3803
560R
1805
6803
1804
3804
390R
3805
270R
1803
3806
220R
1802
2800
6802
100p
B
GND-B GND-B
GND-B GND-B
1
GND-B
GND-B
3139 118 54530...for 89610...3446 pt2 dd wk0116
23
3803 A1
3804 A1
GND
3807
150R
1801
3805 A2
3806 A2
GND-B
3807 A2
6802 A1
FE-ST-VK-N
1800
1
2
3
4
5
6
6803 A1
6804 A2
A
B
This assembly drawing shows a summary of all possible versions. For components used in a specific version see schematic diagram and respective parts list.
VU METER BOARD - COMPONENT LAYOUT VU METER BOARD - CHIP LAYOUT
This assembly drawing shows a summary of all possible versions.
For components used in a specific version see schematic diagram and respective parts list.
3139 113 3446 pt2 dd wk0116
This assembly drawing shows a summary of all possible versions.
For components used in a specific version see schematic diagram and respective parts list.
3139 113 3446 pt2 dd wk0116
3139 113 3446 pt2 dd wk0116
VU METER BOARD - CIRCUIT DIAGRAM
3847 D4
1840 C1
2840 A2
2841 A2
2843 D3
2844 D4
3842 A2
3843 A2
3845 D2
3846 D3
3848 C3
3849 C3
3844 A3
3841 A2
2842 D2
1234
Note : Some values may varies, see respective parts list for correct value.
# : Provision
47K
3841
A
6840
1N4148
2840
100p
3842
7841
BC847B
3843
100K
B
1840
FE-BT-VK-N
1
C
2
3
4
5
6
To Front
D
VUMeter
+5V6
Gnd
Bit0
Bit1
3845
1K2
1K
3850 C4
3851 A3
4842 A2
# 4842
2841
+5V6
4843
2842
100p
3844
8K2
1u
BC857B
Gnd
7842
3848
4843 A2
5600 A4
6840 A1
+5V6
+Vu
6841
470R
7843
BC847B
6841 A3
6842 A4
6843 D4
1N4148
Vu-backlight
3851
180R
12
+Vu
6844
2843
100p
4K7
Gnd
3846
6844 D3
7841 A2
7842 C3
LB3333
6842
3849
150R
7844
BC847B
7843 D3
7844 D3
7845 D4
Gnd
5600
Vu-meter
3847
2844
100p
220R
Gnd
3850
6843
390R
BC857B
7845
A
B
C
D
3139 118 54530...for 89650...3446 pt2 dd wk0116
1234
Page 17
5-5 5-5
12/2/2013
www.nostatatech.nl
World of free manuals
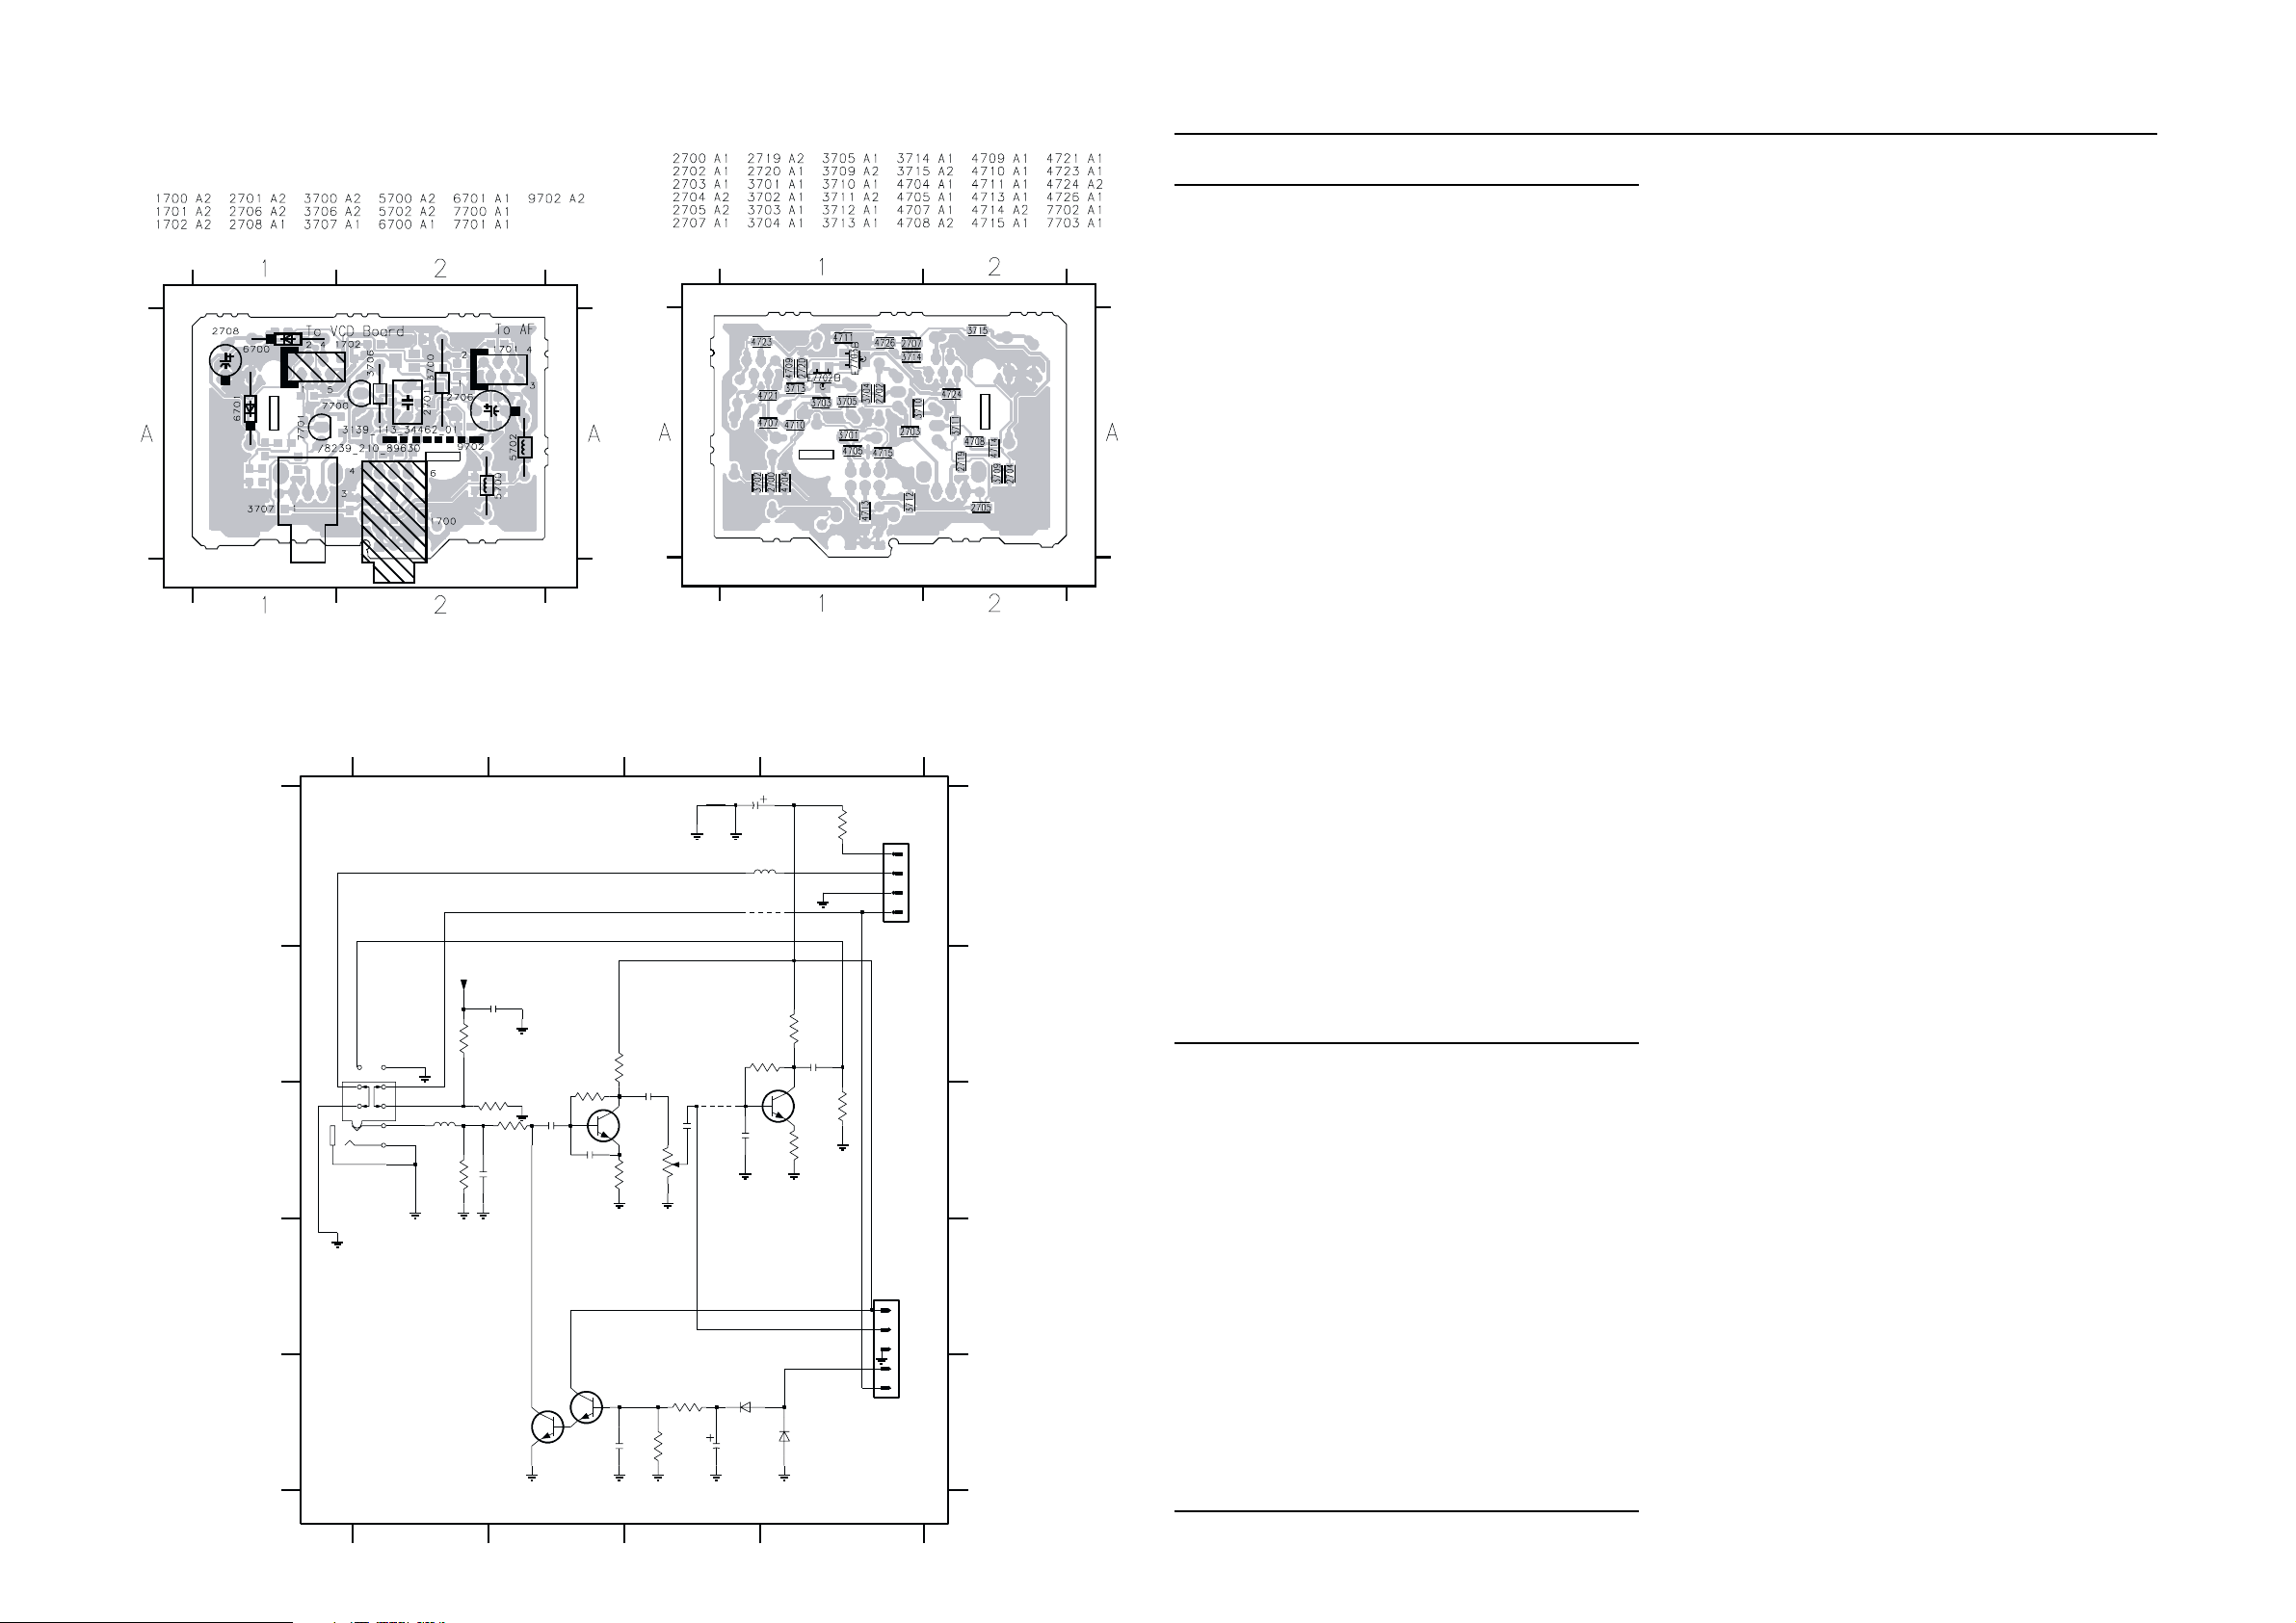
KARAOKE BOARD - COMPONENT LAYOUT KARAOKE BOARD - CHIP LAYOUT
This assembly drawing shows a summary of all possible versions.
For components used in a specific version see schematic diagram and respective parts list.
3139 113 3446 pt2 dd wk0116
This assembly drawing shows a summary of all possible versions.
For components used in a specific version see schematic diagram and respective parts list.
3139 113 3446 pt2 dd wk0116
KARAOKE BOARD - CIRCUIT DIAGRAM
3701 C2
3704 C2
3707 C3
3711 B4
3714 E3
5700 C1
6701 E4
1700 C1
2700 C1
2703 C3
2706 A3
2719 C3
2720 B2
1701 A4
1702 D4
2701 C2
2702 C2
2704 C3
2705 B4
2707 E2
2708 E3
3700 B1
3702 C1
3703 C2
123 4
Note : Some values may varies, see respective parts list for correct value.
# : Provision
SIMPLE KARAOKE
(FOR /21 VERSION ONLY)
A
+12A
# 2720
3700
10K
100n
1K5
# 3701
330R
2700
mic_gnd
4n7
3703
4K7
agnd
agnd
2701
100n
3704
1M
2702
1n
mic_gnd
B
3
2
1
C
TC38
1700
agnd
agnd
6
5
4
8
5700
22u
7
9
3702
mic_gnd
mic_gnd
D
7703
BC847B
E
3139 118 54530...for 89630...3446 pt2 dd wk0116
7702
BC847B
agnd
123 4
3705 B2
3709 B4
3710 C4
mic_gnd
20K
1
1M
2719
3715
150K
3712 C4
3713 A4
agnd
4708
470n
2
6700
1N4148
10u
2708
agnd
3706 C2
3705
7700
BC550C
3706
2707
agnd
2K7
33R
100n
2703
470n
3
3707
agnd
3714
agnd
FOR VIDEO CD ONLY
2706
100u
2704
5702
9702
3709
agnd
2u2
1M
680p
3715 E3
4708 C3
3711
3710
1N4148
agnd
agnd
680R
2705
1u
7701
BC550C
330R
agnd
6701
5702 A4
6700 E3
3713
agnd
agnd
470R
3712
100K
1
2
3
4
5
7700 C2
7701 C4
1701
FE-BT-VK-N
4
+12A
3
2
agnd
1
MIC_DET
1702
FE-BT-VK-N
+Kara
VCD_IN1
agnd
VCD_IN2
MIC_DET
MIC
7702 E2
7703 E2
9702 A4
A
B
C
D
E
ELECTRICAL PARTS LIST - FRONT CONTROL BOARD
MISCELLANEOUS
1602 4822 265 11535 Flex Connector 8P
1603 4822 265 11208 Flex Connector 10P
1650 4822 276 13775 Tact Switch
1651 4822 276 13775 Tact Switch
1652 4822 276 13775 Tact Switch
1653 4822 276 13775 Tact Switch
1654 4822 276 13775 Tact Switch
1655 4822 276 13775 Tact Switch
1656 4822 276 13775 Tact Switch
1657 4822 276 13775 Tact Switch
1658 4822 276 13775 Tact Switch
1659 4822 276 13775 Tact Switch
1663 4822 276 13775 Tact Switch
1664 4822 276 13775 Tact Switch
1665 4822 276 13775 Tact Switch
1666 4822 276 13775 Tact Switch
1667 4822 276 13775 Tact Switch
1669 4822 276 13775 Tact Switch
1670 4822 276 13775 Tact Switch
1671 4822 276 13775 Tact Switch
1672 4822 276 13775 Tact Switch
1673 4822 276 13775 Tact Switch
1674 4822 276 13775 Tact Switch
1690 2422 129 16385 Rotary Encoder 12P
1800 4822 265 11207 Flex Connector 6P
1801 4822 276 13775 Tact Switch
1802 4822 276 13775 Tact Switch
1803 4822 276 13775 Tact Switch
1804 4822 276 13775 Tact Switch
1805 4822 276 13775 Tact Switch
1840 4822 267 10731 Flex Connector 6P
CAPACITORS
2606 5322 126 11583 10nF 10% 50V
2607 5322 126 11583 10nF 10% 50V
2608 4822 122 31765 100pF 2% 63V
2613 4822 122 31765 100pF 2% 63V
2615 4822 124 12233 47uF 20% 25V
2622 4822 126 14305 100nF 10% 16V
2623 4822 126 14305 100nF 10% 16V
2800 4822 122 31765 100pF 2% 63V
2840 4822 122 31765 100pF 2% 63V
2841 4822 124 22651 1uF 20% 50V
2842 4822 122 31765 100pF 2% 63V
2843 4822 122 31765 100pF 2% 63V
2844 4822 122 31765 100pF 2% 63V
2860 4822 124 81286 47uF 20% 16V
2861 4822 126 14238 2,2nF 50V
2862 3198 017 34730 47nF 16V
RESISTORS
3606 4822 051 30103 10k 5% 0,062W
3607 4822 051 30103 10k 5% 0,062W
3610 4822 051 30151 150R 5% 0,062W
3611 4822 051 30221 220R 5% 0,062W
3612 4822 051 30271 270R 5% 0,062W
3613 4822 051 30391 390R 5% 0,062W
3614 4822 051 30561 560R 5% 0,062W
3615 4822 117 12968 820R 5% 0,62W
3616 4822 117 11817 1k2 1% 1/16W
3617 4822 117 12903 1k8 1% 0,063W
3618 4822 116 52263 2k7 5% 0,5W
3619 4822 051 30472 4k7 5% 0,062W
3620 4822 051 30103 10k 5% 0,062W
3621 4822 051 30121 120R 5% 0,062W
3622 4822 051 30121 120R 5% 0,062W
3623 4822 051 30121 120R 5% 0,062W
3624 4822 051 30121 120R 5% 0,062W
3630 4822 051 30151 150R 5% 0,062W
3631 4822 051 30221 220R 5% 0,062W
3632 4822 051 30271 270R 5% 0,062W
3633 4822 051 30391 390R 5% 0,062W
3634 4822 051 30561 560R 5% 0,062W
3635 4822 117 12968 820R 5% 0,62W
3636 4822 117 11817 1k2 1% 1/16W
3637 4822 117 12903 1k8 1% 0,063W
3638 4822 051 30272 2k7 5% 0,062W
3639 4822 051 30472 4k7 5% 0,062W
3640 4822 051 30103 10k 5% 0,062W
3646 4822 051 30181 180R 5% 0,062W
3651 4822 051 30221 220R 5% 0,062W
3652 4822 051 30221 220R 5% 0,062W
3653 4822 051 30271 270R 5% 0,062W
3654 4822 051 30121 120R 5% 0,062W
3655 4822 051 30102 1k 5% 0,062W
3800 4822 116 83872 220R 5% 0,5W
3801 4822 116 83872 220R 5% 0,5W
3802 4822 116 83872 220R 5% 0,5W
3803 4822 051 30561 560R 5% 0,062W
3804 4822 051 30391 390R 5% 0,062W
3805 4822 051 30271 270R 5% 0,062W
3806 4822 051 30221 220R 5% 0,062W
3807 4822 051 30151 150R 5% 0,062W
3841 4822 117 12925 47k 1% 0,063W
3842 4822 117 13632 100k 1% 0,62W
3843 4822 051 30102 1k 5% 0,062W
3844 4822 117 12902 8k2 1% 0,063W
3845 4822 117 11817 1k2 1% 1/16W
3846 4822 116 52283 4k7 5% 0,5W
3847 4822 116 83872 220R 5% 0,5W
3848 4822 051 30471 470R 5% 0,062W
3849 4822 116 83868 150R 5% 0,5W
3850 4822 051 30391 390R 5% 0,062W
3851 4822 051 30181 180R 5% 0,062W
Page 18

ELECTRICAL PARTS LIST - FRONT CONTROL BOARD
12/2/2013
www.nostatatech.nl
World of free manuals
RESISTORS
3860 4822 051 30101 100R 5% 0,062W
3861 4822 051 30103 10k 5% 0,062W
3862 4822 050 11002 1k 1% 0,4W
4500 4822 051 30008 0R Jumper 0603
4600 4822 051 30008 0R Jumper 0603
4601 4822 051 30008 0R Jumper 0603
4602 4822 051 30008 0R Jumper 0603
4603 4822 051 30008 0R Jumper 0603
4604 4822 051 30008 0R Jumper 0603
4605 4822 051 30008 0R Jumper 0603
4606 4822 051 30008 0R Jumper 0603
4607 4822 051 30008 0R Jumper 0603
4627 4822 051 30008 0R Jumper 0603
4628 4822 051 30008 0R Jumper 0603
4843 4822 051 30008 0R Jumper 0603
4845 4822 051 30008 0R Jumper 0603
5-6 5-6
COILS & FILTERS
5600 3139 110 52720 METER VU P-47SI-B BLUE
DIODES
6602 4822 130 30621 1N4148
6603 4822 130 10791 LTL-1CHGE
6604 4822 130 10791 LTL-1CHGE
6605 4822 130 10791 LTL-1CHGE
6606 4822 130 10791 LTL-1CHGE
6610 4822 130 10791 LTL-1CHGE
6611 4822 130 10791 LTL-1CHGE
6613 4822 130 10791 LTL-1CHGE
6623 9322 153 37676 LB3333RT-E7898
6802 4822 130 10791 LTL-1CHGE
6803 4822 130 10791 LTL-1CHGE
6804 4822 130 10791 LTL-1CHGE
6840 4822 130 30621 1N4148
6841 4822 130 30621 1N4148
6842 9322 153 37676 LB3333RT-E7898
6843 4822 130 82978 LTL-1CHPE
6844 4822 130 11589 LTL-1CHAE
TRANSISTORS & INTEGRATED CIRCUITS
7602 4822 130 60511 BC847B
7800 9322 155 22667 IR Receiver TSOP2236ZC1
7841 4822 130 60511 BC847B
7842 4822 130 60373 BC857B
7843 4822 130 60511 BC847B
7844 4822 130 60511 BC847B
7845 4822 130 60373 BC857B
Note : Only the parts mentioned in this list are normal
service spare parts.
Page 19
6-1
12/2/2013
www.nostatatech.nl
World of free manuals
FRONT DISPLAY BOARD
6-1
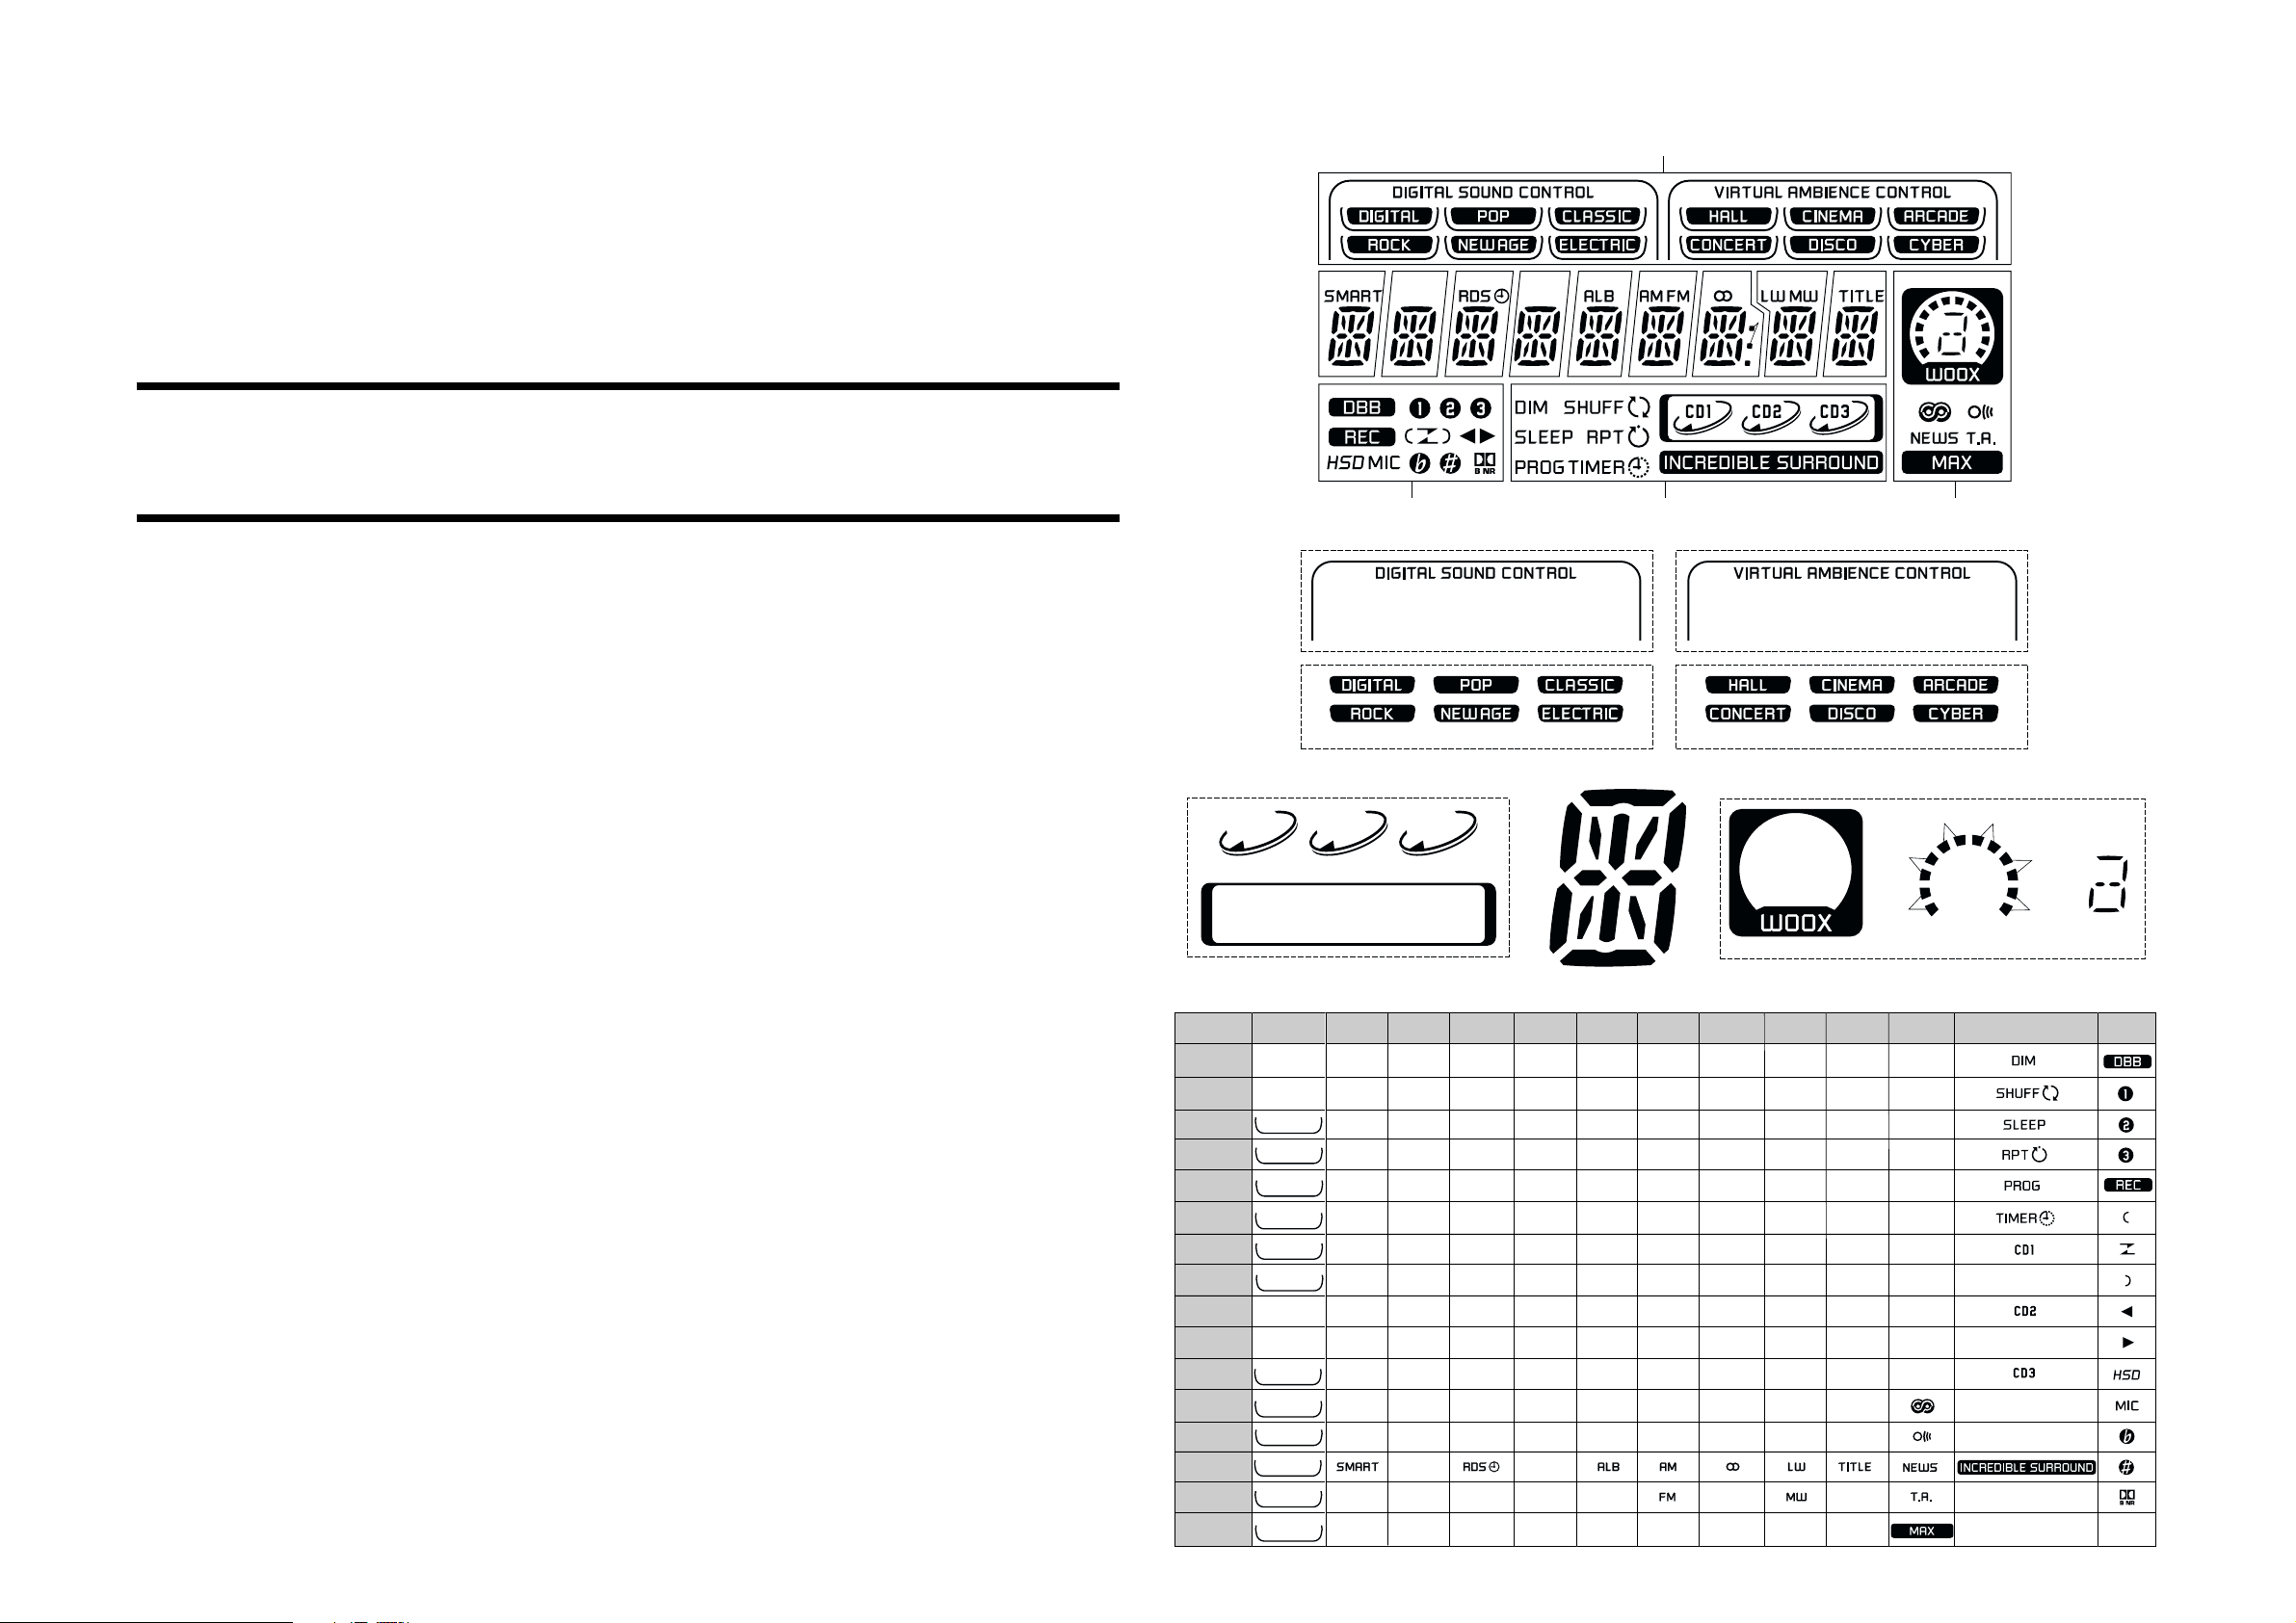
FTD DISPLAY PIN CONNECTIONS
1G
2G 3G 4G 5G 6G 7G 8G 9G 10G
col
Dp
TABLE OF CONTENTS
FTD pin connection ......................................................... 6-1
Front Display Board - Chip layout ................................... 6-2
Front Display Board - Component layout ........................ 6-3
Front Display Board - Circuit diagram ............................. 6-4
Headphone Part - Layout & Circuit diagram ................... 6-5
Electrical parts list............................................................ 6-5
P1
P2
P3
P4
P5
P6
P7
P8
P9
P10
P11
P12
P13
P14
P15
P16
(1G)
(1G)
S1 S2
(12G)
1G
S1
S2
(CLASSIC)
(POP)
(DIGITAL)
(ELECTRIC)
(NEWAGE)
(ROCK)
S3
S4
(ARCADE)
(CINEMA)
(HALL)
(CYBER)
(DISCO)
(CONCERT)
S4
2G
j , p
m
12G13G
11G
(1G)
S1 S3
(1G)
S2 S4
a
S3
g
r
h j
p n ce
bf
k
m
d
S1
(2G-10G)
3G
a
h
j , p
k
b
f
g
c
e
r
n
d
-
-
4G
a
h
k
b
f
m
g
c
e
r
n
d
-
-
-
a
h
j , p
k
b
m
g
c
e
n
d
5G
a
h
j , p
k
b
f
m
g
c
e
r
n
d
-
-
6G
j , p
f
m
r
-
-
-
7G
a
h
k
b
f
g
c
e
r
n
d
-
-
a
h
j , p
k
b
m
g
c
e
n
d
8G
a
h
j , p
k
b
f
m
g
c
e
r
n
d
col
-
Dp
9G
10G
a
h
j , p
k
b
f
r
f
m
g
c
e
r
n
d
-
a
h
j , p
k
b
f
m
g
c
e
r
n
d
-
-
B2
B1
(11G)
11G
S1
B1
B2
B3
B4
B5
B6
a,g,m,d
B3
B4
B5
B6
12G
S1
b
c
e
S2
S3
S4
-
-
a
b
g
m
e
c
d
13G
-
Page 20
FRONT DISPLAY BOARD - CHIP LAYOUT
12/2/2013
www.nostatatech.nl
World of free manuals
6-2
6-2
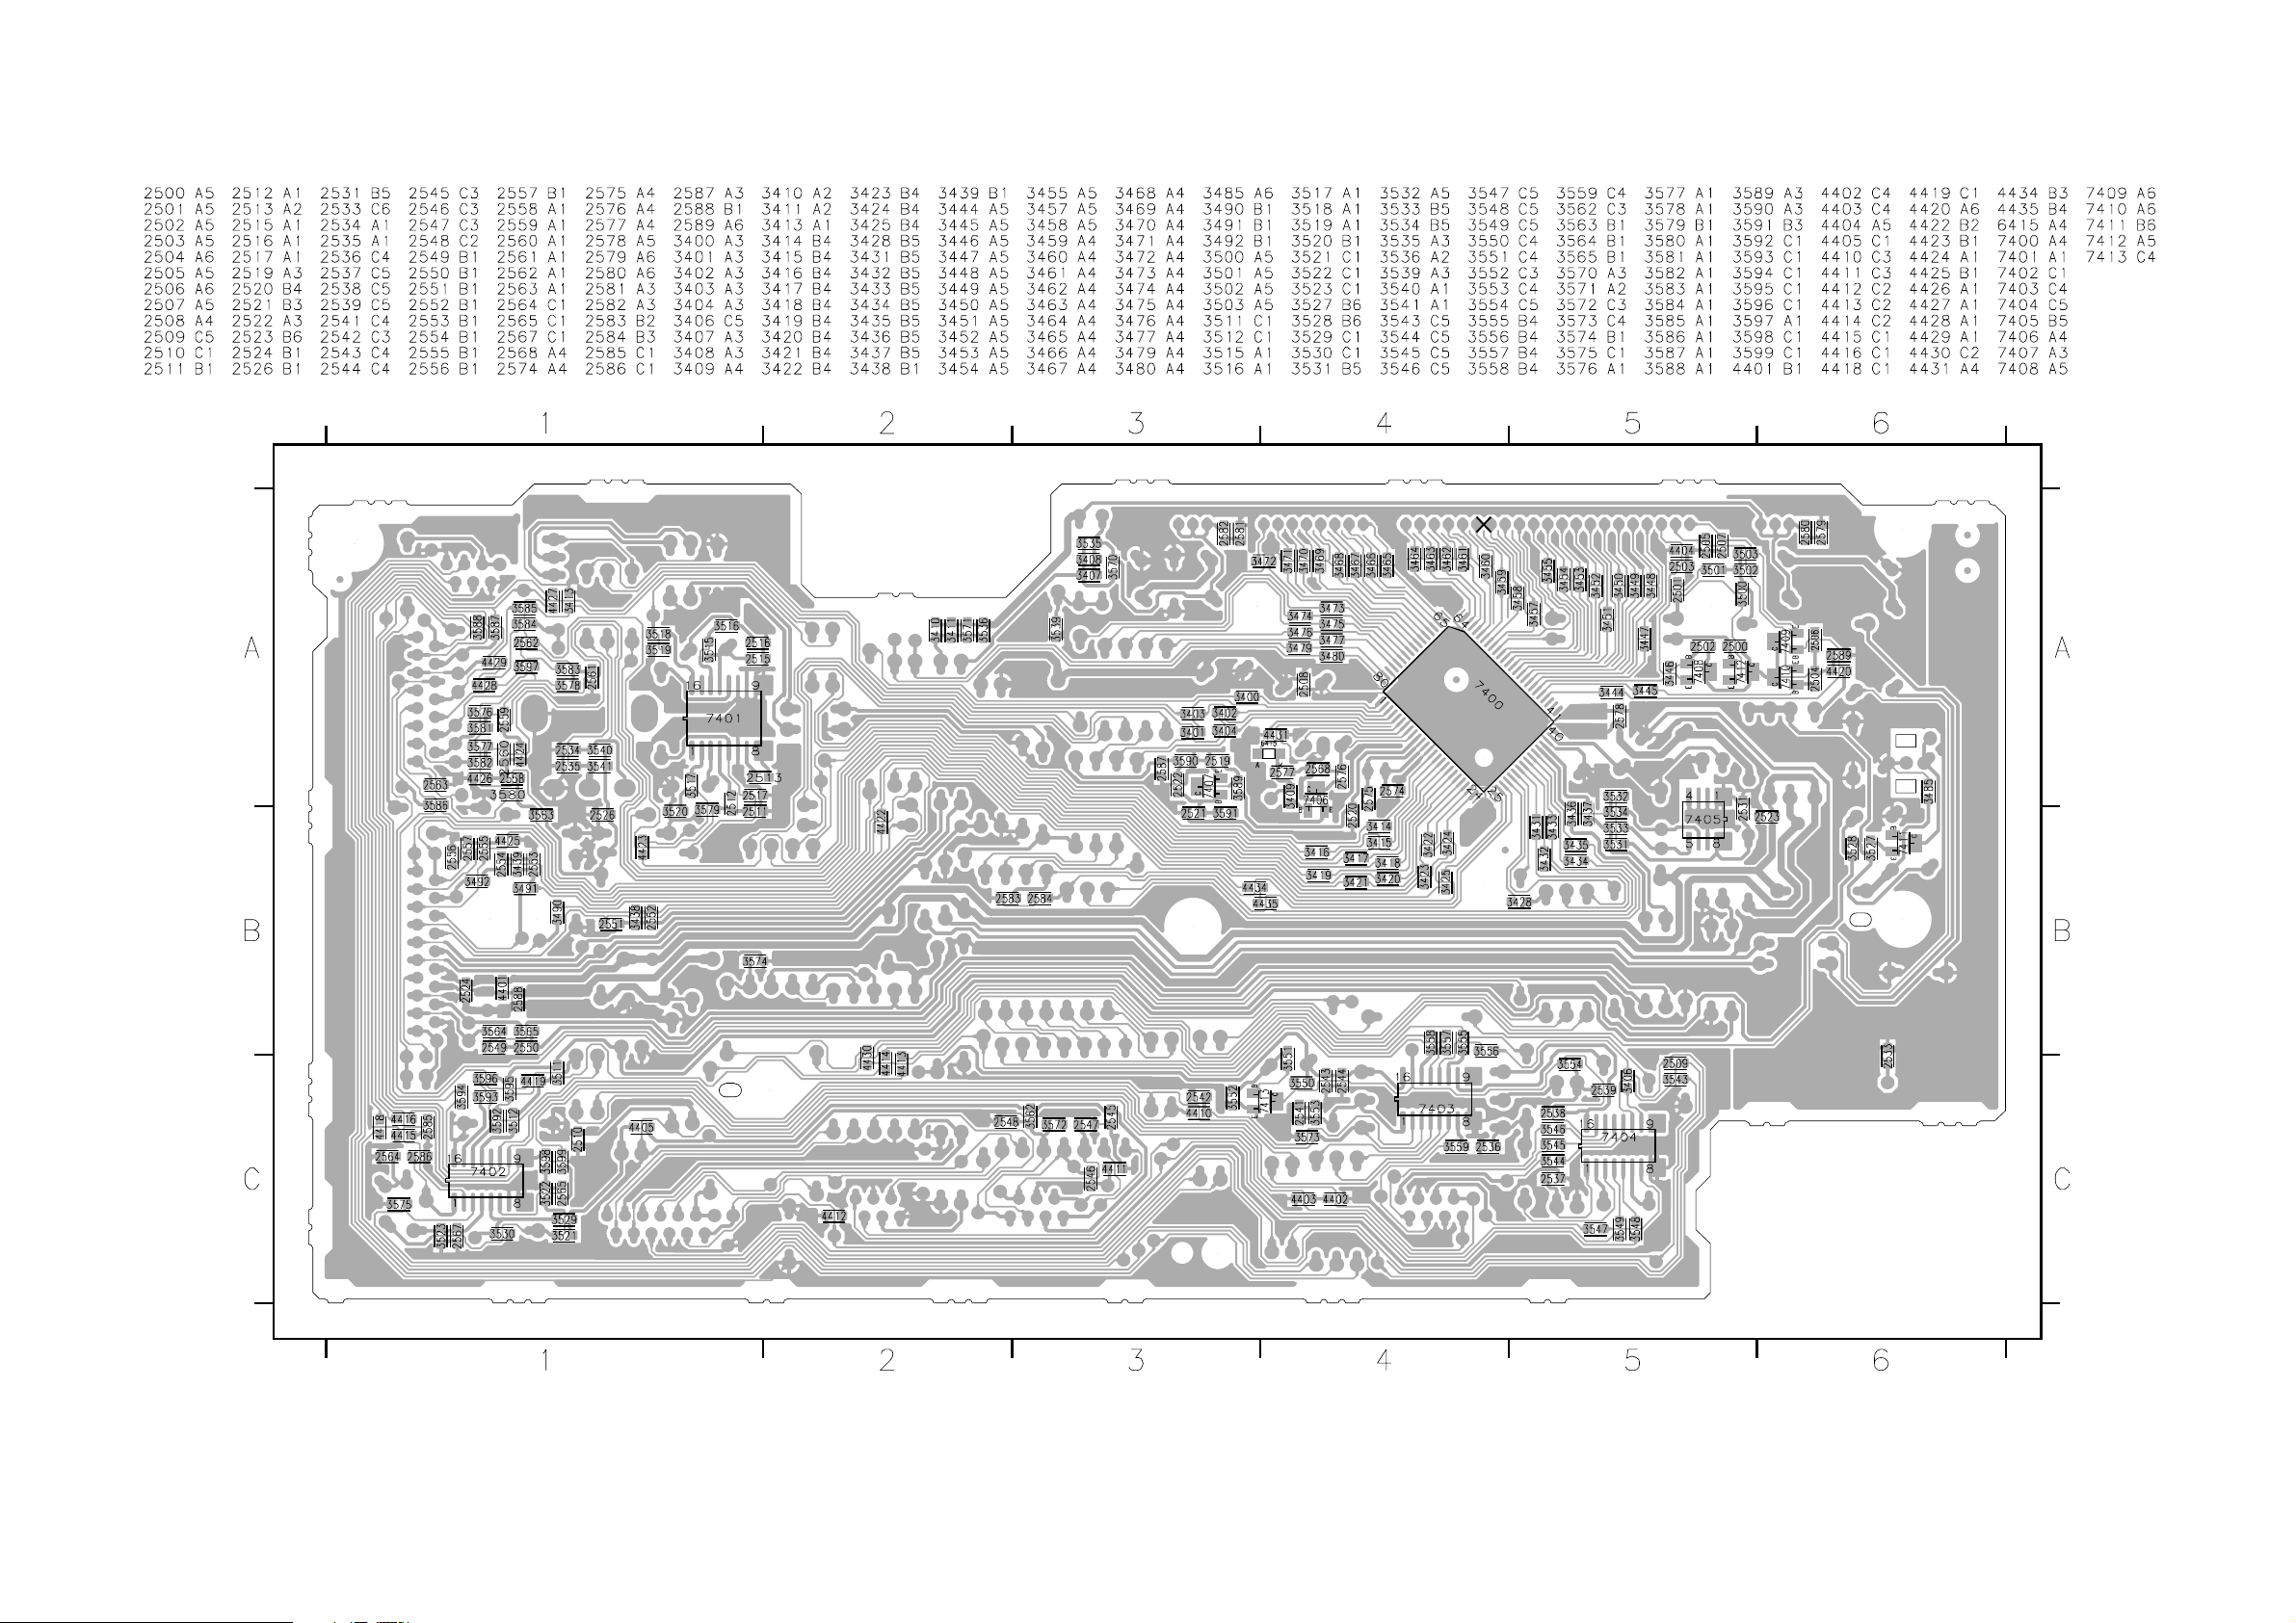
This assembly drawing shows a summary of all possible versions. For components used in a specific version see schematic diagram and respective parts list.
3139 113 3447 pt2 dd wk0119
Page 21
6-3 6-3
12/2/2013
www.nostatatech.nl
World of free manuals
FRONT DISPLAY BOARD - COMPONENT LAYOUT
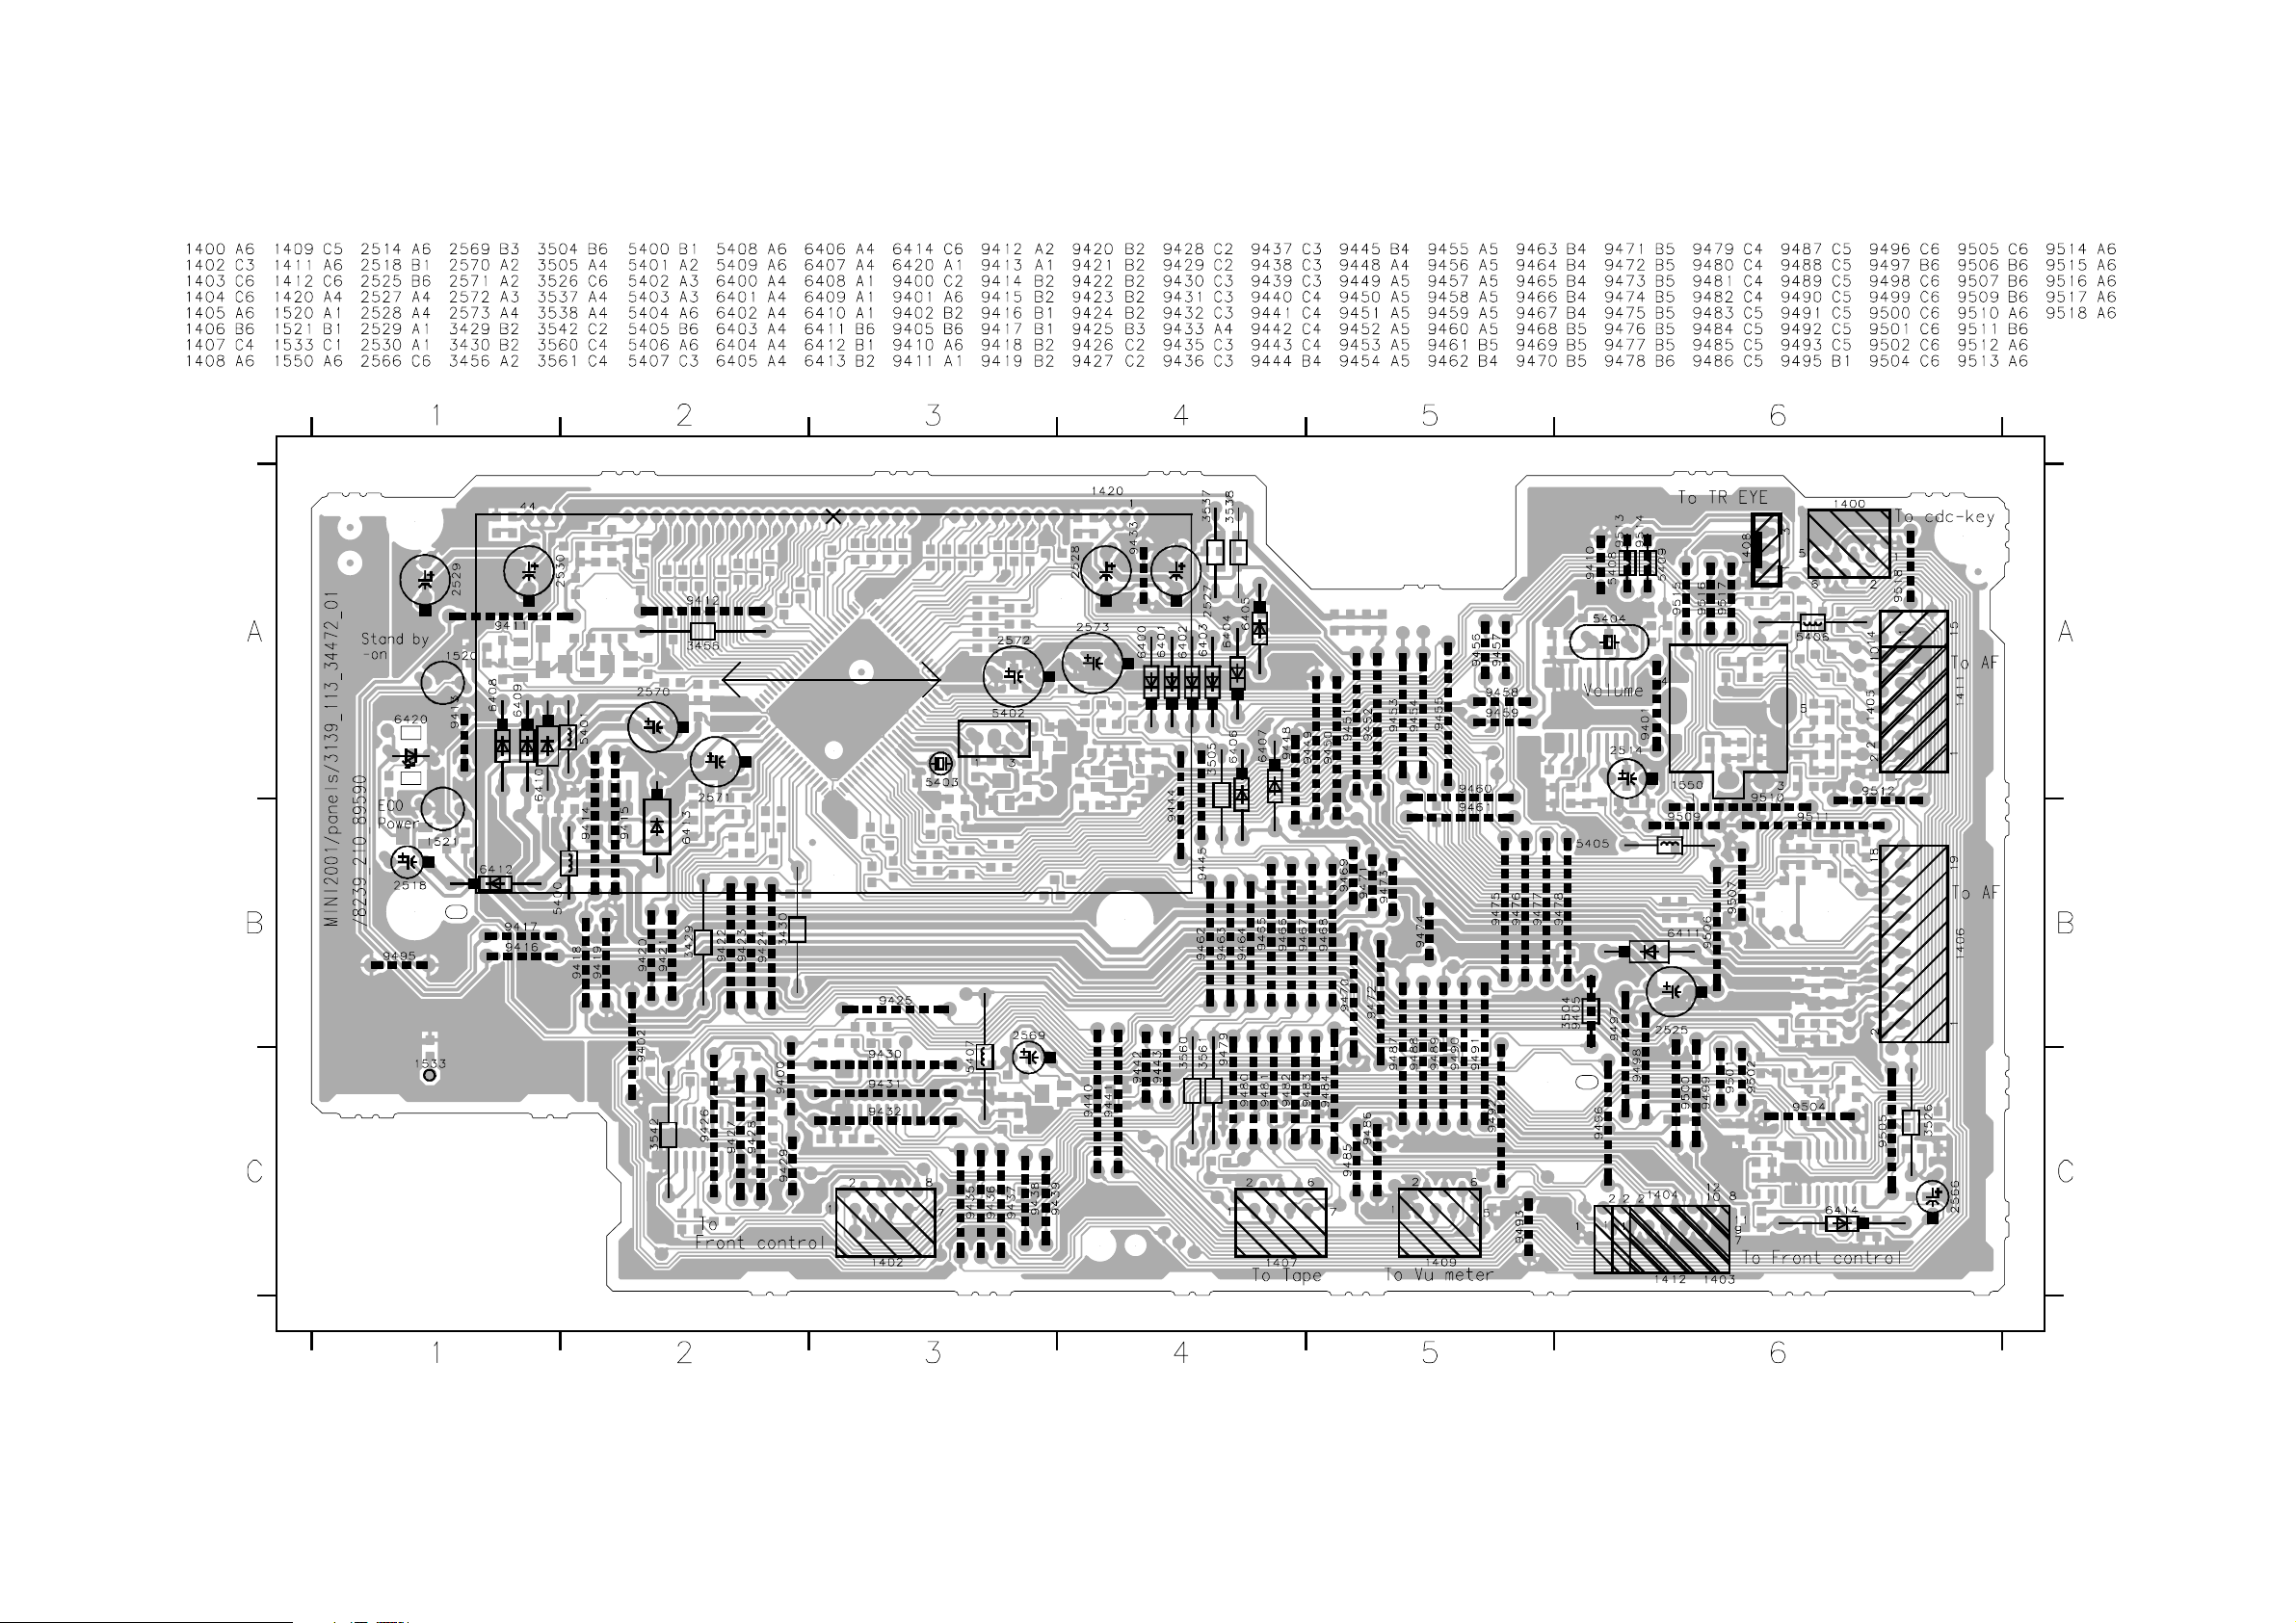
This assembly drawing shows a summary of all possible versions. For components used in a specific version see schematic diagram and respective parts list.
3139 113 3447 pt2 dd wk0119
Page 22

6-4
12/2/2013
www.nostatatech.nl
World of free manuals
FRONT DISPLAY BOARD - CIRCUIT DIAGRAM
6-4
1408 F1
1400 D1
1409 G1
1402 I18
1411 F20
1403 J20
1412 K20
1404 I20
1420 A10
1405 F20
1520 G7
1406 C20
1521 J9
1407 A20
Model (Mini 2001)
FW-C550/37
FW-C700/37
A
FW-C700/34
FW-C700/22
FW-C720/21
FW-P750/37
FW-C780/21/22/30/37
FW-C780/34
FW-C780/33
B
Model (Mini 2002)
FW-C700/21
FW-C785/22
FW-C785/34
FW-C788/21/21M
C
FW-C788/33 12K
FW-V520/21M
FW-C798/21/37
FE-ST-VK-N
D
1400
E
1408
F
EH-B
1409
G
FE-ST-VK-N
H
47p
2511
*
I
*
*
J
K
1533 J16
1550 J16
2500 A3
2501 B4
2502 A4
2503 B5
2504 A6
2505 B6
2506 A7
2507 B7
2508 F8
2509 H17
2510 D5
2511 I1
2512 I1
2513 I1
2514 J1
2515 H3
2516 H4
2517 H5
2518 J8
2519 J10
2520 I10
2521 J10
2522 J10
2523 J12
2524 J12
2525 J12
2526 J13
2527 J14
2528 I14
2529 K14
2530 J14
2531 H14
2533 J15
2534 J17
2535 J17
2536 G15
2537 G15
2538 F16
2539 F16
2541 D14
2542 C15
2543 B16
2544 B17
2545 B19
2546 B19
2547 B19
2548 B19
2549 C19
2550 C19
2551 D19
2552 D19
2553 E19
2554 E19
2555 E19
2556 E19
2557 E19
2558 G18
2559 G19
2560 G19
2561 G19
2562 F19
2563 G20
2564 H7
2565 G4
2566 H7
2567 H9
2568 G10
2569 E16
2570 C13
2571 C14
2572 F9
2573 F9
2574 G11
2575 G11
2576 G11
2577 H10
2578 C13
2579 B9
2580 B9
2581 B13
2582 B13
2583 A18
2584 A18
2585 G7
2586 G7
2587 I10
2588 C19
2589 I13
3400 F9
3401 F10
3402 F10
3403 F10
3404 F10
3406 H16
3407 I14
3408 I14
3409 G10
3410 J14
3411 J14
3413 F9
3414 F11
3415 F11
3416 F12
3417 F12
3418 F12
3419 F12
3420 F12
3421 F12
3422 F12
3423 F13
3424 F13
3425 F13
3428 E13
3429 E13
3430 E13
3431 E13
3432 E13
3433 D13
3434 D13
3435 D13
3436 D13
3437 D13
3438 F18
3439 F18
3444 C13
3445 C12
3446 C12
3447 C12
3448 C12
3449 C12
3450 C12
3451 C11
3452 C11
3453 C11
3454 C11
3455 C11
3456 C11
3457 C11
3458 C10
3459 C10
3460 C10
3461 C10
3462 C10
3463 C10
3464 C10
3465 C9
3466 D9
3467 D9
3468 D9
3469 D9
3470 D9
3471 D9
3472 D9
3473 E9
3474 E9
3475 E9
3476 E9
3477 E9
3479 E9
3480 F9
3485 J7
3490 D20
3491 E20
3492 E20
3500 B4
3501 B5
3502 B6
3503 B7
3504 E8
3505 E8
3511 D7
3512 E7
3515 H3
3516 H3
3517 I5
3518 J5
3519 J5
3520 J5
3521 H7
3522 H7
3523 H8
3526 H7
3527 I8
3528 I9
3529 I11
3530 J11
3531 H13
3532 H14
3533 H13
3534 H13
3535 I14
3536 J14
3537 I14
3538 J14
3539 I15
3540 I17
3541 I17
3542 G16
3543 H16
3544 H16
3545 H16
3546 H16
3547 G16
3548 G16
3549 G16
3550 E16
3551 E16
3552 E16
3553 D15
3554 D14
3555 D16
3556 D16
3557 C16
3558 C16
3559 C16
3560 A18
3561 A18
3562 A19
3563 F18
3564 C19
3565 C20
3570 I14
3571 J14
3572 B20
3573 E5
3574 F8
3575 G6
3576 F18
3577 F19
3578 F19
3579 F19
3580 F20
3581 G20
3582 G20
3583 G19
3584 G20
3585 H19
3586 H18
3587 H19
3588 I19
3589 I10
3590 J10
3591 J10
3592 E7
3593 E7
3594 E7
3595 D7
3596 D7
3597 F18
3598 F5
3599 G4
4401 D18
4430 K20
5400 G13
5401 C14
5402 F11
5403 F11
5404 H3
5405 H4
5406 G19
5407 F15
5408 E1
5409 F1
6400 E8
6401 E8
6402 E8
6403 E8
6404 E8
6405 I16
6406 I10
6407 F1
6408 I12
6409 C14
6410 B14
6411 I12
6412 I8
6413 C14
6414 H8
6415 F10
6420 J8
7400 C9
7401 H1
7402 D5
7403 B15
7404 F15
7405 H12
7406 G11
7407 J10
7408 B5
7409 B7
7410 B6
7411 J8
7412 B4
7413 E15
9400 K19
9405 E8
9513 F1
9514 F1
1 2 3 4 5 6 7 8 9 10111213141516171819 20
LPSKey
470R
470R
470R
2572
2579
220p
470R
470R
470R
470R3471
470R
470R
470R3476
470R
470R
47u
PWRDWN
1420
2581
220p
33031323334353637424344 7891314171819 220212223242526272829
1101112
220p
G11
3446
470R
P1
TC1
T
470R
3420
7405
M24C02
E0
E1
E2
SCL
WC_
2523
G13
G12
3445
470R
V4
V3
80k pull down
3-B. I/O P3
( tristate )
INT2
470R
3421
2525
2524
100n
3444
4-Bit In/Output
8-Bit Input/Output
INT4
SCL
470R
470R
3423
3422
+5V6
2u2
5400
+5V6
8
VCC
SDA
VSS
4
2589
1u
47u
100n
100n
2582
414243444546474849550515253
VAREF
VASS
AIN13
P5
AIN12
AIN11
AIN10
(tri-state)
P4
(tri-state)
-SCKO
470R
3424
+F
+D
2526
V0V1V2
VDD
AIN7
AIN6
AIN5
AIN4
AIN3
AIN2
AIN1
AIN0
SCA
5
220p
2580
P8
3463
3464
3462
470R
470R
470R
7400
65
V21
V23
V22
V24
66
V25
67
V26
68
V27
80k pull
69
V28
70
V29
71
V30
72
V31
8-Bit h. breakdown v.
out. port w. latch P9
73
V32
PD
74
V33
source open
75
V34
76
V35
77
V36
5-Bit h. breakd. v.
out w. latch
VKK
78
8-Bit Input/Output
-SCK1
79
(tri-state)
SI1
P03
P04
SO1
1
4
3
3400
470R
470R
470R
3401
3402
RESET
10n
3589
2520
10n
2519
7407
BC847B
3461
3460
470R
470R
V19
V20
8-Bit h. break. v.
down
drain 80k p.d.
P0
P05
P06
470R
470R
3404
3403
2577
+5V6_Con
2587
1K
100K
3590
470R
V18
P07
33p
1u
2521
6415
47K
3409
3459
7
BAS316
2568
"ON"0.7V
10n
P1P2P3P4P5P6P7
G3G2G1
G4
3454
3458
470R
470R
V16
V17
VFT driver circuit (automatic display)
3453
3456
3455
3457
470R
470R
470R
470R
54555657585966061626364
V12
V13
V14
V15
8-Bit high breakdown voltage 8-Bit high breakdown v.
output port with latch output port with latchout w. latch P8
ROMRAM
G9G8G7G6G5
3451
3449
3450
3452
470R
470R
470R
470R
470R
V11
V10
P7 P6
80k pull down80k pull down
P6-P9 source open drain
Program
Counter
CPU
drain
sink o.
XIN
VSS
XOUT
-RESET
XTOUT
8809
10 11 12 13 14 15 16 17 18 19220 21 22 23 24
5402
2p2
22p
2576
0.3V"ON"
7406
BC847B
Options
6406
1N4148
2522
100n
3591
100K
8-Bit I/O P2
sink o.drain
XTIN
5403
32K768
22p
2575
3530
TEST
2574
RESET
3529
-STOP
-INT0
470R
3415
3414
22p
+C
2K7
1K8
8-Bit Input/Output
(tri state)
TC2
-INT1
470R
470R
3416
3417
+5V6
+5V6 +5V6
G10
3448
3447
470R
470R
V5V6V7V8V9
8-Bit A/D
Converter
TC4
-DV0
470R
470R
3418
3419
1
2
3
6
7
6408
1N4148
6411
1N4003
Items
3407 , 3408 , 3410 , 3411
3535 , 3536 , 3570 , 3571
Items
3479 , 3480 , 3422
Note : Some values may varies, see respective parts list for correct value.
@ : For DPL only
: For RDS only
*
# : Provision
7403
74HC4094D
SRG8
15
220p
-Vkk1
7413
BC847B
7404
74HC4094D
15
1
3
2
3539
2533
100n
EN1
1
STB
3
2
D1
4K7
3550
SRG8
EN1
STB
D1
BZX79-B4V7
6405
22K
GND-B
16
8
1533
-F1
2578
100n
2570
40
39
38
3437
37
470R
3436
36
470R
3435
35
470R
3434
34
470R
3433
33
470R
3432
32
31
3431
3430
30
3429
29
3428
28
27
26
3425
25
470R
3531
3533
1K
3534
1K
3570
F1
3535 10R
3407
3408
10R
3571
F2
3536
3410 10R
3411
10R
For 30-70W Set
4R7
VCD
100R 470R
470R
470R
470R
470R
470R
+L
470R
10K
6410
+5V6
1N4003
6409
5401
2u2
47u
+C
47u
2571
3532
10R
10R
10R
10R
10K
47u
2527
47u
2529
1N4148
6413
1N4003
LowPwrCtr
LEDShEn
LEDShDATA
LEDShSTR
LEDShCLK
1u
2531
I2C_DATA
I2C_CLK
47u
47u
2528
-Vkk1
2530
-Vkk1
+5V6_Con
+5V6
3554
2541
220p
120R
120R
220p
2542
10K
10K
3553
5407
2u2
2537
2536
220p
-F1
3537
-F2
3538
Others
10R
Non-VCD
3490
470R
3491 470R
3492
470R
3580
3581
35821K
256310n
3584
1K
LowPwrCtr
FE-ST-VK-N
FE-ST-VK-N
1403
1
2
3
4
5
6
7
8
1
2
3
4
5
6
7
8
9
10
FE-ST-VK-N
1407
1
2
3
4
5
6
7
FE-ST-VK-N
1406
1
2
3
4
5
6
7
8
9
10
11
12
13
14
15
16
17
18
19
1411
FE-ST-VK-N
1
2
3
4
5
6
7
8
9
10
11
12
1412
FE-ST-VK-N
FE-ST-VK-N
1
2
3
4
5
6
7
8
9
10
11
12
13
14
15
1404
100p
2584
100p
2583
3560100R
TpADC2
3561 100R
TpADC1
+C
DBB_ShStr
IS_ShData
Max_Woox_ShClk
TU_Enab
MuxEnable
+D+D
10K
10K
3541
10n
10n
2535
TPShCLK
TPShDATA
TPShSTR
220n
2545
AmNTC
Cdc1
Cdc2
I2C_DATA
Cdc3
I2C_CLK
Vac
DSC
+5V6_Con
Tu_RDS_Out
TuStereo
Tu_Clk
Tu_Data
Tu_Enab
Bit0
Bit1
CD
HP_DET
Tuner
SA
Aux
PWRDWN
Tape
Clipping
MicDetect
IoVolClk
LEDShClk
LEDShData
FE-ST-VK-N
2588
220n
+12V_D
4401
+5V6
2K2
2K2
3439
3438
+D
10K
10K
10K
3563
3576
# 3597
1402
3577
100p
100p
100p
2559
2558
3585
3586
330K
1K
1K
@ 3587
1K
@ 3588
1
Key2
2
Key1
3
4
CD
5
Tuner
6
7
Aux
8
Tape
+5V6
16
2544
100n
100n
2543
"ON"
0
5V
4
5
6
3559 220R
7
220R3558
14
220R3557
13
3556 220R
12
220R3555
11
9
10
8
+5V6
10u
2569
10K
3551
10K
3552
+5V6
100n
2539
2538
100n
3549 220R
4
220R3548
5
3542 220R
6
120R3547
7
3546 120R
14
120R3545
13
3544 120R
12
220R3543
11
9
@ 3406
10
470R
100p
IS_ShData
@ 2509
VOL_A
1550
EC16
MT14MT2
5
VOL_B
12
3540
3
2534
-Vkk
VOL RE
10K
3562
2K2
220p
2547
2546
220p
220p
2548
3572
3564
220R
254910p
3565
220R
10p2550
-Vkk
F1
F2
10p2554
10p2556
10K
2560
3578
100p
2553 47p
10K
2561
2552 47p
10p2557
10K
3579
3583
22K
5406
2u2
WooxA
WooxB
Vac
DBB_ShStr
IS_ShData
Max_Woox_ShClk
JOG_A
JOG_B
LEDShClk
LEDShSTR
47p2551
100n2555
2562
@ 9400
+5V
@ 4430
1n
1K
1K
6
3139 118 54300...for 89590...3447 pt2 dd wk0138
13 14 15 16 17 18 19 20
Option_R Ohms (3530)
180RFW-C500/37
470R
820R
1K2
1K8
820R
2K7
3K9FW-P750/22/34
5K6
8K2
12K
Option_R Ohms (3530)
470RFW-C555/21/37
820R
5K6
8K2
5K6
5K6FW-C788/30/37
5K6
27KFW-V780/21M
5K6
1
2
3
4
5
6
5408
2u2
9513
1
9514
2
2u2
3
5409
+5V6
1
2
3
4
5
6
7401
*
SAA6579T
2512
560p
4
MUX
8
SCOUT
560p
2513
CIN
7
5
VDDA
3
VREF
2u2
2514
*
Cdc3
Cdc2
Cdc1
Key0
+5V6_Con
6407
1N4148
RC5
VUMeter
Bit0
Bit1
ANTI-
57 Khz
RECONSTRUCTION
BANDPASS
ALIASING
(8th ORDER)
FILTER
CLOCKED
COSTAS LOOP
COMPARATOR
VARIABLE AND
FIXED DIVIDER
VP1
REFERENCE
VOLTAGE
REGENERATION
AND SYNC
VSSA VSSD
6
FILTER
CLOCK
12
+F +F +F +F
2503
100p
G11’
+D
16
VDD
LOGIC
LEVEL
CONVERSION
VSS
8
TuRDSData
TuRDSClk
10K
3520
2504
100p
7410
BC847B
82K
3502
-Vkk
G12
2510
100n
1-of-8
DECODER
VEE
7
GND-B
2506
100p
7409
BC847B
82K
2505
100p
G12’
3512
13
Y0
1K
3592
14
Y1
1K
3593
15
Y2
1K
3594
12
Y3
1K
1
Y4
5
Y5
Y6
2
Y7
4
Z
3
10K
220p
# 3575
3503
100p
2507
-Vkk
2K7
Key0
Key1
Key2
HP_DET
2566
2564
AmNTC
MicDetect
2586
1u
G13’
2K7
3596
IoVolClk
470R
3505
470R
3504
6414
1N4148
6
-Vkk
10K
3574
3523
470K
+L
4u7
3527
820R
2518
BC857B
7411
6420
+C
680K
47K
3521
3522
6412
3485
# 9405
+5V
1N4148
47K
G13
+C+C +C
2K7
3595
3511
1520
220p
2585
3526
15K
1n
P11
1N41486404
6403 1N4148
1N41486402
6401 1N4148
1N41486400
47n
2573
# 2508
2567
220n
P10
47u
3413
+L
3528
-F2
P9
TMP88CU74YF
3465
3466
3467
3468
3469
3470
3472
3473 470R
3474
3475 470R
3477 470R
3479
3480
1M
10K
1521
2500
100p
G1
AT-51
5404
*
82p
2515
2K2
3516
*
*
3515
*
220K
13
14
OSCI
OSCO
OSCILLATOR
AND
DIVIDER
BIPHASE
SYMBOL
DECODER
TEST LOGIC AND OUTPUT
SELECTOR SWITCH
TEST
MODE
10
9
7412
BC847B
82K
3500
+D
47p
5405
2516
*
*
+5V
12
QUALITY
BIT
GENERATOR
DIFFERENTIAL
DECODER
2501
VDDD
100p
2502
7408
BC847B
82K
100p
G1’
LEDShClk
LEDShData
2u2
QUAL
RDDA
RDCL
11
3501
-Vkk-Vkk
G11
7402
HEF4051BT
11
A0
10K
3573
A1
10
A2
9
10K
3598
3599
E_
6
470R
47p
2565
100n
2517
*
1
3517
2
*
10K
3518
16
*
10K
15
T57
10K
3519
3456789101112
A
B
C
D
E
F
1405
1
2
3
4
G
5
6
7
8
9
10
11
H
I
J
K
Page 23
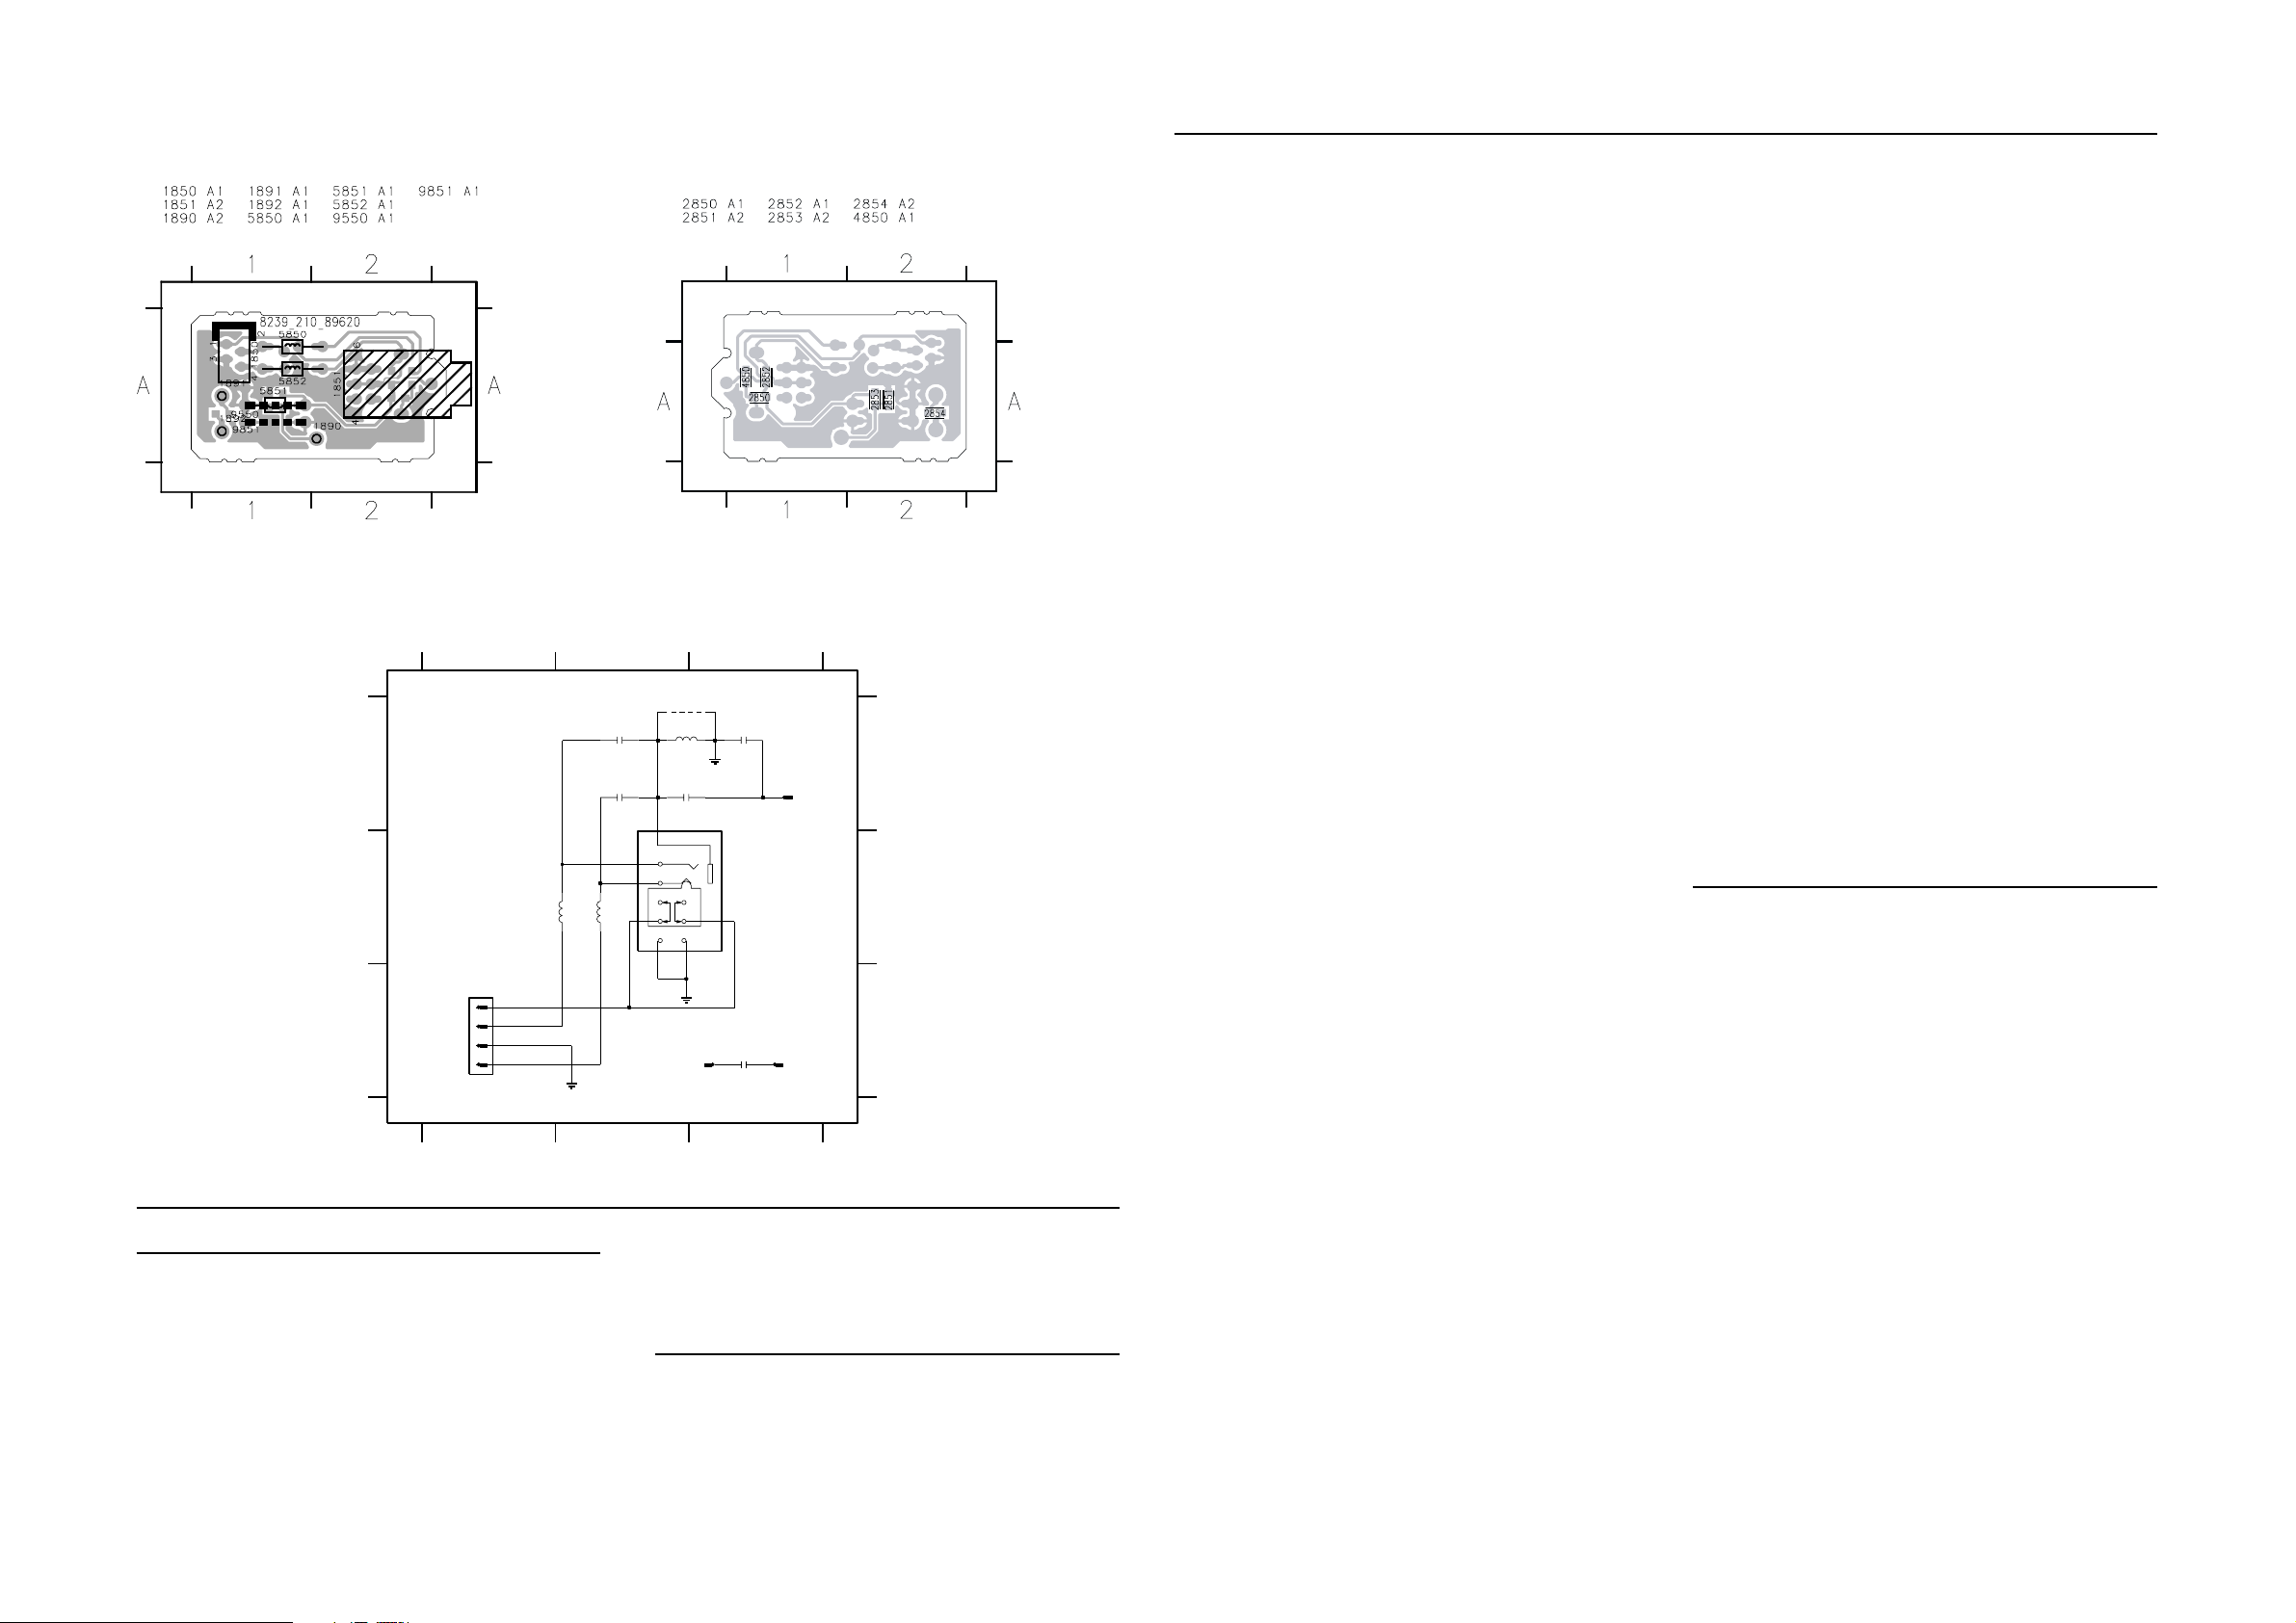
6-5
12/2/2013
www.nostatatech.nl
World of free manuals
6-5
HEADPHONE BOARD - COMPONENT
LAYOUT
This assembly drawing shows a summary of all possible versions.
For components used in a specific version see schematic diagram and respective parts list.
3139 113 3447 pt2 dd wk0119
HEADPHONE BOARD - CIRCUIT DIAGRAM
1850 C1
1890 A3
1892 C3
1851 B3
1891 C3
123
Note : Some values may varies, see respective parts list for correct value.
# : Provision
## : Provision for ESD
A
B
TO AF9
1850
1
HP_DET
2
HP_RIGHT
C
HP_GND
HP_LEFT
3
4
FE-BT-VK-N
123
ELECTRICAL PARTS LIST - FRONT DISPLAY BOARD
MISCELLANEOUS
1400 4822 265 11207 Flex Connector 6P
1402 4822 265 11535 Flex Connector 8P
1405 2422 025 14541 Flex Connector 11P
1406 4822 265 11545 Flex Connector 19P
1407 4822 267 10956 Flex Connector 7P
1409 4822 265 11207 Flex Connector 6P
1412 4822 265 11208 Flex Connector 10P
1420 3139 110 52550 FTD Display
1520 4822 276 13775 Tact Switch
1550 4822 273 10365 Rotary Encoder 24P
2850 A2
2851 A3
2852 A2
2u2
5850
HP
5852
HEADPHONE BOARD - CHIP LAYOUT
This assembly drawing shows a summary of all possible versions.
For components used in a specific version see schematic diagram and respective parts list.
3139 113 3447 pt2 dd wk0119
2853 A2
5850 B1
2854 C3
2850
22n
2852
22n
9
7
8
4
5
2u2
6
1850 4822 267 10733 Flex Connector 4P
1851 4822 265 11529 Headphone Socket
CAPACITORS
2500 4822 122 31765 100pF 2% 63V
2501 4822 122 31765 100pF 2% 63V
2502 4822 122 31765 100pF 2% 63V
2503 4822 122 31765 100pF 2% 63V
2504 4822 122 31765 100pF 2% 63V
2505 4822 122 31765 100pF 2% 63V
5852 B2
5851 A2
9550 A2
# 9550
5851
2851
2u2
22n
HP
2853
100n
1
2
3
1851
TC38
HP
##1891
##2854
1
RT-01T
470n
3139 118 54300...for 89620...3447 pt2 dd wk0119
1890
##1892
1
A
RT-01T1
B
C
RT-01T
ELECTRICAL PARTS LIST - FRONT DISPLAY BOARD
2506 4822 122 31765 100pF 2% 63V
2507 4822 122 31765 100pF 2% 63V
2510 4822 126 14305 100nF 10% 16V
2519 5322 126 11583 10nF 10% 50V
2520 5322 126 11583 10nF 10% 50V
2521 5322 126 11583 10nF 10% 50V
2522 4822 126 14305 100nF 10% 16V
2523 4822 126 14305 100nF 10% 16V
2524 4822 126 14305 100nF 10% 16V
2525 4822 124 12233 47uF 20% 25V
2526 4822 126 14305 100nF 10% 16V
2527 4822 124 22726 4,7uF 35V
2528 4822 124 22726 4,7uF 35V
2529 4822 124 22726 4,7uF 35V
2530 4822 124 22726 4,7uF 35V
2531 3198 017 41050 1uF 10V
2533 4822 126 14305 100nF 10% 16V
2534 5322 126 11583 10nF 10% 50V
2535 5322 126 11583 10nF 10% 50V
2536 3198 016 36810 680pF 25V
2537 4822 126 13883 220pF 5% 50V
2538 4822 126 14305 100nF 10% 16V
2539 4822 126 14305 100nF 10% 16V
2541 4822 126 13883 220pF 5% 50V
2542 4822 126 13883 220pF 5% 50V
2543 4822 126 14305 100nF 10% 16V
2544 4822 126 14305 100nF 10% 16V
2545 4822 126 13879 220nF +80/-20% 16V
2546 4822 126 13883 220pF 5% 50V
2547 4822 126 13883 220pF 5% 50V
2548 4822 126 13883 220pF 5% 50V
2549 4822 122 33741 10pF 10% 50V
2550 4822 122 33741 10pF 10% 50V
2551 4822 122 33777 47pF 5% 63V
2552 4822 122 33777 47pF 5% 63V
2553 4822 122 33777 47pF 5% 63V
2554 4822 122 33741 10pF 10% 50V
2555 4822 126 14305 100nF 10% 16V
2556 4822 122 33741 10pF 10% 50V
2557 4822 122 33741 10pF 10% 50V
2558 4822 122 31765 100pF 2% 63V
2559 4822 122 31765 100pF 2% 63V
2560 4822 122 31765 100pF 2% 63V
2561 4822 122 31765 100pF 2% 63V
2562 3198 016 31020 1nF 25V
2563 5322 126 11583 10nF 10% 50V
2564 5322 126 11578 1nF 10% 50V
2565 4822 122 33777 47pF 5% 63V
2566 4822 124 22651 1uF 20% 50V
2567 4822 126 13879 220nF +80/-20% 16V
2568 4822 126 14223 2,2pF 50V
2569 4822 124 11947 10uF 20% 16V
2570 4822 124 12233 47uF 20% 25V
2571 4822 124 12233 47uF 20% 25V
2572 3198 028 44790 47uF 20% 35V
2573 3198 028 44790 47uF 20% 35V
2574 4822 122 33761 22pF 5% 50V
2575 4822 122 33761 22pF 5% 50V
2576 4822 122 33761 22pF 5% 50V
2577 4822 126 11671 33pF
2578 4822 126 14305 100nF 10% 16V
2579 4822 126 13883 220pF 5% 50V
2580 4822 126 13883 220pF 5% 50V
2581 4822 126 13883 220pF 5% 50V
2582 4822 126 13883 220pF 5% 50V
2583 4822 122 31765 100pF 2% 63V
2584 4822 122 31765 100pF 2% 63V
2585 4822 126 13883 220pF 5% 50V
2586 4822 126 13883 220pF 5% 50V
2587 3198 017 41050 1uF 10V
2588 4822 126 13879 220nF +80/-20% 16V
2589 3198 017 41050 1uF 10V
2850 4822 126 14494 22nF 10% 25V
2851 4822 126 14494 22nF 10% 25V
2852 4822 126 14494 22nF 10% 25V
2853 4822 126 14305 100nF 10% 16V
RESISTORS
3400 4822 051 30471 470R 5% 0,062W
3401 4822 051 30471 470R 5% 0,062W
3402 4822 051 30471 470R 5% 0,062W
3403 4822 051 30471 470R 5% 0,062W
3404 4822 051 30471 470R 5% 0,062W
3407 4822 051 20478 4R7 5% 0,1W
3408 4822 051 20478 4R7 5% 0,1W
3409 4822 117 12925 47k 1% 0,063W
3410 4822 051 20478 4R7 5% 0,1W
3411 4822 051 20478 4R7 5% 0,1W
3413 4822 051 30105 1M 5% 0,062W
3414 4822 051 30471 470R 5% 0,062W
3415 4822 051 30471 470R 5% 0,062W
3416 4822 051 30471 470R 5% 0,062W
3417 4822 051 30471 470R 5% 0,062W
3418 4822 051 30471 470R 5% 0,062W
3419 4822 051 30471 470R 5% 0,062W
3420 4822 051 30471 470R 5% 0,062W
3421 4822 051 30471 470R 5% 0,062W
3422 4822 051 30471 470R 5% 0,062W
3423 4822 051 30471 470R 5% 0,062W
3424 4822 051 30471 470R 5% 0,062W
3425 4822 051 30471 470R 5% 0,062W
3428 4822 051 30471 470R 5% 0,062W
Page 24

6-6
12/2/2013
www.nostatatech.nl
World of free manuals
6-6
ELECTRICAL PARTS LIST - FRONT DISPLAY BOARD
RESISTORS
3429 4822 116 83883 470R 5% 0,5W
3430 4822 116 83883 470R 5% 0,5W
3431 4822 051 30471 470R 5% 0,062W
3432 4822 051 30471 470R 5% 0,062W
3433 4822 051 30471 470R 5% 0,062W
3434 4822 051 30102 1k 5% 0,062W
3435 4822 051 30471 470R 5% 0,062W
3436 4822 051 30471 470R 5% 0,062W
3437 4822 051 30471 470R 5% 0,062W
3438 4822 051 30222 2k2 5% 0,062W
3439 4822 051 30222 2k2 5% 0,062W
3444 4822 051 30471 470R 5% 0,062W
3445 4822 051 30471 470R 5% 0,062W
3446 4822 051 30471 470R 5% 0,062W
3447 4822 051 30471 470R 5% 0,062W
3448 4822 051 30471 470R 5% 0,062W
3449 4822 051 30471 470R 5% 0,062W
3450 4822 051 30471 470R 5% 0,062W
3451 4822 051 30471 470R 5% 0,062W
3452 4822 051 30471 470R 5% 0,062W
3453 4822 051 30471 470R 5% 0,062W
3454 4822 051 30471 470R 5% 0,062W
3455 4822 051 30471 470R 5% 0,062W
3456 4822 116 83883 470R 5% 0,5W
3457 4822 051 30471 470R 5% 0,062W
3458 4822 051 30471 470R 5% 0,062W
3459 4822 051 30471 470R 5% 0,062W
3460 4822 051 30471 470R 5% 0,062W
3461 4822 051 30471 470R 5% 0,062W
3462 4822 051 30471 470R 5% 0,062W
3463 4822 051 30471 470R 5% 0,062W
3464 4822 051 30471 470R 5% 0,062W
3465 4822 051 30471 470R 5% 0,062W
3466 4822 051 30471 470R 5% 0,062W
3467 4822 051 30471 470R 5% 0,062W
3468 4822 051 30471 470R 5% 0,062W
3469 4822 051 30471 470R 5% 0,062W
3470 4822 051 30471 470R 5% 0,062W
3471 4822 051 30471 470R 5% 0,062W
3472 4822 051 30471 470R 5% 0,062W
3473 4822 051 30471 470R 5% 0,062W
3474 4822 051 30221 220R 5% 0,062W
3475 4822 051 30221 220R 5% 0,062W
3476 4822 051 30471 470R 5% 0,062W
3477 4822 051 30471 470R 5% 0,062W
3479 4822 051 30471 470R 5% 0,062W
3480 4822 051 30471 470R 5% 0,062W
3490 4822 051 30471 470R 5% 0,062W
3491 4822 051 30471 470R 5% 0,062W
3492 4822 051 30471 470R 5% 0,062W
3500 4822 117 12864 82k 5% 0,6W
3501 4822 117 12864 82k 5% 0,6W
3502 4822 117 12864 82k 5% 0,6W
3503 4822 117 12864 82k 5% 0,6W
3504 4822 116 83883 470R 5% 0,5W
3505 4822 116 83883 470R 5% 0,5W
3511 4822 051 30272 2k7 5% 0,062W
3512 4822 051 30102 1k 5% 0,062W
3519 4822 051 30103 10k 5% 0,062W
3520 4822 051 30103 10k 5% 0,062W
3521 4822 051 30684 680k 5% 0,062W
3522 4822 117 12925 47k 1% 0,063W
3523 4822 051 30474 470k 5% 0,062W
3524 4822 051 30109 10R 5% 0,062W
3526 4822 116 52244 15k 5% 0,5W
3528 4822 051 30103 10k 5% 0,062W
3529 4822 051 30272 2k7 5% 0,062W
3530 4822 117 12968 820R 5% 0,62W
3531 4822 051 30103 10k 5% 0,062W
3532 4822 051 30103 10k 5% 0,062W
3533 4822 051 30102 1k 5% 0,062W
3534 4822 051 30102 1k 5% 0,062W
3535 4822 051 20478 4R7 5% 0,1W
3536 4822 051 20478 4R7 5% 0,1W
3537 4822 116 52206 120R 5% 0,5W
3538 4822 116 52206 120R 5% 0,5W
3539 4822 051 30223 22k 5% 0,062W
3540 4822 051 30103 10k 5% 0,062W
3541 4822 051 30103 10k 5% 0,062W
3542 4822 116 83872 220R 5% 0,5W
3543 4822 051 30221 220R 5% 0,062W
3544 4822 051 30121 120R 5% 0,062W
3545 4822 051 30121 120R 5% 0,062W
3546 4822 051 30121 120R 5% 0,062W
3547 4822 051 30121 120R 5% 0,062W
3548 4822 051 30221 220R 5% 0,062W
3549 4822 051 30221 220R 5% 0,062W
3550 4822 051 30472 4k7 5% 0,062W
3551 4822 051 30103 10k 5% 0,062W
3552 4822 051 30103 10k 5% 0,062W
3553 4822 051 30103 10k 5% 0,062W
3554 4822 051 30103 10k 5% 0,062W
3555 4822 051 30221 220R 5% 0,062W
3556 4822 051 30121 120R 5% 0,062W
3557 4822 051 30271 270R 5% 0,062W
3558 4822 051 30221 220R 5% 0,062W
3559 4822 051 30221 220R 5% 0,062W
3560 4822 116 52175 100R 5% 0,5W
3561 4822 116 52175 100R 5% 0,5W
3562 4822 051 30103 10k 5% 0,062W
3563 4822 051 30103 10k 5% 0,062W
3564 4822 051 30221 220R 5% 0,062W
ELECTRICAL PARTS LIST - FRONT DISPLAY BOARD
3565 4822 051 30221 220R 5% 0,062W
3570 4822 051 20478 4R7 5% 0,1W
3571 4822 051 20478 4R7 5% 0,1W
3572 4822 051 30222 2k2 5% 0,062W
3573 4822 051 30103 10k 5% 0,062W
3574 4822 051 30103 10k 5% 0,062W
3576 4822 051 30103 10k 5% 0,062W
3577 4822 051 30103 10k 5% 0,062W
3578 4822 051 30103 10k 5% 0,062W
3579 4822 051 30103 10k 5% 0,062W
3580 4822 051 30102 1k 5% 0,062W
3581 4822 051 30102 1k 5% 0,062W
3582 4822 051 30102 1k 5% 0,062W
3583 4822 051 30223 22k 5% 0,062W
3584 4822 051 30102 1k 5% 0,062W
3585 4822 051 30334 330k 5% 0,062W
3586 4822 051 30102 1k 5% 0,062W
3589 4822 051 30102 1k 5% 0,062W
3590 4822 117 13632 100k 1% 0,62W
3591 4822 117 13632 100k 1% 0,62W
3592 4822 051 30102 1k 5% 0,062W
3593 4822 051 30102 1k 5% 0,062W
3594 4822 051 30102 1k 5% 0,062W
3595 4822 051 30272 2k7 5% 0,062W
3596 4822 051 30272 2k7 5% 0,062W
3598 4822 051 30103 10k 5% 0,062W
3599 4822 051 30471 470R 5% 0,062W
4401 4822 051 30008 0R Jumper 0603
4402 4822 051 30008 0R Jumper 0603
4403 4822 051 30008 0R Jumper 0603
4404 4822 051 30008 0R Jumper 0603
4410 4822 051 30008 0R Jumper 0603
4411 4822 051 30008 0R Jumper 0603
4412 4822 051 30008 0R Jumper 0603
4413 4822 051 30008 0R Jumper 0603
4414 4822 051 30008 0R Jumper 0603
4415 4822 051 30008 0R Jumper 0603
4416 4822 051 30008 0R Jumper 0603
4418 4822 051 30008 0R Jumper 0603
4419 4822 051 30008 0R Jumper 0603
4420 4822 051 30008 0R Jumper 0603
4422 4822 051 30008 0R Jumper 0603
4423 4822 051 30008 0R Jumper 0603
4424 4822 051 30008 0R Jumper 0603
4425 4822 051 30008 0R Jumper 0603
4426 4822 051 30008 0R Jumper 0603
4427 4822 051 30008 0R Jumper 0603
4428 4822 051 30008 0R Jumper 0603
4429 4822 051 30008 0R Jumper 0603
4431 4822 051 30008 0R Jumper 0603
4434 4822 051 30008 0R Jumper 0603
4435 4822 051 30008 0R Jumper 0603
4850 4822 051 30008 0R Jumper 0603
COILS & FILTERS
5400 4822 157 62552 Coil 2,2uH 5%
5401 4822 157 62552 Coil 2,2uH 5%
5402 5322 242 73686 RES CER 12MHz
5403 2422 543 01069 RES XTL 32,768kHz
5405 4822 157 62552 Coil 2,2uH 5%
5406 4822 157 62552 Coil 2,2uH 5%
5407 4822 157 62552 Coil 2,2uH 5%
5408 4822 157 62552 Coil 2,2uH 5%
5409 4822 157 62552 Coil 2,2uH 5%
5850 4822 157 62552 Coil 2,2uH 5%
5851 4822 157 62552 Coil 2,2uH 5%
5852 4822 157 62552 Coil 2,2uH 5%
DIODES
6400 4822 130 30621 1N4148
6401 4822 130 30621 1N4148
6402 4822 130 30621 1N4148
6403 4822 130 30621 1N4148
6404 4822 130 30621 1N4148
6405 4822 130 34174 BZX79-B4V7
6406 4822 130 30621 1N4148
6407 4822 130 30621 1N4148
6408 4822 130 30621 1N4148
6409 4822 130 30621 1N4148
6410 4822 130 31878 1N4003G
6411 4822 130 31878 1N4003G
6413 4822 130 31878 1N4003G
6414 4822 130 30621 1N4148
6415 4822 130 11397 BAS316
TRANSISTORS & INTEGRATED CIRCUITS
7400 9965 000 10407 TMP88PU74YF / Version 14
7402 5322 209 11446 HEF4051BT
7403 4822 209 15449 74HC4094D
7404 4822 209 15449 74HC4094D
7405 9322 145 26668 M24C02-WMN6
7406 4822 130 60511 BC847B
7407 4822 130 60511 BC847B
7408 4822 130 60511 BC847B
7409 4822 130 60511 BC847B
7410 4822 130 60511 BC847B
7412 4822 130 60511 BC847B
7413 4822 130 60511 BC847B
Note : Only the parts mentioned in this list are normal
service spare parts.
Page 25

7A-17A-1
1
FM
Osc.
FM
Mixer
AM
Mixer
AM
Osc.
AM IF
IF1
IF2
FM
Det.
AM
Det.
3393733
RADIO IC
TEA 5757H
TUNER BOARD
ECO 6
Systems
1018 11
14
15
24
right
right
left
left
stereo
VCO
4140 36 193244 25
Stereo
Decoder
AFC
AFC +
AFC -
4
4
AGC
Pre-
scaler
Multi-
plexer
Charge
pump
Stabilizer
CONTROL
Reference
Oscillator
29
28
27
clock
data
enable
P1
P0
31
30
programmable
output ports
V
Loop
V
Loop
V
Loop
V
Loop
V
Loop
2
6
5
43
C
D
450kHz450kHz450kHz
20
75kHz
V
Stab
AV
Stab
BV
Stab
B
V
Stab
A V
Stab
B
10,7 MHz 10,7 MHz
35 9
Vdd Vcc1
723
V
Stab
A
V
Stab
B
38
34
22
Vcc2
8
ECO6 Systems, 140499
LF filter
RDS
(MPX)
RDS
(MPX)
stereo
clock
data
enable
Version
1120
1
8
FM
Frontend
AM
Frontend
AM-FRAME AERIAL
B
1103
1101
(1102)
A
FM
MPX
buffer ampl.
5
Discriminator
10,7 MHz
Vdd
Vcc1
Vcc
Vcc2
AM-RF
AM-Osc.
FM-Osc.
FM-RF FM-IF 1 FM-IF 2
AM-IF 1 AM-IF 2
AM-AFC
3
2
BLOCK DIAGRAM
ECO6 Tuner Board
version:
SYSTEMS non-CENELEC
TABLE OF CONTENTS
Blockdiagram ..................................................................7A-1
Schematic Diagram.........................................................7A-2
Component Layout..........................................................7A-3
Adjustment table .............................................................7A-3
Electrical Partslist............................................................7A-4
12/2/2013
www.nostatatech.nl
World of free manuals
Page 26
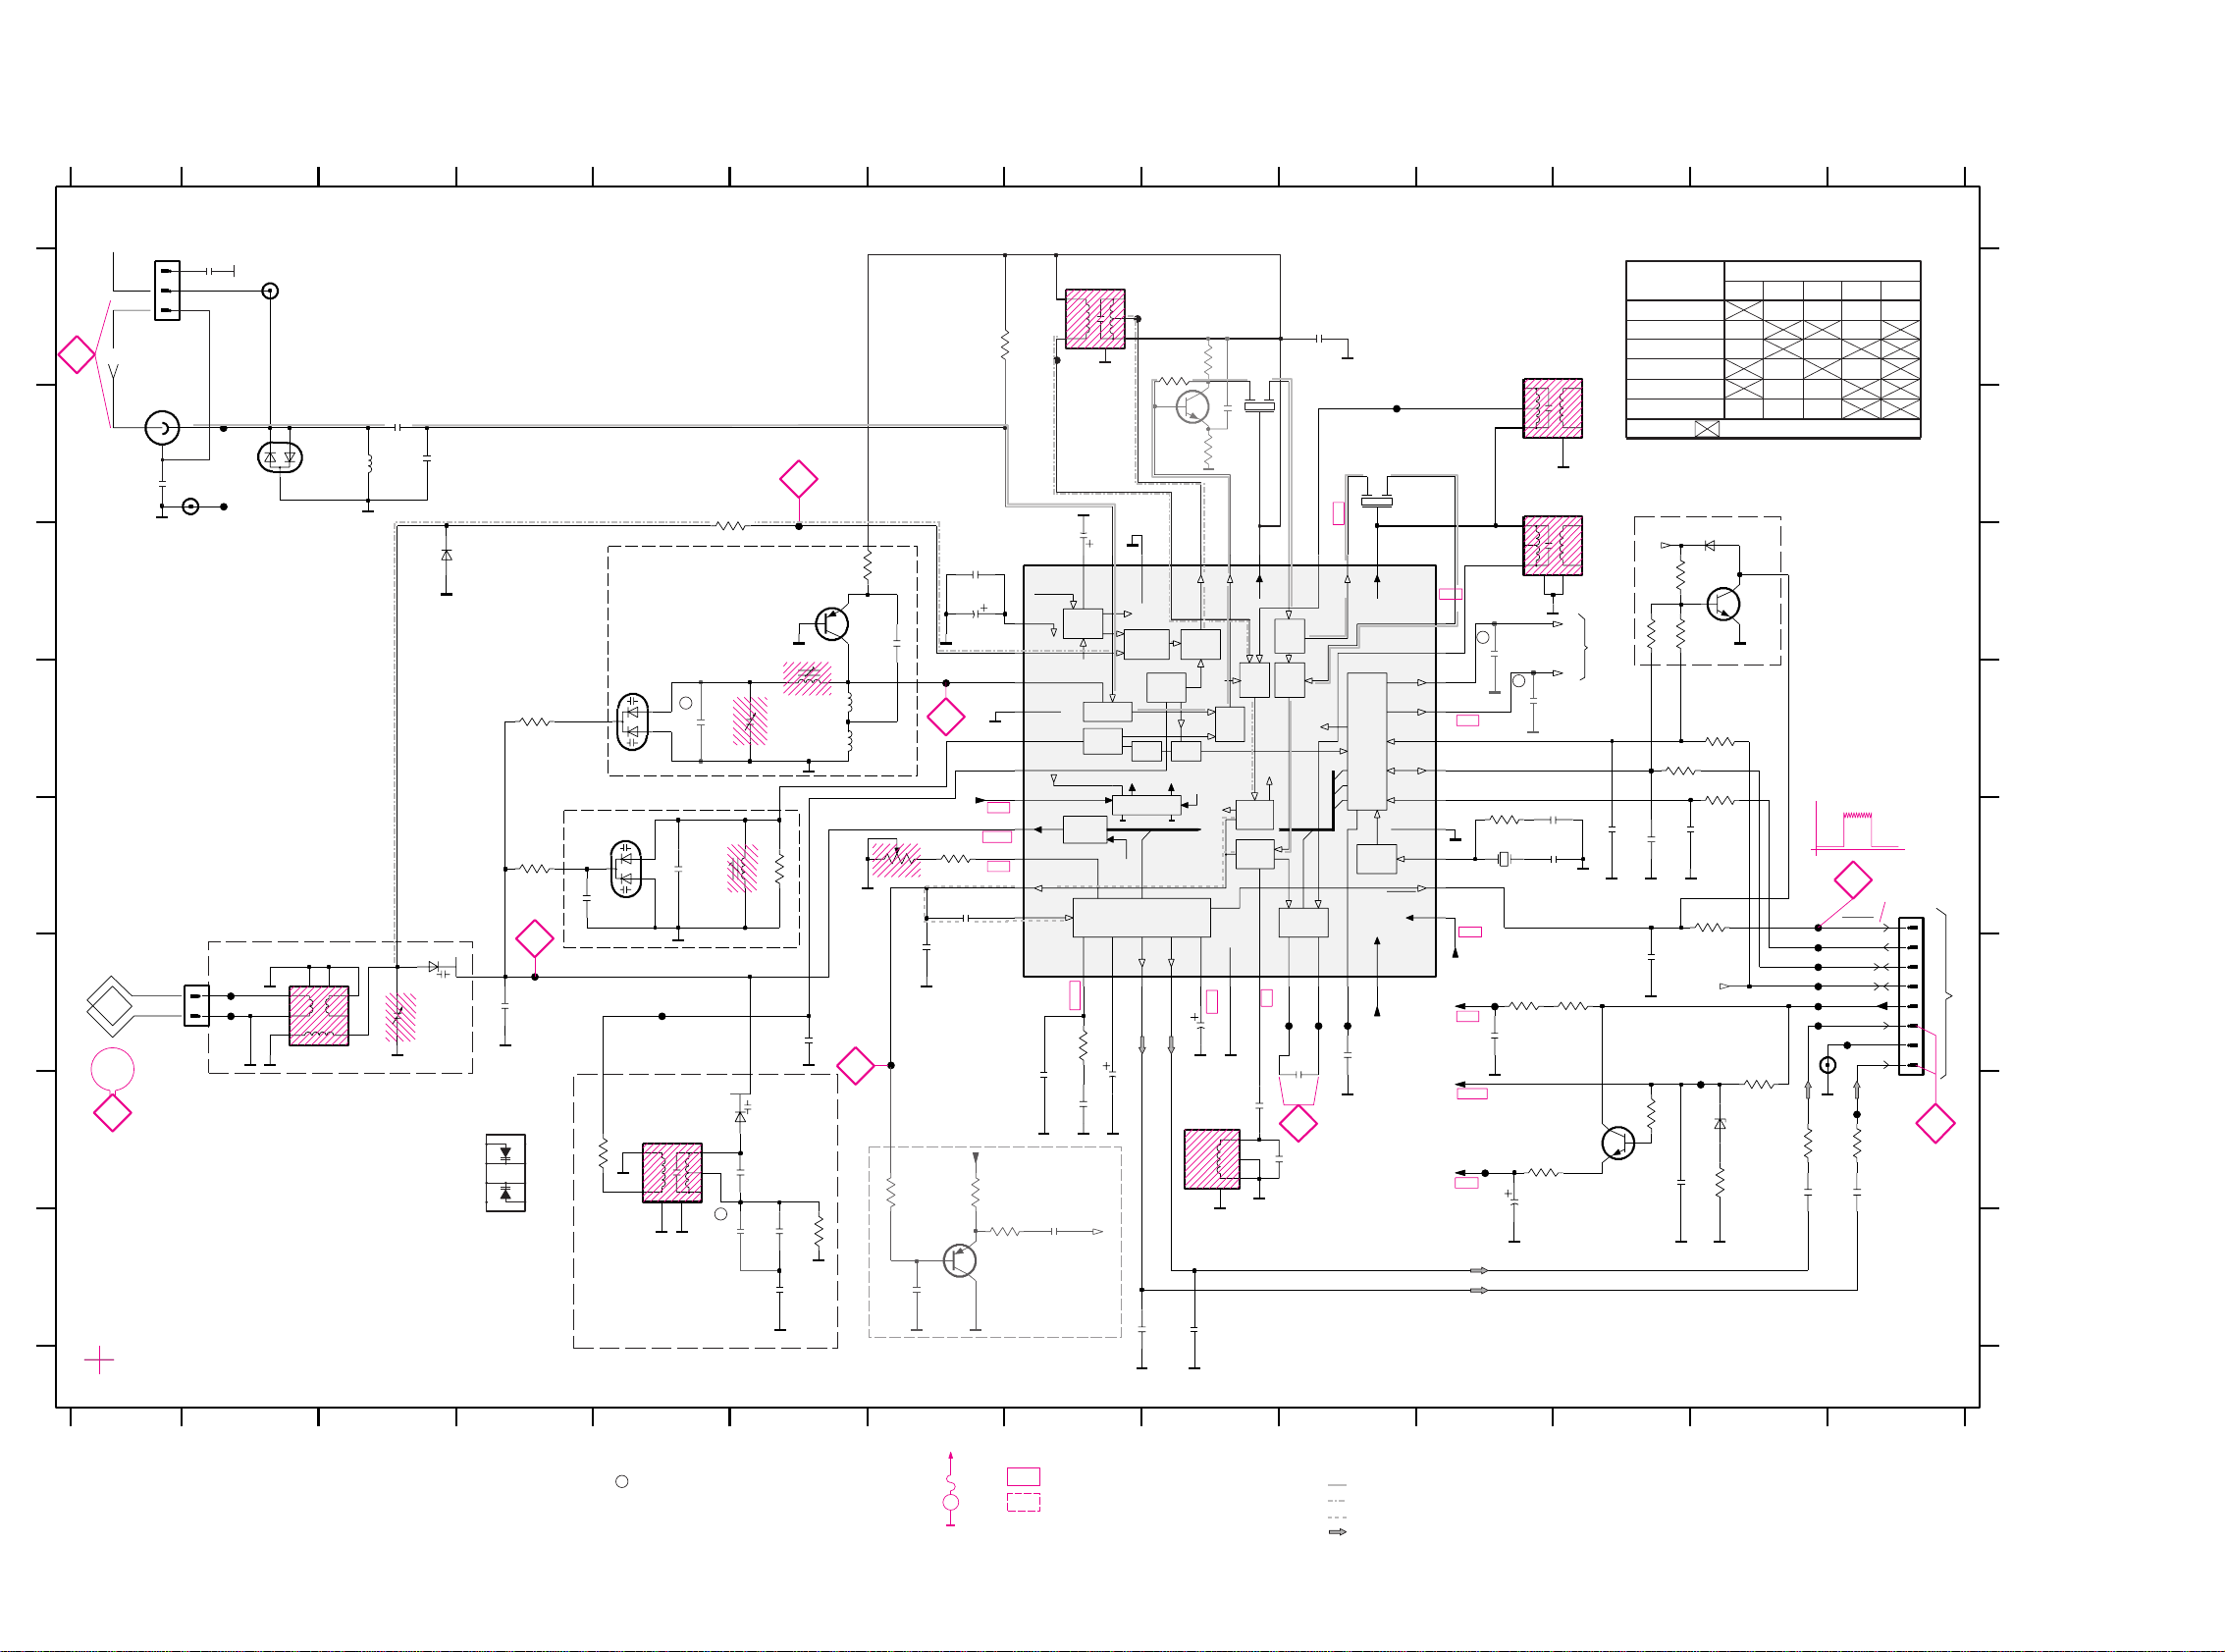
7A-2 7A-2
ECO6 Sys-non Cenelec, 000911
1101 A1
1102 B1
1103 F2
1120 E14
1130 A2
1131 B2
1132 G13
2101 B3
2102 B1
2103 C7
2104 B3
2105 A2
2106 F3
2107 F4
2119 H6
2120 G6
2124 H6
2125 H6
2126 F7
2127 E7
2128 C8
2129 C7
2130 F11
2131 G8
2132 G8
2133 G8
2134 H8
2135 H9
2136 G14
2137 G13
2138 F9
2139 G9
2140 G9
2141 F10
2143 G12
2144 G11
2145 F12
2146 E12
2147 E12
2148 E12
2149 H7
2150 A10
2152 E4
2153 E5
2154 D5
2155 D5
2159 F6
2161 C11
2163 D11
2164 F10
2165 C7
2166 E11
2167 E11
2169 H8
3101 E4
3102 D4
3103 C6
3104 A7
3105 B6
3132 G5
3134 H6
3141 E7
3142 E7
3143 G7
3144 H7
3145 F8
3146 G13
3152 G14
3153 G13
3154 G13
3155 G11
3156 C12
3157 C12
3158 E13
3159 D13
3160 D12
3161 D13
3167 F12
3168 F11
3169 E11
3170 C12
3172 G12
3176 G7
3181 E6
5102 F2
5109 B9
5110 B10
5111 A8
5112 A11
5114 B11
5119 G9
5121 E11
5123 G5
5130 E5
5131 C6
6103 B2
6105-1 F3
6105-2 G5
6106 C3
6107 G13
6120 C13
6130 E5
6131 D5
7101 C8
7102 C6
7103 H7
7111 C13
7112 G12
T102 B2
T103 B2
T105 F2
T106 F2
T109 B6
T110 F5
T111 F4
T112 F7
T113 A8
T114 B10
T115 A8
T116 F10
T117 G13
T118 G11
T120 F13
T121 F13
T122 F13
T123 E13
T124 G14
T125 F14
T126 F13
T127 F13
T128 D7
T140 F11
T141 F10
T142 F10
1
34
6
87
2
1
34
6
87
2
LEGEND
p ...for provision only
USA ... for USA version only
E-EU ... for East European version only
22n
USA
22n
USA
p
p
p
7
1
2
3
8
6105
6
HN1V02H
54
3
6
1
2
7
29
25
13
30
31
16
4
42
15
1
7
22
9
23
38 34
2118
37 35
33
43 39
5
3
8
171412
24
11
10
2019
44
32
41 3640
6
2
27
28
26
1
3
4
5
6
87
2
1
34
6
87
2
1
34
6
87
2
p
SCALER
MULTI-
PLEXER
CONTROL
FILTER
AM
IF
AM
DET
FM
DET
VSTABB
DECODER
CHARGE
PUMP
AGC
OSC
AM DET
FM
IF2
RIPPLE
AGC
STABILIZER
AFC
VDD
VSTABA
AM-IF
MONO/
FM
FRONTEND
CONTROL
XTAL
AGC
PRE-
CTRL
AGC
AM
OSC
AGC
VCC2
FM
OSC
AM
MIXER
MIXER
FM
FM
IF1
FRONTEND
AM
STEREO
STEREO
RDS only
DISCRIMINATOR
to/from
FM-OSCILLATOR
PROGR.
MPX
Q-multiplier
MW
OUTPUT PORTS
to 1120
pin 5
ENABLE/MPX
BUFFER
kHz
VERSION DETECTION
VCO
RIGHT
14
12 3
AM FRAME AERIAL
DATA
C
D
E
F
AM-OSCILLATOR
FM 75 OHM
FM-IF2
MW
2345
AM-RF
450kHz
450kHz
AM-IF2
from 2169
78
AM-AFC
LEFT
6 7 8 9 10 11 12 13
456
FM-RF
TUNER BOARD ECO6
/ SYSTEMS NON CENELEC
9 1011121314
A
B
G
H
A
B
1
VCC
STEREO
CLOCK
AMPLIFIER
GND
H
C
D
E
F
G
470n
2132
BAS216
6120
2103
1u
2107
1n
3134
22K
6105-2
HN1V02H
100n
2163
T141
7KL
1K
3144
5102
3157
100K
T109
470R
3153
2130
22n
220R
3105
3142
100K
3167
120R
33p
2149
2K2
3145
1132
C-PAD
T103
T111
2164
470n
T102
2140 15p
2139
2138
2u2
82p
2133
1u
3103
8K2
T120
4p7
2154
3156
1101
USA
YKD21
100K
2161
100n
5119
2119
10p
T142
5123
11p
2106
3172
6106
BAS216
100n
2165
5K6
3154
3155
220R
330R
2124
33K
3176
22n
WRITE-EN
5114
7P
MUTE
P0
P1
PILOT
RF-GND1
RF-GND2
RIGHT
RIPPLE
VCC1
VCC2
VCO
VDD
VSTABA
VSTABB
FM-DEMOD
FM-IF1-IN
FM-IF2
FM-IF2-IN
FM-IN
FM-MIXOUT
FM-OSC
FM-RF
I-TUNE
IF-GND
LEFT
LPF
MPX-IN
AF-OUT
AFC+
AFC-
AGC
AM-AFC
AM-IF1-IN
AM-IF2
AM-MIXOUT
AM-OSC
AM-RF
CLOCK
DATA
DIG-GND
FIELDSTR-IND
5130
T127
T126
220n
2127
5121
DT-381
150K
3169
75K
3102
100K
56K
3141
1131
C-PAD
3132
5112
7P
6107
47R
6131
1SV228
BZX284-C11
1120
FE-BT-VK-N
T118
T140
T117
T112
2131
470n
33K
3101
1SV228
6130
3168
120R
2125
560p
T116
2n2
2148
100n
2141
470R
18p
2120
470R
3158
3152
3159
XH-S
1103
3160
470R
470R
220n
2143
2150
T125
1
2
3
4
5
6
7
8
22R
3146
BF550
7102
5131
11p
2155
O
100K
5110
G
I
1102
not USA
3170
T122
2135
15n
2167
2145
220p
T110
12p
HN1V02H
1n
2166
T105
6105-1
T106
T121
T123
BC547C
7112
3143
2129
100u
C-PAD
1130
22K
220n
2137
T128
3181
1K
330p
2126
2101
47p
BAV99
6103
2104
100p
2153
15p
T124
2152
33n
560p
E-EU
12p
E-EU
2p2
J
33p
2159
220p
2146
2169
2n2
1u
15n
2134
2144
220n
2136
22K
3161
BC857C
BC847C
7111
7103
2147
220p
VCC2
VCC2
VDD
T114
MPX
P1
P0
P1
VDD
MPX
VCC1
VCC1
VCC1
printed
printed
printed
1
2
13
2
1
2
3
1
2
TEA5757H
TEA5759H
J
7101
2128
10u
7111
component mounted
/14 FM-OIRT/MW
/00 /02 FM/MW/LW
6120 3170
/01 FM/MW
VERSION
/00 /02 FM/MW
3156
/17 FM/AM
/06 FM-Japan/AM
3157
VERSION PROGRAMMING COMPONENTS
J ... for Japanese version only
AM-IF1
450kHz
8
5111
1
2
3
4
6
7
T113
T115
FM-IF1
2
G
1I3
O
5109
3104
330R
100n
0R
4103
...V MW mode
...V LW mode
voltages measured while
set is tuned to a strong transmitter
...V FM mode stereo
EVM
V
5V
0V
152kHz, 50mV
pp
stereo stereomono
9.6V
9.5V
9.5V
10.4V
12V
1V
1.3V
1.4V
stereo 0.2V
mono 4.8V
9.6V
12Vtyp
stereo 0.4V
0.15V
11.1V
7.8V
2V
0.7V
0V
1.2V
7.6V
(10-14V)
0.2V
0V
1.2V
0.1V
D
1.4V
0.7V
4
0V
0V
mono 4.8V
1.4V
9.6V
1.4V
0.2V
0.7V
1.4V
7.9V
7.7V
0V
0V
0V
0V
0.6V
0.8V
0.1V
1.6-8V
1-8V
11.1V
0V
1V
1.4V
1.4V
B
7.6V
5
3
2
A
1.3V
0.7V
7.8V
11.1V
0.8V
0.6V
0.6V
1V
0.7V
1V
1.1V
1.1V
0V
0V
2V
C
1
0.8V
1.2V
1.1V
IF-AMP.
BFS20
7119
J
1K
3113
J
2112
J
100p
330R
3119
J
Signal path
FM
AF - left/right
AM
MPX (Audio Frequency)
2102
100n
2105
USA
100n
12/2/2013
www.nostatatech.nl
World of free manuals
Page 27

7A-37A-3
VARICAP ALIGNMENT
FM RF
FM IF
VCO
AM IF
AM RF
3)
108MHz
87.5MHz
(65.81MHz)
87.5MHz
(65.81MHz)
87.5MHz
(65.81MHz)
279kHz
153kHz
1602kHz
531kHz
5130
check
5122
check
5123
check
8V ±0.2V
4.3V ±0.5V
(1.2V ±0.5V)
8V ±0.2V
1.1V ±0.4V
8V ±0.2V
1.1V ±0.4V
1494kHz
558kHz
560kHz 5102
1500kHz
5103198kHz
1494kHz
558kHz
560kHz
1500kHz
198kHz
2106
5102
2106
3142 152kHz ±1kHz
1)
98MHz
5112
MAX
FM
87.5 - 108MHz
(65.81 - 74, 87.5 - 108MHz)
LW
153 - 279kHz
MW
FM/MW/LW- version, 9kHz grid
531 - 1602kHz
1700kHz
530kHz
5123
check
8V ±0.2V
1.1V ±0.4V
1602kHz
531kHz
5123
check
6.9V ±0.2V
1.1V ±0.4V
108MHz
108MHz 2155
5131
MW
FM/AM-version, 10kHz grid
530 - 1700kHz
FM
MW
LW
98MHz, 1mV
continuous wave
450kHz
connect pin 6 of
IC 7101 (AM Osc.)
with 3.3kΩ to Vcc
Use Service Testprogram. By selecting the TUNER TEST test frequencies will be stored as preset frequencies automatically.
4
1
3
5
5
A
A
5119FM
10.7MHz, 45mV
continuous wave
2D
mod=1kHz
∆f=±22.5kHz
1)
If sensitivity of frequency counter is too low adjust to max. channel separation
(input signal: stereo left 90% + 9%, adjust output on right channel to minimum)
Repeat
ECO6, Sys + PA with frame aerial, 070799
TUNER ADJUSTMENT TABLE ( ECO6 FM/MW- and FM/MW/LW - versions with AM-frame aerial )
∆f=±10kHz
VRF = 0.5mV
C
see
remark
2)
220R
100nF
36
IC 7101
220R
100nF
40
IC 7101
2141
shortcircuit
to block AFC
21
IC 7101
max.
symmetric
f
o
AM AFC
MW
C
continuous wave
VRF = 2mV
5111
5114
2
0 ± 2 mV DC
0 ± 3 mV DC
MW
4)
FM/MW/LW- and FM/MW-version
( 9kHz grid)
531 - 1602kHz
B
∆f = ±30kHz
V
RF
as low as
possible
max.
symmetric
f
o
MW
FM/AM-version, 10kHz grid
530 - 1700kHz
3)
For AM RF adjustments the original frame antenna has to be used !
2)
RC network serves for damping the IF-filter while adjusting the other one.
4)
MW has to be aligned before LW.
Waverange Input frequency Input Tuned to Adjust Output Scope/Voltmeter
FM
87.5 - 108MHz
(65.81 - 74, 87.5 - 108MHz)
FM/MW-version, 9kHz grid
531 - 1602kHz
(as low as
possible)
ECO6 System non Cenelec stage .3, 120900
TUNER BOARD ECO6
Systems non Cenelec
/ componentside view
1101 A6
1102 B6
1103 D6
1120 A4
1130 B5
1131 D5
1132 A5
2106 C5
2107 B5
2128 C4
2129 B4
2133 D2
2138 C2
2144 B2
2155 C4
3142 D2
5102 D6
5109 A3
5110 B3
5111 B4
5112 A3
5114 A2
5119 C2
5121 B2
5123 D5
5130 D3
5131 D4
7112 C1
9101 A2
9103 B2
9104 B5
9105 B1
9106 B3
9107 D4
9108 C4
9109 D2
AM FRAME AERIAL
FM 75Ω
B
A
TUNER BOARD ECO6
Systems - non Cenelec
/
copperside view
2101 B4
2102 B1
2103 D4
2104 B4
2105 C1
2112 B5
2119 D3
2120 D3
2124 D3
2125 D3
2126 D6
2127 C5
2130 D5
2131 C5
2132 D6
2134 D7
2135 D7
2136 A4
2137 A4
2139 C6
2140 C6
2141 C6
2143 C7
2145 A5
2146 B7
2147 A5
2148 B6
2149 D6
2150 B5
2152 C5
2153 C5
2154 C4
2159 C5
2161 A6
2163 B6
2164 C6
2165 C4
2166 B6
2167 B6
2169 A4
3101 D5
3102 C3
3103 C4
3104 B4
3105 C4
3113 B5
3119 B5
3132 D5
3134 D3
3141 C5
3143 D6
3144 B7
3145 C5
3146 C7
3152 A4
3153 A4
3154 C7
3155 C7
3156 A6
3157 A6
3158 A4
3159 A5
3160 A5
3161 A5
3167 B7
3168 C7
3169 B6
3170 A6
3172 C7
3176 D6
3181 D4
4103 B5
4106 C4
4107 C5
4108 C5
6103 B3
6105 C3
6106 C3
6107 C7
6120 A6
6130 D4
6131 C4
7101 C5
7102 D4
7103 D7
7111 A5
7119 B5
These assembly drawings show a summary of all possible versions.
For components used in a specific version see schematic diagram respectively partslist.
ECO6 Systems non CENELEC stage .3, 120900
41..
in schematic diagram)
(not all items shown
SMD jumper
EB
C
A
K
1
2
7
8
4
D
A
C
1
2
5
3
V
dd
Vcc2
Vcc1
12/2/2013
www.nostatatech.nl
World of free manuals
Page 28

MISCELLANEOUS
–––––––––––––––––––––––––––––––––––––––––––––––––––––
1101 2422 015 19376 SOCKET 2P CLICKFIT
USA only
1102 4822 267 10283 SOCKET COAX, IEC 75Ω not USA
1103 4822 265 31184 JST CONNECTOR 2 POLE
1120 4822 265 11515 FFC SOCKET, 8P
CAPACITORS
–––––––––––––––––––––––––––––––––––––––––––––––––––––
2101© 4822 126 13692 47pF 1% 63V
2102© 4822 126 13838 100nF 10% 50V
not USA
2103© 5322 122 31647 1nF 10% 63V
2104© 5322 122 32531 100pF 5% 50V
2105© 4822 126 13838 100nF 10% 50V
USA only
2106 2020 800 00191 3-11pF TRIMCAP.,N450
2107 4822 121 51319 1µF 20% 50V
2120© 4822 126 13689 18pF 1% 63V
2124© 5322 122 32654 22nF 10% 63V
2125© 2020 552 96199 560pF 1% 50V
2126© 5322 122 31863 330pF 5% 50V
2127© 4822 126 14076 220nF 20% 25V
2128 4822 124 40248 10µF 20% 63V
2129 4822 124 41584 100µF 20% 10V
2130© 5322 122 32654 22nF 10% 63V
2131© 4822 126 13482 470nF 20% 16V
2132© 4822 126 13482 470nF 20% 16V
2133 4822 124 21913 1µF 20% 63V
2134© 4822 126 13188 15nF 5% 63V
not USA
2134© 5322 122 32654 22nF 10% 63V USA only
2135© 4822 126 13188 15nF 5% 63V not USA
2135© 5322 122 32654 22nF 10% 63V USA only
2136© 4822 126 14076 220nF 20% 25V
2137© 4822 126 14076 220nF 20% 25V
2138 4822 124 22652 2,2µF 20% 50V
2139© 4822 126 14236 15pF 5% 50V
2140© 4822 126 13695 82pF 1% 63V
2141© 4822 126 13838 100nF 10% 50V
2143© 4822 126 14076 220nF 20% 25V
2144 4822 124 21913 1µF 20% 63V
2145© 4822 122 33575 220pF 5% 50V
2146© 4822 122 33575 220pF 5% 50V
2147© 4822 122 33575 220pF 5% 50V
2148© 4822 122 33127 2,2nF 10% 63V
2149© 5322 122 32659 33pF 5% 50V
RDS only
2150© 4822 126 13838 100nF 10% 50V
2152© 4822 126 12105 33nF 5% 63V
not for East Europe
2152© 5322 116 80853 560pF 5% 63V for East Europe only
2153© 4822 126 13486 15pF 2% 63V not for East Europe
2153© 4822 122 33926 12pF 2% 50V for East Europe only
2155 2020 800 00191 3-11pF TRIMCAP.,N450
2159© 5322 122 32659 33pF 5% 50V
2164© 4822 126 13482 470nF 20% 16V
2165© 4822 126 13838 100nF 10% 50V
2166© 5322 122 31647 1nF 10% 63V
2167© 4822 122 33926 12pF 5% 50V
2169© 4822 122 33127 2,2nF 10% 63V
RDS only
RESISTORS
–––––––––––––––––––––––––––––––––––––––––––––––––––––
3101© 4822 051 20333 33kΩ 5% 0,1W
3102© 4822 117 10837 100kΩ 1% 0,1W
3103© 4822 051 20822 8,2kΩ 5% 0,1W
3104© 4822 117 13577 330Ω 1% 0,1W
3105© 4822 117 11503 220Ω 5% 0,1W
3132© 4822 051 20479 47Ω 5% 0,1W
3134© 4822 051 20223 22kΩ 5% 0,1W
3141© 4822 117 11148 56kΩ 1% 0,1W
3142 4822 100 12159 TRIMPOT. 100kΩ
RESISTORS
–––––––––––––––––––––––––––––––––––––––––––––––––––––
3143© 4822 051 20223 22kΩ 5% 0,1W
RDS only
3144© 4822 051 10102 1kΩ 2% 0,25W RDS only
3145© 4822 117 11449 2,2kΩ 1% 0,1W
3146© 4822 051 20229 22Ω 5% 0,1W
3152© 4822 051 20471 470Ω 5% 0,1W
3153© 4822 051 20471 470Ω 5% 0,1W
3154© 4822 117 13577 330Ω 1% 0,1W
3155© 4822 117 11503 220Ω 5% 0,1W
3156© 4822 117 10837 100kΩ 1% 0,1W
3157© 4822 117 10837 100kΩ 1% 0,1W
3158© 4822 051 20471 470Ω 5% 0,1W
3159© 4822 051 20471 470Ω 5% 0,1W
3160© 4822 051 20471 470Ω 5% 0,1W
3161© 4822 051 20223 22kΩ 5% 0,1W
3167© 4822 051 20121 120Ω 5% 0,1W
3168© 4822 051 20121 120Ω 5% 0,1W
3169© 4822 051 20154 150kΩ 5% 0,1W
3170© 4822 117 10837 100kΩ 1% 0,1W
3172© 4822 051 20562 5,6kΩ 5% 0,1W
3176© 4822 051 20333 33kΩ 5% 0,1W
RDS only
3181© 4822 051 10102 1kΩ 2% 0,25W
4103© 4822 051 20008 CHIP JUMPER 0805
4106© 4822 051 20008 CHIP JUMPER 0805
4107© 4822 051 20008 CHIP JUMPER 0805
4108© 4822 051 20008 CHIP JUMPER 0805
COILS
–––––––––––––––––––––––––––––––––––––––––––––––––––––
5102 4822 157 71634 RF-COIL MW
5109 4822 242 70665 FM-IF FILTER 10,7MHz
5110 4822 242 70665 FM-IF FILTER 10,7MHz
5111 2422 549 44023 AM-IF FILTER 450kHz
5112 4822 157 70302 AM-IF FILTER 450kHz
5114 4822 157 70302 AM-IF FILTER 450kHz
5119 4822 157 11443 DISCRIMINATOR COIL
5121 4822 242 10261 QUARTZ 75kHz
5123 2422 549 44108 RF-COIL, AM-OSCILLATOR
5130 4822 157 11843 RF COIL 1,5 TURNS
5131 4822 157 11843 RF COIL 1,5 TURNS
DIODES
–––––––––––––––––––––––––––––––––––––––––––––––––––––
6103© 5322 130 34337 BAV99
6105© 4822 130 83075 HN1V02H
6106© 4822 130 83757 BAS216
6107© 9340 386 90115 BZX284-C11
6120© 4822 130 83757 BAS216
6130© 4822 130 82833 1SV228
6131© 4822 130 82833 1SV228
TRANSISTORS
–––––––––––––––––––––––––––––––––––––––––––––––––––––
7102 4822 130 42131 BF550
7103© 5322 130 42756 BC857C
RDS only
7111© 5322 130 42755 BC847C
7112 4822 130 44503 BC547C
INTEGRATED CIRCUITS
–––––––––––––––––––––––––––––––––––––––––––––––––––––
7101© 9351 740 80557 TEA5757H/V1, RADIO IC
7A-4
Electrical Partslist
ECO6
SYSTEMS NON-CENELEC
7A-4
12/2/2013
www.nostatatech.nl
World of free manuals
Page 29

9-1
12/2/2013
www.nostatatech.nl
World of free manuals
ETF7 TAPE MODULE
Tapedeck wiring (Double deck)
TO ETF BOARD
CONNECTOR 1770 (ND) 14P
CONNECTOR 1740 (DB) 14P
REC
REV
CRO2*
REC
FWD
9-1
CRO2*
* Not for Ferro version
(Non-Dolby Version)
TABLE OF CONTENTS
Tape Module Wiring & variation table ....................... 9-1
Block diagram ............................................................ 9-2
Brief Introduction ....................................................... 9-3
Connector assignment............................................... 9-4
Tape deck electronics & Tape adjustments ............... 9-5
ETF7 Non-Dolby board layouts ................................. 9-6
Analog Circuit diagram .............................................. 9-7
Servo Circuit diagram ................................................ 9-8
Exploded views & parts list........................................ 9-9
Electrical parts list.................................................... 9-13
MODE
SW
Mechanism B Mechanism A
TO ETF BOARD
CONNECTOR 1710 (ND) 5P
CONNECTOR 1720 (DB) 6P
–
+
H
L
TAPE DECK
MOTOR
TO ETF BOARD
CONNECTOR 1730 (3P)
Variations table for Analog Circuit
Autoreverse Non-autoreverse
ND/DD/FR ND/DD/FF
Chrome/Ferro Chrome/Ferro Ferro
2624 - - 100nF
2701 , 2702 150pF 270pF 270pF
2703 , 2704 100pF 220pF 220pF
2717 , 2718 10nF 15nF 15nF
2721 , 2722 6,8nF 6,8nF 2727 , 2728 470pF 1nF 1nF
3616 10k 1k 1k
3618 6k8 - 3620 10k trimmer - 3622 - 10k trimmer 10k trimmer
3672 4k7 - 3676 47k - 3687 220R 220R 3688 680R - 3723 , 3724 15k 18k 18k
3725 , 3726 10R 10R 3727 , 3728 5k6 6k8 6k8
3729 , 3730 3k3 4k7 4k7
3743 , 3744 1k5 2k2 2k2
3745 , 3746 3k3 5k6 5k6
3754 , 3755 1M 47R 47R
3769 12k 8k2 8k2
3772 6k8 5k6 5k6
4785 - - 0R jumper
3774 15k 8k2 8k2
6614 1N4148 - 7616 BC857B - 7622 BC847B - -
Autoreverse Non-autoreverse
ND/DD/FR ND/DD/FF
Chrome/Ferro Chrome/Ferro Ferro
Page 30

BLOCK DIAGRAM
12/2/2013
www.nostatatech.nl
World of free manuals
9-2
9-2
Line-In
Playback
Head
Rec/Pb
Head
Erase
Head
ATTEN
BIAS SYM
HD SW.
REC
Rec current
BIAS ADJ
Bias
7710
SOURCE SEL
HEF4952BT
1A0 1A1 1A2
7720
PRE-AMPLIFIER
AN7318S
ALCEN
PLAYBACK
EQUALISATION
ALC
7740
PB EON. SW.
HEF4952BT
2A0 2A1 2A2
IEC I IEC II
REC EON.
7730
REC EON. SW.
HEF4952BT
3A0 3A1 3A2
(HS) (REC) (CRB)
4794 #
#
NOM/HI SPEED
REC EON.
9792 #
For Dolby version only
PB A ADJ
1A0
MPX
Rec In
PB B ADJ
1A1
7640
RECORD AMP
NJM4560D
NOM/HI SPEED
REC EON.
PB In
7630
DOLBY B NR
CXA1101M
DOLBY
REC ADJ
2A2
PB Out
ATTEN
PB Out
REC Out
MUTE
7788
2A2
NOTE:
Erase
# For Non-dolby version only
Only 1 channel is presented.
MicroProcessor Control / Communication lines
Direct / Indirect Control lines from Shift Registers
OSCILLATOR
REC
CRB
1A0
REC
CRA
NS/HS
(NS)
7622
7780
7787
7792
7791
ALCEN
1A2
1A1
2A0
HS
3A0
3A0 NS
4x
SOLENOID
SUPPLY CTRL
MOTOR VCC
SUPPLY CTRL
NS/HS CTRL
DECK(S) SW.
STATUS TO
VOLTS CONV.
2x
SOLENOID
SUPPLY CTRL
Deck B (Rec/Pb) switches, sensors & motor
AD1 AD2
CLK
DATA
STROBE
7610
SHIFT
REGISTER
HEF4094BT
1A0
2A1
2A2
REC
NS/HS (NS)
Deck A (Pb) switches, sensors & motor
Page 31

9-3 9-3
12/2/2013
www.nostatatech.nl
World of free manuals
Brief introduction
General
1.
Playback Mode
Signal from the playback head Deck A or Deck B is selected and fed through by the Mode Selector IC7710 (HEF4952BT).
The signal is amplified by amplifier IC7720 (AN7323S) before feeding to the IC7740 (HEF4952BT) and out to the AF Board
via connector 1701.
Recording Mode
2.
Recording Signal is selected and fed through by the Mode Selector IC7710 (HEF4952BT) which is then amplified by the
amplifier IC7720 (AN7323S). The amplified output signal will pass through IC7730 (HEF4952BT) for record equalization and
back to IC7710 (HEF4952BT) before registered into the Rec/PB Head of Deck B.
3.
Dubbing Mode
In Dubbing mode, signal from the playback head Deck A is selected and fed through by the Mode Selector IC7710
(HEF4952BT) which is then equalised for playback mode by the amplifier IC7720 (AN7323S) so that a flat response is
obtained after the pre-amp. The equalised signal will then follow the same path as in the Recording mode.
Mode Selector
4.
The Mode Selector IC7710 (HEF4952BT) caters for 4 inputs signal, namely Playback Signal from Deck A, Playback Signal
from Deck B, Recording Signal and Dubbing Signal.
5. Amplifier PB/REC
Amplifier IC7720 (AN7323S) is for the purpose of amplifying the Playback and Recording signal from the Mode Selector.
6.
Automatic Level Control (ALC)
ALC circuit consists of resistors (3760, 3765, 3766, 3767), capacitors (2762 , 2763) and control by transistor 7787 (BC847B).
ALC limits the amplifier output to a constant value when input signal becomes too large, thus limiting recording current to
below saturation level, to prevent recording distortion.
Muting Circuit (For Non-Dolby version only)
7.
Switch S4 of the IC7740 (HEF4952BT) is for the purpose of muting the output during Recording mode. During Recording
mode, S4 is closed and shorted to the ground.
8. IC7740 (HEF4952BT)
The function of the IC7740 (HEF4952BT) is to change time constant between 120us Ferro (IEC I) and 70us Chrome (IEC
II) during playback mode. It will automatically determined whether the tape type is 120us Ferro (IEC I) or 70us Chrome (IEC
II). This IC will switch to Flat Gain during the Recording mode.
9.
IC7730 (HEF4952BT)
The function of the IC7730 (HEF4952BT) is to change gain and time constant according to tape type and recording speed
to boost recording current at higher frequency during recording to compensate for head loss. It will automatically determined
whether the tape type is 120us Ferro (IEC I ) or 70us Chrome (IEC II).
Bias Level
10.
Bias Level making use of the Variable resistor (3773) for adjusting the optimal level of the bias current for Ferro or Chrome.
11.
Bias Symm (For Dolby B NR version only)
Bias Symm making use of the Variable resistor (3785) to adjust the bias current for the left and the right channel to be equal.
PB Switch
12.
Playback Switch which consists of the FETs 7785 (For Dolby B NR version only) & 7786 (J111) is for the purpose of providing
a virtual ground for the Rec/PB Head (Deck B) during Playback mode. During the Playback mode, the FETs are turn on and
shorted pin 2 and 4 of connector 1720 to the ground. During Recording mode, the FETs are turn off to allow the oscillator
signal to be superposition onto the Recording signal for recording.
13.
Motor Speed (For FR versions only)
During High speed dubbing, a feedback signal from the uP through pin 03 of the IC7610 (HEF4094BT) will trigger the
transistors 7622 (BC847B) and 7616 (BC857B) to cause a change in the voltage level between High and Low, thus changing
the speed of the motor.
IC7610 (HEF4094BT)
14.
IC7610 (HEF4094BT) is a Shift Register use for issues the logic for cmos switch ICs (HEF4952BT) via 1A0, 2A1 and 2A2.
It also issues logic to On/Off SOL_A, SOL_B and MOT. Recording speed is controlled via NS/HS.
Dolby Circuit (For sets with Dolby B NR version only)
15.
IC7630 (CXA1551M)
IC7630 (CXA1551M) in the Dolby circuit is a Dolby Noise Reduction Type B IC for the Playback and Recording signal. Noise
Reduction ON/OFF are controlled by DOLBY, which is from CLK, direct from uP. After clocking in DATA, CLK is set to HIGH/
LOW for NR OFF/ON.
19kHz Filter
16.
The 19kHz filters 5631 & 5632 (LXD-210) in the Dolby circuit is for the purpose of filtering the 19kHz Pilot Tone (for Tuner
signal only) of the Recording signal.
17. Level Adjust
The Variable resistor 3635, 3636,3641 and 3642 in the Dolby circuit is for adjusting the playback level of the Dolby reference
(400Hz , 200nWb/m). Transistor 7631, 7632 are ON to enable adjustment of 3641, 3642 during Playback Deck A. Transistor
7633, 7634 and 3635, 3636 are active for Playback Deck B.
18.
Amplifier IC7640 (NJM4560M)
The Amplifiers 7640A & 7640B (NJM4560M) in the Dolby circuit is for the purpose of amplified the Recording signal.
Muting Circuit
19.
The muting circuit which consists of transistors 7788, 7789 and 7790 (BC847B) is for the purpose of muting the output during
Recording mode.
NOTATIONS & ABBREVIATIONS USED IN THIS
DOCUMENT
CR Chrome (IEC type II)
DB Dolby NR type B
DD Double Deck
DM Double Motor
FE Ferro (IEC type I)
FF Non-Autoreverse
FR Autoreverse Deck B
Gnd x Ground x
HSD High speed dubbing
ND Non Dolby
NR Noise Reduction
NSD Normal speed dubbing
PB Playback
REC Record
S/A Sub-assy
SD Single Deck
SM Single Motor
Page 32

CONNECTORS ASSIGNMENTS:
12/2/2013
www.nostatatech.nl
World of free manuals
9-49-4
CONNECTOR 1701 INTERCONNECTION TO AF BOARD
1 REC-L Record input left
2 REC-R Record input right
3 GND A AF Ground
4 TAPE-L Playback output left
5 +12V D.C. supply (+12V) for AF electronics
6 TAPE-R Playback output right
7 -CMOS Negative d.c. supply (-9V) for CMOS ICs
CONNECTOR 1703 INTERCONNECTION TO AF BOARD
1 GND M Motor Ground
2 +MOTOR D.C. supply (+12V) for tape deck motor & solenoid
CONNECTOR 1706 INTERCONNECTION TO FRONT BOARD
1 AD2 Deck sensing switches output voltage / Deck A EOT
2 AD1 Deck sensing switches output voltage / Deck B EOT
3 +5V DC supply +5V for ADC network
4 GND P Control & Oscillator Ground
5 CLK HEF4094BT shift register Clock line
6 DATA HEF4094BT shift register Data line
7 STROBE HEF4094BT shift register Strobe line
CONNECTOR 1710 DECK B HEADS CONNECTON
1 B R/P HD L+ R/P Head left channel positive
2 GND A R/P Head return ground
3 B R/P HD R+ R/P Head right channel positive
4 ERASE HEAD Erase Head
5 GND A Erase Head ground
CONNECTOR 1720 DECK B HEADS CONNECTON
(For Non-Dolby version only)
(For Dolby B NR version only)
CONNECTOR 1740 DECK A & B CONTROL INTERFACE
1 REC REW Record tab protection status switch (reverse) [open=on: close=off]
2 CrO2 B Chrome tape detection switch deck B [open=Cr: close=Fe]
3 REC FWD Record tab protection status switch (forward) [open=on: close=off]
4 PHOTO B Photo sensor output (tape movement indication)
5 SOL B Solenoid supply for deck B
6 Vcc Deck / Motor supply
7 MODE B Mode switch (head engagement) [open=off: close=engaged]
8 GND M Deck / Motor ground
9 SOL A Solenoid supply for deck A
10 PHOTO A Photo sensor output (tape movement indication)
11 MODE A Mode switch (head engagement) [open=off: close=engaged]
12 L L pin for motor
13 CrO2 A Chrome tape detection switch deck A [open=Cr: close=Fe]
14 H H pin for motor
CONNECTOR 1770 DECK A & B CONTROL INTERFACE
1 REC REW Record tab protection status switch (reverse) [open=on: close=off]
2 CrO2 B Chrome tape detection switch deck B [open=Cr: close=Fe]
3 REC FWD Record tab protection status switch (forward) [open=on: close=off]
4 PHOTO B Photo sensor output (tape movement indication)
5 SOL B Solenoid supply for deck B
6 Vcc Deck / Motor supply
7 MODE B Mode switch (head engagement) [open=off: close=engaged]
8 GND M Deck / Motor ground
9 SOL A Solenoid supply for deck A
10 PHOTO A Photo sensor output (tape movement indication)
11 MODE A Mode switch (head engagement) [open=off: close=engaged]
12 L L pin for motor
13 CrO2 A Chrome tape detection switch deck A [open=Cr: close=Fe]
14 H H pin for motor
(For Dolby B NR version only)
(For Non-Dolby version only)
1 B R/P HD L+ R/P Head left channel positive
2 B R/P HD L- R/P Head left channel negative
3 B R/P HD R+ R/P Head right channel positive
4 B R/P HD R- R/P Head right channel negative
5 ERASE HEAD Erase Head
6 GND A Erase Head ground
CONNECTOR 1730 DECK A HEAD CONNECTIONS
1 A PB HD L+ Pb Head left channel positive
2 GND A Pb Head return ground shield
3 A PB HD R+ Pb Head right channel positive
(For Double Deck versions only)
Page 33
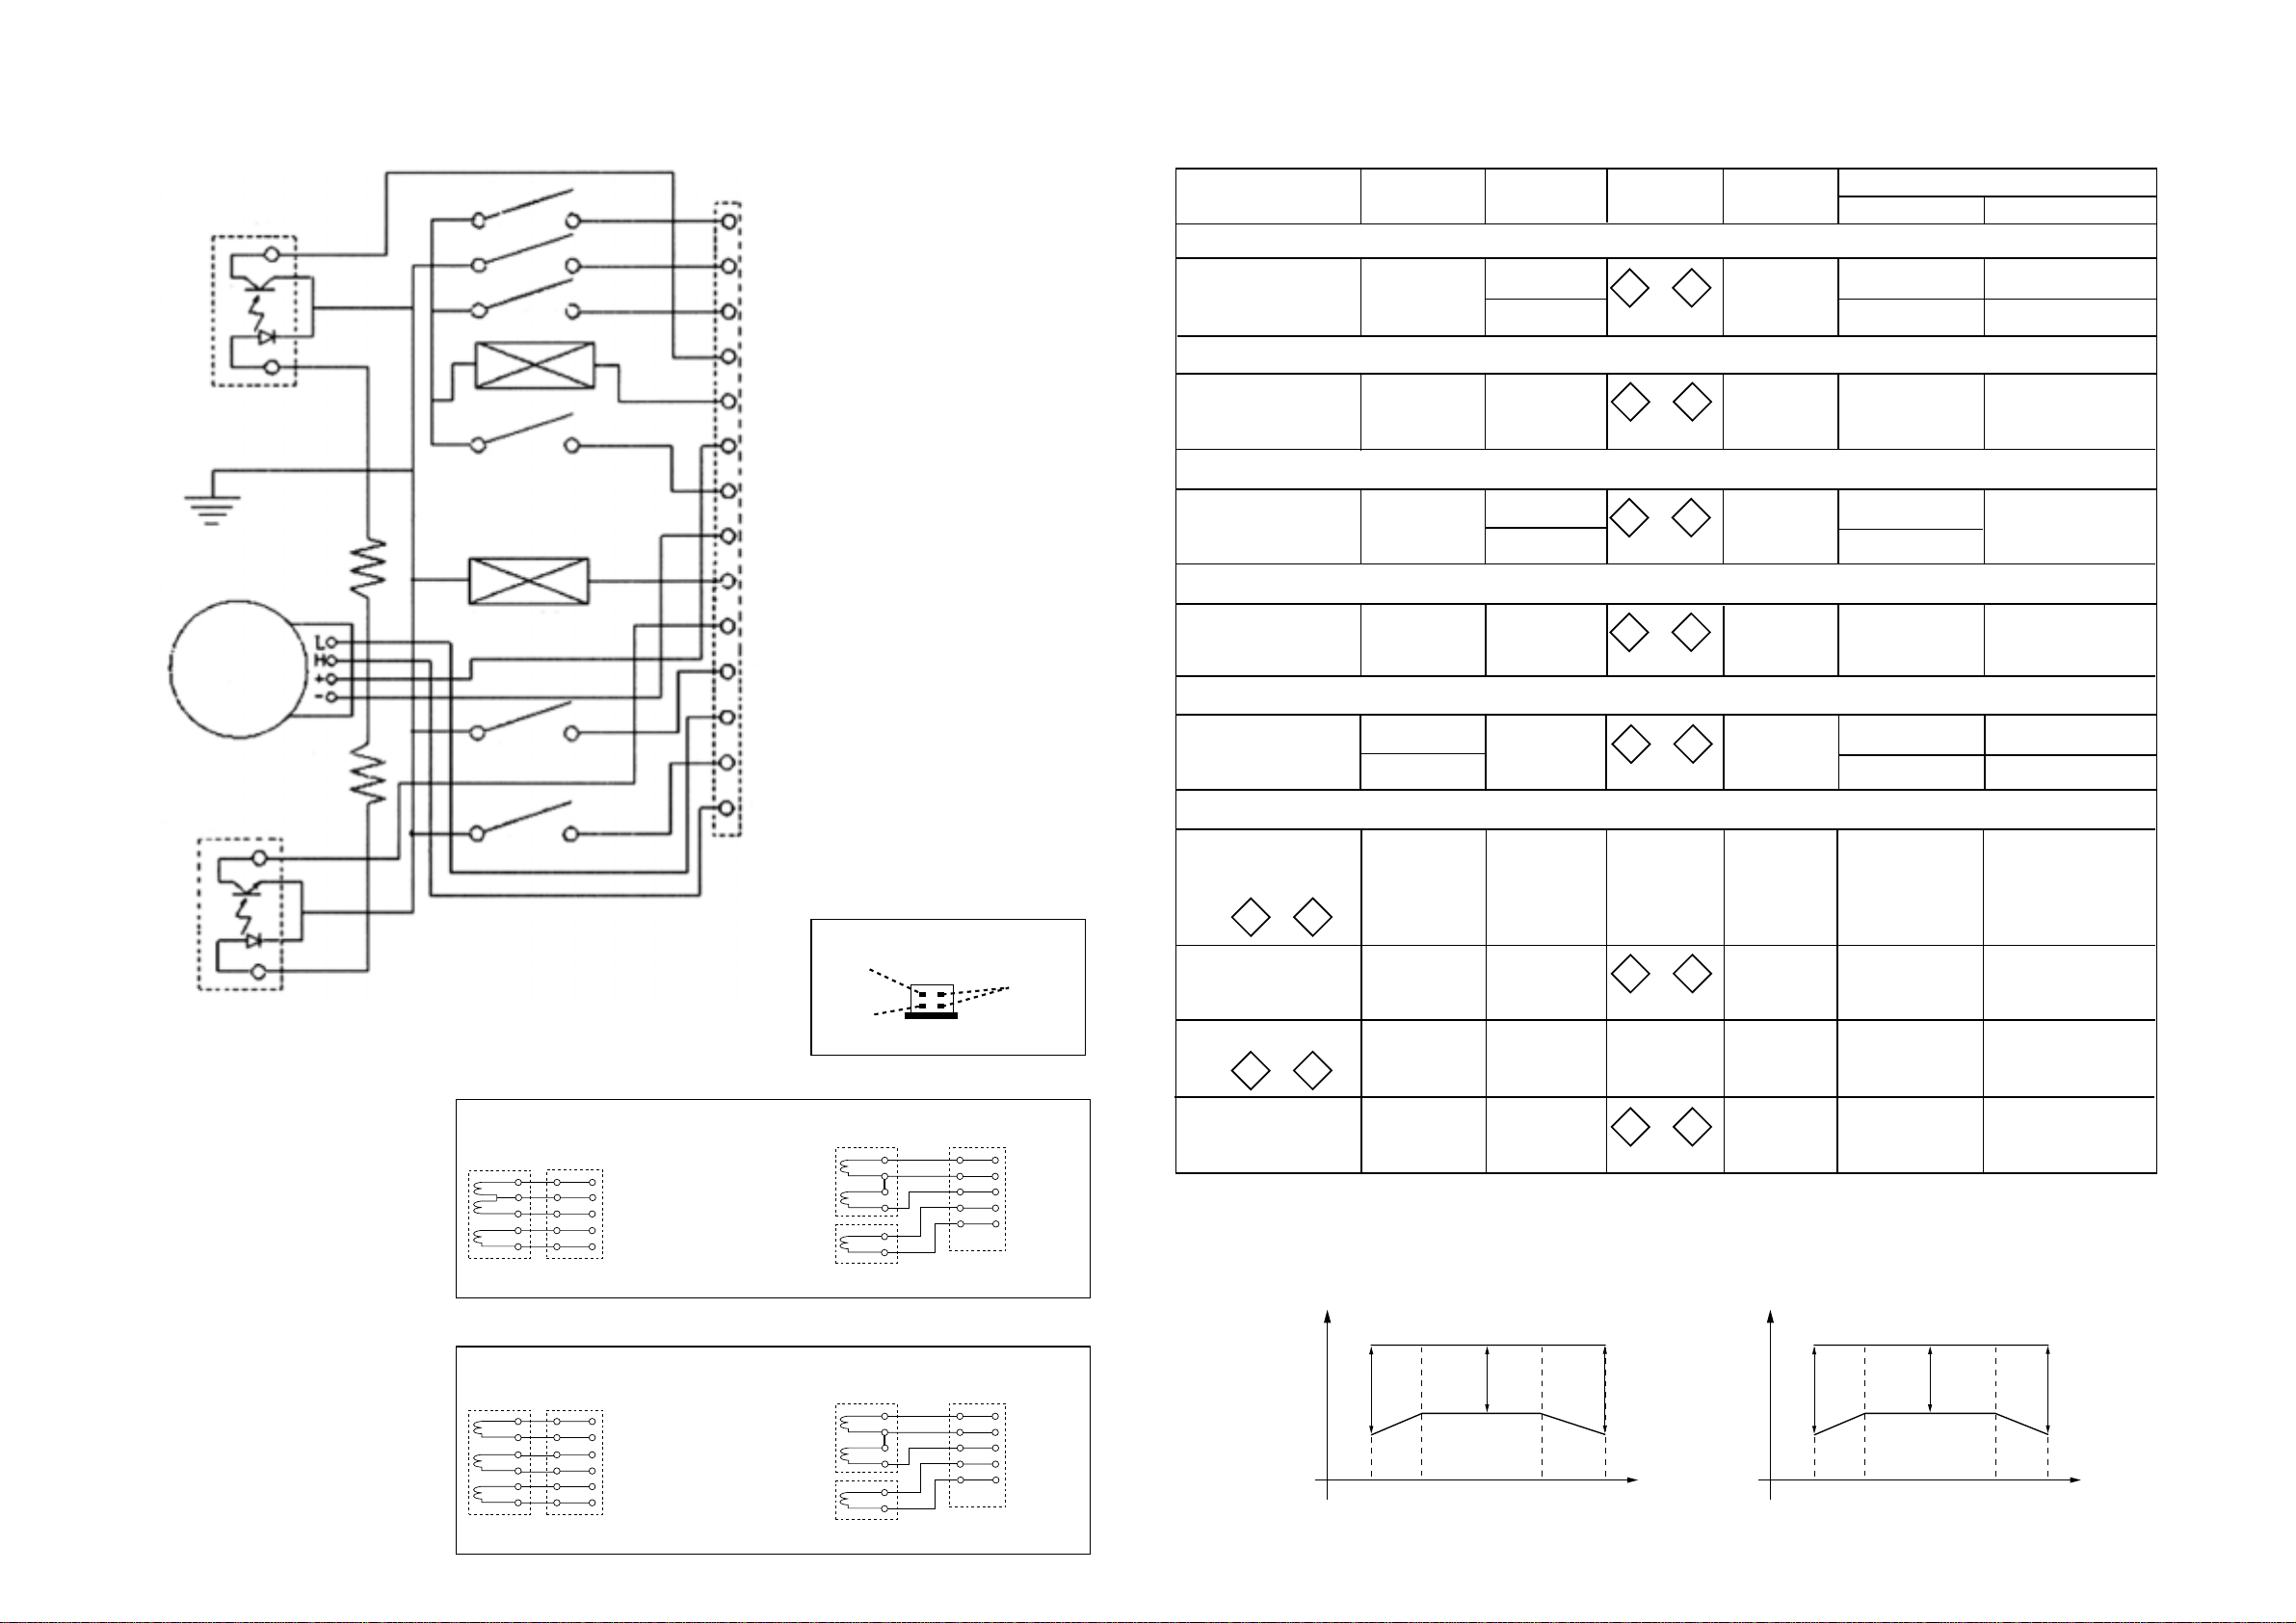
TAPE MECHANISM ELECTRONICS
12/2/2013
www.nostatatech.nl
World of free manuals
9-5 9-5
TAPE ADJUSTMENT & CHECK TABLE
B Photo Sensor
R1 (680R)
Motor
R2 (680R)
Rec-R
CrO2*
Rec-F
Solenoid
B-Mode
Solenoid
A-Mode
1. B Rec Switch (REV)
2. B CrO2 Switch
3. B Rec Switch (FWD)
4. B Photo Out
5. B Solenoid
6. Vcc 12V
7. B Mode Switch
8. Gnd
9. A Solenoid
10. A Photo Out
11. A Mode Switch
12. Motor L
13. A CrO2 Switch
TEST
CASSETTE
ADJUST MOTOR SPEED
NORMAL SPEED
CHECK WOW & FLUTTER
DECK A & B
ADJUST AZIMUTH
DECK A & B
CHECK PLAYBACK FREQUENCY RESPONSE
DECK A & B
ADJUST BIAS CURRENT
DECK B
SBC420
3150Hz
SBC420
3150Hz
SBC420
10kHz
SBC420
SBC419A^
SBC420
RECORDER
MODE
PLAY B
PLAY A
PLAY
PLAY FWD
PLAY REV #
PLAY
RECORD
MEASURE
ON
or
1
RIGHT
LEFT
or
1
RIGHT
LEFT
or
1
RIGHT
LEFT
or
1
RIGHT
LEFT
or
5
LEFT
2
2
2
2
6
RIGHT
READ ON
frequency
counter
W&F-meter
mV-meter
mV-meter
mV-meter
ADJUST
with
3620
check
check
left hand screw
right hand screw
check
3773
check
to
3150Hz +/- 0.5%
3150Hz -0.8/+1.8%
<0.4 % DIN
max. output level
& left=right
limits see fig.1
995mV
750mV +/- 1.5dB
A Photo Sensor
14. Motor H
CrO2*
* No Leaf switch & copper pattern
shorted together for Ferro version
Mechanism B Head Wires Soldering (Non-Dolby version)
Rec/Pb
Head
Mechanism B Head Wires Soldering (Dolby B NR version)
Rec/Pb
Head
Head wire
connector pcb
1. +L ch (White)
2. - ch (Black)
3. +R ch (Red)
4. E Head (Blue)
5. E Head (Yellow)
For Auto-reverse Head
Head wire
connector pcb
1. +L ch (White)
2. - L ch (Black)
3. +R ch (Red)
4. - R ch (Blue)
5. E Head (Yellow)
6. E Head (Yellow)
For Auto-reverse Head
Mechanism A Head Wires Soldering
Pink or
Red
White
Rec/Pb
Head
Erase
Head
Rec/Pb
Head
Erase
Head
Play
Head
Head wire
connector pcb
For Normal Head
Head wire
connector pcb
For Normal Head
Screen
(Gnd)
1. White
2. Black
3. Red
4. Blue
5. Yellow
1. White
2. Black
3. Red
4. Blue
5. Yellow
CHECK OVERALL FREQUENCY RESPONSE AND DISTORTION
Inject 3mV signals
100Hz, 250Hz, 1kHz,
10kHz, 12.5kHz
via
Inject 1kHz 8.85mV
via
SBC419A^ : 4822 397 30069
SBC420 : 4822 397 30071
or
or
level(dB)
4
4
3
3
SBC419A^
or
SBC420
RECORDED
CASSETTE
SBC419A^
or
SBC420
RECORDED
CASSETTE
8dB
250
80
6dB
figure. 1
RECORD B
PLAY B
RECORD B
PLAY B
4k
or
1
RIGHT
LEFT
or
1
RIGHT
LEFT
# For Auto-reverse version only
* If high frequencies are not within limits, decrease bias and re-measure.
If distortion is too high, increase bias and re-meaure
^ Not applicable for Ferro version
8dB
f(Hz)
12.5k
2
2
mV-meter
THD-meter
level(dB)
8dB
10dB (HSD)
100
250
check
check
figure. 2
6dB
limits see fig. 2 *
<3% *
8dB
10dB (HSD)
10k
4k
f(Hz)
Page 34
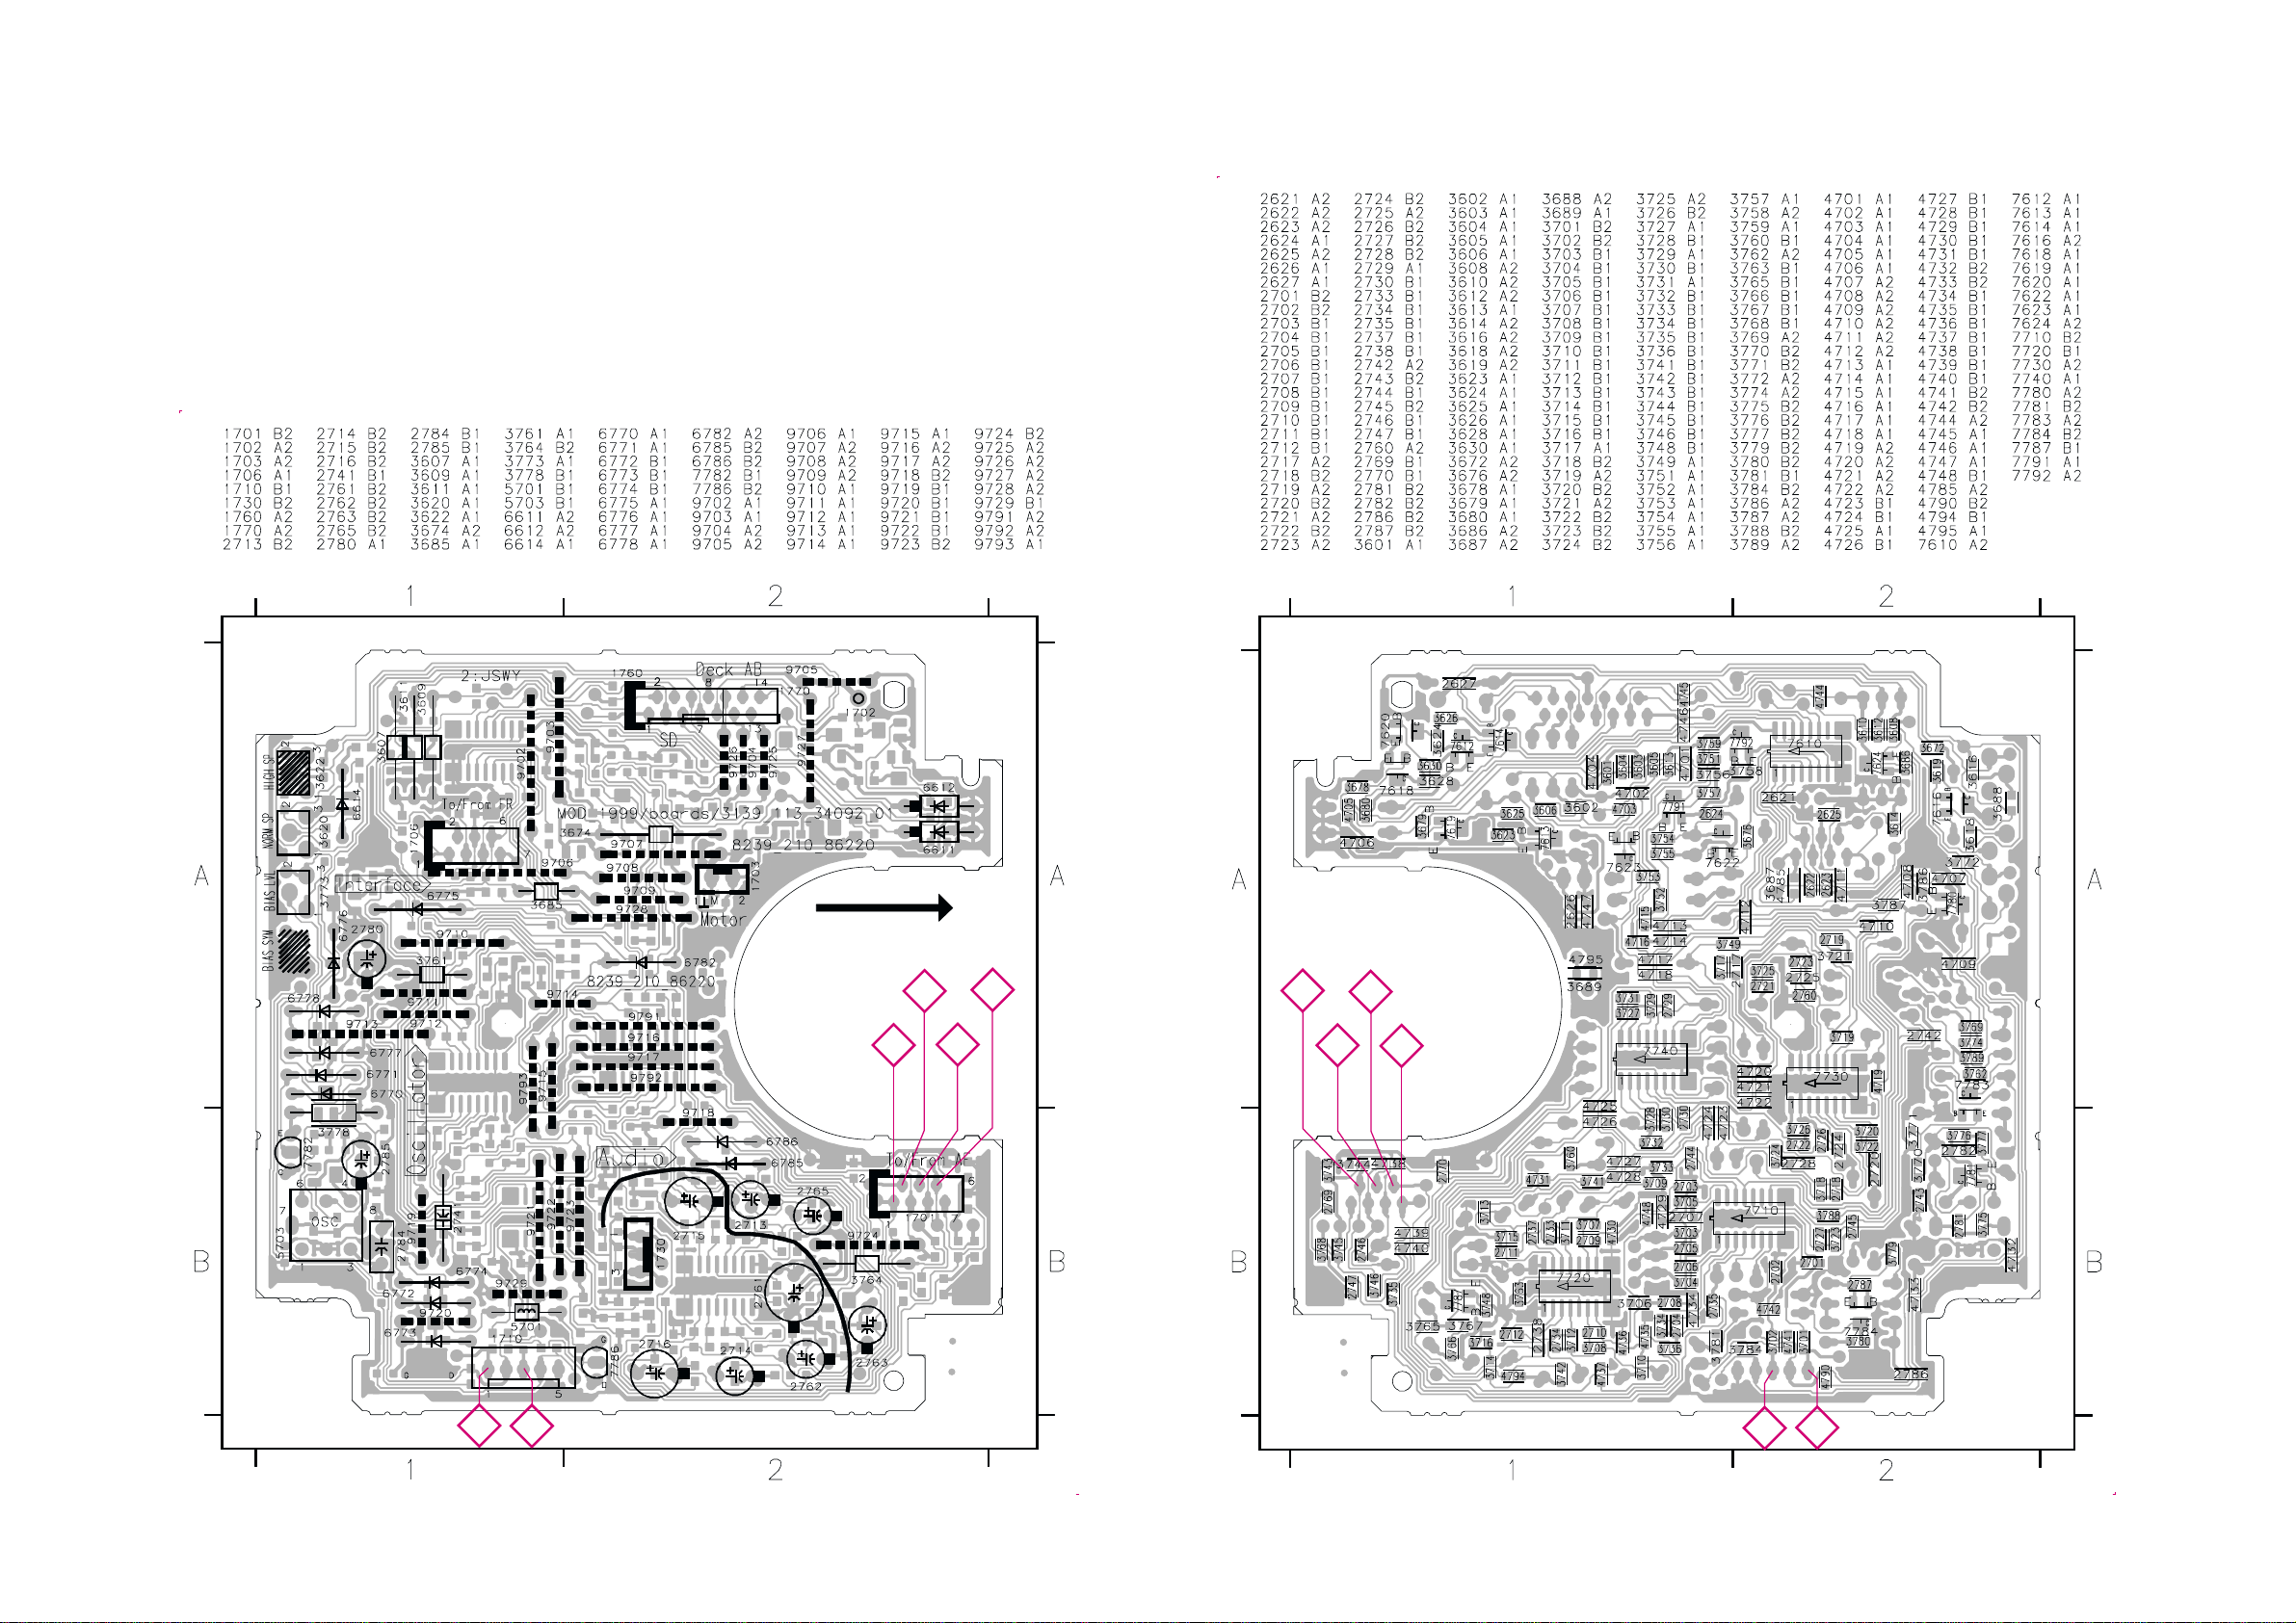
9-6
12/2/2013
www.nostatatech.nl
World of free manuals
9-6
COMPONENT LAYOUT
CHIP LAYOUT
4
3
5
6
3139 113 3409 pt2 dd wk0042
2
1
2
Some location on this board is prepared for both 0603 & 0805 SMDs footprint,
in such locations 0603 SMDs may be substituted.
4
1
3
5
6
3139 113 3409 pt2 dd wk0042
Page 35
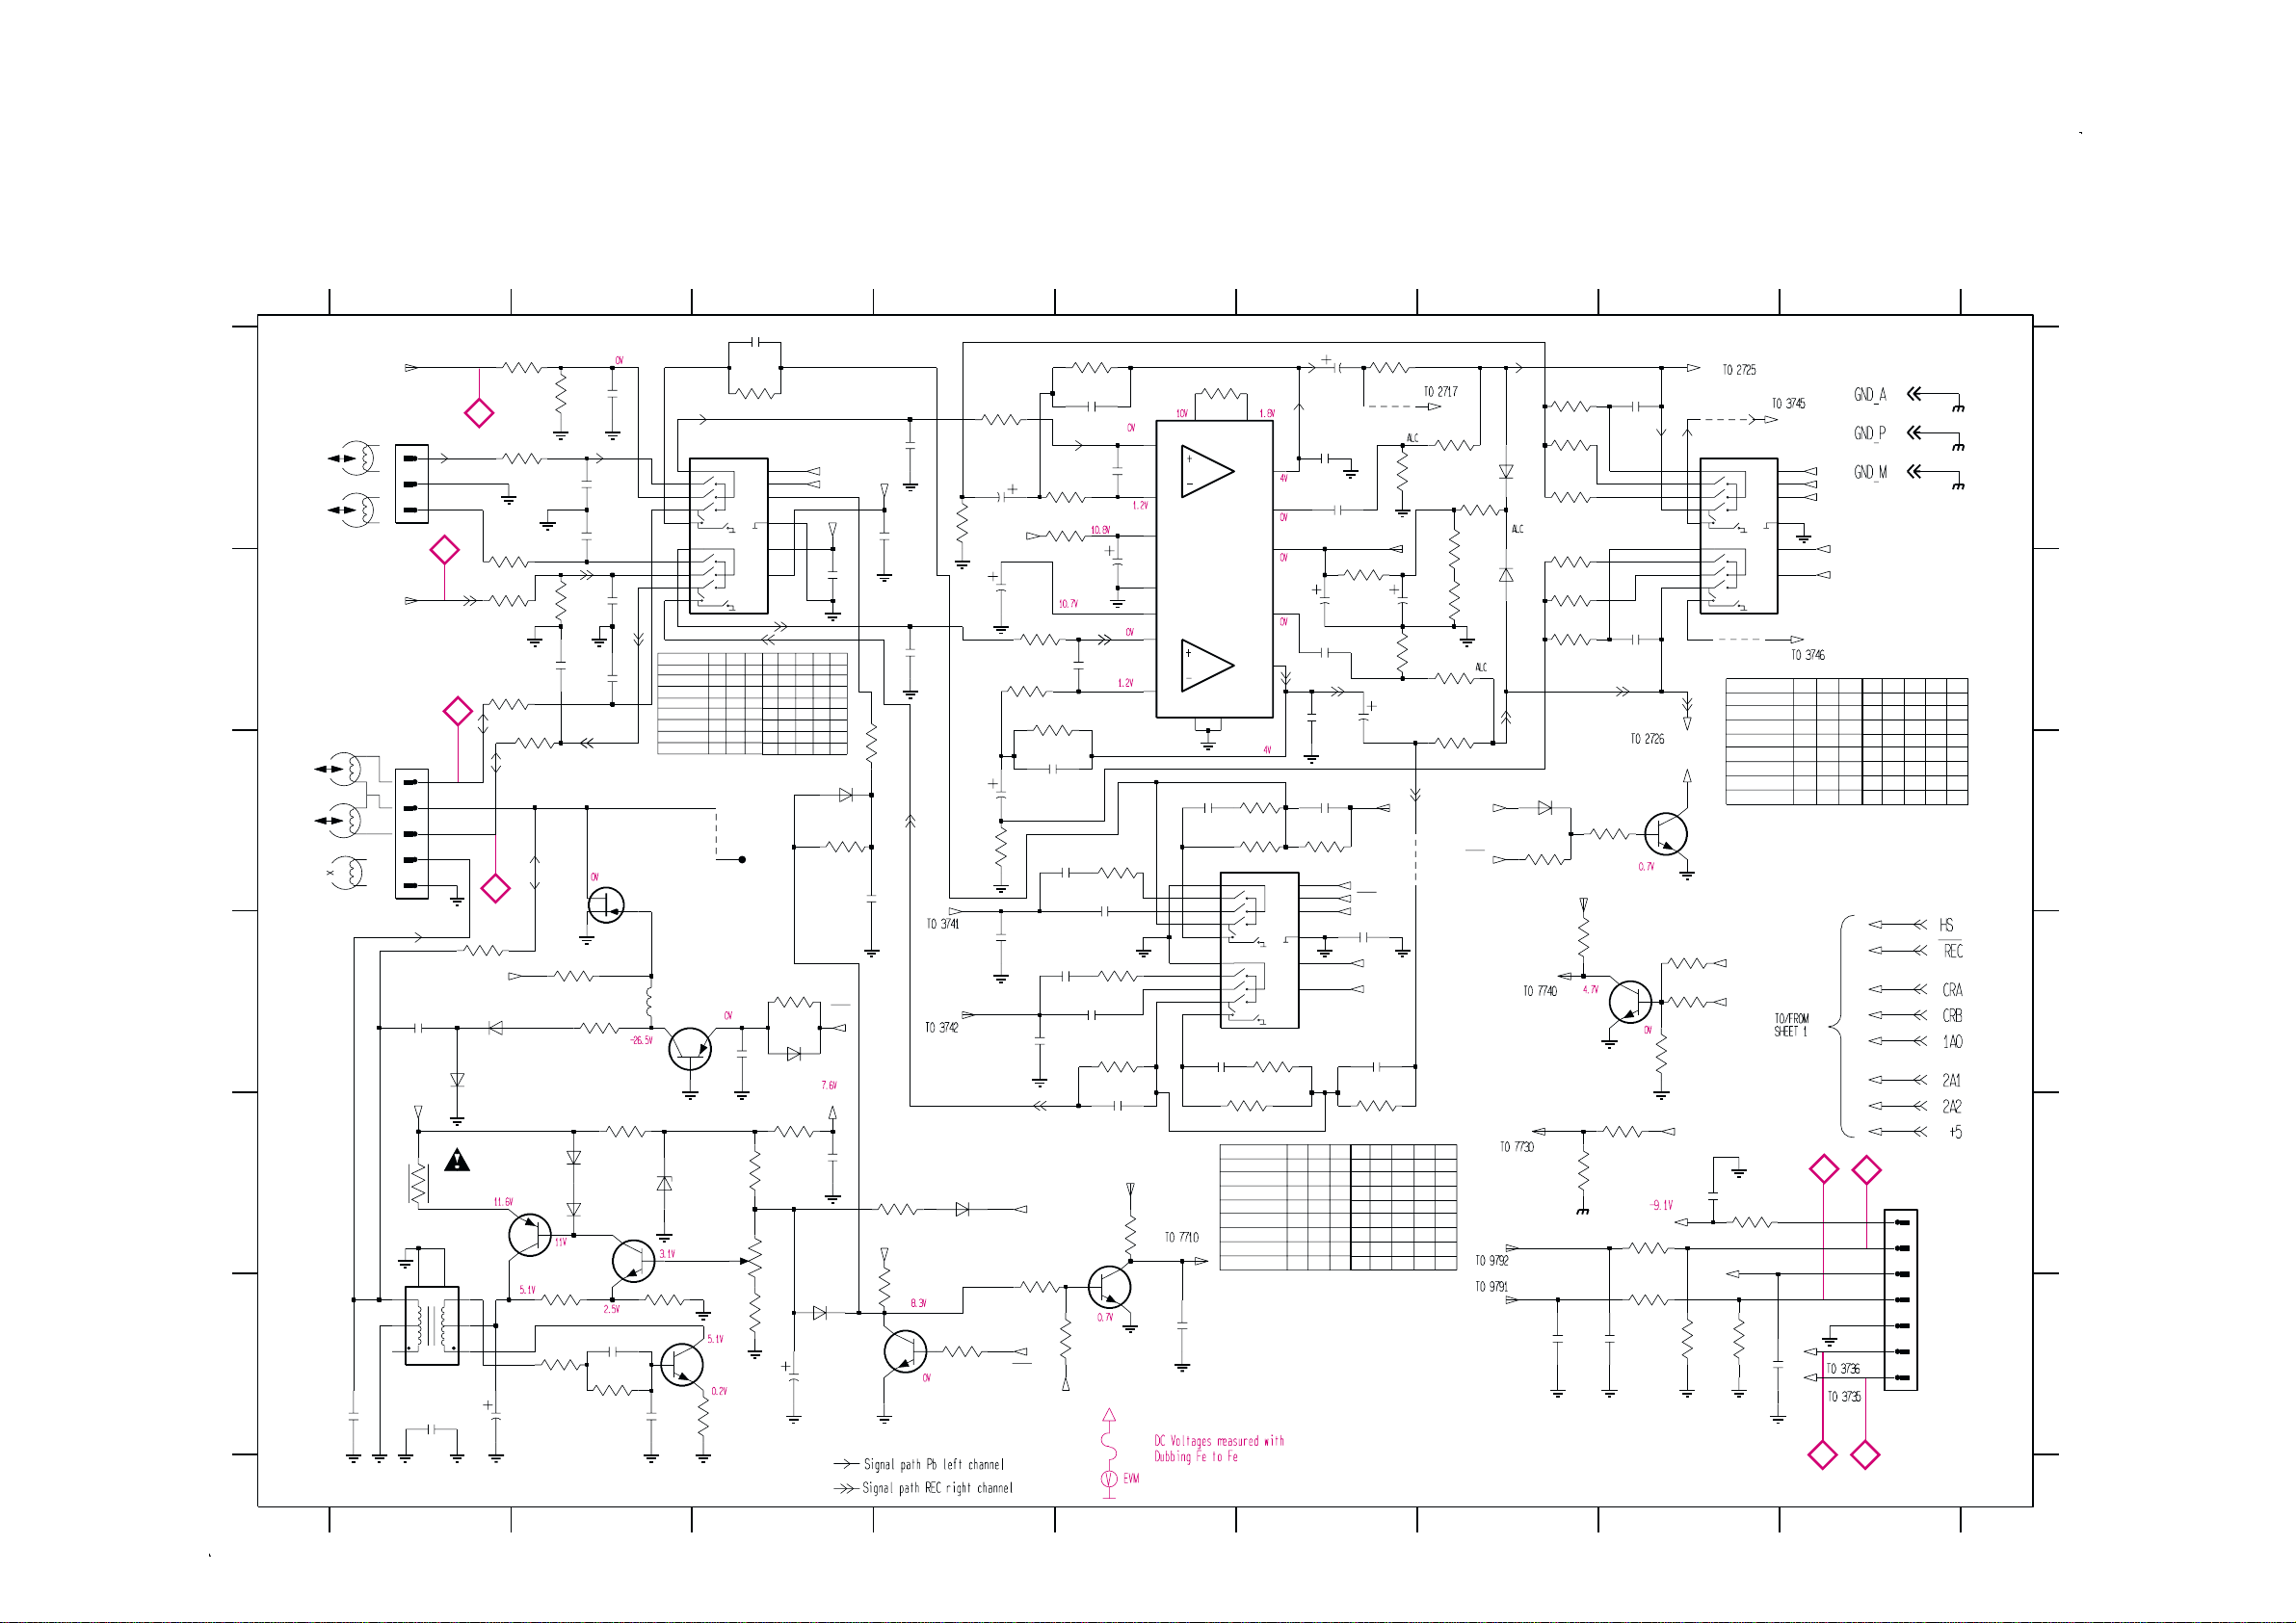
ANALOG CIRCUIT
12/2/2013
www.nostatatech.nl
World of free manuals
1701 F9
1710 C1
1730 A1
2701 B2
2702 B2
2703 A2
2704 B2
A
B
C
D
E
F
2705 A2
2706 A2
2707 A4
2708 B4
2709 A5
2710 B5
2711 A6
REC_R
2784
A
9-7
4794 C6
5701 D2
5703 F1
6770 E2
6771 E2
6772 D1
6773 D1
6774 D3
6775 C3
6776 F3
6777 E2
6778 E4
6782 C7
6785 A7
6786 B7
7710 A3
7720 A5
7730 D6
7740 A8
7780 F4
7781 F3
7782 E1
7783 E2
7784 D2
7786 C2
7787 C8
7791 F5
7792 D8
2712 B6
2713 A6
2714 B6
2715 A4
2716 C4
2717 C6
2718 D6
2719 C5
2720 D5
2721 C5
2722 D5
2723 C5
2724 D5
2725 D4
2726 D4
2727 A3
2728 E5
2729 A8
2730 B8
2733 A5
2734 C4
9-7
2735 B3
2737 A6
2738 B6
2741 D6
2742 C3
2743 F1
2744 A4
2745 F5
2746 F8
2747 E8
2760 E3
2761 B5
2762 B6
2763 B6
2765 B4
2769 F7
2770 F8
2780 F3
2781 F2
2782 F2
2784 F1
2785 F1
2786 D1
2787 D3
3701 B1
3702 C2
3703 A2
3704 B1
3705 A4
3706 B4
3707 A5
3708 B4
3709 A4
3710 C4
3711 A5
3712 B4
3713 A7
3714 B7
3715 A6
3716 B6
3717 C6
3718 E6
3719 C6
3720 E6
3721 C6
3722 D6
3723 A3
3724 D5
3725 C5
3726 D5
3727 A7
3728 B7
3729 A7
3730 B7
3731 A7
3732 B7
3733 A2
3734 B2
3735 A2
3736 B1
3741 A6
3742 C7
3743 F8
3744 F8
3745 F8
3746 E8
3748 C8
3749 C7
3751 E5
3752 F4
3753 F5
3754 E8
3755 E7
3756 D8
3757 D8
3758 D8
3759 D7
3760 A7
3761 E3
3762 E2
3763 A5
3764 A5
3765 B6
3766 B7
3767 A7
3768 E8
3769 E4
3770 F2
3771 F2
3772 F3
3773 E3
3774 E3
3775 F3
3776 F2
3777 F2
3778 E1
3779 D3
3780 D2
3781 D2
3784 D1
3786 F4
3787 C3
3788 C3
3789 F4
4790 C3
123456789
2727
*
13
14
2
3
4
A0
A1
A2
2711
100p
2762
2738
100n
2712
A
2717
*
10n
3717
2K2
7
9
10
8
4
13
7730
HEF4952B
A2
A1
0
0
0
0
1
0
0
1
1
0
1
0
1
1
1
1
2713
10u
2737
100n
4u7
A
3765
39K
3741
2K2
9793
A
ALCEN
3715
2763
3716
1K8
47u
1K8
LH
3713
10R
3767
3766
3714
3760
120R
4M7
4M7
A
6785
1N4148
3727
*
5K6
3731
8K2
3729
*
1N4148
3K3
3732
8K2
6786
3730
*
3K3
3728
*
5K6
2729
22n
2730
22n
15
16
14
12
11
2
1
3
5
6
B1
9791
7740
HEF4952B
S0
S1
S2
S3
S0
S1
S2
S3
9792
S4
VSS
VEE
VDD
S4
10R
100p
A
10u
3A0
REC
CRB
100n
2714
LH
2741
-C
+C
3742
4794
2K2
1A0
REC
6782
1N4148
3749
47K
3748
2K2
+5
ALCEN
A
CONTROL LOGIC
P
2A0
3759
10K
7792
BC847B
3756
220K
3757
220K
B2
7787
BC847B
STOP
REC
HS Chrome
Pb Chrome
Pb Ferro
CRA
HS
P
2718
*
10n
3718
2K2
A0 S0
0
1
0
1
0
1
0
1
S2
S1
S3
S4
1
1
1
1
1
L
1
1
1
1
1
1
1
1
11
1
Not For ND/DD/FR
3754
*
3755
*
1M
1M
3A0
M
B4
B3
2770
2769
470p
A
A
3746
*
3745
*
470p
3K3
3K3
3758
-C
*
10K
P
HS
3744
A
#
2747
1K5
+12
*
A
100n
3768
10K
3743
A
* See Variant Table for details
# For Provision Only
Note : Some values may varies, see respective parts list for correct value.
--
--
--
1K5
A0
A1
A2
7
9
10
8
4
13
2746
#
B3
2A0
2A1
2A2
A
-C
PLAYBACK
+C
EQUALISATION
B4
S0
A0
A1
A2
0
0
0
0
0
1
1
0
0
0
1
1
0
1
0
0
1
1
1
0
1
1
1
1
1
A
REC_R
100n
REC_L
A
S1
1
1
1
1
1
2
1701
S2
S3
1
11
1
7
6
5
4
3
2
1
TO/FROM AF
4
3
REC_L
PLAY BACK
DECK A
1730
REC/PB
DECK B
1710
2786
100p
+12
3778
P
MT1
7
3
2
1
CLNS-2A833 YEZ
5703
2743
15n
22n
A
A
1
2
3
1
2
3
4
5
A
4
5
A
6772
6R8
8
3
6
3784
1K
-C
6773
1N4148
1N4148
BC557B
7782
MT2
6
5
4
2785
P
3703
220R
3704
220R
3736
22K
3701
220R
P
3735
22K
A
A
3702
220R
1u
1K2
3733
A
2705
A
2706
1K2
3734
A
150p
2702
*
7786
J111
A
3781
4M7
3780
1M
6770
6771
7783
BC847B
3770
1K5
3777
150R
ERASE
OSCILLATOR
2703
*
A
220p
220p
2704
*
2701
*
3762
820R
1N4148
1N4148
2782
4n7
3776
6K8
100p
100p
150p
5701
2781
STOP
Pb deck A
Pb deck B
REC in
Dubbing
2u2
6777
P
3771
1K2
10n
P
7710
HEF4952B
15
S0
16
S1
14
S2
12
S3
11
2
S0
1
3
S1
5
S2
S3
6
0
0
0
--
0
1
1
--
1
--
1
4790
7784
BC857B
A
BIAS
LEVEL
BZX79-F8V2
P
7781
BC847B
4R7
3775
P
*
S4
S4
A1A2
0
0
1
1
0
0
1
1
2787
*
*
470p
3723
15K
A0
A1
A2
VSS
VEE
VDD
A0
0
1
0
1
0
1
0
1
3774
3773
3772
MODE
SELECTOR
7
9
10
8
4
13
S1
S0
1
1
1
11
1
3779
330K
6774
33n
1N4148
A
3761
10K
15K
4K7
6K8
P
2780
LEFT CHANNEL
1A0
1A1
-C
2735
100n
A
S2
S4
S3
1
1
1
1
1
1
1
1
1
1
6775
1N4148
3787
1M
REC
+C
2760
100n
A
6776
1N4148
7780
BC847B
22u
P
+C
2744
RIGHT
CHANNEL
3788
2742
P
*
+12
3789
A
1M
22n
3769
6K8
P
2707
100n
2708
A
47K
470p
A
470p
B1
B2
6778
1N4148
3786
22K
3709
A
220R
2715
470u
10R
3705
2765
A
2716
3710
2725
+12
A
A
47u
3706
220R
3708
100R
470u
10R
4n7
3752
100K
REC
3711
150K
2733
470p
3707
100R
3764
220R
2710
3712
150K
2734
470p
2721
*
6n8
2722
*
6n8
2724
15n
4n7
2726
A
REC EQUALISATION
CRB
3753
100K
1A0
A
330p
*
2723
15n
*
*
2728
*
470p
2709
2761
3725
10R
3726
10R
3724
15K
10
330p
11
16
220u
1
15
7
6
+5
3751
7791
BC847B
P
IN2
NF2
Vcc
GND
RF
IN1
NF1
A
10K
3763
150K
12
PC2
AN7323S
7720
PB/REC
AMPLIFIER
NC19NC2
8
2719
33n
15
16
14
12
11
2720
33n
1A1
2745
100n
#
A
5
PC1
OUT2
AN2
ALCC
AIN1
OUT1
A
3721
3K9
3719
12K
S0
S1
S2
S3
S4
2
1
3
5
6
VSS
VEE
S0
S1
VDD
S2
S3
S4
3722
3K9
3720
12K
NS Ferro
HS Ferro
REC MUTE
REC MUTE
NS Chrome
HS Chrome
REC MUTE
--
ANALOG CCTRY
9791 A8
9792 B8
9793 A6
S4
1
1
1
1
1
1
1
-CMOS
TAPE-R
+12V
TAPE-L
GND_A
REC-R
REC-L
A
P
A
M
B
C
D
E
F
12345
6789
Page 36
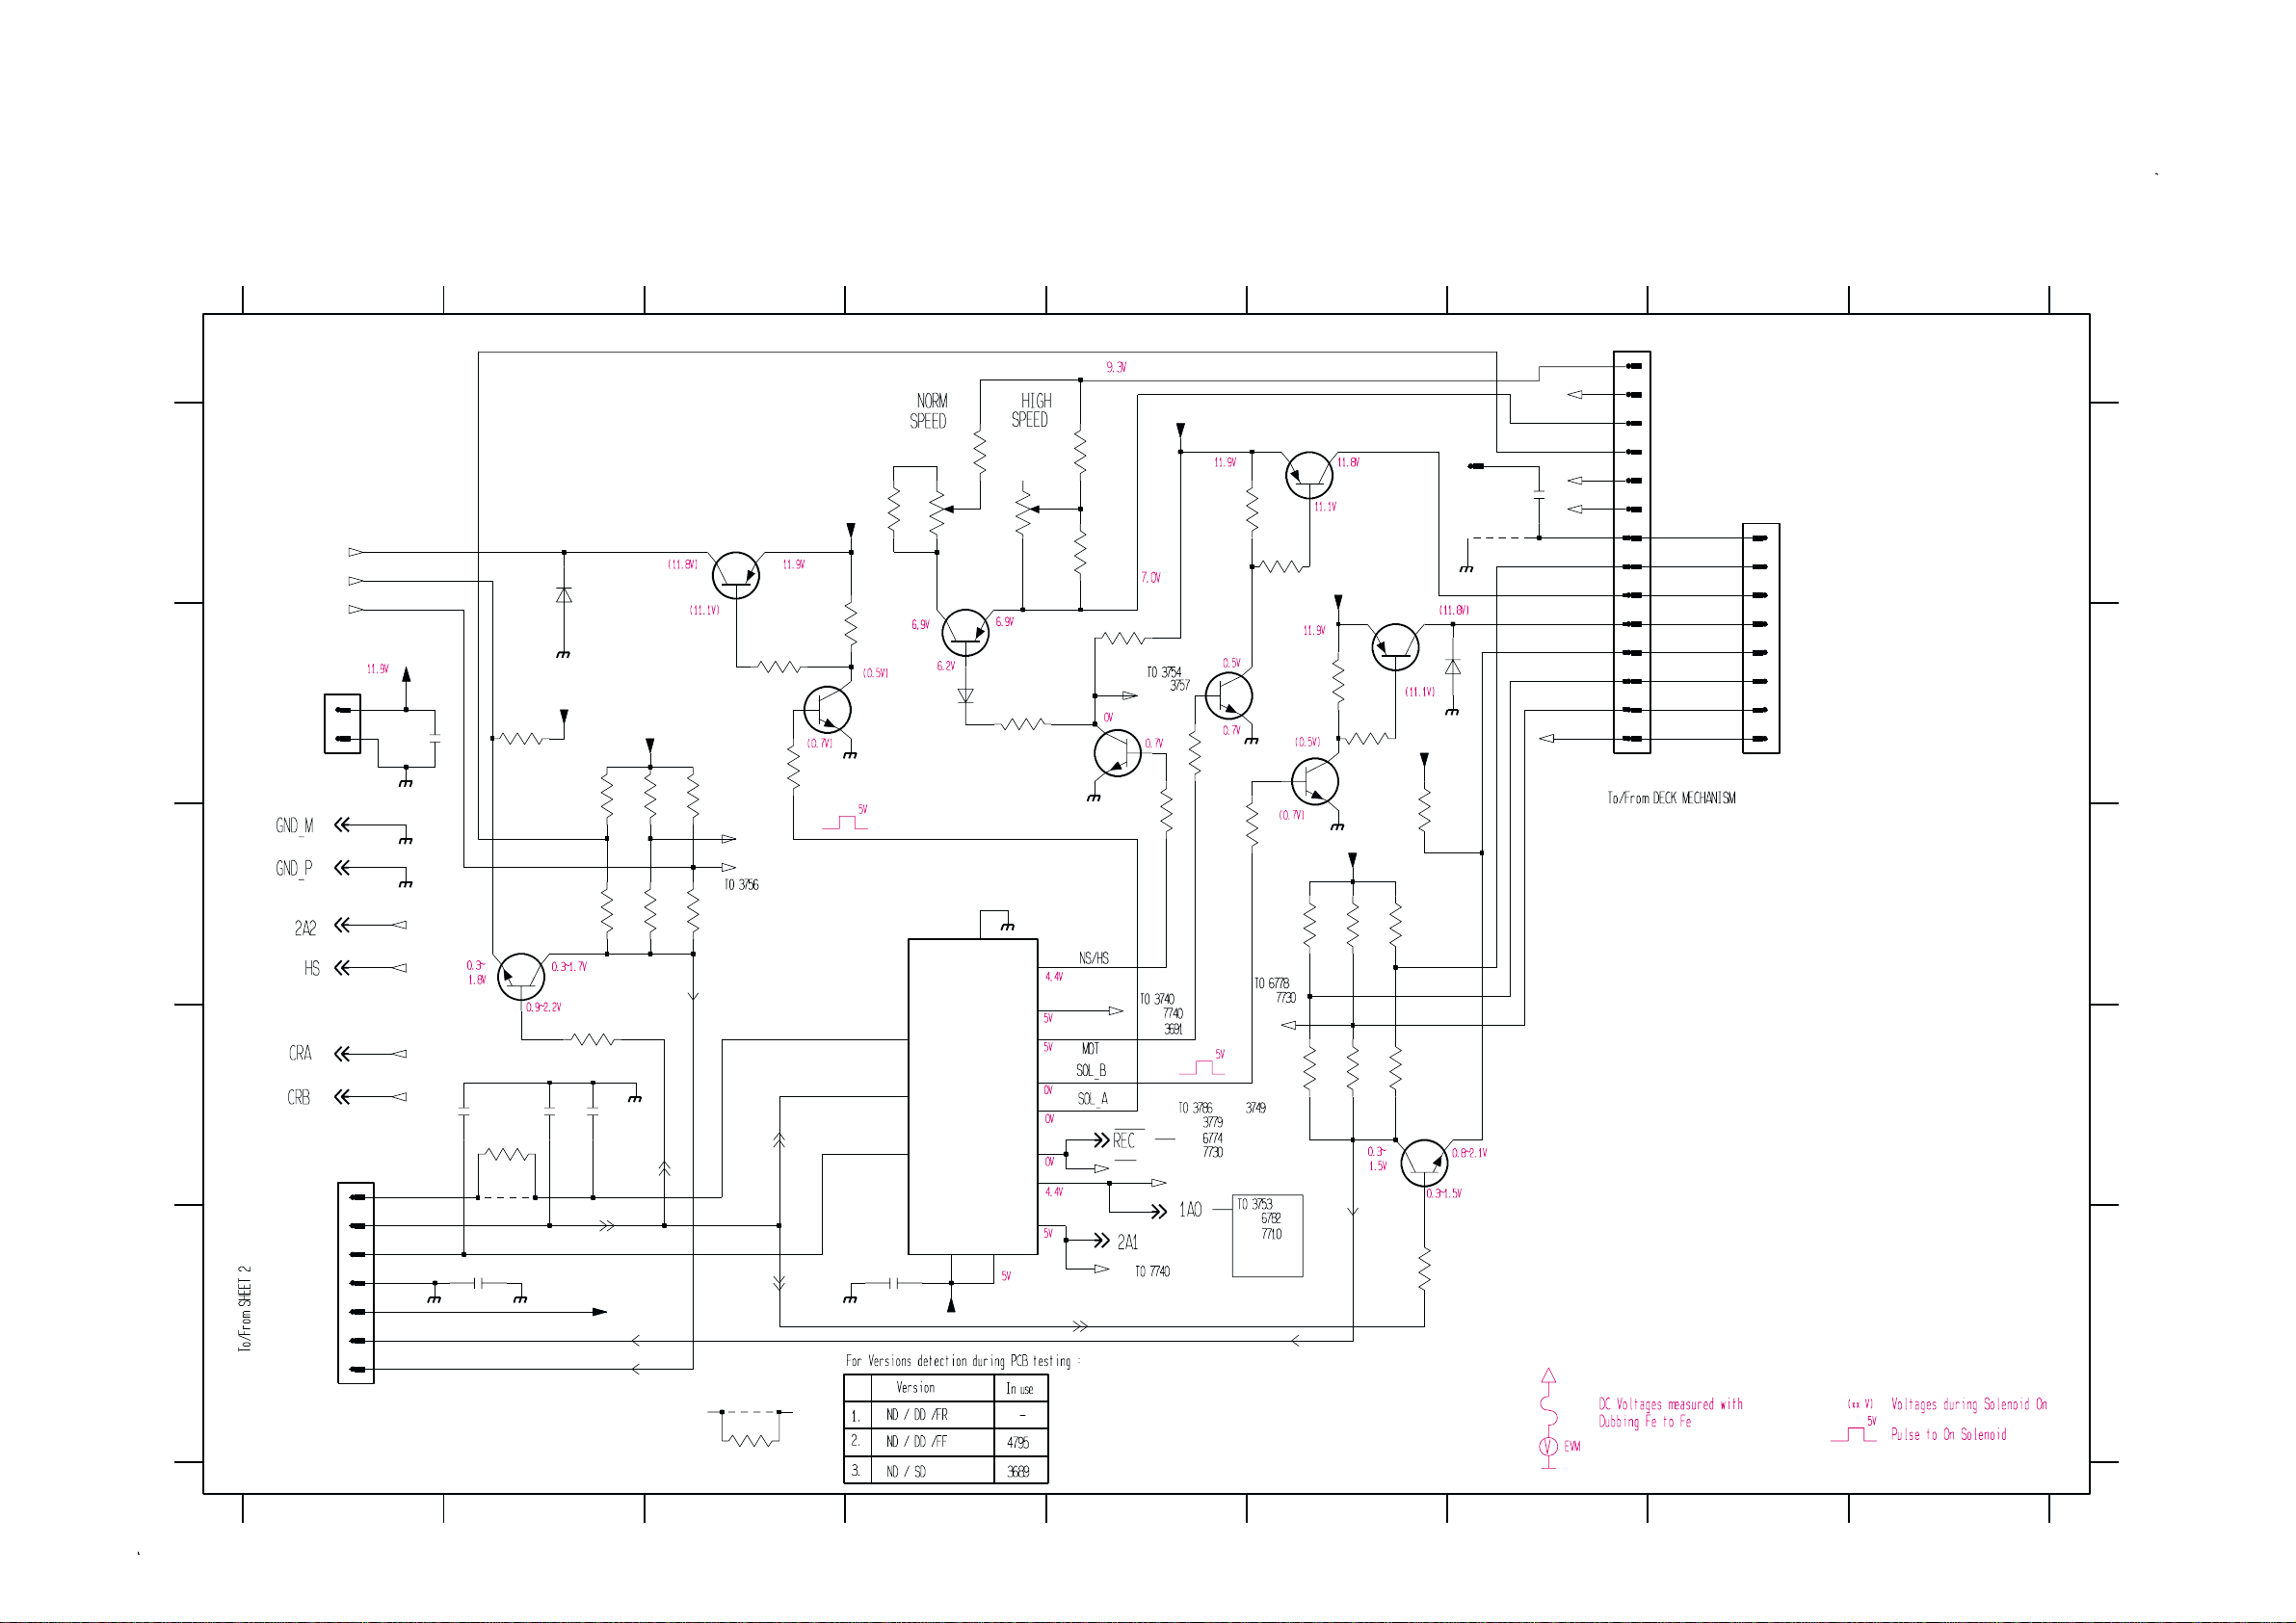
SERVO CONTROL CIRCUIT
12/2/2013
www.nostatatech.nl
World of free manuals
9-8 9-8
A
B
C
D
E
1702 A7
1703 B1
1706 E1
1760 B8
1770 B7
2621 D2
2622 D2
2623 D2
2624 E2
123456789
SOL_A
PHOTO_A
CR02_A
+MOTOR
2
1
1703
STROBE
GND_P
7
6
DATA
5
CLK
4
3
+5
2
AD1
1
AD2
1706
TO/FROM FRONT
2625 E4
2626 B1
2627 A7
2626
#
M
M
P
BC847B
*
P
100n
7623
2623
2624
100n
470p
*
*
3601 B2
3602 C2
3603 B2
3613
27K
3687
220R
4785
M
6611
L
+5
2622
3604 C2
3605 B3
3606 C3
1N4003
M
3685
100K
2621
470p
+5
3601
3602
1n
2K2
27K
+5
3603
3604
P
3607 C6
3608 D6
3609 C6
2K2
3605
56K
3606
3610 D6
3611 C6
3612 D6
7613
BC807-25
2K2
Rec_RVS
CRA
120K
*
*
4795
3689
4K7
3625
1K
+MOTOR
47K
3679
3613 B2
3614 C6
3616 A5
3623
7619
BC847B
P
*
*
100K
M
3619
#
10
2625
100n
9
1
2
3
3618 A4
3619 A4
3620 A4
680R
3620
*
*
Os’
Os
STR
HEF4094BT
D
CP
VDD
16
3622 A4
3623 B3
3624 B6
3618
*
10K
7616
BC857B
6614
8
VSS
7610
+5
6K8
L
*
1N4148
E0
15
3622
3672
4K7
O3
O7
O5
O6
O4
O0
O1
O2
10K
*
BC847B
P
11
13
12
14
4
5
6
3625 B3
3626 B6
3628 A5
3616
*
3688
*
7622
*
7
10K
680R
3674
M
--
2A2
3630 A6
3672 B4
3674 B5
4K7
REC
2A1
+MOTOR
HS
3676
*
1A0
3678
47K
3676 C5
3678 B5
3679 B3
3628
47K
3680
3680 C5
3685 D2
3686 E6
BC807-25
100K
3630
470R
7618
BC847B
M
47K
CRB
7612
+MOTOR
M
3611
3612
3624
100K
3626
1K
7620
BC847B
+5
2K2
3609
56K
3610
3687 D2
3688 A5
3689 E3
7614
BC807-25
2K2
3607
3608
120K
7624
BC847B
+5
3614
2K2
27K
3686
4785 D2
4795 E3
6611 A2
1702
M
6612
1N4003
M
27K
100K
9705
6612 B6
6614 B4
7610 D4
2627
#
Rec_RVS
7612 A6
7613 A3
7614 A6
7616 A4
7618 B6
7619 B4
7620 B6
7622 B5
7623 D2
7624 D6
9705 A7
DECK AB
100n
14
13
12
11
10
9
8
7
6
5
4
3
2
1
1770
H
CR02_A
L
mode_A
PHOTO_A
SOL_A
Gnd
mode_B
Vcc
sol_B
photo_B
Rec_FWD
CrO2_B
Rec_RVS
#
SERVO CONTROL
CCTRY
8
7
6
5
4
3
2
1
1760
* See Variant Table for details
# For Provision Only
Not For ND/DD/FR
L
Note : Some values may varies, see respective parts list for
correct value.
A
B
C
D
E
1234
56789
Page 37
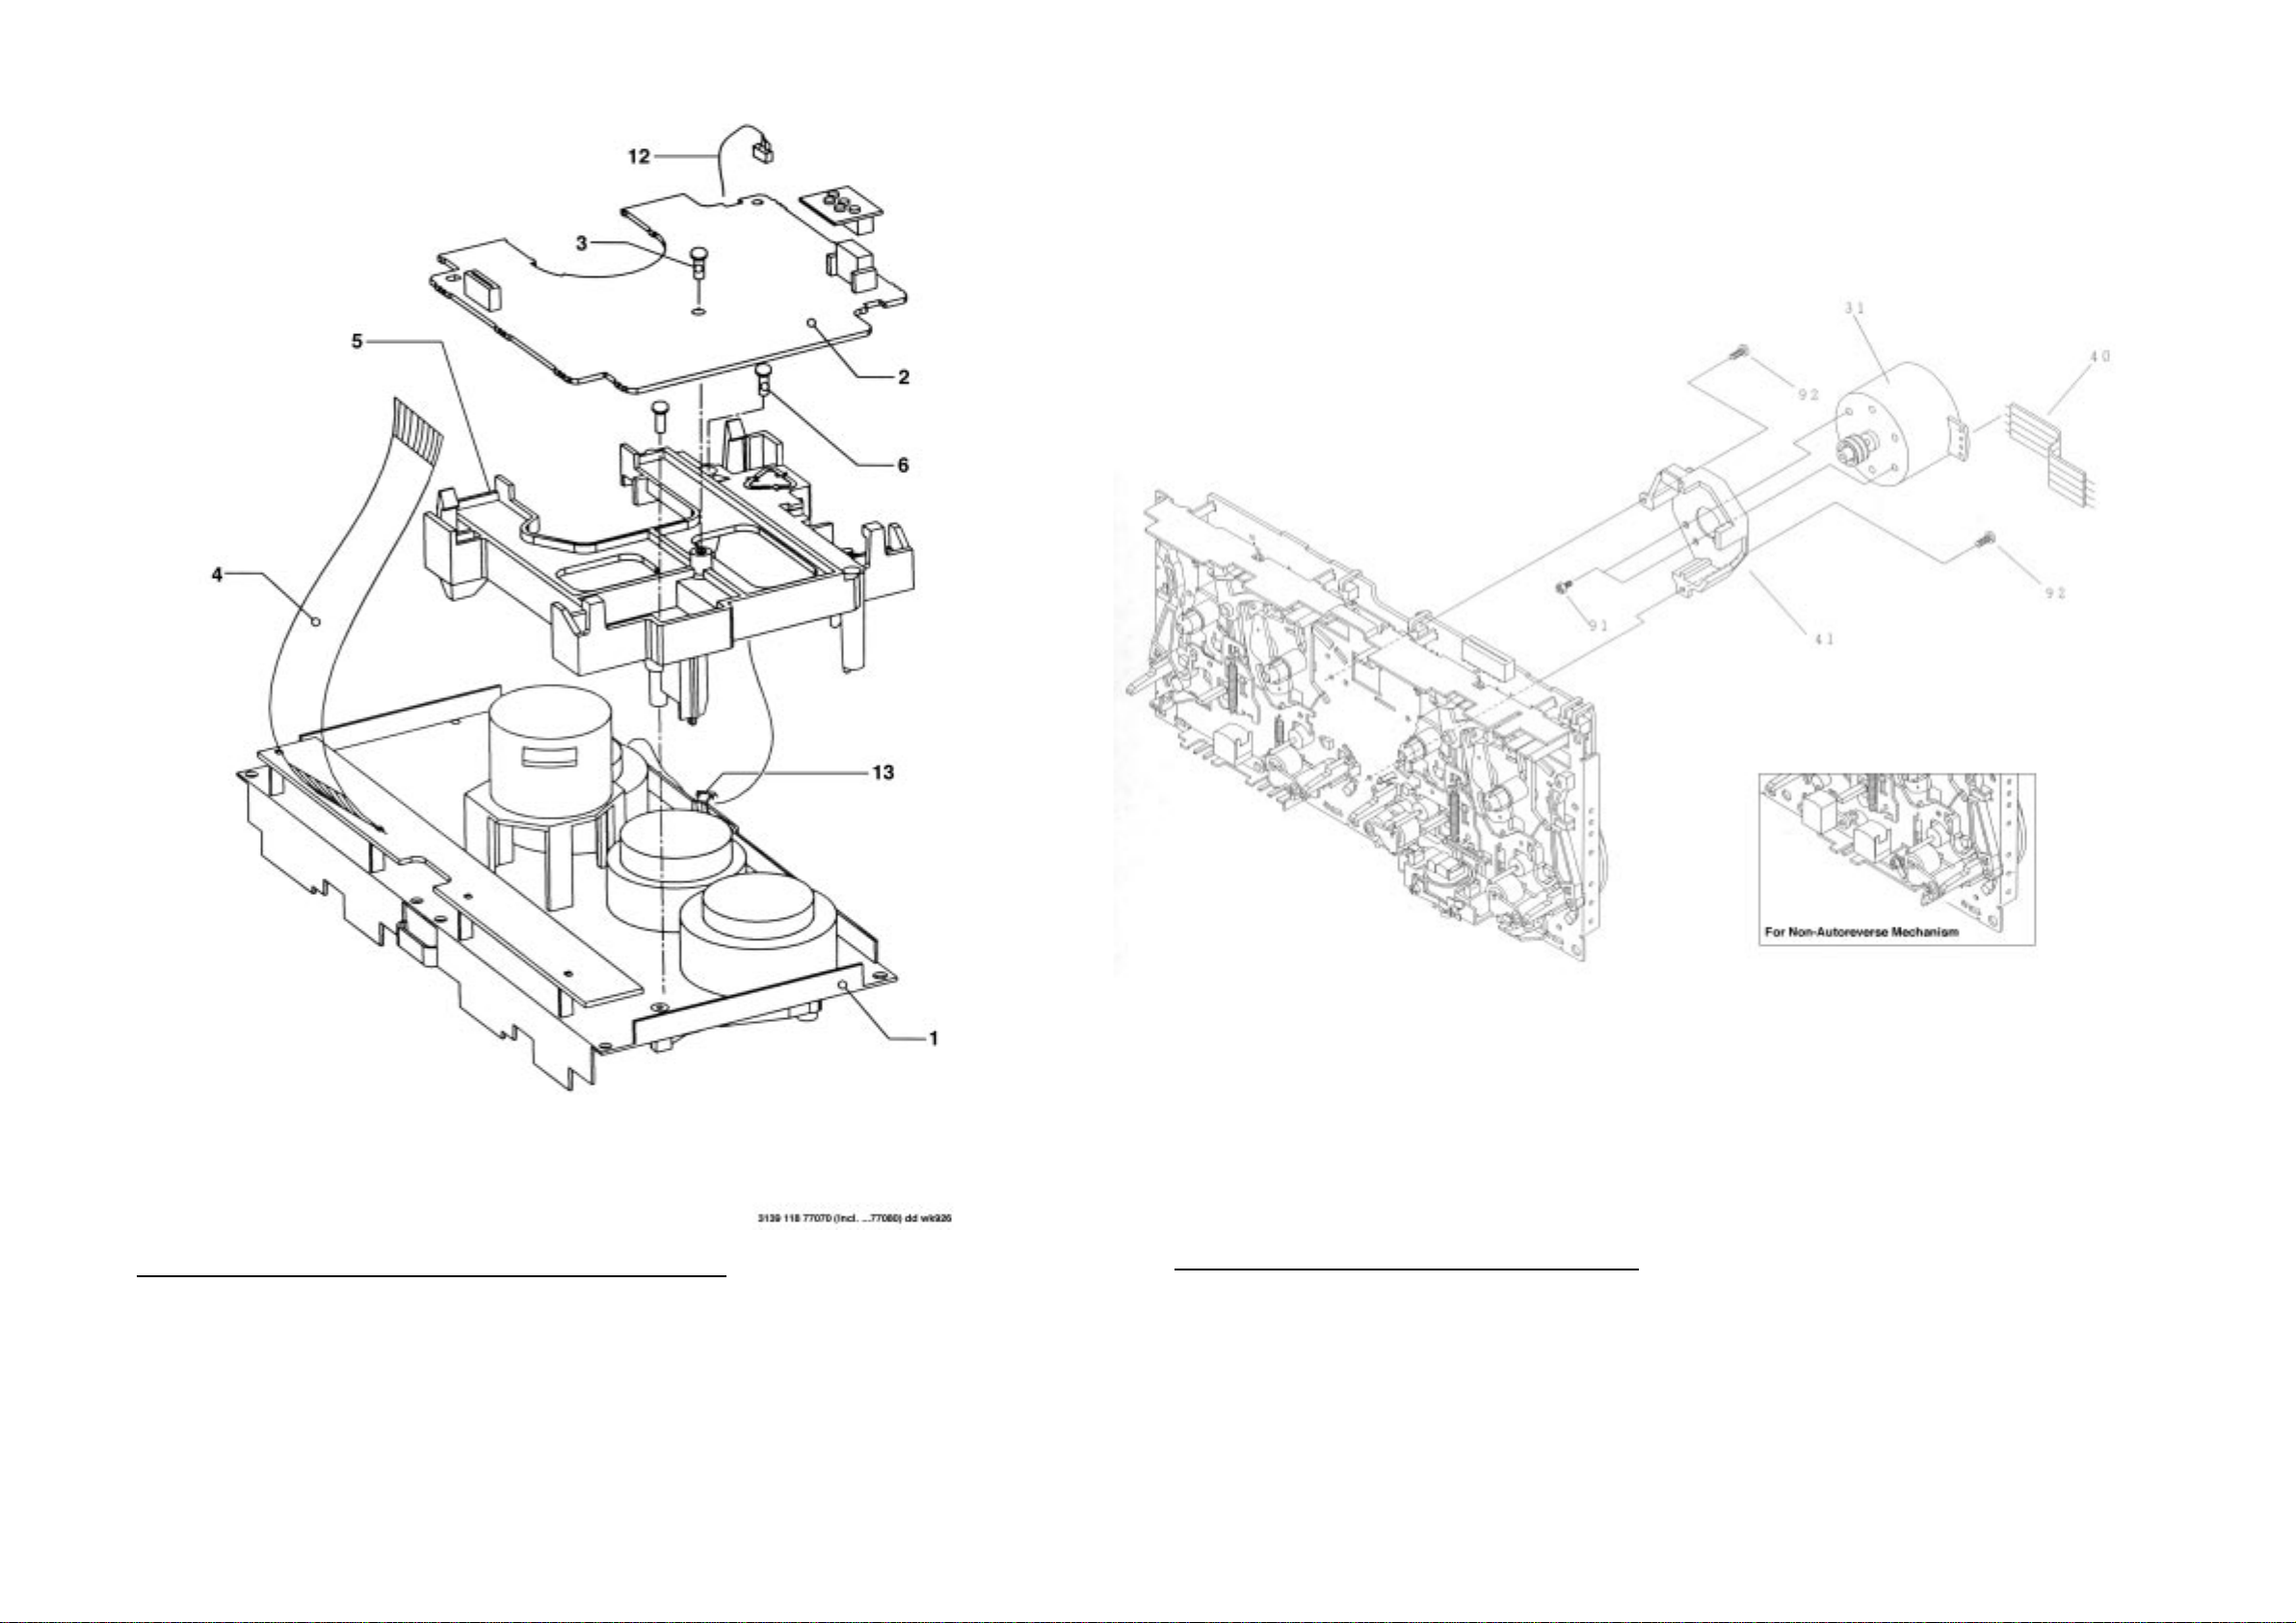
9-9
12/2/2013
www.nostatatech.nl
World of free manuals
9-9
TAPE MODULE EXPLODED VIEW
1 3139 118 77130 Autoreverse Mech. CWE44FR01
1 3139 118 77140 Non-Autoreverse Mech. CWE44FF02 Chrome/Ferro
1 3139 118 77950 Non-Autoreverse Mech. CWE44FF05 Ferro
3 - Screw D3 x 10
6 - Screw M2 x 16
7 3139 110 34080 Flex Cable 14 pin 7,5 cm
Note: Only the parts mentioned in this list are normal service spare parts.
TAPE MECHANISM - MOTOR EXPLODED VIEW
31 4822 361 11055 Motor Assembly
91 - Screw M2,6 x 5
92 - Screw M2 x 5
Note: Only the parts mentioned in this list are normal
service spare parts.
Page 38

TAPE MECHANISM A - PLAY
12/2/2013
www.nostatatech.nl
World of free manuals
MECHANICAL PARTS - PLAY MECHANISM
1 9965 000 02313 Play Head (Non-Autoreverse deck)
1 9965 000 02321 Play Head (Autoreverse deck)
12 4822 402 10972 Pinch Arm Assembly R
23 9965 000 02314 Coil Assembly
25 9965 000 06443 Cam Gear
32 4822 528 11209 Flywheel Assembly RV
42 9965 000 02315 Belt AF (Autoreverse deck)
42 9965 000 02718 Belt AF (Non-autoreverse deck)
69 4822 492 11761 Spring
102 4822 532 12931 Washer
103 4822 532 12932 Washer
104 4822 532 12933 Washer
Note: Only the parts mentioned in the list are normal service
spare parts.
9-10
9-10
Page 39

9-11
12/2/2013
www.nostatatech.nl
World of free manuals
9-11
TAPE MECHANISM B - RECORD/PLAYBACK
MECHANICAL PARTS - REC/PB MECHANISM
1 9965 000 02313 Play Head
3 9965 000 02600 Head, Erase
12 4822 402 10972 Pinch Arm Assembly R
23 9965 000 02314 Coil Assembly
25 9965 000 06443 Cam Gear
32 4822 528 11209 Flywheel Assembly RV
44-2 9965 000 02317 Flex Socket 14 Pin
44-3 9965 000 02320 Photo Interrupter
44-4 4822 050 16801 680R 1% 0,4W
44-6 9965 000 02318 Leaf Switch
44-7 9965 000 02319 Mode Switch
59 9965 000 02719 Belt BF (Large)
69 4822 492 11761 Spring
102 4822 532 12931 Washer
103 4822 532 12932 Washer
104 4822 532 12933 Washer
(Non-Autoreverse version)
Note: Only the parts mentioned in the list are normal service
spare parts.
Page 40
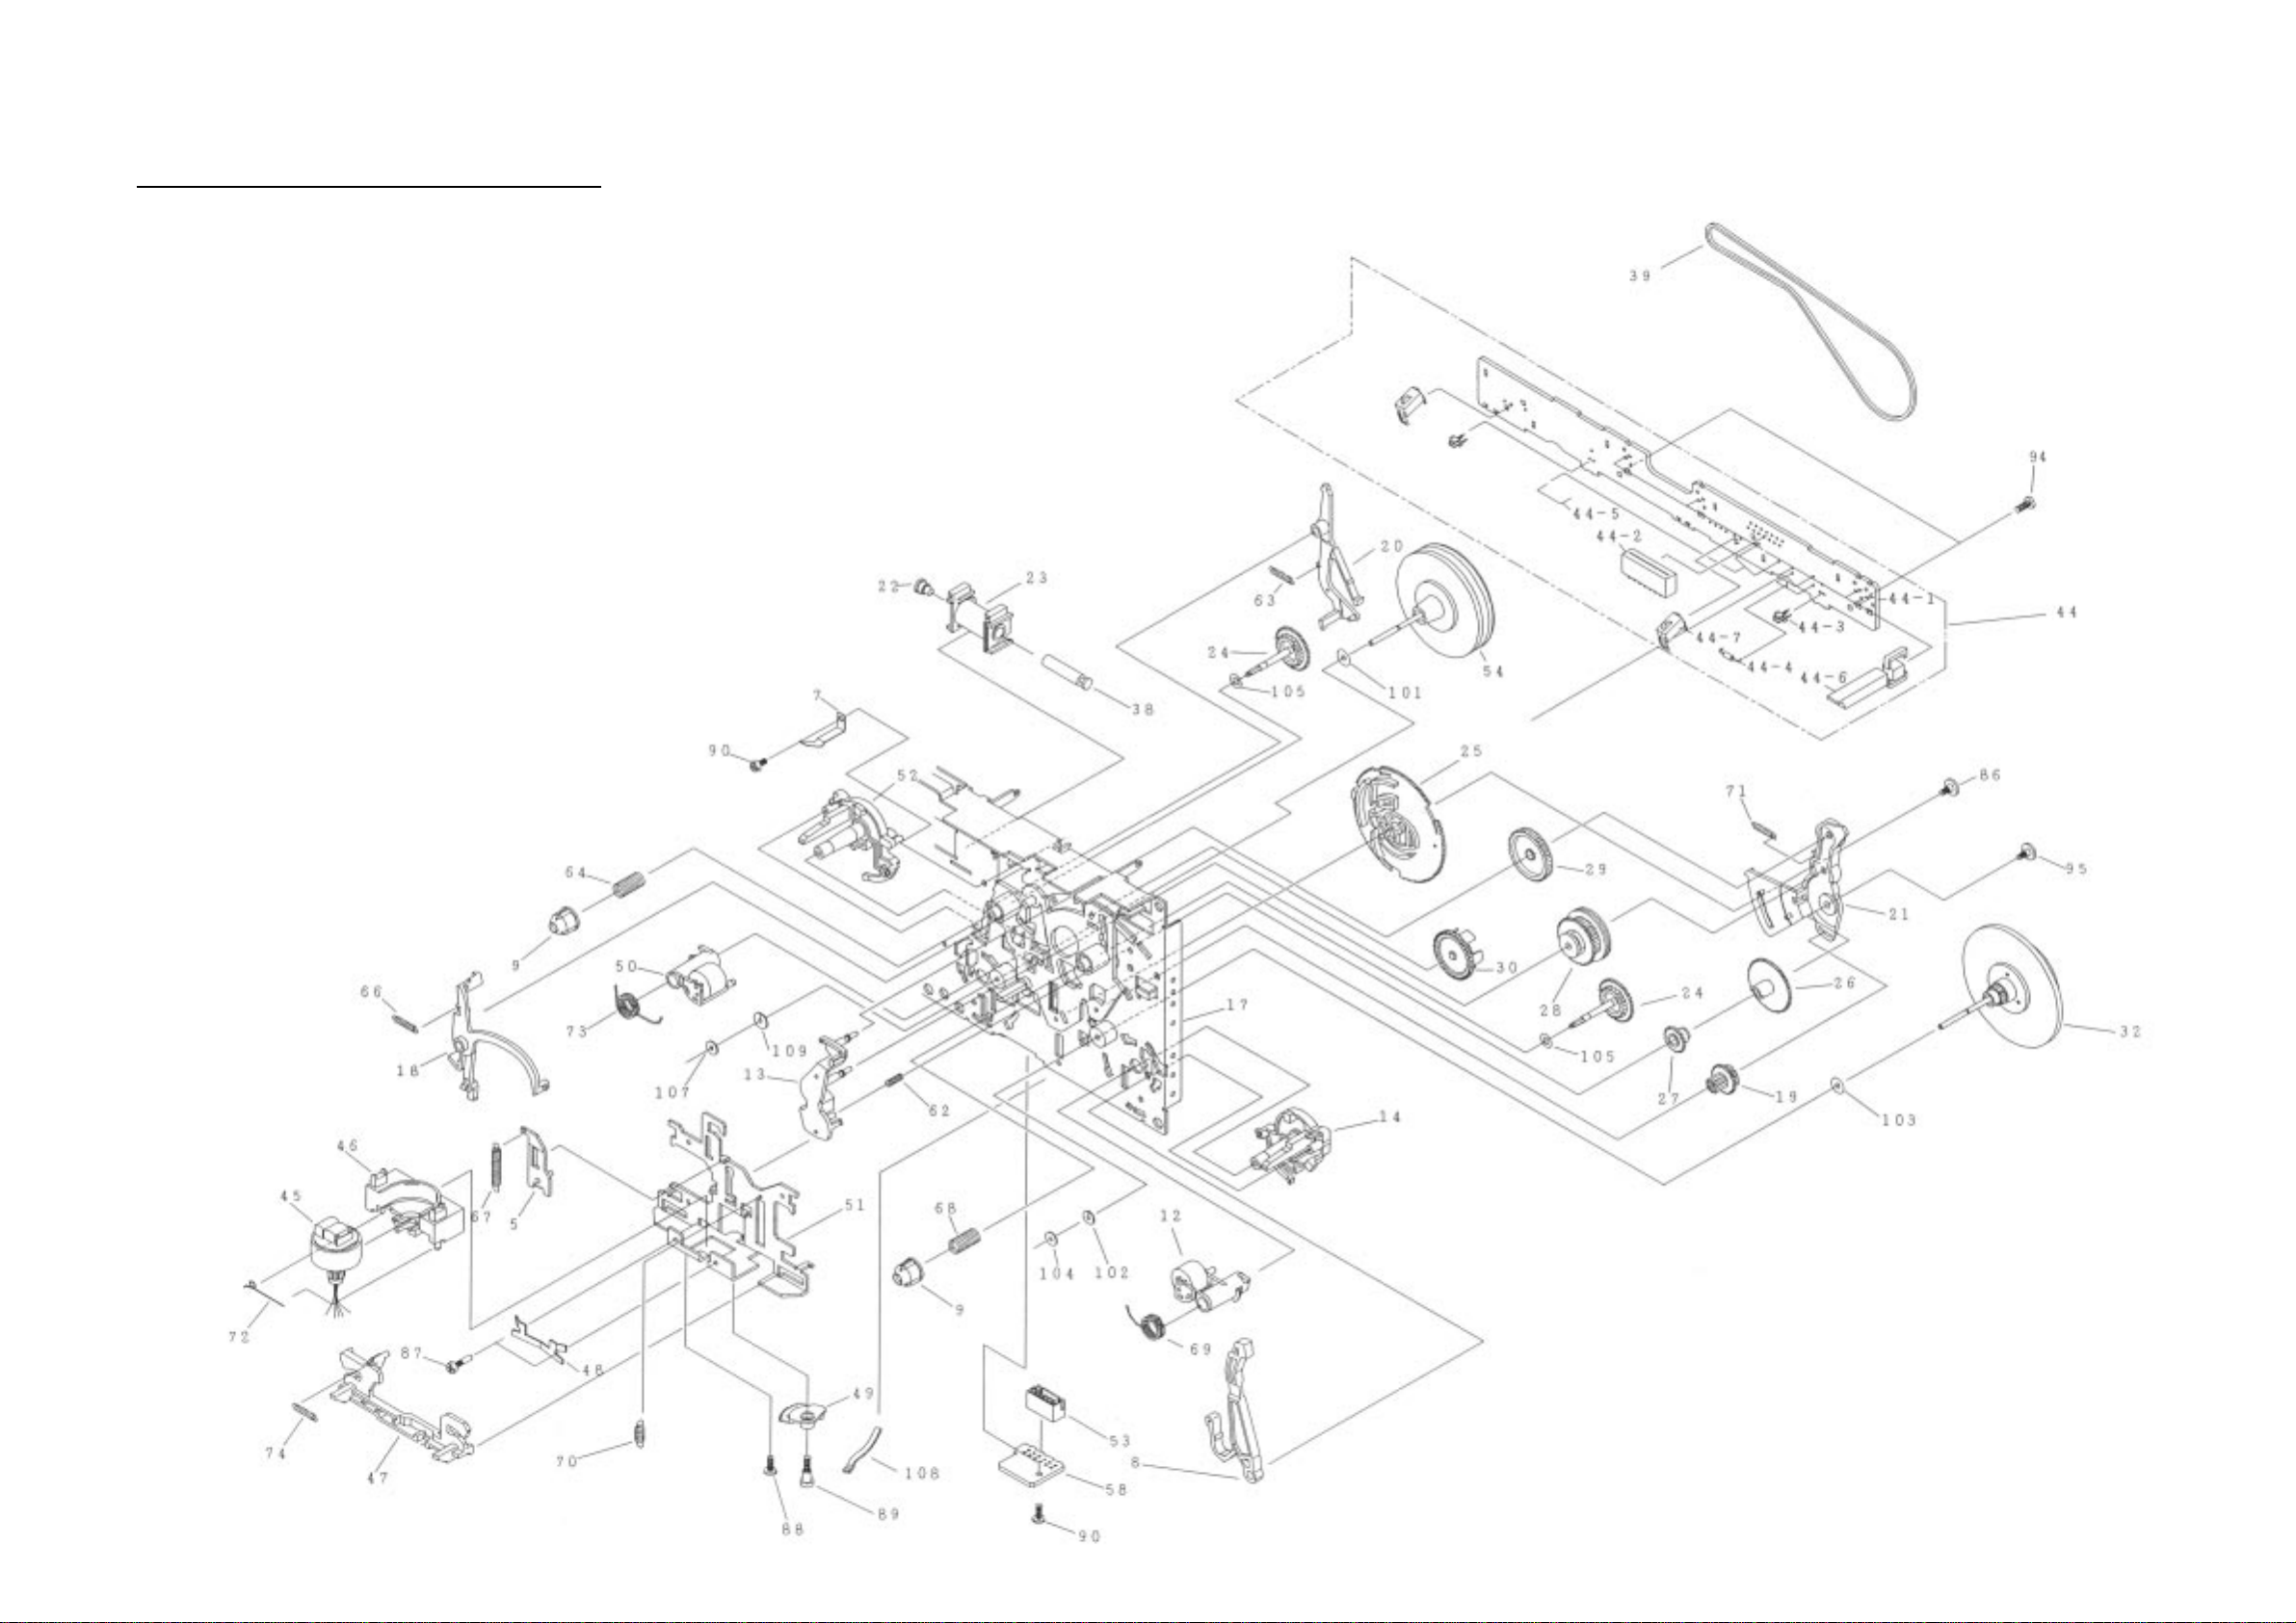
9-12
12/2/2013
www.nostatatech.nl
World of free manuals
9-12
TAPE MECHANISM B - RECORD/PLAYBACK
MECHANICAL PARTS - REC/PB MECHANISM
12 4822 402 10972 Pinch Arm Assembly R
23 9965 000 02314 Coil Assembly
25 9965 000 06443 Cam Gear
32 4822 528 11209 Flywheel Assembly RV
39 9965 000 02322 Belt AF
44-2 9965 000 02317 Flex Socket 14 Pin
44-3 9965 000 02320 Photo Interrupter
44-4 4822 050 16801 680R 1% 0,4W
44-6 9965 000 02318 Leaf Switch
44-7 9965 000 02319 Mode Switch
45 9965 000 02323 Rec/Pb Head Assembly
50 4822 402 10973 Pinch Arm Assembly L
54 9965 000 02324 Flywheel Assembly L
69 4822 492 11761 Spring
73 4822 492 11762 Spring
101 9965 000 02325 Washer
102 4822 532 12931 Washer
103 4822 532 12932 Washer
104 4822 532 12933 Washer
107 9965 000 02326 Washer
(Autoreverse version)
109 9965 000 02327 Washer
Note: Only the parts mentioned in the list are
normal service spare parts.
Page 41

9-13
12/2/2013
www.nostatatech.nl
World of free manuals
ELECTRICAL PARTS LIST - ETF7 NON-DOLBY BOARD ELECTRICAL PARTS LIST - ETF7 NON-DOLBY BOARD
MISCELLANEOUS
1701 482226710953 Flex Socket 7pin Vert.
1706 482226710953 Flex Socket 7pin Vert.
1770 482226751255 Flex Socket 14pin Vert.
CAPACITORS
2621 532212231647 1nF 10% 63V
2622 532212234099 470pF 10% 63V
2623 532212234099 470pF 10% 63V
2624 482212614585 100nF 10% 50V only for Ferro
2625 482212614585 100nF 10% 50V
2701 532212233538 150pF 2% 63V Autoreverse
2701 482212233216 270pF 5% 63V Non-autoreverse
2702 532212233538 150pF 2% 63V Autoreverse
2702 482212233216 270pF 5% 63V Non-autoreverse
2703 532212232531 100pF 5% 50V Autoreverse
2703 482212233575 220pF 5% 63V Non-autoreverse
2704 532212232531 100pF 5% 50V Autoreverse
2704 482212233575 220pF 5% 63V Non-autoreverse
2705 482212233575 220pF 5% 63V
2706 482212233575 220pF 5% 63V
2707 532212234099 470pF 10% 63V
2708 532212234099 470pF 10% 63V
2709 532212231863 330pF 5% 63V
2710 532212231863 330pF 5% 63V
2711 532212232531 100pF 5% 50V
2712 532212232531 100pF 5% 50V
2713 482212440248 10µF 20% 63V
2714 482212440248 10µF 20% 63V
2715 482212480195 470µF 20% 10V
2716 482212480195 470µF 20% 10V
2717 482212233177 10nF 20% 50V Autoreverse
2717 482212613188 15nF 5% 63V Non-autoreverse
2718 482212233177 10nF 20% 50V Autoreverse
2718 482212613188 15nF 5% 63V Non-autoreverse
2719 482212612105 33nF 5% 50V
2720 482212612105 33nF 5% 50V
2721 532212231866 6,8nF 10% 63V not for Ferro
2722 532212231866 6,8nF 10% 63V not for Ferro
2723 482212613188 15nF 5% 63V
2724 482212613188 15nF 5% 63V
2725 532212610223 4,7nF 10% 63V
2726 532212610223 4,7nF 10% 63V
2727 532212234099 470pF 10% 63V Autoreverse
2727 532212231647 1nF 10% 63V Non-autoreverse
2728 532212234099 470pF 10% 63V Autoreverse
2728 532212231647 1nF 10% 63V Non-autoreverse
2729 532212232654 22nF 10% 63V
2730 532212232654 22nF 10% 63V
2733 532212234099 470pF 10% 63V
2734 532212234099 470pF 10% 63V
2735 482212614585 100nF 10% 50V
2737 482212614585 100nF 10% 50V
2738 482212614585 100nF 10% 50V
2741 482212611585 22nF +80/-20% 25V
2742 532212232654 22nF 10% 63V
2743 532212232654 22nF 10% 63V
2744 482212614585 100nF 10% 50V
2760 482212614585 100nF 10% 50V
2761 482212480144 220µF 20% 25V
2762 482212440769 4,7µF 20% 100V
2763 482212440433 47µF 20% 25V
2765 482212440433 47µF 20% 25V
2769 532212234099 470pF 10% 63V
2770 532212234099 470pF 10% 63V
2780 482212481151 22µF 20% 50V
2781 482212233177 10nF 20% 50V
2782 532212610223 4,7nF 10% 63V
2784 482212151305 15nF 10% 50V
2785 482212421913 1µF 20% 63V
2786 532212232531 100pF 5% 50V
2787 482212612105 33nF 5% 50V
RESISTORS
3601 482211711449 2k2 1% 0,1W
3602 482205120273 27k 5% 0,1W
3603 482211711449 2k2 1% 0,1W
3604 482211711148 56k 1% 0,1W
3605 482211711449 2k2 1% 0,1W
3606 482205120124 120k 5% 0,1W
3607 482211652256 2k2 5% 0,5W
3608 482205120273 27k 5% 0,1W
3609 482211652256 2k2 5% 0,5W
3610 482205120124 120k 5% 0,1W
3611 482211652256 2k2 5% 0,5W
3612 482211711148 56k 1% 0,1W
3613 482205120273 27k 5% 0,1W
3614 482205120273 27k 5% 0,1W
3616 482211710833 10k 1% 0,1W Autoreverse
3616 482205110102 1k 2% 0,25W Non-autoreverse
3618 482211711507 6k8 1% 0,1W Autoreverse
3620 482210011141 Trim. 10k 30% Autoreverse
3622 482210011141 Trim. 10k 30% Non-autoreverse
3623 482211710837 100k 1% 0,1W
3624 482211710837 100k 1% 0,1W
3625 482205110102 1k 2% 0,25W
3626 482205110102 1k 2% 0,25W
3628 482211710837 100k 1% 0,1W
3630 482205120471 470R 5% 0,1W
3672 482205120472 4k7 5% 0,1W Autoreverse
3674 482211652283 4k7 5% 0,5W
3676 482211710834 47k 1% 0,1W Autoreverse
3678 482211710834 47k 1% 0,1W
3679 482211710834 47k 1% 0,1W
3680 482211710834 47k 1% 0,1W
3685 482211652234 100k 5% 0,5W
3686 482211710837 100k 1% 0,1W
3687 482211711503 220R 1% 0,1W not for Ferro
3688 482211710361 680R 1% 0,1W Autoreverse
3701 482211711503 220R 1% 0,1W
3702 482211711503 220R 1% 0,1W
3703 482211711503 220R 1% 0,1W
3704 482211711503 220R 1% 0,1W
3705 482211711503 220R 1% 0,1W
3706 482211711503 220R 1% 0,1W
3707 482205120101 100R 5% 0,1W
3708 482205120101 100R 5% 0,1W
3709 482205120109 10R 5% 0,1W
3710 482205120109 10R 5% 0,1W
3711 482205120154 150k 5% 0,1W
3712 482205120154 150k 5% 0,1W
3713 482205120109 10R 5% 0,1W
3714 482205120109 10R 5% 0,1W
3715 482205120182 1k8 5% 0,1W
3716 482205120182 1k8 5% 0,1W
3717 482211711449 2k2 1% 0,1W
3718 482211711449 2k2 1% 0,1W
3719 482211711383 12k 1% 0,1W
3720 482211711383 12k 1% 0,1W
3721 482205120392 3k9 5% 0,1W
3722 482205120392 3k9 5% 0,1W
3723 482211683933 15k 1% 0,1W Autoreverse
3723 482211710965 18k 1% 0,1W Non-autoreverse
3724 482211683933 15k 1% 0,1W Autoreverse
3724 482211710965 18k 1% 0,1W Non-autoreverse
3725 482205120109 10R 5% 0,1W not for Ferro
3726 482205120109 10R 5% 0,1W not for Ferro
3727 482205120562 5k6 5% 0,1W Autoreverse
3727 482211711507 6k8 1% 0,1W Non-autoreverse
3728 482205120562 5k6 5% 0,1W Autoreverse
3728 482211711507 6k8 1% 0,1W Non-autoreverse
3729 482205120332 3k3 5% 0,1W Autoreverse
3729 482205120472 4k7 5% 0,1W Non-autoreverse
3730 482205120332 3k3 5% 0,1W Autoreverse
3730 482205120472 4k7 5% 0,1W Non-autoreverse
3731 482205120822 8k2 5% 0,1W
3732 482205120822 8k2 5% 0,1W
3733 482205120122 1k2 5% 0,1W
3734 482205120122 1k2 5% 0,1W
3735 482205120223 22k 5% 0,1W
3736 482205120223 22k 5% 0,1W
3741 482211711449 2k2 1% 0,1W
3742 482211711449 2k2 1% 0,1W
3743 482211711139 1k5 1% 0,1W Autoreverse
3743 482211711449 2k2 1% 0,1W Non-autoreverse
3744 482211711139 1k5 1% 0,1W Autoreverse
3744 482211711449 2k2 1% 0,1W Non-autoreverse
9-13
3745 482205120332 3k3 5% 0,1W Autoreverse
3745 482205120562 5k6 5% 0,1W Non-autoreverse
3746 482205120332 3k3 5% 0,1W Autoreverse
3746 482205120562 5k6 5% 0,1W Non-autoreverse
3748 482211711449 2k2 1% 0,1W
3749 482211710834 47k 1% 0,1W
3751 482211710833 10k 1% 0,1W
3752 482211710837 100k 1% 0,1W
3753 482211710837 100k 1% 0,1W
3754 482205120105 1M 5% 0,1W Autoreverse
3754 482205120479 47R 5% 0,1W Non-autoreverse
3755 482205120105 1M 5% 0,1W Autoreverse
3755 482205120479 47R 5% 0,1W Non-autoreverse
3756 482211713579 220k 1% 0,1W
3757 482211713579 220k 1% 0,1W
3758 482211710833 10k 1% 0,1W
3759 482211710833 10k 1% 0,1W
3760 482205120121 120R 5% 0,1W
3761 482205021003 10k 1% 0,6W
3762 482211711454 820R 1% 0,1W
3763 482205120154 150k 5% 0,1W
3764 482211683872 220R 5% 0,5W
3765 482205120393 39k 5% 0,1W
3766 482205120475 4M7 5% 0,1W
3767 482205120475 4M7 5% 0,1W
3768 482211710833 10k 1% 0,1W
3769 482211711383 12k 1% 0,1W Autoreverse
3769 482205120822 8k2 5% 0,1W Non-autoreverse
3770 482211711139 1k5 1% 0,1W
3771 482205120122 1k2 5% 0,1W
3772 482211711507 6k8 1% 0,1W Autoreverse
3772 482205120562 5k6 5% 0,1W Non-autoreverse
3773 482210012227 Trimmer 4k7 30% 0,1W
3774 482211683933 15k 1% 0,1W Autoreverse
3774 482205120822 8k2 5% 0,1W Non-autoreverse
3775 482205120478 4R7 5% 0,1W
3776 482211711507 6k8 1% 0,1W
3777 482211710353 150R 1% 0,1W
3778 482205210688!6R8 5% 0,33W
3779 482205120334 330k 5% 0,1W
3780 482205120105 1M 5% 0,1W
3781 482205120475 4M7 5% 0,1W
3784 482205110102 1k 2% 0,25W
3786 482205120223 22k 5% 0,1W
3787 482205120105 1M 5% 0,1W
3788 482205120105 1M 5% 0,1W
3789 482211710834 47k 1% 0,1W
4701 482205120008 0R Jumper 0805
4702 482205120008 0R Jumper 0805
4703 482205120008 0R Jumper 0805
4704 482205120008 0R Jumper 0805
4705 482205120008 0R Jumper 0805
Page 42

ELECTRICAL PARTS LIST - ETF7 NON-DOLBY BOARD
12/2/2013
www.nostatatech.nl
World of free manuals
RESISTORS
4706 482205120008 0R Jumper 0805
4707 482205120008 0R Jumper 0805
4708 482205120008 0R Jumper 0805
4709 482205120008 0R Jumper 0805
4710 482205120008 0R Jumper 0805
4711 482205120008 0R Jumper 0805
4712 482205120008 0R Jumper 0805
4713 482205120008 0R Jumper 0805
4714 482205120008 0R Jumper 0805
4715 482205120008 0R Jumper 0805
4716 482205120008 0R Jumper 0805
4717 482205120008 0R Jumper 0805
4718 482205120008 0R Jumper 0805
4719 482205120008 0R Jumper 0805
4720 482205120008 0R Jumper 0805
4721 482205120008 0R Jumper 0805
4722 482205120008 0R Jumper 0805
4723 482205120008 0R Jumper 0805
4724 482205120008 0R Jumper 0805
4725 482205120008 0R Jumper 0805
4726 482205120008 0R Jumper 0805
4727 482205120008 0R Jumper 0805
4728 482205120008 0R Jumper 0805
4729 482205120008 0R Jumper 0805
4730 482205120008 0R Jumper 0805
4731 482205120008 0R Jumper 0805
4732 482205120008 0R Jumper 0805
4733 482205120008 0R Jumper 0805
4734 482205120008 0R Jumper 0805
4735 482205120008 0R Jumper 0805
4736 482205120008 0R Jumper 0805
4737 482205120008 0R Jumper 0805
4738 482205120008 0R Jumper 0805
4739 482205120008 0R Jumper 0805
4740 482205120008 0R Jumper 0805
4741 482205120008 0R Jumper 0805
4742 482205120008 0R Jumper 0805
4744 482205120008 0R Jumper 0805
4745 482205120008 0R Jumper 0805
4746 482205120008 0R Jumper 0805
4748 482205120008 0R Jumper 0805
4785 482205120008 0R Jumper 0805 only for Ferro
4790 482205120008 0R Jumper 0805
4794 482205120008 0R Jumper 0805
4795 482205120008 0R Jumper 0805
9-14
6612 482213031878 1N4003G
6614 482213030621 1N4148 Autoreverse
6770 482213030621 1N4148
6771 482213030621 1N4148
6772 482213030621 1N4148
6773 482213030621 1N4148
6774 482213030621 1N4148
6775 482213030621 1N4148
6776 482213030621 1N4148
6777 482213034382 BZX79-F8V2
6778 482213030621 1N4148
6782 482213030621 1N4148
6785 482213030621 1N4148
6786 482213030621 1N4148
TRANSISTORS & INTEGRATED CIRCUITS
7610 532220911306 HEF4094BT
7612 532213060845 BC807-25
7613 532213060845 BC807-25
7614 532213060845 BC807-25
7616 482213060373 BC857B Autoreverse
7618 482213060511 BC847B
7619 482213060511 BC847B
7620 482213060511 BC847B
7622 482213060511 BC847B Autoreverse
7623 482213060511 BC847B
7624 482213060511 BC847B
7710 482220932919 HEF4952BT
7720 932214000668 AN7323S
7730 482220932919 HEF4952BT
7740 482220932919 HEF4952BT
7780 482213060511 BC847B
7781 482213042804 BC817-25
7782 482213044568 BC557B
7783 482213060511 BC847B
7784 482213060373 BC857B
7786 482213063494 J111
7787 482213060511 BC847B
7791 482213060511 BC847B
7792 482213060511 BC847B
Note: Only the parts mentioned in this list are normal
service spare parts.
9-14
COILS & FILTERS
5701 482215711477 Coil 2,2µH 5%
5703 482215620946 Osc Coil 100kHz
DIODES
6611 482213031878 1N4003G
Page 43

10-1
TABLE OF CONTENTS
Service Hints.....................................................................10-2
Blockdiagram ....................................................................10-5
Component Layout Main Board ........................................10-6
Circuit Diagram part1........................................................10-7
Component Layout Main Board ........................................10-8
Circuit Diagram part2........................................................10-9
Exploded View ..................................................................10-10
Partslist .............................................................................10-12
3CDC-LLC-DA11
(3 Disc Carousel Changer)
Layout stage .3
12/2/2013
www.nostatatech.nl
World of free manuals
Page 44

10-2
The following steps have to be done when replacing the CD mechanism:
1. Disconnect flexfoil cable from the old CD drive
2. Put a paperclip on the flexfoil to short-circuit the contacts (fig.1)
3. Remove the old CD drive
4. Remove paperclip from the flexfoil and connect it to the new drive
5. Position the new CD drive in its studs
6. Remove solder joint from the Laserunit
CHARGED CAPACITORS ON THE SERVO BOARD MAY DAMAGE THE CD DRIVE ELECTRONICS WHEN
CONNECTING A NEW CD MECHANISM. THAT´S WHY, BESIDES THE SAFETY MEASURES LIKE
• SWITCH OFF POWER SUPPLY
• ESD PROTECTION
ADDITIONAL ACTIONS MUST BE TAKEN BY THE REPAIR TECHNICIAN.
fig.1
Attention: The laser diode of this CD drive is protected against ESD by a solder joint which shortcircuits the
laserdiode to ground.
For proper functionality of the CD drive this solder joint must be removed after connection the drive to
the set.
Emergency open
Service hints
In case of a Supply fault, the tray can be opened manually.
1. Remove the top cover of the set to get access to the Changer Module.
2. Turn gearwheel clockwise (as shown in picture below).
CAUTION
12/2/2013
www.nostatatech.nl
World of free manuals
Page 45

10-3
Pos 49 Guiding
Pos 48 Cam
Detail A
Dismantling of Tray
Service hints
1. Open the tray.
2. Release 2x catch as shown in fig. 2 and
Detail A
3. Pull tray out.
fig.2
Assembling of Tray
1. Turn Cam (pos. 48) clockwise to end
position.
2. If necessary - move Guiding (pos. 49) to the
right end position.
3. Insert the Tray.
12/2/2013
www.nostatatech.nl
World of free manuals
Page 46
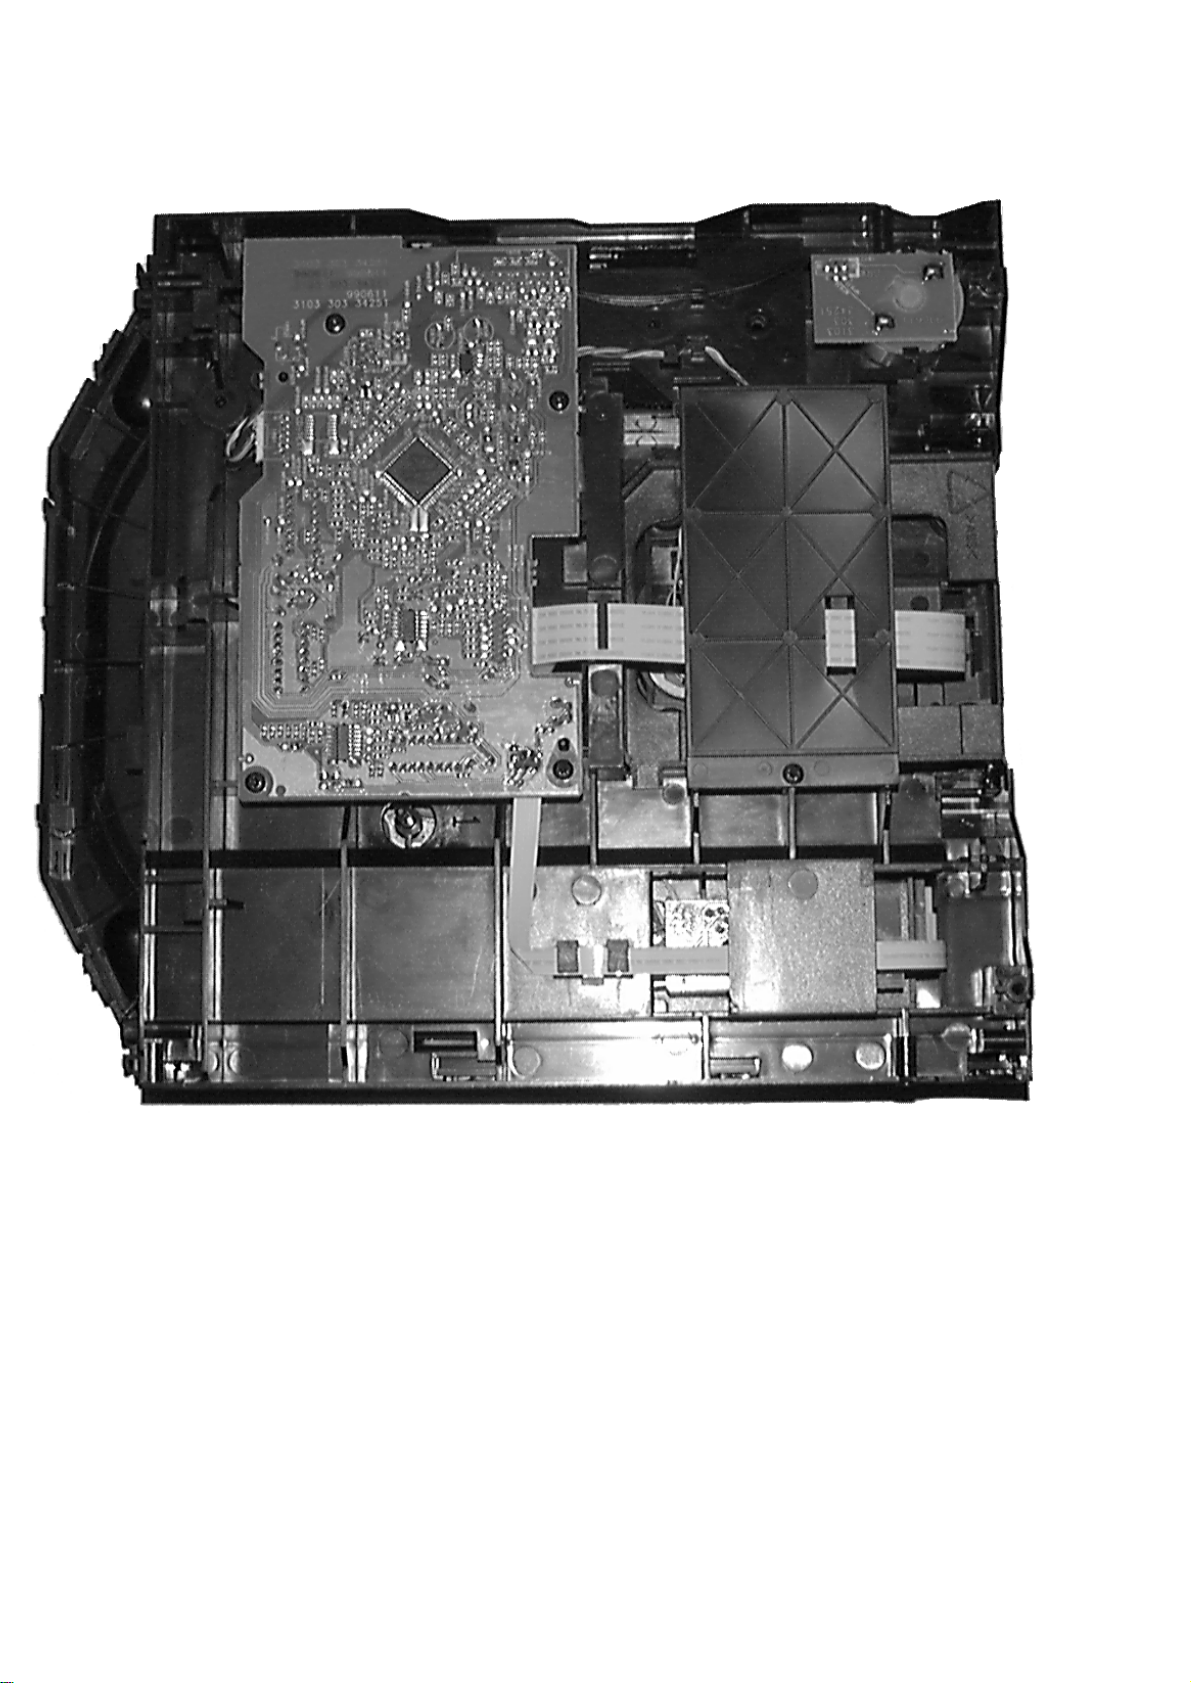
10-4
Service Position
12/2/2013
www.nostatatech.nl
World of free manuals
Page 47

10-510-5
SDA
VCC
DOBM
A-D
A-C
7871
1876 1875
1877 1878
7873
HEF4094BT
LD ON
HF IN
V1
D1
D2
D3
D4
R1,R2
MOT1
REGISTER
SHIFT
SIGNAL PROCESSOR
CD10
SAA7324 (SAA7325)
TRAY
MOTOR
CAROUSEL
MOTOR
SL
D5
VDD
D3
D2
D0
RA
FO
DIODES
PHOTO
FE
INNER SWITCH
SWITCH INFO
LASER &
MONITOR
DIODE
TURNTABLE
MOTOR
DISC
CD MECHANISM
CAROUSEL
TRAY
MAINBOARD
DATA
SHR_CL
7802
38
42
40
39
5,17,21,52,57
64
V4
61
2
63 51
2
3
STB
1
12
11
16
13
9
12
1,3
2
2
4
1,3
2
4
2
3
5
1
3
1
5
14
13
2
1
7
6
+3,3V
SCL
SILD
RESET
Blockdiagram 3CDC-LLC 2001-09-04
+5V
+4V
+3,3V
+10V
7875
+5V
6877
BLOCK DIAGRAM 3CDC-LLC-DA11
+10V
15
16
5V1
V
t
EN1
CD DRIVE UP/DOWN SWITCH
1881
1880
TRAY SWITCH
1882
CD POS.1 SWITCH
POS. RECOGNITION
6
7
4
5
1882 closed if carousel is in Position 1.
1883
1883 open if carousel is in a valid Play-Position.
CD RW= 3V
CD DA= 0V
EQ-Selection
Closed if the tray is in one endposition.
Open during movement.
Open if the drive is in one endposition.
Closed during movement.
VDD (pin 16)
EN1 (pin 15)
Power on
FOCUS
MOTOR
RADIAL
MOTOR
SLEDGE
MOTOR
MOTOR
TURNTABLE
55
54
56
59
1
16
13
9
12
9
12
13
16
6
7
2
7806
TDA7073A
7807
7808,7809
7803,7802
7810
TDA7073A
TTM+
TTM-
LD
MON
SLEDGEB-
SLEDGEB+
RADB-
RADB+
FOCB-
FOCB+
MOT2
60
1
BA
CD
EBU OUT
DA11
RAB
41
4
SHR_STR
TDA7073A
1805
17
18
19
14
16
13
3
4
11
SHR-DATA
12
8
6
9
Active low pass
Filter
TDA1308
7805
1
2
3
6
5
6
+5V
8
4
+
-
+
-
CD LEFT
CD RIGHT
22
23
18
19
RN
RP
LN
LP
DATA
SHR_CL
SWITCH INFO
COAX1
COAX2
14
RAB
41
RAB
EBU OUT
5802
SICL
SILD
+5V
+10V
Supply
Digital Audio
Changer
Control Logic
Analog Audio
Communication
µP ↔ Signal Processor
12/2/2013
www.nostatatech.nl
World of free manuals
Page 48
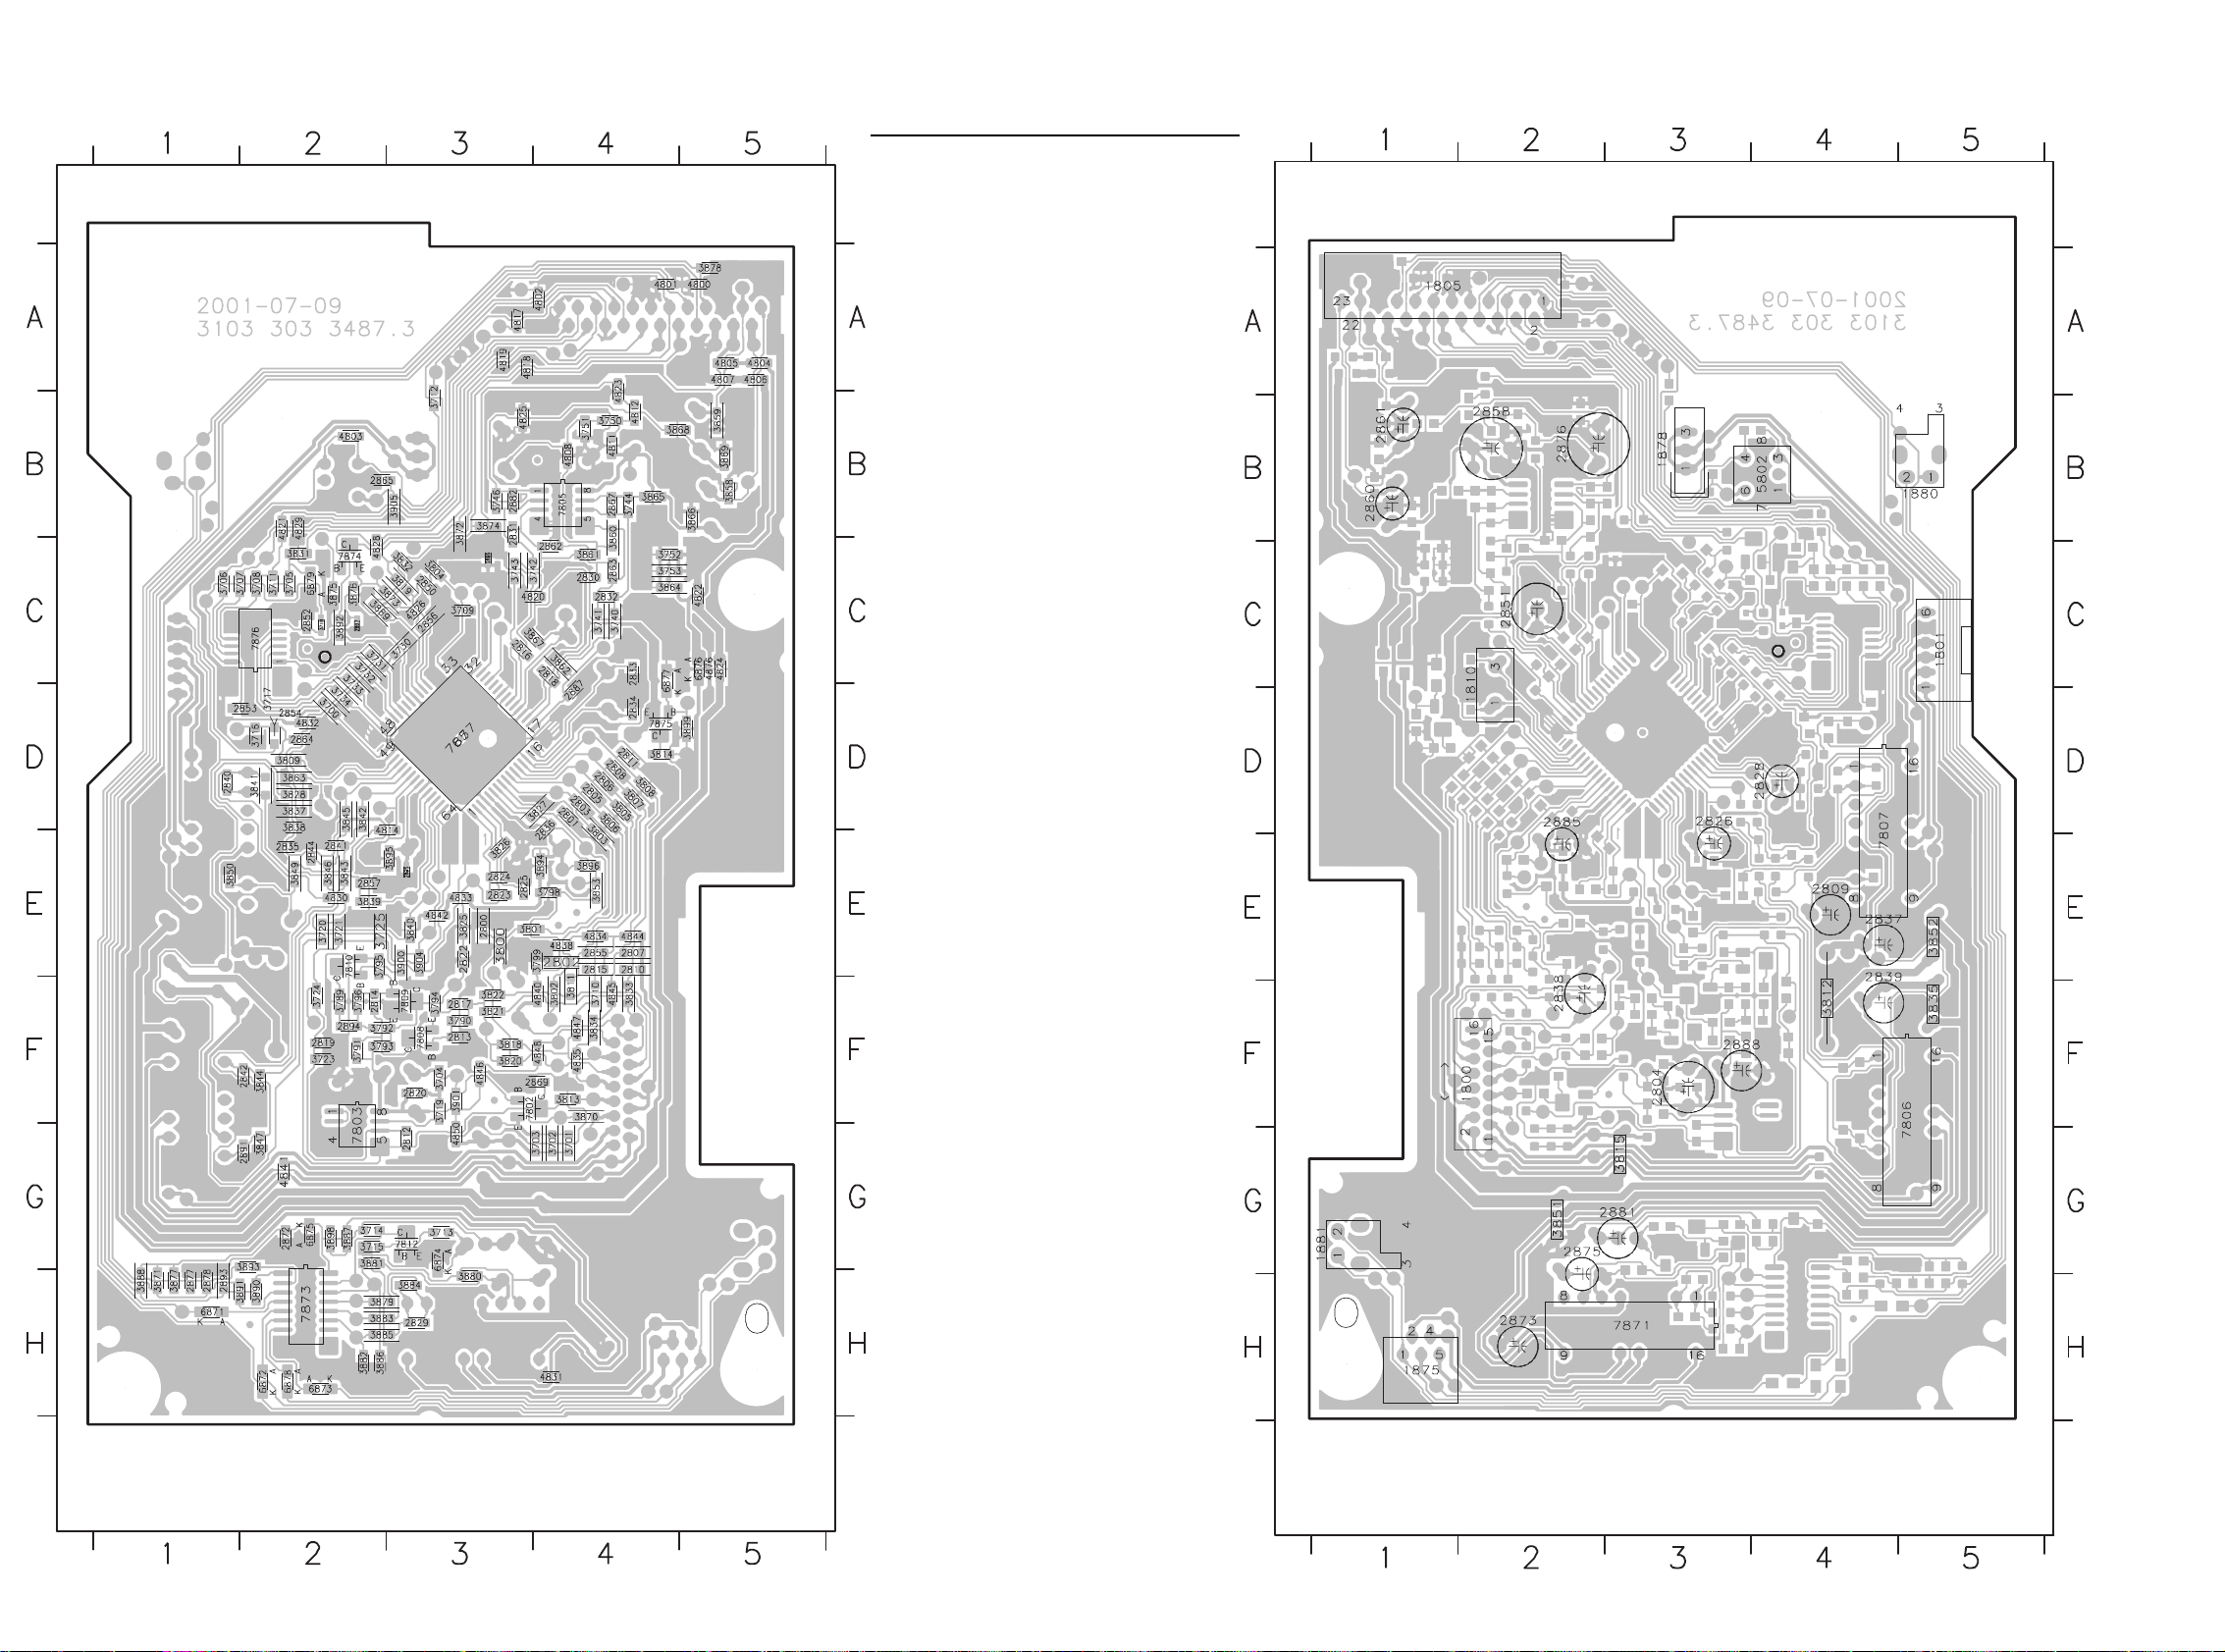
10-6 10-6
This assembly drawing shows a summary
of all possible versions.
For components used in a specific version
see schematic diagram respectively partslist.
3CDC-LLC Layout stage .3 2001-07-25
3CDC-LLC Componentside view
This assembly drawing shows a summary
of all possible versions.
For components used in a specific version
see schematic diagram respectively partslist.
3CDC-LlC Layout stage .3 2001-07-25
3CDC-LLC Copperside view
2800 E3
2801 D4
2802 E4
2803 D4
2805 D4
2806 D4
2807 E4
2808 D4
2810 E4
2811 D4
2812 G3
2813 F3
2814 F2
2815 E4
2816 C3
2817 F3
2818 C4
2819 F2
2820 F3
2822 E3
2823 E3
2824 E3
2825 E3
2829 H3
2830 C4
2831 B3
2832 C4
2833 C4
2834 D4
2835 E2
2836 D4
2840 D1
2841 E2
2842 F2
2844 E2
2850 C3
2852 C2
2853 D2
2854 D2
2855 E4
2856 C3
2857 E2
2862 C4
2863 C4
2864 D2
2865 B3
2867 B4
2869 F4
2872 G2
2877 H1
2878 H1
2882 B3
2887 C4
2891 G2
2893 H1
2894 F2
2895 E3
2896 C3
2897 C2
3700 D2
3701 G4
3702 G4
3703 G4
3704 F3
3705 C2
3706 C1
3707 C2
3708 C2
3709 C3
3710 F4
3711 C2
3712 A3
3713 G3
3714 G2
3715 G2
3716 D2
3717 D2
3718 C2
3719 F3
3720 E2
3721 E2
3723 F2
3724 F2
3725 E2
3730 C3
3731 C2
3732 C2
3733 C2
3734 D2
3740 C4
3741 C4
3742 C4
3743 C3
3744 B4
3746 B3
3750 B4
3751 B4
3752 C4
3753 C4
3789 F2
3790 F3
3791 F2
3792 F3
3793 F3
3794 F3
3795 E2
3796 F2
3798 E4
3799 E4
3800 E3
3801 E4
3802 F4
3803 D4
3804 C3
3805 D4
3806 D4
3807 D4
3808 D4
3809 D2
3811 F4
3813 F4
3814 D4
3818 F3
3819 C3
3820 F3
3821 F3
3822 F3
3825 E3
3826 E3
3827 D4
3828 D2
3831 C2
3832 C3
3833 F4
3834 F4
3837 D2
3838 D2
3839 E2
3840 E3
3841 D2
3842 D2
3843 E2
3844 F2
3845 D2
3846 E2
3847 G2
3849 E2
3850 E1
3853 E4
3858 B5
3859 B5
3860 B4
3861 C4
3862 C4
3863 D2
3864 C4
3865 B4
3866 B5
3867 C4
3868 B5
3869 B5
3870 F4
3871 H1
3872 B3
3873 C3
3874 B3
3875 C2
3876 C2
3877 H1
3878 A5
3879 H3
3880 G3
3881 G2
3882 H2
3883 H3
3884 H3
3885 H3
3886 H2
3887 G2
3888 H1
3889 C2
3890 H2
3891 H2
3892 C2
3893 G2
3894 E4
3895 E3
3896 E4
3898 G2
3899 D5
3900 E3
3901 F3
3904 E3
3905 B3
4800 A5
4801 A4
4802 A4
4803 B2
4804 A5
4805 A5
4806 A5
4807 A5
4808 B4
4811 B4
4812 B4
4814 D3
4817 A3
4818 A3
4819 A3
4820 C4
4821 B2
4822 C5
4823 A4
4824 C5
4825 B3
4826 C3
4828 C2
4829 B2
4830 E2
4831 H4
4832 D2
4833 E3
4834 E4
4835 F4
4838 E4
4840 F4
4841 G2
4842 E3
4844 E4
4845 F4
4846 F3
4847 F4
4848 F4
4850 G3
4876 C5
6871 H1
6872 H2
6873 H2
6874 G3
6875 G2
6876 C5
6877 C4
6878 H2
6879 C2
7802 F4
7803 F2
7805 B4
7808 F3
7809 F3
7810 E2
7812 G3
7873 H2
7874 C2
7875 D4
7876 C2
7877 D3
1800 F2
1801 C5
1805 A2
1810 C2
1875 H1
1878 B3
1880 B5
1881 G1
2804 F3
2809 E4
2826 D3
2828 D4
2837 E5
2838 F2
2839 E5
2851 C2
2858 B2
2860 B1
2861 B1
2873 H2
2875 G3
2876 B2
2881 G3
2885 D2
2888 F4
3812 F4
3815 G3
3835 F5
3851 G2
3852 E5
5802 B4
7806 F5
7807 D5
7871 H3
Mapping
Copperside
Componentside
12/2/2013
www.nostatatech.nl
World of free manuals
Page 49
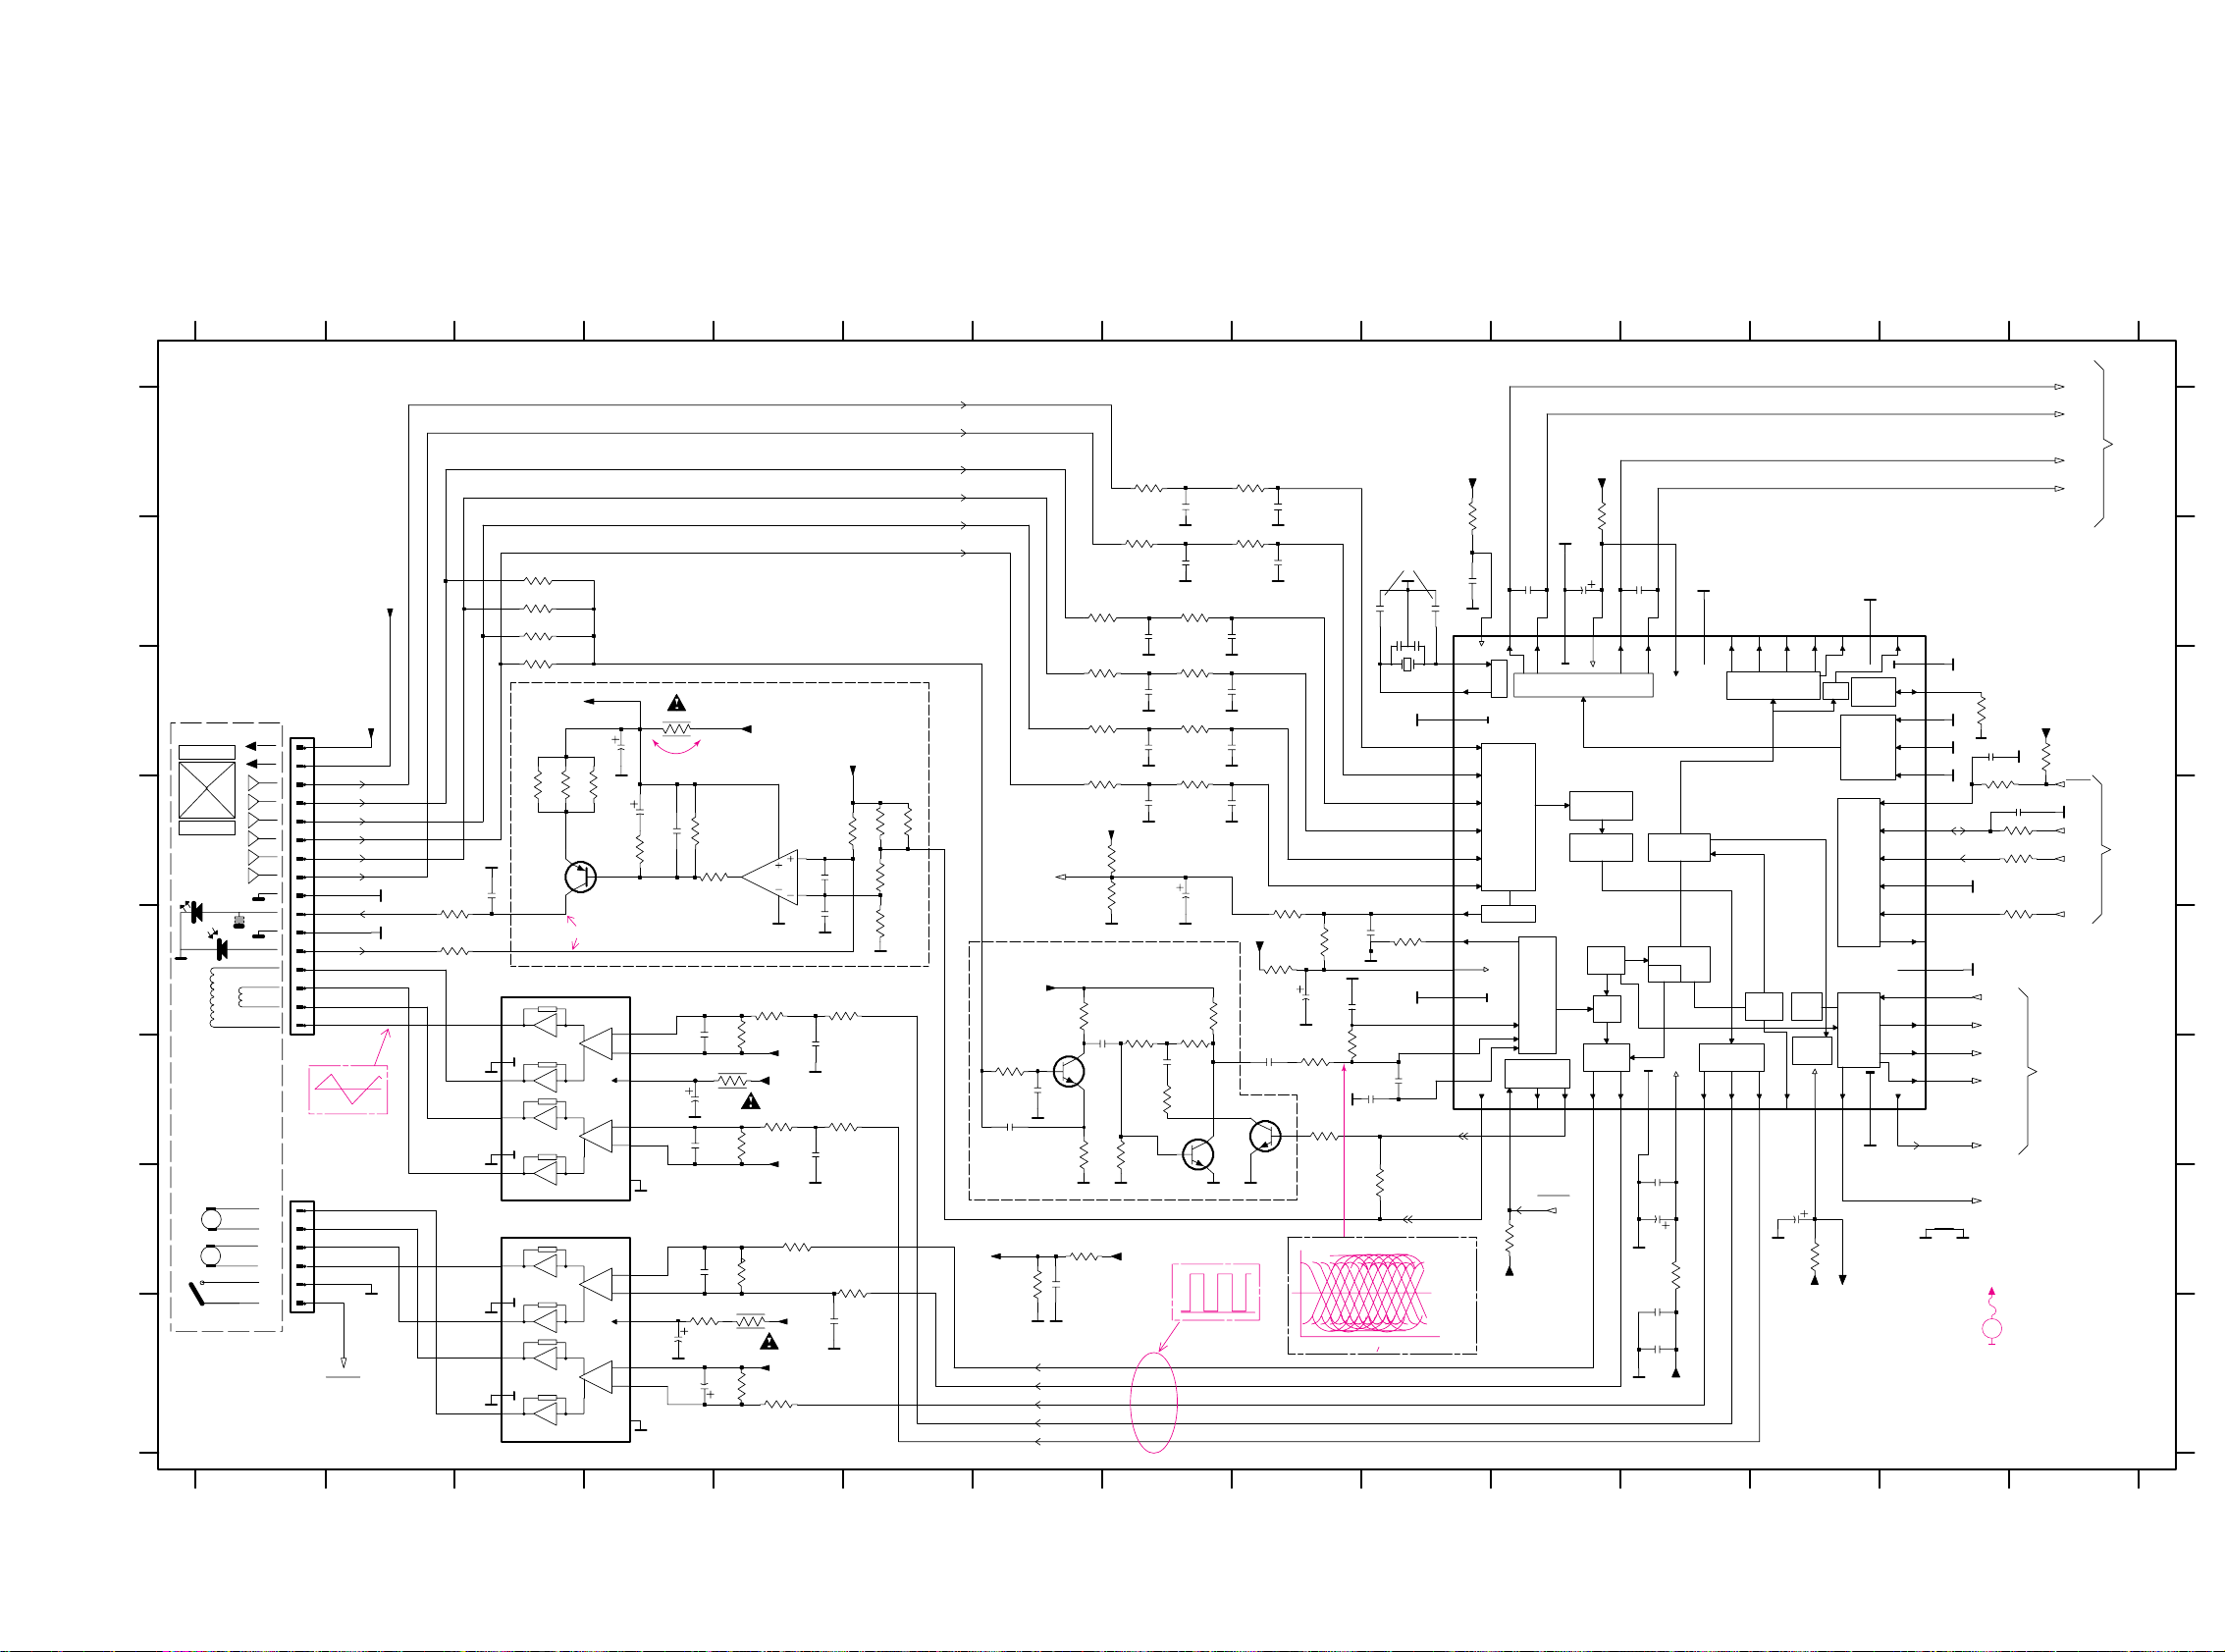
10-710-7
+
-
+
-
VDD
INTERFACE
VERSATILE
DEMOD
EFM
PLL
DIG.
STAGES
OUTPUT
CONTROL
MOTOR
KILL
INTERF.
LOOPBACK
SER. DATA
INTERF.
VERSAT.
INTERFACE
SER. DATA
BITSTREAM DAC
TIMING
INTERFACE
MICROCONTROLLER
PROCESSOR
AUDIO
PROCESSING
PRE-
FUNCTION
CONTROL
SRAM
ADDR
INTERF.
EBU
DET.
PEAK
CORR.
ERROR
PROCESSOR
SUBCODE
END
FRONT
VREF GEN.
ADC
+
-
+
-
VDD
MP847 H2
MP848 E2
MP849 E2
MP850 E2
MP851 E2
MP852 G2
MP853 G2
120K
LDON
+
MP730 C9
TRACK
C
FOCUS
on7876
1V
F
(CD-TEXT IC)
4.7V
MP841 F6
MP842 H6
MP843 G7
MP844 E9
MP845 F4
MP846 H2
3789 F8
3790 F7
3791 E7
3792 F8
+
Servo driver
_
Motor Driver
+
2851 B11
_
7808 F7
7809 G8
7810 F9
7877 D12
MP713 C9
MP715 D9
MP716 B9
MP717 A9
MP729 B9
3842 E6
3843 E5
3844 E5
(uP-interface)
B
to
180K
TRACK
3798 D8
11.3 MHz
CD Drive
control
to 7805 on part 2
3704 D4
3709 C14
3710 B8
3719 D4
3720 D5
3721 D6
3723 E6
3724 D6
3725 D6
2838 D8
2839 F4
3863 = 33R
part 2
2802 C8
B
SLIDE
_
D
A
2801 D8
E
2840 G4
2841 F5
2842 E5
2844 F5
2850 C14
3828 G11
3832 C15
3833 A8
3834 B8
3835 F5
3837 G7
3838 H7
3839 H6
3840 G5
3841 G5
E
R1 (CD10)
from 1801
on
2820 D4
_
C
Laser power
2816 B12
2817 F7
2818 B11
3793 E8
3794 F7
3795 F8
3796 F8
2822 F9
2823 F10
2824 F10
2825 E9
2826 G12
2828 G13
2833 B10
2834 B10
2835 H7
2836 E10
2837 H4
123456
1810 B10
2800 D8
2855 C8
2856 D15
2857 H5
2869 D3
2885 E9
2887 B10
2888 C4
2891 F4
2894 F8
2895 G12
2896 H12
2897 H12
3701 D3
E
+
MON
VREF
D
only for digital out versions
D
E
F
G
H
A
B
2819 E5
D
E
F
G
H
1800 F1
1801 G1
TRACK
SLIDE
D4 (CD10)
7 8 9 101112131415
234567 8
INNERSW.
D3 (CD10)
PIN50
DISC
to
dig. out circuitry
#.... for provision only
T+
A
(Quartz used)
DISC DISC
F
1805
for digital out version:
F+
R2 (CD10)
C
10 11 12 13 14 15
A
SLIDE
B
C
/ SAA7325
D1 (CD10)
on
mainboard
GND
3CDC-LLC
_
D
F-
part 1
B
#
+
FOCUS
3702 D3
1
2803 C8
2804 D4
2805 C8
2806 B8
2807 B8
2808 B9
2809 H4
2810 A8
2811 A9
2812 D5
2813 F7
2814 F7
2815 B8
GND
LD
for CD TEXT only
to
sheet 2
7803-B D5
7806 G3
7807 H3
3815 C4
3818 B3
3819 D14
3820 C3
3821 B3
3822 B3
3825 F9
3826 F9
9
3799 D8
3800 D8
3801 D8
3802 C8
3803 C8
3804 C14
3805 B8
3806 C8
3807 B9
3808 A9
3811 C8
3812 H4
3813 E2
_
FOCUS
MP818 C4
MP819 F10
MP820 F8
VCC
3845 F6
3846 F5
3847 F5
3849 H5
3850 H5
3852 H5
3853 E9
3862 A10
3703 D3 3867 A11
3870 E2
3873 D14
3889 D15
3892 E15
3894 E9
3895 G12
3896 E9
3900 F9
3901 D4
3904 G10
7802 D3
7803-A B5
A
MP883 C4
MP884 C5
MP893 F10
part 2
to 7877
120K
D2 (CD10)
MP821 C15
MP827 B10
MP828 G11
MP829 A3
MP831 A4
MP836 D3
MP837 D4
MP838 G6
MP839 G6
3827 E10 MP731 B13
MP743 D2
MP744 C2
MP745 E2
MP800 E2
MP802 B15
MP809 D10
MP812 G2
MP813 B3
MP814 G2
MP815 B3
MP816 A3
MP817 A3
Signal Processor
MP840 E6
T-
HF-Amplifier
DOBM
F
C
#
3863 G13
+
MP858 G8
MP859 E10
MP860 C2
MP872 C15
MP873 H4
MP875 F13
MP876 E2
MP877 E3
MP878 B13
MP879 B11
39K
3721
47n2835
470n
2894
100n2820
2812
33p
2834
33p
GND GND
3704
1R
27p
2856
3800
2826
47u
3802
2K2
3795
10K
3803
33p
2833
2836
47n
1810
TF01
EBUGND
2807
2815
GND
GND
+3.3V
330K
3849
1K
3837
58
VSSD3
35
WCLI
28
WCLK
470R3873
63
V1
34
V2|V3
61V462
V5
5
VDDA1
17
VDDA2
52
VDDD1P
57
VDDD2C
20
VNEG
21
VPOS
7
VRIN
4
VSSA1
14
VSSA2
33
VSSD1
50
VSSD2
RP
48
SBSY
40
SCL
37
SCLI
29
SCLK
39
SDA
36
SDI
24
SELPLL
47
SFSY
42
SILD
56
SL
43
STATUS
46
SUB
25
TEST1
31
TEST2
44
TEST3
IREF
3
ISLICE
32
KILL
64
LDON
18LN19
LP
59
MOTO1
60
MOTO2
12
R1
13
R2
54
RA
41
RAB
45
RCK
38
RESETn
22RN23
49
CL11|4
26
CL16
16
CRIN
15
CROUT
8
D1
9
D2
10
D3
11
D4
27
DATA
51
DOEM
30
EF
55
FO
2
HFIN
1
HFREF
6
5
6
7
8
4
SAA7324
7877
53
CFLG
4K7
3870
7803-B
LM358D
10K
4
8,11,15
8,11,15
3842
7806 TDA7073A
14
10
2
1
6
7
16
13
9
12
5
3
2822
1n
2819
470R
3889
3834
10K
3832
220n
2809
+3servo
47R
4R7
3835
3701
2804
47u
+3.3V
3789
470R
220p
2805 2806
220p
3846
2816
1n5
47K
3811
3710
1n
BC847B
7810
2841
2840
100n
2825
47R3702
3820
1K3838
2K2
1K
3798
BC847B
7808
2855
2891
1n5
14
15
16
2
3
4
5
6
7
8
9
1800
1
10
11
12
13
2824
47R3703
GND
3844
3806
10K
3K3
2800
2823
10K
+3.3V
3892
470R
2808
220p
3805
7
16
13
9
12
5
3
4
TDA7073A7807
14
10
2
1
6
2814
2802
3862
120R
1
2
3
4
5
6
3840
47u
2888
1801
PH-S
1K
3719
3801
10K
3853
470R
2839
47u
10n
3895
15R
+3servo
2857
3807
10K
10u
2838
2K7
3900
3894
100R
+10V
2801
220p
+3.3V
2850
1n
+3servo
3845
10K
1K
3799
+3.3V
2869
47n
2K2 3821
470R
3819
3863
100R
560R
3790
2828
47u
1n
2844
+3.3V
3796
3K3
1n5
2818
10K3901
3812
2R2
3850
10K
470K
3720
2K2 3818
2813
82p
3826
120R
3867
3724
8K2
2817
560p
2842
1n5
10K
3841
3815
4R7
2811
220p
3808
10K
BC807-40
7802
4u7
+10V
2851
220u
2885
2K2 3822
4K7
3847
3K3
3792
2803
3791
220p
3813
4R7
3833
2K7
3723
100n
2897
100n
2895
100n
2896
3794
3852
2R2
3828
22K
BC847B
7809
27K
3827
47K
3843
+5V
3725
47u
2837
3896
220K
100n
2887
3904
100K
3839
820R
3793
2810
3825
RN
RP
SBSY
SFSY
SL
SUB
Innersw
+5V_HF
+3.3V
+5V_HF
CL11
DOBM
FO
LN
LP
M1M2
RA
RCK
Vref
Innersw
Vref
+5V_HF
VrefCD10
+3.3V
VrefCD10
SILD
SICL
SDA
PORE
Vref
Vref
HFIN
3709
1R
56K
56K
56K
56K
180p 180p
180p 180p
1K5
680n
22K
6n8
2n2
1K
47n
820R
47p
39K
39K
180p
100p
Sanyo DA11T3C
3CDC-LLC (Sanyo) part1 2001 09 06
4.9V
10V
1.7V
1.7V
1.7V
1.7V
1.7V
1.7V
1.7V
3.3V
1.7V
3.2V
1.6V
1.6V
1.6V
3.4V
3.2V
4.8V
1.6V
1.6V
4.6V
3V
3V
0V
4.7V
0.8V
10V
0.3V
1.7V
5.1V
1.6V
1.6V
5V
1.6V
3.2V
3.2V
1.6V
1.6V
1.6V
1.7V
5V
0.3V
1.6V
1.7V
1.6V
3.2V
4V
1.8V
1.2V
0.6V
2.4V
2.7V
4.7V
+3.3V
->Laser damaged !
U >400mV
CD_RW : 3V
CD_DA : 0V
0V
3V
800mVpp
EYE-PATTERN
TB = 0.5us/div
during Focus search
ESD sensitive lines!
. . . V DC voltages measured in
PLAY MODE
with following conditions:
"+10V" = 10V
"+5V" = 5V
EVM
V
12/2/2013
www.nostatatech.nl
World of free manuals
Page 50

10-8 10-8
This assembly drawing shows a summary
of all possible versions.
For components used in a specific version
see schematic diagram respectively partslist.
3CDC-LLC Layout stage .3 2001-07-25
3CDC-LLC Componentside view
This assembly drawing shows a summary
of all possible versions.
For components used in a specific version
see schematic diagram respectively partslist.
3CDC-LlC Layout stage .3 2001-07-25
3CDC-LLC Copperside view
2800 E3
2801 D4
2802 E4
2803 D4
2805 D4
2806 D4
2807 E4
2808 D4
2810 E4
2811 D4
2812 G3
2813 F3
2814 F2
2815 E4
2816 C3
2817 F3
2818 C4
2819 F2
2820 F3
2822 E3
2823 E3
2824 E3
2825 E3
2829 H3
2830 C4
2831 B3
2832 C4
2833 C4
2834 D4
2835 E2
2836 D4
2840 D1
2841 E2
2842 F2
2844 E2
2850 C3
2852 C2
2853 D2
2854 D2
2855 E4
2856 C3
2857 E2
2862 C4
2863 C4
2864 D2
2865 B3
2867 B4
2869 F4
2872 G2
2877 H1
2878 H1
2882 B3
2887 C4
2891 G2
2893 H1
2894 F2
2895 E3
2896 C3
2897 C2
3700 D2
3701 G4
3702 G4
3703 G4
3704 F3
3705 C2
3706 C1
3707 C2
3708 C2
3709 C3
3710 F4
3711 C2
3712 A3
3713 G3
3714 G2
3715 G2
3716 D2
3717 D2
3718 C2
3719 F3
3720 E2
3721 E2
3723 F2
3724 F2
3725 E2
3730 C3
3731 C2
3732 C2
3733 C2
3734 D2
3740 C4
3741 C4
3742 C4
3743 C3
3744 B4
3746 B3
3750 B4
3751 B4
3752 C4
3753 C4
3789 F2
3790 F3
3791 F2
3792 F3
3793 F3
3794 F3
3795 E2
3796 F2
3798 E4
3799 E4
3800 E3
3801 E4
3802 F4
3803 D4
3804 C3
3805 D4
3806 D4
3807 D4
3808 D4
3809 D2
3811 F4
3813 F4
3814 D4
3818 F3
3819 C3
3820 F3
3821 F3
3822 F3
3825 E3
3826 E3
3827 D4
3828 D2
3831 C2
3832 C3
3833 F4
3834 F4
3837 D2
3838 D2
3839 E2
3840 E3
3841 D2
3842 D2
3843 E2
3844 F2
3845 D2
3846 E2
3847 G2
3849 E2
3850 E1
3853 E4
3858 B5
3859 B5
3860 B4
3861 C4
3862 C4
3863 D2
3864 C4
3865 B4
3866 B5
3867 C4
3868 B5
3869 B5
3870 F4
3871 H1
3872 B3
3873 C3
3874 B3
3875 C2
3876 C2
3877 H1
3878 A5
3879 H3
3880 G3
3881 G2
3882 H2
3883 H3
3884 H3
3885 H3
3886 H2
3887 G2
3888 H1
3889 C2
3890 H2
3891 H2
3892 C2
3893 G2
3894 E4
3895 E3
3896 E4
3898 G2
3899 D5
3900 E3
3901 F3
3904 E3
3905 B3
4800 A5
4801 A4
4802 A4
4803 B2
4804 A5
4805 A5
4806 A5
4807 A5
4808 B4
4811 B4
4812 B4
4814 D3
4817 A3
4818 A3
4819 A3
4820 C4
4821 B2
4822 C5
4823 A4
4824 C5
4825 B3
4826 C3
4828 C2
4829 B2
4830 E2
4831 H4
4832 D2
4833 E3
4834 E4
4835 F4
4838 E4
4840 F4
4841 G2
4842 E3
4844 E4
4845 F4
4846 F3
4847 F4
4848 F4
4850 G3
4876 C5
6871 H1
6872 H2
6873 H2
6874 G3
6875 G2
6876 C5
6877 C4
6878 H2
6879 C2
7802 F4
7803 F2
7805 B4
7808 F3
7809 F3
7810 E2
7812 G3
7873 H2
7874 C2
7875 D4
7876 C2
7877 D3
1800 F2
1801 C5
1805 A2
1810 C2
1875 H1
1878 B3
1880 B5
1881 G1
2804 F3
2809 E4
2826 D3
2828 D4
2837 E5
2838 F2
2839 E5
2851 C2
2858 B2
2860 B1
2861 B1
2873 H2
2875 G3
2876 B2
2881 G3
2885 D2
2888 F4
3812 F4
3815 G3
3835 F5
3851 G2
3852 E5
5802 B4
7806 F5
7807 D5
7871 H3
Mapping
Copperside
Componentside
12/2/2013
www.nostatatech.nl
World of free manuals
Page 51

10-910-9
+
-
+
-
VDD
STB
D1
EN1
SRG8
M
M
9101112
CAROUSEL-MOTOR
delay circuitry
PORE
C
D
E
F
voltage stab.
D
3
1 2 3 4 5 6 7 8 9 101112131415
12345678
2873 D6
2875 E6
2876 C7
2877 F11
SILD
DRAWER-MOTOR
board
GND
SHR_STR
2
5.6V version only
GNDA
13 14 15
A
B
C
D
E
F
G
H
A
B
3714 F8
3715 G8
3716 B3
3717 B3
1882
mainboard
(19 Pin)
3CDC-LLC
D
D
1883
2852 H2
2853 G4
2854 B3
2858 A9
2860 A11
2861 B11
2862 B8
2863 B8
2864 B3
2865 C4
2867 A8
2872 G10
3750 B7
3751 C7
3752 A6
3753 A6
3V-5V log. Level
DIG. OUT
POS rec
FE-ST-VK-N
LEFT
DIPMATE
1
from digital-out circuitry
SDA
to 7877 on part 1
DOWN
1
2878 F11
2881 F8
2882 B10
2893 F12
3700 H2
3705 G4
3706 G4
3707 G4
3708 H4
3711 G5
3712 B4
3713 G8
3876 C11
3877 F12
3878 E12
3879 D7
3
RF-500TB
RF-500TB
1876
2
changer control
GND
COAX2/EBU
DRIVE UP/
3718 G3
3730 G2
3731 G2
3732 G2
3733 G2
3734 H2
3740 A7
3741 A7
3742 B7
3743 B7
3744 A9
3746 B10 MP724 D8
MP725 D8
MP726 D8
MP740 H14
to/from 7877 on part 1
D
3809 B2
3814 D12
3831 G4
3851 D7
3858 A11
3859 B11
3860 B7
3861 B8
3864 A7
3865 A10
3866 A10
3868 B10
3869 B10
3871 F12
3872 C13
3874 C13
3875 C12
MP811 F14
MP822 E3
MP823 E3
MP824 D4
BASIC VERSION
COAX1/+3V
6871 F8
6872 E8
6873 E8
6874 G7
6875 F7
6876 D13
6877 D12
6878 E8
6879 G4
7805-A B9
7805-B A8
7812 G8
7871 C5
7873 D10
7874 C12
7875 D12
7876 G3
MP721 C8
MP722 E8
MP723 D8
MP886 G3
MP887 H5
MP888 G5
MP889 G5
FROM 7877 ON PART 1
SHR_CL
3.2V
SICL
5V1
MP741 G14
MP742 G14
MP801 E12
MP803 F10
MP804 G14
MP805 F13
MP806 F13
MP807 F14
MP808 F13
MP810 F13
4803 B4
4811 A7
4812 B7
4876 D13
5802 B4
+5V(+5.6V)
DATA
GND
MP825 D4
MP830 A7
MP832 G9
MP833 F14
MP835 F14
MP854 A13
MP856 E14
MP857 B13
MP863 C11
MP865 D11
MP866 E8
MP867 E8
MP868 F8
MP869 C12
MP871 D6
MP874 D12
MP881 G2
MP882 G2
EBU_GND
5
8003
Transformer
1877
#
#
#
3880 E6
3881 E7
3882 D7
3883 D6
3884 D6
3885 D6
3886 E7
3887 D6
3888 F12
3890 F11
3891 F11
3893 F11
3898 F7
3899 D12
3905 C5
4
D
logic
(15 Pin)
0V
G
H
1805 E15
1875 D2
1878 E2
1880 F8
1881 E8
2829 D6
2830 C9
2831 B9
2832 A8
Output enable
+10V
GND
part 2
MP890 B3
MP891 B5
MP892 B5
MP897 E13
MP898 E13
MP899 E14
0V
to combi-
D
TRAY POS
8002
SW_INFO
POS1 rec
RIGHT
EBUGND
2860
10u
2878
220p
3874 10K
3858
47K
1K
3891
BAS216
6876
1880
10K
3878
9
12
5
3
4
8
11
15
7871
TDA7073A
14
10
2
1
6
7
16
13
OUT1-
220R
3898
1
2
3
4
5
GNDA
1875
FE-ST-VK-N
220R
3887
47p
2877
3744
10K
3741
22K
7875
BC847B
3899
100R
3R3
3851
4811
3872 10K
2867
220p
3746
10K
3860
220p
2862
3715
100K
10K
22K
3713
3879
100K
2858
220u
470R
3893
10K
3714
3742
22K
220p
2893
BC847B
7812
8
4
TDA1308T
7805-A
3
2
1
BAS216
6871
1K
3750
13
12
11
9
10
1
16
8
HEF4094BT
7873
3
2
15
4
5
6
7
14
10K
3877
2863
220p
10u
GNDA
3875
10K
2875
6874
BAS216
BZX284-C3V9
6877
33R
3814
4876
3740
22K
BZX284-C
6875
2872
47n
2861
10u
100R
3868
100R
3865
3864
100R
GNDA
22n
2829
3884
270R
3859
47K
3
1878
DIPMATE
1
2
2831
100p
3876
100K
3883 10K
1881
BAS216
6873
GNDA
47K
3880
3K9
3882
3885
10K
GNDA
7874
BC847B
GNDA
3861
10K
10K
3871
BAS216
6872
100K
3881
10K
3888
3886
47K
3751
1K
2873
4u7
2881
47u
3743
22K
2882
220p
TDA1308T
5
6
7
8
4
7805-B
6
7
8
9
17
18
19
2
20
21
22
23
3
4
5
1
10
11
12
13
14
15
6
7
8
9
2
3
4
5
1
10
11
12
13
14
15
16
6
7
8
9
17
18
19
2
3
4
5
1
10
11
12
13
14
15
16
1805
6878
BAS216
GNDA
GNDA
2832
100p
GNDA
GNDA
47n
2830
3890
1K
2876
220u
GNDA
COAX1
+5.6V
+3.3V
+3.3V
+5V
RN
RP
LN
LP
COAX2
+4V
+5.6V
+10V
+3.3V
+10V
SICL
SDA
PORE
SILD
CD-TEXT
GND
DQSY
(23 Pin)
uP_CLK
SRDT
FE-ST-VK-N
PROTECTION
TIMING & SYNC
CHECK
CRC
INTERF
CPU
RAM
2 PORT
32 x 8
only during
11MHz
TOC-reading
DQSY
3.3ms
CD-Text circuitry (optional)
7.35KHz
on
to
SRDT
4V
SCLK
CD-TEXT INFO
part1
7877
2853
22n
470R3734
470R3733
10K3711
33K
3730
470R3708
470R3732
3707 470R
3700 470R
47n
2852
3705
220R
470R3706
3718
4K7
10K3731
8
VDD
14
WFCK4
XMODE6
13DQSY
1
EXCK
GND
7
MCK5
2 SBSO
SCLK 11
SCOR3 SRDT 12
9SW1
SW2 10
TEST
7876
LC89170M
6879
BZX284-C3V9
3831
100R
+5.6V
RCK
SUB
SBSY
SFSY
CL11
4.9V
2V
0V
4V
2.3V
2V
4.9V
0V
4V
4.9V
4.1V
5.2V
10V
5.2V
0V
5.2V
5.1V
5.2V
3.3V
4.2V
5V(5.6V)
2.3V
0V
2V
0V
0V
4.9V
0V
2V
5.2V
0V
5.1V
5.1V
5.1V
. . . V DC voltages measured in
PLAY MODE
with following conditions:
"+10V" = 10V
"+5V" = 5V
EVM
V
4.5V
7877
from
on
part1
10R
3809
470R
3809
2864
22p
2854
47n
3716
470R
3716
470R
DOBM
7877
from
on
part1
DOBM
10R
3712
1R
3717
10R
3712
to 1805
to 1805
COAX2
COAX2
COAX1
5802
920927152B
1
2
34
6
78
2865
22n
digital out circuitry - 75Ω version (not on all versions)
digital out circuitry
(not for 75Ω Versions)
12/2/2013
www.nostatatech.nl
World of free manuals
Page 52

3CDC-LC-DA11 Exploded view 2000 09 07
Pos. 51
Pos. 53
Pos. 52
Pos. 47
Pos. 48
Pos. 49
Pos. 43
Pos. 44
Pos. 42
Pos. 57
54
53
47
55
56
31
30
35
32
31
32
33
34
X spare part
non spare part
Y
57
58
52
48
45 5x 4x
4x
46
49
44
43
42
59
41
21
20
51
23
2x
EXPLODED VIEW (3CDC-LC MODULE)
MECHANICAL PARTS
Loader → this page
–––––––––––––––––––––––––––––––––––––––––––––––––––––
20 3103 304 66500 DRAWER
21 3140 114 29070 PRESSURE RING-DA11
23 3140 111 21270 METAL RING-DA11
30 3103 304 66560 SUPPORT
31 4822 529 10386 RUBBER DAMPER CD DRIVE, REAR
32 4822 529 10387 RUBBER DAMPER CD DRIVE, FRONT
33 3103 304 06970 WASHER
35 3103 309 05310 CD DRIVE DA11T3CN
36 3104 119 40010 MOTOR MABUCHI RF-500TB-12560
37 4822 361 10753 CAROUSEL MOTOR
41 3103 304 66480 FRAME
42 3103 304 66540 BRACKET-GUIDING
43 3103 301 06460 SPRING-GUIDING
44 3103 304 06890 GEAR-3
45 3103 304 06980 NAIL FIXATION
46 3103 304 06880 GEAR-2
47 3103 304 66530 BRACKET-LOAD
48 3103 304 06910 CAM
49 3103 304 66510 GUIDING
51 3103 304 06900 GEAR-4
52 3103 304 06870 GEAR-1
53 3103 304 06960 PULLEY-FRAME
54 3103 304 66910 DRIVING-BELT-DRAWER
55 4822 361 10753 TRAY MOTOR
56 4822 502 12548 SCREW M2,6X3,5
57 3103 304 69880 COVER-DA11
59 4822 466 12146 RUBBER
MECHANICAL PARTS
Drawer → Chapter 10-11
––––––––––––––––––––––––––––––––––––––––––––––––––––––––––
20 3103 304 66500 DRAWER
21 3103 304 66490 CAROUSEL
22 3103 304 06860 PULLEY-DRAWER
23 3103 304 06850 ECCENTRIC GEAR WHEEL
24 3103 304 06980 NAIL FIXATION
25 3103 304 66850 DRIVING BELT CAROUSEL
27 4822 532 12365 BUSH DRAWER (height=5,5mm,d=9,4mm)
27 3103 304 07100 BUSH DRAWER (height=8,5mm,d=16mm)
29 3103 304 66550 BRACKET-DISC
30 3103 304 66520 TUMBLER
31 3103 301 06470 SPRING-DISC
32 3103 304 06920 CONTROL-DISC
34 3103 304 06870 GEAR-1
37 4822 361 10753 CARROUSEL MOTOR
10-10 10-10
12/2/2013
www.nostatatech.nl
World of free manuals
Page 53
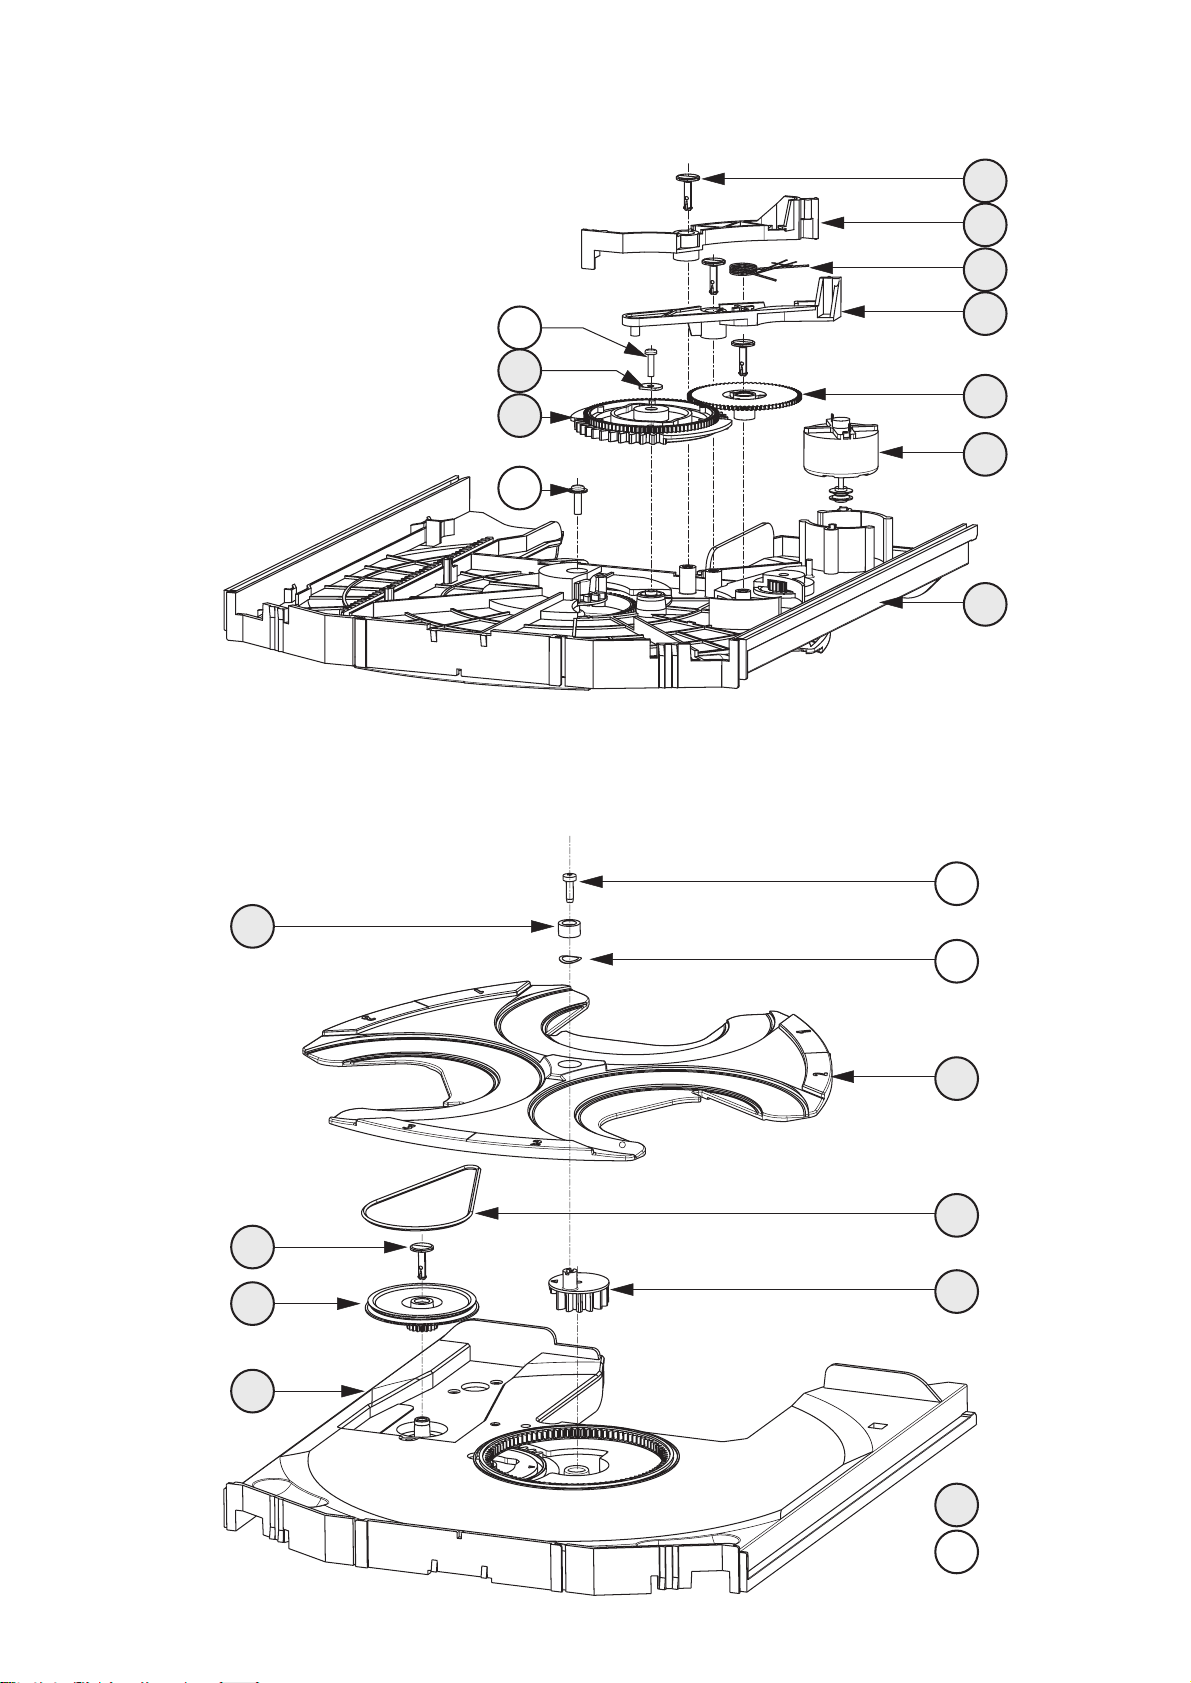
10-11
3CDC-LC Drawer assy 1999 09 13
37
20
32
35
33
36
29
31
34
24
30
3x
27
24
22
20
23
25
21
26
28
Drawer top view
Drawer bottom view
X spare part
non spare part
Y
12/2/2013
www.nostatatech.nl
World of free manuals
Page 54

10-12
MISCELLANEOUS
–––––––––––––––––––––––––––––––––––––––––––––––––––––
35 3103 309 05310 CD DRIVE DA11T3CN
37 4822 361 10753 CAROUSEL MOTOR
55 4822 361 10753 TRAY MOTOR
1800 2422 025 17389 FLEX FOIL CONNECTOR 16Pin
1805 4822 265 10979 FLEX FOIL CONNECTOR 15Pin
1805 4822 265 11545 FLEX FOIL CONNECTOR 19Pin
1875 4822 267 10958 FLEX FOIL CONNECTOR 5Pin
1876 2422 025 08332 FLEX FOIL CONNECTOR 5Pin
1880 4822 276 13503 SWITCH, Tray switch
1881 4822 276 13503 SWITCH, Drive UP/DOWN
1882 4822 276 13503 SWITCH, CD Pos.1 recognized
1883 4822 276 13503 SWITCH, valid CD Play position
8002 3103 308 91990 FLEX FOIL CABLE 5P 200mm 1:n
8005 3103 308 92930 FLEX FOIL CABLE 16P 170mm 1:n
CAPACITORS
–––––––––––––––––––––––––––––––––––––––––––––––––––––
2800© 4822 126 10326 180pF 5%
2801© 4822 126 13883 220pF 5% 50V
2802© 4822 126 10326 180pF 5%
2803© 4822 126 13883 220pF 5% 50V
2804 4822 124 41751 47µF 20% 16V
2805© 4822 126 13883 220pF 5% 50V
2806© 4822 126 13883 220pF 5% 50V
2807© 4822 126 10326 180pF 5%
2808© 4822 126 13883 220pF 5% 50V
2809 4822 124 40746 0,22µF 20% 63V
2810© 5322 122 32531 100pF 5% 50V
2811© 4822 126 13883 220pF 5% 50V
2812© 2222 867 15339 33pF 5% 50V
2813© 4822 126 14226 82pF 50V
2814© 2238 780 59861 680nF 10% 16V
2815© 4822 126 10326 180pF 5%
2816© 4822 126 14247 1,5nF 10% 50V
2817© 4822 126 14249 560pF 10% 50V
2818© 4822 126 13344 1,5nF 5% 63V
2819© 5322 126 11578 1nF 10% 63V
2820© 4822 126 14305 100nF 10% 16V
2822© 4822 122 33127 2,2nF 10% 63V
2823© 4822 122 33777 47pF 5% 63V
2824© 4822 126 13751 47nF 10% 50V
2825© 5322 126 11582 6,8nF 10% 63V
2826 4822 124 12362 47µF 20% 4V
2828 4822 124 12362 47µF 20% 4V
2829© 3198 017 42230 22nF 10% 50V
2830© 4822 126 13751 47nF 10% 50V
2831© 4822 122 31765 100pF 5% 50V
2832© 4822 122 31765 100pF 5% 50V
2835© 3198 024 44730 47nF 5% 50V
2836© 3198 024 44730 47nF 5% 50V
2837 4822 124 40433 47µF 20% 25V
2838 4822 124 40248 10µF 20% 63V
2839 4822 124 40433 47µF 20% 25V
2840© 4822 126 14585 100nF 10% 50V
2841© 5322 126 10511 1nF 5% 50V
2842© 4822 126 14247 1,5nF 10% 50V
2844© 3198 016 31020 1nF 5% 25V
2850© 5322 126 11578 1nF 10% 63V
2851 4822 124 42383 220µF 20% 4V
2855© 4822 126 10326 180pF 5%
2856© 4822 126 13691 27pF 1% 63V
2857© 5322 126 11583 10nF 10% 63V
2858 4822 124 12245 220µF 20% 16V
2860 4822 124 11947 10µF 20% 16V
CAPACITORS
–––––––––––––––––––––––––––––––––––––––––––––––––––––
2861 4822 124 11947 10µF 20% 16V
2862© 4822 126 13883 220pF 5% 50V
2863© 4822 126 13883 220pF 5% 50V
2865© 4822 126 14494 22nF 10% 25V
2867© 4822 126 13883 220pF 5% 50V
2872© 3198 024 44730 47nF 5% 50V
2873 4822 124 80231 47µF 20% 16V
2875 4822 124 11947 10µF 20% 16V
2876 4822 124 12245 220µF 20% 16V
2877© 4822 122 33777 47pF 5% 63V
2878© 4822 126 13883 220pF 5% 50V
2881 4822 124 40769 4,7µF 20% 100V
2882© 4822 126 13883 220pF 5% 50V
2885 4822 124 40769 4,7µF 20% 100V
2887© 4822 126 14585 100nF 10% 50V
2888 4822 124 80231 47µF 20% 16V
2891© 4822 126 14247 1,5nF 10% 50V
2893© 4822 122 33575 220pF 5% 50V
2894© 3198 017 44740 470nF 20% 10V
2895© 4822 126 14305 100nF 10% 16V
2896© 4822 126 14305 100nF 10% 16V
2897© 4822 126 14305 100nF 10% 16V
RESISTORS
–––––––––––––––––––––––––––––––––––––––––––––––––––––
3701© 4822 051 20479 47Ω 5% 0,1W
3702© 4822 051 20479 47Ω 5% 0,1W
3703© 4822 051 20479 47Ω 5% 0,1W
3704© 4822 117 12917 1Ω 5% 0,06W
3710© 4822 117 11148 56kΩ 1% 0,1W
3712© 4822 051 30109 10Ω 5% 0,06W
3713© 4822 051 30223 22kΩ 5% 0,06W
3714© 4822 051 30103 10kΩ 5% 0,06W
3715© 4822 117 13632 100kΩ 1% 0,06W
3716© 4822 051 30471 470Ω 5% 0,06W
3717© 4822 117 12917 1Ω 5% 0,06W
3719© 4822 051 30102 1kΩ 5% 0,06W
3720© 4822 051 20474 470kΩ 5% 0,1W
3721© 4822 051 20393 39kΩ 5% 0,1W
3723© 4822 051 30272 2,7kΩ 5% 0,06W
3724© 4822 117 12902 8,2kΩ 1% 0,06W
3725© 4822 051 30184 180kΩ 5% 0,06W
3730© 4822 051 20333 33kΩ 5% 0,1W
3740© 4822 051 20223 22kΩ 5% 0,1W
3741© 4822 051 20223 22kΩ 5% 0,1W
3742© 4822 051 20223 22kΩ 5% 0,1W
3743© 4822 051 20223 22kΩ 5% 0,1W
3744© 4822 051 30103 10kΩ 5% 0,06W
3746© 4822 051 30103 10kΩ 5% 0,06W
3750© 4822 051 30102 1kΩ 5% 0,06W
3751© 4822 051 30102 1kΩ 5% 0,06W
3789© 4822 051 30471 470Ω 5% 0,06W
3790© 4822 051 30561 560Ω 5% 0,06W
3791© 4822 051 30152 1,5kΩ 5% 0,06W
3792© 4822 051 30332 3,3kΩ 5% 0,06W
3793© 4822 117 12968 820Ω 5% 0,06W
3794© 4822 117 12968 820Ω 5% 0,06W
3795© 4822 051 30222 2,2kΩ 5% 0,06W
3796© 4822 051 30332 3,3kΩ 5% 0,06W
3798© 4822 051 30102 1kΩ 5% 0,06W
3799© 4822 051 30102 1kΩ 5% 0,06W
3800© 4822 117 11148 56kΩ 1% 0,1W
3801© 4822 051 30103 10kΩ 5% 0,06W
3802© 4822 117 11148 56kΩ 1% 0,1W
ELECTRICAL PARTSLIST 3CDC-LLC-DA11 MODULE
––––––––––––––––––––––––––––––––––––––––––––––––––––––––––––––––––––––––––––––––––––––––––––––––––––––––––––––––––
12/2/2013
www.nostatatech.nl
World of free manuals
Page 55

10-13
RESISTORS
–––––––––––––––––––––––––––––––––––––––––––––––––––––
3803© 4822 117 10833 10kΩ 1% 0,1W
3804© 4822 051 30103 10kΩ 5% 0,06W
3805© 4822 051 30103 10kΩ 5% 0,06W
3806© 4822 051 30103 10kΩ 5% 0,06W
3807© 4822 051 30103 10kΩ 5% 0,06W
3808© 4822 051 30103 10kΩ 5% 0,06W
3809© 4822 051 20471 470Ω 5% 0,1W
3811© 4822 117 11148 56kΩ 1% 0,1W
3812 4822 053 10228 2,2Ω 5% 1W
3813© 4822 117 13608 4,7Ω 5% 0,06W
3814© 4822 051 30339 33Ω 5% 0,06W
3815 4822 052 10478 4,7Ω 5% NFR
3818© 4822 051 30222 2,2kΩ 5% 0,06W
3819© 4822 051 20471 470Ω 5% 0,1W
3820© 4822 051 30222 2,2kΩ 5% 0,06W
3821© 4822 051 30222 2,2kΩ 5% 0,06W
3822© 4822 051 30222 2,2kΩ 5% 0,06W
3825© 4822 051 10102 1kΩ 2% 0,25W
3826© 4822 051 30223 22kΩ 5% 0,06W
3827© 4822 051 20273 27kΩ 5% 0,1W
3828© 4822 051 20223 22kΩ 5% 0,1W
3831© 4822 051 30101 100Ω 5% 0,06W
3832© 4822 051 30103 10kΩ 5% 0,06W
3833© 4822 051 20393 39kΩ 5% 0,1W
3834© 4822 051 20393 39kΩ 5% 0,1W
3835 4822 052 10478 4,7Ω 5% NFR
3837© 4822 051 10102 1kΩ 2% 0,25W
3838© 4822 051 30102 1kΩ 5% 0,06W
3839© 4822 051 20124 120kΩ 5% 0,1W
3840© 4822 051 30124 120kΩ 5% 0,06W
3841© 4822 117 10833 10kΩ 1% 0,1W
3842© 4822 117 10833 10kΩ 1% 0,1W
3843© 4822 117 10834 47kΩ 1% 0,1W
3844© 4822 051 30332 3,3kΩ 5% 0,06W
3845© 4822 117 10833 10kΩ 1% 0,1W
3846© 4822 117 10834 47kΩ 1% 0,1W
3847© 4822 051 30472 4,7kΩ 5% 0,06W
3849© 4822 051 20334 330kΩ 5% 0,1W
3850© 4822 051 30103 10kΩ 5% 0,06W
3851 4822 052 10338 3,3Ω NFR25
3852 4822 052 10228 2,2Ω 5% 0,33W
3853© 4822 051 20471 470Ω 5% 0,1W
3858© 4822 117 12925 47kΩ 1% 0,06W
3859© 4822 117 10834 47kΩ 1% 0,1W
3860© 4822 117 10833 10kΩ 1% 0,1W
3861© 4822 051 30103 10kΩ 5% 0,06W
3862© 4822 051 20121 120Ω 5% 0,1W
3863© 4822 117 11373 100Ω 1% 0,1W
3864© 4822 117 11373 100Ω 1% 0,1W
3865© 4822 051 30101 100Ω 5% 0,06W
3867© 4822 051 30121 120Ω 5% 0,06W
3868© 4822 051 30101 100Ω 5% 0,06W
3870© 4822 051 20472 4,7kΩ 5% 0,1W
3871© 4822 051 30103 10kΩ 5% 0,06W
3873© 4822 051 20471 470Ω 5% 0,1W
3875© 4822 051 30103 10kΩ 5% 0,06W
3876© 4822 117 13632 100kΩ 1% 0,06W
3877© 4822 051 30103 10kΩ 5% 0,06W
3878© 4822 051 30103 10kΩ 5% 0,06W
3879© 4822 117 10837 100kΩ 1% 0,1W
3880© 4822 051 30392 3,9kΩ 5% 0,06W
3881© 4822 117 13632 100kΩ 1% 0,06W
3882© 4822 117 12925 47kΩ 1% 0,06W
RESISTORS
–––––––––––––––––––––––––––––––––––––––––––––––––––––
3883© 4822 117 10833 10kΩ 1% 0,1W
3884© 4822 051 30271 270Ω 5% 0,06W
3885© 4822 117 10833 10kΩ 1% 0,1W
3886© 4822 117 12925 47kΩ 1% 0,06W
3887© 4822 051 30221 220Ω 5% 0,06W
3888© 4822 117 10833 10kΩ 1% 0,1W
3889© 4822 051 20471 470Ω 5% 0,1W
3890© 4822 051 30102 1kΩ 5% 0,06W
3891© 4822 051 30102 1kΩ 5% 0,06W
3892© 4822 051 20471 470Ω 5% 0,1W
3893© 4822 051 30471 470Ω 5% 0,06W
3894© 4822 051 30101 100Ω 5% 0,06W
3895© 4822 117 12971 15Ω 5% 0,06W
3898© 4822 051 30221 220Ω 5% 0,06W
3899© 4822 051 30101 100Ω 5% 0,06W
3900© 4822 117 12955 2,7kΩ 1% 0,1W
3901© 4822 117 10833 10kΩ 1% 0,1W
3904© 4822 117 13632 100kΩ 1% 0,06W
4800© 4822 051 20008 CHIP JUMPER 0805
4801© 4822 051 20008 CHIP JUMPER 0805
4802© 4822 051 20008 CHIP JUMPER 0805
4803© 4822 051 30008 CHIP JUMPER 0603
4804© 4822 051 20008 CHIP JUMPER 0805
4805© 4822 051 30008 CHIP JUMPER 0603
4806© 4822 051 20008 CHIP JUMPER 0805
4807© 4822 051 20008 CHIP JUMPER 0805
4808© 4822 051 20008 CHIP JUMPER 0805
4811© 4822 051 20008 CHIP JUMPER 0805
4814© 4822 051 20008 CHIP JUMPER 0805
4817© 4822 051 20008 CHIP JUMPER 0805
4818© 4822 051 20008 CHIP JUMPER 0805
4819© 4822 051 20008 CHIP JUMPER 0805
4820© 4822 051 20008 CHIP JUMPER 0805
4821© 4822 051 20008 CHIP JUMPER 0805
4822© 4822 051 20008 CHIP JUMPER 0805
4823© 4822 051 20008 CHIP JUMPER 0805
4824© 4822 051 30008 CHIP JUMPER 0603
4825© 4822 051 30008 CHIP JUMPER 0603
4826© 4822 051 20008 CHIP JUMPER 0805
4828© 4822 051 20008 CHIP JUMPER 0805
4829© 4822 051 20008 CHIP JUMPER 0805
4830© 4822 051 20008 CHIP JUMPER 0805
4831© 4822 051 20008 CHIP JUMPER 0805
4832© 4822 051 30008 CHIP JUMPER 0603
4833© 4822 051 20008 CHIP JUMPER 0805
4834© 4822 051 20008 CHIP JUMPER 0805
4835© 4822 051 20008 CHIP JUMPER 0805
4838© 4822 051 30008 CHIP JUMPER 0603
4840© 4822 051 20008 CHIP JUMPER 0805
4841© 4822 051 30008 CHIP JUMPER 0603
4842© 4822 051 20008 CHIP JUMPER 0805
4844© 4822 051 20008 CHIP JUMPER 0805
4845© 4822 051 20008 CHIP JUMPER 0805
4846© 4822 051 20008 CHIP JUMPER 0805
4847© 4822 051 20008 CHIP JUMPER 0805
4848© 4822 051 20008 CHIP JUMPER 0805
4850© 4822 051 20008 CHIP JUMPER 0805
4876© 4822 051 20008 CHIP JUMPER 0805
ELECTRICAL PARTSLIST 3CDC-LLC-DA11 MODULE
––––––––––––––––––––––––––––––––––––––––––––––––––––––––––––––––––––––––––––––––––––––––––––––––––––––––––––––––––
12/2/2013
www.nostatatech.nl
World of free manuals
Page 56

10-14
COILS
–––––––––––––––––––––––––––––––––––––––––––––––––––––
1810 4822 242 73557 CERAMIC RES. 8,46MHz
DIODES
–––––––––––––––––––––––––––––––––––––––––––––––––––––
6871© 4822 130 11397 BAS316
6872© 4822 130 11397 BAS316
6873© 4822 130 11397 BAS316
6874© 4822 130 11397 BAS316
6875© 9340 548 52115 BZX284-C5V1
6877© 9322 129 34685 BZX284-C3V9
6878© 4822 130 11397 BAS316
6879© 9322 129 34685 BZX284-C3V9
TRANSISTORS
–––––––––––––––––––––––––––––––––––––––––––––––––––––
7802© 5322 130 60123 BC807-40
7808© 4822 130 60511 BC847B
7809© 4822 130 60511 BC847B
7810© 4822 130 60511 BC847B
7812© 4822 130 60511 BC847B
7874© 4822 130 60511 BC847B
7875© 4822 130 60511 BC847B
INTEGRATED CIRCUITS
–––––––––––––––––––––––––––––––––––––––––––––––––––––
7803© 5322 209 82941 LM358D, Dual Opamp
7805© 4822 209 33165 TDA1308T/N1
7806 4822 209 32852 TDA7073A/N2
7807 4822 209 32852 TDA7073A/N2
7871 4822 209 32852 TDA7073A/N2
7873© 5322 209 11306 HEF4094BT, SHIFT REGISTER
7877© 9352 641 80557 SAA7324H/M2B,“CD10“ SIGN.PROC.
ELECTRICAL PARTSLIST 3CDC-LLC-DA11 MODULE
––––––––––––––––––––––––––––––––––––––––––––––––––––––––––––––––––––––––––––––––––––––––––––––––––––––––––––––––––
12/2/2013
www.nostatatech.nl
World of free manuals
Page 57
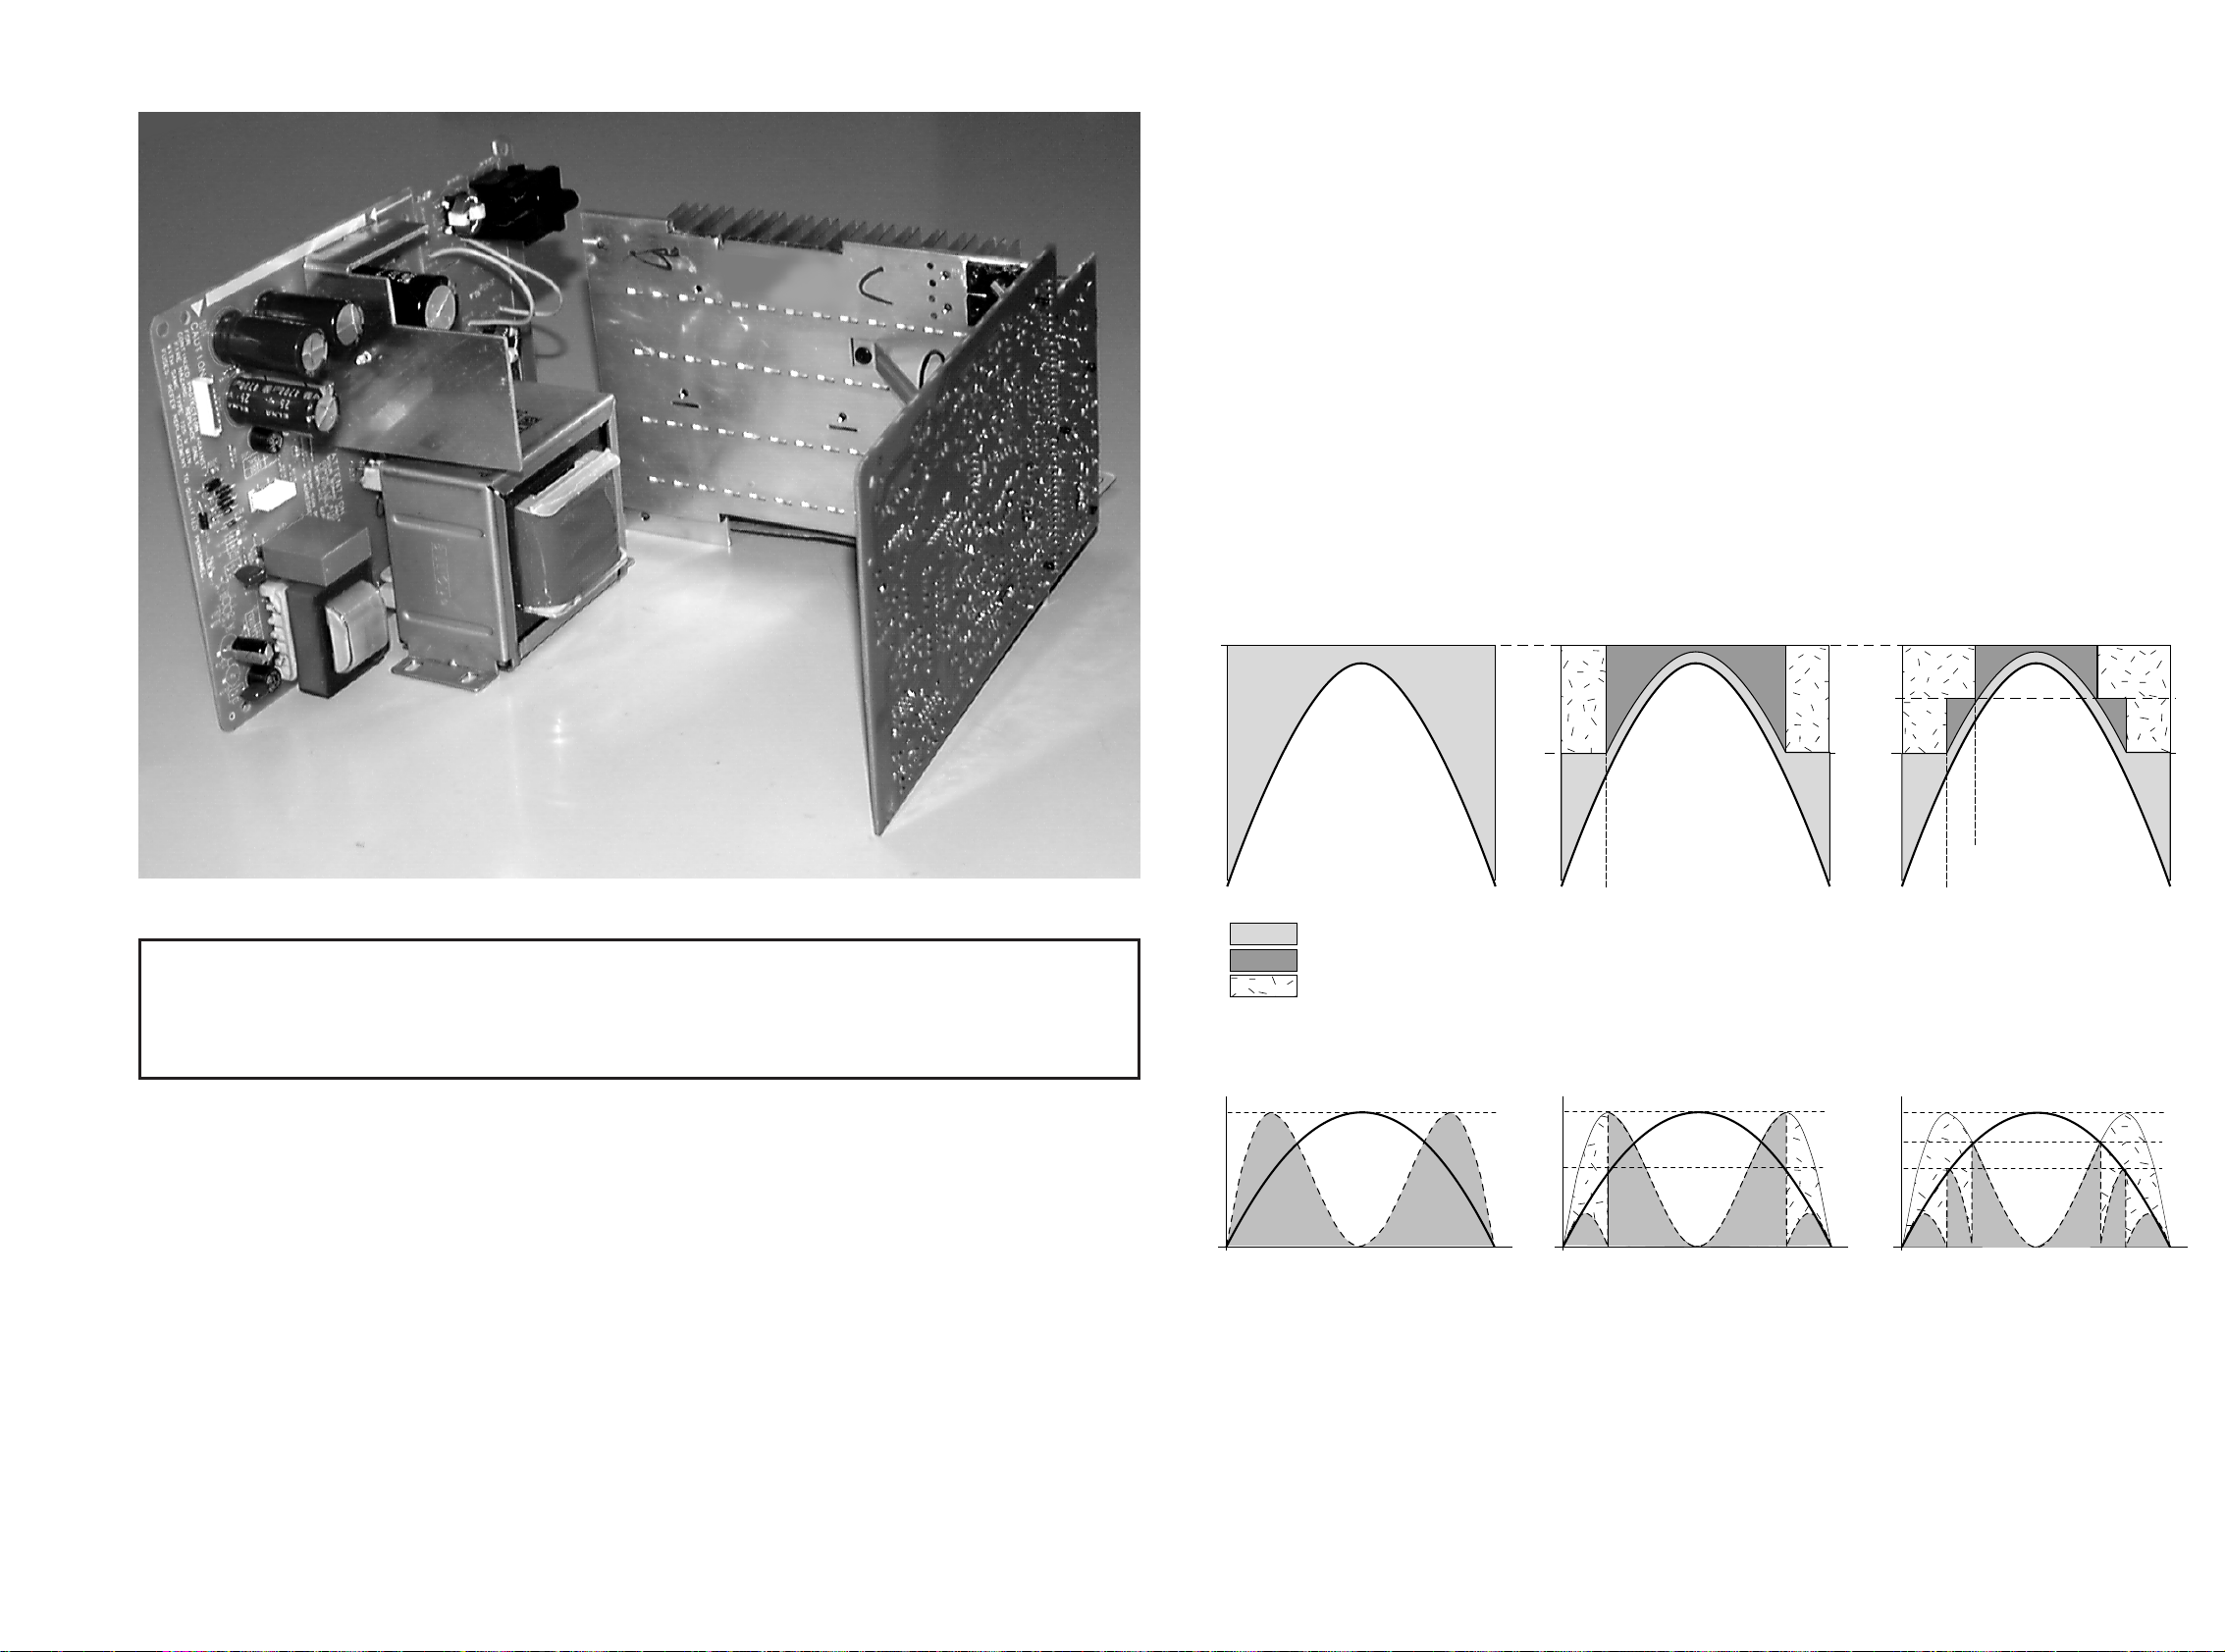
stage .9
11-111-1
TABLE OF CONTENTS
Brief Circuit Description.........................................................................11-1
Block Diagram.......................................................................................11-3
Component Layout Mains part.............................................................11-4
Circuit Diagram Mains part ..................................................................11-5
Component Layout Power part ............................................................11-6
Circuit Diagram Power part..................................................................11-7
Partslist .................................................................................................11-8
Circuit details:
Amplifier:
Attention: In the POWER 2001 module the power amplifier IC AN7591 is used as a bridge-amplifier.
Any connection from output to ground will destroy the outpout stages!
• Via the AMP_ON control line, connected to pins 6 (Stby), the power amplifiers are switched on/off by the µP.
High level (approx. 4,5V): power amplifiers switched on
Low level (approx. 0V): power amplifiers switched off
• Super class G - operation
The power amplifiers operate as so-called super class G - amplifiers:
The supply pins 12 (Vcc) are not just connected to one fixed DC-supply as in conventional amplifiers.
Dependent on the output power there are three different DC-voltages supplied to the power amplifiers:
⇒ +C1 (+20V) for low output power
⇒ +B1 (+29V) for medium output power
⇒ +A1 (+41V for high output power
Principle / benefit of Super Class G
Conventional power stage Class G amplifier Super class G amplifier
output signal
output signal
output signal
+A
+B
+C +C
+A
+B
+C
Voltage drop on power stage IC
Voltage drop on switching transistor(s)
Benefit - voltage drop on switching transistor(s) reduces total power dissipation
activating point +A activating point +B
activating point +A
Power
Powe r
dissipation
Power
Powe r
dissipation
Power
Powe r
dissipation
Output power
Benefit
Output power
%% %
Output power
Benefit
+C
+A
+A
+C
+A
+B
POWER 2001 Module
(30 - 70W Version)
12/2/2013
www.nostatatech.nl
World of free manuals
Page 58

Circuit details continued:
• Low power standby feature
An additional small standby transformer, reduces power consumption in standby-mode.
In case power is switched on, the control line ECO is low → relay 1210 is activated → contacts 1 and 2 are closed →
transformer 5001is connected to mains.
When the set is switched off (standby) the control line ECO is high → relay 1210 is not activated → mainstransformer is
disconnected. Via standby transformer and rectifiers 6210-6214 the supply voltage LOW_PWR_SUP is substituted. This
voltage is always available and so the microprocessor is kept running.
• DC voltages +A1, +B1, +C1
These voltages supply the Super Class G amplifier, described on previous page.
The whole power supply is optimized for the special characteristic of this type of amplifier. For that reason several “tricky”
details have been applied to ensure optimal efficiency and symmetrical load to the mains transformer.
Generation of +A1
Common full wave rectifying with bridge rectifier 6202, using 100% secondary winding of mains transformer (pin 10-14).
Generation of +B1
The supply for +B1 consists of one full wave rectifier:
– 2 diodes of bridge rectifier 6202, with 6200(6220 in parallel) 6201(6221 in parallel) for generation of +B1using approx.
70% secondary winding of mains transformer (pin 10-13 respectively pin 11-14).
As example for generation of +B1 see picture 1.
Generation of +C1
Full wave rectifying with 2 diodes of bridge rectifier 6202, using 50% secondary winding of mains transformer (pin 13-15/13-11).
See picture 2 below.
11-2 11-2
*
2204
2206
2203
2201
2215
2205
2216
6201
6200
+B1
+C1
+A1
1207
1200
1205
6202
5001
17
10
11
12
13
14
8
9
1
2
3
4
5
6
7
15
16
10,5V
10,5V
6,5V
6,5V
4,5V
38V
19,5V
28,5V
41V
pos. halfwave
neg. halfwave
Signal path
picture 1
*
2204
2206
2203
2201
2215
2205
2216
6201
6200
+B1
+C1
+A1
1207
1200
1205
6202
5001
17
10
11
12
13
14
8
9
1
2
3
4
5
6
7
15
16
2215
2216
+C1
1200
15
11
13
6202
D5SBA20
6202
simplified:
28,5V
17V
17V
19,5V
10,5V
10,5V
6,5V
6,5V
4,5V
38V
19,5V
41V
pos. halfwave
neg. halfwave
Signal path
picture 2
12/2/2013
www.nostatatech.nl
World of free manuals
Page 59
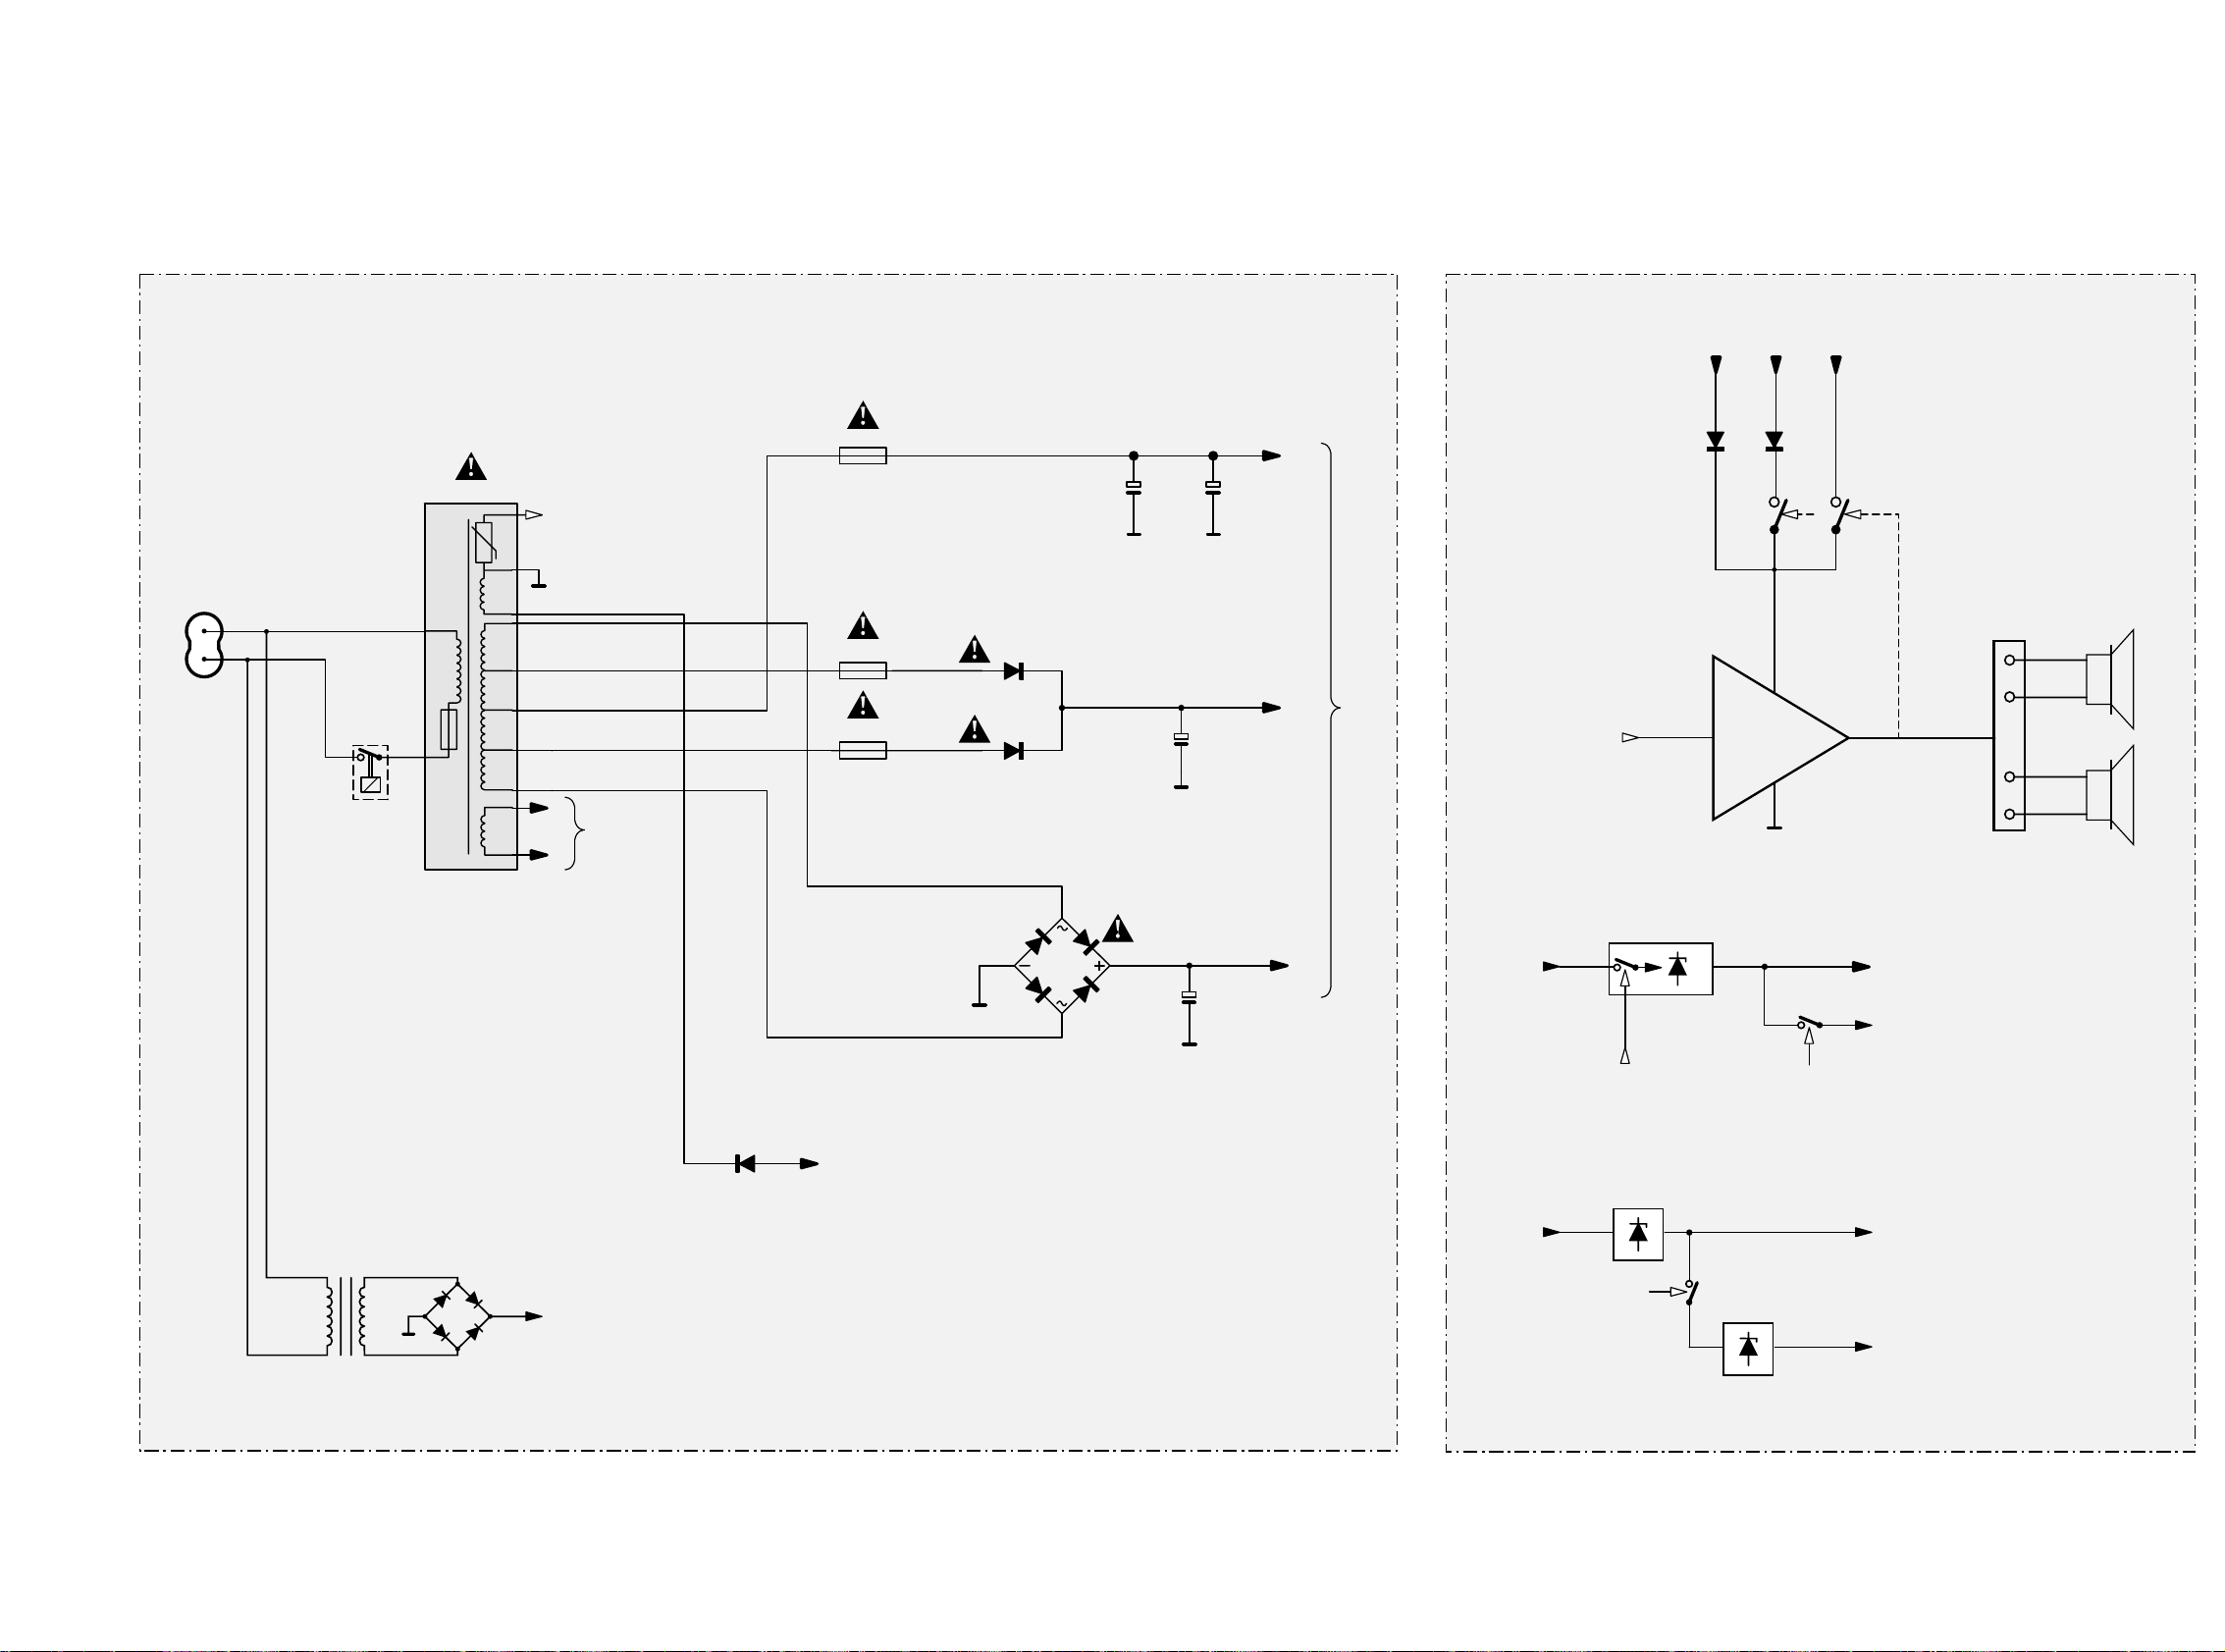
11-311-3
P2001 BOARD
2201
6308
63047309
7304
Level detection
2215
2205
2216
6201
6200
6206
+B1
+C1
+C1 +B1 +A1
+A1
7301,7302
Power amplifier
1207
1200
1205
6202
5001
17
10
11
12
13
14
8
9
15
16
+12V_A
+12V_D
+12V_CDR
1204
Mains socket
1210
Stand by
Relais
NTC
F1
F2
is used for
monitoring the
transformer temparature
LOW_PWR_SUP is used to
supply the microprocessor
during ECO stand by
is used for
filament of
display
-Vkk
supply of
display
supply for Power amplifier
(Super Class G)
LEFT, RIGHT
from Source Selector
on Audio Frequency Board
6210-6214
5203
Stand by
Tr ansformer
B1
LOW_PWR_CNTRL
C1 +5V6
+5V_VCD
VCD_ON
7330
VCD_ON
Blockdiagram Power2001 30-70W, 26 09 2000
12V Regulator
5,6V Regulator
5V Regulator
MAINS BOARD
Block Diagram
12/2/2013
www.nostatatech.nl
World of free manuals
Page 60
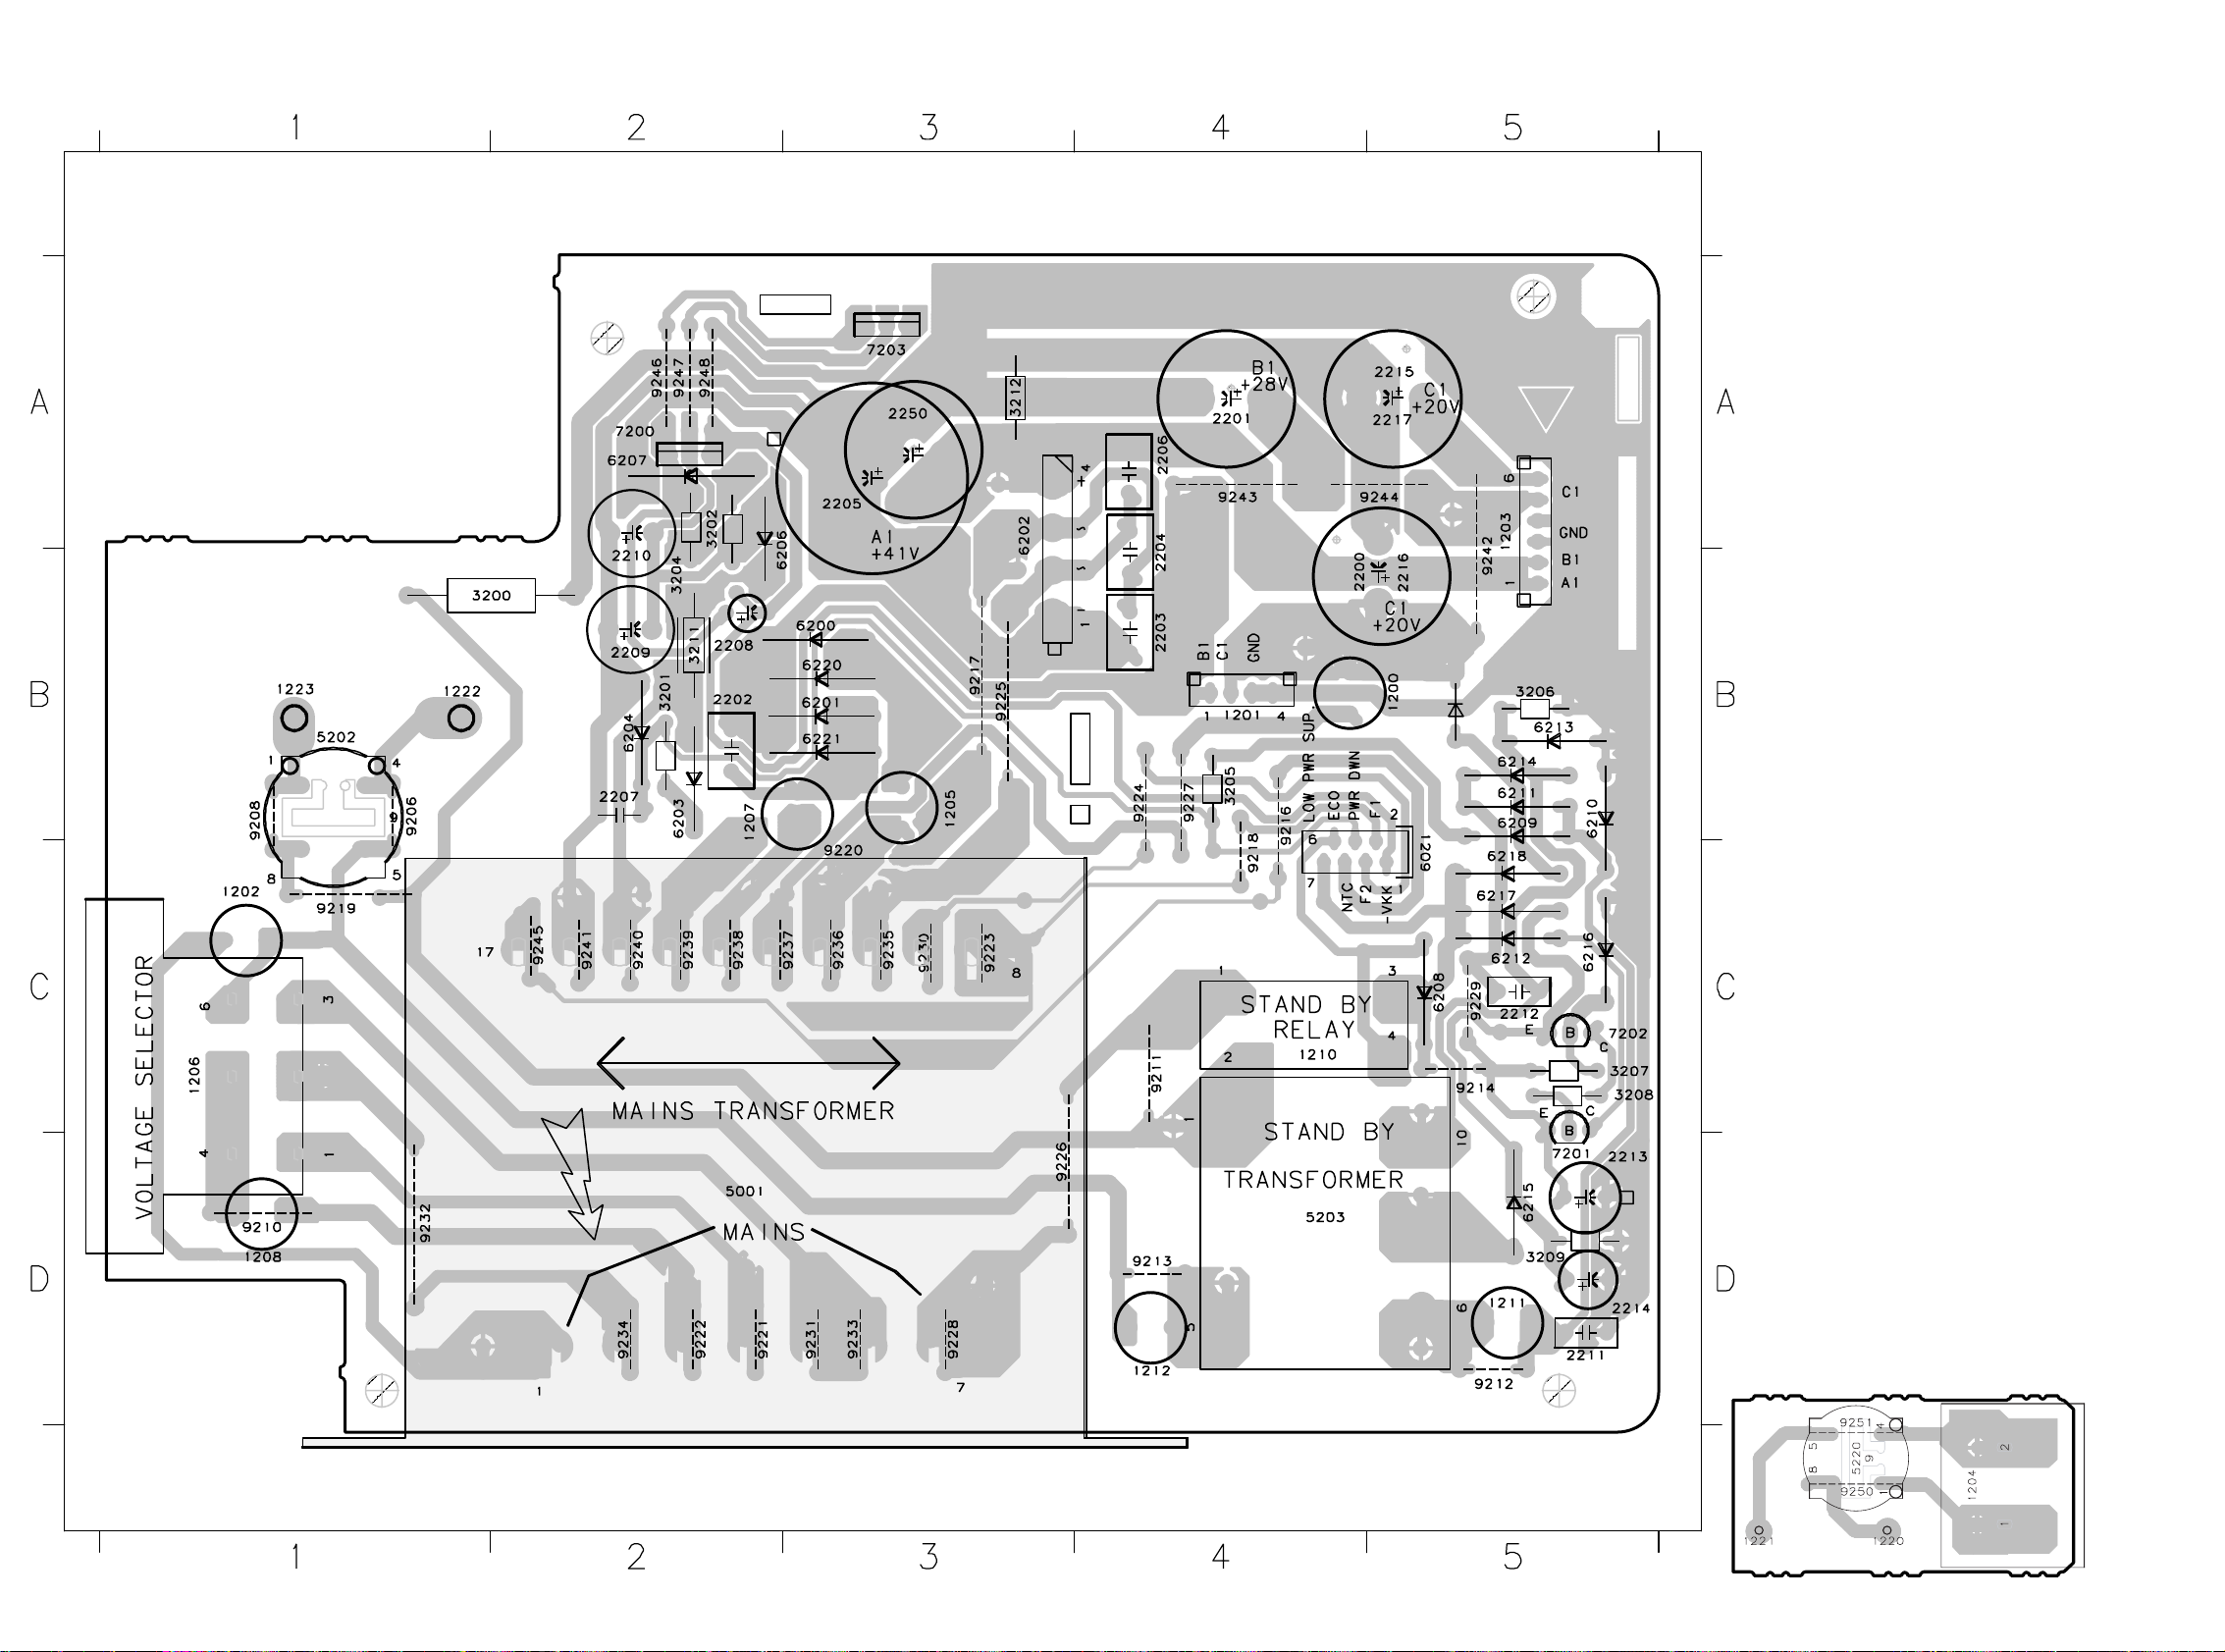
11-4 11-4
3103 303 3446.9
01-06-11
1200 B5
1201 B4
1202 C1
1203 A5
1205 B3
1206 C1
1207 C3
1208 D1
1209 C5
1210 C5
1211 D5
1212 D4
1222 B2
1223 B1
2200 B5
2201 A4
2202 B3
2203 B4
2204 B4
2205 B3
2206 A4
2207 B2
2208 B3
2209 B2
2210 B2
2211 D5
2212 C5
2213 D5
2214 D5
2215 A5
2216 B5
2217 A5
2250 A3
3200 B2
3201 B2
3202 B3
3204 A3
3205 B4
3206 B5
3207 C5
3208 C5
3209 D5
3211 B3
3212 A4
5001 C2
5202 B1
5203 D5
6200 B3
6201 B3
6202 B4
6203 B2
6204 B2
6206 B3
6207 A2
6208 C5
6209 C5
6210 C5
6211 B5
6212 C5
6213 B5
6214 B5
6215 D5
6216 C5
6217 C5
6218 C5
6220 B3
6221 B3
6222 B5
7200 A2
7201 D5
7202 C5
7203 A3
9206 B2
9208 B1
9210 D1
9211 D4
9212 D5
9213 D4
9214 C5
9216 B4
9217 B3
9218 C4
9219 C1
9220 C3
9221 D3
9222 D3
9223 C4
9224 B4
9225 B4
9226 D4
9227 B4
9228 D3
9229 C5
9230 C3
9231 D3
9232 D2
9233 D3
9234 D2
9235 C3
9236 C3
9237 C3
9238 C3
9239 C3
9240 C2
9241 C2
9242 B5
9243 A4
9244 A5
9245 C2
9246 A2
9247 A2
9248 A3
Mains Board Copperside view
This assembly drawing shows a summary of all possible versions.
For components used in a specific version see schematic diagram respectively partslist.
Power 2001, Mainsboard Layout stage .9 2001-06-26
BCE
BCE
6222
3447.9
Mains socket
Mains Socket
12/2/2013
www.nostatatech.nl
World of free manuals
Page 61

11-511-5
D
E
F
TO POWER BOARD
NOT /21
97TS
/21 ONLY
ONLY /21
F2
D
E
F
A
1
2
1204
GND
NTC
Low Power Supply
B1
ECO
T. F.
1221
5201
T160mA
optional
F1
B
C
optional
T1,25A
T4A
ONLY /21 version
1220
TO C/S BOARD
T100mA
C
C1
123456789
P2001 30-70W MAINS
456789
CDR ONLY
T4A
A
/21 ONLY
T4A
B
NOT /21
123
C1
NOT /21
-Vkk
TO POWER BOARD
/37 ONLY
GND
/21 ONLY
Power Down
NOT /21
-Vkk regulator
Low Power supply regulator
for /21 version only
2208
0u47
4K7
3201
6208
1N4148
680R
3204
1N5392
6200
BD238
7200 or 7203
3212
33K
100n
2206
BZX79-C8V2
6216
2211
1205
2204
100n
47n
1211
C1
2201
3m3
6203
1N4148
1223
1202
T1,6A
3K9
3202
BYV10-40
1N4003*
→
for /21 BYV10-40 is used
6215
9213
6213
1N4003*
100u
2209
2
5
1
4
3
6
1206
SDKGA
2215
6m8
6209
1N4148
BYV10-40
6217
9211
2205 or 2250
4m7 only for /37
3m3 not for /37
6202
GBU8D
4
6212
BYV10-40
9210
EH-B
1201
1
2
3
1207
9212
10M
3200
BZX79-F8V2
6204
2
3
4
5
6
7
2202
100n
FE-BT-VK-N
1209
1
100K
3209
47n
2207
1212
220u
2213
6210
1N4003*
34
1222
5
6
1210
SDT
21
2
1
4
3
7202
BC547B
BC327-25
7201
10K
3206
2212
47n
2203
100n
220u
2214
2210
100u
1N4148
6218
BZX79-C2V7
6222
1N4003*
6211
2200
4m7
4K7
3205
5203
110
5
6
8
BZX79-C33
6207
6201
1N5392
1N5392
6220
6221
1N5392
T5A
1200
19372
1N4003*
6214
4m7
2217
C1
9214
3211
4R7
5202
97TS
6
7
8
9
11
12
13
14
15
16
17
2
3
4
5
5001
1
10
6m8
2216
6206
1N4003
T1,6A
1208
4K7
3208
3207
4K7
NTC
F1
ECO
F2
NTC
LOW_PWR_SUP
LOW_PWR_SUP
LOW_PWR_SUP
ECO
F2
F1
not on all versionsnot on all versions
Mains Transformer
Voltage Selector
Stand by Transformer
Stand by Relay
Power2001 Mainsboard, 2001-03-21
13.5V
28.5V
28.5V
41V
41V
41V
14V
0V
8.5V
8.4V
13.5V
13.5V 2,5V
28V
13.4V
28V
12.9V
28V
14V
7.5V
V... at 240V AC
V... at 120V AC
-45V -33V
-33.5V
7.8V
19.5V
19.5V
28.5V
19.5V
14V
GND
A1
A1
GND
B1
1203
EH-B
DC-voltages measured
with low output power
.....V
EVM
V
1200 A6
1201 A9
1202 A4
1203 B9
1205 B6
1206 B3
1207 B6
1208 B4
1209 E9
1210 D4
1211 E2
1212 E1
1222 A2
1223 B2
2200 A7
2201 C8
2202 C8
2203 C7
2204 D7
2205 D8
2206 D8
2207 D8
2208 E8
2209 E6
2210 E7
2211 E3
2212 E3
2213 E4
2214 F3
2215 A7
2216 A7
2217 A8
2250 D8
3200 C2
3201 D6
3202 E7
3204 E7
3205 E4
3206 E3
3207 E4
3208 F4
3209 F3
3211 E6
3212 D9
5001 C5
5202 A2
5203 E1
6200 B8
6201 B8
6202 C8
6203 D6
6204 D9
6206 E6
6207 F7
6208 D4
6209 E4
6210 E3
6211 E3
6212 E5
6213 E3
6214 E3
6215 F3
6216 F4
6217 F5
6218 F6
6220 B8
6221 C8
7200 D7
7201 E4
7202 F5
7203 D7
9206 A2
9208 B2
9210 B4
9211 C4
9212 D2
9213 E1
9214 E5
9215 F6
12/2/2013
www.nostatatech.nl
World of free manuals
Page 62

11-6 11-6
0300 B3
1300 A5
1301 B5
1302 A3
1304 C1
1305 A3
1306 C2
1307 B5
1308 A2
1310 A2
1312 B2
1313 B1
1314 A2
1315 C1
1316 C1
2300 B4
2301 C4
2302 B4
2303 C4
2304 B4
2305 C4
2306 A4
2307 C4
2308 A4
2309 B5
2310 A5
2311 B4
2312 A4
2313 B4
2314 A4
2315 C4
2316 A4
2317 C5
2318 B5
2319 B5
2320 A5
2321 C5
2322 A5
2323 A3
2324 B4
2325 B2
2326 C3
2327 B3
2328 A3
2329 A4
2330 A4
2331 A3
2332 A2
2333 B4
2334 C3
2335 C2
2336 A1
2337 A1
2338 A2
2339 A1
2340 C1
2341 B1
2342 B1
2343 A3
2344 C2
3300 C3
3301 C4
3302 B4
3303 C4
3304 B4
3305 C4
3306 A4
3307 C4
3308 A4
3309 B5
3310 A5
3311 C5
3312 B5
3313 B3
3314 B4
3315 C5
3316 C3
3317 C3
3318 C5
3319 B1
3320 B1
3321 B1
3322 C1
3323 B3
3324 A3
3325 A3
3326 C5
3327 B2
3328 A4
3329 C3
3330 C3
3331 C1
3332 B3
3333 B2
3336 A2
3337 B3
3338 B3
3339 A3
3340 C5
3341 B5
3342 A4
3343 A3
3344 A3
3345 A2
3346 A3
3347 A3
3348 C2
3349 C2
3350 B1
3351 C2
3352 C3
3353 C3
3354 A4
3355 A2
3356 A1
3357 A1
3358 A2
3359 A1
3360 B1
3361 A1
3362 A1
3363 A1
3364 C5
3365 C5
3366 C1
3367 C1
3368 A4
3369 B1
3370 A1
3371 B1
3372 A1
3373 B1
3374 C2
3375 C1
3376 A1
3377 B3
3378 A3
3379 C5
3380 B2
3381 B3
3382 C2
3383 C1
3391 C1
3392 B1
3393 C2
3394 C1
3395 C2
3396 A1
3397 C2
3398 A4
5300 A5
5301 B5
5302 A5
5303 B5
6300 B5
6301 C5
6302 B5
6303 C5
6304 C4
6305 C2
6306 B3
6307 B4
6308 B3
6309 A3
6310 A4
6311 B3
6312 B3
6313 A2
6314 B3
6315 C3
6316 A2
6317 A4
6318 A3
6319 A3
6320 B2
6321 B1
6322 C2
6323 C4
6324 C4
6325 A1
6326 A1
6327 A1
6328 C1
6329 B1
6330 A1
6331 A3
6332 A3
6333 C1
6334 A1
6335 C3
7300 A4
7301 C4
7302 A4
7303 A3
7304 B4
7305 A4
7306 C2
7307 C5
7308 B4
7309 C4
7310 C3
7311 C3
7312 B2
7313 B3
7314 B3
7315 B2
7316 B2
7317 A4
7318 A4
7319 A1
7320 C2
7321 C2
7322 C2
7323 A2
7324 A1
7325 A1
7326 C5
7327 B1
7328 B1
7330 B2
7331 C2
7332 B1
7333 C1
7334 C2
9300 B3
9301 C3
9302 A2
9303 A2
9306 A3
9307 A3
9308 A3
9309 A3
9310 B2
9320 A4
9321 A5
9322 B5
9323 B5
9324 B4
9325 B4
9326 A1
9327 A2
9328 B1
9329 B3
9330 B2
9331 B3
9332 C1
9333 C1
9334 C3
9335 B4
9336 C3
9337 B1
9338 B2
9339 B3
9340 B3
9341 B4
9342 C1
9343 A1
9344 C3
9345 A2
9346 B3
9347 A3
9348 B1
9349 C1
9350 B4
9351 C1
9352 B2
9353 B2
9354 A2
9355 B3
9356 C4
9358 A4
9359 B2
9360 A3
9361 B1
9362 B1
9363 A3
9364 C1
9365 C1
9367 C4
9368 C5
9369 C1
9370 A1
9371 C2
9372 B1
Power 2001, Powerboard Layout stage .9 2001-08-21
This assembly drawing shows a summary of all possible versions.
For components used in a specific version see schematic diagram respectively partslist.
Power Board Copperside view
12/2/2013
www.nostatatech.nl
World of free manuals
Page 63
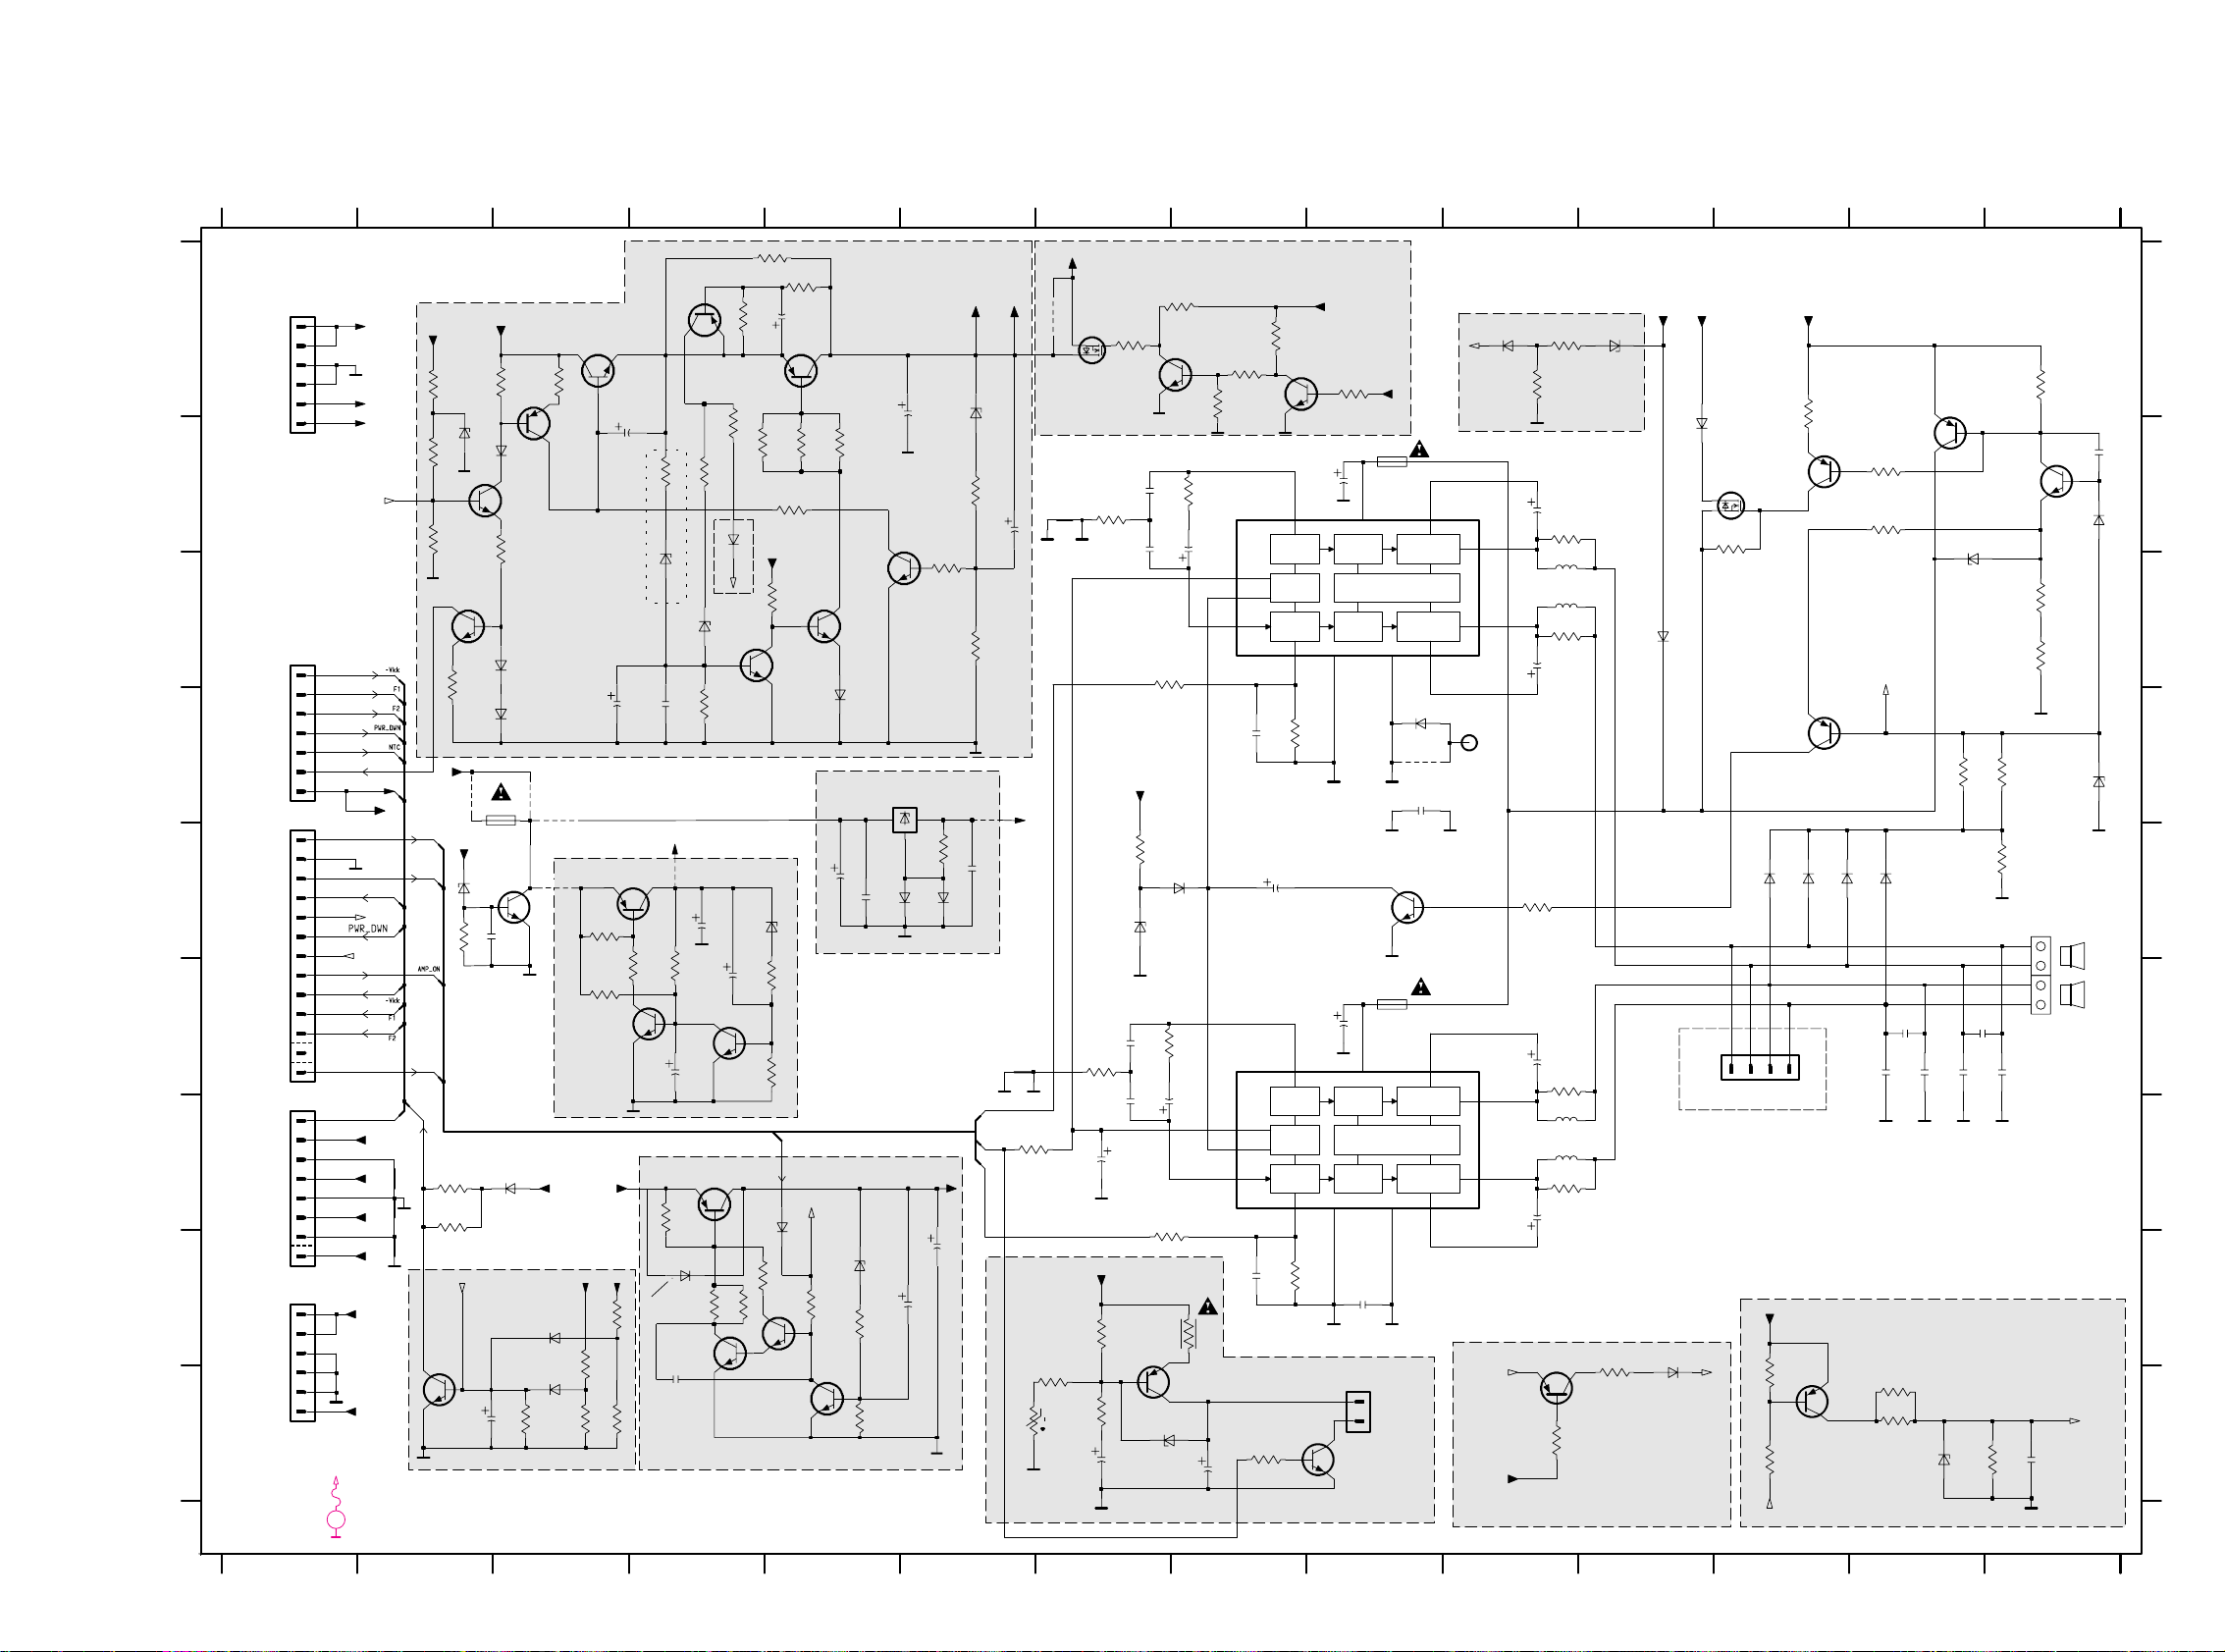
11-711-7
CIRCUIT
CIRCUIT
INPUT
CIRCUIT
DRIVER
CIRCUIT
SEPP OUTP
CIRCUIT
PROTECTION
CIRCUITS
DRIVER SEPP OUTP
RIPPLE
FILTER
CIRCUIT
INPUT
CIRCUIT
CIRCUIT
INPUT
CIRCUIT
DRIVER
CIRCUIT
SEPP OUTP
CIRCUIT
PROTECTION
CIRCUITS
DRIVER SEPP OUTP
RIPPLE
FILTER
CIRCUIT
INPUT
t
5V_VCD
PWR_DWN
+11V_A
Clipping Detection
RIGHT
GND_A
VCD+CDR ONLY
Left
F2
+11V_M
ECO
NON CDR
FAN
Power Amplifier
AMP_ON
NTC
TO SUPPLY MAINS
10k
_SUPPLY
5V6 Regulator
NTC
-
PWR_DWN
GND_A
Amplifier Part
Power Amplifier
-Vkk
GND_D
TO CDR or VCD
µP-Overvoltage
TO AF BOARD
RIGHT
VCD_ON
t.b.f.
F1
GND
A1
LOW_PWR
+
_CNTRL
5V_CDR
Overvoltage
Fan Control
for matrix surround only
GND
Right
CDR ONLY NOT ON ALL VERSIONS
5V_VCD short circuit
B1
+5V6
TO SUPPLY MAINS
_SUPPLY
+11V_CDR
CDR ONLY
C1
LOW_PWR
LEFT
TO AF BOARD
LOW_PWR
14
A
B
C
D
E
F
G
H
-Vkk
Overvoltage
LEFT
A1
F1
NC
F2
CLIPPING
GND_M
5V6 Regulator
10 11 12 13
12345678
I
A
B
C
D
E
F
G
H
GND_D
456789
Protection
detection
protection
91011121314
123
detection
P2001 30-70W
I
470R
3376
3379
220R
3370
1K
2332
100n
C1
B1
C1
1N4148
6327
LRIN
47K
3372
1N4148
6330
100n
2331
BC327-25
7327
6326
1N4148
2302
4n7
1302
EH-B
1
2
3
4
5
6
220R
3340
3347
1K5
9303
C1
1
2
EH-B
1313
15K
3360
4n7
2315
1K
3363
BYV28-200/20
6304
3366
10K
B1
1u
2309
1u
5301
O1
10O2
1RF
6 STBY
12
VCC
A1
+5V6
AN7591
7301
8
B1
11
B2
3
GND19GND2
5
IN
4 NF1
2
NF2
7
1K8
3353
100u
2342
470K
3343
LRIN
3364
100K
3365
220K
LRIN
1301
F3A15
BC547B
7300
10K
3342
100K
3359
22K
3354
3302
220R
1312
PH-B
1
2
3
4
5
6
+12V_D
BYV27-200
6308
4K7
3341
10K
3344
A1
3314
2314
100u
3K9
3300
470R
LRIN
3304
330R
4n7
2304
2306
47u
7328
BC557B
4R7
3311
2341
100u
3308
470R
3369
270R
1u
5300
+12V_A
LOW_PWR_SUP
330R
3315
1N4148
6306
6315
BZX79-B24
1
2
3
4
5
6
7
8
6316
BZX79-C6V8
1310(1314)
EH-B
+12V_D
LRIN
6K8
3362
+12V_CDR
10K
3375
5V_VCD
1N4148
6319
470R
3307
1N4003
6301
LRIN
7325
BC547B
5302
1u
33p
2324
3309
4R7
47u
2336
6303
1N4003
BZX79-C3V9
6329
100n
2318
270R
3345
+5V6
+5V6
6300
1N4003
9300
220R
3329
1N4003
6311
100u
2312
1N4003
6318
D
1307-A
2
1
7313
BC557B
YKD21-0026
4K7
3305
3312
4R7
LRIN
4n7
2308
1N4148
6317
9302
C1
D
100R
3357
100n
2340
BZX79-B4V7
6328
2K2
3355
L7805
7318
GND
IN OUT
A1
1304
1
2
3
4
5
6
7
+12V_D
1N4148
6323
220R
3301
T1A
T2,5A
1305
3306
4K7
1N4003
6302
1
STBY6
VCC
12
7302
AN7591
B1
8
B2
11
GND13GND2
9
IN
5
NF14
NF2
2
O1 7
O2 10
RF
10u
2337
47u
2333
2321
47n
150R
3358
4R7
3310
5R6
3371
7319
BC368
2322
47n
1307-B
YKD21-0026
3
4
6307
BZX79-B3V9
BZX79-C15
6332
47n
2319
10K
3373
1u
2329
2316
4n7
100u
2313
1u
2338
1
2
3
2307
4n7
7317
BDW94C
0300
12
13
2
3
4
5
6
7
8
9
2317
100n
1306
(1315,1316)
FE-BT-VK-N
1
10
11
100K
3356
9308
9309
5V_VCD
3367
68K
5V_VCD
10K
3377
7324
BC547B
5303
1u
BC547B
7323
47K
3323
BC337-40
7308
7304
BDW94C
+5V6
1K5
3346
330R
3303
D
820R
3378
1N4148
6331
LOW_PWR_SUP
EH-B
1308
1
2
3
4
+5V6
2303
4n7
3368
+5V6
+5V6
STP16NE06
7309
2310
1u
10u
2300
F3A15
1300
3361
1K
BC557B
7326
LRIN
2311
100u
3330
220R
47u
2339
47u
2305
9306
4n7
2301
BC337-40
7332
6325
BZX79-B4V7
47n
2320
100n
2330
3K9
3391
3K3
3318
4K7
3326
6324
BZX79-C6V8
7307
BC556B
OCD
VCD_ON_DET
OCD
CLIPPING
CL_DET
LOW_PWR_CNTRL
CLIPPING
OCD
LOW_PWR_CNTRL
CL_DET
9307
0300 D10
1300 F9
1301 B9
1302 A1
1304 C1
1305 D3
1306 E1
1307-a F14
1307-b E14
1308 F12
1310 G1
1312 H1
1313 I9
1314 G1
1315 D1
1316 D1
2300 E8
2301 B7
2302 F7
2303 B7
2304 G7
2305 B8
2306 G7
2307 D8
2308 H8
2309 B9
2310 F9
2311 B10
2312 F10
2313 C10
2314 G10
2315 D9
2316 H9
2317 F13
2318 F13
2319 F13
2320 F13
2321 F14
2322 F13
2323 A4
2324 B14
2325 A5
2326 B3
2327 B6
2328 D4
2329 E5
2330 E5
2331 E6
2332 F5
2333 G7
2334 H6
2335 H5
2336 E4
2337 F4
2338 F4
2339 I2
2340 I14
2341 I7
2342 I8
2343 D3
3300 G6
3301 B7
3302 F7
3303 B8
3304 F7
3305 C7
3306 H7
3307 D8
3308 H8
3309 B10
3310 F10
3311 C10
3312 G10
3313 A5
3314 A14
3315 A12
3316 A3
3317 A3
3318 B13
3319 B4
3320 B5
3321 B5
3322 B2
3323 B13
3324 B4
3325 B4
3326 B12
3327 B6
3328 B3
3329 C14
3330 C14
3331 B2
3332 B3
3333 C6
3336 C5
3337 C6
3338 C2
3339 D4
3340 D14
3341 E14
3342 E10
3343 F3
3344 E6
3345 F5
3346 G2
3347 G2
3348 G4
3349 H4
3350 H5
3351 H5
3352 I5
3353 E7
3354 E3
3355 F3
3356 F4
3357 F5
3358 F5
3359 I3
3360 H3
3361 I3
3362 H3
3363 I3
3364 I12
3365 I12
3366 I13
3367 I14
3368 I6
3369 H7
3370 I7
3371 H8
3372 I11
3373 I10
3374 H4
3375 I13
3376 I7
3377 A10
3378 A10
3379 D13
3380 A7
3381 A8
3382 A8
3383 A8
3391 I8
5300 G10
5301 C10
5302 G10
5303 C10
6300 E12
6301 E12
6302 E13
6303 E12
6304 B11
6305 A6
6306 B14
6307 B13
6308 C11
6309 C4
6310 C4
6311 D9
6312 C2
6313 D5
6314 D2
6315 D14
6316 F5
6317 E6
6318 E6
6319 G3
6320 H4
6321 H5
6322 H5
6323 E8
6324 E7
6325 E5
6326 H2
6327 H3
6328 I13
6329 I7
6330 H11
6331 A10
6332 A11
7300 E9
7301 B8
7302 F8
7303 A4
7304 A13
7305 A3
7306 A5
7307 B12
7308 B14
7309 B12
7310 B3
7311 B3
7312 B6
7313 D12
7314 C2
7315 C5
7316 C5
7317 E3
7318 D6
7319 F6
7320 G4
7321 H4
7322 I5
7323 F3
7324 F4
7325 I2
7326 I12
7327 I8
7328 H10
7330 A7
7331 A8
7332 I9
9300 D9
9302 D3
9303 D2
9306 D3
9307 E3
9308 D4
9309 D4
9310 A5
Direct OV-Protection ONLY
CDR ONLY
+12V Regulator
for non switchable 12V_CDR
CDR ONLY
8K2
3398
1K
3321
7330
STP16NE06
B1
+12V_CDR
3383
100K
BC547B
7331
100K
3381
0R22
3395
6334
1N4148
10K
3396
3393
100K
VCD_ON
BZX79-C5V6
6333
6335
CDR only
LOW_PWR_SUP
2K2
3332
4K7
3392
10u
2323
33K
3K3
for CDR
3K3
for CDR
1K5
for CDR
3331
7303
BC557B
1K
3316
7333
BC547B
BC547B
7316
3319
1K
7305
BDX53BFI
3380
1K
3382
100K
100K
3394
1K
3320
7306
BD438
47K
3322
47u
2325
100n
2328
+12V_A
B1
68R
3333
120R
3337
7315
BC547B
180R
3327
6310
BZX79-B8V2
3336
10K
+12V_D
2343
1u
1K
3328
6314
1N4148
6305
BZX79-B10
15K
3324
10R
3338
6K8
3313
2u2
2326
1N4148
6313
270R
3317
7314
BC337-40
10u
2327
B1
1N4148
1N4148
6312
7312
BC547B
BC547B
7311
7310
BC557B
3K3
3339 3325
3K3
6309
BZX79-C15
9310
OCD
only for not
switchable 5V
5V Regulator
1N4148
6321
BC547B
7321
100K
3350
2344
4n7
3K3
3397
10u
2335
3351
180R
7334
BC547B
10K
3348
3352
120R
6322
BZX79-B3V9
150R
3349
7320
BD438
150R
3374
47u
2334
7322
BC547B
5V_VCD
6320
1N4148
VCD_ON
LEFT
AMP_ON
RIGHT
VCD_ON_DET
Power2001 30-70W, 2001-08-21
LOW_PWR_SUP
VCD_ON
NTC
NTC
RIGHT
LEFT
41V
40V
0.8V
18.5V
0.6V
0.6V
19.5V
0.6V
28.5V
28.5V
0.6V
0.8V
0.6V
10V
10V
9.5V
18V
4.5V
1.5V
9.5V
0V
5V
5.1V
1,2V
0.6V
4.5V
0.6V
19.5V
5.6V
5.6V
5.6V
11.9V
11.8V
11.3V
41V
19V
10V
14.4V
9.5V
9.5V
9.5V
5V
0V
5.6V
5V
0.6V
1.5V
16V
16V
0V
16V
16V
4.5V
0V
19V
40V
40V
4.5V
4.5V
0V
5V
2.5V
4.4V
1.4V
0V
1.4V
7.5V
11.6V
11V
3.6V
0V
24.2V
24.8V
13.1V
13.1V
0V
0V
0V
19.5V 28.5V
41V
1.5V
1.5V
18V
28V
0V
0.6V
FOR SETS WITHOUT CDR ONLY
FOR SETS WITH CDR ONLY
19.5V
41V
CDR ONLY
28V
DC-voltages measured
with low output power
.....V
EVM
V
12/2/2013
www.nostatatech.nl
World of free manuals
Page 64

11-8 11-8
ELECTRICAL PARTSLIST POWER2001 MODULE
––––––––––––––––––––––––––––––––––––––––––––––––––––––––––––––––––––––––––––––––––––––––––––––––––––––––––––––––––
ELECTRICAL PARTSLIST POWER2001 MODULE
––––––––––––––––––––––––––––––––––––––––––––––––––––––––––––––––––––––––––––––––––––––––––––––––––––––––––––––––––
MISCELLANEOUS
–––––––––––––––––––––––––––––––––––––––––––––––––––––
1200 ! 2422 086 10963 FUSE RAD 5A 250V IEC
1202 ! 4822 071 51252 FUSE 1.25A for sets without 5203
1202 ! 4822 071 51602 FUSE 1,6A for sets with 5203
1202 ! 4822 253 10126 FUSE T4A
1204 ! 2422 030 00328 MAINS SOCKET /37
1204 ! 4822 265 31015 MAINS SOCKET /21, /22
1205 ! 2422 086 10786 FUSE RAD 4A 250V IEC
1206 ! 2422 129 16478 VOLTAGE SELECTOR
1207 ! 2422 086 10786 FUSE RAD 4A 250V IEC
1208 ! 4822 071 51252 FUSE 1.25A for sets without 5203
1208 ! 4822 071 51602 FUSE 1,6A for sets with 5203
1209 4822 267 10953 FLEX FOIL CONNECTOR 7P
1210 ! 4822 280 10382 STAND 1P 9V
1211 ! 2422 086 10771 FUSE RAD 160mA 250V IEC
1212 ! 4822 071 51001 FUSE 100mA
1300 ! 4822 252 11225 FUSE F3.15A IEC 250V
1301 ! 4822 252 11225 FUSE F3.15A IEC 250V
1304 4822 267 10953 FLEX FOIL CONNECTOR 7P
1305 ! 4822 071 51002 FUSE T1A for sets without 5203
1305 ! 4822 071 52502 FUSE T2,5A for sets with 5203
1306 4822 267 10738 FFC-CONNECTOR 13P
1307 4822 267 31176 SPEAKER TERMINAL
5203 ! 3103 308 30600 STANDBY TRANSFORMER /21
5203 ! 3103 308 30610 STANDBY TRANSFORMER /22
5203 ! 3103 308 30800 STANDBY TRANSFORMER /37
8010 3139 110 34600 FLEX FOIL CABLE 7Pin, 280mm
4822 492 11735 SPRING FIXATION TRANSISTOR
CAPACITORS
–––––––––––––––––––––––––––––––––––––––––––––––––––––
2200 4822 124 12012 4700µF 20% 25V
2201 4822 124 42367 3300µF 20% 35V
2202 5322 121 42386 100nF 5% 63V
2203 5322 121 42386 100nF 5% 63V
2204 5322 121 42386 100nF 5% 63V
2205 4822 124 80415 4700µF 20% 50V only for /37
2206 5322 121 42386 100nF 5% 63V
2207 4822 122 33449 47nF 30% 50V
2208 5322 124 41948 0,47µF 20% 50V
2209 2020 012 93547 100µF 20% 63V
2211 4822 121 43526 47nF 5% 100V
2212 4822 121 43526 47nF 5% 100V
2213 4822 124 11769 220µF 20% 50V
2214 4822 124 40207 100µF 20% 25V
2217 4822 124 12012 4700µF 20% 25V
2250 2020 012 93774 3300µF 20% 50V not for /37
2300 4822 124 40248 10µF 20% 63V
2301 4822 126 11714 4,7nF 20% 16V
2302 4822 126 11714 4,7nF 20% 16V
2303 4822 126 11714 4,7nF 20% 16V
2304 4822 126 11714 4,7nF 20% 16V
2305 4822 124 40433 47µF 20% 25V
2306 4822 124 40433 47µF 20% 25V
2307 4822 126 11714 4,7nF 20% 16V
2308 4822 126 11714 4,7nF 20% 16V
2309 4822 124 21913 1µF 20% 63V
2310 4822 124 21913 1µF 20% 63V
2311 4822 124 40207 100µF 20% 25V
2312 4822 124 40207 100µF 20% 25V
2313 4822 124 40207 100µF 20% 25V
2314 4822 124 40207 100µF 20% 25V
2315 4822 126 11714 4,7nF 20% 16V
2316 4822 126 11714 4,7nF 20% 16V
2317 4822 126 12882 100nF 20% 50V
2318 4822 126 12882 100nF 20% 50V
2319 4822 121 43526 47nF 5% 100V
2320 4822 121 43526 47nF 5% 100V
2321 4822 121 43526 47nF 5% 100V
2322 4822 121 43526 47nF 5% 100V
2323 4822 124 40248 10µF 20% 63V
2324 4822 122 33069 33pF 5% 50V
2325 4822 124 40433 47µF 20% 25V
2326 4822 124 22652 2,2µF 20% 50V
2327 4822 124 40248 10µF 20% 63V
CAPACITORS
–––––––––––––––––––––––––––––––––––––––––––––––––––––
2328 4822 126 12882 100nF 20% 50V
2329 4822 124 21913 1µF 20% 63V
2330 4822 126 12882 100nF 20% 50V
2331 4822 126 12882 100nF 20% 50V
2332 4822 126 12882 100nF 20% 50V
2333 4822 124 40433 47µF 20% 25V
2334 4822 124 40433 47µF 20% 25V
2335 4822 124 40248 10µF 20% 63V
2336 4822 124 40433 47µF 20% 25V
2337 4822 124 40248 10µF 20% 63V
2338 4822 124 21913 1µF 20% 63V
2339 4822 124 40433 47µF 20% 25V
2341 4822 124 23052 100µF 20% 16V
2342 4822 124 23052 100µF 20% 16V
2343 4822 124 21913 1µF 20% 63V
RESISTORS
–––––––––––––––––––––––––––––––––––––––––––––––––––––
3200 4822 053 21106 10MΩ 5% 0,5W
3201 4822 116 52283 4,7kΩ 5% 0,5W
3202 4822 116 52276 3,9kΩ 5% 0,5W
3204 4822 116 52228 680Ω 5% 0,5W
3205 4822 116 52283 4,7kΩ 5% 0,5W
3206 4822 050 21003 10kΩ 2% 0,25W
3207 4822 116 52283 4,7kΩ 5% 0,5W
3208 4822 116 52283 4,7kΩ 5% 0,5W
3209 4822 116 52234 100kΩ 5% 0,5W
3211 4822 052 10478 4,7Ω 5% NFR
3212 4822 050 23303 33kΩ 1% 0,6W
3300 4822 116 52276 3,9kΩ 5% 0,5W
3301 4822 116 83872 220Ω 5% 0,5W
3302 4822 116 83872 220Ω 5% 0,5W
3303 4822 116 52219 330Ω 5% 0,5W
3304 4822 116 52219 330Ω 5% 0,5W
3305 4822 116 52283 4,7kΩ 5% 0,5W
3306 4822 116 52283 4,7kΩ 5% 0,5W
3307 4822 116 83883 470Ω 5% 0,16W
3308 4822 116 83883 470Ω 5% 0,16W
3309 4822 050 24708 4,7Ω 1% 0,6W
3310 4822 050 24708 4,7Ω 1% 0,6W
3311 4822 050 24708 4,7Ω 1% 0,6W
3312 4822 050 24708 4,7Ω 1% 0,6W
3313 4822 116 83961 6,8kΩ 5% 0,16W
3314 4822 116 83883 470Ω 5% 0,16W
3315 4822 116 52219 330Ω 5% 0,5W
3316 4822 050 11002 1kΩ 5% 0,2W
3317 4822 116 83876 270Ω 5% 0,16W
3318 4822 116 52269 3,3kΩ 5% 0,5W
3319 4822 050 11002 1kΩ 5% 0,2W
3320 4822 050 11002 1kΩ 5% 0,2W
3321 4822 050 11002 1kΩ 5% 0,2W
3322 4822 116 83884 47kΩ 5% 0,16W not for CDR
3322 4822 116 52269 3,3kΩ 5% 0,16W for CDR only
3323 4822 116 83884 47kΩ 5% 0,16W
3324 4822 116 52244 15kΩ 5% 0,5W
3325 4822 116 52269 3,3kΩ 5% 0,5W
3326 4822 116 52283 4,7kΩ 5% 0,5W
3327 4822 116 52213 180Ω 5% 0,5W
3328 4822 050 11002 1kΩ 5% 0,2W
3329 4822 053 11221 220Ω 5% 2W
3330 4822 053 11221 220Ω 5% 2W
3331 4822 050 23303 33kΩ 1% 0,6W not for CDR
3331 4822 116 52269 3,3kΩ 5% 0,16W for CDR only
3332 4822 116 52256 2,2kΩ 5% 0,16W
3333 4822 116 52199 68Ω 5% 0,16W
3336 4822 050 21003 10kΩ 2% 0,25W
3337 4822 116 52206 120Ω 5% 0,5W
3338 4822 116 52176 10Ω 5% 0,5W
3339 4822 116 52269 3,3kΩ 5% 0,5W
3340 4822 116 83872 220Ω 5% 0,5W
3341 4822 116 52283 4,7kΩ 5% 0,5W
3342 4822 050 21003 10kΩ 2% 0,25W
3343 4822 116 52285 470kΩ 5% 0,5W
3344 4822 050 21003 10kΩ 2% 0,25W
RESISTORS
–––––––––––––––––––––––––––––––––––––––––––––––––––––
3345 4822 116 83876 270Ω 5% 0.16W
3346 4822 116 52243 1,5kΩ 5% 0,16W
3347 4822 116 52243 1,5kΩ 5% 0,16W
3348 4822 050 21003 10kΩ 2% 0,25W
3349 4822 116 52213 180Ω 5% 0,5W
3350 4822 050 21003 10kΩ 2% 0,25W
3351 4822 116 83868 150Ω 5% 0,5W
3352 4822 116 52206 120Ω 5% 0,5W
3353 4822 116 52249 1,8kΩ 5% 0,16W
3354 4822 116 52257 22kΩ 5% 0,5W
3355 4822 116 52256 2,2kΩ 5% 0,16W
3356 4822 116 52234 100kΩ 5% 0,5W
3357 4822 116 52175 100Ω 5% 0,5W
3358 4822 116 83868 150Ω 5% 0,5W
3359 4822 116 52234 100kΩ 5% 0,5W
3360 4822 116 52244 15kΩ 5% 0,5W
3361 4822 050 11002 1kΩ 5% 0,2W
3362 4822 116 83961 6,8kΩ 5% 0,16W
3363 4822 050 11002 1kΩ 5% 0,2W
3368 2322 640 63103 10kΩ NTC
3369 4822 116 83876 270Ω 5% 0.16W
3370 4822 050 11002 1kΩ 5% 0,2W
3371 4822 052 10568 5,6Ω 5% 0,33W
3372 4822 116 83884 47kΩ 5% 0,16W
3373 4822 050 21003 10kΩ 2% 0,25W
3374 4822 116 52213 180Ω 5% 0,5W
3376 4822 116 83883 470Ω 5% 0,16W
3377 4822 050 21003 10kΩ 2% 0,25W
3378 4822 116 52231 820Ω 5% 0,5W
3379 4822 116 83872 220Ω 5% 0,5W
3380 4822 050 11002 1kΩ 5% 0,2W
3381 4822 116 52234 100kΩ 5% 0,5W
3382 4822 116 52234 100kΩ 5% 0,5W
3383 4822 116 52234 100kΩ 5% 0,5W
3391 4822 116 52276 3,9kΩ 5% 0,5W
3392 4822 116 52283 4,7kΩ 5% 0,5W not for CDR
3392 4822 116 52243 1,5kΩ 5% 0,5W for CDR only
COILS
–––––––––––––––––––––––––––––––––––––––––––––––––––––
5202 4822 157 11832 400µH
5220 4822 157 11832 400µH
5300 4822 157 62255 COIL 18,5 TURNS
5301 4822 157 62255 COIL 18,5 TURNS
5302 4822 157 62255 COIL 18,5 TURNS
5303 4822 157 62255 COIL 18,5 TURNS
DIODES
–––––––––––––––––––––––––––––––––––––––––––––––––––––
6200 ! 4822 130 31878 1N4003G
6201 ! 4822 130 31878 1N4003G
6202 4822 130 11139 GBU8D
6203 4822 130 30621 1N4148
6204 3198 010 58280 BZX79-B8V2
6206 4822 130 31878 1N4003G
6207 4822 130 34142 BZX79-B33
6208 4822 130 30621 1N4148
6209 4822 130 30621 1N4148
6210 4822 130 31878 1N4003G not for /21
6210 4822 130 32245 BYV10-40 only for /21
6211 4822 130 31878 1N4003G not for /21
6211 4822 130 32245 BYV10-40 only for /21
6212 4822 130 32245 BYV10-40
6213 4822 130 31878 1N4003G not for /21
6213 4822 130 32245 BYV10-40 only for /21
6214 4822 130 31878 1N4003G not for /21
6214 4822 130 32245 BYV10-40 only for /21
6215 4822 130 32245 BYV10-40
6216 4822 130 34382 BZX79-B8V2
6217 4822 130 32245 BYV10-40
6218 4822 130 30621 1N4148
6220 ! 4822 130 31878 1N4003G
6221 ! 4822 130 31878 1N4003G
6222 5322 130 34563 BZX79-C2V7
DIODES
–––––––––––––––––––––––––––––––––––––––––––––––––––––
6300 4822 130 31878 1N4003G
6301 4822 130 31878 1N4003G
6302 4822 130 31878 1N4003G
6303 4822 130 31878 1N4003G
6304 9340 550 66112 BYV28-200/24
6305 4822 130 61219 BZX79-C10
6306 4822 130 30621 1N4148
6307 3198 010 53980 BZX79-B3V9
6308 5322 130 31938 BYV27-200
6309 4822 130 34281 BZX79-C15
6310 3198 010 58280 BZX79-B8V2
6311 4822 130 31878 1N4003G
6312 4822 130 30621 1N4148
6313 4822 130 30621 1N4148
6314 4822 130 30621 1N4148
6315 4822 130 34398 BZX79-C24
6316 4822 130 34278 BZX79-C6V8
6317 4822 130 30621 1N4148
6318 4822 130 31878 1N4003G
6319 4822 130 30621 1N4148
6321 4822 130 30621 1N4148
6322 3198 010 53980 BZX79-B3V9
6323 4822 130 30621 1N4148
6324 4822 130 34278 BZX79-C6V8
6325 4822 130 34174 BZX79-B4V7
6326 4822 130 30621 1N4148
6327 4822 130 30621 1N4148
6329 4822 130 31981 BZX79-B3V9
6330 4822 130 30621 1N4148
6331 4822 130 30621 1N4148
6332 4822 130 34281 BZX79-C15
6333 4822 130 34173 BZX79-B5V6
6335 4822 130 30621 1N4148
TRANSISTORS
–––––––––––––––––––––––––––––––––––––––––––––––––––––
7200 4822 130 40917 BD238
7201 4822 130 41246 BC327-25
7202 4822 130 40959 BC547B
7300 4822 130 40959 BC547B
7303 4822 130 44568 BC557B
7304 4822 130 10847 BDW94C
7305 9322 139 23687 BDX53BFP
7306 4822 130 40995 BD438
7307 4822 130 41691 BC556B
7308 4822 130 40855 BC337-40
7309 4822 130 11336 STP16NE06FP
7310 4822 130 44568 BC557B
7311 4822 130 40959 BC547B
7312 4822 130 40959 BC547B
7313 4822 130 44568 BC557B
7314 4822 130 44503 BC547C
7315 4822 130 40959 BC547B
7316 4822 130 40959 BC547B
7317 4822 130 10847 BDW94C
7319 5322 130 44647 BC368
7320 4822 130 40995 BD438
7321 4822 130 40959 BC547B
7322 4822 130 40959 BC547B
7323 4822 130 40959 BC547B
7324 4822 130 40959 BC547B
7325 4822 130 40959 BC547B
7327 4822 130 41246 BC327-25
7328 4822 130 44568 BC557B
7330 4822 130 11336 STP16NE06FP
7331 4822 130 40959 BC547B
7332 4822 130 40855 BC337-40
INTEGRATED CIRCUITS
–––––––––––––––––––––––––––––––––––––––––––––––––––––
7301 9322 161 89682 AN7591, Power amplifier
7302 9322 161 89682 AN7591, Power amplifier
7318 4822 209 31841 L7805CP, Stabilizer 5V
12/2/2013
www.nostatatech.nl
World of free manuals
Page 65

12-1 12-1
12/2/2013
www.nostatatech.nl
World of free manuals
BRIEF INTRODUCTION OF THE AF9 BOARD
The AF9 Board consists of the following features :
a. TDA7468D IC
TDA7468D IC (7501) which includes functions such as source selection, loudness control, dynamic bass control, treble
control, volume control and muting function. Sound features such as ALC, DBB, DSC and IS are controllable via I2C Bus
from the microprocessor.
The TDA7468D IC caters for 4 input sources namely TUNER, TAPE, CD and AUX. It also has a Mic mix input. In our
application, software will switch the input source to previous source MUTE during STANDBY mode and some other
occasions where noise from other input source is undesirable.
AF9 BOARD
TABLE OF CONTENTS
Brief Introduction of the AF9 Board ............................... 12-1
AF9 Board - Component layout ..................................... 12-2
AF9 Board - Chip layout ................................................ 12-3
AF9 Board - Circuit Diagram (Part 1) ............................ 12-4
AF9 Board - Circuit Diagram (Part 2) ............................ 12-5
AF9 Board - Circuit Diagram (Part 3) ............................ 12-6
Video Out Cinch part - Layout & Circuit diagram .......... 12-7
Electrical parts list.......................................................... 12-7
Note that the input to the TDA7468D IC must be ac coupled to prevent 'polp' noise.
Input networks are included to provide appropriate attenuation for various sources.
b. SIMPLE MIC MIXING
The AF9 Board has provisions which can be configured to cater for one of the following:
MM : which caters for Mic mixing with additional Mic amplifier board.
NM : non Mic mixing.
c.
DOLBY PRO LOGIC (DPL) INTERFACE
The AF9 Board has provisions which can be configured to cater for DPL.
LINE OUT
d.
Line out cinch socket for connection to external amplifier.
e.
SUB-WOOFER OUT
Sub-woofer out cinch socket for connection to active sub-woofer speaker.
INCREDIBLE SURROUND
f.
Incredible surround effect using transistor circuit to create phase shifting and spatial effect.
g.
HEADPHONE AMPLIFIER
Headphone amplifier to drive 32 ohm to 1kohm headphone.
CD STANDBY CONTROL
h.
CD Standby Control circuit which switches on the supply to CD servo control IC, digital out buffer IC, HF circuit and the laser
light pen in CD mode only.
i. ATTENUATION NETWORK
Attenuation network is provided at the output of the AF9 Board for interfacing with power board of different output power.
j.
CD DIGITAL OUT
CD Digital out cinch socket for connection to external digital audio decoders.
Page 66
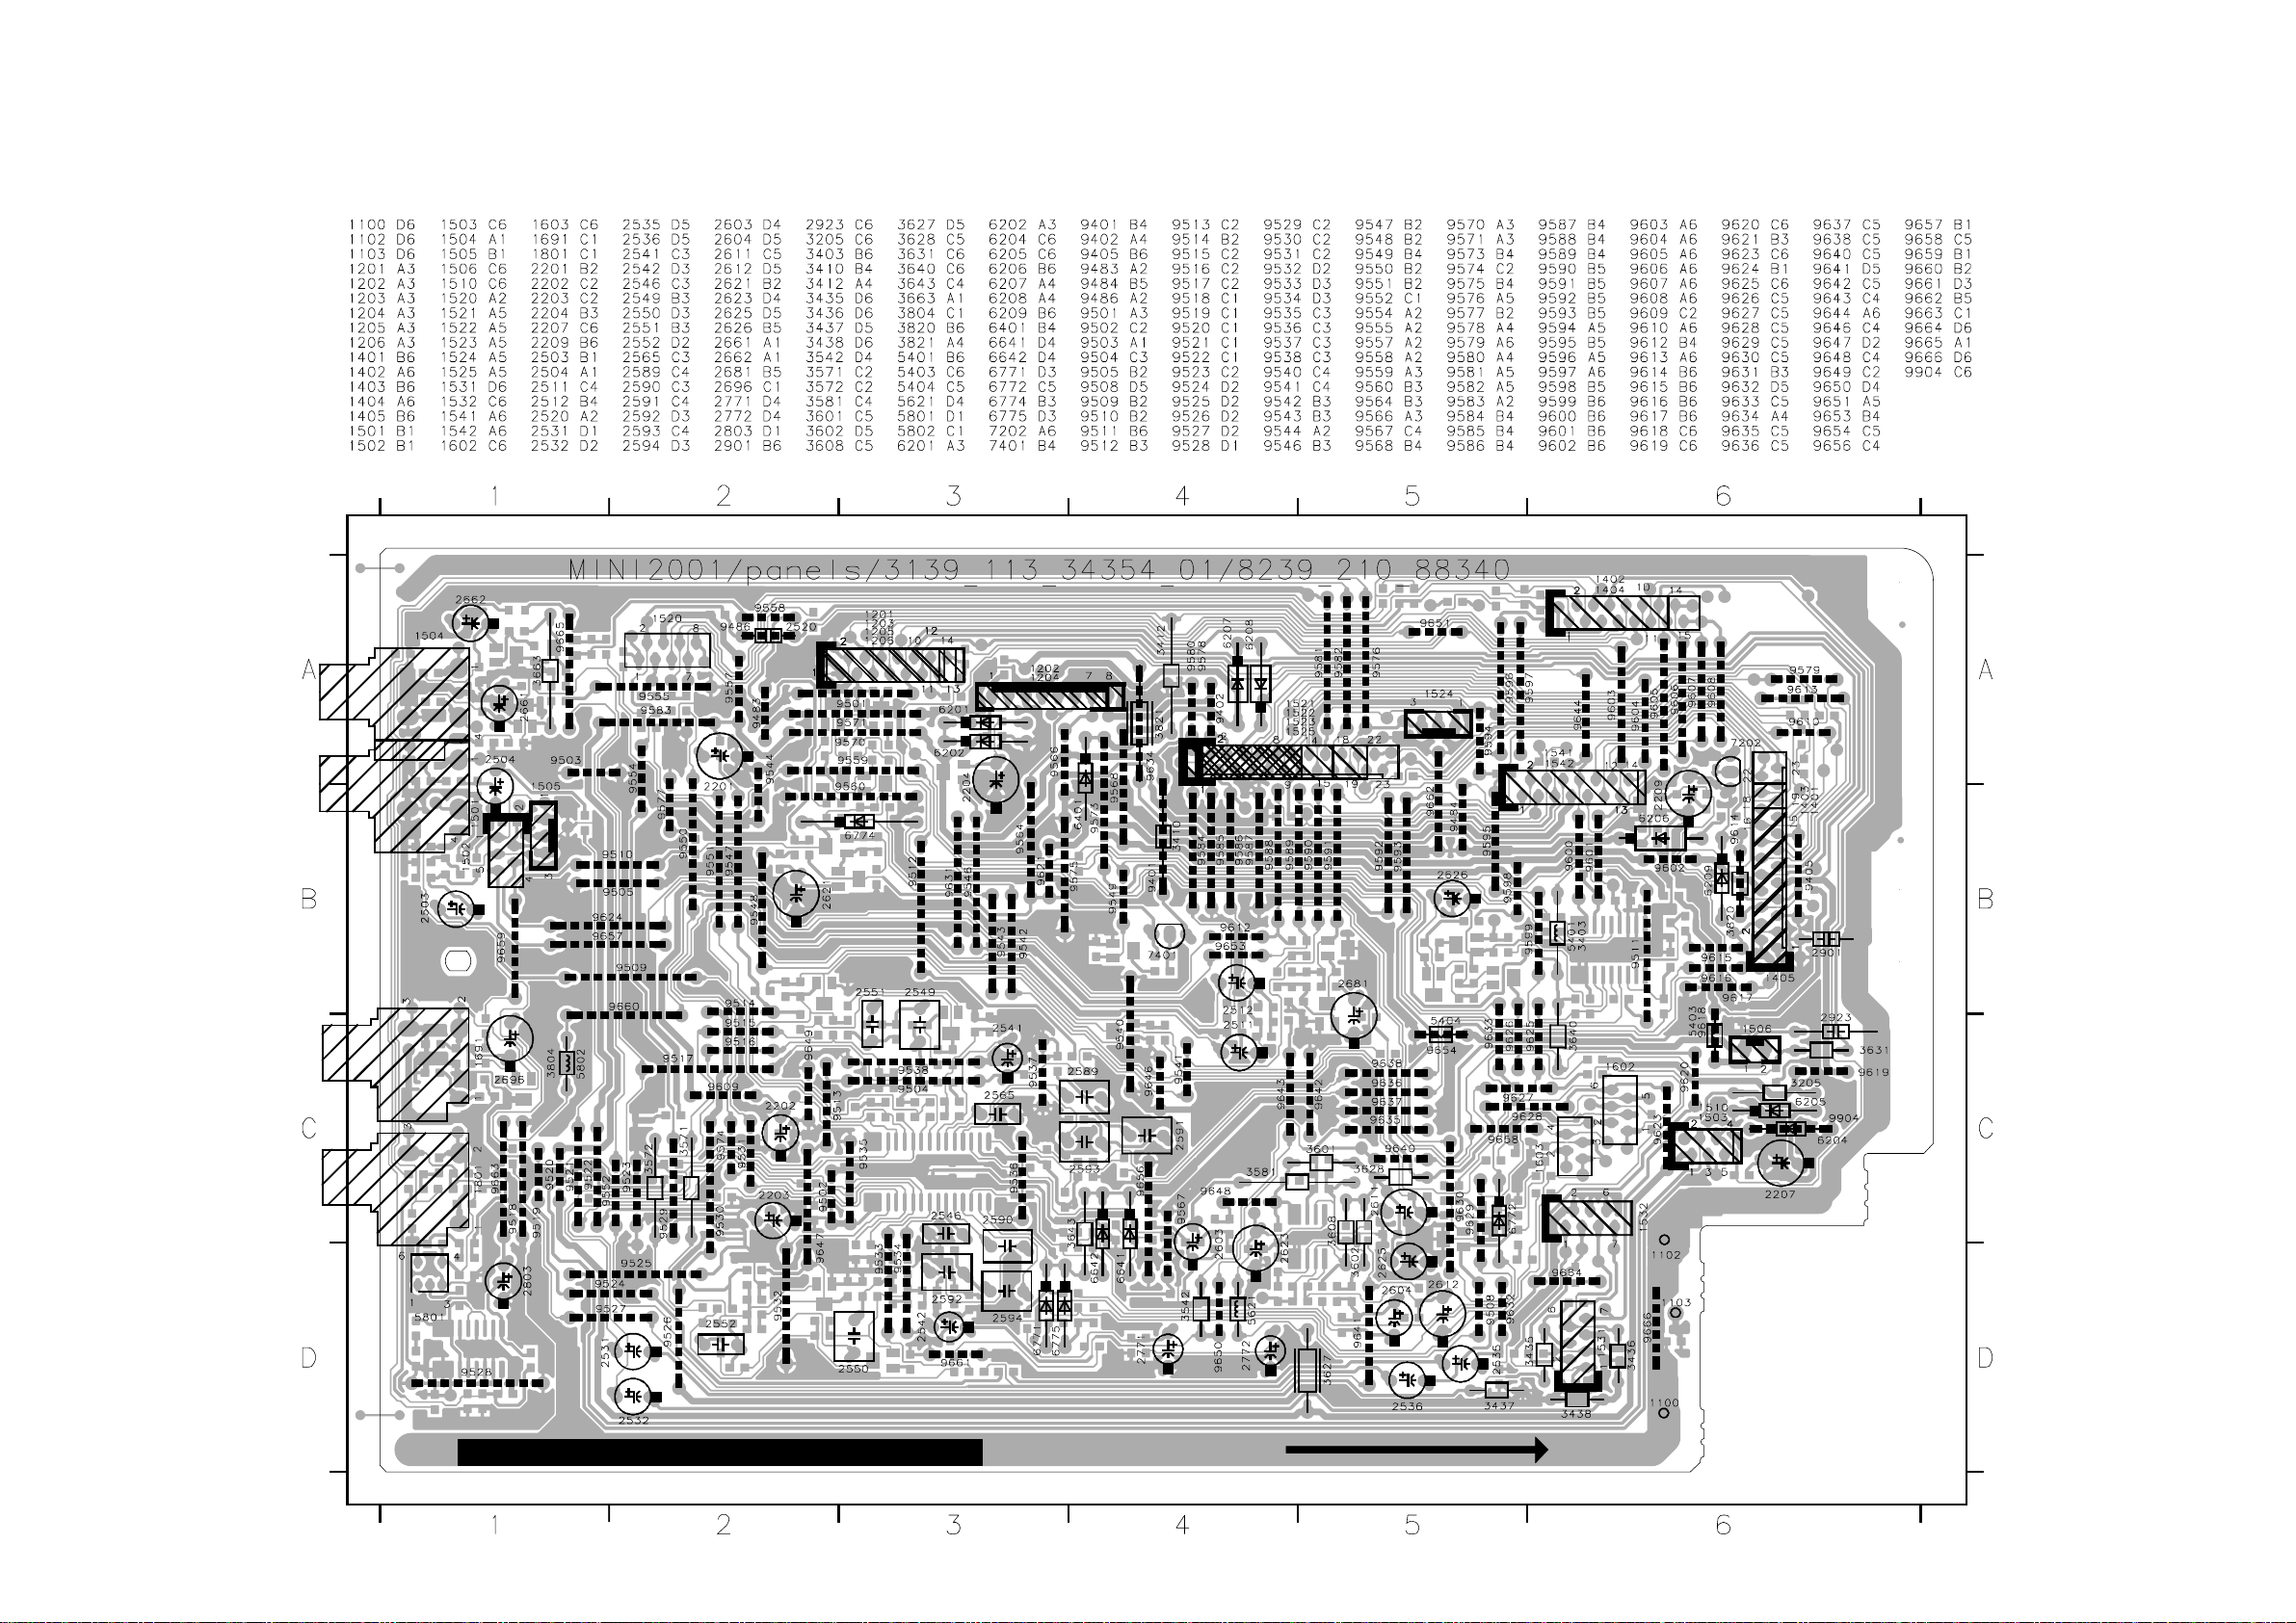
AF9 BOARD - COMPONENT LAYOUT
12/2/2013
www.nostatatech.nl
World of free manuals
12-2
12-2
This assembly drawing shows a summary of all possible versions. For components used in a specific version see schematic diagram and respective parts list.
3139 113 3435 pt4 dd wk0123
Page 67
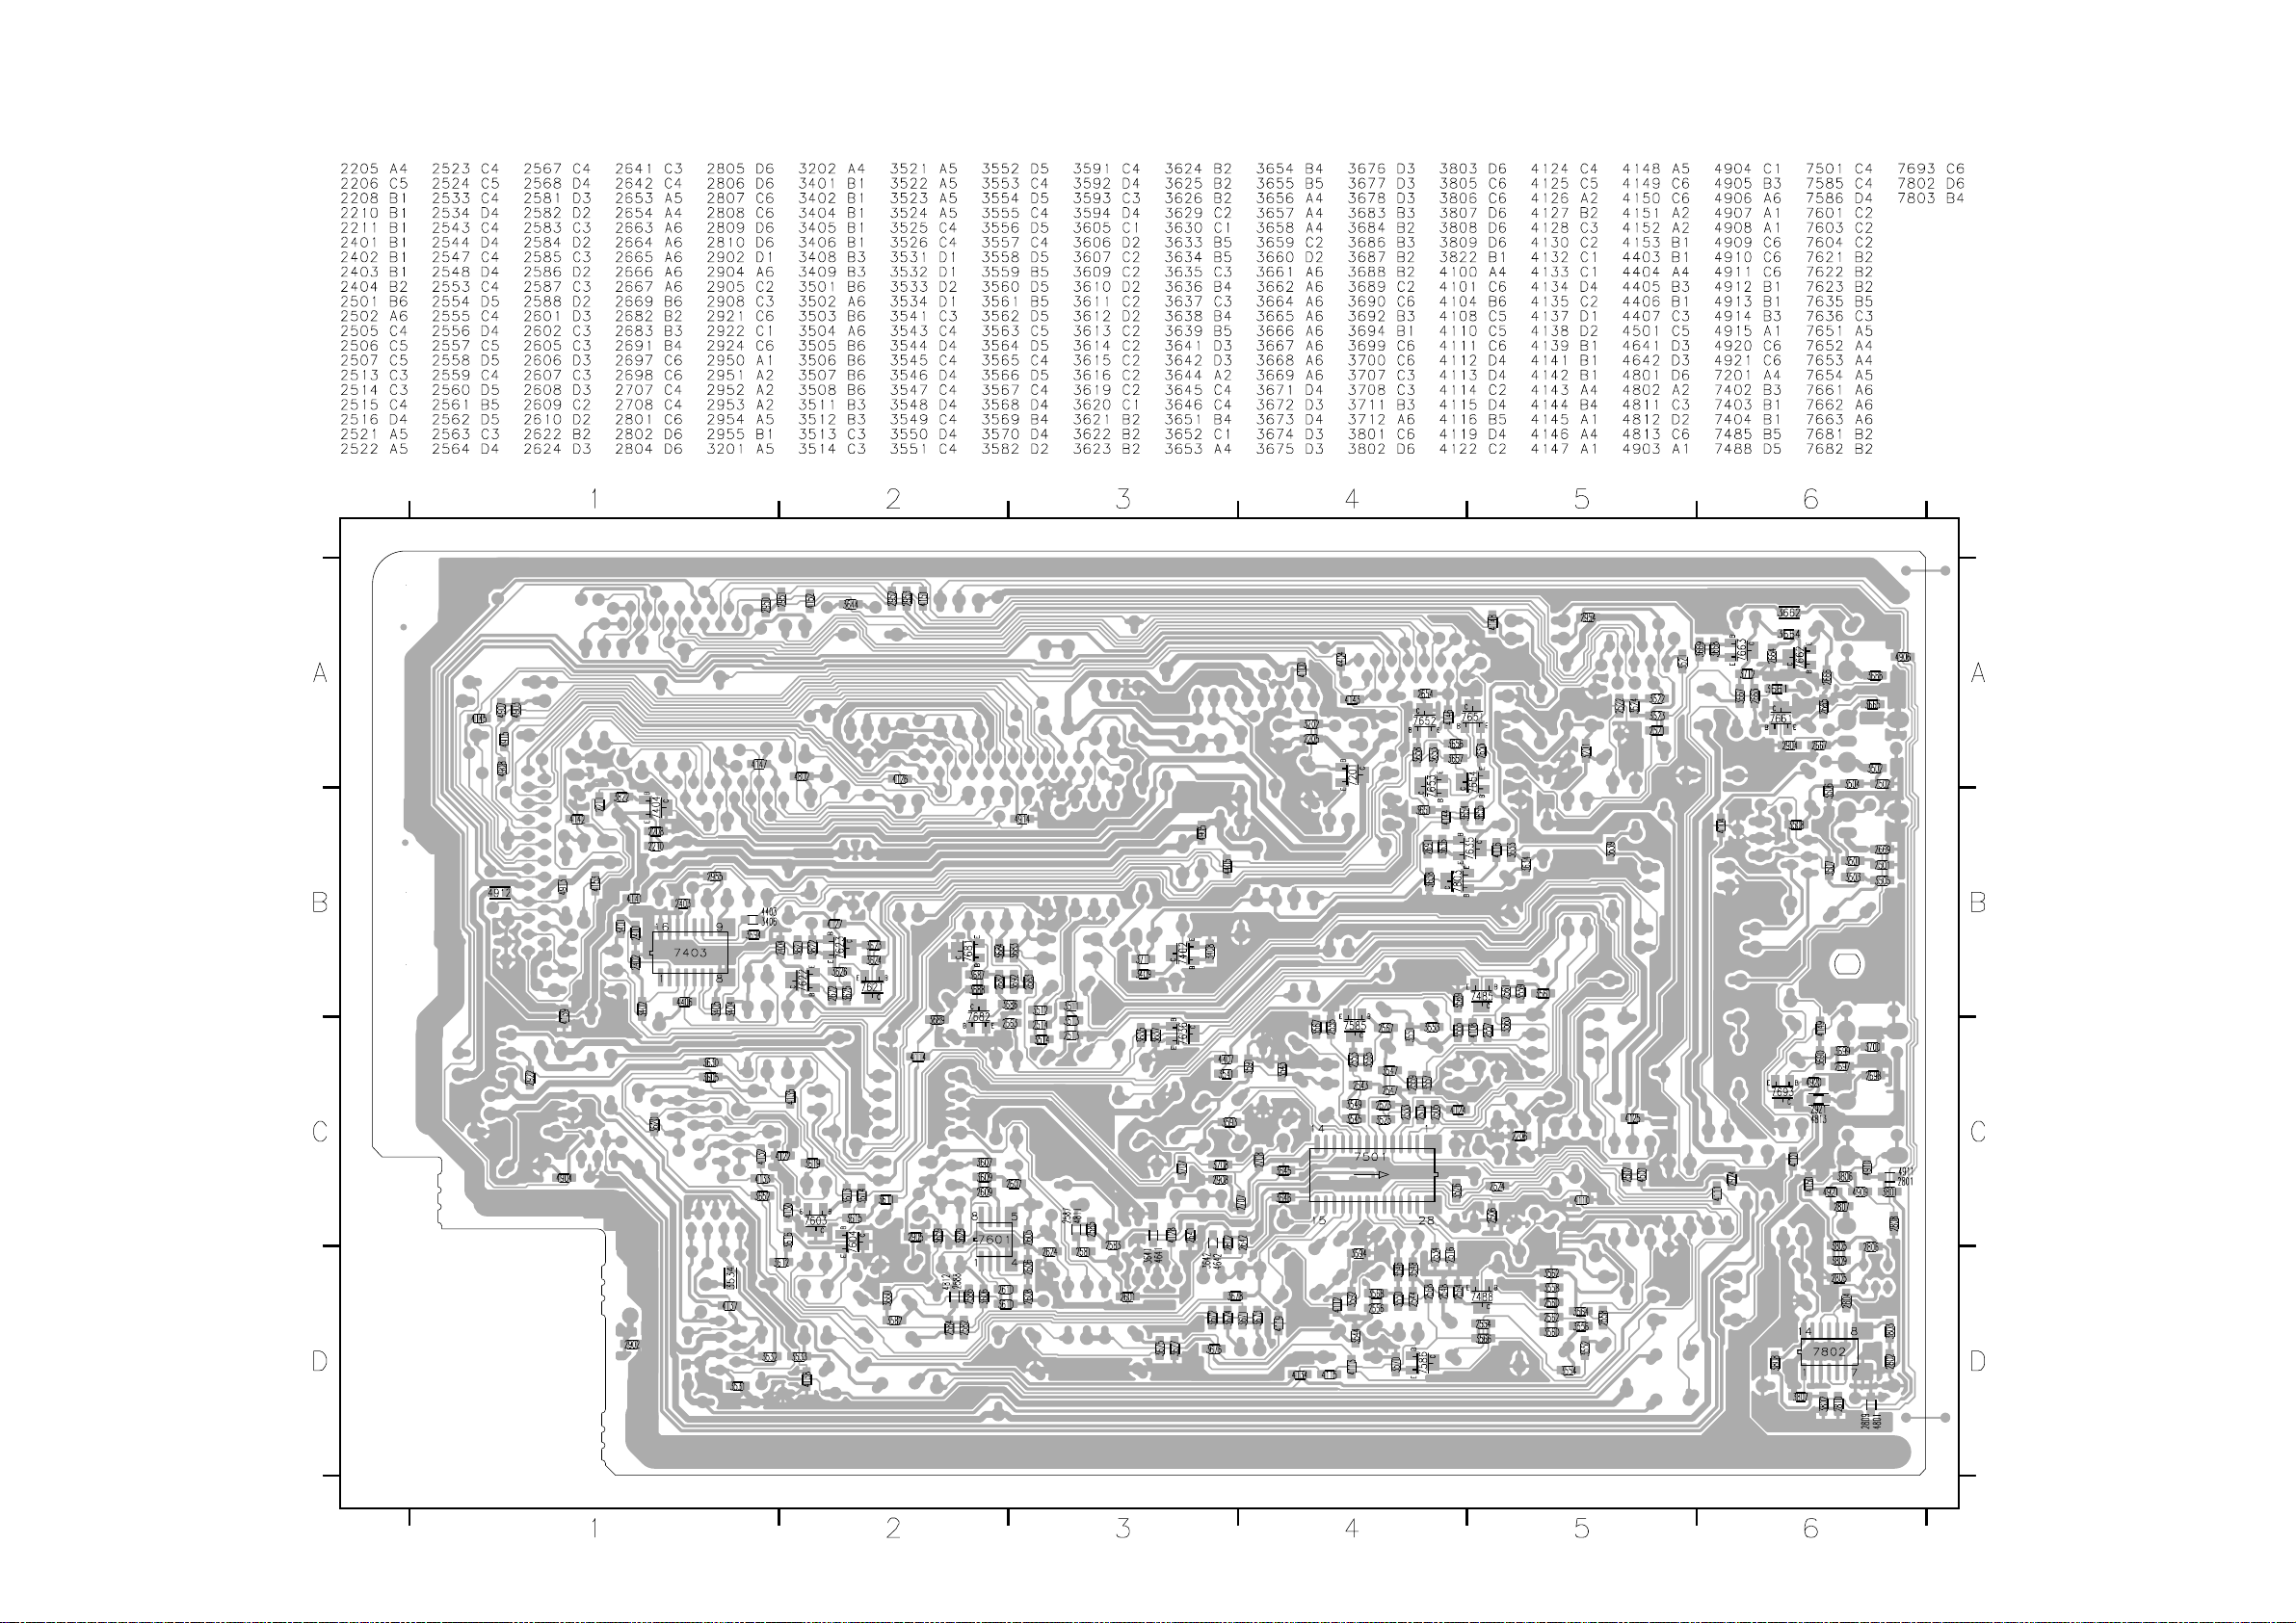
AF9 BOARD - CHIP LAYOUT
12/2/2013
www.nostatatech.nl
World of free manuals
12-3
12-3
This assembly drawing shows a summary of all possible versions. For components used in a specific version see schematic diagram and respective parts list.
3139 113 3435 pt4 dd wk0123
Page 68

AF9 BOARD - CIRCUIT DIAGRAM (PART 1)
12/2/2013
www.nostatatech.nl
World of free manuals
1 234567891011121314
1K5
3507
10K
3508
10K
1u
P
GND_A
SS_R
SS_L
3712
3511
820R
3512
820R
3532
A_Tp
P
2503
0V
100K
A_CD
A_CD
3533
27K
3534
27K
1K5
3437
A_Tp
1u
3667
1M
7663
BC857B
5.4V
3521
1K
3522
1K
3513
3514
3436
1K
4K7
A_Aux
FE-BT-VK-N
# only for
SOLID STATE
3661
2K7
P
P
#
5.6V
3669
A_TU
3K3
3K3
3668
4K7
10K
3662
2K7
A_TU
P
P
3438
A_Tp
3
4
5
2535
2536
1
2
3523
3524
4u7
4u7
1502
TU_Left
only for
CDR
1532
FE-BT-VK-N
1
2
3
A_Tp
4
5
6
7
A_Tp
-CMOS
3503
12K
100p
3504
12K
100p
+12V_A
MIC_DET
1V
470p
GND_A
1V
470p
GND_A
A_Mic
2663
1n
2664
1n
TU_Right
CD_Left
CD_Right
3505
A_Aux
3506
A_Aux
2661
1u
BC847B
7661
BC847B
7662
2662
1u
15K
15K
3531
A_Tp
3435
1K
#
#
2504
4.6V
3663
2K2
3664
2K2
4.6V
A
+12V_M
9618
P
1506
2
1
2923
GND_EMC
1
2
3
4
5
6
7
5403
2u2
9654
P
5404
2u2
10n
+12V_A
GND_M
A_Tp
EH-B
B
FE-BT-VK-N
1531
TP_REC_LEFT
C
TP_REC_RIGHT
GND_A_Tp
TP_LEFT
+12V_A
TP_RIGHT
-CMOS
D
3501
4K7
GND_EMC
4
E
4920
2669
2
100n
A_Aux
1
3
1501
YKC21-3418
AUX IN
F
MIC_DET
1510
FE-BT-VK-N
A_Aux
1
2
3
4
5
1503
FE-BT-VK-N
2501
A_Aux
3502
4K7
2502
A_Aux
1
2
3
4
G
GND_A
3665
470R
2665
GND_A
3666
470R
2666
GND_A
GND_A
100n
2667
2904
100n
4
2
H
1
3
1504
YKC21-3418
LINE OUT
I
1 234567891011121314
12-4 12-4
2521
100n
4K7
2593
101911
BASS
BASS
RIGHT
GND_A
LEFT
3592
3591
GND_A
18
8K2
8K2
2592
330n
2591
330n
3593
GND_A
2549
470n
VOLUME II
LEFT
BASS ALC
IIC BUS
REC
VOLUME II
RIGHT
2550
470n
5K6
3594
GND_A
5K6
2594
470n
470n
3566
3568
GND_A
12
16
14
15
13
17
680K
220K
3551
5K6
3553
5K6
3552
5K6
3554
5K6
2554
2556
GND_A
3n3
470p
2551
2707
2552
GND_A
+IS
1n8
3645
220R
3646
220R
1n8
+IS
3564
7586
BC847B
3570
100p
10K
10K
2708
3563
10K
ALC_LEVEL
P
3707
3708
100p
GND_A
GND_A
3555
8K2
3643
12K
1K
1K
2908
100n
3556
8K2
4K7
4K7
2513
A_CD
2514
A_CD
2531
4u7
2522
100n
1n
1n
SS_L
Line_L
Line_R
SS_R
2532
4u7
1
2
3
1505
only for
Game Sound Port
LINE_L
-Vkk
+5V6
Mute2
LINE_R
2511
2512
EH-B
D
100u
22u
2203
GND_A
GND_A
5.9V
2206
GND_A
2516
+IS
+9.1V
22n
47u
GND_A
2507
100n
100p
GND_A
SUB_W
3541
1K
LINE_L
27
1
28
3
4
5
6
2
23
24
25
26
100p
2506
LINE_R
MUTE_SW_FR
D
3542
1K
7501
TDA7468
POWER
SUPPLY
SOURCE
SELECTOR
47K
3543
0u47
2541
GND_A
S
3545
5K6
3549
18K for S
2543
10K for S
10n for S
3547
3K3
GND_A
8
7
VOLUME I
SUR.
SUR.
21
22
LEFT
LOGIC
VOLUME I
RIGHT
GND_A
3548
3K3
10K for S
2544
10n for S
3550
18K for S
S
3546
5K6
2542
0u47
47K
3544
GND_A
1u
DPL_R
3201
1u
820R
2201
GND_A
7201
BC847B
2205
GND_A
11.7V
2n2
A_Aux
A_Tp
A_CD
3202
2204
GND_A
150R
9.8V
220u
6201
1N4148
9.1V
6202
GND_A
A_Mic
A_HP
A_TU
2202
GND_A
BZX55-C9V1
4.6V
VREF
A_DPL
+12V_A
3525
470R
3526
470R
1n
4501
100p
GND_EMC
2505
100p
2515
100p
2924
GND_A
GND_A
P
4813
P
2921
100n
2698
100n
GND_A
2533
GND_A
GND_AGND_A
1
2
3K3
GND_A
3700
GND_A
YKC21-3416
1691
3
GND_A
2523
100p
3699
470R
0V
7693
BC817-25
100p
2524
GND_A
GND_A
2697
470p
GND_A
0V
3690
1K
SUBWOOFER
OUT
2534
2696
100p
22u
DPL_L
2565
4n7
2546
4n7
5K6
33n
33n
5K6
SIMPLE I.S.
1n
2567
TREBLE
LEFT
TREBLE
RIGHT
20
1n
2568
SIMPLE I.S.
2590
2589
220n
GND_A
3n3
2547
9
3n3
2548
GND_A
220n
3n3
3565
680K
3567
220K
GND_A
2553
2555
470p
7585
BC847B
3569
GND_A
10K
2557
3571
100n
8K2
FULL I.S.
+IS
3561
3559
1K
33K
2561
220p
3557
GND_A
8K2
2559
GND_A
1n
1n
1N4148
2641
GND_A
P
6641
GND_A
3641
220R
4641
7485
BC847B
2563
GND_A
VOL_L
I2C_Clk
P
I2C_Data
GND_D
6642
1N4148
2642
GND_A
4642
3642
220R
1n
3560
+IS
3562
VOL_R
1K
33K
2562
220p
GND_A
7488
BC847B
2558
100n
3558
GND_A
8K2
2560
GND_A
3572
8K2
1n
FULL I.S.
D...for DPL
S...for simple I.S.
P...provision
Note : Some values may varies, see respective parts list
for correct value.
3139 118 53770...88340 for...3435 pt4 dd wk0123
470p
GND_A
2564
470p
3511 A3
1501 E1
3512 B3
1502 E3
3513 A3
1503 F1
3514 B3
1504 H1
3521 A3
1505 E4
3522 A3
1506 A1
3523 A3
1510 F1
3524 A3
1531 C1
3525 E6
1532 C2
3526 E7
1691 H5
3531 C2
2201 B7
A
B
C
D
E
F
G
H
I
2202 C7
2203 D7
2204 C6
2205 C5
2206 C7
2501 E2
2502 E2
2503 D3
2504 E3
2505 F5
2506 F7
2507 E7
2511 A4
2512 B4
2513 A4
2514 B4
2515 F6
2516 F7
2521 A4
2522 A4
2523 F6
2524 F6
2531 D4
2532 C4
2533 F6
2534 F7
2535 B3
2536 C3
2541 A8
2542 H8
2543 C9
2544 G9
2546 F9
2547 B10
2548 G10
2549 C11
2550 F11
2551 C11
2552 F11
2553 B12
2554 G11
2555 B12
2556 H11
2557 B13
2558 G12
2559 C12
2560 G12
2561 C14
2562 G14
2563 C14
2564 G14
2565 C9
2567 B9
2568 G9
2589 A10
2590 I9
2591 A10
2592 I10
2593 A11
2594 I11
2641 D13
2642 E13
2661 G2
2662 I2
2663 H2
2664 I2
2665 H2
2666 H2
2667 G1
2669 E1
2696 G7
2697 H7
2698 G5
2707 E11
2708 E12
2904 G1
2908 E12
2921 G5
2923 B1
2924 F5
3201 B6
3202 C6
3435 D3
3436 D3
3437 D3
3438 D3
3501 D1
3502 E1
3503 D2
3504 E2
3505 E2
3506 E2
3507 E3
3508 E3
3532 C3
3533 B3
3534 C3
3541 A7
3542 I7
3543 A9
3544 I9
3545 B9
3546 G9
3547 C9
3548 F9
3549 B9
3550 G9
3551 C11
3552 F11
3553 C11
3554 F11
3555 C12
3556 F12
3557 C12
3558 G12
3559 C14
3560 F14
3561 B14
3562 F14
3563 A12
3564 G11
3565 B12
3566 G11
3567 B12
3568 H11
3569 B13
3570 H11
3571 B13
3572 G13
3591 A10
3592 I10
3593 A10
3594 I10
3641 D14
3642 E14
3643 D12
3645 D11
3646 E11
3661 G3
3662 I3
3663 G3
3664 H3
3665 G1
3666 H1
3667 G3
3668 I3
3669 I3
3690 H7
3699 G6
3700 H6
3707 E12
3708 E12
3712 I3
4501 F5
4641 D14
4642 E14
4813 G5
4920 E1
5403 A1
5404 B1
6201 C6
6202 C6
6641 D13
6642 E13
7201 B6
7485 C14
7488 G14
7501 C8
7585 B13
7586 G11
7661 G2
7662 H2
7663 H3
7693 H6
9618 A1
9654 B1
Page 69
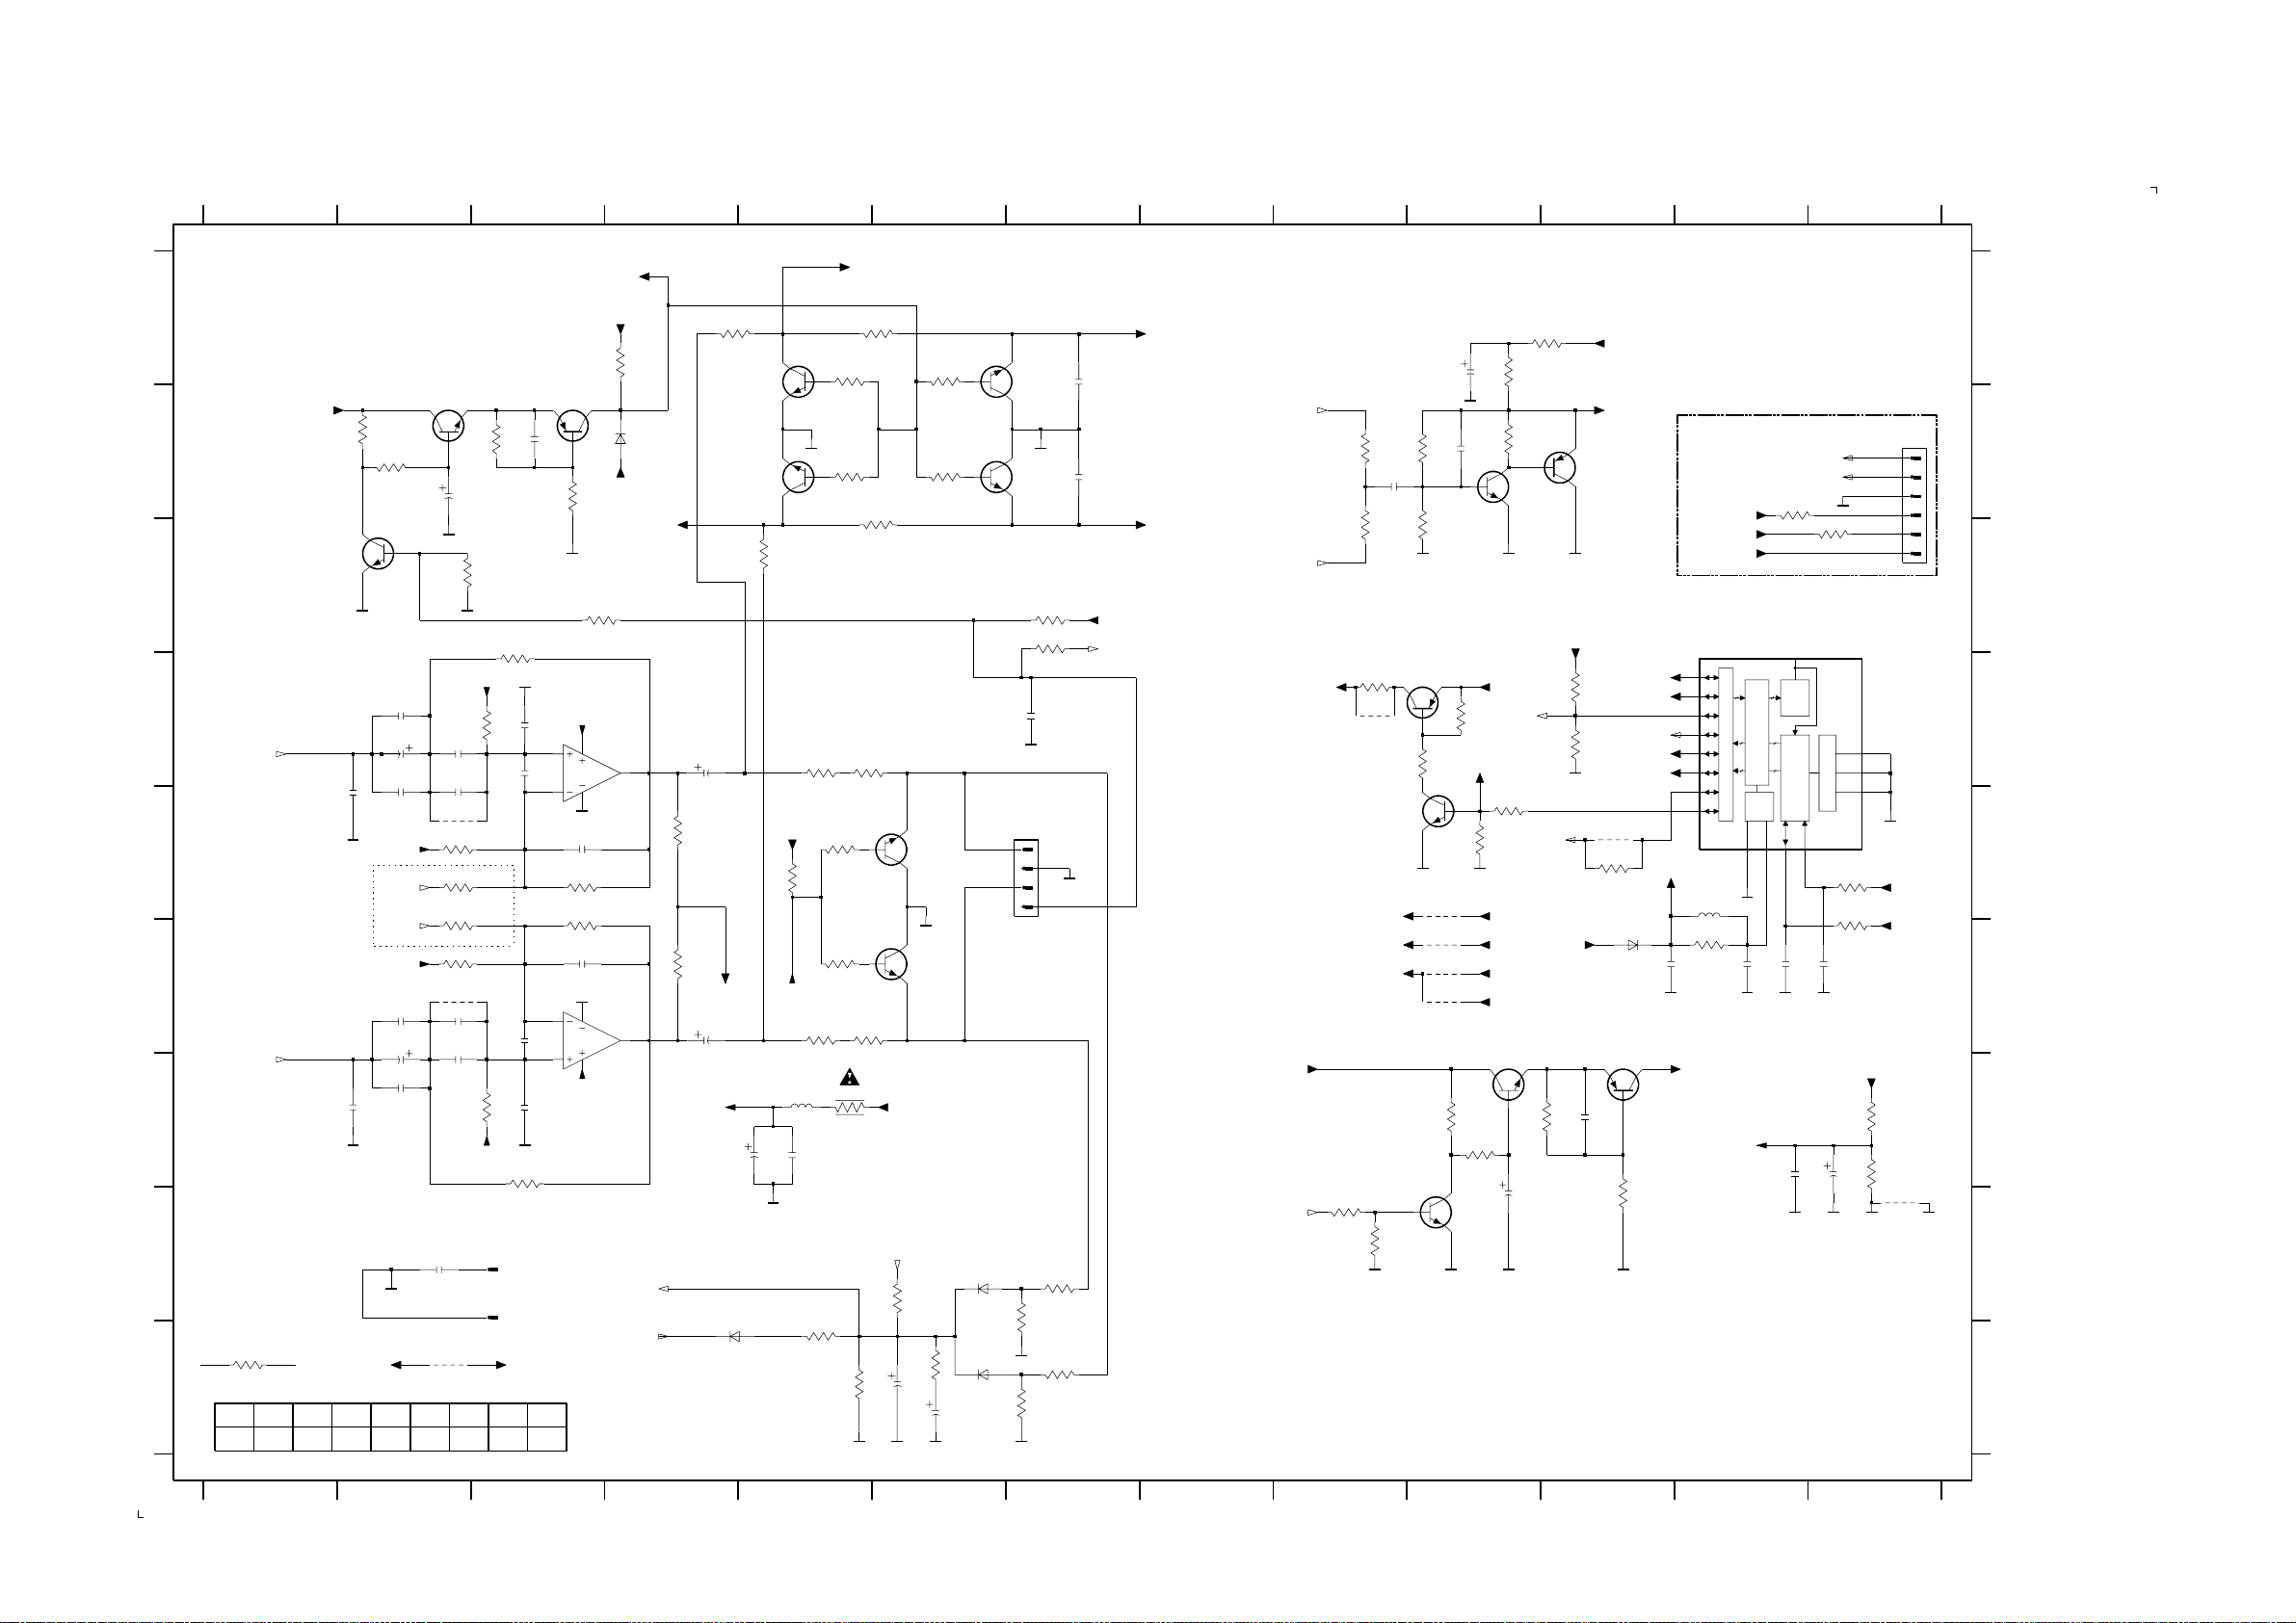
AF9 BOARD - CIRCUIT DIAGRAM (PART 2)
12/2/2013
www.nostatatech.nl
World of free manuals
12-5
12-5
12345678910111213
3653
0V
1K
aa
3654
0V
1K
3611
47R
3613
1K
4M7
3614
1K
3612
47R
3627
10R
22n
P
3678
470K
P
GND_A GND_A
VC_OUT_LEFT
3655
1K
3656
1K
3615
33R
3616
33R
+12V_A
VREF
P
3676
10M
3677
2771
GND_A
3657
3658
7603
BC817-25
A_HP
7604
BC817-25
680K
P
3675
0u47
P
2772
47u
3688
3687
GND_A
+5V6
ALC_Enable
3694
2K2
10K
DPL_ReqDVD_ON
+5V_CD
VCD_ON
CDR_On
7621
BC847B
0V
2626
390R
1K2
3.2V
7682
BC847B
10u
3689
150R
Mute2
0V
3625
GND_A
+5V
P
GND_D
+5V6
4K7
3.9V
7681
BC857B
3404
3405
2622
+12V_A
SA_IN
CD_PORE1
1K
CDR_On
HighPower / ALC Enable
4403
P
3406
1K
BC857B
100p
6401
1N4148
7622
3626
Mute1
DPL_Req
AmOn
0V
4K7
10K
GND_D
VC_OUT_RIGHT
VC_OUT_LEFT
+5V
100n
2404
GND_D
MUTE_SW
0V
FROM / TO VC
P...provision
+12V_A
M62320FP
7403
4
D0
5
D1
6
D2
7
D3
9
D4
I/O PORT
88 8
10
D5
11
D6
12
D7
GND_D
P
5401
2u2
4.9V
3403
100R
2403
GND_D
HPREF
1602
FE-BT-VK-N
CS2
CS1
CS0
3401
470R
3402
470R
100u
14
15
16
+12V_A
36283629
A_HPA_HP
GND_D
I2C_Data
4K7
4K7
4407
1
2
3
4
5
6
I2C_Clk
P
VC_LEFT
VC_RIGHT
A_HP
3620
1K
3619
1K
1
SO
REG
SHIFT
88
DATA LATCHES
8
OUT I/O IN
C BUS
2
I
CHIP SELECT
TRANSCEIVER
RES
PWR
GND8SCL2SDA
VDD
3
13
2401
100p
100p
2402
100n
GND_D GND_D
5.9V
22n
2905
2625
A_HP
3139 118 53770...88340 for...3435 pt4 dd wk0123
aa
+5V
HP_DET
AMP_LEFT
AMP_RIGHT
2681
150K
2683
100n
150K
4.8V
BC847B
10K
GND_A
BC327-25
0.2V
7402
GND_D
0.7V
GND_A
15p
3692
2682
330K
0.6V
82K
3686
7401
5K6
3711
VCD_ON
5K6
3409
0.7V
3408
GND_D
For DVD sets only
4404
9402
For VCD sets only
4405
For CDR sets only
4406
5.4V
1K
3623
3624
5K6
0.2V
7623
BC847B
GND_D GND_D
+5V_CD
Mute1
SS_L
SS_R
+5V6
5.4V
VCDorCDRon
3621
10K
GND_D
3683
3684
P
3410
2R2
9401
+5V_VCD
3622
P...provision
W...Provision for Woox only
Note : Some values may varies, see respective parts list for correct value.
0V
0V
7651
0V
1N4148
1N4148
6775
6771
P
GND_A
P
BC817-25
7652
BC817-25
0V
1603
FE-BT-VK-N
1
2
3
4
P
3674
P
3673
GND_A
1K
1K
3K3
0u47
2922
aa
3640
5K6
1K
3631
100p
GND_D
HP_in_L
HP_in_R
27K
3671
27K
3672
47K
P
47K
2653
100p
100p
2654
A_HP
P
MUTE_SW_FR
7635
BC857B
3638
B_REF3
5
6
A_HP
2
3
B_REF3
P
MUTE_SW
4K7
VC_OUT_RIGHT
3635
10K
NJM4556AM
7601-B
8
4
A_HP
2609
180p
3609
27K
3610
27K
2610
180p
NJM4556AM
7601-A
4
8
-Vkk
4M7
0V
6774
5.9V
5.9V
ALC_LEVEL
ALC_Enable
3639
1N4148
7
1
3659
3660
2611
22u
3K33K3
2612
22u
B_REF3
SUB_W
11.6V
3651
1K
BC817-25
P
6772
1N4148
7653
BC817-25
7654
3652
2623
A_HP
0V
0V
1K
-Vkk
P
3630
MUTE_SW
5621
2u2
47u
2624
A
7803
BC847B
0.7V
0V
2621
GND_D
W
W
W
W
2902
470n
9599
2585
47n
2587
470n
4811
3607
6K8
3605
1K
3606
1K
3608
6K8
4812
2588
470n
2586
47n
22u
3637
0V
10K
HPREF
3601
3602
HPREF
1103
1102
3636
1
1
4K7
W
3581
15K
A_HP
3K9 for W
12K
3K9 for W
12K
A_HP
W
FRONT
CD_PORE1
2605
2607
2608
2606
3582
15K
TAPO
2691
GND_D
100p
470p
5.9V
470p
5.9V
100p
100p
5.9V
5.9V
+5V6
B
C
D
VOL_L
E
7636
BC847B
GND_A
2601
3633
0.2V
GND_D
1n
1K
3634
5K6
W
2581
47n
2603
22u
W
2583
470n
HPREF
P...provision
VC_LEFT
VC_RIGHT
HPREF
GND_D
F
W
2584
470n
2602
GND_A
2604
22u
W
2582
47n
1n
VOL_R
G
H
GND_EMC
3644
1K
CD_PORE
I
C500/37 C780/37 C380/21 P750/37
C380/37
3644 1K 2K2
3K3 4K7
6K8 8K2 15K10K
1102 H3
1103 H3
1602 B13
1603 E7
2401 F13
2402 F12
2403 F12
2404 F11
2581 D2
2582 G2
A
2583 D2
2584 F2
2585 D2
2586 F2
2587 D2
2588 F2
2601 E2
2602 G2
2603 D2
2604 F2
B
2605 D3
2606 G3
2607 D3
2608 F3
2609 E3
2610 F3
2611 D4
2612 F4
2621 B2
2622 G11
C
2623 G5
2624 G5
2625 G13
2626 H10
2653 A7
2654 B7
2681 A10
2682 B10
2683 B9
2691 B3
2771 I6
D
2772 I6
2902 H2
2905 G12
2922 D7
3401 E13
3402 E13
3403 F12
3404 D11
3405 D11
3406 E11
E
3408 E10
3409 D10
3410 D9
3581 D3
3582 G3
3601 D3
3602 G3
3605 E2
3606 F2
3607 E2
3608 F2
F
3609 E3
3610 F3
3611 D5
3612 F5
3613 E5
3614 F5
3615 D5
3616 F5
3619 C13
3620 B12
G
3621 H9
3622 H9
3623 G10
3624 G10
3625 G10
3626 H11
3627 G5
3628 G13
3629 G13
3630 E5
H
3631 D7
3633 B2
3634 B2
3635 C3
3636 B3
3637 C2
3638 B3
3639 A4
3640 C7
3644 I1
3651 A4
I
3652 C5
3653 A5
3654 B5
3655 A6
3656 C6
3657 A6
3658 B6
3659 E4
3660 F4
3671 I7
3672 H7
3673 I7
3674 H7
3675 I6
3676 H6
3677 I5
3678 I5
3683 B9
3684 C9
3686 C10
3687 B10
3688 A10
3689 A11
3692 B10
3694 E10
3711 D10
4403 E11
4404 E10
4405 F10
4406 F10
4407 H13
4811 E2
4812 F2
5401 E12
5621 G5
6401 F11
6771 I6
6772 I4
6774 B4
6775 H6
7401 D10
7402 E10
7403 C12
7601-A G3
7601-B D3
7603 E6
7604 F6
7621 F10
7622 F11
7623 H10
7635 B3
7636 C2
7651 A7
7652 B7
7653 B5
7654 B5
7681 B11
7682 B10
7803 B2
9401 D9
9402 F10
9599 I2
12345678910111213
Page 70
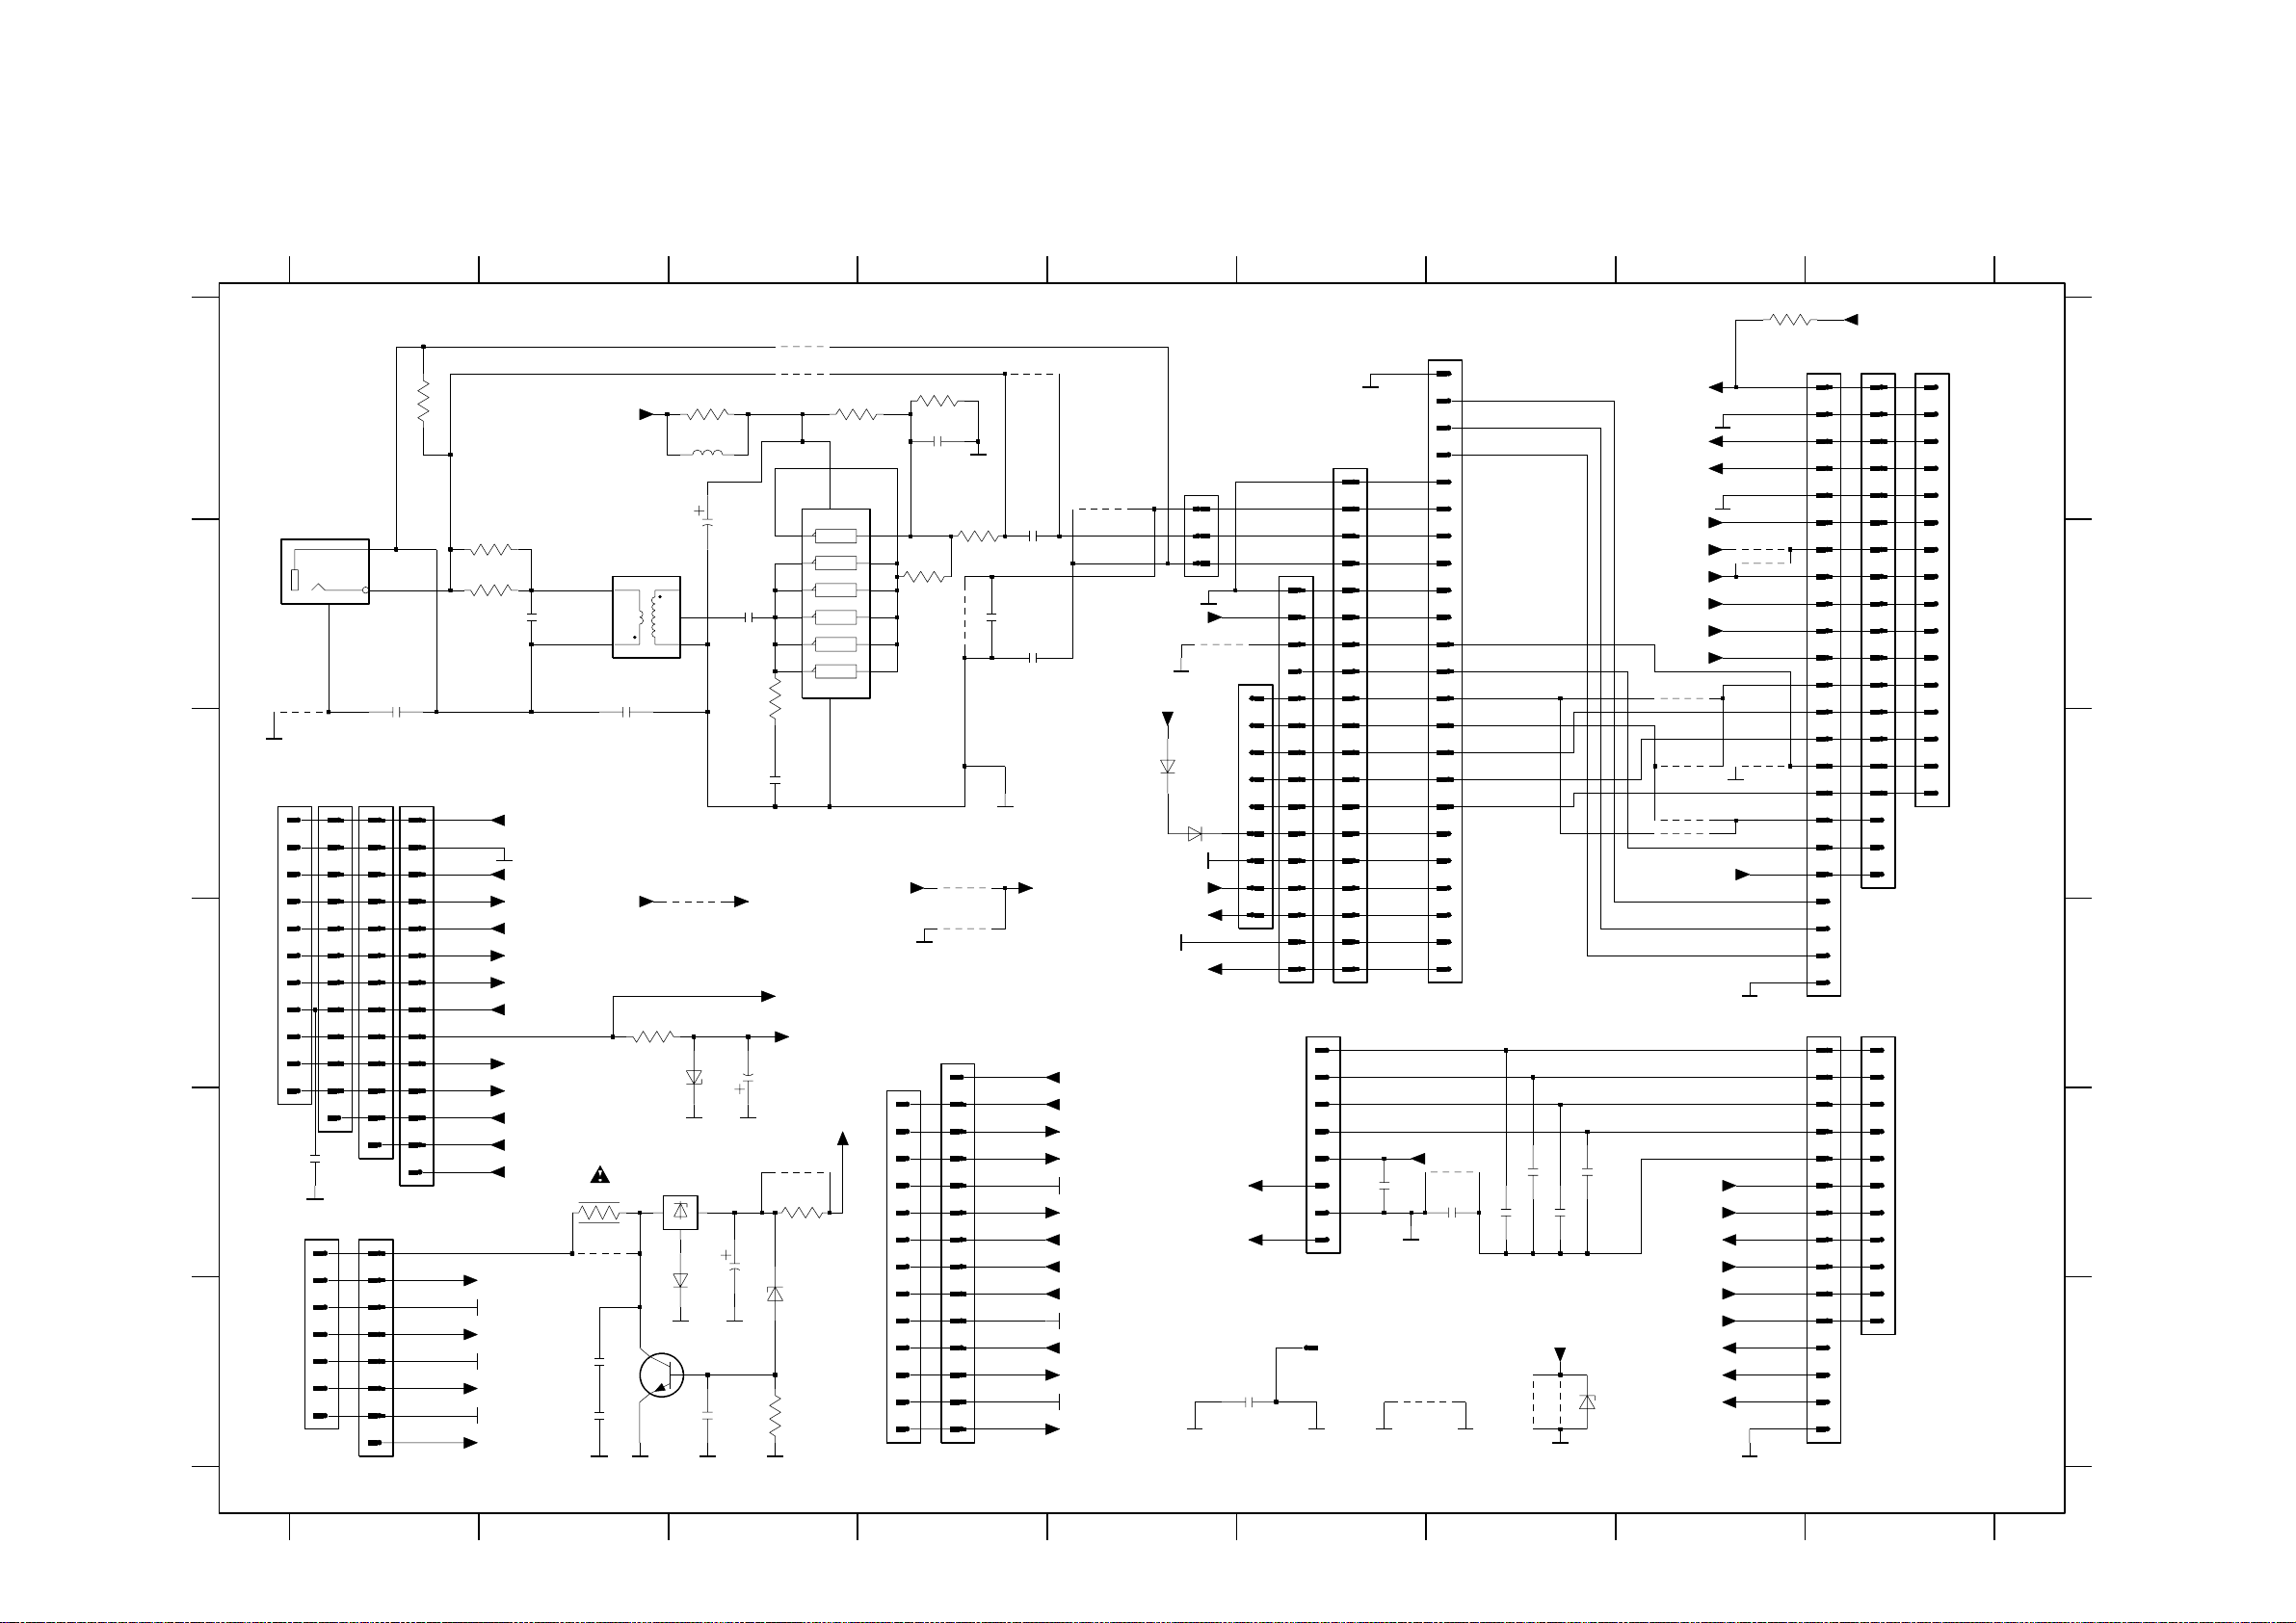
AF9 BOARD - CIRCUIT DIAGRAM (PART 3)
12/2/2013
www.nostatatech.nl
World of free manuals
12-6 12-6
1100 F6
1203 C1
1206 C1
1403 A9
1520 E6
1201 C1
1202 E1
1204 E1
1205 C1
1401 A9
1402 D9
1404 D9
1405 A9
1521 A7
1522 A6
123456789
Note : Some values may varies, see respective parts list for correct value.
P...provision
75R
3
2
1201
1202
2807
100n
P
1205
1
2
3
4
5
6
7
8
3806
1
2
3
4
5
6
7
8
9
10
11
12
13
14
A
B
C
D
E
F
YKC21-3416
1
COAX
DIGITAL
OUT
4921
GND_EMC
FE-BT-VK-N
1206
1203
1
2
3
4
5
6
7
8
9
FROM / TO Power Board
10
11
1n
GND_D
1204
EH-B
FROM / TO Power Board
1801
2955
1
2
3
4
5
6
7
EH-B
1523 D6
1524 A5
1525 B5
3809
47R
3805
220R
AMP_LEFT
aa
AMP_RIGHT
NTC
Low_Pw_Ctrl
Pw_Dn
Clipping
AmOn
F1
F2
AMP_CS_DC
VCDorCDRon
DVD_ON
+12V_A
GND_A
+12V_M
GND_M
+5V6
GND_D
+5V_VCD
2806
9.3V
1541 D4
1542 D4
1801 A1
150p
For CDR version only
-32V
3821
10R
9634
2208
2210
GND_D
2207 D3
2208 F2
2209 E3
+5V_CD
5801
6RG
6
4
2805
100n
+5V6
220n
220n
GND_D
3205
5K6
GND_D
7202
MC78L05
IN OUT
GND
6206
GND_D
2210 F2
2211 F3
2520 E7
3804
220R
5802
2u2
2803
1
2
3
4905
-10V
6205
1N4003
GND_D
7404
BC817-25
2211
GND_D
2801 B4
2802 C3
2803 B3
1u
2804
100n
3803
2802
+12V_M
-CMOS
47u
2207
BZX79-C10
GND_D
47u
2209
6209
3822
100n
GND_D
2804 B3
2805 B2
2806 B2
P
4909
P
4910
2.9V
14
1Y
2
2Y
4
3Y
6
4Y
8
5Y
10
6Y
12
GND
7
560R
1n
-Vkk
+5V6_Con
9614
3820
10R
BZX79-C6V8
270R
2807 B1
2808 B4
2809 B4
3808
22K
7802
74LVU04D
VCC
1A
1
2A
3
3A
5
4A
9
5A
11
6A
13
CD_PORE
GND_D
FE-BT-VK-N
FROM / TO DPL Board
2810 A4
2901 F6
2950 E7
1542
2951 E7
2952 E7
2953 E7
3802
22K
2810
47p
GND_D
3801
470R
3807
2K2
4801
P
For VCD version only
4802
9484
For Non-VCD version only
1541
FE-BT-VK-N
13
12
11
10
9
8
7
6
5
4
3
2
1
2809
GND_D
14
13
12
11
10
9
8
7
6
5
4
3
2
1
2954 E6
2955 E1
3205 D2
P
4911
2801
100n
100n
2808
100n
3412 A8
3801 B4
3802 A4
P
DSA_STB
AMP_CS_DC
AmOn
DPL_Clk
DPL_Data
D_DPL
DPL_Vol_Clk
DPL_Req
+12V_A
SS_L
A_DPL
SS_R
DPL_R
A_DPL
DPL_L
4906
3803 B3
3804 A3
3805 B2
3
2
1
GND_D
CD_PORE
For VCD version only
GND_M
+12V_M
6207
1N4003
GND_M
+5V_CD
CD_Right
A_CD
CD_Left
GND_D
3806 A1
3807 B4
3808 A3
EH-B
1524
4914
1525
FE-BT-VK-N
9
8
7
6
1N4003
5
6208
4
3
2
1
FE-BT-VK-N
TU_STEREO
TU_CLK
TU_DATA
TU_ENAB
+12V_A
FROM/TO TUNER
TU_Right
GND_A
TU_Left
2901
100n
3809 B2
3820 E3
3821 E2
1523
FE-BT-VK-N
GND_EMC
3822 F3
4801 B4
4802 C4
4903 B8
4904 F7
4905 C3
D_Text
FE-BT-VK-N
1522
15
14
13
12
11
10
9
8
7
6
5
4
3
2
1
8
7
6
5
4
3
2
1
1520
1100
4906 A5
4907 C8
4908 C8
FE-BT-VK-N
19
18
17
16
15
14
13
12
11
10
9
8
7
6
5
4
3
2
1
+12V_A
47n
2954
A_TU
9483
aa
1521
9486
2520
10n
GND_A
4909 A3
4910 A3
4911 A4
23
22
21
20
19
18
17
16
15
14
13
12
11
10
9
8
7
6
5
4
3
2
1
P
4912 B8
4913 B8
4914 B5
GND_D
UP_CLK
DQSY
SRDT
GND_D
SHIELD
COAX2
COAX1
GND_D
PORE / DSA_STB
GND_D
SILD
CD_SH_DATA
SICL
CD_SH_CLK
CD_SH_STR
SW_INFO
+12V_M
GND_M
+5V_CD
CD_RIGHT
GND_A
CD_LEFT
470p
470p
2950
2951
100p
FROM/TO 3CDC
MIC_DET
4904
9904
GND_D
470p
2952
6204
4915 C8
4921 B1
5801 B2
5802 A3
6204 F7
6205 D3
GND_D
I2C_Data
I2C_Clk
GND_D
+5V6_Con
+12V_M
P
DSA_STB
2953
HP_DET
Low_Pw_Ctrl
MIC_DET
DPL_Vol_Clk
DPL_Clk
DPL_Data
BZX79-B3V3
NTC
+5V6
-Vkk
F1
F2
4903
P
4907
4908
4915
D_Text
SA_IN
Pw_Dn
Clipping
6206 F3
6207 C5
6208 C5
D_DPL
6209 F3
7202 E3
7404 F3
4.5V
P
4912
4913
9405
GND_D
FE-BT-VK-N
3412
1K
3.5V
8.5V
4.9V
7802 A3
9405 C8
9483 F6
1403
1404
9484 D4
9486 E7
9614 E3
+5V
FE-BT-VK-N
1401
1
1
2
2
3
3
4
4
5
5
6
6
7
7
8
8
9
9
10
10
11
11
12
12
13
13
14
14
15
15
16
16
17
17
18
18
19
19
20
UP_CLK
21
DQSY
SRDT
22
GND_D
23
1402
FE-BT-VK-N
1
1
2
2
3
3
4
4
5
5
6
6
7
7
8
8
9
9
10
10
11
11
12
DPL_VOL_CLK
13
DPL_CLK
14
DPL_DATA
15
GND_D
9634 E2
9904 F7
1405
1
NTC
GND_D
2
I2C_DATA
3
I2C_CLK
4
GND_D
5
+5V6_CON
6
+11V_D
7
8
+5V6
9
-VKK
F1
10
11
F2
12
CD_SH_DATA
CD_SH_CLK
13
CD_SH_STR
14
15
GND_D
16
SW_INFO
SICL
SILD
DSA_STB/GND_D
FROM/TO
FRONT
TU_STEREO
TU_CLK
TU_DATA
TU_ENAB
Tu_Gnd
HP_DET
SA_IN
POWER_DOWN
CLIP
LOW_PWR_CTRL
MIC_DET
FROM/TO
FRONT
A
B
C
D
E
F
123
3139 118 53770...88340 for...3435 pt4 dd wk0123
456789
Page 71
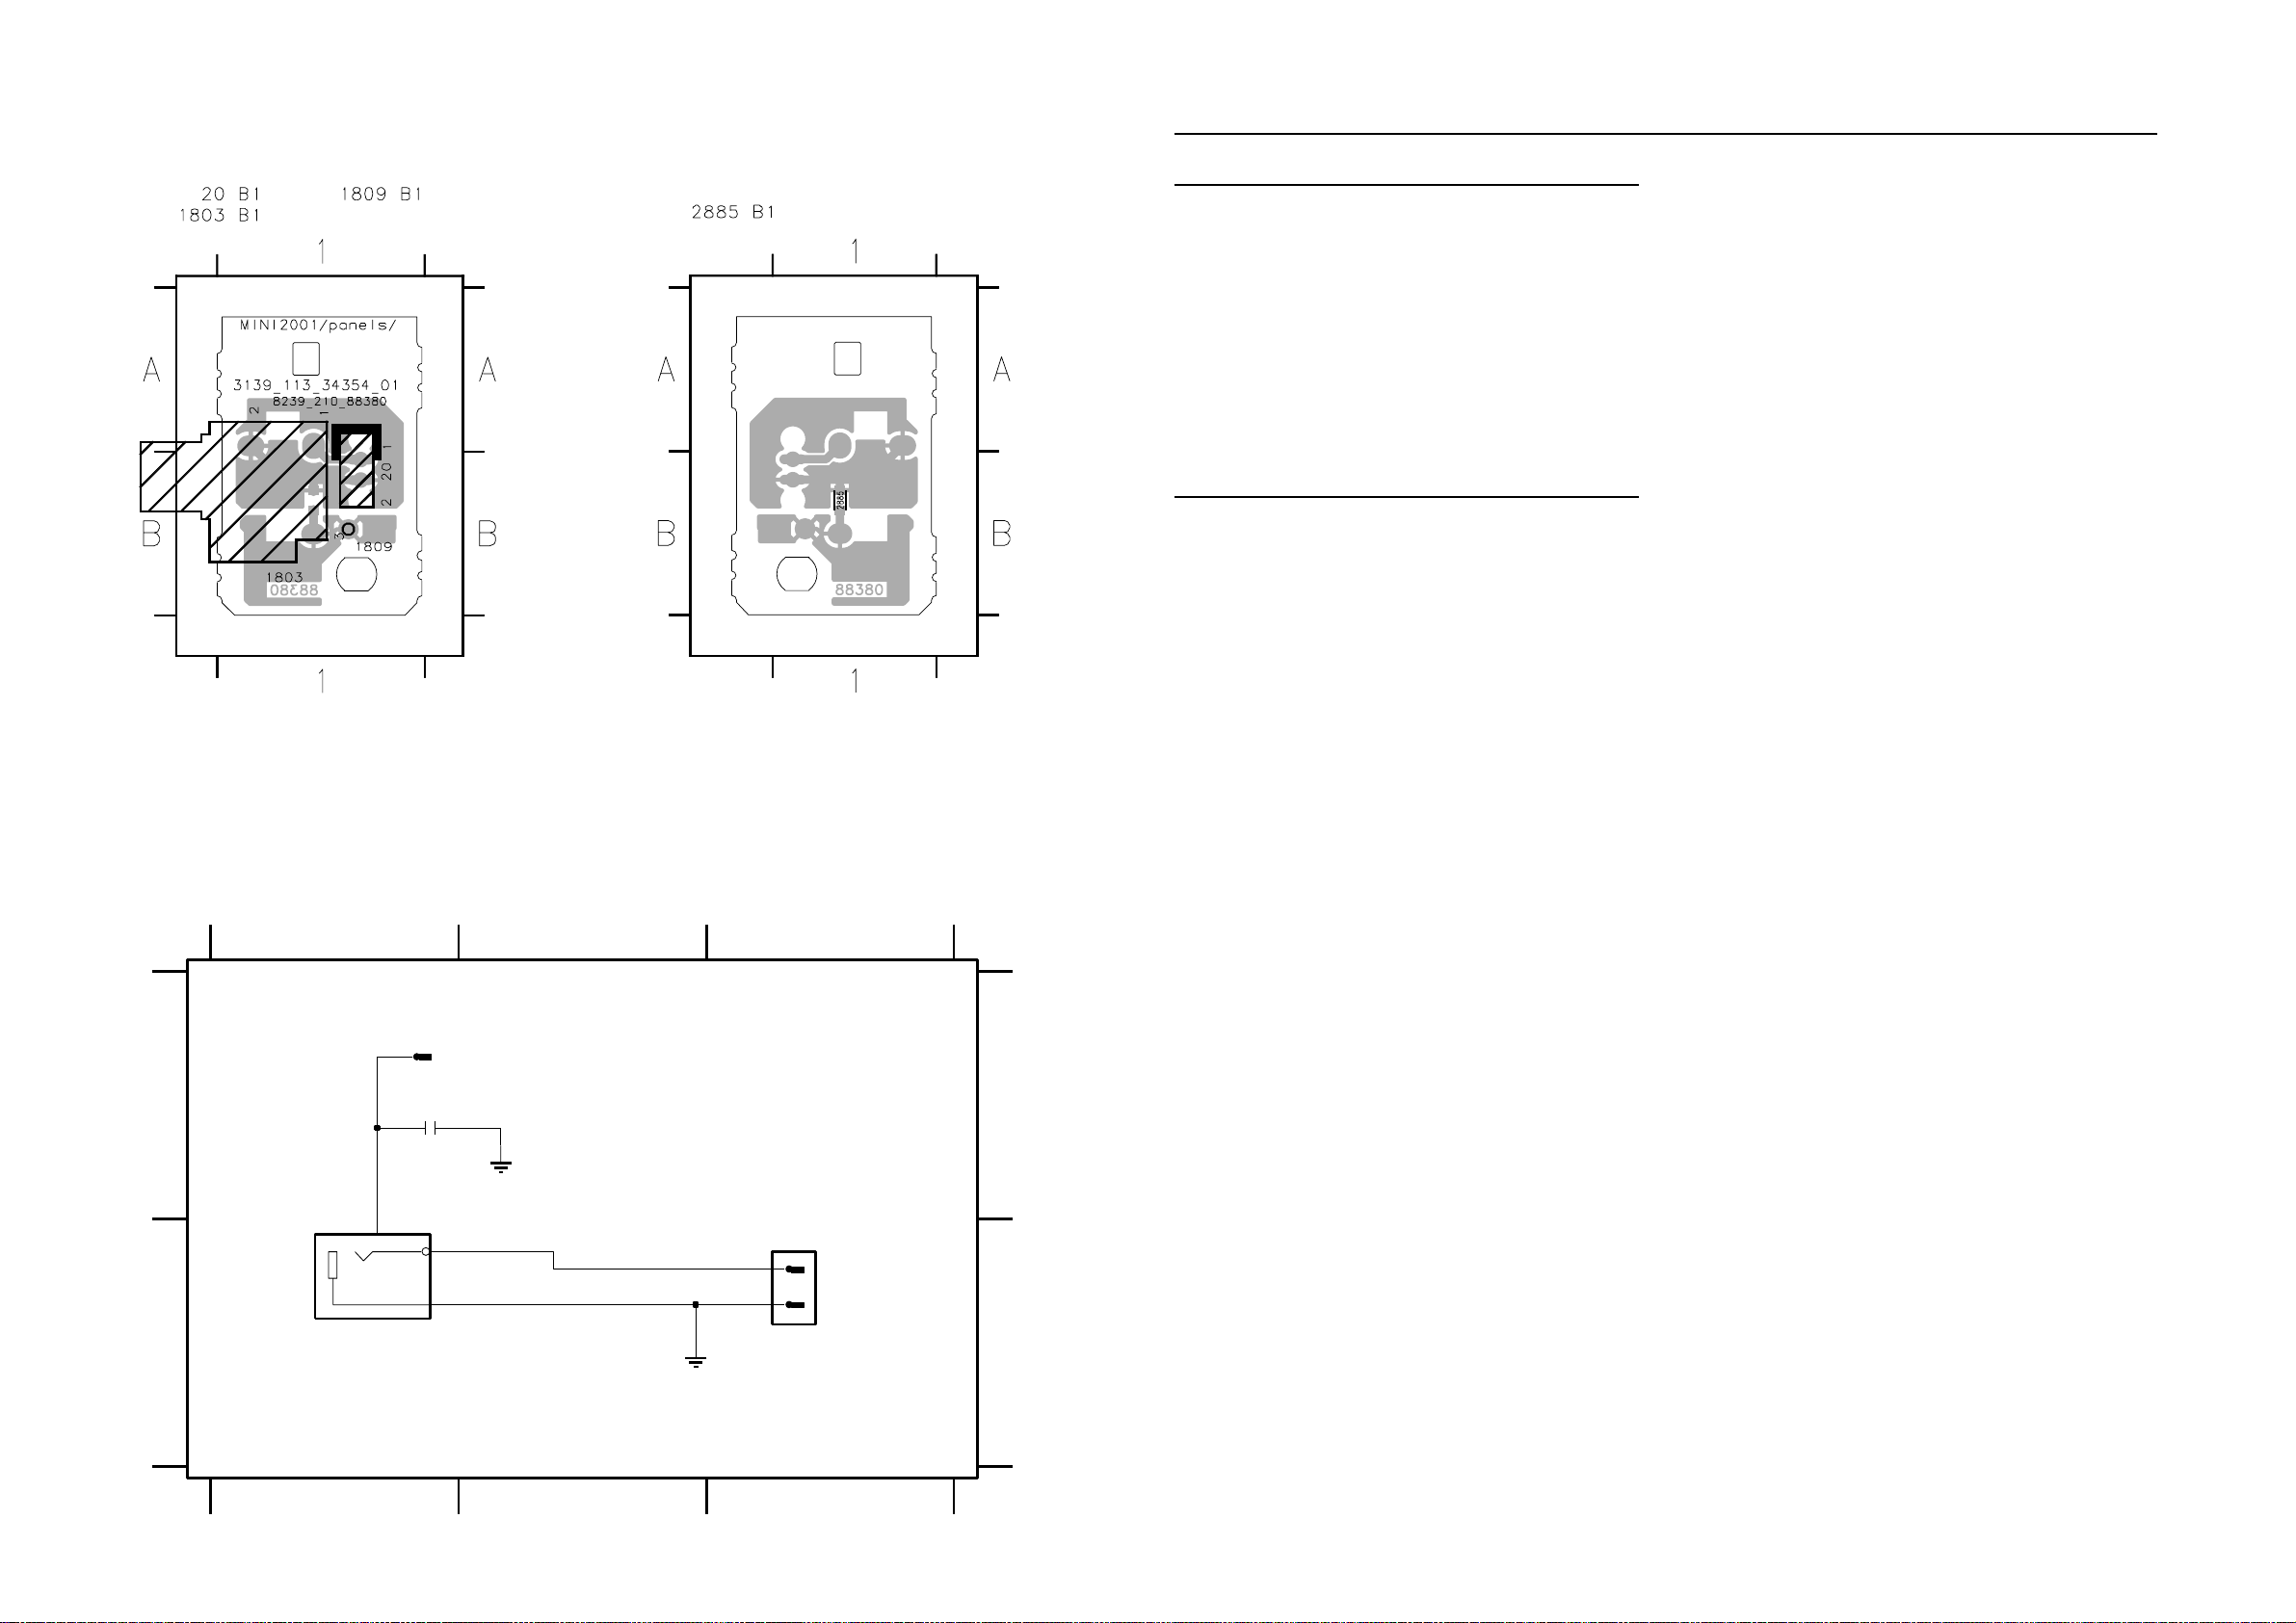
12-7
12/2/2013
www.nostatatech.nl
World of free manuals
12-7
VIDEO OUT CINCH BOARD COMPONENT LAYOUT
This assembly drawing shows a summary of all possible versions.
For components used in a specific version see schematic diagram
and respective parts list.
3139 113 3435 pt4 dd wk0123
VIDEO OUT CINCH PART - CIRCUIT DIAGRAM
20 B3 1803 B1 1809 A1 2885 A1
123
Note : Some values may varies, see respective parts list for correct value.
1809
1
A
YKC21-3564
B
2885
10n
3
1
2
1803
123
VIDEO OUT CINCH BOARD CHIP LAYOUT
This assembly drawing shows a summary of all possible versions.
For components used in a specific version see schematic diagram
and respective parts list.
3139 113 3435 pt4 dd wk0123
20
1
2
3139 118 53770...88380 for...3435 pt4 dd wk0123
DIPMATE
A
B
ELECTRICAL PARTS LIST - AF9 BOARD
MISCELLANEOUS
1206 4822 267 11039 Flex Connector 11P
1401 4822 265 11553 Flex Connector 19P
1402 4822 267 11039 Flex Connector 11P
1501 4822 265 20553 Cinch Socket - Aux in
1504 4822 265 20553 Cinch Socket - Line out
1520 4822 265 11515 Flex Connector 8P
1522 4822 265 11553 Flex Connector 19P
1531 4822 267 10953 Flex Connector 7P
1603 4822 267 10733 Flex Connector 4P
1801 4822 267 31729 Cinch Socket - Digital out
CAPACITORS
2201 4822 124 40207 100uF 20% 25V
2202 4822 124 81151 22uF 50V
2203 4822 124 40433 47uF 20% 25V
2204 4822 124 40196 220uF 20% 16V
2205 4822 126 14238 2,2nF 50V
2206 4822 126 14494 22nF 10% 25V
2207 4822 124 40433 47uF 20% 25V
2401 4822 122 31765 100pF 2% 63V
2402 4822 122 31765 100pF 2% 63V
2403 4822 126 14305 100nF 10% 16V
2404 4822 126 14305 100nF 10% 16V
2501 4822 122 31765 100pF 2% 63V
2502 4822 122 31765 100pF 2% 63V
2503 4822 124 22466 1uF 20% 50V
2504 4822 124 22466 1uF 20% 50V
2505 4822 122 31765 100pF 2% 63V
2506 4822 122 31765 100pF 2% 63V
2507 4822 126 14305 100nF 10% 16V
2511 4822 124 22466 1uF 20% 50V
2512 4822 124 22466 1uF 20% 50V
2513 3198 016 31020 1nF 25V
2514 3198 016 31020 1nF 25V
2515 4822 122 31765 100pF 2% 63V
2516 4822 122 31765 100pF 2% 63V
2521 4822 126 14305 100nF 10% 16V
2522 4822 126 14305 100nF 10% 16V
2523 4822 122 31765 100pF 2% 63V
2524 4822 122 31765 100pF 2% 63V
2531 4822 124 40769 4,7uF 20% 100V
2532 4822 124 40769 4,7uF 20% 100V
2533 4822 122 31765 100pF 2% 63V
2534 4822 122 31765 100pF 2% 63V
2535 4822 124 40769 4,7uF 20% 100V
2536 4822 124 40769 4,7uF 20% 100V
2541 4822 124 41407 0,47uF 20% 63V
2542 4822 124 41407 0,47uF 20% 63V
2543 5322 126 11583 10nF 10% 50V
2544 5322 126 11583 10nF 10% 50V
2546 4822 121 43856 4,7nF 5% 250V
2547 5322 126 11579 3,3nF 10% 63V
2548 5322 126 11579 3,3nF 10% 63V
2565 4822 121 43856 4,7nF 5% 250V
2567 3198 016 31020 1nF 25V
2568 3198 016 31020 1nF 25V
2589 4822 121 42408 220nF 5% 63V
2590 4822 121 42408 220nF 5% 63V
2591 5322 121 42661 330nF 5% 63V
2592 5322 121 42661 330nF 5% 63V
2593 4822 121 51252 470nF 5% 63V
2594 4822 121 51252 470nF 5% 63V
2601 3198 016 31020 1nF 25V
2602 3198 016 31020 1nF 25V
2603 4822 124 81151 22uF 50V
2604 4822 124 81151 22uF 50V
2605 4822 122 31765 100pF 2% 63V
2606 4822 122 31765 100pF 2% 63V
2607 4822 126 13881 470pF 5% 50V
2608 4822 126 13881 470pF 5% 50V
2609 4822 126 14508 180pF 5% 50V
2610 4822 126 14508 180pF 5% 50V
2611 4822 124 81151 22uF 50V
2612 4822 124 81151 22uF 50V
2621 4822 124 81151 22uF 50V
2622 4822 122 31765 100pF 2% 63V
2623 4822 124 40433 47uF 20% 25V
2624 3198 017 42230 22nF 50V
2625 4822 124 40207 100uF 20% 25V
2626 4822 124 40769 4,7uF 20% 100V
2641 3198 016 31020 1nF 25V
2642 3198 016 31020 1nF 25V
2653 4822 122 31765 100pF 2% 63V
2654 4822 122 31765 100pF 2% 63V
2661 4822 124 21913 1uF 20% 63V
2662 4822 124 21913 1uF 20% 63V
2663 3198 016 31020 1nF 25V
2664 3198 016 31020 1nF 25V
2665 4822 126 13881 470pF 5% 50V
2666 4822 126 13881 470pF 5% 50V
2667 4822 126 14305 100nF 10% 16V
2669 4822 126 14305 100nF 10% 16V
2681 4822 124 40433 47uF 20% 25V
2682 4822 122 33752 15pF 5% 50V
2683 4822 126 14305 100nF 10% 16V
2691 4822 122 31765 100pF 2% 63V
2707 4822 122 31765 100pF 2% 63V
2708 4822 122 31765 100pF 2% 63V
2771 4822 124 41407 0,47uF 20% 63V
2801 4822 126 14305 100nF 10% 16V
2802 3198 016 31020 1nF 25V
2803 4822 124 40756 1uF 20% 100V
2804 4822 126 14305 100nF 10% 16V
2805 4822 126 14305 100nF 10% 16V
2806 4822 122 33753 150pF 5% 50V
2807 4822 126 14305 100nF 10% 16V
Page 72

12-8 12-8
12/2/2013
www.nostatatech.nl
World of free manuals
ELECTRICAL PARTS LIST - AF9 BOARD
CAPACITORS
2808 4822 126 14305 100nF 10% 16V
2809 4822 126 14305 100nF 10% 16V
2810 4822 122 33777 47pF 5% 63V
2902 3198 017 44740 470nF 10V
2905 3198 017 42230 22nF 50V
2908 4822 126 14305 100nF 10% 16V
2950 4822 126 13881 470pF 5% 50V
2951 4822 126 13881 470pF 5% 50V
2952 4822 122 31765 100pF 2% 63V
2953 4822 126 13881 470pF 5% 50V
RESISTORS
3201 4822 117 12968 820R 5% 0,62W
3202 4822 051 30151 150R 5% 0,062W
3205 4822 116 52289 5k6 5% 0,5W
3401 4822 051 30471 470R 5% 0,062W
3402 4822 051 30471 470R 5% 0,062W
3403 4822 116 52175 100R 5% 0,5W
3405 4822 051 30103 10k 5% 0,062W
3408 4822 051 30103 10k 5% 0,062W
3409 4822 051 30562 5k6 5% 0,063W
3412 4822 050 11002 1k 1% 0,4W
3435 4822 050 11002 1k 1% 0,4W
3436 4822 050 11002 1k 1% 0,4W
3501 4822 051 30472 4k7 5% 0,062W
3502 4822 051 30472 4k7 5% 0,062W
3503 4822 051 30123 12k 5% 0,062W
3504 4822 051 30123 12k 5% 0,062W
3505 4822 051 30153 15k 5% 0,062W
3506 4822 051 30153 15k 5% 0,062W
3511 4822 117 12968 820R 5% 0,62W
3512 4822 117 12968 820R 5% 0,62W
3513 4822 051 30332 3k3 5% 0,062W
3514 4822 051 30332 3k3 5% 0,062W
3521 4822 051 30102 1k 5% 0,062W
3522 4822 051 30102 1k 5% 0,062W
3525 4822 051 30471 470R 5% 0,062W
3526 4822 051 30471 470R 5% 0,062W
3531 4822 051 30152 1k5 5% 0,062W
3532 4822 051 30152 1k5 5% 0,062W
3533 4822 051 30273 27k 5% 0,062W
3534 4822 051 30273 27k 5% 0,062W
3543 4822 117 12925 47k 1% 0,063W
3544 4822 117 12925 47k 1% 0,063W
3545 4822 051 30562 5k6 5% 0,063W
3546 4822 051 30562 5k6 5% 0,063W
3547 4822 051 30103 10k 5% 0,062W
3548 4822 051 30103 10k 5% 0,062W
3549 4822 051 30183 18k 5% 0,062W
3550 4822 051 30183 18k 5% 0,062W
3591 4822 117 12902 8k2 1% 0,063W
3592 4822 117 12902 8k2 1% 0,063W
3593 4822 051 30562 5k6 5% 0,063W
3594 4822 051 30562 5k6 5% 0,063W
3601 4822 116 52238 12k 5% 0,5W
3602 4822 116 52238 12k 5% 0,5W
3607 4822 051 30682 6k8 5% 0,062W
3608 4822 116 83961 6k8 5%
3609 4822 051 30273 27k 5% 0,062W
3610 4822 051 30273 27k 5% 0,062W
3611 4822 051 30479 47R 5% 0,062W
3612 4822 051 30479 47R 5% 0,062W
3613 4822 051 30102 1k 5% 0,062W
3614 4822 051 30102 1k 5% 0,062W
3615 4822 051 30339 33R 5% 0,062W
3616 4822 051 30339 33R 5% 0,062W
3621 4822 051 30103 10k 5% 0,062W
3622 4822 051 30103 10k 5% 0,062W
3623 4822 051 30102 1k 5% 0,062W
3624 4822 051 30562 5k6 5% 0,063W
3625 4822 051 30472 4k7 5% 0,062W
3626 4822 051 30472 4k7 5% 0,062W
3627 4822 052 10109!10R 5% 0,33W
3628 4822 116 52283 4k7 5% 0,5W
3629 4822 051 30472 4k7 5% 0,062W
3631 4822 050 11002 1k 1% 0,4W
3633 4822 051 30102 1k 5% 0,062W
3634 4822 051 30562 5k6 5% 0,063W
3635 4822 051 30103 10k 5% 0,062W
3636 4822 051 30472 4k7 5% 0,062W
3637 4822 051 30103 10k 5% 0,062W
3638 4822 051 30472 4k7 5% 0,062W
3640 4822 116 52289 5k6 5% 0,5W
3644 4822 051 30332 3k3 5% 0,062W
3645 4822 051 30221 220R 5% 0,062W
3646 4822 051 30221 220R 5% 0,062W
3651 4822 051 30102 1k 5% 0,062W
3652 4822 051 30102 1k 5% 0,062W
3653 4822 051 30102 1k 5% 0,062W
3654 4822 051 30102 1k 5% 0,062W
3655 4822 051 30102 1k 5% 0,062W
3656 4822 051 30102 1k 5% 0,062W
3657 4822 051 30102 1k 5% 0,062W
3658 4822 051 30102 1k 5% 0,062W
3661 4822 051 30272 2k7 5% 0,062W
3662 4822 051 30272 2k7 5% 0,062W
3663 4822 116 52256 2k2 5% 0,5W
3664 4822 051 30222 2k2 5% 0,062W
3665 4822 051 30471 470R 5% 0,062W
3666 4822 051 30471 470R 5% 0,062W
3668 4822 051 30472 4k7 5% 0,062W
3669 4822 051 30103 10k 5% 0,062W
3683 4822 051 30154 150k 5% 0,062W
3684 4822 051 30154 150k 5% 0,062W
3686 4822 117 12864 82k 5% 0,6W
3687 4822 117 11817 1k2 1% 1/16W
ELECTRICAL PARTS LIST - AF9 BOARD
3688 4822 051 30391 390R 5% 0,062W
3689 4822 051 30151 150R 5% 0,062W
3692 4822 051 30334 330k 5% 0,062W
3694 4822 051 30222 2k2 5% 0,062W
3707 4822 051 30102 1k 5% 0,062W
3708 4822 051 30102 1k 5% 0,062W
3711 4822 051 30562 5k6 5% 0,063W
3801 4822 051 30471 470R 5% 0,062W
3802 4822 051 30223 22k 5% 0,062W
3803 4822 051 30561 560R 5% 0,062W
3804 4822 116 83872 220R 5% 0,5W
3805 4822 051 30221 220R 5% 0,062W
3807 4822 051 30222 2k2 5% 0,062W
3808 4822 051 30223 22k 5% 0,062W
3809 4822 051 30479 47R 5% 0,062W
4100 4822 051 30008 0R Jumper 0603
4101 4822 051 30008 0R Jumper 0603
4104 4822 051 30008 0R Jumper 0603
4108 4822 051 30008 0R Jumper 0603
4110 4822 051 30008 0R Jumper 0603
4111 4822 051 30008 0R Jumper 0603
4112 4822 051 30008 0R Jumper 0603
4113 4822 051 30008 0R Jumper 0603
4114 4822 051 30008 0R Jumper 0603
4115 4822 051 30008 0R Jumper 0603
4116 4822 051 30008 0R Jumper 0603
4119 4822 051 30008 0R Jumper 0603
4122 4822 051 30008 0R Jumper 0603
4124 4822 051 30008 0R Jumper 0603
4125 4822 051 30008 0R Jumper 0603
4126 4822 051 30008 0R Jumper 0603
4127 4822 051 30008 0R Jumper 0603
4128 4822 051 30008 0R Jumper 0603
4130 4822 051 30008 0R Jumper 0603
4132 4822 051 30008 0R Jumper 0603
4133 4822 051 30008 0R Jumper 0603
4134 4822 051 30008 0R Jumper 0603
4135 4822 051 30008 0R Jumper 0603
4137 4822 051 30008 0R Jumper 0603
4138 4822 051 30008 0R Jumper 0603
4139 4822 051 30008 0R Jumper 0603
4141 4822 051 30008 0R Jumper 0603
4142 4822 051 30008 0R Jumper 0603
4143 4822 051 30008 0R Jumper 0603
4144 4822 051 30008 0R Jumper 0603
4145 4822 051 30008 0R Jumper 0603
4146 4822 051 30008 0R Jumper 0603
4147 4822 051 30008 0R Jumper 0603
4148 4822 051 30008 0R Jumper 0603
4150 4822 051 30008 0R Jumper 0603
4151 4822 051 30008 0R Jumper 0603
4152 4822 051 30008 0R Jumper 0603
4153 4822 051 30008 0R Jumper 0603
4403 4822 051 30008 0R Jumper 0603
4501 4822 051 30008 0R Jumper 0603
4641 4822 051 30008 0R Jumper 0603
4642 4822 051 30008 0R Jumper 0603
4811 4822 051 30008 0R Jumper 0603
4812 4822 051 30008 0R Jumper 0603
4903 4822 051 30008 0R Jumper 0603
4904 4822 051 30008 0R Jumper 0603
4908 4822 051 30008 0R Jumper 0603
4913 4822 051 30008 0R Jumper 0603
4921 4822 051 30008 0R Jumper 0603
COILS & FILTERS
5621 4822 157 62552 Coil 2,2uH 5%
5801 2422 536 00019 Transformer 6RG
DIODES
6201 4822 130 30621 1N4148
6202 4822 130 30862 BZX55-C9V1
6205 4822 130 61219 BZX79-C10
6207 4822 130 31878 1N4003G
6208 4822 130 31878 1N4003G
6401 4822 130 30621 1N4148
6774 4822 130 30621 1N4148
TRANSISTORS & INTEGRATED CIRCUITS
7201 4822 130 60511 BC847B
7401 4822 130 41246 BC327-25
7402 4822 130 60511 BC847B
7403 4822 209 17345 M62320FP
7501 9322 150 74668 TDA7468D
7601 4822 209 31378 NJM4556AM
7603 4822 130 42804 BC817-25
7604 4822 130 42804 BC817-25
7621 4822 130 60511 BC847B
7622 4822 130 60373 BC857B
7623 4822 130 60511 BC847B
7635 4822 130 60373 BC857B
7636 4822 130 60511 BC847B
7651 4822 130 42804 BC817-25
7652 4822 130 42804 BC817-25
7653 4822 130 42804 BC817-25
7654 4822 130 42804 BC817-25
7661 4822 130 60511 BC847B
7662 4822 130 60511 BC847B
7663 4822 130 60373 BC857B
7681 4822 130 60373 BC857B
7682 4822 130 60511 BC847B
7802 4822 209 17235 74LVU04D
7803 4822 130 60511 BC847B
Note : Only the parts mentioned in this list are normal
service spare parts.
Page 73

SET MECHANICAL EXPLODED VIEW
12/2/2013
www.nostatatech.nl
World of free manuals
13-1 13-1
,,
Exploded_View_3139 119 33850 dd wk0136
Page 74

13-2 13-2
12/2/2013
www.nostatatech.nl
World of free manuals
MECHANICAL & ACCESSORIES PARTS LIST - MAIN UNIT SCREW LISTS - MAIN UNIT
0101 3139 118 15420 Cabinet Front
0103 3139 118 14320 Window CDC
0105 3139 118 16820 Button Set CDC
0106 3139 118 14340 Cover Tray CDC
0107 4822 454 13408 Badge Philips
0111 3139 118 14870 Button Power
0115 3139 118 14370 Cover Ring Volume/VU Chrome
0116 3139 118 14830 Window Display
0117 3139 118 14380 Knob Volume Rotary
0120 3139 114 72360 Frame Button Set Source Select
0121 3139 118 14390 Button Cap Source-CD
0122 3139 118 14400 Button Cap Source-Tuner
0123 3139 118 14410 Button Cap Source-Tape
0124 3139 118 14420 Button Cap Source-Aux
0125 3139 114 72410 Lightguide Source-CD
0126 3139 114 72420 Lightguide Source-Tuner
0127 3139 114 72430 Lightguide Source-Tape
0128 3139 114 72440 Lightguide Source-Aux
0130 3139 118 14440 Button Prog/Time-Disp
0131 3139 118 15450 Cover Ring Func Control
0246 4822 462 40683 Foot Rubber (SQ)
0251 3139 114 72750 Bracket CDC Left
0252 3139 114 72760 Bracket CDC Right
0253 3139 114 73570 Panel Left
0254 3139 114 73580 Panel Right
0255 3139 114 73590 Cover Top
0256 3139 114 72790 Panel Rear
0271 3139 114 71010 Stopper Heatsink
0350 3139 118 78320 L/R Loudspeaker Box
0351 4822 303 50063 FM Aerial
0356 3139 228 87110 Remote Control
0384 2422 549 45067 Antenna AM Loop
0385 2422 070 98151!Mains Cord
!
0386 4822 263 21092
Adaptor Plug 6A 250V
0387 3139 115 21060 Instruction For Use
1202 3139 110 35350 FFC Foil 11P/220/11P AD
1204 3139 110 34600 FFC Foil 07P/280/07P AD
1401 3139 110 34970 FFC Foil 19P/180/19P AD
1402 3139 110 34610 FFC Foil 11P/180/11P AD
1403 3139 110 35130 FFC Foil 06P/180/06P AD
185 D3 x 12
186 D3 x 12
211 D3 x 12
212 D3 x 12
213 D3 x 12
214 M3 x 12
215 M3 x 12
226 M3 x 6
227 M3 x 6
231 M3 x 6
232 M3 x 6
276 M3 x 6
277 M3 x 10
278 D3 x 16
279 D3 x 12
280 D3 x 12
283 D3 x 12
285 D3 x 12
286 D3 x 12
287 D3 x 12
0132 3139 118 15460 Button Set Func Control
0133 3139 118 14470 Cap Function Control
0134 3139 118 15170 Cover Ring DSC/VAC/IS
0135 3139 118 14770 Button DSC/VAC/IS
0140 3139 118 14500 Knob Jog Rotary
0141 3139 118 14850 Button WOOX Plus
0142 3139 114 72470 Frame Button Set WOOX
0144 3139 118 14840 Button Plus WOOX Level
0148 3139 118 15510 Cover Orn Control
0149 3139 118 14810 Cover Control WOOX
0151 3139 118 16070 Cover Cassette Left
0152 3139 118 16060 Cover Cassette Right
0153 3139 114 72820 Lens Cassette Left
0154 3139 114 72830 Lens Cassette Right
0197 3139 114 68630 Door Cassette Right
0198 3139 114 68620 Door Cassette Left
0199 4822 402 10621 Push-Catch
0200 4822 529 10322 Damper Assembly
0201 3139 114 68640 Push Catch Left
0203 4822 492 11344 Spring Compression
0204 4822 402 11246 Bracket Right
0205 4822 402 11245 Bracket Left
0206 3139 111 01380 Spring Torsion Right
0207 3139 111 01390 Spring Torsion Left
0209 4822 492 42787 Spring Cassette
1404 3139 110 35280 FFC Foil 10P/120/10P AD
1405 3139 110 35000 FFC Foil 08P/120/08P AD
1406 4822 320 12752 FFC Foil 07P/180/07P AD
1407 3139 110 34010 FFC Foil 06P/140/06P AD
1501 3139 110 35120 FFC Foil 04P/400/04P BD
1503 3139 110 34800 FFC Foil 19P/180/19P BD
1601 3139 110 35050 FFC Foil 08P/220/08P AD
1702 4822 320 12654 FFC Foil 07P/220/07P AD
5001 3103 308 30640!Mains Transformer
LEFT/RIGHT LOUDSPEAKER BOX BREAKDOWN
9965 000 08796 Woofer 5,25" 6R 60W
9965 000 07455 Tweeter 2"
9965 000 08797 Woox 6,5"
9965 000 08798 Piezo Assembly
9965 000 08799 Woox Ring
9965 000 08800 Woox Guard
9965 000 08801 Woofer Ring Left
9965 000 08802 Woofer Ring Right
9965 000 08803 Cloth Frame Assembly Left
9965 000 08804 Cloth Frame Assembly Right
9965 000 03233 Grommet (Dia. 11mm)
9965 000 08805 Grommet (Dia. 9mm)
Note : Only the parts mentioned in this list are normal
service spare parts.
292 M3 x 12
293 M3 x 12
294 M3 x 6
295 D3 x 12
296 D3 x 12
297 D2 x 8
298 D3 x 10
299 D3 x 10
300 D3 x 12
301 D3 x 12
302 D3 x 12
304 D3 x 12
305 D2 x 8
306 D3 x 12
Page 75
Mini System
12/2/2013
www.nostatatech.nl
World of free manuals
FW-C700/22/37
Service
Service
Service
Service Manual
TABLE OF CONTENTS
Page
Location of pc boards & Version variations................1-2
Technical Specifications .............................................1-3
Measurement setup ....................................................1-4
Service Aids, Safety Instruction, etc...........................1-5
Instruction for use : European version excerpt..........2-1
Disassembly Instructions & Service positions ...........3-1
Service Test Programs ............................................... 3-4
Set Block diagram ......................................................4-1
Set Wiring diagram .....................................................4-2
Front Control Board .......................................................5
Front Display Board ....................................................... 6
ECO6 Tuner Board : Systems Non-Cenelec.............. 7A
ECO6 Tuner Board : Systems Cenelec...................... 7B
ETF7 ND Tape Module .................................................. 9
ETF7 DB Tape Module ............................................... 9A
3CDC-LC-MB-DA11 Module........................................ 10
Power 2001 Module (30-70W Version) ....................... 11
AF9 Board .................................................................... 12
Set Mechanical Exploded view & parts list ................. 13
COMPACT
DIGITAL AUDIO
©
Copyright 2000 Philips Consumer Electronics B.V. Eindhoven, The Netherlands
All rights reserved. No part of this publication may be reproduced, stored in a retrieval system or
transmitted, in any form or by any means, electronic, mechanical, photocopying, or otherwise
without the prior permission of Philips.
Published by BB 0052 Service Audio Printed in The Netherlands Subject to modification
CLASS 1
LASER PRODUCT
GB
3139 785 22640
Page 76
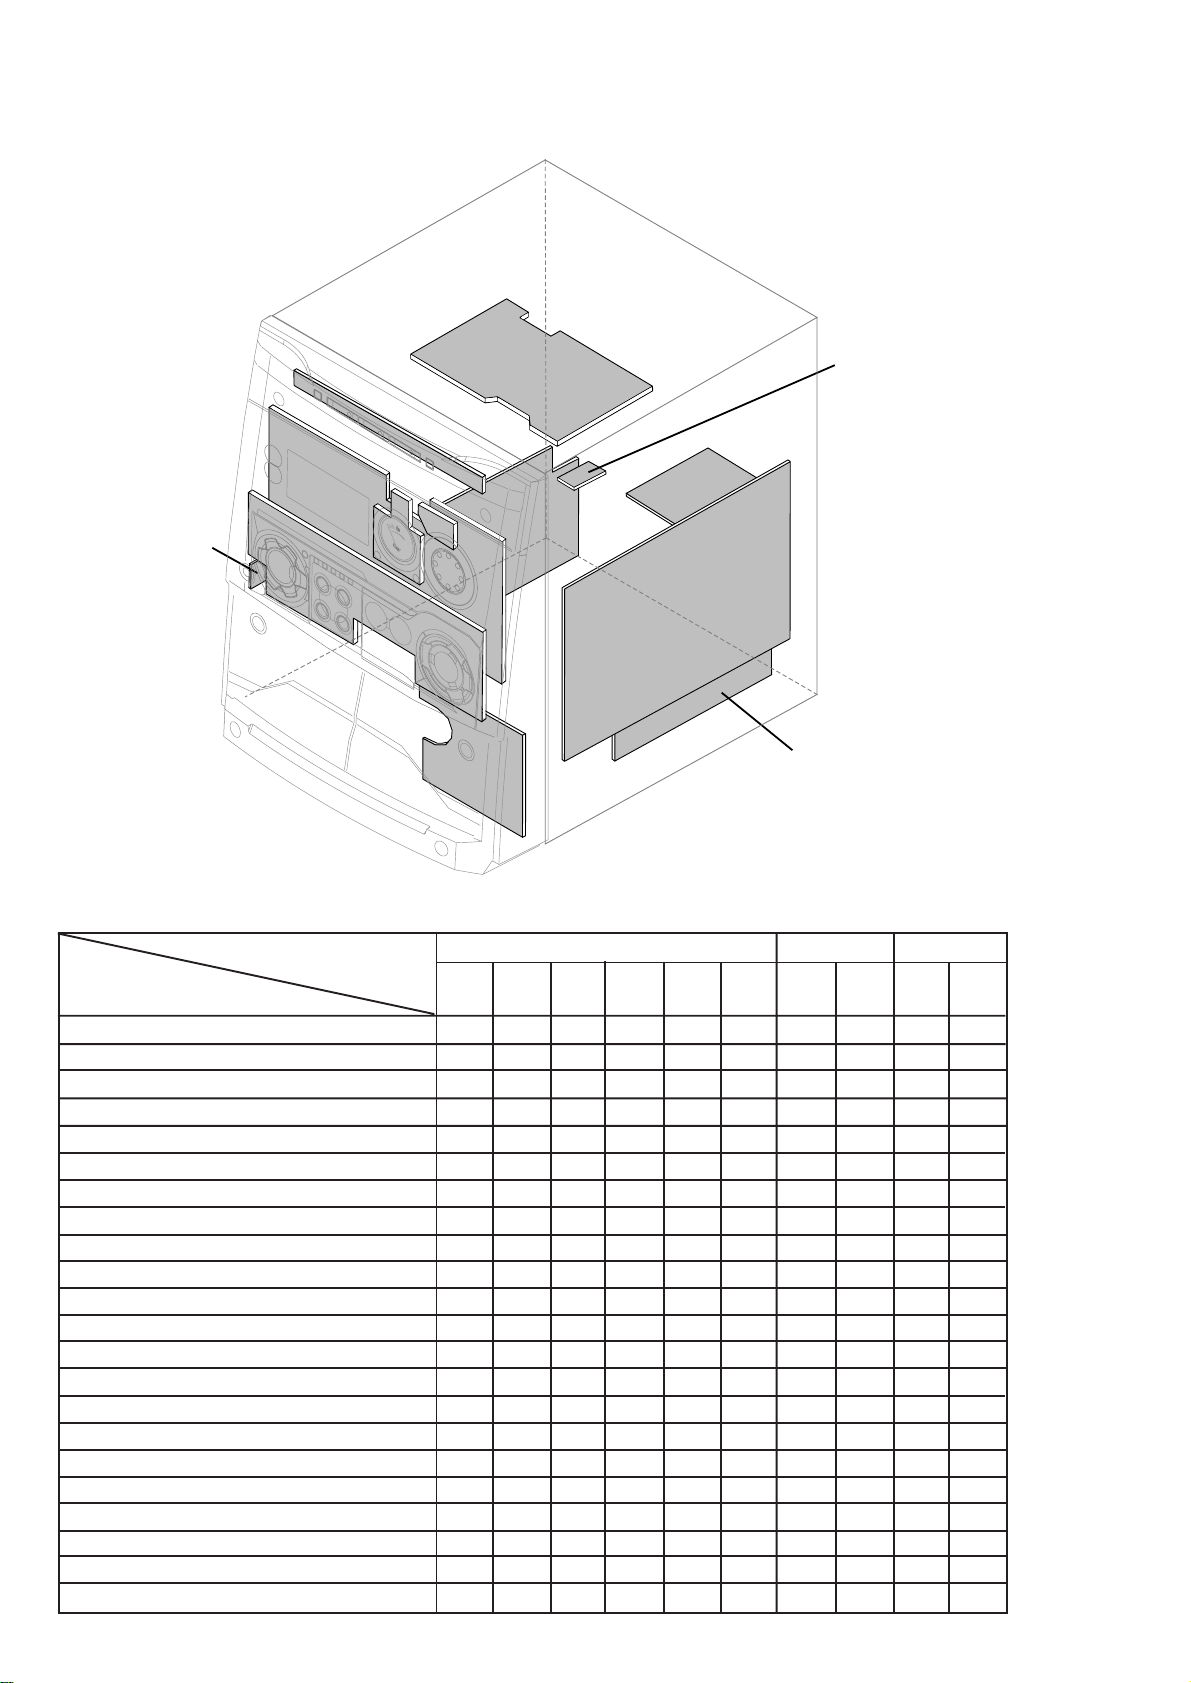
LOCATION OF PRINTED CIRCUIT BOARDS
12/2/2013
www.nostatatech.nl
World of free manuals
KEY-CDC BOARD
FRONT
DISPLAY
BOARD
IR-EYE
VU
METER
BOARD
BOARD
HEADPHONE
BOARD
FRONT CONTROL
BOARD
1-2
CD
BOARD
MAINS
BOARD
TUNER
BOARD
AF9
BOARD
MAINS SOCKET
BOARD
ETF7
BOARD
VERSION VARIATIONS:
Type /Versions: FW-C700
Features &
/22 /37
Board in used:
Aux in /CDR in x x
Line Out x x
Surround Out
Subwoofer Out
Digital Out x x
Matrix Surround
CD Text
Dolby B
RDS x
News x
Dolby Pro Logic (DPL)
Incredible Surround x x
Karaoke Features
Voltage Selector
ECO Power Standby (Clock Display Off) x
ECO6 Tuner Board - Systems Non-Cenelec x
ECO6 Tuner Board - Systems Cenelec x
Center/Surround Channel
ETF7 ND/DD/FR - Chapter 9 x x
ETF7 DB/DD/FR - Chapter 9A
POWER
BOARD
Page 77

SPECIFICATIONS
12/2/2013
www.nostatatech.nl
World of free manuals
1-3
GENERAL:
Mains voltage : 110-127V/220-240V Switchable for /21/21M
120V for /37
220V for /33
220-230V for /22/34
230-240V for /30
Mains frequency : 50/60Hz
Power consumption : < 1W at ECO Power Standby
: 15W at Standby
: 100W at Active
Clock accuracy : < 4 seconds per day
Dimension centre unit : 265 x 310 x 390mm
TUNER:
FM
Tuning range : 87.5-108MHz
65.81-74MHz for /34
1)
Grid : 50kHz (& 30kHz for /34)
100kHz for /37
IF frequency : 10.7MHz ± 25kHz
Aerial input : 75Ω coaxial
300Ω click fit for /37
Sensitivity at 26dB S/N : < 7µV
Selectivity at 600kHz bandwidth : > 25dB
Image rejection : > 25dB
Distortion at RF=1mV, dev. 75kHz : < 3%
-3dB Limiting point : < 8µV
Crosstalk at RF=1mV, dev. 40kHz : > 18dB
MW
Tuning range : 531-1602kHz
530-1700kHz for /21/21M/37
Grid : 9kHz
10kHz for /21/21M/37
IF frequency : 450kHz ± 1kHz
Aerial input : Frame aerial
Sensitivity at 26dB S/N : < 4.0mV/M
Selectivity at 18kHz bandwidth : > 18dB
IF rejection : > 45dB
Image rejection : > 28dB
Distortion at RF=50mV, m=80% : < 5%
LW
Tuning range : 153-279kHz /22
Grid : 3kHz
IF frequency : 450kHz ± 1kHz
Aerial input : Frame aerial
Sensitivity at 26dB S/N : [< 7.0mV/M]
Selectivity at 18kHz bandwidth : [> 24dB]
IF rejection : [> 30dB]
Image rejection : [> 30dB]
Distortion at RF=50mV, m=80% : [< 5%]
AMPLIFIER:
Output power (6Ω, 1kHz, 10% THD)
L & R : 2 x 60W RMS /22
Output power (6Ω, 60Hz-12.5kHz, 10% THD)
L & R : 2 x 50W FTC /37
Frequency response within -3dB : 40Hz-20kHz
Incredible Surround : ON/OFF
WOOX : Level 1, 2, 3 & OFF
Digital Sound Control (DSC) : Digital, Rock, Pop,
Newage, Classic, Electric
Virtual Ambience Control (VAC) : Hall, Concert, Cinema,
Disco, Arcade, Cyber
Input sensitivity
Aux in : 500mV ± 3dB at 1kHz
CDR in : 1V ± 3dB at 1kHz
Output sensitivity
Line out (Left/Right) : 500mV ± 2dB at 22kΩ
Digital out : IEC 958, 44.1kHz
Headphone output at 32Ω : 15mW ± 1dB
CASSETTE RECORDER:
Number of track : 2 x 2 stereo
Tape speed : 4.76 cm/sec ± 2%
Wow and flutter : < 0.4% DIN
Fast-wind/Rewind time C60 : 130 sec
Bias system : 75kHz ± 10kHz
Rec/Pb frequency response within 8dB: 80Hz - 12.5kHz
Signal to Noise Ratio (Type I) : > 48dBA
COMPACT DISC:
Measurement done at output conn. of the CDC module.
Frequency response : < ±1.5dB for 20Hz-20kHz
Output Voltage (in Vrms) : 550mV ± 2dB unloaded
Signal to Noise Ratio (A-weighted) : > 80dBA
Distortion at 1kHz : < 0.003%
Channel Unbalance : < ±1dB
Channel Separation (1kHz) : >60dB
De-emphasis : 0 or 15/50 mS (Switched by subcode
on the disc)
[....] Values indicated are for "ECO6 Cenelec Board" only.
1)
Default setting is OFF, to switch on please refer page 3-4.
Page 78
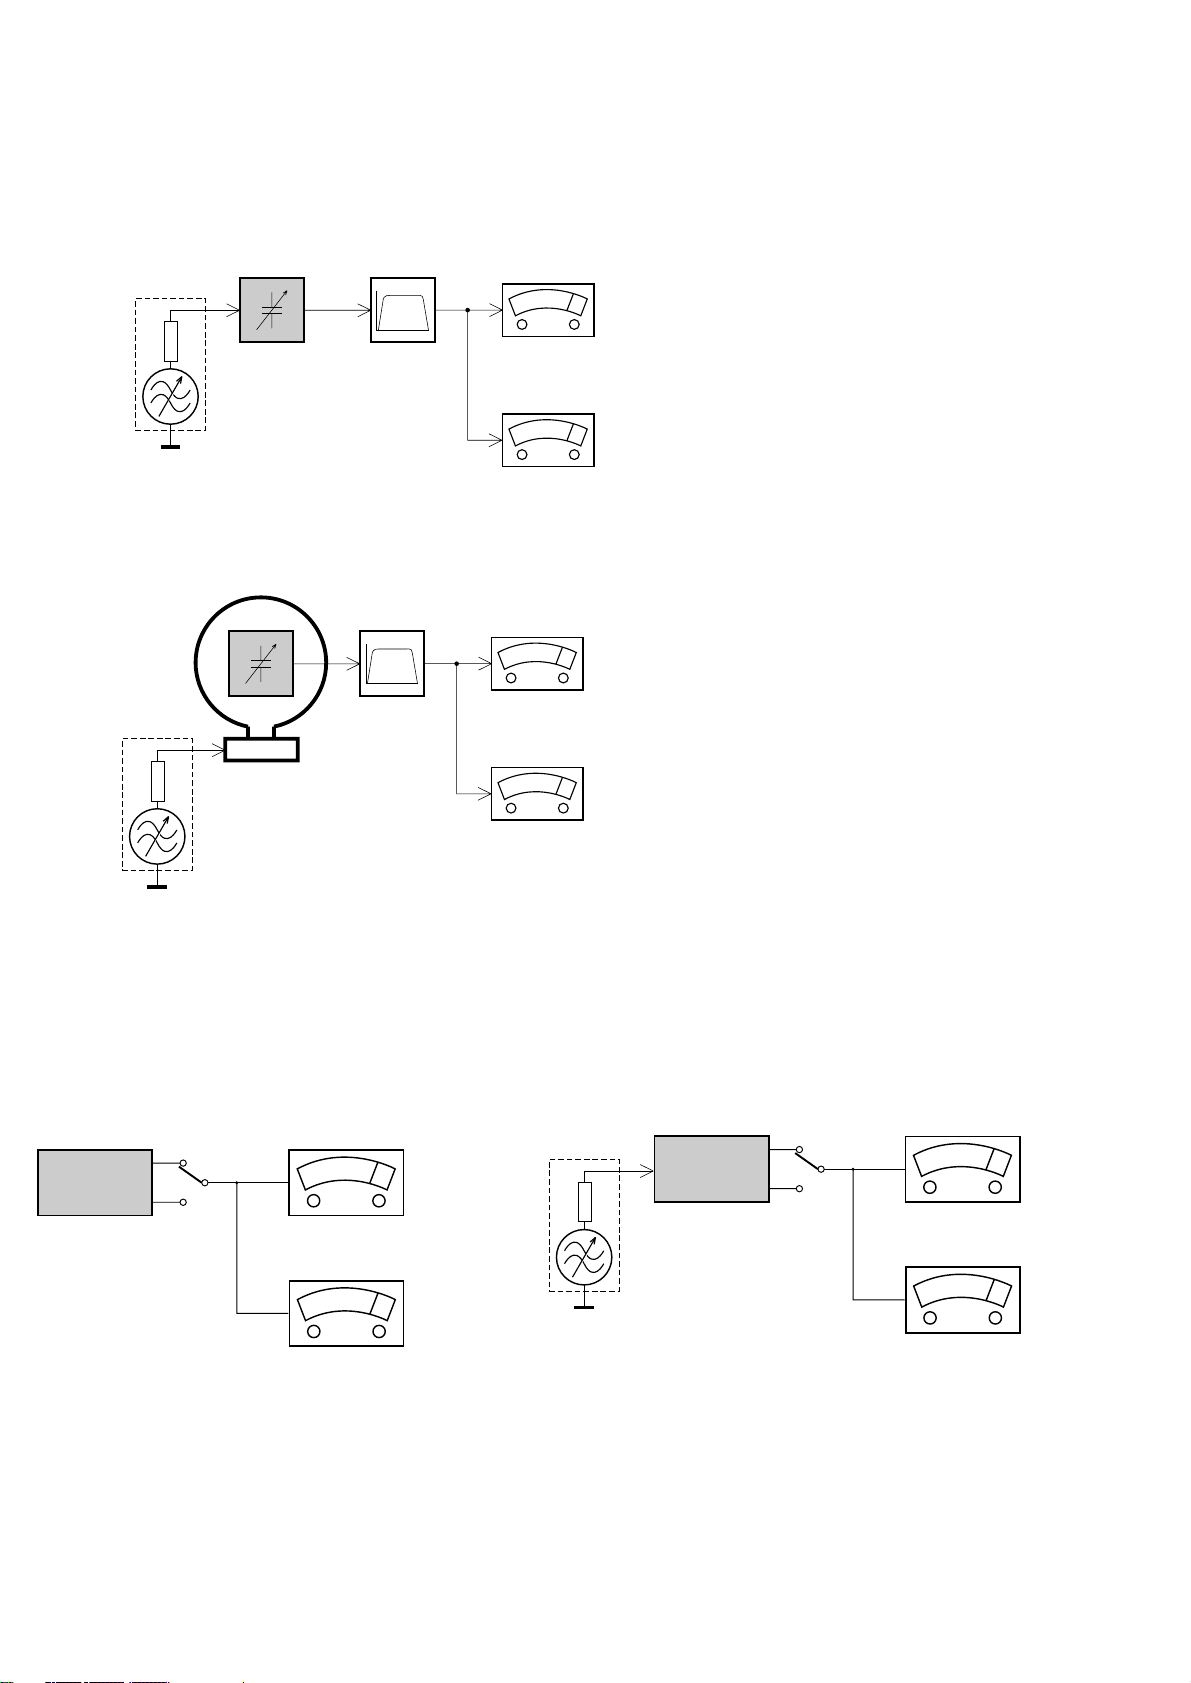
MEASUREMENT SETUP
12/2/2013
www.nostatatech.nl
World of free manuals
Tuner FM
1-4
Bandpass
LF Voltmeter
e.g. PM2534
RF Generator
e.g. PM5326
DUT
250Hz-15kHz
e.g. 7122 707 48001
Ri=50Ω
S/N and distortion meter
e.g. Sound Technology ST1700B
Use a bandpass filter to eliminate hum (50Hz, 100Hz) and disturbance from the pilottone (19kHz, 38kHz).
Tuner AM (MW,LW)
RF Generator
e.g. PM5326
Ri=50Ω
DUT
Frame aerial
e.g. 7122 707 89001
Bandpass
250Hz-15kHz
e.g. 7122 707 48001
LF Voltmeter
e.g. PM2534
S/N and distortion meter
e.g. Sound Technology ST1700B
To avoid atmospheric interference all AM-measurements have to be carried out in a Faraday´s cage.
Use a bandpass filter (or at least a high pass filter with 250Hz) to eliminate hum (50Hz, 100Hz).
CD
Use Audio Signal Disc
(replaces test disc 3)
DUT
L
R
SBC429 4822 397 30184
S/N and distortion meter
e.g. Sound Technology ST1700B
LEVEL METER
e.g. Sennheiser UPM550
with FF-filter
Recorder
Use Universal Test Cassette CrO2 SBC419 4822 397 30069
or Universal Test Cassette Fe SBC420 4822 397 30071
LF Generator
e.g. PM5110
DUT
L
R
S/N and distortion meter
e.g. Sound Technology ST1700B
LEVEL METER
e.g. Sennheiser UPM550
with FF-filter
Page 79
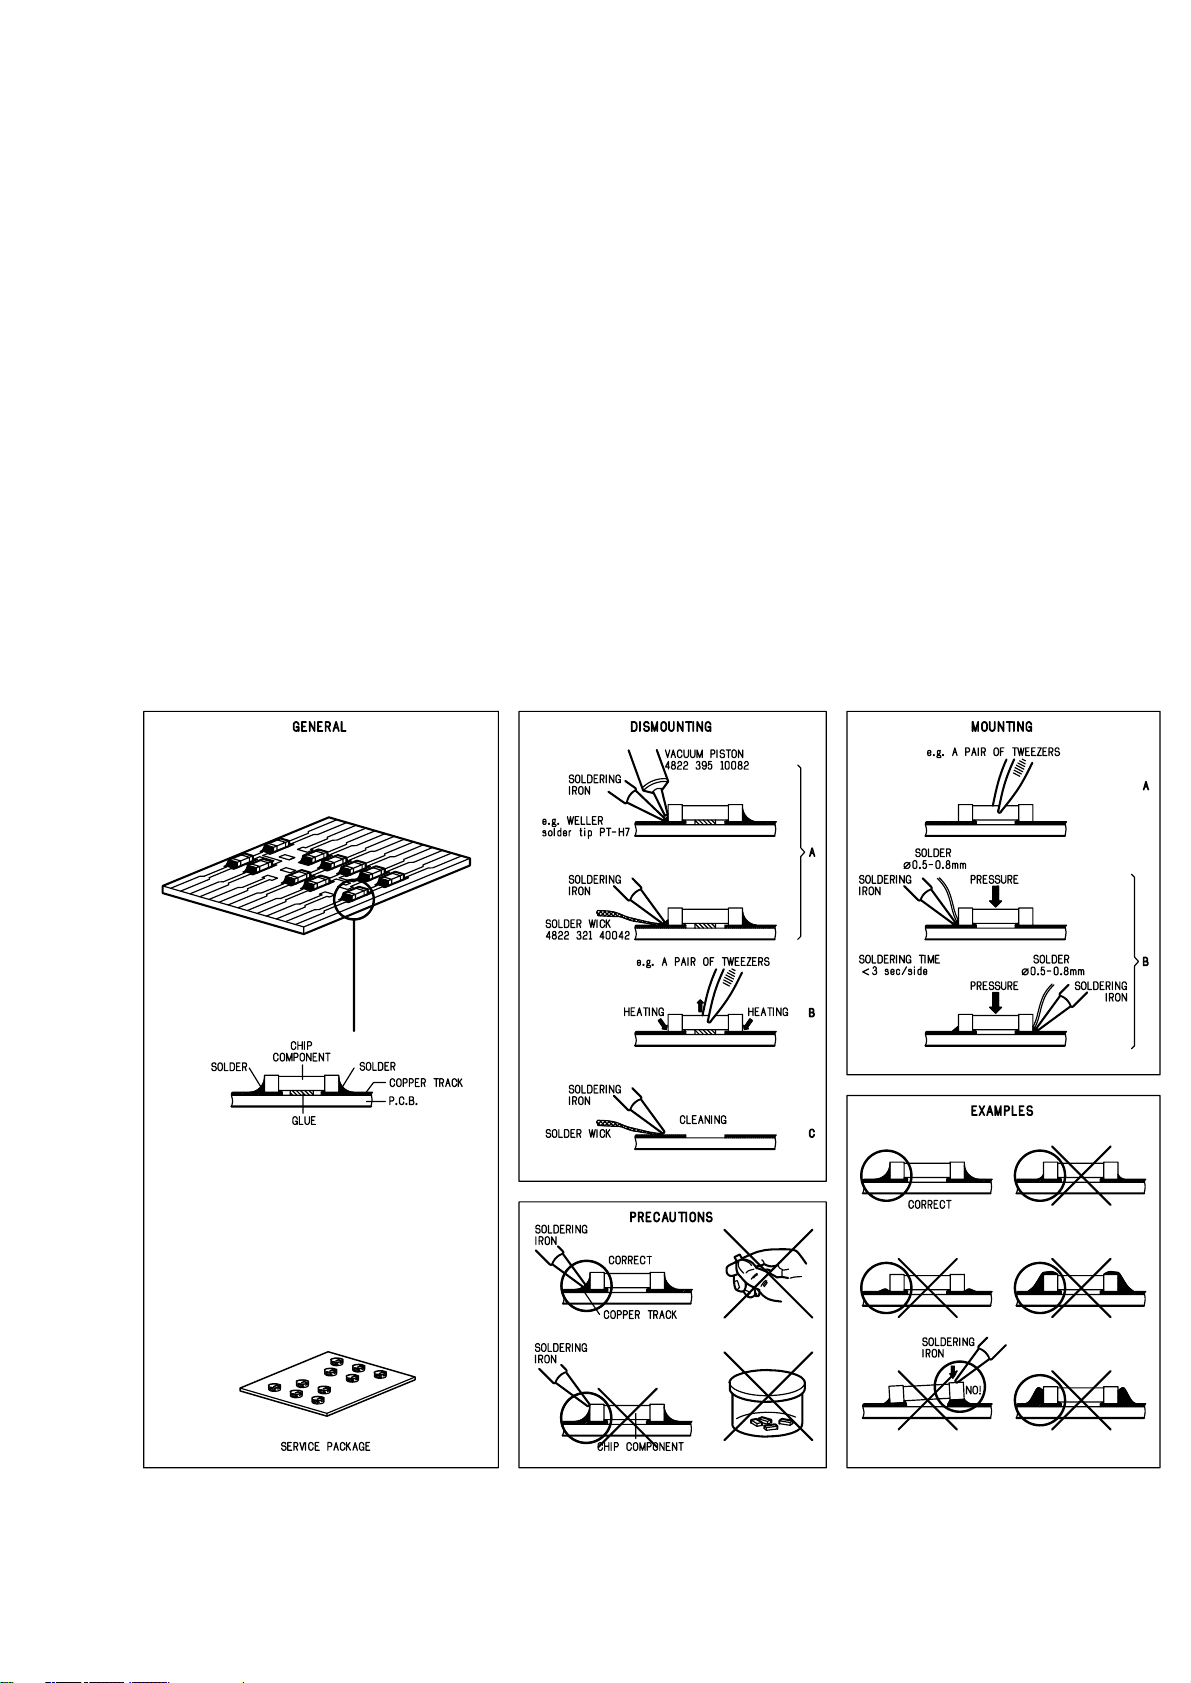
SERVICE AIDS
12/2/2013
www.nostatatech.nl
World of free manuals
1-5
Service Tools:
Universal Torx driver holder .................................. 4822 395 91019
Torx bit T10 150mm ............................................. 4822 395 50456
Torx driver set T6 - T20 ......................................... 4822 395 50145
Torx driver T10 extended ...................................... 4822 395 50423
Cassette:
SBC419 Test cassette CrO2 ................................. 4822 397 30069
SBC420 Test cassette Fe ..................................... 4822 397 30071
MTT150 Dolby level 200nWb/M ............................ 4822 397 30271
Compact Disc:
SBC426/426A Test disc 5 + 5A ............................ 4822 397 30096
SBC442 Audio Burn-in Test disc 1kHz ................. 4822 397 30155
SBC429 Audio Signals disc .................................. 4822 397 30184
Dolby Pro-logic Test Disc ...................................... 4822 395 10216
HANDLING CHIP COMPONENTS
ESD Equipment:
Anti-static table mat - large 1200x650x1.25mm ... 4822 466 10953
Anti-static table mat - small 600x650x1.25mm ..... 4822 466 10958
Anti-static wristband .............................................. 4822 395 10223
Connector box (1MΩ) ............................................ 4822 320 11307
Extension cable
(to connect wristband to conn. box) .................. 4822 320 11305
Connecting cable
(to connect table mat to conn. box) .................. 4822 320 11306
Earth cable (to connect product to mat or box) .... 4822 320 11308
Complete kit ESD3
(combining all above products) ......................... 4822 320 10671
Wristband tester .................................................... 4822 344 13999
Page 80

WARNING
12/2/2013
www.nostatatech.nl
World of free manuals
GB
All ICs and many other semi-conductors are
susceptible to electrostatic discharges (ESD).
Careless handling during repair can reduce life
drastically.
When repairing, make sure that you are
connected with the same potential as the mass
of the set via a wrist wrap with resistance.
Keep components and tools also at this
potential.
F
ATTENTION
Tous les IC et beaucoup d’autres
semi-conducteurs sont sensibles aux
décharges statiques (ESD).
Leur longévité pourrait être considérablement
écourtée par le fait qu’aucune précaution n’est
prise à leur manipulation.
Lors de réparations, s’assurer de bien être relié
au même potentiel que la masse de l’appareil et
enfiler le bracelet serti d’une résistance de
sécurité.
Veiller à ce que les composants ainsi que les
outils que l’on utilise soient également à ce
potentiel.
1-6
ESD
D
WARNUNG
Alle ICs und viele andere Halbleiter sind
empfindlich gegenüber elektrostatischen
Entladungen (ESD).
Unsorgfältige Behandlung im Reparaturfall kan
die Lebensdauer drastisch reduzieren.
Veranlassen Sie, dass Sie im Reparaturfall über
ein Pulsarmband mit Widerstand verbunden
sind mit dem gleichen Potential wie die Masse
des Gerätes.
Bauteile und Hilfsmittel auch auf dieses gleiche
Potential halten.
WAARSCHUWING
NL
Alle IC’s en vele andere halfgeleiders zijn
gevoelig voor electrostatische ontladingen
(ESD).
Onzorgvuldig behandelen tijdens reparatie kan
de levensduur drastisch doen verminderen.
Zorg ervoor dat u tijdens reparatie via een
polsband met weerstand verbonden bent met
hetzelfde potentiaal als de massa van het
apparaat.
Houd componenten en hulpmiddelen ook op
ditzelfde potentiaal.
I
AVVERTIMENTO
Tutti IC e parecchi semi-conduttori sono
sensibili alle scariche statiche (ESD).
La loro longevità potrebbe essere fortemente
ridatta in caso di non osservazione della più
grande cauzione alla loro manipolazione.
Durante le riparazioni occorre quindi essere
collegato allo stesso potenziale che quello della
massa dell’apparecchio tramite un braccialetto
a resistenza.
Assicurarsi che i componenti e anche gli utensili
con quali si lavora siano anche a questo
potenziale.
GB
Safety regulations require that the set be restored to its original
condition and that parts which are identical with those specified,
be used.
NL
Veiligheidsbepalingen vereisen, dat het apparaat bij reparatie in
zijn oorspronkelijke toestand wordt teruggebracht en dat onderdelen,
identiek aan de gespecificeerde, worden toegepast.
F
Les normes de sécurité exigent que l’appareil soit remis à l’état
d’origine et que soient utiliséés les piéces de rechange identiques
à celles spécifiées.
D
Bei jeder Reparatur sind die geltenden Sicherheitsvorschriften zu
beachten. Der Original zustand des Geräts darf nicht verändert werden;
für Reparaturen sind Original-Ersatzteile zu verwenden.
“Pour votre sécurité, ces documents
doivent être utilisés par des spécialistes agréés, seuls habilités à réparer
votre appareil en panne”.
CLASS 1
LASER PRODUCT
GB
Warning !
Invisible laser radiation when open.
Avoid direct exposure to beam.
S
Varning !
Osynlig laserstrålning när apparaten är öppnad och spärren
är urkopplad. Betrakta ej strålen.
3122 110 03420
I
Le norme di sicurezza esigono che l’apparecchio venga rimesso
nelle condizioni originali e che siano utilizzati i pezzi di ricambio
identici a quelli specificati.
"After servicing and before returning set to customer perform a
leakage current measurement test from all exposed metal parts to
earth ground to assure no shock hazard exist. The leakage current
must not exceed 0.5mA."
Varoitus !
SF
Avatussa laitteessa ja suojalukituksen ohitettaessa olet alttiina
näkymättömälle laserisäteilylle. Älä katso säteeseen!
DK Advarse !
Usynlig laserstråling ved åbning når sikkerhedsafbrydere er
ude af funktion. Undgå udsaettelse for stråling.
Page 81
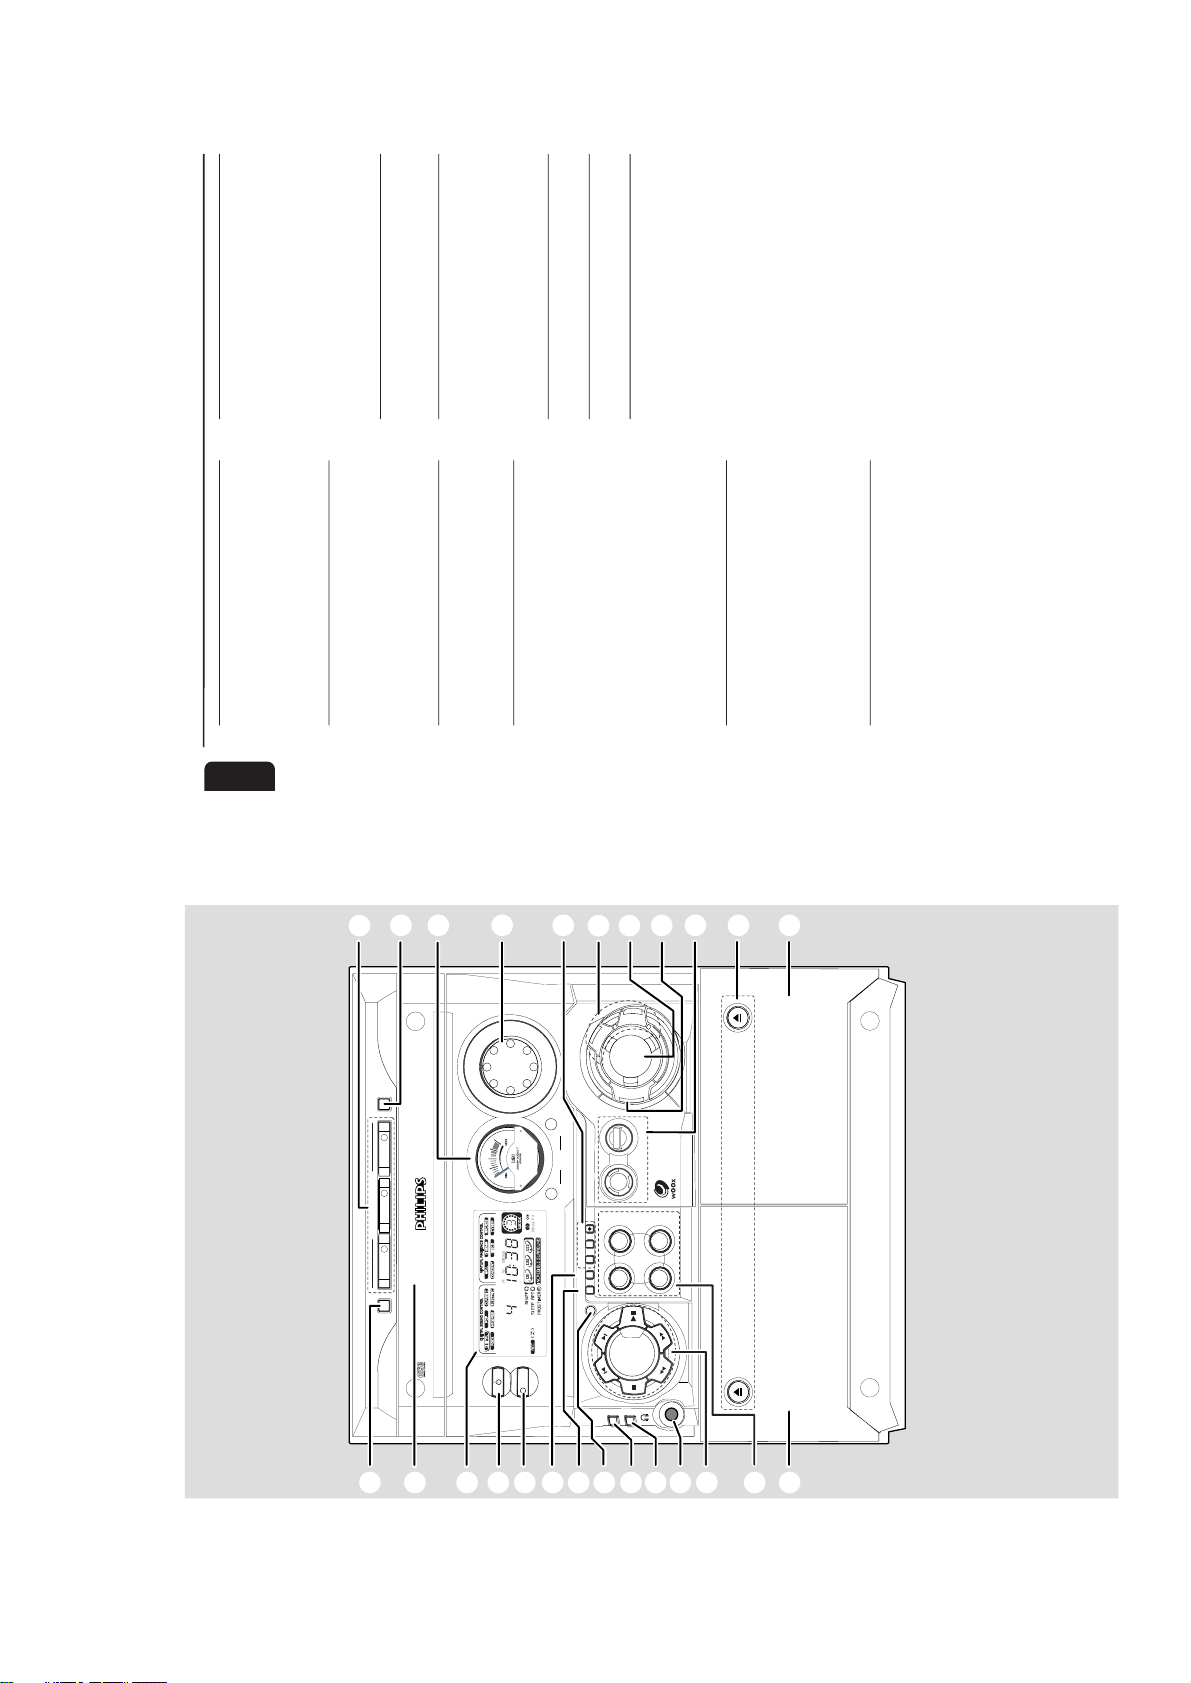
2-1
3
3
FW-
MINI HIFI SYSTEM
DISC
CHANGE
OPEN•
CLOSE
DC
3
CHANGER
ECO POWER
CD 1•2•3
BAND
CDR/DVD
TAPE 1•2
PROG
DUBBING
REC
CLOCK•
TIMER
AUTO
REPLAY
STANDBY-ON
3
DISC DIRECT PLAY
DISC
3
CD SYNCHRO RECORDING
CD/CD
-
R/CD
-
RW COMPATIBLE
MUSIC LEVEL
INTERACTIVE VU METER
VOLUME
VOLUME
TA PE 1
TA PE 2
P
R
E
V
P
R
E
S
E
T
N
E
X
T
DEMO
STOP/
CLEAR
PLAY•
PAUSE
S
E
A
R
C
H
•
T
U
N
I
N
G
DISC
2
DISC
1
1
2
3
4
5
6
7
8
9
0
$
%
^
&
*
)
(
£
≤
∞
CD
TUNER
TAPE AU X
SOURCE
DISPLAY
ON•OFF LEVEL
WOOX
W
OO
X
DYNAMIC
AMPLIFICATION
CONTROL
DOLBY
B NR
RDS
NEWS/TA
™
¡
S
U
R
R
O
U
N
D
V
A
C
D
S
C
I
N
C
R
E
D
I
B
L
E
!
@
#
S
O
U
N
D
N
A
V
I
G
ATION - JOG
6
English
Contents
General Information
Environmental Information ................................ 7
Acknowledgement ............................................... 7
Supplied Accessories ........................................... 7
Safety Information ................................................ 7
Preparations
Rear Connections ............................................ 8–9
Optional Connections ........................................ 9
Inserting batteries into the remote
control .................................................................... 9
Controls
Controls on the system and remote
control ........................................................... 10–11
Basic Functions
Plug and Play ........................................................ 12
Demonstration mode ........................................ 13
Switching the system on ................................... 13
Switching the system to Standby mode ........ 13
Switching the system to Eco Power
Standby mode ..................................................... 13
Power Saving Automatic Standby .................... 13
Display mode....................................................... 14
Volume Control .................................................. 14
Sound Navigation ........................................ 14–15
CD Operation
Discs for Playback .............................................. 16
Loading Discs ...................................................... 16
Disc Playback ....................................................... 17
Programming the disc tracks .................... 17–18
Repeat ................................................................... 18
Shuffle .................................................................... 18
Radio Reception
Storing Preset Radio Stations ................... 19–20
Tuning to Preset Radio Stations ...................... 20
Erasing a Preset Radio Station ........................ 20
RDS ................................................................ 20–21
NEWS/TA ............................................................ 21
Ta pe Operation/Recording
Ta pe Playback ............................................... 22–23
General Information on Recording ................ 23
Preparation for Recording ............................... 23
One Touch Recording ........................................ 23
CD Synchro Recording .............................. 23–24
Dubbing Tapes ..................................................... 24
Digital Recording via Digital Out .................... 24
External Sources
Listening to External Sources .......................... 24
Clock/Timer
View Clock .......................................................... 25
Clock Setting ....................................................... 25
Timer Setting ................................................ 25–26
Sleep Timer Setting ............................................ 26
Specifications
........................................... 27
Maintenance
.............................................. 28
Tr oubleshooting
............................. 28
–
29
12/2/2013
www.nostatatech.nl
World of free manuals
Page 82
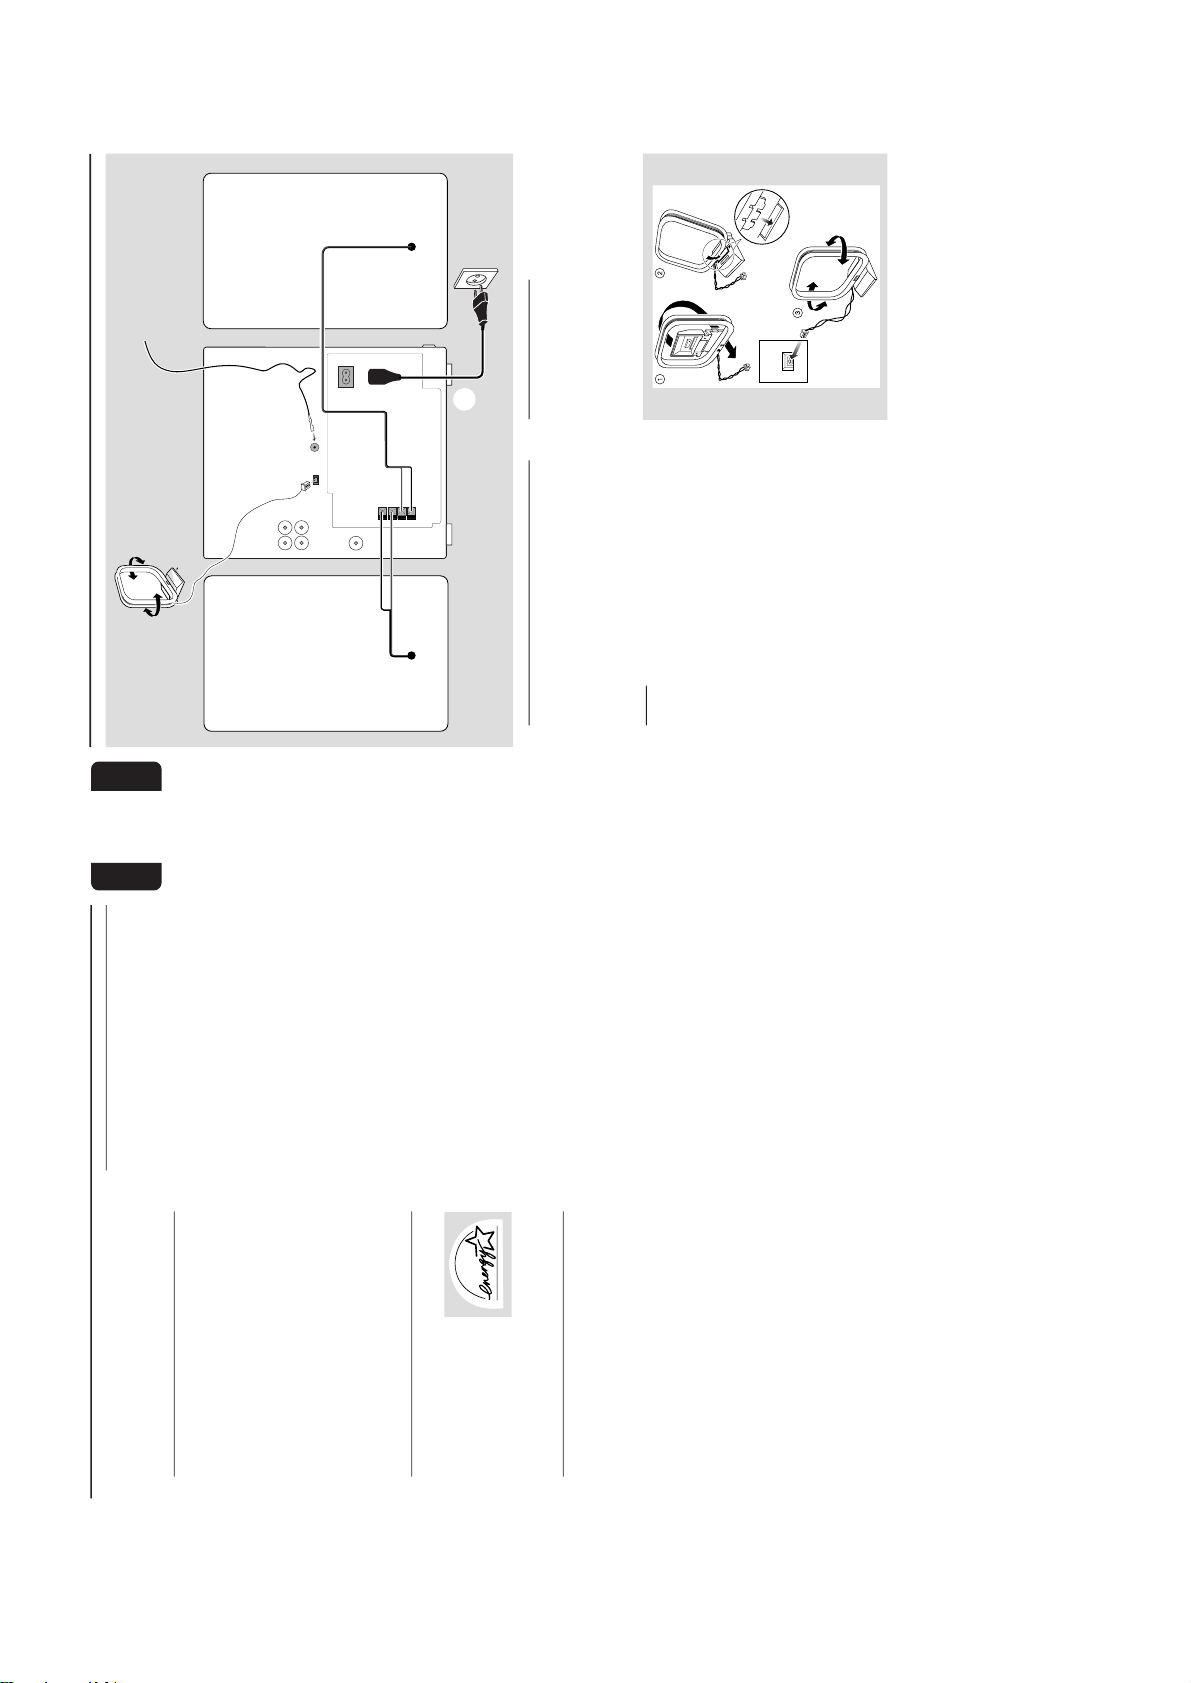
2-2
7
English
General Information
This product complies with the radio
interference requirements of the European
Community.
Environmental Information
All unnecessary packaging has been omitted. We
have tried to make the packaging easy to
separate into three materials: cardboard (box),
polystyrene foam (buffer) and polyethylene (bags,
protective foam sheet).
Your system consists of materials which can be
recycled and reused if disassembled by a
specialised company. Please observe the local
regulations regarding the disposal of packaging
materials, exhausted batteries and old
equipment.
Acknowledgement
Energy Star
As an ENERGY STARRPartner, Philips has
determined that this product
meets the ENERGY STAR
R
guidelines for energy
efficiency.
Supplied accessories
– Remote control
– Batteries (two AA size) for remote control
– AM loop antenna
– FM wire antenna
–AC power cord
Safety Information
● Before operating the system, check that the
operating voltage indicated on the typeplate (or
the voltage indication beside the voltage
selector) of your system is identical with the
voltage of your local power supply. If not, please
consult your dealer.
● Place the system on a flat, hard and stable
surface.
● Place the system in a location with adequate
ventilation to prevent internal heat build-up in
your system. Allow at least 10 cm (4 inches)
clearance from the rear and the top of the unit
and 5 cm (2 inches) from each side.
● Do not expose the system, batteries or discs to
excessive moisture, rain, sand or heat sources
caused by heating equipment or direct sunlight.
● If the system is brought directly from a cold to a
warm location, or is placed in a very damp room,
moisture may condense on the lens of the disc
unit inside the system. Should this occur, the CD
player would not operate normally. Leave the
power on for about one hour with no disc in the
system until normal playback is possible.
● The mechanical par ts of the set contain self-
lubricating bearings and must not be oiled or
lubricated.
● When the system is switched to Standby
mode, it is still consuming some power.
To disconnect the system from the
power supply completely, remove the AC
power plug from the wall socket.
8
English
Preparations
Rear Connections
The type plate is located at the rear of the
system.
For users in the U.K.: please follow the
instructions on page 2.
A
Powe r
Before connecting the AC power cord to the
wall outlet, ensure that all other connections
have been made.
WARNING!
–For optimal performance, use only the
original power cable.
–Never make or change connections with
the power switched on.
To avoid overheating of the system, a safety
circuit has been built in. Therefore, your
system may switch to Standby mode
automatically under extreme conditions. If
this happens, let the system cool down
before reusing it (not available for all versions).
B
Antennas Connection
Connect the supplied AM loop antenna and FM
antenna to the respective terminals. Adjust the
position of the antenna for optimal reception.
AM Antenna
AM ANTENNA
Fix the claw
to the slot
¶ Position the antenna as far as possible from a TV,
VCR or other radiation source.
SPEAKERS 6Ω
R
+
–
L
–
+
SUBWOOFER
OUT
DIGITAL
OUT
AUX/
CDR
IN
AM ANTENNA
AC
MAINS
LR
speaker
(right)
speaker
(left)
AC power cord
FM wire antenna
AM loop
antenna
A
B
C
LINE
OUT
FMANTENNA
12/2/2013
www.nostatatech.nl
World of free manuals
Page 83

2-3
9
English
Preparations
FM Antenna
¶ For better FM stereo reception, connect an
outdoor FM antenna to the FM ANTENNA
terminal.
C
Speakers Connection
Front Speakers
Connect the speaker wires to the SPEAKERS
(FRONT) terminals, right speaker to "R" and left
speaker to "L", coloured (marked) wire to "+"
and black (unmarked) wire to "-".
1
¶ Clip the stripped por tion of the speaker wire as
shown.
Notes:
–For optimal sound performance, use the
supplied speakers.
– Do not connect more than one speaker to any
one pair of
+
/
-
speaker terminals.
– Do not connect speakers with an impedance
lower than the speakers supplied. Please refer to
the SPECIFICATIONS section of this manual.
Optional Connections
The optional equipment and connecting cords
are not supplied. Refer to the operating
instructions of the connected equipment for
details.
Line Out Connection
Connect this output to any analogue audio
equipment for playback or recording (CD
recorder, tape recorder or amplifier for example).
Use a cinch cable to connect the LINE OUT
terminals to the analogue audio in terminals of
the equipment.
Connecting other equipment to your
system
Connect the audio left and right OUT terminals
of a TV, VCR, Laser Disc player, DVD player or
CD Recorder to the AUX/CDR IN terminals.
Notes:
– Do not connect equipment to both the LINE
OUT and AUX/CDR IN terminals at the same time.
Otherwise, noise will be generated and malfunction
might occur.
– If you are connecting equipment with a mono
output (a single audio out terminal), connect it to
the AUX/CDR IN left terminal. Alternatively, you
can use a “single to double” cinch cable (still be
mono sound).
Digital Out Connection
Connect this digital output when recording on
any audio equipment with digital input (CD
Recorder, Digital Audio Tape [DAT] deck, Digital
to Analogue Converter and Digital Signal
Processor, for example). Use a cinch cable to
connect the DIGITAL OUT terminal to the
digital input terminal of the equipment.
Inserting batteries into the
Remote Control
Insert two batteries (Type R06 or AA) into the
remote control with the correct polarity as
indicated by the + and - symbols inside the
battery compar tment.
1
2
CAUTION!
– Remove batteries if they are exhausted
or not to be used for a long time.
– Do not use old and new or different
types of batteries in combination.
– Batteries contain chemical substances, so
they should be disposed off properly.
10
English
Controls
(main system’s illustration on page 3)
Controls on the system and
remote control
1
ECO POWER
– to switch the system on or to Eco Power
Standby mode.2STANDBY ON
yy
yy
y
– to switch the system on or to Standby mode.
3
DISPLAY SCREEN
– to view the current status of the system.
4
DISC TRAY5DISC CHANGE
– to change disc(s).
6
DISC 1 / DISC 2 / DISC 3 (CD DIRECT)
– to select a disc tray for playback.
7
OPEN•CLOSE
– to open or close the disc tray.
8
INTERACTIVE VU METER
– to show the VU (volume unit) meter in music or
volume mode depending on the display mode
selected.9VOLUME
– to increase or decrease the volume.
0
Tape Deck Operation
AUTO REPLAY (AUTO RE.)
– to select continuous playback in either AUTO
PLAY or ONCE mode only.
DUBBING
– to dub a tape.
REC
– to start recording on tape deck 2.
!
SOUND NAVIGATION
– to select the desired sound feature : DSC or
VAC.@JOG CONTROL
– to select the desired sound effect for the
selected sound feature.
DSC ..................DIGITAL, ROCK, POP, NEWAGE,
CLASSIC or ELECTRIC.
VAC .................. HALL, CONCERT, CINEMA,
DISCO, ARCADE or CYBER.
#
INCREDIBLE SURROUND (IS)
– to activate or deactivate the surround sound
effect.
$
wOOx ON•OFF
– to select enhanced or normal wOOx sound
effect.
wOOx LEVEL
– to select desired wOOx level : WOOX 1,
WOOX 2 or WOOX 3.
%
ç
– to open the tape deck door.
^
TAPE DECK 2
&
TAPE DECK 1
*
SOURCE – to select the following:
CD / (CD 1•2•3)
– to select disc tray 1, 2 or 3.
TUNER / (BAND)
– to select waveband : FM, MW or LW.
TAPE / (TAPE 1• 2)
– to select tape deck 1 or 2.
AUX / (CDR/DVD)
– to select a connected external source :
CDR/DVD or AUX (auxiliar y) mode.
(
Mode Selection
PLAY PAUSE ÉÅ
for CD .................to start or interrupt playback.
for TAPE .............. to start playback.
for PLUG & PLAY…(on the system only) to
initiate and start plug & play
mode.
SEARCH• TUNING 11 22
for CD .................to search backward/forward.
for TUNER ......... to tune to a lower or higher radio
frequency.
for TAPE .............. to rewind or fast forward.
for CLOCK ....... (on the system only) to set the
hour.
DEMO STOP/CLEAR Ç
for CD .................to stop playback or to clear a
programme.
for TUNER ........ to stop programming.
................................. to delete the preset radio
station.
for TAPE .............. to stop playback or recording.
................................. to reset tape counter number.
for DEMO .........(on the system only) to activate/
deactivate the demonstration.
for CLOCK ....... (on the system only) to exit clock
setting or cancel timer.
for PLUG & PLAY…(on the system only) to exit
plug & play mode.
PREV / PRESET / NEXT íë
for CD .................to skip to the beginning of the
current, previous, or next track.
for TUNER ........ to select a preset radio station.
for CLOCK ....... (on the system only) to set the
minute.
12/2/2013
www.nostatatech.nl
World of free manuals
Page 84
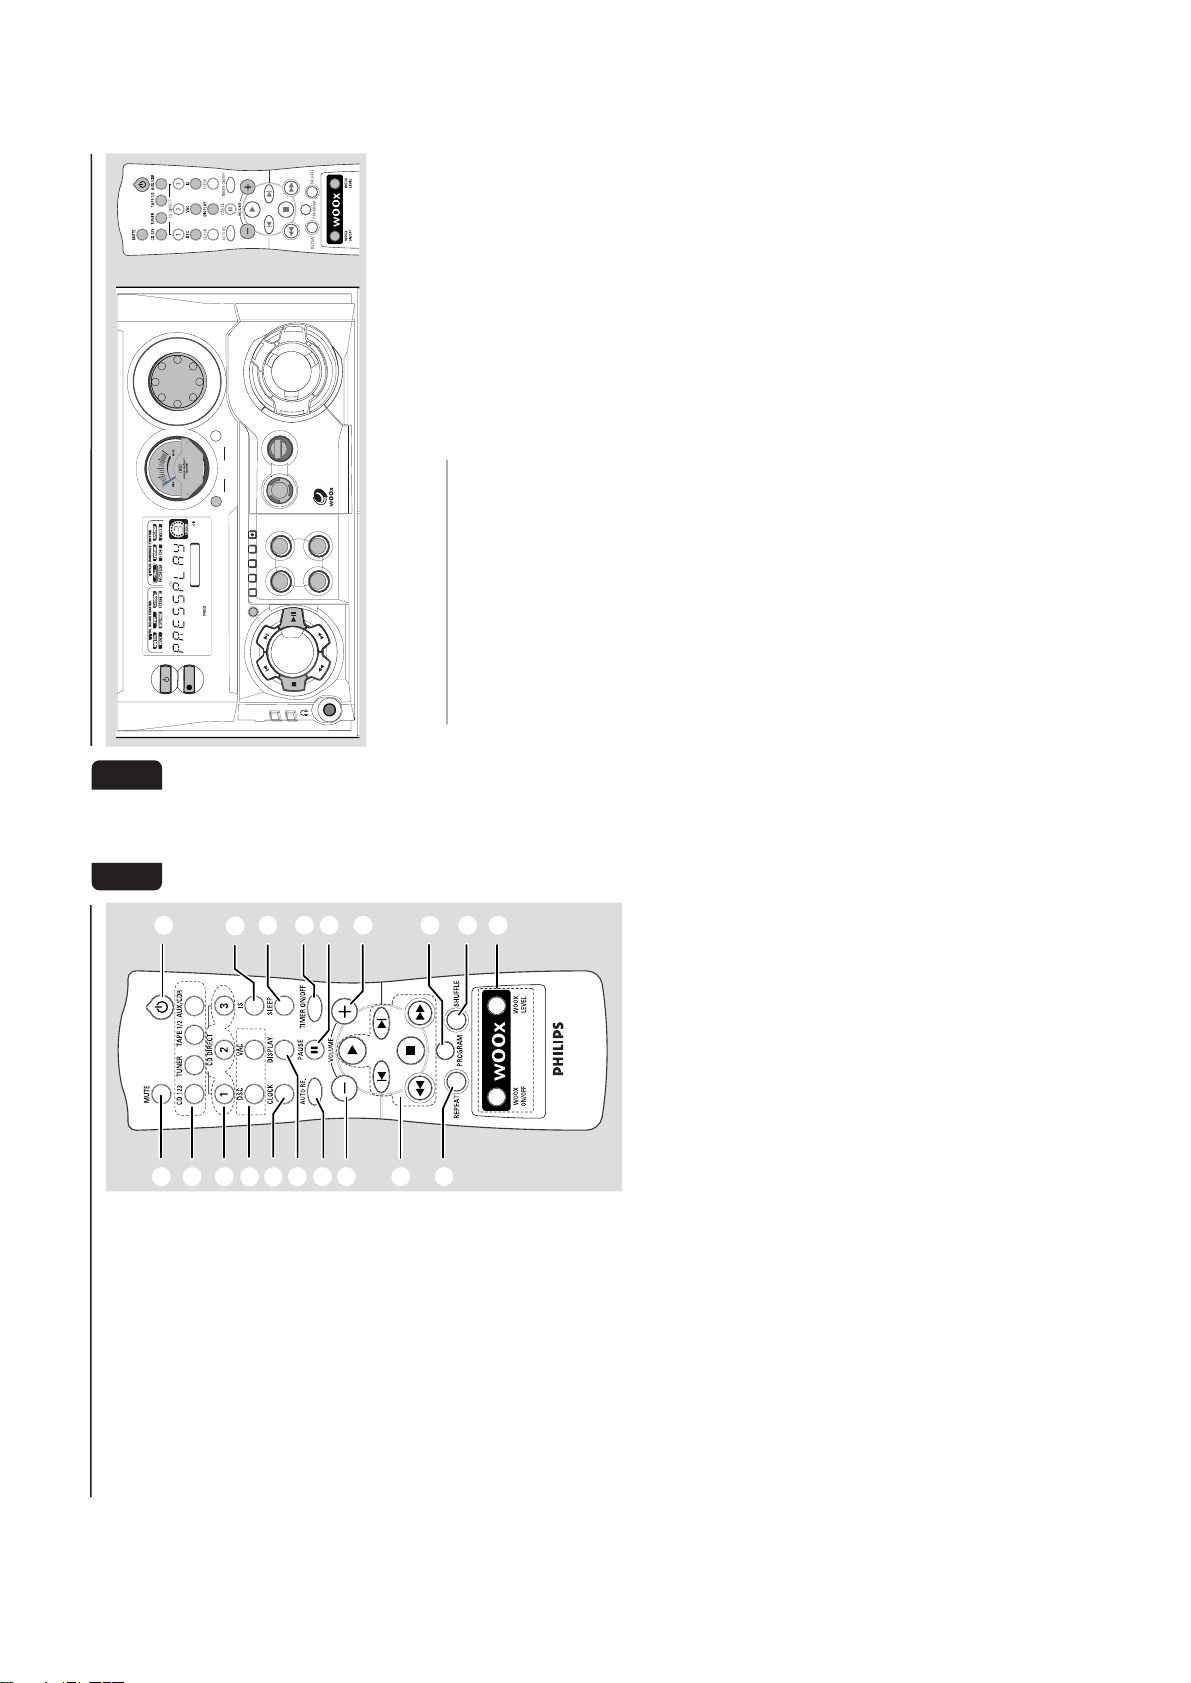
2-4
11
English
Controls
§
*
6
£
0
9
(
•
¤
⁄
º(9
≤
ª
$
@
≥
#
)
n
– to connect headphones.
¡
NEWS/TA
– to hear News or Traffic Announcement
automatically.™RDS
– to select RDS information.
£
DISPLAY
– to select different screen display mode :
NORMAL, MODE 1, MODE 2, or MODE 3.
≤
PROG (PROGRAM)
for CD .................to programme disc tracks.
for TUNER ........ to programme preset radio
stations.
for CLOCK .......(on the system only) to select 12-
or 24-hour clock mode.
∞
CLOCK•TIMER
– to view the clock, set the clock or set the timer.
§
MUTE
– to interrupt or resume sound reproduction.
≥
CLOCK
– to view the clock display.
•
REPEAT
– to playback track(s)/disc(s)/programme
repeatedly.
ª
SHUFFLE
– to playback all available discs and their tracks/
programme in random order.ºTIMER ON/OFF
– to activate or deactivate the timer.
⁄
SLEEP
– to activate, deactivate or set the sleep timer.
¤
B
– to switch the system to Standby mode.
– to switch the system to Eco Power Standby
mode.
Notes for remote control:
– First, select the source you wish to
control by pressing one of the source select
keys on the remote control (CD 123 or
TUNER, for example).
– Then select the desired function (
É
,
í
,
ë
, for e
xample).
12
English
Basic Functions
IMPORTANT!
Before you operate the system, complete
the preparation procedures.
Plug and Play
Plug and Play allows you to store all available
RDS stations and radio stations automatically.
If Plug and Play has not been installed
1
When you turn on the system, "AUTO
INSTALL - PRESS PLAY" will be displayed.2Press PLAYÉon the system to star t
installation.
➜ "INSTALL" will be displayed and followed by
"TUNER" and then "AUTO".
➜
PROG
will start flashing.
➜ The system will search for all RDS stations
and then continue with radio stations on FM,
MW and LW band respectively. Weak RDS
stations may be stored in later presets.
➜ All available RDS and radio stations with
sufficient signal strength will be stored
automatically.
➜ The system will stop searching when all the
available radio stations are stored or when the
memory for 40 preset radio stations is used.
➜ The last preset radio station or the first
available RDS station will play when Plug and
Play is completed.
3
The system will proceed to set the RDS time
automatically with the stored RDS preset station.
● If no RDS station is found in the first preset
station;
➜ The programme will exit automatically.
● If RDS radio station is found;
➜ "INSTALL" will be displayed and followed by
"TIME".
● When searching RDS time;
➜ "SEARCH RDS TIME" will be displayed.
➜ When RDS time is read, "RDS TIME" will be
displayed. The current time will be displayed for
2 seconds and stored automatically.
➜ If RDS station does not transmit RDS time
within 90 seconds, the programme will exit
automatically and the display will show “NO RDS
TIME”.
To reinstall Plug and Play
1
In Standby or Demonstration mode, press and
hold PLAYÉ on the system until "AUTO
INSTALL - PRESS PLAY" is displayed.
2
Press PLAYÉagain to start installation.
➜ All previously stored radio stations will be
replaced.
To exit without storing the Plug and Play
● Press Çon the system.
Notes:
– When the power is turned on, the disc tray may
open and close to initialise the system.
– If you do not complete Plug and Play installation,
Plug and Play will be reinitiated the next time you
turn on the power.
– If no stereo frequency is detected during
Plug and Play, "
CHECK ANTENNA
" will be
displayed.
– During Plug and Play, if no button is pressed
within 15 seconds, the system will exit Plug and
Play mode automatically.
FW-
MINI HIF I SYST EM
ECO POWER
CD 1•2•3
BAND
CDR/DVD
TAPE 1•2
PROG
DUBBING REC
CLOCK•
TIMER
AUTO
REPLAY
STANDBY-ON
MUSIC LEVEL
INTERACTIVE VU METER
VOLUME
VOLUME
P
R
E
V
P
R
E
S
E
T
N
E
X
T
DEMO
STOP/
CLEAR
PLAY•
PAUSE
S
E
A
R
C
H
•
T
U
N
I
N
G
CD
TUNER
TAPE AUX
DISPLAY
ON•OFF LEVEL
WOOX
S
O
U
N
D
N
A
V
I
G
ATION-JOG
SOURCE
W
OO
X
DYNAMIC
AMPLIFICATION
CONTROL
DOLBY
B NR
RDS
NEWS/TA
S
U
R
R
O
U
N
D
V
A
C
D
S
C
I
N
C
R
E
D
I
B
L
E
12/2/2013
www.nostatatech.nl
World of free manuals
Page 85
2-5
13
English
Demonstration mode
The system has a demonstration mode that
shows the various features offered by the system.
To activate the demonstration
● In Standby mode, press and hold DEMO
STOPÇon the system until "DEMO ON" is
displayed.
➜ The demonstration will begin.
To deactivate the demonstration
● Press and hold DEMO STOP Çon the system
until "DEMO OFF" is displayed.
➜ The system will switch to Standby mode.
Note:
– Even if you remove the AC power cord and
reconnect it to the wall socket, the demonstration
will remain off until you activate it again.
Switching the system on
In Standby/Demonstration mode
● Press STANDBY ON.
➜ The system will switch to the last selected
source.
● Press CD, TUNER, TAPE, AUX (or CD 123,
TUNER, TAPE 1/2 or AUX/CDR on the
remote control).
➜ The system will switch to the selected source.
● Press any one of the DISC DIRECT PLAY
buttons or OPEN•CLOSE.
➜ The system will switch to CD mode.
In Eco Power Standby mode
● Press ECO POWER.
➜ The system will switch to last selected source.
● Press CD 123, TUNER, TAPE 1/2 or AUX/
CDR on the remote control.
➜ The system will switch to the selected source.
Switching the system to Standby
mode
In Demonstration mode
● Press and hold DEMO STOP Ç on the
system.
In any other source mode (except Eco
Power Standby mode)
● Press STANDBY ON (or B on the remote
control).
➜ The clock will appear on the display when the
system is in Standby mode.
Switching the system to Eco
Power Standby mode (< 1 Watt)
● Press ECO POWER (or press and hold B on
the remote control).
➜ "ECO POWER" will be displayed, then the
display screen will go blank.
➜ The low power ECO POWER LED will be
lighted.
Note:
– If you have not deactivated the demonstration, it
will resume five seconds after the system switches
to Eco Power Standby or Standby mode.
Power Saving Automatic Standby
As a power-saving feature, the system will
automatically switch to Standby mode if you do
not press any buttons within 30 minutes after a
disc or tape has stopped playing.
Basic Functions
14
English
Display mode
There are four different display modes for
selection.
● Press DISPLAY repeatedly to select NORMAL,
MODE 1, MODE 2, or MODE 3.
NORMAL ........ All available LEDs will light up
and the display screen will have
full brightness. The VU meter will
be in music mode.
MODE 1 ..........All available LEDs will light up
and the display screen will have
full brightness. The VU meter will
be in volume mode.
MODE 2 ..........All available LEDs will light up
and the display screen will be at
half brightness. The VU meter
will be in music mode.
MODE 3 ..........The display screen will be at half
brightness. The VU meter and all
LEDs will be off.
Volume Control
Adjust VOLUME to increase (turn knob
clockwise or press VOLUME +) or decrease
(turn knob anti-clockwise or press VOLUME -)
the sound level.
To listen through the headphones
● Connect the headphones plug to the n socket
at the front of the system.
➜ The speakers will be muted.
To switch off the volume temporarily
● Press MUTE on the remote control.
➜ Playback will continue without sound and
"MUTE" will be displayed.
● To restore the volume, press MUTE again or
increase the VOLUME level.
Sound Navigation
For optimal sound listening, select only one
of the following navigation sound controls
at a time : wOOx, DSC or VAC.
wOOx
There are three wOOx settings to enhance the
bass response.
1
Press wOOx ON•OFF to
switch ON (enhanced) or OFF
(normal) the wOOx sound
effect.
● When wOOx is switched on;
➜
WOOX
and the last selected wOOx level will
appear on the display.
● When wOOx is switched off;
➜ The display will show "WOOX NORM" and
WOOX
will disappear from the display.
2
When wOOx is switched on, adjust wOOx
LEVEL (or press wOOx LEVEL on the
remote conrol) to select the desired wOOx
level: WOOX 1, WOOX 2 or WOOX 3.
Note:
– Some discs or tapes might be recorded in high
modulation, which causes a distortion at high
volume. If this occurs, deactivate wOOx or reduce
the volume.
Automatic DSC-wOOx / VAC-wOOx
selection
The best wOOx setting is generated
automatically for each DSC or VAC selection.
You can manually select the wOOx setting that
best suits your listening environment.
Basic Functions
12/2/2013
www.nostatatech.nl
World of free manuals
Page 86
2-6
15
English
Basic Functions
DSC (Digital Sound Control)
The DSC feature enables you to adjust the
system to suit your type of music.1Press DSC.
➜ DSC button lights up
2
Adjust the JOG
CONTROL (or press
DSC on the remote
control repeatedly) to select
the desired Digital Sound
Control effect : DIGITAL, ROCK, POP, NEWAGE,
CLASSIC or ELECTRIC.
➜ The selected DSC will be highlighted.
Note:
–For a neutral sound effect, select CLASSIC .
VAC (Virtual Ambience Control)
The VAC feature enables you to adjust the
system to select a type of environment.
1
Press VAC .
➜ VAC button lights up.2Adjust the JOG
CONTROL (or press
VAC on the remote
control repeatedly) to
select the desired Vir tual
Ambience Control effect : HALL, CONCERT,
CINEMA, DISCO, ARCADE or CYBER.
➜ The selected VAC will be highlighted.
Note:
– When you select VAC, Incredible Surround will
switch on automatically.
S
U
R
R
O
U
N
D
V
A
C
D
S
C
I
N
C
R
E
D
I
B
L
E
S
U
R
R
O
U
N
D
V
A
C
D
S
C
I
N
C
R
E
D
I
B
L
E
S
U
R
R
O
U
N
D
V
A
C
D
S
C
I
N
C
R
E
D
I
B
L
E
Incredible Surround
The Incredible Surround magnifies the virtual
distance between the front speakers for an
incredibly wide, enveloping, stereo effect.
● Press INCREDIBLE
SURROUND (or IS on
the remote control)
repeatedly to activate/
deactivate the surround
sound effect.
➜ If activated,
will appear on the display and the INCREDIBLE
SURROUND button lights up.
➜ If deactivated, “IS OFF” will be displayed.
16
English
CD Operation
FW-
MINI HIF I SYST EM
DISC
CHANGE
OPEN•
CLOSE
DC
3
CHANGER
ECO POWER
CD 1•2•3
BAND
CDR/DVD
TAPE 1•2
PROG
DUBBING REC
CLOCK•
TIMER
AUTO
REPLAY
STANDBY-ON
3
DISC DIRECT PLAY
DISC
3
CD SYNCHRO RECORDING
CD/ CD
-
R/CD
-
RW COMPATIBLE
MUSIC LEVEL
INTERACTIVE VU METER
VOLUME
VOLUME
P
R
E
V
P
R
E
S
E
T
N
E
X
T
DEMO
STOP/
CLEAR
PLAY•
PAUSE
S
E
A
R
C
H
•
T
U
N
I
N
G
DISC
2
DISC
1
CD
TUNER
TAPE AUX
DISPLAY
ON•OFF LEVEL
WOOX
S
O
U
N
D
N
A
V
I
G
ATION - JO G
SOURCE
W
OO
X
DYNAMIC
AMPLIFICATION
CONTROL
DOLBY
B NR
RDS
NEWS/TA
S
U
R
R
O
U
N
D
V
A
C
D
S
C
I
N
C
R
E
D
I
B
L
E
IMPORTANT!
– This system is designed for regular discs .
Therefore, do not use any accessories such
as disc stabiliser rings or disc treatment
sheets, etc., as offered on the market,
because they may jam the changer
mechanism.
– Do not load more than one disc into
each tray.
Discs for Playback
This system can playback all digital audio CD,
finalised digital audio CD-Recordable (CDR)
discs and finalised digital audio CD-Rewritable
(CDRW)discs.
Loading Discs
1
Press CD to select CD mode.
2
Press OPEN•CLOSE to open the disc tray.3Load up to two discs on the individual disc trays.
To load the third disc, press DISC CHANGE.
➜ The disc tray will rotate until the empty tray
is ready for loading.
3
CD CHANGER
CLOCK
.
TIMER
VOLUME
DEMO
PRESET TUNING
SHUFFLE
TIMER
PLAY
MODE
SIDE
SET CLOCK
TIMER SET
BAND
RECORD
DUBBING
CD TAPE
PROGRAM
CLEAR
RDS
MODE
1
2
3
TIMER
DBB
PROGRAM
AMPM
SHUFFLE
FMMW
LWSW
STEREO
NR
FRONT
BACK
RECORD
HSD
2
2
1
DISC CHANGE
DISC 1 DISC 2 DISC 3
OPEN•CLOSE
1
4
Press OPEN•CLOSE to close the disc tray.
➜ "READING" will be displayed. The selected
disc tray, total number of tracks and the playing
time will appear on the display.
➜ A lighted button indicates that a disc is loaded
in the disc tray.
Notes:
– Load the discs with the label side facing up.
–To ensure good system performance, w
ait until
the disc tray completely reads the disc(s) before
proceeding.
12/2/2013
www.nostatatech.nl
World of free manuals
Page 87

2-7
17
English
CD Operation
Disc Playback
a disc is loaded in the disc tray
the current selected disc tray is empty
the current selected disc tray is loaded
or playing
To playback all discs on the disc tray
● Press PLAYÉ.
➜ All the available discs will playback once, then
stop.
➜ During playback, the selected disc tray, track
number and elapsed playing time of the current
track will appear on the display.
To playback one disc only
● Press the DISC DIRECT PLAY button : DISC 1,
DISC 2 or DISC 3.
➜ The selected disc will playback once, then
stop.
To interrupt playback
● Press PA USEÅ.
● To resume playback, press PLAYÉ again.
To stop playback
● Press Ç.
To search for a particular passage during
playback
● Press and hold à or á and release it when
the desired passage is located.
➜ During searching, the volume will be reduced.
To select a desired track
● Press í or ë repeatedly until the desired
track appears on the display.
● If playback is stopped, press PLAYÉ to start
playback.
Note:
– In Shuffle mode, pressing
í
will cause the
player to skip only to the beginning of the current
track.
To skip to the beginning of the current
track during playback
● Press í once.
Replace discs during playback
1
Press DISC CHANGE.2To change the inner disc, press DISC
CHANGE again.
➜ "DISC CHANGE" will be displayed and the
disc will stop playing.
➜ The disc tray will close to retrieve the inner
disc, then reopen with the inner disc accessible.
Programming the disc tracks
Programming tracks is possible when playback is
stopped. Up to 40 tracks can be stored in the
memory in any order.
1
Load the desired discs on the disc tray (refer to
“Loading Discs”).
2
Press PROG to start programming.
➜
PROG
will start flashing.
3
Press CD (CD 1•2•3) or DISC 1/2/3 button
to select a disc.4Press í or ë repeatedly to select the desired
track.
5
Press PROG to store the track.
¶ Repeat steps 3–5 to store other discs and
tracks.6Press PLAYÉ to start programme playback.
➜ "PLAY PROGRAM" will be displayed.
● To end programming without star ting playback,
press Ç once .
➜ The total number of tracks programmed and
the total playing time will appear on the display.
Notes:
– If the total playing time is more than "99:59"
or if one of the programmed tracks has a number
greater than 30, then "--:--" will appear on the
display instead of the total playing time.
– If you attempt to programme more than 40
tracks, "
PROGRAM FULL
" will be displayed.
– If you press any of the DISC DIRECT PLAY
buttons, the system will playback the selected disc
or track, and the stored programme will be ignored
temporarily. The
PROG
symbol also will disappear
temporarily from the display. It will reappear when
playback of the selected disc ends.
– During programming, if no button is pressed
within 20 seconds, the system will exit the
Programme mode automatically.
To review the programme
● Stop playback and press í or ë repeatedly.
● To exit review mode, press Ç.
18
English
To erase the entire programme
● Press Ç once when playback is stopped or
twice during playback.
➜ "PROGRAM CLEARED" will be displayed.
➜
PROG
will disappear from the display.
Note:
– The programme will be erased when the system
is disconnected from the power supply or when the
disc tray is opened.
Repeat
The current track, a disc, all available discs or all
programmed tracks can be played repeatedly.1Press REPEAT on the remote control
repeatedly to select various repeat modes.
● In normal playback
➜ "TRACK" – to repeat the current track.
"DISC" – to repeat the entire disc.
"ALL DISC" – to repeat all available discs.
➜
RPT
appears on the display.
● In programme playback
➜ "TRACK" – to repeat the current
programmed track.
"PROGRAM" – to repeat all programmed
tracks.
➜
RPT
and
PROG
will appear on the display.
● The selected track/disc(s)/progr amme will now
be played repeatedly until you press Ç.
2
To resume normal playback, press REPEAT
until the "OFF" mode is displayed.
➜
RPT
will disappear from the display.
Note:
– Selecting SHUFFLE during repeat playback will
cancel all repeat modes.
CD Operation
Shuffle
All the available discs and their tracks or all the
programmed tracks can be played in random
order.
1
Press SHUFFLE on the remote control.
➜ "SHUFFLE" and
SHUFF
will appear on the
display.
● The discs and the tr acks will be played in
random order until you press Ç.
2
To resume normal playback, press SHUFFLE
again.
➜
SHUFF
will disappear from the display.
When select REPEAT mode during
shuffling
● In normal shuffled playback
➜ "TRACK" and "ALL DISC" repeat modes are
available for selection.
➜
RPT
and
SHUFF
will appear on the
display.
● In programme shuffled playback
➜ "TRACK" or "PROGRAM" repeat modes are
available for selection.
➜
RPT
,
SHUFF
and
PROG
will appear on the
display.
For Recording, please refer to “Tape
Operation/Recording”.
12/2/2013
www.nostatatech.nl
World of free manuals
Page 88
2-8
19
English
Radio Reception
FW-
MINI HIF I SYST EM
ECO POWER
CD 1•2•3
BAND
CDR/DVD
TAPE 1•2
PROG
DUBBING REC
CLOCK•
TIMER
AUTO
REPLAY
STANDBY-ON
MUSIC LEVEL
INTERACTIVE VU METER
VOLUME
VOLUME
P
R
E
V
P
R
E
S
E
T
N
E
X
T
DEMO
STOP/
CLEAR
PLAY•
PAUSE
S
E
A
R
C
H
•
T
U
N
I
N
G
CD
TUNER
TAPE AUX
DISPLAY
ON•OFF LEVEL
WOOX
S
O
U
N
D
N
A
V
I
G
ATION - JO G
SOURCE
W
OO
X
DYNAMIC
AMPLIFICATION
CONTROL
DOLBY
B NR
RDS
NEWS/TA
S
U
R
R
O
U
N
D
V
A
C
D
S
C
I
N
C
R
E
D
I
B
L
E
Storing Preset Radio Stations
You can store up to 40 preset radio stations in
the memory.
Automatic Preset Programming
● Plug and Play setting (refer to “Basic Functions -
Plug and Play”).
OR
1
Press TUNER (BAND) to select TUNER mode .
➜ "TUNER" will be displayed. A few seconds
later, the current radio frequency will appear on
the display.
➜ If a FM station is received in stereo,
will
appear on the display.
To begin automatic preset from a desired
preset number
● Press í or ë to select the desired preset
number.
➜ For those radio stations that had been stored
in one of the preset will not be restored again to
another preset number.
2
Press and hold PROG until "AUTO" appears on
the display.
➜
PROG
will start flashing.
➜ The system will search for all RDS stations
and then continue with radio stations on FM,
MW and LW band respectively.
➜ All available radio stations with sufficient signal
strength will be stored automatically.
➜ The system will stop searching when all the
available radio stations are stored or when the
memory for 40 preset radio stations is used.
➜ The last preset radio station or the first
available RDS station will then be played when
completed.
To stop storing the automatic preset
● Press PROG or Ç on the system.
Note:
– If no preset number is selected, automatic preset
will begin from preset (1) and all your former
presets will be overridden.
Manual Preset Programming
1
Press TUNER (BAND) repeatedly to select the
desired waveband : FM, MW or LW.2Press PROG.
➜
PROG
will start flashing.
➜ The next available preset number will be
displayed for selection.
3
Press and hold à or á until the frequency
indication starts to change, then release.
➜ The display will show "SEARCH" until a radio
station with sufficient signal strength is found.
To store the radio station to another
preset number
● Press í or ë to select the desired preset
number.
4
Press PROG again to store the radio station.
➜
PROG
will disappear from the display.
● Repeat steps 2–4 to store other preset radio
stations.
Tuning to a weak radio station
● Press à or á briefly and repeatedly until the
optimal reception is found.
To stop storing the manual preset
● Press Ç
on the system.
20
English
Notes:
– If you attempt to store more than 40 preset
radio stations, "
PROGRAM FULL
" will be
displayed.
– During programming, if no button is pressed
within 20 seconds, the system will exit the
Programme mode automatically.
Tuning to Preset Radio Stations
● Once you’ve preset the radio stations, press í
or ë to select the desired preset number.
➜ The preset number, radio frequency, and
waveband will appear on the display.
Erasing a Preset Radio Station
1
Press í or ë to select the preset radio station
to be erased.2Press and hold Çon the system until “PRESET
DELETED” appears on the display.
➜ The radio frequency remain on the display.
➜ The preset numbers of all other preset radio
stations in the band with higher numbers are also
decreased by one.
● Repeat steps 1–2 to erase other preset radio
stations.
For Recording, please refer to “Tape
Operation/Recording”.
Radio Reception
RDS
RDS (Radio Data System) is a broadcasting
service that allows FM stations to send additional
information along with the regular FM radio
signal. This additional information can contain:
Station name: The radio station name is
displayed.
Programme type: The following programme
types exist and can be received by your tuner:
News, Affairs, Info, Sport, Educate, Drama,
Culture, Science, Varied, Pop M, Rock M, M.O.R.
(middle of the road music), Light M, Classics,
Other M, No type.
Radio text (RT): text messages appear on the
display.
Receiving RDS Radio Station
● Tuned to a radio station from FM band.
➜ If the radio station transmitting RDS signal,
the RDS logo (
) and the radio station name
will appear on the display.
To check the RDS information
● Press RDS repeatedly to scroll through the
following information (if available) : STATION
NAME
™™
™™
™ PROGRAMME TYPE
™™
™™
™ RADIO TEXT
™™
™™
™ TUNED FREQUENCY
™™
™™
™ STATION NAME ....
Notes:
– If the tuned radio station does not transmit RDS
signal or is a non RDS station, "
NO RDS
" will be
displayed.
– If the RDS text message is not available at the
RDS station, "
NO RDS TEXT
" will be displayed.
RDS Time
Some RDS station may be transmitting a real
clock time at an interval of ever y minute.
Setting the RDS time
1
Press CLOCK•TIMER twice.
➜ "00:00" or current time star ts flashing.2Press RDS.
➜ "SEARCH RDS TIME" will be displayed.
➜ When RDS time is read, "RDS TIME" and
RDS time logo (
) will be displayed. The
current time will be displayed for 2 seconds and
stored automatically.
➜ If the RDS station does not transmit RDS
time within 90 seconds, "NO RDS TIME" will be
displayed.
12/2/2013
www.nostatatech.nl
World of free manuals
Page 89
2-9
21
English
Note:
– Some RDS station may be transmitting a real
time clock at a minute interval. The accuracy of
the transmitted time depends on the transmitting
RDS station.
NEWS/TA (traffic announcement)
(only available in RDS radio station)
Once the News PTY (Programme Type) or TA
(Traffic Announcement) data is detected in a
RDS station, it will switch to TUNER mode
automatically.
IMPORTANT!
You can activate NEWS/TA function in
Standby, Demonstration or any source
mode except Tuner and Eco Power Standby
mode.
To start NEWS/TA function
1
Press NEWS/TA to select NEWS or TA
function.
➜ If NEWS is selected, "NEWS" and
NEWS
will
appear on the display.
➜ If TA is selected, "TA" and
TA
will appear on
the display.
➜ It will scan the radio stations stored in the
first 5 preset and wait for the News Programme
Type/Traffic Announcement data to be available
in any of these RDS radio stations.
● If no RDS station is detected in the first 5
presets, the system will exit NEWS/TA function.
➜ "NO RDS NEWS" or "NO RDS TA" will be
displayed and
NEWS
or
TA
will disappear from
the display.
2
When NEWS or TA transmission is detected, the
system will switch to Tuner mode automatically.
➜
NEWS
or
TA
will start flashing.
Notes:
–You have to exit Tuner mode before selecting
NEWS/TA function.
– While searching NEWS/TA in progress, the
current source activity will remain uninterrupted.
– Before you activate the NEWS/TA feature,
ensure that the first 5 presets have RDS stations.
– The NEWS/TA works only once for each
activation.
– The NEWS/TA will not start if a recording is in
progress.
To cancel NEWS/TA function
● Press NEWS/TA again or press TUNER to
select tuner mode.
● During news bulletin or traffic announcement,
press any other available source keys to execute
the relevant source mode.
Radio Reception
22
English
Ta pe Operation/Recording
FW-
MINI HIFI SYSTEM
ECO POWER
CD 1•2•3
BAND
CDR/DVD
TAPE 1•2
PROG
DUBBING REC
CLOCK•
TIMER
AUTO
REPLAY
STANDBY-ON
MUSIC LEVEL
INTERACTIVE VU METER
VOLUME
VOLUME
TAPE 1
TAPE 2
P
R
E
V
P
R
E
S
E
T
N
E
X
T
DEMO
STOP/
CLEAR
PLAY•
PAUSE
S
E
A
R
C
H
•
T
U
N
I
N
G
CD
TUNER
TAPE AUX
DISPLAY
ON•OFF LEVEL
WOOX
S
O
U
N
D
N
A
V
I
G
ATION - JOG
SOURCE
WOOX
DYNAMIC
AMPLIFICATION
CONTROL
DOLBY
B NR
RDS
NEWS/TA
S
U
R
R
O
U
N
D
V
A
C
D
S
C
I
N
C
R
E
D
I
B
L
E
IMPORTANT!
– Before playing a tape, check and tighten
slack tape with a pencil. Slack tape may get
jammed or may burst in the mechanism.
– C-120 tape is extremely thin and is easily
deformed or damaged. It is not
recommended for use in this system.
– Store the tapes at room temperature and
do not put them too close to a magnetic
field (for example, a transformer, TV or
speaker).
Ta pe Playback
1
Press çto open the tape deck door.2Insert a recorded tape and close the tape door.
● Load the tape with the open side down and the
full spool to the left.
3
Press TAPE (TAPE 1•2) repeatedly to select
tape deck 1 or tape deck 2.
➜ The selected tape deck number is displayed.
4
Press PLAYÉ to start playback.
To stop playback
● Press Ç.
To change the playback mode
● Press AUTO REPLAY repeatedly to select the
different playback modes.
➜ "AUTO REPLAY" ( å ) or "ONCE" will
appear on the display.
AUTO REPLAY …the tape will rewind
automatically at the end of
playback and replay again. It will
replay up to a maximum of 20
times until you press Ç.
ONCE ..............the tape will playback the
selected side once and then stop.
To rewind or fast forward during
playback
● Press and hold à or á until the desired
passage is reached, then release.
➜ The tape continues playing.
● The tape will stop automatically at the end of
the rewinding or fast forwarding.
➜ During searching, the sound is reduced to a
low volume.
12/2/2013
www.nostatatech.nl
World of free manuals
Page 90
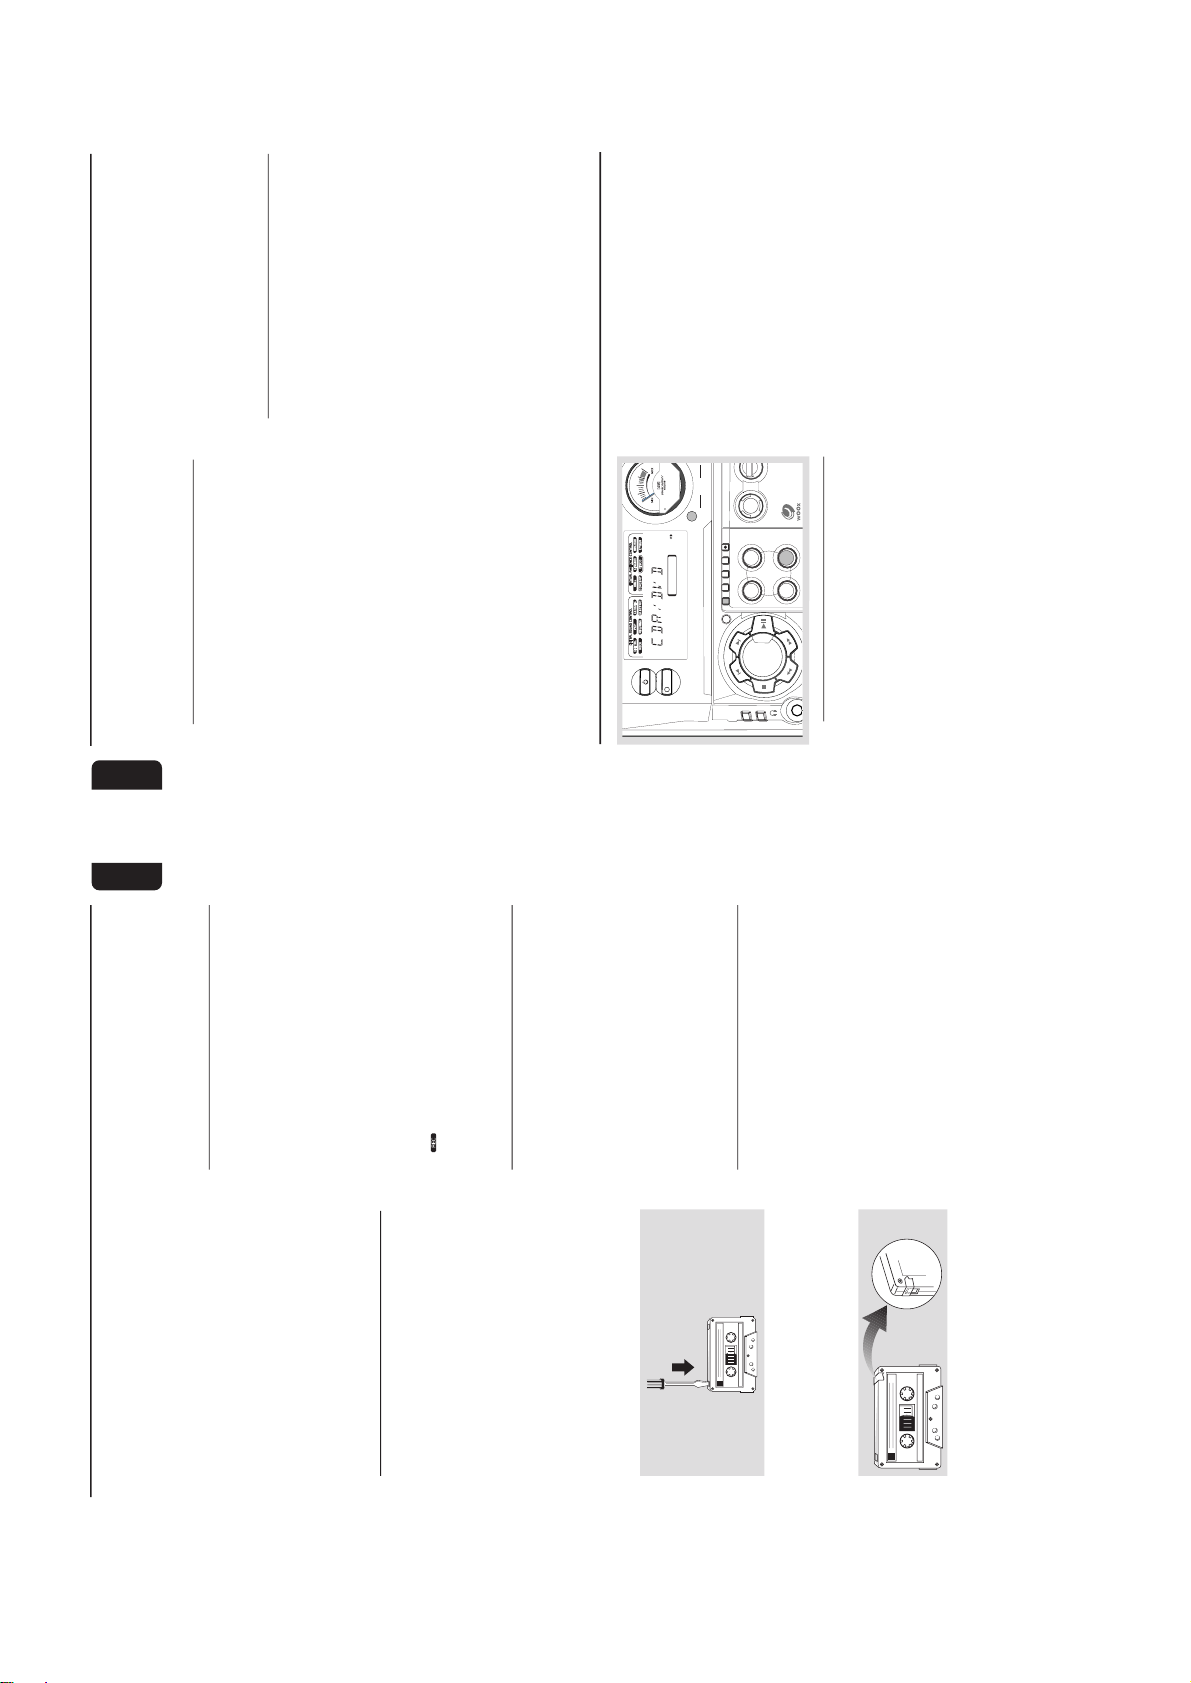
2-10
23
English
To rewind or fast forward when playback
is stopped
1
Press à or á.2Press Ç when you reached the desired passage.
To reset tape counter number
● When in stop mode, pressÇ.
➜ “TP1 000” or “TP2 000” will be displayed.
Notes:
– During rewinding or fast forwarding of a tape, it
is also possible to select another source (CD,
TUNER or AUX, for example).
– The tape counter will automatically set to zero
after detecting end of tape.
General Information on
Recording
● For recording, use only tape of IEC type I
(normal tape) or IEC type II (Cr0
2
).
● The recording level is set automatically, regardless
of the position of the Volume, VAC, DSC and so
forth.
● The tape is secured at both ends with leader
tape. At the beginning and end of the tape ,
nothing will be recorded for six to seven
seconds.
● To prevent accidental recording, break out the
tab on the left shoulder of the tape side you
want to protect.
● If “CHECK TAPE” is displayed, the protection
tab has been broken. Put a piece of clear
adhesive tape over the opening. Do not cover
the Cr0
2
tape detection hole when covering the
tab opening.
IMPORTANT!
– Recording is permissible if copyright or
other rights of third parties are not
infringed upon.
– Recording is possible only on tape deck 2.
Preparation for Recording
1
Press TAPE (TAPE 1•2) to select TAPE 2.2Load a recordable tape into tape deck 2 with full
spool to the left.
3
Prepare the source to be recorded.
CD – load the disc(s).
TUNER – tune to the desired radio station.
TAPE – load the prerecorded tape into tape
deck 1 with the full spool to the left.
AUX – connect external equipment.
When recording is in progress
➜
starts flashing.
● It is not possible to listen to another source
except for dubbing tapes.
● It is not possible to activate the timer function.
One Touch Recording
1
Press CD, TUNER or AUX to select the
source.2Start playback of the selected source.3Press REC to start recording.
To stop recording
● Press Ç on the system.
Note:
– One Touch Recording is not possible in TAPE
mode, "
SELECT SOURCE
" will be displayed.
CD Synchro Recording
1
Press CD 1•2•3 to select the disc.
● Press í or ë to select the desired track to
start recording.
● You can programme the tracks in the order you
want them to be recorded (refer to “CD
Operation - Programming the disc tracks”).
2
Press REC to start recording.
➜ The disc will star t playback automatically.
To select another track during recording
1
Press PAUSEÅ to interr
upt recording.
2
Pressí or ë to select the desired track.3Press PLAYÉ to resume recording.
Ta pe Operation/Recording
24
English
Ta pe Operation/Recording
To stop recording
● Press Ç.
➜ Recording and disc playback will stop
simultaneously.
Dubbing Tapes
1
Load the prerecorded tape in tape deck 1.
● You can set the tape to the desired passage
where recording will start.2Press DUBBING.
➜ Playing and recording will star t simultaneously.
➜ "DUB OOO" will be displayed.
● Dubbing of tapes is possible on one side of the
tape only. To continue record on the reverse
side, at the end of side A, flip the tapes to side B
and repeat the procedure.
Listening to External Sources
1
Connect the audio out terminals of the external
equipment (TV, VCR, Laser Disc player, DVD
player or CD Recorder) to the AUX/CDR IN
terminals of your system.
2
Press AUX (CDR/DVD) repeatedly to select
CDR/DVD mode or normal AUX mode.
➜ "CDR/DVD" or "AUX" will be displayed.
ECO POWER
CD 1•2•3
BAND
CDR/DVD
TAPE 1•2
PROG
DUBBING REC
CLOCK•
TIMER
AUTO
REPLAY
STANDBY-ON
MUSIC LEVEL
INTERACTIVE VU MET
P
R
E
V
P
R
E
S
E
T
N
E
X
T
DEMO
STOP/
CLEAR
PLAY•
PAUSE
S
E
A
R
C
H
•
T
U
N
I
N
G
CD
TUNER
TAPE AUX
DISPLAY
ON•OFF LEVE
WOOX
SOURCE
W
OO
X
DYNAM IC
AMPLIFICATION
CONTROL
DOLBY
B NR
RDS
NEWS/TA
External Sources
● When CDR/DVD mode is selected, any audio
equipment connected to the LINE OUT
terminals of this mini system will be muted. You
will not be able to record or listen to the sound
from the LINE OUT source.
● If the sound from the external source is
distorted, select CDR/DVD mode for listening.
Notes:
–You are advised not to listen to and record from
the same source simultaneously.
– All the navigation sound control features (DSC
or VAC for example) are available for selection.
– Refer to the operating instructions for the
connected equipment for details.
For Recording, please refer to “Tape
Operation/Recording”.
To stop dubbing
● Press Ç.
Notes:
– Dubbing of tapes is possible only from tape
deck 1 to tape deck 2.
–To ensure good dubbing, use tapes of the same
length.
–You can listen to another source while dubbing.
Digital Recording via Digital Out
For CD digital recording, please refer to the
instruction manuals for the CD recorder,
digital
audio equipment and so forth.
12/2/2013
www.nostatatech.nl
World of free manuals
Page 91
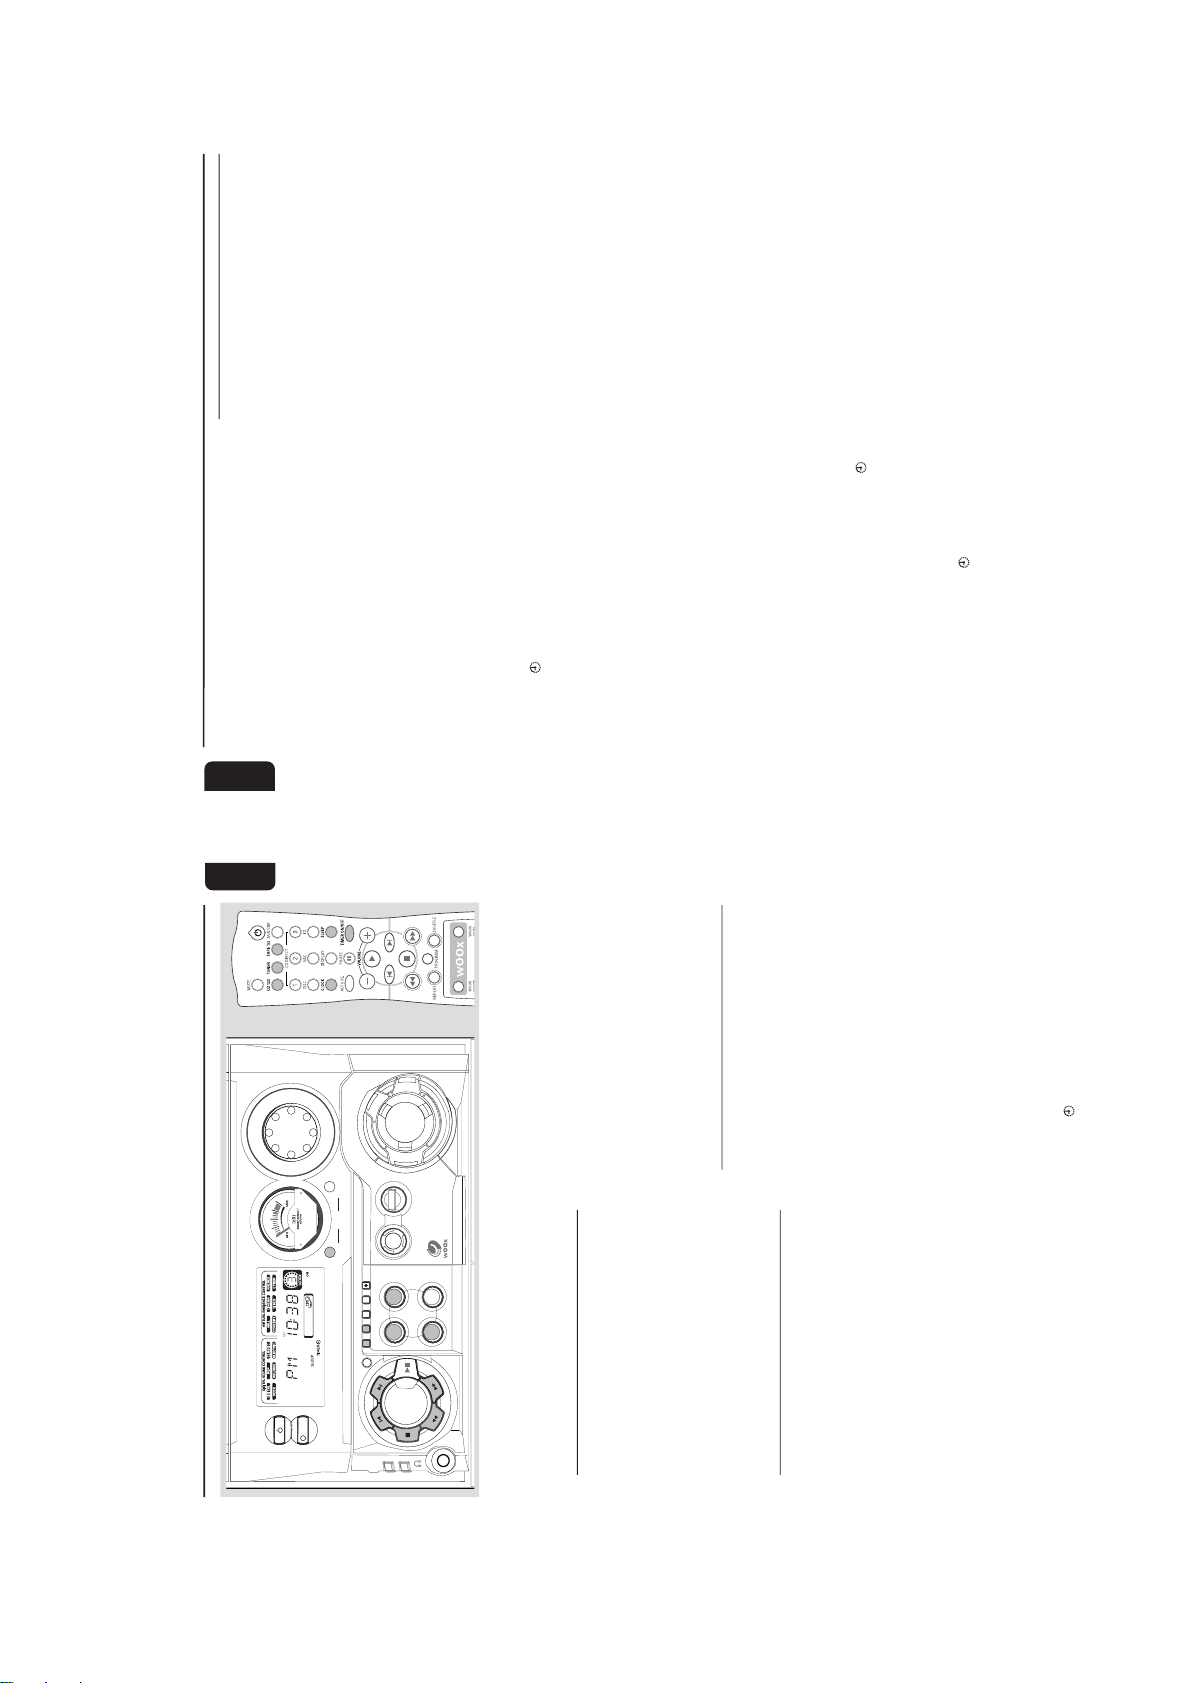
2-11
25
English
Clock/Timer
FW-
MINI HIF I SYST EM
ECO POWER
CD 1•2•3
BAND
CDR/DVD
TAPE 1•2
PROG
DUBBING REC
CLOCK•
TIMER
AUTO
REPLAY
STANDBY-ON
MUSIC LEVEL
INTERACTIVE VU METER
VOLUME
VOLUME
P
R
E
V
P
R
E
S
E
T
N
E
X
T
DEMO
STOP/
CLEAR
PLAY•
PAUSE
S
E
A
R
C
H
•
T
U
N
I
N
G
CD
TUNER
TAPE AUX
DISPLAY
ON•OFF LEVEL
WOOX
S
O
U
N
D
N
A
V
I
G
ATION - JOG
SOURCE
W
OO
X
DYNAMIC
AMPLIFICATION
CONTROL
DOLBY
B NR
RDS
NEWS/TA
S
U
R
R
O
U
N
D
V
A
C
D
S
C
I
N
C
R
E
D
I
B
L
E
IMPORTANT!
– When in Eco Power Standby mode, it is
not possible to operate clock or timer
function.
View Clock
The clock (if it is set) will be shown in Standby
mode.
To view the clock in any source mode
(CD or TUNER for example)
● Press CLOCK•TIMER (or CLOCK on the
remote control).
➜ The clock will be displayed for a few seconds.
➜ If the clock has not been set, "--:--" will be
displayed.
Clock Setting
The clock can be set in either 12-hour or
24-hour mode ("AM 12:00" or "00:00" for
example)
1
Press CLOCK•TIMER twice.2Press PROG on the system repeatedly to select
clock mode.
➜ If 12-hour mode is selected, "AM 12:00" will
start flashing.
➜ If 24-hour mode is selected, "00:00" will start
flashing.
3
Press à or á on the system repeatedly to set
the hour.4Press í or ë on the system repeatedly to set
the minute.5Press CLOCK•TIMER again to store the
setting.
➜ The clock will star t working.
To exit without storing the setting
● Press Çon the system.
Notes:
– The cloc k setting will be cancelled when the
power cord is disconnected or if a power failure
occurs.
– During clock setting, if no button is pressed
within 90 seconds, the system will exit clock setting
mode automatically.
–To set the clock automatically through the time
information in the RDS signal, refer to "Radio
Reception - RDS Time".
Timer Setting
The system can switch on to CD, TUNER, or
TAPE 2 mode automatically at a preset time,
serving as an alarm to wake you up.
IMPORTANT!
– Before setting the timer, ensure that the
clock is set correctly.
– The timer will always be switched on
after it has been set.
– The timer will not start if a recording is in
progress.
– The volume of the timer will increase
gradually from the minimum level until it
reaches the last tuned volume level.
1
Press and hold CLOCK•TIMER for more than
two seconds to select timer mode.
➜ "AM 12:00" or "00:00" or the last timer
setting will start flashing.
➜
TIMER
will start flashing.
➜ The selected source will be lighted while
other availab
le sources are flashing.
26
English
2
Press CD, TUNER or TAPE to select the
desired source.
● Before setting timer, make sure the music source
has been prepared.
CD – Load the disc(s). To star t from a specific
track, make a programme (refer to “CD
Operation - Programming the disc tracks”).
TUNER – tune to the desired radio station.
TAPE – load the prerecorded tape into tape
deck 2.
3
Press à or á on the system repeatedly to set
the hour for the timer to start.4Press í or ë on the system repeatedly to set
the minute for the timer to start.5Press CLOCK•TIMER to store the start time.
➜ "TIMER ON" will be displayed and followed
by the set timer "XX:XX" and then the selected
source.
➜
TIMER
will remain on the display.
● At the preset time , the selected source will play.
To exit without storing the setting
● Press Çon the system.
Notes:
– If the selected source (CD) is not available when
preset timer is reached, TUNER will be selected
automatically.
– If the source selected is TAPE, and if the preset
time is reached during dubbing, TUNER will be
selected automatically.
– During timer setting, if no button is pressed
within 90 seconds, the system will exit timer setting
mode automatically.
To deactivate the TIMER
● Press TIMER ON/OFF on the remote control.
➜ The display will show "CANCEL" and
TIMER
will disappear from the display.
To activate the TIMER
● Press TIMER ON/OFF on the remote control.
➜ The last set timer information will be shown
for a few seconds and
TIMER
will appear on
the display.
Sleep Timer Setting
The sleep timer enables the system to switch to
Standby mode automatically at a preset time.1Press SLEEP on the remote control repeatedly
to select a preset time.
➜ The selections are as follows (time in
minutes):
15
™™
™™
™ 30
™™
™™
™ 45
™™
™™
™ 60
™™
™™
™ OFF
™™
™™
™ 15 …
➜ "SLEEP XX" or "OFF" will be displayed. "XX"
is the time in minutes.
2
When you reach the desired length of time, stop
pressing the SLEEP button.
➜
SLEEP
will appear on the display, except for
"OFF" mode.
➜ The Sleep Timer is now set. Before the
system switches to standby mode, a countdown
of 10 seconds will be displayed.
"SLEEP 10"
™™
™™
™ "SLEEP 9"....
™™
™™
™ "SLEEP 1"
™™
™™
™ "SLEEP"
While SLEEP mode is activated
To check the remaining length of time
● Press SLEEP once.
To change the preset sleep timer
● Press SLEEP twice.
➜ The display will show the remaining time
followed by the sequence of sleep timer options.
To deactivate the Sleep Timer
● Press SLEEP repeatedly until "OFF" is displayed,
or press the STANDBY ON button.
Clock/Timer
12/2/2013
www.nostatatech.nl
World of free manuals
Page 92
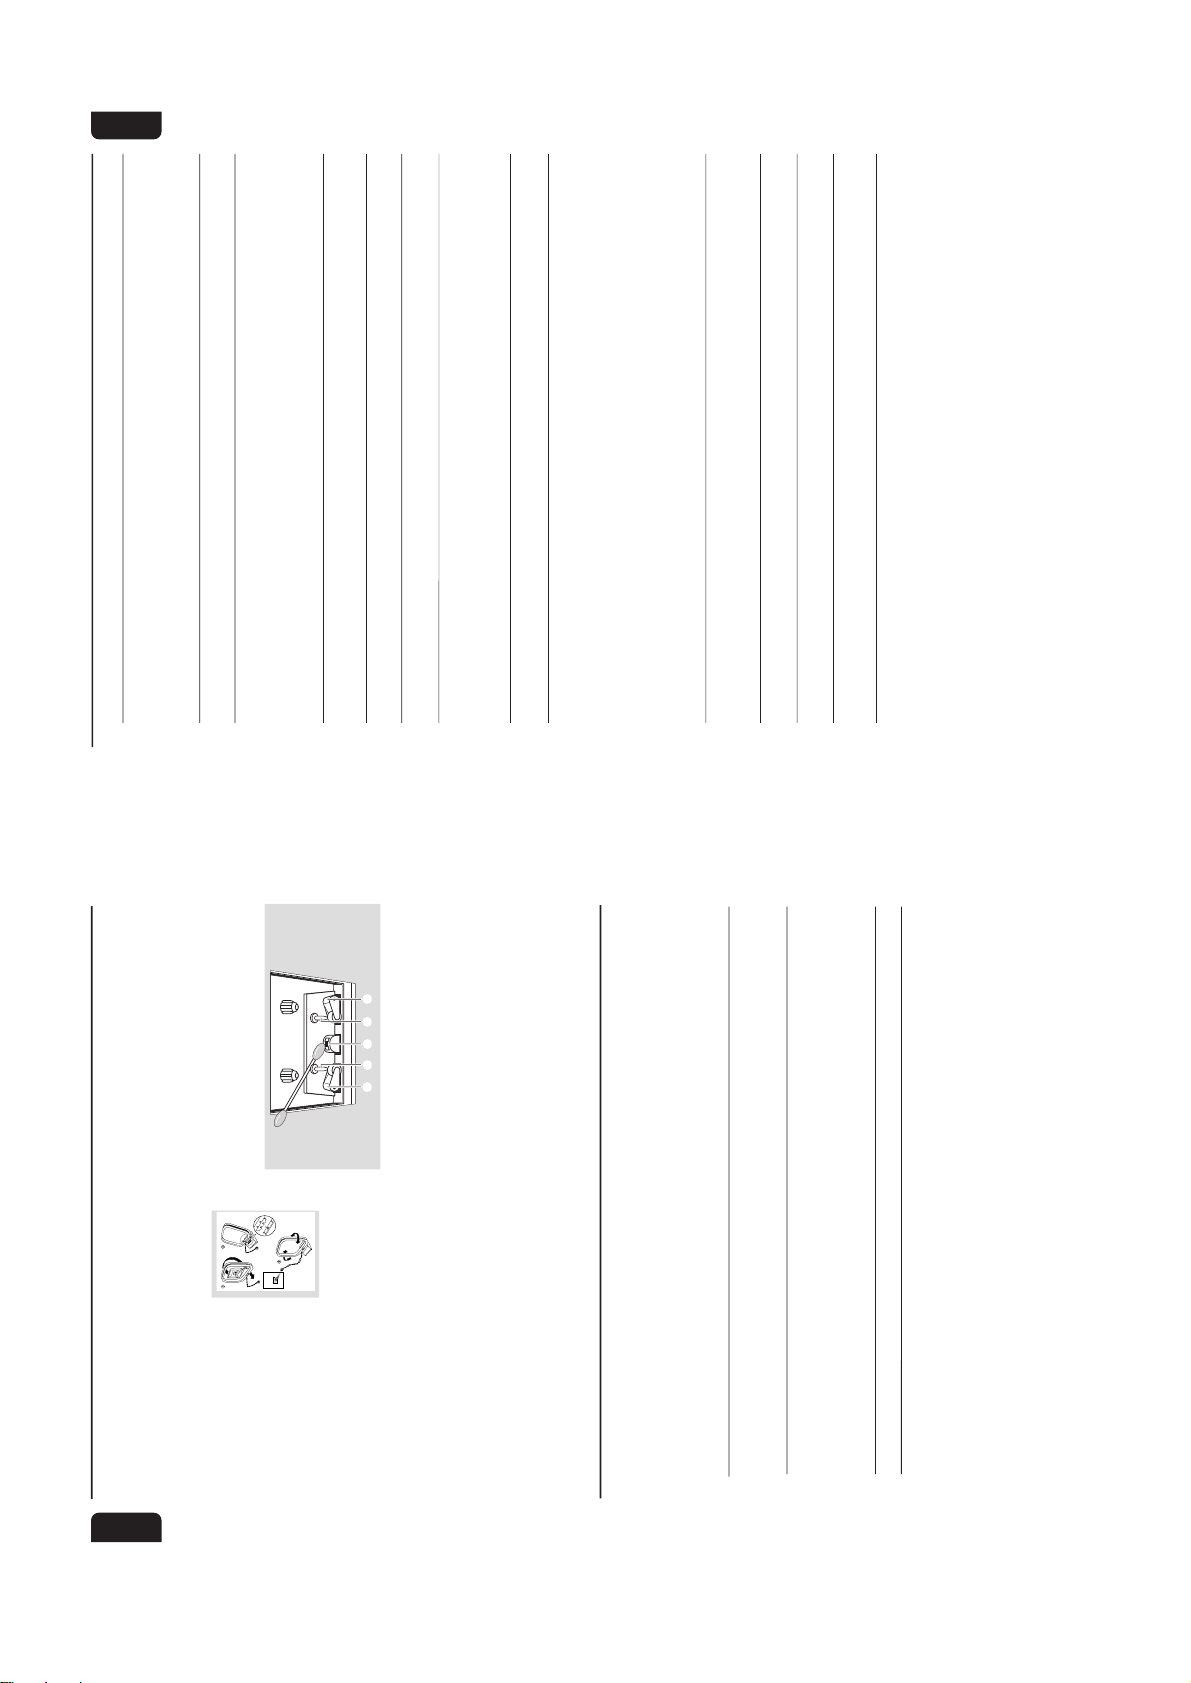
2-12
28
English
Maintenance
Cleaning the Cabinet
¶ Use a soft cloth slightly moistened with a mild
detergent solution. Do not use a solution
containing alcohol, spirits, ammonia or abrasives.
Cleaning Discs
¶ When a disc becomes dir ty,
clean it with a cleaning cloth.
Wipe the disc from the centre
out. Do not wipe in a circular
motion.
¶ Do not use solvents such as
benzine, thinner, commercially
available cleaners, or antistatic spray intended for
analogue records.
Cleaning the disc lens
¶ After prolonged use, dirt or dust may
accumulate at the disc lens. To ensure good
playback quality, clean the disc lens with Philips
CD Lens Cleaner or any commercially available
cleaner. Follow the instructions supplied with the
cleaner.
Cleaning the Heads and the Tape Paths
¶ To ensure good recording and playback quality,
clean the heads
A
, the capstan(s)
B
, and
pressure roller(s)
C
after every 50 hours of
tape operation.
¶ Use a cotton swab slightly moistened with
cleaning fluid or alcohol.
¶ You also can clean the heads by playing a
cleaning tape once.
C CB
B
A
Demagnetising the heads
¶ Use a demagnetising tape available at your
dealer.
AM ANTENNA
Fix the claw
to the slot
Tr oubleshooting
WARNING
Under no circumstances should you try to repair the system yourself, as this will invalidate the
warranty. Do not open the system as there is a risk of electric shock.
If a fault occurs, first check the points listed below before taking the system for repair. If you
are unable to remedy a problem by following these hints, consult your dealer or service centre.
Problem Solution
CD OPERATION
“NO DISC” is displayed. – Inser t a disc.
– Check if the disc is inser ted upside down.
–Wait until the moisture condensation at the lens
has cleared.
– Replace or clean the disc, see “Maintenance”.
“DISC NOT FINALIZED” is displayed. – Use a finalised CD-R(W) or CD-R.
29
English
Troubleshooting
RADIO RECEPTION
Radio reception is poor. – If the signal is too weak, adjust the antenna or
connect an external antenna for better reception.
– Increase the distance between the Mini HiFi
System and your TV or VCR.
TAPE OPERATION/RECORDING
Recording or playback cannot be made. – Clean deck parts, see “Maintenance”.
– Use only NORMAL (IEC I) or IEC type II (Cr0
2
)
tape.
– Apply a piece of adhesive tape over the missing
tab space.
The tape deck door cannot open. – Remove and reconnect the AC power plug and
switch on the system again.
GENERAL
The system does not react when buttons – Remove and reconnect the AC power plug and
are pressed. switch on the system again.
Sound cannot be heard or is of poor – Adjust the volume.
quality. – Disconnect the headphones.
– Check that the speakers are connected correctly.
– Check if the stripped speaker wire is clamped.
The left and right sound outputs are – Check the speaker connections and location.
reversed.
The remote control does not function – Select the source (CD or TUNER, for example)
properly. before pressing the function button (É,í,ë).
– Reduce the distance between the remote control
and the system.
– Inser t the batteries with their polarities
(+/– signs) aligned as indicated.
– Replace the batteries.
–Point the remote control in the direction of the
system’s IR sensor.
The timer is not working. – Set the clock correctly.
– Press TIMER ON/OFF to switch on the timer.
– If recording is in progress, stop recording.
Not all lighted buttons are showing light. – Press DISPLAY to select NORMAL or MODE 1
display mode.
The Clock/Timer setting is erased. –Power has been interrupted or the power cord
has been disconnected. Reset the clock/timer.
The system displays features – Press and hold DEMO STOP Çon the system
automatically and buttons start flashing. to switch off the demonstration.
12/2/2013
www.nostatatech.nl
World of free manuals
Page 93

3-1 3-1
12/2/2013
www.nostatatech.nl
World of free manuals
DISMANTLING INSTRUCTIONS
Dismantling of the Cassette Cover
2. Twist screw driver
3. Lift up and out
Dismantling of the CDC Module and Front Panel
4) Remove the Cover Tray CDC (pos 106) as indicated.
Remove Cover Tray CDC
1. Place screw driver
(flat side) between
the cassette cover
& cassette door
Remove Cassette Cover
Dismantling of the CDC Module and Front Panel
1) Loosen 4 screws to remove the Cover Top (pos 255) of the
set.
2) Loosen 2 screws to remove the Panel Left (pos 253) and
2 screws to remove the Panel Right (pos 254) of the set.
3) Slide out the CDC Tray as shown in the diagram below with
the help of a flat head screw driver.
Cassette Cover
5) Loosen 2 screws A and 2 screws B to remove the CDC
Module (pos 1105) as indicated.
6) Remove 2 screws (pos 226) at the bottom to separate the
Front Panel Assembly from the Plate Bottom (pos 265).
Front View CDC
Sliding out the CDC Tray
Remove CDC Module
Page 94

3-2
12/2/2013
www.nostatatech.nl
World of free manuals
3-2
Dismantling of Rear PortionDismantling of the Front Display Board and Front Control Board
1) Remove 1 screw C as indicated to loosen the Headphone
Board (pos 1101-B).
2) Remove 5 screws D as indicated to loosen the Front
Display Board (pos 1101-A).
3) Remove 9 screws E as indicated to loosen the Front
Control Board (pos 1107-A).
4) Remove 1 screw F as indicated to loosen the IR-Eye
Board (pos 1107-D).
5) Remove 3 screws N as indicated to loosen the VU Meter
Board (pos 1107-C).
1) Remove 3 screws J and uncatch M1 as indicated to
loosen the AF Board (pos 1102-A).
2) Remove 3 screws K and uncatch M2 as indicated to
loosen the Tuner Board (pos 1103).
3) Remove 4 screws L as indicated to loosen the Panel
Rear (pos 256).
Remove AF Board
Remove Front Display Board and Headphone Board
Remove VU Meter Board
Dismantling of the ETF Tape Module
1) Remove 6 screws G as indicated to loosen the ETF Tape
Module (pos 1104).
Remove Front Control Board and IR-Eye Board
Repair Hints
1) The Knob Volume Rotary (pos 117) can be remove by
inserting a strong string into the slot and pull it out in the
direction as indicated. See picture 1.
2) The Knob Jog Rotary (pos 140) can be remove by
inserting a strong string into the slot and pull it out in the
direction as indicated. See picture 2.
Picture 1
Picture 2
Page 95
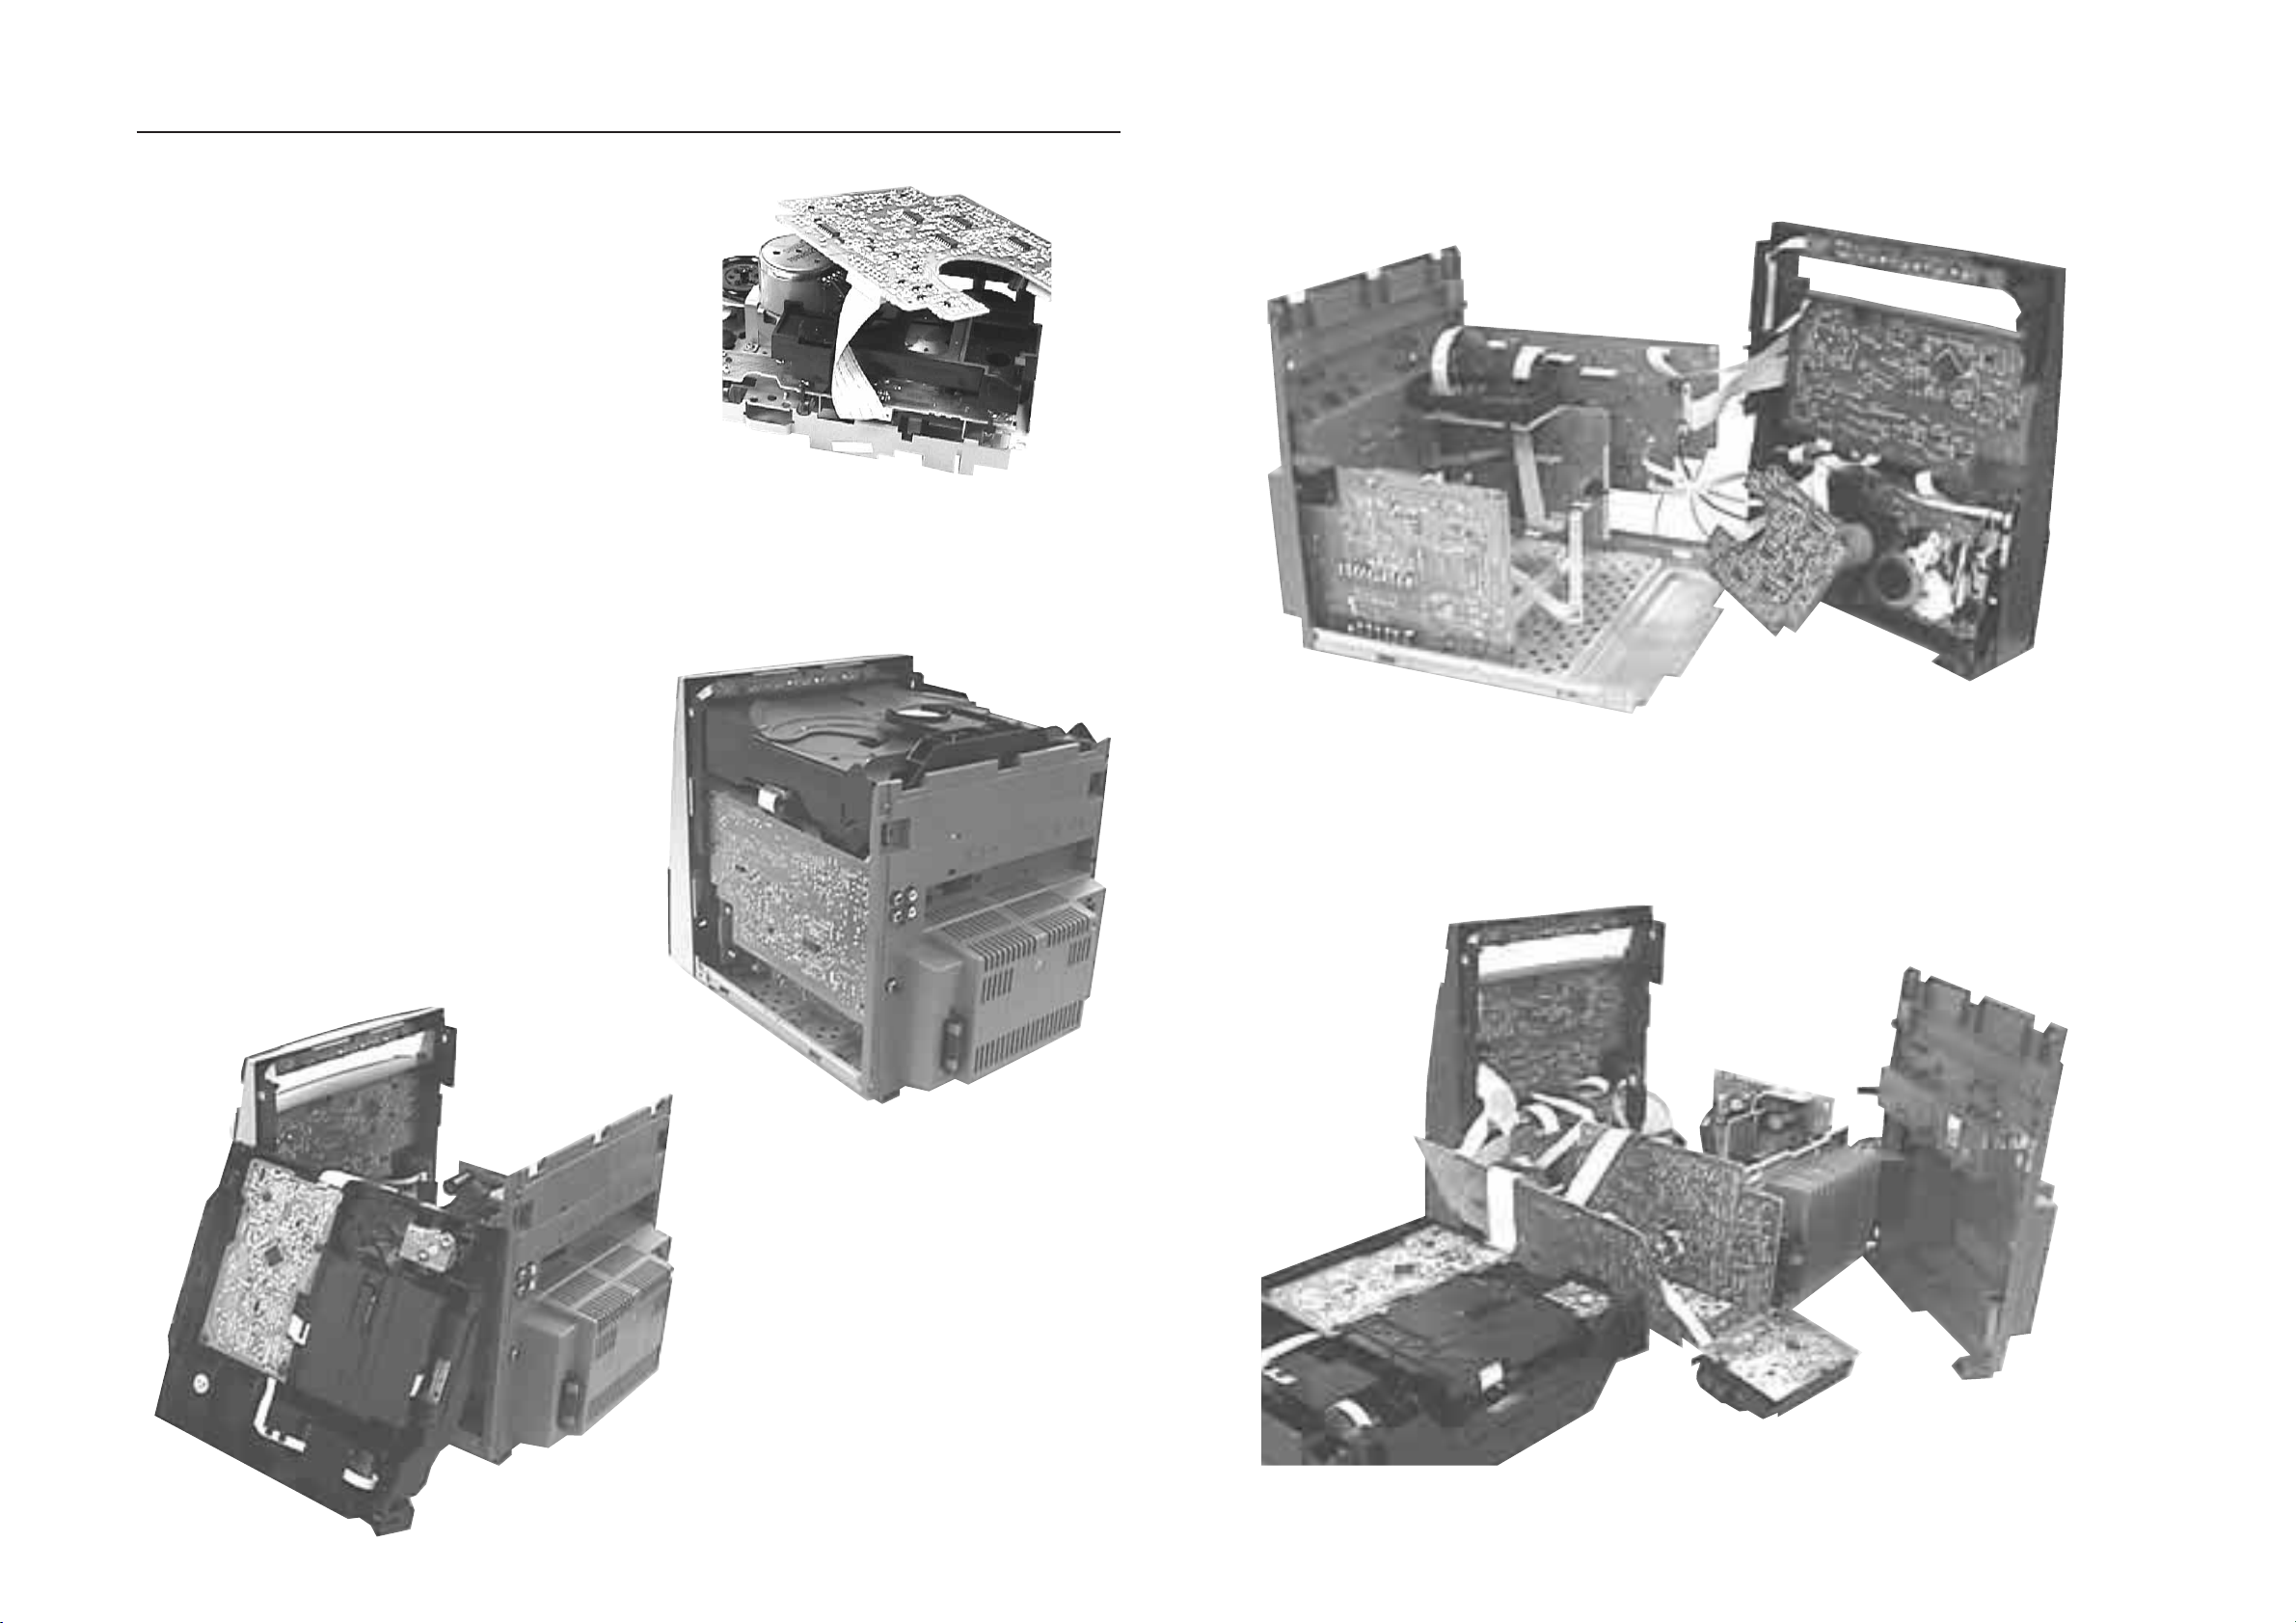
Repair Hints
12/2/2013
www.nostatatech.nl
World of free manuals
3-3 3-3
3) During repair it is possible to disconnect the Tuner board
and CDC Module completely unless the fault is suspected to be in that area. This will not affect the
performance of the rest of the set.
4) Due to the short flex cable wires in the ETF Module, the
pc board should be disconnected and reconnected on
the reverse side of the tape mechanism to keep it
electrically connected during repair. See picture 3.
Note: The flex cables are very fragile, care should be taken
not to damage them during repair. After repair, be
very sure that the flex cables are inserted properly
into the flex sockets before encasing, otherwise faults
may occurs.
Service pos A
Picture 3
Service pos C
Service pos B
Service pos D
Page 96
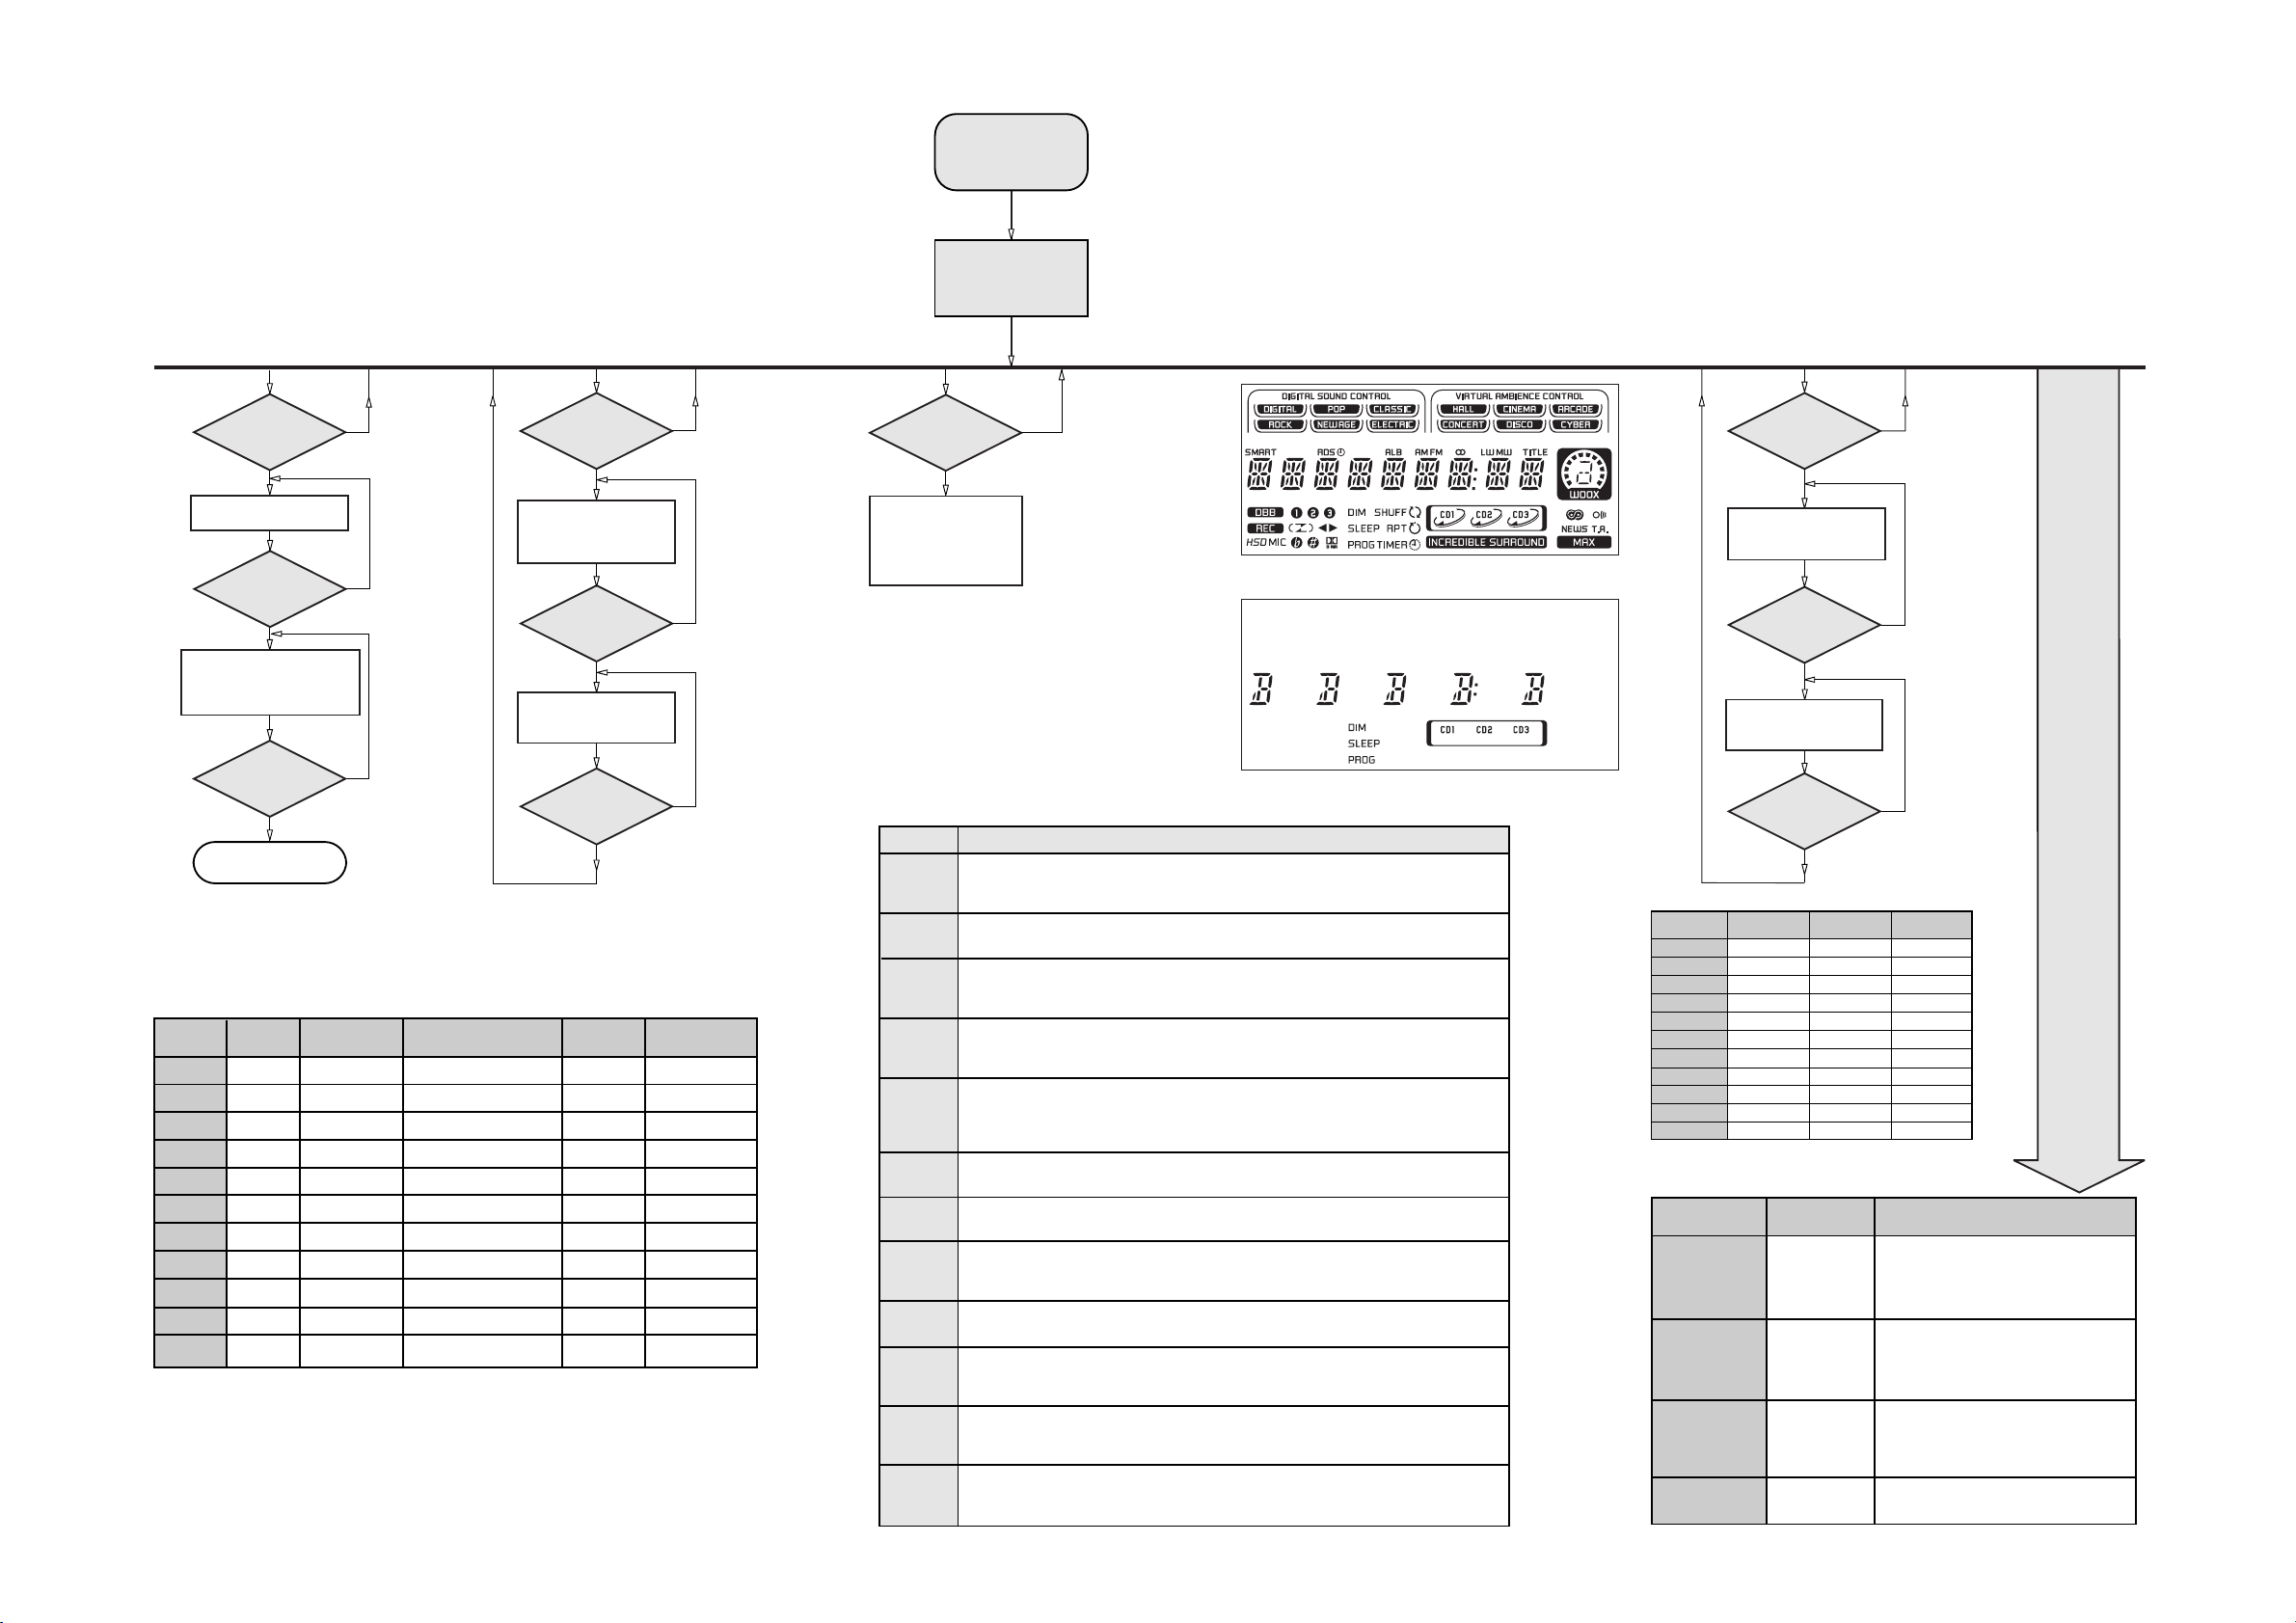
3-4 3-4
12/2/2013
www.nostatatech.nl
World of free manuals
SERVICE TEST PROGRAM
TUNER
TEST
TUNER
Button pressed?
Y
Display Tuner Version
"ccc"
TUNER
Button pressed?
Service frequencies are
copied to the RAM (see Table 1)
Tuner works normally except:
PROGRAM button
Disconnect
Mains cord ?
Y
Service Mode left
PRESET
10
11
Europe
"EUR"
1
87.5MHz
2
108MHz
3
531kHz
4
1602kHz
5
558kHz
6
1494kHz
7
153kHz
8
279kHz
9
198kHz
98MHz
87.5MHz
Note: * Depending on the selected grid frequency (9 or 10kHz)
By holding the TUNER and R buttons depressed while switching on the Mains supply, one
of the undermentioned features will be activated:
- the tuning grid frequency is toggled between 9kHz and 10kHz for the Oversea (/21) version.
- the extended FM1 (65.81MHz - 74MHz) is toggled on and off for East Eur. (/34) version.
N
N
N
East Eur.
"EAS"
87.5MHz
108MHz
531kHz
1602kHz
558kHz
1494kHz
87.5MHz
87.5MHz
87.5MHz
87.5MHz
98MHz
East Eur. Extended-band
65.81MHz
108MHz
87.5MHz
531kHz
1602kHz
558kHz
1494kHz
70.01MHz
65.81MHz
Table 1
QUARTZ
TEST
Output at (Front Display Board)
pin 19 of uP = 2048Hz
Output at (Front Display Board)
pin 19 of uP = 2,929.6875Hz
"EAS"
74MHz
98MHz
O
Button pressed?
Y
Display shows
32K
O
Button pressed?
Y
Display shows
12M
9
Button pressed?
Y
USA
"USA"
87.5MHz
108MHz
530kHz
1700kHz
560kHz
1500kHz
98MHz
87.5MHz
87.5MHz
87.5MHz
87.5MHz
N
N
N
Oversea
"OSE"
87.5MHz
108MHz
531/530kHz*
1602/1700kHz*
558/560kHz*
1494/1500kHz*
87.5MHz
87.5MHz
87.5MHz
87.5MHz
98MHz
To start service test program
hold
depressed while
plugging in the mains cord
Display shows the
ROM version
(Main menu)
SERVICE
PLAY MODE
STANDBY-ON
Button pressed?
Y
Set is in Service PLAY Mode.
In case of failures, error
codes according to Table 2
will be displayed.
The Service Play Mode is intended to
detect and identify the failures in the CD Mode.
In this mode the electronics will still function
even when an error is detected so that
repair activities can be carried out.
Error code
E1000
E1001
E1002
E1003
E1005
E1006
E1007
E1008
E1020
E1070
E1071
E1079
Error Description
Focus Error
Triggered when the focus could not be found within a certain time when starting up the CD
or when the focus is lost for a certain time during play.
Radial Error
Triggered when the radial servo is off-track for a certain time during play.
Sledge In Error
The sledge did not reach its inner position (inner-switch is still close) before approximately
6 Sec. have passed by. Inner-switch or sledge motor problem.
Sledge Out Error
The sledge did not come out of its inner position (inner-switch is still open) before approximately
250 mSec. have passed by. Inner-switch or sledge motor problem.
Jump-offtrack error
Triggered in normal play when the jump destination could not be found within a certain time.
When this error occurred, software will try to recover by initiating the jump command again.
If it is recoverable, the disc will continue to play.
Subcode Error
Triggered when a new subcode was missing for a certain time during play.
PLL Error
The Phase Lock Loop could not lock within a certain time.
Turntable Motor Error
Generated when the CD could not reached 75% of speed during startup within a certain time.
Discmotor problem.
Focus Search Error
The focus point has not been found within a certain time.
The carousel switch is not open within certain time. This can happen when either the switch is
defective and closed all the time, or when the carousel is blocked when located exactly at a
disc position.
The carousel position switch did not close within a certain time. This can happen when the
switch is defective and never closes electrically, or when the carousel is blocked in between
two disc positions. The time-out is approximately 5 Sec.
The drawer could not enter the inside position is opening again. This can be caused because
the drawer is blocked by something and cannot go fully inside, or the drawer switch is defective
and does not close.
™
"S-Vyy"
& Aux
N
S refers to Service Mode
V refers to Version
yy refers to Software version number of the µProcessor
(counting up from 01 to 99)
Table 2
Figure 1
Figure 2
DISPLAY
TEST
or
N
N
N
FW-C780
On
On
On
On
On
On
On
FW-P750
On
On
On
On
On
On
On
On
On
On
On
ACTION
"PASS" is displayed if the uProcessor read
back the test pattern correctly, otherwise
"ERROR" will be displayed.
Load default data. Display shows "NEW"
for 1 second.
Caution!
All presets from the customer will be lost!!
Display shows value for 2 seconds.
Values increases or decreases in steps of 1
until 0 (Min.) or 40 (Max.) is reached.
Mini 2001 FW-C5xx/7xx Service Test Program (dd wk0046)
Various
other Tests
2
Button pressed?
Y
Display shows Figure 1 and
switch all LEDs on (except ECO
POWER & VU Volume LEDs),
and full VU deflection.
2
Button pressed?
Y
Display shows Figure 2
and switch alternate LEDs on
(see Table 3),
and partial VU deflection.
9
Button pressed?
Y
LEDs
FW-C500 , FW-C550
DISC 1
DISC 3
TAPE
TUNER
CENTRE
SURROUND LEFT
STEREO RIGHT
VAC
DBB
VU BACK LIGHT
VU VOLUME
TEST
EEPROM TEST A test pattern will be sent to the EEPROM.
FW-C700 , FW-C720
On
On
On
On
On
On
On
On
Table 3
Activated with
R
9 to Exit
TEST
ROTARY
ENCODER TEST
QEEPROM FORMAT
Rotary
Volume Knob
Jog Shuttle Knob
LEAVE SERVICE
TESTPROGRAM
Disconnect
mains cord
Page 97
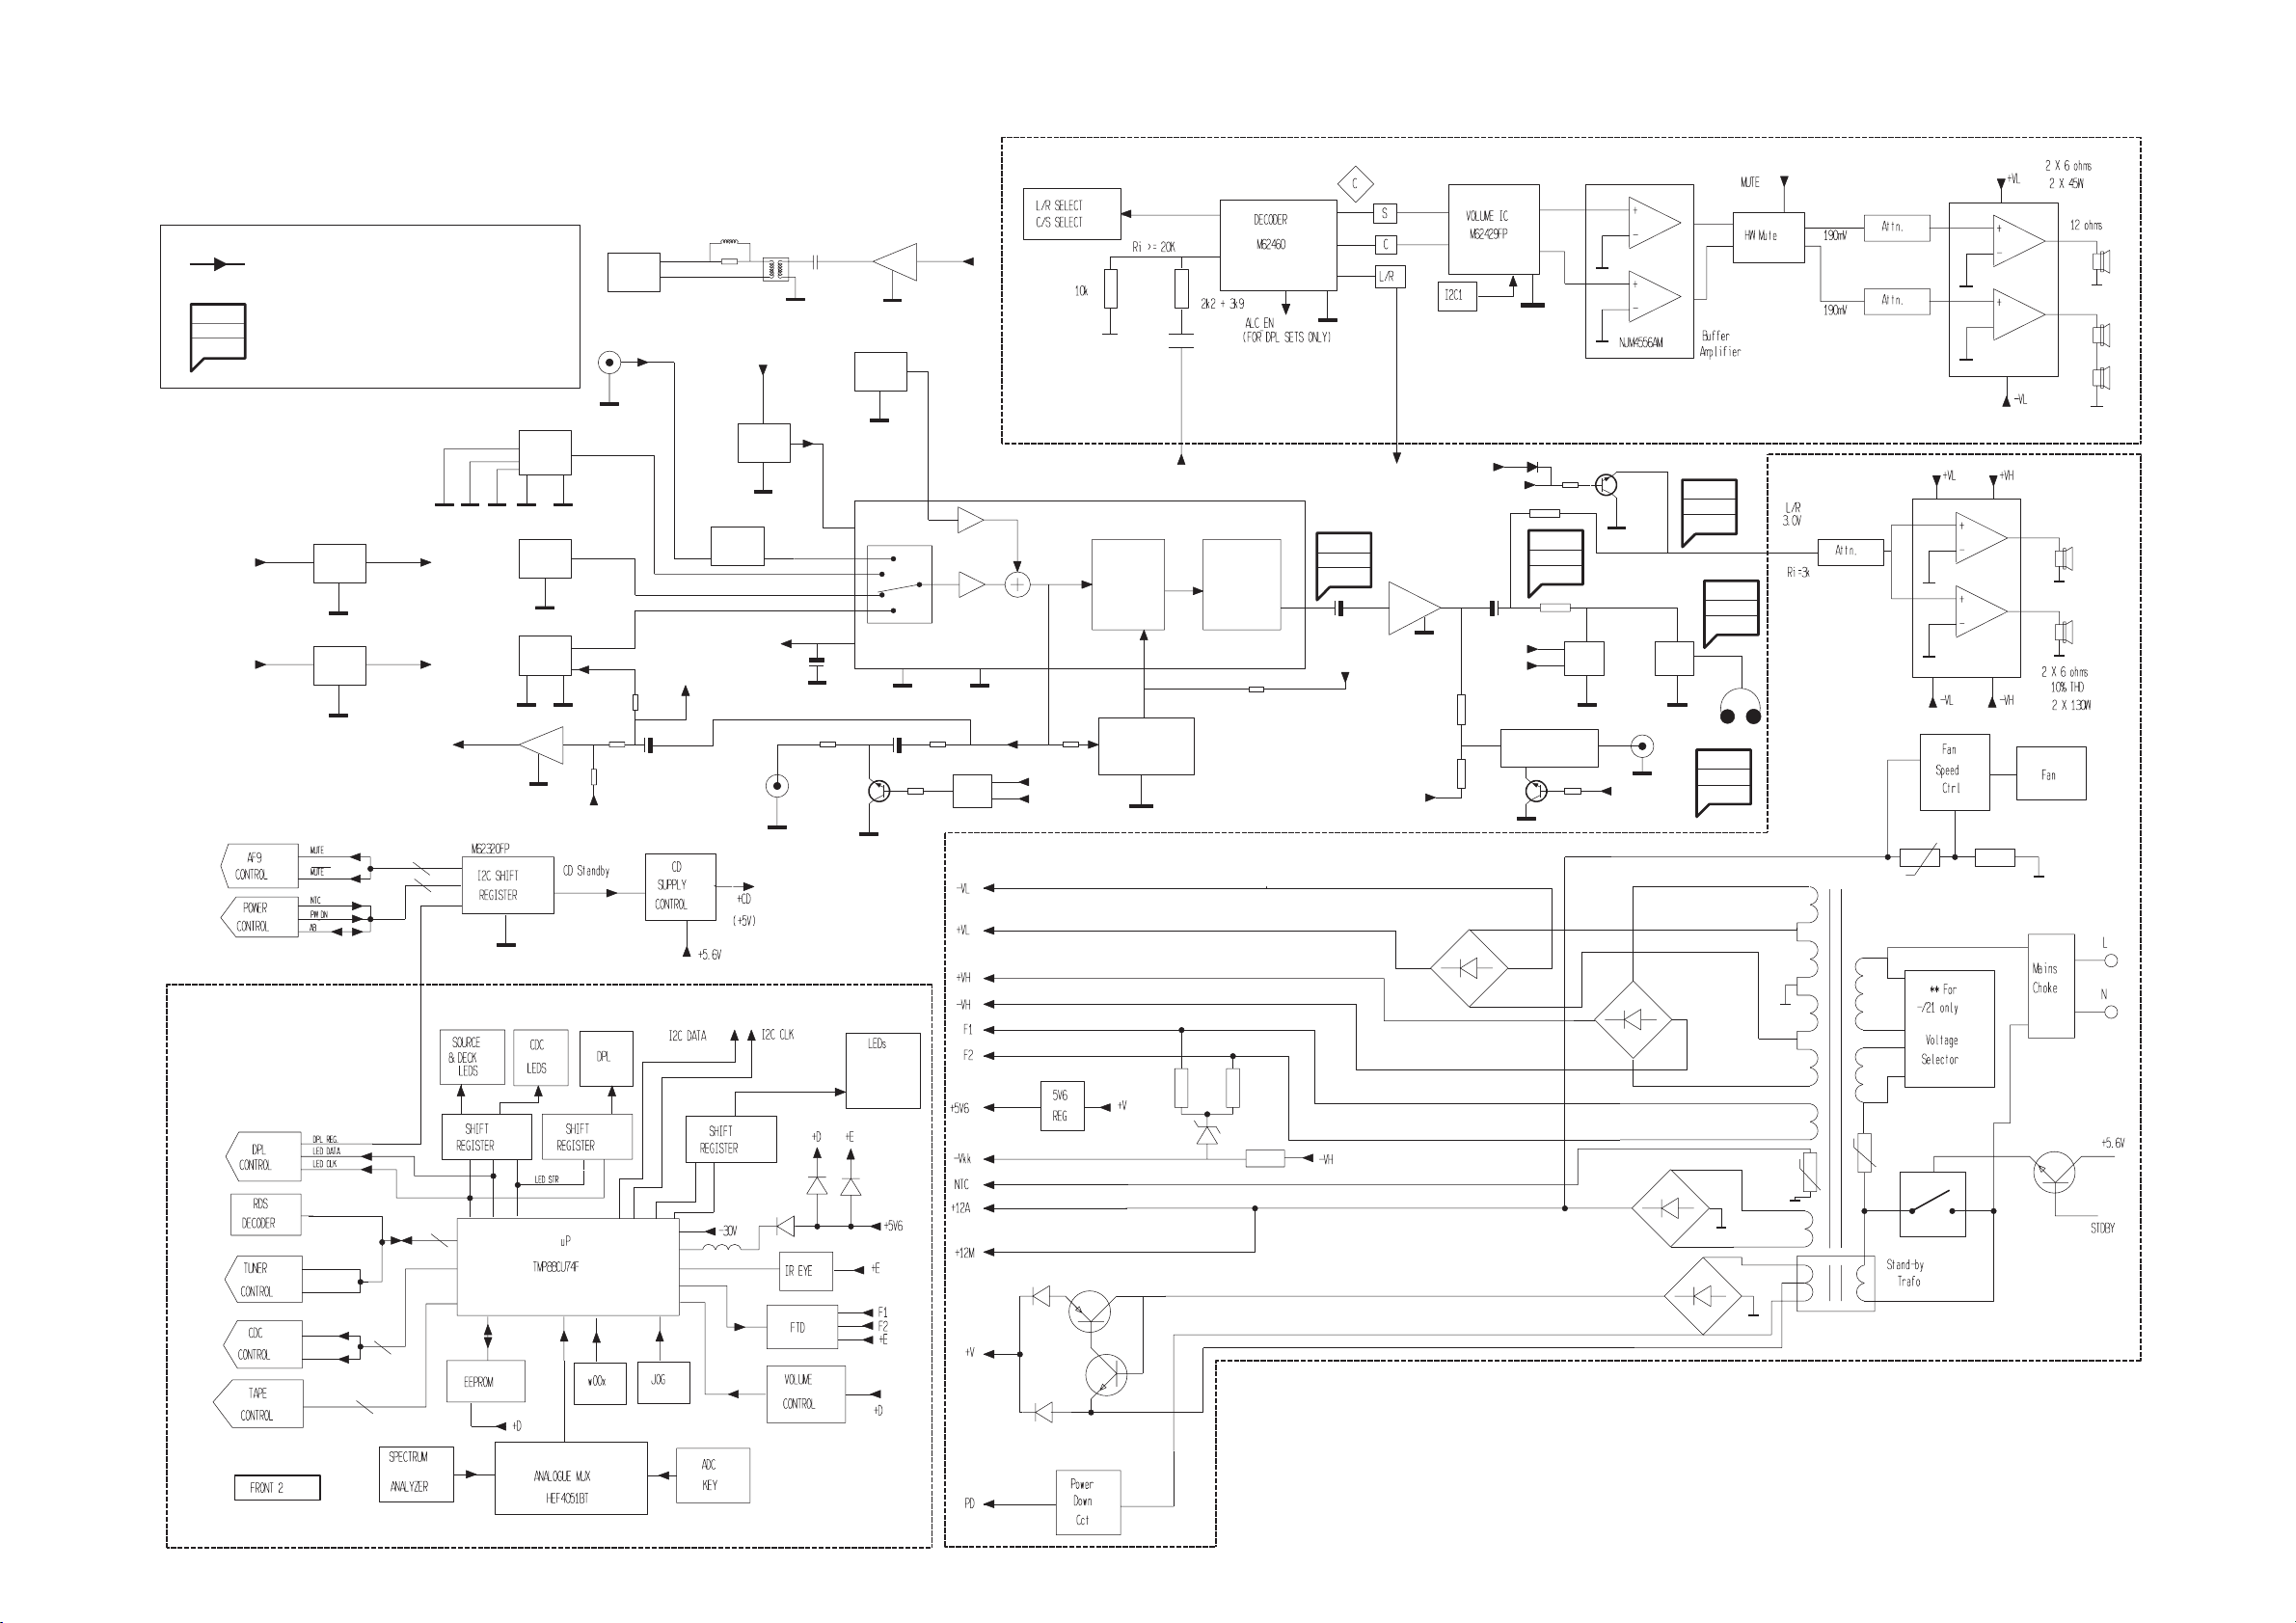
SET BLOCK DIAGRAM
12/2/2013
www.nostatatech.nl
World of free manuals
4-1 4-1
NOTE :
MAIN SIGNAL PATH
MEASUREMENTS ARE IN AUX MODE :
XX mV
YY dBA
ZZ dB
LEVELS AT MAX VOL
S/N AT 500mW
HEADROOM (1% THD) WRT TO LEVEL AT MAX VOL
-VKK
-CMOS
REG.
A
LOW_PW_SPLY
+5V
REG.
A
D
-CMOS
-9V
+5V6
CON
SA_OUT
2.1V
75 ohm
Vpp 0.5V
DIG
OUT
AUX
AUX 500mV
CDR 1V
DIG
+12V_A
COAX1 (FROM CDC)
DIG
A
A
D
MIC
A
A
Attn
-8.5 dB
VREF
Line Out
500mV
+9V1
REG.
DPL
H/P Amp
From other
Chan.
Mute_SW
Mute_SW_FR
A
Mute1
2.50V
85dBA
3dB
-Vkk
SUBWOOFER
CCT
A
Mute
CCT
A
Mute_SW_FR
A
S/W OUT
A
H/P
1.90V
67dBA
3dB
A
1.25V
86dBA
650mV
78dBA
3.2dB
3.5dBA
H/P
FIS or
SIS Filter
CCT
SSL
500mV
Audio
Signal
76dBA
16dB
Proc.
DPL
A
A
DPL/
IS
Interface
A
A
AD
Mute
CCT
A
-Vkk
Mute2
CDC
D
DIG
TUNER
250mV
MA
125mV
A
125mV
TAPE
26mV
SSL
A
M
A
From other
Chan.
D
(Blue Strip)
(wOOx)
(BassTreble)
Block_Diagram (3139 119 33780) dd wk0048
Page 98

SET WIRING DIAGRAM
12/2/2013
www.nostatatech.nl
World of free manuals
4-2
4-2
FRONT
VU Meter
( 1107 )
+5V6
VUmeter
GND_D
GND__D
1
HR 3p/100/3p OE
1840
1407
FFC AD 06p 140
1408
1
IR Receiver
FRONT
CDC KEYS
( 1107 )
Bit0
GND_D
Bit1
1
1400
11
1409
1408
1
20
RC5
GND_B
+5V6_Con
GND-B
Cdc1Lit
Cdc3Lit
Key_Con
Cdc2Lit
1800
1403
FFC AD 06p 180
Key2
TP_ADC1
+F
GND
TP_ADC2
TP_SH_CLK
1407
1406
FFC AD 07p 180
Key1
GND-B
CD Led
TP_SH_DATA
TP_SH_STR
7
1
TP_ADC2
( 1107 ) ( 1104 )
TAPE DD
ETF7
CD-CHANGER
3CDC-LC
1602
FFC AD 08p 120
1402
GND_D
Tuner Led
1
+F
GND
TP_ADC1
MPEG GND
ECHO I/P
FRONT
CONTROL/KEYS
1
1405
8
1
1412
Aux Led
Tape Led
FRONT
DISPLAY/u-P
( 1101 )
TP_SH_CLK
TP_SH_STR
TP_SH_DATA
( 1105 )
MPEG01B
CVBS
MIC_DET
1
( 1107 )
wOOx A
1
1403
1411
1706
SHR_DATA
DSA_DATA
DSA_ACK
GND_D_VCD
DSA_STR
GND_D
1603
VAC Led
wOOx B
1602
1404
1
GND_D
1405
TP_REC_LEFT
TP_REC_RIGHT
CD_SH_STR
CD_SH_DATA
GND_D_COAX
GND_D_CDTEXT
JOG A
GND_D
1600 (12p)
1603 (10p)
1601 (8p)
12
1404
FFC AD 10p 120 ( For C 5xx, 700 & 720 )
FFC AD 12p 120 (For C780 only )
FFC AD 12p 120 ( For P750 only )
1406
19p
1402
FFC AD 11p 180
( For C5xx & C7xx only )
or
FFC AD 15p 180
( For P750 only )
1701
1
GND_A_TP
TP_LEFT
+11V_A
TP_RIGHT
-CMOS
GND_M
+11V_M
1703
1805
CD_Left
GND_A_CD
CD_Right
+5V_CD
GND_M
+11V_M
SW_INFO
CD_SH_CLK
SICL
SILD
GND_D_CD
CD_PORE
GND_D_CD
COAX1
COAX2
SHIELD
SRDT
DQSY
uP_CLK
JOG B
+5V6
Max / wOOx / LedShClk
IS Led / LedShData
DBB / LedShStr
DSC Led
1
FFC AD 07p 220
1
HR 02p/180/02p HR
23
1503
FFC BD 15p 120
( For C5xx & P750 )
FFC BD 19p 120
( For C7xx only )
1
1509
HR 2P/280/2P
1508
HR 3P/280/3P
1401
1702
1701
or
FFC AD 19p 180
1403 1401 1405
1
16
19
23
1404 1402
1
11
15
1531
1
7
1506
1
15211522 1523
1
23
20
1
CVBS
GND_D
NTC
GND_D_I2C
I2C_DATA
I2CCLOCK
GND_D
+5V6_CON
+11V
+5V6
-Vkk
F1
F2
CD_SH_DATA
CD_SH_CLK
CD_SH_STR
GND_D_CD
SW_INFO
SICL
SILD
GND_D
uP_CLK
DQSY
SRDT
GND_D_CDTEXT
TU_STEREO
TU_CLK
TU_DATA
TU_ENAB
GND_A_TU
HP_DET
SA_IN
PWR_DN
CLIP
L_PWR_CTRL
MIC_DET
DPL_VOL_CLK
DPL_CLK
DPL_DATA
GND_D_DPL
TP_REC_LEFT
TP_REC_RIGHT
GND_A_TP
TP_LEFT
+11V_A
TP_RIGHT
-CMOS
GND_M
+11V_M
1525
9
15
19
AF9
( 1102 )
CD_Left
GND_A_CD
1
CD_Right
+5V_CD
GND_M
+11V_M
SW_INFO
CD_SH_STR
CD_SH_CLK
SICL
CD_SH_DATA
SILD
GND_D_CD
CD_PORE
GND_D_CD
COAX1
COAX2
SHIELD
GND_D_COAX
SRDT
DQSY
uP_CLK
GND_D_CDTEXT
1803
VCD OUT
(CVBS)
DSA_DATA
GND_D_VCD
SHR_DATA
DSA_ACK
DSA_STR
SHR_DATA
DSA_DATA
DSA_ACK
GND_D_VCD
DSA_STR
1
AUX IN
1501
MIC_DET
MPEG GND
ECHO I/P
AF9
48
1504
( 1102 )
+KARA
VCD_IN1
AGND
VCD_IN2
MIC_DET
1705
57(pt1 PCB only)
FRONT
VCD
( 1107 )
LINE OUT
1
5
OUT
SUBWOOFER
1691 1801
AMP_LEFT
GND_AA
AMP_RIGHT
LOW_PWR_CTRL
VCD_ON/CDR_ON
NTC
PWR_DN
CLIPPING
AMP_ON
-VKK
AMP_CS_DC
DVD_ON
LOW_PWR_SPLY
DPL_VOL_CLK
AMP_CS_DC
COAX
1203 1205
1206
F1
F2
+11V_A
GND_A
+11V_M
GND_M
+5V6
GND_D
5V_VCD
DPL_LEFT
GND_A
DPL_RIGHT
SS_RIGHT
GND_A
SS_LEFT
+11V_A
DPL_STR
GND_D
DPL_DATA
DPL_CLK
AMP_ON
GND_A_TU
TU_RIGHT
TU_ENAB
TU_DATA
TU_STEREO
HP_LEFT
HP_RIGHT
MIC_DET
DIGITAL OUT
1201
1204 1202
1542 1541
TU_LEFT
+11V_A
TU_CLK
GND_A
HP_DET
+11V_A
MIC
GND_A
1520
1603
1503
1
FFC AD 11p 220
( For C 5xx& 7xx )
FFC AD 12p 220
( For P750 only )
*FFC AD 13p 220
11
( For V720 only )
12
13
14
1
HR 07p/220/07p HR
( For C5xx & C7xx )
*HR 08p/220/08p HR
7
8
1
14
1
FFC AD 08p 220
8
1
4
1
FFC BD 04p 180
4
FFC AD 5p 180
FAN
MOTOR
*1300
1202
or
or
*1301
1201
or
( For V720 only )
1601
1502
1507
1
1259/60/61 (11p/12p/13p )
1
14
*1306 (13p)
1262/3 (7p/8p)
1
8
*1310 (8p)
1
1120
1501
FFC BD 04p 400
1701
4
1
1702
1
5
* For POWER 2001 Module (30-70W Version) only
1300
+FAN
GND
AMP_LEFT
GND_AA
AMP_RIGHT
NTC
LOW_PWR_CTRL
PWR_DN
CLIPPING
AMP_ON
-VKK
F1
F2
AMP_CS_DC
VCD_ON
DVD_ON
LOW_PWR_SPLY
+11V_A
GND_A
+11V_M
GND_M
+5V6
GND_D
5V_VCD
FFC AD 14p 220
TU_LEFT
GND_A_TU
TU_RIGHT
+11V_A
TU_ENAB
TU_DATA
TU_CLK
TU_STEREO
MIC
1700
+11V_A
MIC
GND_A
MIC_DET
MIC-AMP.
( For C780/33 & V720/21
+KARA
VCD_IN1
AGND
VCD_IN2
MIC_DET
Version only )
LS
1321
*1307
GND_D
GND_D
L_PWR_CTRL
L/R+SUP / POWER-BOARD
1801
*1302
12511250
A1
B1
B2
A2
+D
GND
+D2
-VKK
PWR_DN
NTC
L_PWR_S
( 1106 )
1330
*1308
F1
F2
1252
*1304
TUNER
ECO6
( 1103 )
1
4
GND_A
HP_DET
HP_LEFT
FRONT
HP_RIGHT
FRONT
HEADPHONE
( 1107 )
1
1
1
H/P
1850
( 1101 )
*1205
HR 04p/340/04p HR
For 100 W version
8906
HR 06p/340/06p OE
8909
HR 09p/340/09p OE
*1200
HR 06p/340/06p HR
*1201
1203
FFC AD 07p 340
1851
LS SL/SR
1315
1
1913
and
1
1
1914
*1209
1700
1
14
( Only for FW-C720 )
MATRIX SURR
*1203
1912
MAINS BOARD
A1
B1
GND_D
GND_D
B2
A2
+D
GND
+D2
-VKK
F1
F2
PWR_DN
NTC
L_PWR_CTRL
L_PWR_S
HR 04p/280/04p OE
DPL_LEFT
GND_A
DPL_RIGHT
SS_RIGHT
GND_A
SS_LEFT
+11V_A
DPL_STR
DPL_VOL_CLK
GND_D
DPL_DATA
DPL_CLK
AMP_MUTE
AMP_CS_DC
( 1106 )
B1
A1
1
1304
1
A1
B1
( 1108 )
GND_D
GND_D
DPL
C/S AMP
( 1106 )
( 1108 )
LEGEND
LS SL/SRLS C
FFC TOP ENTRY
FFC SIDE ENTRY
EH TOP ENTRY
EH SIDE ENTRY
DIPMATE
SPARE
PROVISIONP
11
HR 04p/280/04p OE
Wiring_Diagram (3139 119 33780) dd wk0048
GND_D
*1201
1911
10
GND_D
CTR
1305
1314
A2
B2
A2
B2
GND_C
P
GND_S
SURR
1
1
Page 99

5-1
12/2/2013
www.nostatatech.nl
World of free manuals
FRONT CONTROL BOARD
5-1
REMARKS :
TABLE OF CONTENTS
Front Control Board - Component & Chip layout ............5-2
Front Control Board - Circuit diagram .............................5-3
IR-Eye Part - Layout & Circuit diagram ........................... 5-3
Key-CDC Part - Layout & Circuit diagram....................... 5-4
VU Meter Part - Layout & Circuit diagram....................... 5-4
Karaoke Part - Layout & Circuit diagram ........................ 5-5
VCD Interface Part - Layout & Circuit diagram ...............5-5
Electrical parts list............................................................ 5-6
Page 100
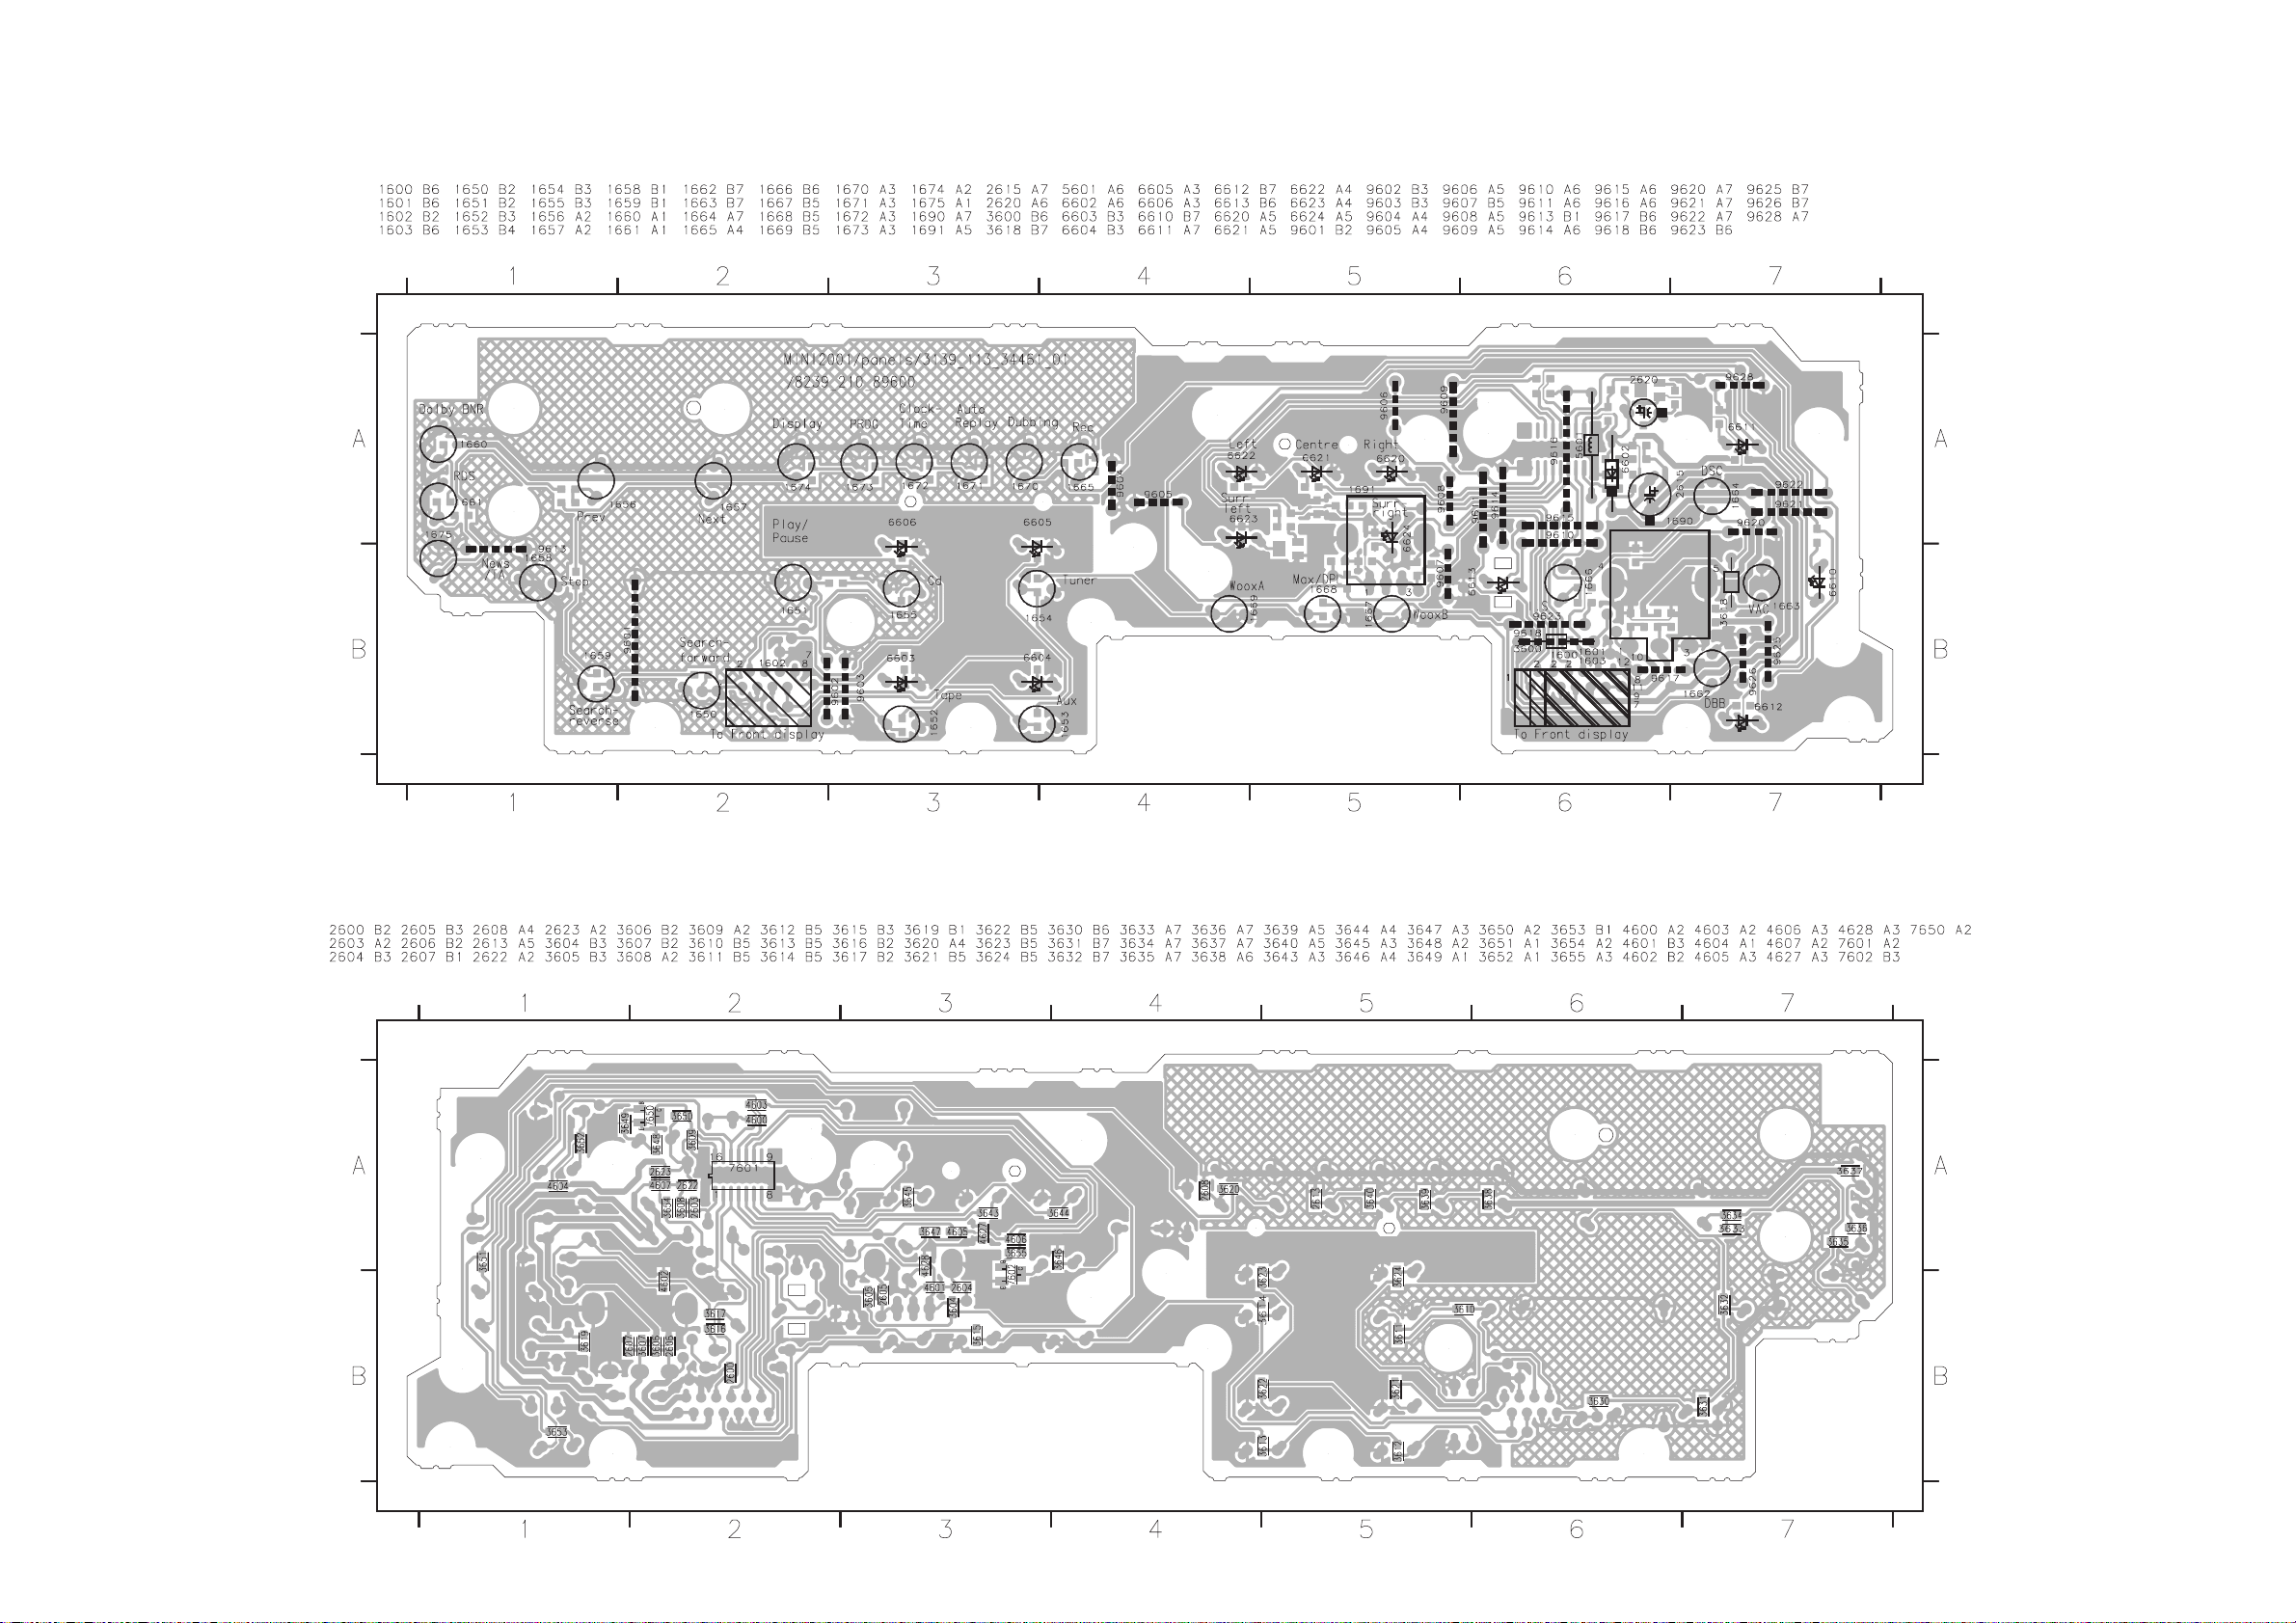
5-2
12/2/2013
www.nostatatech.nl
World of free manuals
FRONT CONTROL BOARD - COMPONENT LAYOUT
5-2
This assembly drawing shows a summary of all possible versions. For components used in a specific version see schematic diagram and respective parts list.
FRONT CONTROL BOARD - CHIP LAYOUT
3139 113 3446 pt1 dd wk0047
This assembly drawing shows a summary of all possible versions. For components used in a specific version see schematic diagram and respective parts list.
3139 113 3446 pt1 dd wk0047
 Loading...