Philips Codemaster XL+, CodeMaster XL+, M1722 User manual

0 (0)

M1722B CodeMaster XL+

Defibrillator/Monitor User’s Guide

3DUW 1R 0

3ULQWHG LQ 86$ -XQH

(GLWLRQ

Notice

About This Edition

Publication number M1722-94980

Edition 3

Printed in USA

The information in this guide applies to the CodeMaster XL+ defibrillator/monitor. This information is subject to change without notice. Hewlett-Packard shall not be liable for errors contained herein or for incidental or consequential damages in connection with the furnishing, performance, or use of this material.

Edition History

Edition 1, May 1996

Edition 2, May 29, 1998

Edition 3, June 2000

Copyright

Copyright © 1996, 1998, 2000

Hewlett-Packard Company

Andover, MA 01810 USA

This document may not be photocopied, reproduced, or translated to another language without prior written consent of HewlettPackard.

This information is subject to change without notice.

Reproduction, adaptation, or translation without prior written permission is prohibited, except as allowed under the copyright laws.

Medical Device Directive

This product complies with the requirements of the Medical Device Directive 93/42/EEC and carries the 0123 mark accordingly.

Authorized EU-representative:

Hewlett-Packard Deutschland GmbH

Herrenbergerstrasse 130

D-71034 Boeblingen Germany

Fax: +49-7031-14-2346

Warranty

Hewlett-Packard makes no warranty of any kind with regard to this material, included, but not limited to, the implied warranties or merchantability and fitness for a particular purpose.

WARNING

As with electronic equipment, Radio Frequency (RF) interference between the defibrillator and any existing RF transmitting or receiving equipment at the installation site, including electrosurgical equipment, should evaluated carefully and any limitations noted before the equipment is placed in service

Monitoring during quiescent periods of electrosurgery is possible but electromagnetic interference generated by electrosurgical tools during operation is sufficient to mask cardiac signals. A momentary recovery period is required for the monitor to return to normal operation and will be longer if the diagnostic monitoring mode is used. Pads or electrodes should be placed as far from the surgical area as reasonable while still performing normal function to minimize the possibility of burns. Radio frequency generation from electrosurgical equipment and close proximity transmitters may seriously degrade performance of the CodeMaster XL+ defibrillator/monitor.

Hewlett-Packard assumes no liability for failures resulting from RF interference between HP medical electronics and any radio frequency generating equipment at levels exceeding those established by applicable standards.

CAUTION

The manufacturer, importer and seller are responsible for the effects on safety, reliability and performance only if: assembly operations, extensions, re-adjustments, modifications or repair are carried out by persons authorized by them, and the electrical installation of the relevant room complies with all local regulations and the equipment is used in accordance with the instructions for use. Use of accessories other than those recommended by Hewlett-Packard may compromise product performance.

THIS PRODUCT IS NOT INTENDED FOR HOME USE.

Responsibility of Manufacturer

Hewlett-Packard only considers itself responsible for any effects on safety, reliability and performance of the CodeMaster XL+ defibrillator/monitor if:

assembly operations, extensions, readjustments, modifications or repairs are done by persons authorized by Hewlett-Packard, and

the electrical installation of the relevant room or vehicle complies with the IEC or national requirements, and

the instrument is used according to the instructions for use presented in this manual.

ii

iii

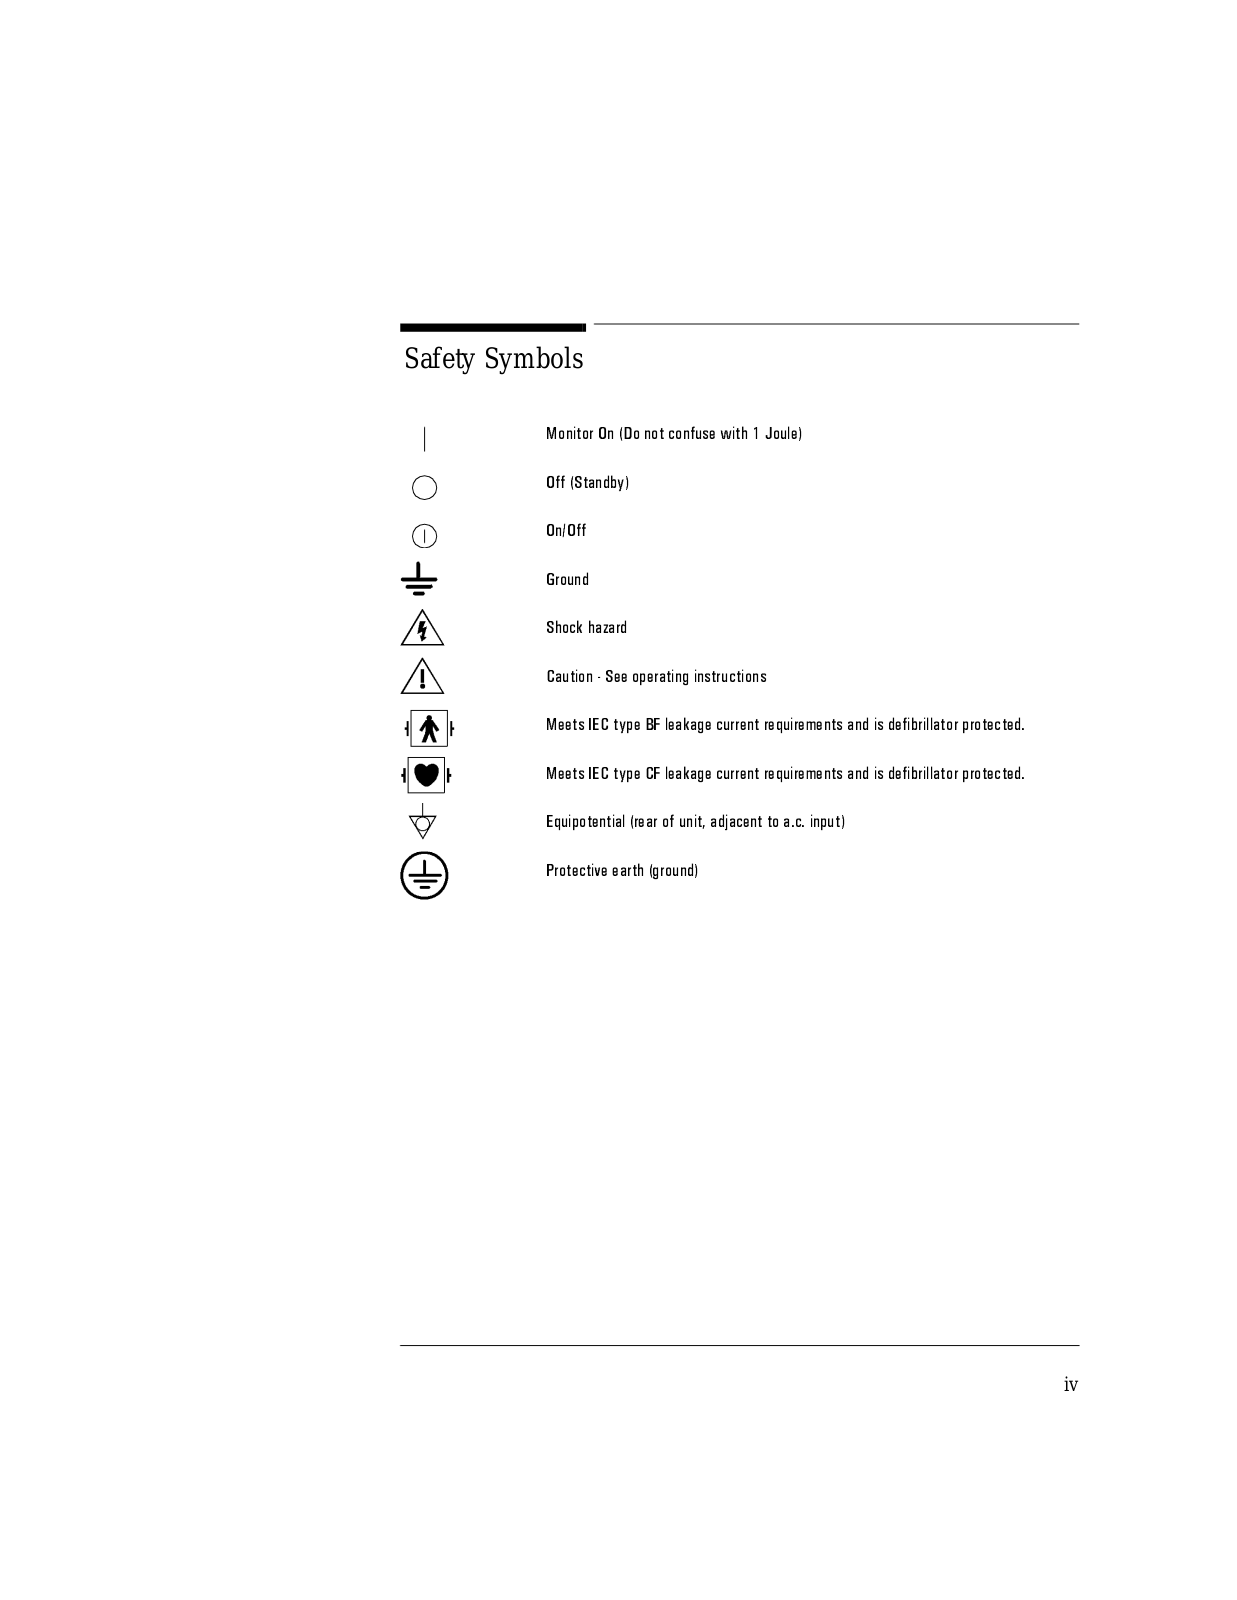
Safety Symbols

0RQLWRU 2Q 'R QRW FRQIXVH ZLWK -RXOH 2II 6WDQGE\

2Q 2II *URXQG 6KRFN KD]DUG

&DXWLRQ 6HH RSHUDWLQJ LQVWUXFWLRQV 0HHWV ,(& W\SH %) OHDNDJH FXUUHQW UHTXLUHPHQWV DQG LV GHILEULOODWRU SURWHFWHG 0HHWV ,(& W\SH &) OHDNDJH FXUUHQW UHTXLUHPHQWV DQG LV GHILEULOODWRU SURWHFWHG (TXLSRWHQWLDO UHDU RI XQLW DGMDFHQW WR D F LQSXW

3URWHFWLYH HDUWK JURXQG

iv

:$51,1*

&$87,21

127(

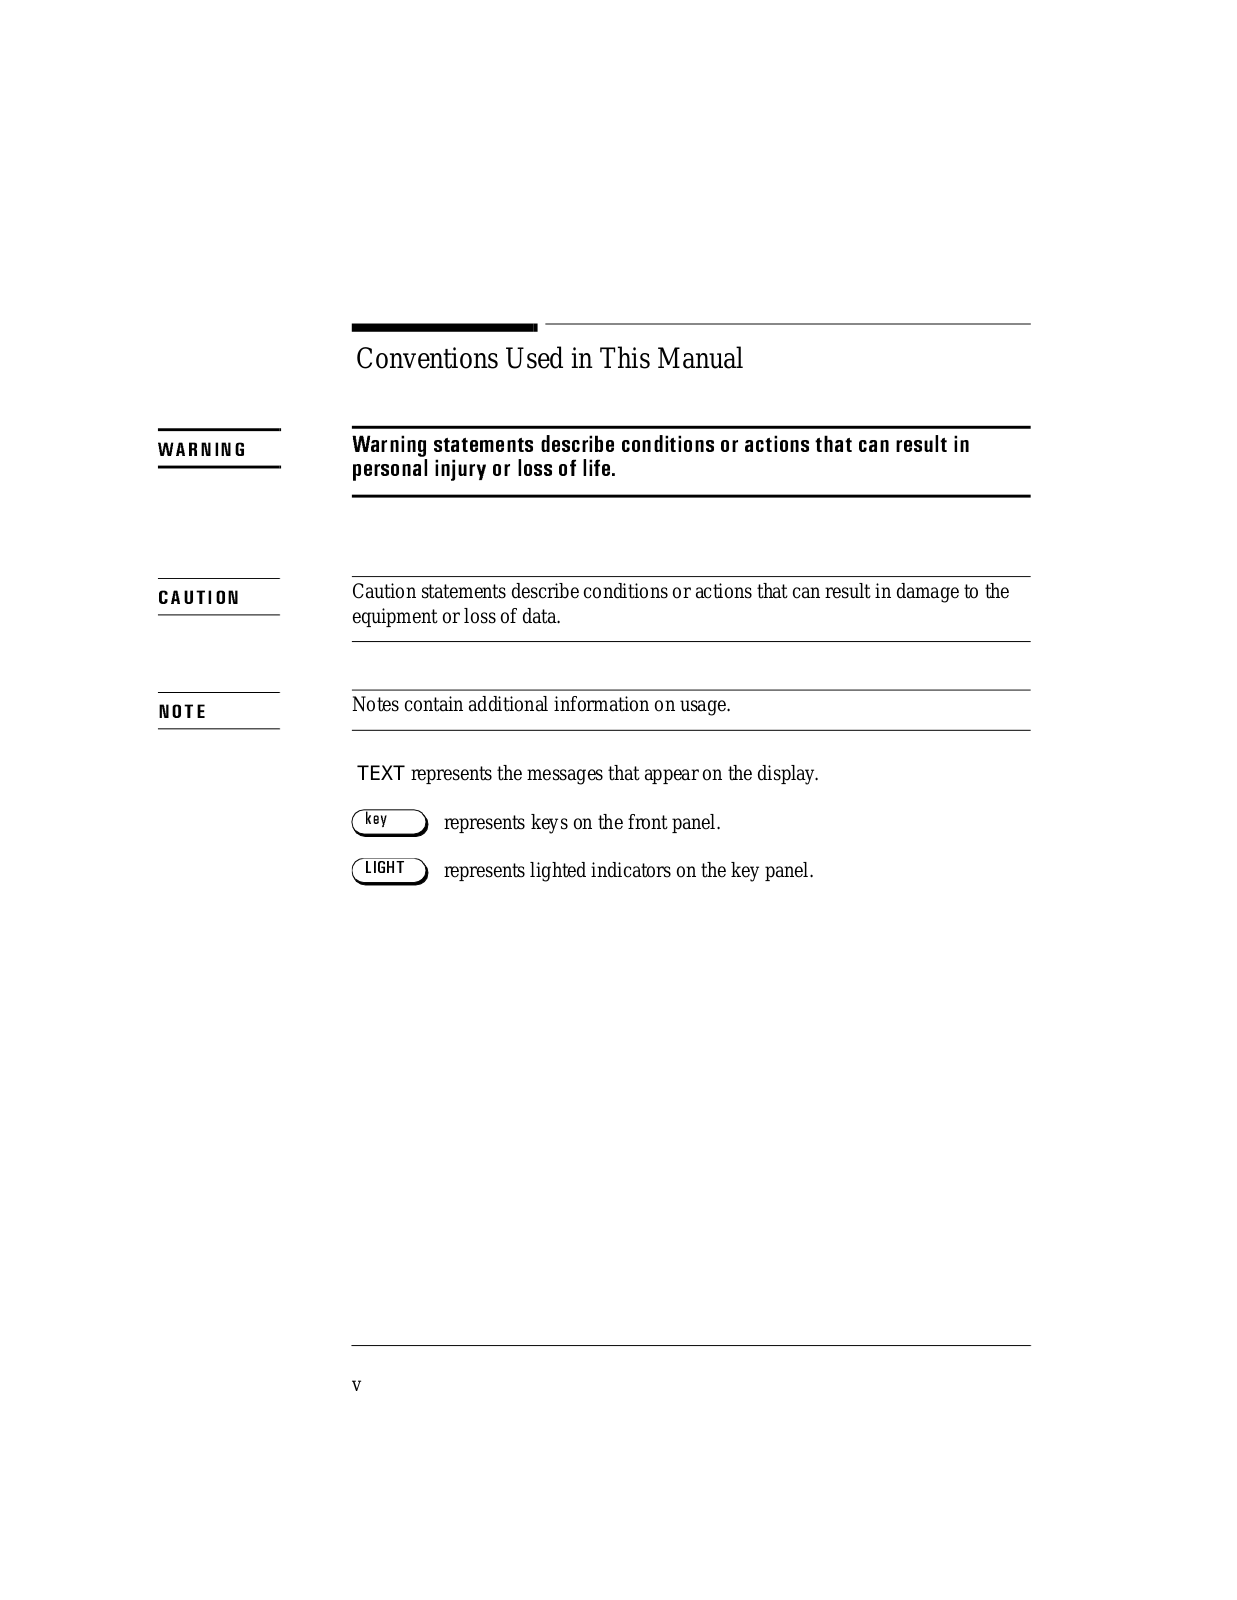
Conventions Used in This Manual

:DUQLQJ VWDWHPHQWV GHVFULEH FRQGLWLRQV RU DFWLRQV WKDW FDQ UHVXOW LQ SHUVRQDO LQMXU\ RU ORVV RI OLIH

Caution statements describe conditions or actions that can result in damage to the equipment or loss of data.

Notes contain additional information on usage.

TEXT represents the messages that appear on the display.

NH\

represents keys on the front panel.

/,*+7 represents lighted indicators on the key panel.

v

Preface

This manual provides operational, basic maintenance, and troubleshooting instructions for use and proper care of the Hewlett-Packard M1722B CodeMaster XL+ defibrillator.

This manual is organized as follows:

Chapter 1—Getting Acquainted. Provides basic maintenance instructions for safe use and proper care.

Chapter 2—Defibrillating. Contains information about defibrillating a patient and using different paddle sets for defibrillating.

Chapter 3—Monitoring. Contains information about preparing and monitoring a patient that apply to the synchronized cardioversion and pacing procedures.

Chapter 4—Performing Synchronized Cardioversion. Contains information about performing synchronized cardioversion on a patient.

Chapter 5—Pacing (Optional). Contains information about pacing.

Chapter 6—SpO 2 Monitoring (Optional). Contains information on both cardiac and respiratory systems, and provides details of oxygen transportation in the body.

Chapter 7—Using Advisory Mode (Optional). Contains information on how the CodeMaster XL+ can act as a semi-automatic external defibrillator.

vi

Chapter 8—Troubleshooting. Contains information about troubleshooting and performing diagnostics on the CodeMaster XL+ defibrillator.

Chapter 9—Maintaining the Defibrillator. Contains information about maintaining and cleaning the CodeMaster XL+ defibrillator.

Appendix A—Installation and Setup. Contains information about battery installation and charge, paper installation, and configuration

settings.

Index.

vii

Contents

1Getting Acquainted

Operating Controls and Indications 1-1 Safety Considerations 1-10

AC / Battery Operation 1-12

Battery Life 1-13

2Defibrillating

Defibrillating a Patient 2-1

1.Select Energy 2-2

2.Charge 2-3

3.Shock 2-4

After Using the Defibrillator 2-5

Defibrillating with Alternate Paddle Sets 2-5

3 Monitoring

Using Leads to Monitor 3-1

Preparing the Leads for Monitoring 3-2

Preparing the Patient 3-4

Monitoring Electrodes 3-5

Monitoring 3-6

Heart Rate Alarms 3-7

Printing the Event Summary Record (Optional) 3-8

Recording 3-9

Automatic Recordings 3-9

Post Shock Data (Optional) 3-10

Recorder Errors 3-11

External Monitoring 3-11

4 Performing Synchronized Cardioversion

Performing Cardioversion 4-1

Monitoring During Cardioversion 4-1

Using Paddles for Performing Synchronized Cardioversion 4-3

viii

&RQWHQWV

Using External Multi-function Defib Electrodes for Performing Synchronized Cardioversion 4-5

After Using the Defibrillator 4-8

5

Pacing (Optional)


Using the Pacer 5-2


Defibrillation During Pacing 5-5


6

SpO2 Monitoring (Optional)


SaO2 and SpO2 6-1


Application Notes 6-1


Using SpO2 to Monitor a Patient

6-3


Apply the Sensor to the Patient 6-4


Troubleshooting Sensor Application

6-5

Connect the Sensor to the CodeMaster XL+ 6-6

Start Monitoring 6-7

SpO2 Readings 6-7

SpO2 Alarms 6-8

Activating SpO2 Alarms 6-8

Deactivating SpO2 Alarms 6-8

Recorder Output 6-9

7 Using Advisory Mode (Optional)

Using Advisory Mode 7-1

Verify Patient Condition 7-2

A.Select Advisory On 7-2

B.Apply External Adhesive Electrodes 7-6

C.Press the Analyze Button 7-8

D.Follow Prompts 7-10

After Using the Defibrillator 7-12

Printing the Advisory Event Summary Record 7-13

Advisory Mode Default Settings 7-18

8 Troubleshooting

ix

&RQWHQWV

Troubleshooting 8-1

Troubleshooting the Defibrillator 8-1

Troubleshooting the Pacer 8-4

Troubleshooting SpO2 8-6

Troubleshooting the Advisory Mode 8-7

Performing Diagnostics 8-7

Operational Checks 8-9

Every Shift 8-9

Every Day 8-10

Every Week 8-14

Every Three Months 8-14

Every Six Months 8-14

9Maintaining the Defibrillator

Changing the Recorder Paper 9-1 Cleaning the Recorder Printhead 9-2

Maintaining the Battery 9-3

Battery Capacity Check 9-4

Replacing the Battery 9-5

Cleaning Exterior Surfaces 9-6

Cleaning and Sterilizing the Internal Paddles 9-6

Steam Sterilizing the Internal Paddles 9-7 Ethylene Oxide Sterilization 9-8

Supplies 9-9

A Installation and Setup

Installation A-1

Line Voltage Settings A-1

Installing and Charging the Battery A-1

Loading the Recorder Paper A-3

Connecting Paddles and Patient Cables A-4

Setup A-9

x

&RQWHQWV

Specifications A-14

Defibrillator A-14

Monitor A-15

Thermal Array Recorder A-16

Size and Weight A-16

Battery A-17

External Pacemaker (Optional) A-17

SpO2 (Optional) A-18

Advisory Mode (Optional) A-18

Calling for Service A-19

Index

xi

Philips Codemaster XL+, CodeMaster XL+, M1722 User manual

Getting Acquainted

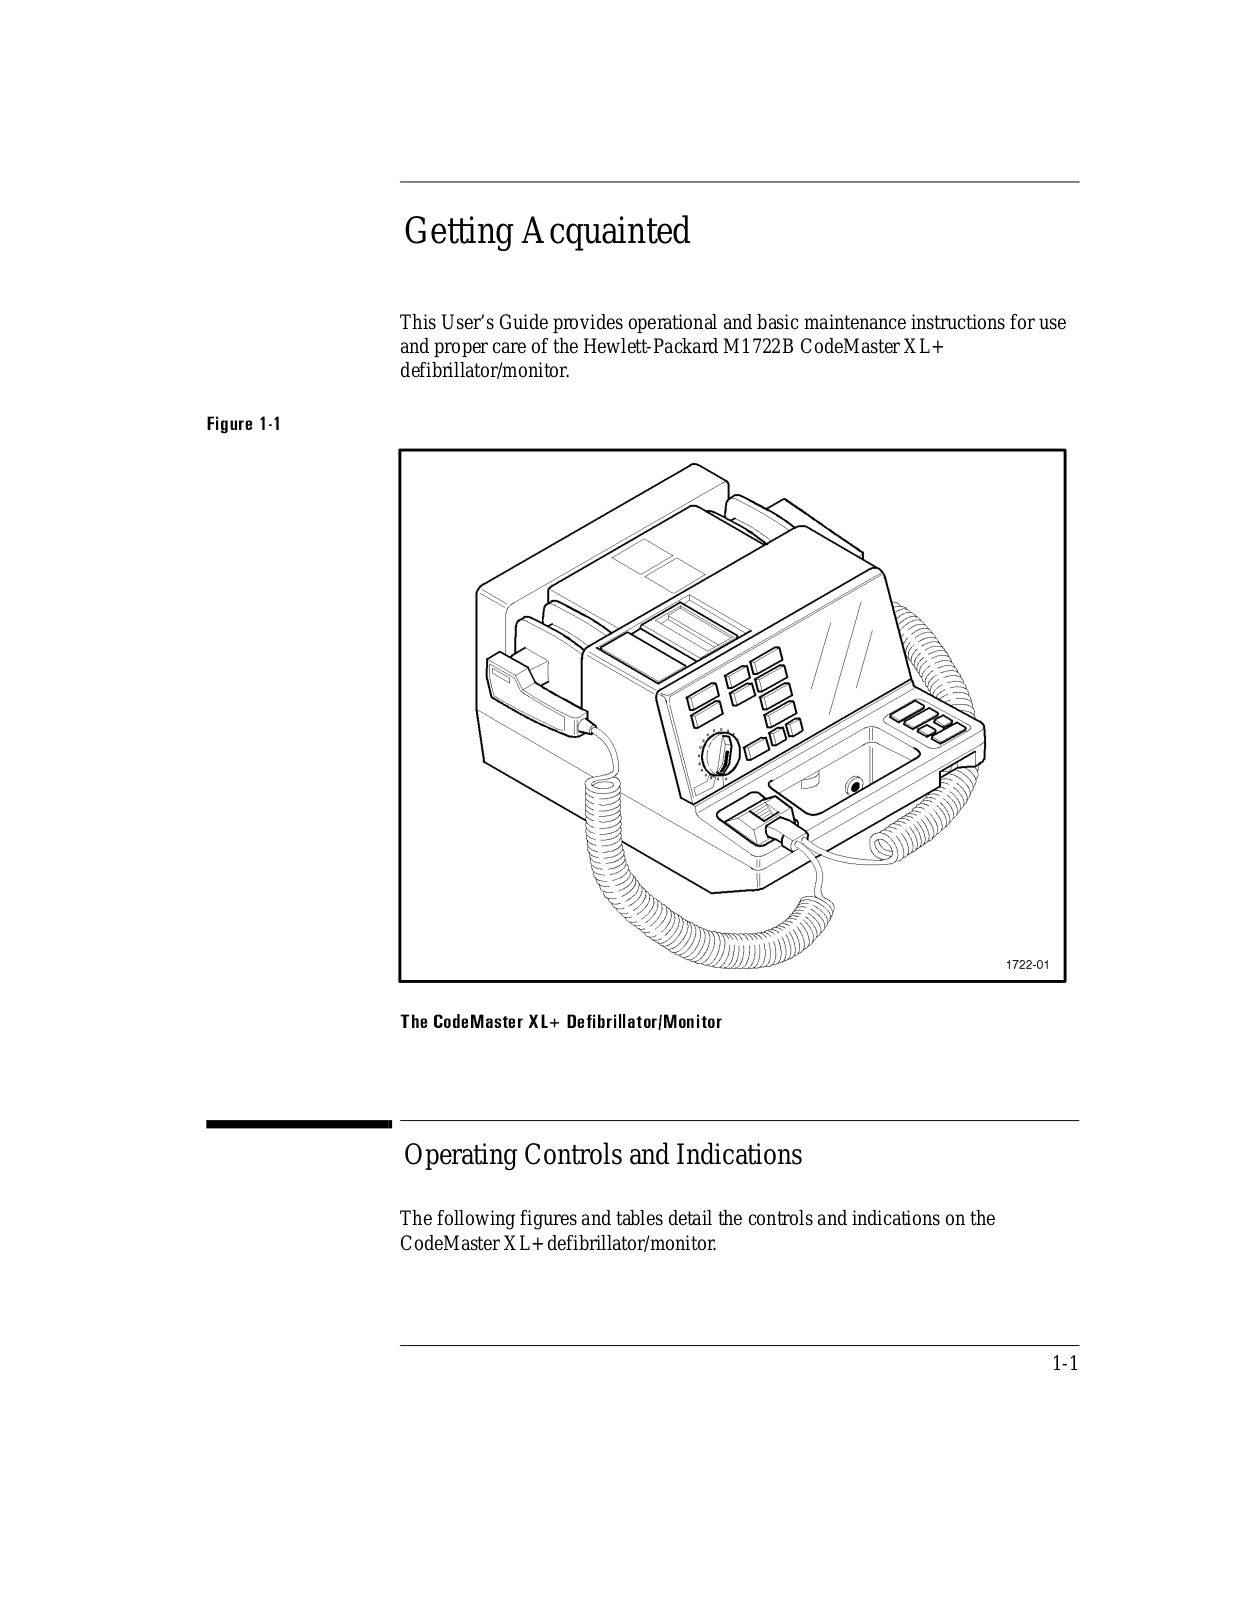
This User’s Guide provides operational and basic maintenance instructions for use and proper care of the Hewlett-Packard M1722B CodeMaster XL+ defibrillator/monitor.

)LJXUH

7KH &RGH0DVWHU ;/ 'HILEULOODWRU 0RQLWRU

Operating Controls and Indications

The following figures and tables detail the controls and indications on the

CodeMaster XL+ defibrillator/monitor.

1-1

*HWWLQJ $FTXDLQWHG

2SHUDWLQJ &RQWUROV DQG ,QGLFDWLRQV

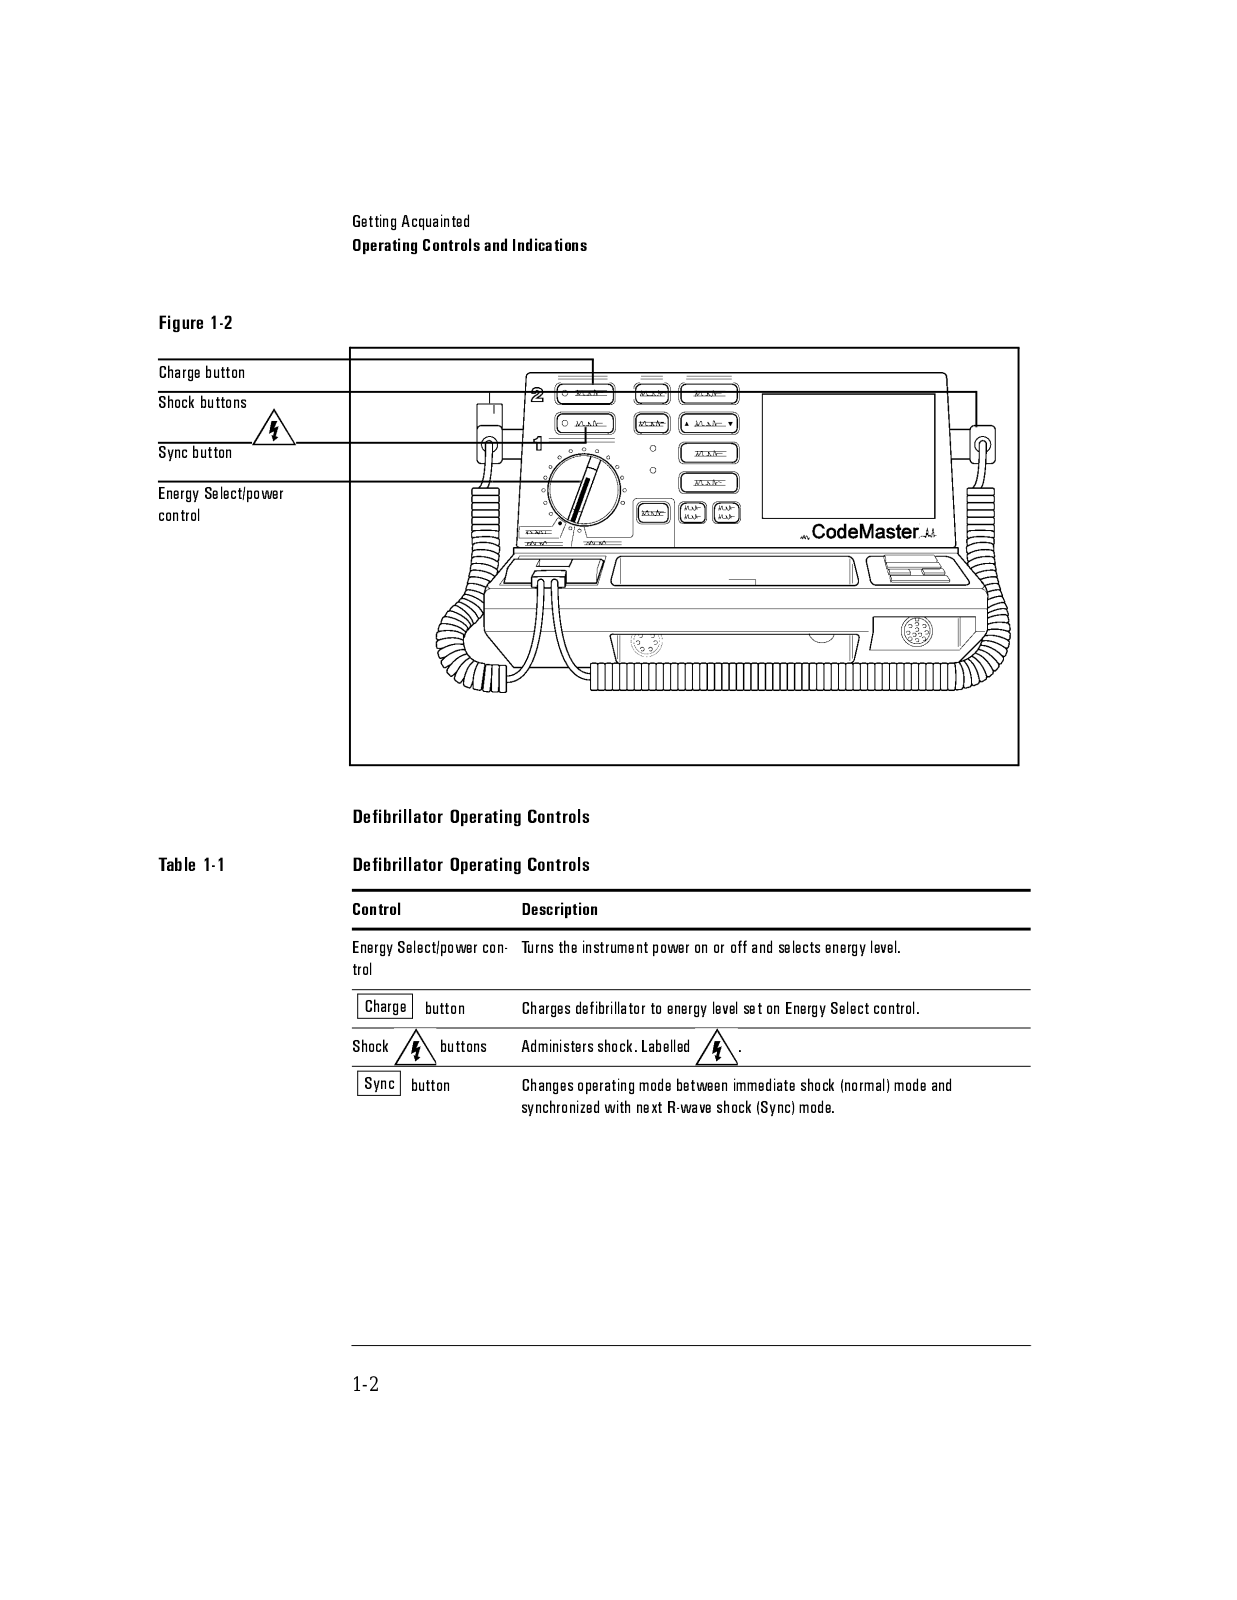
)LJXUH

&KDUJH EXWWRQ

6KRFN EXWWRQV

6\QF EXWWRQ

(QHUJ\ 6HOHFW SRZHU FRQWURO


'HILEULOODWRU 2SHUDWLQJ &RQWUROV


7DEOH

'HILEULOODWRU 2SHUDWLQJ &RQWUROV


&RQWURO


'HVFULSWLRQ


(QHUJ\ 6HOHFW SRZHU FRQ 7XUQV WKH LQVWUXPHQW SRZHU RQ RU RII DQG VHOHFWV HQHUJ\ OHYHO


WURO


&KDUJH

EXWWRQ

&KDUJHV GHILEULOODWRU WR HQHUJ\ OHYHO VHW RQ (QHUJ\ 6HOHFW FRQWURO


6KRFN

EXWWRQV

$GPLQLVWHUV VKRFN /DEHOOHG


6\QF

EXWWRQ

&KDQJHV RSHUDWLQJ PRGH EHWZHHQ LPPHGLDWH VKRFN QRUPDO PRGH DQG


V\QFKURQL]HG ZLWK QH[W 5 ZDYH VKRFN 6\QF PRGH

1-2

*HWWLQJ $FTXDLQWHG

2SHUDWLQJ &RQWUROV DQG ,QGLFDWLRQV

)LJXUH

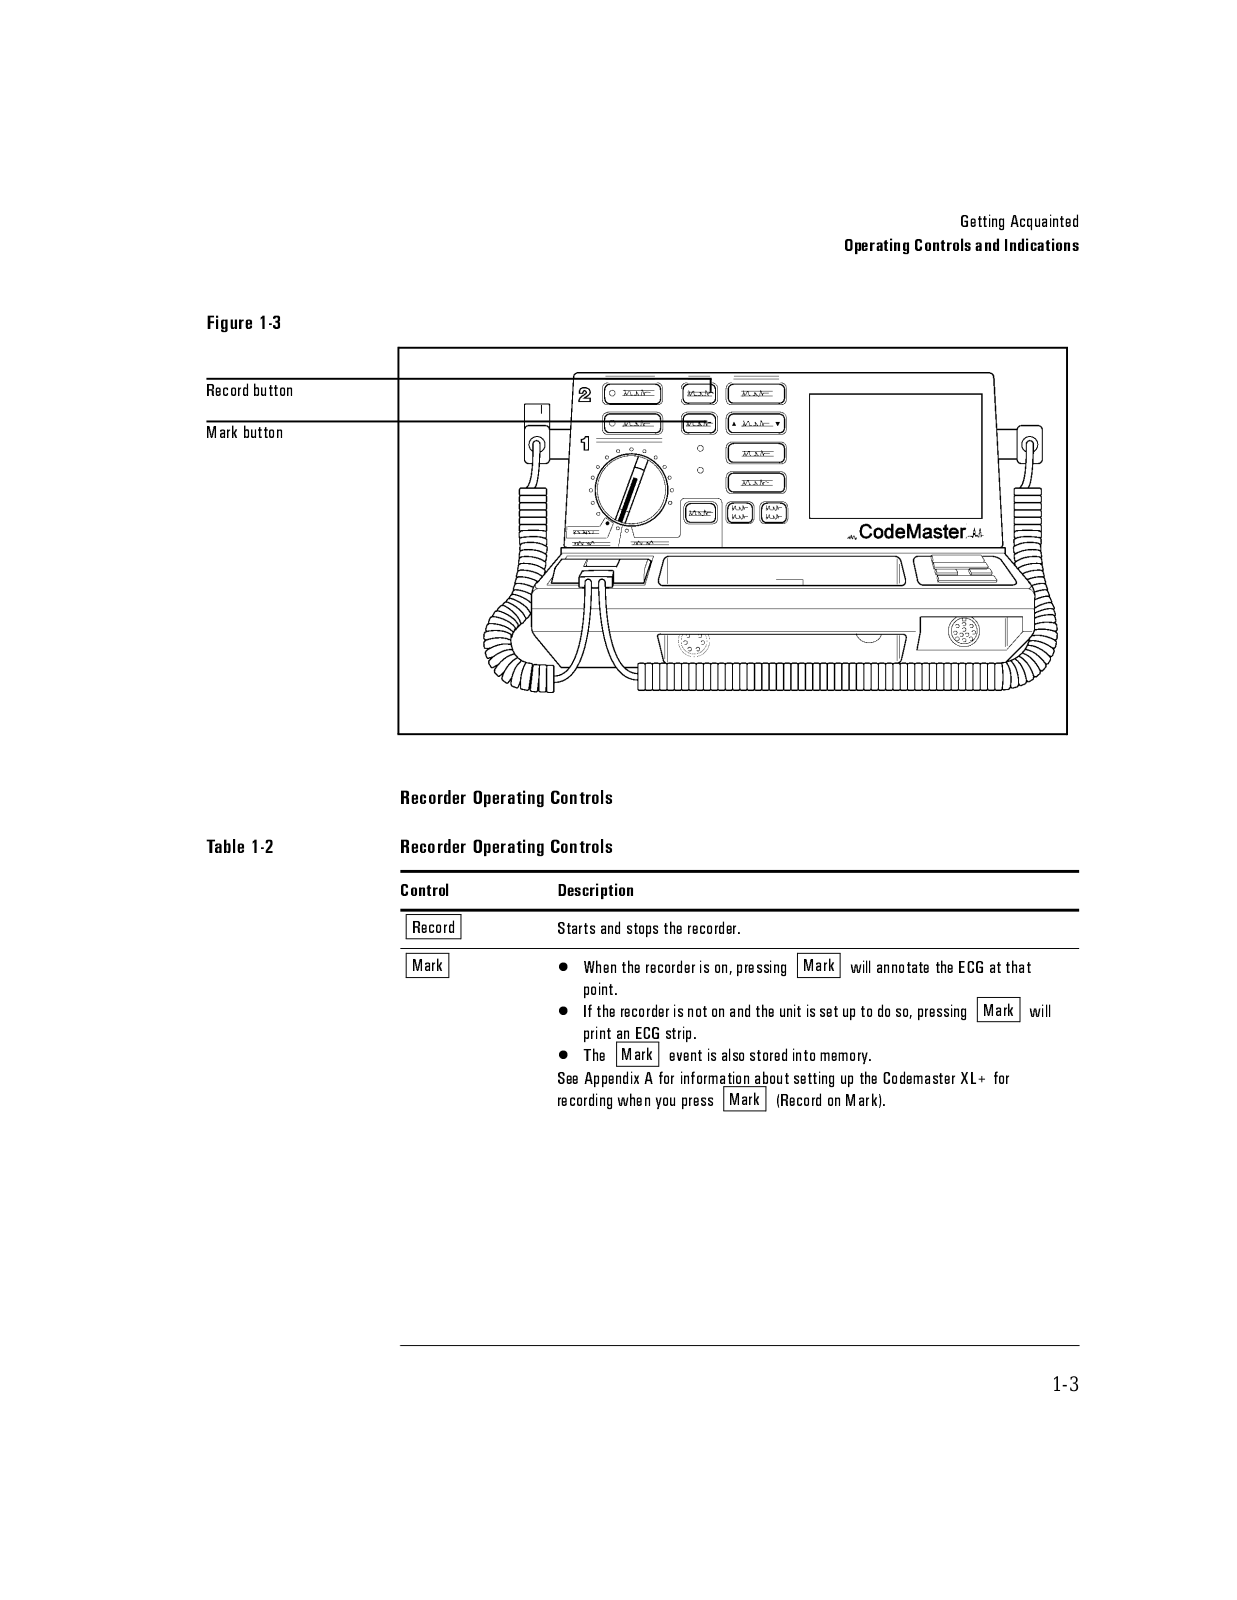
5HFRUG EXWWRQ

0DUN EXWWRQ


5HFRUGHU 2SHUDWLQJ &RQWUROV

7DEOH

5HFRUGHU 2SHUDWLQJ &RQWUROV


&RQWURO

'HVFULSWLRQ


5HFRUG

6WDUWV DQG VWRSV WKH UHFRUGHU


0DUN


‡ :KHQ WKH UHFRUGHU LV RQ SUHVVLQJ

0DUN

ZLOO DQQRWDWH WKH (&* DW WKDW


SRLQW


‡ ,I WKH UHFRUGHU LV QRW RQ DQG WKH XQLW LV VHW XS WR GR VR SUHVVLQJ

0DUN

ZLOO


SULQW

DQ (&*

VWULS


‡ 7KH

0DUN

HYHQW LV DOVR VWRUHG LQWR PHPRU\


6HH $SSHQGL[ $ IRU LQIRUPDWLRQ DERXW VHWWLQJ XS WKH &RGHPDVWHU ;/ IRU


UHFRUGLQJ ZKHQ \RX SUHVV

0DUN

5HFRUG RQ 0DUN

1-3

*HWWLQJ $FTXDLQWHG

2SHUDWLQJ &RQWUROV DQG ,QGLFDWLRQV

)LJXUH

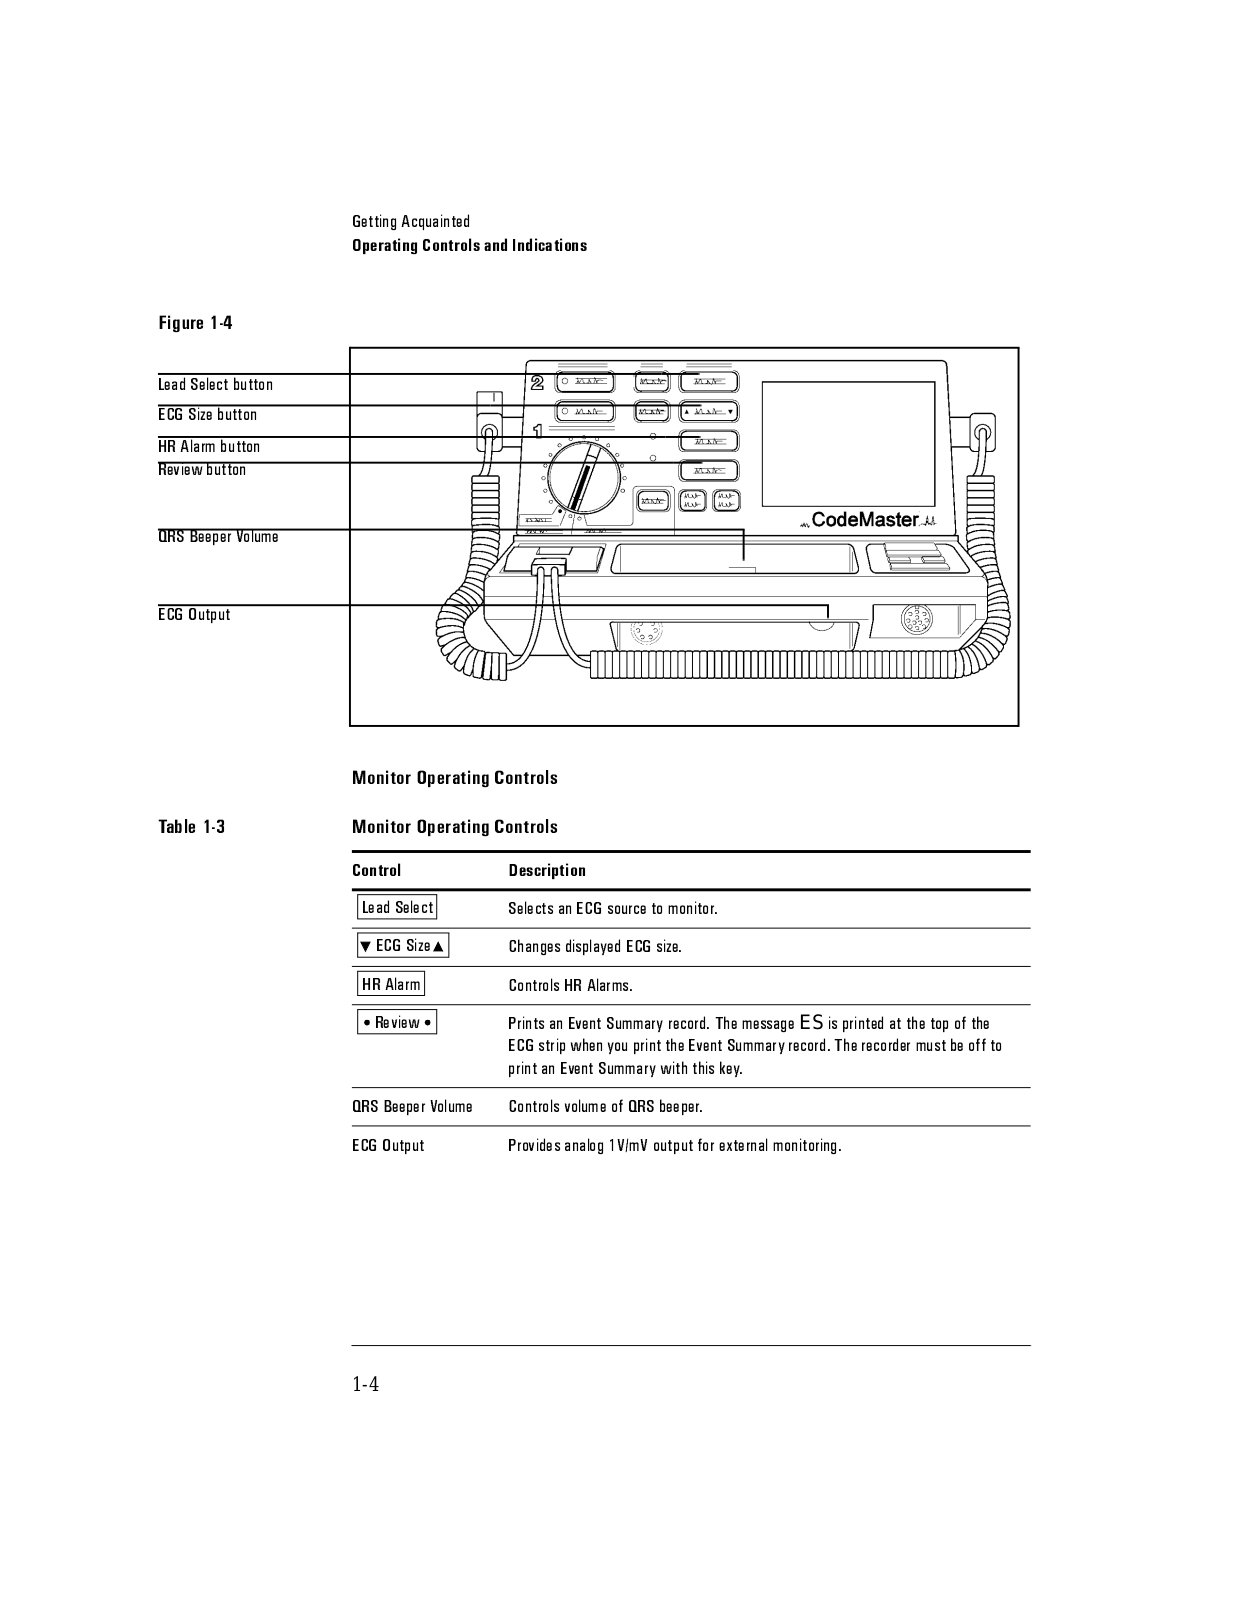
/HDG 6HOHFW EXWWRQ

(&* 6L]H EXWWRQ

+5 $ODUP EXWWRQ 5HYLHZ EXWWRQ

456 %HHSHU 9ROXPH

(&* 2XWSXW


0RQLWRU 2SHUDWLQJ &RQWUROV

7DEOH

0RQLWRU 2SHUDWLQJ &RQWUROV


&RQWURO


'HVFULSWLRQ


/HDG 6HOHFW


6HOHFWV DQ (&* VRXUFH WR PRQLWRU


(&* 6L]H


&KDQJHV GLVSOD\HG (&* VL]H


+5 $ODUP


&RQWUROV +5 $ODUPV


3ULQWV DQ (YHQW 6XPPDU\ UHFRUG 7KH PHVVDJH ES LV SULQWHG DW WKH WRS RI WKH


5HYLHZ


(&* VWULS ZKHQ \RX SULQW WKH (YHQW 6XPPDU\ UHFRUG 7KH UHFRUGHU PXVW EH RII WR


SULQW DQ (YHQW 6XPPDU\ ZLWK WKLV NH\


456 %HHSHU 9ROXPH

&RQWUROV YROXPH RI 456 EHHSHU


(&* 2XWSXW


3URYLGHV DQDORJ 9 P9 RXWSXW IRU H[WHUQDO PRQLWRULQJ

1-4

*HWWLQJ $FTXDLQWHG

2SHUDWLQJ &RQWUROV DQG ,QGLFDWLRQV

)LJXUH

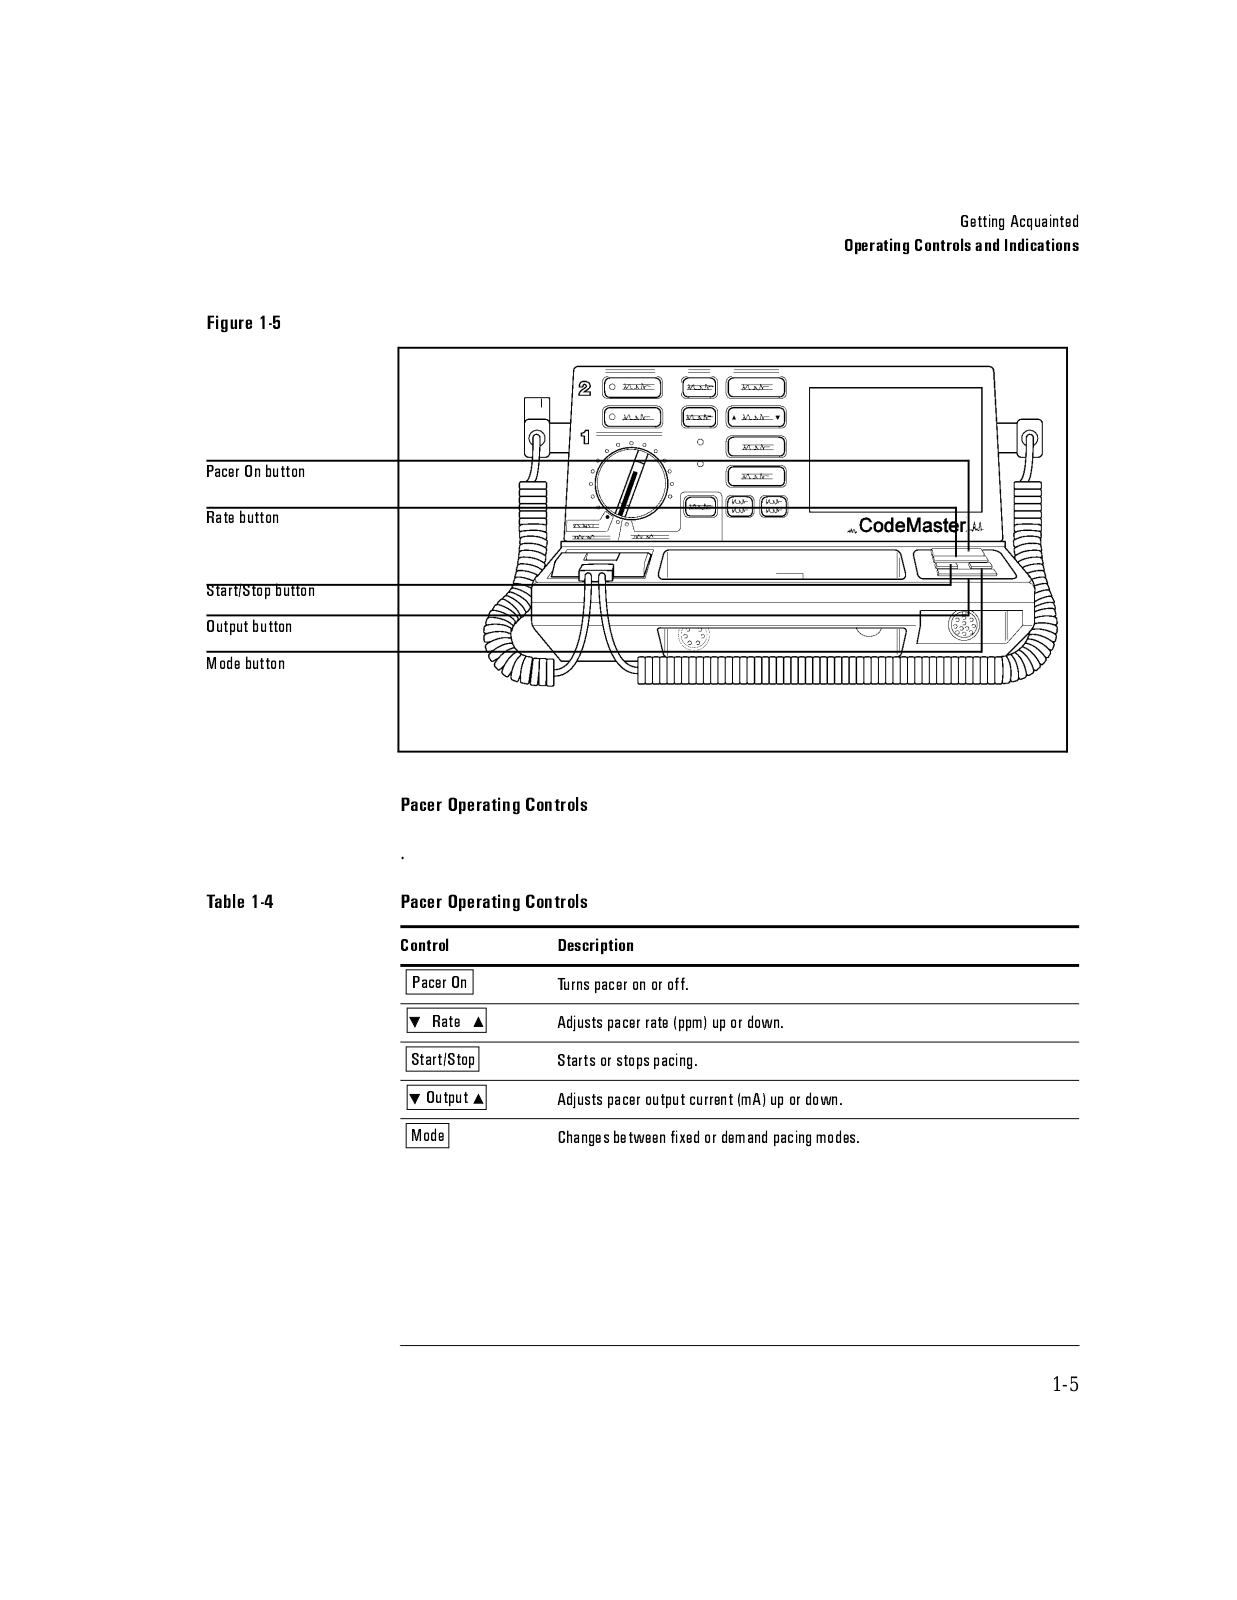
3DFHU 2Q EXWWRQ

5DWH EXWWRQ

6WDUW 6WRS EXWWRQ

2XWSXW EXWWRQ

0RGH EXWWRQ

3DFHU 2SHUDWLQJ &RQWUROV

.

7DEOH

3DFHU 2SHUDWLQJ &RQWUROV


&RQWURO

'HVFULSWLRQ


3DFHU 2Q


7XUQV SDFHU RQ RU RII


5DWH

$GMXVWV SDFHU UDWH SSP XS RU GRZQ


6WDUW 6WRS


6WDUWV RU VWRSV SDFLQJ


2XWSXW

$GMXVWV SDFHU RXWSXW FXUUHQW P$ XS RU GRZQ


0RGH


&KDQJHV EHWZHHQ IL[HG RU GHPDQG SDFLQJ PRGHV

1-5

*HWWLQJ $FTXDLQWHG

2SHUDWLQJ &RQWUROV DQG ,QGLFDWLRQV

)LJXUH

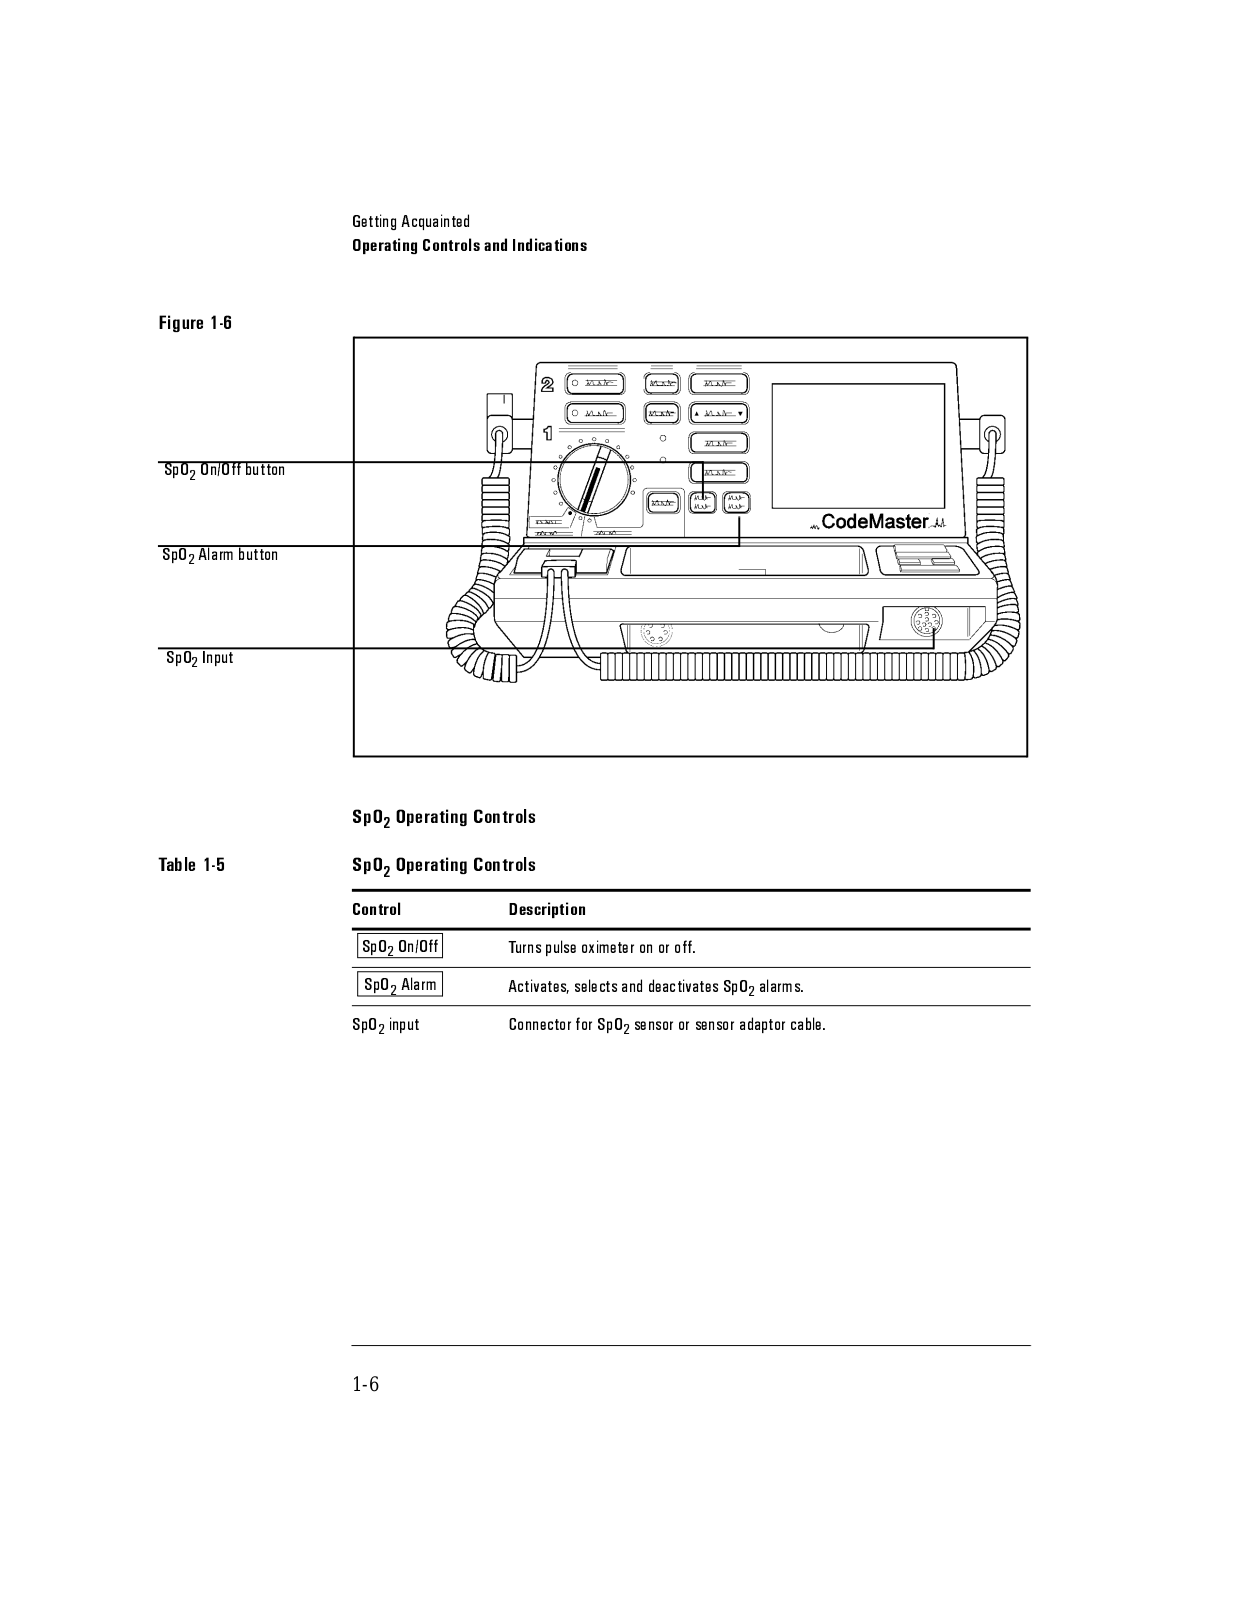
6S2 2Q 2II EXWWRQ

6S2 $ODUP EXWWRQ

6S2 ,QSXW


6S2 2SHUDWLQJ &RQWUROV

7DEOH

6S2 2SHUDWLQJ &RQWUROV


&RQWURO

'HVFULSWLRQ


6S2 2Q 2II

7XUQV SXOVH R[LPHWHU RQ RU RII


6S2 $ODUP

$FWLYDWHV VHOHFWV DQG GHDFWLYDWHV 6S2 DODUPV


6S2 LQSXW

&RQQHFWRU IRU 6S2 VHQVRU RU VHQVRU DGDSWRU FDEOH

1-6

*HWWLQJ $FTXDLQWHG

2SHUDWLQJ &RQWUROV DQG ,QGLFDWLRQV

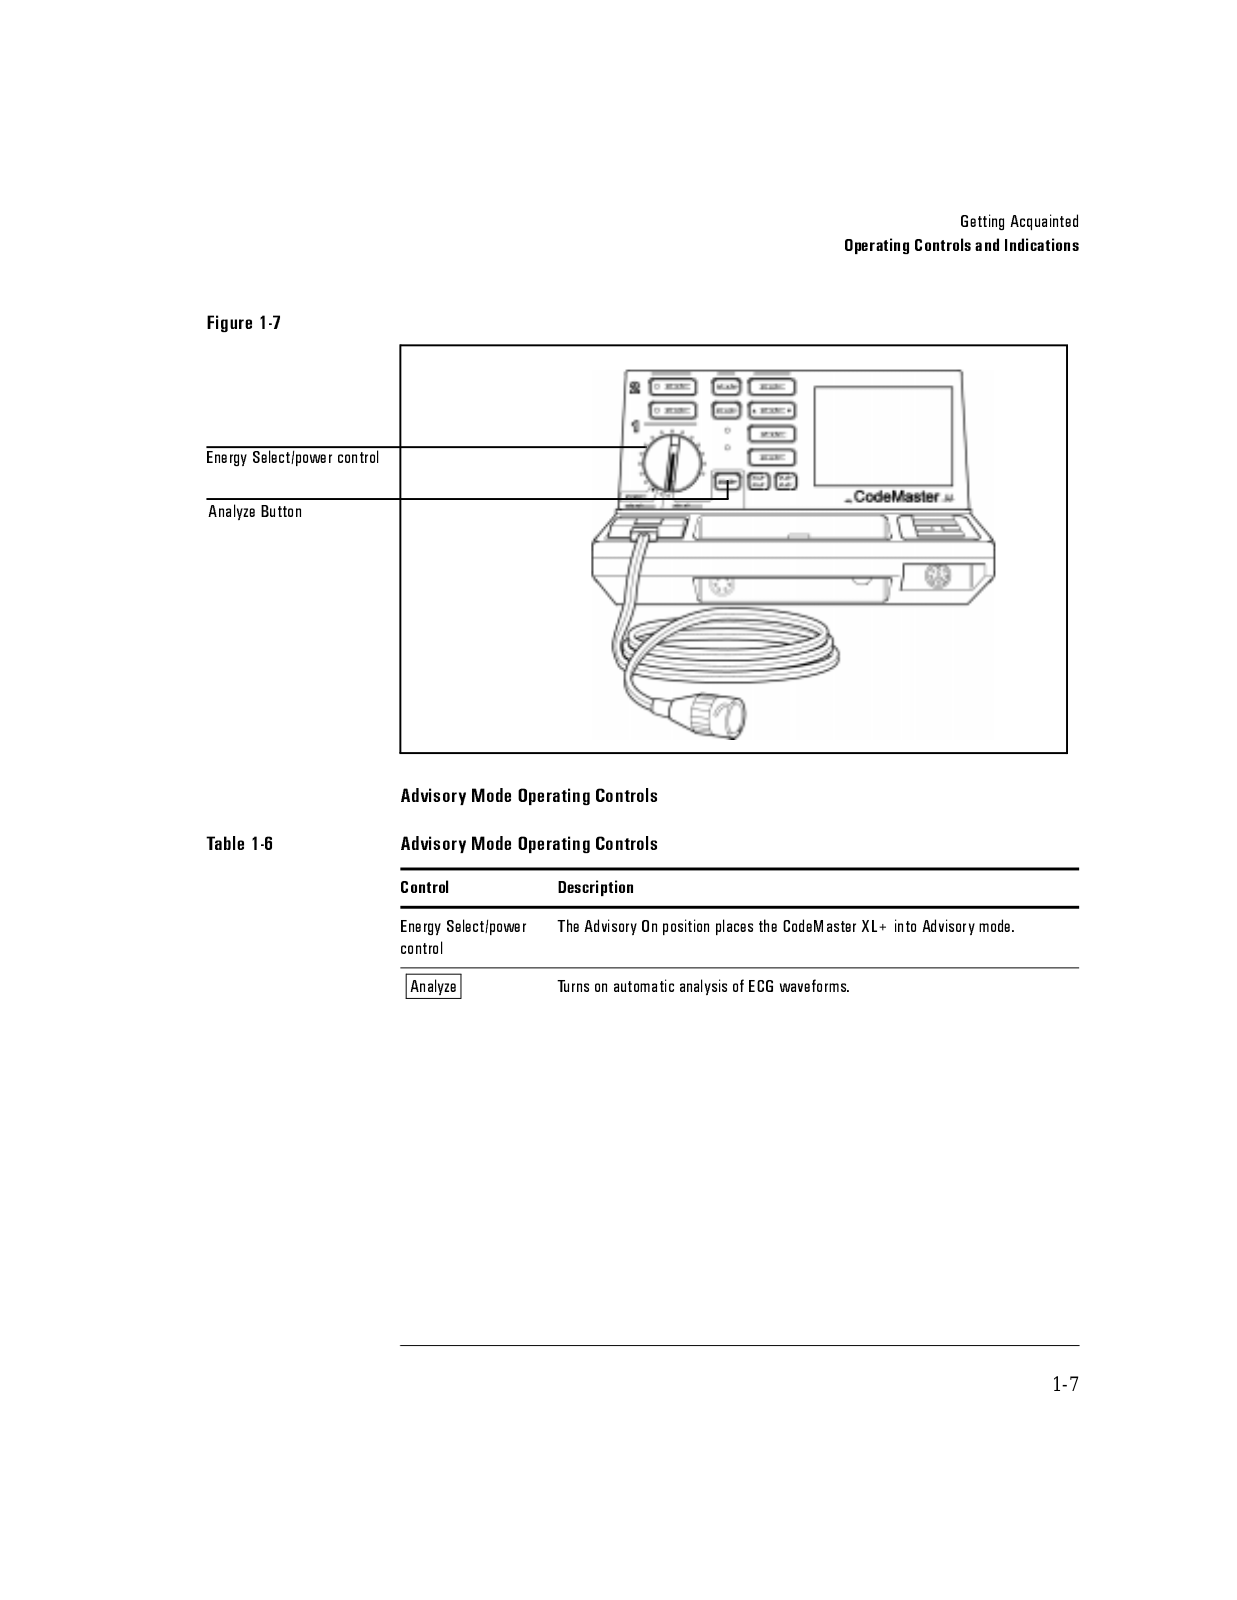
)LJXUH

(QHUJ\ 6HOHFW SRZHU FRQWURO

$QDO\]H %XWWRQ


$GYLVRU\ 0RGH 2SHUDWLQJ &RQWUROV

7DEOH

$GYLVRU\ 0RGH 2SHUDWLQJ &RQWUROV


&RQWURO

'HVFULSWLRQ


(QHUJ\ 6HOHFW SRZHU

7KH $GYLVRU\ 2Q SRVLWLRQ SODFHV WKH &RGH0DVWHU ;/ LQWR $GYLVRU\ PRGH


FRQWURO


7XUQV RQ DXWRPDWLF DQDO\VLV RI (&* ZDYHIRUPV


$QDO\]H


1-7

*HWWLQJ $FTXDLQWHG

2SHUDWLQJ &RQWUROV DQG ,QGLFDWLRQV

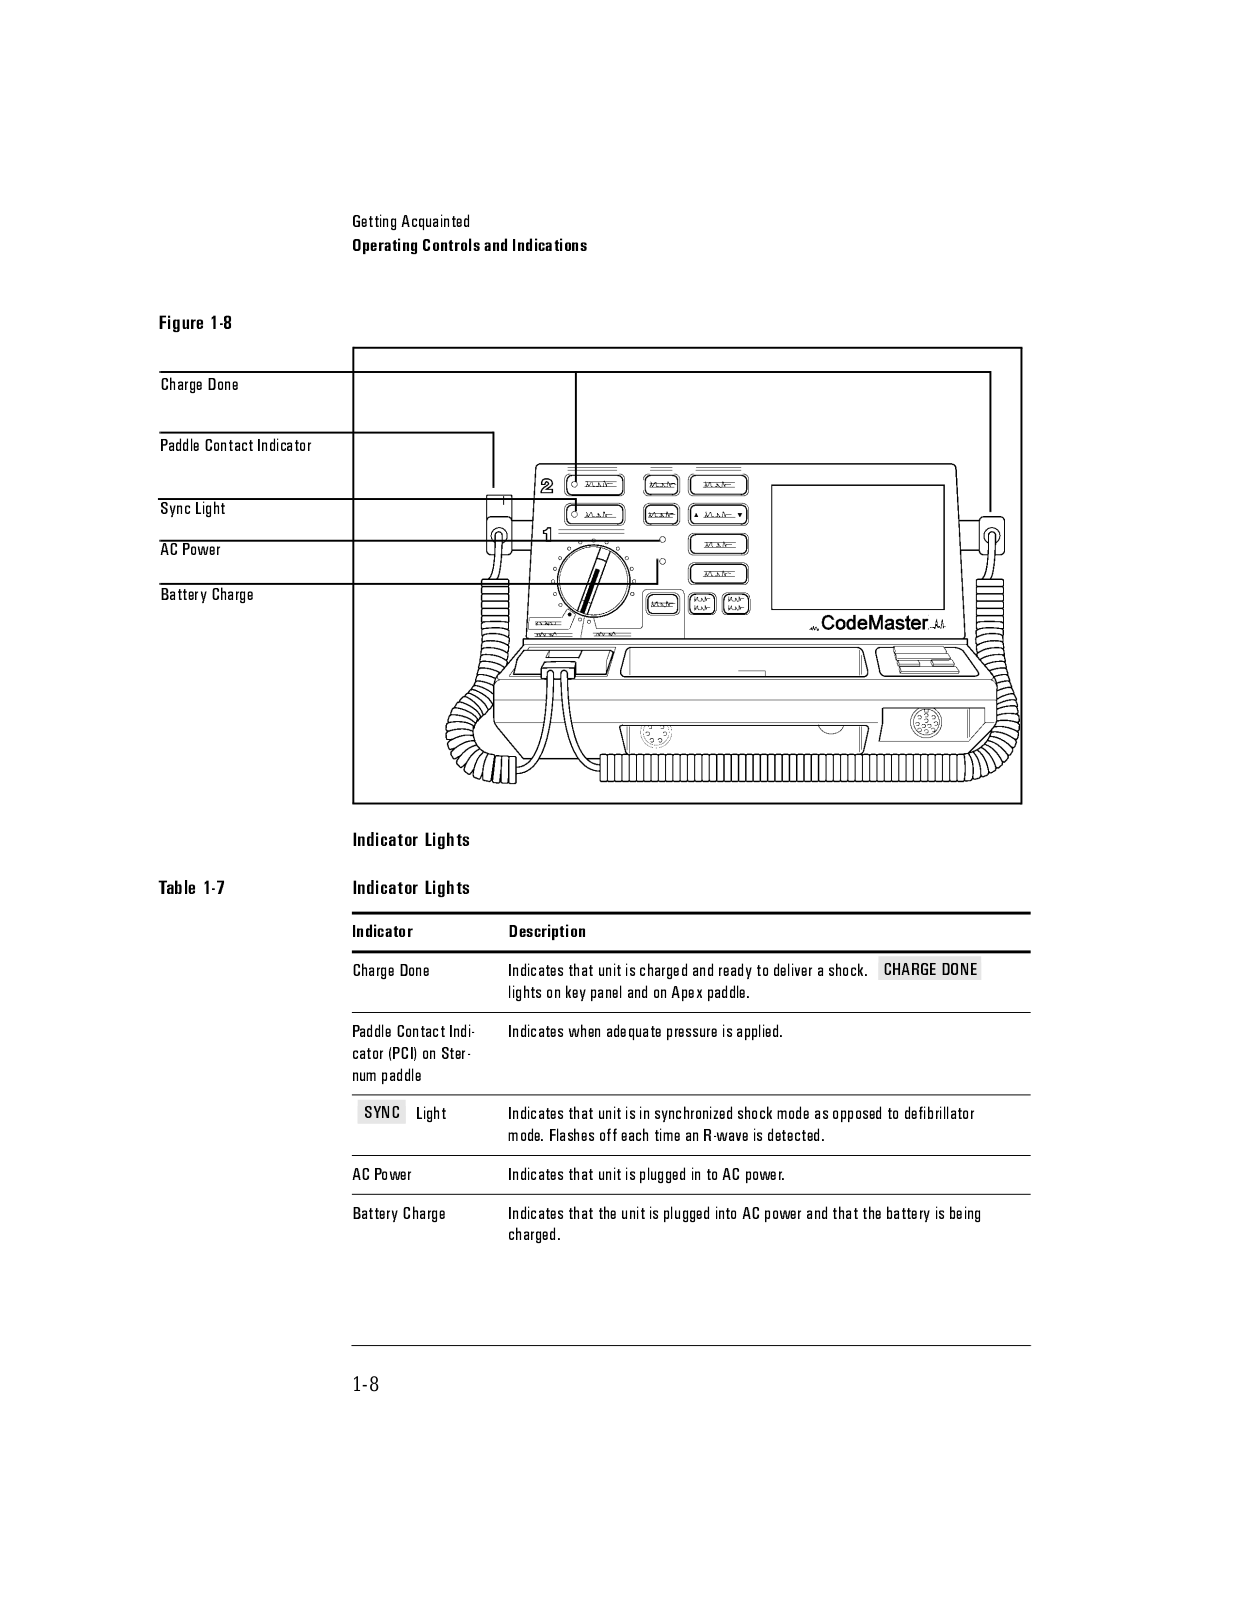
)LJXUH

&KDUJH 'RQH

3DGGOH &RQWDFW ,QGLFDWRU

6\QF /LJKW

$& 3RZHU

%DWWHU\ &KDUJH


,QGLFDWRU /LJKWV


7DEOH

,QGLFDWRU /LJKWV


,QGLFDWRU

'HVFULSWLRQ


&KDUJH 'RQH

,QGLFDWHV WKDW XQLW LV FKDUJHG DQG UHDG\ WR GHOLYHU D VKRFN

&+$5*( '21(


OLJKWV RQ NH\ SDQHO DQG RQ $SH[ SDGGOH


3DGGOH &RQWDFW ,QGL

,QGLFDWHV ZKHQ DGHTXDWH SUHVVXUH LV DSSOLHG


FDWRU 3&, RQ 6WHU


QXP SDGGOH


6<1&

/LJKW

,QGLFDWHV WKDW XQLW LV LQ V\QFKURQL]HG VKRFN PRGH DV RSSRVHG WR GHILEULOODWRU


PRGH )ODVKHV RII HDFK WLPH DQ 5 ZDYH LV GHWHFWHG


$& 3RZHU

,QGLFDWHV WKDW XQLW LV SOXJJHG LQ WR $& SRZHU


%DWWHU\ &KDUJH

,QGLFDWHV WKDW WKH XQLW LV SOXJJHG LQWR $& SRZHU DQG WKDW WKH EDWWHU\ LV EHLQJ


FKDUJHG

1-8


*HWWLQJ $FTXDLQWHG


2SHUDWLQJ &RQWUROV DQG ,QGLFDWLRQV

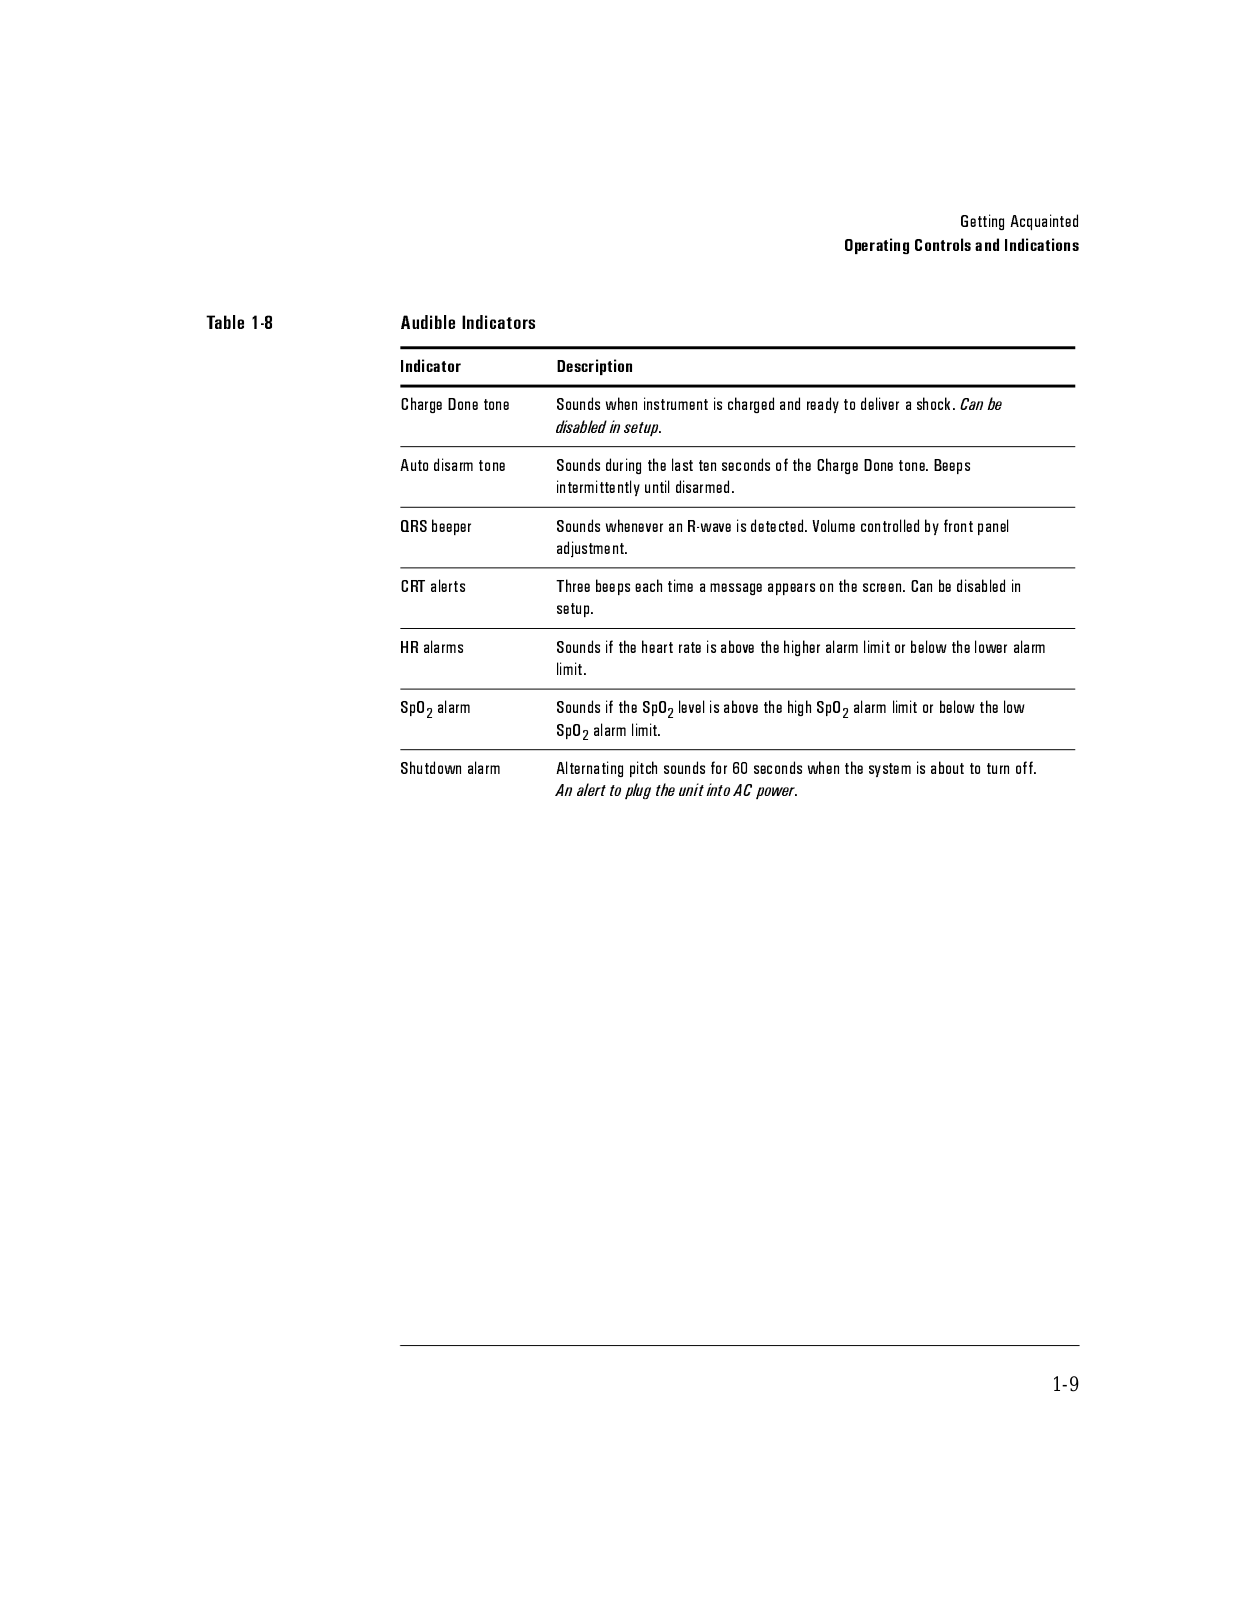
7DEOH

$XGLEOH ,QGLFDWRUV


,QGLFDWRU

'HVFULSWLRQ


&KDUJH 'RQH WRQH

6RXQGV ZKHQ LQVWUXPHQW LV FKDUJHG DQG UHDG\ WR GHOLYHU D VKRFN &DQ EH


GLVDEOHG LQ VHWXS


$XWR GLVDUP WRQH

6RXQGV GXULQJ WKH ODVW WHQ VHFRQGV RI WKH &KDUJH 'RQH WRQH %HHSV


LQWHUPLWWHQWO\ XQWLO GLVDUPHG


456 EHHSHU

6RXQGV ZKHQHYHU DQ 5 ZDYH LV GHWHFWHG 9ROXPH FRQWUROOHG E\ IURQW SDQHO


DGMXVWPHQW


&57 DOHUWV

7KUHH EHHSV HDFK WLPH D PHVVDJH DSSHDUV RQ WKH VFUHHQ &DQ EH GLVDEOHG LQ


VHWXS


+5 DODUPV

6RXQGV LI WKH KHDUW UDWH LV DERYH WKH KLJKHU DODUP OLPLW RU EHORZ WKH ORZHU DODUP


OLPLW


6S2 DODUP

6RXQGV LI WKH 6S2 OHYHO LV DERYH WKH KLJK 6S2 DODUP OLPLW RU EHORZ WKH ORZ


6S2 DODUP OLPLW


6KXWGRZQ DODUP

$OWHUQDWLQJ SLWFK VRXQGV IRU VHFRQGV ZKHQ WKH V\VWHP LV DERXW WR WXUQ RII


$Q DOHUW WR SOXJ WKH XQLW LQWR $& SRZHU

1-9

*HWWLQJ $FTXDLQWHG

6DIHW\ &RQVLGHUDWLRQV

Safety Considerations

The CodeMaster XL+ stores high voltage energy and is capable of delivering up to 360 joules of DC energy to a 50 ohm impedance.

To remove power from the instrument, you must turn the Energy Select control to Off (Standby). Disconnecting the CodeMaster XL+ from an AC outlet will not remove power because the instrument is battery powered.

To disarm a charged instrument, use one of three methods:

-Turn the Energy Select control from an energy level setting to the Monitor On or Off (Standby) position.

or

-Place the paddles in their holders and depress both Shock buttons. or

-Leave the unit charged for 60 seconds and it will automatically disarm.

&$87,21


• Do not leave the instrument turned on when it is not in use and it is not plugged


into AC power.


• Do not discharge the defibrillator with the paddles shorted together. To do so can


cause burning and pitting of the metal paddle contacts.


• Disconnect any other medical electronic equipment from the patient during


defibrillation discharge unless labelled as defibrillator protected.


(

and

)


1-10

*HWWLQJ $FTXDLQWHG

6DIHW\ &RQVLGHUDWLRQV

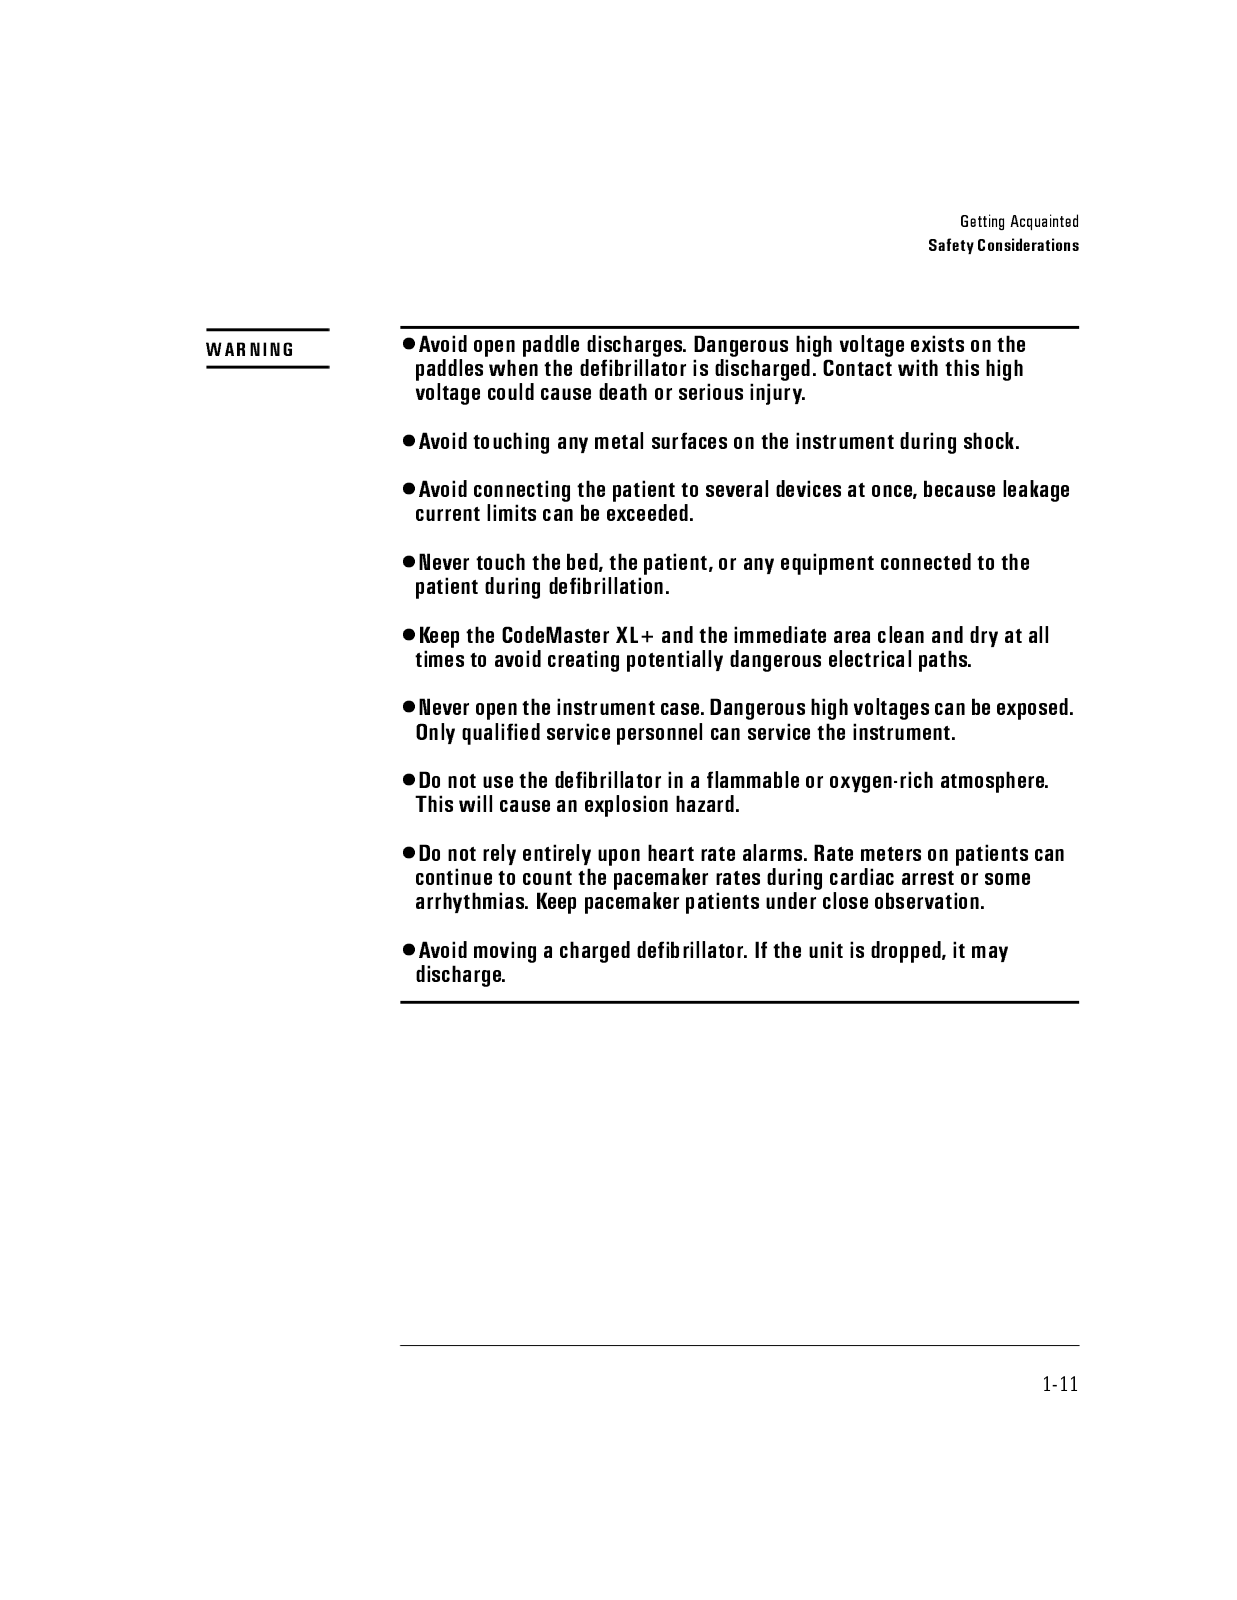
:$51,1* ‡$YRLG RSHQ SDGGOH GLVFKDUJHV 'DQJHURXV KLJK YROWDJH H[LVWV RQ WKH SDGGOHV ZKHQ WKH GHILEULOODWRU LV GLVFKDUJHG &RQWDFW ZLWK WKLV KLJK YROWDJH FRXOG FDXVH GHDWK RU VHULRXV LQMXU\

‡$YRLG WRXFKLQJ DQ\ PHWDO VXUIDFHV RQ WKH LQVWUXPHQW GXULQJ VKRFN

‡$YRLG FRQQHFWLQJ WKH SDWLHQW WR VHYHUDO GHYLFHV DW RQFH EHFDXVH OHDNDJH FXUUHQW OLPLWV FDQ EH H[FHHGHG

‡1HYHU WRXFK WKH EHG WKH SDWLHQW RU DQ\ HTXLSPHQW FRQQHFWHG WR WKH SDWLHQW GXULQJ GHILEULOODWLRQ

‡.HHS WKH &RGH0DVWHU ;/ DQG WKH LPPHGLDWH DUHD FOHDQ DQG GU\ DW DOO WLPHV WR DYRLG FUHDWLQJ SRWHQWLDOO\ GDQJHURXV HOHFWULFDO SDWKV

‡1HYHU RSHQ WKH LQVWUXPHQW FDVH 'DQJHURXV KLJK YROWDJHV FDQ EH H[SRVHG 2QO\ TXDOLILHG VHUYLFH SHUVRQQHO FDQ VHUYLFH WKH LQVWUXPHQW

‡'R QRW XVH WKH GHILEULOODWRU LQ D IODPPDEOH RU R[\JHQ ULFK DWPRVSKHUH 7KLV ZLOO FDXVH DQ H[SORVLRQ KD]DUG

‡'R QRW UHO\ HQWLUHO\ XSRQ KHDUW UDWH DODUPV 5DWH PHWHUV RQ SDWLHQWV FDQ

FRQWLQXH WR FRXQW WKH SDFHPDNHU UDWHV GXULQJ FDUGLDF DUUHVW RU VRPH DUUK\WKPLDV .HHS SDFHPDNHU SDWLHQWV XQGHU FORVH REVHUYDWLRQ

‡$YRLG PRYLQJ D FKDUJHG GHILEULOODWRU ,I WKH XQLW LV GURSSHG LW PD\ GLVFKDUJH

1-11

127(

&$87,21

*HWWLQJ $FTXDLQWHG $& %DWWHU\ 2SHUDWLRQ

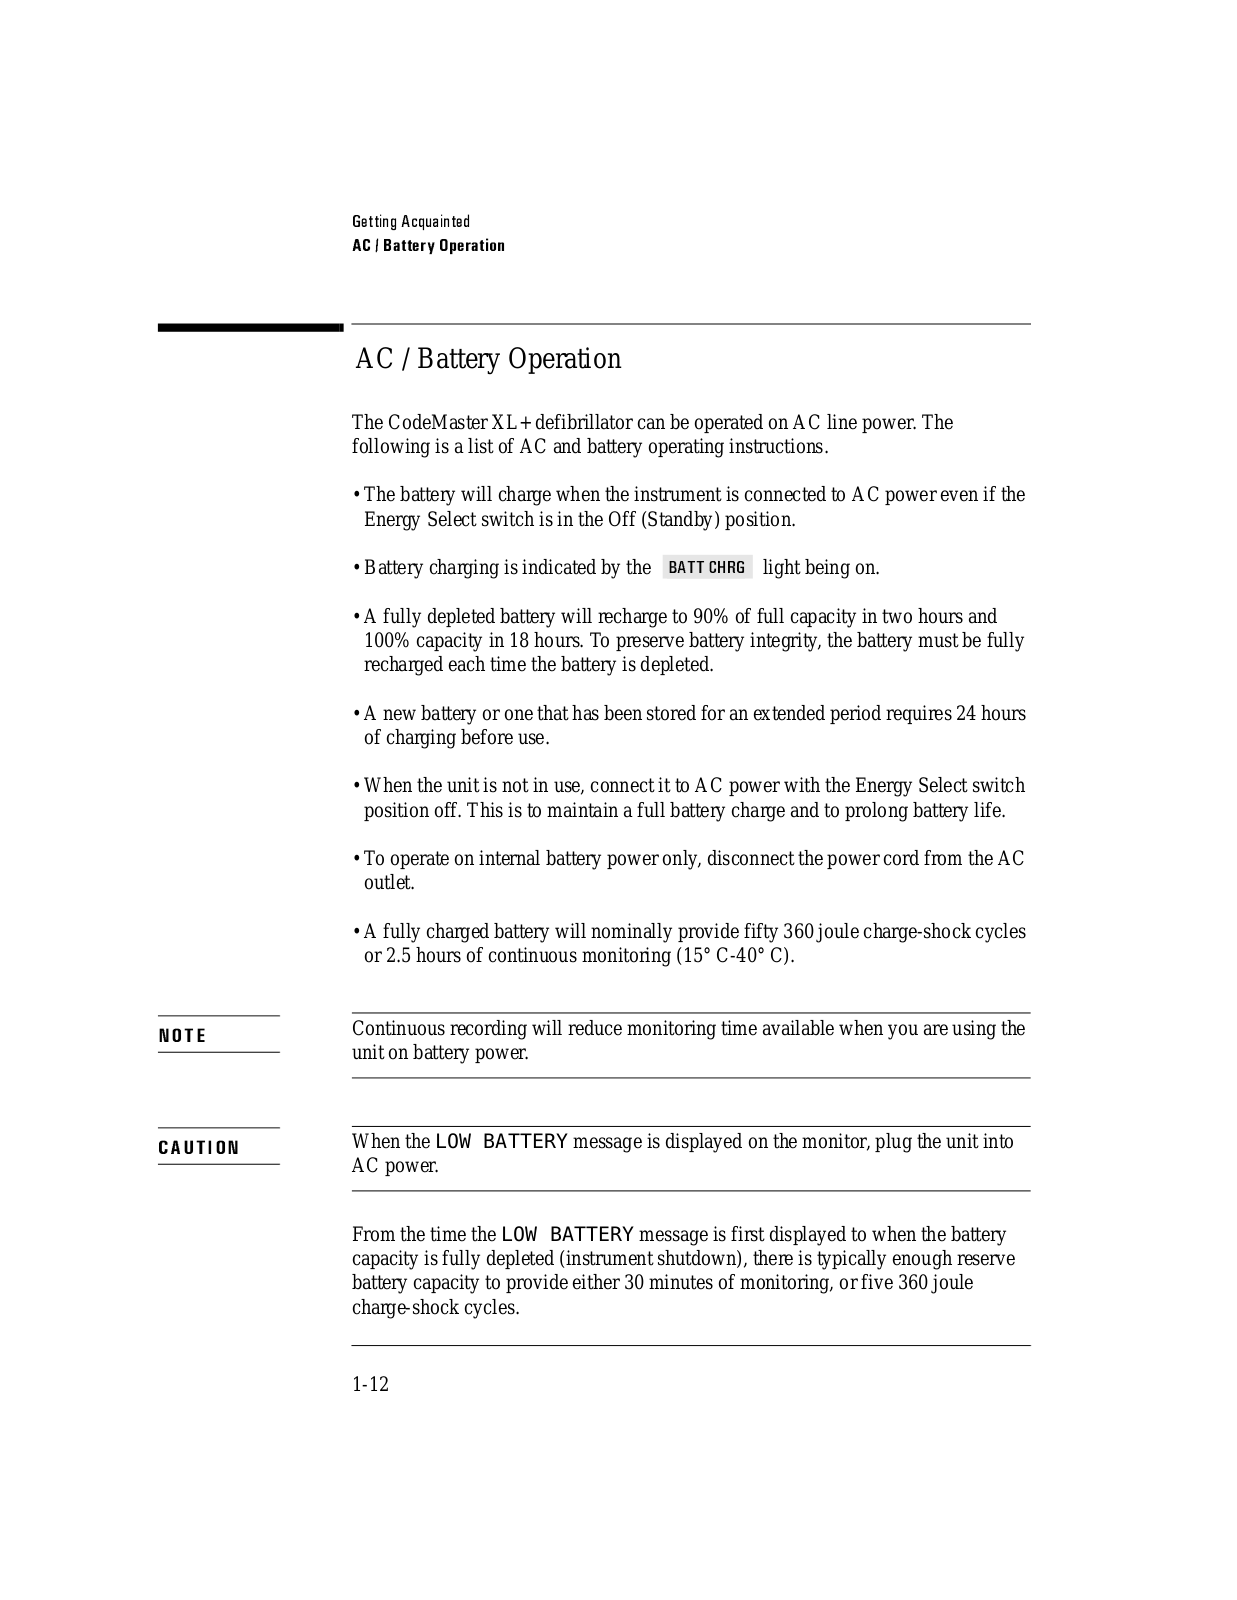
AC / Battery Operation

The CodeMaster XL+ defibrillator can be operated on AC line power. The following is a list of AC and battery operating instructions.

The battery will charge when the instrument is connected to AC power even if the Energy Select switch is in the Off (Standby) position.

• Battery charging is indicated by the %$77 &+5* light being on.

A fully depleted battery will recharge to 90% of full capacity in two hours and 100% capacity in 18 hours. To preserve battery integrity, the battery must be fully recharged each time the battery is depleted.

A new battery or one that has been stored for an extended period requires 24 hours of charging before use.

When the unit is not in use, connect it to AC power with the Energy Select switch position off. This is to maintain a full battery charge and to prolong battery life.

To operate on internal battery power only, disconnect the power cord from the AC outlet.

A fully charged battery will nominally provide fifty 360 joule charge-shock cycles or 2.5 hours of continuous monitoring (15° C-40° C).

Continuous recording will reduce monitoring time available when you are using the unit on battery power.

When the LOW BATTERY message is displayed on the monitor, plug the unit into AC power.

From the time the LOW BATTERY message is first displayed to when the battery capacity is fully depleted (instrument shutdown), there is typically enough reserve battery capacity to provide either 30 minutes of monitoring, or five 360 joule charge-shock cycles.

1-12

*HWWLQJ $FTXDLQWHG $& %DWWHU\ 2SHUDWLRQ

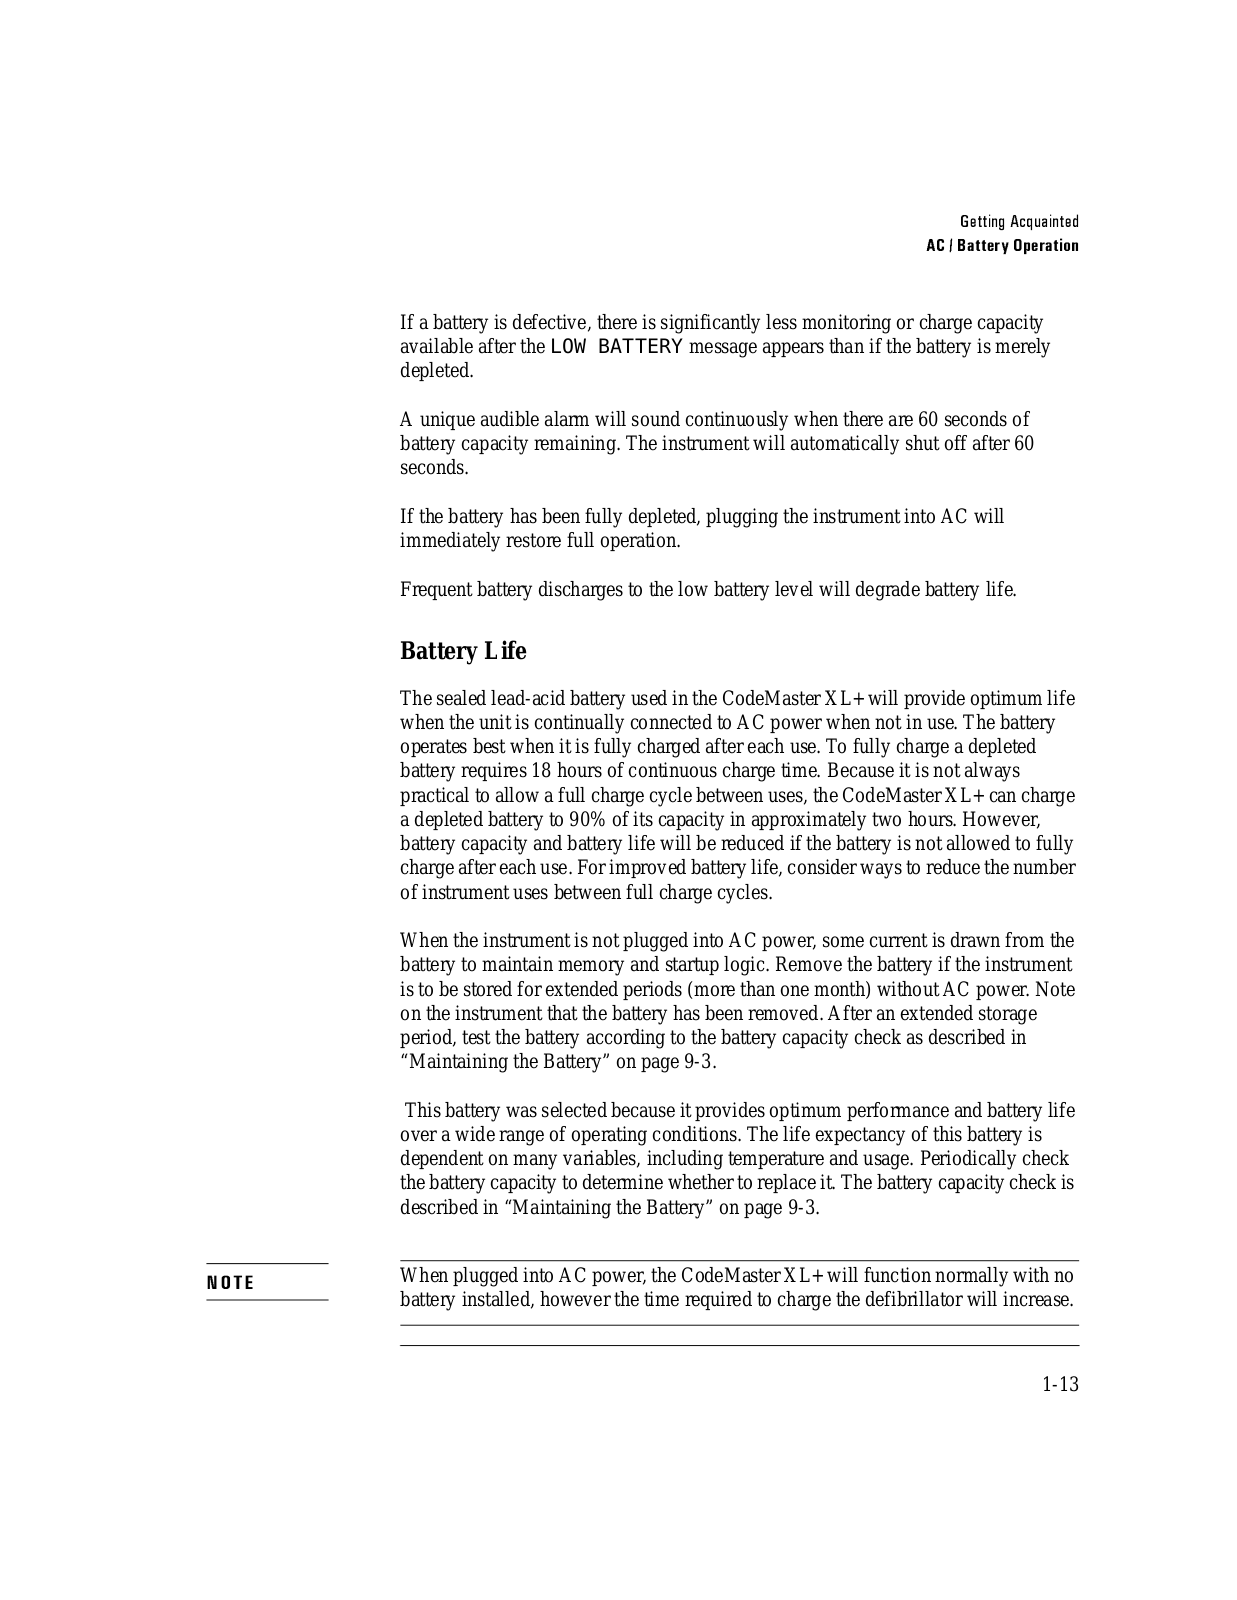
If a battery is defective, there is significantly less monitoring or charge capacity available after the LOW BATTERY message appears than if the battery is merely depleted.

A unique audible alarm will sound continuously when there are 60 seconds of battery capacity remaining. The instrument will automatically shut off after 60 seconds.

If the battery has been fully depleted, plugging the instrument into AC will immediately restore full operation.

Frequent battery discharges to the low battery level will degrade battery life.

Battery Life

The sealed lead-acid battery used in the CodeMaster XL+ will provide optimum life when the unit is continually connected to AC power when not in use. The battery operates best when it is fully charged after each use. To fully charge a depleted battery requires 18 hours of continuous charge time. Because it is not always practical to allow a full charge cycle between uses, the CodeMaster XL+ can charge a depleted battery to 90% of its capacity in approximately two hours. However, battery capacity and battery life will be reduced if the battery is not allowed to fully charge after each use. For improved battery life, consider ways to reduce the number of instrument uses between full charge cycles.

When the instrument is not plugged into AC power, some current is drawn from the battery to maintain memory and startup logic. Remove the battery if the instrument is to be stored for extended periods (more than one month) without AC power. Note on the instrument that the battery has been removed. After an extended storage period, test the battery according to the battery capacity check as described in “Maintaining the Battery” on page 9-3.

This battery was selected because it provides optimum performance and battery life over a wide range of operating conditions. The life expectancy of this battery is dependent on many variables, including temperature and usage. Periodically check the battery capacity to determine whether to replace it. The battery capacity check is described in “Maintaining the Battery” on page 9-3.

127(

When plugged into AC power, the CodeMaster XL+ will function normally with no

battery installed, however the time required to charge the defibrillator will increase.


1-13

%$77 &+5*
$& 32:(5

:$51,1*

:$51,1*

*HWWLQJ $FTXDLQWHG $& %DWWHU\ 2SHUDWLRQ

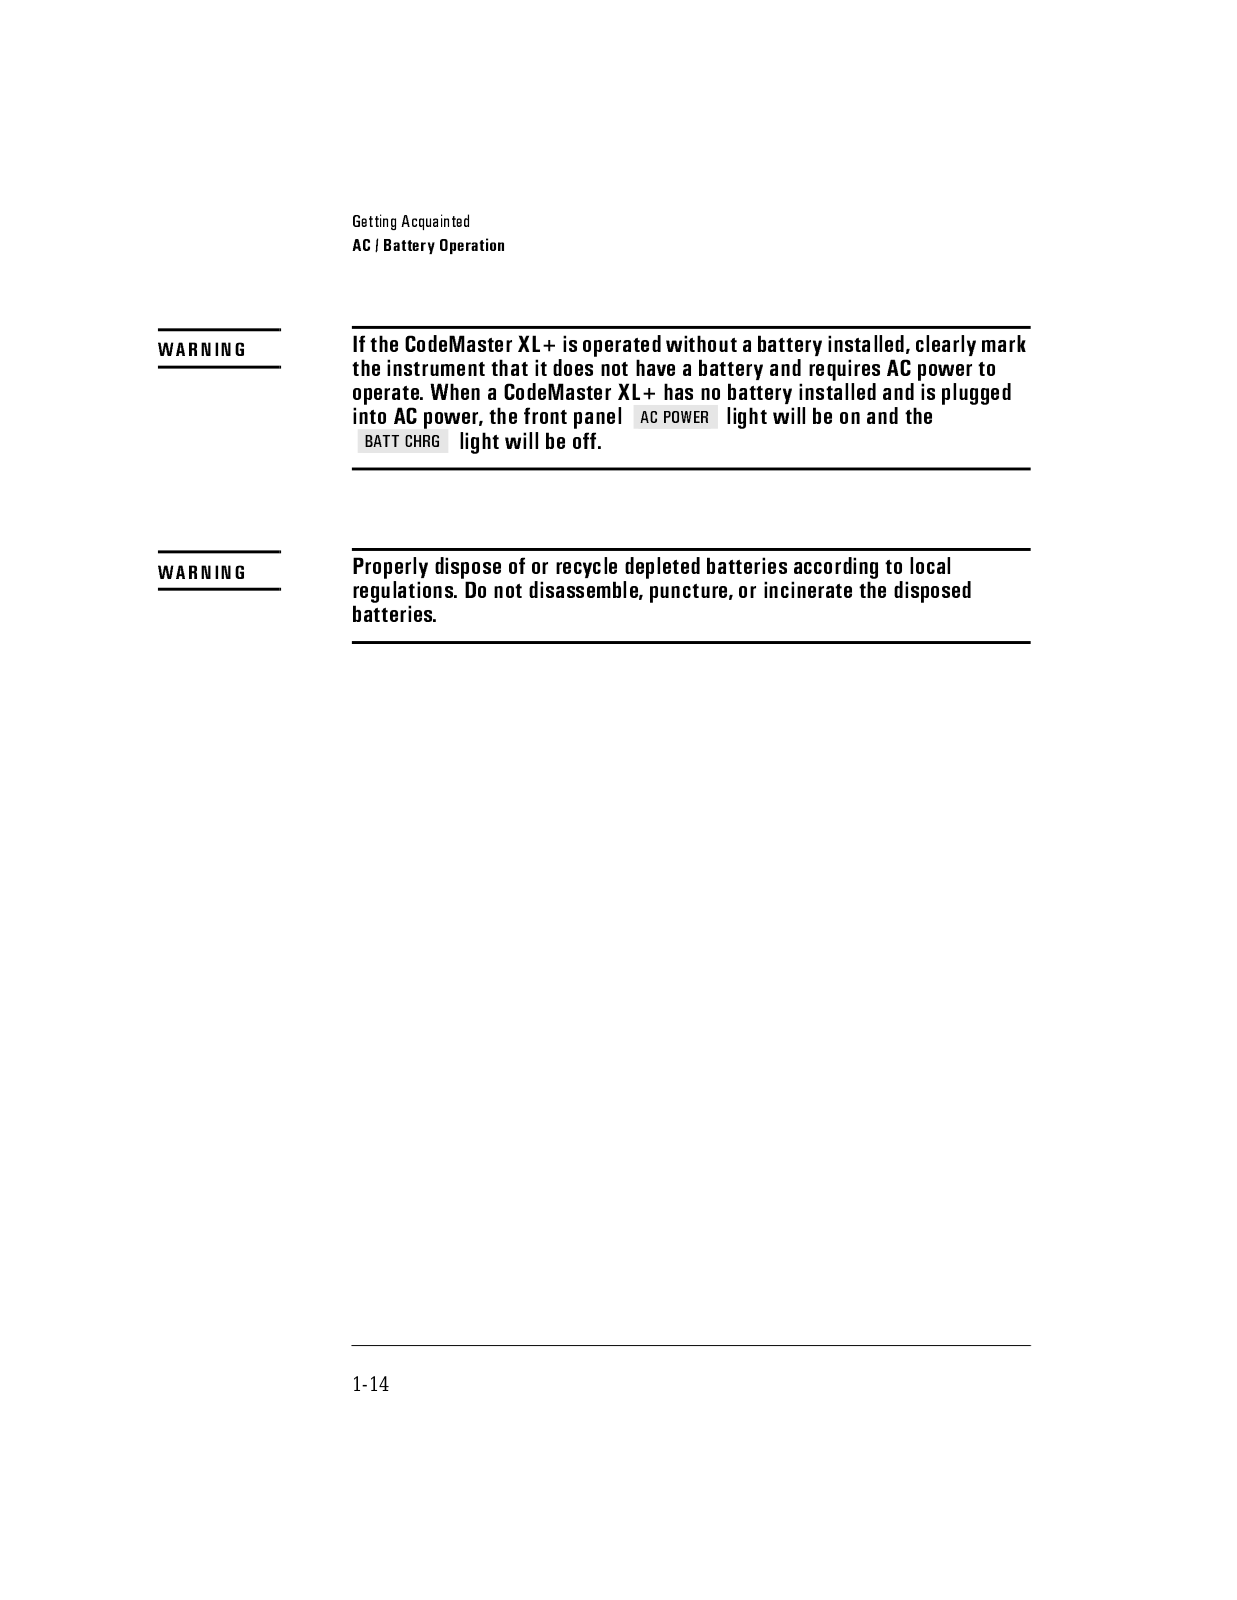
,I WKH &RGH0DVWHU ;/ LV RSHUDWHG ZLWKRXW D EDWWHU\ LQVWDOOHG FOHDUO\ PDUN WKH LQVWUXPHQW WKDW LW GRHV QRW KDYH D EDWWHU\ DQG UHTXLUHV $& SRZHU WR RSHUDWH :KHQ D &RGH0DVWHU ;/ KDV QR EDWWHU\ LQVWDOOHG DQG LV SOXJJHG LQWR $& SRZHU WKH IURQW SDQHO OLJKW ZLOO EH RQ DQG WKH

OLJKW ZLOO EH RII

3URSHUO\ GLVSRVH RI RU UHF\FOH GHSOHWHG EDWWHULHV DFFRUGLQJ WR ORFDO UHJXODWLRQV 'R QRW GLVDVVHPEOH SXQFWXUH RU LQFLQHUDWH WKH GLVSRVHG EDWWHULHV

1-14

Defibrillating

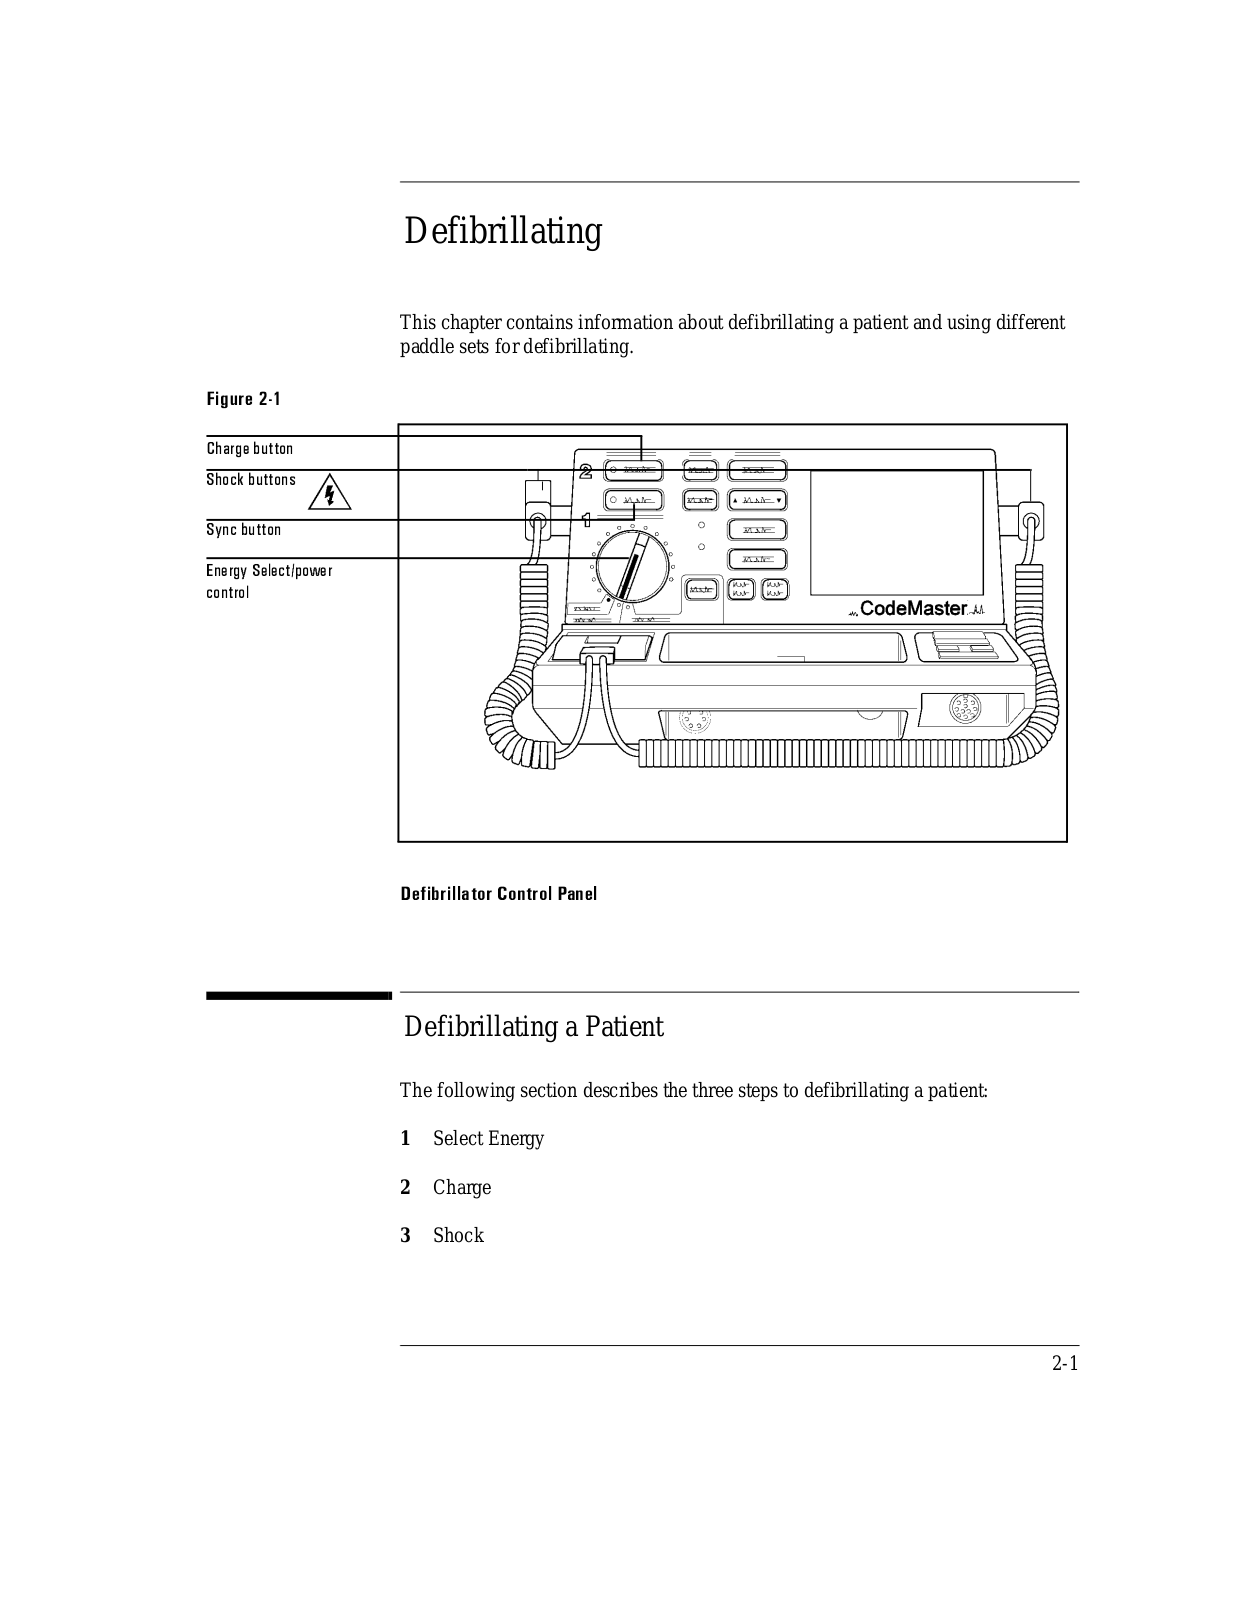
This chapter contains information about defibrillating a patient and using different paddle sets for defibrillating.

)LJXUH

&KDUJH EXWWRQ

6KRFN EXWWRQV

6\QF EXWWRQ

(QHUJ\ 6HOHFW SRZHU FRQWURO

'HILEULOODWRU &RQWURO 3DQHO

Defibrillating a Patient

The following section describes the three steps to defibrillating a patient:

1Select Energy

2Charge

3Shock

2-1

:$51,1*

&$87,21

'HILEULOODWLQJ

'HILEULOODWLQJ D 3DWLHQW

1. Select Energy

1Turn the Energy Select control to the desired energy level. The defibrillator is now on.

2Prepare the paddles by following these steps.

a.Remove the paddles from their holders by grasping the handles and lifting them straight up.

b.Holding both paddles in one hand, apply electrolyte paste to the electrode surface of each paddle.

'R QRW DOORZ SDVWH WR DFFXPXODWH RQ \RXU KDQGV RU RQ WKH SDGGOH KDQGOHV WR DYRLG ULVN RI HOHFWULFDO VKRFN

Do not rub the electrode surfaces together to distribute the applied paste. Placing the electrode surfaces together increases the risk of an accidental paddle-to-paddle discharge.

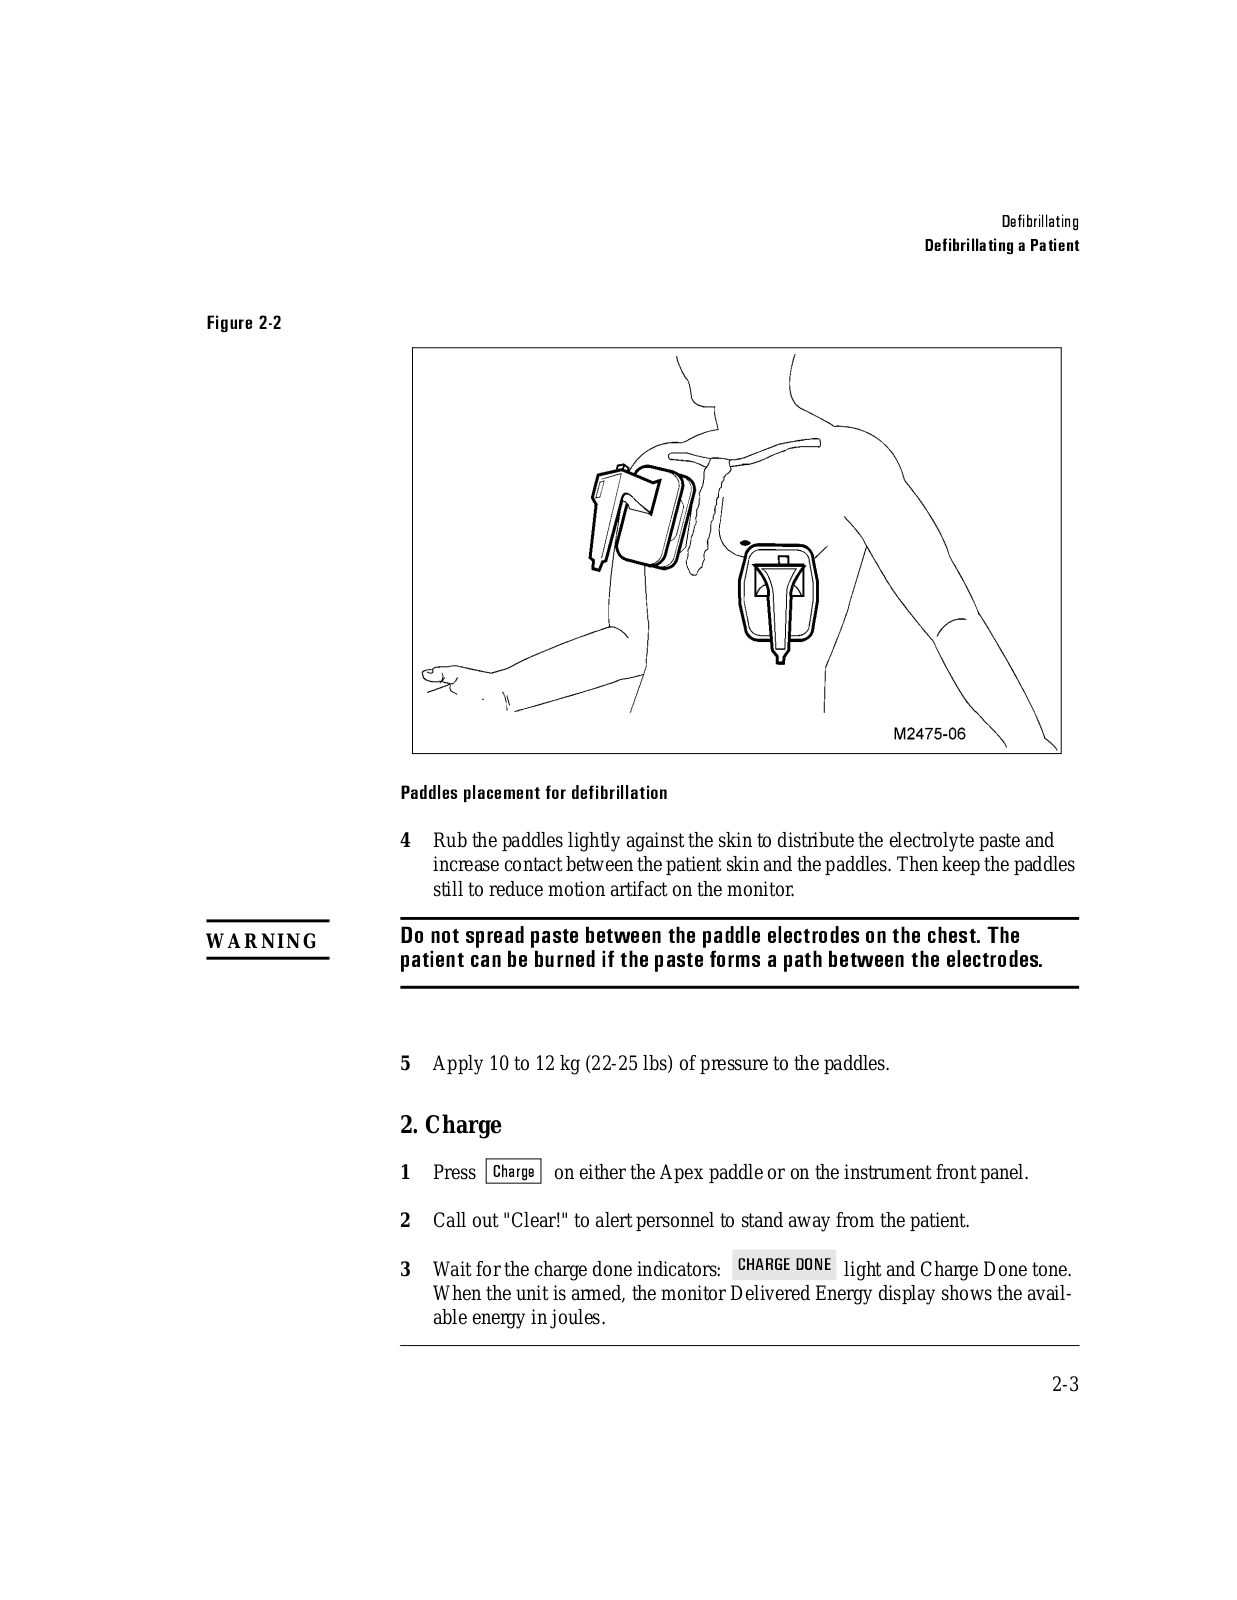
3Apply the paddles as described in Figure 2-2.

a.Place the Sternum paddle near the upper sternum in the patient’s right midclavicular line, just below the clavicle.

b.Place the Apex paddle on the chest just below and to the left of the patient's left nipple, in the anterior-axillary line.

2-2

)LJXUH

W AR NI N G

'HILEULOODWLQJ

'HILEULOODWLQJ D 3DWLHQW

3DGGOHV SODFHPHQW IRU GHILEULOODWLRQ

4Rub the paddles lightly against the skin to distribute the electrolyte paste and increase contact between the patient skin and the paddles. Then keep the paddles still to reduce motion artifact on the monitor.

'R QRW VSUHDG SDVWH EHWZHHQ WKH SDGGOH HOHFWURGHV RQ WKH FKHVW 7KH SDWLHQW FDQ EH EXUQHG LI WKH SDVWH IRUPV D SDWK EHWZHHQ WKH HOHFWURGHV

5 Apply 10 to 12 kg (22-25 lbs) of pressure to the paddles.

2. Charge

1 Press &KDUJH on either the Apex paddle or on the instrument front panel.

2Call out "Clear!" to alert personnel to stand away from the patient.

3Wait for the charge done indicators: &+$5*( '21( light and Charge Done tone. When the unit is armed, the monitor Delivered Energy display shows the available energy in joules.

2-3

:$51,1*

127(

'HILEULOODWLQJ

'HILEULOODWLQJ D 3DWLHQW

If the defibrillator does not charge, refer to Chapter 8, ”Troubleshooting”.

Resetting the Selected Energy Level

To increase or decrease the selected energy level after pressing the Charge button, perform the following steps.

1Move the Energy Select control to the new energy level.

2Wait for the Charge Done indicators.

3. Shock

To shock the patient, perform the following steps.

1Briefly adjust paddle pressure and placement to optimize patient contact, as registered on the paddle contact indicator (if supplied).

2Verify that no one is in contact with the patient, the monitoring cable or leads, the bed rails, or another potential current pathway.

3Call out "Clear!" to alert personnel to stand away from the patient.

.HHS KDQGV FOHDU RI WKH SDGGOH HOHFWURGH HGJHV 8VH \RXU WKXPEV WR GHSUHVV WKH 6KRFN EXWWRQV RQ WKH SDGGOH KDQGOHV

4Press and briefly hold both Shock buttons (one on each paddle) simultaneously, to deliver energy to the patient.

If the defibrillator does not shock, refer to Chapter 8, ”Troubleshooting”.

If you must disarm the charged defibrillator (if countershock is not needed), turn the Energy Select control to Monitor On. Any stored energy will be discharged internally and the available energy on the display will return to 0.

2-4

'HILEULOODWLQJ

'HILEULOODWLQJ D 3DWLHQW

After Using the Defibrillator

If installed, if you want to print an Event Summary now, press 5HYLHZ . See “Printing the Event Summary Record (Optional)” on page 3-8. After you use the defibrillator, perform the following steps to prepare the defibrillator for its next use.

1Turn the Energy Select control to Off (Standby).

2Return the instrument to its storage location, and plug the power cord into an

AC power outlet. Verify that the %$77 &+5* and $& 32:(5 lights are on.

3Clean all paddles, controls, and cables. Refer to Chapter 9, ”Maintaining the Defibrillator” for cleaning instructions.

4Check that sufficient recorder paper and electrolyte paste or defibrillator electrodes are available for the next use of the defibrillator.

Defibrillating with Alternate Paddle Sets

The CodeMaster XL+ will defibrillate with several different electrodes/paddles sets.

• Adult/Pediatric Anterior/Anterior External Paddles

• Anterior/Posterior Paddles

• External Multi-Function Defib Electrodes

• Internal Paddles

:$51,1* 'R QRW VZLWFK SDGGOH VHWV LQ DQ HQYLURQPHQW ZKHUH ZDWHU PD\ JHW LQ WKH HOHFWURGHV SDGGOHV FRQQHFWRU UHFHSWDFOH

Performing Pediatric Defibrillation

The CodeMaster XL+ paddle set comes with pediatric paddles. To use the pediatric paddle set, depress the release latch at the front of the standard external paddle set while pulling forward on the adult paddle surface. This action will remove the adult paddle contact surface and expose the smaller pediatric contact surface. When

2-5

Loading...
+ 111 hidden pages