

Page 1
When you use this camera for the first time, it is
recommended you read this Quick Guide first
in order to gain a feei for the basic operation of
the camera. Refer to the separately supplied
“Operating Manual” for further explanation of
function and advanced operations of the
camera, and refer to the separateiy supplied
“PC Connection Manuai” for an expianation of
how to connect the camera to your PC.
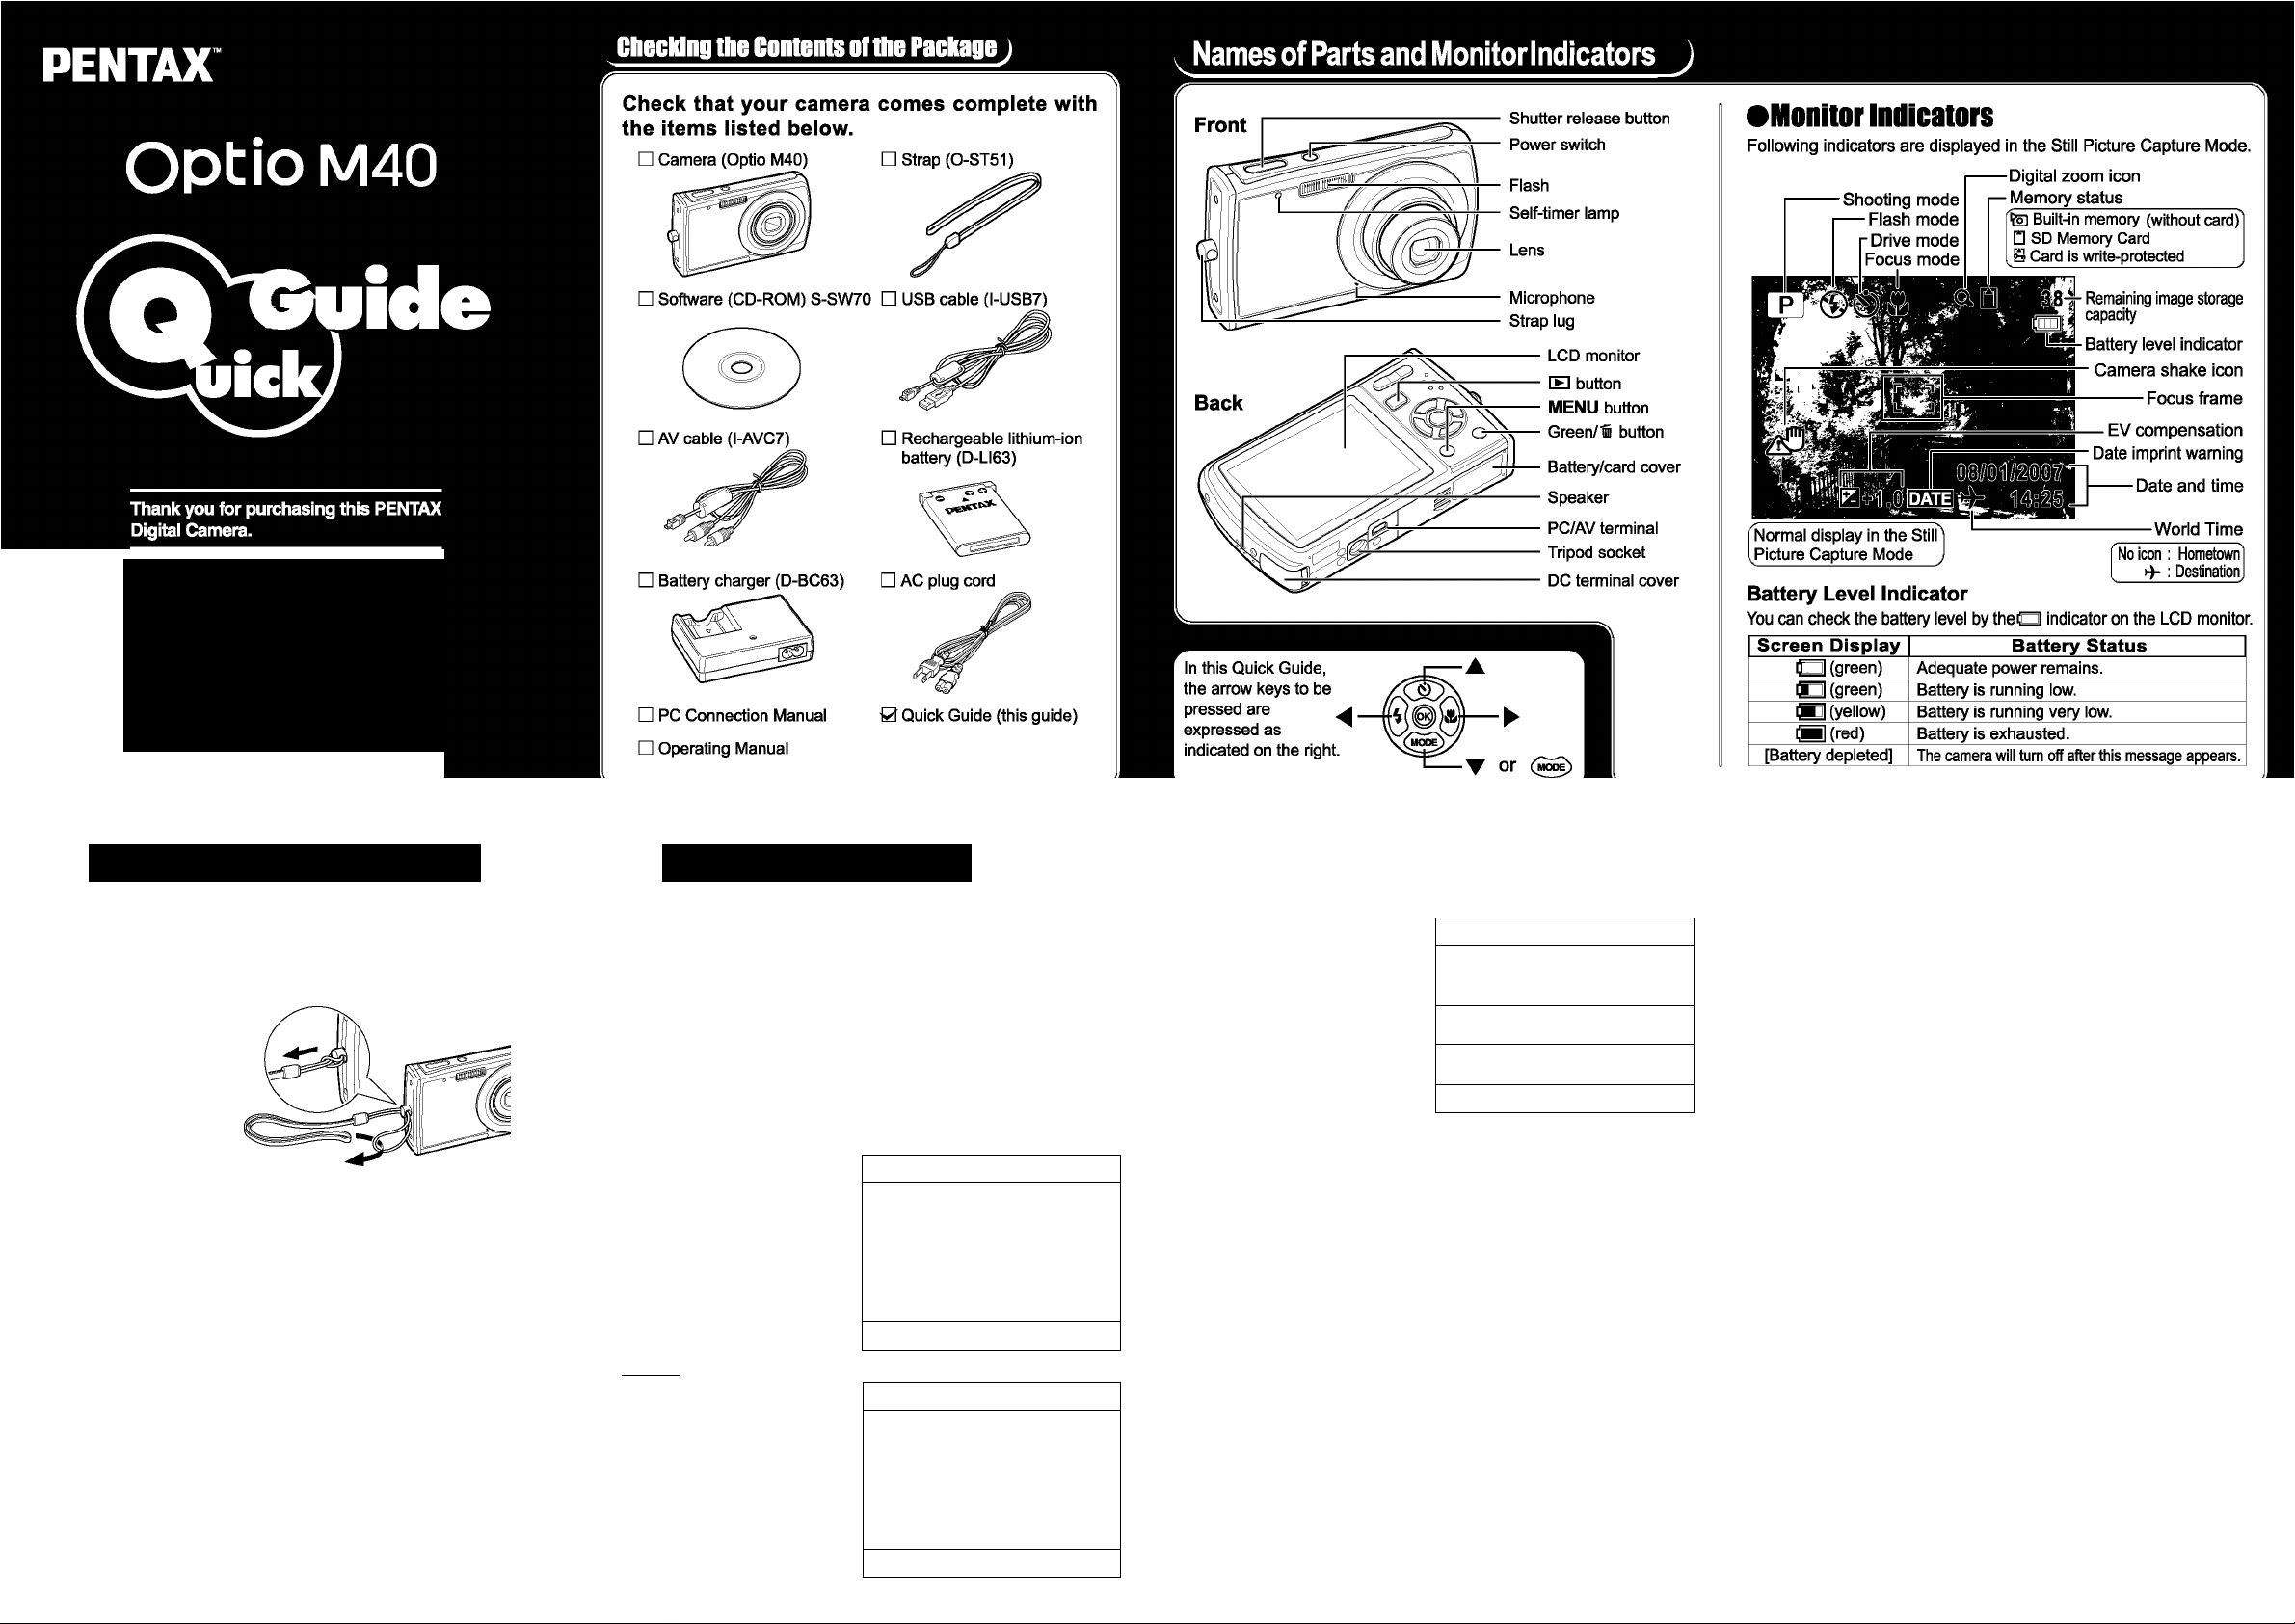
Preparing the Camera for Use Turning the Camera On
Prepare your camera for use before you begin
using it.
•Attaching the Strap
Attach the strap supplied
with the camera as
shown in the illustration.
•instaiiing the Battery and SB Memnry
Card
Install the battery and
SD Memory Card as
shown In the Illustration.
Battery —
lock lever
SD Memory
Card socket
' The SD Memory Card is sold separately.
Before using the battery
Charge the battery before using it in the camera for the first time.
For Instructions on how to charge the battery, refer to the
Operating Manual (p.20).
--------------SD Memory Card
=®Ae
Battery/
card cover
Battery
•Press the newer switch.
The camera turns on
and is ready to take
still pictures. Press the
□
power switch again to
^ turn the camera off.
•Setting the langnage, Bate and Time
The language selection screen appears when the camera Is turned on for
the first time. Select the desired language and then set the date and time.
Use the four-way controller
(AT^^) to select the
desired language.
Press the OK button.
(Memo)
the language, and then press
the OK button. The Initial Setting
------------------
If you accidentally select another
language, press the four-way
controller (1^), use the four-way
controller (AT4^) to select
screen appears in the selected
language.
Í Language/aig 1
English Dansk
Français Svenska
Deutsch Finnish
Español Polish
Portugués Czech
Italiano Hungarian
Nederlands Tiirkce
MENUlCancel
[ Initial Setting
Language/Wlp
■¿SHometown
New York
MENUlCancel
PyCCKMM
In El
®0K
1
English V
l^F
(M]0K
0
Press the four-way controller
(▼) to move the frame to
[Hometown].
Press the four-way controller (►) to display the Hometown screen.
Use the four-way controller (-^ ^) to choose the city.
Press the four-way controller (▼) to move the frame to [DST|
(Daylight Saving Time).
Use the four-way controller (-^ ►) to select 0^ (On) or □ (Off).
Press the OK button to display the Initial Setting screen.
Press the OK button.
(C) Use the four-way controller (
1 Initial Setting |
Language/sfg
OHometown
New York
iMENUlCancel
AT)
to select [Date Style].
English
[MlOK
Press the four-way controller
(►) to select [mm/dd/yy],then
use the four-way controller
(AT)
display style.
0
Press the four-way controller
(^) to select [24h], then use
the fbur-way controller (AT)
to select [24h] (24fxxjr display)
or [12h] (12-hour display).
0
Press the four-way controller (►), then press the four-way
controller (T) to move the frame to [Date].
0
Press the four-way controller (►) to select [01] (month), [01]
(day) or [2007] (year), then use the four-way controller (AT)
to set the date to the current day.
0
Press the four-way controller (^), then press the four-way
controller (T) to move the frame to [Time].
Set the time in the same manner as in (D-
Press the OK button.
to choose the date
[ Date Adjust |
▲
Date Style < mm/dd/yy 24h
Date 01/01/2007
Time 0:00
IMENUlCancel
(MJOK
•Formatting an SB Memory Card
Use this camera to format (initialize) an SD Memory Card that is unused
or has been used on another camera or digital devices. Be aware that
formatting will delete all the data stored In the SD Memory Card. For how
to format an SD Memory Card, refer to the Operating Manual (p. 164).
Page 2
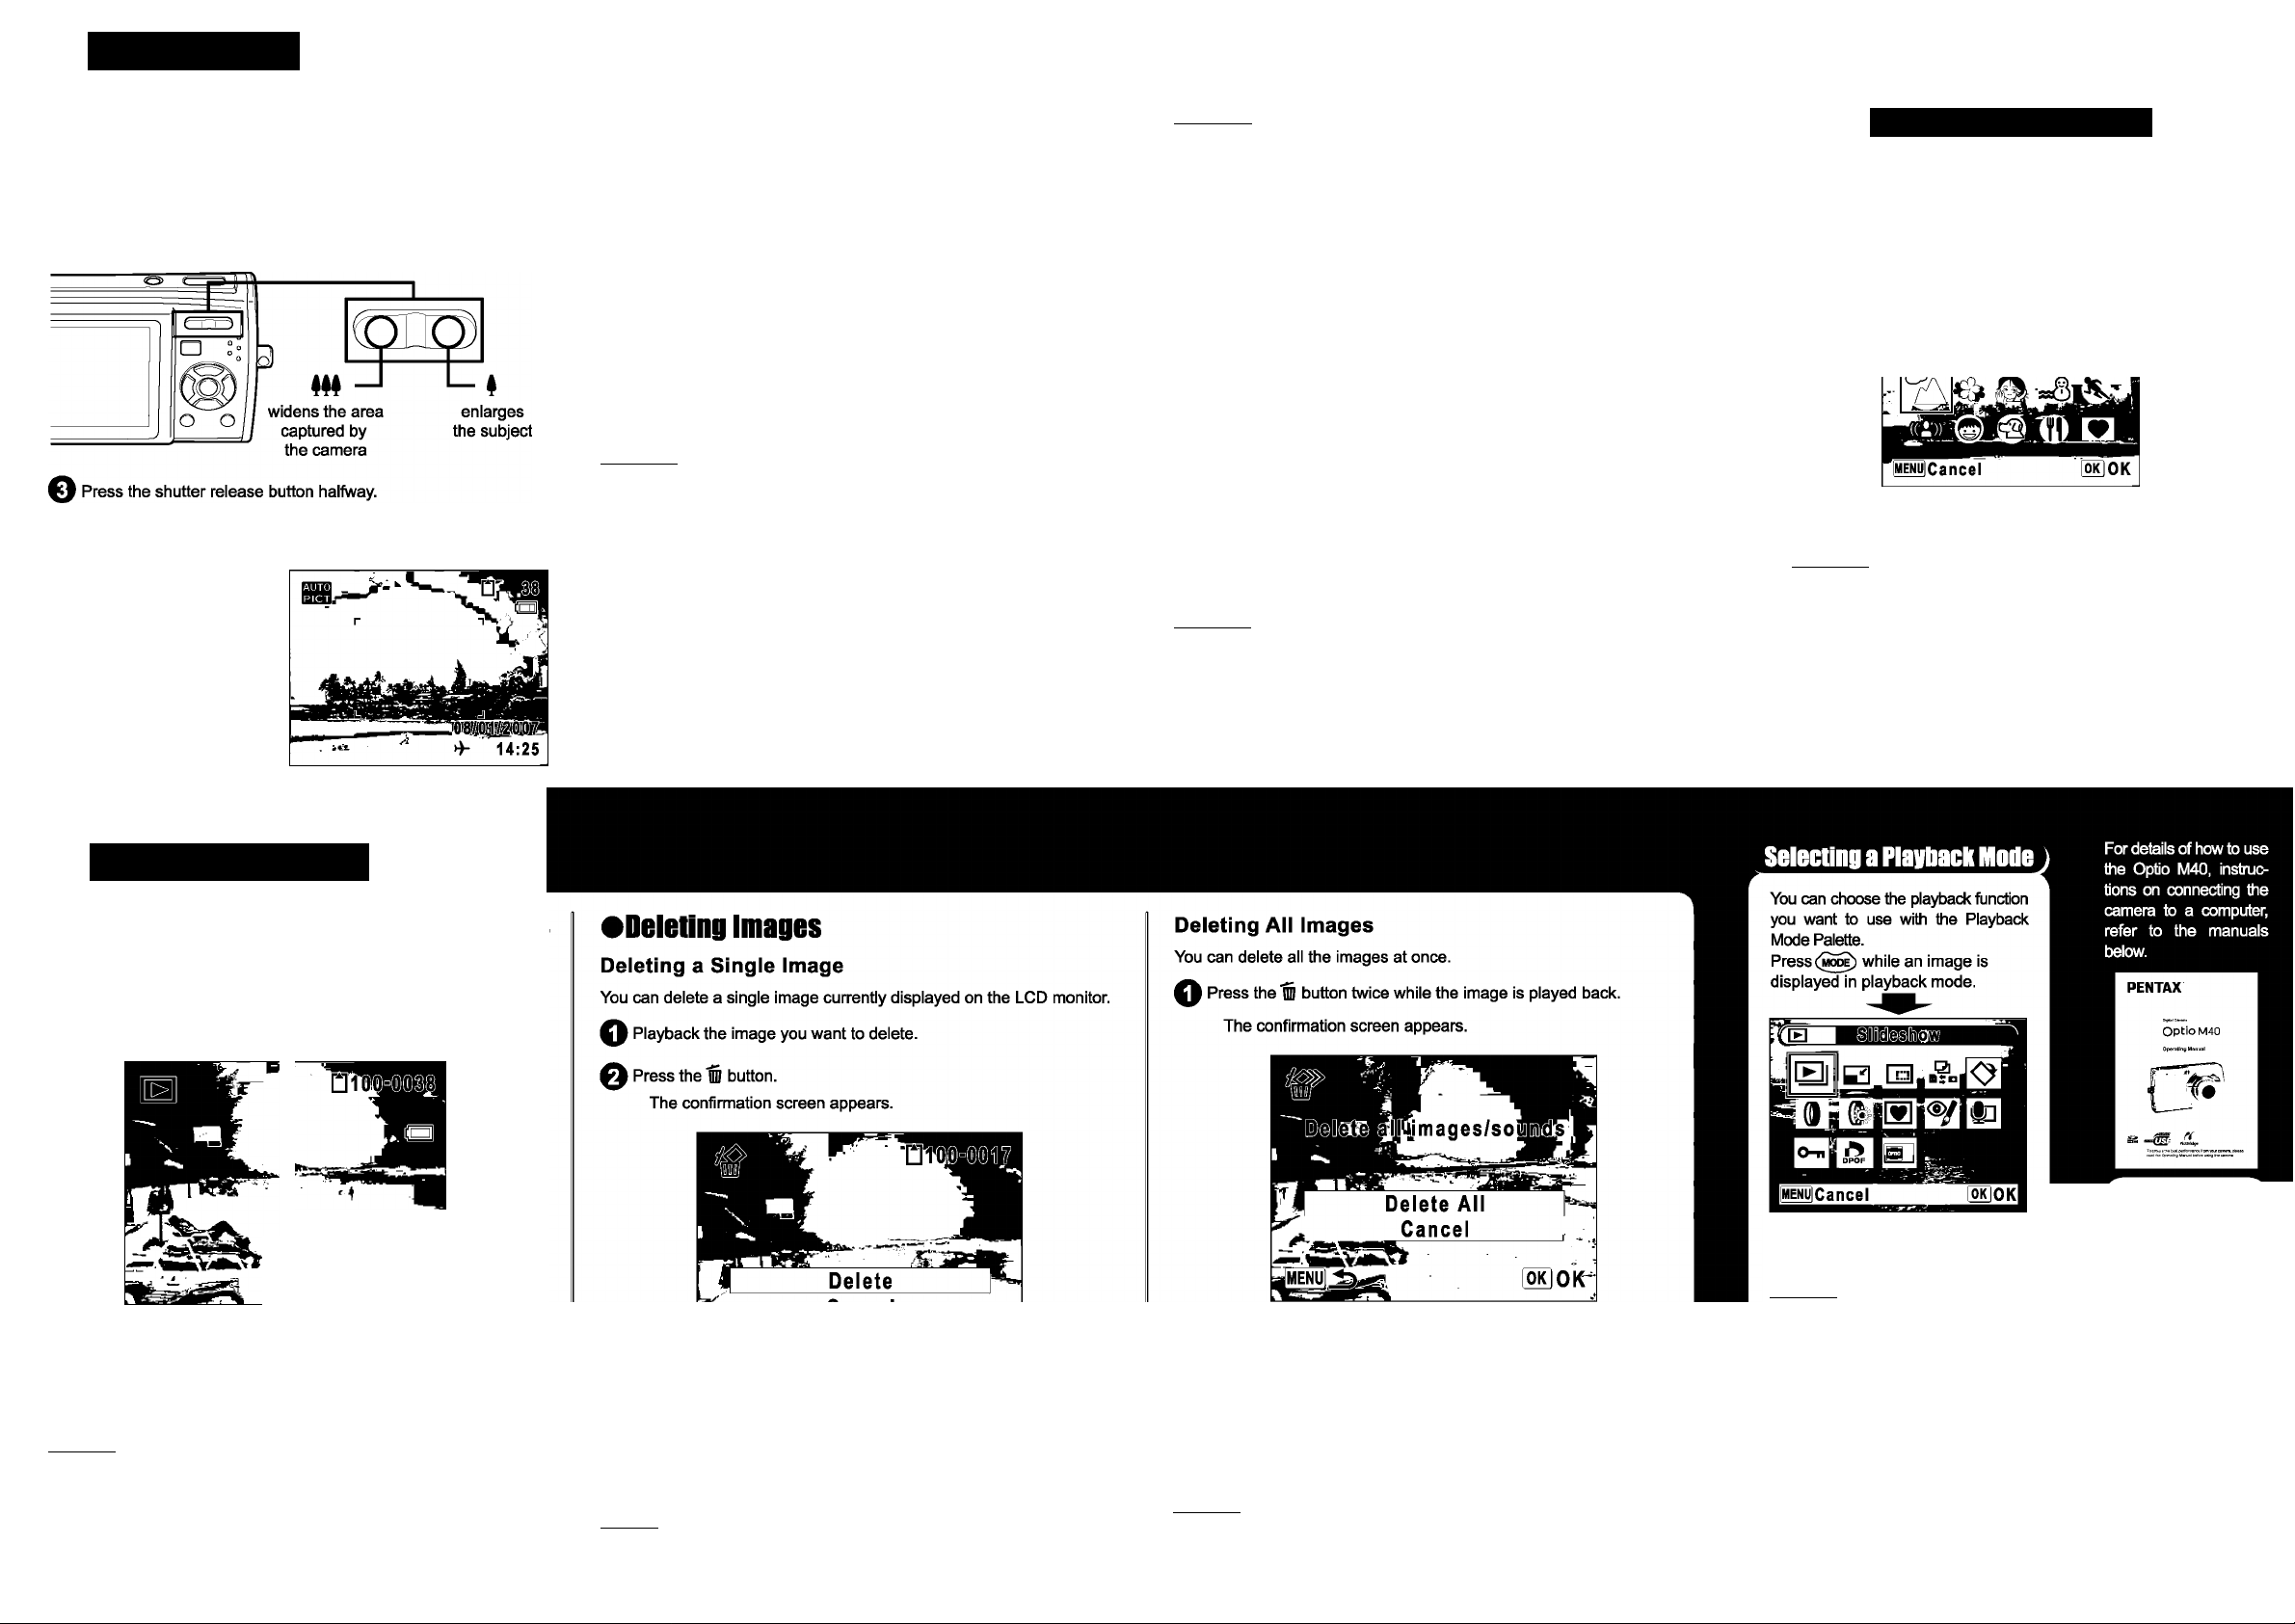
Taking Pictures
Aim the camera at the subject, then press the shut
ter release button. The flash discharges automati
cally depending on the brightness.
Frame the subject using the focus frame on the LCD monitor.
Use the Zoom/M#/1 button to change the captured area.
The focus frame on the LCD monitor turns green if the
subject is in focus.
' Press the shutter reiease
button fuiiy.
The picture is taken.
•Selecting the Flash Mede
Each time you press the four-way controiier (^), the flash mode switches
between the foliowing modes.
f Auto
Flash Off
^ Flash On
<§>.
^ Auto + Red-eye
<S^
^ Flash On + Red-eye
^ Soft Flash
C Memo >
For detaiis, refer to the Operating Manuai (p. 81).
•Selecting the nrive Mede
Each time you press the four-way controiier (A )> the drive mode switches
between the foilowing modes.
S standard (single-frame)
^ 10 sec. Self-timer
C Memo y
• You can seiect (2 sec. Self-timer) by pressing the four-way
controiier(^ ► ) after seiecting 0 (10 sec. Self-timer).
>in I
Shooting) cannot be seiected.
• For detaiis, refer to the Operating Manuai (p. 72, 73).
Gi,
li, or m mode, (Continuous
•Selecting the Fecns Mede
Each time you press the four-way controiier (^), the focus mode switches
between the foliowing modes.
*AF Standard
Macro
Super Macro
Infinity
PF Pan Focus
MF Manual Focus
( Memo )
For detaiis, refer to the Operating Manuai (p. 79).
---------------------------------------------
Selecting a Sheeting Mede
r \
You can choose the right mode for your particuiar situation
from the Capture Mode Paiette.
Press (hS^
Use the four-way controiier (AV4 ►)
to choose a shooting mode, then
press the OK button.
C Memo )
A shooting mode guide appears about 2 seconds after the
shooting mode is chosen.
-----------------------------------
Playing Back Images
You can play back the images taken on the LCD monitor.
•Playing Back Images
Press the H button after taking a picture.
The image appears on the LCD monitor.
08/01/2007
^ 14:25
(Memo >
• To piayback the previous or next image, press the four-way controiier
(◄►)■
• Press H of the Zoom/H/CX button during piaying back to dispiay 9
thumbnaii images at a time. Press H button again whiie the
thumbnail images are dispiayed to switch to the foider dispiay or
caiendar dispiay screen.
l^] Continuous Shooting
O Use the four-way controiier (AT) to seiect [Deietej.
Press the OK button.
(Memo)
---------------------------------------------
You can deiete severai images seiected from the nine-image
dispiay. For detaiis, refer to the Operating Manual (p.120).
Use the four-way controller (AT) to select [Delete All],
e Press the OK button.
(Memo >
You can protect stored images from being accidentally deleted.
For details, refer to the Operating Manual (p.123,124).
Use the four-way controller (AT-^ ►)
to choose a playback mode, then
press the OK button.
C Memo)
A playback mode guide appears
about 2 seconds after the playback
mode is chosen.
PENTAX Corporation — http://www.pentax.co.jp
PENTAX Europe GmbH (European Headquarters)
PENTAX U.K. Limited — http://www.pentax.co.uk
PENTAX France S.A.S.
PENTAX Italia S.r.l.
HQ— http://www.pentaxeurope.com
Germany — http://www.pentax.de
------------
http://www.pentax.ff
-----------
http://www.pentaxitalia.it
Optio M40
Operating Manual
PC Connection
Manual ,
. PC Connection Manual,
PENTAX (Schweiz) AG —
PENTAX Scandinavia AB
PENTAX Imaging Company
A Division of PENTAX of America, Inc.
----------------------------
PENTAX Canada Inc. http://www.pentax.ca
Printed in Indonesia 01 - 200706
http://www.pentax.ch
http://www.pentax.se
http://www.pentaximaging.com
57908
 Loading...