How it Works
Log In / Sign Up
Buy Points
How it Works
FAQ
Contact Us
Questions and Suggestions
Users
PEG PEREGO
Loading...
P
Pliko Mini Stroller
Pliko P3
9
PLIKO P3 COMPACT
3
Pliko P3 Modular System On Track
Pliko P3 Naked
Pliko P3 Pramette
Pliko P3 series
PLIKO SWITCH
4
pliko switch compact
Pliko X-Lite
POLARIS
POLARIS 400 Dragonfly
POLARIS IGOD0515
Polaris OUTLAW
3
Polaris Outlaw IGOR0044
Polaris Outlaw IGOR0045
Polaris Outlaw IGOR0049
Polaris Ranger RZR
4
POLARIS RANGER RZR 900
2
Polaris RANGER RZR IGOD0516
Polaris SLINGSHOT
Polaris SLINGSHOT RC
POLARIS SPORTSMAN 400
2
Polaris Sportsman 700 TWIN
2
Polaris Sportsman 800 Twin
Polaris Sportsman 850
Polaris Sportsman 850 Twin
Polaris Sportsman Twin 850 EFI
POLARIS TRAIL BOSS
POLARIS TRAIL BOSS IGOD0052
POLARIS Trail Princess
pramette A3
prima pappa best
3
Prima Pappa Diner
2
Prima Pappa Dondolino
2
PRIMA PAPPA ZERO-3
2
Primonido Elite
2
primonido new
Primo Vaggio SIP 5-70 convertible
Primo Viaggio
4
PRIMO VIAGGIO 4-35
2
Primo Viaggio Convertible
Primo Viaggio Convertible 2014
primo Viaggio Sip
4
Primo Viaggio SIP 30-30
2
Primo Viaggio SIP 5.65 Convertible
Primo Viaggio SIP Convertible
3
PRIMO VIAGGIO SIP ES 30.30
PRIMO VIAGGIO SL
4
PRIMO VIAGGIO TRIFIX
3
primo viaggio tri-fix ISIP
Primo Viaggio Tri fix K
Primo Viaggio Tri-Fix SL
R
RAIDER Police-Polize
Ranger RZRS FIUS1201G124 IGOD0516
RCX
Rialto
ROCKY IGED0092US
Rodeo Ranger
Rzr
2
S
SANTA FE' TRAIN
Santa Fé TRAIN SET
Santa Fé TRAIN SET IGED1084
Scrambler
SDRAIETTA MELODIA
SEAT POP-UP
Seat Unit
3
seggiolino pop-up
2
seggiolino switch
2
Si
3
Si CLASSICO
Si COMPLETO
siesta
2
Siesta Follow Me
si switch
2
SKATE
Skate System
2
SPORT RALLY
SPORT RALLY IGOD0038
SPORTSMAN 2X
SPST5981GR
SuperPower
SW
SWITCHABLE
Switch Four
T
tatamia
3
Tatamia Follow Me
TEAM
TRIO EASY DRIVE
triplette piroet
Triplette Pop-Up
Triplette SW
5
TRIPLETTE SW SPST5981GR
Triplette SW Stroller
TWIN 60-40
U
Uno
7
V
VELA EASY DRIVE
2
Venezia
2
VESPA
VESPA GT
Loading...
Loading...
Nothing found
PRIMO VIAGGIO TRIFIX
User Manual
108 pgs
2.99 Mb
0
User Manual
47 pgs
4.33 Mb
0
User manual
12 pgs
751.08 Kb
0
Table of contents
Loading...
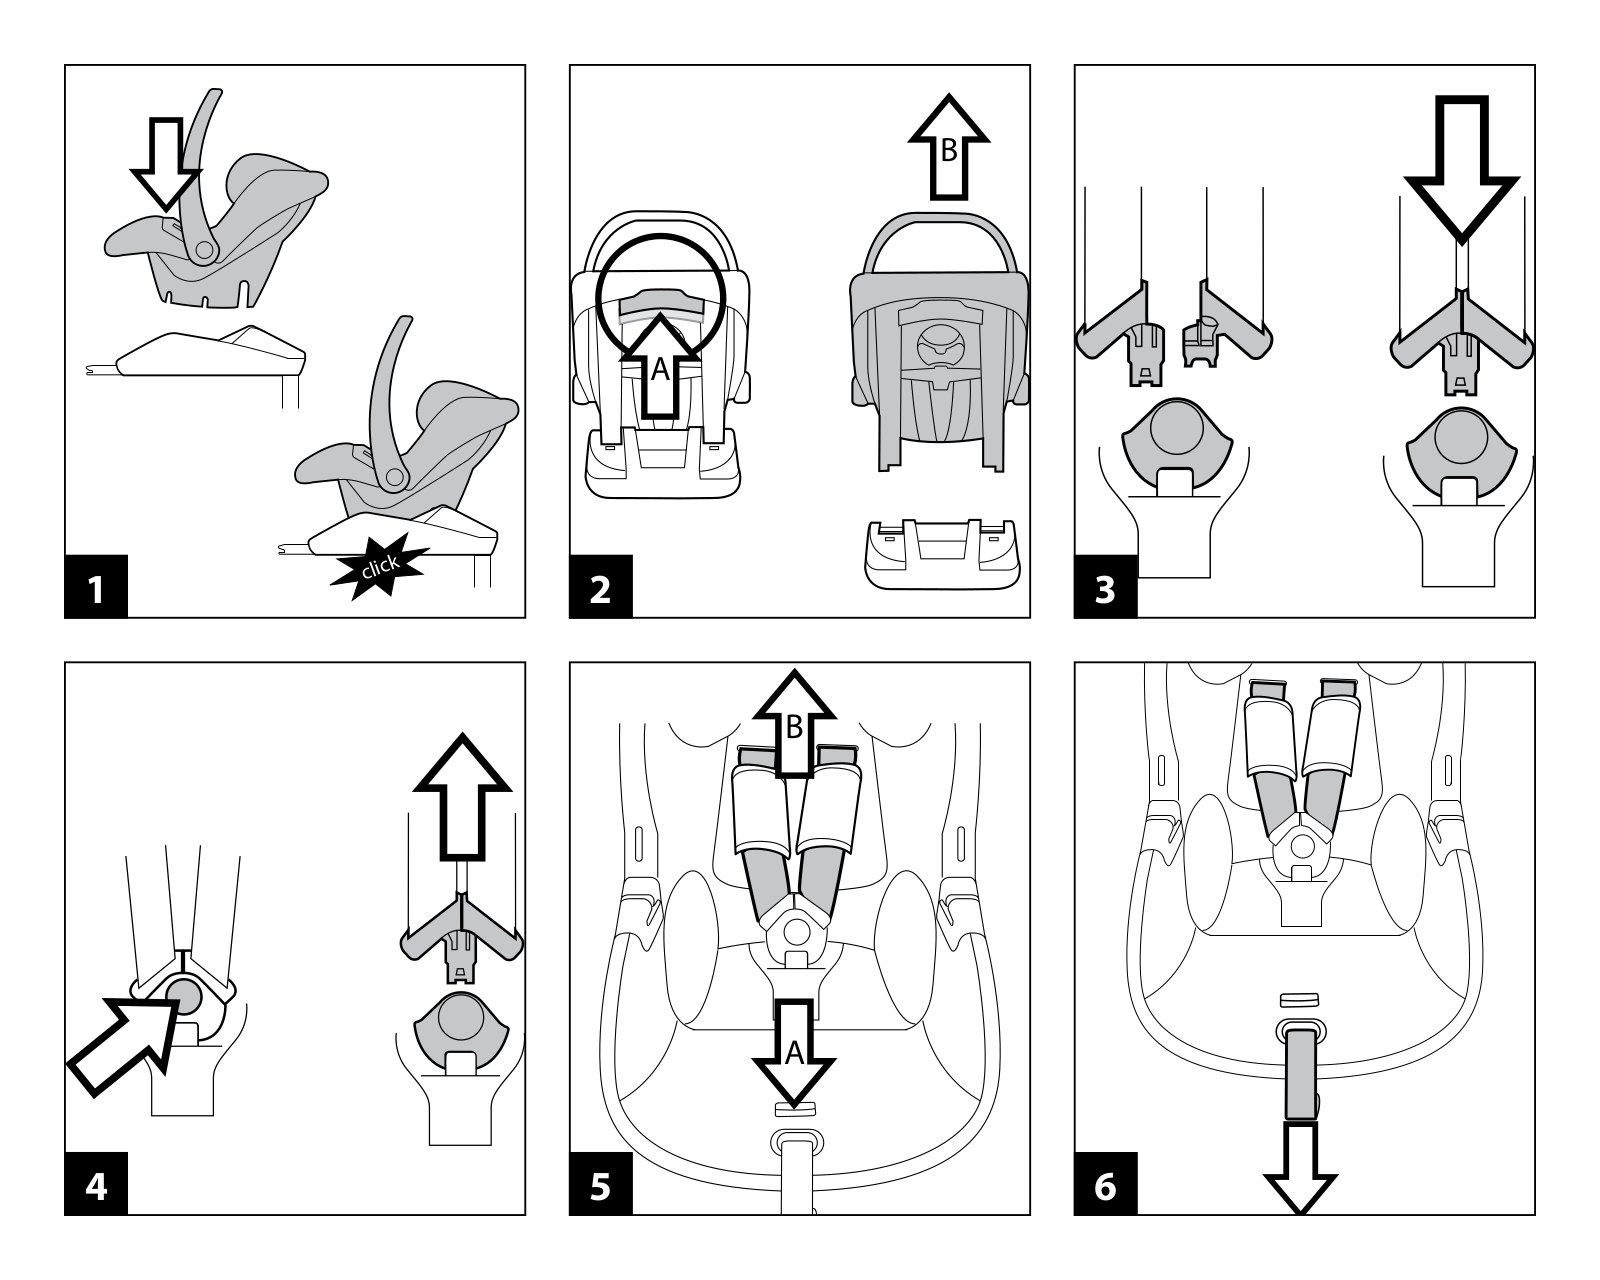
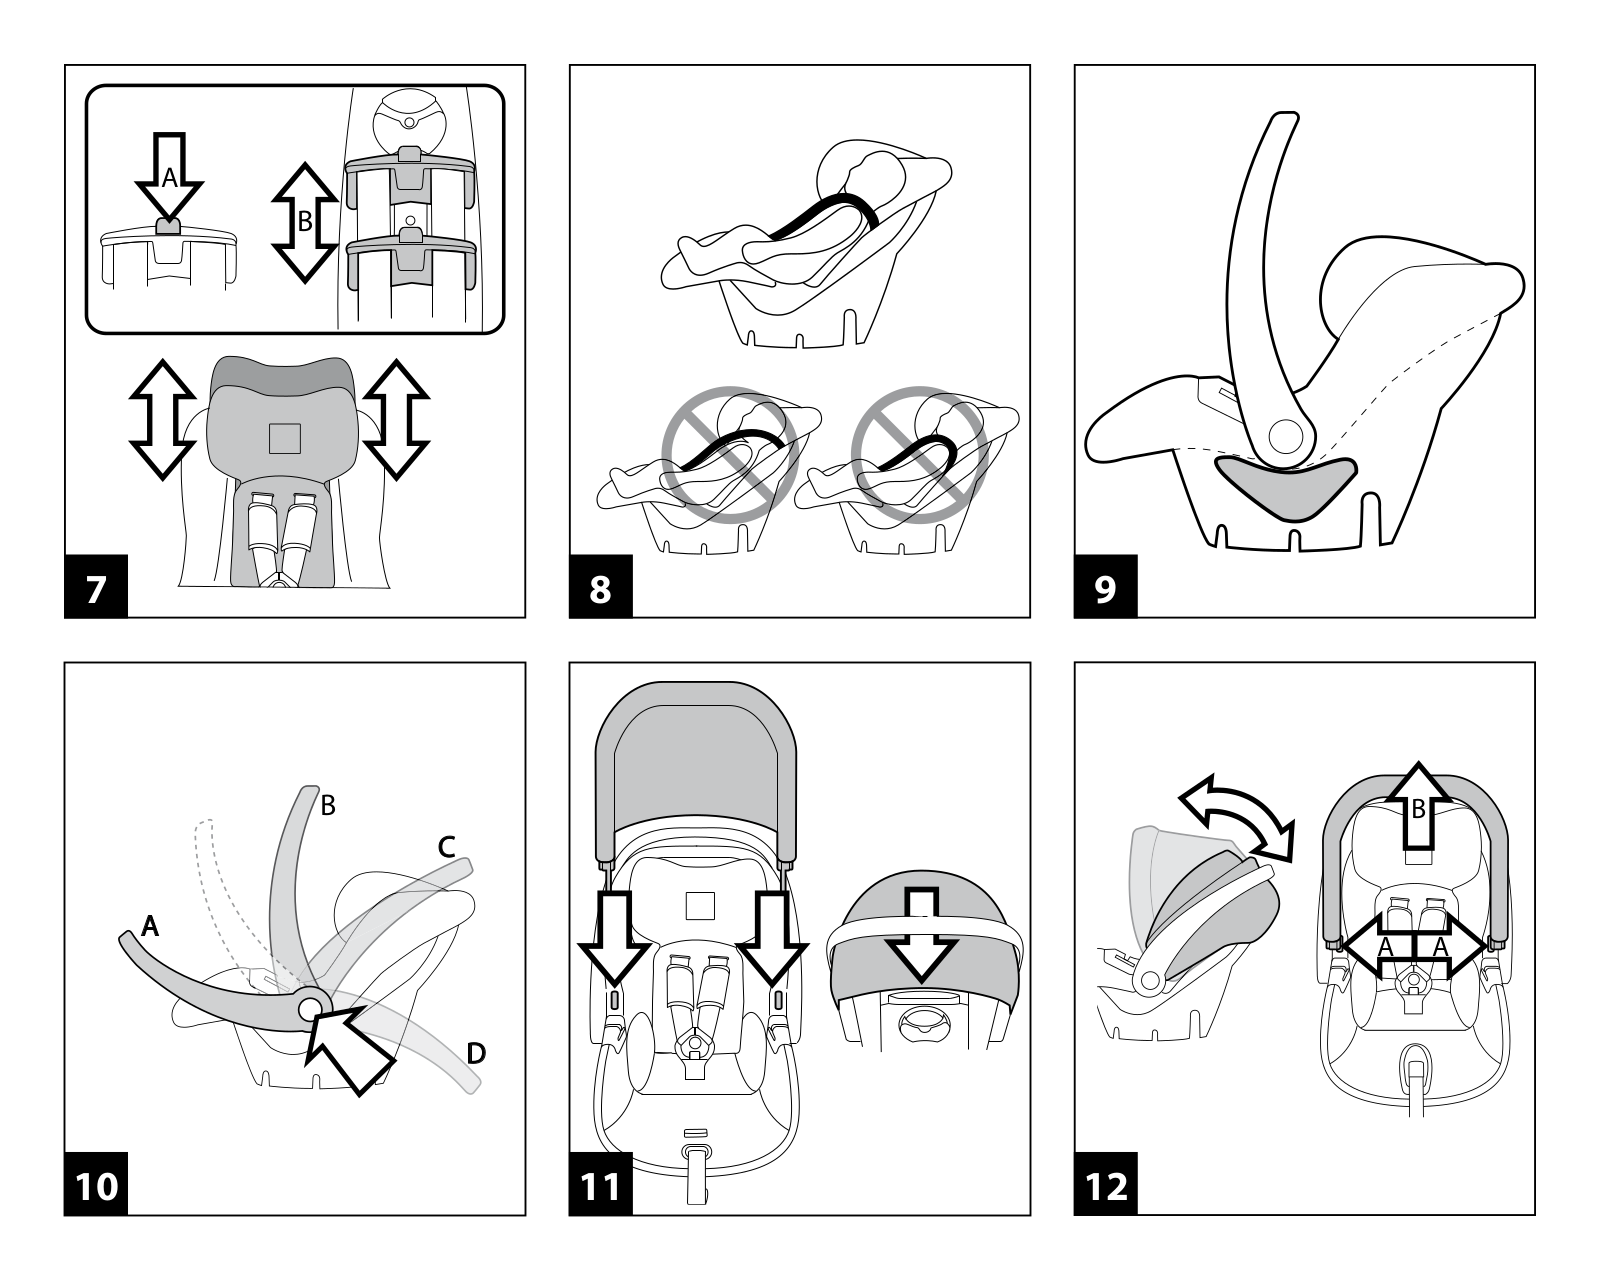
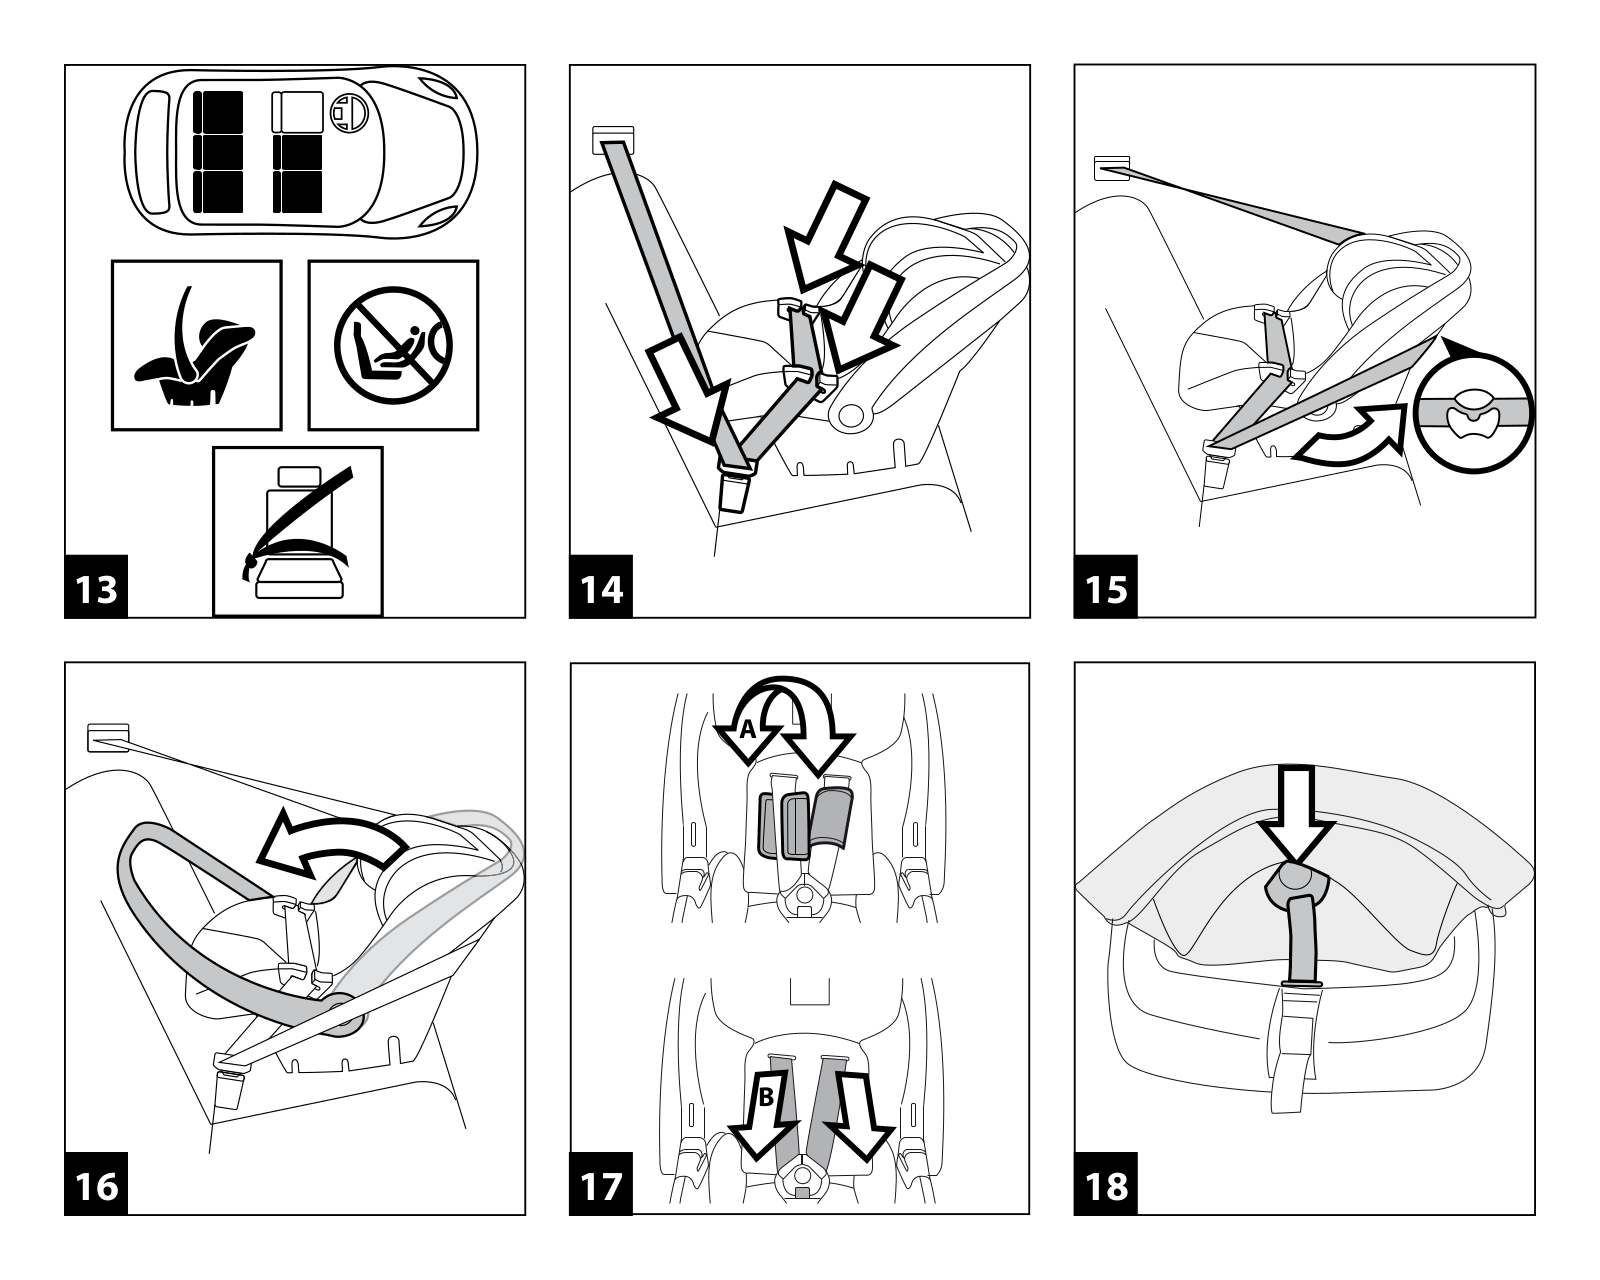
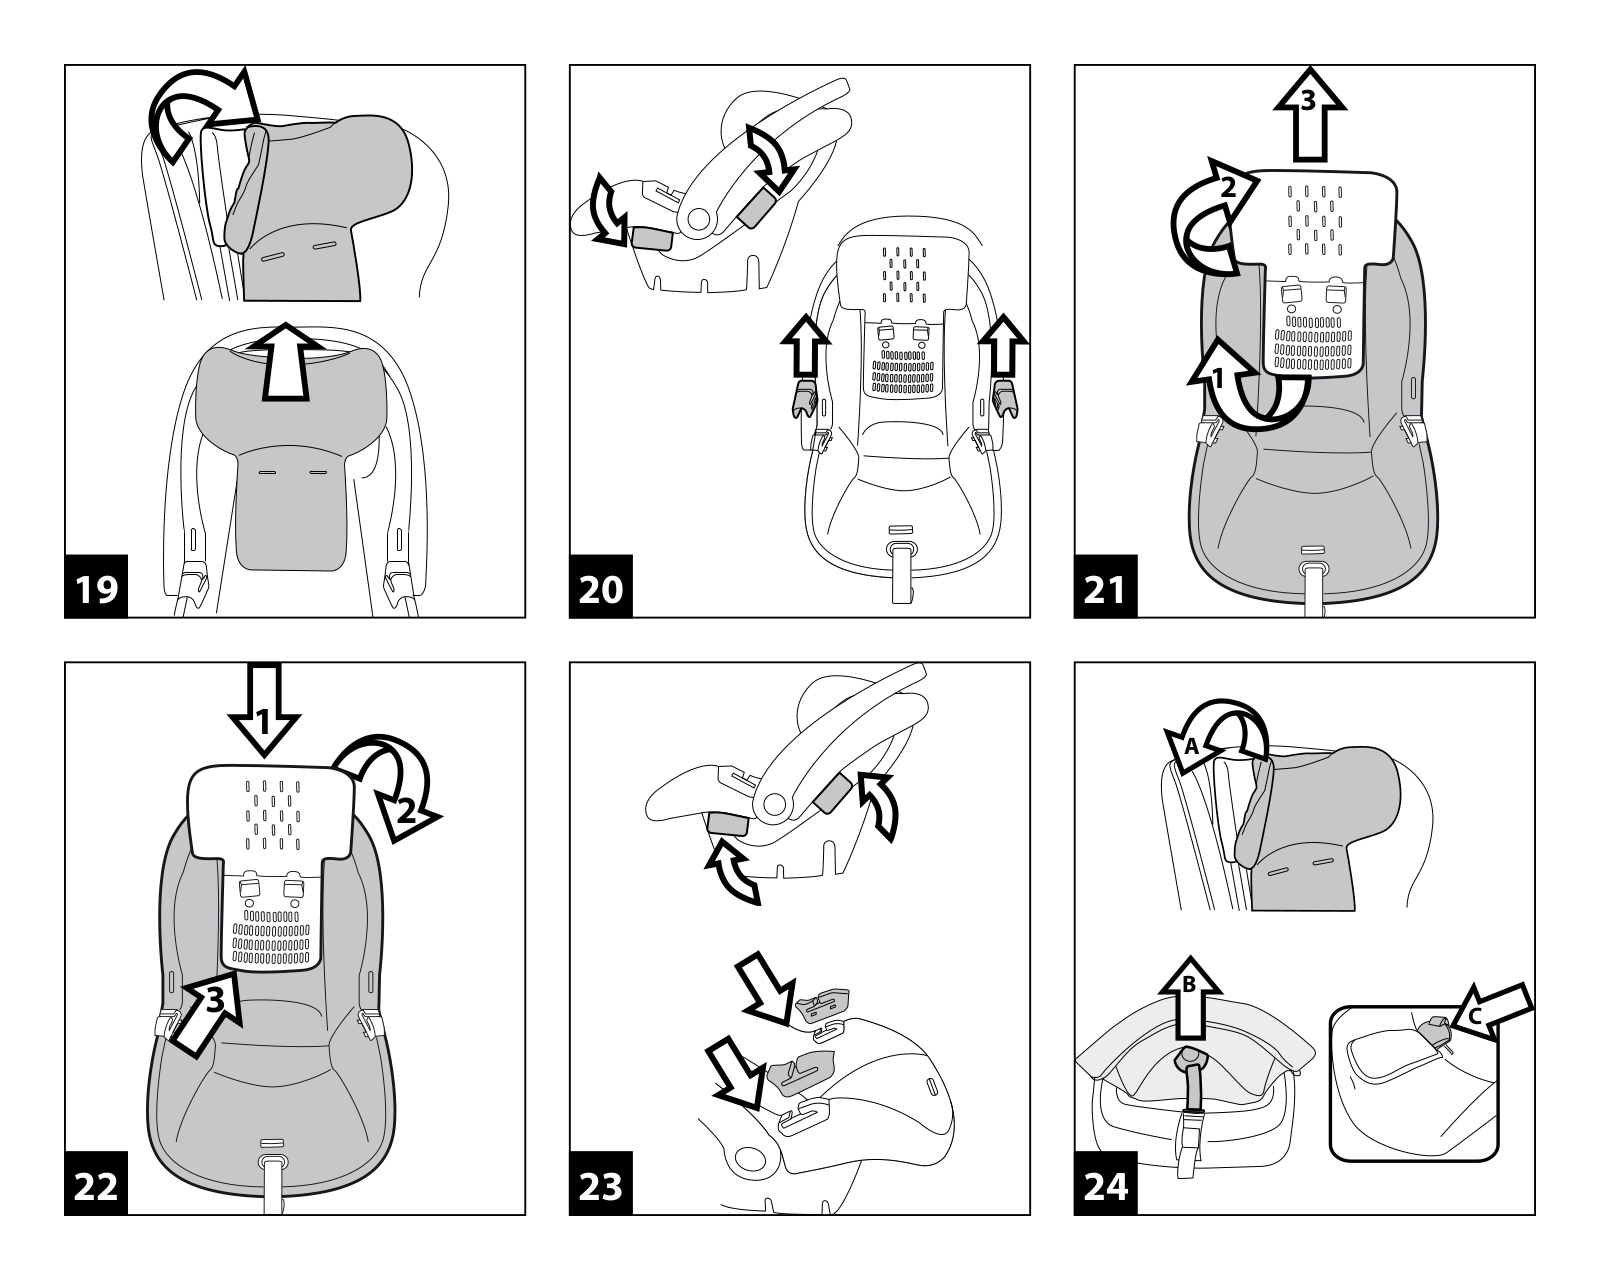
PEG PEREGO PRIMO VIAGGIO TRIFIX User Manual
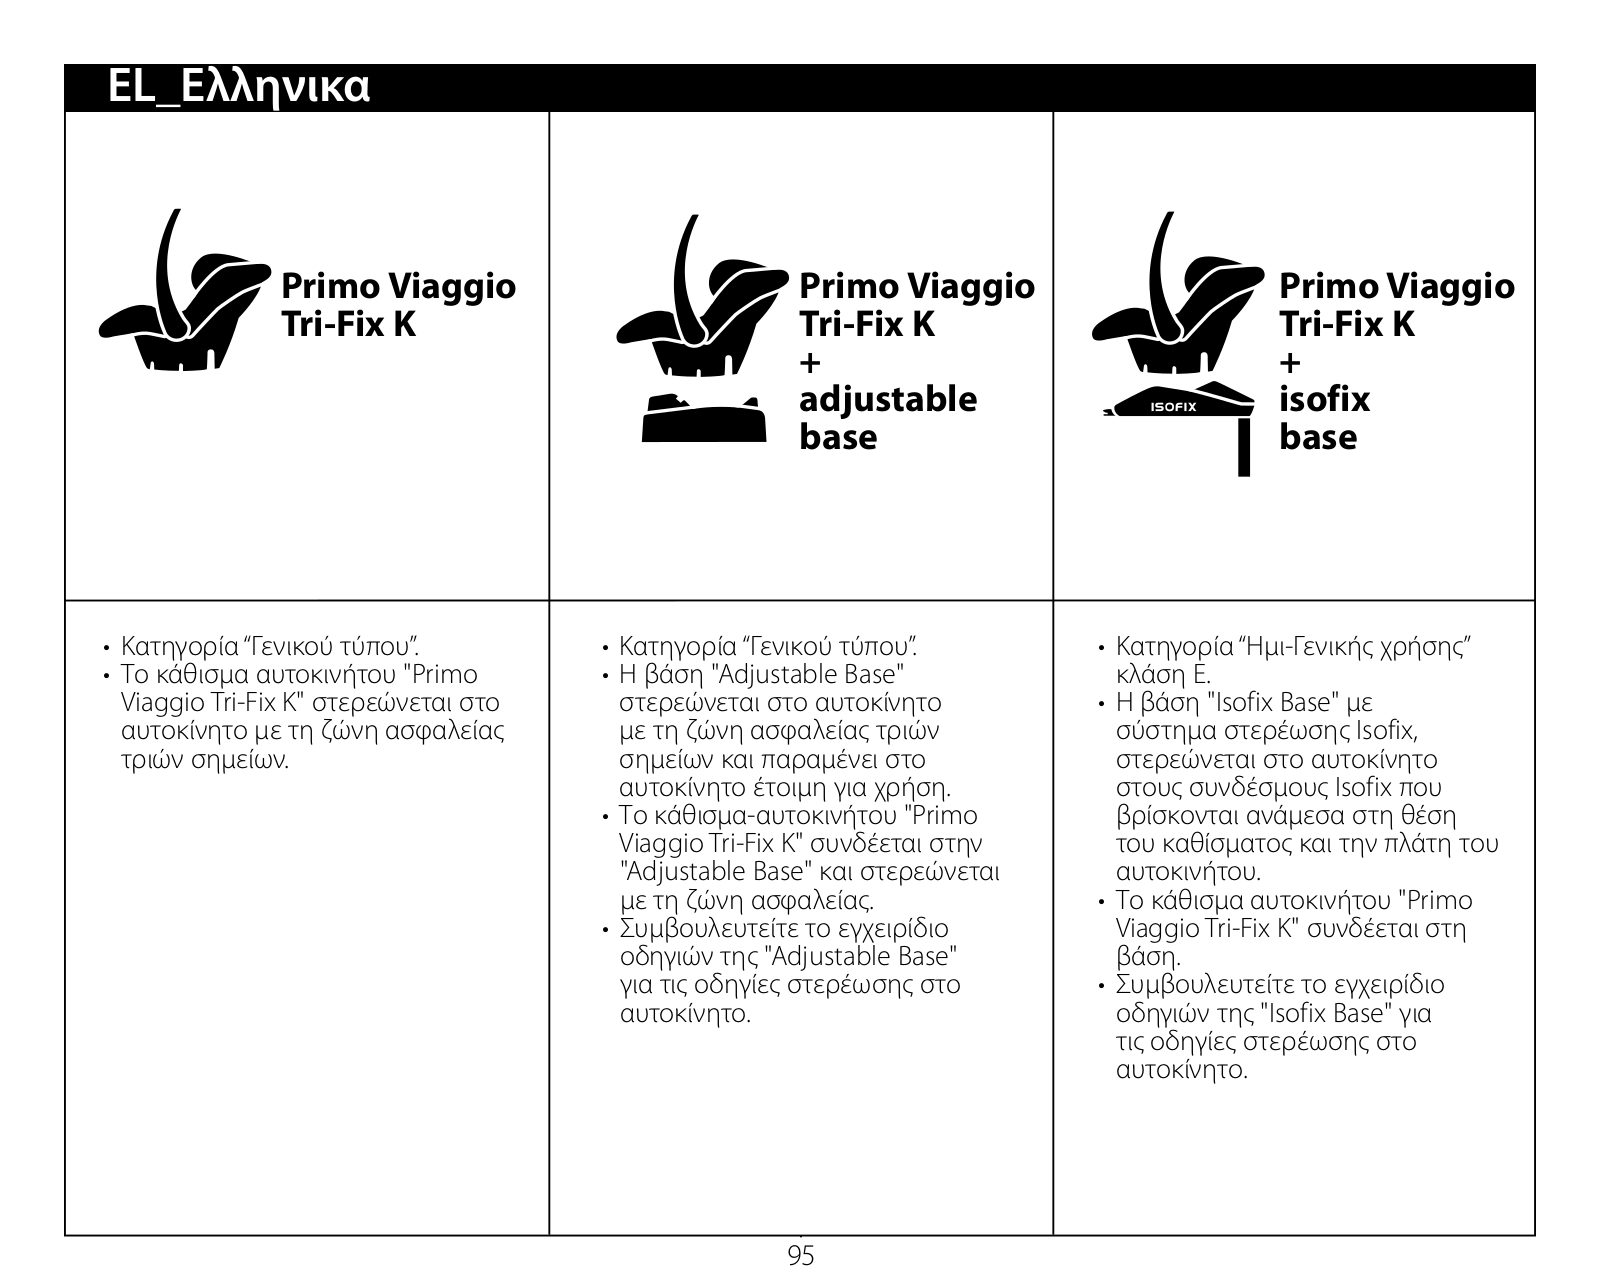
...
PEG PEREGO User Manual
Download
Specifications and Main Features
Frequently Asked Questions
User Manual
Download
Loading...
+
hidden pages
Unhide
You need points to download manuals.
1 point = 1 manual.
You can buy points or you can get point for every manual you upload.
Buy points
Upload your manuals
 Loading...